
1
ELECTRIC CERAMIC
COOKTOP
Instruction For Installation
and Use
CRAH302B
CRAH774B
Kindly Note:
Prior to installation and use, we would like to remind
you of reading through the instruction manual and get
full understand of the unit. Please keep the manual in
safe place for future reference. If you get any question
regarding operation, maintenance and service of the
induction cooktop, please feel free to contact us via e-
mail: [email protected].

2
CONTENTS
BEFORE USE..................................................................................................................................................................3
SAFETY INSTRUCTIONS.............................................................................................................................................3
INSTALLATION...............................................................................................................................................................5
USING YOUR COOKTOP.............................................................................................................................................7
TEMPERATURE LEVEL TABLE................................................................................................................................1
1
TIPS FOR USE............................................................................................................................................................. 12
CLEAN YOUR COOKTOP
..........................................................................................................................................
14
TROUBLESHOOTING GUIDE
...................................................................................................................................
15
AFTER-SALES SERVICE
...........................................................................................................................................
16

3
BEFORE USE
Check the Package
Please check the package to make sure it is in perfect condition after long distance shipment, in
case of ceramic glass getting damaged or accessories getting missing. Please feel free to contact
us if anything unexpected occurs, we will do our best to serve and help.
Thank you very much for your kind understanding.
SAFETY INSTRUCTIONS
IMPORTANT Keep these instructions handy for future use.
The appliance is manufactured in compliance with the relevant safety standard.
WARNING Read all instructions carefully before installation and operation
of the appliance.
WARNING Failure to follow these warnings could result in a fire or explosion
that causes property damage, personal injury or death. To reduce the risk of fire,
electric shock or injury, take the following precautions:
YOUR SAFETY AND THAT OF OTHERS IS VERY IMPORTANT
Cooking Safety
WARNING: Unattended cooking on a hob with fat or oil can be dangerous and may result in fire.
NEVER try to extinguish a fire with water, but switch off the appliance and then cover flame e.g.
with a lid or a fire blanket.
WARNING: The appliance and its accessible parts become VERY HOT during or short after
use. Care MUST be taken to avoid touching heating elements. Children less than 8 years old
shall be kept away unless continuously supervised to ensure they do not play with it.
Do not use the unit on carpet or tablecloth (vinyl) or any other low-heat-resistant article.
Do not block the air intake or exhaust vent.
Do not heat an empty pot or overheat the pot. Never leave the cooktop unattended when in use.
Overheat oils and fats catch fire easily. Pay attention when cooking food products rich in fat and
oil.
This appliance can be used by children aged from 8 years and above and persons with reduced
physical, sensory or mental capabilities or lack of experience and knowledge if they have been
given supervision or instruction concerning use of the appliance in a safe way and understand

4
hazards involved. Children shall not play with the appliance. Cleaning and user maintenance
shall not be made by children without supervision.
Do not touch the appliance heating elements during and after use. Do not allow the appliance to
come into contact with cloths or other flammable materials until all the components have cooled
sufficiently.
Metallic objects such as knives, forks, spoons and lids should not be placed on the hob surface
since they can get hot.
Use only dry potholders-moist or damp potholders on hot surfaces may result in burns from
steam. Do not let the potholder touch hot heating elements.
After use, switch off the hob element by its control and do not rely on the pan detector.
CAUTION! Surface remains hot after use! Do not touch the top plate right after
removing the pot or the pan, as the top plate will still be very hot.
Using Safety
IMPORTANT: Do not use the cooktop as a work surface. Certain substances such as salt,
sugar, or sand can scratch the glass ceramic surface. Do not store hard or pointed objects over
the cooktop as they can damage the unit if they fall on top.
IMPORTANT: Do not cook on Broken Cooktop. If cooktop break, cleaning solutions and
spillovers may penetrate the broken cooktop and create a risk of electric shock.
Do not place flammable materials on or near the appliance.
Do not use steam cleaners or high-pressure cleaners to clean to cooktop, as they may result in
electric shock.
Power Cord Safety
The appliance must be earthed.
The power cable must be long enough for connecting the appliance, fitted in the cabinet, to the
power supply.
Do not use multi-sockets or extension cords.
Do not pull the appliance’s power cable.

5
Do not place rough or uneven objects on the units as they may damage the surface. If the
cooktop is near a window, ensure that curtains do not blow over or near the unit.
To reduce risk of burns, ignition of flammable materials, and spillage due to unintentional
contact with cookware, the cookware handles should be turned inward and not extend over
adjacent heating surface.
Wear proper apparel - loose fitting or hanging garments should never be worn while using the
appliance.
To protect against electric shock, do not immerse cord, or main body in water or any other liquid.
Do not let cord hang over edge of table or counter.
Installation and Repair Safety
A 30AMP double pole circuit breaker(not supplied) must be installed in the circuit panel
for proper and safe 240V power supply.
Any electrical part mus not be accessible to the user after you finish installation.
For installation to comply with the current safety regulations, an omnipolar switch with minimum
contact gap of 3mm is required.
Do not repair or replace any part of the appliance unless specifically stated in the user manual.
This product may not be treated as household waste. Instead it should be handed
over to the applicable collection point for the recycling of electrical and electronic
equipment. By ensuring this product is disposed of correctly, you will help
prevent potential negative consequences for the environment and human health,
which could otherwise be caused by inappropriate waste handling of this product.
For more detailed information about recycling of this product, please contact your
local city office, your household waste disposal service or the shop where you
purchased the product.
6
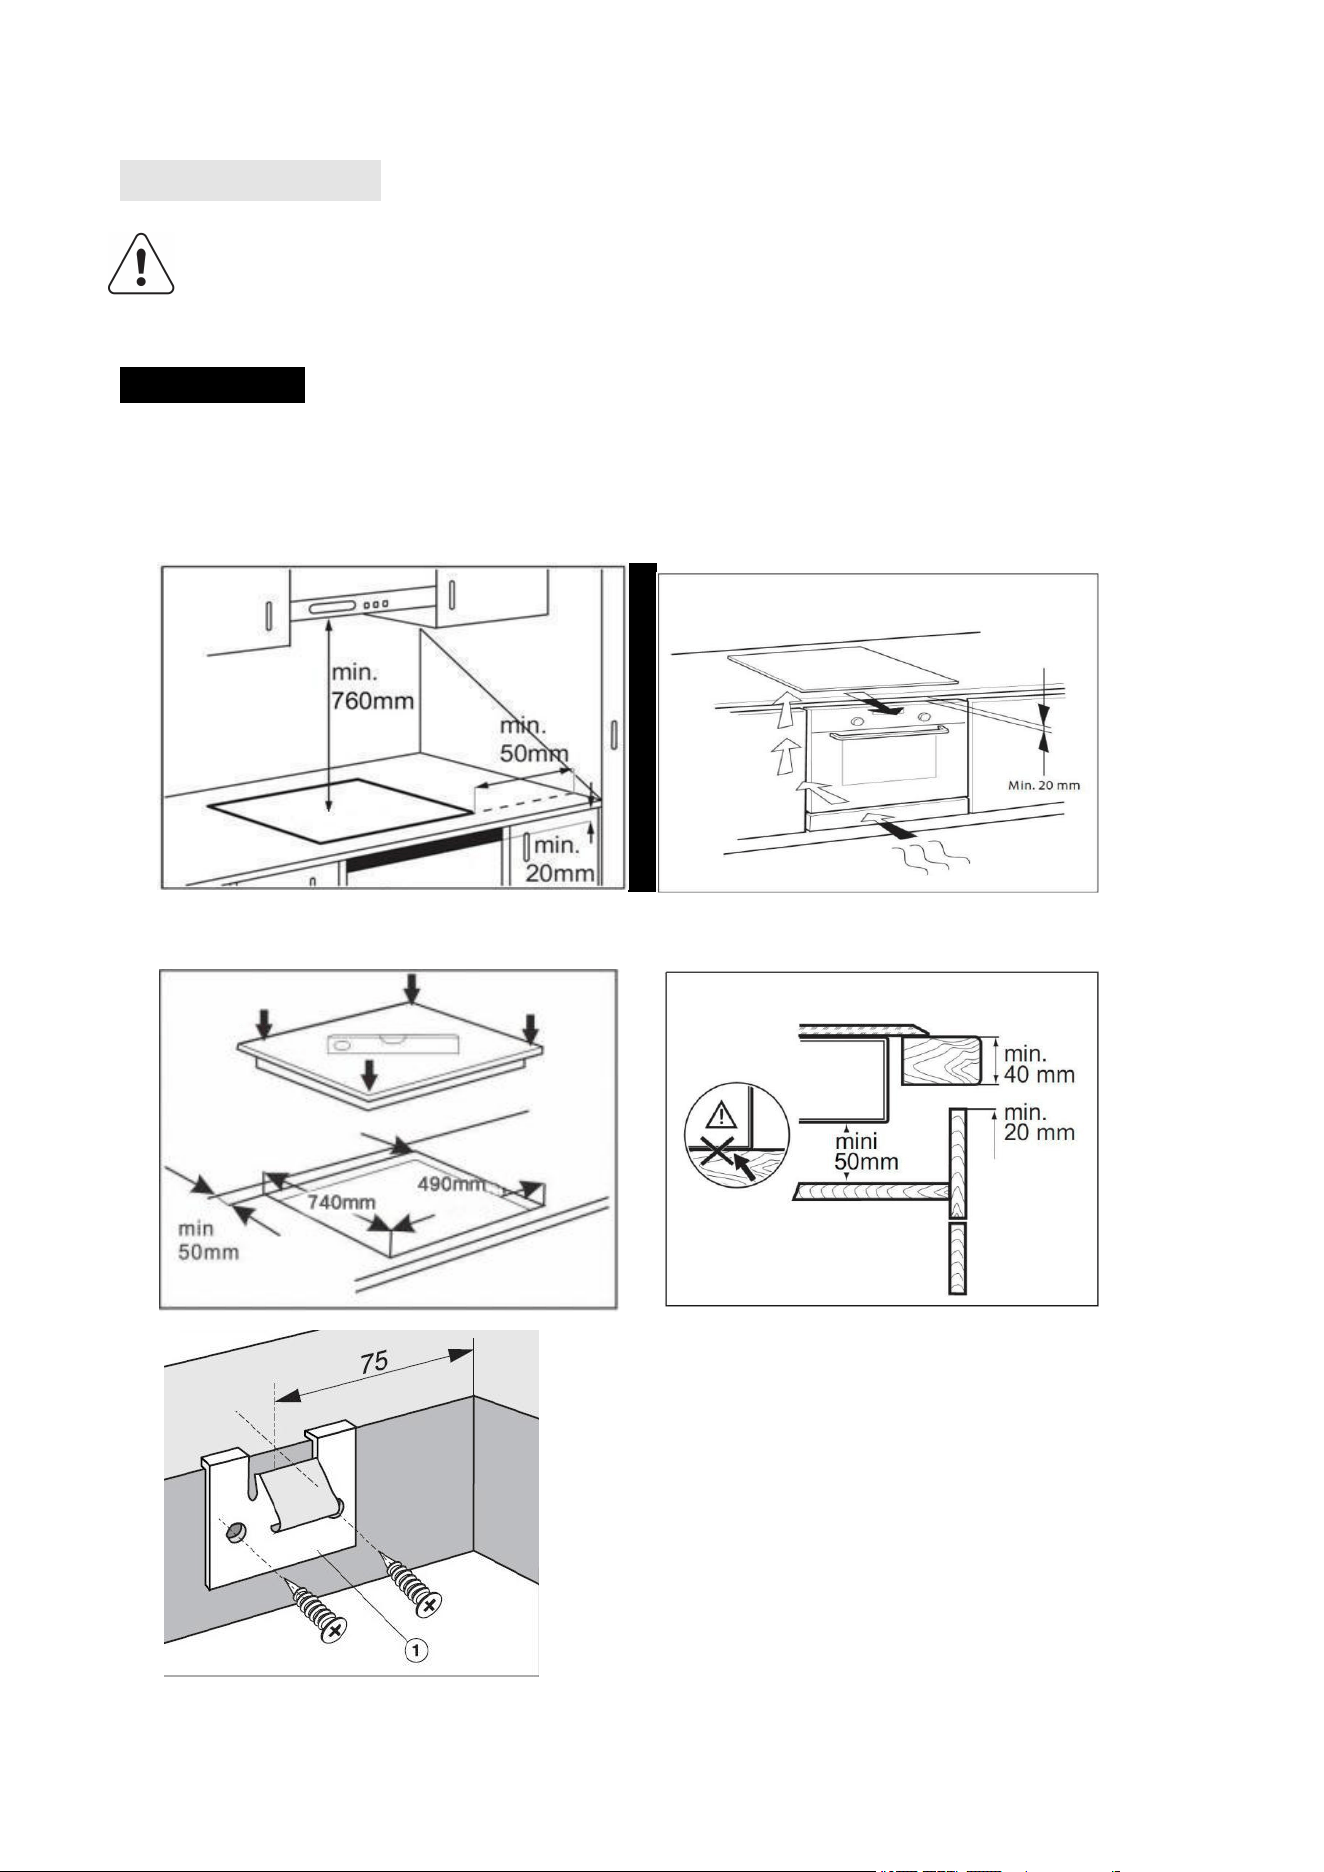
INSTALLATION
DANGER
Always read and obey all safety information, failure to follow these
instructions can be killed or seriously injured.
IMPORTANT Read and save these instructions for future reference.
For built-in dimensions and installation instruction, see in below figures
7
Note:
The distance between the underside of the appliance and the
separator panel must respect the dimensions given in the figure
(mini.50mm).
In order to ensure the correct operation of the product, do not obstruct
the minimum required clearance (min. 20 mm) on the worktop for air
flow out.
If an undertop oven is installed, make sure the oven is equipped with a cooling system.
Do not install the hob above a dishwasher or washing-machine, so that
the electronic circuits do not come into contact with steam or moisture
which could damage them.
Place the device on a stable and level surface.
Do not block the ventilation slots of the device. It may overheat the device.
Do not place hotplates next to open fires, heaters or other sources of heat.
Make sure that the mains connection cable is not damaged or
squashed beneath the device.
Make sure that the mains connection cable does not come into contact
with sharp edges and/or hot surfaces.
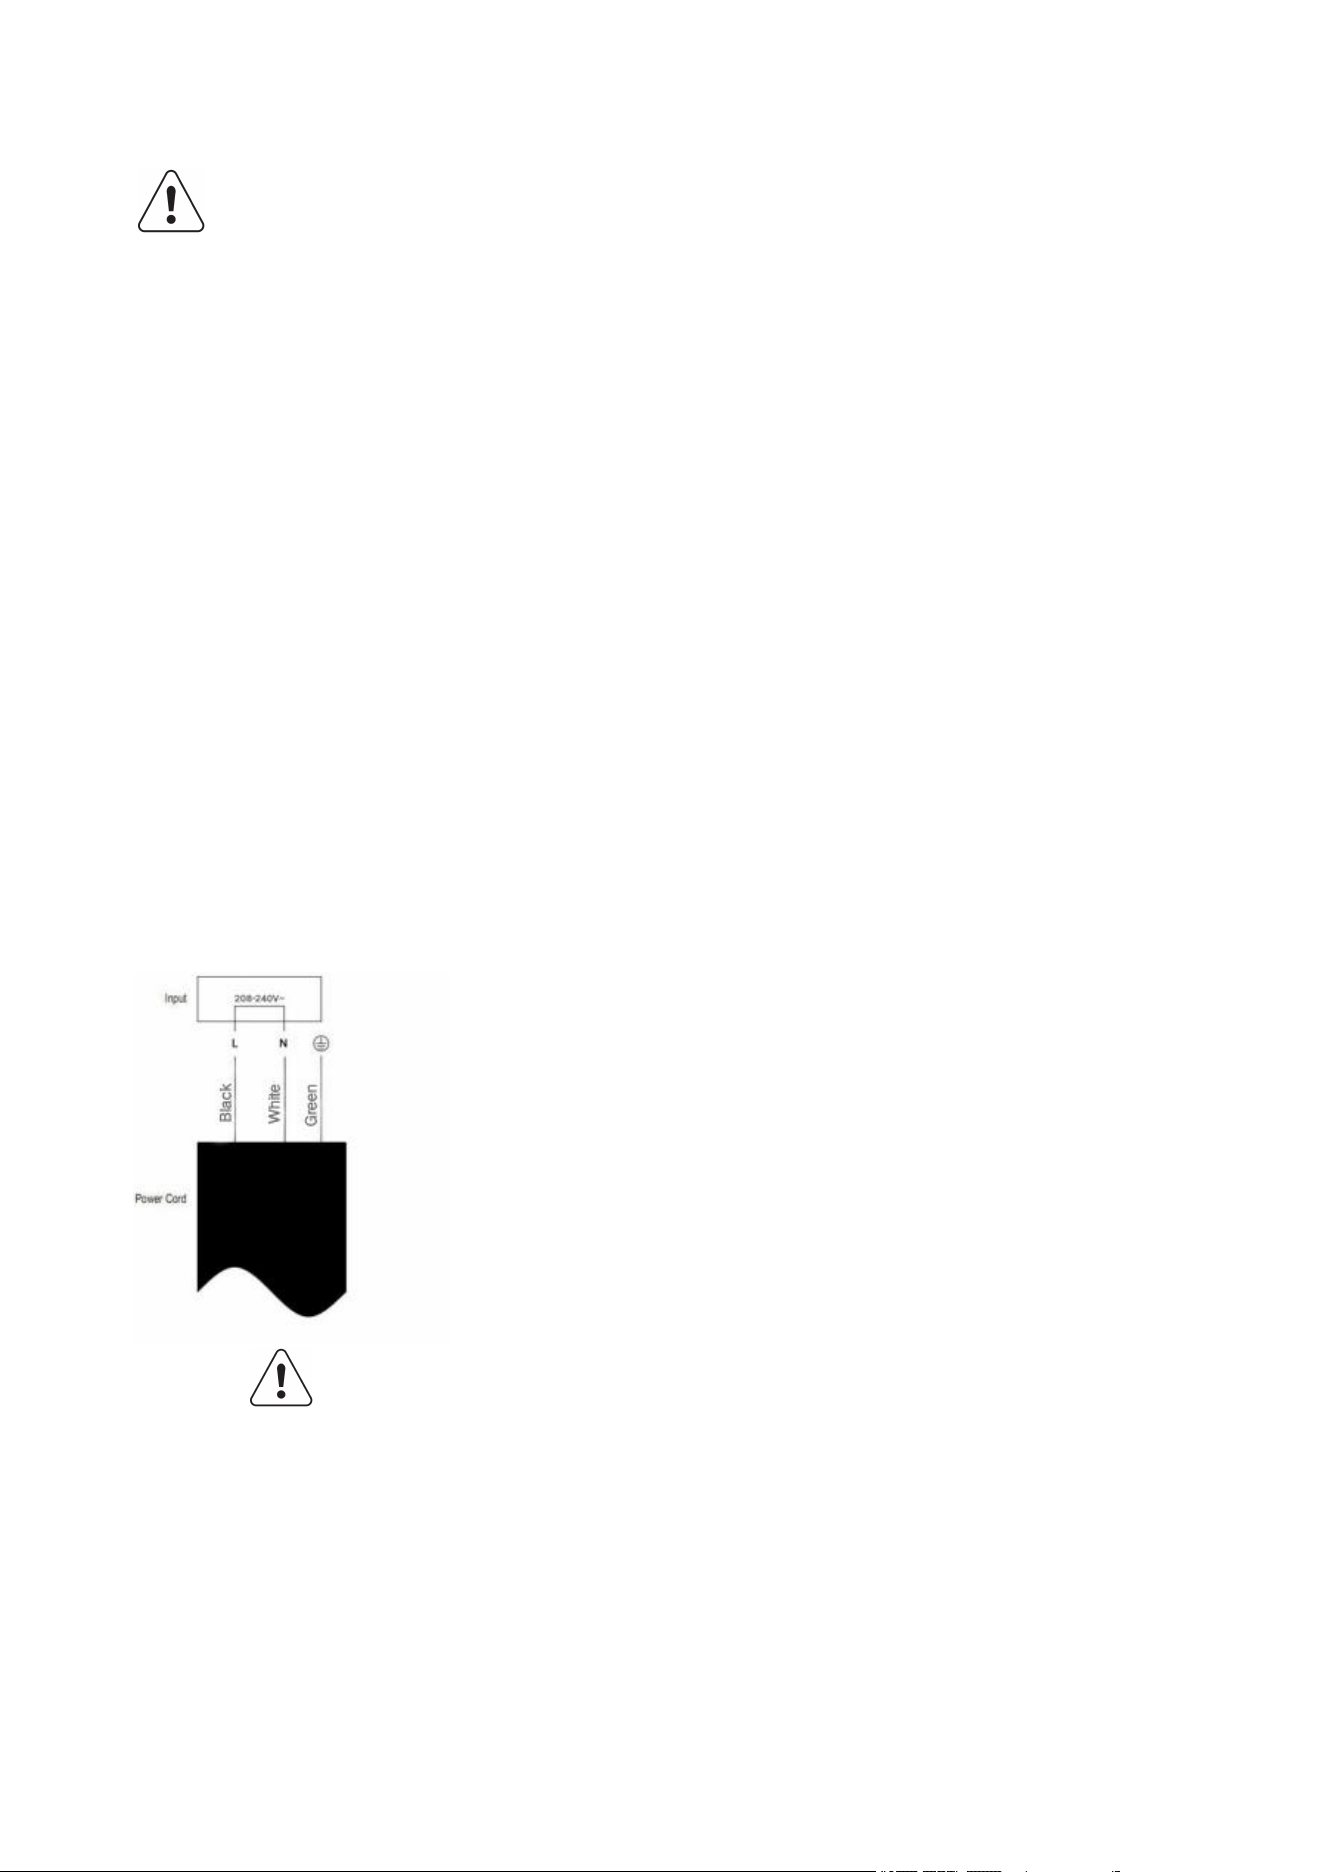
Electrical Connection
Switch off the circuit breaker and disconnect the appliance
from the power supply when you do the electrical connection.
You need to run a set of 10AWG/2 wires with Grounding wire from
the cooktop to your breaker panel and a 30AMP double pole breaker is
needed for proper 240V power supply.
This electric cooktop works off 240V power supply, will not work off 120V.
This electric cooktop must be connected firmly to the Grounding bar of
your home breaker panel, failure to do so may cause serious injury or
death.

8
Installation must be carried out by qualified personnel who know the
current safety and installation regulations.
The manufacturer declines all liability for injury to persons or animals and
for damage to property resulting from failure to observe the regulations
provided in this chapter.
The power cable must be long enough to allow the hob to be removed from the worktop.
Make sure the voltage specified on the rating label located on the
bottom of the appliance is the same as that of the home.
After Installation
1. Remove all the stickers and items from the top of the cooktop surface.
2. Clean cooktop before use. Dry with a soft cloth. See Cleaning Your Cooktop for
reference.
3. Read Using Your Cooktop.
4. Turn on the power to the cooktop.
5. Vertify all function operation properly.
NOTE: If the cooktop does not work, or you met any problem in your operation, please
check that the circuit breaker has not tripped or the house has not blown. For more
information, please see Troubleshooting Guide. If you do not solve the problem by yourself,

9
USING YOUR COOKTOP
Commissioning the device
Prior to connecting the device, check whether the voltage indicated
on the type plate corresponds to the voltage supply in your home.
A wrong connection may lead to grave damage on the device and
injury to persons.
The hotplate's surface consists of temperature-resistant ceramics. In
case of damage, even if this concern only a small tear, disconnect the
device from the power supply immediately and contact the customer
service.
We recommend not placing any metal kitchen utensils, cookware or pan
lids, knives or other metal objects on the hotplate. These may heat up
when the device is turned on.
Do not place any magnetically objects like credit cards,
cassettes etc. on the glass surface while the device is in
operation.
On order to avoid overheating, do not place any aluminium foil or metal
plates on the device.
Do not insert any objects like wires or tools into the ventilation slots.
Attention: this may cause electric shocks.
Do not touch the hot surface of the ceramic field. Please note: the
hotplate does not heat up itself during cooking, but the temperature of
the cookware heats up the hotplate!
Do not heat up any unopened tins on the hotplate. A heated tin
could explode; therefore remove the lid under all circumstances
beforehand.
To avoid permanently damaging the glass-ceramic top, do not use:
Pots with bottoms that are not perfectly flat.
Metal pots with enamelled bottom.
Using the Touch Controls
The controls respond to touch, so you don’t need to apply any pressure.
Use the ball of your finger, not its tip.
You will hear a beep each time a touch is registered.
Make sure the controls are always clean, dry, and that there is no object (e.g.
a utensil or a cloth) covering them. Even a thin film of water may make the

10
1. Max 2000W zone
2. Max 1200W zone
3. Max 2400W zone
4. Max 1200W zone
5.Glass plate
6.Control panel
controls difficult to operate.
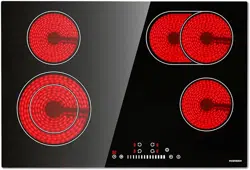
Cooktop Features
4
1.Heating zone selection control
2.Double ring burner
3.0N/OFF control
4.key lock control
5.Power /Timer regulating key
6.Timer control
11
Operating the device
Place suitable cookware on the cook top. Caution! DO NOT place hot
pots or pans on the keypad!.
The operation of both zones is the same.
Switching the hob On/Off
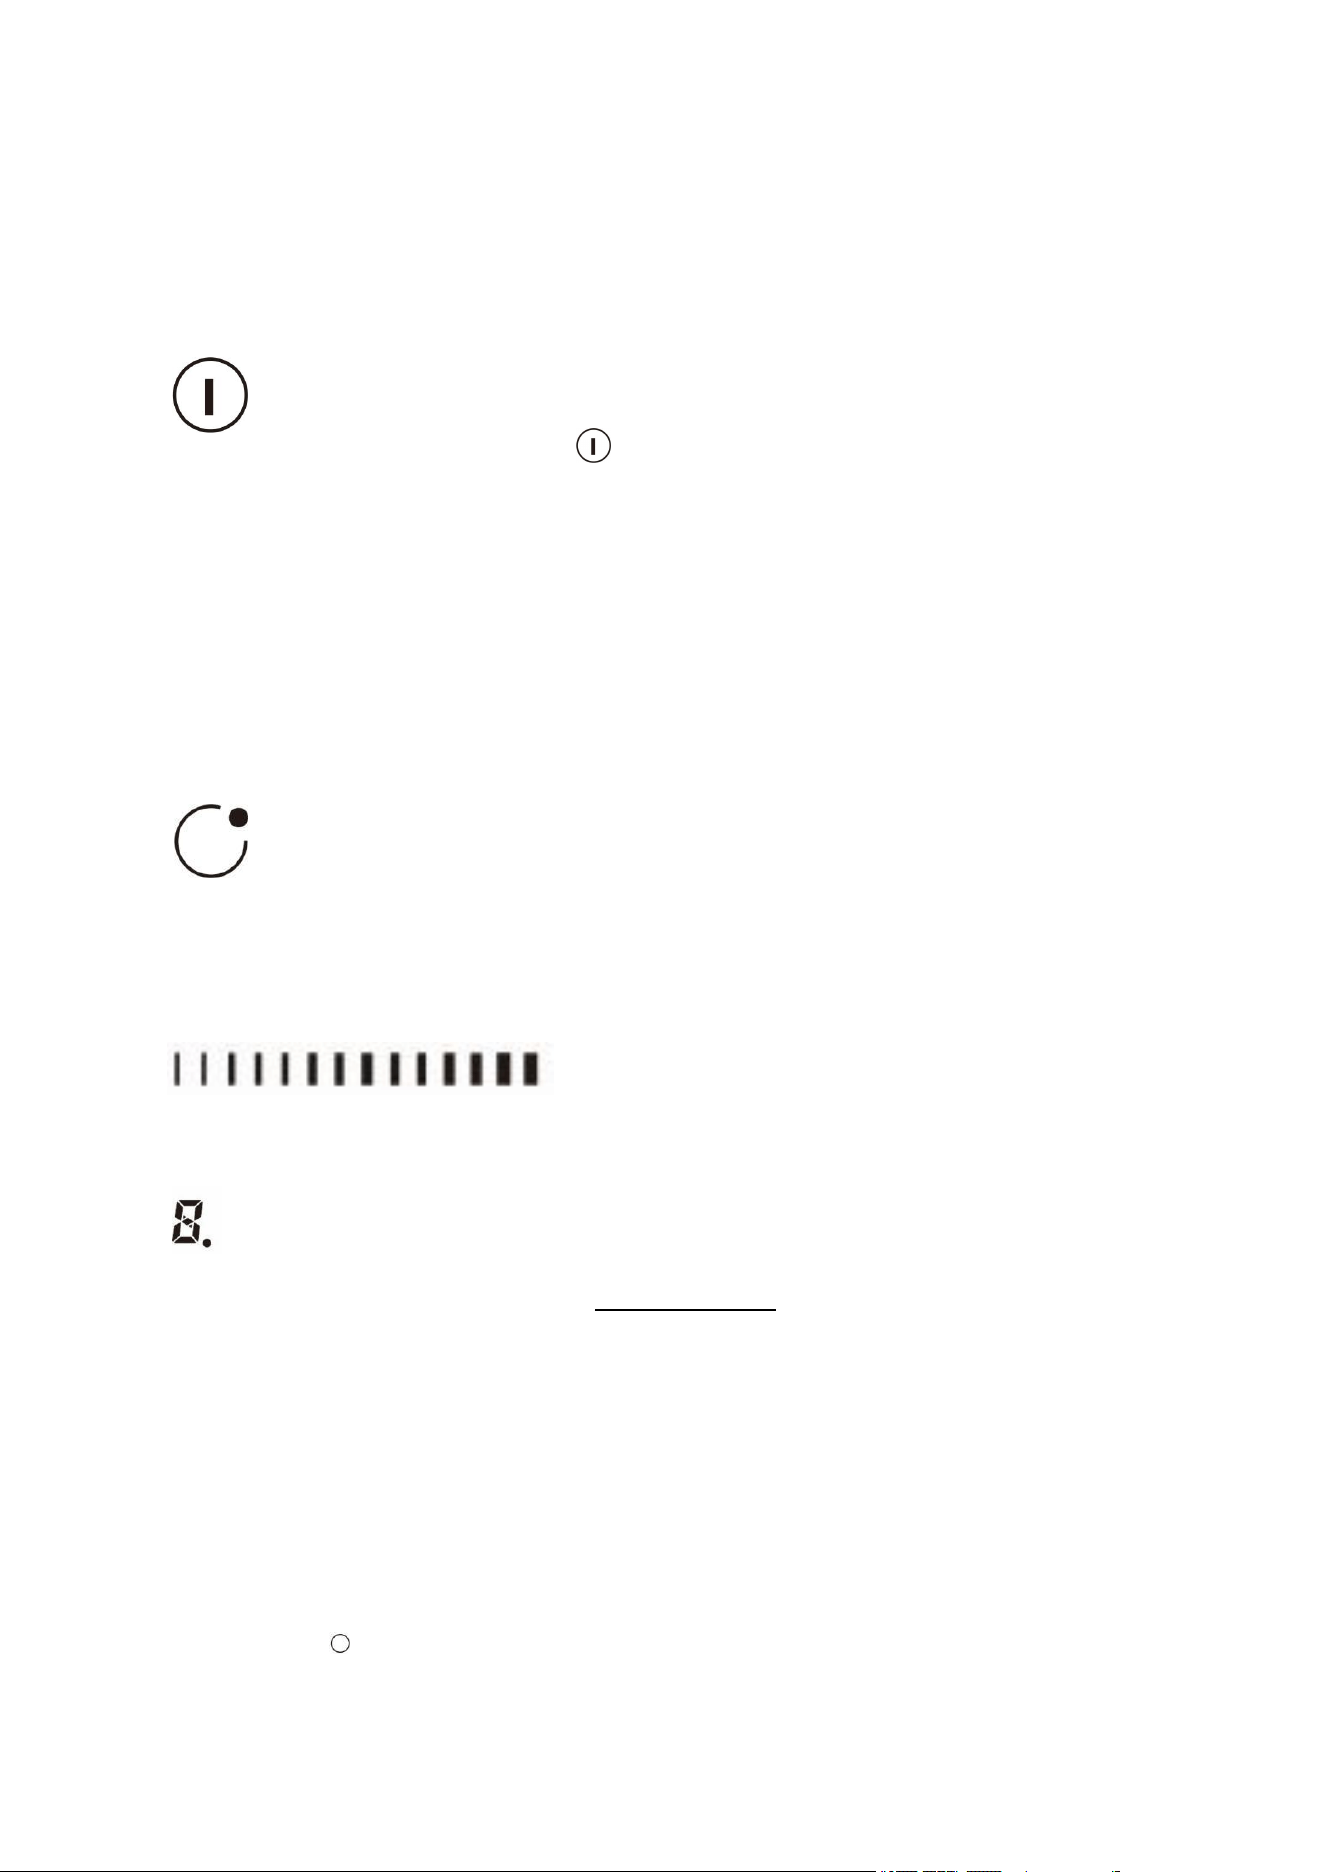
To switch on the cooktop, press the button and the cooking zone displays
light up. To switch off, press the same button until the displays switch off and
then all the cooking zones are deactivated.
If the hob had been use, the residual heat indicator “H” remains lit until the
cooking zones have cooled down.
If no heating zone is selected within 120 seconds of switching on, the cooktop
switches off automatically.
Switching on and adjusting cooking zones
Once the hob is switched on and the pan is positioned on the chosen cooking
zone, select the zone by pressing the corresponding button.The display shows
level 0.
Each cooking zone has 9 various power levels, adjustable with the
buttons, going from “1”: min. level, to “9”: max. level.
Specifically function
Select the cooking zone you need and press the same power level button
twice.The cooking zone will work with high level output. Press the number level
again, then the cooking zone will recover to previous level.
Rear cooking zone up to max. 2000W
Front cooking zone up to max. 1200W
Deactivation of cooking zones
Select the cooking zone you wish to switch off. Press the corresponding power
button.
Press the key ” to set the level to “0”. The cooking zone switches off and the
residual heat indicator “H” lights up.
12
Child lock
This function locks the controls to prevent accidental switching of the hob. To
activate the child lock function, switch on the hob and hold for 3 seconds; the
timer shows Lo. And then the control panel is locked.
To deactivate the control panel lock, repeat the activation procedure. The Lo goes
off and the control panel is active again.
When the cooktop is in the lock mode, all the controls are dsable except the
ON/OFF. You can always turn the ceramic cooktop off with the ON/OFF
control in an emergency, but you shall unlock the coktop first in the next
operation.
Timer Setting
Independent timers can be set for the 2 zones to count down cooking time from 1-
99 minutes(1 hour and 39 minutes).
If more than one cooking zone use Timer, the Timer indicator will display the
lowest time.(e.g. the zone1# setting time of 5 minutes, zone3# setting time of 9
minutes, the timer indicator shows 5 minutes.)
Stand-By-Modus
Press the Pause button. You will hear a Beep and see flashing lines on the display,
the unit will return to standby without output.If you need to run the unit again, press
the pause button again, it will get back to previous working status.
Residual heat indicator
The hob is fitted with a residual heat indicator for each cooking zone. The
indicators alert the user when cooking zones are still hot shortly after cooking.
If the display shows , the cooking zone is still hot. If the residual heat indicator of
a given cooking zone is lit, that zone can be used, for example, to keep a dish
warm or to melt butter.
13
When the cooking zone cools down, the display goes off.
Safety systems
In order to protect the electronics from overheating if the control unit detects
excessive heat it will switch off the hotplate closest to the sensors and the letter H
will appear on the display. This hotplate can be activated when the temperature of
the electronic unit returns to normal.
Each hotplate is equipped with an interior temperature limiter that switches off the
hotplate if the radiant surface is heated excessively.
If any cracks appear in the radiant surface, immediately disconnect it from the
mains. Do not use any part of the cooktop until a new radiant surface has been
fitted.
Automatic Shut-off
If a hotplate is left on accidentally, it will automatically be switched off after a period
of time has elapsed, depending on the power level that has been selected
TEMPERATURE LEVEL TABLE
Temperature level
Type of
cooking
Level use
(indicating cooking experience and habits)
Max level
9
Frying - boiling
Ideal for browning, starting to cook, frying deep frozen
products, fast boiling
High level
7-8
Browning -
sautéing -
boiling -
grilling
Ideal for sautéing, maintaining a lively boil, cooking and
grilling
6-7
Browning –
cooking –
stewing -
sautéing -
grilling
Ideal for sautéing, maintaining a light boil, cooking and
grilling , preheating accessories
4-5
Cooking –
Ideal for stewing, maintaining a gentle boil, cooking (for a
Setting
Time (hour)
1-3
8
4-6
4
7-9
2
14
Medium
level
stewing -
sautéing -
grilling
long period of time). Creaming pasta
3-4
Cooking –
simmering –
thickening -
creaming
Ideal for long-cooking recipes (rice, sauces, roasts, fish)
with liquids (e.g. water, wines, broth, milk),
creaming pasta
2-3
Ideal for long-cooking recipes (less than a liter in volume:
rice, sauces, roasts, fish) with liquids (e.g.
water, wines, broth, milk)
Low level
1-2
Melting –
defrosting –
keeping – food
warm -
creaming
Ideal for softening butter, gently melting chocolate, thawing
small products and keeping just-cooked
food warm (e.g. sauces, soups, minestrone)
1
Ideal for keeping just-cooked food warm, for creaming
risottos and for keeping serving dishes warm
(with induction-suitable accessory)
Power off
0/H
Support surface
Hob in stand-by or off mode (possible end-of-cooking
residual heat, indicated by an “H”)
Note: The data in the table is for guidance only. The relation between the heat
setting and the cooking zone consumption of power is not linear. When
you increase the heat setting it is not proportional to the increase of the
cooking zone
consumption of power.
The power of the cooking zones can be different in some small range. It
changes with the material and dimensions of the cookware.
TIPS FOR USE
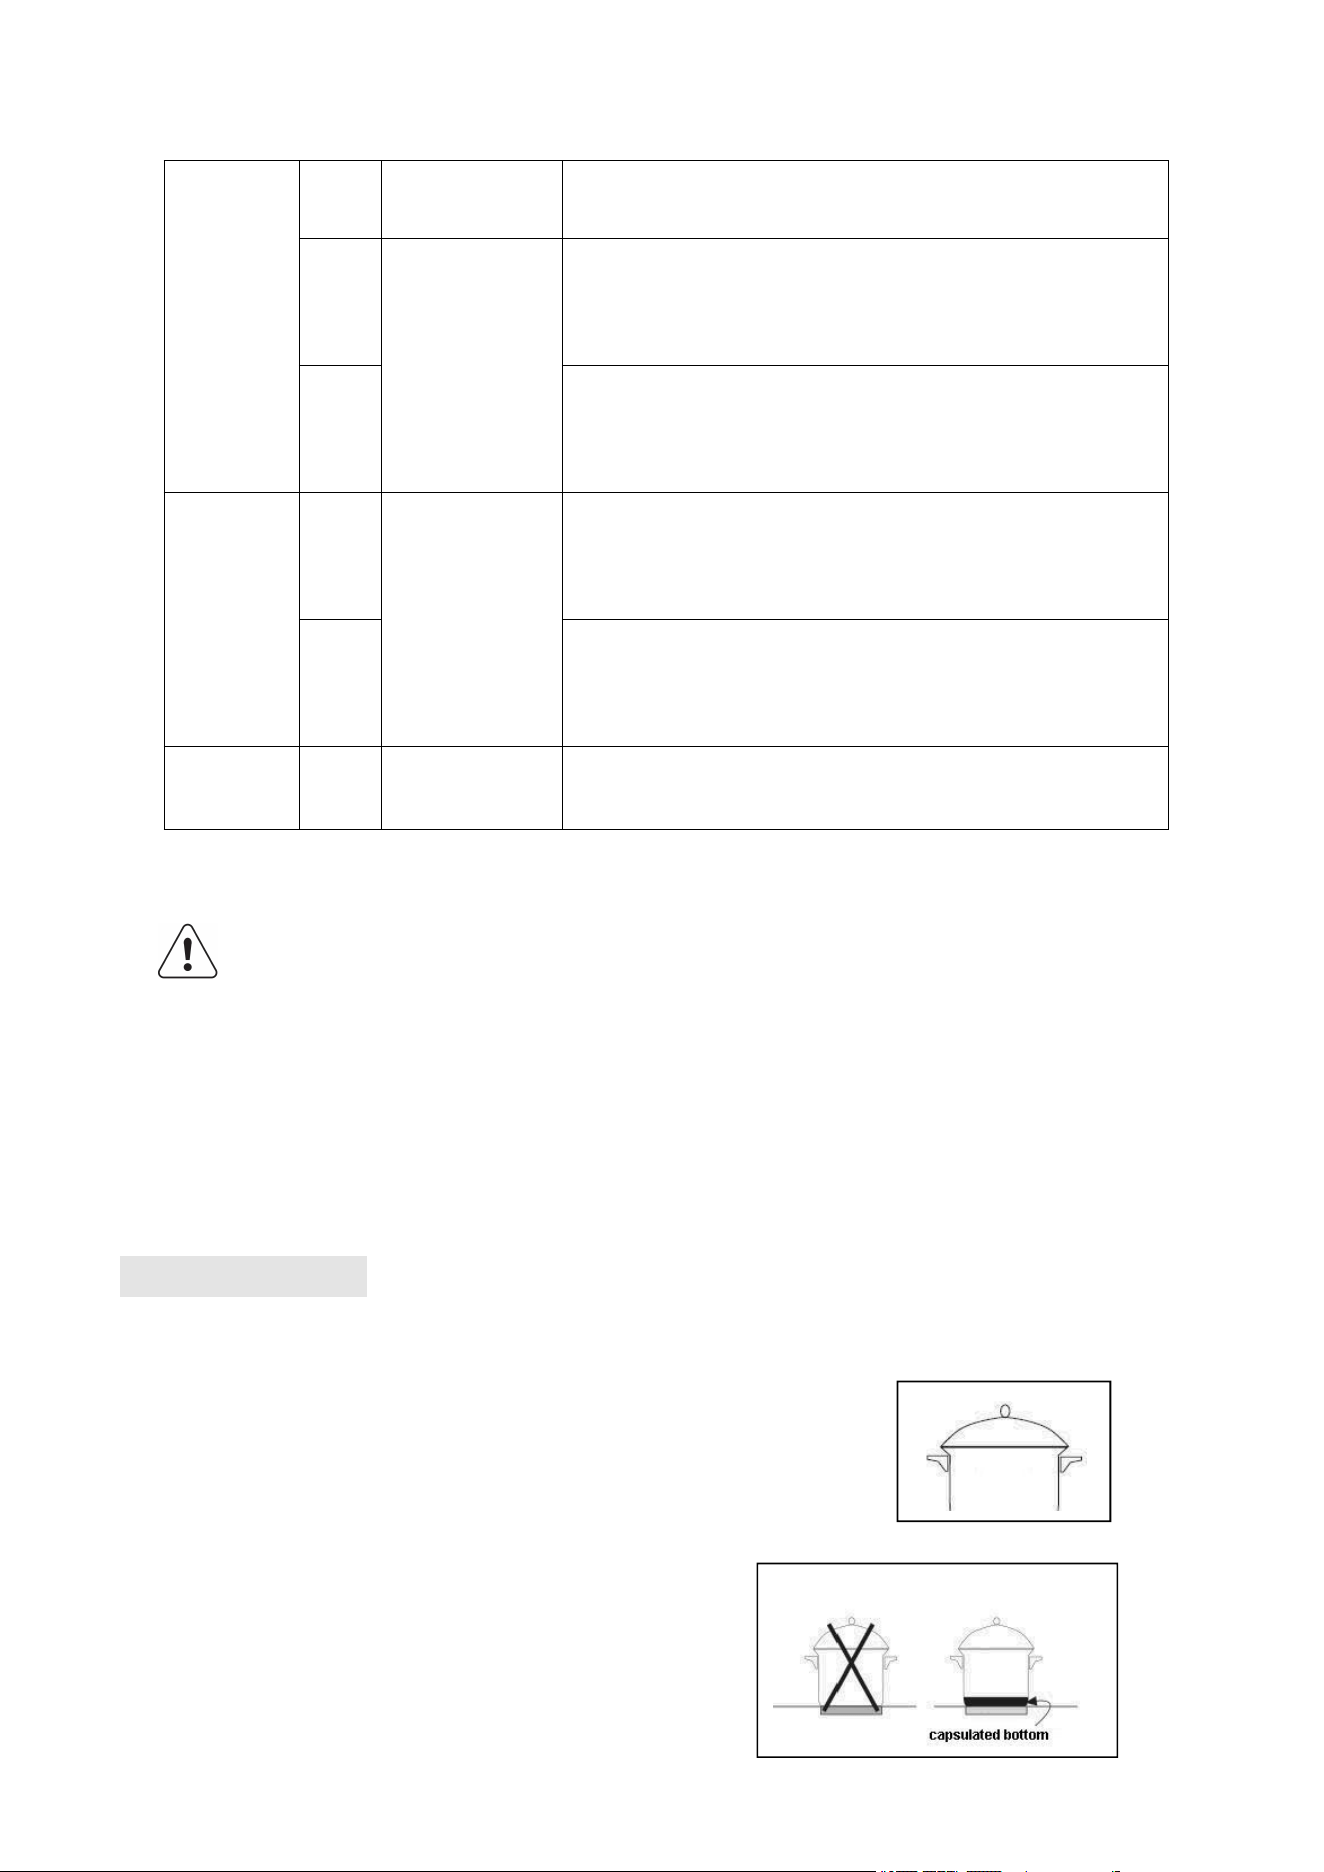
Use of Cookware
Most stainless steel, enamel, iron, ceramic and copper
pans can be used on radiant cooktops.
Recommended is cookware with
Sandwich/ capsulated bottom.
15
Hotplates should not be switched on without a
pan on top. The base of the pan should be flat
and dry.
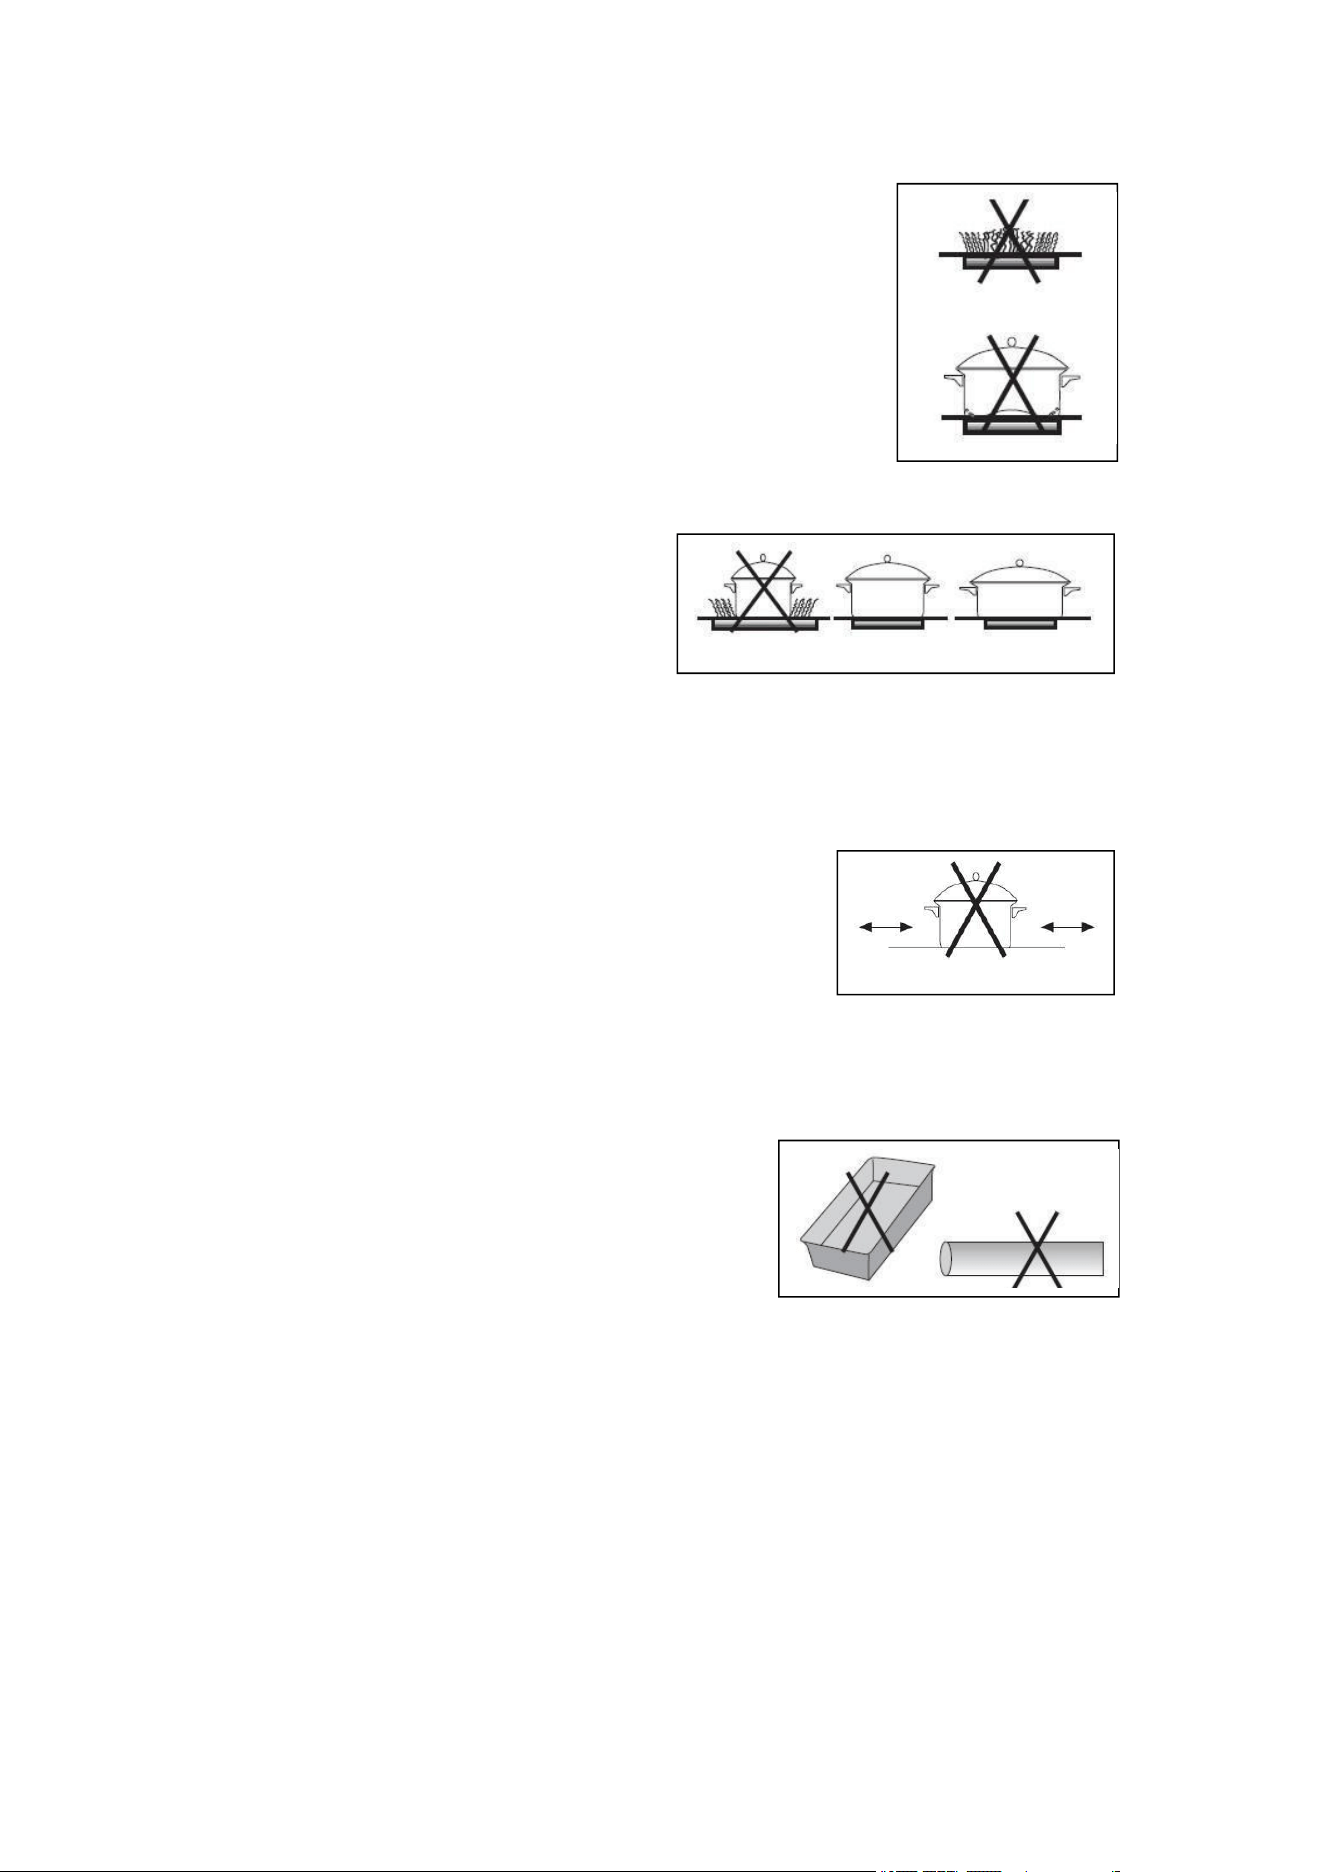
Pans that have been used on gas cookers are not normally
completely flat and absorb heat badly.
Make sure that the
diameter of the pan is
at least that of the
hotplate.
Avoid dragging pans over the
radiant glass surface, as it may
get scratched.
Always lift the pan.
Never use tin foil or plastic containers.
They may melt and fuse permanently
with the radiant glass surface.
Cooking Tips
When food comes to the boil, reduce the temperature setting.
Using a lid will reduce cooking times and save energy by retaining the heat.
Minimize the amount of liquid or fat to reduce cooking times.
Start cooking on a high setting and reduce the setting when the food has heated through.
16
Energy saving
For optimum results, it is advisable to:
Use pots and pans with bottom width equal to that of the cooking zone.
Only use flat-bottomed pots and pans.
When possible, keep pot lids on during cooking.
Use a pressure cooker to save even more energy and time.
Place the pot in the middle of the cooking zone marked on the hob.
CLEANING YOUR COOKTOP
Switch off power supply and wait until the unit is cooled down completely.
Clean after every use.
If the pots/pans are used without being cleaned, discoloration or cooked on
stains may occur.
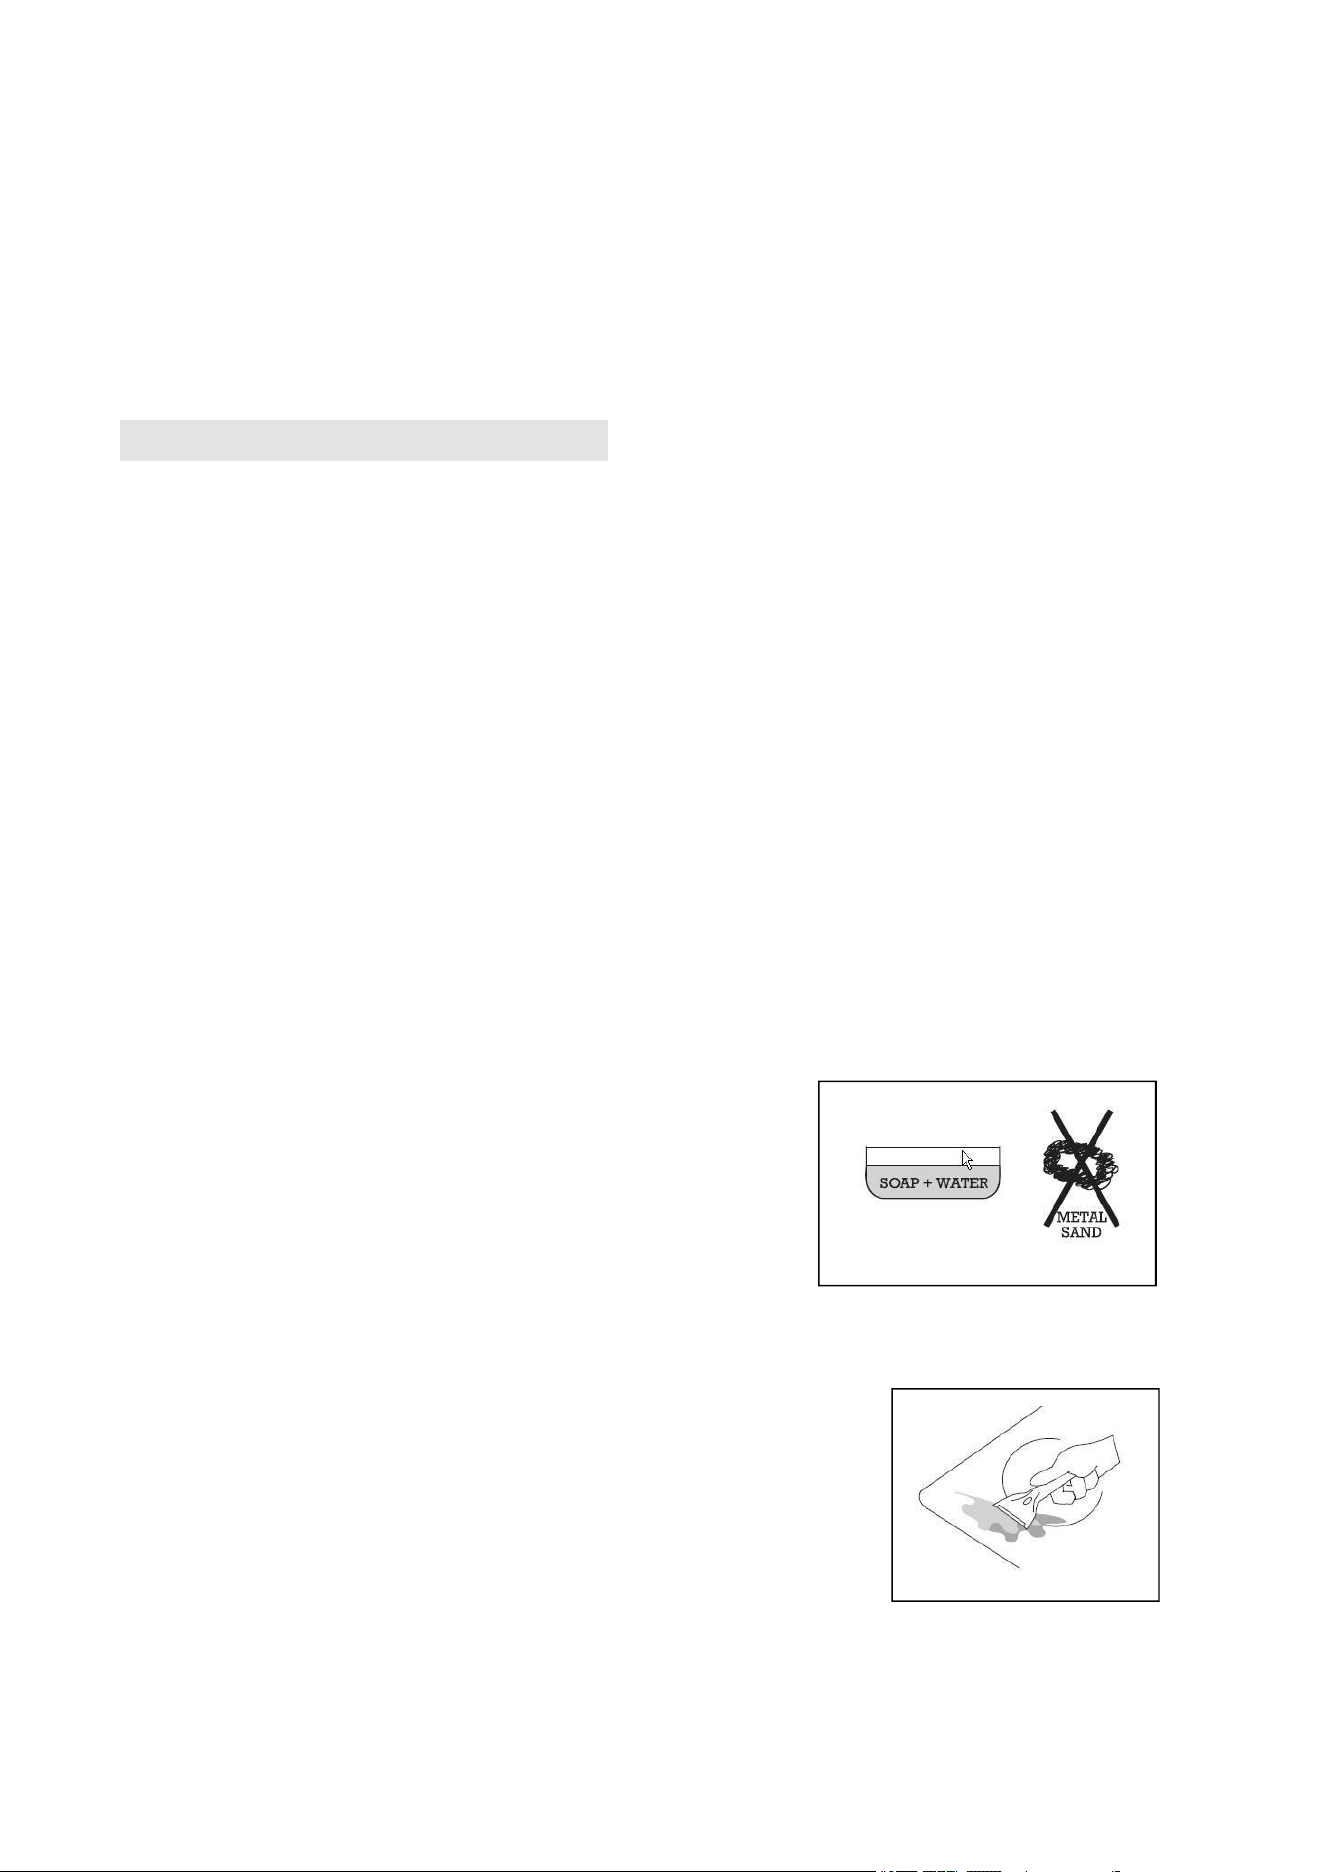
Do not use benzene, thinner, scrubbing brush or polishing powder to clean the cooker.
Do not use any flammable, acid or alkaline materials or substances near the device,
as this may reduce the service life of the device and lead to deflagration when
the device is turned on.
Wipe using dish washing agent and damp cloth.
Use vacuum cleaner to suck up dirt from the air intake and exhaust vent.
Never run water over the unit (Water getting inside may cause a malfunction).
Clean the radiant glass surface frequently,
when it is cool. Never use abrasive
products or pads. Clean with a damp
cloth and soapy water.
Once a week, clean thoroughly with specific
products that preserve and protect radiant
cooktops hobs.
Scrape off stuck on stuck dirt with a scraper.
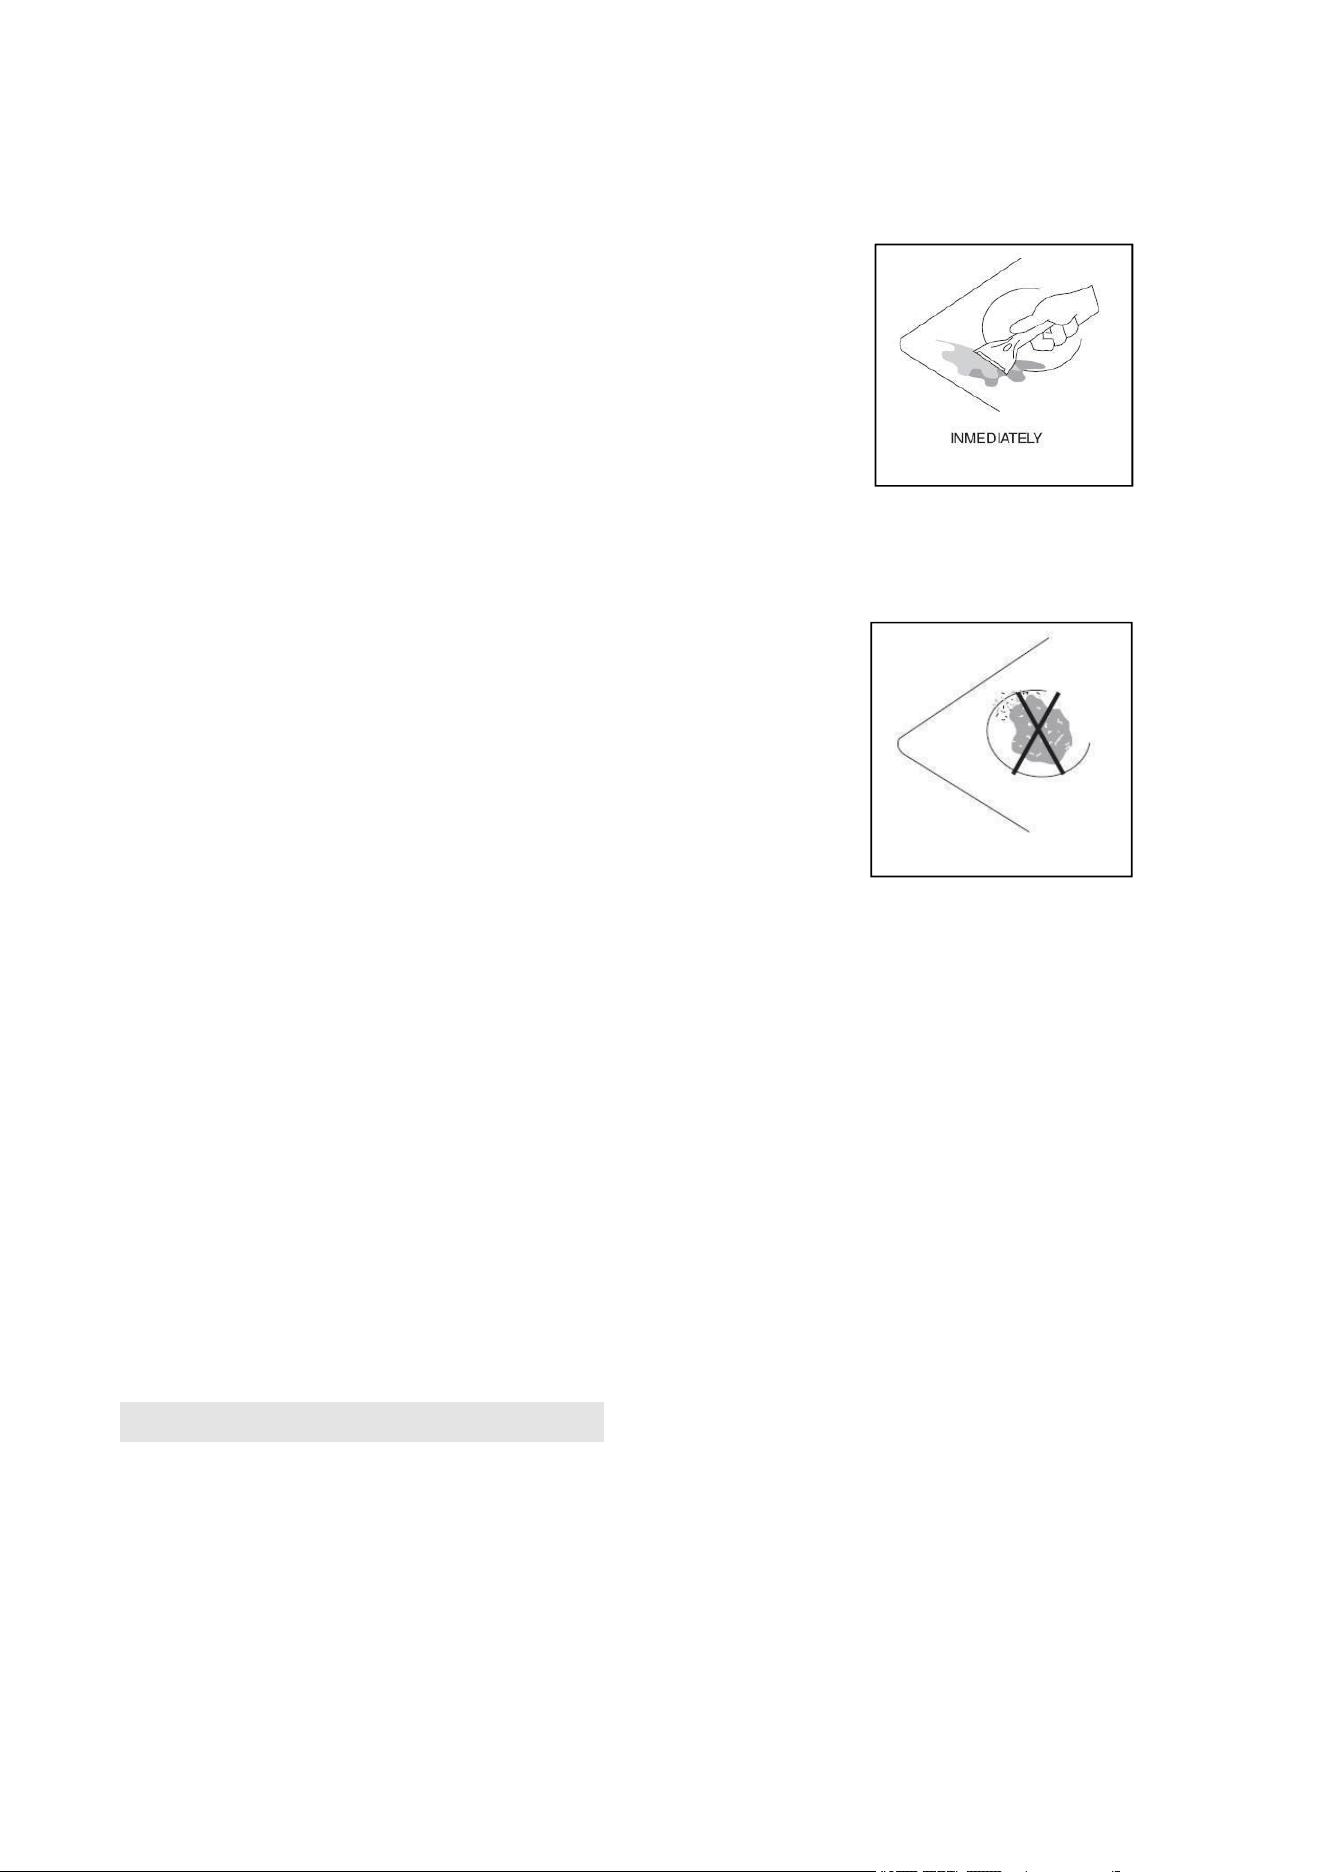
17
If sugar (or sugary matter) or plastic is accidentally burnt
on the cooktop, remove at once with the scraper
while still hot. Otherwise it may leave a
permanent mark.
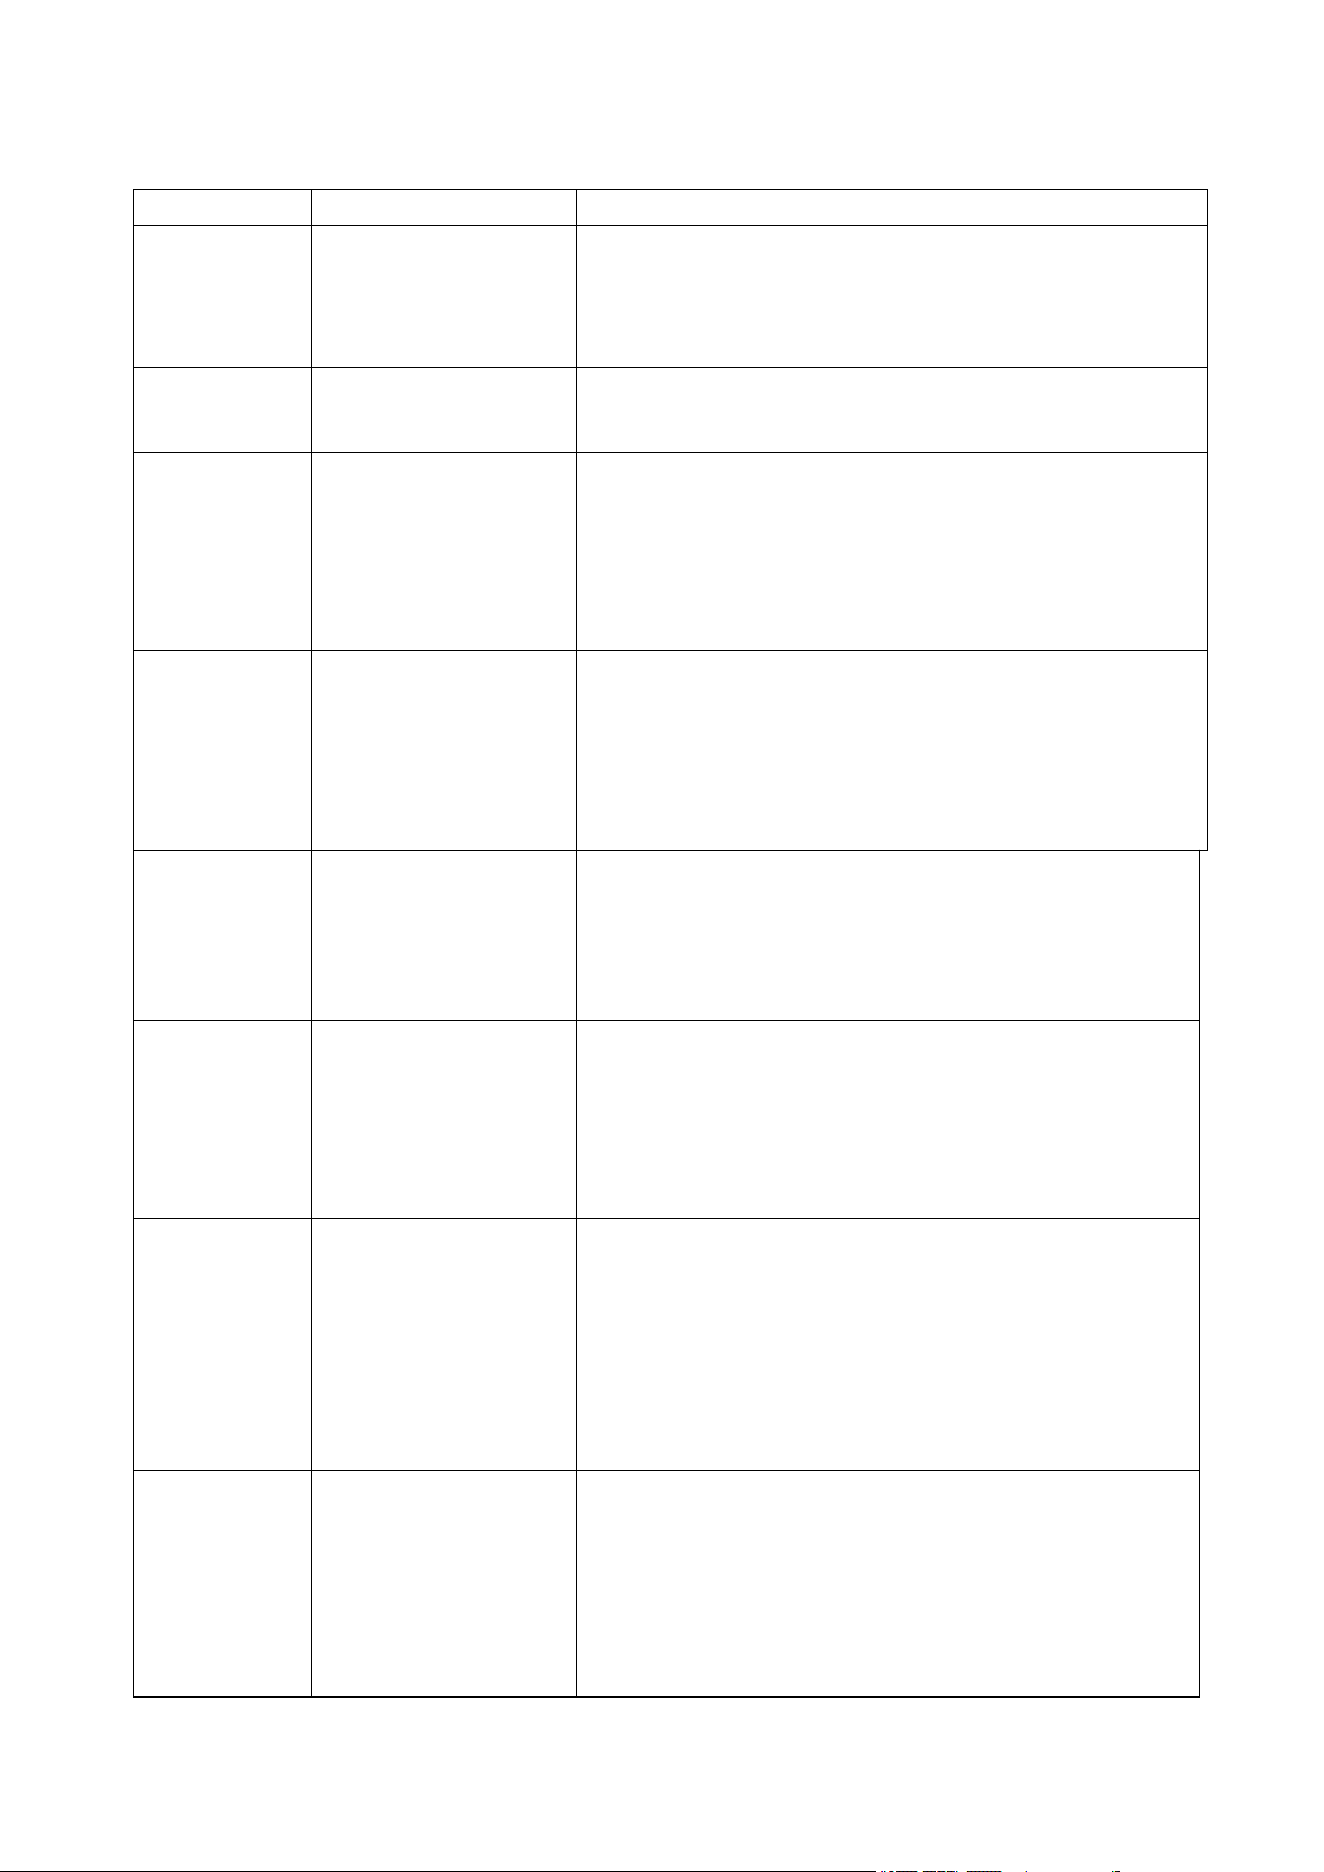
Do not use the cooktop as a work surface. Be
particularly careful with dirt or dust from vegetables,
cleaning powders, etc. which may scratch the
surface when pans are slid over it.
TROUBLESHOOTING GUIDE
Read and follow the instructions given in the section “Instructions for use”.
Check that the electricity supply has not been shut off.
Dry the hob thoroughly after cleaning it.
If, when the hob is switched on, alphanumeric codes appear on the display, consult
the following table for instructions.
If the hob cannot be switched off after using it, disconnect it from the power supply.
18
Problem
Possible causes
What to do
The electric
hob cannot be
turned on.
No power.
Make sure the electric hob is connected to the power
supply and that it is switched on. Check whether there
is a power outage in your home or area. If you’ve
checked everything and the problem persists, call a
qualified technician.
The touch
controls are
unresponsive.
The controls are
locked.
Unlock the controls. See section‘Using your cooktop’
for instructions.
The touch
controls are
difficult to
operate.
There may be a slight
film of water over the
controls or you may
be using the tip of
your finger when
touching the
controls.
Make sure the touch control area is dry and use the
ball of your finger when touching the controls.
The glass is
being
scratched.
Rough-edged
cookware.
Unsuitable, abrasive
scourer or
cleaning
products being
used.
Use cookware with flat and smooth bases. See
‘Safety Instructions’.
See ‘Cleaning Your Cooktop’.
Some
pans make
crackling or
clicking
noises.
This may be caused
by the construction of
your cookware (layers
of different metals
vibrating differently).
This is normal for cookware and does not indicate a
fault.
The electric
hob makes a
low humming
noise when
used on
a high heat
setting.
This is caused by the
technology of
induction cooking.
This is normal, but the noise should quieten down or
disappear completely when you decrease the heat
setting.
Fan noise
coming from
the induction
hob.
A cooling fan built into
your induction hob
has come on to
prevent the
electronics from
overheating. It may
continue to run even
after you’ve turned
the induction hob off.
This is normal and needs no action. Do not switch the
power to the induction hob off at the wall while the fan is
running.
Pans do not
become hot
and appears
in the display.
The electric hob
cannot detect the pan
because it is not
suitable for electric
cooking.
The electric hob
cannot detect the pan
because it is too small
Use cookware suitable for electric cooking. See
section ‘Safety Instructions’.
Centre the pan and make sure that its base matches
the size of the cooking zone.
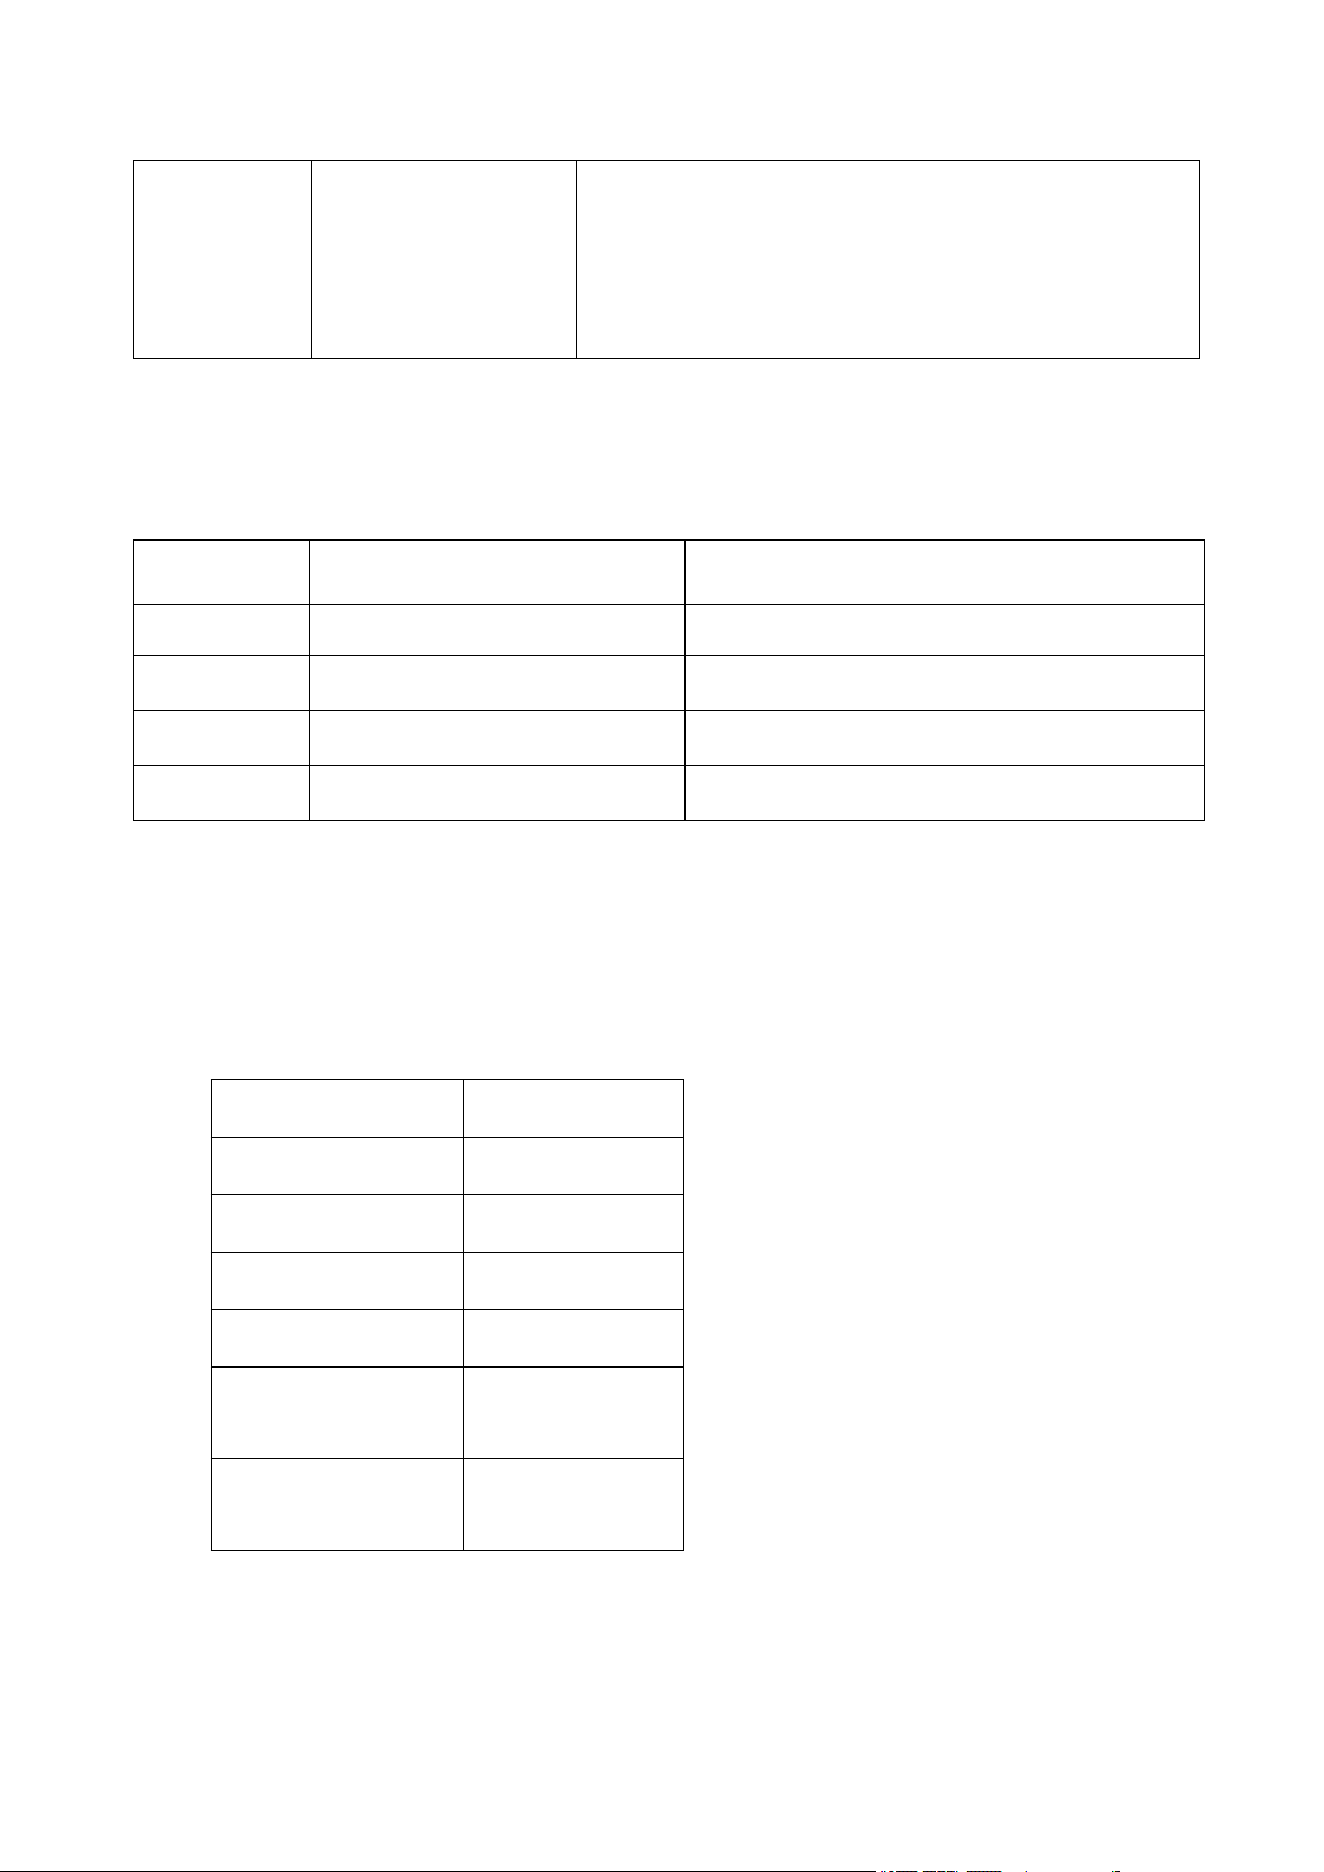
19
for the cooking zone
or not properly
centred on it.
Technical Specification
Model
CRAH774B
Cooking Zones
4 Zones
Supply Voltage
240V~
Frequency
60Hz
Rating Power
6800W
Product Size
L×W×H
700*520*60
Built-in Dimension
A×B
740*490
Error code
Possible Cause
Remedy
E0
No Pan or did not detect the pan
Put on the pan
E2
NTC short or open
Call the after-sales service and specify the error
code
E3
High voltage
Call the after-sales service and specify the error
code
E4
Low voltage
Call the after-sales service and specify the error
code

20
AFTER-SALES SERVICE
Before contacting the After-sales Service:
1. See if you can solve the problem yourself with the help of the “Troubleshooting guide”.
2. Switch the appliance off and then on again it to see if the problem has been eliminated.
If the problem persists after the above checks, contact our official
ECOTOUCH appliance support team via e-mail: handingus@outlook.com.
Always specify:
a brief description of the fault
the product type and exact model
your full address
your telephone number
If any repairs are required, contact an authorized After-Sales Service Centre
(to ensure the use of original spare parts and correct repairs). Spare parts are
available.