
Gamelink RAW 4K USB HDMI Video Capture Device
Live Streaming Record Capture, USB 3.1, GEN1 Video Recording
with HDMI Pass-Through
PLINK3
www.PyleUSA.com
2
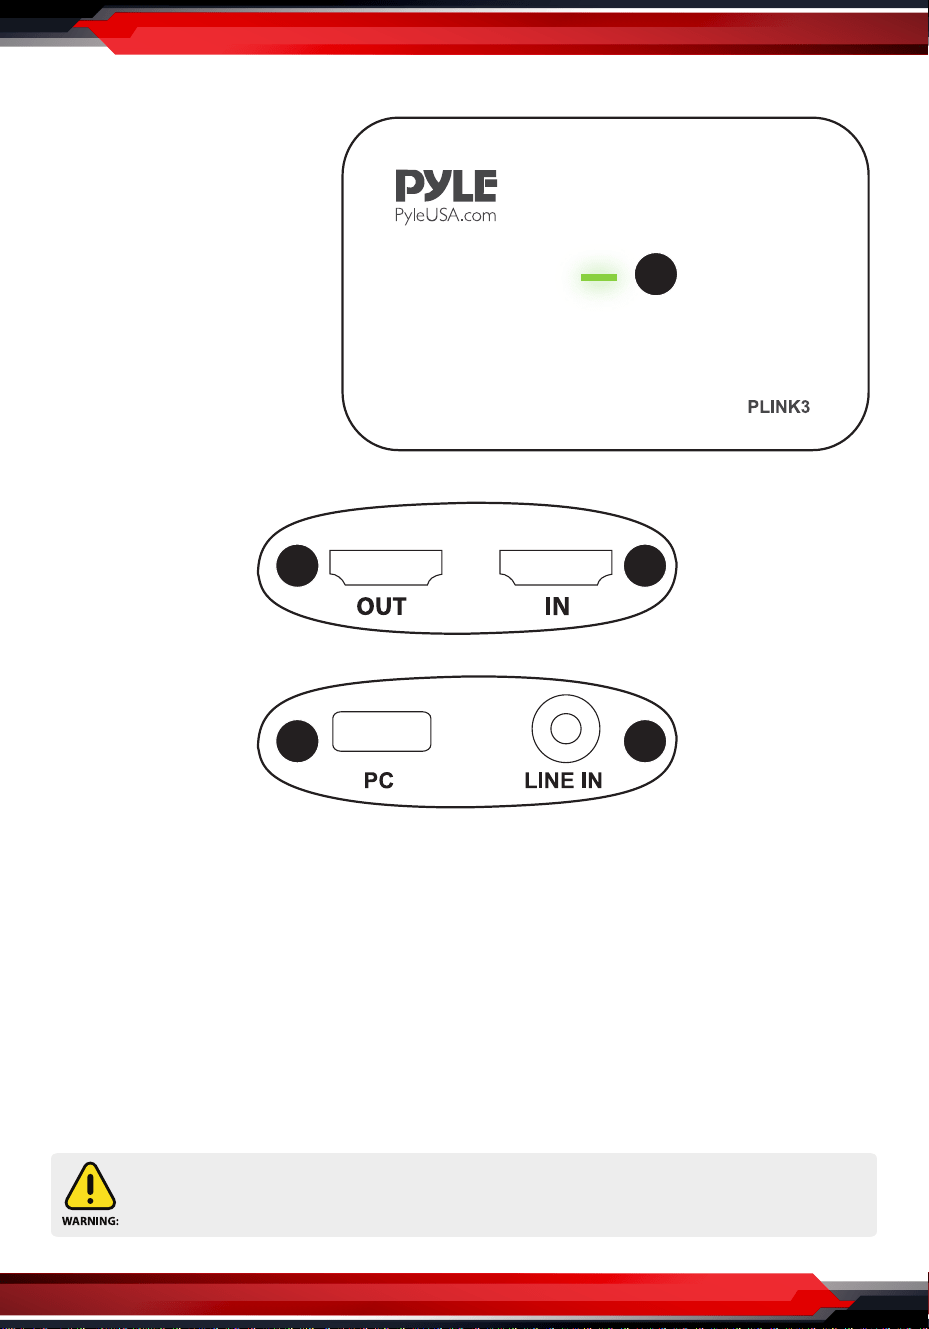
Overview
1. HDMI Input Port
2. HDMI Output Port
3. LED Indicator
4. Line In Port
5. USB 3.0 Port
LED Indicator
Red: No operation, power ON only
Green: Run signal
Software
For professional live streaming or recording, we suggest use OBS, download
link: https://obsproject.com/
This product can expose you to a chemical or group of chemicals, which may include
“Nickel Carbonate” which is known in the state of California to cause cancer, birth defects,
or other reproductive harm. For more info, go to https://www.p65warnings.ca.gov/.
3
1
2
5
4

www.PyleUSA.com
3
Work with OBS
Device Select
After download and installation, run OBS, add a “Video Capture Device”:
Click “OK” to Create
Pyle Game Link PLINK3
Device: Choose “Pyle Game Link PLINK3”

www.PyleUSA.com
4
Resolution Setting
Resolution: Choose Custom or Default
Set a resolution you want (if set custom):
Note:
Make sure the resolution set is the same or smaller than the source, otherwise,
you may see “Check Resolutions Settings” as follows:
Set to 4k while input is not. Set to lower resolution to match the source.
Pyle Game Link PLINK3

www.PyleUSA.com
5
If you set resolution to 4k (3840*2160), you may nd that the viewing picture is
way out of the frame of OBS. Right click window and select “Resize output
(source size)”.
After conrmation you can see the whole picture:

www.PyleUSA.com
6
Video Format & FPS
The video format options depend on resolution, the max FPS depends on both
resolution and video format:
Video Format options MAX FPS
3840 x 2160
NV12 30
NV12 120
1920 x 1080
YUY2 60
XRGB 30
2560 x 1440
NV12 60
YUY2 50
NV12 60
1280 x 720
YUY2 60
XRGB 60
www.PyleUSA.com
7
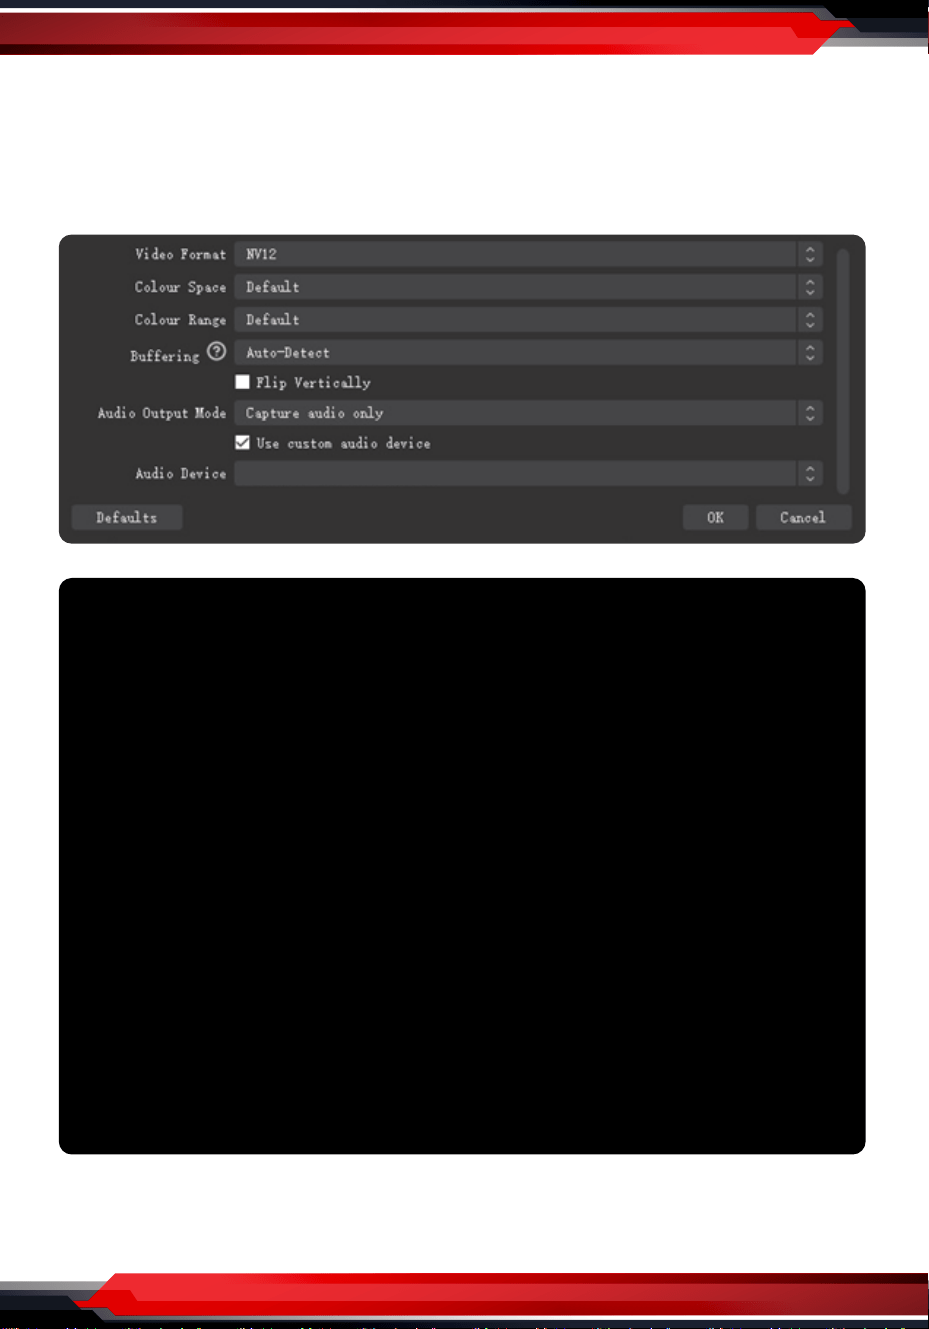
Audio Setting
Audio Output Mode: Capture audio only
Tick “Use custom audio device”
Audio Device: HDMI (Pyle Game Link PLINK3)
Click Settings, then click “Advanced Audio Properties”
Audio Monitoring: Monitor Only (mute output)
HDMI (Pyle Game Link PLINK3)

www.PyleUSA.com
8
Sync oset: - 470ms (this is for audio and video sync; you can adjust it untill
your audio video is synched)
Recording
Record resolution setting:

www.PyleUSA.com
9
You may also want to record a 120HZ video -- Choose Integer FPS, then type 120:
Output setting for Recording:
If you want record a better quality, one of the suggest setting is:
Recording Quality: High Quality, Medium File Size
Recording Format: Mp4
Encoder: Software (x264 low CPU usage preset, increase le size)

www.PyleUSA.com
10
After setting, simply click “Start Recording”
During recording click to stop when you want:
Streaming
Set video quality for streaming (adjust depends your computer, network speed):
Set the service:

www.PyleUSA.com
11
Click “Start streaming” to start:
Operating system
Windows® 10 x64
Laptop
For 4Kp30 or 1080p120 recording:
• Intel Core i7-7700HQ or above
• NVIDIA® GeForce® GTX1050 Ti or above
• 8 GB*
For 1080p60 recording:
• Intel Core i7-4810MQ
• NVIDIA® GeForce® GTX 870M or above
• 8 GB
Desktop
For 4Kp30 or 1080p120 recording:
• Intel® Core™ i5-6XXX / AMD Ryzen™
3 XXX or above
• NVIDIA® GTX 1060 / AMD RX 5700 or
above
• 8 GB*
For 1080p60 recording:
• Intel® Core™ i5-3330 or above
(i7-3770 recommended)
• NVIDIA® GeForce® GTX 650 / AMD
Radeon™ R7 250X or above
• 4 GB
• * RAM must be DDR4 2400 or above
Mac system requirement
Operating system:
MacOS High Sierra 10.15 and above
Mac Thunderbolt 3 For 4Kp30 or
1080p120 Recording
iMac 2019:
• 3.2GHz 6-core Intel Core i7
• Radeon Pro 555X with 2GB of
GDDR5 memory
• 16GB of 2400MHz DDR4 memory
MacBook Pro 2018:
• 2.6GHz 6-core Intel Core i7
• Radeon Pro 560X with 4GB of
GDDR5 memory and above
• 16GB 2400MHz DDR4 memory