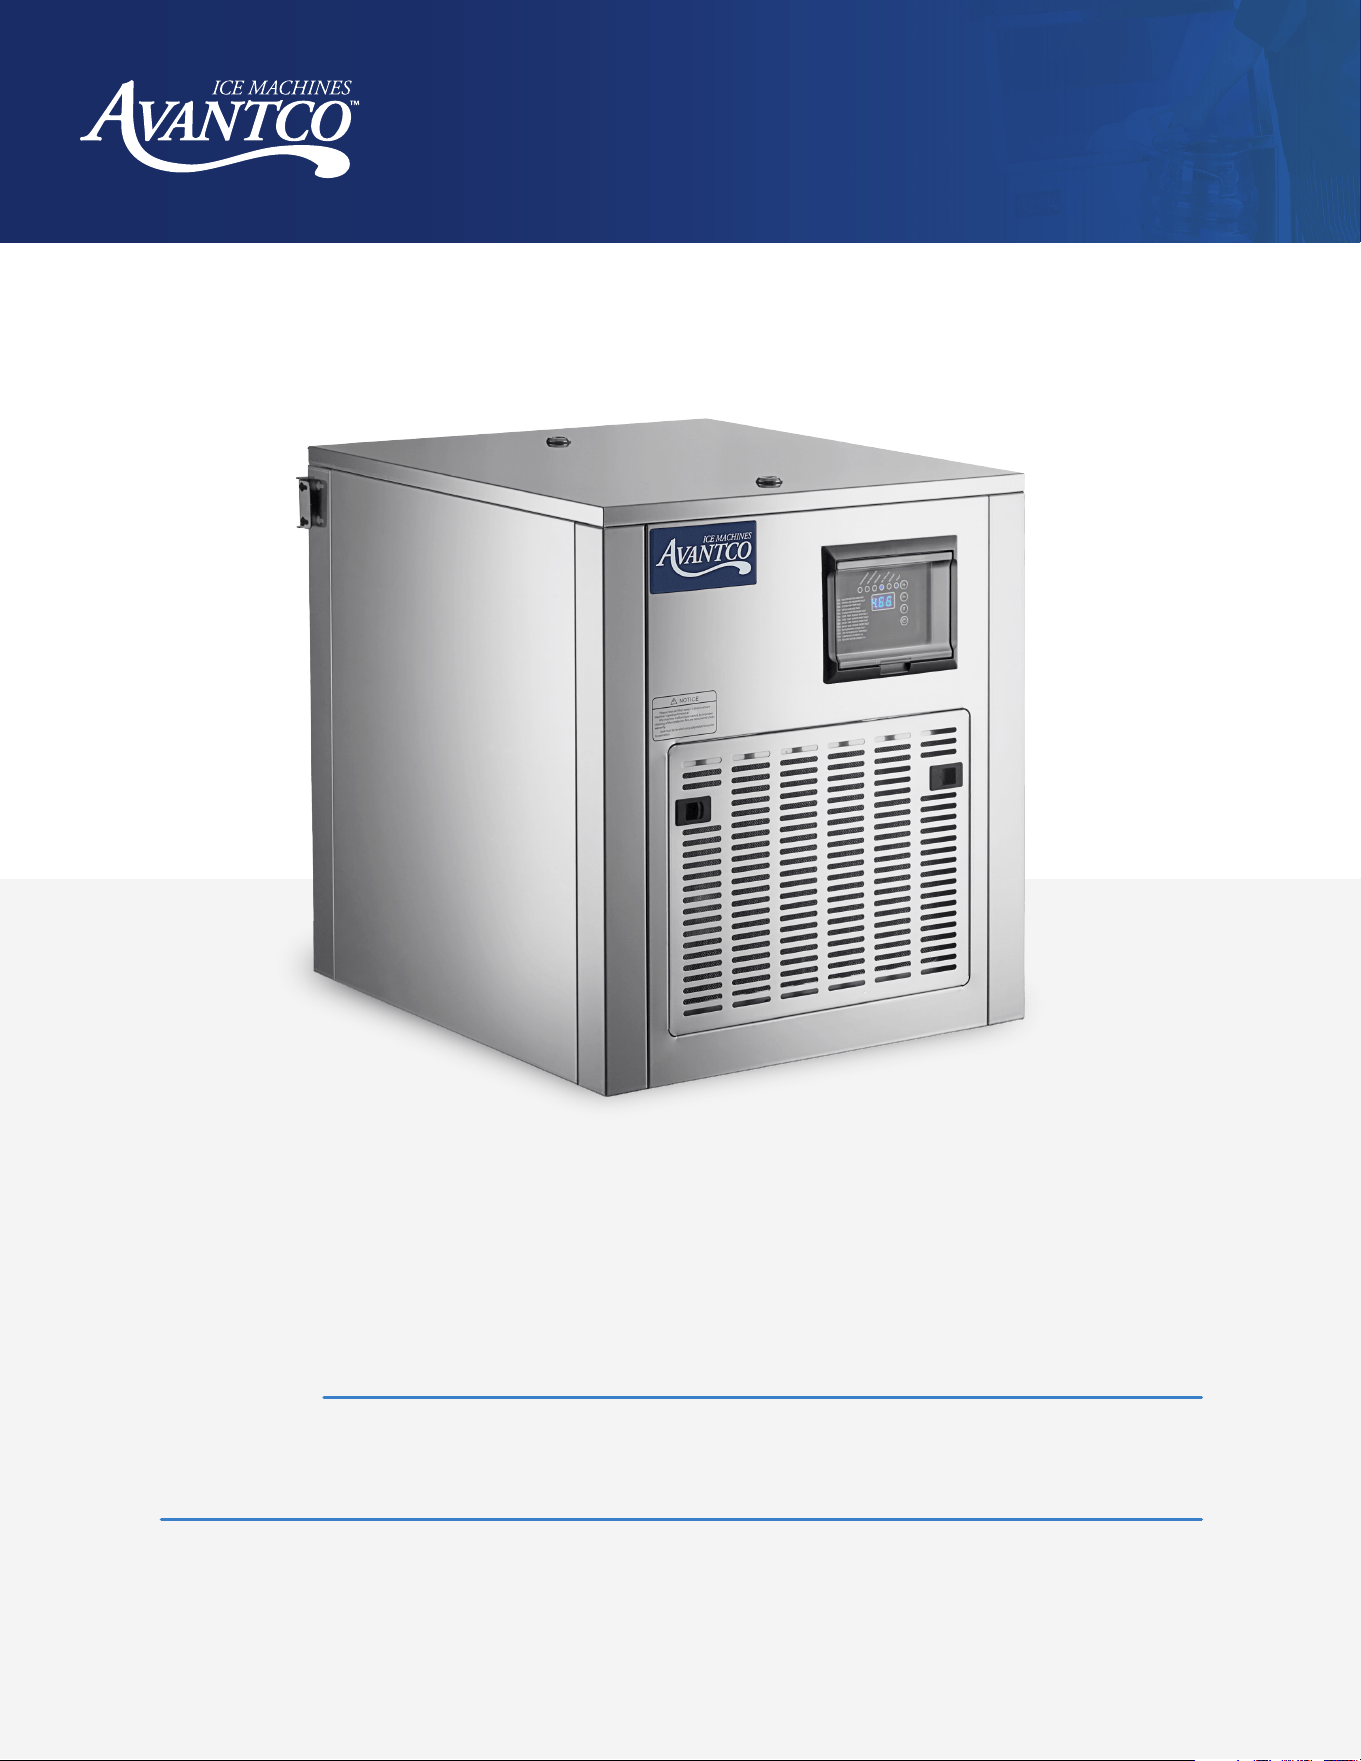
User Manual
11/2024
Nugget Ice Machines
Models:
#194MN522A #194KMN522BA #194KMN522LA #194KMN522HA
Note:
Read this manual in its entirety prior to equipment setup, operation, and maintenance.
www.AvantcoIce.com

2
www.AvantcoIce.com
User Manual
Nugget Ice Machines
Contents
Warnings ........................................................................................................................................................ 3
Installation ..................................................................................................................................................... 5
Startup and Operation ................................................................................................................................ 8
Control Panel ...............................................................................................................................................10
Special Shutdown Protections ..................................................................................................................11
Care and Maintenance ...............................................................................................................................12
Professional Servicing ................................................................................................................................13
Cleaning ........................................................................................................................................................14
Troubleshooting ..........................................................................................................................................18
Hotel Ice Dispenser User's Manual .......................................................................... 19
General Information ................................................................................................................................... 20
Dimensioned Illustration ............................................................................................................................ 21
Product Description ................................................................................................................................... 22
Unpacking ....................................................................................................................................................23
Installation ................................................................................................................................................... 24
Final Checklist / Initial Startup ................................................................................................................. 26
General Care and Cleaning .....................................................................................................................28
Maintenance ................................................................................................................................................ 30
Adjustments .................................................................................................................................................31
Troubleshooting .........................................................................................................................................32
NEMA 5-15P

3
www.AvantcoIce.com
User Manual
Nugget Ice Machines
Warnings
DANGER – RISK OF FIRE OR EXPLOSION. FLAMMABLE REFRIGERANT USED. TO BE REPAIRED ONLY
BY TRAINED SERVICE PERSONNEL. DO NOT PUNCTURE REFRIGERANT TUBING.
PELIGRO – RIESGO DE INCENDIO O EXPLOSION. REFRIGERANTE INFLAMABLE UTILIZADO. PARA
SER REPARADO SOLAMENTE POR PERSONAL DE SERVICIO CALIFICADO. NO PINCHAR LA TUBERÍA
REFRIGERANTE.
DANGER – RISQUE DE FEU OU D’EXPLOSION. LE FRIGORIGÈNE EST INFLAMMABLE. CONFIER LES
RÉPARATIONS À UN TECHNICIEN SPÉCIALISÉ. NE PAS PERFORER LA TUBULURE CONTENANT LE
FRIGORIGENE.
CAUTION – RISK OF FIRE OR EXPLOSION. FLAMMABLE REFRIGERANT USED. CONSULT REPAIR
MANUAL/OWNER’S GUIDE BEFORE ATTEMPTING TO SERVICE THIS PRODUCT. ALL SAFETY
PRECAUTIONS MUST BE FOLLOWED.
ATENCIÓN – RIESGO DE INCENDIO O EXPLOSIÓN. REFRIGERANTE INFLAMABLE UTILIZADO.
CONSULTE EL MANUAL DE REPARACIÓN / GUÍA DEL PROPIETARIO ANTES DE INTENTAR DAR
SERVICIO A ESTE PRODUCTO. DEBEN CUMPLIR CON TODAS LAS PRECAUCIONES DE SEGURIDAD.
ATTENTION – RISQUE DE FEU OU D’EXPLOSION. LE FRIGORIGÈNE EST INFLAMMABLE. CONSULTER
LE MANUEL DU PROPRIÉTAIRE/GUIDE DE RÉPARATION AVANT DE TENTER UNE RÉPARATION. TOUTES
LE MESURES DE SÉCURITÉ DOIVENT ÊTRE RESPECTÉES.
CAUTION – RISK OF FIRE OR EXPLOSION DUE TO PUNCTURE OF REFRIGERANT TUBING; FOLLOW
HANDLING INSTRUCTIONS CAREFULLY. FLAMMABLE REFRIGERANT USED.
ATENCIÓN – RIESGO DE INCENDIO O EXPLOSIÓN DEBIDO A LA PERFORACION DE LA TUBERÍA
REFRIGERANTE; SIGA LAS INSTRUCCIONES DE MANIPULACIÓN CON CUIDADO. REFRIGERANTE
INFLAMABLE UTILIZADO.
ATTENTION – RISQUE DE FEU OU D’EXPLOSION SI LA TUBULURE CONTENTANT LE FRIGORIGÈNE
EST PERFORÉE; SUIVRE LES INSTRUCTIONS DE MANUTENTION AVEC SOIN. LE FRIGORIGÈNE EST
INFLAMMABLE.
CAUTION – RISK OF FIRE OR EXPLOSION DUE TO FLAMMABLE REFRIGERANT USED. FOLLOW
HANDLING INSTRUCTIONS CAREFULLY IN COMPLIANCE WITH LOCAL GOVERNMENT REGULATIONS.
ATENCIÓN – RIESGO DE INCENDIO O EXPLOSIÓN DEBIDO A REFRIGERANTE INFLAMABLE UTILIZADO.
SIGA LAS INSTRUCCIONES DE MANIPULACIÓN CON CUIDADO CONFORME A LAS REGLAS DE LA
MUNICIPALIDAD.
ATTENTION – RISQUE DE FEU OU D’EXPLOSION SI LE FRIGORIGÈNE EST INFLAMMABLE. SUIVRE
LES INSTRUCTIONS DE MANUTENTION AVEC SOIN CONFORMÉMENT AUX RÈGLEMENTATION
GOUVERNEMENTALE LOCAUX.
4
www.AvantcoIce.com
User Manual
Nugget Ice Machines
Warnings
WARNING! Only use drinking water for this machine.
•
Dedicated Circuit: Connect the ice maker to a dedicated electrical circuit to prevent power fluctuations and
potential circuit breaker trips.
•
Proper Voltage: Use a grounded outlet with the correct voltage. Do not use an extension cord.
•
Cord Safety: Do not immerse cords, plugs, or the equipment in water or other liquids. Keep cords away
from wet areas and avoid hanging over counters to prevent tripping hazards. Replace cords only with the
manufacturer's cord set.
•
Cleaning and Maintenance: Regularly clean and maintain the ice maker according to instructions for safe and
hygienic operation.
•
Sanitization: Ensure the ice maker's interior is sanitized after cleaning.
•
Upright Storage: Upon arrival, the nugget ice maker should be kept upright for more than 24 hours to allow
the lubricating oil in the compressor to settle before startup, preventing compressor damage.
•
User Training: Instruct and train users in safe and correct ice maker operation.
•
No Modifications: Do not modify the ice maker's settings or components outside of the manufacturer’s
specifications.
•
Emergency Procedures: Know how to turn o the ice maker quickly in case of emergencies.
•
Instruction Labels: Ensure all operational or safety labels are visible and legible. Do not remove any labels.
•
Volatile Substances: Do not store volatile or flammable substances in the nugget ice maker to prevent
explosions or fire.
•
Regular Inspection: Regularly inspect the ice maker for signs of wear, damage, or malfunction and address
any issues promptly.
•
Maintenance Schedule: Follow the recommended maintenance schedule to ensure the ice maker's longevity
and safety.
Flammable Refrigerant R-290
•
Ventilation: Ensure adequate ventilation space around the ice maker to prevent fire or explosion due to the
flammable refrigerant.
•
Defrosting: Do not use mechanical devices to defrost the refrigerator or puncture refrigerant tubing.
•
Service Personnel: Repairs must only be conducted by an insured foodservice equipment technician or
plumber. Do not puncture refrigerant tubing.
•
Electrical Appliances: Do not use electrical appliances in the ice storage bin.
•
Service Manual: Follow the service manual for repairs. Adhere to all safety precautions.
•
Disposal: Dispose of the ice maker properly according to federal or local regulations.
•
Handling Instructions: Follow handling instructions carefully to avoid puncturing refrigerant tubing.

5
www.AvantcoIce.com
User Manual
Nugget Ice Machines
Installation
This product cannot be used in outdoor environments. Not intended for use by children or persons with
reduced physical, sensory, or mental capabilities, or lack of experience and knowledge.
•
The installation, repair, or maintenance of this ice machine must be carried out by professional and qualified
personnel. Electric shock, fire, or personal injury may result from incorrect operation.
•
After the ice machine is delivered, keep the machine upright for at least 24 hours to have the refrigerant be
fully precipitated before startup. Otherwise, the compressor may be damaged.
•
When handling, keep the cabinet upright with the inclination not exceeding 45°. Do not invert the machine or
lay it horizontally. This ice machine should not be placed in wet or easily splashed areas.
•
The grounding of this ice machine cannot be connected to a gas pipe, water pipe, telephone line, or lightning
rods, etc.
•
There are rotating components in this ice machine. Do not insert slim objects into ventilation or exhaust ports,
or serious mechanical damage and injury may occur.
•
Do not store volatile or flammable substances in this ice machine or it may result in an explosion or fire.
•
Do not store any sundries or freeze any food in the storage bin. Keep the ice scoop clean.
•
The ice machine must be placed on a floor sucient enough to support its weight. An insucient base may
cause the equipment to fall over and cause injury.
•
There should be sucient ventilation space around the ice machine. See page 7 for clearance requirements.
•
Only the power supply specified on the machine nameplate can be used with this ice machine.
•
This ice machine cannot be connected to hot water.
•
The outlet for this ice maker must be reliably grounded with leakage protection.
•
The ice machine must be disconnected from power before manual cleaning, repairing, and maintenance.
•
Before cleaning, repairing, and maintenance, the remaining ice in the ice bin should be removed from the ice
machine to avoid contamination to ice.
•
Do not splash water directly onto the surface of the ice machine during the cleaning process; otherwise, it
may cause a short circuit, leakage, or other faults.
•
Flammable foaming agent is used during the foaming process. The ice maker should be disposed of and
recycled by qualified personnel and institutions.
•
The ice machine should be properly managed to ensure that children will not play with the machine.
•
When the ice machine malfunctions, turn o the power and contact professional personnel to be repaired.
6
www.AvantcoIce.com
User Manual
Nugget Ice Machines
This automatic nugget ice maker should be connected to a drinking water source and power supply. Once
it is properly installed, the nugget ice maker can be started for normal ice production. When the ice bin is
full of nugget ice, the machine will automatically stop running. The nugget ice maker is typically used in the
following settings or similar situations:
•
Kitchen areas in shops, oces, or other workplaces.
•
Preservation areas in supermarkets and for aquatic products.
•
Storage areas in laboratories and medical facilities.
•
Preservation and cooling during long-distance transportation.
•
The catering industry and similar non-retail environments.
NOTE: Under normal circumstances, the nugget ice maker is not intended for residential use.
C Pure creates specialty water filters to be used with common restaurant equipment, ensuring that the water
utilized by the equipment is both clean and clear. These filters are easily installed into water lines, and their
cartridges can be quickly swapped out for fast, easy, and ecient replacements. The water filters below
are approved for use with Avantco Ice Machines. Failure to use and maintain an appropriate water filter will
void warranty coverage on your Avantco Ice Machine. For installation instructions, refer to the C Pure water
filtration manual or contact a C Pure water filtration dealer.
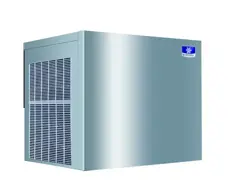
Modular Nugget Ice Machines
Item Number
Ice Shape
Ice Production
Per 24 Hours
Filtration System
Replacement
Cartridge
194MN522A Nugget 550 lb. 790OCLOKITL 790OCLOCARTL
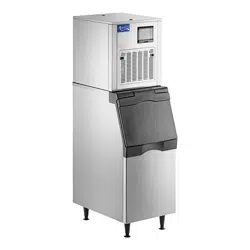
Modular Nugget Ice Machines with Bin
Item Number
Ice Shape
Ice Production
Per 24 Hours
Filtration System
Replacement
Cartridge
194KMN522BA Nugget 550 lb. 790OCLOKITL 790OCLOCARTL
194KMN522LA Nugget 550 lb. 790OCLOKITL 790OCLOCARTL
Modular Nugget Ice Machines with Hotel Dispenser
Item Number
Ice Shape
Ice Production
Per 24 Hours
Replacement
Cartridge
Replacement
Cartridge
194KMN522HA Nugget 550 lb. 790OCLOKITL 790OCLOCARTL
7
www.AvantcoIce.com
User Manual
Nugget Ice Machines
Installation
The installation location should meet the following conditions:
•
Indoors, at an altitude of 2,000 meters or less.
•
Ambient temperature: 40-90°F (5-33°C).
•
Power supply: Rated voltage on the nameplate ± 6%.
•
Water source: Drinking water source with a pressure of 18.75 PSI to 80 PSI and a temperature of 40-90°F
(5-33°C).
•
Away from heat sources and not exposed to high or low temperatures or direct sunlight to ensure proper heat
dissipation and longevity.
Additionally, sucient ventilation space should be maintained around the nugget ice maker to ensure smooth
ventilation. The spacing should be 12” in front, 8” in the back, and 2” on the sides. The nugget ice maker must
be placed on a surface strong enough to support its weight. A reliably grounded socket with leakage protection
should be used. There must also be a suitable floor drain near the installation location.
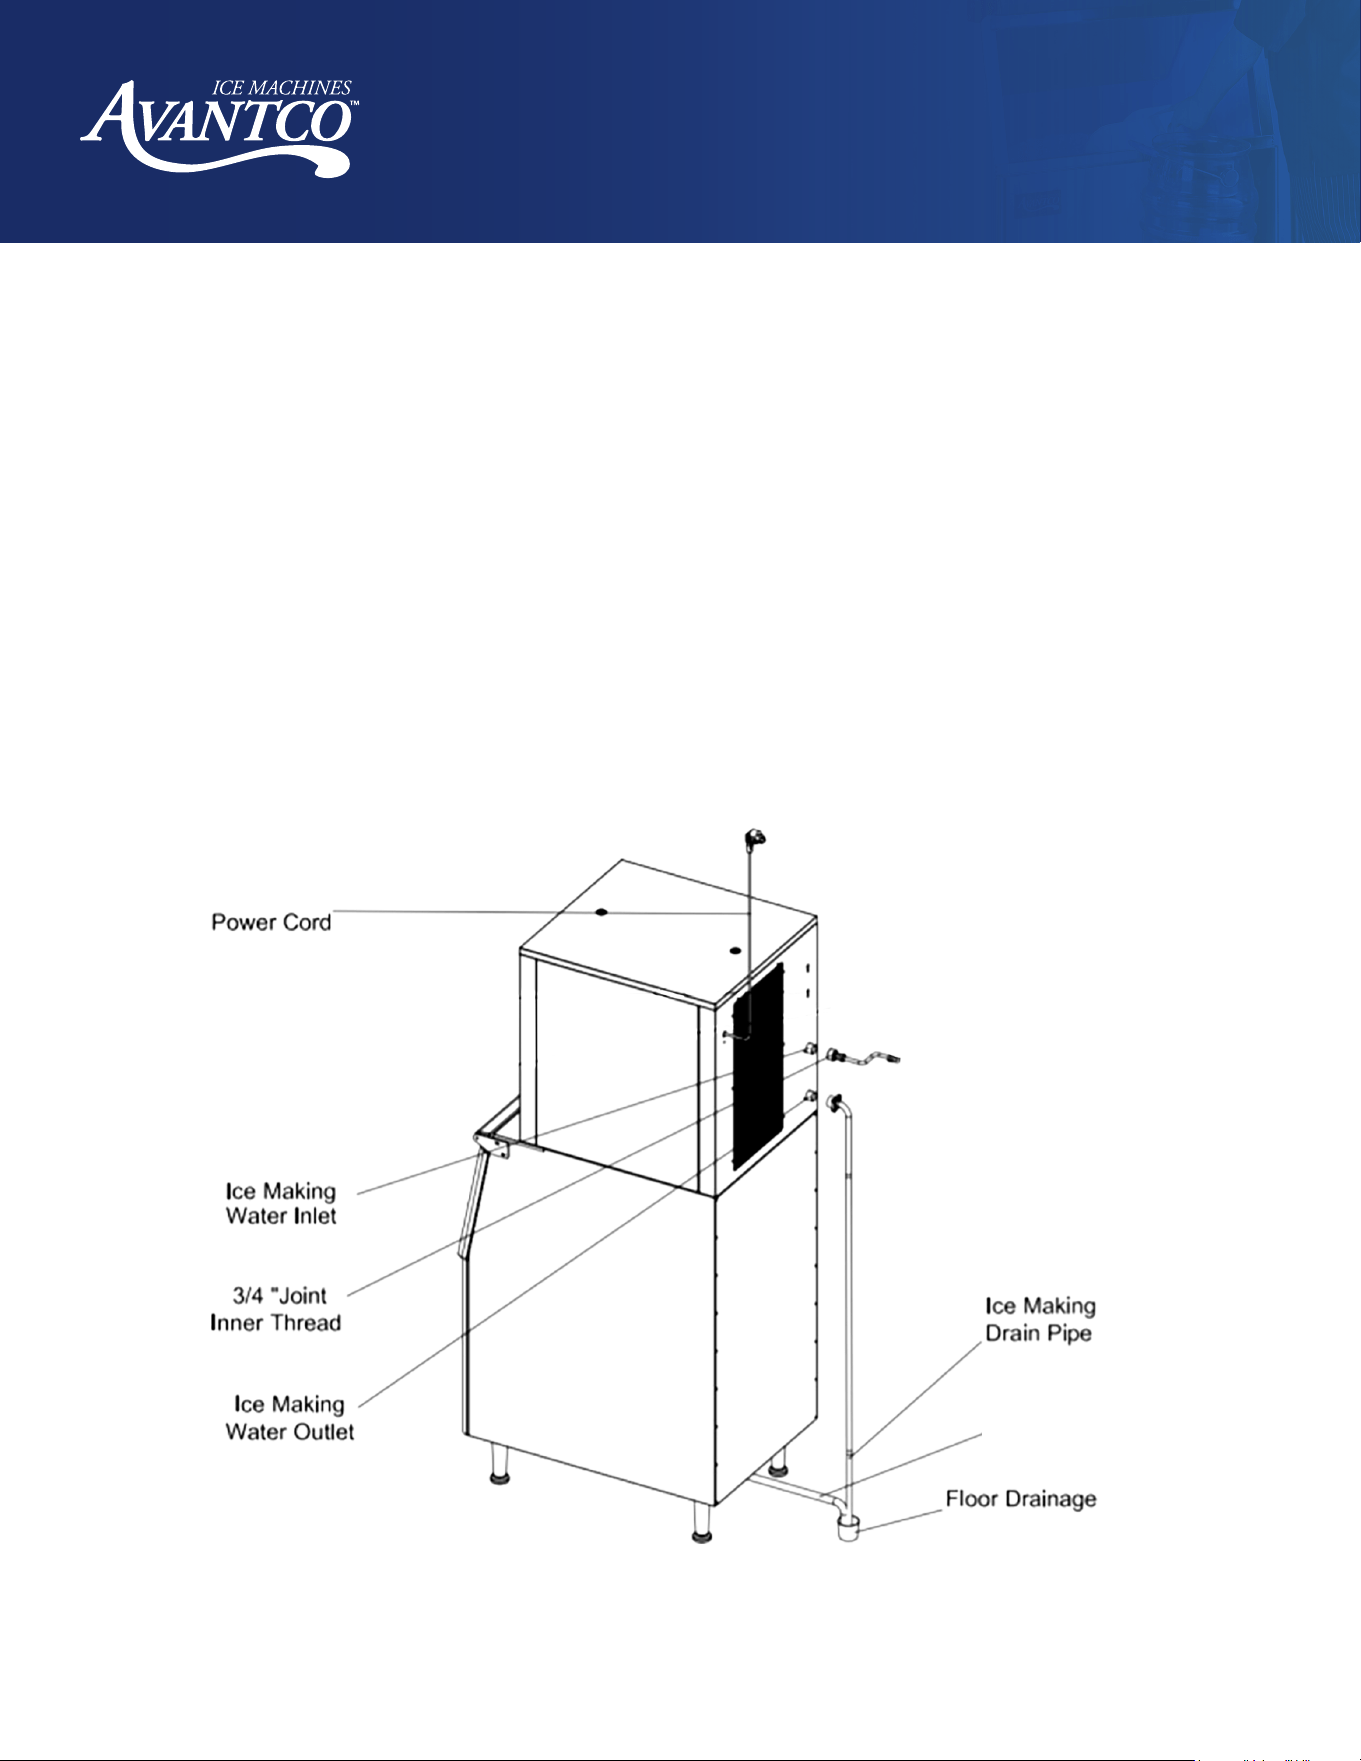
Installation Diagram
Air Cooled Ice Maker
Ice Bin
Drain Pipe

8
www.AvantcoIce.com
User Manual
Nugget Ice Machines
Startup and Operation
1. Pre-Installation Checks:
• Verify the nugget ice maker's condition before installation.
• Confirm the model and nameplate of the machine.
2. Cleaning:
• Clean the ice bin and interior of the machine with a sponge soaked in warm water and baking soda.
Rinse and dry thoroughly.
3. Placement and Ventilation:
• Place the air-cooled nugget ice maker in a well-ventilated area, maintaining a ventilation space of
2” on both sides.
• Adjust the legs at the bottom of the machine for leveling and ease of floor cleaning.
4. Water Connection:
• Connect the water filtration system (if applicable) in accordance with all applicable state and local
laws and regulations.
• Note: The water inlet and outlet directions are typically marked on the manifold head or cartridge.
Install the filter in the correct direction.
• Note: To continuously filter impurities, the filter cartridge must be replaced in accordance with your
water filtration system's instructions.
• Connect the machine to the water supply pipe using the 1/2’’ joint provided. It is recommended to install a
water valve (not provided) on the water supply pipe.
• Connect the supplied drainpipe to the drain port, ensuring the drainpipe has a drop greater than 1” to
facilitate drainage. Ensure the drainpipe is not blocked and no section of it is higher than the drain port or
any previous section.
5. Before Startup:
• Ensure all accessories or items have been removed from the nugget ice maker.
• Ensure the nugget ice maker has been standing upright for 24 hours.
• Ensure the water pipe is connected and the water valve is open.
• Ensure the plug is connected to the power supply and the power switch is turned o.
• Confirm the ambient temperature, water temperature, and water supply pressure are within the specified
ranges.
6. Startup:
• Turn on the power switch on the power supply line.
• When the machine is powered on, press the “Power” button on the display panel. The machine will enter
automatic ice-making mode.
7. Operation and Inspection:
• During normal operation, ensure that ice falls o normally, the fan works properly, and there is no abnormal
noise or vibration.
• Note: If exposed to thunderstorms or not in use for a long time, disconnect the power supply and
water source.
9
www.AvantcoIce.com
User Manual
Nugget Ice Machines
8. Ice Making Process:
• After powering on, press the “Power” button on the display panel. Following a 10-second countdown, the
balance valve, reducer, fan, and compressor will start in sequence.
• The continuous water flow is stored in the inner wall of the evaporator, where it freezes. The ice is then cut
by the auger driven through the reducer and taken out through the spiral ice blade.
• Water Shortage Restart: If water is insucient, the “low water level” indicator will be ON. When normal
water supply resumes, the indicator will turn OFF. After some time, the machine will restart and the “water
shortage restart” indicator will be ON, turning OFF automatically after 10 hours of normal operation.
9. Shutdown:
• To shut down, press the “Power” button on the panel. The compressor will stop immediately and after a
60-second countdown, the auger and fan will shut down, turning the machine OFF.
• Automatic Shutdown with Full Ice: When the ice bin is full, the machine will detect the blockage between
the infrared transmitter and receiver of the full ice switch and automatically stop running after 60 seconds.
• Ice Making Recovery After Ice Removal: As ice is removed from the ice bin, the machine will detect the
decreased ice height and resume normal ice making after two minutes.
Installing an Adapter
Item Number
Adapter
Bin Options
194MCF322A 194ADAP2230
194BIN27530,
194BIN54030
194MCH322A 194ADAP2230
194BIN27530,
194BIN54030
194MCF422A 194ADAP2230
194BIN27530,
194BIN54030
194MCH422A 194ADAP2230
194BIN27530,
194BIN54030
194MN522A 194ADAP2230
194BIN27530,
194BIN54030
How to Use 194ADAP2230:
1.
Place 194ADAP2230 on top of your 30" ice bin.
2.
Once the adapter is on the ice bin, place your 22" ice machine on top of the adapter.
3.
Nothing else is required for set-up. If preferred, you can seal the adapter to the ice machine with a gasket.
10
www.AvantcoIce.com
User Manual
Nugget Ice Machines
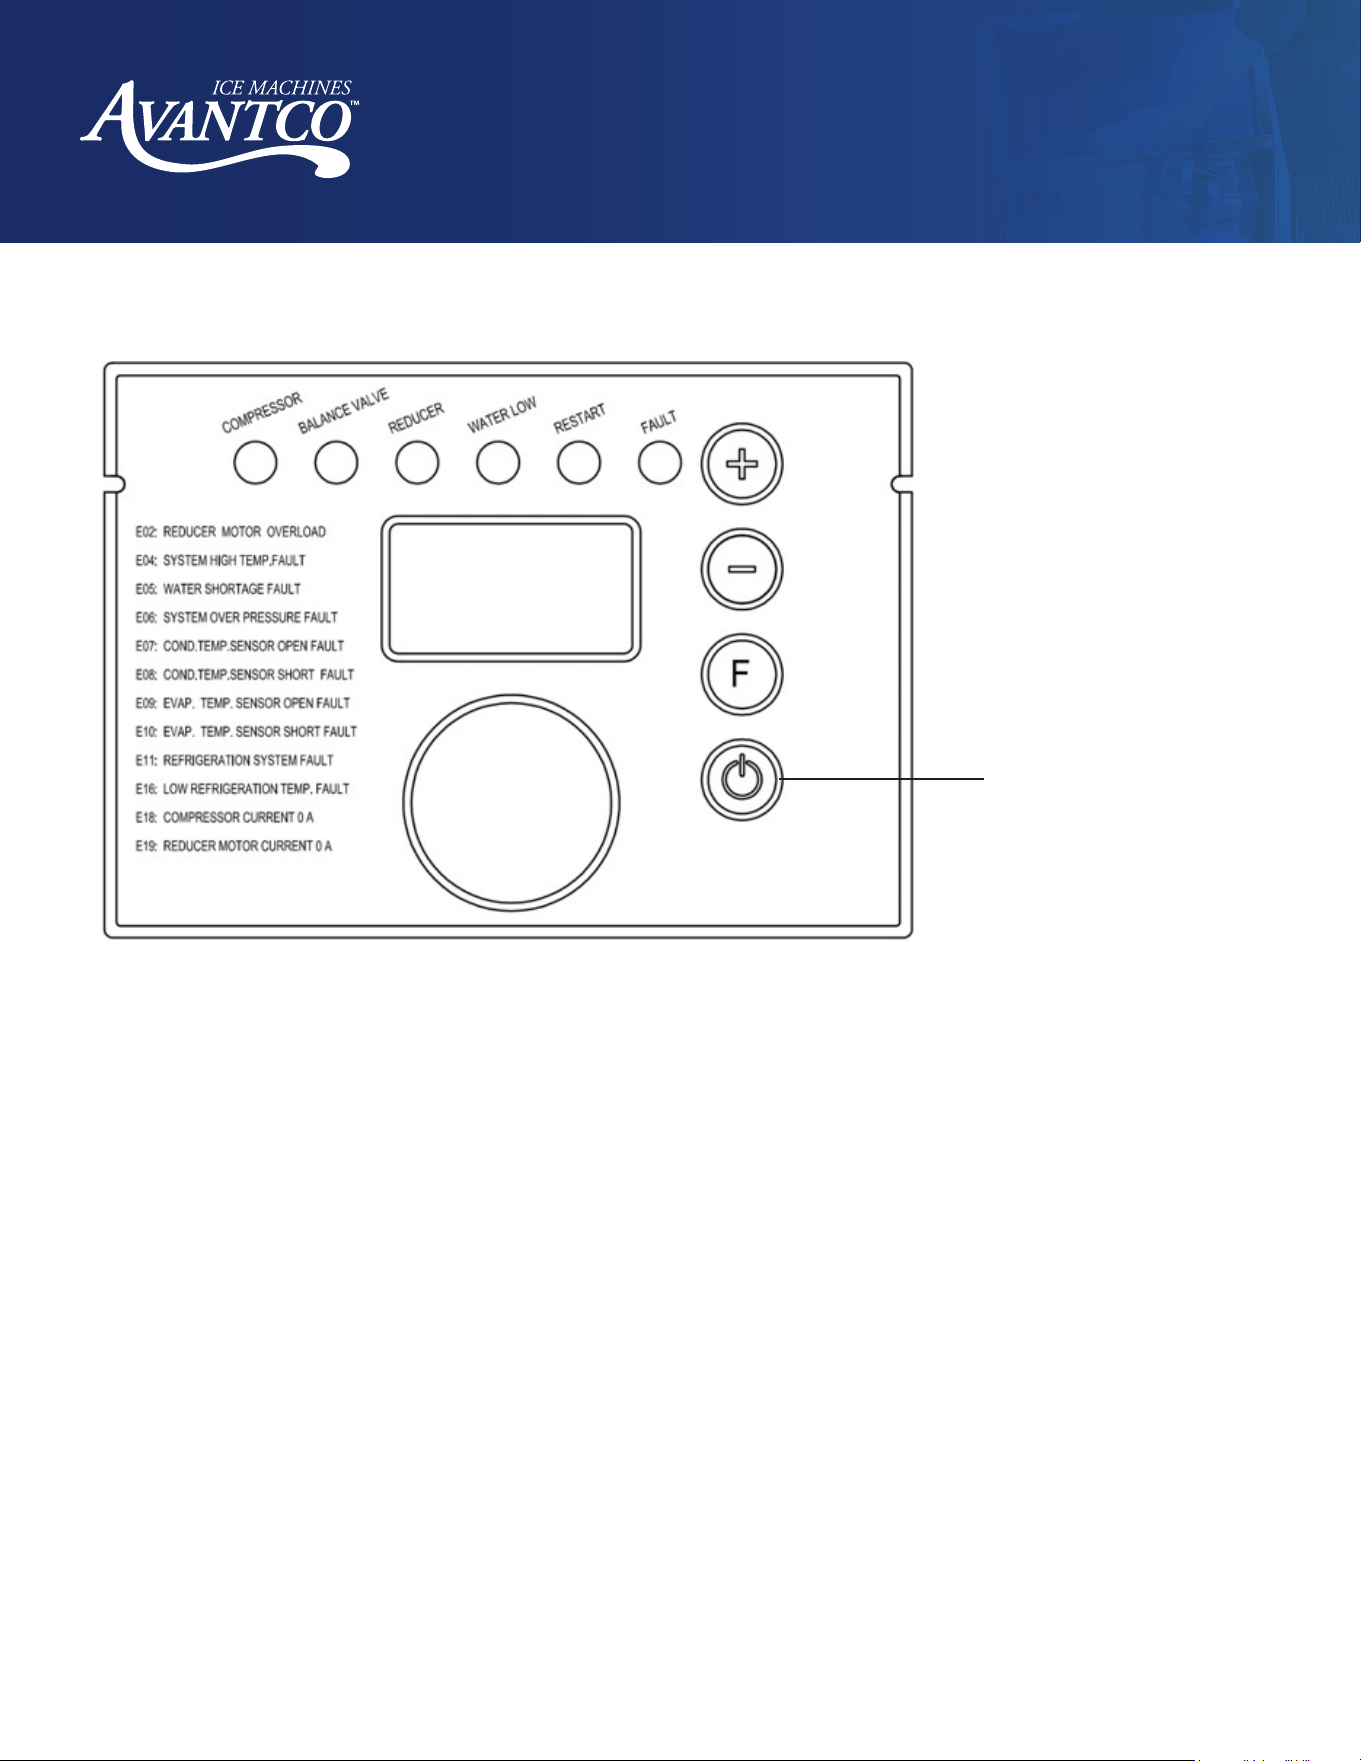
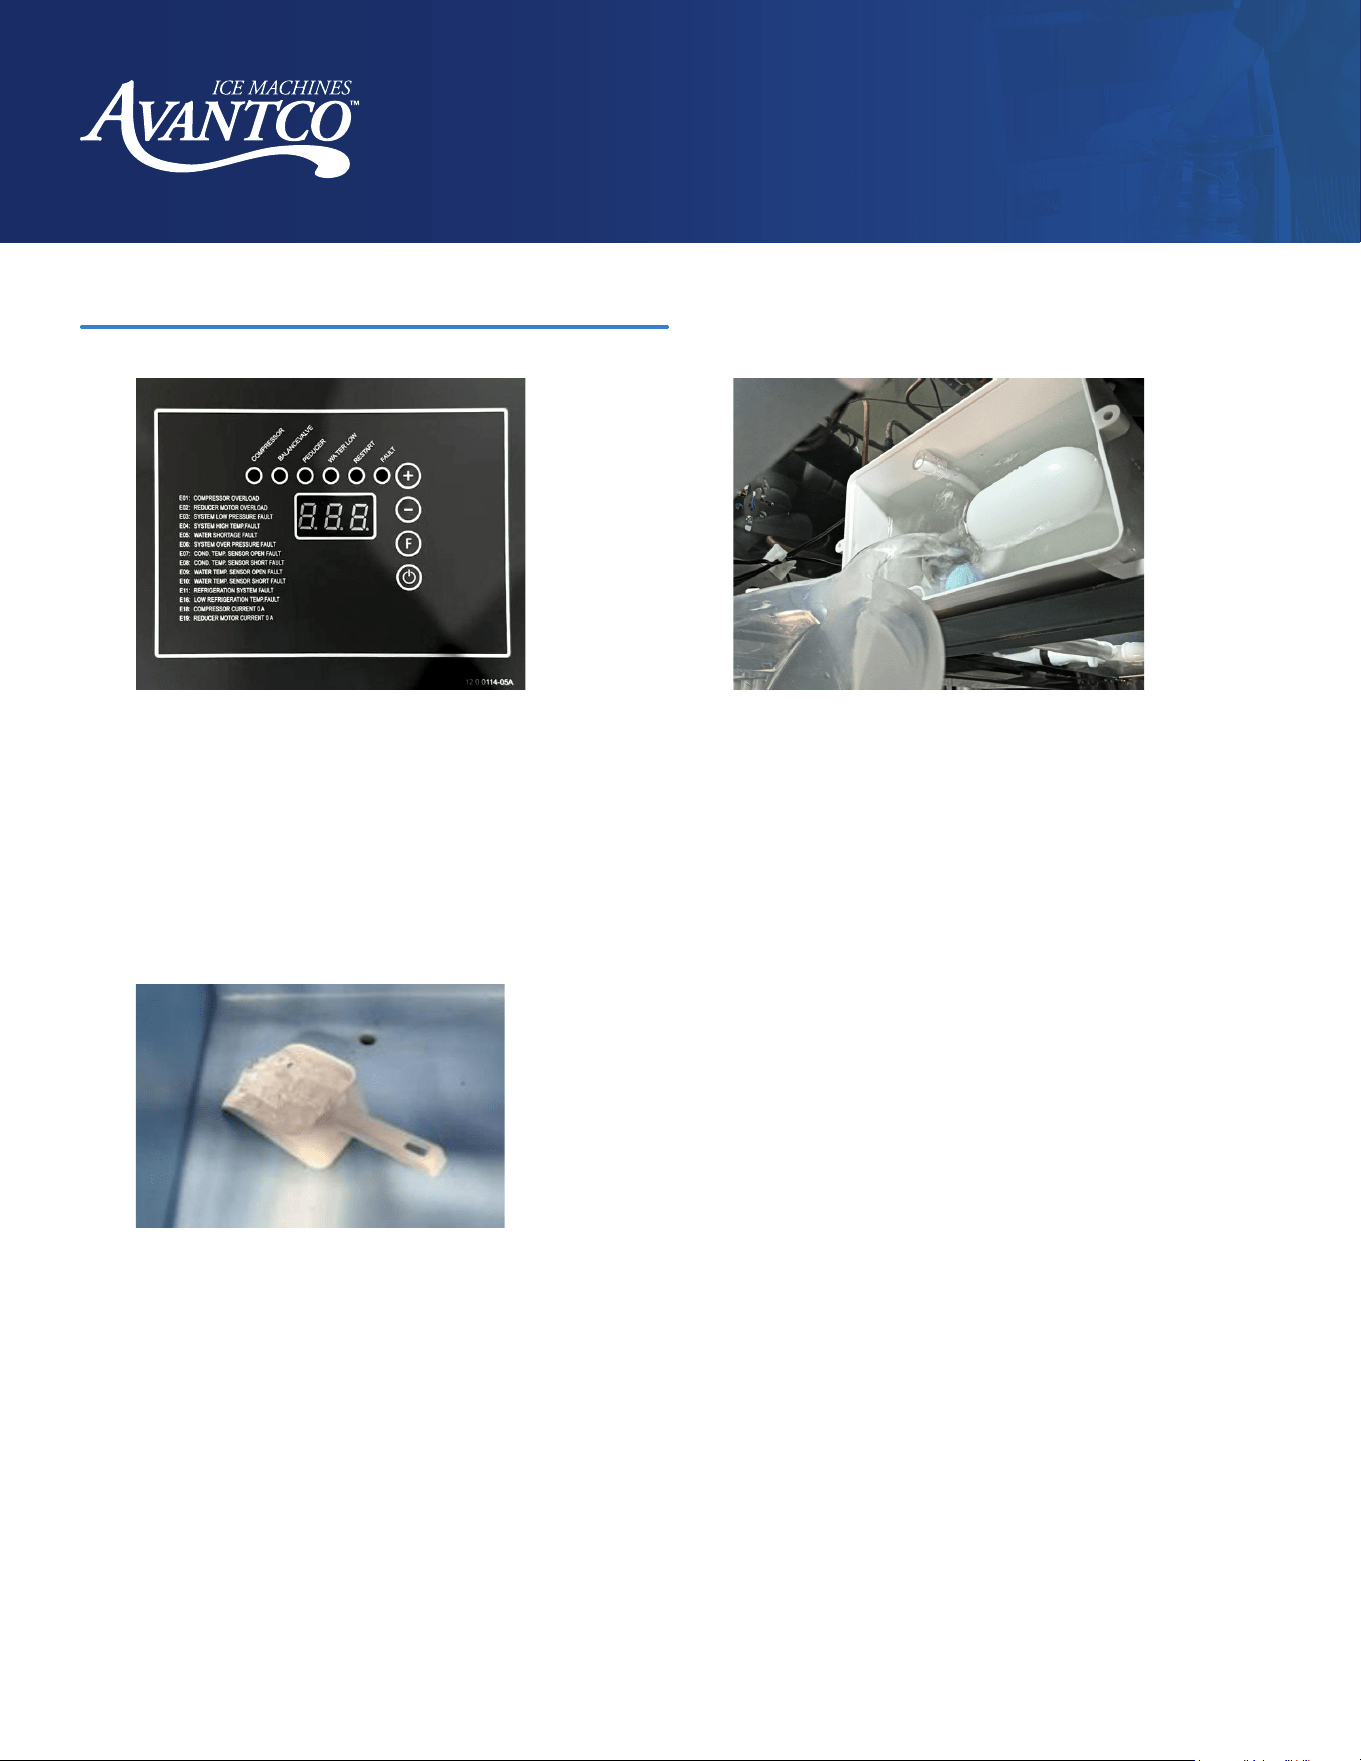
Control Panel
Power Button
1. Digital Tube Display:
• Preparation Stage: Displays a 10-second countdown.
• Ice Making Stage: Default display of the compressor current (unit: A). Press the function key to alternately
display the reducer current (unit: A) and condensate temperature (unit: ºC).
2. LED Indicator:
• Displays the status of the nugget ice maker, including the compressor, reducer, low water level, water
shortage restart, and other faults.
3. Power:
• When the machine is powered on, press the "Power" button to shut down and start up the machine.
4. Ice Bin Door:
• Gently open and close the door of the ice bin to avoid slamming. Ensure the door is closed after taking
out ice.
5. Long-Term Inactivity:
• If the nugget ice maker has not been used for some time and will not be in use long term, it should be
powered on and run for 2-4 hours once every two months.
11
www.AvantcoIce.com
User Manual
Nugget Ice Machines
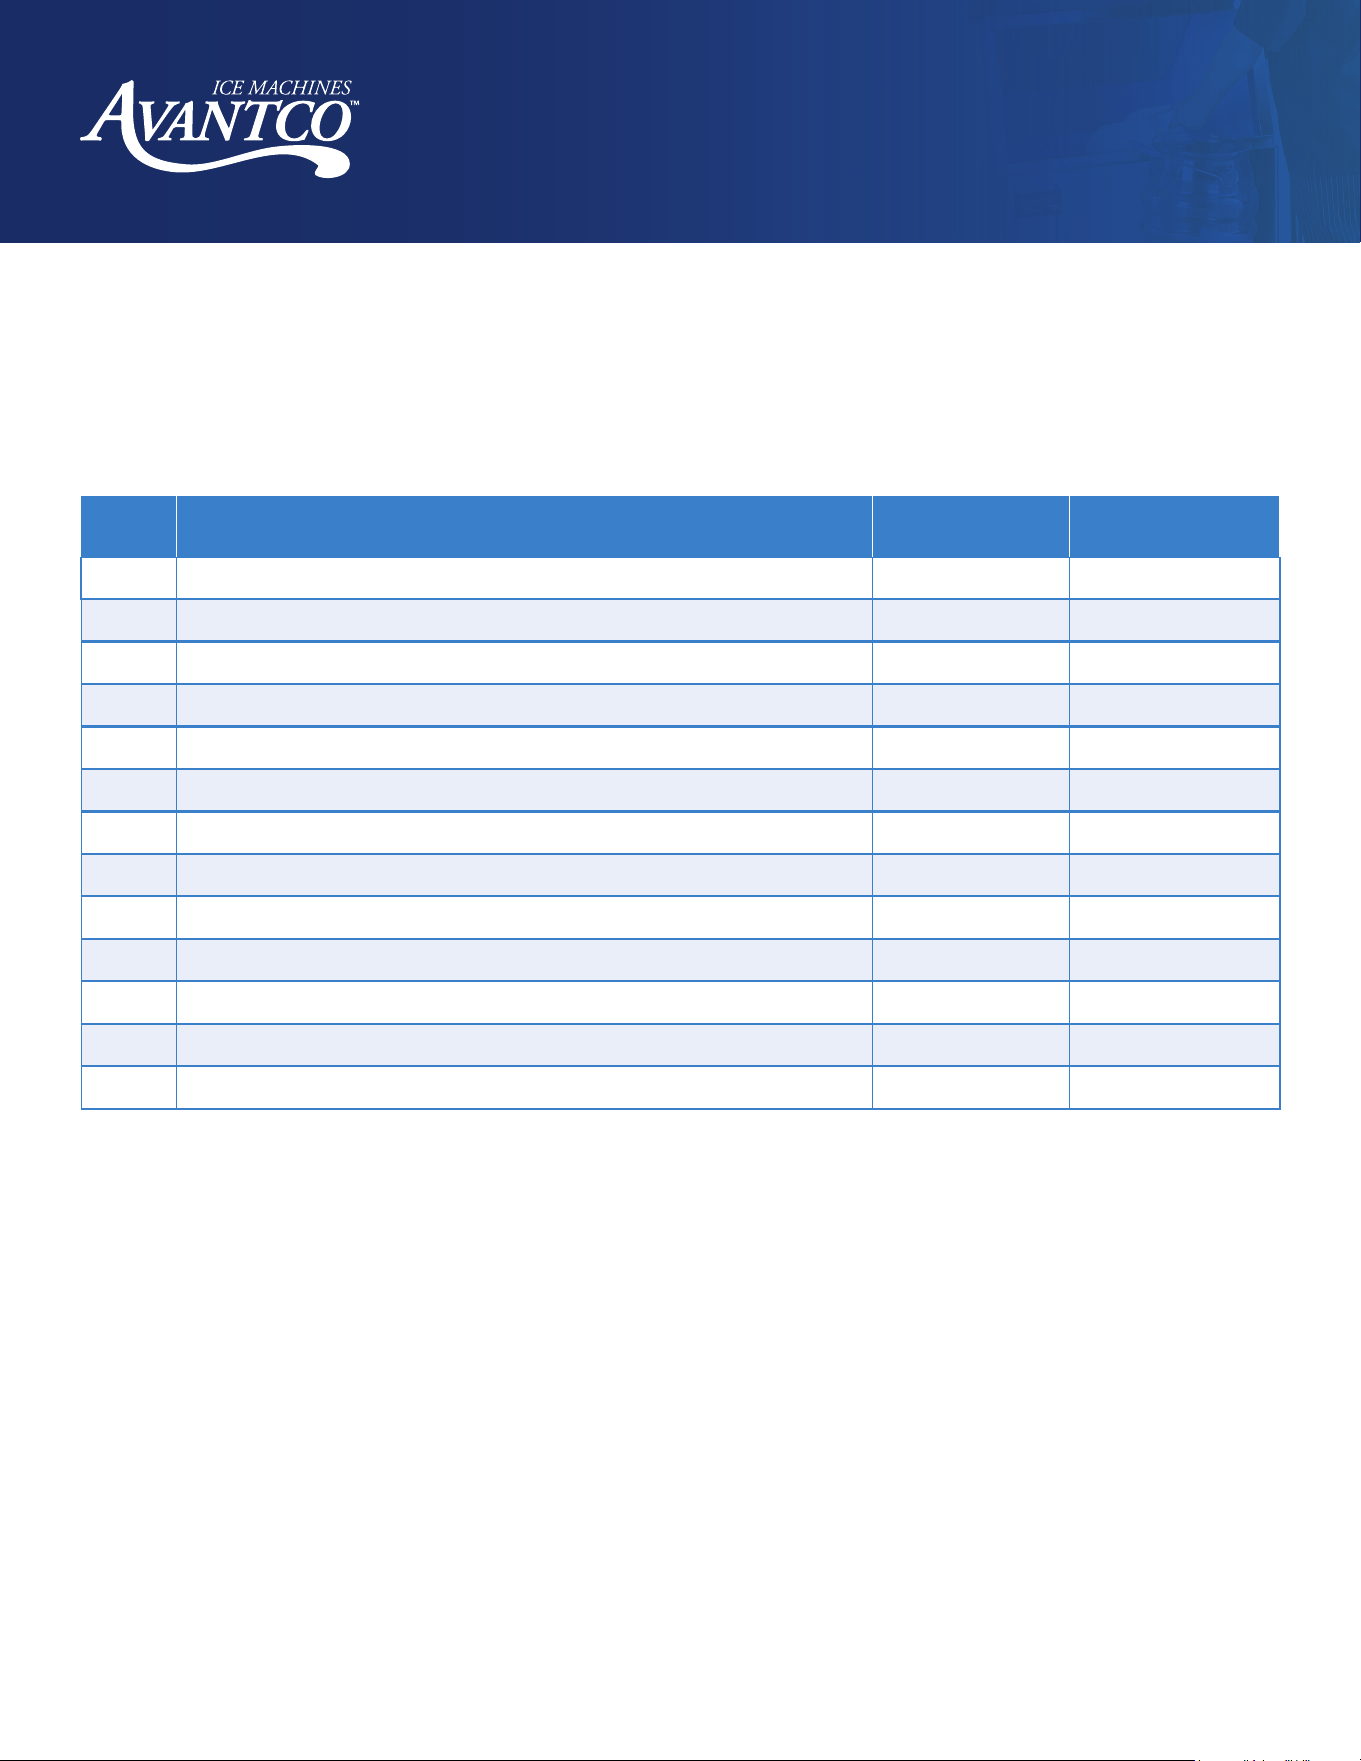
Special Shutdown Protections
•
Ambient Temperature: If too high, the nugget ice maker will shut down for protection.
•
Water Inlet Abnormality: If an abnormality is detected in the water-cooled nugget ice maker, the machine will
shut down for protection.
Code
Note Machine Action
User Action
E01 Compressor Overload Shutdown Call Servicing
E02 Reducer Overload Shutdown Call Servicing
E04 High Temperature Fault Shutdown Call Servicing
E05 Water Shortage Fault Shutdown Check water valve
E06 High Pressure Fault Shutdown Call Servicing
E07 Condenser Temperature Open Circuit Fault: Displayed once every 5 seconds Will not shutdown Call Servicing
E08 Condenser Temperature Short Circuit Fault: Displayed once every 5 seconds Will not shutdown Call Servicing
E09 Evaporator Temperature Open Circuit Fault Shutdown Call Servicing
E10 Evaporator Temperature Short Circuit Fault Shutdown Call Servicing
E11 Refrigeration System Fault Will not shutdown Call Servicing
E16 Low Refrigeration Temperature Fault Shutdown Call Servicing
E18 Compressor Current 0 Amps Shutdown Call Servicing
E19 Reducer Current 0 Amps Shutdown Call Servicing
12
www.AvantcoIce.com
User Manual
Nugget Ice Machines
Care and Maintenance
NOTE: An insured foodservice equipment technician or plumber must conduct maintenance.
WARNING: Before maintenance and manual cleaning, ensure the water source and power supply are turned o
and the plug is removed.
External Cleaning:
• Always keep the area around the nugget ice maker clean and ensure the vents are not blocked.
• Clean the exterior with neutral detergent and a soft cloth. If necessary, use a commercial stainless steel
cleaner and polish.
Note: Stainless steel can rust without proper maintenance.
Filter:
• Regularly check the filter element. It is recommended to replace the filter element every one to three
months.
Internal Cleaning of Ice Bin:
• The inside of the ice bin can be directly rinsed with a water pipe.
Full Ice Switch:
• It is recommended to clean the lens of the transmitter and receiver once every one to three months.
• Note: The fins of the air condenser are sharp; exercise caution during cleaning.
Plumbing:
• Regularly clean the plumbing to ensure food hygiene.
Long-Term Storage:
• Turn o the water source and power supply, and drain the remaining water in the water tank and water inlet
pipe.
Note: Maintenance of the nugget ice maker is excluded from the manufacturer's warranty.
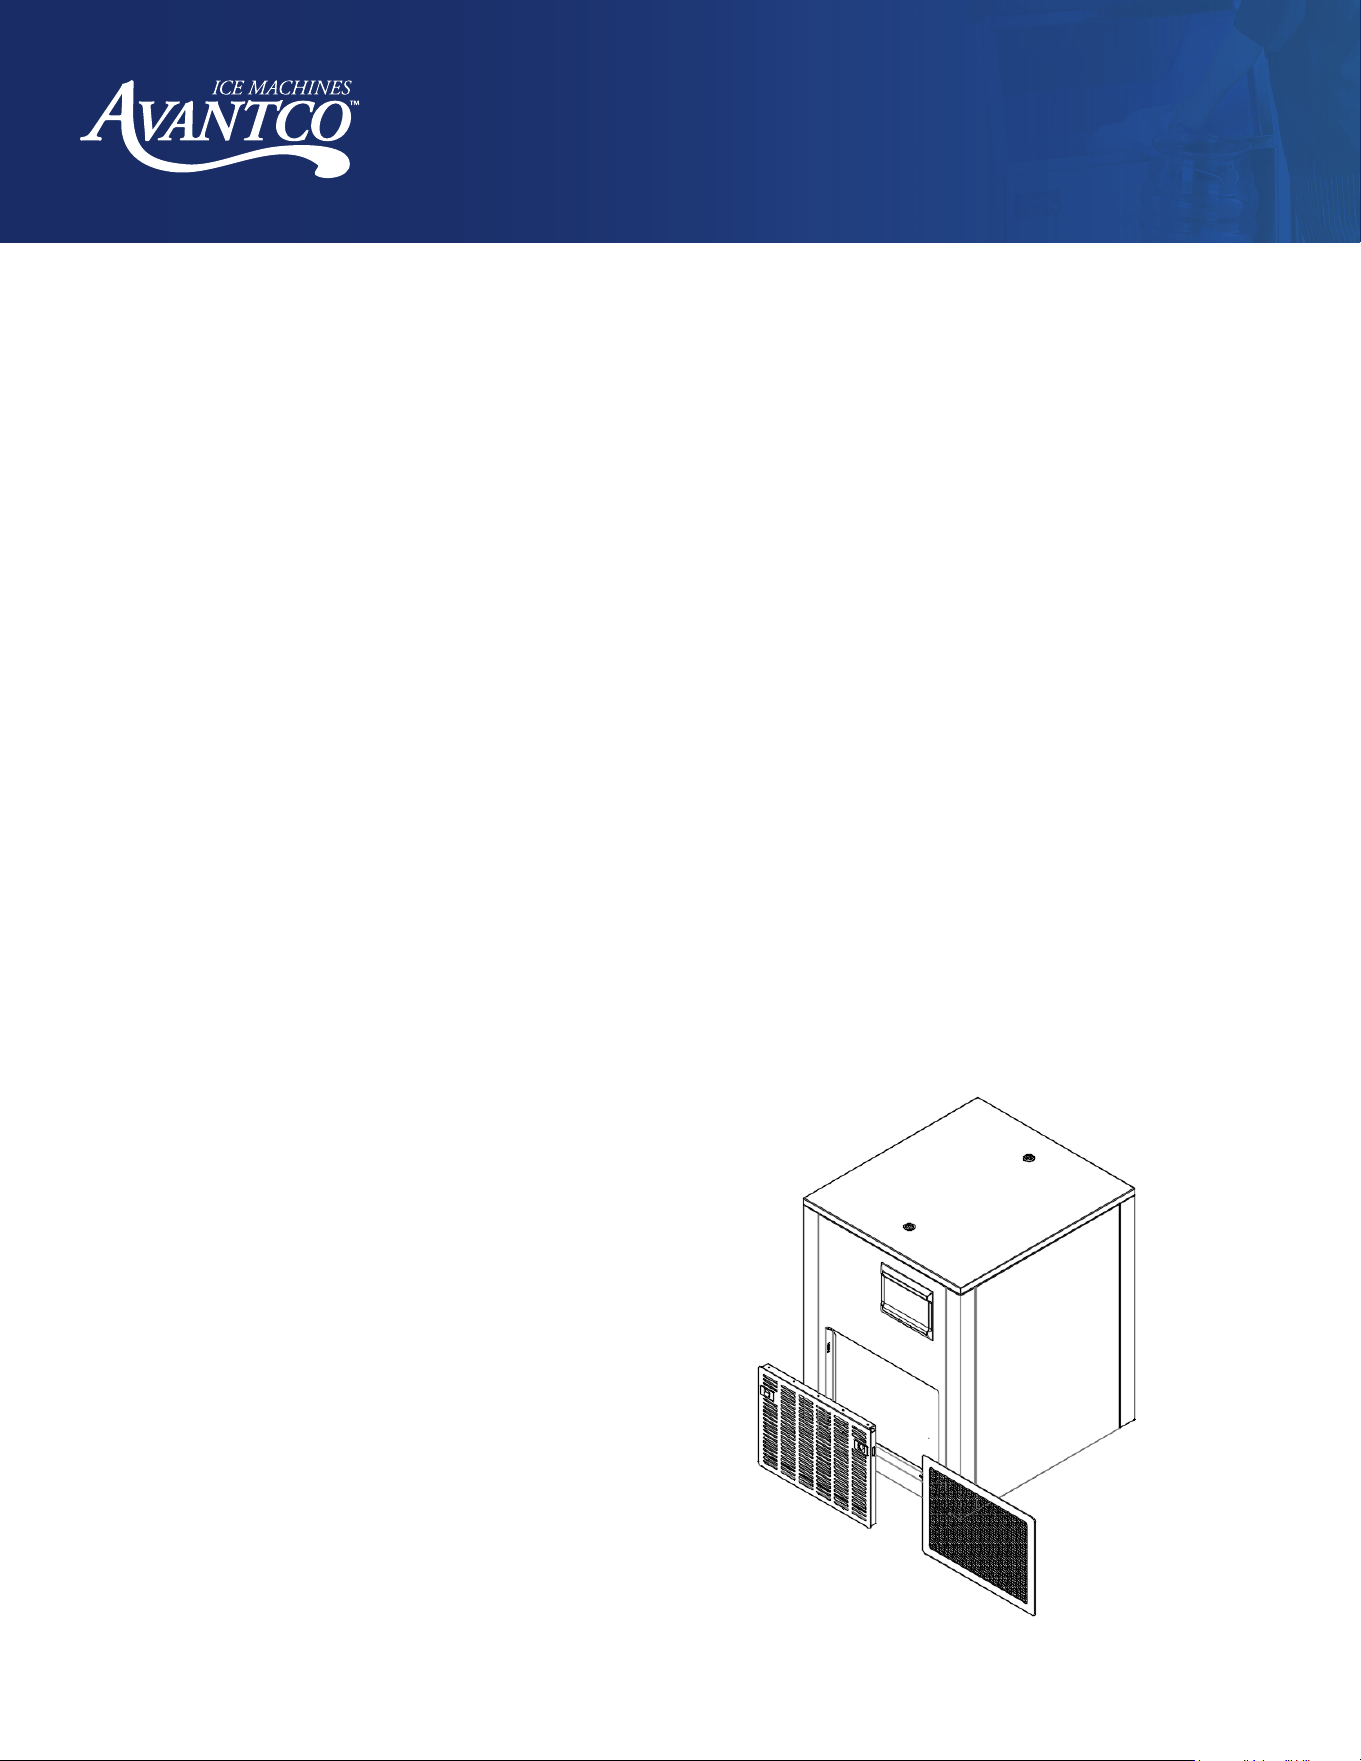
Condenser:
• The air-cooled nugget ice maker's condenser
should be cleaned every three weeks by
brushing vertically with a soft brush or using
a vacuum cleaner with a brush attachment to
avoid damaging the fins and aecting cooling.
• Clean the stainless steel filter every
two weeks.
• Removal of the Stainless Steel Filter:
Gently press the two buckles on the
ventilation window towards the middle, then
remove the ventilation window and pull out
the filter from the side.
13
www.AvantcoIce.com
User Manual
Nugget Ice Machines
Professional Servicing
Before making a service call due to any abnormalities, ensure the following checks are performed:
1. Check the Water Source:
• Verify that the LED "low water level" indicator on the display panel is always ON.
• Ensure the water pressure in the nugget ice maker is between 18.75 PSI to 80 PSI, and the water
temperature is between 40-90°F (5-33°C).
• Confirm that the water valve is open.
• Check for any water leakage.
2. Check the Power Supply:
• Ensure that the indicator on the display panel is ON.
• Confirm that the display panel does not show an OFF status.
• If the LED indicator on the display panel is ON, check the condition of the power plug and socket, and
ensure that the switch on the power supply line and the circuit breaker on the back are ON.
3. Check the Nameplate and Machine Number:
• Examine the nameplate on the side face of the nugget ice maker and record the model and number.
NOTE: On-site services requested for reasons such as no water, no electricity, or environmental factors, rather than
faults with the machine, will be chargeable.
Noble Chemical oers a full line of products to clean and sanitize your
commercial ice machine. These chemicals are approved for use with
Avantco Ice Machines. Failure to regularly clean and sanitize your Avantco
Ice Machine will void warranty coverage. For information and instructions,
contact a Noble Chemical dealer. The ice machine needs to be cleaned
every other month, or once a month for high yeast environments.
Cleaners
Item No.
Size
Type
147ARCTIC 16 oz. Concentrate
147ARCTICRPT 16 oz. Ready-to-use
147ARCTICR1G 1 Gallon Ready-to-use
Sanitizers
Item No.
Size
Type
147QKSANICE (12) 16 oz. Bottles Concentrate
999QKSANICE 16 oz. Concentrate
14
www.AvantcoIce.com
User Manual
Nugget Ice Machines
Cleaning
HIGH
VOLTAGE
CHEMICALS
WARNING! Follow the instructions below before cleaning the unit.
•
Wash and disinfect your hands when touching food areas.
•
Always wear proper food safety apparel.
•
Turn o the nugget ice machine and disconnect it from the power supply before cleaning.
For Water Station Models:
1. Reach behind the front panel and shut o the water supply valve to the water faucet.
2. Disconnect the water line from the shut o valve.
3. Turn on the faucet and drain the water for more than 5 minutes to discharge the rust, sediment, and other
materials that may accumulate in the water supply system.
4. Turn on the water purifier and drain the purified water for 30 minutes. When finished, open the water supply
valve of the ice maker.
Exterior Cleaning:
1. Use clean water and a cloth to wipe down the outer surfaces, such as the door panel, side panel, front panel,
and top cover panel.
2. Use a cloth and the appropriate mix of ice maker disinfectant (KAY-5) to clean the external surfaces.
3. Use a clean cloth and water to wipe away any remaining residue. Wipe dry.
Interior Cleaning:
NOTE: Empty the bin of ice in advance. Clean and sanitize the bin and do a complete rinsing.
•
Turn on the ice maker; push "clean" button for 3 seconds. The ice maker will begin the cleaning process. Put
in the proper amount of cleaning solution manually into the water trough until it reaches the normal operating
water level.
•
Push the "clean" button. The ice maker will auto-clean for about 15 minutes. Spray the evaporator with the
cleaning solution in the meantime to ensure a complete clean. When finished, the LED display will flash "Clean"
slowly again.
•
Put in the proper amount of sanitizing solution manually into the water trough followed by the clean and
sanitizing process instruction. Push the "clean" button again. The ice maker will auto-sanitize for about 15
minutes. Spray the evaporator with the sanitizing solution in the meantime to ensure complete sanitization.
When finished, the ice maker will go into the rinsing process, which will take about 5 minutes, and do 5 rinsing
cycles. Refer to your cleaner and sanitizer for proper mixing and code instructions.
•
The ice maker will go back to making ice as soon as the cleaning process ends.
•
Throw away the next batch of ice in case of residual cleaner.
15
www.AvantcoIce.com
User Manual
Nugget Ice Machines
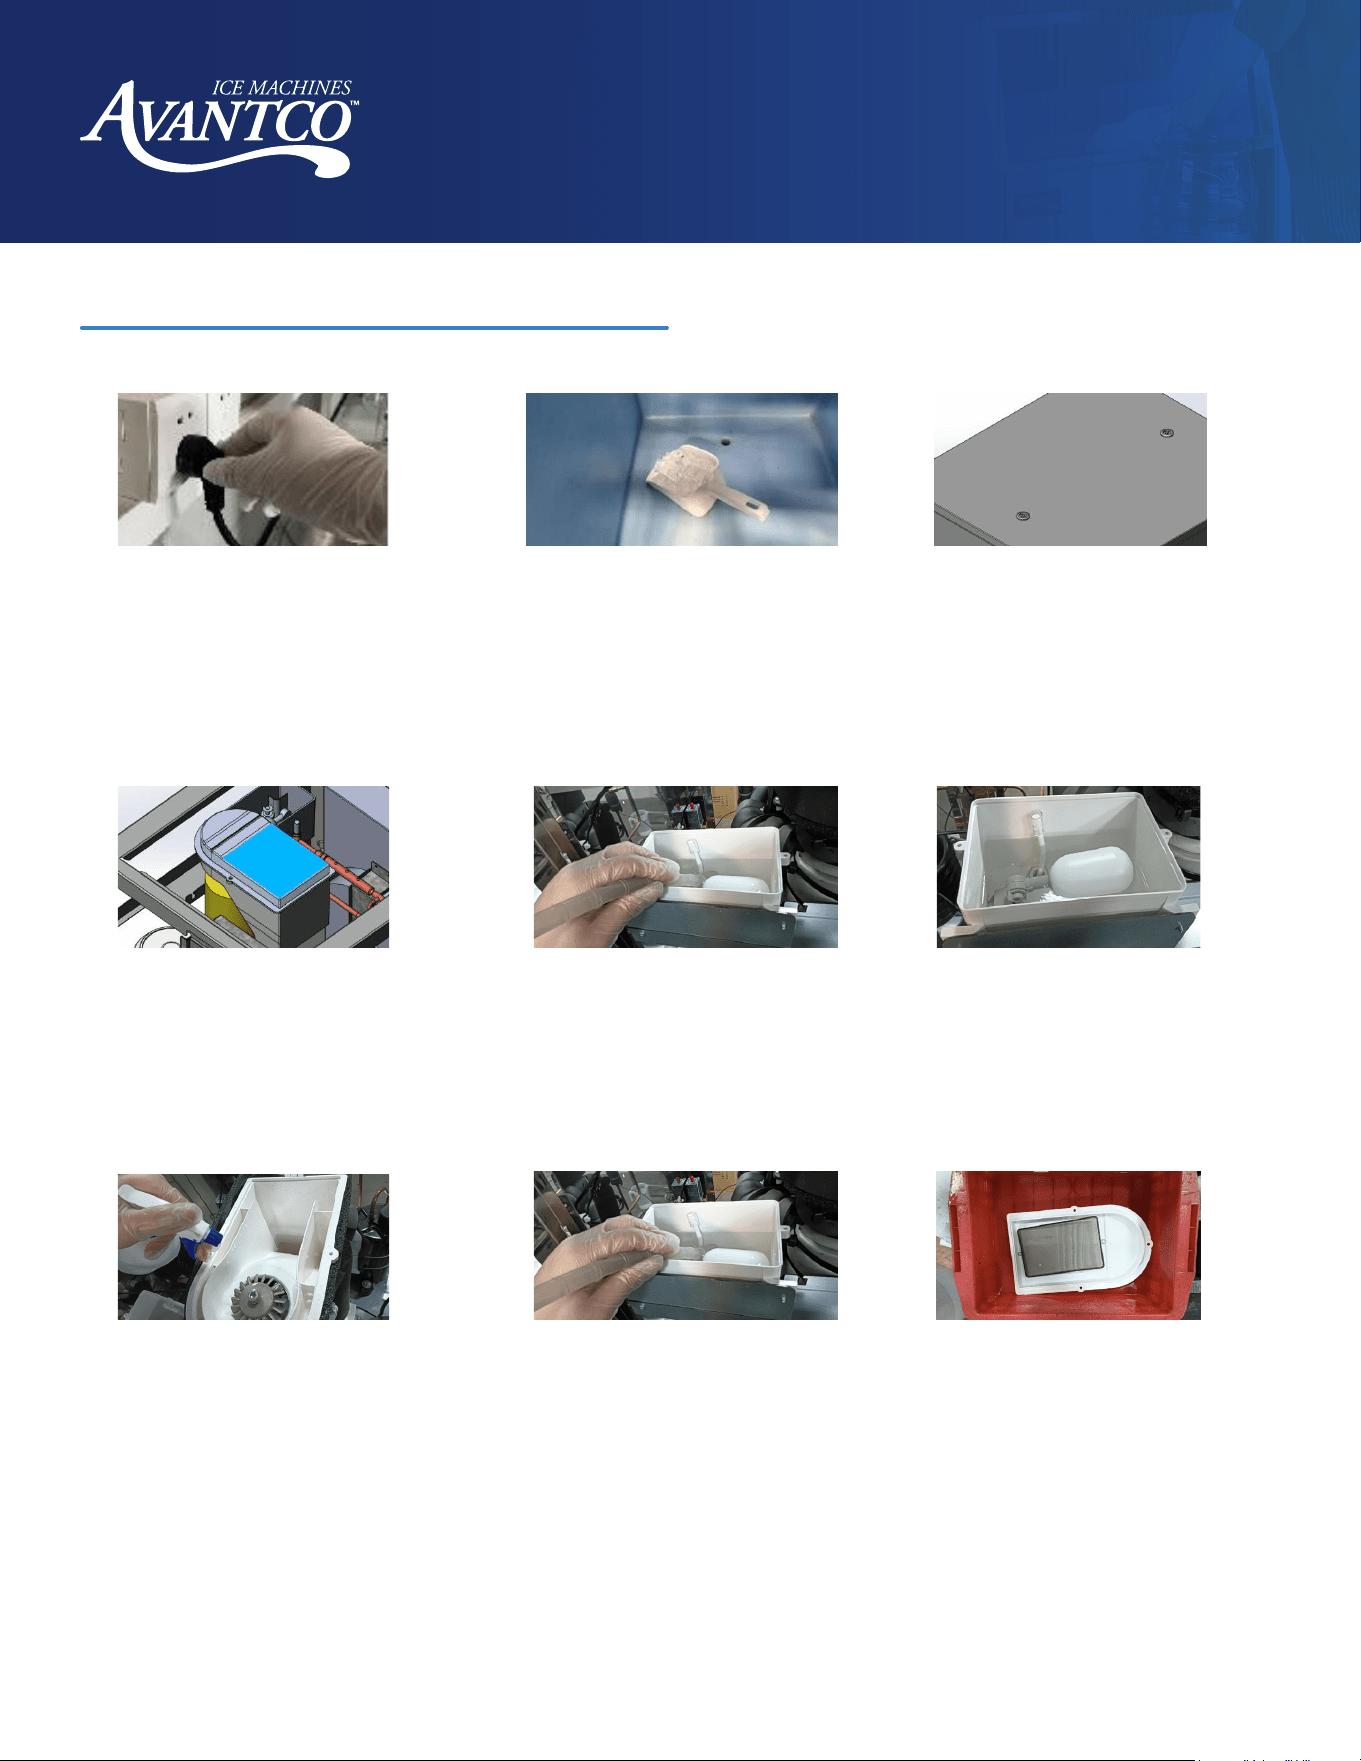
4-6 Month Manual Cleaning Instructions
10. Spray the cleaning solution into the ice bin and other sanitary areas. Let it sit for 15 minutes, and rinse all areas thoroughly with water.
1. Make sure the power supply is cut
o. Turn o the unit and disconnect
from the power and water supply.
2. Remove all ice from the ice bin to
avoid contamination.
3. Using a flat head screwdriver, open
the top by unlocking the fixed locks
on top of the ice maker; remove the
top cover, then open the front left
and right side panels.
4. Use a screwdriver to remove sink
cover and ice tank top cover.
5. Make sure the inlet valve is closed.
Use a siphon to drain the water.
6. Fill the reservoir with approximately
1,000 ml of Noble Chemical Cleaner
and soak for 15 minutes. After 15
minutes, use a siphon to drain the
Noble Chemical cleaning solution.
7. Spray the ice auger and upper part
of the barrel with Noble Cleaning
solution. Use a cleaning cloth
dipped in appropriate descaling
solution to clean the ice bucket
body and ice outlet. Let it stand for
15 minutes and then wash it with
clean water.
8. Using clean water, rinse the tank
and evaporator barrel until the
reservoir is full. Using the siphon,
drain the water and repeat the cycle
at least 3 times.
9. Soak the sink cover plate and
ice tank top cover in the Noble
Chemical cleaning solution and
agitiate. Then let soak for 15
minutes.
16
www.AvantcoIce.com
User Manual
Nugget Ice Machines
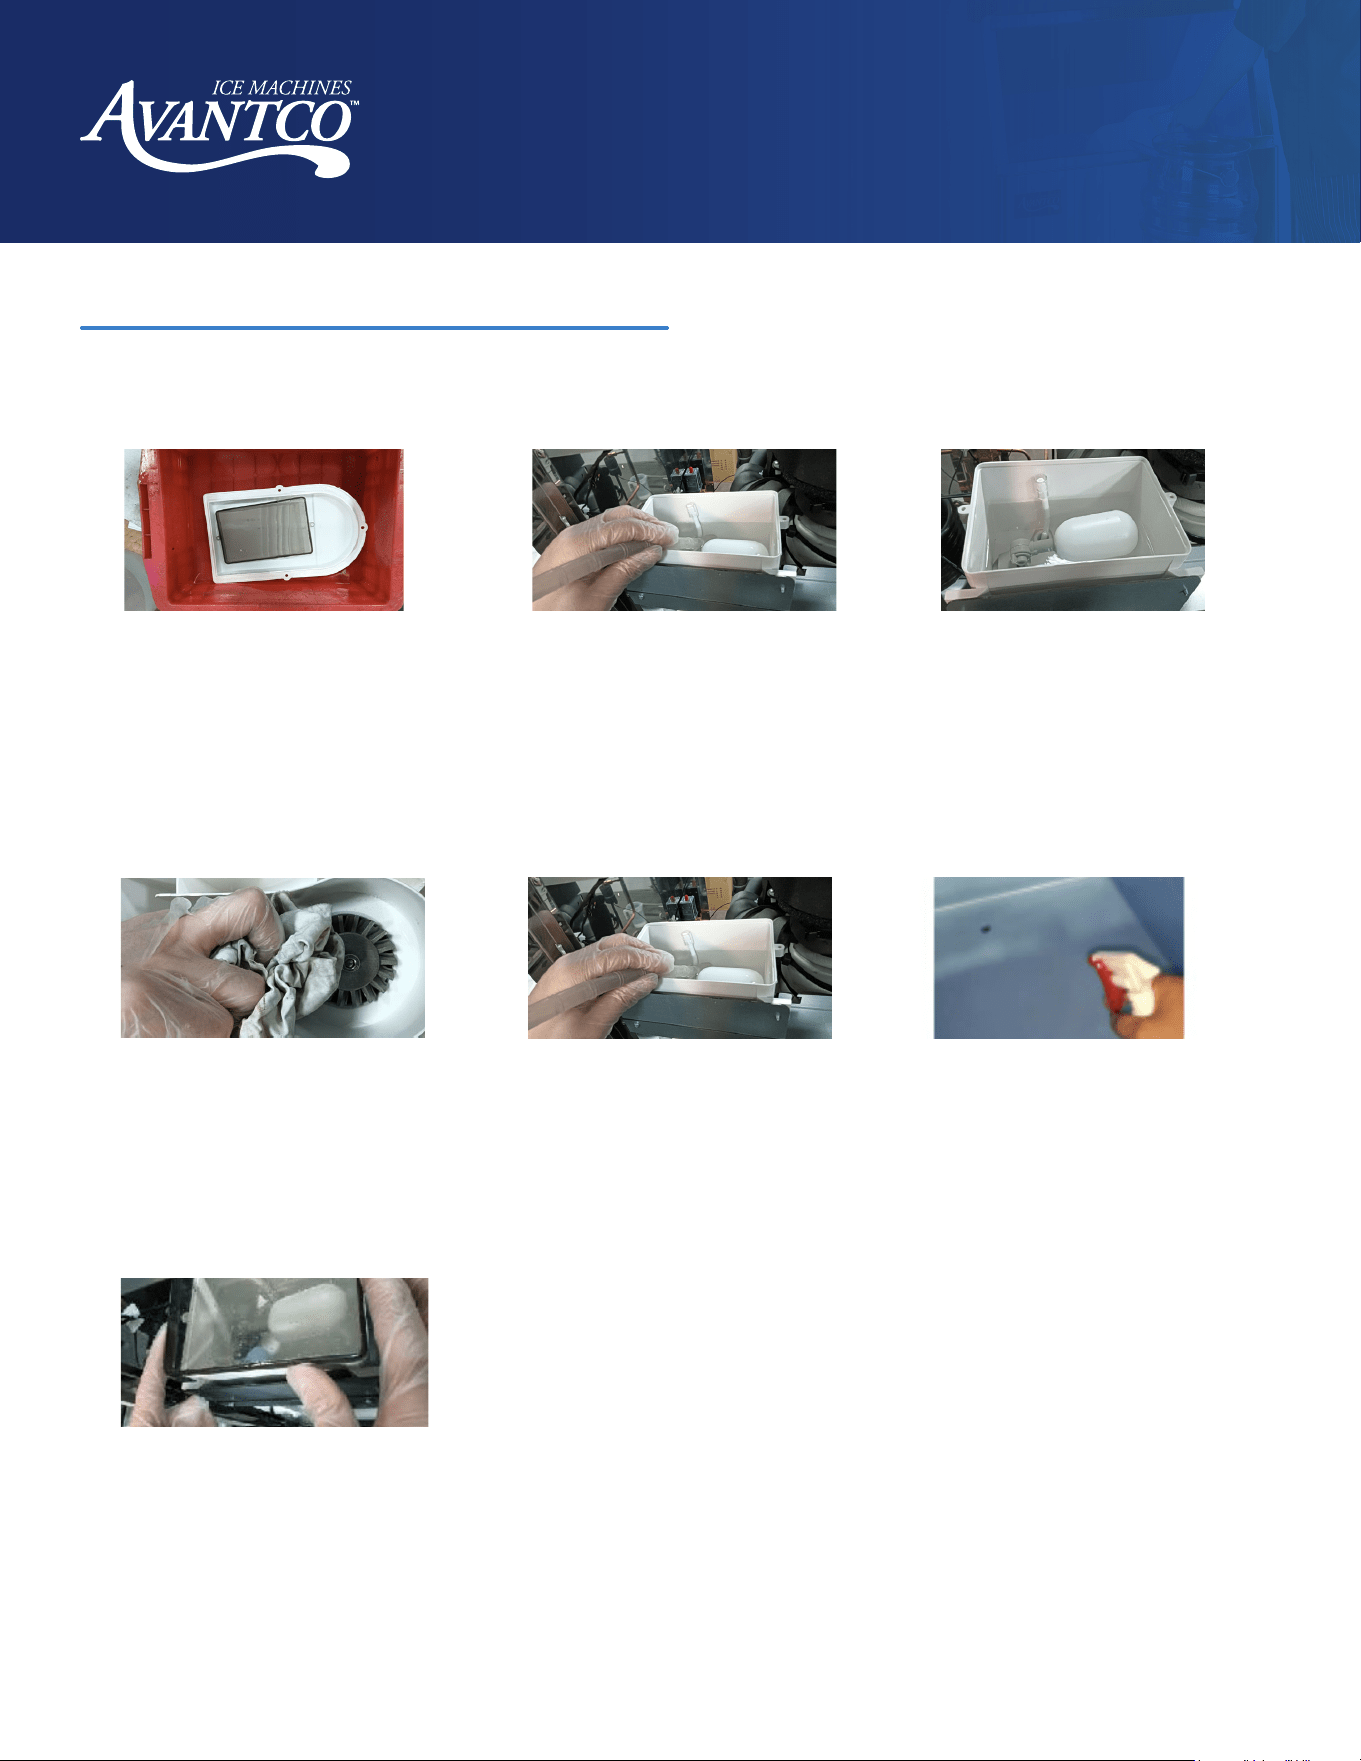
4-6 Month Sanitizing Instructions
NOTE: Empty the bin of ice in advance.
NOTE: Clean and sanitize the bin and do a complete rinsing.
1. Prepare disinfection solution
according to the scale specified
on the disinfectant bottle. Make
sure the disinfection solution is
completely dissolved. Soak the sink
cover plate and ice tank top cover in
the disinfection solution and slowly
shake. Let sit for 15 minutes, then
rinse well with clean water.
2. Drain the reservoir.
3. Add approximately 1,000 ml of
Noble Chemical sanitizer solution
and soak for 15 minutes. After 15
minutes, use a siphon to drain the
disinfection solution.
4. Spray the ice auger and upper part
of the barrel with Noble Sanitizing
solution. Use a cleaning cloth
dipped in an appropriate descaling
solution to clean the ice bucket
body and ice outlet. Let it stand for
15 minutes and then rinse it with
clean water.
5. While rinsing the tank and
evaporator barrel, fill the sink with
approximately 1,000 ml of clean
water. Siphon and repeat the rinsing
procedure at least 3 times, or until
clean.
6. Spray the ice outlet and the upper
part of the ice bin. Use a cleaning
cloth dipped in the appropriate
sanitizing solution to wipe down the
ice bin body and ice outlet. Let it
stand for 15 minutes and then rinse
it with clean water.
7. Allow all dismantled parts, bin,
and reservoir to dry. Reinstall all
parts to their original positions.
17
www.AvantcoIce.com
User Manual
Nugget Ice Machines
Automated Cleaning Instructions
1. Turn on the unit and press and hold the +
and - buttons for 3 seconds during the normal
ice-making cycle to enter the cleaning process
countdown. After 60 seconds, the display
flashes "CLE". After draining the reservoir, add
approximately 400 ml of cleaning solution. Press
the function button "F" to automatically enter the
disinfection mode.
2. Add an additional 400 ml of cleaning solution
every 30 minutes (at the 30th, 60th, and 90th
minute). During the cleaning process, the ice
machine will dispense the solution through ice
production into the bin.
3. The cleaning process lasts about 150 minutes.
After finishing cleaning, the system enters the
standby state. After the automatic cleaning and
disinfection is finished, fill the reservoir with
clean water and press the function button to
resume ice making. Please discard the ice in the
first 30 minutes.
18
www.AvantcoIce.com
User Manual
Nugget Ice Machines
Troubleshooting
Symptom
Probable Cause
Possible Fix
Ice machine not working. Power switch not turned on. Turn on the power switch.
Indicator is OFF. Plug is loose. Check plug and socket.
Shutdown every 3 minutes after startup. The ambient temperature is too high. Normal working temperature range of 40-90°F.
The display shows E04 high temperature. Condenser is dirty. Clean the condenser.
The display shows E06 high pressure
protection.
Fan does not start. Check and correct high pressure switch wires.
Ice defrost abnormal.
Ambient temperature too low. Normal working temperature range of 40-90°F.
Defrost valve does not start normally. Check and correct the defrosting valve.
Ice thickness too thin or too thick. Check and correct ice thickness setting.
Poor transparency of ice cubes; ice cubes
too thin or incomplete.
Ice thickness is too thin. Check and correct ice thickness setting.
Water pressure is too low.
Check that the water supply pressure is 1.3 bar
to 5.5 bar.
Inlet water valve is dirty and blocked. Normal working temperature range of 40-90°F.
Inlet water filter has not been replaced
for a long time.
Check and correct the inlet water valve.
Inlet water valve is dirty and blocked. Check whether water leaks and correct.
Water leaking.
Check and correct the inlet water filter and
water connection.
Inlet water filter has not been replaced
for a long time.
Too slow in ice making.
The condenser or air filter is dirty. Clean the condenser and filter screen.
High ambient temperature. Normal working temperature range of 40-90°F.
Poor ventilation. Check the environment around the ice machine.
Water temperature is too high.
Check the water supply temperature of
40-90°F.
Too much noise. The ice machine is not level. Level the ice machine.
19
www.AvantcoIce.com
User Manual
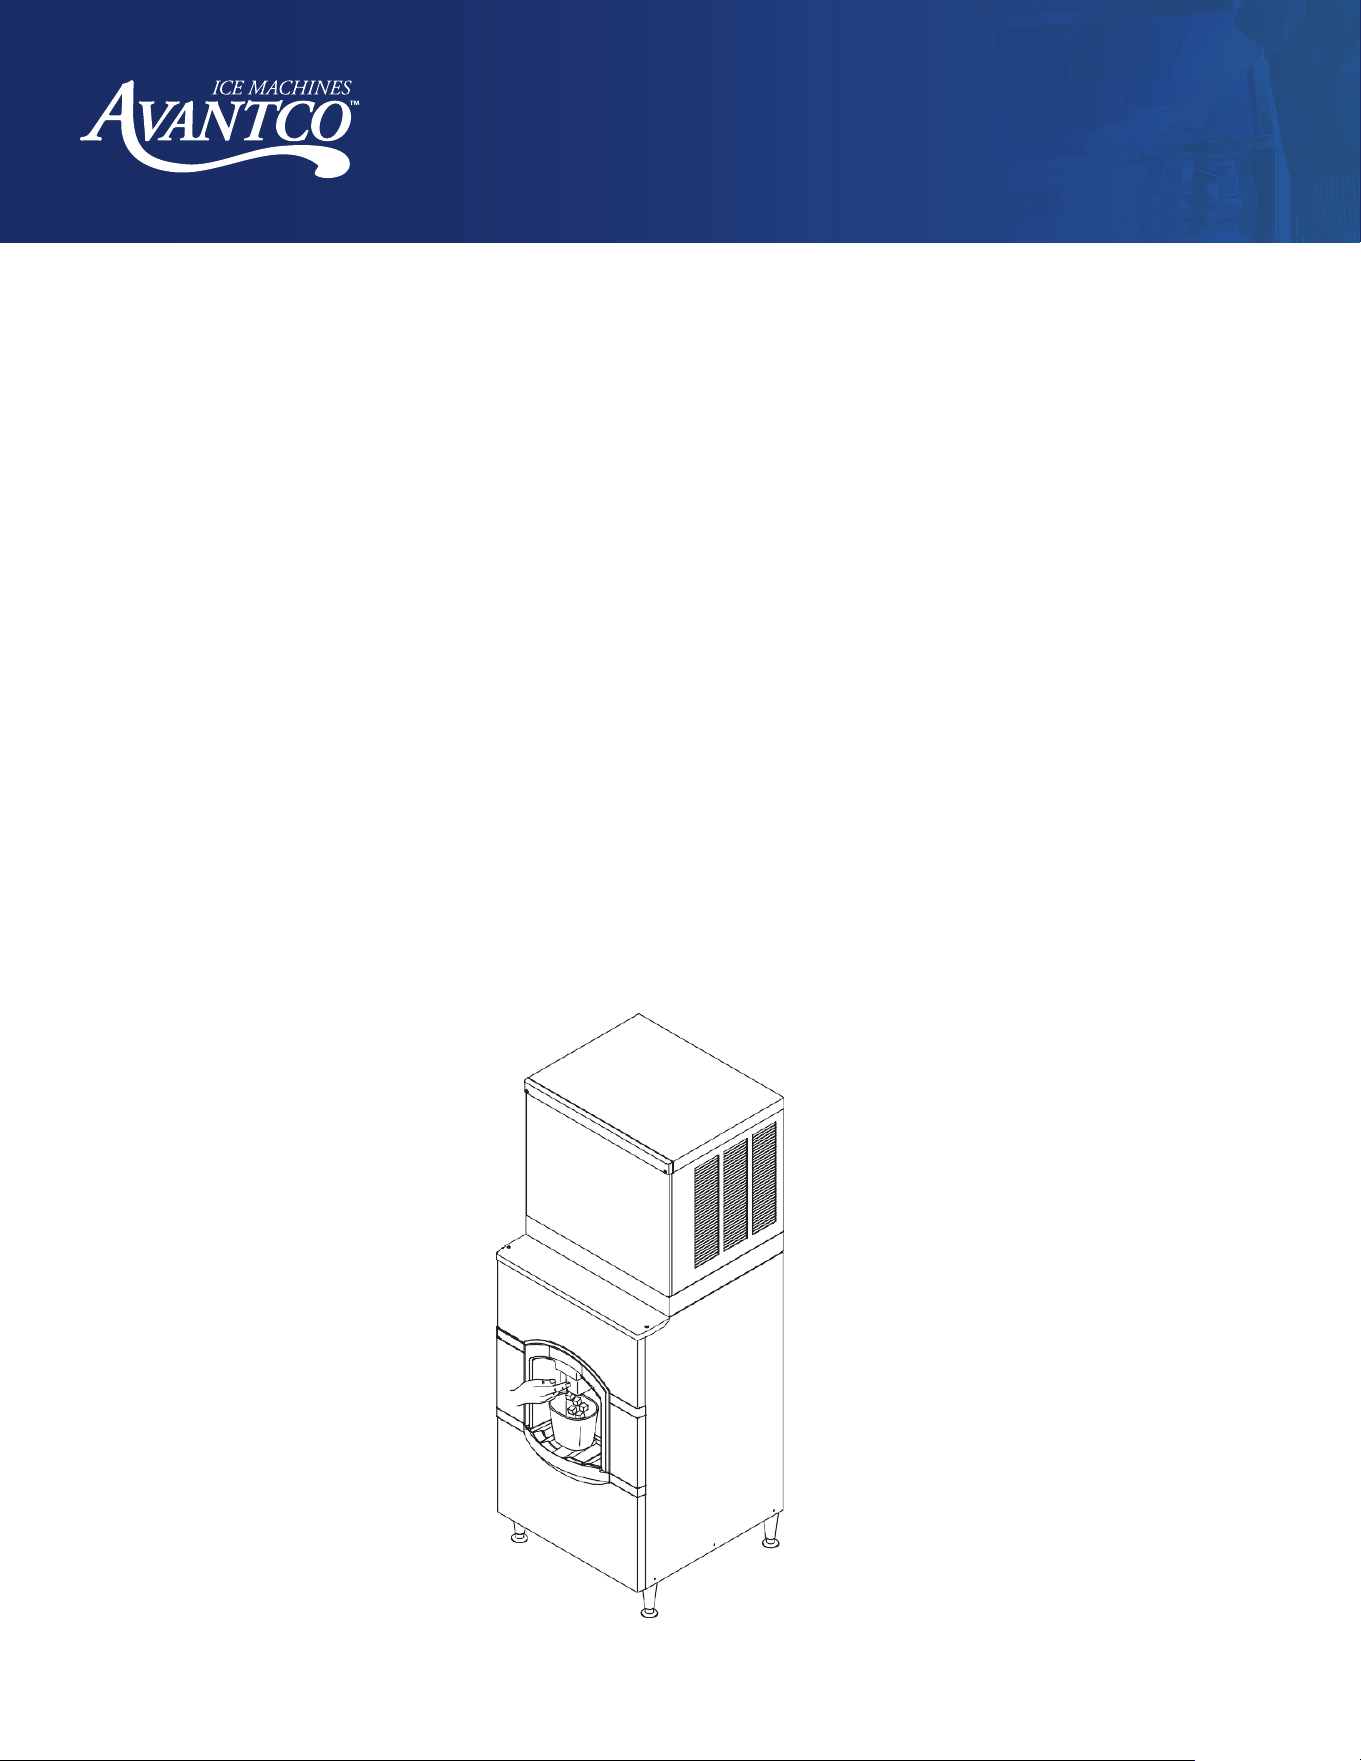
Hotel Ice Dispenser
Hotel Ice Dispenser
Models:
#194KMN522HA
Note:
Read this manual in its entirety prior to equipment setup, operation, and maintenance.
www.AvantcoIce.com
User Manual
Hotel Ice Dispenser
20
www.AvantcoIce.com
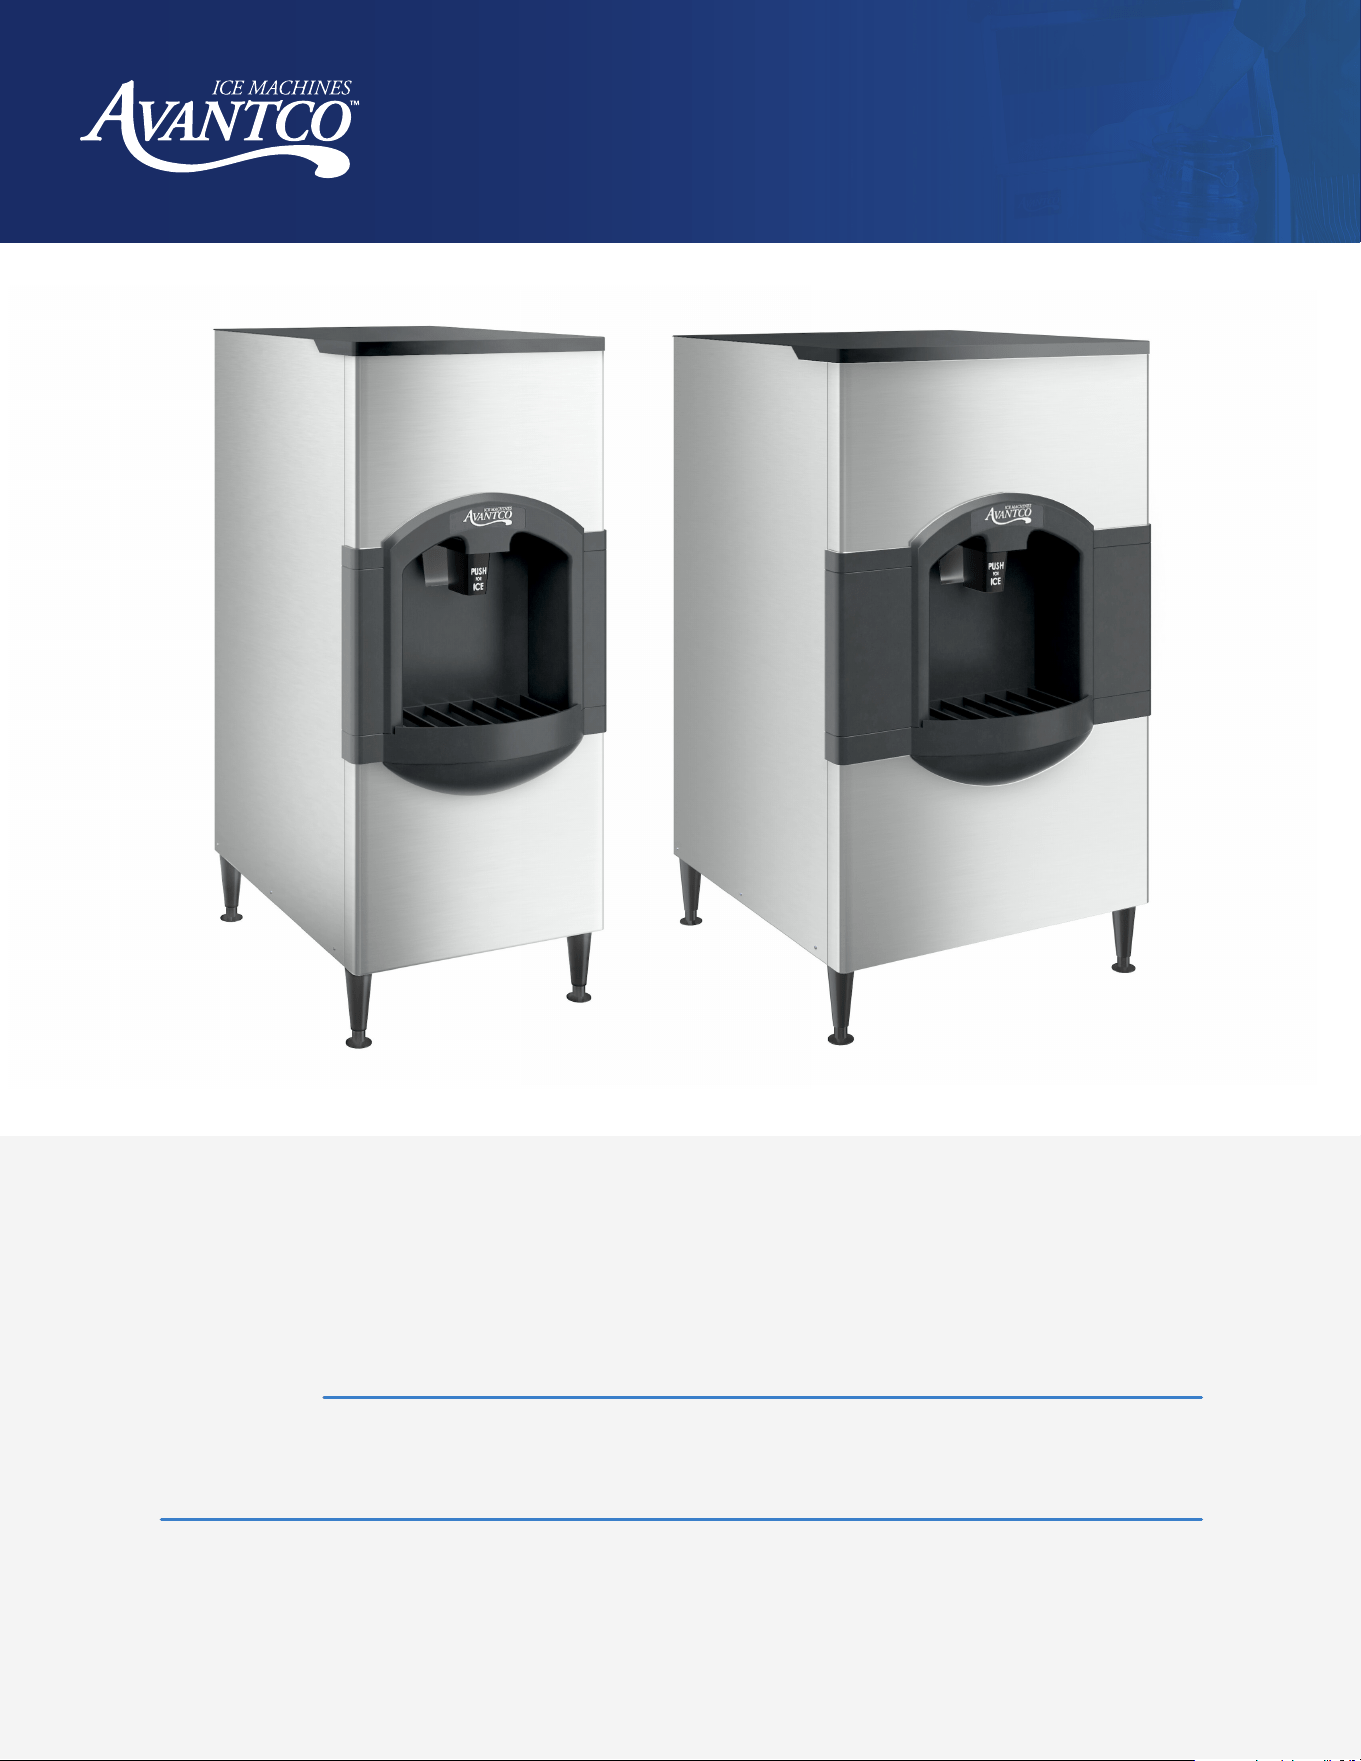
General Information
Ice dispenser 194HBN12022 is 22" wide and designed for use with Avantco ice cube machines
194MCF322A/194MCH322A/194MN522A or 194MCF422A/194MCH422A for ice production.
Ice from the nugget ice machine falls into the insulated hopper, where it is stored until needed. When a user
pushes the dispense chute, a rotating wheel scoops the ice up to the top front of the hopper where there is an
outlet to the ice chute.
Nugget Model
Fits Dispenser
Safety Adapter
194MN522A 194HBN12022 N/A
*Although not required for operation, the safety adapters provide additional safety measures when the unit is
placed in a public setting.
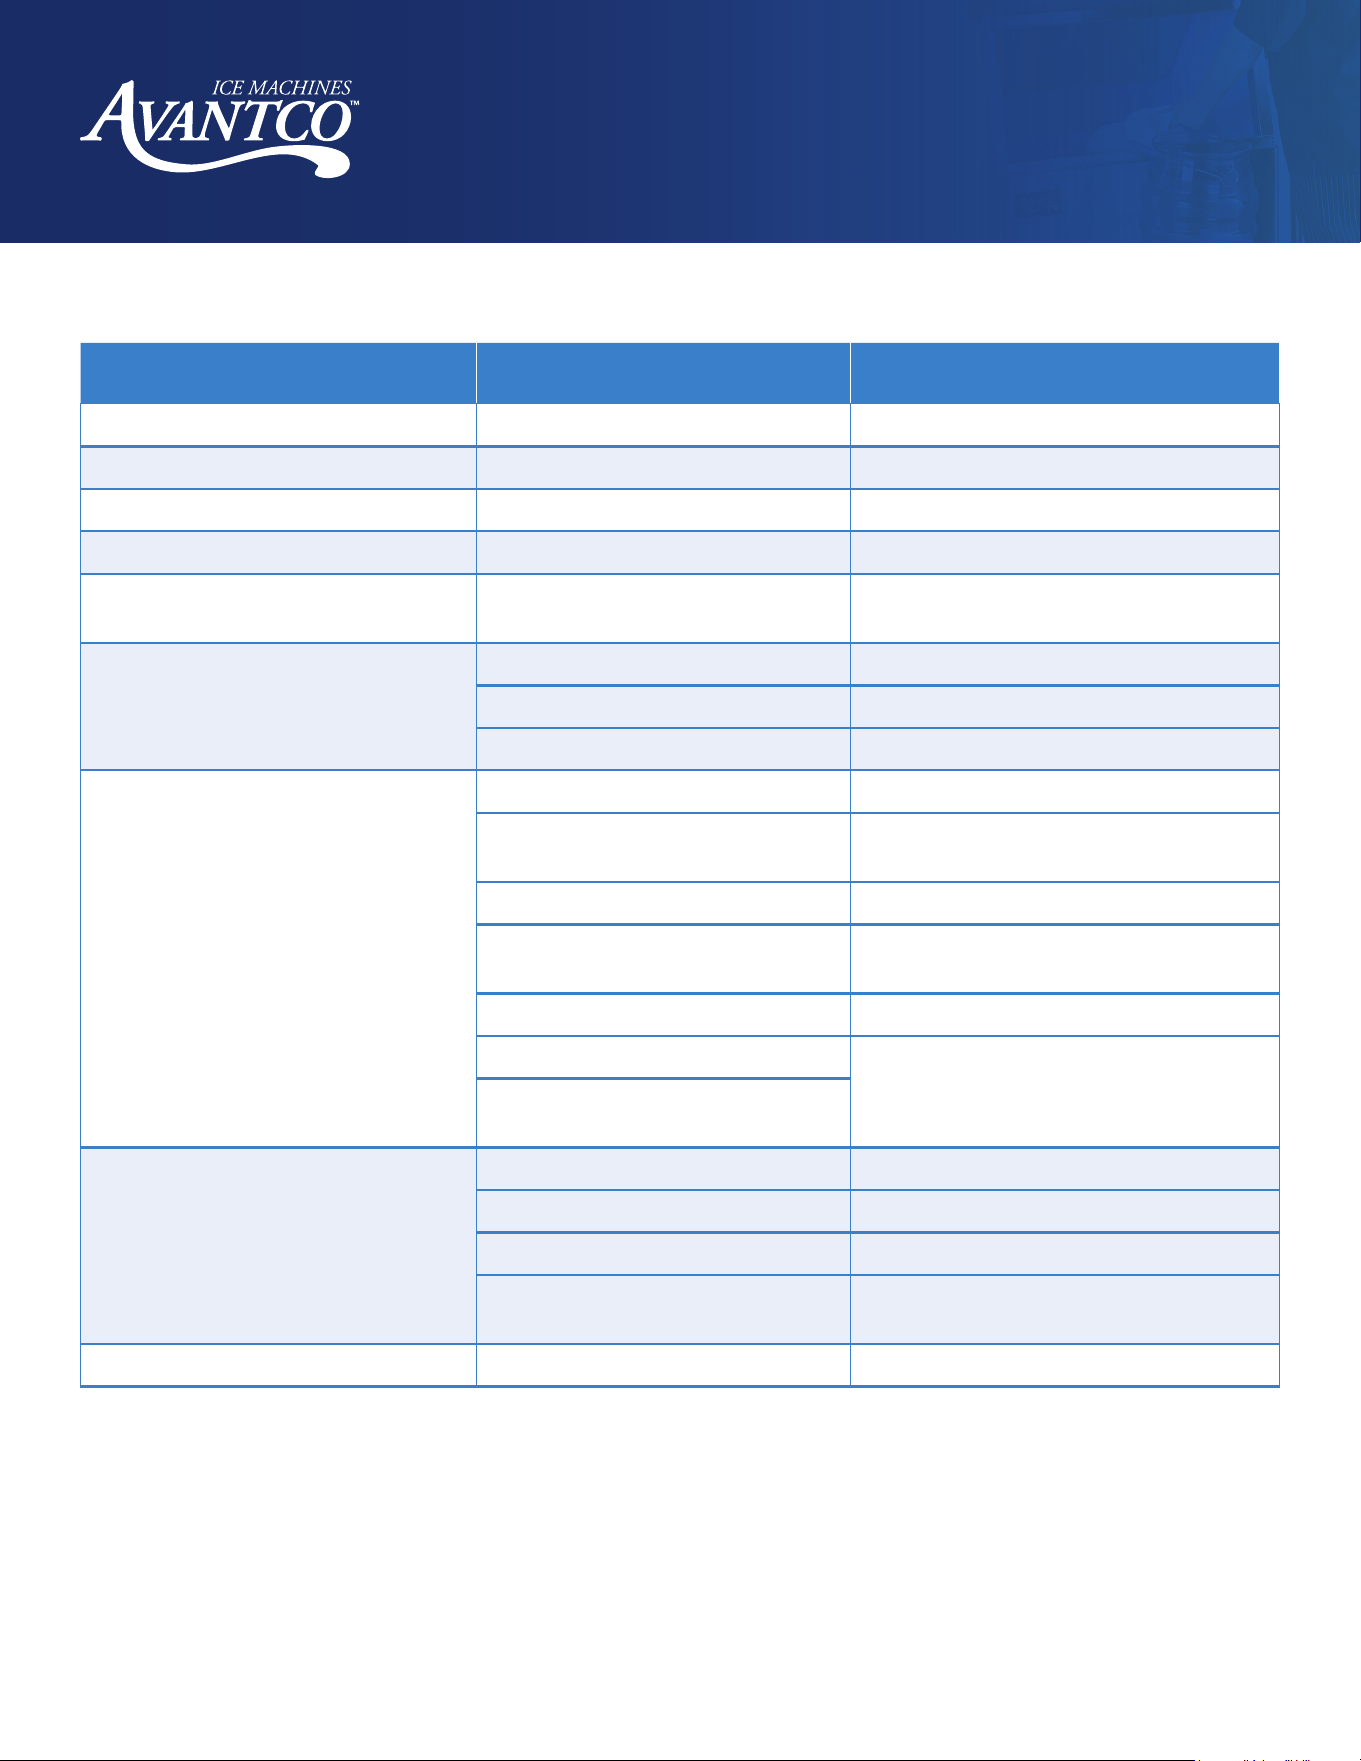
Basic Specifications
Model
Dimensions
W" x H" x D" with 6" leg
Basic Electrical
volts/hertz/phase
Model Description Bin Storage Capacity
194HBN12022 22 x 53 x 33 ½ 115/60/1 Basic 22" model 120 lb.
194HBN18030 30 x 53 x 33 ½ 115/60/1 Basic 30" model 180 lb.
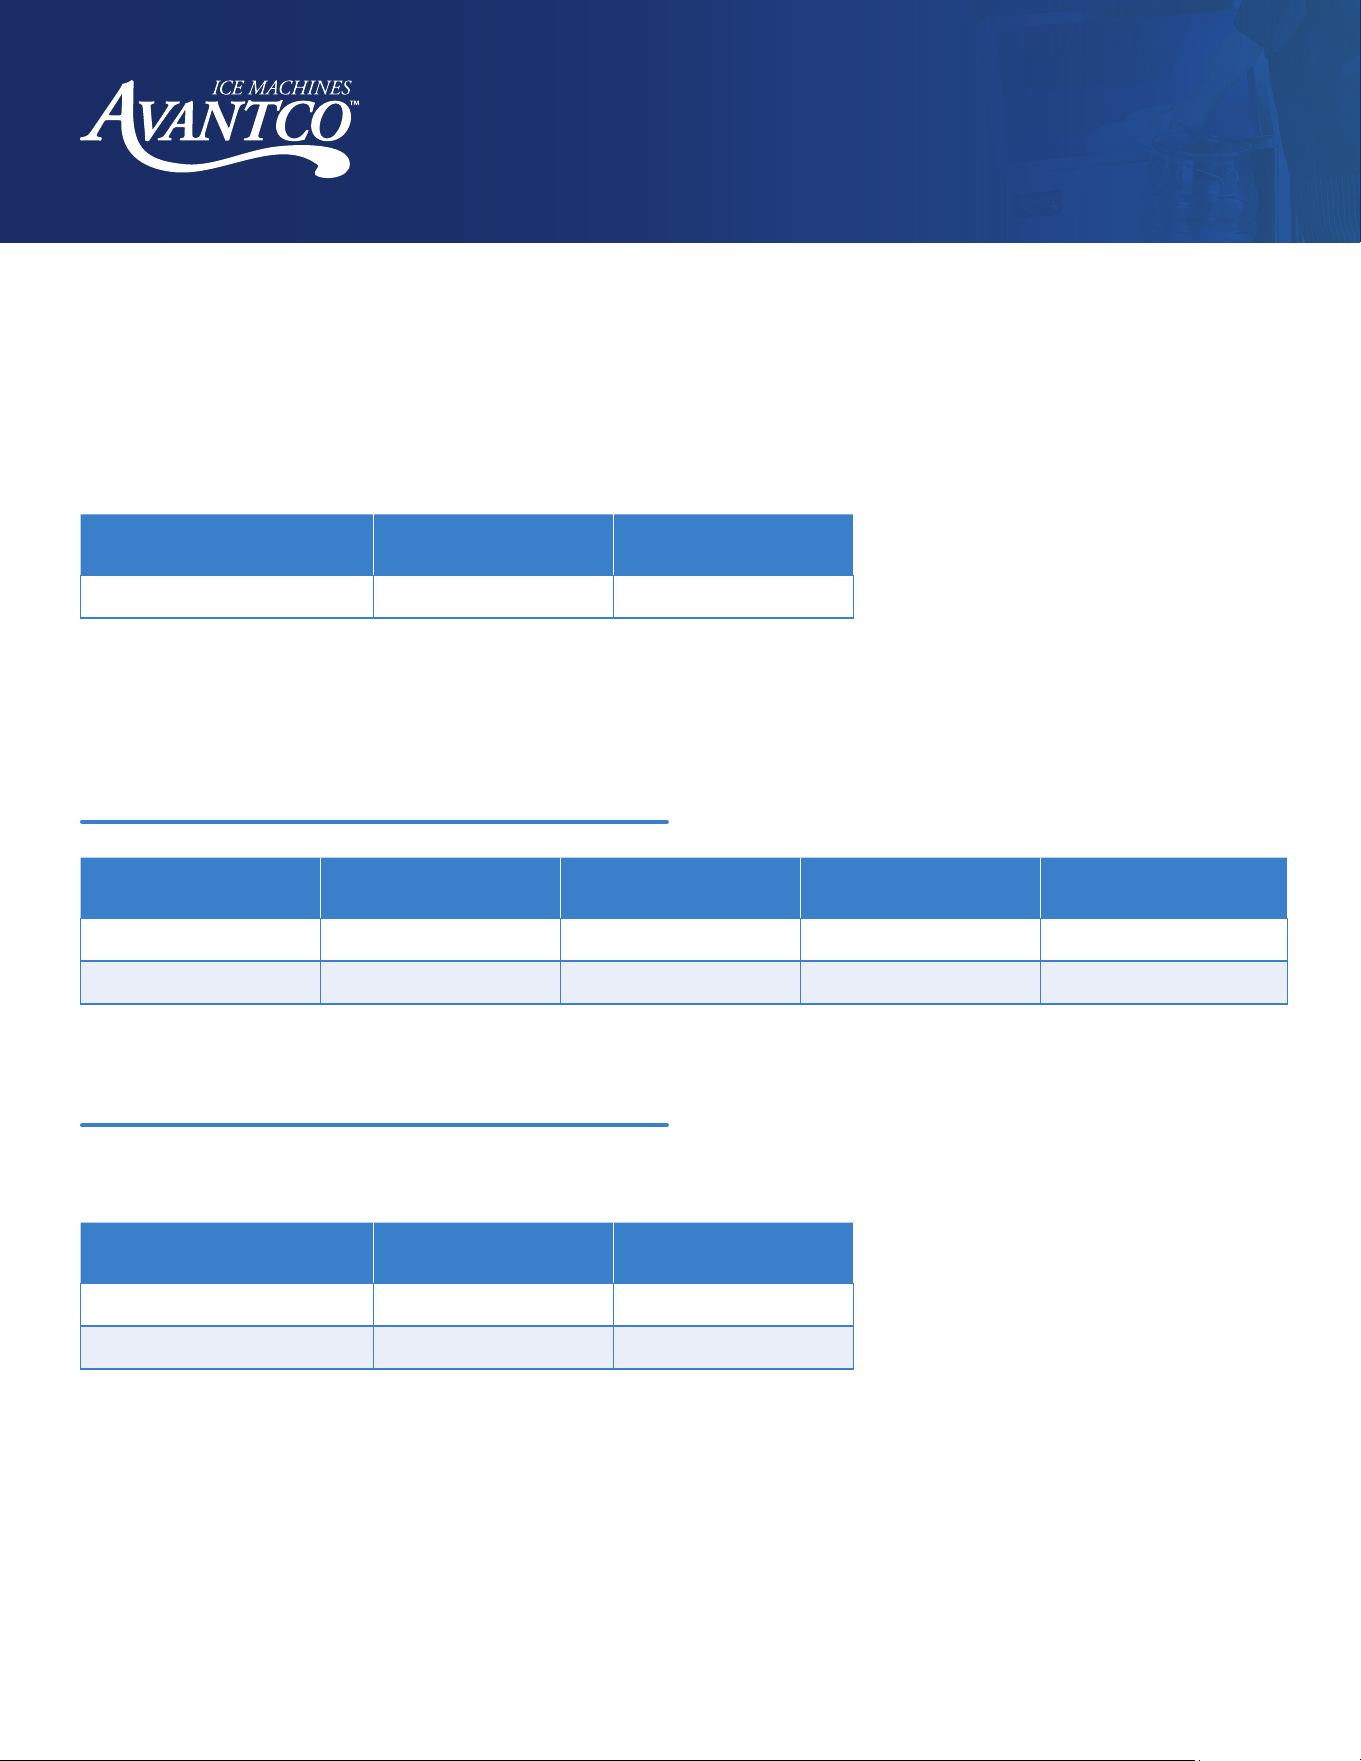
Specifications & Limitations
This ice dispenser is designed to be installed and operated indoors in a controlled environment. Follow the
installation instructions in the ice machine manual to ensure the ice machine has been installed properly.
Minimum
Maximum
Air Temp 40°F 90°F
Voltage 60 Hz 104 126
Check the nameplate located on the back of the cabinet for specific information.
Avantco Ice Machines assumes no liability or responsibility of any kind for products that have been altered in any
way, including the use of any parts and/or other components not specifically approved by Avantco Ice Machines.
User Manual
Hotel Ice Dispenser
21
www.AvantcoIce.com
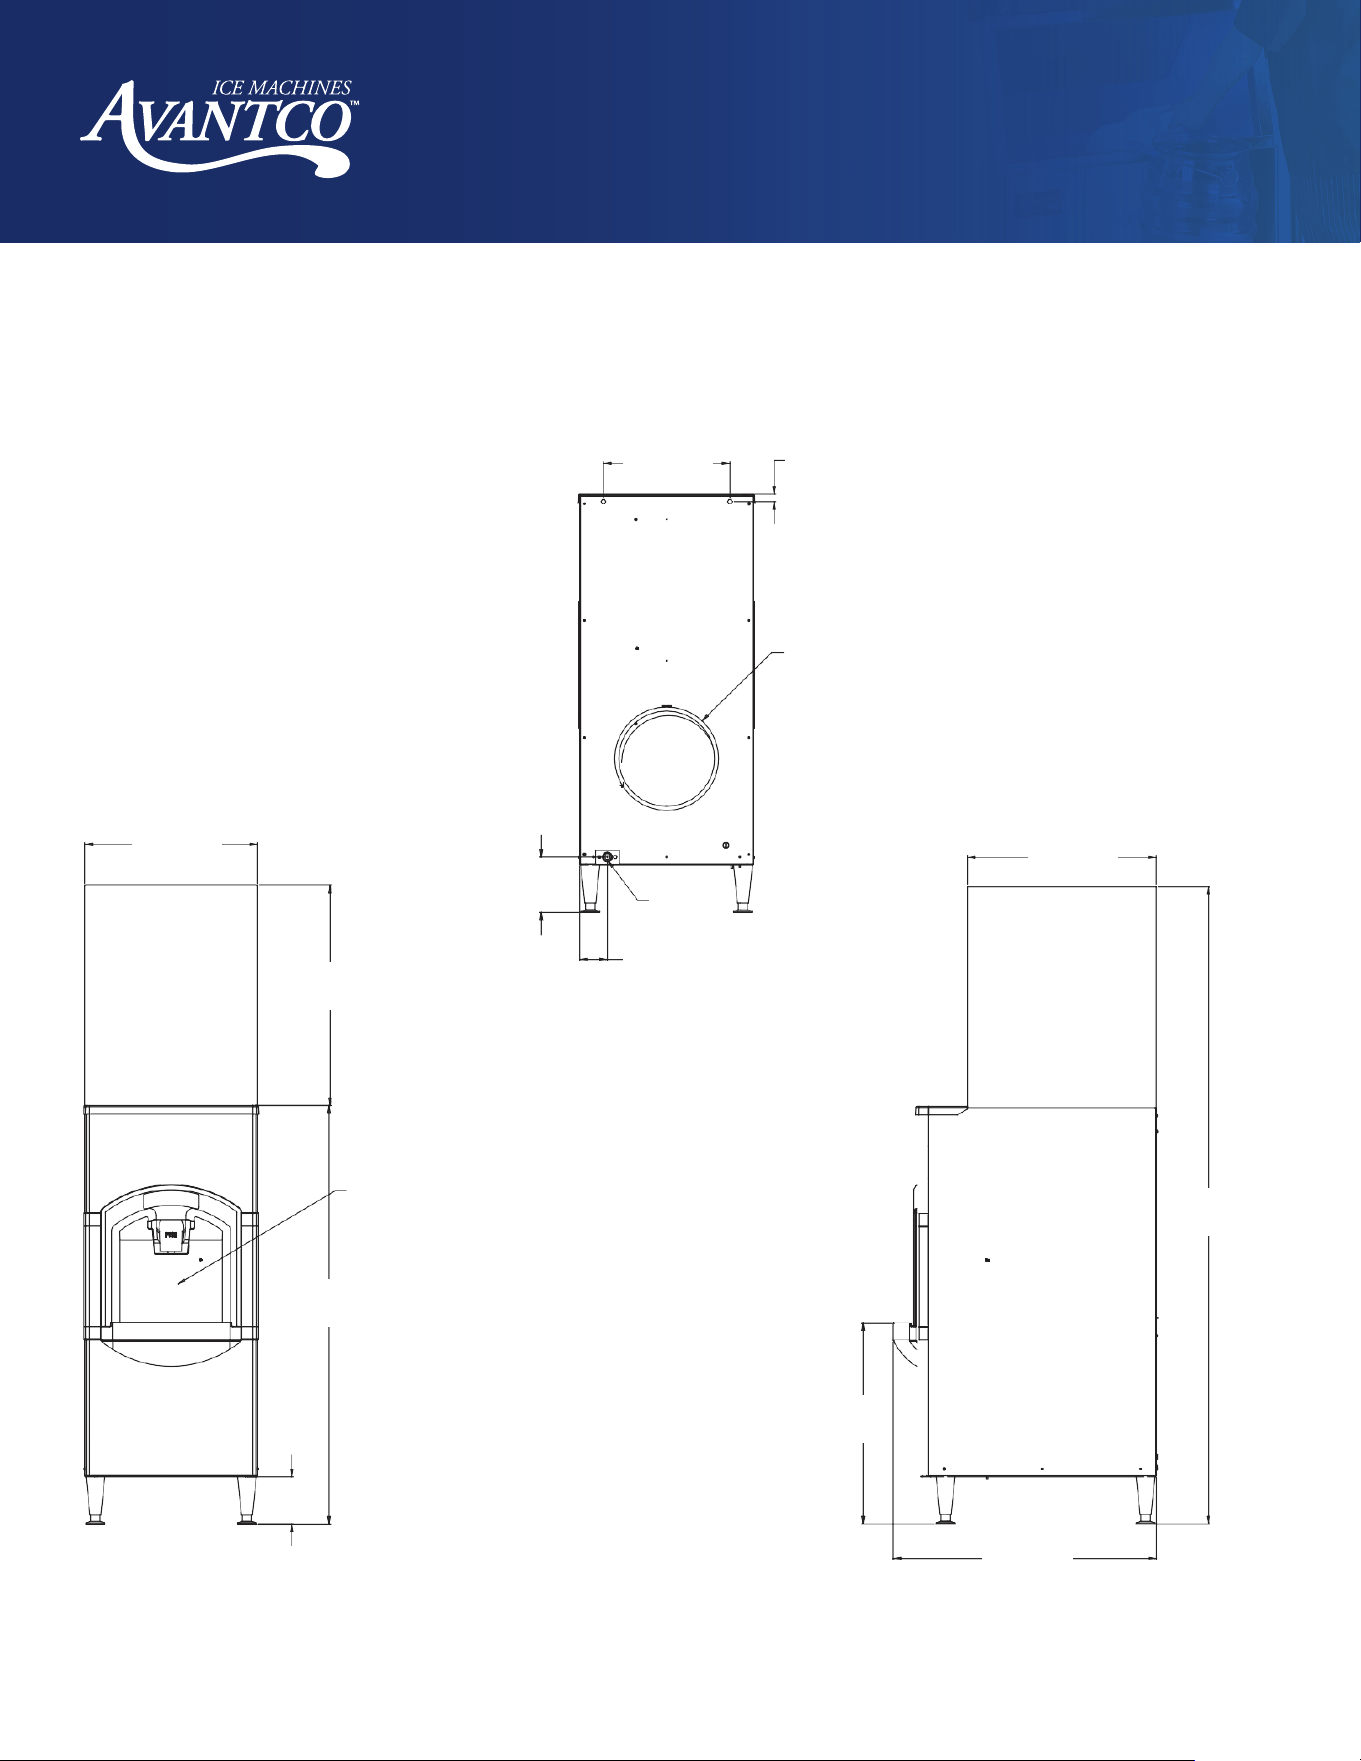
194HBN12022
Dimensioned Illustration
558.8
22"
Ice Head Ice Head
609.6
24"
849.4
33 ½"
711.2
28"
2062.5
81 ¼"
650.5
25 ⅝"
1351.3
53 ¼"
152.4
6"
Ice Fill
Station
8 ¾ [221.5]
Height
13 ½ [342.9]
Width
8 ½ [215.9]
Depth
Note: Ice fill station depth is curved to
match large ice buckets. Listed number is
the maximum depth.
406.4
16"
88.9
3 ½"
¾ FPT
Drain
Power
Cord
24.1
1"
179.1
7"
Back
Front
Right Side
User Manual
Hotel Ice Dispenser
22
www.AvantcoIce.com
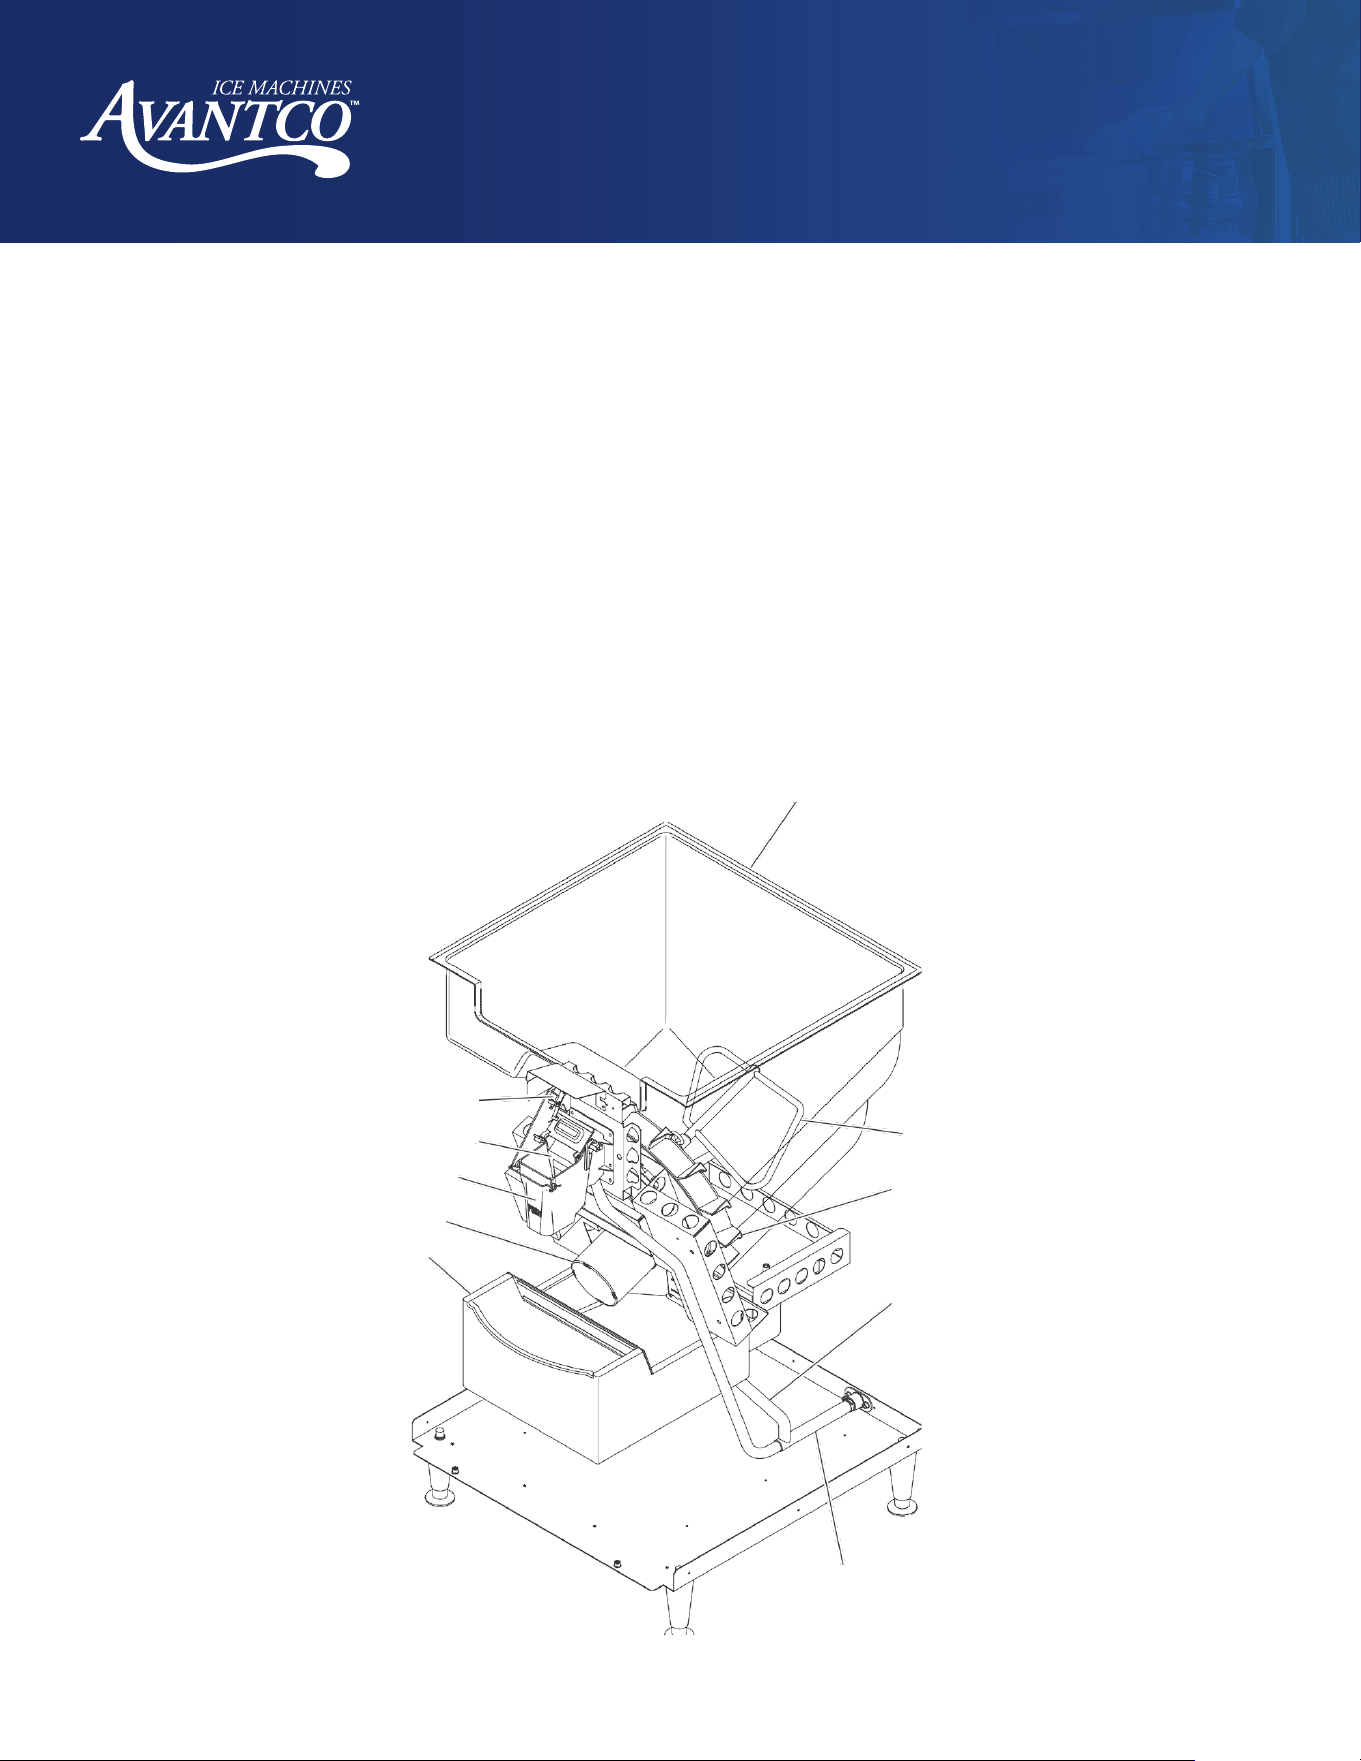
Product Description
All models consist of a plastic-lined, insulated hopper mounted to a metal base. The hopper contains a 15-blade
plastic dispense wheel and a stainless steel sweep arm. The top front of the hopper has a removable door to
facilitate maintenance and cleaning of the hopper without removal of the ice machine.
The dispense wheel and sweep arm rotate when the dispense drive motor is actuated. The drive motor's actuation
is controlled by the agitation timer or the vend switch. When the ice dispense chute is pushed back, it moves the
actuation lever up. The actuation lever releases the chute door and pushes the vend switch arm up. When the
vend switch arm has moved a preset distance, the vend switch contacts close, providing power to the dispense
drive motor. Ice is delivered to the top end of the ice chute by the dispense wheel and slides down the chute to the
container below.
The container rests on a grill. The grill's openings are over the ice catch pan, and any spilled ice goes there. The
grill has a flange at the front to help contain the ice that spills during vending. After the ice dispense chute is
released, the ice chute door closes to stop ice flow. Ice in the chute will eventually melt. Melted ice water is routed
to the drain through a hose attached to the bottom of the chute. Spilled ice is contained in an insulated ice catch
pan. Melted ice water from the ice catch pan is routed to the drain. User debris is kept away from the drain in the
catch pan by a slotted shield. The side and front exterior panels are stainless steel. The vending area and top panel
are made of plastic.
Vend Switch
Bin
Bin
Sweep Arm
Dispense Wheel
Drain Hose
Chute Door
Chute
Drive Motor
Ice Catch Pan
User Manual
Hotel Ice Dispenser
23
www.AvantcoIce.com
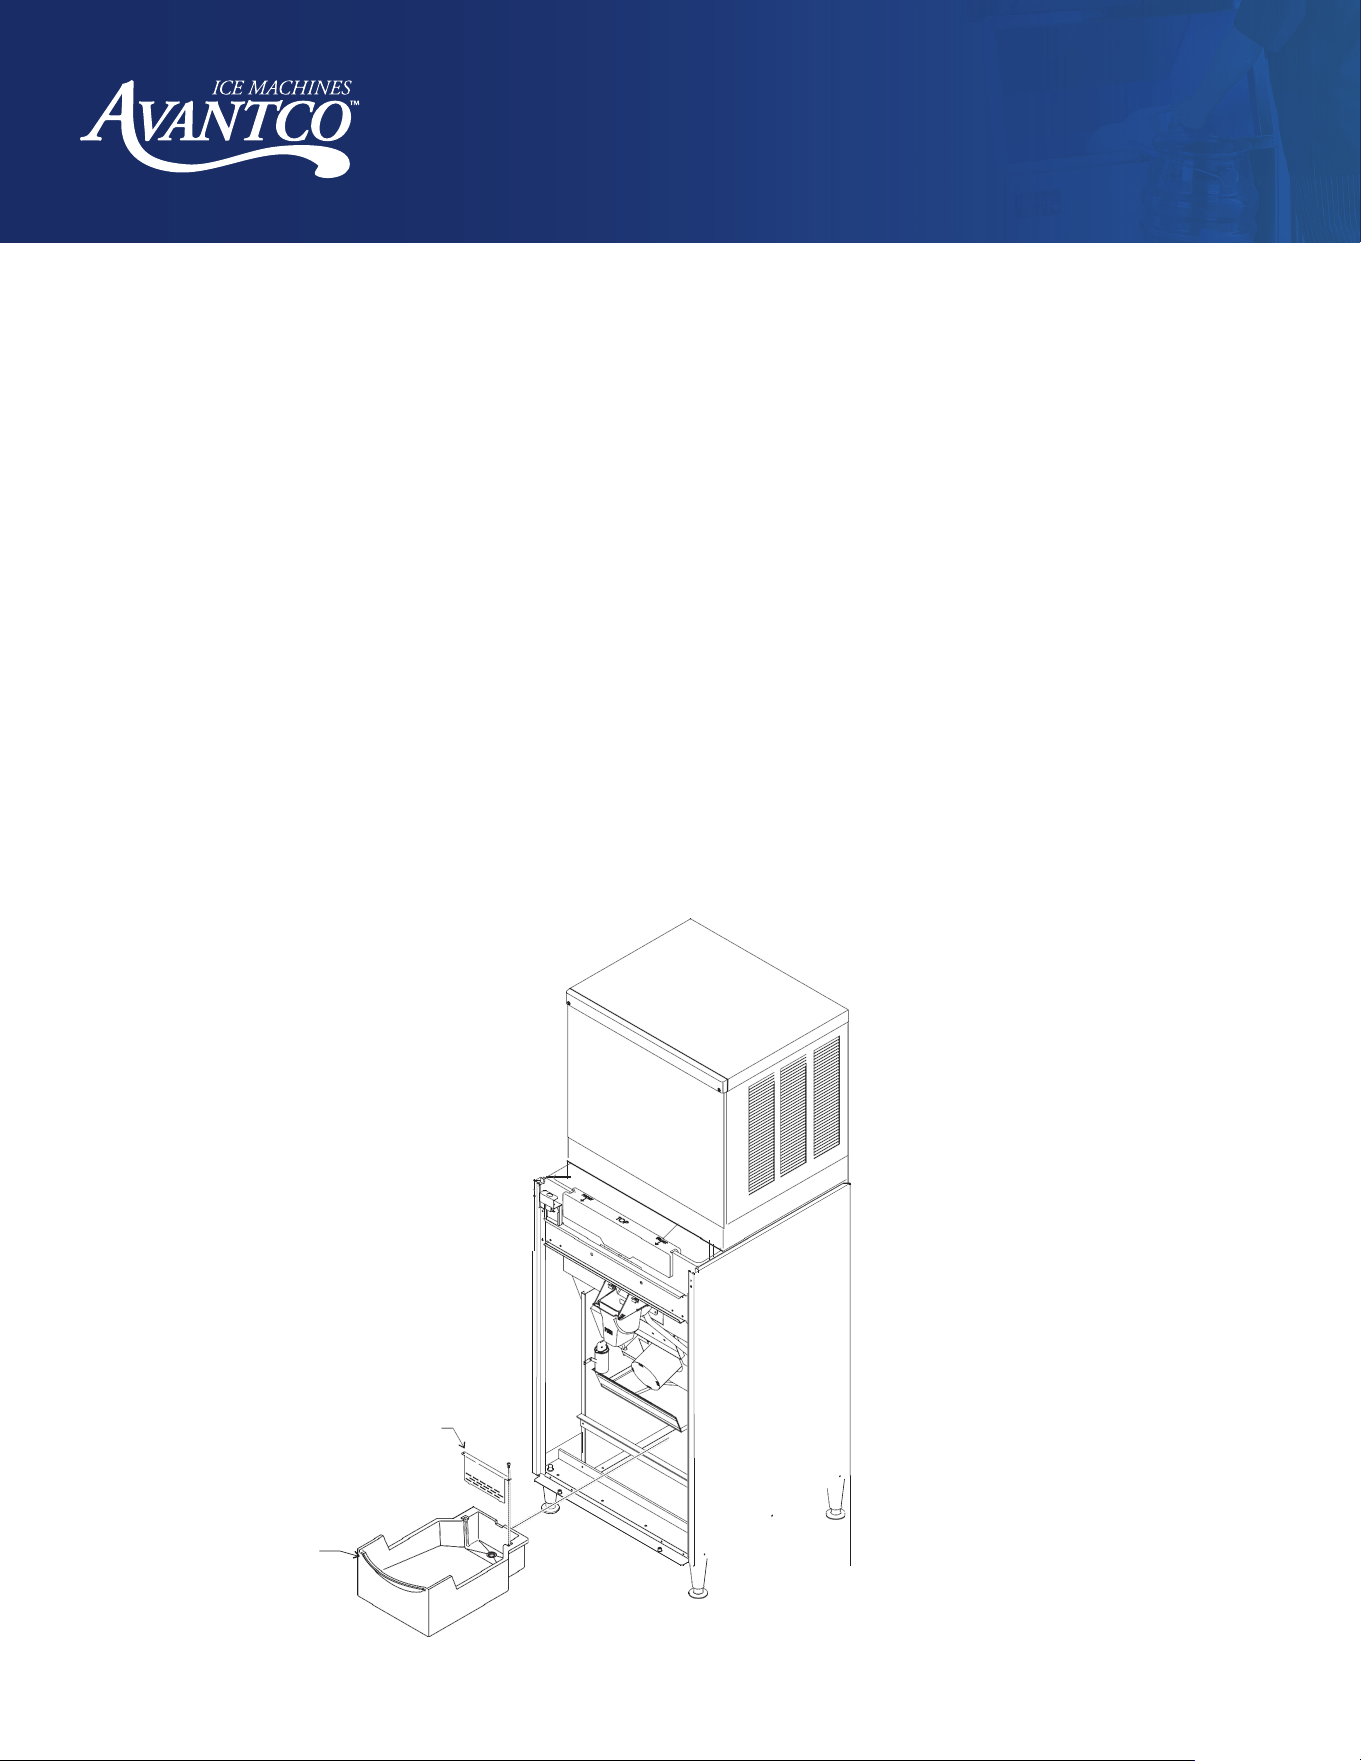
Unpacking
After removing the carton, check for the loose-shipped parts packed in the storage bin. The parts will include a
carton with four legs. Remove the leg carton and any other loose-shipped items.
To remove the pallet, place part of the carton behind the unit and tip the unit on its back. Remove the bolts holding
the pallet to the base of the HBN dispenser and separate the pallet from the unit.
Install the legs into the base of the unit, using the holes where the pallet bolts were. Turn the leg levelers in all the
way. Adjust them later after the unit is in its final installed position.
Move the dispenser to an upright position and set it in the location where it will be installed. Note where drain lines
and electrical connections will be made.
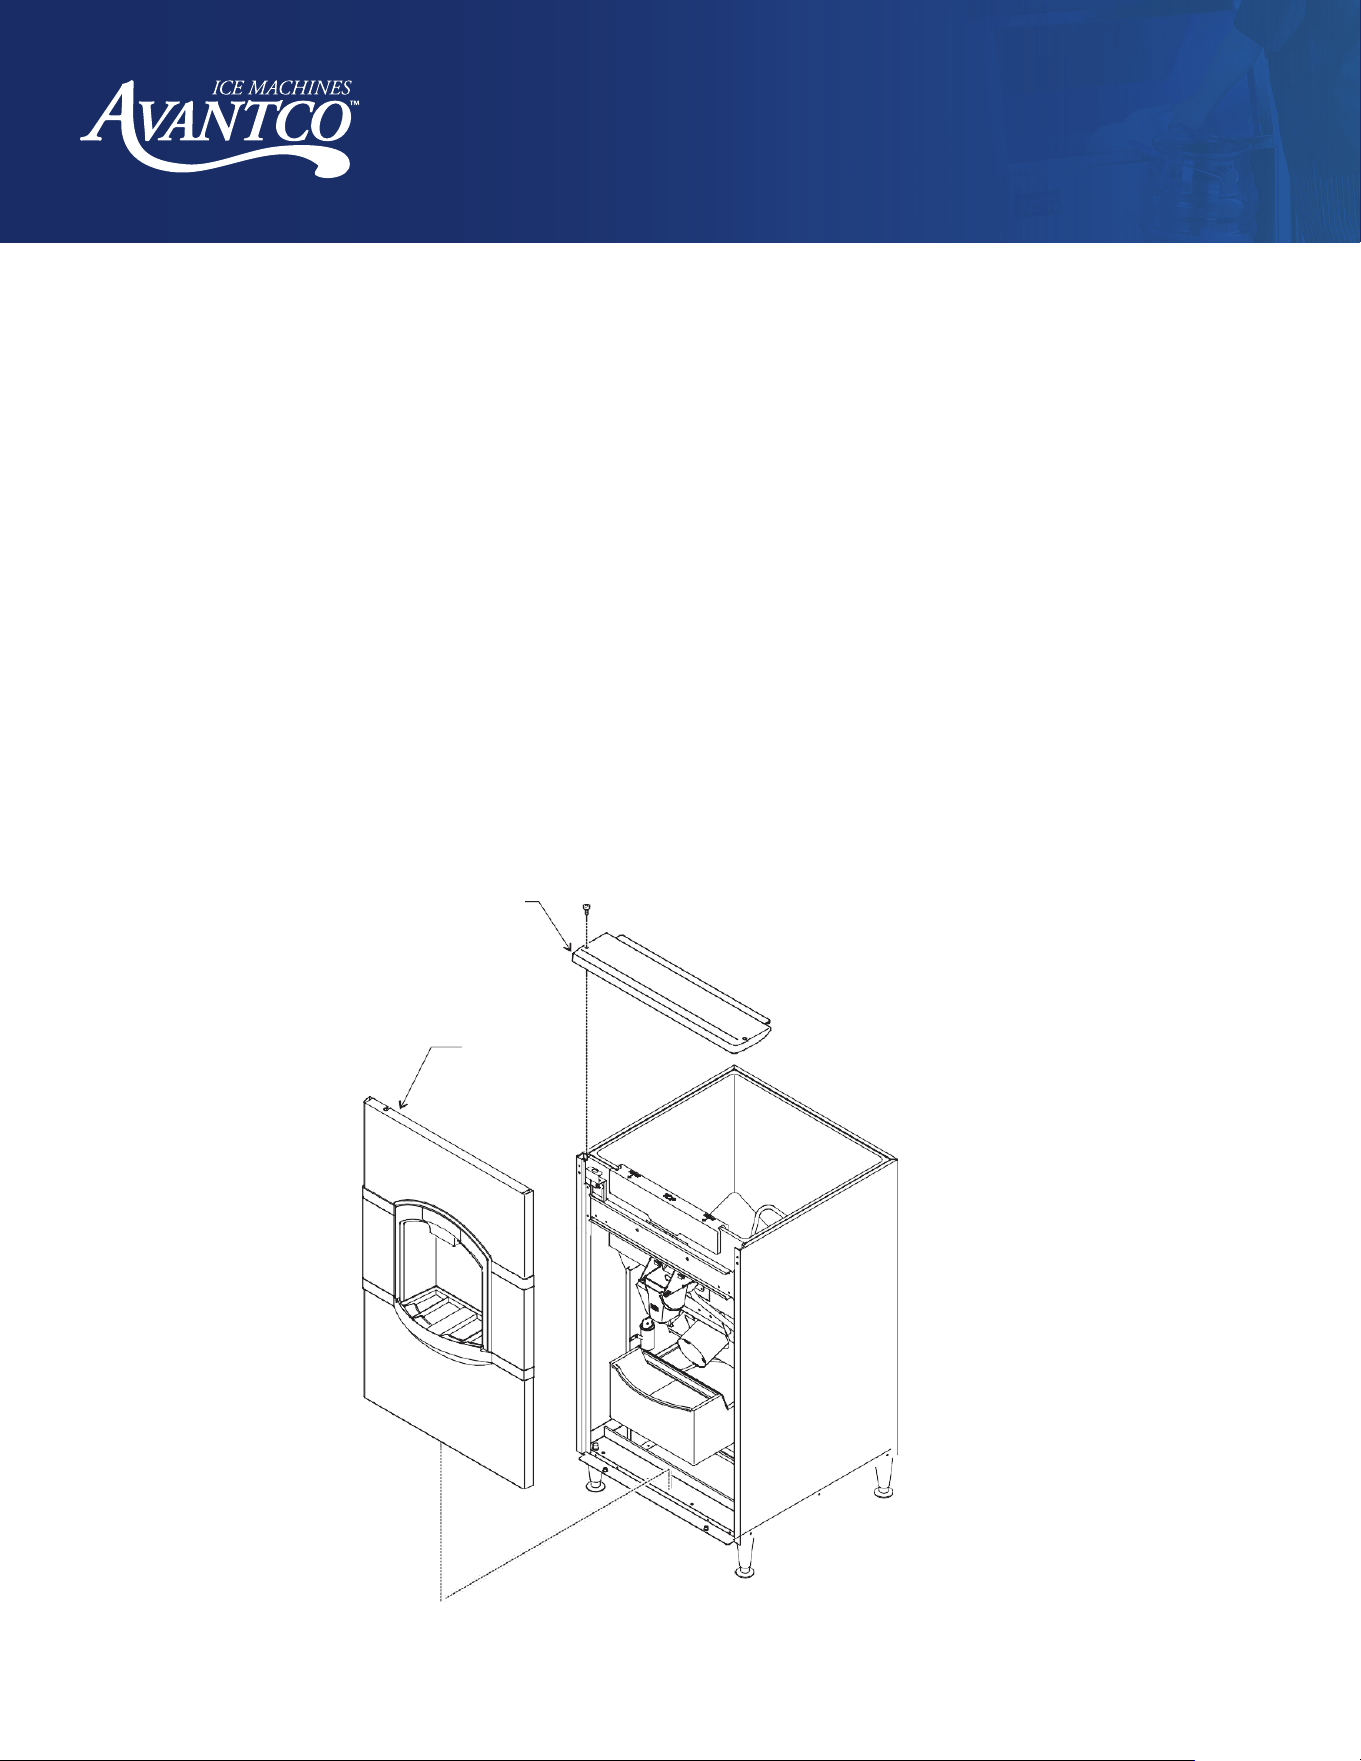
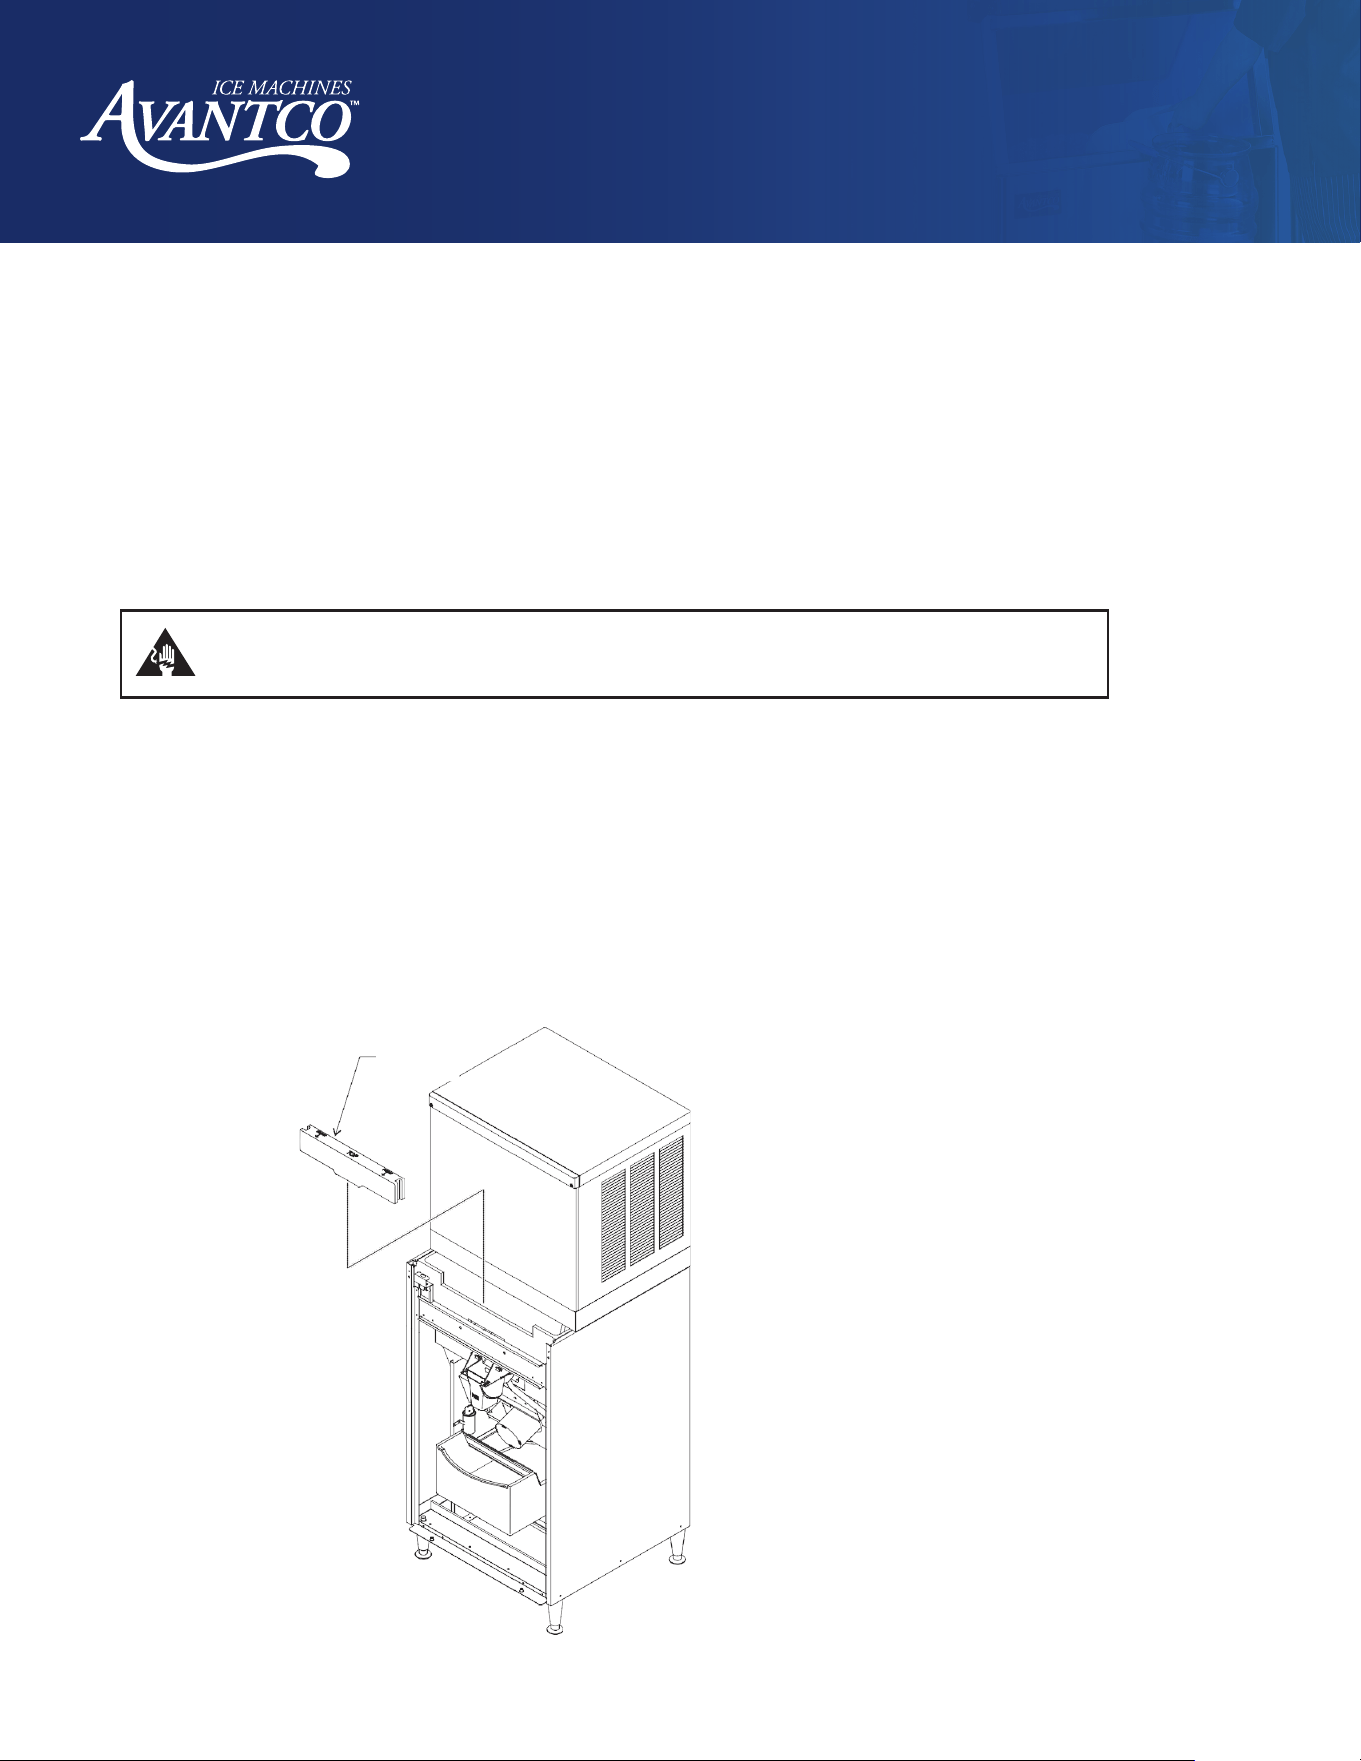
Front Panel Removal
The front panel rests on the base and is located with pins that stick up from the base. It is retained to the side
panels by strikes and latches. The top panel keeps the front panel from moving forward.
To remove:
1.
Disconnect electrical power.
2.
Remove the two screws holding the top panel to the dispenser. Lift the top panel up and over the dispenser.
3.
Pull the top edge of the front panel forward until the two snaps disengage.
4.
Lift the front panel up and o the base.
Top Panel
Front Panel
User Manual
Hotel Ice Dispenser
24
www.AvantcoIce.com
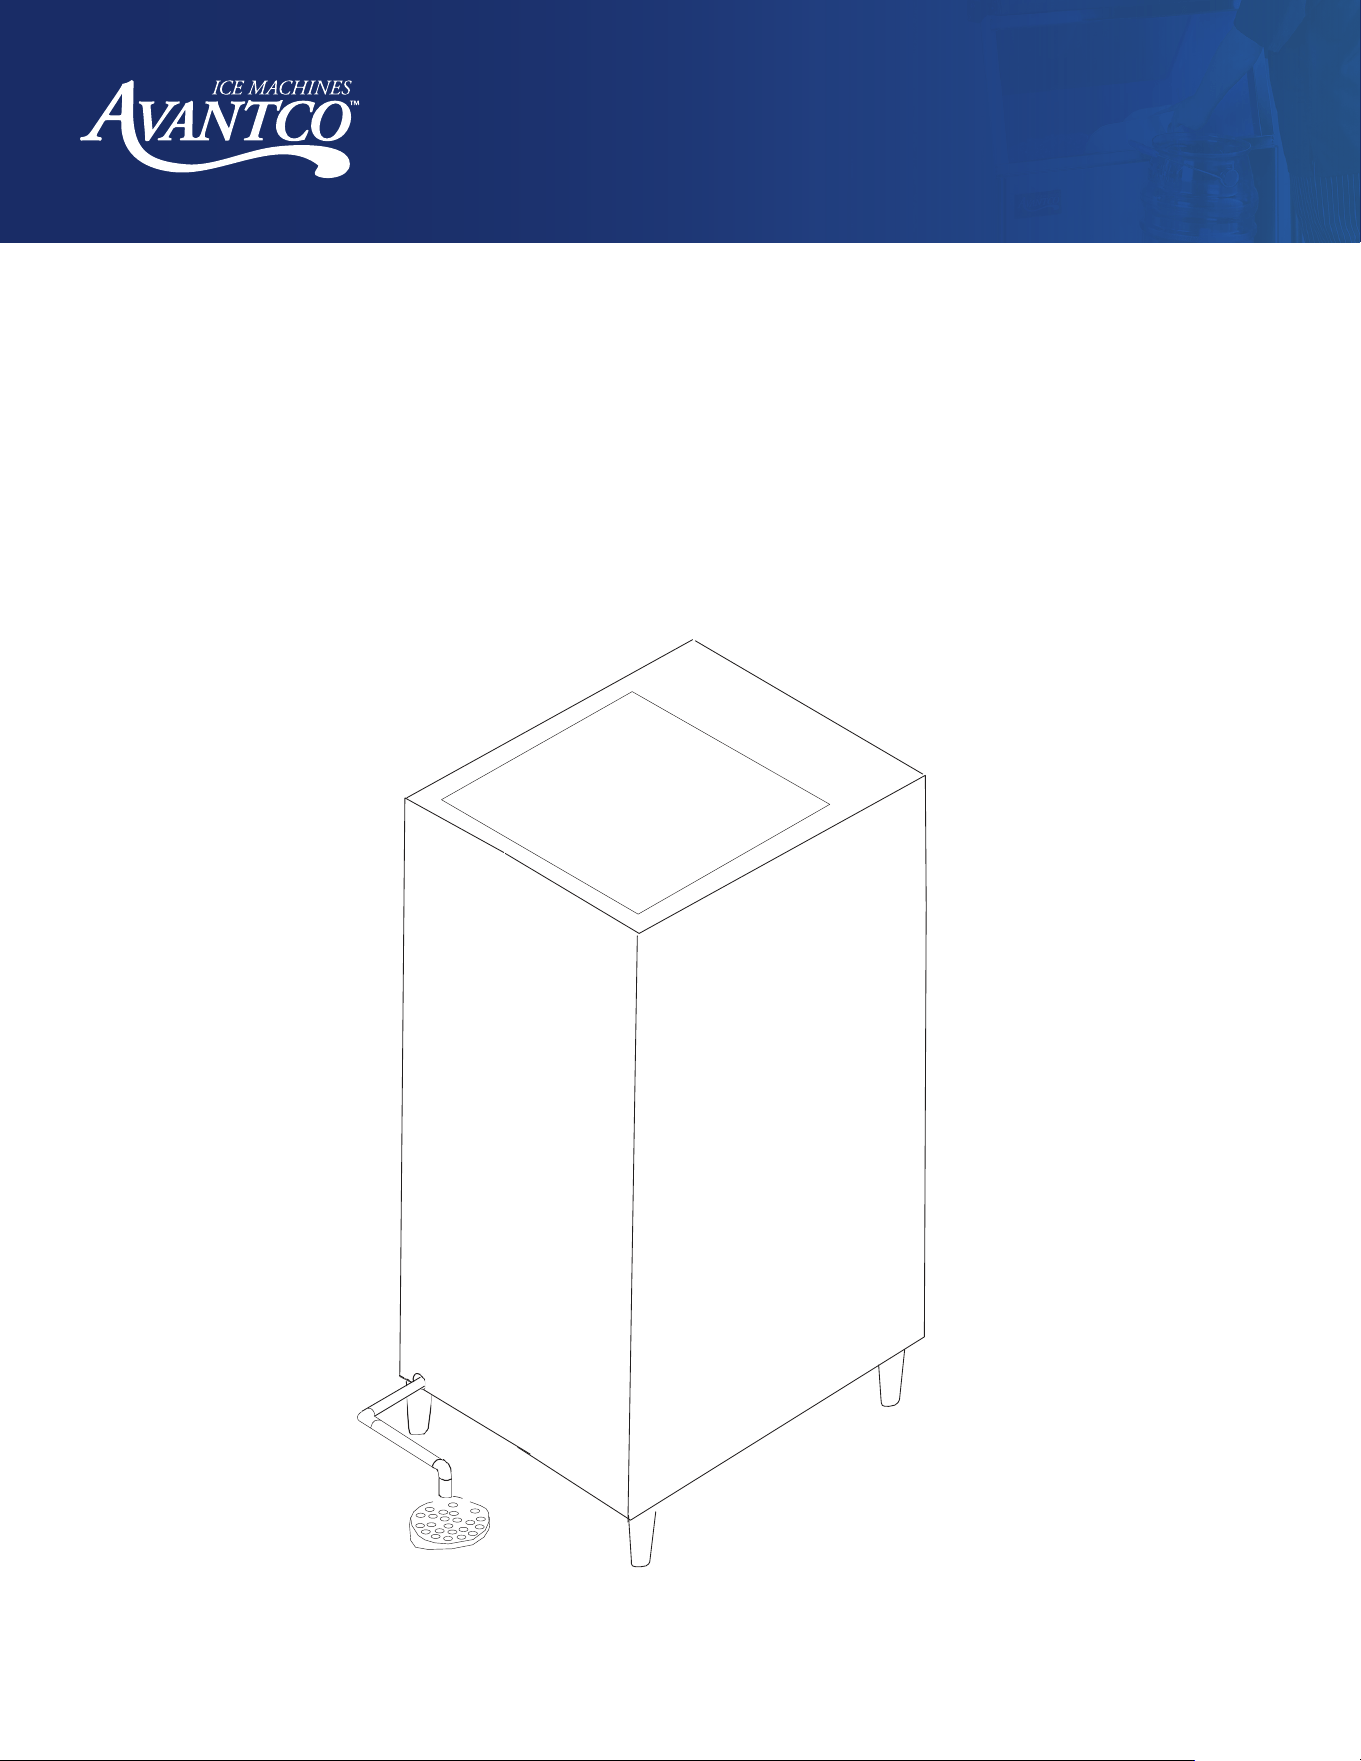
Installation - Plumbing
DRAIN
All models of the dispenser have a ¾" FPT drain fitting at the bottom of the back panel. Connect ¾" rigid tubing to
this connection. A vent is recommended for most installations. Route the drain tubing to the building drain.
Note: Drain fitting material is plastic. If using copper, sweat the copper tube to copper together before installing
on the dispenser.
Note: Keep PVC solvent away from all plastic parts of the dispenser.
Follow all applicable plumbing codes.
Because the drain tubing will be very cold, insulation is recommended for the tubing.
Drain Connection, Back View of Dispenser
User Manual
Hotel Ice Dispenser
25
www.AvantcoIce.com
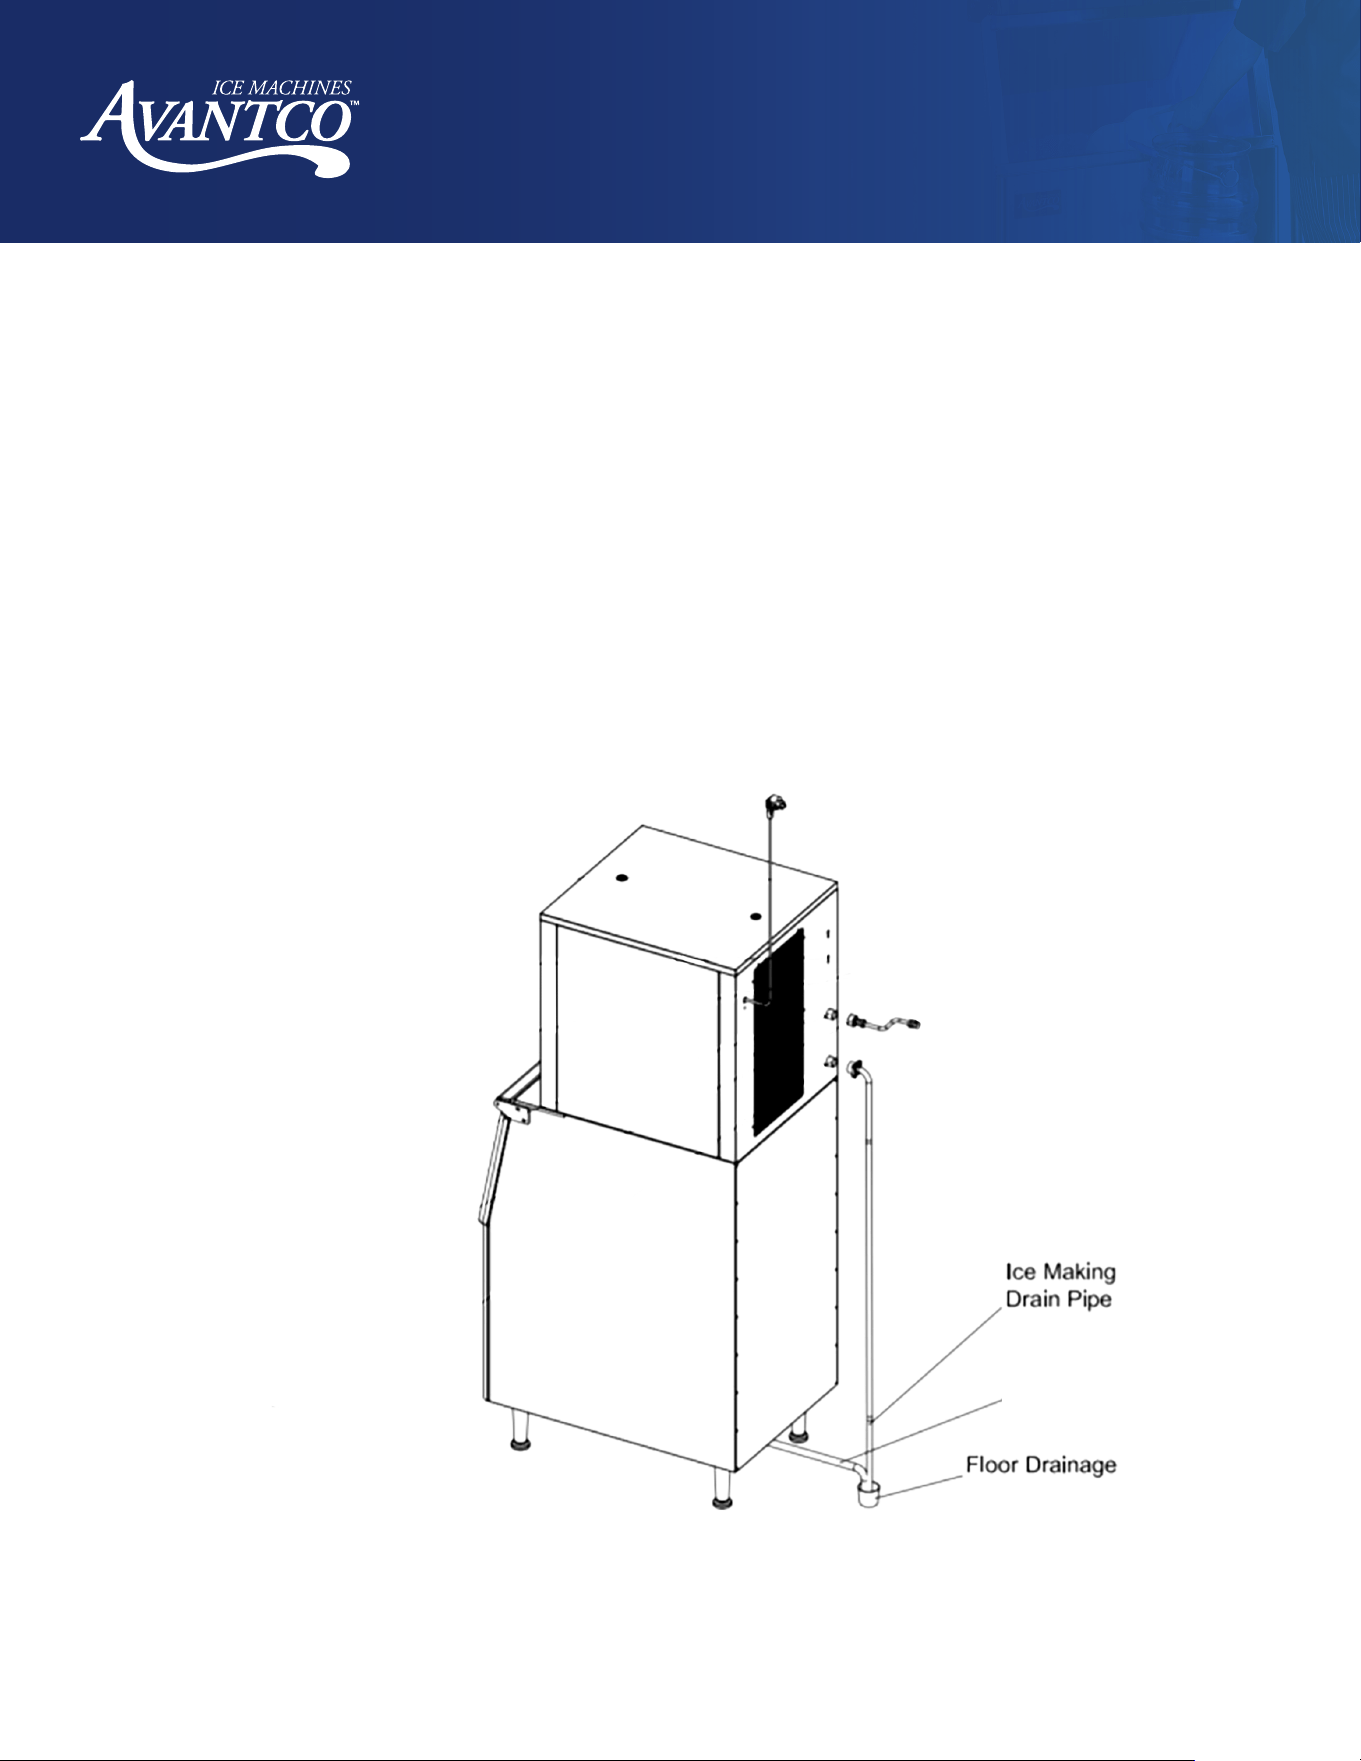
Installation - Electrical & Ice Machine Assembly
The dispenser is supplied with a power cord. Do not use with an extension cord. The unit must be plugged into a
properly grounded outlet.
The dispenser must be installed so that it is a separate piece of equipment from the ice machine. The drains and
electrical supply must be separate.
Follow all local state and national codes.
Ice Machine
All models: Place the dispenser in the location where it will be used. Level the top edge of the dispenser front to
back and left to right, ensuring a seal between ice machine and dispenser.
Sanitize the dispenser bin with a locally approved sanitizer.
Place the ice machine on the dispenser and seal using gaskets.
Ice Bin
Drain Pipe
User Manual
Hotel Ice Dispenser
26
www.AvantcoIce.com
Final Checklist / Initial Startup
1.
Check that electrical power has been supplied.
2.
Check that a drain, separate from the ice machine, insulated and made of rigid tubing, has been connected to
the dispenser.
3.
Check that the ice machine has been properly installed per the ice machine's installation directions.
4.
Check that the ice machine/dispenser assembly is level front to back and left to right.
To Start:
1.
Connect electrical power. The dispensing system will cycle on for a few seconds.
2.
Go through ice machine startup procedures. Let ice machine make two harvests.
3.
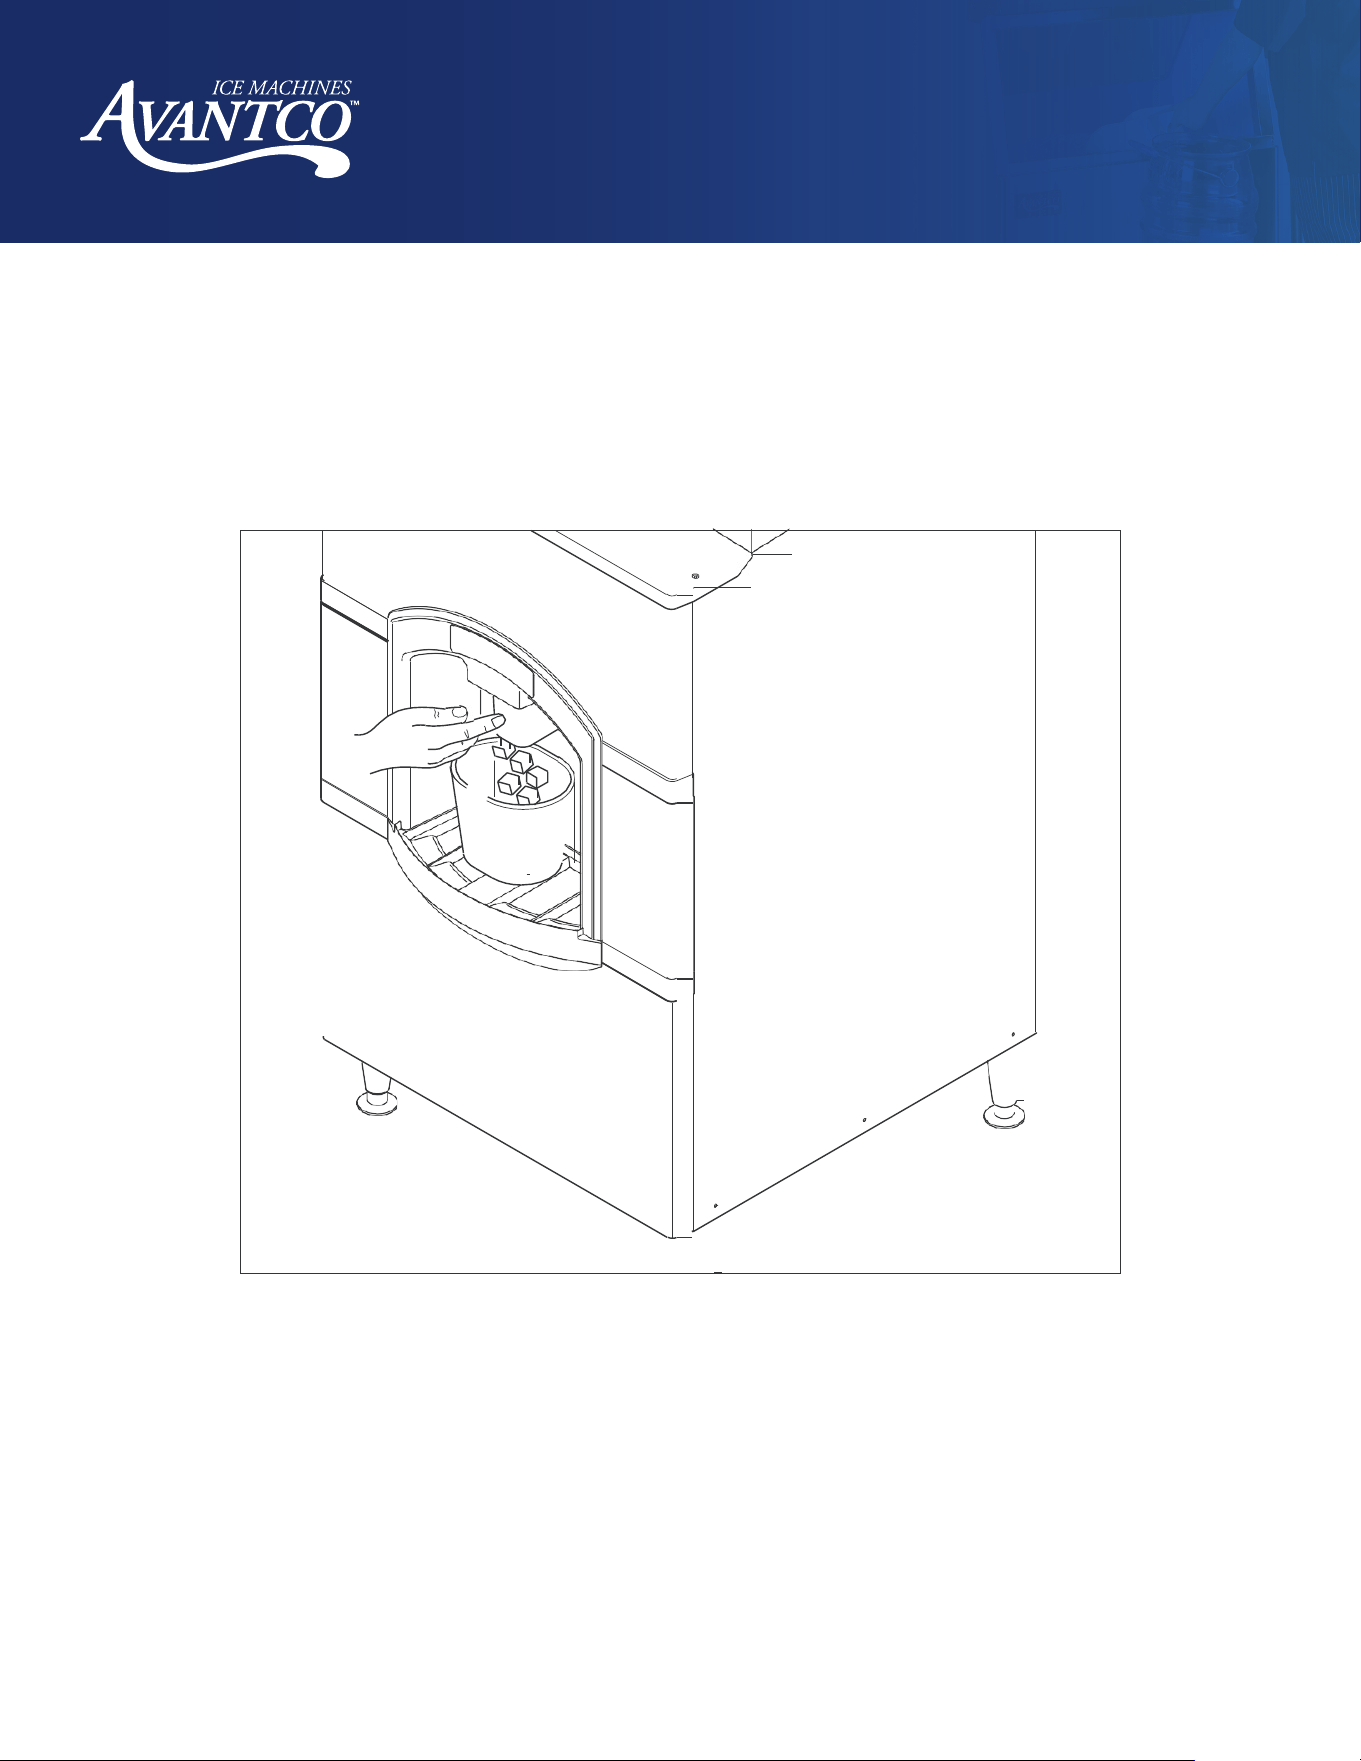
Push in the ice chute.
4.
Dispense wheel turns.
5.
Ice will be dispensed from ice chute.
6.
Give the operator any keys and the instructions on the operation and maintenance of the product. Check that
the operator knows who to call for service and has the product/service manuals for the machines.
ELECTRICAL SEQUENCE
Pushing the ice chute closes a contact to the gear motor.
The gear motor will have power and the dispenser will continue to operate as long as the ice chute is pushed in.
This model also has an agitation cycle of 3 seconds every 6 hours. Since the ice chute is not pushed in during
agitation, no ice is dispensed.
User Manual
Hotel Ice Dispenser
27
www.AvantcoIce.com
Push the chute back to dispense ice.
User Manual
Hotel Ice Dispenser
28
www.AvantcoIce.com
General Care and Cleaning
Periodically inspect and clean the ice dispenser to keep it operating at peak performance.
Wash the outside of the dispenser with warm water and soap. Rinse out and wipe dry.
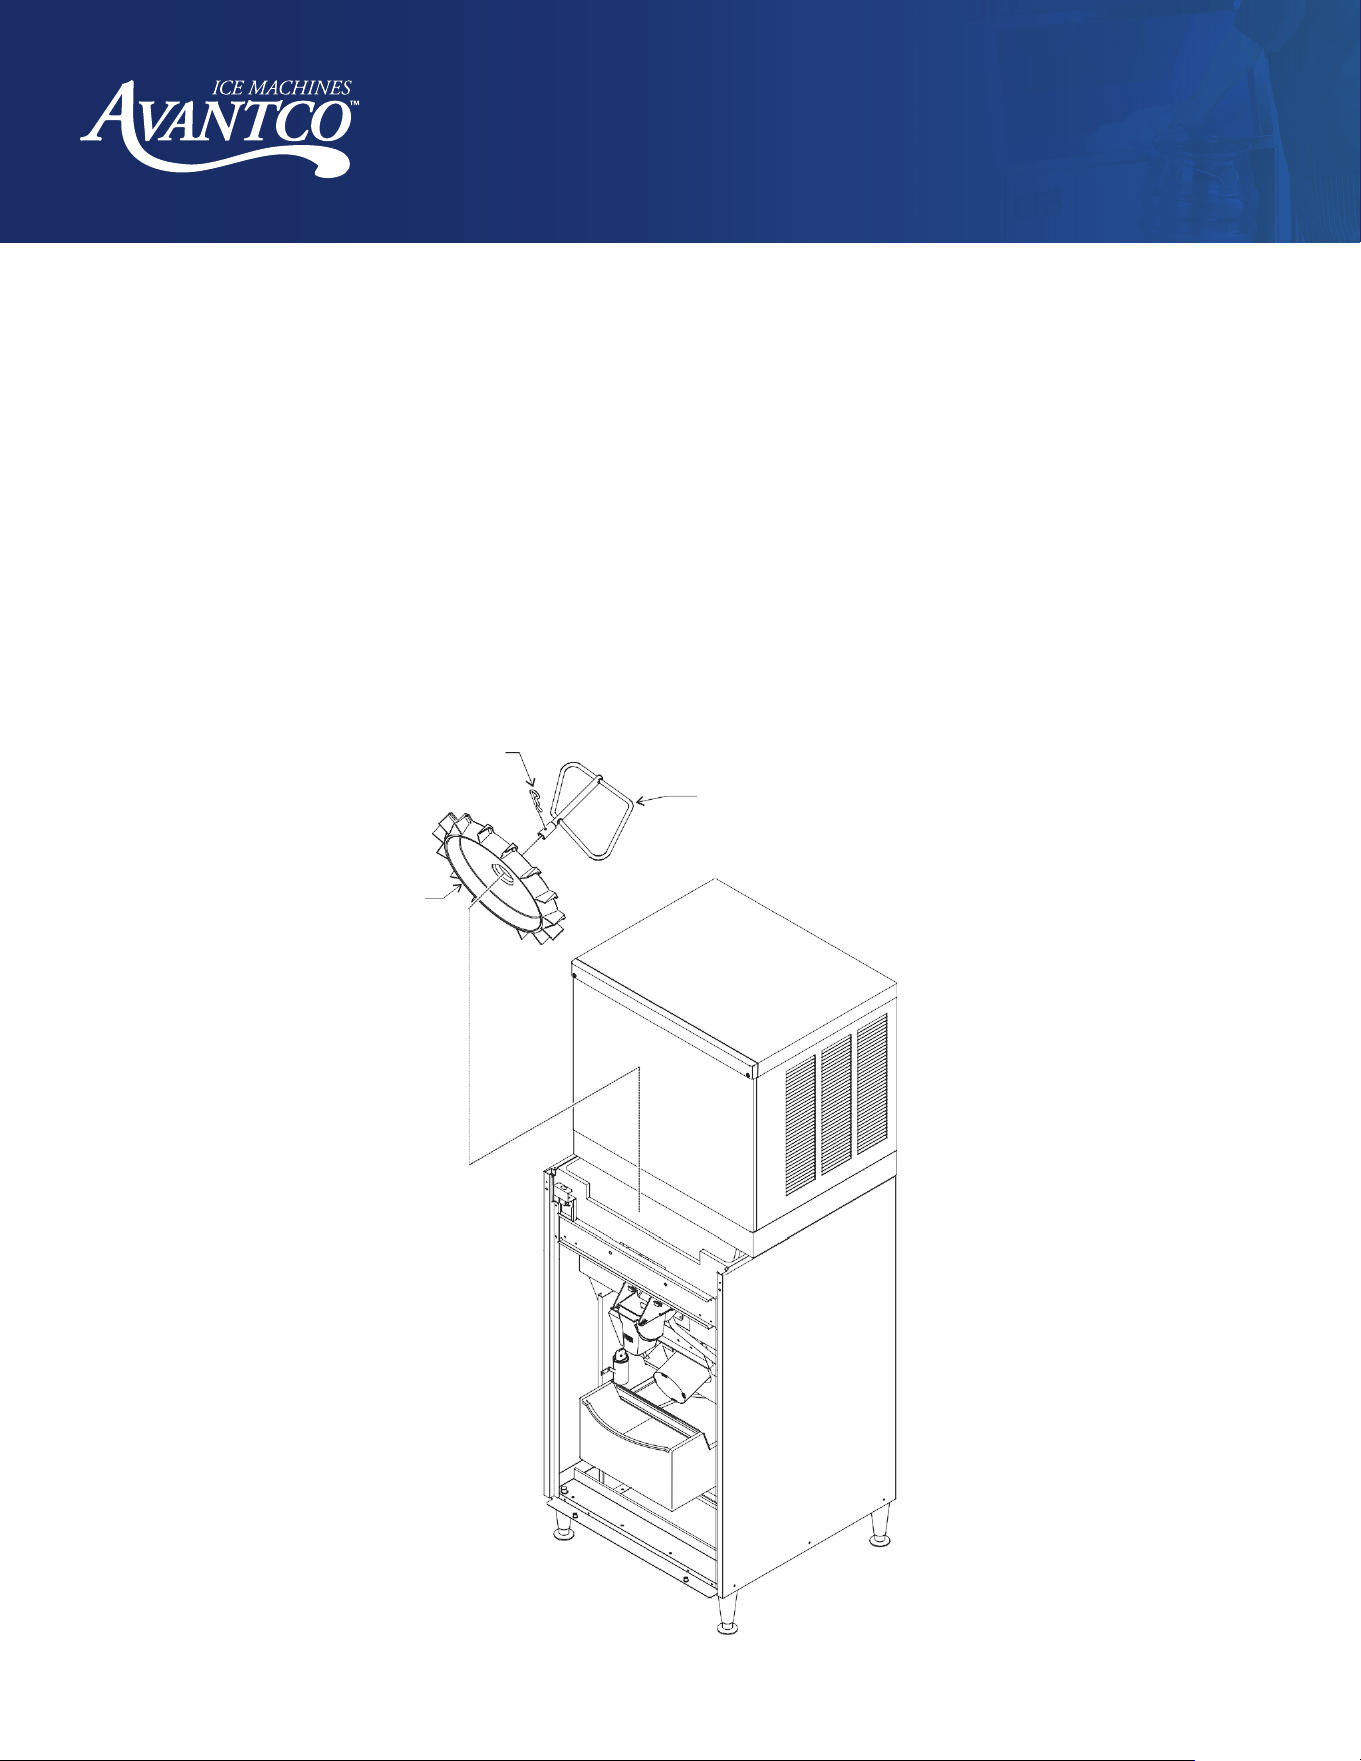
Cleaning and Sanitizing of the Ice Storage Bin:
The minerals, chlorine, and other impurities in the water are rejected from the water during the freeze cycle of the
ice machine. These minerals will collect in the storage bin. The ice storage bin should be cleaned and sanitized
every 90 days.
1.
Remove all of the ice stored inside the dispenser bin and shut o the ice maker.
2.
Disconnect electrical power to the dispenser.
3.
Remove top front panel (in front of the machine).
4.
Remove the front panel.
5.
Lift up and remove the access door at the front of the bin.
6.
Reach into the opening, locate the hair pin, and pull it out of the shaft.
7.
Pull the sweep arm of the shaft and remove it from the dispenser.
8.
Pull the dispense wheel of the drive shaft and remove it from the dispenser.
9.
Mix a solution of 5 ounces of ice machine cleaner to 1 gallon of warm (95°F - 115°F) water. Wash the entire bin
area and the delivery area. Use a clean brush or cloth.
WARNING! Electrical shock and moving parts hazard.
Disconnect electrical power before beginning service or maintenance procedures.
EZ Access
Door
User Manual
Hotel Ice Dispenser
29
www.AvantcoIce.com
General Care and Cleaning (cont.)
10. Rinse all areas washed with clean, fresh water.
11. Using the ice machine cleaning solution, clean the ice grill, sink, sweep arm, and dispense wheel. Rinse these
parts with clean, fresh water.
12. To sanitize: Use a locally approved sanitizer. A possible sanitizer: Mix a solution of ice machine sanitizer and
water; 1 ounce of household bleach to 2 gallons of warm (95°F - 115°F) water. Wash all interior surfaces, the
sweep arm, and the dispense wheel with the sanitizer solution. Use a clean cloth.
13. Allow the parts to air dry.
14. Reassemble wheel and sweep arm onto drive shaft. Be sure to reinsert hairpin.
15. Replace all panels.
16. Reconnect power. Be sure ice machine is switched back on.
Be sure to clean and sanitize your ice machine following the instructions that came with your ice machine.
The cleaning instructions in this manual are only for the ice dispenser.
Sweep Arm
Hair Pin
Dispense Wheel
User Manual
Hotel Ice Dispenser
30
www.AvantcoIce.com
Maintenance
Spilled ice and user debris will collect in the ice catch pan, located just below the sink grill.
Occasionally, the debris will need to be removed and drained out to prevent water backups.
Note: Failure to clean out the ice catch pan will likely result in a leak that is NOT covered by warranty.
To clean out the ice catch pan:
1.
Remove the front panel.
2.
Disconnect electrical power.
3.
Remove the two screws holding the top panel to the dispenser. Lift the top panel up and o the dispenser.
4.
Pull the top edge of the front panel forward until the two snaps disengage.
•
If the unit is a coin-operated model, reach behind the front panel and disconnect the coin mechanism harness
from the front panel.
•
If the unit is a water station model, reach behind the front panel and shut o the water supply valve to the water
faucet. Then, disconnect the water line from the shut o valve.
5.
Lift the front panel up and o the base.
6.
Pull the ice catch pan forward a few inches until the drain hose can be reached.
7.
Pull the drain hose from the ice catch pan.
8.
Slide the ice catch pan out of the ice dispenser and clear it of any debris. Wash out the drain.
9.
Return the ice catch pan to its normal position.
10.
Re-attach the drain hose.
Screen
Ice Catch Pan
User Manual
Hotel Ice Dispenser
31
www.AvantcoIce.com
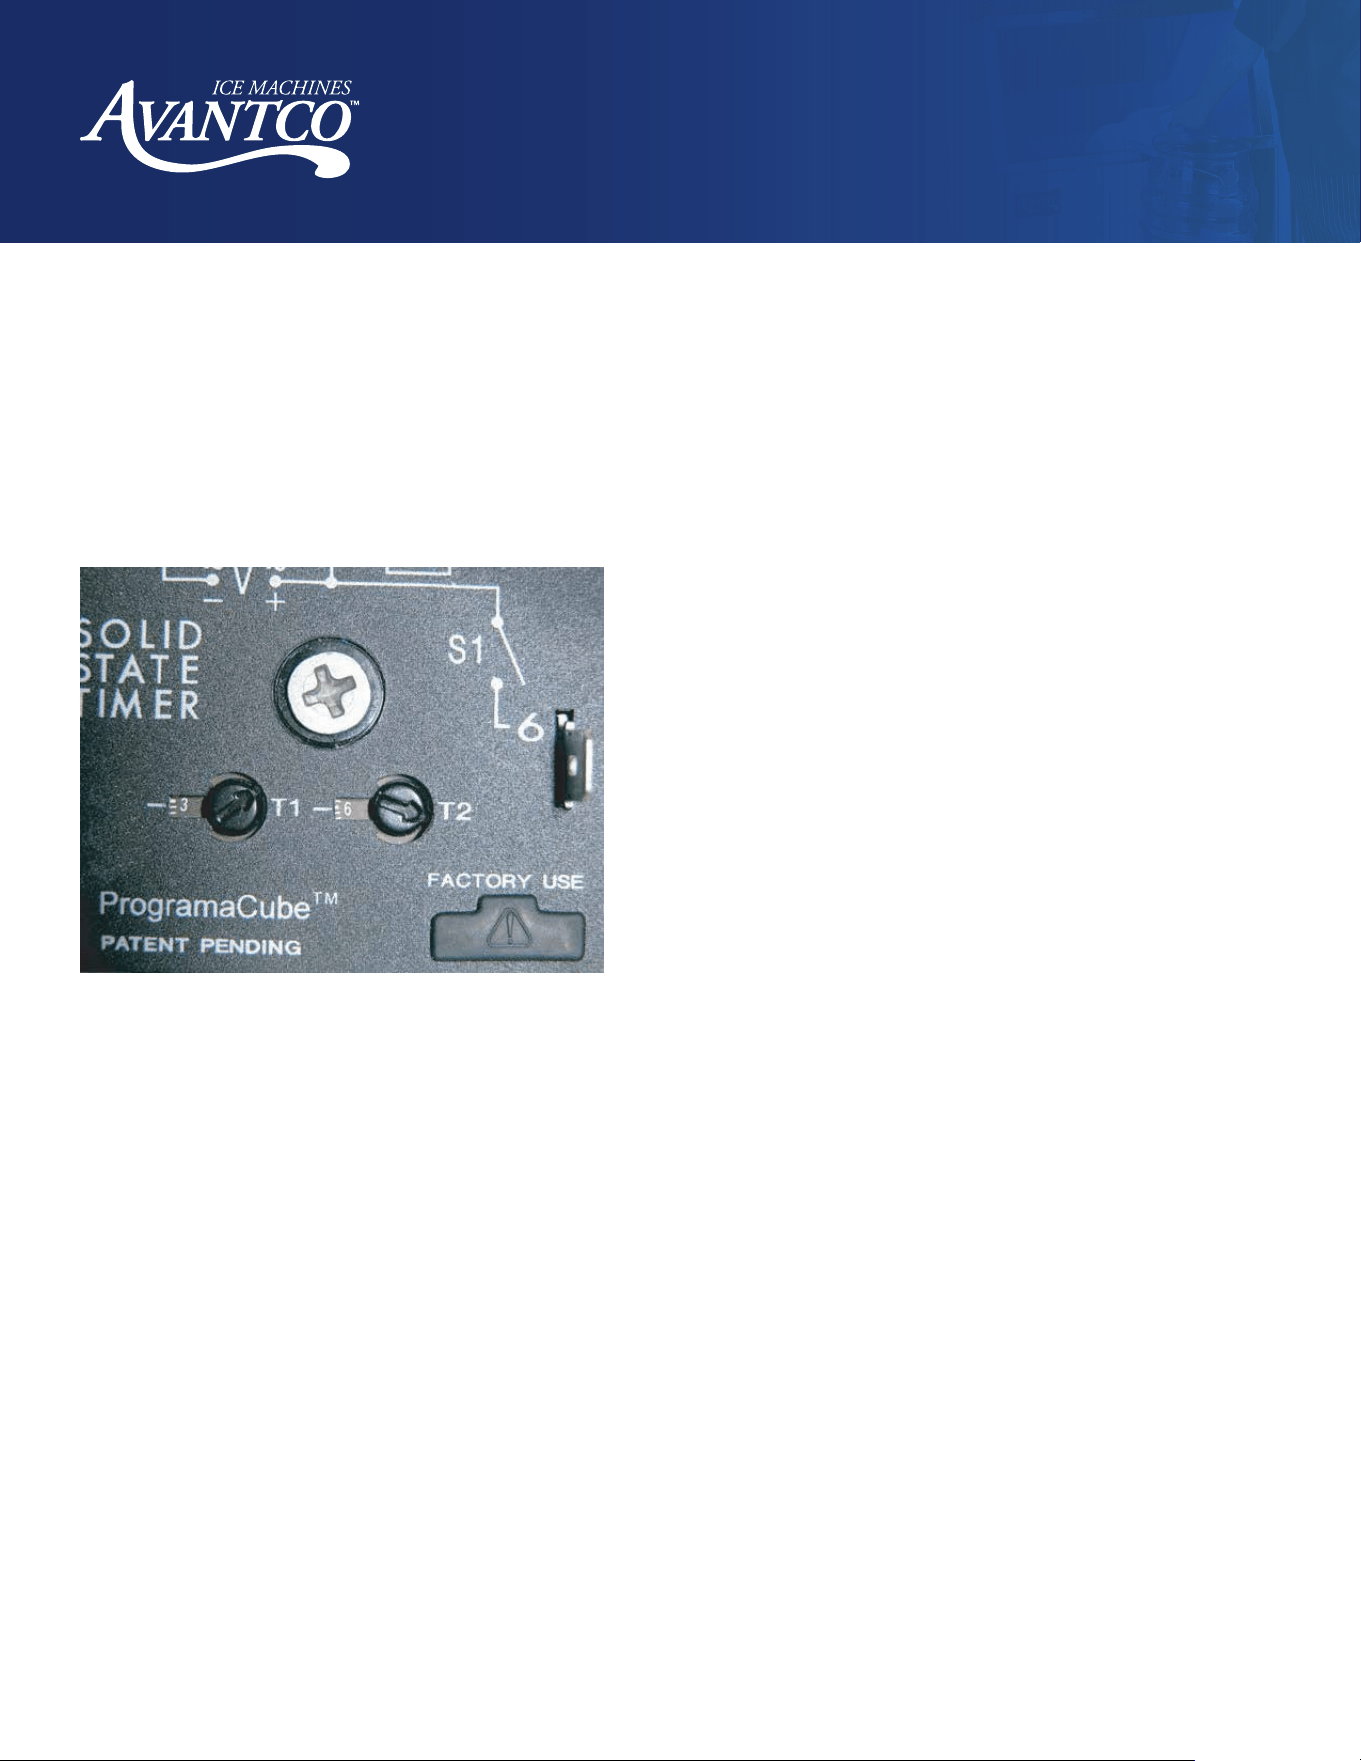
Adjustments
The dispenser is preset at the factory. Adjustments are rarely needed.
Agitation Time Recommendations:
The standard time is 3 seconds on every 6 hours. Adjust to agitate more frequently if the unit is installed in a low
temperature environment.
However, if the ice being produced by the ice machine is cloudy and crumbles easily, adjust to agitate less
frequently.
Agitation timer, shown pre-set to 3 seconds every 6 hours.
User Manual
Hotel Ice Dispenser
32
www.AvantcoIce.com
Troubleshooting
Symptom
Probable Cause
Possible Fix
No ice is dispensed.
No power to dispenser.
Check for proper power. Ensure unit is
plugged in.
No ice. Check ice machine.
Vend switch does not close.
Check vend switch.
Check chute for proper motion.
Chute cannot be pushed back. Check door lock for proper operation.
Interlock switch open.
Check interlock switch. Ensure top panel
is in place.
Drive motor windings open. Check drive motor.
Drive gears failed. Check gear reducer.
Coin switch doesn't close. Check coin switch.
Vend timer does not work.
Connect power to post 6 of coin mech timer.
The timer should activate and the ready light
should be on. Pushing the chute should start
the gear motor. If not, replace the vend timer.
Only dispenses small amount of ice. Sweep arm damaged. Check/replace sweep arm.
No water is dispensed. Water shut o.
Check water supply to unit. Check shut o
valve inside cabinet.
Water leak.
Drain is plugged. Check drain for restriction.
Ice catch pan has overfilled. Remove excess ice.
Ice catch pan screen is plugged. Clean screen.
Seal between ice machine and dispenser
is leaking.
Remove ice machine and replace gasket tape.
Water drip from spout.
Spout drain restriction.
Note: Some dripping is normal.
Check spout drain for restriction.
"Ready" light is on all the time. Restrictor is open. Replace resistors (15K, 2 watt in parallel).