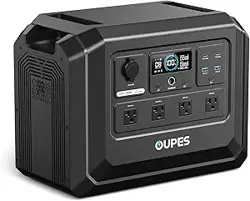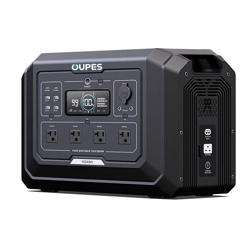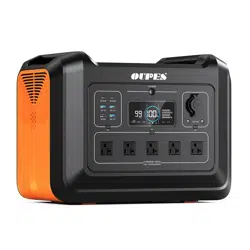
2000W Portable Power Station
Mega 1
User Manual

Disclaimer
Safety Instruction
Preparation Before Use
Device Compatibility and Precautions
Common Mistakes and How to Avoid Them
Usage Scenarios and Precautions
Product List
Product Description
Specifications
Overview
LCD Screen
Instructions for Use
Power ON/OFF
AC Input Overload Protection
Recharge Methods
AC Charging
Solar Charging
Cigarette Lighter Charging
Extra Battery Charging
EPS(Emergency Power Supply) Function
Error Code & Trouble Shooting
FAQ(Frequently Asked Question)
Certification and Compliance
Contents
01
02
02-04
02-03
03
04
05
06-08
06
07
08
09-10
09-10
10
11-12
11
11
12
12
13
14-15
16
16-17

Disclaimer
Before using this product, please read this user manual carefully to ensure that you
fully understand the product and can use it correctly. After reading this user
manual, please keep it in a safe place for future reference. Improper use of this
product may cause serious injury to yourself or others, or result in product damage
and property loss. By using this product, you are deemed to have understood,
recognized and accepted all the terms and contents of this document. The Com-
pany shall not be responsible for any damages caused by the user's failure to use
this product in accordance with this user manual.
In accordance with laws and regulations, the company reserves the right of final
interpretation of this document and all documents related to this product. This
document is subject to change, update, revision or termination without notice.
Please visit our website for the latest product information.
●The company shall not be held responsible for any damage caused by force
majeure(e.g. fire, typhoon, flood, earthquake) or use under other abnormal circum-
stances by the customer.
●The company bears no responsibility for loss caused by the use of non-standard
connectors.
●The company shall not be liable for any damage caused by non-compliance
with the standard operation.
●Please do not disassemble the product. Otherwise, the warranty will be voided.
01

Safety Instruction
Preparation Before Use
02
1.1 Read the User Manual
Carefully review the user manual provided with the device to understand the power
station's interface functions, rated power, supported device types, and usage methods.
Pay special attention to the rated power and output voltage of each interface to ensure
compatibility with connected devices.
1.2 Device Inspection
Before use, inspect the power station and accessories to ensure they are intact, with
no exposed wires or damaged interfaces.
Confirm that all interfaces are dry and clean.
2.1 Matching Power Specifications
Verify that your device's rated power matches the power station's output. Examples
include:
●USB-C Interface: Suitable for small portable devices like smartphones and tablets
(e.g., iPad).
●Car Charger Interface: Avoid connecting sensitive devices like radios.
●AC Socket: Designed for high-power devices like TVs or sound systems, but the
power must be within the station's rated output.
Device Compatibility and Precautions
2.2 Avoid Simultaneous Connection of High-Power and Sensi-
tive Devices
Do not connect high-power devices (e.g., refrigerators, induction cookers) and sensi-
tive equipment (e.g., TVs) at the same time to prevent voltage fluctuations that could
damage the devices.
Do not use the power station to power medical equipment and precision instrument.

03
Device Compatibility and Precautions
Common Mistakes and How to Avoid Them
3.1 Using the Wrong Interface, Causing Device Damage
●Error Example: Using the car charger port for powering voltage-sensitive devices (e.g.,
radios).
●Precautionary Measures:
○Check the device's power requirements (wattage, voltage).
○Connect to the correct interface.
3.2 Damage Due to Instant Voltage Fluctuations
●Error Example: Keeping sensitive devices connected while turning the power station
on or off.
●Precautionary Measures: Disconnect devices before powering the station on or off.
3.3 Overloading the Power Station
●Error Example: Powering multiple high-power devices simultaneously, exceeding
the station's power limit.
●Solution: Check the station's rated power and plan device usage accordingly.
2.3 Special Note: List of Sensitive Devices
Devices sensitive to voltage fluctuations include:
●High-end TVs (OLED, 4K)
●High-end sound systems
For these devices, use them individually and ensure proper interface matching.
●Tablets like iPads
●Cameras and drones

04
Usage Scenarios and Precautions
4.1 Charging via the car charger
●Do not charge devices via the car charger interface when the vehicle is starting or
stopping to avoid voltage spikes.
●Ensure the device's power aligns with the station's output specifications when
using the car charger interface.
4.2 Indoor Use
●For TVs, sound systems, and other devices in EPS mode, ensure the input source is
grid power or a pure sine wave generator.
4.3 Outdoor Use
●Keep the power station away from water, dust, and extreme temperatures.
●Regularly clean interfaces and power cables after outdoor use.
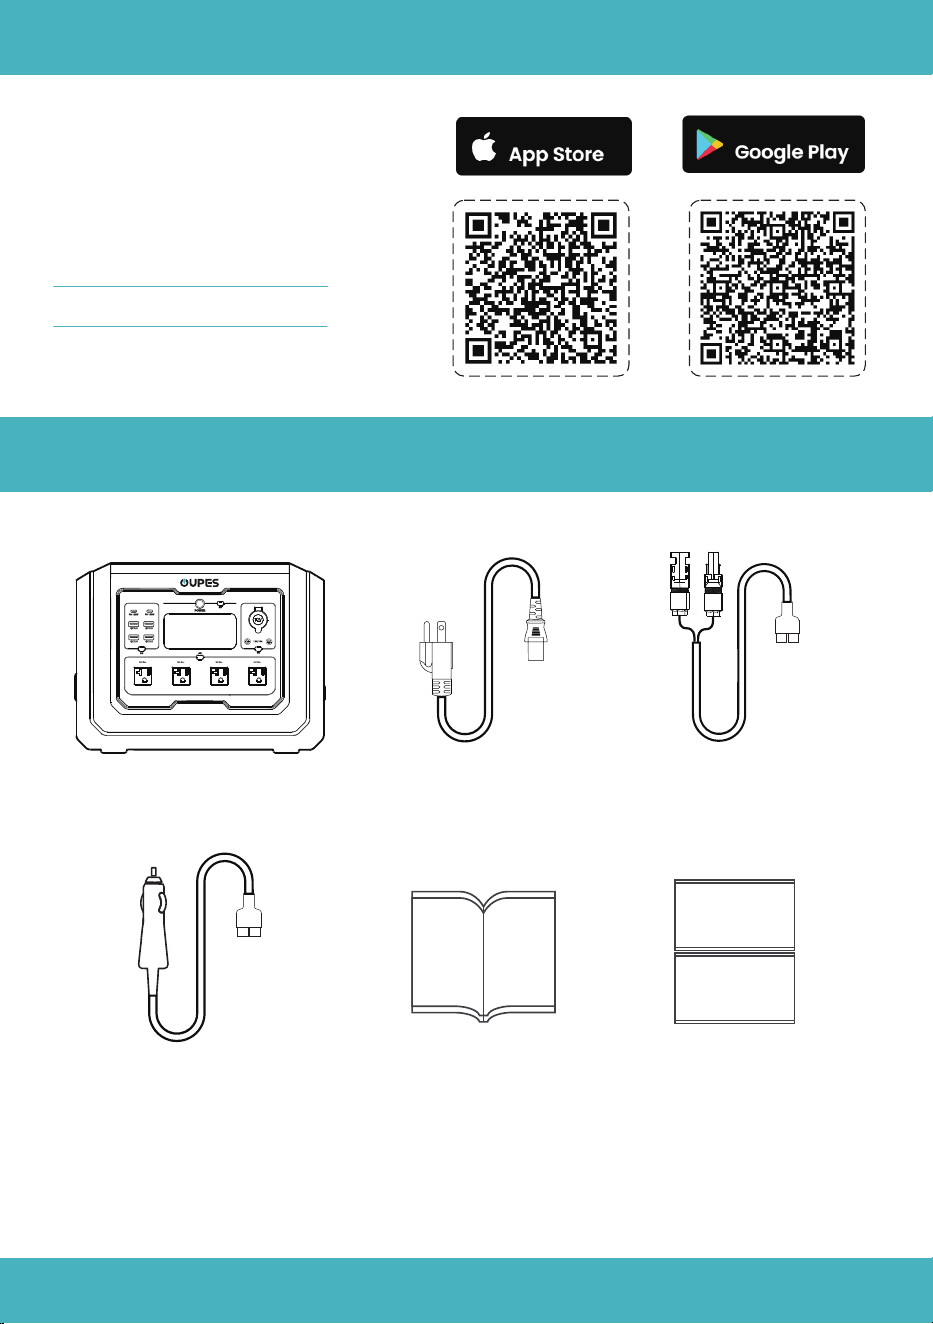
MC4 to Anderson
Cable *1
Cigarette Lighter to
Anderson Cable*1
Power Station*1 AC Charging
Cable *1
What's in the Box
APP
You can connect this product via
APP to view information, control the
device and personalize settings.
Scan the QR code to down-
load our Smart Control APP.
Available On
Available On
05
User Manual*1
Warranty Card*1
Brand card*1

Product Description
120V 50Hz/60Hz
Max 2000W(Surge: 4500W)
Bypass Mode: 2000W
13V10A 130W Total
5V3A; 9V2A; 12V1.5A【18W Max】
5V3A; 9V3A; 12V3A; 15V3A; 20V5A【100W Max】
90V~140V 60Hz 12A Max 1400W Max
12V~78V MPPT: 18V~75V 14A Max 800W Max
12V~15V 8A Max
Output
Input
27.8lb (12.6kg)
15.1*9.1*11.6in (384*232*295mm)
1024Wh(51.2V/20Ah)
LiFePO4
32°F~104°F (0°C~40°C)
-4°F~140°F (-20°C~60°C)
General Info
06
Specifications
AC Output
DC 12V & Cigarette
Lighter Output
USB-A Output
USB-C Output
AC Input
Solar Input
Cigarette Lighter Input
Output
Net Weight
Storage Temperature
Dimension
Battery Capacity
Battery Type
Working Temperature
Product Description
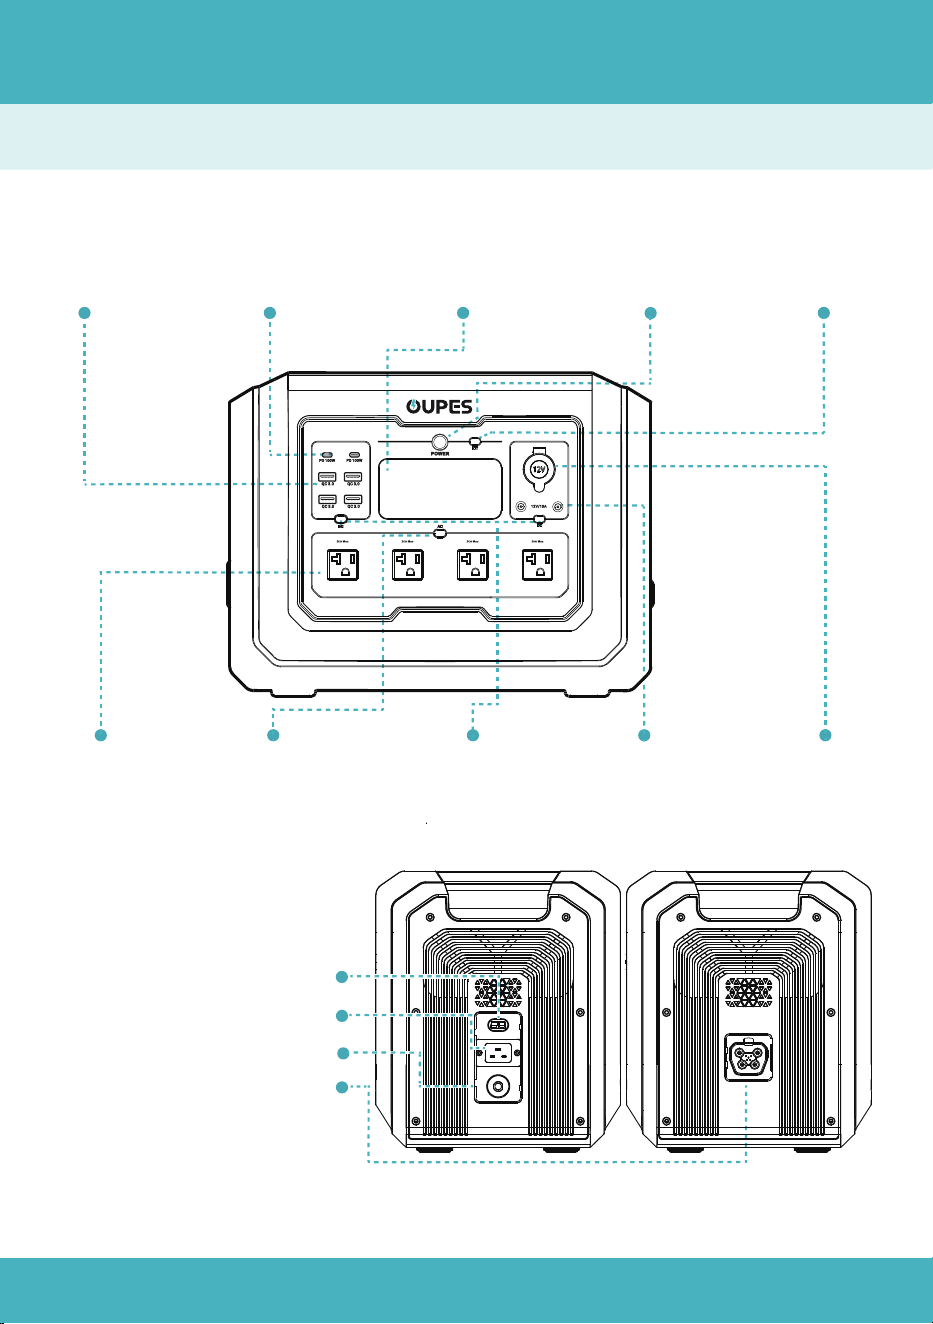
Overview
07
USB-A
Output Port
USB-C
Output Port
LCD
Screen
Main Power
Button
IOT
Button
AC Output
Socket
AC Output
Power Button
DC Output
Power Button
DC 5521
Output Port
Cigarette Lighter
Output Port
AC Input Port
Solar/Car Input Port
AC Input Overload Protection
Extra Battery Port
Product Description
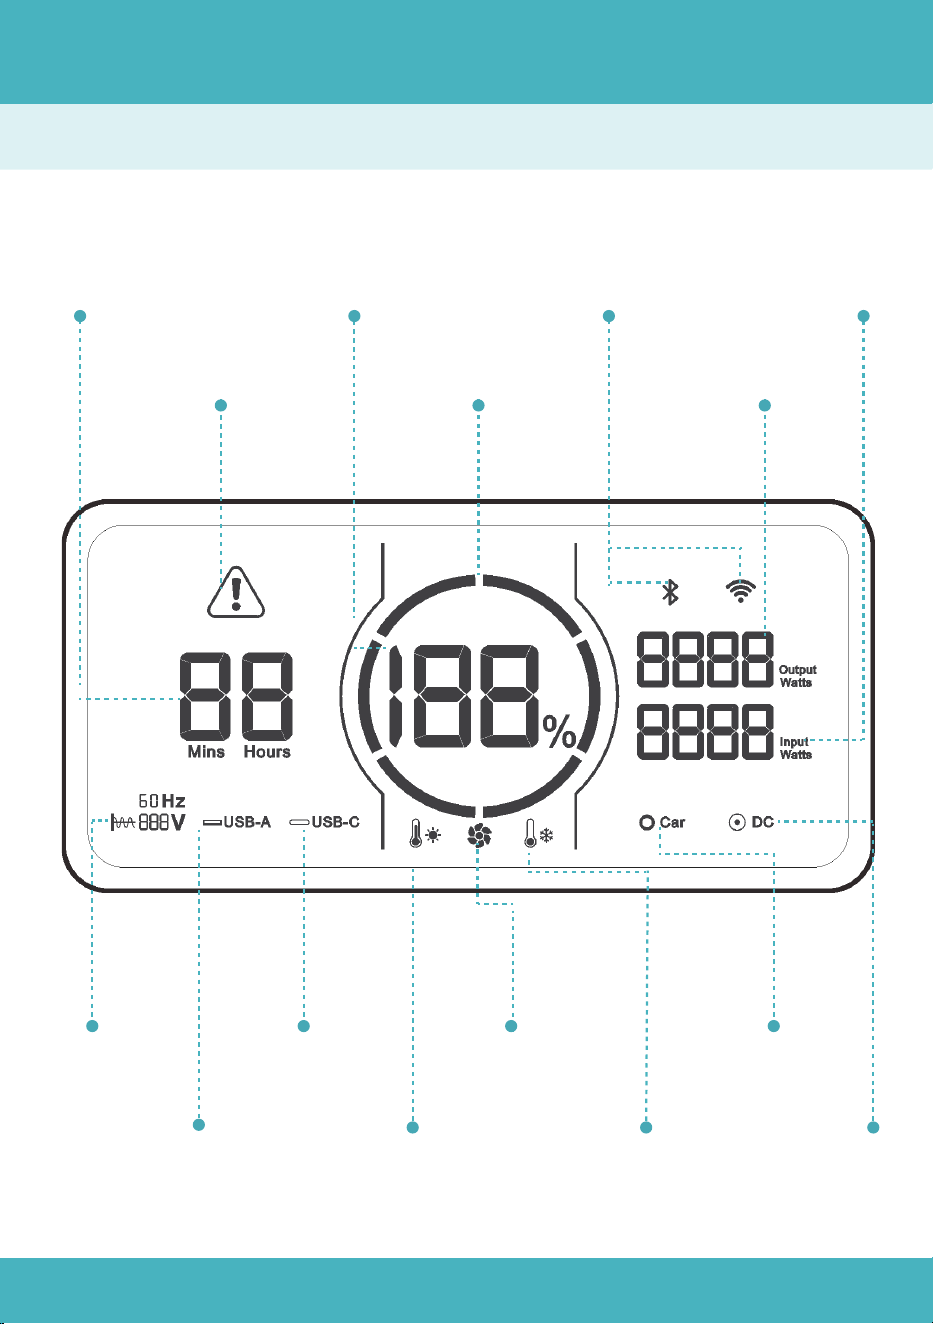
LCD Screen
08
Remaining discharge
time display
Error Warning
Battery Capacity
Percentage
Battery Capacity
Circle
WiFi&
Bluetooth
Output Power
Display
Input Power
Display
AC Output
Indicator
USB-A
Indicator
USB-C
Indicator
High temperature
lndicator
Cooling
Fan
Low temperature
lndicator
Cigarette Lighter
Indicator
DC 5521
Indicator
Instructions for use
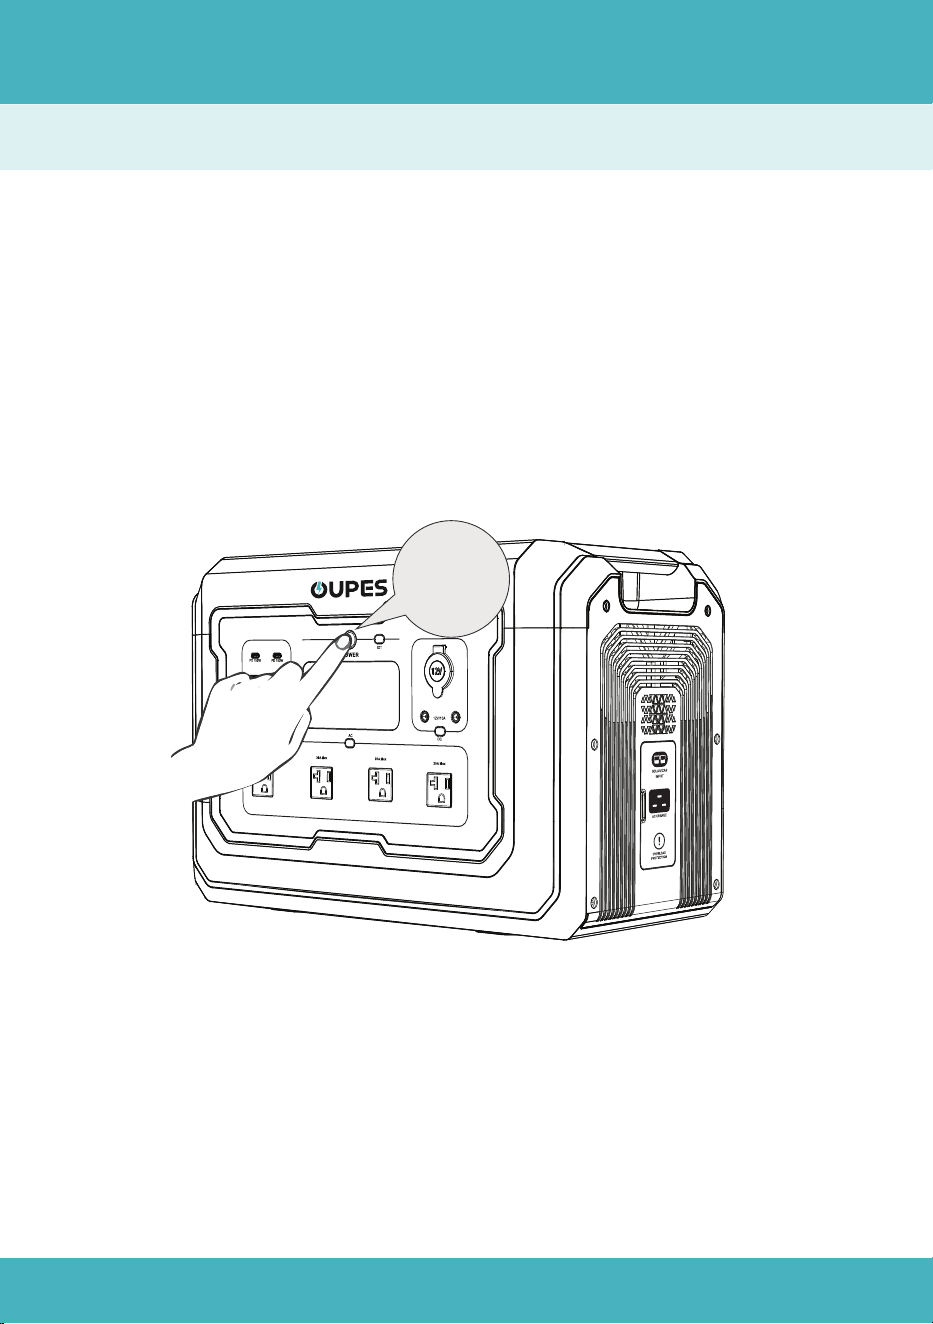
Power ON/OFF
09
Main Power:
a)Press and hold the main power button for 3 seconds to turn the main power
on or off.
b)When the main power is on, short press the main power button to turn the
screen on or off.
c)The product will shut down after 5 minutes without operation.
hold 3S
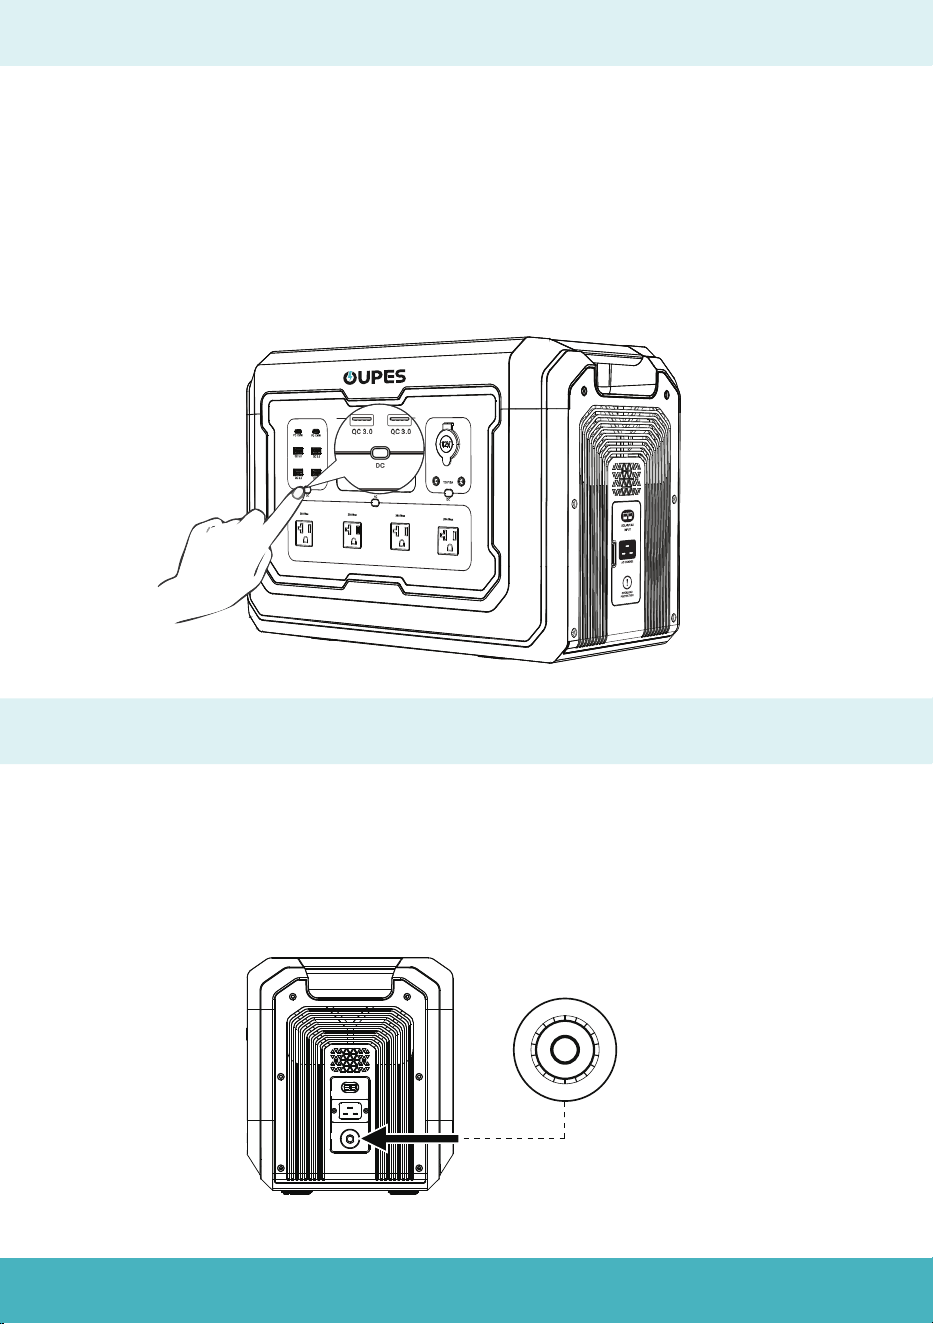
Power ON/OFF
AC Input Overload Protection
a)When AC input current exceeds 25A, the protector will blow automatically.
b)Please disconnect all the connections for safety reason, and ensure that the current
is lower than 25A. Then press the button to resume using.
10
AC/DC Output Power:
a) When the main power is on, press AC/DC output power button to turn on, press
them again to turn off.
b) The product will shut down after 6 hours without any load connected, which can
be adjusted on the APP.
P
R
E
S
S
O
T
R
E
S
E
T
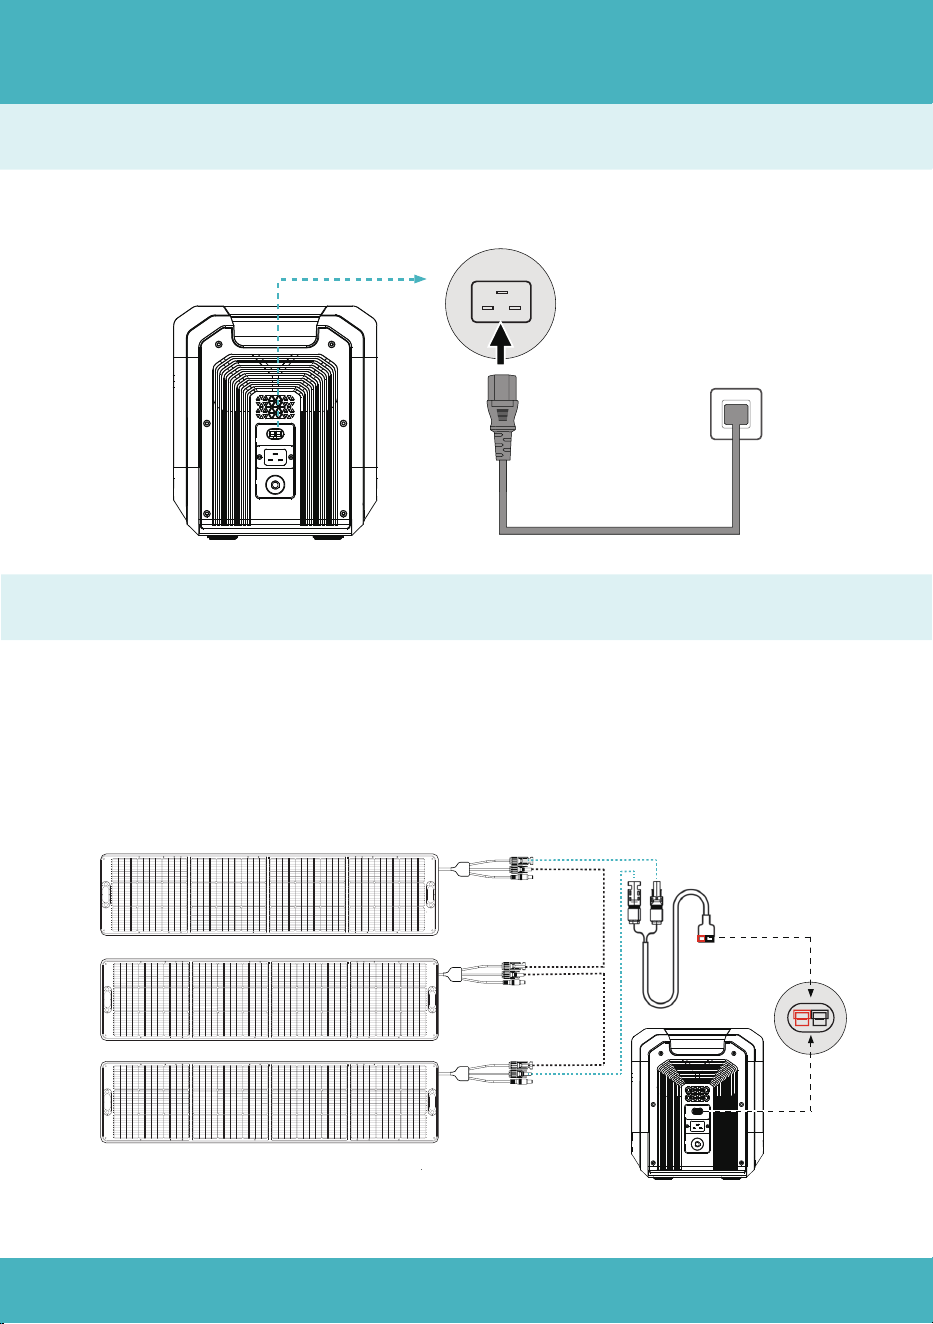
Recharge Methods
AC Charging
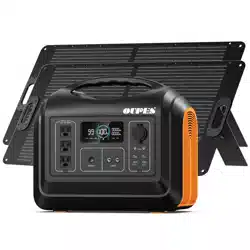
Solar Charging
Use AC charging cable to connect AC wall outlet and the power station.
a)Use MC4 to Anderson charging cable to connect solar panels and the power station.
b)Connect 3*240W solar panels at most in series to get maximum power.
c)Make sure the solar panels meet the following requirements:
OCV: 78V;Current: 14A;Max Power: 800W
11
Cigarette Lighter Charging
a)The cigarette lighter port supports 12V~15V, 8A car charging input.
b)Please ensure that the car is started before connecting the power station in case
that the car battery drains.
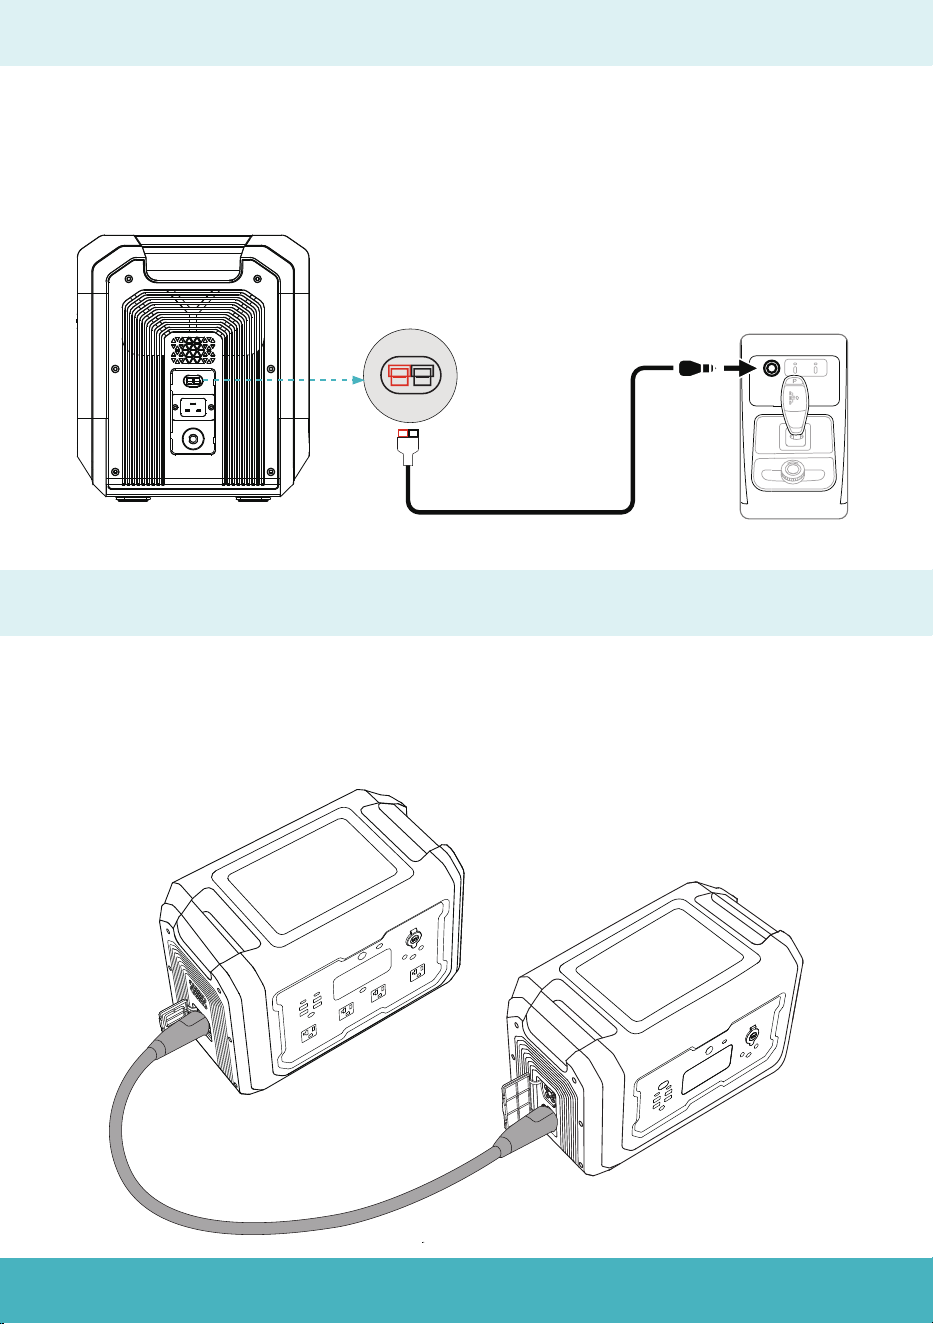
Extra Battery Charging
a)Turn off the power station and the extra battery before connecting or discon-
necting them.
b)Use battery expansion cable to connect the extra battery and the power station.
12

13
EPS(Emergency Power Supply) Function
a)EPS function is enabled by default with a 20ms switching when grid power is
cut off.
b)Charge the power station from power grid and connect the device to AC
output port as shown in the picture, then press AC output power button on.
c)Please do not connect the power station to equipment requiring 0ms uninter-
rupted power supply.
d)The total input and output power should lower than 2000W. Otherwise, the
power station will shut down in 1 minute.
14
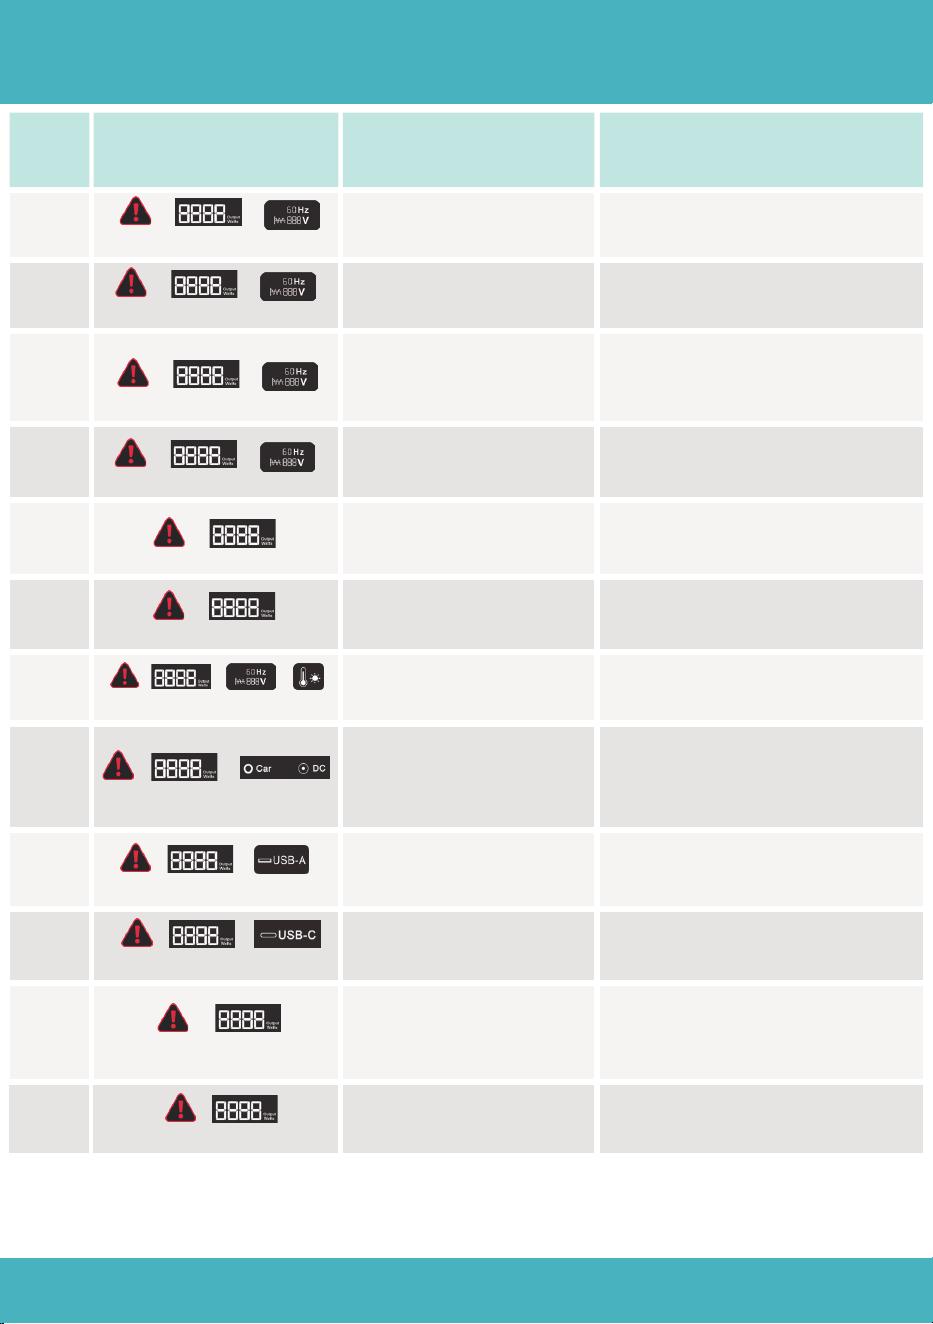
Error Code & Trouble ShootingEPS(Emergency Power Supply) Function
E000
Error
Code
Solution
Press the AC output
power button to restore.
Press the AC output power
button to restore.
E004
Automactically restores after
frequency returning to normal.
E005
Press the AC output power
button to restore.
E006
Turn off output power and rest
the device to restore.
E001
E002
Charge the device in time and
restart the corresponding
function button to restore.
E003
Press the AC output power
button to restore.
Cause
Abnormal AC input
frequency.
High and low bus
voltage.
Over temperature
of Inverter.
Overload of AC output.
Battery voltage of
inverter input is low.
Over voltage and under
voltage of AC output.
Status
flashing, no output
+
+
flashing, no output
Short circuit of AC
output.
E010
Press the DC output power
button to restore.
Overload or short circuit
of the cigarette lighter
output port.
flashing, no output
E011
Press the DC output power
button to restore.
Overload or short circuit of
the USB-A port.
flashing, no output
+
+
E012
Press the DC output
button to restore.
Overload of the
USB-C port.
flashing, no output
flashing, no output
flashing, no output
+
+
flashing, no output
+
+
+
+
+
flashing, no input
+
+
+
+
E017
Turn on AC power again
after turning off main
power for 5 minutes.
Hardware is abonormal.
flashing, no output
+
+
+
flashing, no output
+
+
E020
Contact after sales service
team for further support.
BMS communication
failure.
flashing
+
15
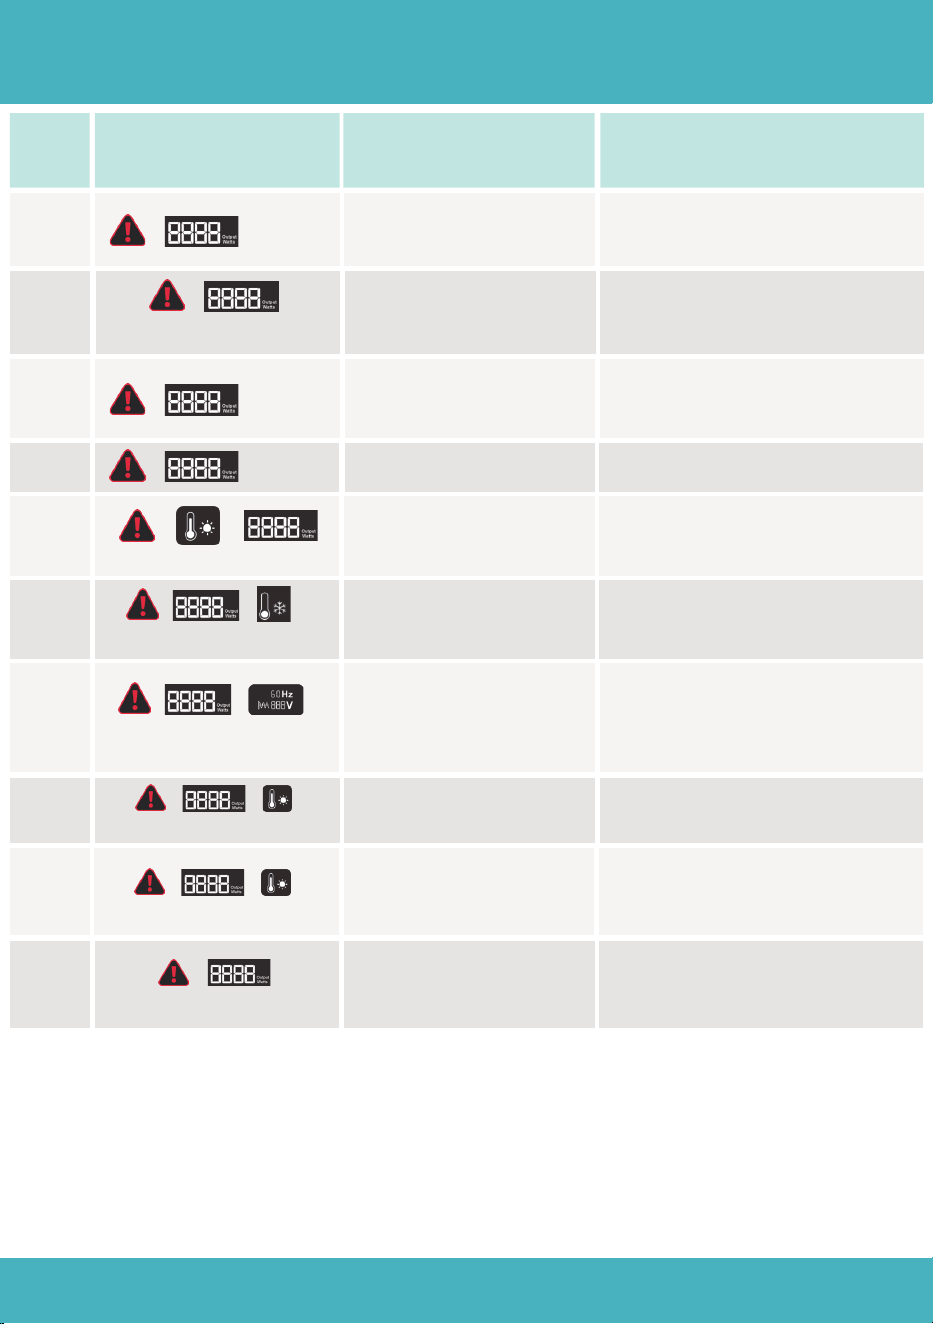
Error Code & Trouble Shooting
Error
Code
Solution
Cause
Status
flashing, no input
E021
Stop charging and discharge
until the battery voltage
returns to normal.
E022
E023
Charge the device until the
voltage returns to normal.
Stop charging and start
discharging until the battery
voltage returns to normal.
E024
E025
Charge the device until the
voltage returns to normal.
E026
The device will automatically
return to normal when the
temperature returns to normal.
E027
Reduce AC loads and press the
AC power button to restore.
Over voltage of single
battery cell
Low Voltage of single
battery cell.
Battery total voltage
too high
Battery total voltage
too low
High temperature of
battery.
System overload, AC
output is over 2100VA or
the total AC and DC
output is over 2100W.
Low temperature of
battery.
The device will automatically
return to normal when the
temperature returns to normal.
flashing
flashing
flashing
flashing, no output
flashing, no ouput
+
+
flashing, no AC output.
DC output is normal.
flashing, no output
E028
Charge over
temperature.
Charge the device after the
temperature returning to normal.
flashing, no input
flashing, no input
E030
Connect the wrong
expansion battery.
Connect correct extra
battery to restore.
flashing
+
flashing, no input
E029
Over temperature of
MOSFET.
The device will automatically
return to normal when the
temperature returns to normal.
flashing, no intput
+
+
+
+
+
+
+
+
+
+
+
+

Certification and Compliance
FCC Warning
This device complies with part 15 of the FCC Rules. Operation is subject to the following
two conditions: (1)This device may not cause harmful interference, and (2) this device
must accept any interference received, including interference that may cause unde-
sired operation. Any changes or modifications not expressly approved by the party
responsible for compliance could void the user's authority to operate the equipment.
01
FAQ
Scan QC code for FAQ.
16

FCC Warning
This equipment has been tested and found to comply with the limits for a Class B digital
device, pursuant to part 15 of the FCC Rules. These limits are designed to provide
reasonable protection against harmful interference in a residential instal- lation. This
equipment generates uses and can radiate radio frequency energy and, if not installed
and used in accordance with the instructions, may cause harmful interference to radio
communications. However, there is no guarantee that interference will not occur in a
particular installation. If this equipment does cause harmful interference to radio or
television reception, which can be determined by turning the equipment off and on, the
user is encouraged to try to correct the interference by one or more of the following
measures:
(1)Reorient or relocate the receiving antenna.
(2)Increase the separation between the equipment and receiver.
(3)Connect the equipment into an outlet on a circuit different from that to which the
receiver is connected.
(4)Consult the dealer or an experienced radio/TV technician for help.
This equipment complies with FCC radiation exposure limits set forth for an uncon-
trolled environment.
This equipment should be installed and operated with minimum distance 20cm
between the radiator & your body.
Notice:
17

Customer Service Hours (EST):
Call Us: +1 (209) 400-9909(9:00 AM - 5:00 PM, Mon. - Fri.)
Email Us: 9:00 PM - 5:00 AM, Mon. - Fri.
https://oupes.com