Compact RV Dryer
Capacity: 3.2Kg
P/N: 041834
USER MANUAL
Warranty
PRODUCT WARRANTY
This product includes a 1 year limited warranty. To view our full Warranty Statement,
please visit www.camec.com
If your product is faulty or you are experiencing difficulties using this product and
require assistance, please contact our warranty department as listed below:
Australia Ph: 1300 654 936 or email [email protected]
New Zealand: 09 225 1910 or email [email protected]
V1.0 © 2017 Camec Pty Ltd.
041834
3.2kg
Timer knob does not
turn dryer on
Solution
Check the RV’s 240V fuse
Is the motor operating?
Increase the drying time.
turning, replace drive belt.
Does the dryer have power?
Check for power as per above.
If motor is operating but drum not
Clean the filters.
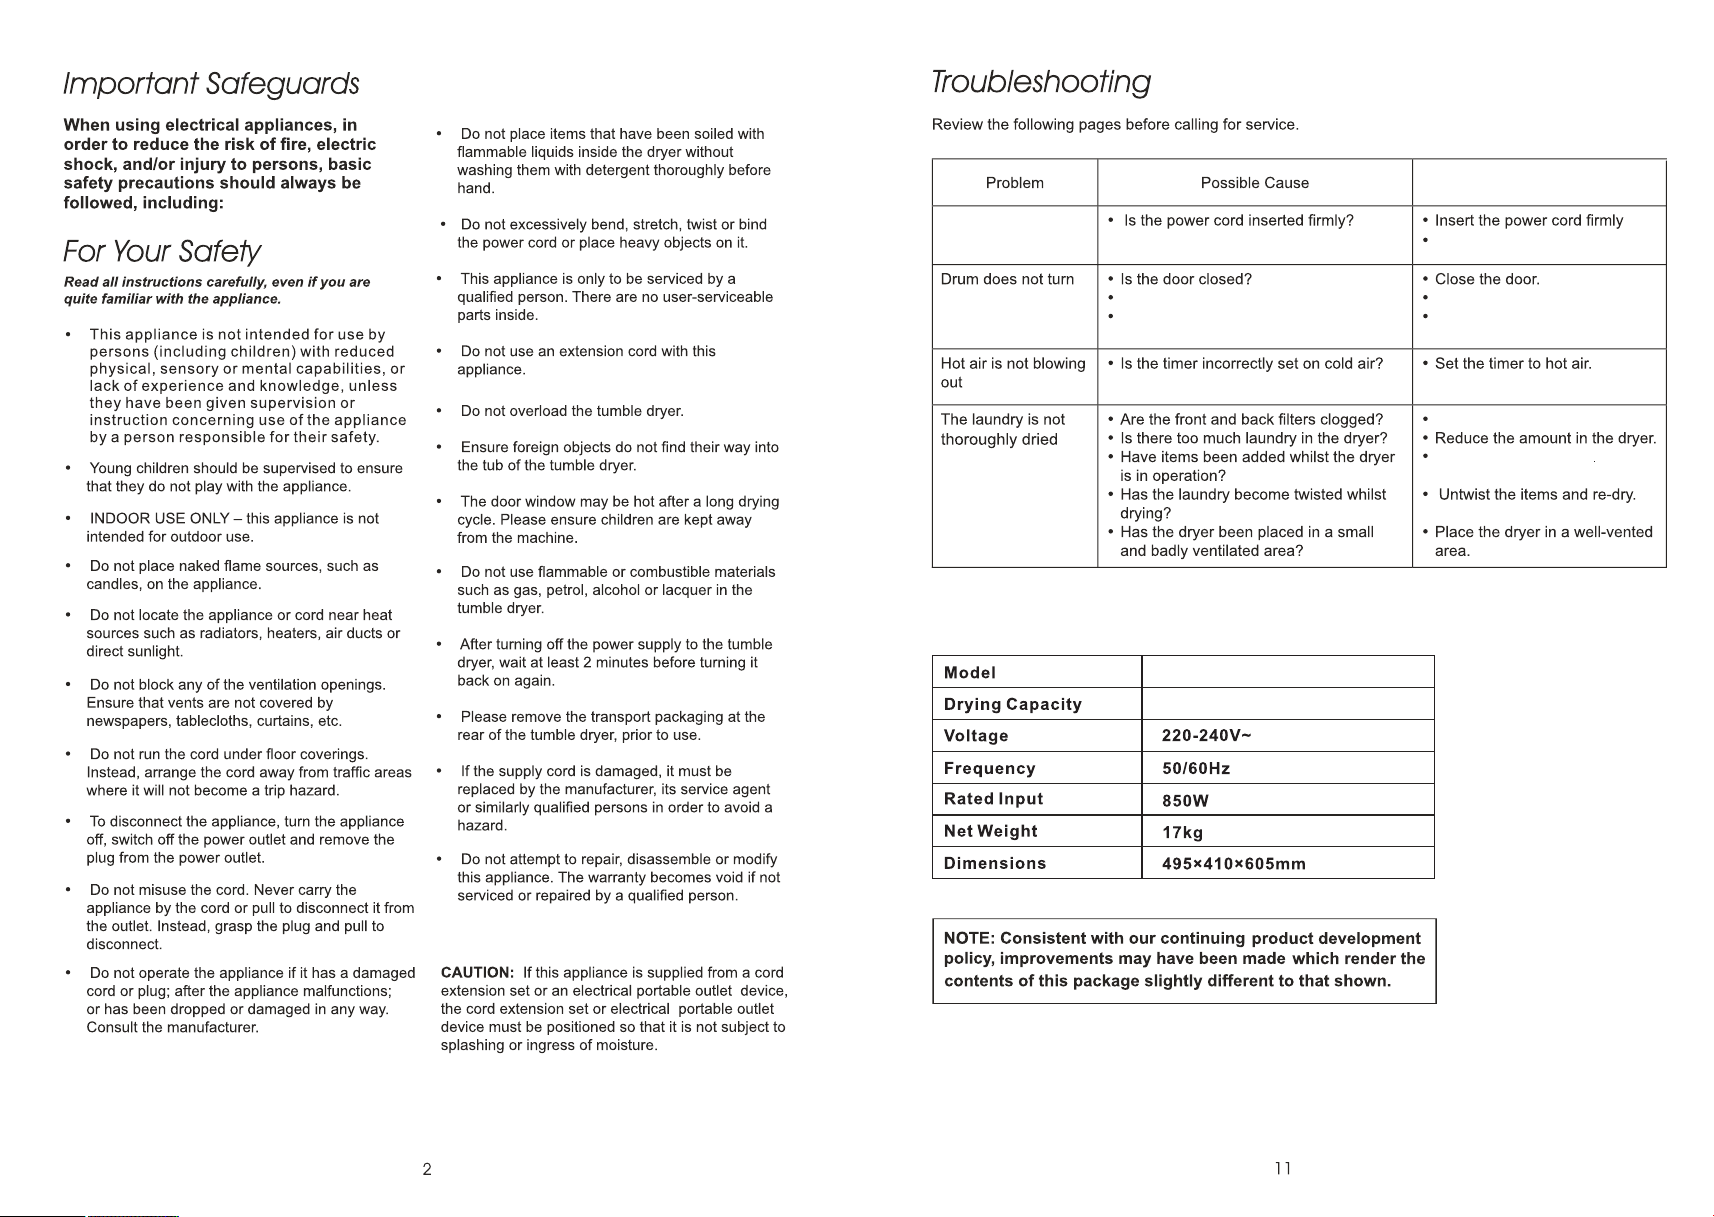
SPECIFICATIONS
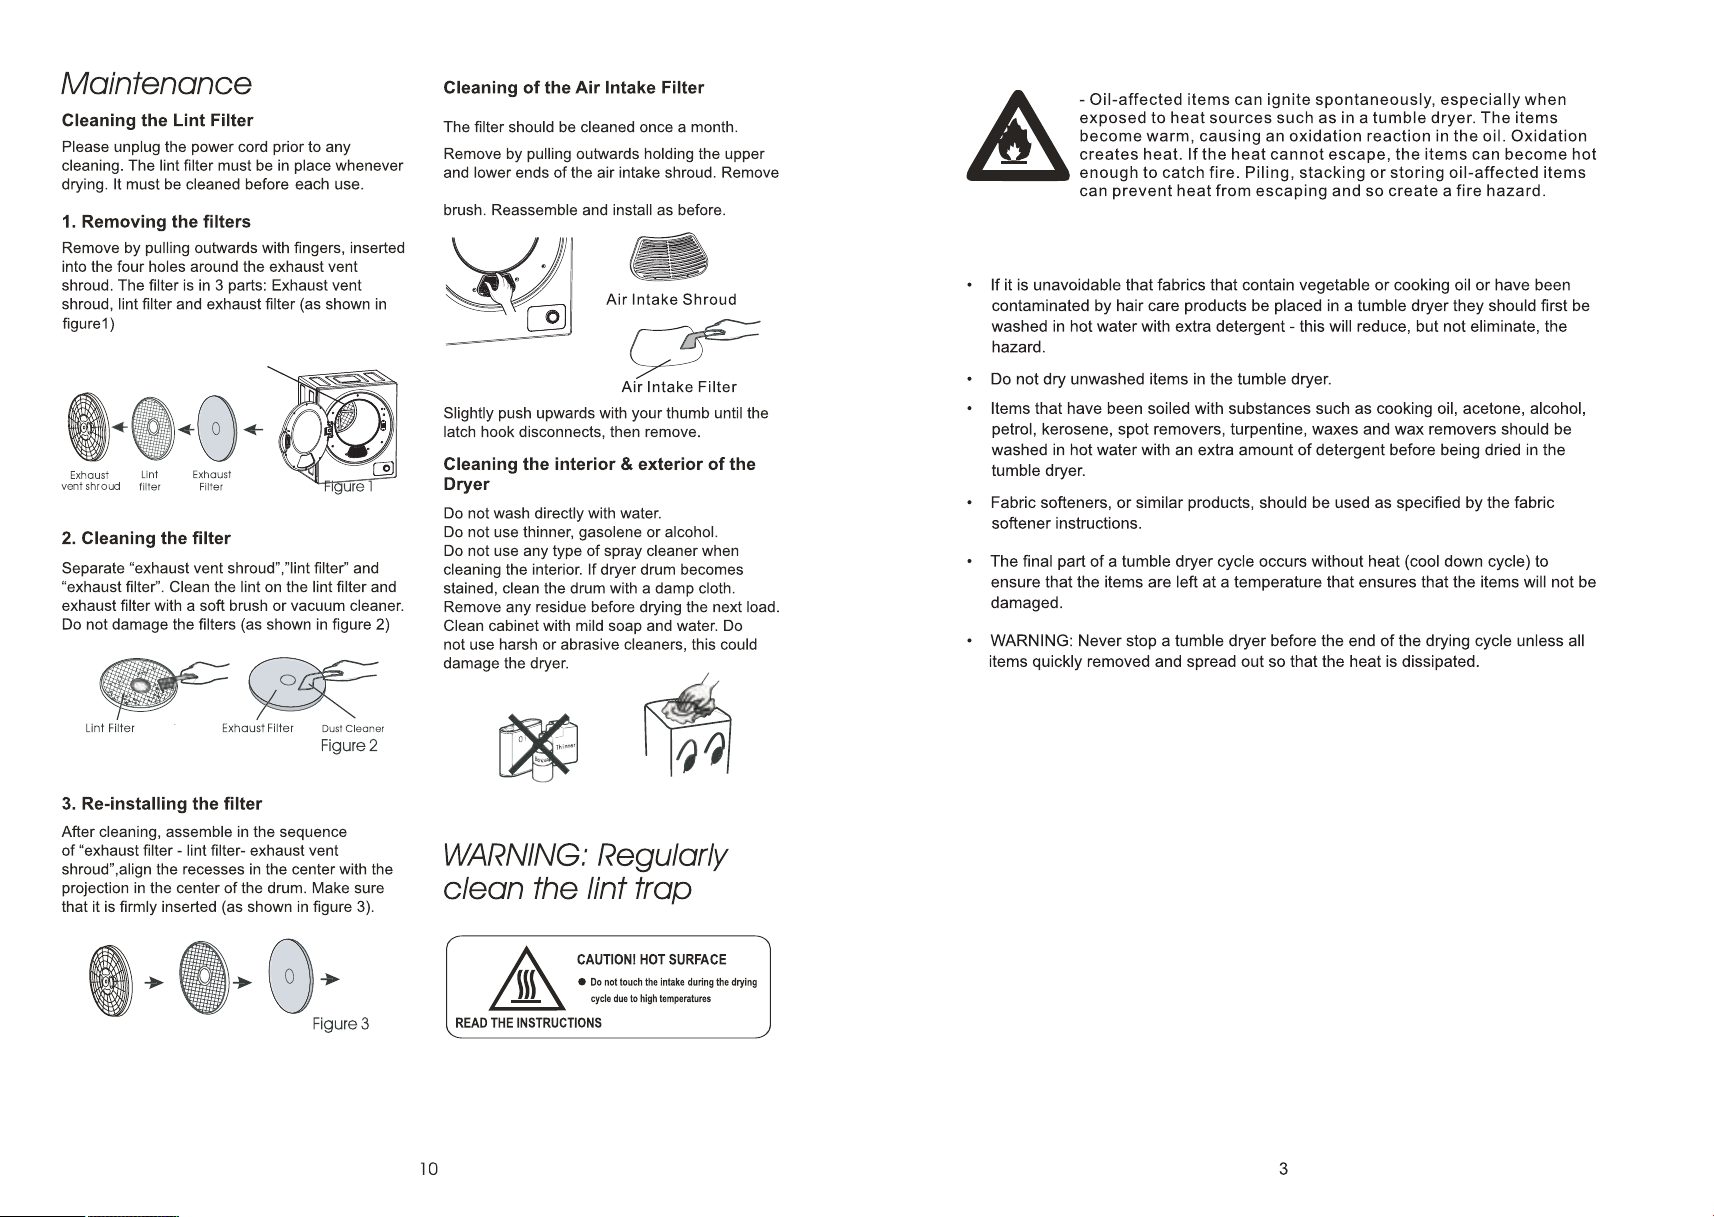
Filters are located at
the rear of the drum.
the filter behind the shroud and clean it with a soft

Component Identification
For RV mounting, we advise to mount the dryer
in a cabinet or shelving with at least 100mm
clearance between the rear of the dryer and the
wall and 100mm clearance above the dryer.
Ventilation must be supplied either by installing a
wall vent directly behind the dryer’s rear vent or
alternately using the included vent kit to direct
the air to an external vent in a different location.
Left/Right-hand door hinging
This dryer is specially designed to be mounted
standard (left-hand door hinge) or upside down
(right-hand door hinge) so it matches the hinging
of the front load washing machine and/or allows
the most clearance in a small RV environment.
Two stickers are provided for the selector knob
depending on mounting orientation. Simply
remove the knob by pulling it off it’s shaft, apply
the appropriate sticker and reinstall the knob.
CABINET STYLE INSTALLATION
Please see installation example below when
used in conjunction with a front-load washing
machine in a cabinet-style installation.
Note a minimum of 100mm clearance is required
at the back of the dryer and above the dryer,
along with a vent or duct kit.
SECURING THE DRYER
If cabinet mounted, (not supplied) can M6 bolts
be used to secure the dryer to the mounting shelf
using 4 mounting foot locations on the bottom of
the machine (indicated on FIG A). Mounting
points should be secured at the base of the
machine (not from the top). If mounting the dryer
upside-down, please secure the dryer with
appropriate screws/brackets. Make sure the
dryer is checked internally for clearances if
screwing through it’s chassis.
DUCT KIT
This dryer is supplied with duct kit that allows the
hot air from the dryer to be routed to an
appropriate area or vent.
It is installed by attaching one exhaust connector
to the rear of the dryer (Fig. A)
Mounting
points
Then connect the flexible hose and stretch to the
desired length. The hose can be stretched to a
length of up to 1.5m. A second exhaust adaptor is
supplied to attach to the exhaust end of the hose
if required that can be mounted in front of a vent.
Mounting in other locations.
The dryer should be positioned away from heat
and direct sunlight.
If the dryer is not cabinet mounted, it must be
placed on firm horizontal ground. Do not place
the dryer on carpet as this may block the intake.
The dryer comes with fixed legs that need to be
screwed in and levelled to ensure stability.
Fig. A
Exhaust
Connector
100mm
min
100mm min
FRONT VIEW
SIDE VIEW
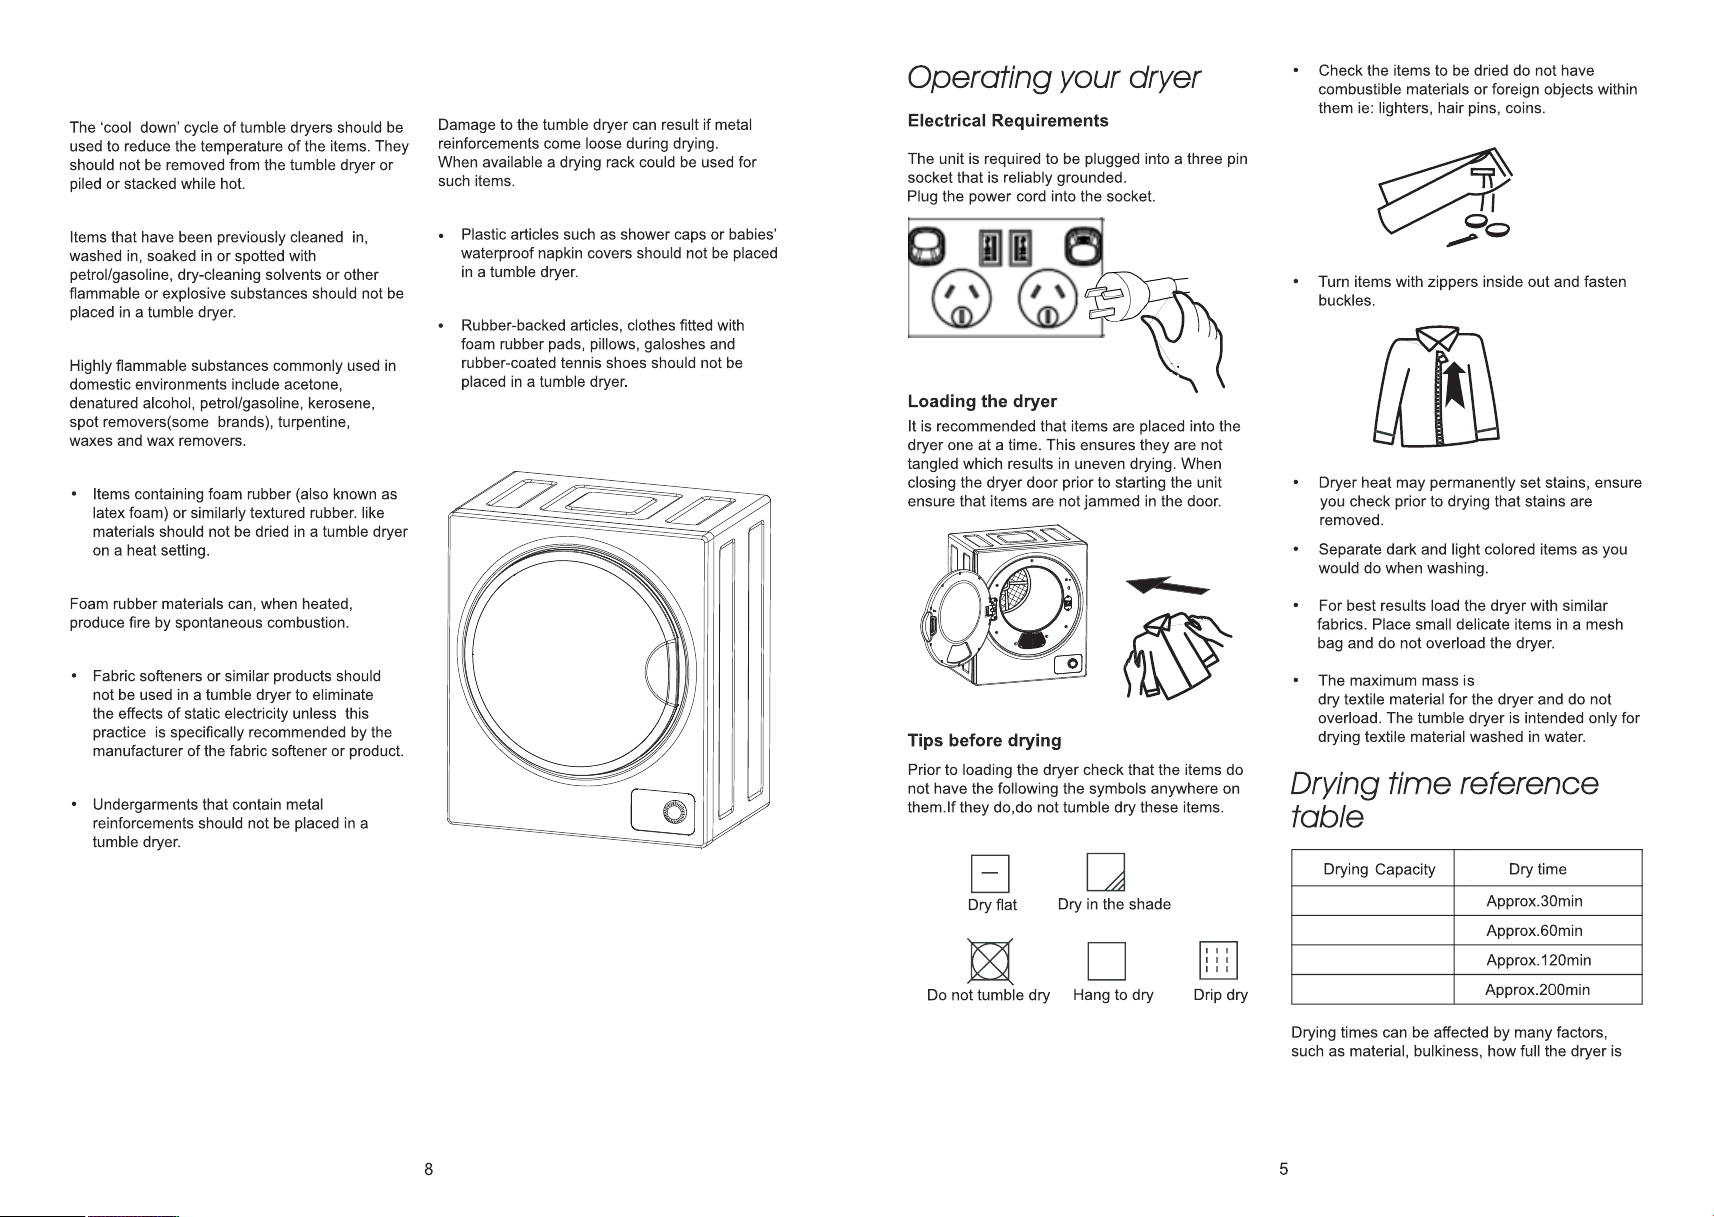
Approx. 3.2kgApprox. 3.2kg
Approx. 2.0kg
Approx. 0.5kg
Approx. 1.0kg
etc. The above table is a guide only.
3.2 kilograms of
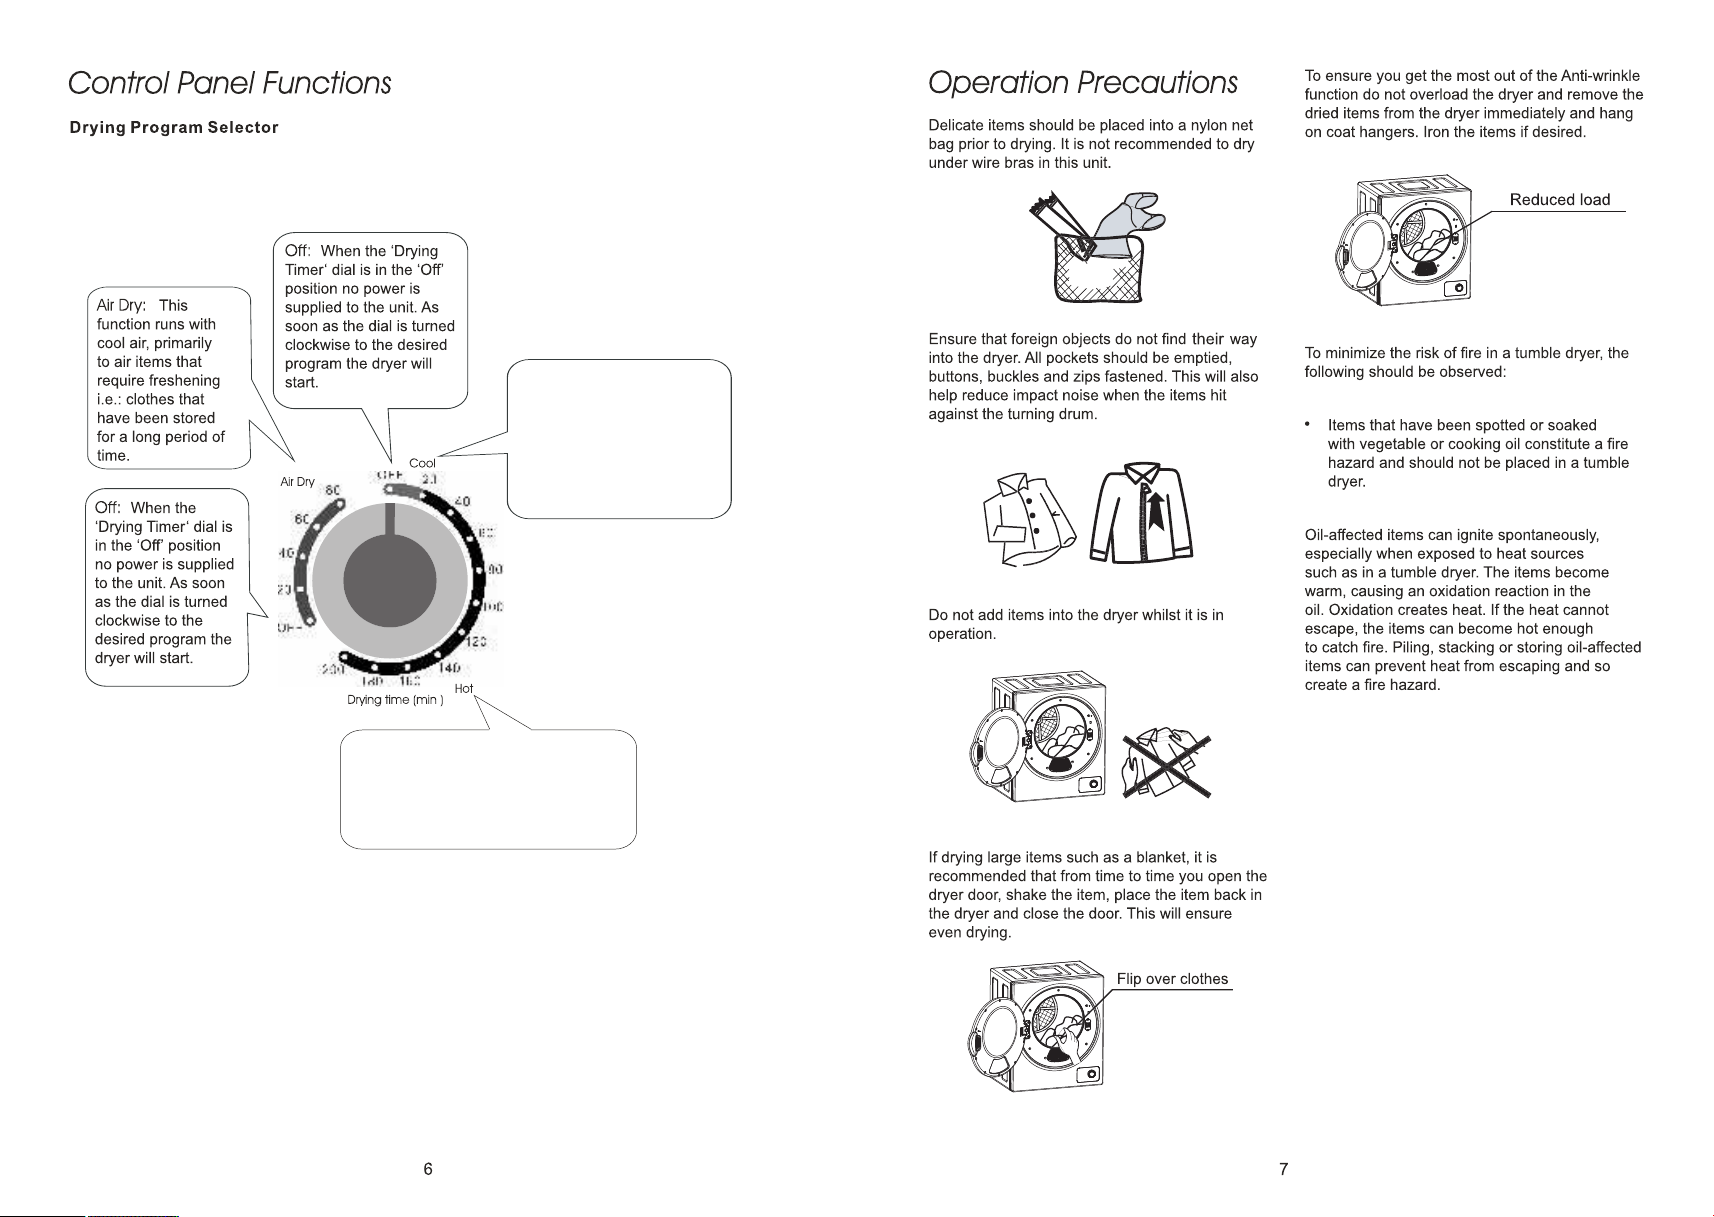
Cool: This function is
generally used to cool the
items that have just been
dried. This helps to prevent
creasing. Instead of the
motor pushing heat in to the
drum, the motor will
generate cool air.
There are three drying combinations available: Cool, Hot and Air dry.
Hot: Main dryer setting. For larger
loads (drum more than 1/2 full), set the
timer for more than 120 minutes.
Drying time varies with the types of
clothes being dried and the ambient
temperature.