Super High Efficiency Condensing
Tankless Water Heater
Outdoor Kit
Installation Instructions
AP22604 Rev 02
2
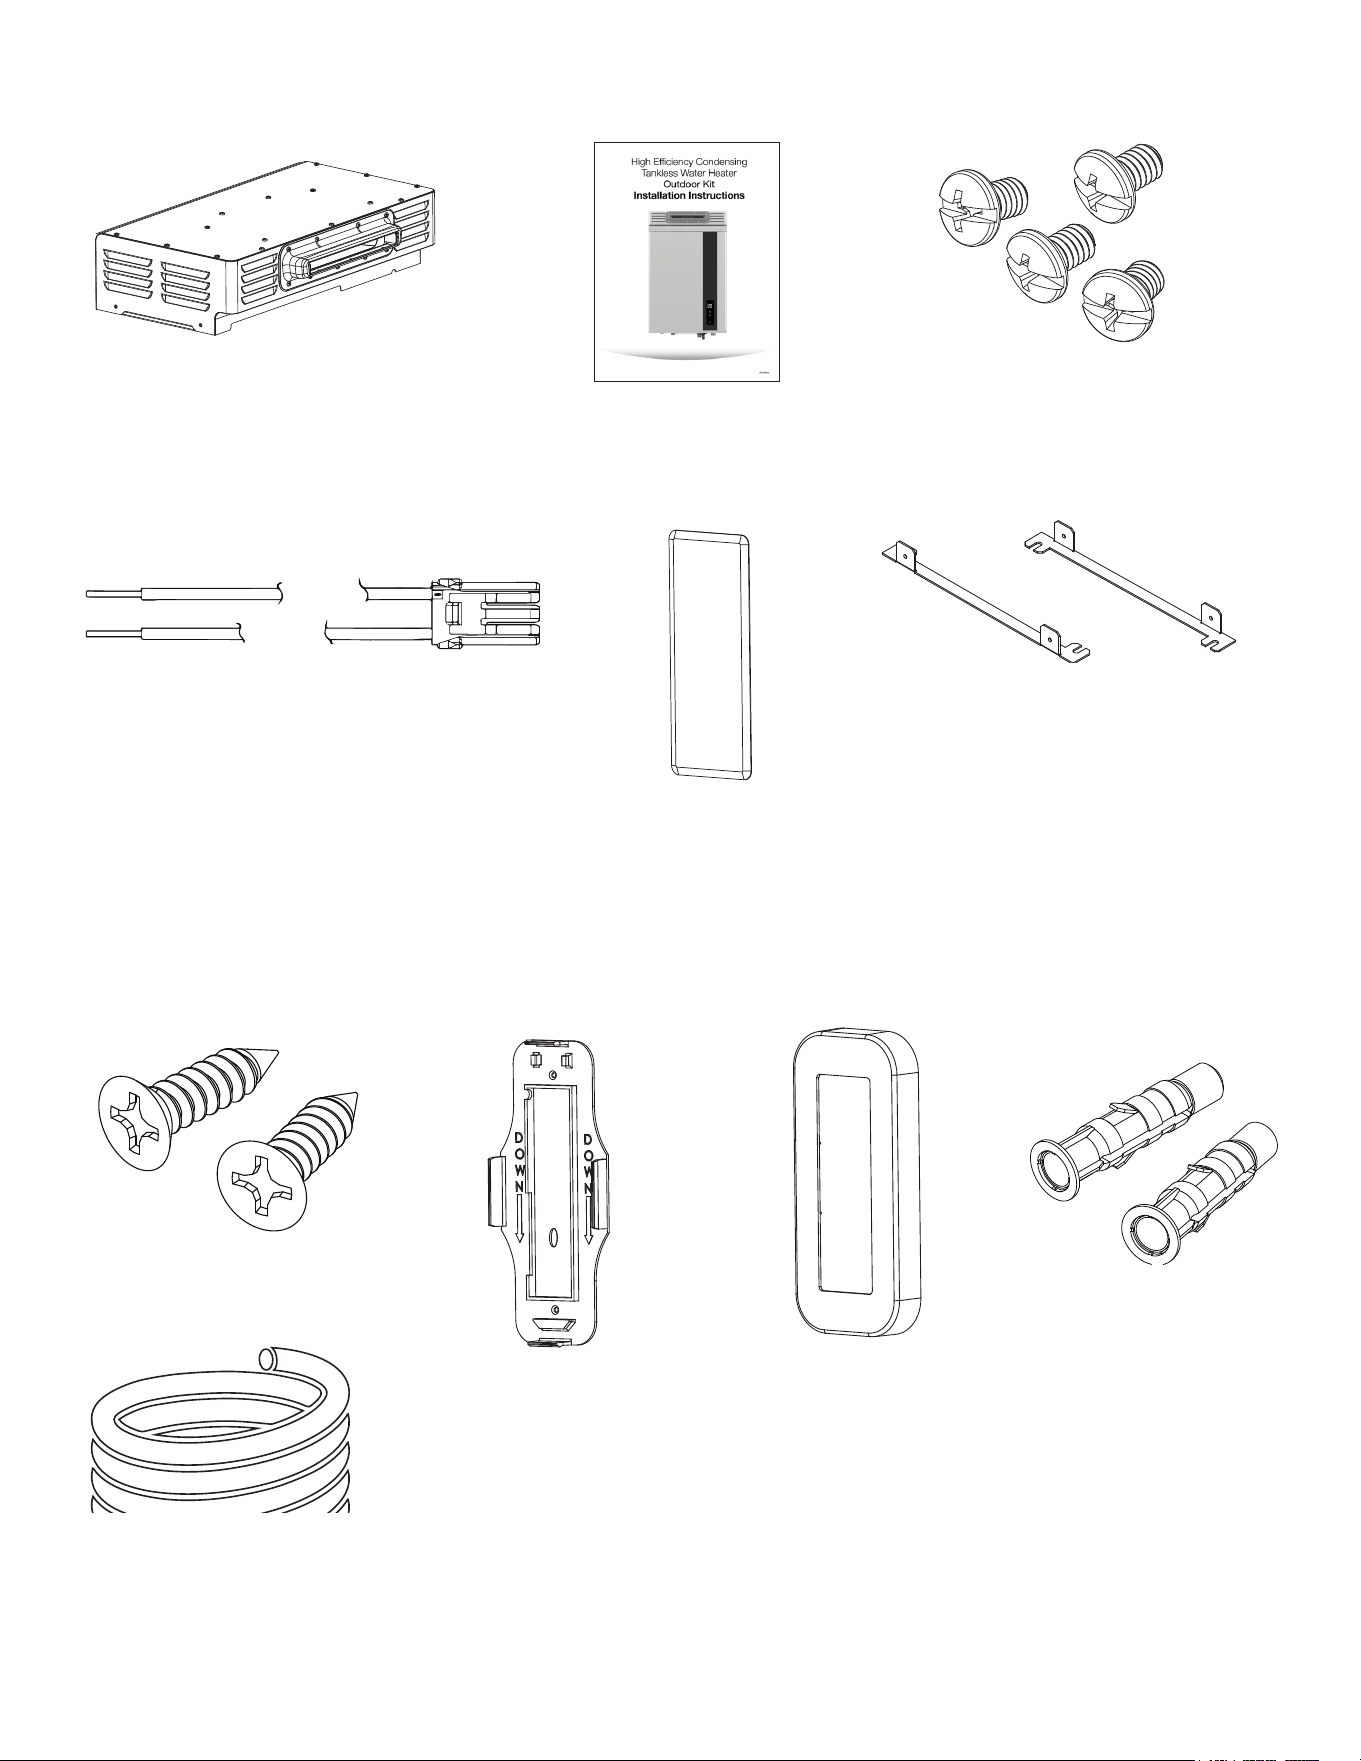
CONVERSION KIT CONTAINS THE FOLLOWING PARTS:
FOR WIFI MODELS ONLY:
Outdoor Box
Outdoor Kit Mounting Bracket
Wood Screws (2) for
Display Mount
Anchors (2)
Display Mounting
Back
Display Mounting
Front
Screws (4) for Slide
Mounting Bracket
10 ft. Cable
Display Cover
Installation
Instructions
Outdoor Power Cord
WARNING:
If the information in these instructions is not
followed exactly, a re or explosion may result,
causing death, personal injury, or property
damage.
SAFETY PRECAUTIONS
• Read these instructions and the water heater
instruction manual before installing this outdoor
conversion kit.
• Use this outdoor conversion kit for only
the intended purpose as described in these
instructions.
• Be sure to install your water heater properly in
accordance with local codes and the installation
instructions provided.
• DO NOT attempt to repair or replace any other
parts not provided in this outdoor conversion kit.
• All servicing should be referred to a qualied
technician.
The installation of this Outdoor Conversion Kit
requires that the installer have the following tools:
1. Phillips head screw driver
2. Wire nuts (2)
3. Power cord for hard-wiring
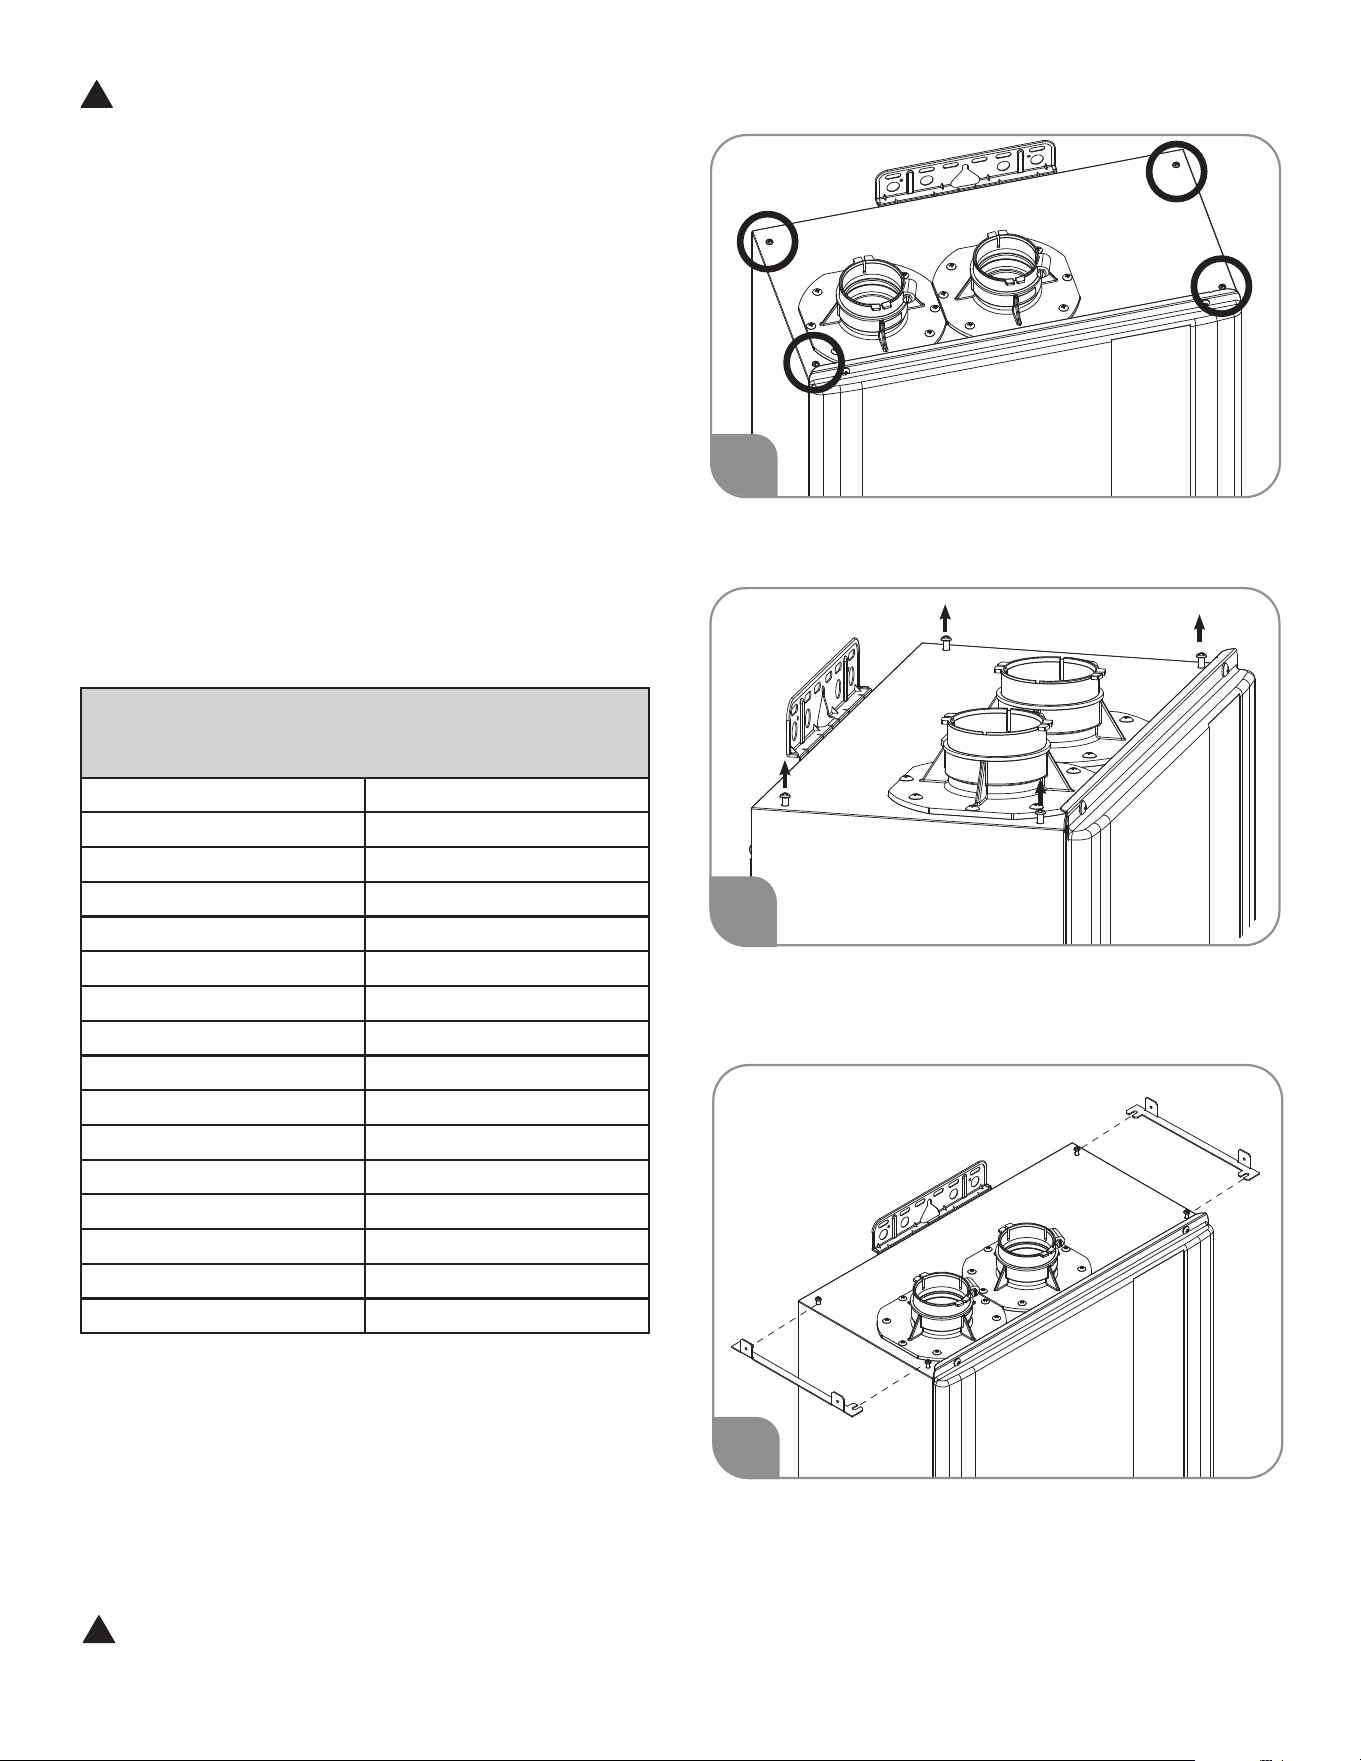
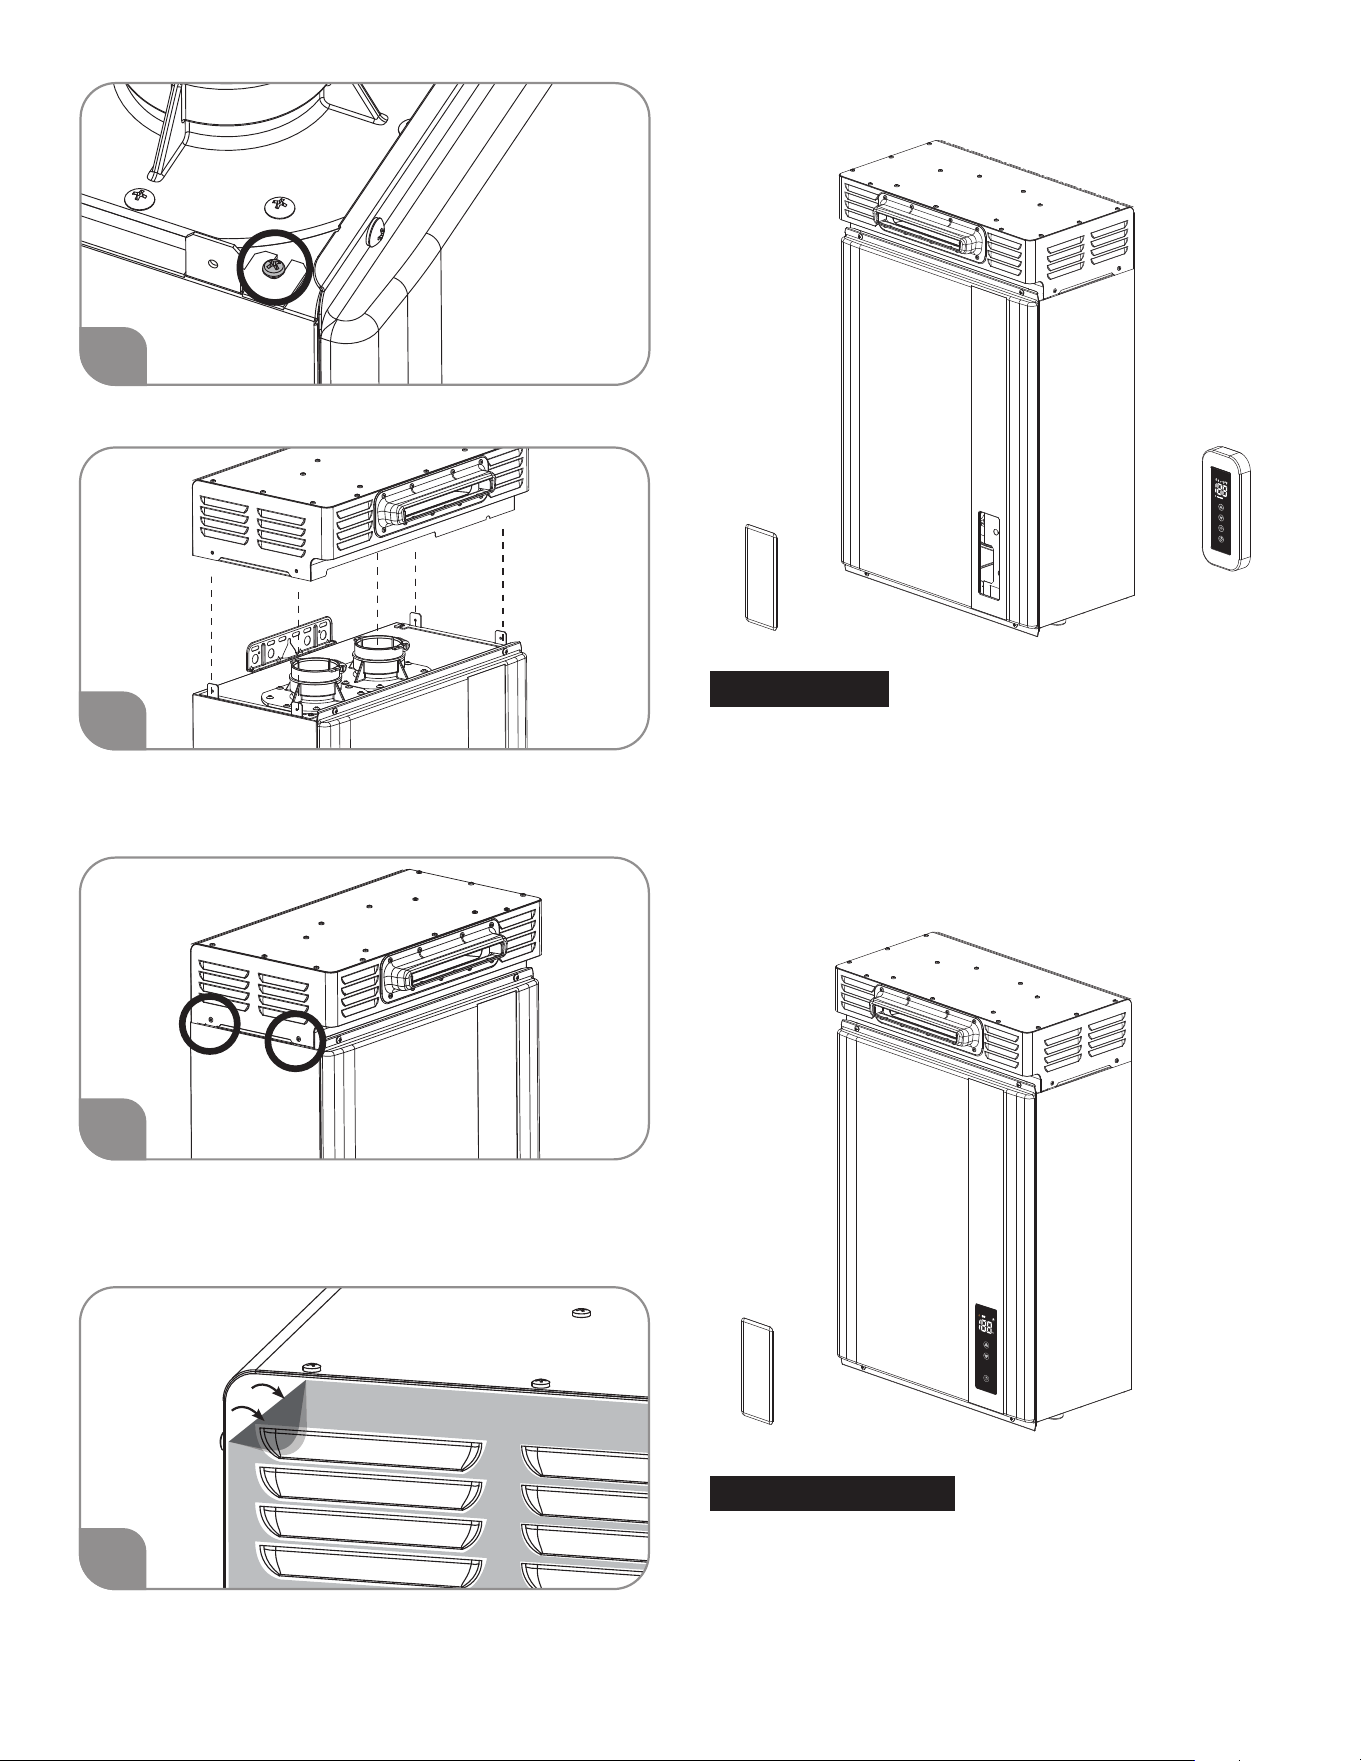
EXHAUST HOOD INSTALL
Locate 4 screws on top of the unit that will be used to
mount the exhaust hood.
Loosen the four screws to prepare for the mounting
brackets. (5 or 6 turns).
Slide mounting bracket onto screws. Before tightening,
ensure bracket is inserted along guides fully.
!
!
1
2
CAUTION: Front opening and their surrounding area can be hot while the water heater is
operating. DO NOT touch these area. DO NOT block these opening.
3
The outdoor conversion instructions are only
for tankless water heaters with model numbers
beginning with:
ECOH160DVELN-3 RTGH-90DVLN-3
ECOH160DVELP-3 RTGH-90DVLP-3
ECOH180DVELN-3 RTGH-95DVELN-3
ECOH180DVELP-3 RTGH-95DVELP-3
ECOH200DVELN-3 RTGH-95DVLN-3
ECOH200DVELP-3 RTGH-95DVLP-3
RMTGH84DVELN-3 RUTGH-68DVLN-3
RMTGH84DVELP-3 RUTGH-68DVLP-3
RMTGH90DVELN-3 RUTGH-84DVLN-3
RMTGH90DVELP-3 RUTGH-84DVLP-3
RMTGH95DVELN-3 RUTGH-90DVLN-3
RMTGH95DVELP-3 RUTGH-90DVLP-3
RTGH-68DVLN-3 RUTGH-95DVELN-3
RTGH-68DVLP-3 RUTGH-95DVELP-3
RTGH-84DVLN-3 RUTGH-95DVLN-3
RTGH-84DVLP-3 RUTGH-95DVLP-3
3
Tighten screws to secure the brackets to the unit.
Place the exhaust hood on the top of the unit by aligning
the exhaust pipe to the outlet ue connection of the unit.
Secure the exhaust hood to the mounting brackets with 4
screws.
After completion of all installation steps, peel o
protective lm from all external surfaces.
DISPLAY INSTALLATION OPTIONS
WiFi Models
NOTE: When converting indoor Wi-Fi with
LeakGuard models to outdoor, included cable
and indoor mount should be used. This cable
disables LeakGuard in outdoor installations in
order to avoid false alarms and shut-o. Indoor
installation also improves WiFi connectivity.
Non-WiFi Models
• Display cover installed to protect display. Display
cannot be removed from unit.
• For control inside the home, an optional bath
remote must be installed.
!
!
6
7
4
5
4

POWER CORD INSTALL
Remove 4 screws of Front Cover to access into unit.
Remove power cable by disconnecting Molex connector.
Connect wire harness to the power supply via wire nuts.
Reconnect the Molex connector of the wire harness to the
unit.
WIFI MODELS ONLY
WALL MOUNTED DISPLAY INSTALL
Replace display cable with 10ft cable.
Run cable through wall to display location.
Use two screws to mount back of wall mount to wall/
desired location.
2
1
3
White
Black
4
5
1
1A
2
3
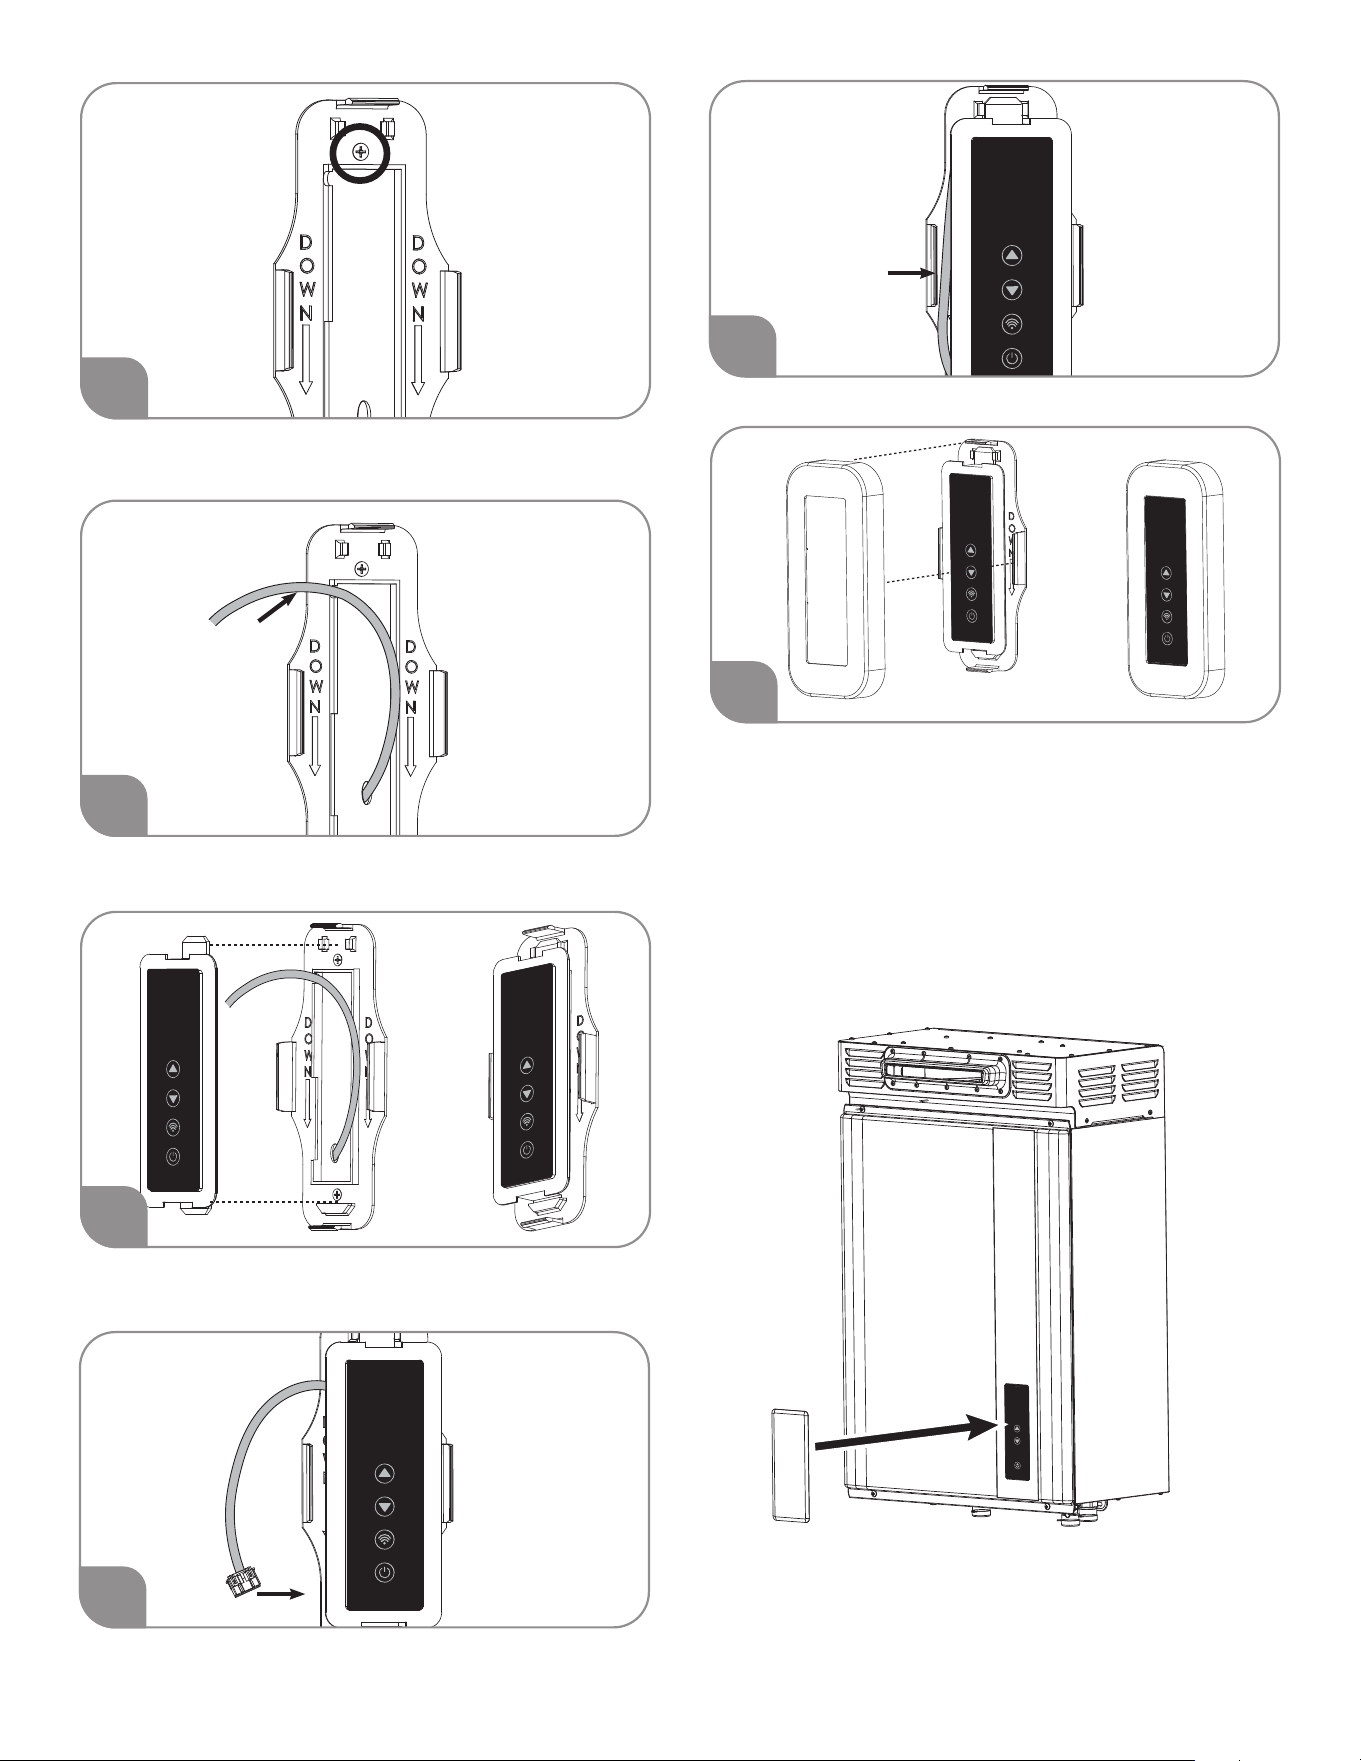
Ensure screw is ush to mount and does not protrude, as
it will interfere with the display.
Pull wire through designated route at the top left of the
mount.
Rest display in “cup” at the bottom of mount and push
into retention clips at the top.
Have enough slack in wire to plug into the bottom of the
display.
Ensure wire is tucked inside of the retention clip.
Front cover snaps onto the back of wall mount kit.
NON-WIFI DISPLAY COVER INSTALL
NOTE: When converting indoor Wi-Fi with
LeakGuard models to outdoor, included cable
and indoor mount should be used. This cable
disables LeakGuard in outdoor installations in
order to avoid false alarms and shut-o. Indoor
installation also improves WiFi connectivity.
• Peel release paper to expose adhesive.
• Place display cover over display.
• Press rmly around entire cover border to ensure
water tight seal.
5
6
4
6
7
8
9

7
CAUTION:
DO NOT remove the display cover once placed.
It will compromise the water tight seal. Remove 4
screws and the front cover to operate the display.
WARNING:
Outdoor installation of the water heater requires
a junction box and hard-wire (permanent) power
supply per National code, state code or local code.
Without an appropriate junction box or hard-wiring
(permanent) power supply, electric shock or short
circuit can cause death, personal injury or property
damage.
1 YEAR LIMITED WARRANTY
1 Year Limited Warranty – This part will be replaced at no cost (upon receipt of the defective part and proof of purchase) if it
becomes defective during normal use within one year from date of purchase. This Limited Warranty does not cover labor or any other
related expenses.
!
!


