
New 10/24 APDC215ES12
PARA REDUCIR EL RIESGO DE INCENDIOS, DESCARGAS ELÉCTRICAS SIEMPRE SIGA LAS
SIGUIENTES INSTRUCCIONES Y ADVERTENCIAS:
SERVICIO AL CLIENTE:
E-mail: [email protected] Sitio web: www.lasko.com
Nuestro equipo de atención al cliente está disponible para brindarle ayuda con el producto y responder preguntas de mantenimiento y repuestos.
Chatea con nosotros en www.lasko.com de lunes a viernes de 8am a 9pm EST(Válida solo en EE. UU. Y Canadá). Tenga el número de modelo a
mano, así como el tipo y estilo de dispositivo. Encontrará esta información en la parte inferior del producto.
Departamento de Atención al Cliente,
820 Lincoln Ave., West Chester, PA 19380
(No envíe productos a esta dirección).
LASKO PRODUCTS, LLC. GARANTÍA LIMITADA (VÁLIDA SOLO EN LOS ESTADOS UNIDOS Y CANADÁ)
Alcance de la garantía: Este producto tiene garantía por defectos de fabricación o de materiales.
Duración de la garantía: Esta garantía se aplica solo al comprador original del producto y tiene una duración de dos (2) años desde la fecha de
compra original o hasta que el comprador original venda o transfi era el producto, lo que ocurra primero.
Accionar de Lasko: Durante el período de garantía, Lasko reparará o sustituirá, a su entera discreción, cualquier pieza que resulte defectuosa o
sustituirá todo el producto por un modelo igual o de características similares. Para todos los reclamos de garantía, el producto debe ser devuelto a
Lasko Products, LLC, con los gastos pagados por el cliente, junto con la prueba de compra y dentro del período de la garantía. Contáctese con el
departamento de atención al cliente de Lasko para obtener una autorización de devolución. No devuelva productos sin dicha autorización puesto
que no se procesará la garantía si así lo hiciera.
Exenciones de la garantía: Esta garantía no aplica si el producto sufrió daños o fallas a causa de un accidente, manipulación o uso inadecuados,
daños de transporte, abuso, mal manejo, reparaciones no autorizadas que se hicieran o se intentaran hacer. Esta garantía no cubre los gastos de
envío de devolución de los productos a Lasko para su reparación o sustitución. Lasko pagará los gastos de envío desde sus instalaciones, luego
de haber reparado o sustituido el producto.
Todas y cada una de las garantías, expresas o implícitas (incluyendo, sin limitación, cualquier garantía implícita de comercialización), tienen una
duración de dos años desde la fecha de compra original o hasta que el comprador original venda o transfi era el producto, lo que ocurra primero. En
ningún caso, Lasko será responsable bajo ninguna garantía expresa o implícita de (i) daños incidentales o consecuentes por cualquier causa o (ii)
la sustitución o reparación de cualquier fusible, disyuntor o receptor de la casa. Sin perjuicio de cualquier disposición contraria, la responsabilidad
de Lasko, bajo ninguna garantía expresa o implícita, excederá el precio de compra del producto. Cualquier responsabilidad terminará al vencer el
período de garantía.
Algunos estados y condados no permiten limitar la duración de una garantía implícita, ni excluir o limitar los daños incidentales o consecuentes,
por lo que estas exclusiones o limitaciones no serían válidas. Esta garantía le otorga a usted derechos legales específi cos. También puede tener
otros derechos que varían de un estado o condado a otro.
Se requiere un comprobante de compra antes de que se acepte un reclamo de garantía.
MANTENIMIENTO
• Desconecte siempre el cable antes de mover, reparar o limpiar el equipo.
• Nunca coloque el ventilador dentro del agua o cerca del agua.
• Para quitar más fácilmente la pelusa y suciedad acumulada dentro del ventilador, use una aspiradora con cepillo.
• Limpie la estructura del ventilador solo con paños suaves.
• Nunca use alcohol o solventes como gasolina, benceno, diluyente de pintura u otros limpiadores abrasivos.
CONSEJOS PARA SOLUCIONAR PROBLEMAS
Si el ventilador no funciona, consulte a continuación una lista de posibles causas y sus soluciones:
• Intente apagar el ventilador y desenchufarlo de la toma de corriente. Deje que el ventilador repose durante 10-15 minutos e
intente enchufarlo de nuevo.
• Cuando enchufe el ventilador, asegúrese de que esté enchufado directamente a una toma de corriente que funcione.
• ¿El control remoto no funciona? Asegúrese de que está utilizando baterías nuevas y que están instaladas correctamente.
ALMACENAMIENTO: Guarde el ventilador, junto con estas instrucciones, en su caja original y en un lugar fresco y seco.
LUBRICACIÓN: El motor está permanentemente lubricado. No se requiere mantenimiento.
DISPOSICIÓN: Los materiales de embalaje corrugados son reciclables. Para una eliminación ambientalmente responsable
de este producto, póngase en contacto con el proveedor de servicios de gestión de desechos de su localidad
o visite www.1800recycling.com®.
APDC215ESNew 10/24 1
Used for Model:
APDC215
READ AND SAVE THESE INSTRUCTIONS
Read carefully before attempting to assemble, install, operate or maintain the product described. Protect yourself
and others by observing all safety information. Failure to comply with instructions could result in personal injury
and/or property damage!
This fan is for residential use only. It is not intended to be used in commercial, industrial or agricultural settings.
Have a Question? Need a Part?
Please Do Not Return Product to Store!
Chat with us at www.lasko.com Monday-Friday 8am - 9pm EST
(Valid in U.S. and Canada only)
Register Your Product Today
You will benefi t from:
• Effi cient and enhanced support
• Future product updates
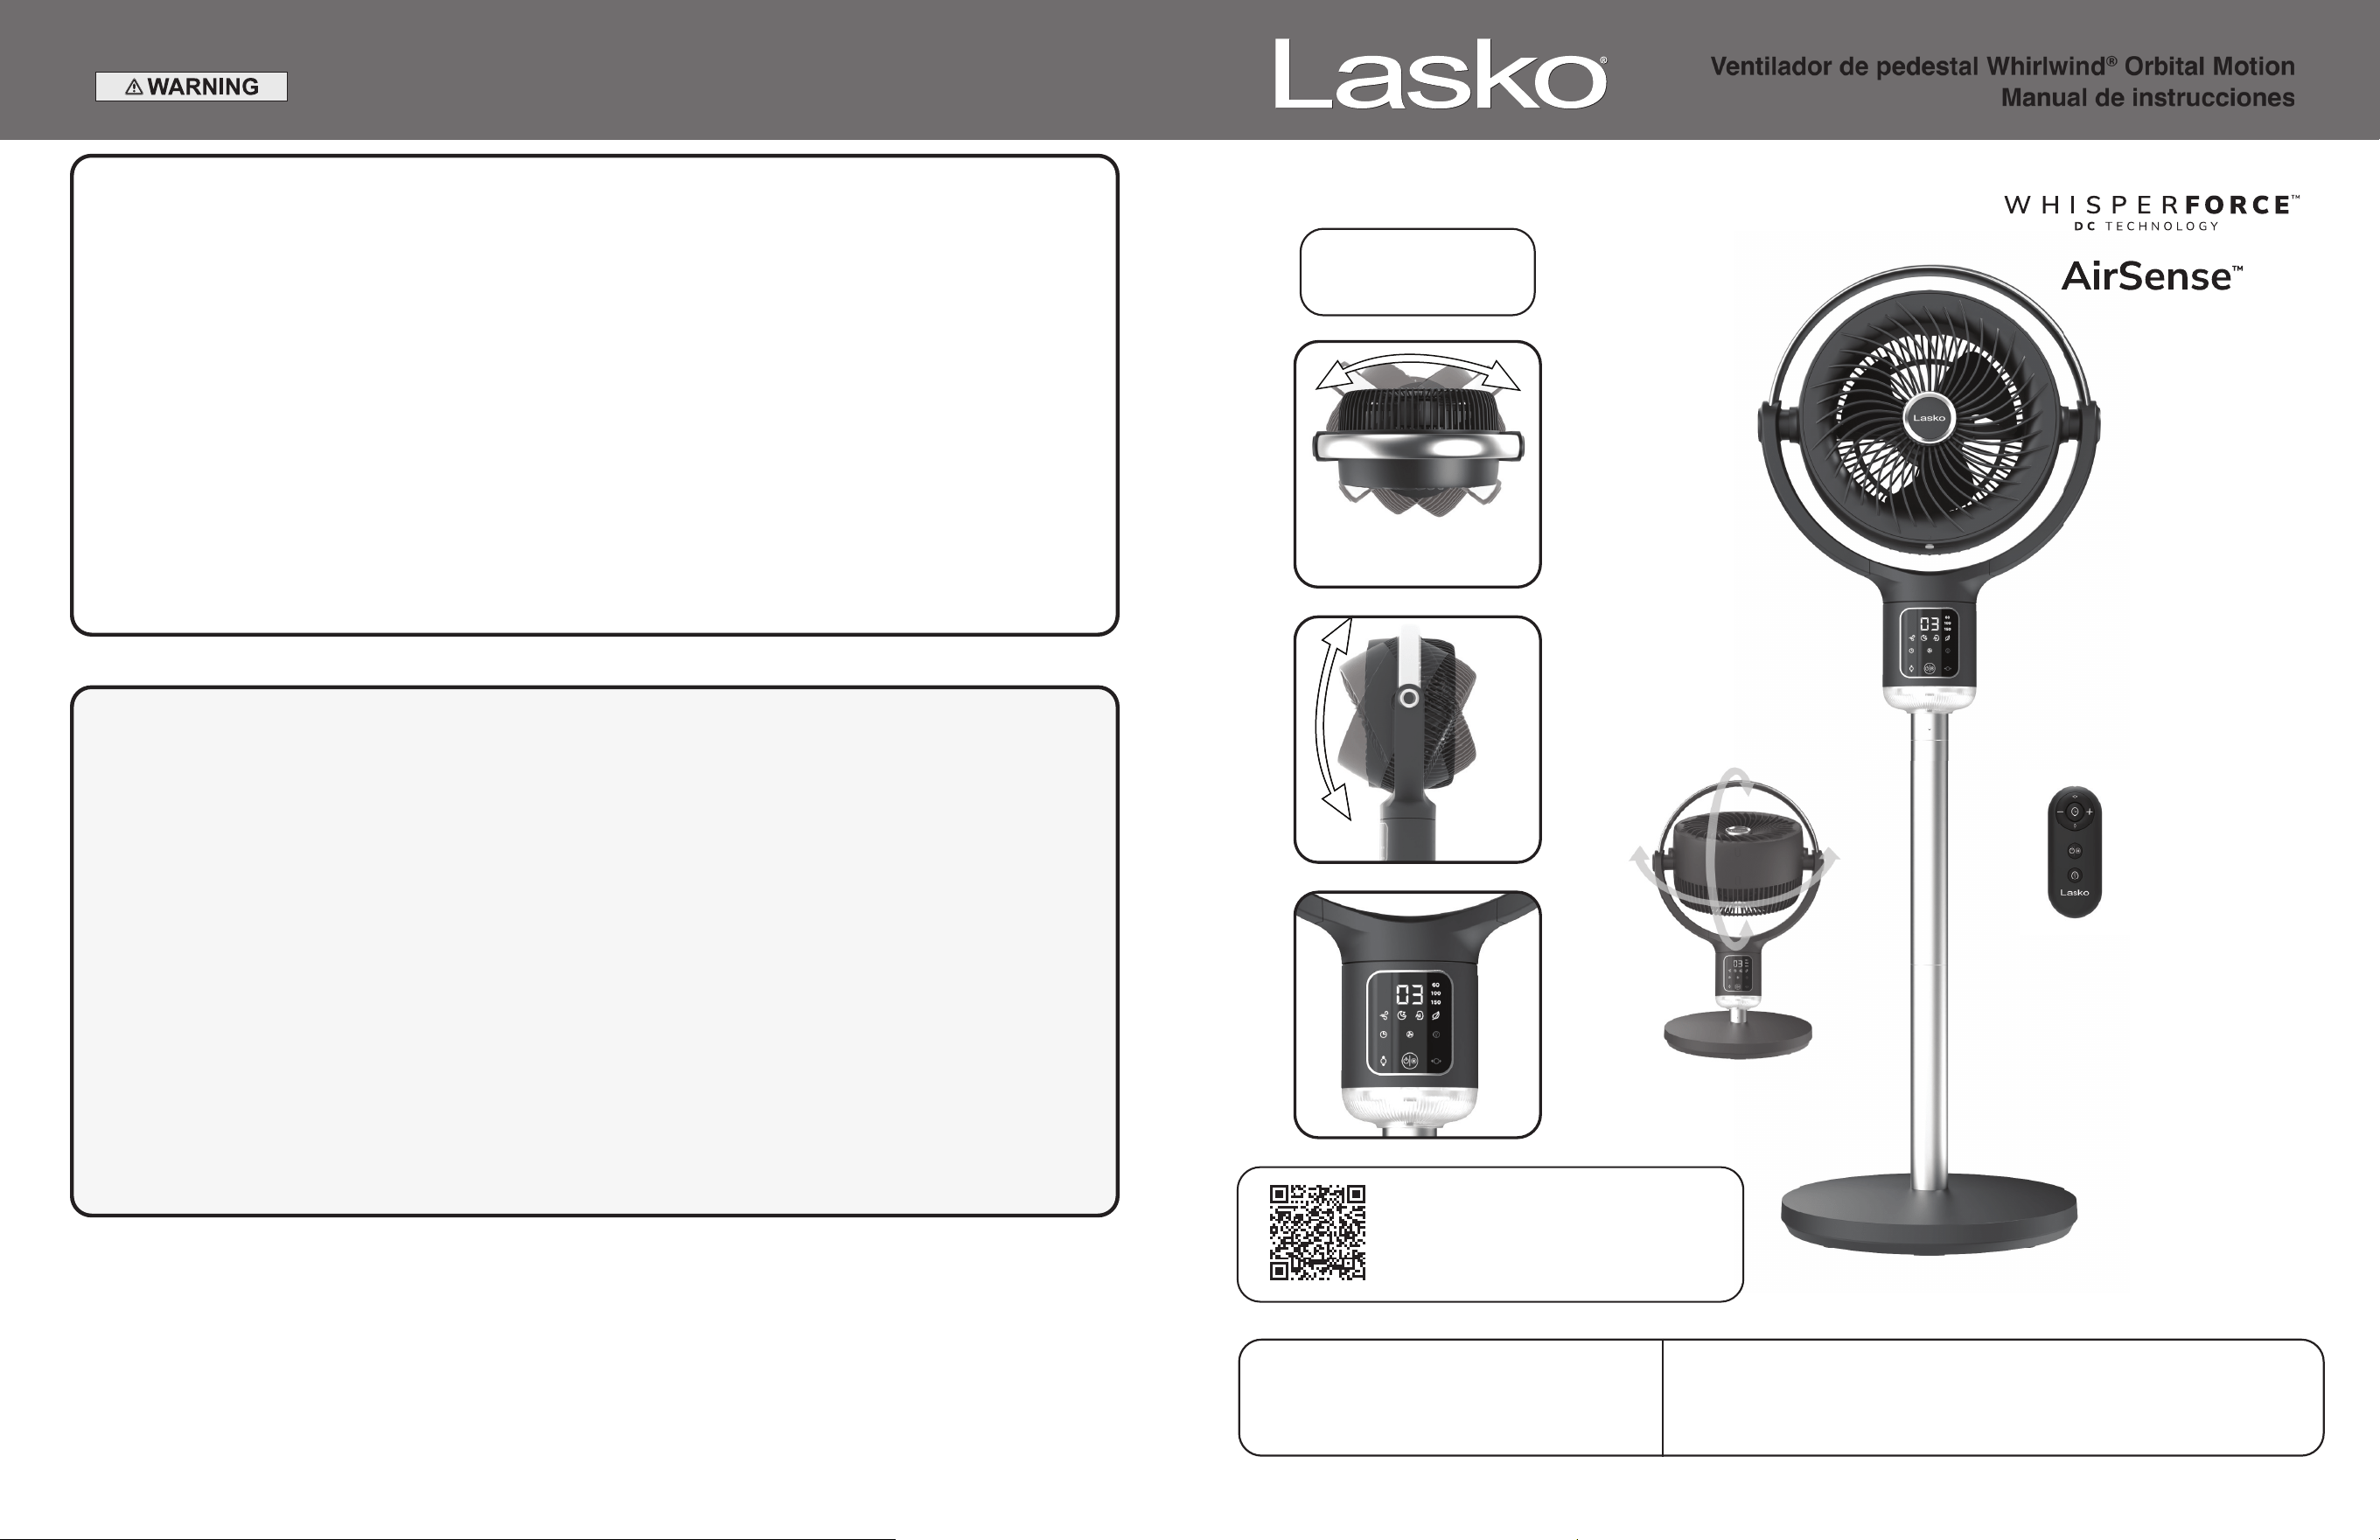
105˚
Vertical Tilt
3 Horizontal
Oscillation Options
60˚ / 100˚ / 150˚
Remote Control
Requires 1 CR2025
3V Coin Cell Battery
(battery included)
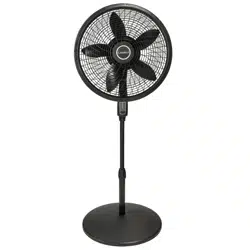
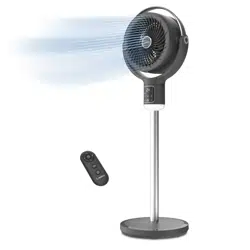
Whirlwind
®
Orbital Motion Pedestal Fan
Instruction Manual
Re
mo
te
C
on
tr
Req
uires 1 CR20
3
V Coin Cell Batt
e
(ba
tte
ry
includ
ed
New 10/24 APDC215ES2
READ ALL INSTRUCTIONS BEFORE USING THIS FAN.
SAVE THESE INSTRUCTIONS
IMPORTANT SAFETY INSTRUCTIONS
When using electrical appliances, these instructions and warnings should always be
followed to reduce the risk of fi re, electrical shock and injury to persons:
TO REDUCE THE RISK OF FIRE, ELECTRICAL SHOCK OR PERSONAL INJURY, ALWAYS FOLLOW
THESE IMPORTANT SAFETY INSTRUCTIONS AND WARNINGS:
DO NOT use this Fan to ventilate areas where fl ammable liquids or vapors are used, stored or are present, including paints, gasoline,
varnishes, fl oor refi nishing products or solvents. ALWAYS read and follow all warnings and instructions on the containers for
these products!
ALWAYS be sure the plug fi ts tightly into the outlet. When plugs fi t loosely into outlets, they may slip partially out of the outlet and
create a poor connection. This may cause outlets to overheat and create a potential fi re hazard. Outlets in this condition should be
replaced by a qualifi ed electrician.
ALWAYS unplug the power cord when servicing, cleaning or moving the Fan. DO NOT use the ON/OFF switch as the sole means of
disconnecting power. NEVER leave children unattended when the Fan is on or plugged in. ALWAYS turn off and unplug the Fan
when not in use.
BE CERTAIN that the power source for the Fan is 120V AC. DO NOT plug the Fan into 240V or other power source.
WARNING: Chemical Burn Hazard. Keep batteries away from children.
This product contains a lithium button/coil cell battery. If a new or used lithium button/coin cell battery is swallowed or enters the
body, it can cause severe internal burns and can lead to death in as little as 2 hours. Always completely secure the battery
compartment. If the battery compartment does not close securely, stop using the product, remove the batteries, and keep it away
from children. If you think batteries might have been swallowed or placed inside any part of the body, seek immediate medical attention.
The cells should be disposed of properly, including keeping them away from children; even used cells may cause injury.
WARNING: To reduce the risk of fi re, electric shock, or injury to persons, do not use replacement parts that have not been recommended by the
manufacturer (e.g. parts made at home using a 3D printer).
• Avoid the use of extension cords, power strips, power taps, outlet style air fresheners or other cord connected device, as these devices may
overheat and cause a fi re hazard.
• Do not operate any fan with a damaged cord or plug. Discard fan or return to an authorized service facility for examination
and/or repair.
• Do not route power cord under rugs, carpets, runners or furniture. This may damage the cord or cause it to overheat creating
a fi re hazard.
• Always place the fan on a stable, fl at, level surface while in operation to prevent the fan from overturning.
• Never insert or allow fi ngers or objects to enter grill openings while fan is in operation or injury and/or damage to the fan may occur.
• Do not block, cover or obstruct air fl ow to or from the fan while in operation.
• Do not run cord under carpeting. Do not cover cord with throw rugs, runners, or similar coverings. Do not route cord under furniture
or appliances. Arrange cord away from traffi c area and where it will not be tripped over.
• Never use a single extension cord to operate more than one fan or other electrical device.
• Do not use this fan if it has been damaged or is not functioning properly.
• Remote controls for other appliances or electronic equipment can sometimes interfere with the operation of this fan. If this occurs, move the
fan to another location.
• Keep fan remote control unit away from chairs and your bed where it may be sat or laid upon and inadvertently turn on the fan.
• THIS FAN DOES NOT MEET THE REQUIREMENTS OF NEC ARTICLE 547-7 (2008). This fan is not suitable for use in agricultural
facilities including areas where livestock, poultry or other animals are confi ned. Please refer to national electric code (NEC) Article 547-7
(2008), or applicable state or local codes or standards relating to electrical requirements for agricultural buildings.
• THIS FAN DOES NOT MEET THE REQUIREMENTS OF NEC ARTICLE 500 (2008). This fan is not suitable for use in hazardous
locations. Please refer to national electric code (NEC) article 500 or applicable state or local codes or standards relating to electrical
requirements for hazardous locations.
WARNING
CAUTION
APDC215ESNew 10/24 11
• Extraiga y recicle o tire de inmediato las pilas usadas según las disposiciones locales,
y no las deje al alcance de los niños. NO tire las pilas en el cesto de basua de su hogar. Tampoco las incinere.
• Las pilas usadas también pueden provocar lesiones graves o la muerte”.
• Comuníquese con el centro de toxicología local para obtener información sobre el tratamiento.
• Utilise une pile CR2025 de 3V.
• Las pilas no recargables no se deben recargar.
• No fuerce la descarga de las pilas, ni las recargue, desarme, caliente sobre la temperatura nominal establecida
por el fabricante o incinere. Si lo hace, podría sufrir lesiones por aireación, fugas o explosiones que generarán
quemaduras químicas.
• Verifi que que las pilas estén colocadas de forma correcta según su polaridad (+ y -).
• No mezcle pilas nuevas con usadas ni diferentes marcas o tipos de pilas, como alcalnas, carbono-zinc o recargables.
• Extraiga y recicle o tire de inmediato las pilas de equipos que no se hayan usado durante mucho tiempo, según las
disposiciones locales.
• Siempre trabe correctamente el compartimento de pilas. Si el compartimento no cierra bien, no use más el producto,
quite las pilas y no las deje al alcance de los niños.
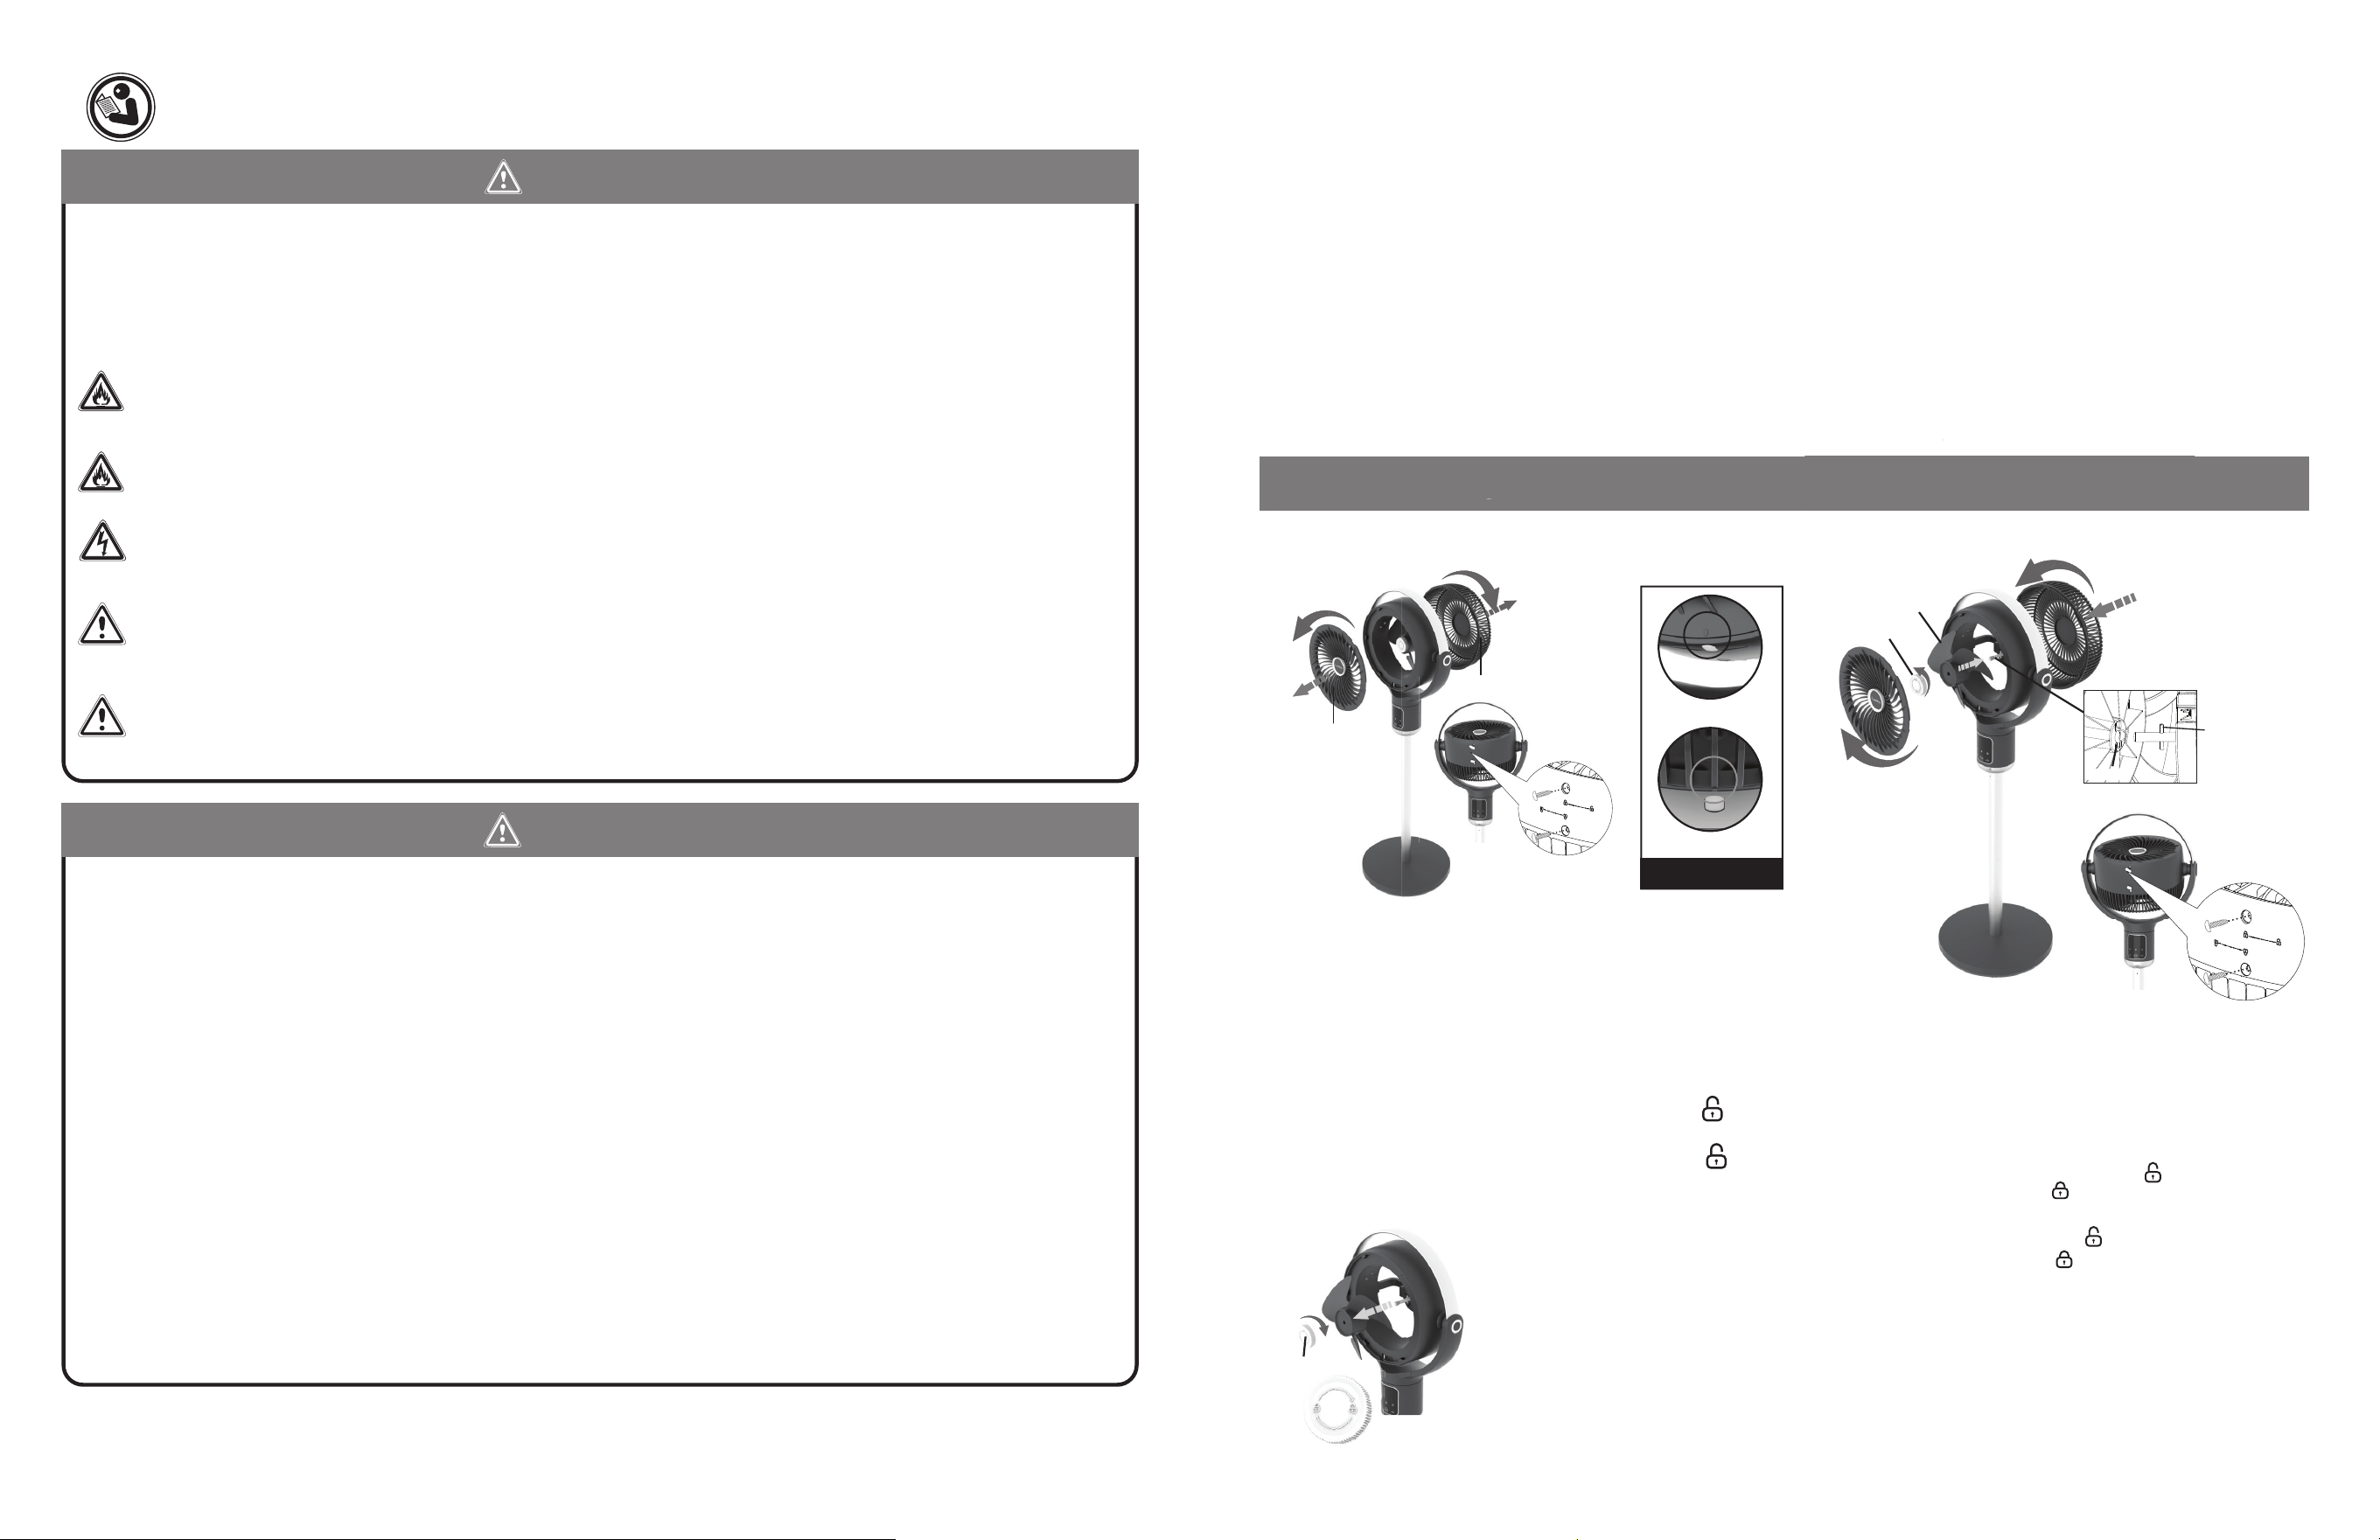
Limpieza del producto
pp
p
Antes del limpiar el producto, verifi que que haya desconectado el enchufe para evitar fugas eléctricas o el arranque imprevisto del
producto, y espere que se enfríe para comenzar la limpieza.
Nervadura elevada de la
rejilla frontal
(Imagen 1B)
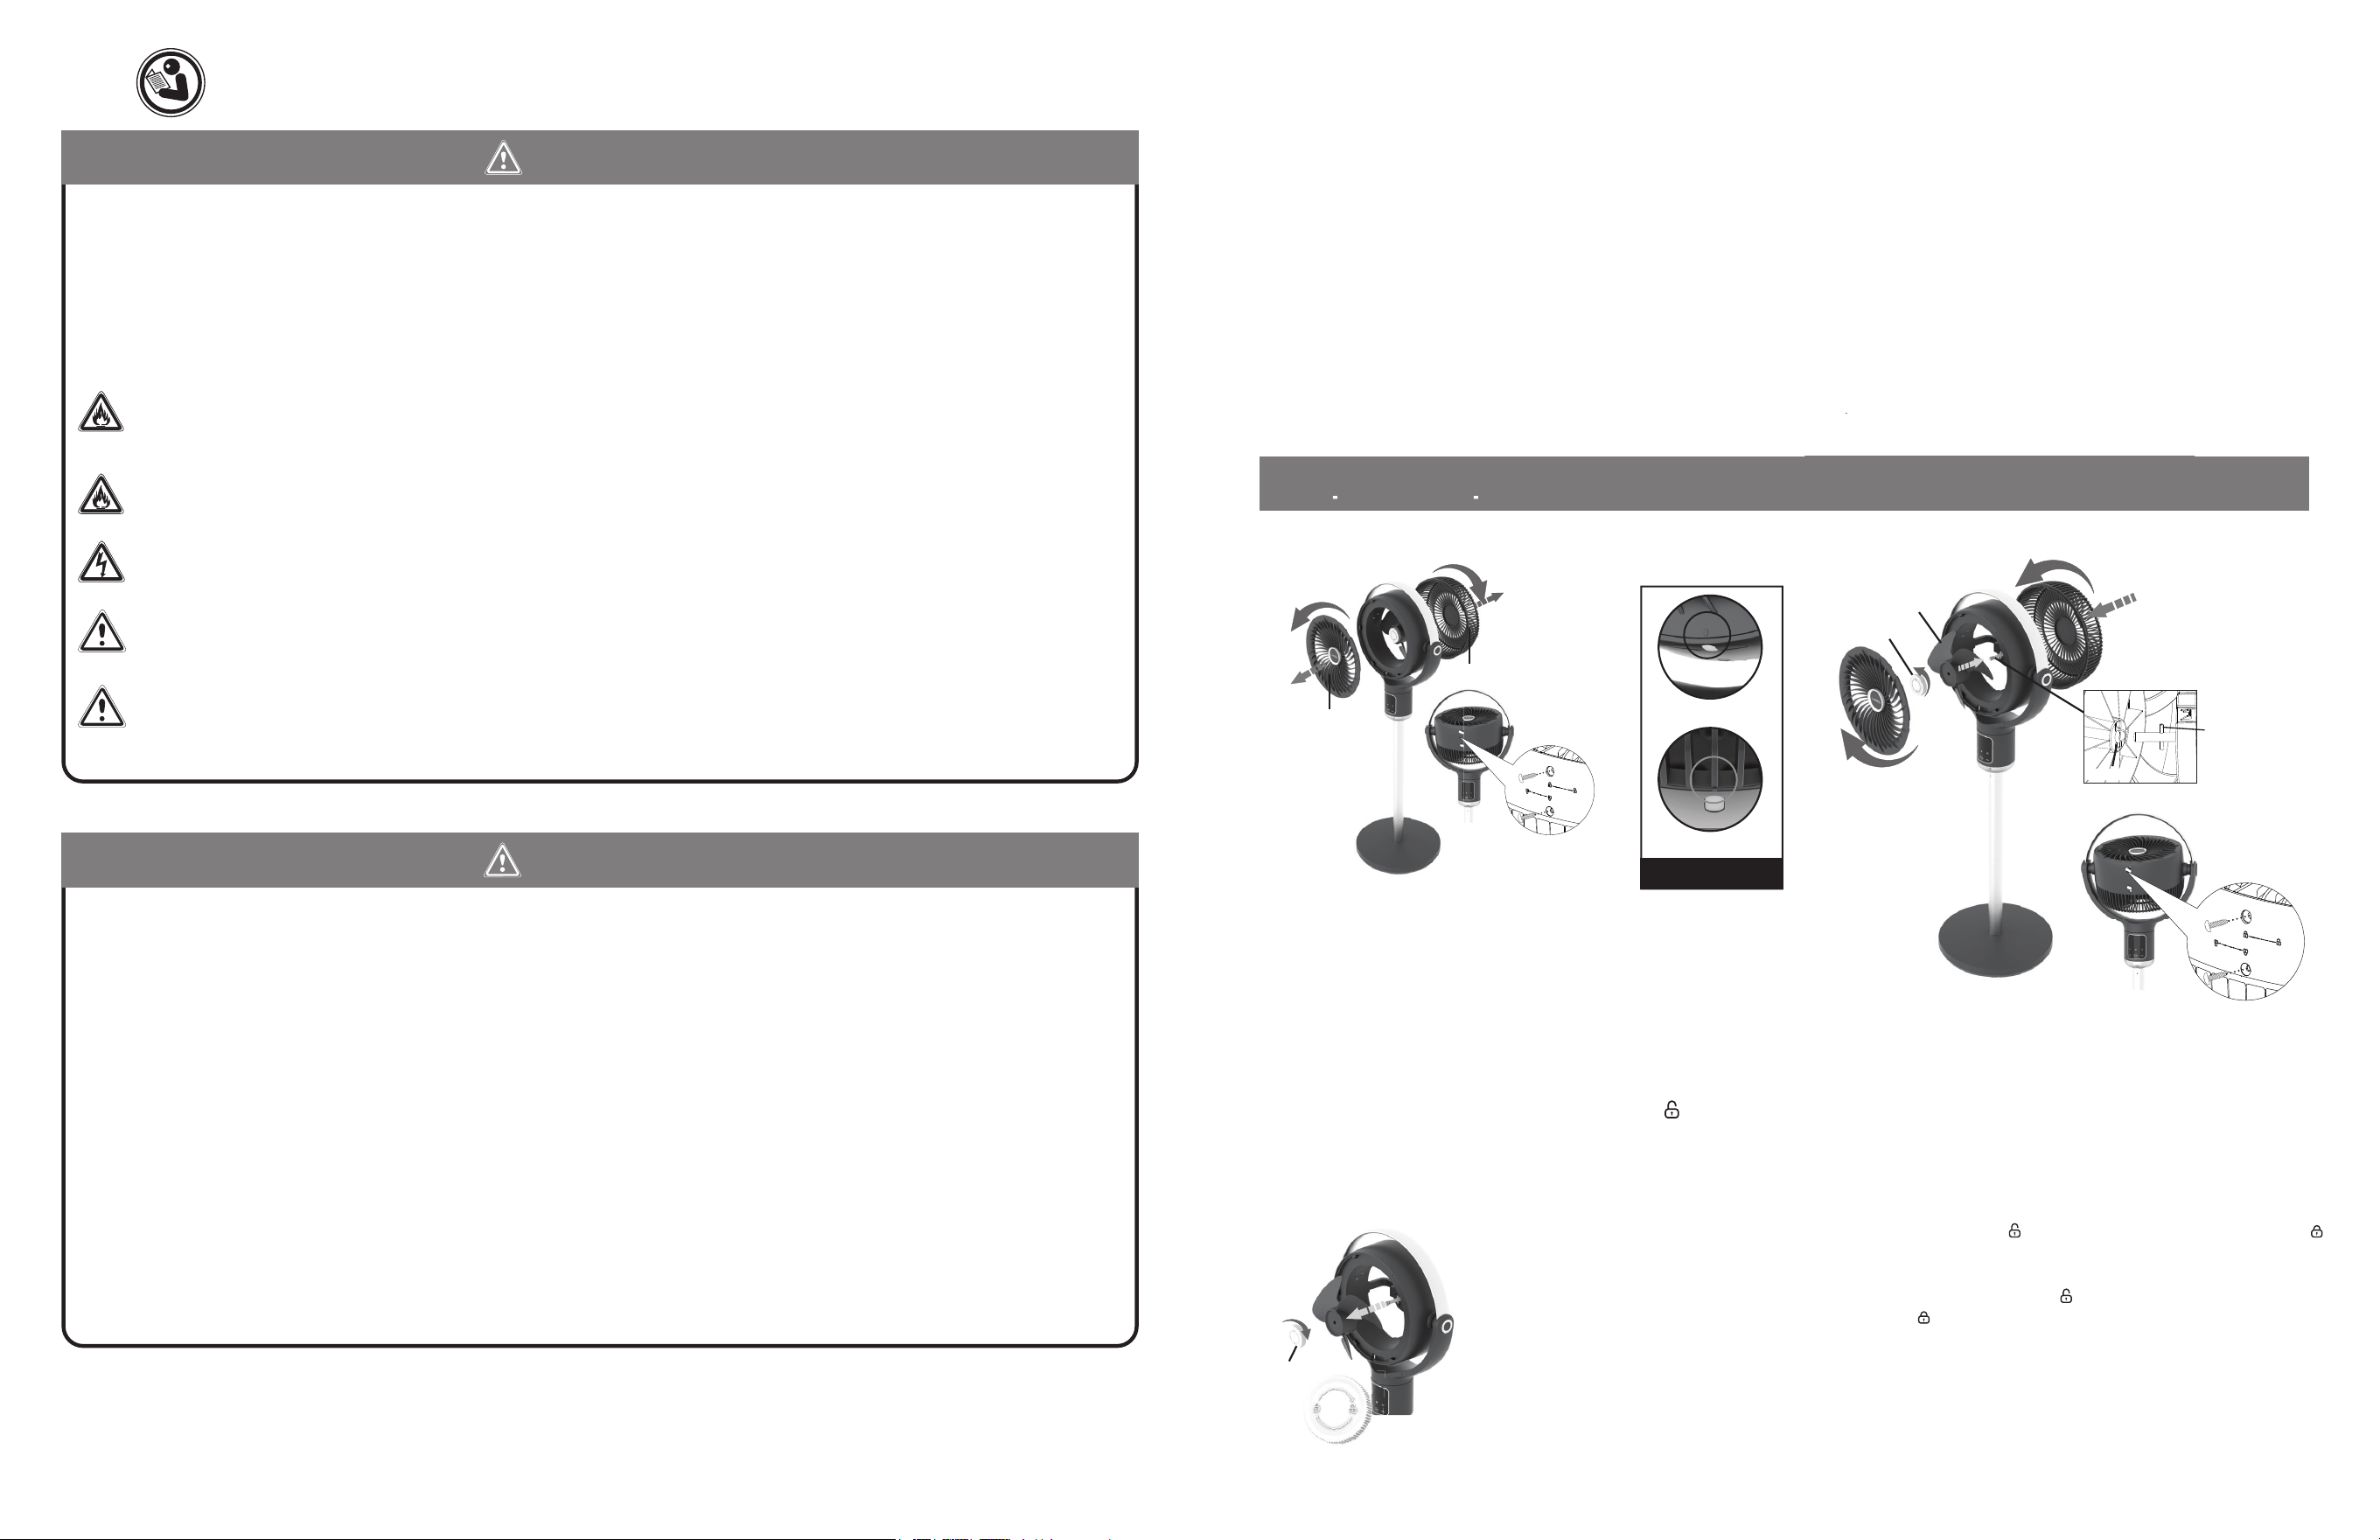
1. Cómo desarmar las rejillas
• Incline el ventilador hacia arriba para encontrar los tornillos
de bloqueo de la rejilla que están ocultos detrás de las tapas
de goma. (Imagen 1A)
• Gire las tapas de goma para quitarlas y acceder a los
tornillos de bloqueo de la rejilla. (Imagen 1A)
• Con un destornillador Phillips, quite los tornillos y
sepárelos. (Imagen 1A)
• Para quitar la rejilla frontal, gire la rejilla en sentido
antihorario para que la nervadura elevada (Imagen 1B)
quede alineada con el símbolo de desbloqueo.
• Para quitar la rejilla trasera, gire la rejilla en sentido
antihorario para que la nervadura elevada (Imagen 1B)
quede alineada con el símbolo de desbloqueo.
• To help remove lint and dirt from inside the fan, use a
vacuum equipped with a brush attachment.
2. Cómo extraer la hoja
• Gire la tuerca de bloqueo en sentido
horario para quitarla.
• Luego, tire de la hoja del ventilador
desde el pasador del eje del motor.
• Limpie la hoja y la tuerca únicamente
con un paño suave.
3. Rearmado del ventilador
• Primero, deslice la hoja del ventilador hacia el eje del
motor. Haga coincidir la ranura del eje de la hoja con el
pasador del eje del motor (observe la imagen que
aparece arriba).
• Gire la tuerca de bloqueo en sentido antihorario
para ajustarla.
• Luego, reemplace la rejilla frontal; para hacerlo, alinee la
nervadura elevada (Imagen 1B) en la rejilla frontal con el
logo de desbloqueo. Gire en sentido horario para trabarla.
• Luego, reemplace la rejilla trasera; para hacerlo, alinee
la nervadura elevada (Imagen 1B) en la rejilla trasera
con el logo de desbloqueo. Gire en sentido horario para
trabarla.
• Por último, con un destornillador Phillips, reemplace
ambos tornillos en la ranura y ajuste. (Imagen 3A)
• Gire las tapas de goma sobre los tornillos. (Imagen 3A)
• Y así ya ha vuelto a armar el ventilador.
Rejilla frontal
Rejilla trasera
(Imagen 1)
(Imagen 1A)
Nervadura elevada de
la rejilla trasera
Rejilla frontal
Rejilla trasera
Tuerca de bloqueo
Hoja del ventilador
Coloque la hoja del ventilador
al eje del motor
Pasador
Ranura
(Imagen 3)
(Imagen 3A)
Tuerca de bloqueo
(Imagen 2)
New 10/24 APDC215ES10
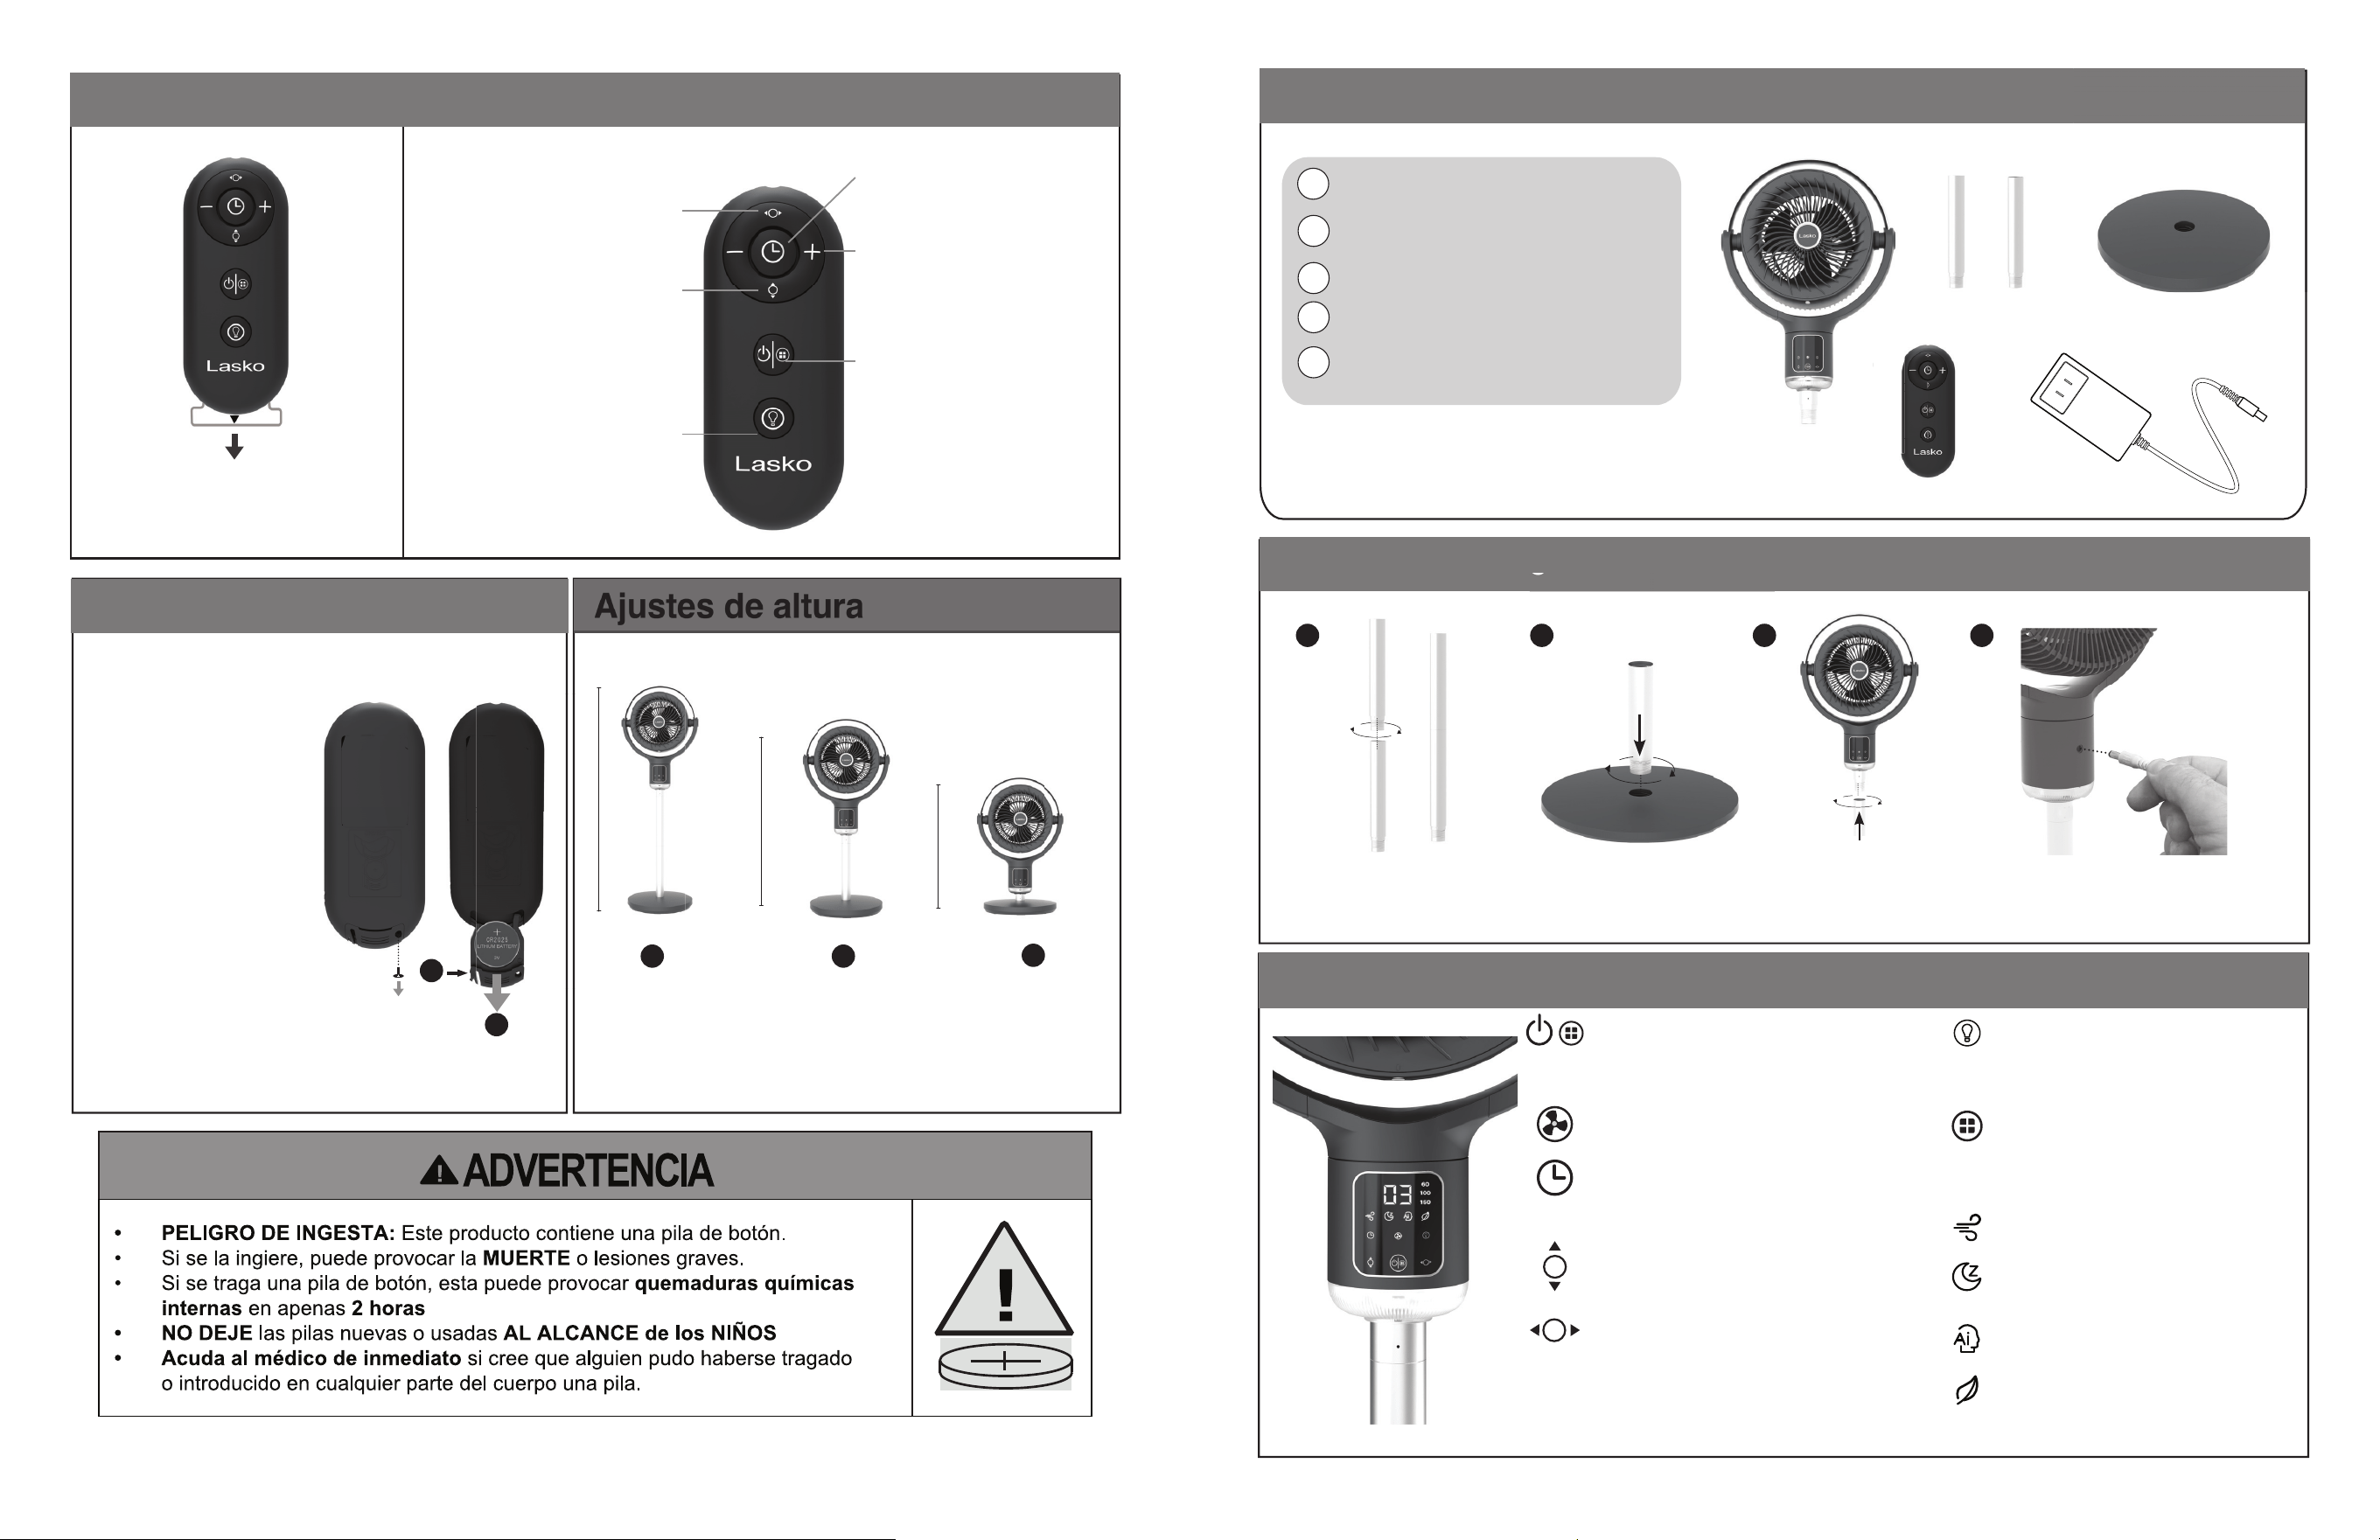
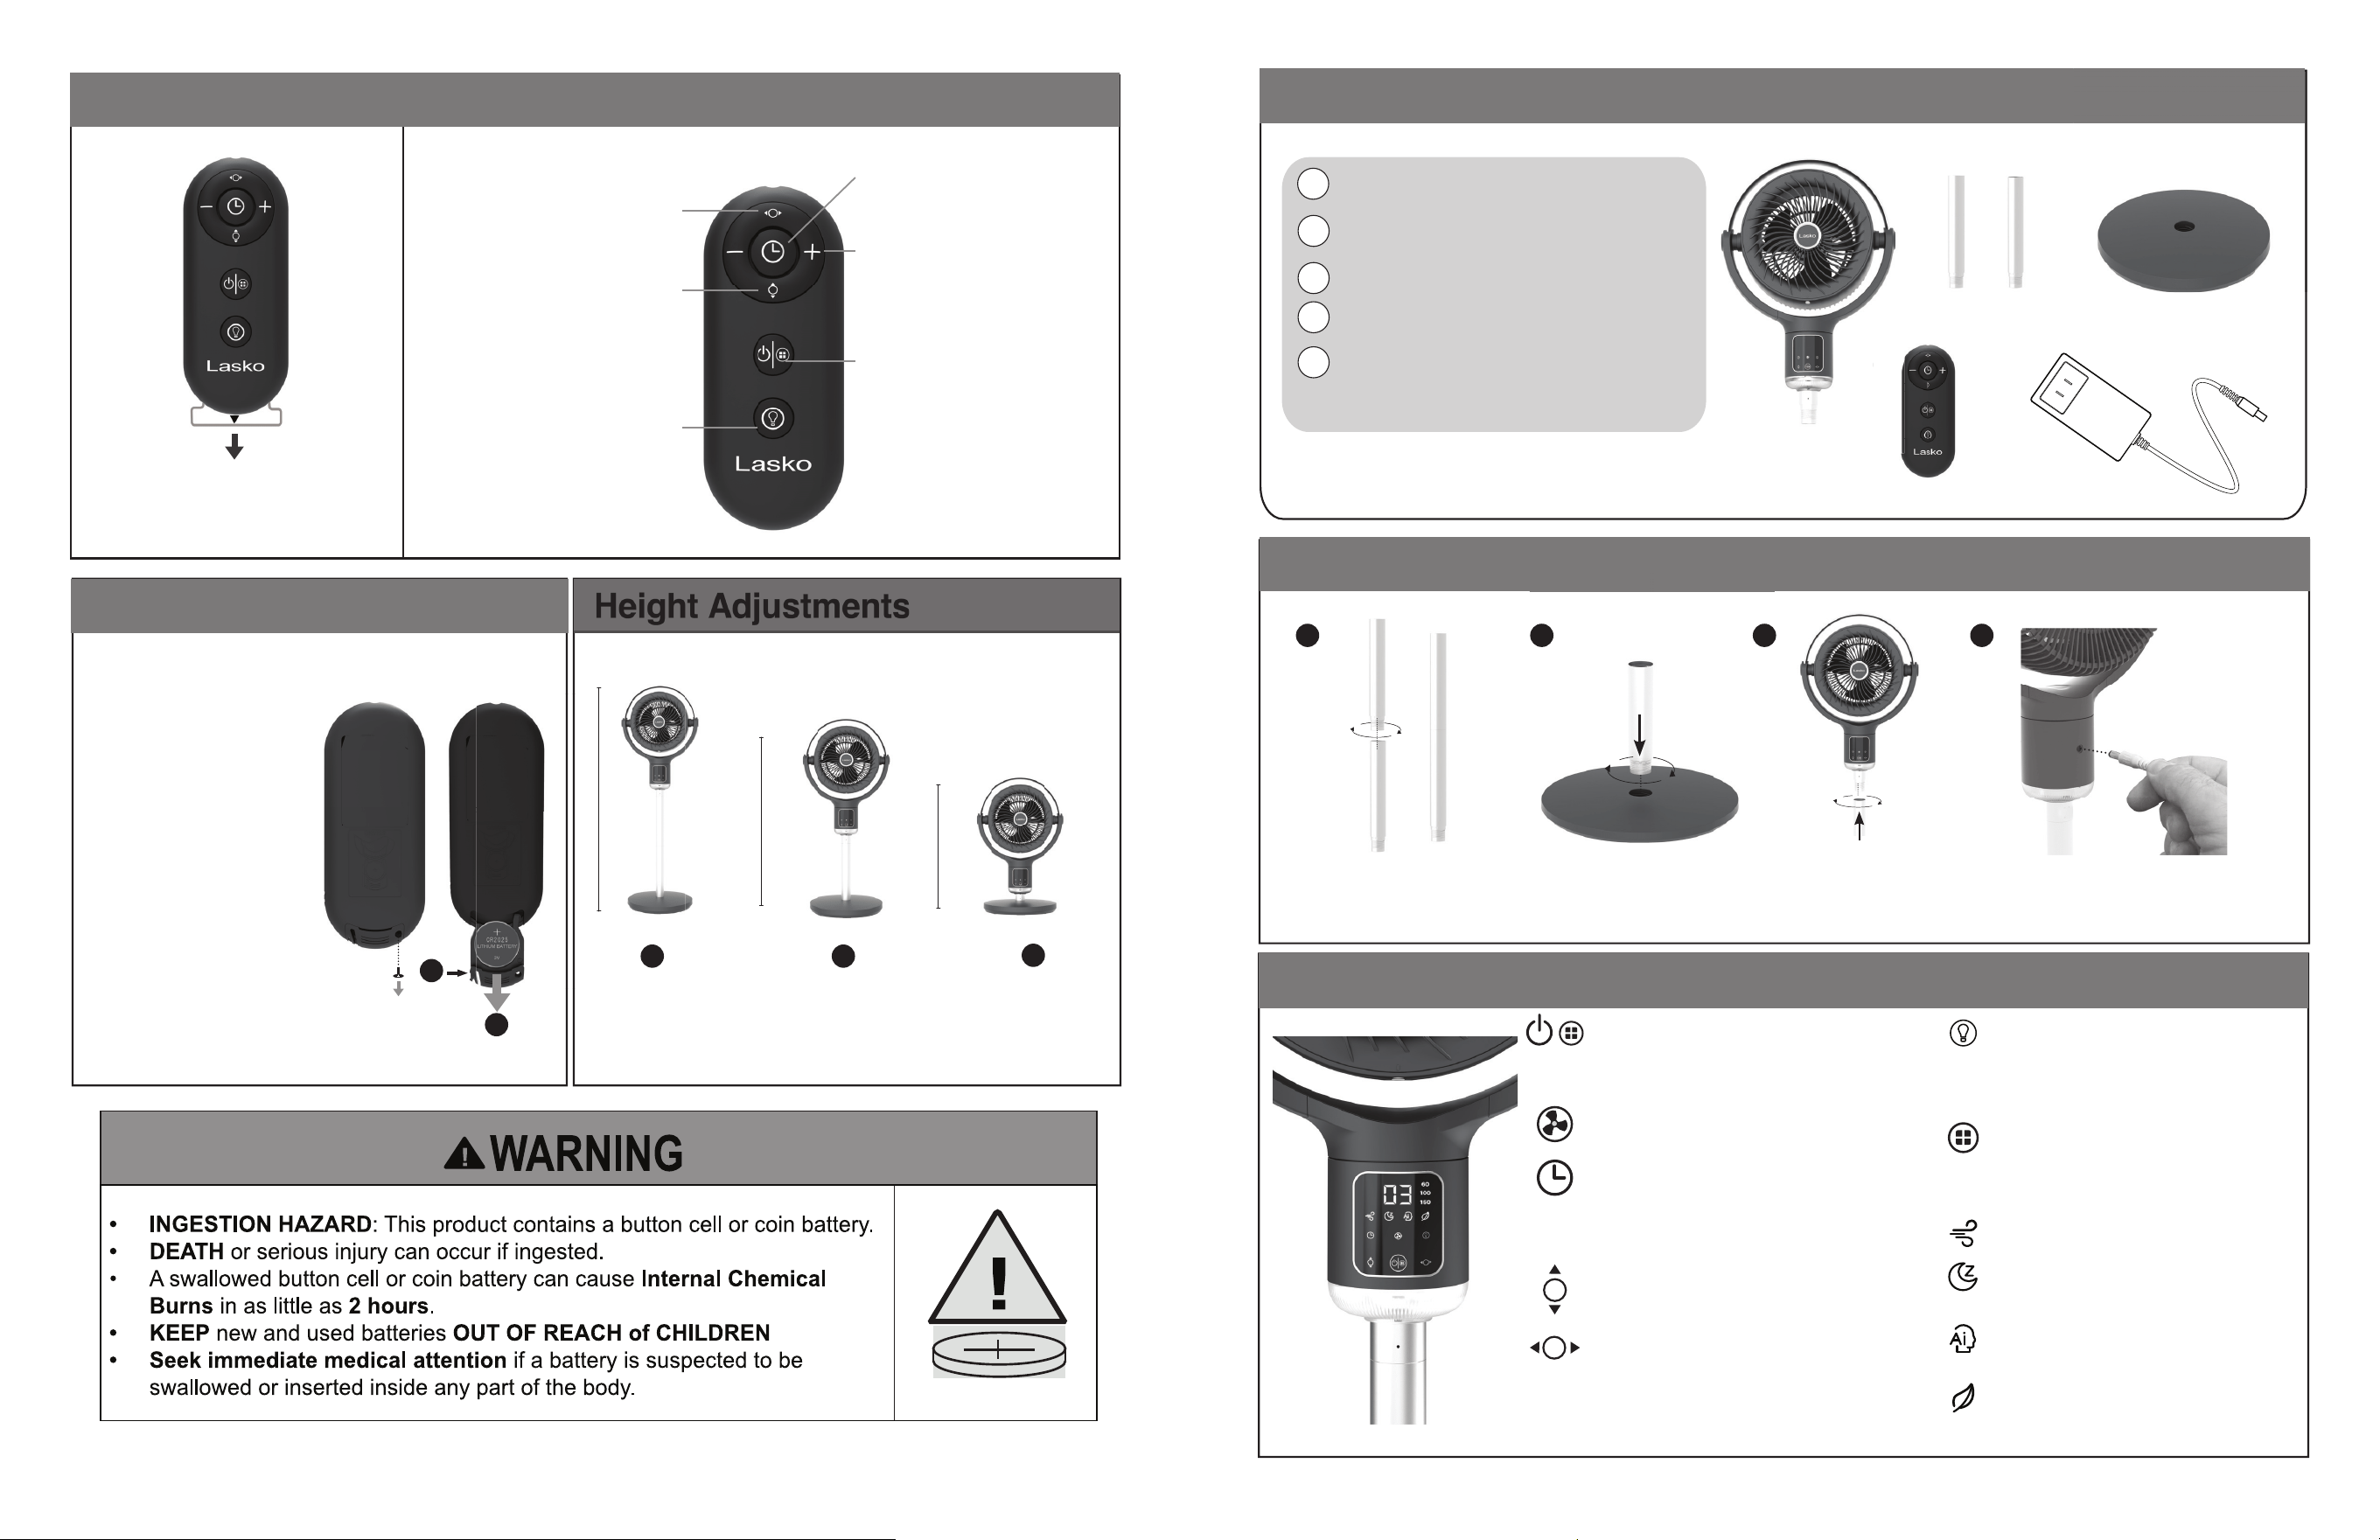
Cómo usar el control remoto
Reemplazo de batería
.
Botón de encendido
Presione este botón para
apagar o encender el ventilador
Modos AirSense™
Elija entre los modos Noche,
Automático, Naturaleza o
Personalizado.
Ajustes de altura
1
1
2
3
2
39” H
31” H
21” H
Luz nocturna
Presione la función de encendido y
apagado de luz nocturna y elija entre
las opciones de luz de día y luz tenue.
Presione y mantenga presionado
para ajustar el brillo.
Quite la lengüeta de la batería de
plástico antes de usar el control
remoto por primera vez. Tome la
lengüeta y tire de ella hacia afuera.
Oscilación de movimiento
Presione el botón de oscilación de
movimiento para iniciar o apagar la
función de oscilación.
Oscilación de inclinación
Presione el botón de oscilación de inclin-
ación para iniciar o apagar
la función de oscilación.
Oscilación orbital
Presione los botones de mover e inclinar
oscilación para encender
la oscilación orbital.
Temporizador
Presione el ícono de temporizador
para apagarlo o encenderlo.
Presione -/+ para ajustar la
confi guración del temporizador
(hasta 24 horas).
Velocidades
Presione +/- para cambiar las
velocidades
(hasta 24 velocidades).
Use ambas barras
para lograr la mayor
altura posible.
Quite ambas barras
para usar el ventilador
con la altura más baja.
Use solo una barra
para altura media.
Si debe cambiar la pila del
control remoto, use una pila de
litio de 3 V CR2025.
Para cambiar la pila, quite el
tornillo que está en la parte
posterior del control remoto con
un destornillador Phillips.
Para quitar la tapa de la pila,
presione hacia dentro y sostenga
la tapa (1) mientras quita la
bandejita de la pila (2).
Deseche la pila vieja de forma
correcta. Coloque la pila nueva
en la bandejita. Luego empuje la
bandejita para deslizarla hacia
adentro del control remoto
hasta que escuche un clic y la
bandejita quede encastrada
en su lugar. Vuelva a colocar el
tornillo con un destornillador
Phillips para que la bandejita
quede cerrada.
APDC215ESNew 10/24 3
1
2
Fan Head
Pipes x 2
Base
1
2
3
45
Remote Control
Power Supply with Cord
3
4
5
Power/AirSense™
Pressing the power button will turn the fan ON/OFF and
cycle through the 4 diff erent fan modes. You can cycle all
the way through the Modes to turn the fan OFF or Press
and hold to turn fan off .
Fan Speeds
Fan Speed can be adjusted up to 24 Speeds.
Timer
The timer can be set up to 24 hours.
Continue pressing the Timer Button to reach desired time
setting. To turn off the timer function, press the Timer
Button until none of the timer LEDs are illuminated.
Tilt Oscillation
Press the tilt oscillation button to start
and stop the oscillation function.
Swing Oscillation
Press the swing oscillation button to start
and stop the oscillation function. 60˚/100˚/150˚
oscillation options.
Orbital Oscillation
Press the swing and tilt oscillation buttons to turn on
orbital oscillation.
Nightlight—Press to turn ON/OFF nightlight
feature and choose between daylight and
soft light settings. Press and hold to
adjust brightness.
Lasko AirSense™ - Using sensor
technology integrated with smart
AI capabilities, AirSense tracks your
patterns and preferences to create the
ideal temperature-controlled environment.
Custom Mode - Choose your desired
speed, oscillation, and display settings.
Sleep Mode - The display will shut off
and the speed will gradually decrease
as you sleep.
Auto Mode - Fan speed adapts to
the ambient air temperature of the room.
Nature Mode - The fan replicates
natural wind patterns by adjusting its
speed randomly.
Parts Included
How to Assemble
Controls
4
Join the two pipes as
illustrated above. Secure by
tightening in a clockwise direction.
Attach the pipe to the base and
tighten it by turning clockwise.
Secure the fan onto
the pipe and tighten by
turning clockwise.
Plug the power supply cord into
the socket at the back of the fan.
The fan is now ready for use.
e
3
1 2 3 4
New 10/24 APDC215ES4
How to Use your Remote Control
Battery Replacement
.
Power
Press to turn fan ON/OFF
Timer
Press the timer icon to turn on
or off . Push the -/+ to adjust the
timer settings. (up to 24 hours)
Speeds
Press the -/+ to change the speeds.
(up to 24 speeds)
AirSense™ Modes
Choose between Sleep, Auto,
Nature, or Custom Mode.
Swing Oscillation
Press the Swing Oscillation Button
to start and stop the
oscillation function.
Tilt Oscillation
Press the Tilt Oscillation Button
to start and stop the
oscillation function.
Orbital Oscillation
Press the Swing and Tilt Oscillation
Buttons to turn on Orbital Oscillation.
Height Adjustments
Use both poles to
achieve maximum
height.
Remove both poles for
the shortest height.
Use one pole only for
medium height.
1
1
2
3
2
39” H
31” H
21” H
Nightlight
Press to turn ON/OFF nightlight
feature and choose between
daylight and soft light settings.
Press and hold to adjust brightness.
If the remote control battery
needs replacement, use a 3V
CR2025 lithium battery.
To replace the battery, remove
the screw from the back of the
remote control using a
Phillips-head screwdriver.
To remove battery door push in
and hold tab (1) while pulling out
battery tray (2).
Dispose of old battery properly.
Install new battery in battery
tray. Then slide battery tray back
into remote by pushing tray in
until it clicks and locks in place.
Reinstall the screw using the
Phillips-head screwdriver to
secure the battery tray closed.
Remove the plastic battery tab
before using the remote for the fi rst
time. Grab and pull the tab out.
APDC215ESNew 10/24 9
1
2
3
45
Encendido/AirSense™
Presione el botón de encendido para apagar o encender
el ventilador y alternar entre los 4 diferentes modos
del ventilador. Puede pasar por todos los modos para
apagar el ventilador o presionar y sostener el botón para
apagar el ventilador.
Velocidades del ventilador
El ventilador tiene 24 velocidades posibles de ajuste.
Temporizador
El temporizador se puede confi gurar hasta 24 horas.
Presione el botón del temporizador tantas veces como
desee hasta llegar a la confi guración deseada. Para
apagar la función de temporizador, presione el botón
del temporizador hasta que no queden luces LED
encendidas.
Oscilación de inclinación
Presione el botón de oscilación de inclinación para iniciar
o apagar la función de oscilación.
Oscilación de movimiento
Presione el botón de oscilación de movimiento para
iniciar o apagar la función de oscilación. Las opciones de
oscilación son las siguientes: 60˚/100˚/150˚.
Oscilación orbital
Presione los botones de mover e inclinar oscilación para
encender la oscilación orbital.
Luz nocturna - Presione la función de
encendido y apagado de luz nocturna y elija
entre las opciones de luz de día y luz tenue.
Presione y mantenga presionado para
ajustar el brillo..
AirSense™ de Lasko - Con tecnología
de sensor integrada con funciones de IA,
AirSense registra sus patrones y
preferencias para crear un ambiente ideal
con la temperatura controlada.
Modo Personalizado - Elija los ajustes
deseados de velocidad, oscilación y pantalla.
Modo Noche - La pantalla se apaga y la
velocidad se reduce gradualmente mientras
duerme.
Modo Automático - La velocidad del
ventilador se adapta a la temperatura de
aire ambiente de la habitación.
Modo Naturaleza - El ventilador ajusta su
velocidad de forma aleatoria para replicar
los patrones del viento naturales.
Partes Incluidas
Ensamblaje
Controles
4
3
1 2 3 4
1
2
Cabezal del ventilador
2 tubos
Base
Control remoto
Fuente de alimentación
con cable
3
4
5
Una los dos tubos como se
muestra en la imagen de arriba.
Una los dos tubos como se
muestra en la imagen de arriba.
Coloque el tubo en la base y
gírelo en sentido horario
para ajustarlo.
Ajuste el ventilado en el tubo
y gírelo en sentido horario
para apretarlo.
Conecte el cable de la fuente de
alimentación en el enchufe, en la
parte posterior del ventilador. Ya
puede utilizar el ventilador.
New 10/24 APDC215ES8
LEA TODAS LAS INSTRUCCIONES ANTES DE USAR ESTE VENTILADOR.
CONSERVE ESTAS INSTRUCCIONES
INSTRUCCIONES IMPORTANTES DE SEGURIDAD
Cuando use este ventilador, se deben de seguir las siguientes advertencias y precauciones
para reducir el riesgo de incendio, descargas eléctricas y lesiones:
PARA REDUCIR EL RIESGO DE INCENDIOS, DESCARGAS ELÉCTRICAS SIEMPRE SIGA
LAS SIGUIENTES INSTRUCCIONES Y ADVERTENCIAS:
NO utilice este ventilador para ventilar las zonas donde se usen, almacenen o estén presentes líquidos o vapores infl amables, incluidos
pinturas, gasolina, barnices, disolventes o productos de acabado para pisos. ¡SIEMPRE lea y siga todas las adverten-cias e
instrucciones descritas en los envases de estos productos!
SIEMPRE asegúrese de que el enchufe encaje bien en el tomacorriente. Cuando los enchufes no encajan bien en el tomacorri-ente,
pueden deslizarse un poco y crear una mala conexión. Esto puede causar que los tomacorrientes se sobrecalienten y crear un riesgo
de incendio potencial. Un electricista califi cado debe cambiar los tomacorrientes que se encuentren en esta condición.
SIEMPRE desenchufe el cable de corriente cuando realice mantenimiento, limpieza o mueva el ventilador. NO use el interruptor
ENCENDIDO/APAGADO (ON/OFF) como el único medio para desconectar de la electricidad. NUNCA deje a los niños sin super-visión
cuando el ventilador esté encendido o conectado. SIEMPRE apague y desenchufe el ventilador cuando no esté en uso.
ASEGURESE que la fuente de energía para el ventilador sea de 120 Vca. NO enchufe el ventilador en una fuente de energía de 240
Vca ni en ninguna otra fuente de energía que no sea la indicada.
ADVERTENCIA: Peligro de quemaduras químicas. Mantenga las baterías lejos de los niños.
Este producto contiene una batería botón de litio/celda de tipo moneda. Si una persona traga una batería de litio/de celda de tipo
moneda nueva o usada o esta ingresa en el cuerpo, puede causar quemaduras internas graves y provocar la muerte en tan solo 2
horas. Asegure siempre completamente el compartimento de la batería. Si el compartimento de la batería no cierra bien, deje de utilizar
el producto, retire las baterías y manténgalo fuera del alcance de los niños. Si cree que alguien puede haber tragado la batería o puede
haberlas colocado en el interior de alguna parte del cuerpo, busque atención médica de inmediato. Las celdas deben desecharse
adecuadamente, incluso manteniéndolas fuera del alcance de los niños; incluso las células usadas pueden causar lesiones.
ADVERTENCIA: Para reducir el riesgo de incendio, descarga eléctrica o lesiones a las personas, no utilice piezas de repuesto que no
hayan sido recomendado por el fabricante (por ejemplo, piezas hechas en casa con una impresora 3D).
• Evite el uso de cables de extensión, enchufes, tomacorrientes, ambientadores de enchufe u otros dispositivos conectados con cables, ya
que estos dispositivos pueden sobrecalentarse y causar un riesgo de incendio.
• No utilice ningún ventilador que tenga el cable o el enchufe dañados. Descarte el ventilador o devuélvalo a un centro de servicio autorizado
para su revisión o reparación.
• No pase el cable de alimentación debajo de alfombras, tapetes, caminos de mesa o muebles. Esto puede dañar el cable o causar que se
sobrecaliente creando un peligro de incendio.
• Siempre coloque el ventilador en una superfi cie estable, plana y nivelada mientras esté en funcionamiento, para evitar que
el ventilador se voltee.
• Nunca introduzca o permita que los dedos u objetos entren en las aberturas de la rejilla mientras el ventilador está en funcionamiento, ya
que pueden ocurrir lesiones o daños al ventilador.
• No bloquee, cubra ni obstruya el fl ujo de aire hacia el ventilador o desde él mientras esté en funcionamiento.
• No pase el cable debajo de las alfombras. No cubra el cable con tapetes, alfombras de pasillo o elementos similares. No coloque el cable
debajo de muebles o dispositivos.
• Coloque el cable lejos del área de tráfi co y donde nadie se pueda tropezar.
• Nunca use un solo cable de extensión para operar más de un ventilador u otro dispositivo eléctrico.
• No use este ventilador si está dañado o no funciona correctamente.
• Los controles remotos para otros dispositivos o equipos electrónicos pueden interferir con el funcionamiento de este ventilador. Si esto
ocurre, coloque el ventilador en otra ubicación.
• No coloque el control remoto del ventilador en sillas o camas en donde podría sentarse o recostarse y, sin quererlo, encender el ventilador.
• ESTE VENTILADOR NO CUMPLE CON LOS REQUISITOS DEL ARTÍCULO 547-7 (2008) DEL NEC. Este ventilador no es adecuado
para su uso en instalaciones agrícolas, incluidas las zonas donde se encuentran confi nados el ganado, las aves de corral u otros animales.
Consulte el Código Eléctrico Nacional (National Electric Code, NEC) Artículo 547-7 (2008), o los códigos o normas estatales o locales
aplicables en relación con los requisitos eléctricos para los edifi cios agrícolas.
• ESTE VENTILADOR NO CUMPLE CON LOS REQUISITOS DEL ARTÍCULO 500 (2008) DEL NEC. Este ventilador no es apto para uso
en zonas peligrosas. Consulte el artículo 500 del Código Eléctrico Nacional (NEC) o las normativas o estándares estatales o locales en
relación con los requisitos eléctricos para ubicaciones peligrosas.
ADVERTENCIA
PRECAUCIÓN
APDC215ESNew 10/24 5
How to Clean your Product
• Remove and immediately recycle or dispose of used batteries according to local regulations and
keep away from children. Do NOT dispose of batteries in household trash or incinerate.
• Even used batteries may cause severe injury or death.
• Call a local poison control center for treatment information.
• Uses 1 - 3V CR2025 battery.
• Non-rechargeable batteries are not to be recharged.
• Do not force discharge, recharge, disassemble, heat above (manufacturer’s specifi ed temperature rating) or
incinerate. Doing so may result in injury due to venting, leakage or explosion resulting in chemical burns.
• Ensure the batteries are installed correctly according to polarity (+ and -).
• Do not mix old and new batteries, different brands or types of batteries, such as alkaline, carbon-zinc, or
rechargeable batteries.
• Remove and immediately recycle or dispose of batteries from equipment not used for an extended period of
time according to local regulations.
• Always completely secure the battery compartment. If the battery compartment does not close securely, stop
using the product, remove the batteries, and keep them away from children.
y
attery
compartment
does
not
close
securely
,
s
a
y
f
rom childre
n.
Before cleaning this product, please make sure that the power plug has been unplugged to avoid electric leakage or accidental start of
the product, and you need to wait for the body to cool before cleaning.
Front Grille
Front Grille
Back Grille
Back Grille
Locking Nut
Fan Blade
Locking Nut
Attach fan blade to motor shaft
Pin
Groove
2. How to Remove the Blade
• Spin the locking nut clockwise
to remove.
• Next, pull off the fan blade from
the motor shaft pin.
• Clean the blade and nut with a
soft cloth only.
3. How to Reassemble Your Fan
• First, slide fan blade onto to the motor shaft. Align the
groove on blade hub with the pin on motor shaft. (see inset
shot above)
• Spin the locking nut counterclockwise to tighten.
• Next, replace the front grille by lining up the raised rib
(Figure 1B) on the front grille with the unlock logo. Turn
clockwise to lock in place.
• Replace the back grille by lining up the raised rib (Figure
1B) on the back grille with the unlock logo. Turn
clockwise to lock in place.
• Finally, with a Phillips-head screwdriver, replace the two
screws into the slots and tighten. (Figure 3A)
• Pivot rubber fl aps back over the screws. (Figure 3A)
• You have now reassembled your fan.
c
kin
g N
ut
(Figure 1)
(Figure 3)
(Figure 3A)
(Figure 2)
(Figure 1A)
Back Grille Raised Rib
Front Grille Raised Rib
(Figure 1B)
1. How to Dissassemble Grilles
• Tilt the fan upward to fi nd the grille locking screws hidden
behind the rubber fl aps. (Figure 1A)
• Pivot rubber fl aps out of the way to access the grille locking
screws. (Figure 1A)
• Using a Phillips-head screwdriver, remove the screws and
put aside. (Figure 1A)
• To remove front grille, rotate grille counterclockwise so the
raised rib (Figure 1B) aligns with the unlock symbol.
• To remove back grille, rotate grille counterclockwise so the
raised rib (Figure 1B) aligns with the unlock symbol.
• To help remove lint and dirt from inside the fan, use a
vacuum equipped with a brush attachment.
New 10/24 APDC215ES6
TO REDUCE THE RISK OF FIRE, ELECTRICAL SHOCK OR PERSONAL INJURY, ALWAYS FOLLOW
THESE IMPORTANT SAFETY INSTRUCTIONS AND WARNINGS:
MAINTENANCE
• Always unplug the cord before moving, servicing or cleaning.
• Never place the fan in or near water.
• Clean the Fan only with a vacuum equipped with a brush attachment;
the vacuum will remove the lint and dirt from inside the Fan
• Clean the body of the Fan with a soft cloth only.
• NEVER use ALCOHOL or SOLVENTS such as gasoline, benzene, paint thinner, or other harsh cleaners.
TROUBLE SHOOTING TIPS
If your Fan fails to operate, see below for a list of probable causes and solutions:
• Try powering the fan off and unplugging it from the wall outlet. Allow the fan to sit for 10-15 minutes and try plugging
it in again.
• When plugging the fan in, be sure it is plugged directly into a working outlet.
• Remote not working? Be sure you are using brand new batteries, and they are installed correctly.
STORAGE: Store the fan with these instructions, in the original carton in a cool, dry place.
LUBRICATION: Motor is permanently lubricated. No maintenance is required.
DISPOSITION: Corrugated packaging materials are recyclable. For environmentally responsible disposal of this product, contact
your local waste service provider or visit www.1800recycling.com
®
.
LASKO PRODUCTS, LLC LIMITED WARRANTY (VALID IN U.S. AND CANADA ONLY)
What this warranty covers: This product is warranted against defects in workmanship and/or materials.
How long this warranty lasts: This warranty extends only to the original purchaser of the product and lasts for two (2) years from the date of
original purchase or until the original purchaser of the product sells or transfers the product, whichever fi rst occurs.
What Lasko will do: During the warranty period, Lasko will, at its sole option, repair or replace any part or parts that prove to be defective or
replace the whole product with the same or comparable model. For all warranty claims, the product must be returned to Lasko Products, LLC
at customer’s expense with proof of purchase within the warranty period. Contact the Lasko customer service department to obtain a Return
Authorization (“RA”) Do not return products without an RA or the warranty claim will not be processed.
What this warranty does not cover: This warranty does not apply if the product was damaged or failed because of accident, improper handling
or operation, shipping damage, abuse, misuse, or unauthorized repairs made or attempted. This warranty does not cover shipping costs for the
return of products to Lasko for repair or replacement. Lasko will pay return shipping charges from Lasko following warranty
repairs or replacement.
Any and all warranties, expressed or implied (including, without limitation, any implied warranty of merchantability), last two years from the date
of original purchase or until the original purchaser of the product sells or transfers the product, whichever fi rst occurs and in no event shall lasko’s
liability under any express or implied warranty include (i) incidental or consequential damages from any cause whatsoever, or (ii) replacementor
repair of any house fuses, circuit breakers or receptacles. Notwithstanding anything to the contrary, in no event shall lasko’s liability under any
express or implied warranty exceed the purchase price of the product and any such liability shall terminate upon the expiration of
the warranty period.
Some states and provinces do not allow limitations on how long an implied warranty lasts, or the exclusion or limitation of incidental or
consequential damages, so these exclusions or limitations may not apply to you. This warranty gives you specifi c legal rights. You may also have
other rights which vary from state to state and province to province.
Proof of purchase is required before a warranty claim will be accepted.
CUSTOMER SERVICE:
Email: [email protected]. Web: www.lasko.com
Our Customer Service team is available to assist you with product service questions and replacement parts. Chat with us at www.lasko.
com Monday-Friday 8am - 9pm EST (Valid in U.S. and Canada only). Please have your model number available, as well as the type
and style (located on the underside of your product).
Customer Service Dept.,
820 Lincoln Ave., West Chester, PA 19380
(Please do not send product to this location)
APDC215ESNew 10/24 7
LEA Y GUARDE ESTAS INSTRUCCIONES
Lea cuidadosamente las instrucciones antes de intentar armar, instalar, usar o dar mantenimiento al producto
descrito. Protéjase a sí mismo y a los demás cumpliendo con toda la información de seguridad. El no seguir las
instrucciones podría resultar en lesiones personales y/o daños a la propiedad.
Este Ventilador es sólo para uso residencial. No está destinado para ser usado en instalaciones comerciales,
industriales o agricultura.
Tiene Preguntas? Necesita una Parte?
Por favor no regrese el producto a la tienda!
Chatea con nosotros en www.lasko.com de lunes a
viernes de 8am a 9pm EST
(Válida solo en EE. UU. Y Canadá)
Registre su producto hoy
Podrás disfrutar de los siguientes benefi cios:
• Soporte efi ciente y avanzado
• Actualizaciones acerca del producto en el futuro
Escanee con un teléfono inteligente
Utilizado para Modelos:
APDC215
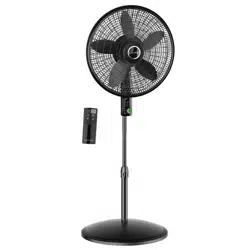
Ventilador de pedestal Whirlwind
®
Orbital Motion
Manual de instrucciones
3 opciones de
oscilación horizontal
60˚ / 100˚ / 150˚
105˚ de
inclinación
vertical
Control Remoto
Lleva 1 pila CR2025
Pila de botón de 3 V
(batería incluida)