A5P | 01
2500873
Please read all instructions carefully before
use and retain for future reference.
ATTENTION This appliance has a thermal
cut out switch. The thermal cut out will
activate and shut down the appliance
should the appliance overheat.
Unplug from the mains and or battery and
allow to cool for 30 minutes before re-use.
CAUTION Do not immerse in water.
CAUTION hot surfaces
Do not cover.
Do not use outdoors.
THIS PRODUCT IS ONLY SUITABLE FOR WELL INSULATED SPACES OR
OCCASIONAL USE.
BATTERY WARNINGS (INCLUDING BUT-
TON CELLS, AA BATTERYS, LITHIUM
PACKS)
WARNING The use, and particularly abuse
of portable sealed secondary lithium cells
and batteries may result in the creation of
hazards and may cause harm.
Do not dismantle, open or shred secondary
cells or
batteries.
Keep batteries out of the reach of children.
Use the appliance only with specically
designated battery packs. Use of any other
battery packs may create a risk of injury and
re.
First read the safety instructions and then
follow the charging notes and procedures.
Incorrect reassembly may result in a risk of
electric shock or re.
Protect the battery against water and mois-
ture. Always keep cells and batteries clean
and dry.
Wipe the cell or battery terminals with a
clean dry cloth if they become dirty.
Protect the battery from heat and re.
Place the charger in a position away from
any heat source and avoid storage in direct
sunlight.
Do not maintain secondary cells and batter-
ies on charge when not in use.
After extended periods of storage, it may be
necessary to charge and discharge the cells
or batteries several times to obtain maxi-
mum performance.
Do not short-circuit a cell or battery.
Do not store cells or batteries haphazardly
in a box or drawer where they may short-
circuit each other or be short-circuited by
conductive materials. When the battery

A5P | 01
Please read all instructions carefully
before use and retain for future reference.
INTENDED USE Only operate the
appliance for its intended purpose and
within the parameters specied in this
manual.
This appliance is for domestic use only.
Do not use outdoors or on wet surfaces.
This appliance is not intended for use by
persons with reduced physical, sensory or
mental capabilities, or lack of experience
and knowledge, unless supervised or
given appropriate instruction concerning
the product’s use by a person responsible
for their safety.
The appliance is not intended to be
operated by means of an external timer or
separate remote-control system.
GENERAL SAFETY Do not allow to
be used as a toy. Children should be
supervised to ensure they do not play with
the appliance.
If the appliance is not functioning
properly, has been dropped, damaged,
left outdoors, or immersed in liquid, do
not use, contact DOMU Brands Customer
Services.
Do not use the appliance if any parts
appear to be faulty, missing or damaged.
Ensure all parts are securely attached
as instructed by this instruction manual
before use.
CABLES AND PLUGS Check to ensure
your electricity supply matches that
shown on the rating plate. This product
should only be used as rated. Preferably,
the socket outlet should be protected by
a Residual Current Device RCD (UK/EU)
pack is not in use, keep it away from other
metal objects such as paper clips, coins,
keys, nails, screws or other small metal
objects that can make a connection from
one terminal to another. Short-circuiting
the battery terminals together may result in
burns or a re.
Do not expose battery to mechanical shock.
When possible, remove the battery from the
remote when not in use.
To facilitate cooling of the battery after use,
avoid placing the charger or battery pack in
a warm environment such as a metal shed
or an uninsulated trailer.
In the event of a cell leaking, do not allow
the liquid to come into contact with the skin
or eyes. If contact has been made, wash
the aected area with copious amounts of
water and seek medical advice.
Seek medical advice immediately if a cell or
battery has been swallowed.
Always observe the polarity marks (+) and
(-) on the cell, battery and equipment and
ensure correct use.
Retain the original cell and battery literature
for future reference
When disposing of secondary cells or
batterie, keep cells or batteries of dierent
electrochemical systems separate from
each other.
Do not use any cell or battery which is not
designed for use with the equipment.
Do not mix any cells of dierent
manufacturers, capacity, size or type within
a device.
Always purchase the battery recommended
by the
device manufacturer for the equipment.

A5P | 01
Ground Fault Indicator (US).
Do not use with a damaged cable or plug.
If the supply cable is damaged, it must
be replaced by a qualied engineer or
authorised service agent in order to avoid
a hazard. The use of an extension cable is
not recommended.
Do not handle the plug or appliance with
wet hands.
Keep the cable away from heated surfaces.
Do not let the cable hang over the edge of
the table or countertop where it could be
pulled on inadvertently by children or pets.
Do not pull the cable around sharp edges
or corners.
Do not leave unattended when plugged in.
Unplug from outlet when not in use.
Turn o all controls before unplugging.
Do not unplug by pulling on the cable. To
unplug, grasp the plug, not the cable.
Always unplug before performing user
maintenance, connecting or disconnecting
attachments, or changing accessories.
Ensure the cable is stored safely to prevent
hazards.
RISK OF PERSONAL INJURY Always
locate your appliance away from the
edge of the worktop, on a rm, at, heat-
resistant surface with sucient space
around all sides. Do not insert any objects
into openings or cover the appliance.
Do not place any cardboard, plastics or
paper inside or on the appliance unless
stated in the instructions.
Do not use the appliance near any
combustible surfaces. Do not use outdoors
or near heat sources.
Take care not to touch any surfaces that
may get hot when in use. Take care not to
touch any surfaces that may remain hot for
a period of time after use.
Never operate the appliance when empty.
Do not overload/overll the appliance.
When using for the rst time your
appliance may give o a ‘new’ smell or
vapour. This will dissipate after a few uses.
Do not lift or move the appliance whilst in
use.
Do not operate continuously for periods
longer than those marked on the product
or indicated in the instructions.
Ensure the appliance is switched o and
unplugged before changing accessories or
cleaning.
Use only as described in this manual
and with DOMU Brands recommended
attachments only.
TECHNICAL SPECIFICATION
Rated Voltage 220V-240V~
Rated Power 2500W
Rated Frequency 50Hz
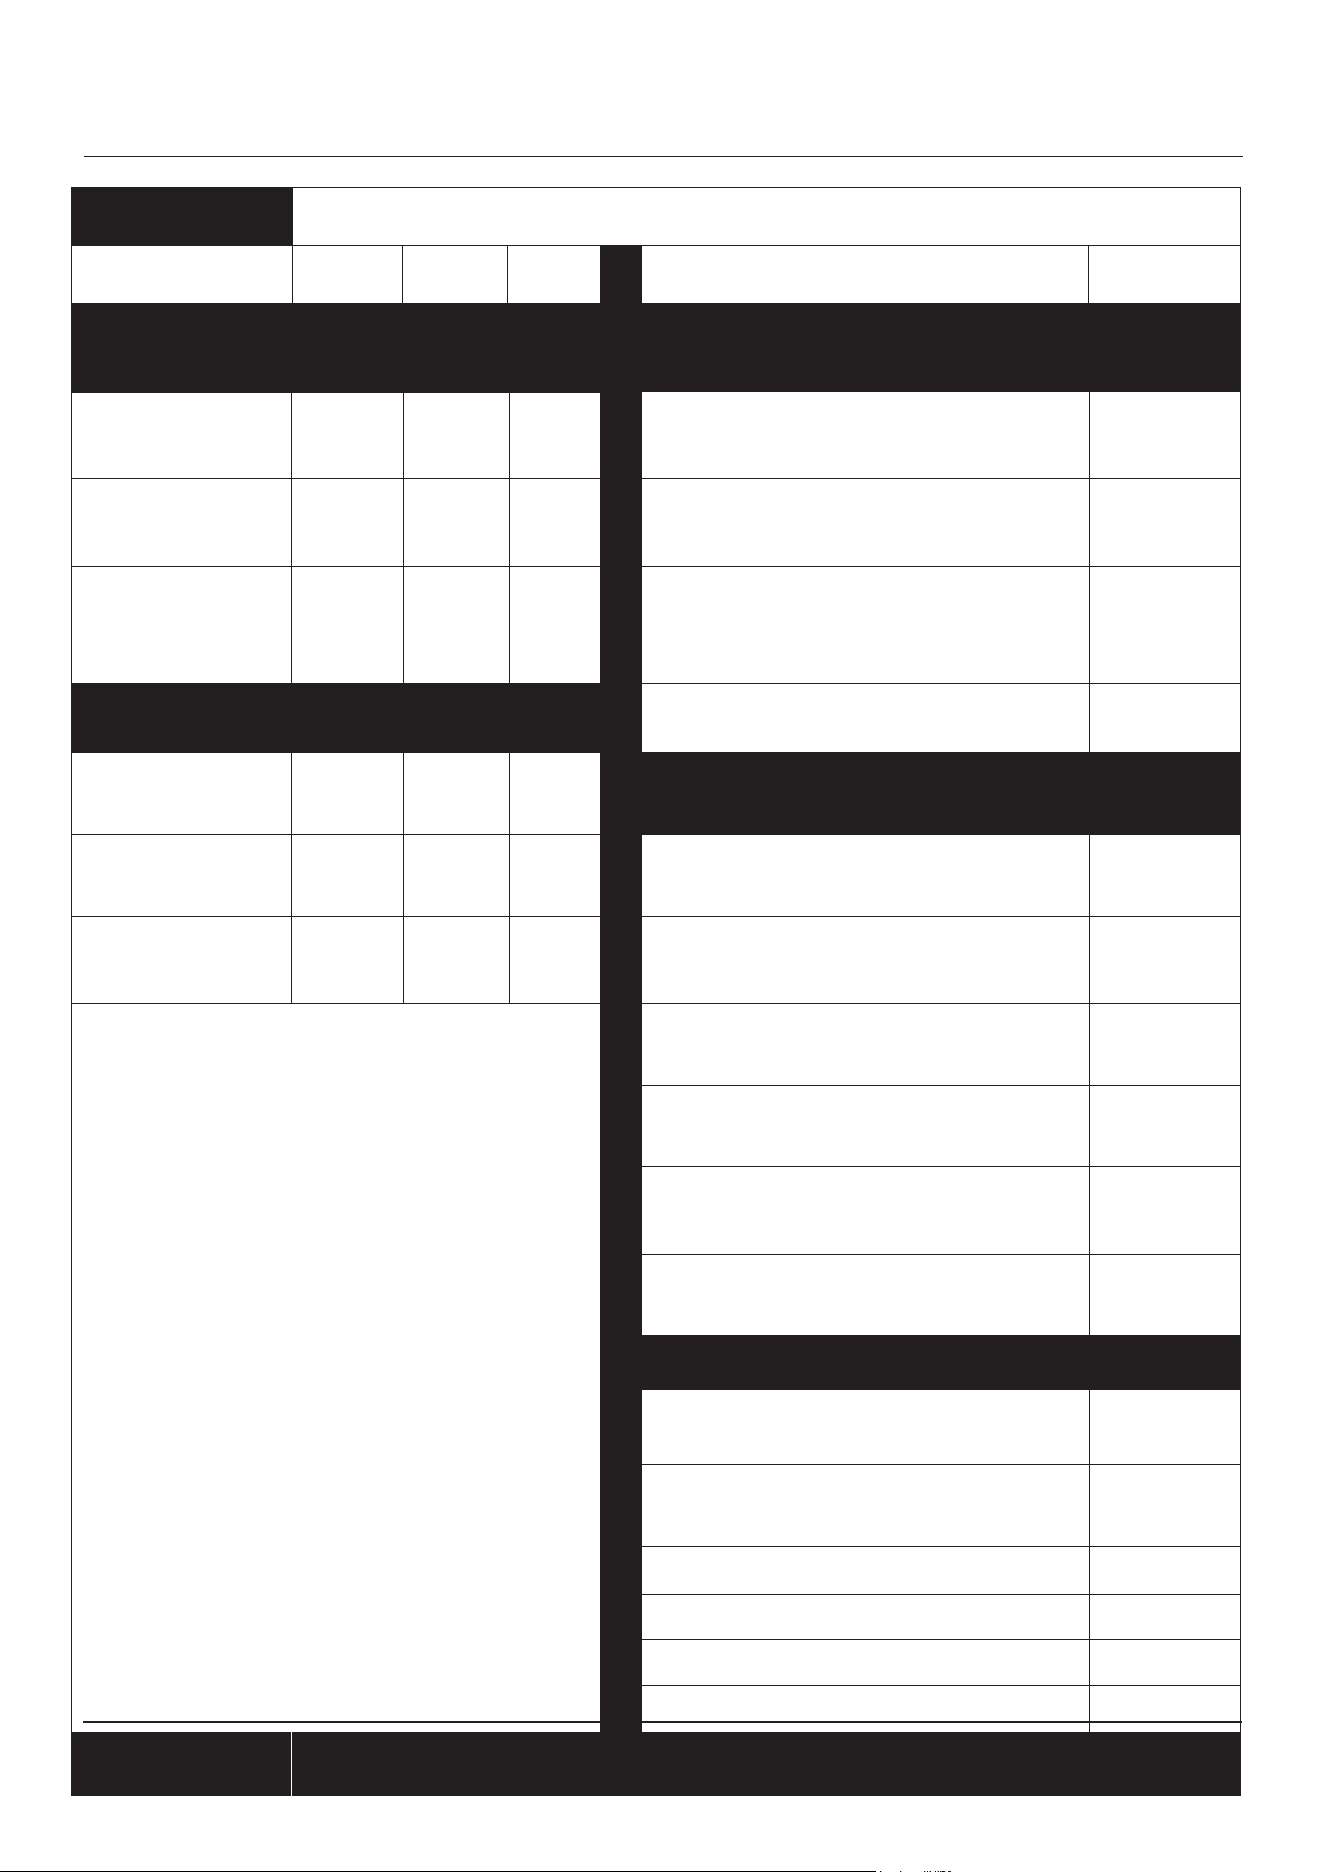
A5P | 01
Item Symbol Value Unit Item Unit
Heat Output
Type of heat input for Electrical Storage Radia-
tors only (select one)
Nominal Heat
Output
Minimum Heat
Output (indicative)
Maximum
Continious Heat
Output
Manual heat charge control with
integrated thermostat.
Manual heat charge control with room
and/or outdoor temperature feedback.
Electronic heat charge control with
room and/or outdoor temperature
feedback
no2.5
1.0
2.5
N/A
N/A
0.00017
no
no
no
no
no
Yes
no
Yes
no
no
no
no
no
no
no
Auxiliary electricity consumption Fan assisted heat output
At nominal
heat output
At minimum
heat output
In standy mode
Model
Type of heat output/room temperature control
(select one)
2500873
Single stage heat output and no room
temperature control
Two or more manual stages, no room
temperature control
With mechanical thermostat room
temperature control
With electronic room temperature
control
Electronic room temperature control
plus day timer
Electronic room temperature control
plus week timer
Other control options (multiple selections possible)
room temperature control with
prescence detection
room temperature control with
open window detection
with distance control option
with adaptive start control
with working time limitation
with black bulb sensor
Contact Details
P
nom
P
min
P
max
EL
max
EL
min
EL
SB
kW
kW
kW
kW
kW
kW
DOMU Brands Ltd, 6th Floor, The Tower, Deva City Office Park, Salford, M3 7BF
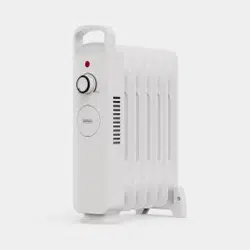
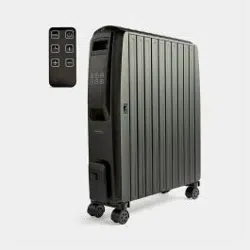
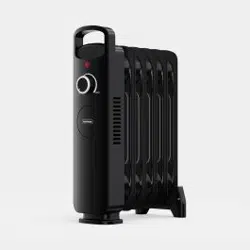
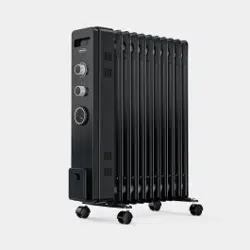
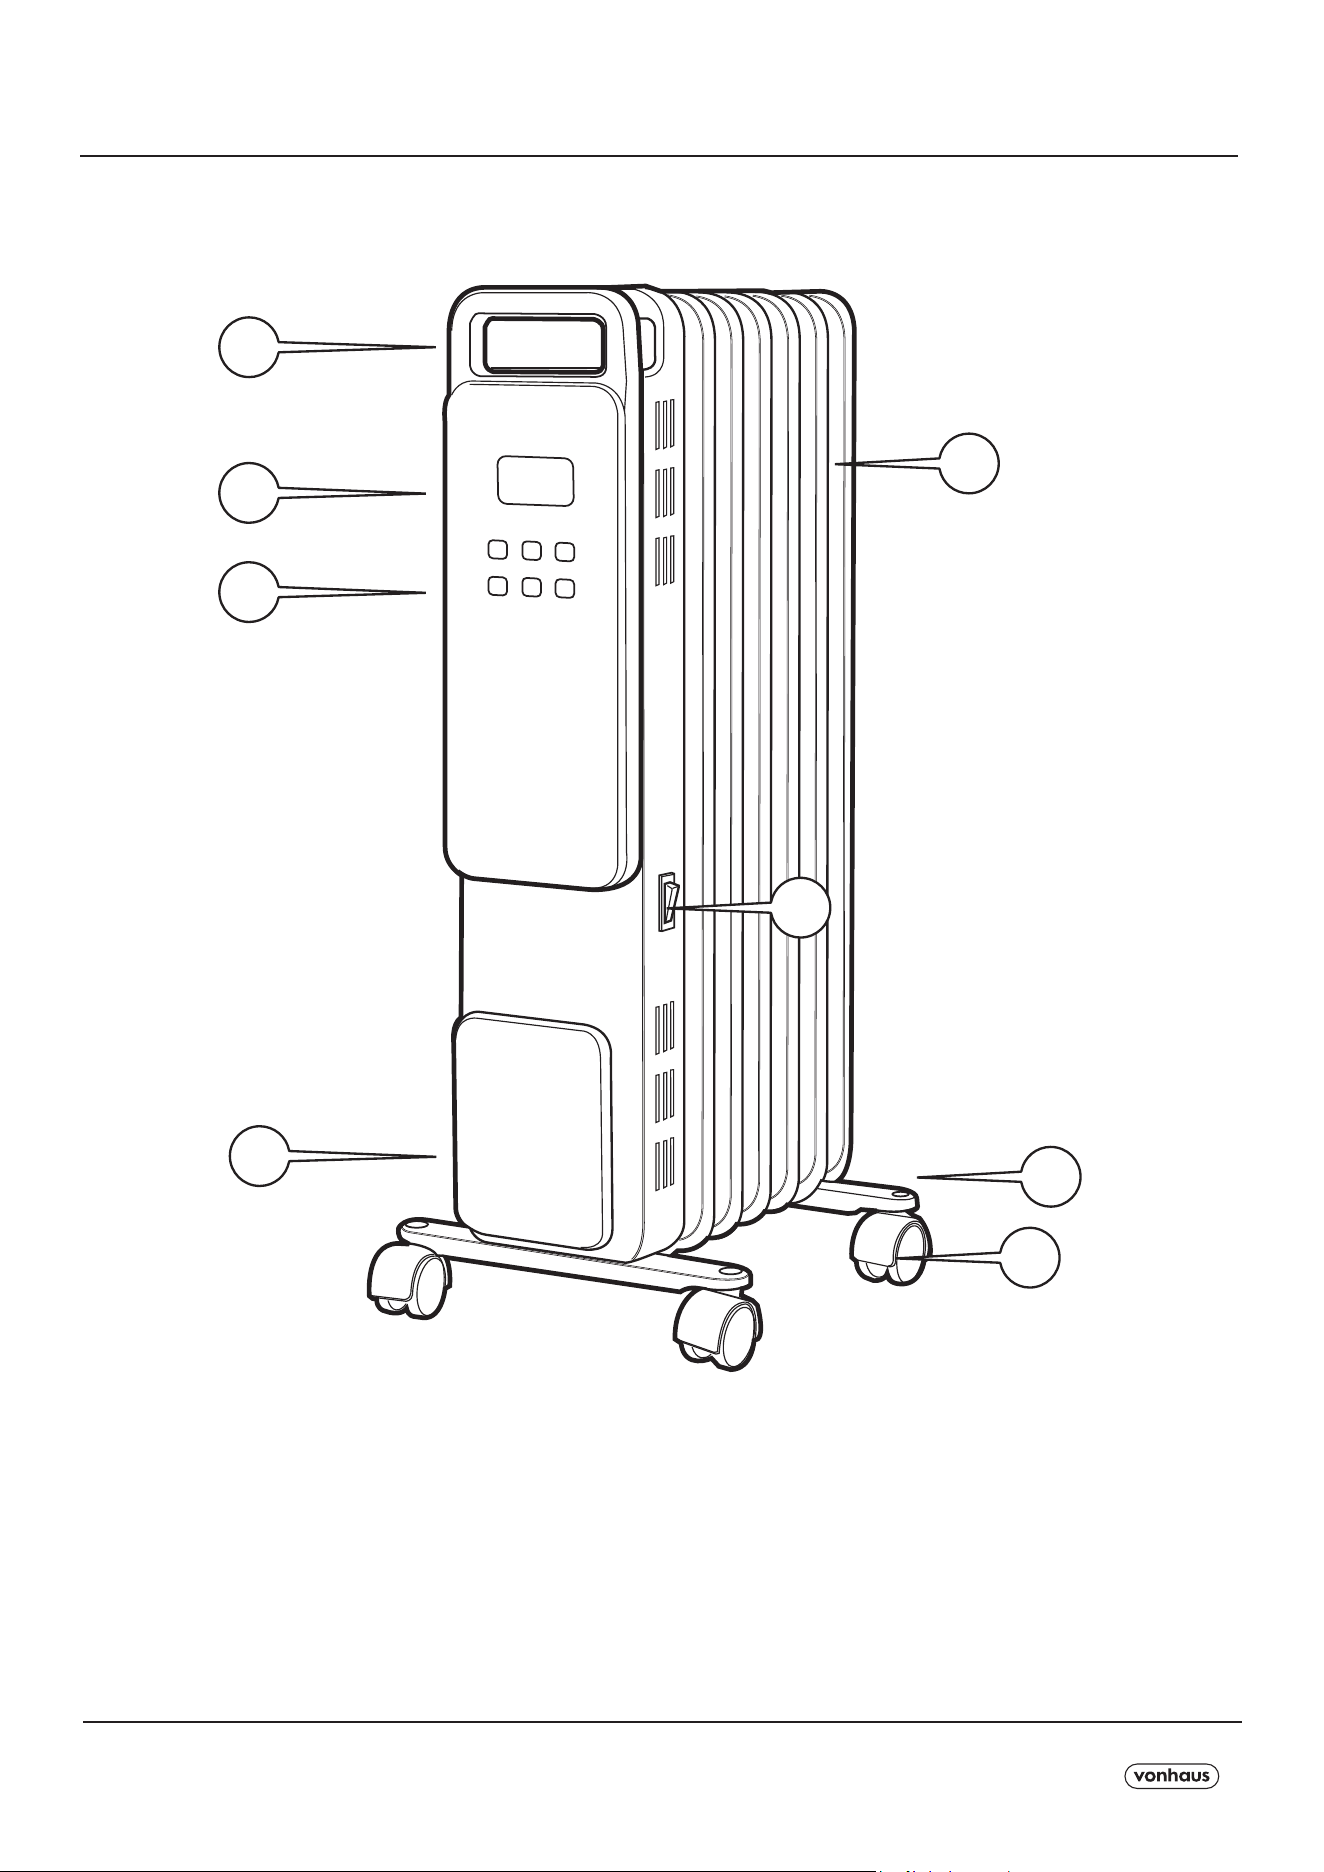
COMPONENTS / COMPOSANTS / KOMPONENTEN / COMPONENTES / COMPONENTI /COMPONENTE
A5P | 01
SPECIFICATION
1- Handle
2- Radiator Body
3- LED Panel
4- Control Panel
5- Cable Plate.
6- Wheel Base
7- Wheels
8- ON/OFF Switch
9- Remote Control (not pictured)
2
6
7
8
1
3
4
5
A5P | 01
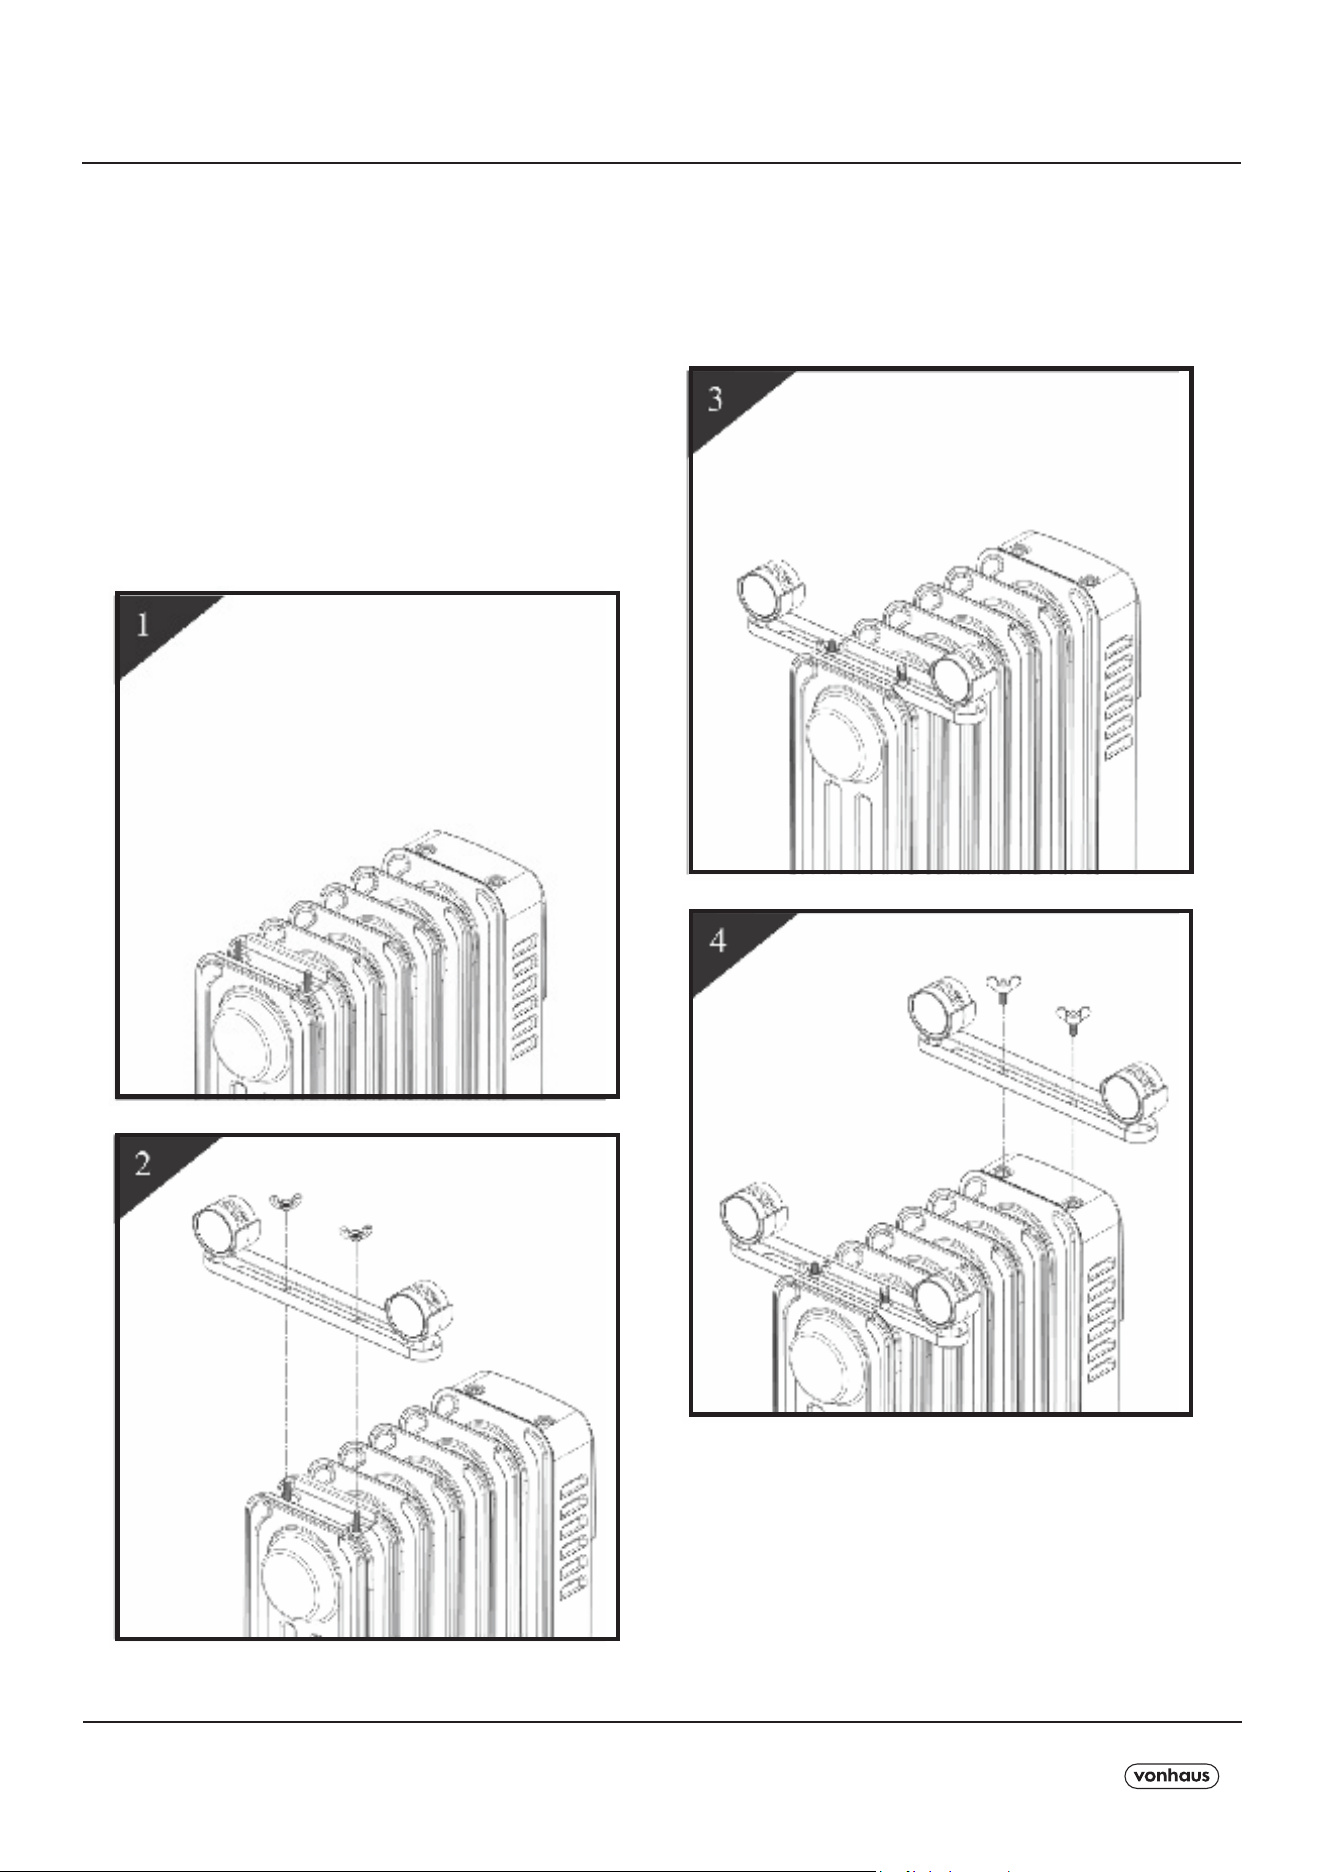
ASSEMBLY
1. Turn the radiator upside-down on a
scratch-free and stable surface to prevent
damage to the paint nish or your oor
surfacing (see Fig 1).
2. Securely fasten the wheels assemblies
onto the radiator by screwing the wing
nuts onto the threads (see Fig. 2).
3. Ensure the legs/wheels are
completely secure before reverting the
Radiator back to the upright position
(see Fig 4).
A5P | 01
BEFORE FIRST USE
OPERATION
OPERATION
1. Ensure the ON/OFF Switch is in the
‘OFF’ position before connecting to a
suitable mains outlet.
2. Switch the Radiator on.
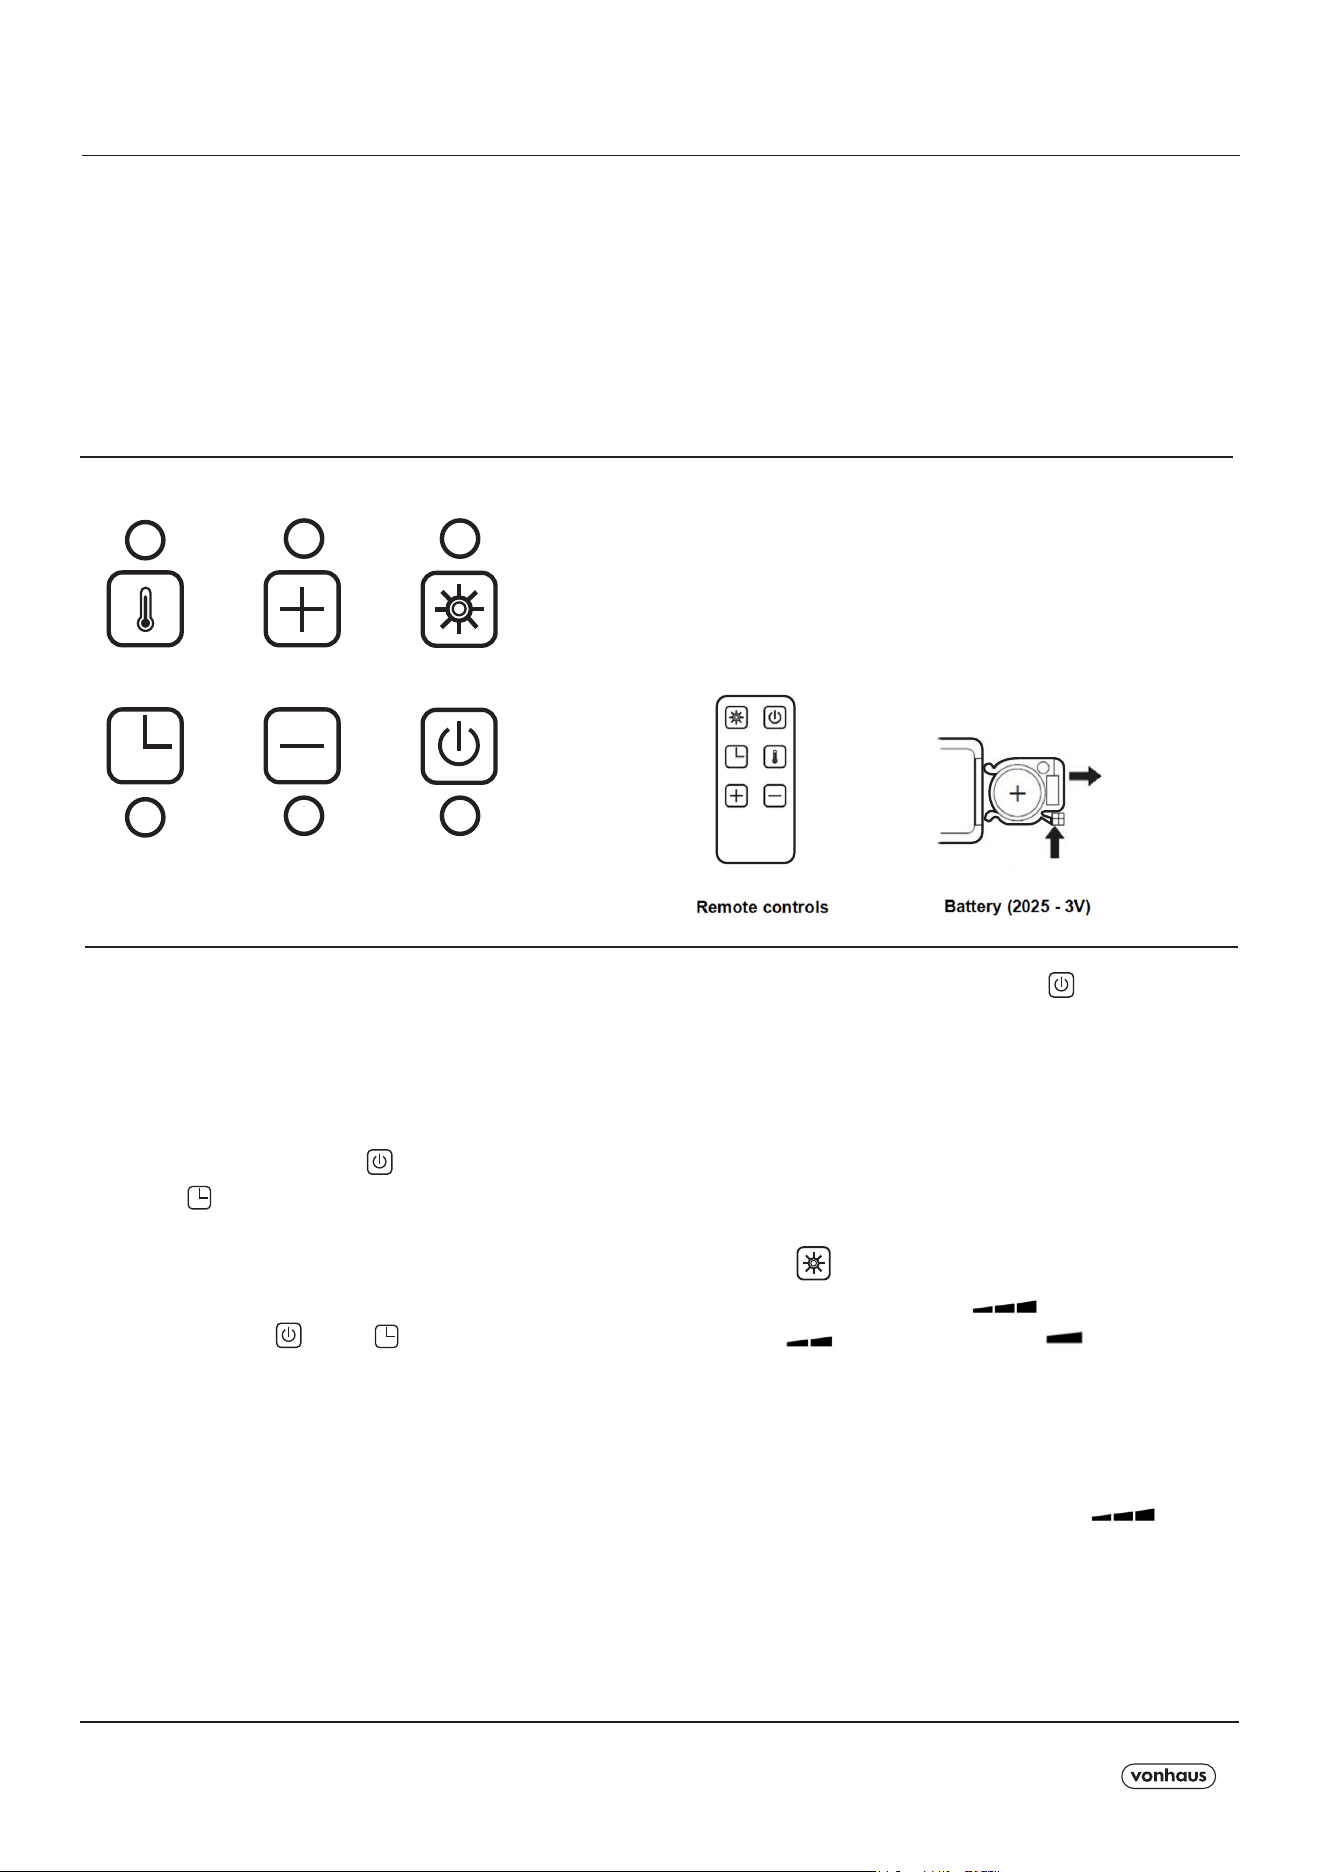
The stand-by button ( ) and Timer
button ( ) will illuminate.
The product is now in stand-by awaiting a
function to be selected via the buttons on
the Control Panel.
Press button ( ) or ( ), the screen and
other buttons will light on also.
The appliance will emit a beep sound.
The following settings can be performed
using the touch panel.
A beep sound is emitted at every press.
Wipe down the surfaces of the Radiator
Body with a warm,damp cloth.
This will help remove any manufacturing
residue.
Press the stand-by button ( ) to exit the
stand-by mode and begin selection of the
dierent modes.
The Radiator will start working under Eco
mode (ECO).
HEATING POWER & ECO MODE -
With each press of the Power/Mode
button ( ), it will cycle from Eco mode
(ECO) to High power ( ) to Medium
power ( ) to Low power ( ).
Under Low power, Medium power and
High power setting, the Radiator will keep
working controlled by thermal cut-out.
Note: The higher the power is ( ),the
quicker the desired temperature will be
achieved but the power consumption
will be higher. Lower power levels are
recommended when the Radiator is being
used for an extended period of time.
Place the Unit in an upright position on a
at, steady, stable, heat-resistant surface.
Make sure there is nothing ammable or
heat sensitive within 1 meter (40 inches).
CAUTION: Operating the product in any
other position could cause a hazard.
A
D
B
E
C
F
A. Thermostat Button.
B. Temperature & Hour increase Button.
C. Power/Mode Button.
D. Timer Button.
E. Temperature & Hour decrease Button.
F. Stand-by Button
A5P | 01
OPERATION
ECO MODE -
Press the Power/Mode button ( ), until
the ‘Eco’ icon illuminates.
Under the Eco mode, the heating power
will adjust automatically when the room
temperature is approaching the set
temperature.
For example, if the temperature is set to
25ºC, and the room temperature is less
than 22ºC, the Radiator will adjust to high
power until the room temperature has
increased.
The Radiator will then drop to medium
power then low power until the room has
reached the set temperature.
Note: If no temperature has been set, the
default temperature is 23ºC under the Eco
mode.
TIMER - Auto power On.
Note: This function should only be set if
you require the Radiator to automatically
switch on after a certain period of time (1
to 24 hours from the time the function is
set).
1. Press the On/O power switch to turn
the appliance on.
The stand-by and Timer button will
illuminate The appliance will be in Stand-
by mode.
2. Press the Timer button ( ), the hour
digit (0.0) will blink.
3. Use the “+” and “-” buttons to set the
operation time between 1 and 24 hours.
This function will activate once the hour
digit stops blinking.
The digits counting down will display on
the screen.
4. The Radiator will automatically turn on
when the time runs out.
Note : When using timer modes,
consideration should be given to the fact
that the Radiator may come on whilst
unattended.
THERMOSTAT SETTING -
Desired temperature setting ranges
between 5ºC-30ºC.
Press the Power/Mode button ( ) to set
the Power Mode, then press the
Thermostat Button ( ). You will see the
digits blink on screen.
Adjust using the + and - buttons to set the
desired temperature.
The set temperature will then stop blinking
on screen and appear static.
The Radiator will automatically adjust its
power to maintain the set temperature.

A5P | 01
OPERATION
TIMER - Auto power O.
Note: This function should only be set if
you require the Radiator to automatically
switch o after a certain period of time (1
to 24 hours from the time the function is
set).
1. Whilst the Radiator in switched on and
in operation, press the Timer button ( )
and the hour digit (0.0) will blink.
2. Use the “+” and “-” buttons to set the
operation time between 1 and 24 hours.
This function will activate once the hour
digit stops blinking.
The digits counting down and setting
temperature will alternately display on the
screen.
3. The Radiator will automatically turn o
when the time runs out.
To switch o -
Simply press the stand-by button ( )
to end any of the cycles, then turn the
Radiator OFF using the ON/OFF Switch.
Disconnect from the mains outlet and
allow to completely cool.

A5P | 01
CAUTION: Switch o the Radiator and
disconnect the from the mains outlet.
Ensure the Radiator is completely cool
before cleaning.
Vacuum-clean the Vents to remove dust
from these areas.
To remove dust on external surfaces, wipe
the Radiator with a damp (not wet) lint-free
cloth rinsed in hot soapy water only.
CAUTION: Do not use any harsh detergent
or abrasive cleaners.
WARNING! Do not spray with liquids or
submerge in any liquid or water.
WARNING! Do not attempt to clean the
inside of the Radiator. Do not attempt to
open the casing at any time. There are no
user-serviceable parts.
SAFETY FEATURES
MAINTENANCE
This Radiator is tted with an overheat
protection switch (thermal cut-out) which
will power o the appliance automatically
in case of overheating. Should this occur,
unplug the appliance and allow to cool fully
for approximately 30 minutes.
Follow the operation instructions to restart
the appliance after removing the source
of the overheating (poor ventilation, item
covering the Radiator etc.). The Radiator
should function normally. Should the
problem persist, please contact DOMU
Brands Customer Services.
To avoid damage and to regulate the
temperature, this Radiator is tted with
a thermostatic safety device. The safety
device will activate and cut out the power
to the Radiator once a certain temperature
is reached. The Radiator will start again
once the temperature has lowered.
The Radiator is also tted with a tip switch
which will cut o the power to the Radiator
if it is knocked over. Should this happen,
disconnect at the mains and allow to
cool fully before attempting to move the
Radiator. Inspect the Radiator for damage.
If - and only if - the Radiator is free from
damage, plug back into the mains. The
Radiator should function normally.

A5P | 01
DISPOSAL INFORMATION Please
recycle where facilities exist. Check with
your local authority for recycling advice.
CUSTOMER SERVICE If you are having
diculty using this product and require
support, please contact
WARRANTY To register your product and
nd out if you qualify for a free extended
warranty please go to
www.vonhaus.com/warranty.
Please retain a proof of purchase receipt
or statement as proof of the purchase
date. The warranty only applies if the
product is used solely in the manner
indicated in the warnings page of this
manual, and all other instructions have
been followed accurately. Any abuse of
the product or the manner in which it is
used will invalidate the warranty. Returned
goods will not be accepted unless re-
packaged in its original packaging
and accompanied by a relevant and
completed returns form. This does not
aect your statutory rights. No rights are
given under this warranty to a person
acquiring the appliance second-hand or
for commercial or communal use.
COPYRIGHT All material in this
instruction manual are copyrighted by
DOMU Brands.Any unauthorised use may
violate worldwide copyright, trademark,
and other laws.
C
THANK YOU
Thank you for purchasing your product/
appliance.
Should you require further assistance with
your
purchase, you can contact us at
VonHaus is a registered trademark of DOMU
Brands Ltd. Made in China for DOMU
Brands. M24 2RW.