Brand:AOBOSI
Model:6006B
120V~ 60Hz 108W
Instruction Manual
RANGE HOOD

SAFETY INSTRUCTIONS
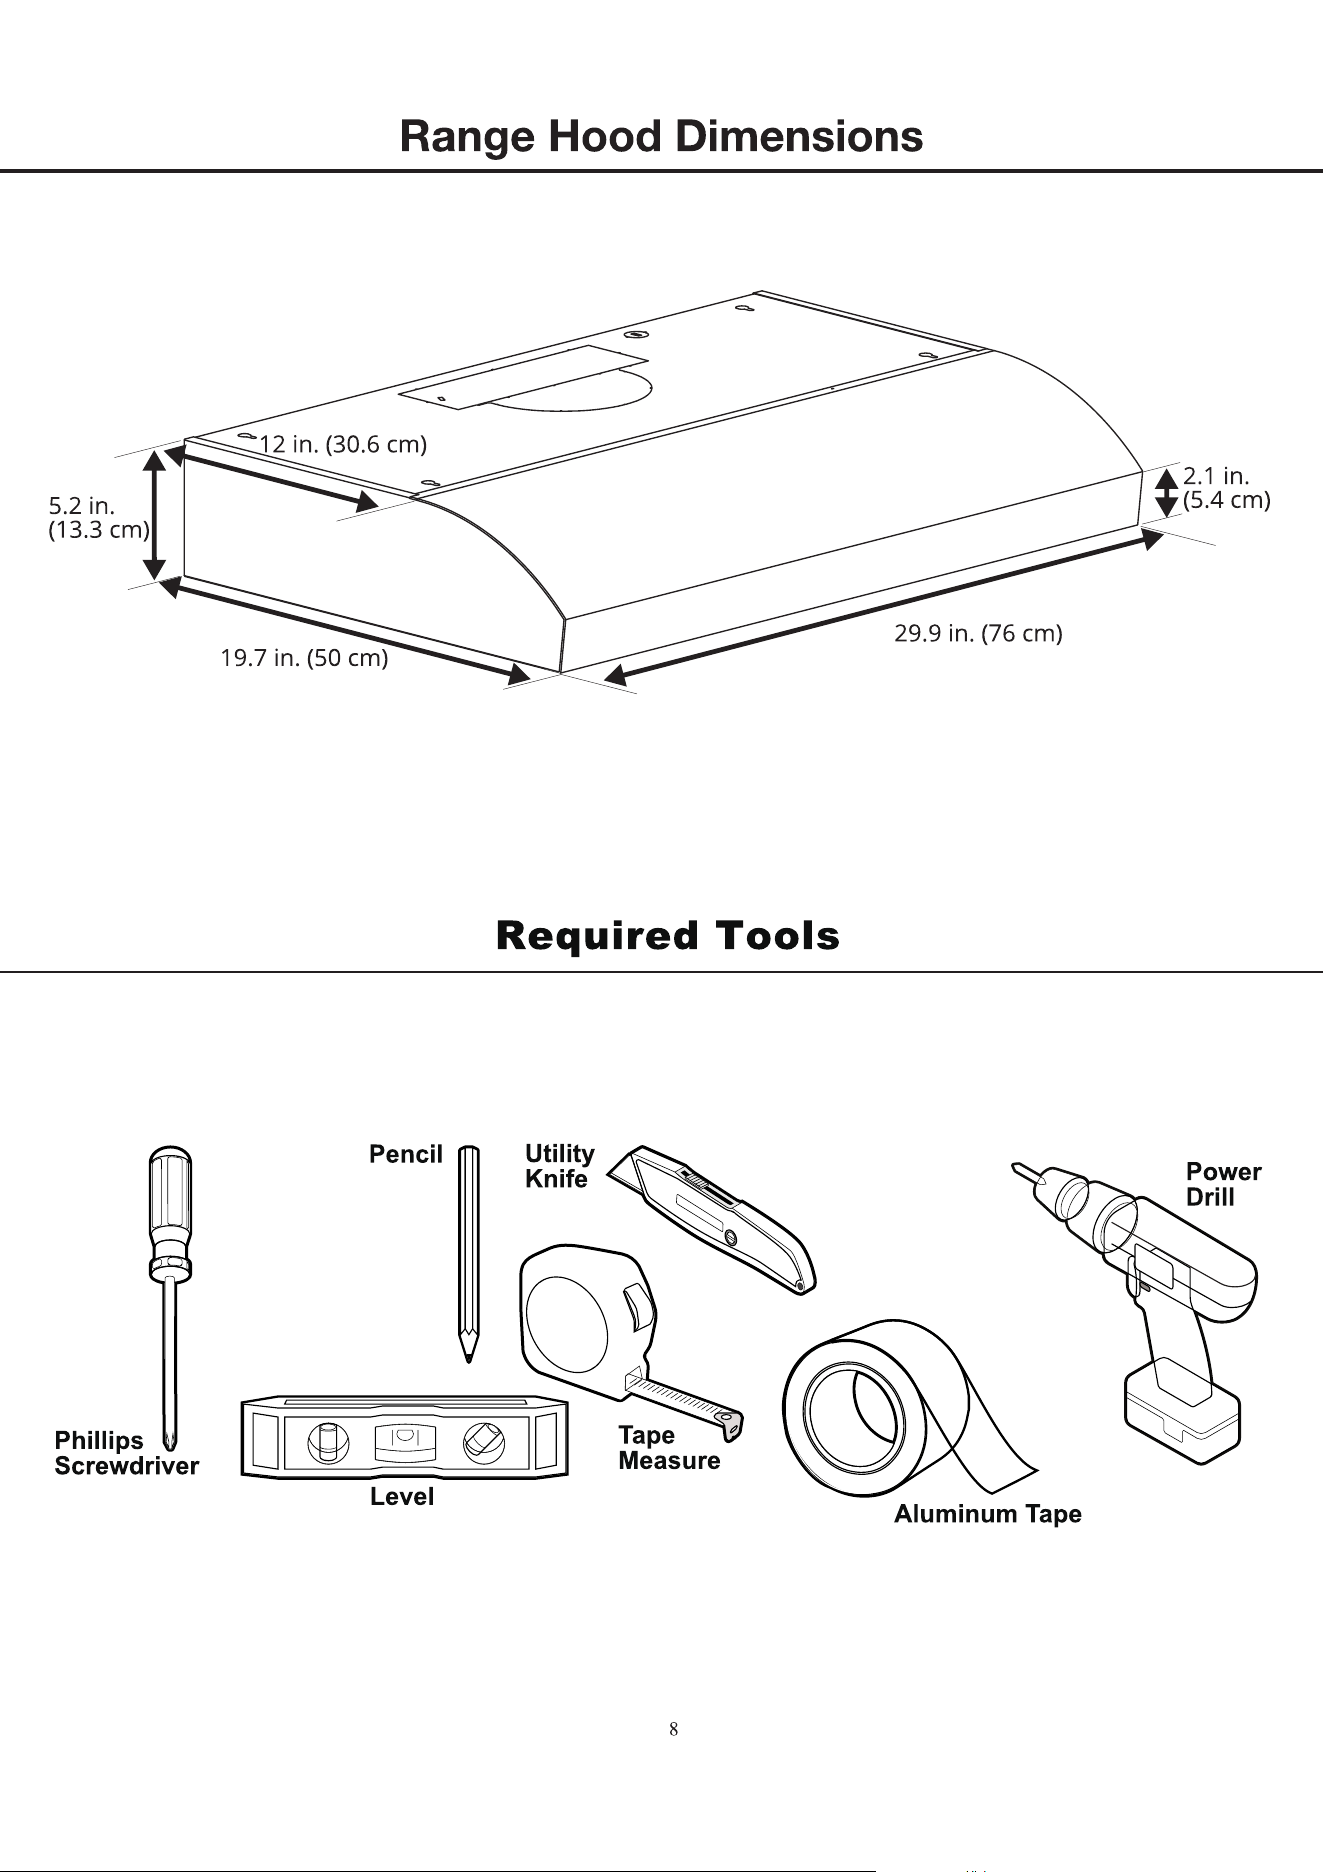
INSTALLATION
START USING YOURRANGE HOOD
TROUBLESHOOTING
MAINTENANCE AND CLEANING
ENVIRONMENT PROTECTION
WARRANTY
3
10
15
16
17
19
20
CONTENT
MANUFACTURERS: GUANGDONG ATLAN ELECTRONIC APPLIANCE MANUFACTURE CO., LTD
ADD: 29-1, FUAN INDUSTRIAL PARK, LELIU, SHUNDE, GUANGDONG, CHINA
3
SAFETY INSTRUCTIONS
This manual explains the proper installation and use of your range hood,
please read it carefully before using even if you are familiar with the product.
The manual should be kept in a safe place for future reference.
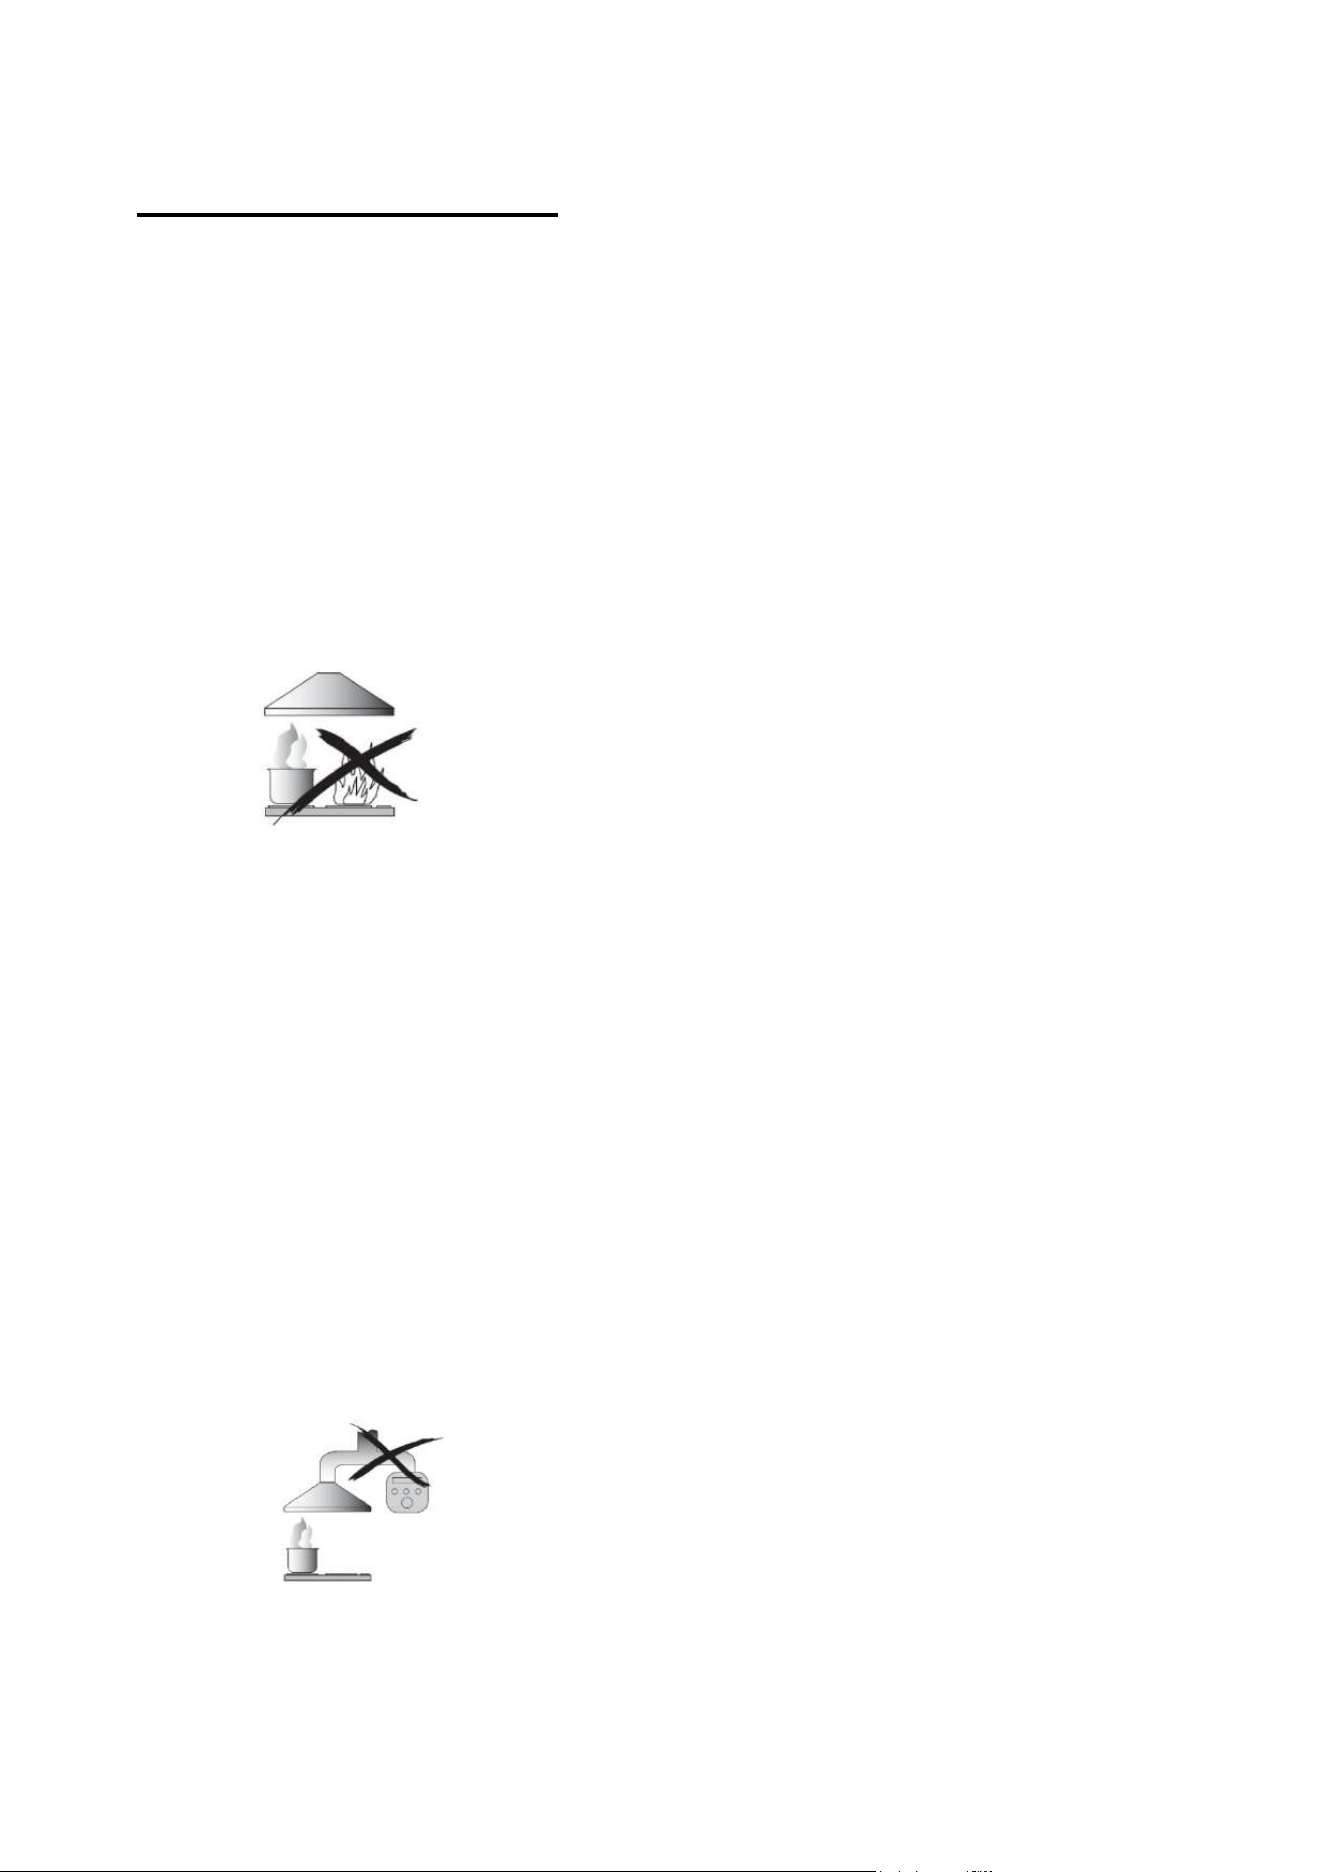
Never to do:
● Do not try to use the range hood
without the grease filters or if the filters
are excessively
greasy!
●Do not leave frying pans unattended
during use beca
use overheated fats or
oils might catch fire.
●Never leave naked flames under the
range hood.
●If the range h
ood is damaged, do not
attempt to use.
●
Do not flam
e under the range hood; risk of fire.
●CAUTION: Accessible parts may
b
ecome hot whe
n used with cooking
appliances.
●
The minimum distance b
etween the
supporting surface for the cooking
vessels on the hob and the lowest part
of the range hood. (When the range
hood is located above a gas appliance,
this distance shall be at least 65 cm
)
●
The air must not be discharged into a
flue tha
t is used for exhausting fumes
from appliances burning gas or other
fuels.
Range hoods and other cooking
fume extractors may adversely affect
the safe operation of appliances
burning gas or other fuels (including
those in other rooms) due to back flow
of combustion gases. These gases
can potentially result in carbon
monoxide poisoning. After installation of a range hood or other cooking fume
extractor, the operation of open flued gas appliances should be tested by a
competent person to ensure that back flow of combustion gases does not occur.
4
Always to do:
● Important! Always switch off the electricity supply at the mains during
installation and maintenance such aslight bulb replacement.
●The range hood must be installed in ccordance with the installation
instructions and all measurements followed.
●All installation work must be carried out by a competent person or qualified electrician.
●Please dispose of the packing material carefully. Children are vulnerable to it.
● Pay attention to the sharp edges inside the range hood especially during installation
and cleaning.
●Make sure the ducting has no bends sharper than 90 degrees as this will
reduce the efficiency of the range hood.
●Warning: Failure to install the screws or fixing device in accordance with
these instructions may result in electrical hazards.
●Warning: Before obtaining access to terminals, all supply circuits must be disconnected.
●Always put lids on pots and pans when cooking on a gas cooker.
●When in extraction mode, a
ir in the room is being removed by the range hood.
Please make sure that proper ventilation measures are being observed.
The range hood removes odours from room but not steam.
●There shall be adequate ventilation of the room when the range hood is
use
d
a
t
t
h
e
s
a
m
e
t
i
m
e as appliances burning gas or other fuels.
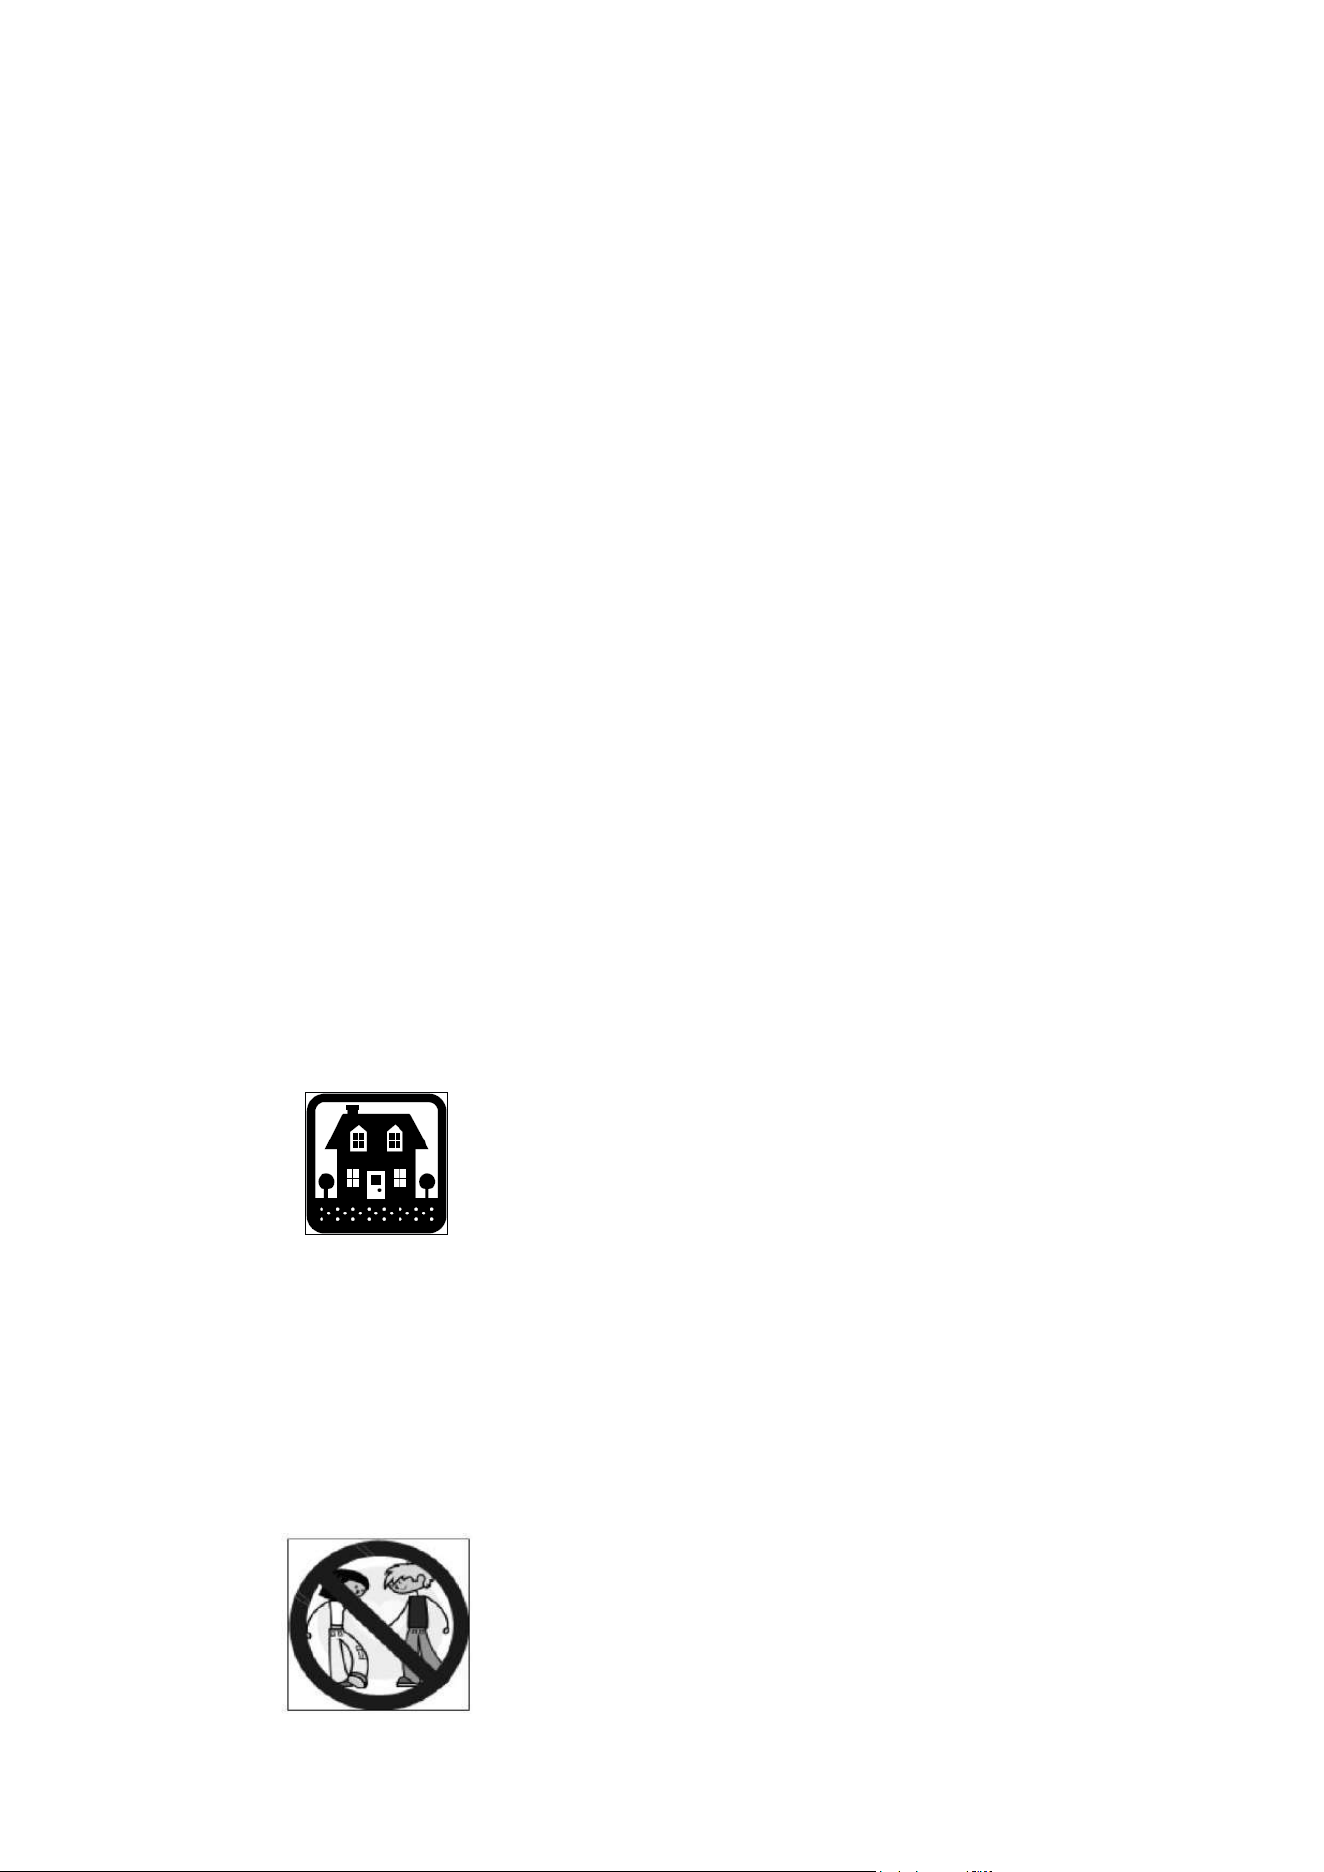
●Range hood is for domestic use only.
●If the supply cord is damaged, it must be replaced by the manufacturer, its
service agent or similarly q
ualified persons in order to avoid a hazard.
●This appliance can be used by children aged from 8 years and above and persons with
reduced physical, sensory or mental capabilities or lack of experience and knowledge
if they have been given supervision or instruction concerning use of the appliance in a
safe way and
understand the hazards involved. Children shall not play with the appliance.
Cl
e
a
n
ing
a
n
d
u
se
r
maintenance shall not be made by children without supervision.

5
Always to do:
●Caution: The appliance and its accessible parts can become hot during operation.
Be careful to avoid touching the heating elements.
Children younger than 8 years old should stay away unless they are
under permanent supervision.
●There is a fire risk if cleaning is not carried out in accordance with the instructions.
●Regulations concerning the discharge of air have to be fulfilled.
●Clean your appliance periodically by following the method given in the
chapter MAINTENANCE.
●
For safety reason, please use only the same size of fixing or mounting screw
which are recommended in this instruction manual.
●Regarding the details about the method and frequency of cleaning,
please refer to maintenance and cleaning section in the instruction manual.
●Cleaning and user maintenance shall not be made by children without supervision.
●When the range hood and appliances supplied with energy other
than electricity are simultaneously in operation, the negative pressure in the
room must not exceed 4 Pa(4 x 10
-5
bar)
.
●WARNING: Danger of fire: do not store items on the cooking surfaces.
●A steam cleaner is not to be used.
●
NEVER try to extinguish a fire with water, but switch off the appliance and
then cover flame e.g. with a lid or a fire blanket.
6
WARNING
1. Before servicing or cleaning unit, unplug or disconnect the range hood from the
power supply.
2. TO REDUCE THE RISK OF A RANGE TOP GREASE FIRE:
A. Never leave surface units unattended at high settings. Boil overs cause
smoking and greasy spillovers that may ignite. Heat oils slowly on low or
medium settings.
B. Always turn hood ON when cooking at high heat or when flam being food (i.e.
Crepes Suzette, Cherries Jubilee, Peppercorn Beef Flambé).
C. Clean ventilating fans frequently.
D. y. Grease should not be allowed to accumulate on fan or filter.
E. Use proper pan size. Always use cookware appropriate for the size of the
surface element.
3. TO REDUCE THE RISK OF INJURY TO PERSONS IN THE EVENT OF A RANGE
TOP GREASE FIRE, OBSERVE THE FOLLOWING:
A. SMOTHER FLAMES with a close-fitting lid, cookie sheet, or metal tray, then
turn off the burner. BE CAREFUL TO PREVENT BURNS. If the flames do not
go out immediately, EVACUATE AND CALL THE FIRE DEPARTMENT.
B. NEVER PICK UP A FLAMING PAN – You may be burned.
C. DO NOT USE WATER, including wet dishcloths or towels – a violent steam
explosion will result.
D. Use an extinguisher ONLY if:
1) You know you have a Class ABC extinguisher, and you already know how
to operate it.
2) The fire is small and contained in the area where it started.
3) The fire department is being called.
4) You can fight the fire with your back to an exit.
a
Based on “Kitchen Fire safety Tips” published by NFPA.
4. To Reduce The Risk Of Fire Or Electric Shock, Do Not Use This Fan With Any
Solid-State Speed Control Device.
For the permanently-connected range hood
5. TO REDUCE THE RISK OF FIRE, ELECTRIC SHOCK, OR INJURY TO
PERSONS, OBSERVE THE FOLLOWING:
A. Use this unit only in the manner intended by the manufacturer. If you have
questions, contact the manufacturer.
B. Before servicing or cleaning unit, switch power off at service panel and lock the
service disconnecting means to prevent power from being switched on
accidentally. When the service disconnecting means cannot be locked, securely
fasten a prominent warning device, such as a tag, to the service panel.
For the cord-connected range hood
6. To provide protection against electric shock, connect to properly grounded outlets
only.
CAUTION: For General Ventilating Use Only. Do Not Use To Exhaust Hazardous
Or Explosive Materials And Vapors.
7
WARNING
1. TO REDUCE THE RISK OF FIRE, USE ONLY METAL DUCTWORK.
For the permanently-connected range hood
2. TO REDUCE THE RISK OF FIRE, ELECTRIC SHOCK, OR INJURY TO
PERSONS, OBSERVE THE FOLLOWING:
A. Installation work and electrical wiring must be done by qualified person(s) in
accordance with all applicable codes and standards, including fire-rated
construction.
B. Sufficient air is needed for proper combustion and exhausting of gases through
the flue (chimney) of fuel burning equipment to prevent back drafting. Follow the
heating equipment manufacturer’s guideline and safety standards such as those
published by the National Fire Protection Association (NFPA), and the American
Society for Heating, Refrigeration and Air Conditioning Engineers (ASHRAE),
and the local code authorities.
C. When cutting or drilling into wall or ceiling, do not damage electrical wiring and
other hidden utilities.
D. Ducted fans must always be vented to the outdoors.
E. If this unit is to be installed over a tub or shower, it must be marked as
appropriate for the application and be connected to a GFCI (Ground
Fault Circuit Interrupter) – protected branch circuit.
For the cord-connected range hood
3. GROUNDING INSTRUCTIONS
This appliance must be grounded. In the event of an electrical short circuit,
grounding reduces the risk of electric shock by providing an escape wire for
the electric current. This appliance is equipped with a cord having a
grounding wire with a grounding plug. The plug must be plugged into an
outlet that is properly installed and grounded.
WARNING – Improper grounding can result in a risk of electric shock.
Consult a qualified electrician if the grounding instructions are not completely
understood, or if doubt exists as to whether the appliance is properly
grounded.
Do not use an extension cord. If the power supply cord is too short, have a
qualified electrician install an outlet near the appliance.
10
CAUTION
1. To reduce risk of fire and to properly exhaust air, be sure to duct air outside. Do not
vent exhaust air into spaces within walls or ceilings or into attics, crawl spaces, or
garages.
2. Take care when using cleaning agents or detergents.
3. Avoid using food products that produce flames under the Range Hood.
4. To avoid motor bearing damage and noisy and/or unbalanced impellers, keep
drywall spray, construction dust, etc. off power unit.
5. Your hood motor has a thermal overload which will automatically shut off the motor
if it becomes overheated. The motor will restart when it cools down. If the motor
continues to shut off and restart, have the hood serviced.
6. For best capture of cooking impurities, the bottom of the hood should be a
minimum of 26" (65 cm) and a maximum of 30" (75 cm) above the cooking surface.
7. Two installers are recommended because of the large size and weight of this hood.
8. This product is equipped with a thermostat which may start blower automatically.
To reduce the risk of injury and to prevent power from being switched on
accidentally, switch power off at service panel and lock or tag service panel.
9. Use with approved wiring for electrical connections only.
10. Please read specification label on product for further information and requirements.
11. Use only with range hood cord-connection kits that have been investigated and
found acceptable for use with this model rang hood.
INSTALLATION
A. Wall Mounting
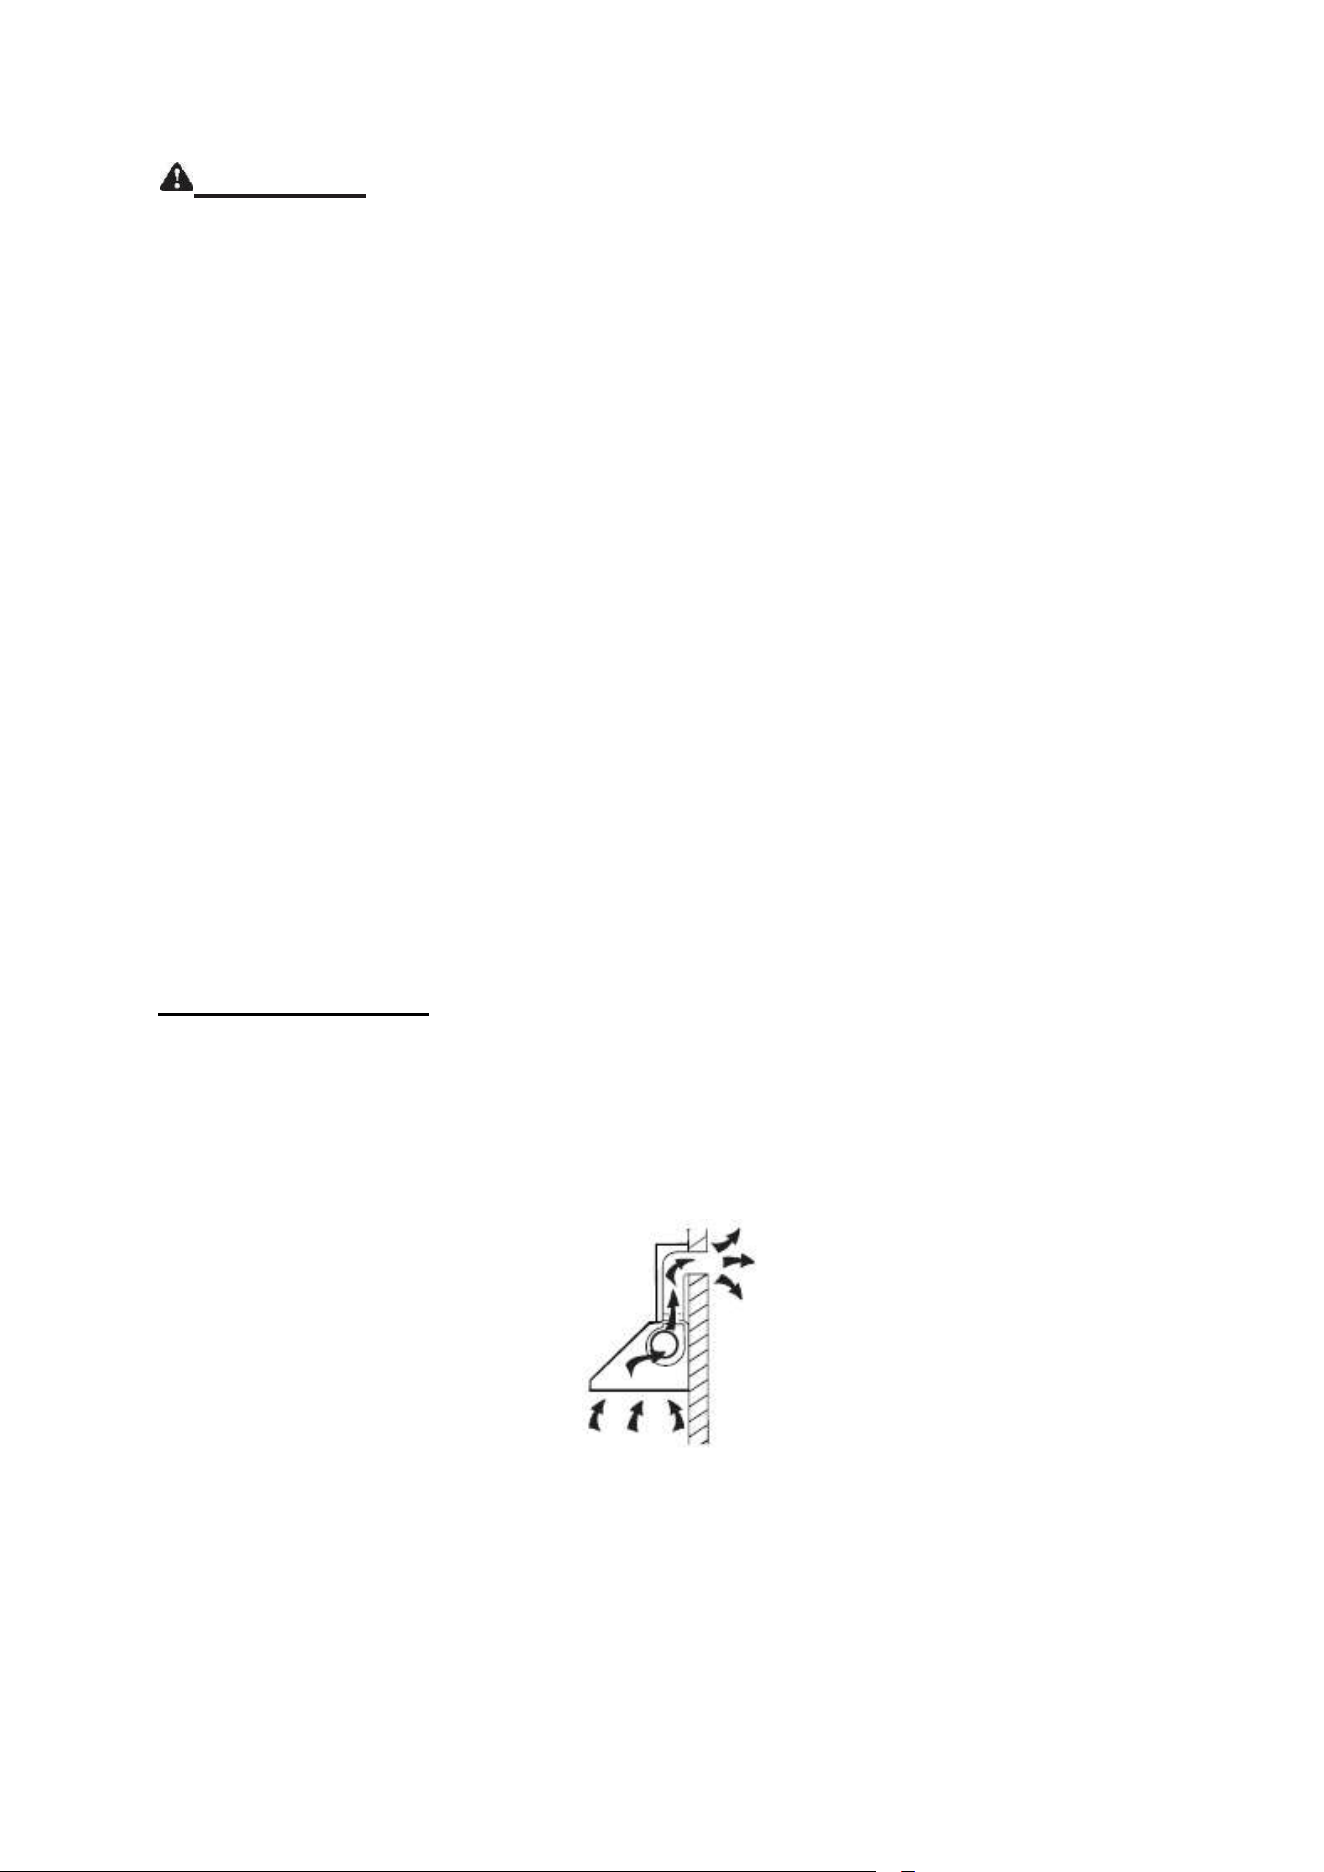
If you have an outlet to the outside, your range hood can be connected as below
picture by means of an extraction duct (enamel, aluminium, flexible pipe or non-
flammable material)
1. Before installation, turn the unit off.
11
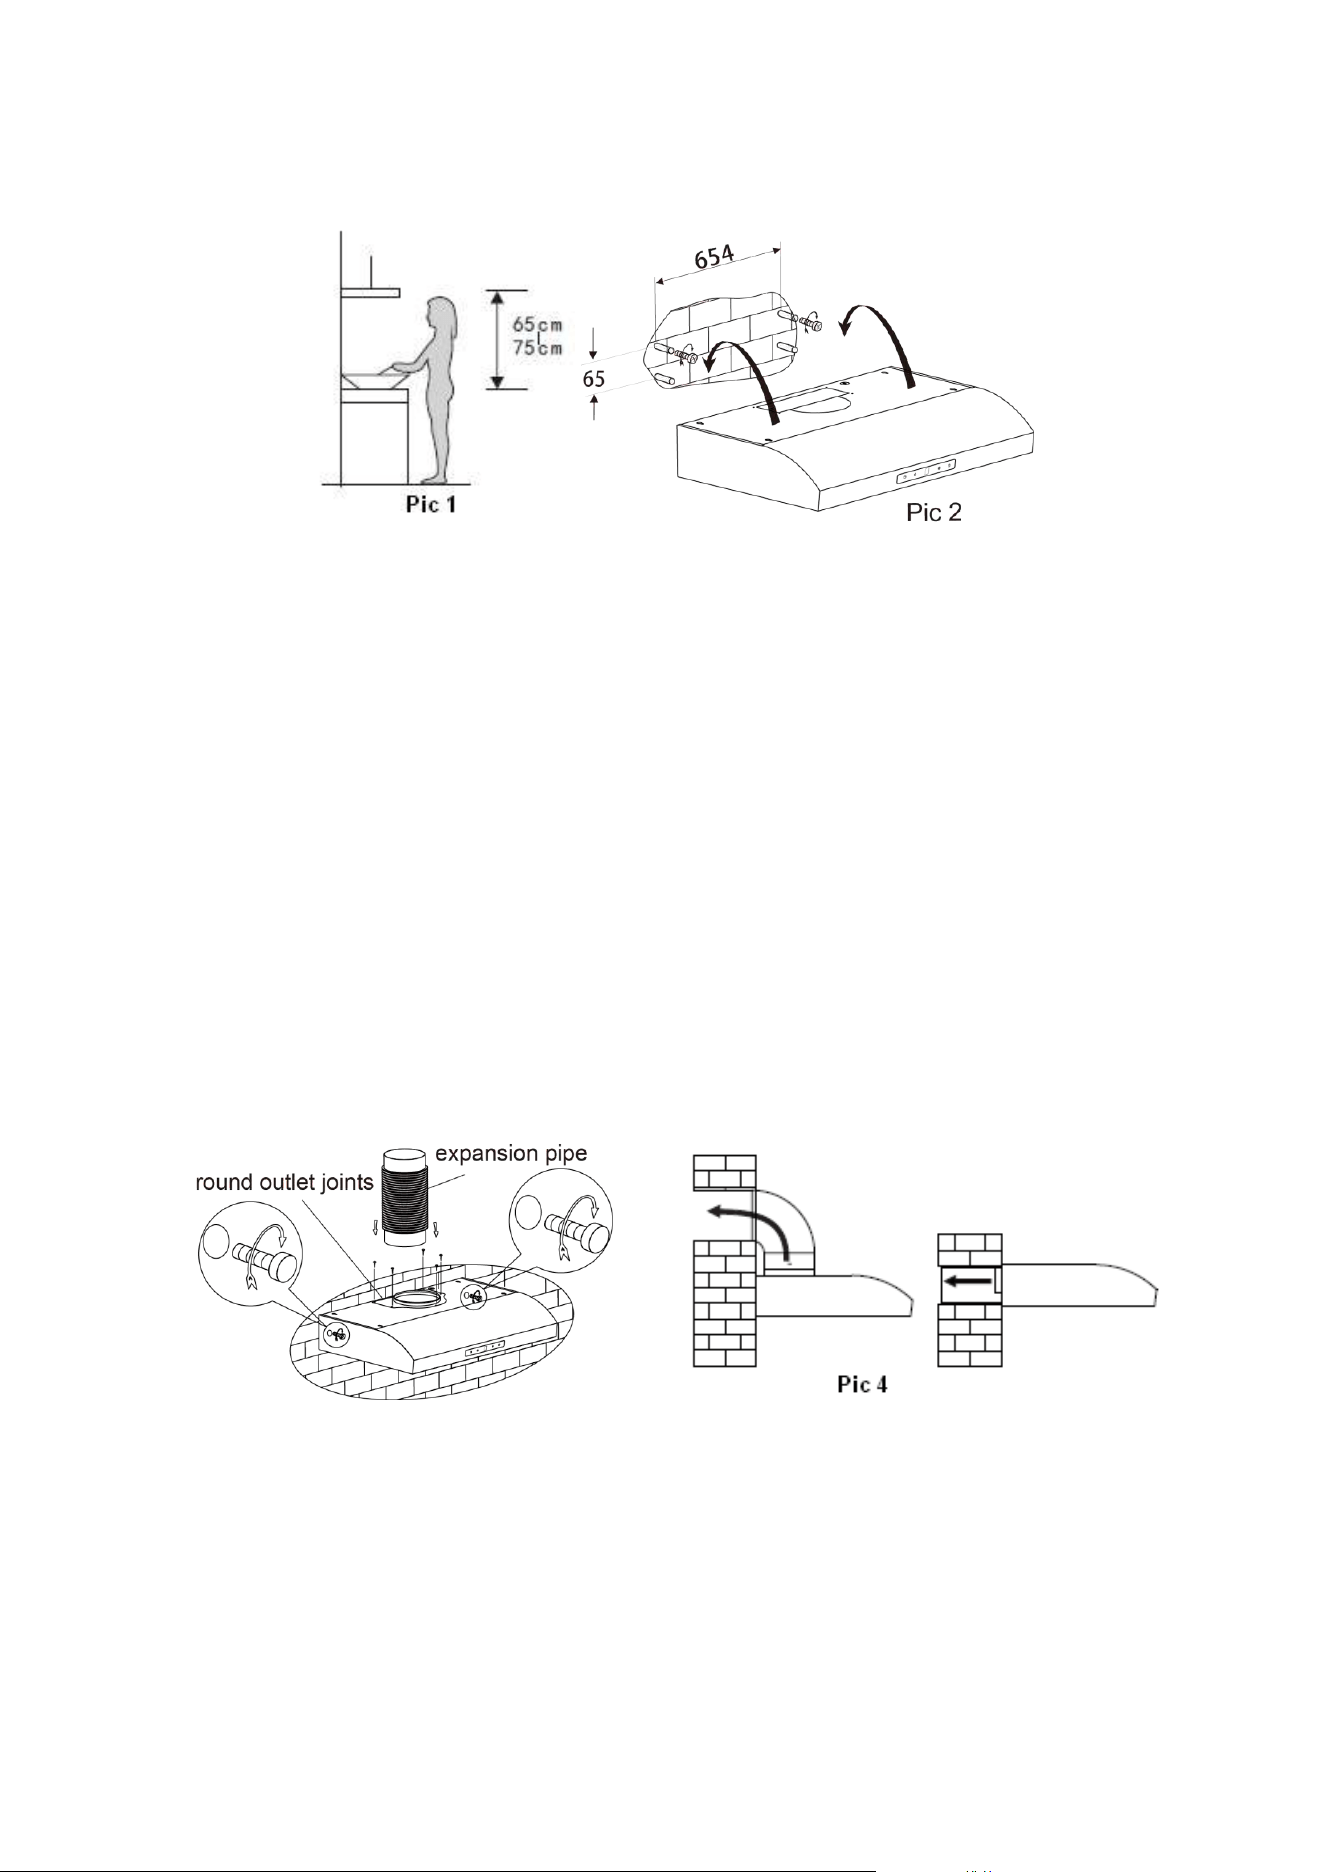
2. The range hoods should be placed at a distance of 65-75cm from the cooking
surface for best effect. See pic 1.
3. To install onto the wall, drill 4 holes of Ø 8mm on a suitable place according with
the centre distance of hole in the back of the range hood. See pic 2.
4. Insert the expansion screws into the holes.
5. Insert and tight the screws(ST4*30mm) into the plugs.
6. Put up the range hood onto the fixed screws. See pic 2.
7. Then turn the screws into the two holes of inside the hood, and then tighten the
screws to secure the hood onto the wall.
8. Attach the outlet joints onto the range hood. (Note: Before installing the air outlet,
please select the outlet of the hood and pry open.) Fix the expansion pipe on the
outlet joints. Lift up the expansion pipe till it out of the wall through the hole on the
wall. See pic 3 & 4. (Note: the expansion pipe is not including, need to purchase
separately.)
12
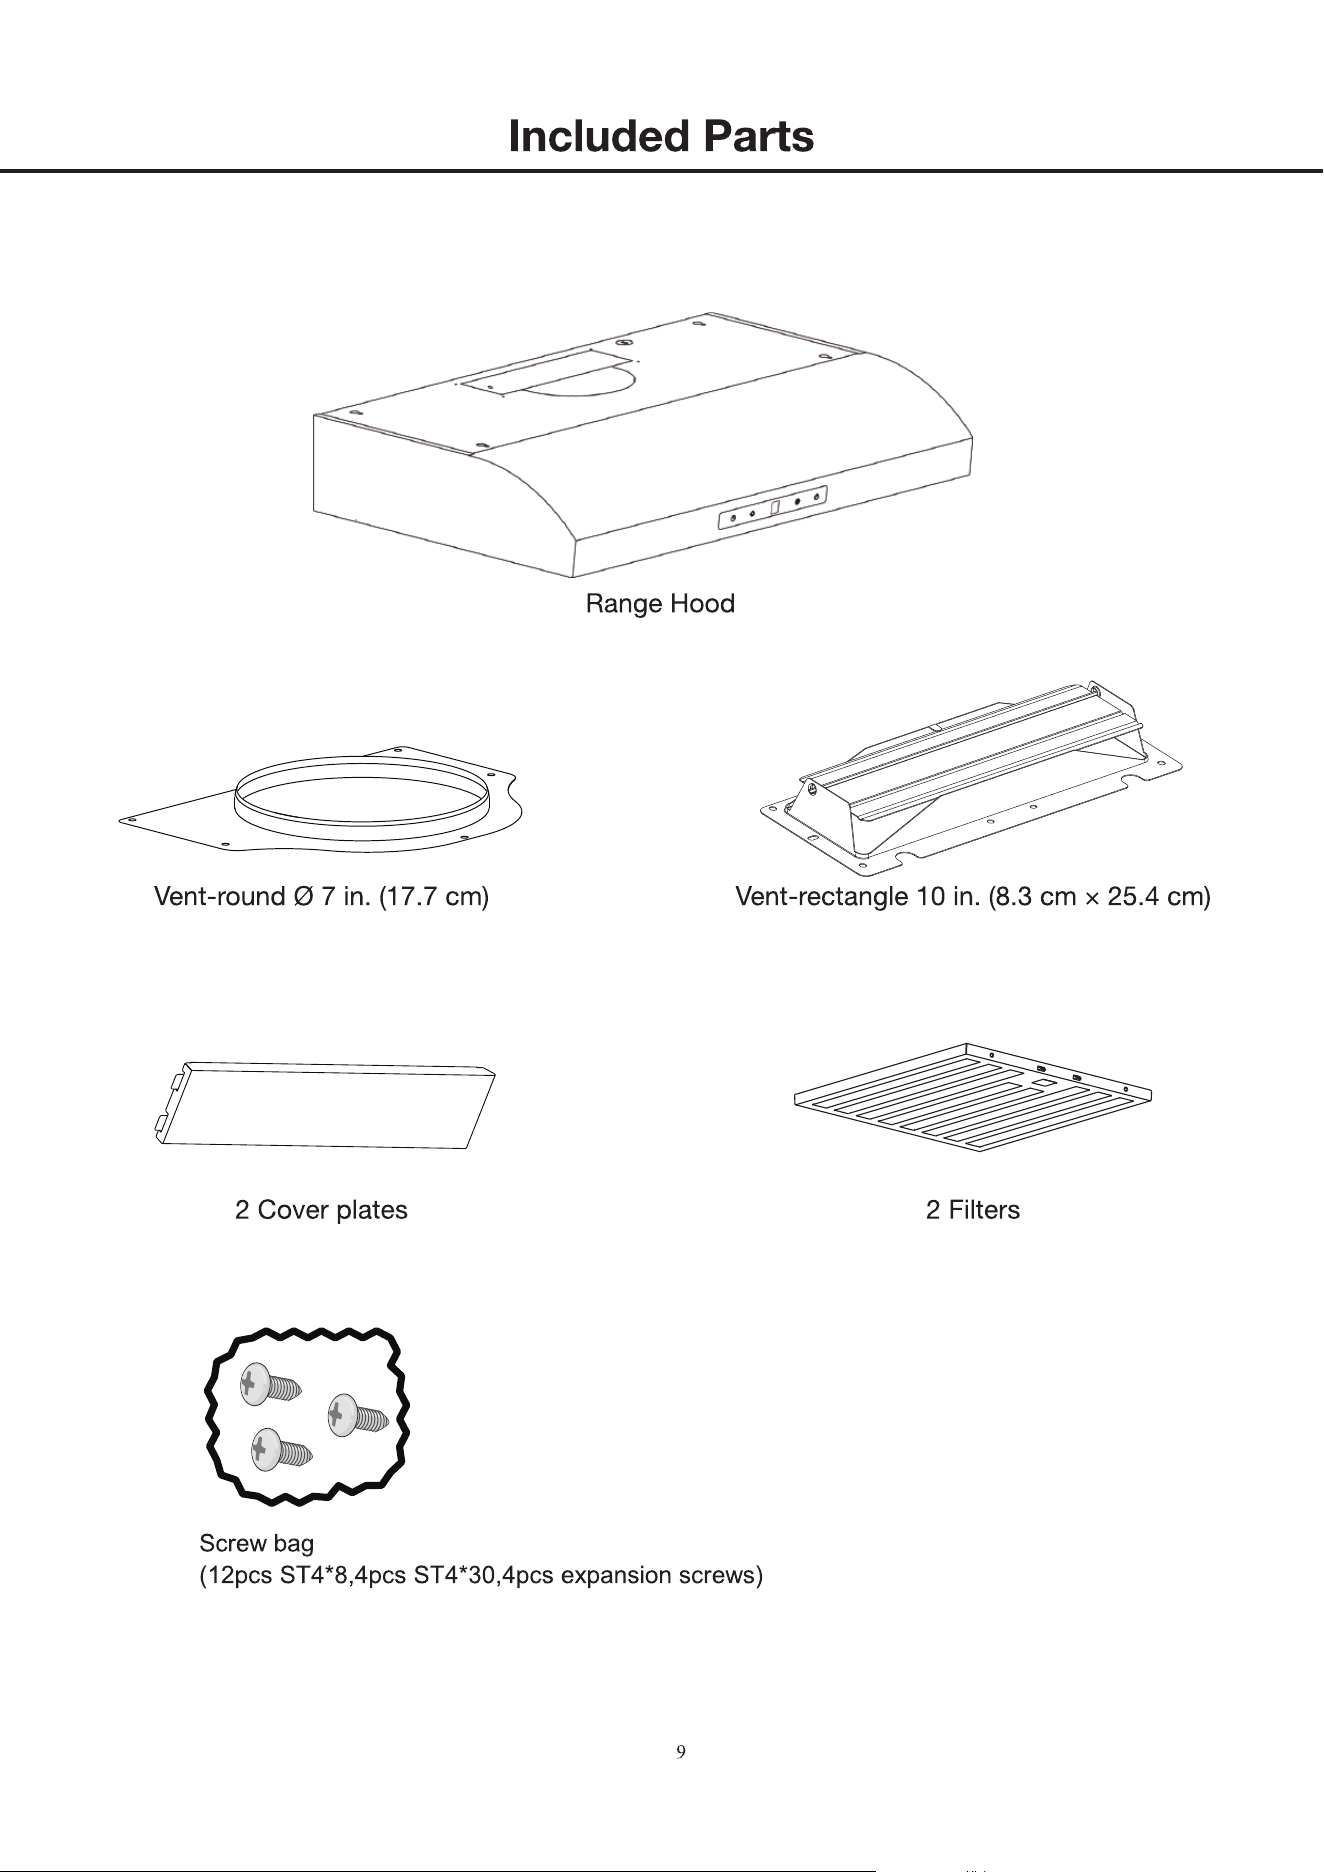
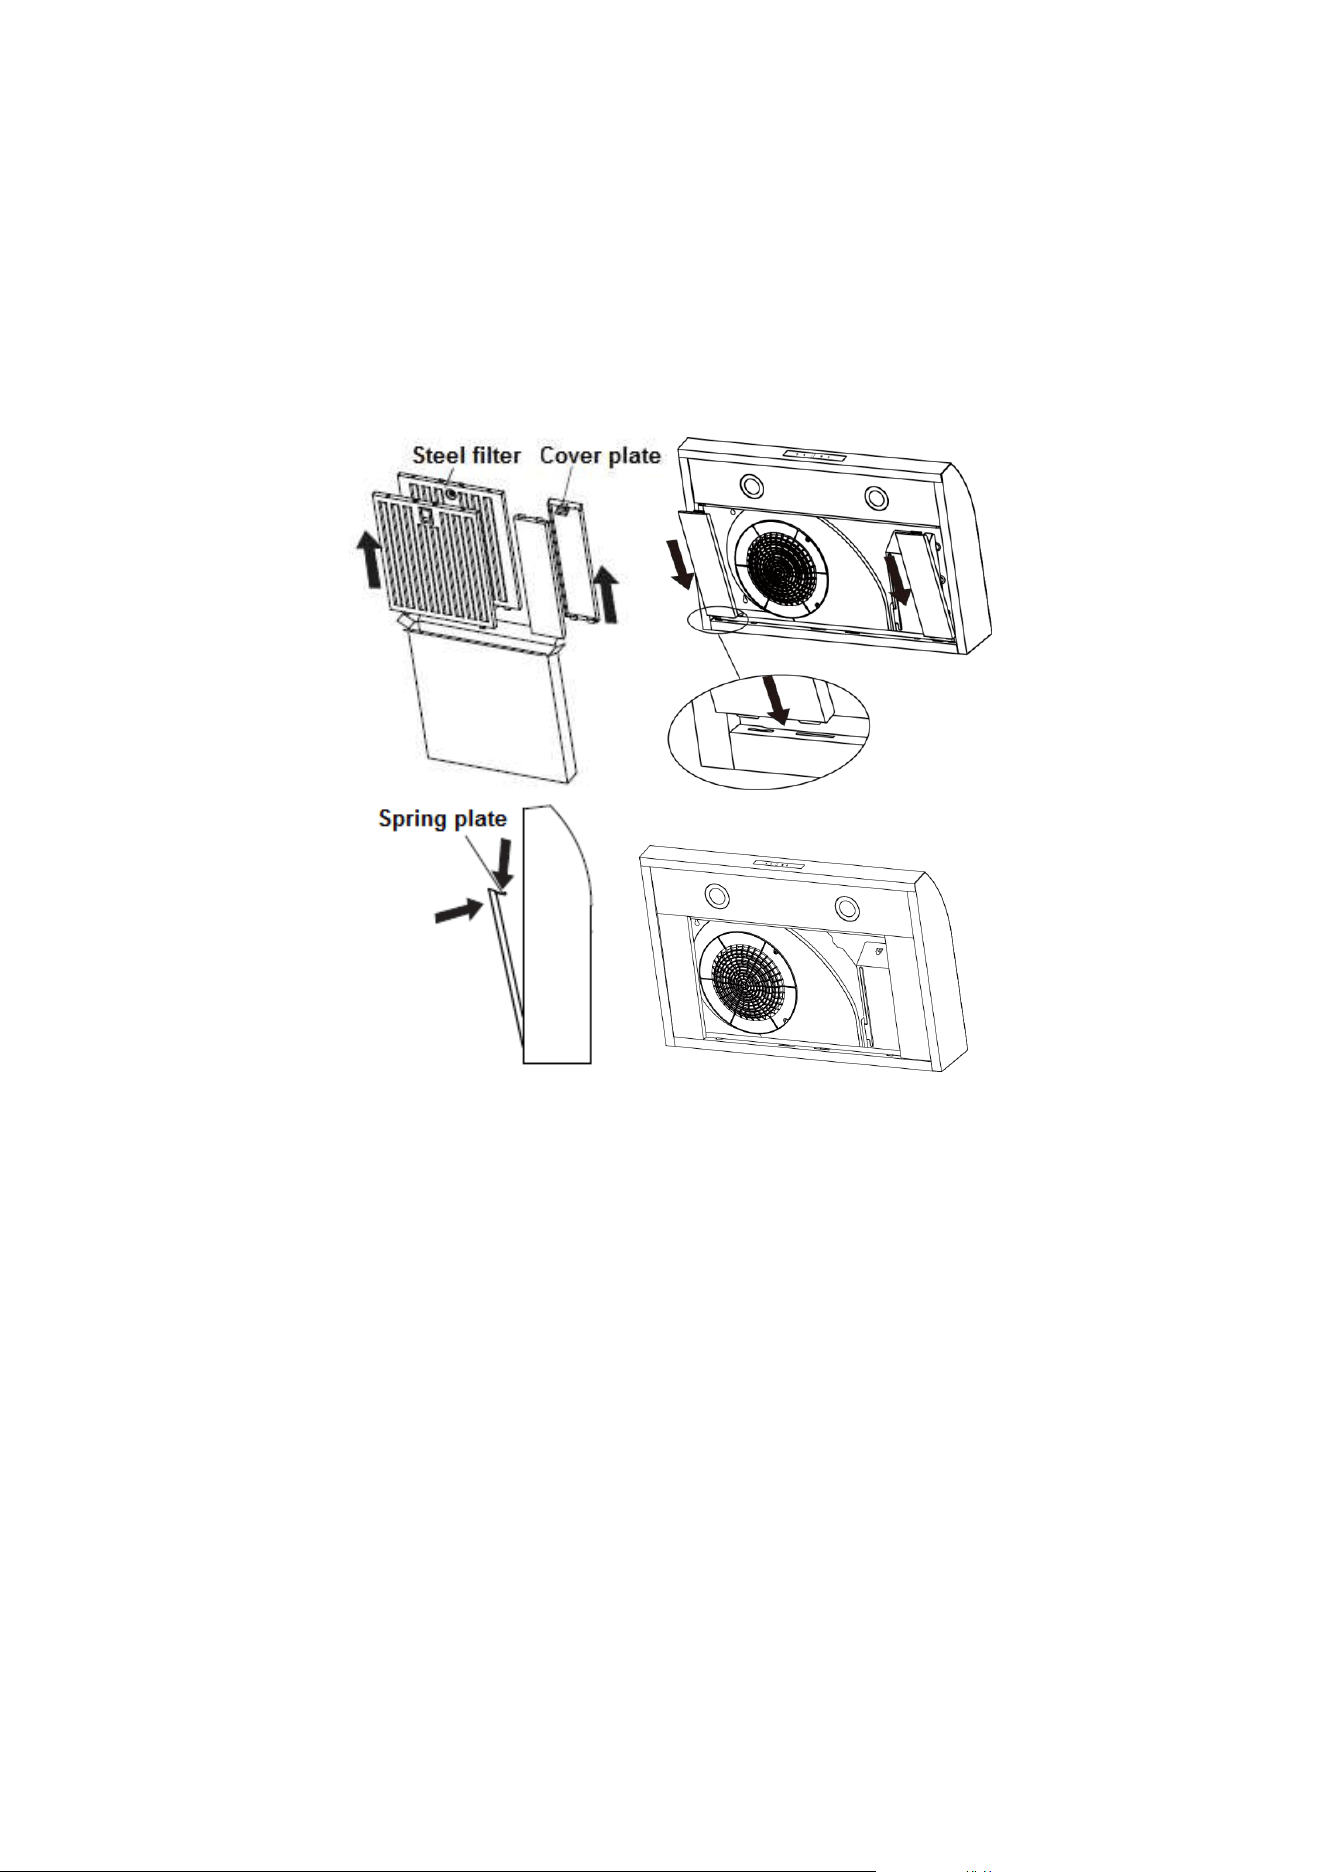
9. Take out the baffle filter and cover plate from the accessory carton, and then install
the two cover plates on both sides of the body. The installation method is as
follows:
a. Insert the pin of the cover plate into the lower part of the body,
b. Press down the spring plate and push the cover plate then fasten it on the body
(see the pic below),
c. Double check whether the cover is firmly installed.
10. Finally, install the baffle filter into the range hood.
B. Cabinet Mounting
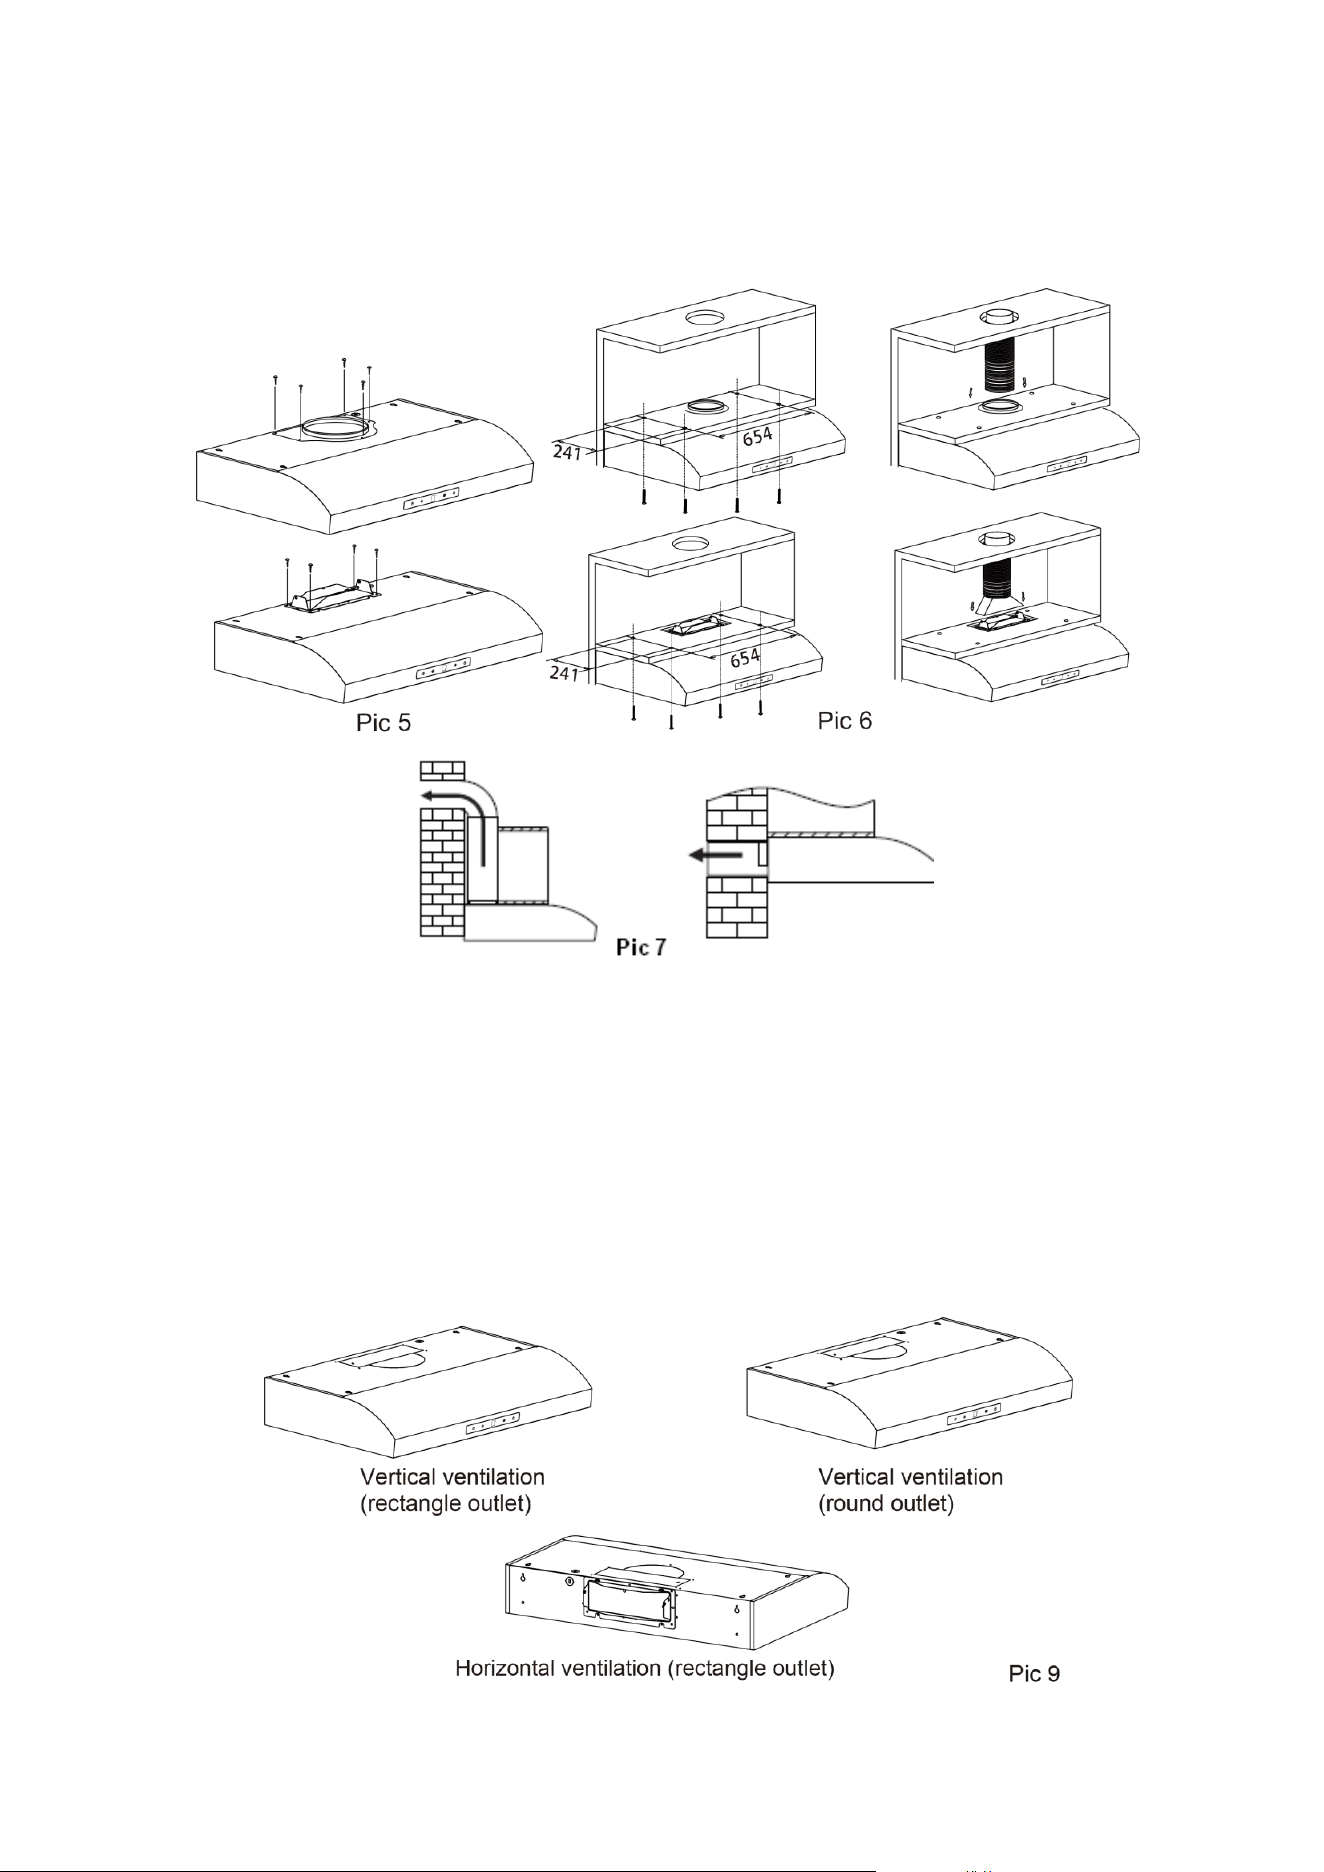
1. Install the outlet joints on the top or back of the hood with screws. See pic 5.
2. Drill 4 holes of Ø 6mm at the hanging cupboard. Then install the range hood on
the bottom of the cupboard, tighten the range hood with enclosed 4 pcs screws
(ST4*30mm). See pic 6.
13
3. Lay the expansion pipe on the outlet joints. Lift up the expansion pipe till it out of the wall
through the hole on the wall. See pic 6 & 7. (Note: the expansion pipe is not including, need to
purchase separately.)
4. After completion of installation, follow the above steps 9-10 to complete the
installation of cover plate and baffle filter.
Installation attention:
The three air outlets are shown in the following figure:
14
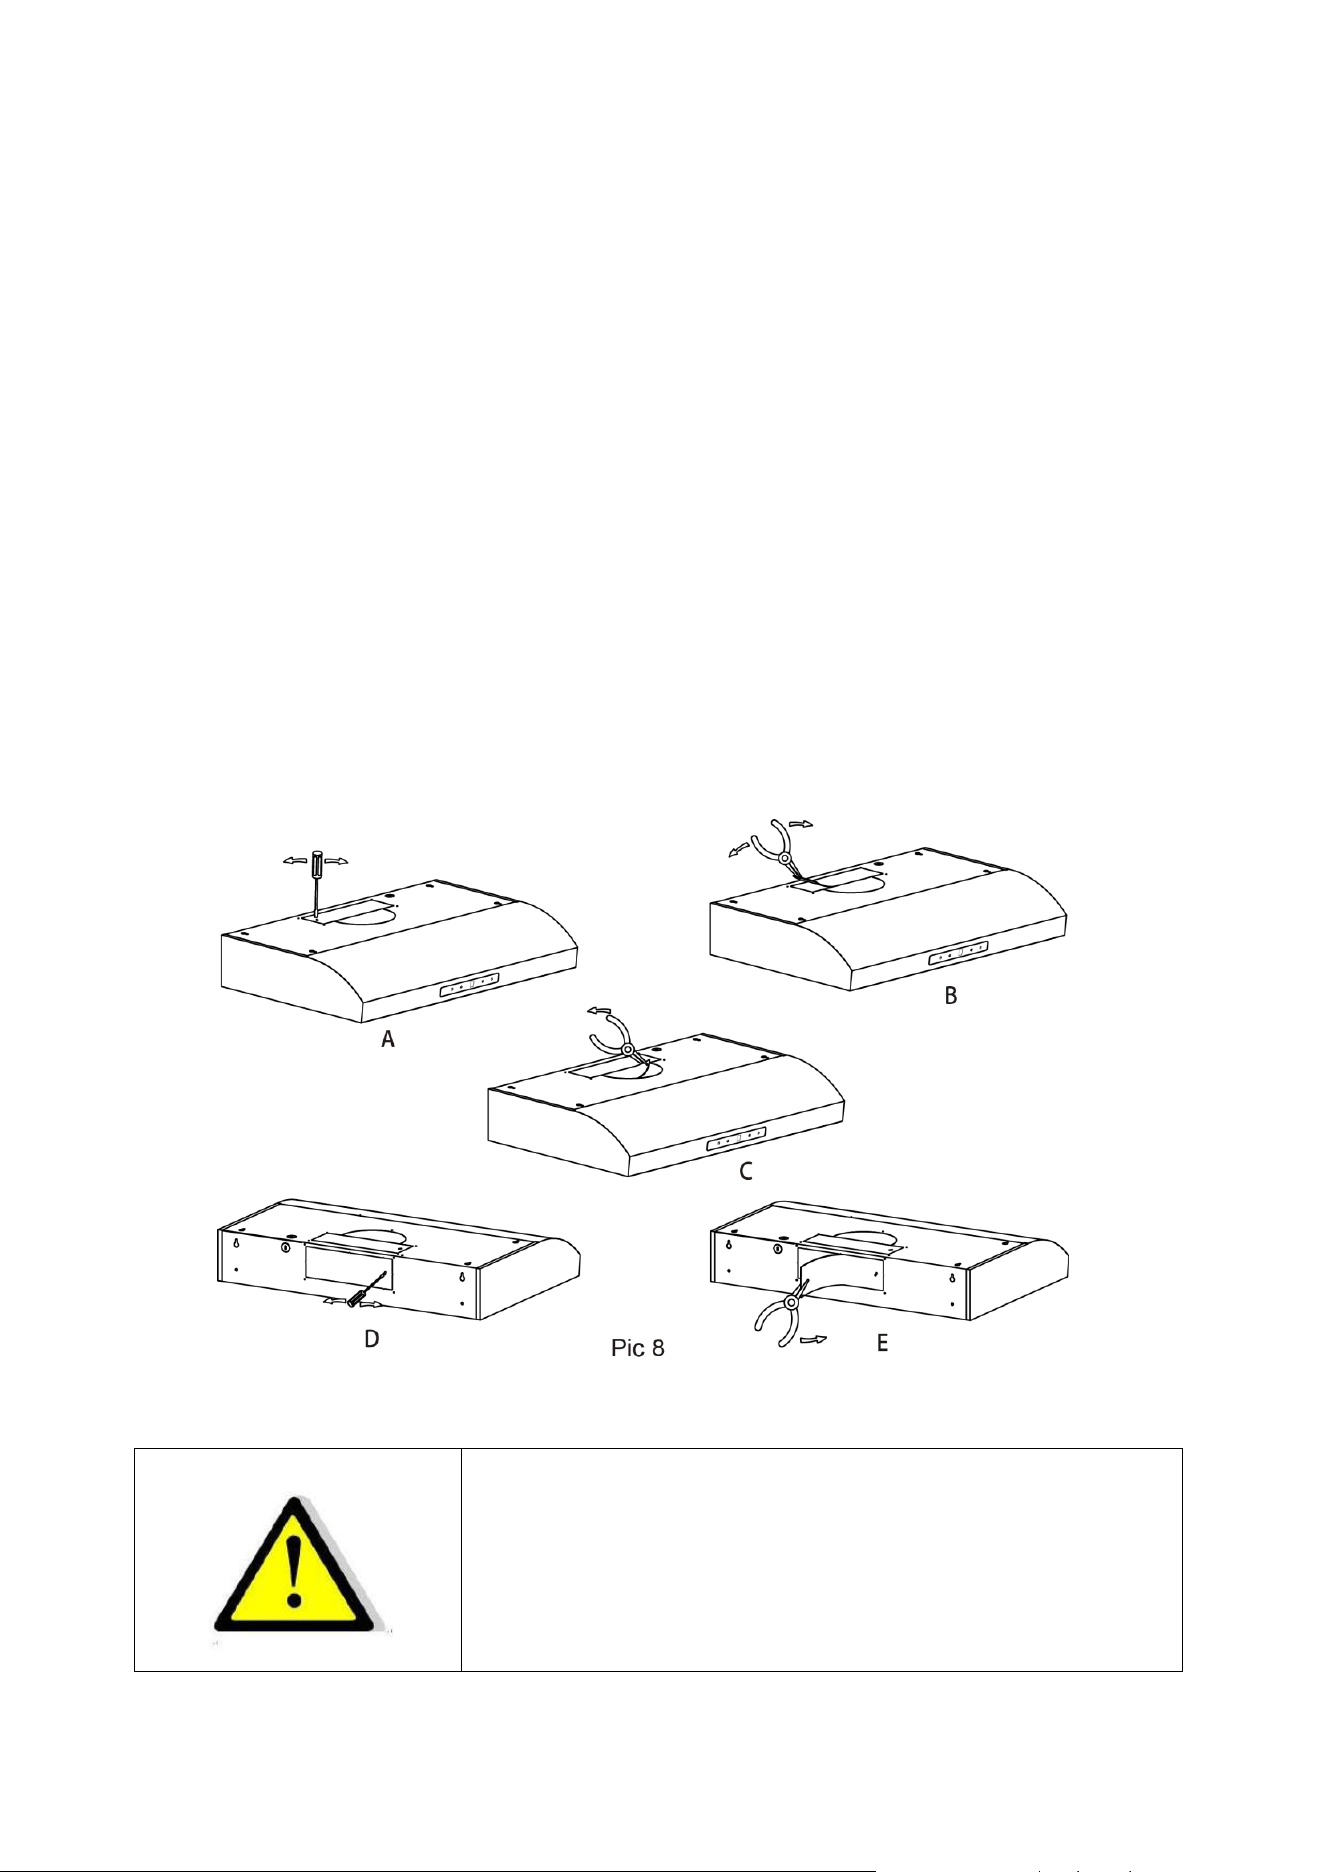
3. Horizontal ventilation(rectangle outlet): As shown in D, E of picture 8, use a flat-
blade screwdriver to pry the rectangular air outlet cover(Pic D), then remove the
outlet cover with pliers(Pic E), install a rectangular air outlet joints to allow the oil
fume to escape from the back.
Outdoor ventilation
There are 2 methods for outdoor ventilation, including ' horizontal ventilation' and '
vertical ventilation'. The round outlet and rectangle outlet on the top of hood are for
vertical ventilation. The outlet at the back of hood is for vertical ventilation .Please pay
attention to the ventilation method when installation.
1. Vertical ventilation(rectangle outlet): As shown in A, B of picture 8, use a flat-blade
screwdriver to pry the rectangular air outlet cover(Pic A), then remove the outlet
cover with pliers(Pic B), install a rectangular air outlet to allow the oil fume to
escape from the top.
2. Vertical ventilation(round outlet): As shown in A, B, C of picture 8, use a flat-blade
screwdriver to pry the rectangular air outlet cover(Pic A), then remove the
rectangular air outlet cover and round air outlet cover with pliers(Pic B & C), install
round outlet joints to allow the oil fume to escape from the top.
WARNING:
For safety reason, please use only the same
size of fixing or mounting screws which are
recommended in this instruction manual.
Failure to install the screws or fixing device in
accordance with these instructions may result
in electrical hazards.
15
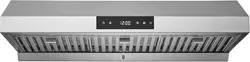
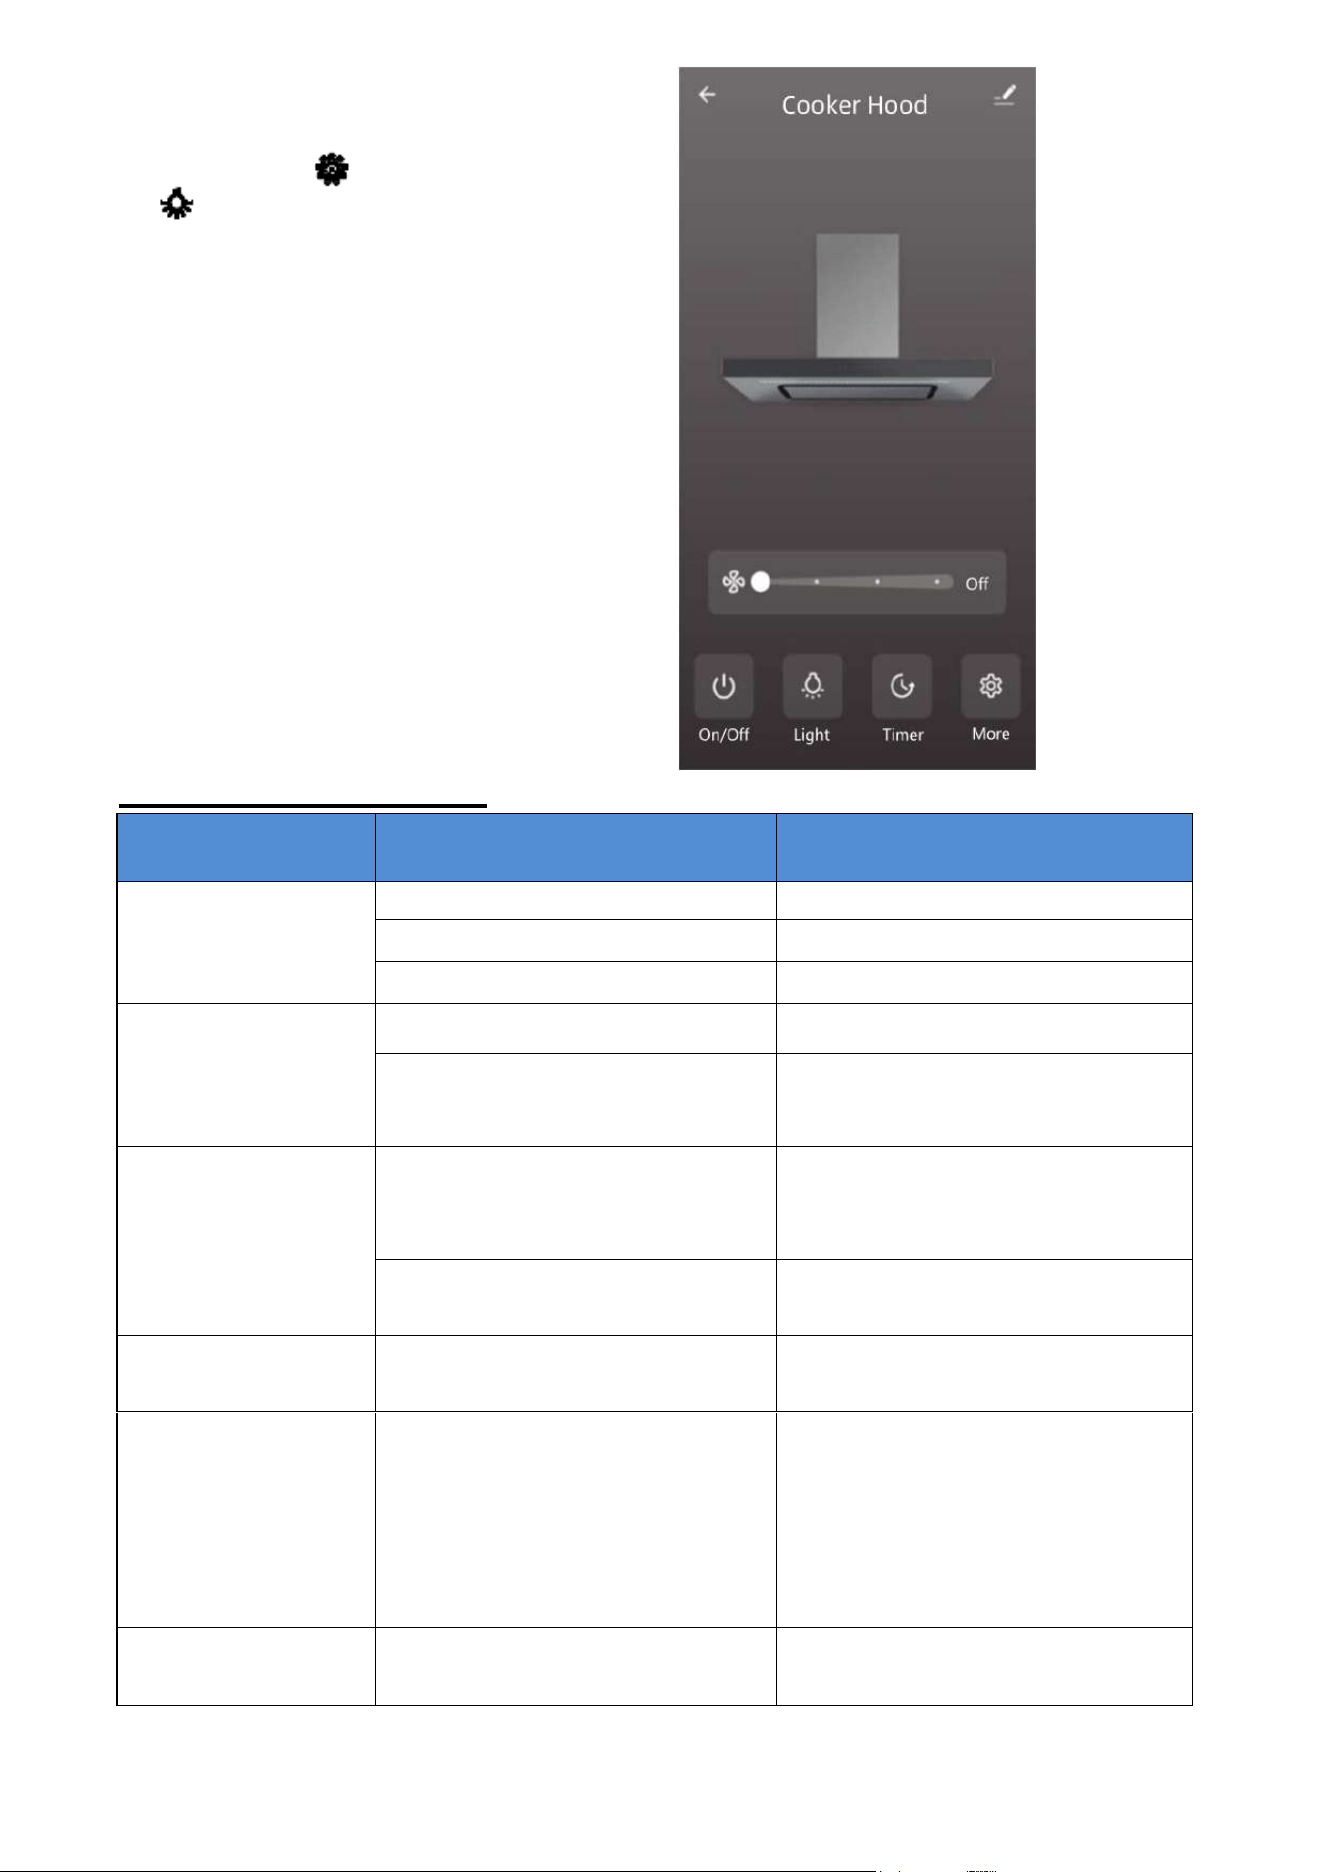
Start Using Your Cooker Hood
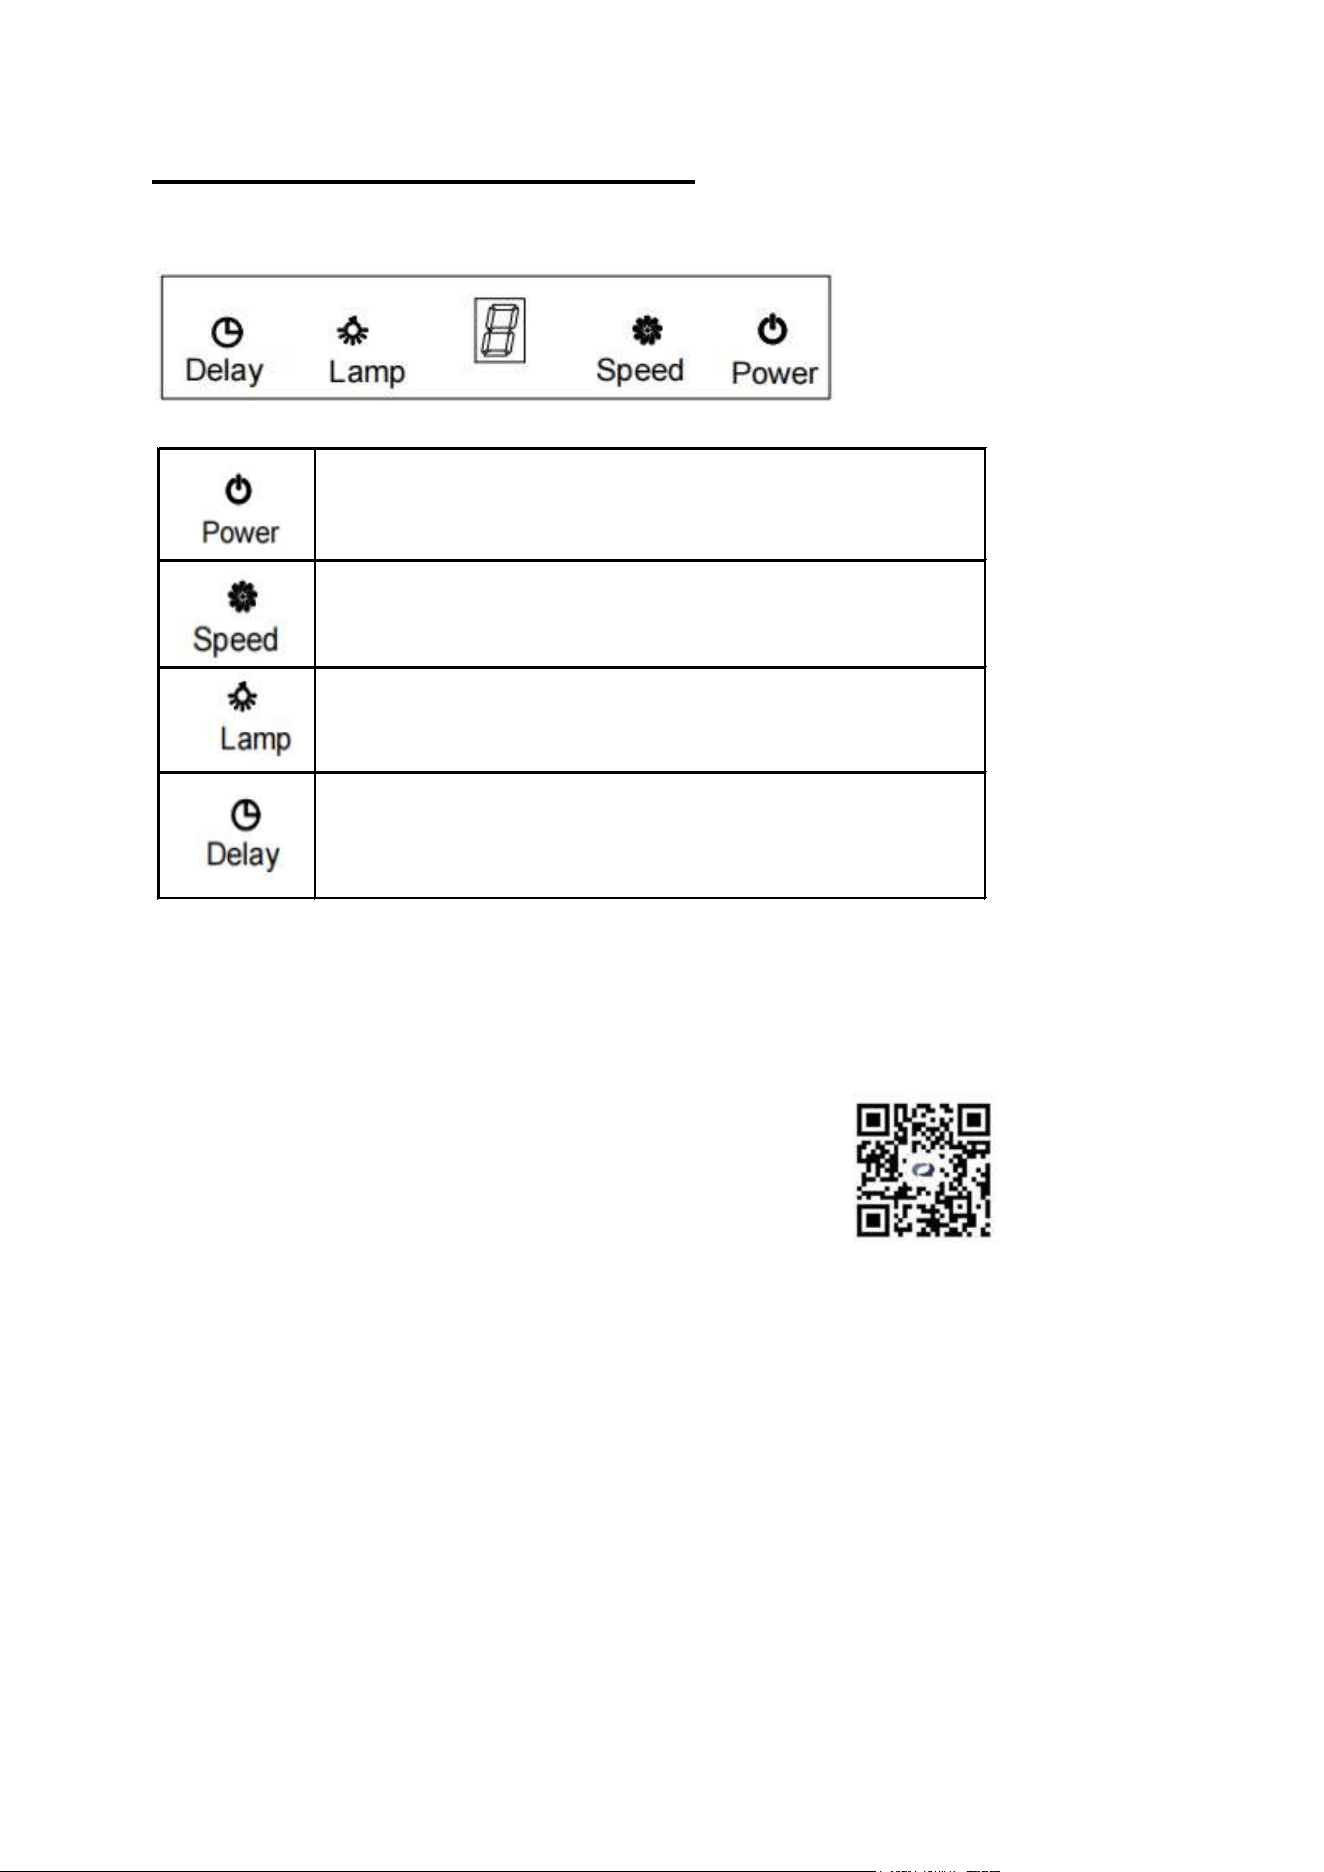
Touch control with LED display
WIFI
&RQQHFWLQJ
Scan the QR Code with your smartphone or search it in the
APP Store or Google Play to download the "QZsmart" app.
1.Make sure your range hood is on and ensure that your smartphone is connected to
2.4GHz Wifi network.
NOTE: This device works only on 2.4GHz Wifi network.
2.Ensure that the Bluetooth function of the phone is enabled at the same time; otherwise the
device cannot be automatically searched.
3.Log in the "QZ smart" app, and add the device "kitchen applicance - range hood".
NOTE: If you do not have an account, you need to register a new user account.
You can register by phone number or e-mail address.
Touch this button to turn on or off the range hood,and the
f
an will start and stop accordingly.
Touch this button to set 1-3 speed. The LED display will
indicate as 1-2-3-closed-1-2…circularly.
Touch this button to turn on or off the light.
Touch this button to set the time by 5 mins, the range hood
will be off after 5 mins. (Do not adjust the speed after
setting the delay function, otherwise the delay function will
be invalid.)
Note: The delay function on the range hood only can be setting to 5 mins at first.
When you connect the WIFI,you can set 1-60mins on the APP.
If you set 10 mins on the APP, next time when you push the delay button on
the range hood, the delay time will be 10 mins.
16
TROUBLESHOOTING
Fault
Possible Cause
Solution
Light on, but motor
does not work
Fan switch turned off
Select a fan switch position.
Fan switch failed
Contact service center.
Motor failed
Contact service center.
Light does not
work, motor does
not work
House fuses blown
Reset/Replace fuses.
Mains power cable is loose or
disconnected
Refit mains power cable to
power outlet.
Switch power outlet on.
Oil leakage
One way valve and the outlet
are not tightly sealed
Take down the one way valve
and seal with sealant.
Leakage from the connection of
chimney and cover
Take chimney down and seal.
Lights not working
Broken or faulty bulbs
Replace bulbs as per this
instruction.
Insufficient suction
Too far away from the cooking
surface
Refit the range hood to the
correct distance.(attention:
When the range hood is located
above a gas appliance, this
distance shall be at least 65
cm)
The Range hood
inclines
The fixing screw is not tight
enough
Tighten the hanging screw and
make it horizontal.
4.Long-press the speed button and
the light button on the range hood at
the same time.
5.Click the device to enter the
operation interface. Then you can
start to control the hood.
17
NOTE:
Any electrical repairs to this appliance must conform to your local, state
and federal laws. Please contact the service centre if in any doubt before
undertaking any of the above. Always disconnect the unit from the power
source when opening the unit.
MAINTENANCE AND CLEANING
Caution:
• Before maintenance or cleaning is carried out, the range hood should be
disconnected from the mains power supply. Ensure that the range hood is switched
off at the wall socket.
• External surfaces are susceptible to scratches and abrasions, so follow the cleaning
instructions to ensure the best possible result is achieved without damage.
GENERAL
Cleaning and maintenance should be carried out with the appliance cold especially
when cleaning. Avoid leaving alkaline or acid substances (lemon juice, vinegar etc.) on
the surfaces.
STAINLESS STEEL
The stainless steel must be cleaned regularly (e.g.weekly) to ensure a long life
expectancy. Dry with a clean soft cloth. A specialized stainless steel cleaning fluid may
be used.
NOTE:
Ensure that wiping is done along with the grain of the stainless steel to prevent any
unsightly crisscross scratching patterns from appearing.
CONTROL PANEL SURFACE
The inlay control panel can be cleaned using warm soapy water. Ensure the cloth is
clean and well wrung before cleaning. Use a dry soft cloth to remove any excess
moisture left after cleaning.
Important
Using neutral detergents and avoid using harsh cleaning chemicals, strong household
detergents or products containing abrasives, as this will affect the appearance of the
appliance and potentially remove any printing of artwork on the control panel and will
void manufactures warranty.
.
18
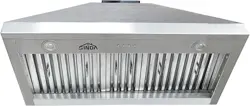
GREASE MESH FILTERS
The filters can be cleaned by hand. Soak them for about 3 minute in water with a mild
detergent and then brush it gently with a soft brush. Do not apply too much pressure
so as to avoid any damage to it . (Leave to dry naturally out of direct sun light)
Filters should be washed separately to crockery and kitchen utensils. It is advisable
not to use rinse aid. Please do not use abrasive detergent for it will damage the hood.
Warning: When cleaning the range hood, please make sure that the power
is turned off. And please pay attention to the filters to fall and hurt people when
removing them.
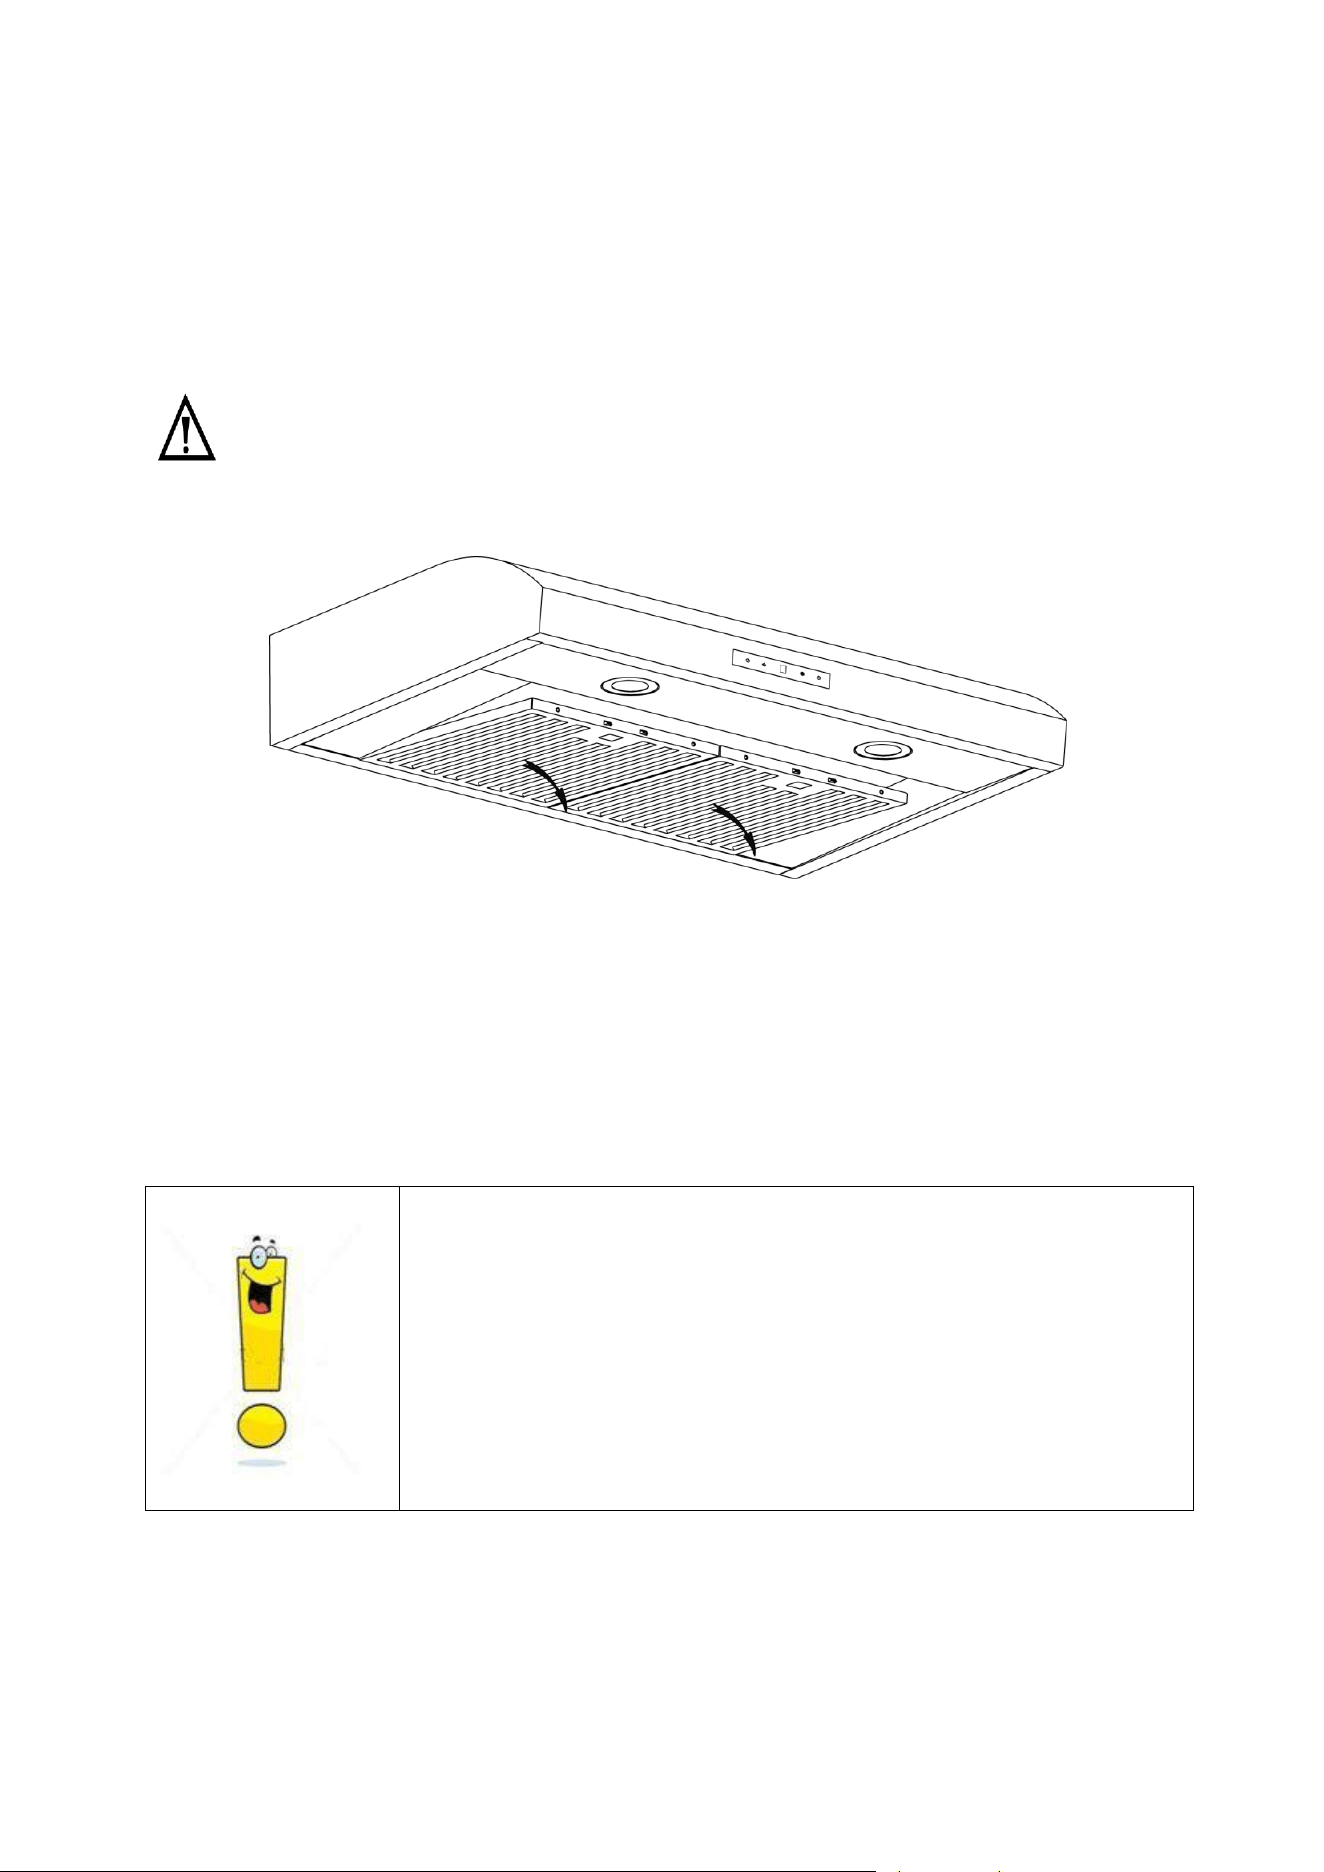
INSTALLING GREASE MESH FILTERS
• To install filters for the following four steps:
- Angle the filter into the slots at the back of the hood.
- Push the button on the handle of the filter.
- Release the handle once the filter fits into a resting position.
- Repeat to install all filters.
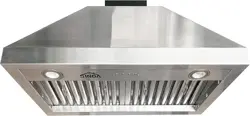
BULB REPLACEMENT
Important :
The bulb must be replaced by the manufacturer, its
service agent or similarly qualified persons.
Always switch off the electricity supply before
carrying out any operations on the appliance. When
handling bulb, make sure it has completely cooled
down before any direct contact with hands.
When handling bulbs hold with a cloth or gloves to
ensure perspiration does not come in contact with
the bulb as this can reduce the life of the bulb.
Note:
Before changing the lights, make sure that the appliance is turned off and
unplugged.
Protect against danger when changing lights, such as wearing gloves.
19
Changing the light
Remove the grease filter.
Use a tool or the hand to press the
spring splinter of both sides of LED
light to the inside, until the light is
pressed out. Then slightly pull the light
connecting wire out, and dismantle the
terminal of the light connecting wire.
Apply the reverse procedure to install
the light back.
• ILCOS D code for this lamp is: DSR-
1.5/65-S-64
– LED modules –round lamp
– Max wattage: 2×1.5W
– Voltage range: DC 12V
– Dimensions:
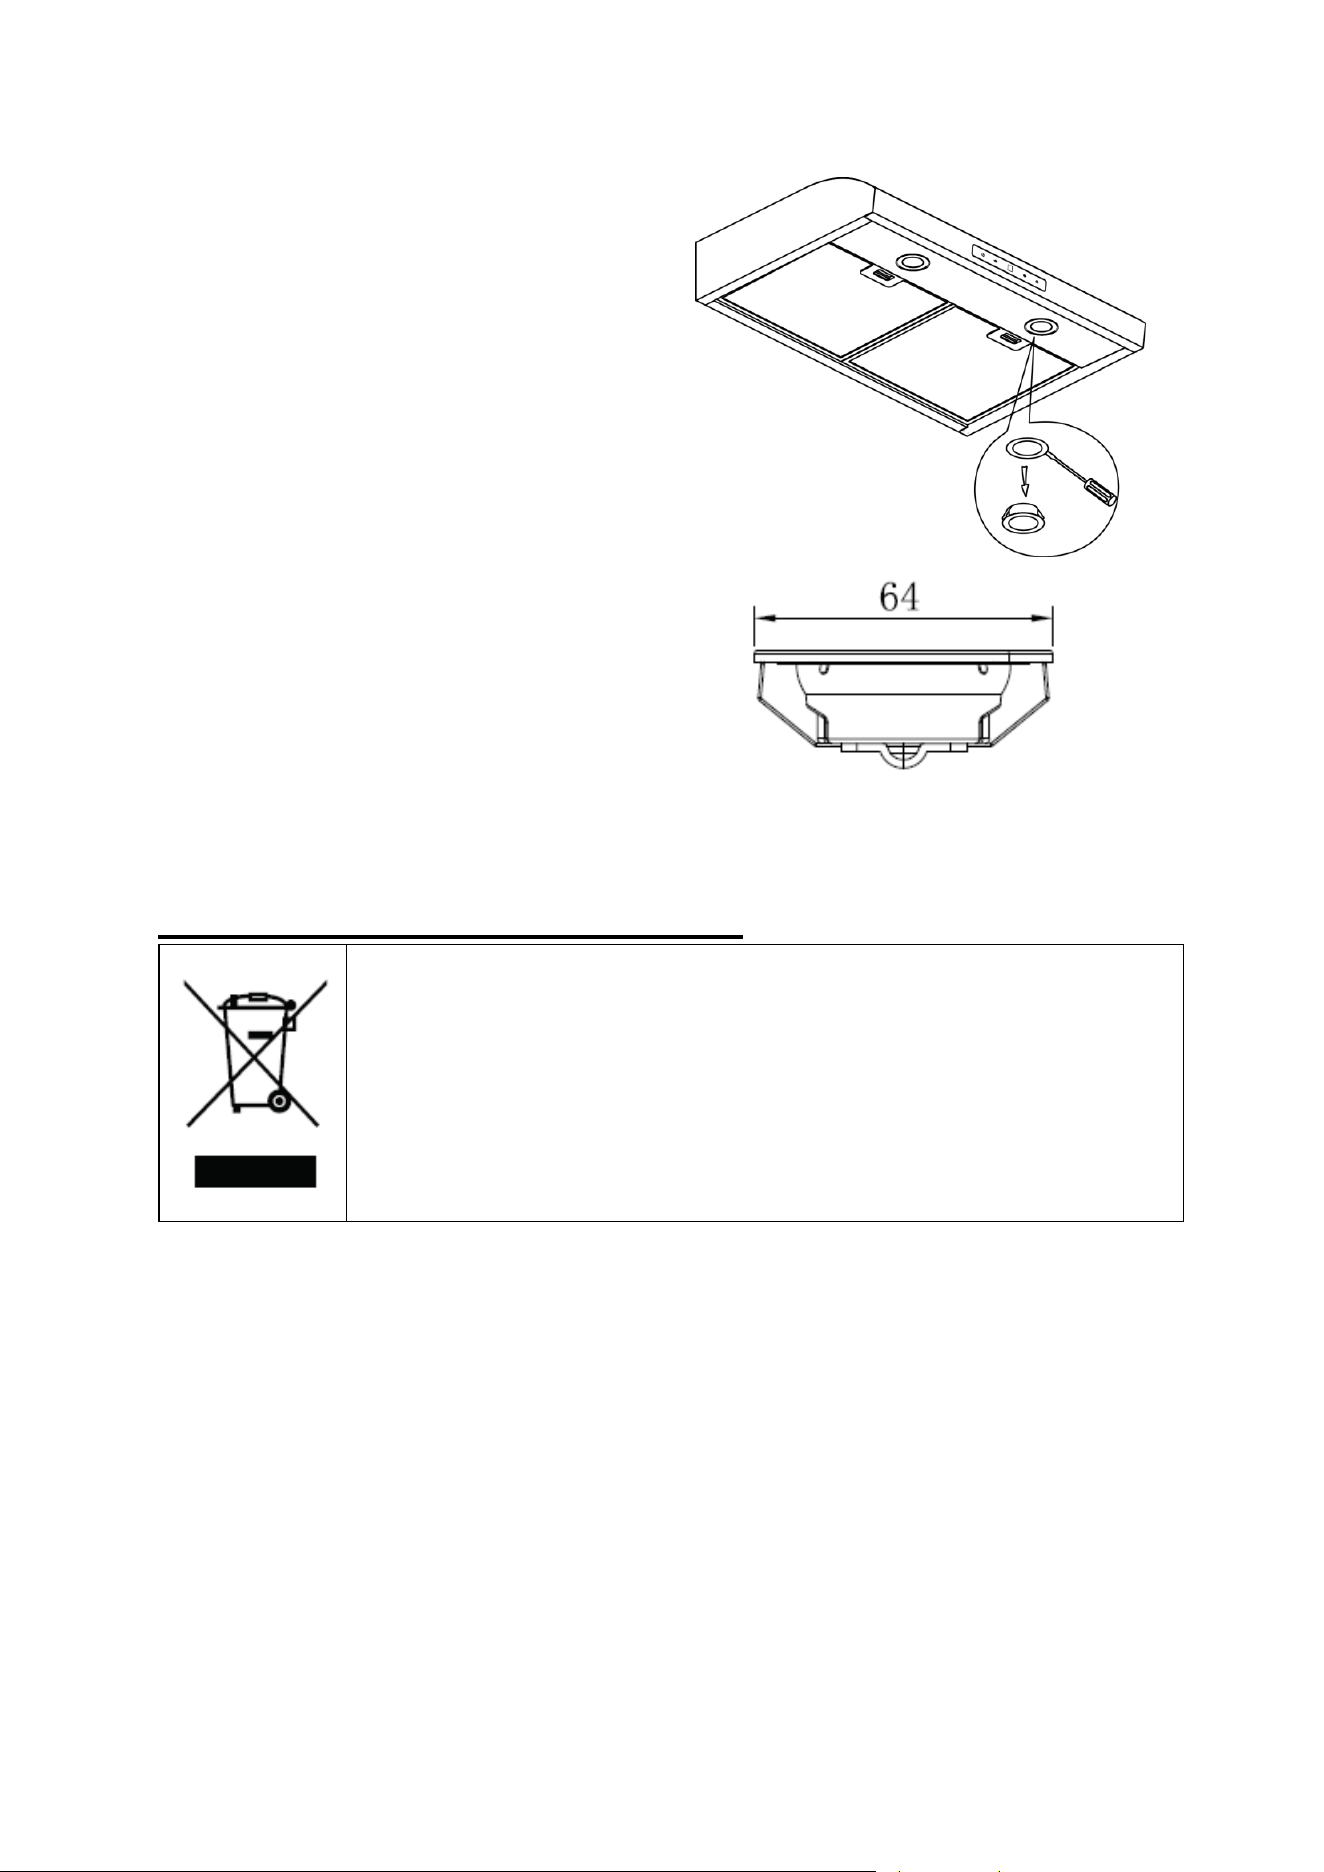
ENVIRONMENTAL PROTECTION:
This product is marked with the symbol on the selective sorting of
waste electronic equipment. This means that this product must not
be disposed of with household waste but must be supported by a
system of selective collection in accordance with Directive
2012/19/EU. It will then be recycled or dismantled to minimize
impacts on the environment, electrical and electronic products are
potentially dangerous for the environment and human health due to
the presence of hazardous substances. For more information, please
contact your local or regional authorities.
NOTE:
The following shows how to reduce total environmental impact (e.g. energy use) of the
cooking process).
(1) Install the range hood in a proper place where there is efficient ventilation.
(2) Clean the range hood regularly so as not to block the airway.
(3) Remember to switch off the range hood light after cooking.
(4) Remember to switch off the range hood after cooking.
INFORMATION FOR DISMANTLING
Do not dismantle the appliance in a way which is not shown in the user manual. The
appliance could not be dismantled by user. At the end of life, the appliance should
not be disposed of with household waste. Check with your Local Authority or retainer
for recycling advice.
AOBOSI
WARRANTY
20