Turnkey Kitchens & Bars
Installation and User Manual
BEFORE USE, PLEASE READ AND FOLLOW ALL SAFETY RULES AND OPERATING INSTRUCTIONS.
Felix Storch, Inc.
An ISO 9001:2015 registered company
770 Garrison Ave
Bronx, New York 10474
www.summitappliance.com
Mesa Series
MESAWH33
MESAWH35
MESAMN33
MESAMN35
Write Model and Serial Numbers here:
Model
Serial No.
Oasis Series
OASISWH33
OASISWH35
OASISMN33
OASISMN35
Caldera Series
CALDERAWH33I
CALDERAWH35I
CALDERAMN33I
CALDERAMN35I

1
Table of Contents
1. Introduction ...................................................................................................................................................................................2
2. Safety Guidelines ...........................................................................................................................................................................2
General Safety During Installation ............................................................................................................................................................................ 2
Handling Appliances Safely ......................................................................................................................................................................................... 2
Fire Safety ........................................................................................................................................................................................................................... 2
Proper Use and Maintenance ..................................................................................................................................................................................... 3
Cleaning and Maintenance Safety ............................................................................................................................................................................ 3
Electrical and Water Safety .......................................................................................................................................................................................... 3
Safe Storage Practices ................................................................................................................................................................................................... 3
Handling and Disposing of Packaging ................................................................................................................................................................... 3
3. Getting Started ..............................................................................................................................................................................4
Unpacking Instructions ................................................................................................................................................................................................. 4
Setting Up the Area ........................................................................................................................................................................................................ 5
4. Installation Overview ....................................................................................................................................................................6
Adjusting Legs and Toekick (Leveling) .................................................................................................................................................................... 6
Replacing the Legs ......................................................................................................................................................................................................... 6
Plumbing ............................................................................................................................................................................................................................. 6
Attaching the Sink and Faucet ................................................................................................................................................................................... 6
Cooktop .............................................................................................................................................................................................................................. 7
Refrigerator ........................................................................................................................................................................................................................ 7
Adhering the Backsplash .............................................................................................................................................................................................. 7
Anchoring the Turnkey Kitchen ................................................................................................................................................................................. 7
Removing Support Brace ............................................................................................................................................................................................. 7
Installing the Wall Cabinets......................................................................................................................................................................................... 8
5. Setup ...............................................................................................................................................................................................8
Attaching the Toekick .................................................................................................................................................................................................... 8
Attaching the Knobs....................................................................................................................................................................................................... 8
Adjusting the Shelf with Shelf Pins........................................................................................................................................................................... 8
Adjusting the Cabinet Door ........................................................................................................................................................................................ 8
6. Care & Maintenance......................................................................................................................................................................9
Special Care ....................................................................................................................................................................................................................... 9
Maintenance Tips ............................................................................................................................................................................................................ 9
7. Troubleshooting ......................................................................................................................................................................... 10
8. Appendix ..................................................................................................................................................................................... 11
9. Limited Warranty........................................................................................................................................................................ 12

2
1. Introduction
Welcome to Effortless Style & Instant Living!
Thank you for choosing Summit Appliance! Your new Turnkey Kitchen or Bar is designed to bring effortless
style, functionality, and convenience to your space—right out of the box. Whether creating a sleek home
bar, upgrading a small kitchen, or enhancing a hospitality setting, this fully assembled unit is built for
seamless integration and everyday ease. This manual will guide you through everything you need to know,
from setup to care instructions, ensuring you get the most out of your new kitchen or bar.
2. Safety Guidelines
General Safety During Installation
Ergonomic Hazard: Do not attempt to lift the
product alone as it may result in serious injury.
Always lift safely with a minimum of two people.
Professional Installation Recommended: If
your turnkey kitchen requires plumbing or
electrical work, it is recommended to have a
certified professional install these components to
avoid any safety hazards or damages.
Secure Heavy Items: When installing cabinets or
shelves, ensure they are properly anchored to the
wall to prevent tipping or falling.
Work Area Safety: Keep the installation area
clear of obstacles, and ensure the workspace is
well-lit and ventilated, especially when working
with adhesives, paints, or other chemicals.
Check for Gas and Electrical Lines: Before
drilling or cutting into walls, cabinets, or
countertops, double-check that there are no gas,
electrical, or water lines in the installation area to
avoid accidental damage or injury.
Handling Appliances Safely
Power Off Before Installation: For any appliance
that requires electrical connections (e.g.,
cooktops, dishwashers, refrigerators), ensure the
power supply is turned off before installation or
maintenance.
Avoid Overloading Circuits: Ensure that the
kitchen appliances are plugged into outlets with
the correct power rating and avoid overloading
circuits. (see individual appliance user manuals for
requirements).
Proper Ventilation: Ensure that the kitchen
appliances such as cooktops and refrigerators are
properly ventilated according to the
manufacturer’s guidelines to avoid overheating.
Positioning Appliances Correctly: Follow the
manufacturer’s guidelines for the placement and
spacing of appliances, especially for items that
generate heat, to reduce the risk of fire.
Fire Safety
Fire Extinguisher: Always keep a fire
extinguisher in or near the turnkey kitchen and
familiarize yourself with how to use it.
Never Leave Cooking Unattended: Never leave
cooking food unattended on the cooktop. Always
turn off appliances when finished using them.
Avoid Flammable Items Near Heat Sources:
Keep towels, paper products, and other
flammable items away from heat sources.

3
Proper Use and Maintenance
Child Safety: If young children are in the home,
ensure that all appliances and drawers are safely
secured. Use childproof latches on cabinets and
lower drawers, and keep knives, sharp objects,
and cleaning chemicals out of reach.
Regular Cleaning: Clean surfaces regularly to
remove food debris and grease buildup. This will
help maintain hygiene and prevent slips or
accidents.
Handle Sharp Objects Carefully: Always store
knives and sharp utensils in safe places, such as
knife blocks or secure drawers. Use caution when
handling glass or ceramic items, as they can break
easily.
Check for Loose Fixtures: Periodically check for
loose handles, hinges, or hardware on cabinets,
drawers, and appliances. Tighten them as needed
to avoid accidents.
Cleaning and Maintenance Safety
Use Non-Toxic Cleaners: Use cleaning products
that are non-toxic and safe for food contact
surfaces. Avoid harsh chemicals that can damage
countertops, cabinets, or appliances.
Avoid Wet Floors: Wipe up any water or spills
immediately from floors to prevent slipping
accidents. Pay extra attention to areas near sinks
and refrigerators.
Protect Surfaces: Use cutting boards to protect
countertops from scratches and cuts. Avoid
placing hot cookware directly onto countertops
without trivets or heat-resistant pads.
Electrical and Water Safety
Waterproof Electrical Outlets: Ensure that
electrical outlets near sinks and other water
sources are GFCI (Ground Fault Circuit
Interrupter) protected to prevent electrical
shocks.
Proper Plumbing Connection: Verify that all
plumbing connections are secure to avoid water
leaks, which can damage the turnkey kitchen and
cause mold growth.
Drainage and Ventilation: Make sure that your
sink and other water fixtures are properly
installed with proper drainage. Ensure that
appliances have adequate airflow.
Safe Storage Practices
Heavy Items on Lower Shelves: Store heavier
items on lower shelves or in lower cabinets to
prevent injury from lifting heavy items overhead.
Organize for Accessibility: Store sharp objects
(such as knives, scissors, etc.) in safe locations,
and ensure that cleaning supplies, chemicals, and
medications are locked away in childproof
storage areas.
Handling and Disposing of Packaging
Proper Disposal: Once you’ve finished installing
your turnkey kitchen, ensure that you properly
dispose of packaging materials like cardboard
and plastic wrap. These can create tripping
hazards if left lying around and should be
recycled where possible.
Recycle and Reuse: Consider recycling
packaging materials and reusing parts like screws,
bolts, or brackets for future projects or repairs.

4
IMPORTANT:
1.
NEVER Lift Alone
Always have at least one other person to assist when lifting heavy items. The turnkey kitchens contain
heavy cabinetry and countertops that can cause injury if lifted improperly or alone. Always team up for
the lift.
2.
Do NOT Drag the Turnkey Kitchen
Dragging the turnkey kitchen across the floor can damage both the cabinetry and the floor. Use proper
lifting techniques and equipment (like dollies or sliders) to move the items.
3.
Do NOT Lift from the Countertop
Lifting from the countertop can cause damage to the surface or even cause the countertop to detach.
Always lift the turnkey kitchen from the base, ensuring stability.
4.
Do NOT Disassemble any Parts
*Disassembling Parts Will Void Your Warranty
Any attempt to disassemble your turnkey kitchen, unless explicitly instructed, will void the warranty. The
unit is pre-assembled for your convenience, and disassembly can cause misalignment or damage.
NOTE: Use the provided moving straps to facilitate lifting the turnkey kitchen. Read the instructions
that came with the straps before attempting to lift the product.
Additional Safety Tips:
1.
Ensure the area is clear of obstacles to avoid tripping or damage.
2.
Wear protective gear, including gloves and steel-toed shoes, to prevent injury from sharp edges or
rough surfaces.
3.
Check the manufacturer's manual for specific handling or unpacking instructions before proceeding.
3. Getting Started
Unpacking Instructions

5
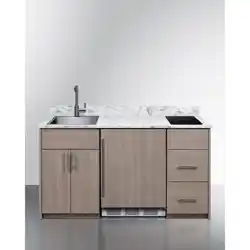
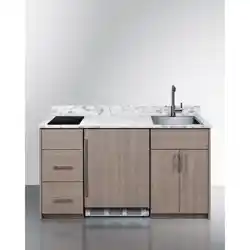
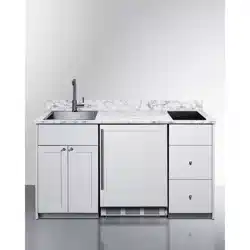
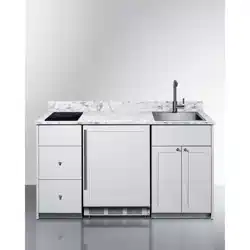
MESA: 54” W x 20 ⅝” D x 35 ¾” H*
OASIS: 68 ½” W x 25 ¾” D x 35 ¾” H*
CALDERA: 62 ⅝” W x 25 ¾” D x 35 ¾” H*
Setting Up the Area
PREPARATION
1.
Clear the Area
Ensure the entire installation space is free of
any obstructions, furniture, or debris. Sweep
the floor and remove any items that could
interfere with the setup.
2.
Protect Floors and Walls
Lay down protective coverings such as drop
cloths or plywood to shield the floor and
walls from damage during installation.
MEASURING THE ROOM
3.
Verify Dimensions
Use a tape measure to ensure the room’s
measurements match the specifications in
the kitchen plans. Measure the length, width,
and height of the space, as well as any
openings for windows or doors.
* All ADA-compliant turnkey kitchens are designed
with a height of 33 ¾”
4.
Check for Level Surface
Use a spirit level to confirm that the floor and
walls are level. If any irregularities are found,
take note of them, as adjustments may need
to be made during installation. (See leveling
instructions on page 6)
5.
Mark Key Locations
Mark on the floor where major
components such as cabinets,
appliances, or plumbing will be
placed.
POSITIONING THE TURNKEY KITCHEN
6.
Check for Proper Fit
Place the turnkey kitchen into its designated
spot to ensure it fits correctly. Adjust
placement as needed to ensure even spacing
from walls or other units.
CHECK LIST
Upon receiving the turnkey kitchen, immediately
verify the delivery with the packing list. Ensure all
boxes and components listed are present:
A.
Check for Damages
B.
Check Manufacturer Labels
C.
Inventory Check (vary by model)
o
Turnkey Kitchen (1)
o
Lifting Straps (2)
o
Harness (2)
o
Harness Instructions (1)
o
Backsplash (1)
o
Refrigerator (1)
o
Sink (1)
o
Faucet (1)
o
Miscellaneous Box (1)
D.
Basic Tools (not included)
o
Utility Kinfe
o
Tape Measure
o
Leveler
o
Spacer(s)
o
Philips Head Screwdriver
o
Wrench
o
Silicone
o
Touch-Up Paint Pen

6
NOTE: For installation involving plumbing,
professional installation is strongly
recommended to ensure all the connections
are secure and meet local building codes.
IMPORTANT:
•
Ensure all steps are completed in the order
listed to avoid any complications.
•
Professional installation is
recommended for
tasks involving plumbing and anchoring to
the wall and floor.
•
Refer to the manufacturer’s manuals for
each appliance (i.e. refrigerator,
cooktop) for
detailed installation instructions.
4. Installation Overview
Adjusting Legs and Toekick (Leveling)
Each leg should be firmly grounded for maximum
support. Allow enough space to attach the
toekick.
1. Extend the legs by twisting them gently. Do
not use excessive force.
2. Ensure the turnkey kitchen is leveled.
3. Snap the toekick in place.
Replacing the Legs
If the legs need to be replaced, locate them in
the miscellaneous box included with your unit.
1. If the leg base requires replacement, unscrew
the existing base and install the new one. If
the base is intact, proceed to the next step.
2. Insert the leg into the leg base and adjust
the height as needed.
3. If the clip on the toekick needs replacement,
slide off the old clip and attach the new one.
4. Snap the leg into place securely.
Plumbing
(Applicable for Oasis & Caldera Only)
Attaching the Sink and Faucet
The sink is not pre-installed and must be sealed
to the countertop using silicone. If you do not
have the necessary skills to complete this
installation, it is recommended to hire a
professional.
Follow these steps to properly attach the sink to the
countertop:
1. Apply silicone sealant around the underside
and lip of the sink.
2. Insert the sink into the counter. Allow it sit
for a few minutes to allow the silicone to set.
3. Screw the mounting clips (10pcs) with a
drill.
7
NOTE:
Anchoring the turnkey kitchen
requires drilling through the wall and/or the
floor. Proper spacer placement is essential
for a secure installation. If you are unsure
how to install spacers correctly, professional
installation is recommended.
Figure 2
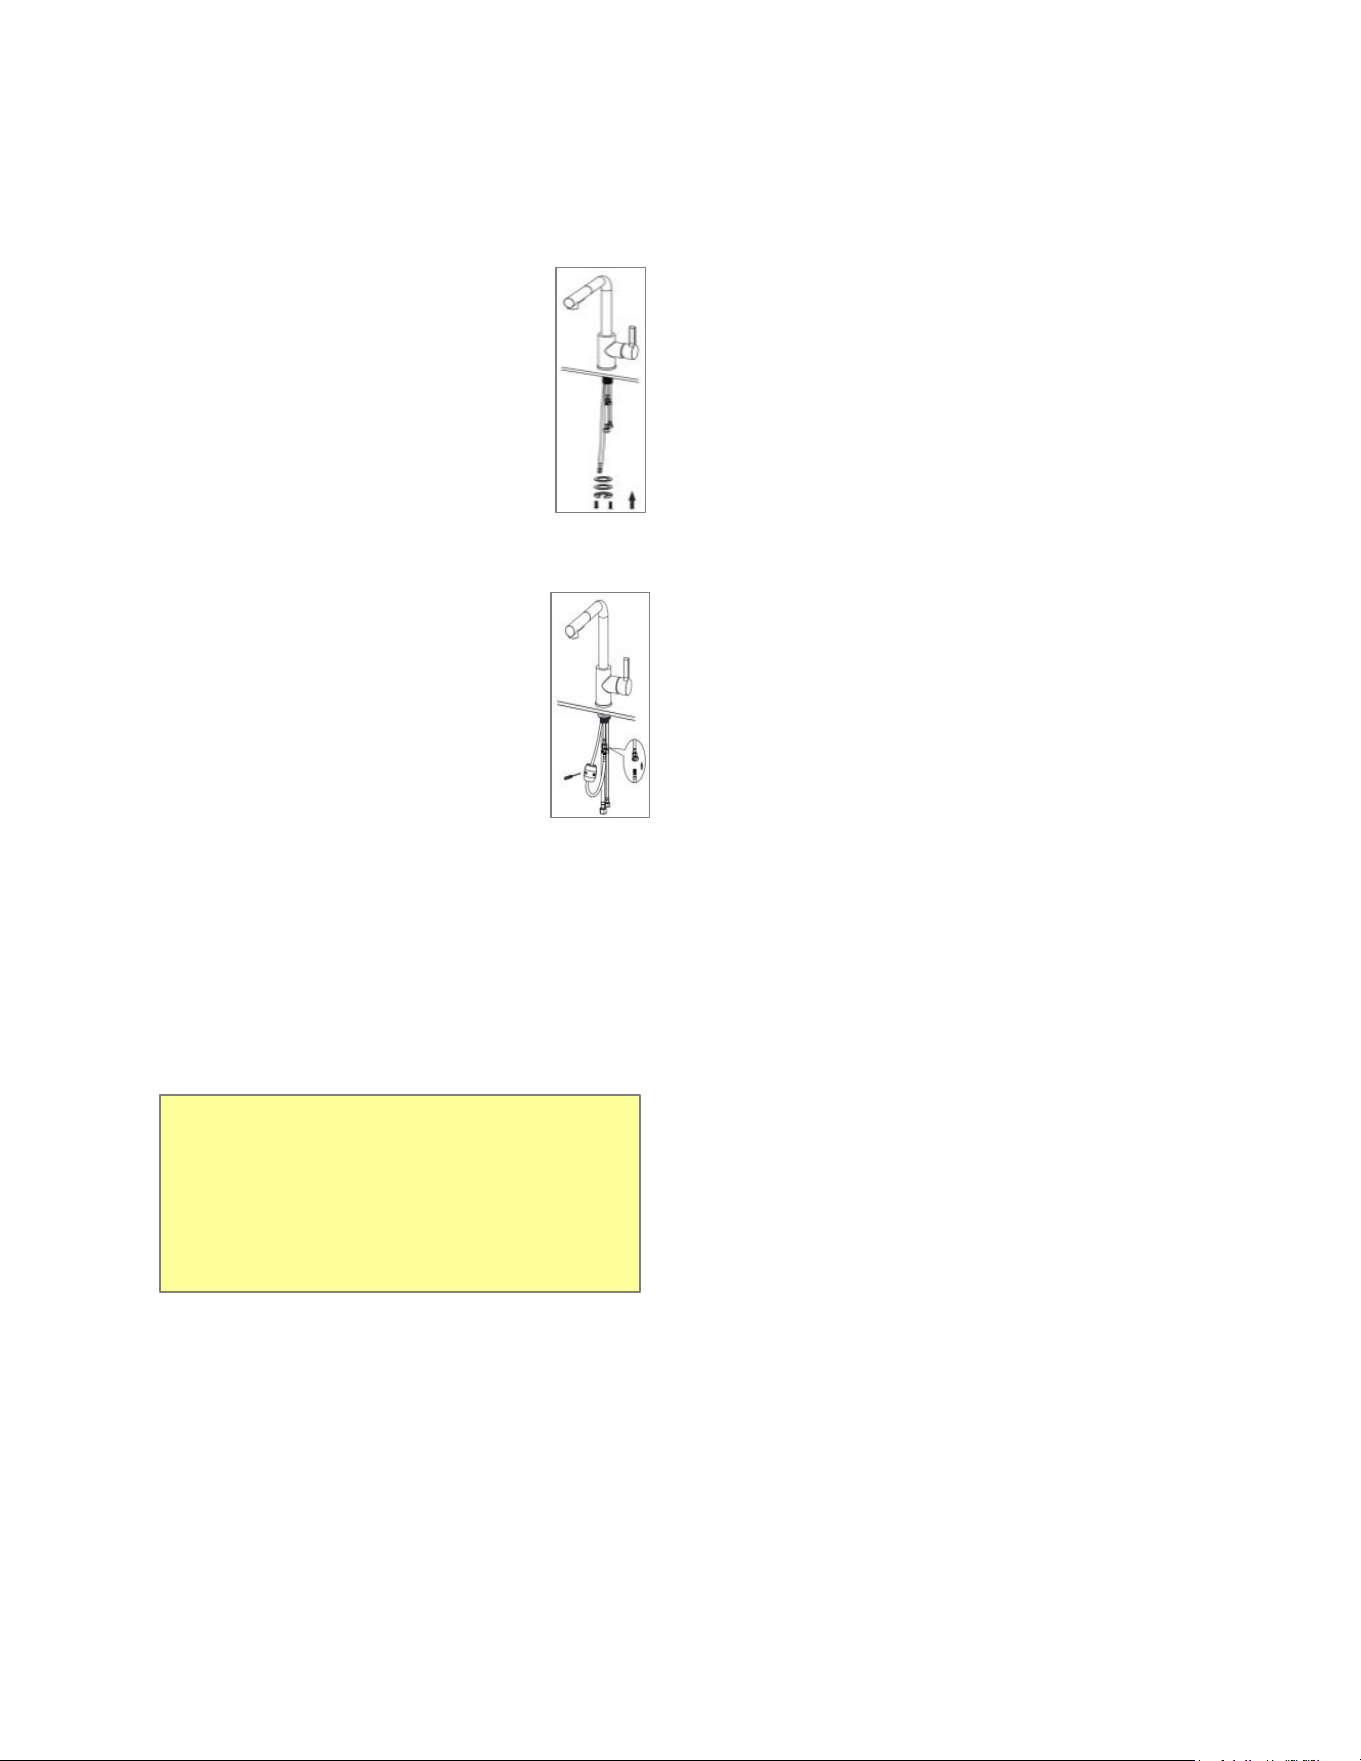
Follow these steps to properly attach the
faucet to the sink:
1. Remove the mounting hardware
and set aside.
2. Position faucet body to the sink
hole.
3. Secure the mounting hardware
till snug. (Figure 1)
4. Attach the spray hose and install
counterweight on spray hose.
(Figure 2)
5. Connect waterlines and tighten
with a wrench. If you are
unfamiliar with plumbing, we
recommend seeking
professional help for this step.
6. Detach the spray head from the
hose to flush out debris. Hold the
tip of the spray hose, turn on the
faucet, and let the water run for 60
seconds.
7. Check for leaks, tighten if necessary.
Anchoring the Turnkey Kitchen
After installing the spacers, anchor the turnkey
kitchen with the following methods:
1.
Use the pre-drilled holes in the metal
frame located on the back of the
cabinetry with the appropriate spacer
for secure attachment.
2.
Alternatively, drill through the back
cabinets to anchor the unit.
Both methods provide added support
and security for the installation.
Removing Support Brace
(If applicable to your turnkey kitchen)
Only remove the support brace after properly installing the
unit.
1. Locate the brace at the front of the cavity.
2. Remove the screws on each side of the brace.
3. Discard the brace.
Refrigerator
(CT661WBIIF, CT661WBIIFADA, ASDG2411PNR,
SDHG2443PNR, AL57GPNR, CL24BV1)
1. Connect the Refrigerator:
Before pushing the refrigerator in place, connect it
to the power source.
2. Adjust the Legs:
Make sure the refrigerator is level by adjusting its
legs if necessary.
Raise the refrigerator legs to
decrease the gap between the counter for a cleaner
more cohesive look.
3. Consult the Refrigerator’s Manual:
Refer to the refrigerator’s user manual for
additional installation instructions and power
requirements.
Cooktop
(SINC2B115)
Consult the Cooktop’s Manual:
Refer to the cooktop’s user manual for additional
installation instructions and power requirements.
Adhering the Backsplash
(Optional)
Consider attaching the backsplash before anchoring
the kitchen, depending on your installation
preferences.
1. Apply silicone along the edge of the
countertop.
2. Position the backsplash.
3. Use temporary braces to hold the backsplash in
place until the silicone cures.
Figure 1
8
Installing the Wall Cabinets
(Sold Separately)
Wall cabinets are available as optional
accessories and are not included with the
unit. Installation hardware is not supplied.
Please consult a contractor for correct
installation.
1. Select appropriate hardware based on your
wall type and the weight of the cabinets.
2. Measure and mark the desired height and
position of the cabinets on the wall. Use a
level to ensure accuracy.
3. Locate and mark stud positions, then drill
pilot holes through the back of the cabinet.
4. Secure the cabinet to the wall using screws
long enough to provide a firm hold.
5. Setup
Attaching the Toekick
1. Align with the front legs and
snap into place.
Refer to page 6 of the manual if the
legs need to be replaced before
attaching the toekick.
Attaching the Knobs
1.
Attach knobs to the cabinets and
drawers and screw them into place.
2.
Ensure they’re snug but not overly
tight, which could damage the
materials.
Adjusting the Shelf with Shelf Pins
To adjust the shelf height inside your cabinets:
1. Reposition the pins in different holes to set
the shelf at the desired height.
2. Ensure the shelf is stable and securely
positioned.
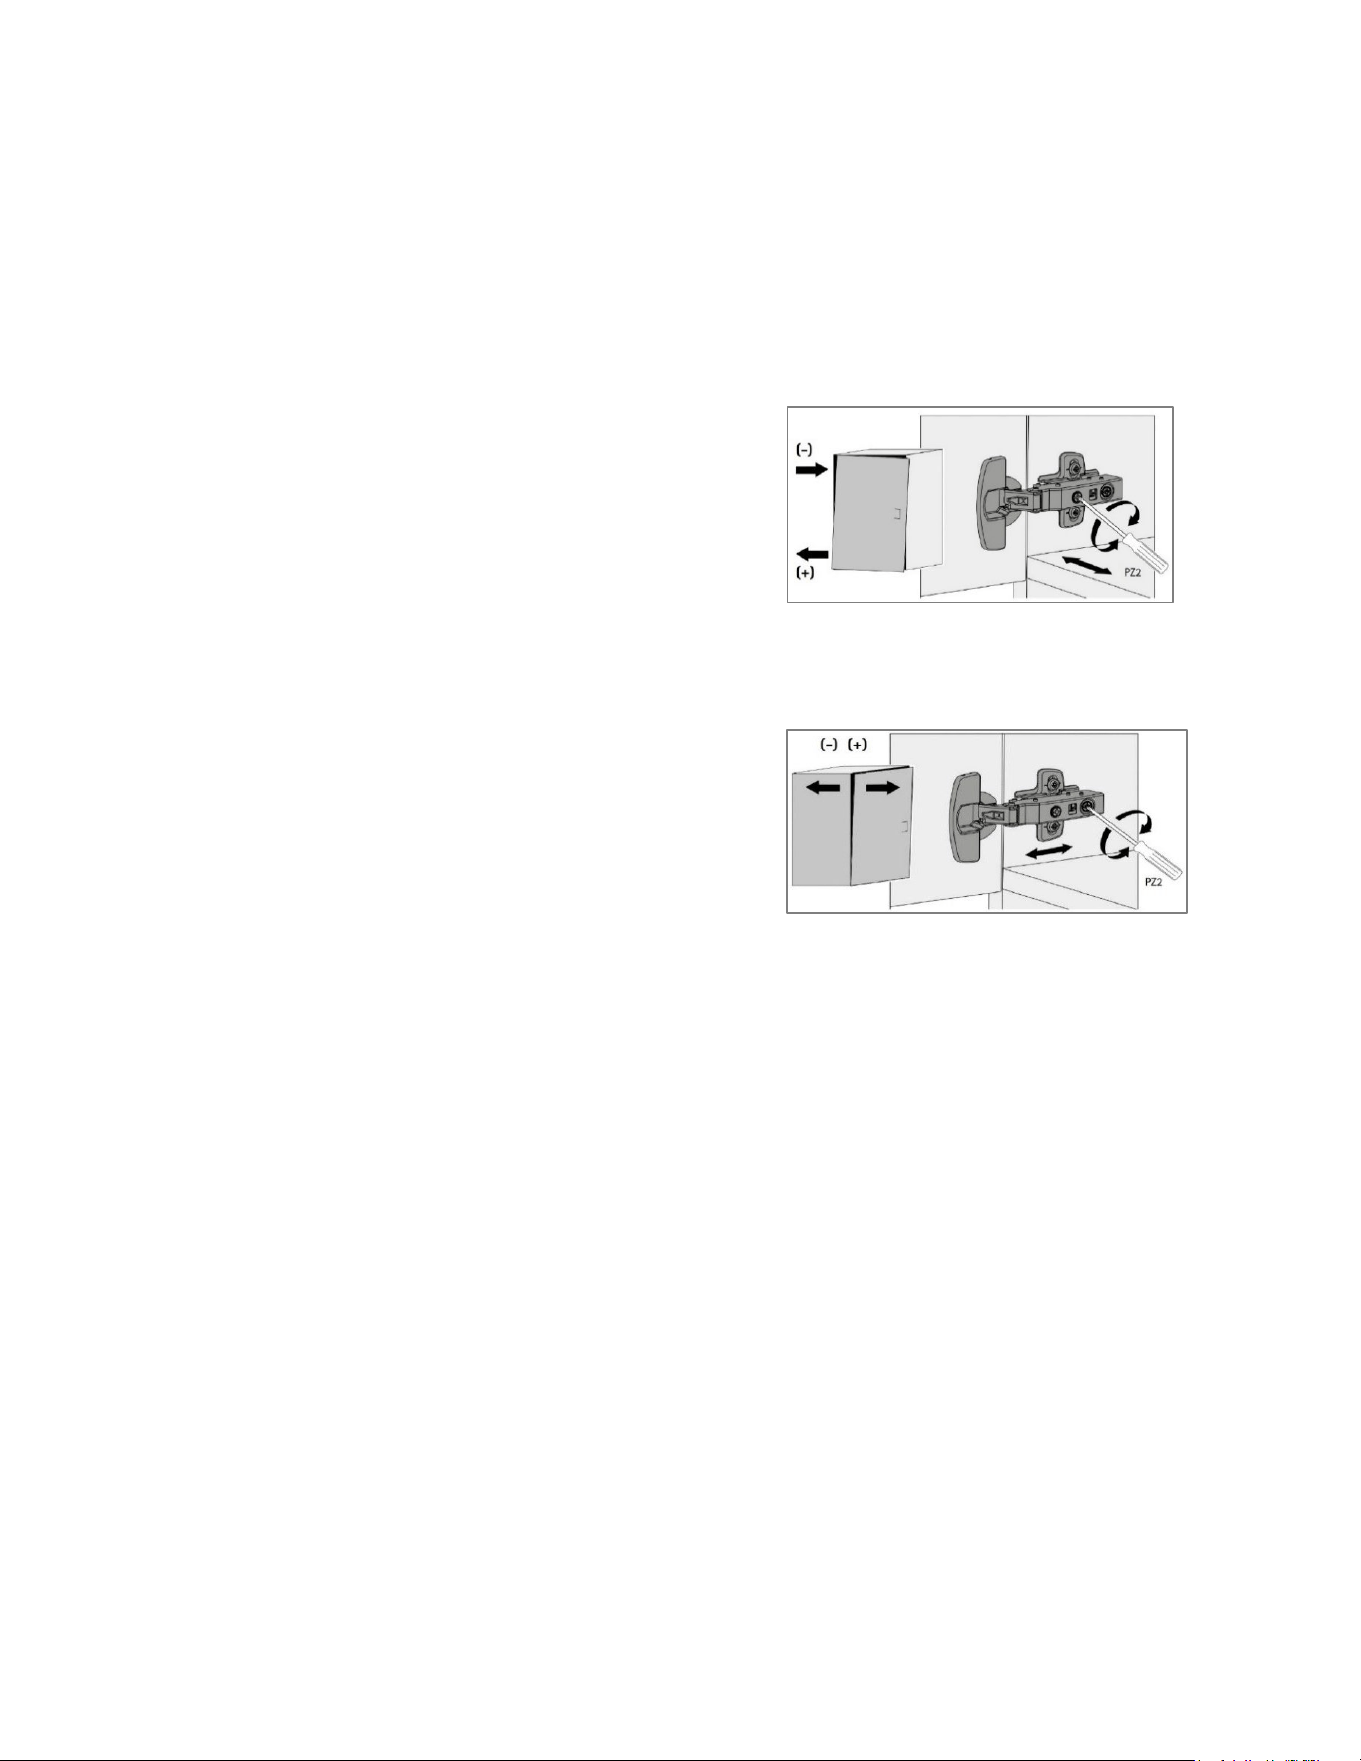
Adjusting the Cabinet Door
To adjust the overlay and projection of the cabinet
doors, use a Phillips head screwdriver to turn the
screws on the hinge till the doors align.
1.
Overlay Adjustment (Left/Right): The screw
closest to the cabinet door.
2.
Projection Adjustment (Front/Back): The screw
furthest from the cabinet door.
3.
Check that doors open and close evenly once
adjustments are complete.

9
WARNING: Avoid setting toasters, coffee makers,
and other heating appliances which may expose
cabinets to long-
term heat and humidity. The
continuous heat and steam they generate can
damage the cabinet finishes over time.
NOTE: In some cases, touch-up kits may be
available to assist with minor cosmetic repairs.
Availability is limited and not guaranteed with
every kitchen. Please contact us for more
information if needed.
6. Care & Maintenance
Your turnkey kitchen requires regular care to
preserve its functionality and efficiency. Follow
the suggested care and maintenance tips to
extend the lifespan of your turnkey kitchen.
Special Care
Countertop
•
Clean Immediately After Use: Wipe down
spills promptly to prevent staining.
•
Use Trivets or Hot Pads: Protect countertops
from heat when cooking with hot pots or
pans.
•
Avoid Sharp Objects Directly on Counter:
Use a cutting board to prevent scratches.
Cabinets
•
Wipe Down Surfaces Regularly: Use
a soft cloth with a gentle cleaning
solution to wipe down cabinet faces
and handles. Avoid harsh chemicals
that could damage finishes.
•
Avoid Moisture Exposure: Keep
cabinets dry, especially around sink
areas, to prevent swelling or warping
of wood.
Sink
•
Clean Faucets and Sink Regularly:
Use a non-abrasive cleaner to
prevent buildup.
•
Unclog Drains: Check and clean
drains regularly to avoid clogs.
•
Check for Leaks: Inspect faucets and
pipes periodically for any leaks.
Appliances
See Use and Care guide provided with your
appliance.
Maintenance Tips
•
Use touch-up paint to cover minor scuffs or
scratches — refer to the recommended colors
below for the best match.
•
Regularly clean and declutter cabinet interiors to
maintain functionality.
• Avoid overloading cabinets to ensure long-term
durability.
Recommended Touch-Up Paint Colors:
a.
SW 2739 - Charcoal Blue
b.
SW 7005 - Pure White
Daily Care
•
Put items back after use
•
Wipe down shelves regularly
•
Keep the under-sink area dry
•
Organize items based on frequency

10
7. Troubleshooting
Problem
Possible Cause
Solution
Broken leg
•
Dragging the unit
•
Tilting the unit
•
Order new legs from our
website
Cabinets are chipped or
scratched
•
Normal wear and tear over time
•
Apply touch-up paint
Cabinet doors are misaligned
•
Loose or worn hinges
•
Warped or swollen wood due
to moisture
•
Adjust hinges
•
Check for moisture
Leaky faucet
•
Worn out rubber washers
•
Loose faucet
•
Shut off water supply
•
Replace washers
•
Reassemble faucet
If you have checked the information above and you still need help with your appliance, call our Customer
Service facility at 800-932-4267 (Ext. 513) between 9:00 AM and 5:00 PM ET or visit our website
summitappliance.com/support at any time. We will do our best to answer your questions.
To order replacement parts, visit our website: summitapplianceparts.com

11
8. Appendix
Chart of Replaceable Kitchen Components and Their Part Numbers
Component
Part Number
Description/Notes
Door Pair
CB-DR-B-24DD-MN-SL
Door Pair for 24"W Base Cabinet - Navy, Slab
Door Pair
CB-DR-W-2430DD-MN-SL
Door Pair for 24"W x30"H Wall Cabinet - Navy, Slab
Door Pair
CB-DR-W-2418DD-MN-SL
Door Pair for 24"W x18"H Wall Cabinet - Navy, Slab
Door Pair
CB-DR-W-2412DD-MN-SL
Door Pair for 24"W x12"H Wall Cabinet - Navy, Slab
Door Pair
CB-DR-B-21DD-MN-SL
Door Pair for 21"W Base Cabinet - Navy, Slab
Door Pair
CB-DR-W-21DD-MN-SL
Door Pair for 21"W Wall Cabinet - Navy, Slab
Right Hand Door
CB-DR-B-15RH-MN-SL
Door RH for 15"W Base Cabinet - Navy, Slab
Left Hand Door
CB-DR-B-15LH-MN-SL
Door LH for 15"W Base Cabinet - Navy, Slab
Right Hand Door
CB-DR-W-1530RH-MN-SL
Door RH for 15"W Wall Cabinet - Navy, Slab
Left Hand Door
CB-DR-W-1530LH-MN-SL
Door LH for 15"W Wall Cabinet - Navy, Slab
Flip Up Door
CB-DR-W-2018FU-MN-SL
Door FU for 20"W Wall Cabinet - Navy, Slab
Top Drawer
CB-DWT-B-24-MN-SL
Top Drawer for 24"W Base Cabinet - Navy, Slab
Top Drawer
CB-DWT-B-21-MN-SL
Top Drawer for 21"W Base Cabinet - Navy, Slab
Top Drawer
CB-DWT-B-15-MN-SL
Top Drawer for 15"W Base Cabinet - Navy, Slab
Bottom Drawer
CB-DWB-B-15-MN-SL
Bottom Drawer for 15"W Base Cabinet - Navy, Slab
Door Pair
CB-DR-B-24DD-WH-SH
Door Pair for 24"W Base Cabinet - White, Shaker
Door Pair
CB-DR-W-2430DD-WH-SH
Door Pair for 24"W x30"H Wall Cabinet - White, Shaker
Door Pair
CB-DR-W-2418DD-WH-SH
Door Pair for 24"W x18"H Wall Cabinet - White, Shaker
Door Pair
CB-DR-W-2412DD-WH-SH
Door Pair for 24"W x12"H Wall Cabinet - White, Shaker
Door Pair
CB-DR-B-21DD-WH-SH
Door Pair for 21"W Base Cabinet - White, Shaker
Door Pair
CB-DR-W-21DD-WH-SH
Door Pair for 21"W Wall Cabinet - White, Shaker
Right Hand Door
CB-DR-B-15RH-WH-SH
Door RH for 15"W Base Cabinet - White, Shaker
Left Hand Door
CB-DR-B-15LH-WH-SH
Door LH for 15"W Base Cabinet - White, Shaker
Right Hand Door
CB-DR-W-1530RH-WH-SH
Door RH for 15"W Wall Cabinet - White, Shaker
Left Hand Door
CB-DR-W-1530LH-WH-SH
Door LH for 15"W Wall Cabinet - White, Shaker
Flip Up Door
CB-DR-W-2018FU-WH-SH
Door FU for 20"W Wall Cabinet - White, Shaker
Top Drawer
CB-DWT-B-24-WH-SH
Top Drawer for 24"W Base Cabinet - White, Shaker
Top Drawer
CB-DWT-B-21-WH-SH
Top Drawer for 21"W Base Cabinet - White, Shaker
Top Drawer
CB-DWT-B-15-WH-SH
Top Drawer for 15"W Base Cabinet - White, Shaker
Bottom Drawer
CB-DWB-B-15-WH-SH
Bottom Drawer for 15"W Base Cabinet - White, Shaker
To order replacement parts, visit our website: summitapplianceparts.com

12
9. Limited Warranty
Scope of Warranty:
Within the 48 contiguous United States, for one year from
the date of purchase, when the Turnkey Kitchens and Bars
are utilized and maintained according to the instructions
attached to or furnished with the product, the warrantor
will pay for factory-specified parts. Outside the 48 states,
all parts are warranted for one year from manufacturing
defects. Plastic parts, shelves, and cabinets are warranted
to be manufactured to commercially acceptable standards
and are not covered from damage during handling or
breakage. This warranty does not cover cabinets sold or
shipped outside of the United States and Canada. The
warranty is valid only for the original purchaser of the
cabinets and is not transferable to subsequent owners.
This limited warranty applies to all materials, labor,
workmanship, and furniture components provided as part
of the turnkey kitchen installation.
Warranty Coverage:
1. APPLIANCES:
For appliances provided as part of the turnkey
kitchen, the manufacturer’s warranty applies. Please
refer to the manufacturer’s documentation for
specific terms and conditions regarding appliance
coverage.
2. COUNTERTOPS:
Not Covered Under Warranty
The countertop provided as part of the turnkey
kitchen installation is not covered under this
warranty.
3. FINISHES:
Painted, stained, or lacquered surfaces may develop
minor signs of wear over time with regular use. While
our finishes are applied with care and tested for
durability, normal household activity may result in
light scratches, scuffs, or subtle color changes, which
are not considered defects.
The furniture may expand and contract slightly in
response to environmental changes, which can lead
to small shifts in finish appearance—such as hairline
cracks at joints or slight color variation over time.
These natural changes are expected characteristics of
the material and are not covered under this Limited
Warranty.
4. CABINETS, HARDWARE, AND COMPONENTS :
We warrant that all hardware, including drawer slides,
hinges, tracks, sink, faucet and other moving
components, will function as intended and remain
free from defects under normal use for 1 year. The
warranty period is applicable for the hardware for 1
year from the date of original purchase. A detailed
chart listing the components that may be replaced,
along with their corresponding part numbers for
ordering, can be found in the product manual or on
our website. Damage due to installation error,
product abuse, misuse or use of cleaners not in
compliance are excluded from the warranty.
5. EXCLUSIONS:
This warranty does not cover:
• DISASSEMBLY OR MODIFICATIONS: ANY
DISASSEMBLY, MODIFICATION, OR ALTERATION
OF THE INSTALLED TURNKEY KITCHEN BY THE
CUSTOMER OR A THIRD PARTY WILL VOID THIS
WARRANTY. THIS INCLUDES BUT IS NOT
LIMITED TO THE REMOVAL, REARRANGEMENT,
OR REINSTALLATION OF ANY TURNKEY
KITCHEN COMPONENTS, CABINETRY, OR
APPLIANCES THAT WERE PART OF THE
ORIGINAL INSTALLATION.
• Service calls to correct the installation of your
product, to instruct you how to use your
product, to replace or repair fuses, or to correct
wiring or plumbing.
• Damage resulting from accident, alteration,
misuse, abuse, fire, flood, acts of God, improper
installation, installation not in accordance with
electrical or plumbing codes, or use of products
not approved by the warrantor.
• Replacement parts or repair labor costs for
units operated outside the United States.
• Natural wear and tear (such as fading, cracking,
or discoloration due to normal aging or
exposure).
• Damage from environmental factors such as
humidity, temperature extremes, or water
damage (temperature range of 50-85°F / 10-
29°C and humidity range of 30-55% are
considered acceptable).
• Cosmetic imperfections such as minor scratches
or color variations inherent in natural materials.
• Damage caused by improper maintenance or
cleaning.

13
• The removal and reinstallation of your appliance
if it is installed in an inaccessible location or is
not installed in accordance with published
installation instructions.
• Any issues arising from non-compliance with
maintenance guidelines.
6. CARE AND MAINTENANCE:
To maintain this warranty, the Customer must follow
the care and maintenance instructions provided with
the turnkey kitchen. Proper care includes regular
cleaning with appropriate products and avoiding
exposure to harmful elements such as harsh
chemicals or abrasive cleaning tools. Failure to follow
these guidelines may void the warranty.
7. WARRANTY CLAIMS:
To make a warranty claim, the Customer must notify
Summit Appliance via phone or email within 30 days
of discovering any issue. Please include a detailed
description of the problem, photos (if applicable), and
proof of purchase/installation.
8. DISCLAIMER OF IMPLIED WARRANTIES AND
LIMITATION OF REMEDIES:
THE CUSTOMER’S SOLE AND EXCLUSIVE REMEDY
UNDER THIS LIMITED WARRANTY SHALL BE
PRODUCT REPAIR AS PROVIDED HEREIN. IMPLIED
WARRANTIES, INCLUDING WARRANTIES OF
MERCHANTABILITY OR FITNESS FOR A PARTICULAR
PURPOSE, ARE LIMITED TO ONE YEAR. WARRANTOR
SHALL NOT BE LIABLE FOR INCIDENTAL OR
CONSEQUENTIAL DAMAGES. SOME STATES DO NOT
ALLOW THE EXCLUSION OR LIMITATION OF
INCIDENTAL OR CONSEQUENTIAL DAMAGES, OR
LIMITATIONS ON THE DURATION OF IMPLIED
WARRANTIES OF MERCHANTABILITY OR FITNESS, SO
THESE EXCLUSIONS OR LIMITATIONS MAY NOT
APPLY TO YOU. THIS WARRANTY GIVES YOU SPECIFIC
LEGAL RIGHTS AND YOU MAY ALSO HAVE OTHER
RIGHTS, WHICH VARY FROM STATE TO STATE.
9. WARRANTY PERFORMANCE:
If a defect does occur within the terms and conditions
of this warranty such defective part will be repaired or
replaced by Summit Appliance at its sole discretion.
Summit Appliance will not provide or pay for the cost
of removal of defective product, transportation of
defective, repaired or replaced product or installation
of repaired or replaced product. If it is not
commercially feasible to repair or replace a defective
product, we may refund the original price paid by you
for the defective product or provide a credit towards
a similar type of product sold by us. Summit
Appliance will not be responsible for any shipping
damages to the defective, replaced or repaired
product. If defective item has been discontinued or is
not available at the time, we reserve the right to
replace the item with the most similar item available
in our inventory at that time. We reserve the right to
alter design, specifications and material without
obligation to make similar changes to products
previously manufactured. Summit Appliance cannot
guarantee that the finish of any replacement will
exactly match the finish and appearance of the
defective item due to the natural ageing process of
the wood and finishes of the cabinets. Summit
Appliance may require at its discretion that the
customer submit a clear photo, or that a company
representative inspects the item being claimed before
honoring this warranty.
10. TRANSFERABILITY:
This warranty applies only to the original Customer
and is not transferable to future owners or third
parties.
NOTE:
Please do not send back any items prior to receiving
proper authorization from customer service. Summit
Appliance takes no responsibility on any items sent
back without proper return authorization.
Contact Information:
For warranty claims or questions, please contact:
Summit Appliance at:
1-800-932-4267 ext. 5111
service@summitappliance.com
770 Garrison Ave. Bronx, New York 10474
www.summitappliance.com/support

14
Notes