ITEM/ARTÍCULO #5632015
MODEL/MODELO #39547
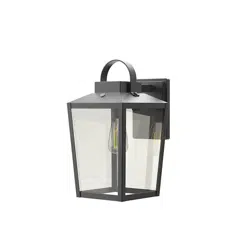
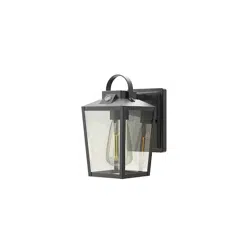
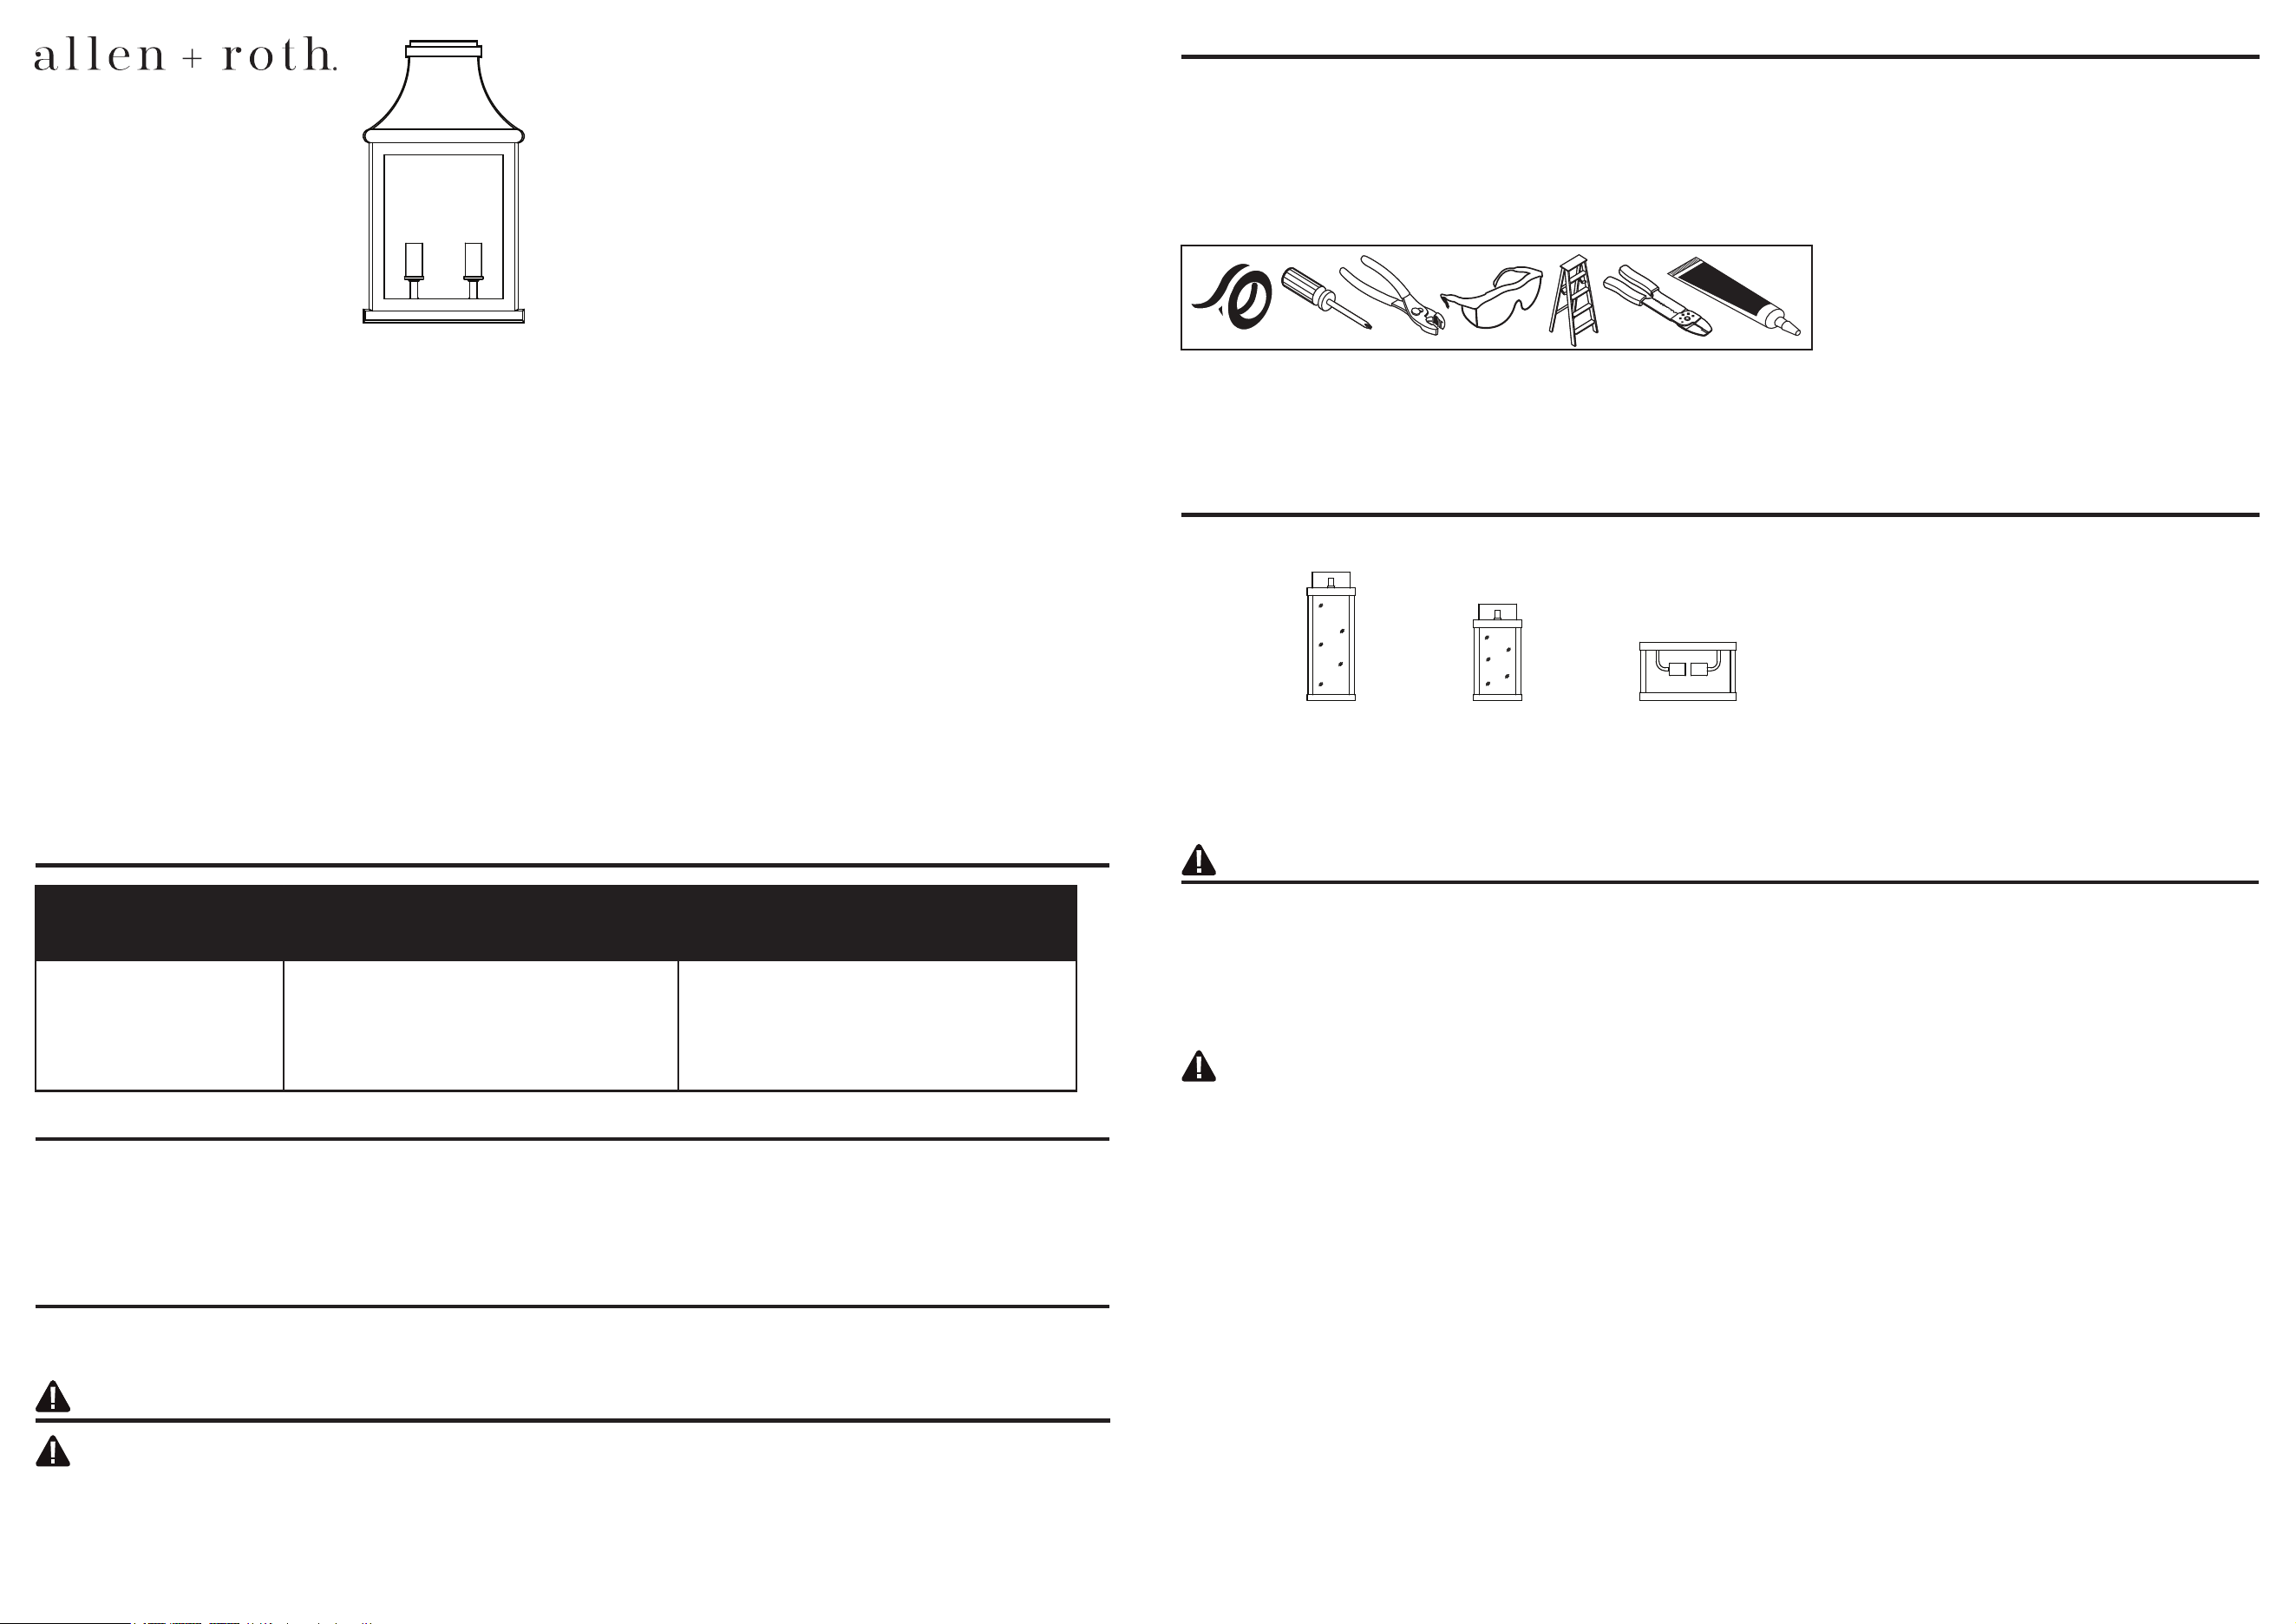
14-IN OUTDOOR WALL LANTERN
FAROL DE EXTERIORES PARA PARED DE 35.56 CM
AS23503
Thank you for purchasing this ALLEN + ROTH product. We’ve created these easy-to-follow instructions to ensure you spend your time enjoying the product
instead of putting it together. But, if you need more information than what is provided here, please visit Lowes.com, search the item number and refer to the
Guides & Documents tab on the product’s page.
If the item is no longer for sale, or if you have any questions or problems, please call our customer service department at 866-439-9800, 8 a.m. - 8 p.m.,
EST, Monday - Sunday. You could also contact us at [email protected].
Gracias por comprar este producto ALLEN + ROTH. Hemos creado estas instrucciones fáciles de seguir para garantizar que pase su tiempo disfrutando el
producto en lugar de armándolo. No obstante, si necesita más información que la entregada aquí, visite Lowes.com, busque el número de artículo y consulte
la pestaña Guides & Documents (Guías y documentos) en la página del producto.
Si el artículo ya no está a la venta o si tiene alguna pregunta o problema, llame a nuestro Departamento de Servicio al Cliente al 866-439-9800, de lunes a
domingo de 8 a.m. a 8 p.m., hora estándar del Este. También puede ponerse en contacto con nosotros a través de [email protected].
ALLEN + ROTH and logo design are trademarks or
registered trademarks of LF, LLC. All rights reserved.
ALLEN + ROTH y el diseño del logotipo son marcas
comerciales o marcas registradas de LF, LLC. Todos
los derechos reservados.
PREPARATION/PREPARACIÓN
Before beginning assembly of product, make sure all parts are present. Compare parts with package contents list and hardware contents list.
If any part is missing or damaged, do not attempt to assemble the product.
Antes de comenzar a ensamblar el producto, asegúrese de tener todas las piezas. Compare las piezas con la lista del contenido del paquete y la lista de
aditamentos. No intente ensamblar el producto si falta alguna pieza o si alguna está dañada.
Estimated Assembly Time: 30 minutes to 1 hour
Tiempo estimado de ensamblaje: de 30 minutos a 1 hora
TOOLS REQUIRED/HERRAMIENTAS NECESARIAS:
FEELING CONFIDENT? START YOUR NEXT PROJECT/¿SE SIENTE CONFIADO? EMPIECE SU PRÓXIMO PROYECTO
• Visit Lowes.com for more information./Para obtener más información, visite Lowes.com.
Printed in China
Impreso en China
WARNING:/ADVERTENCIA:
• This fixture is intended for installation in accordance with the National Electrical Code (NEC) and all
local code specifications. If you are not familiar with code requirements, installation by a certified electrician
is recommended./La lámpara se debe instalar de acuerdo con el Código Eléctrico Nacional (NEC, por sus siglas
en inglés) y todas las especificaciones de códigos locales. Si no está familiarizado con los requisitos del código,
se recomienda que un electricista certificado realice la instalación.
• Do not use bulbs with wattage greater than specified on this fixture./No utilice bombillas de un vataje mayor al
especificado en esta lámpara.
CALIFORNIA PROPOSITION 65:/PROPUESTA 65 DE CALIFORNIA:
• WARNING: This product can expose you to chemicals including lead, which is known to the State of California
to cause cancer, birth defects, or other reproductive harm. For more information, go to
http://www.P65Warnings.ca.gov./ADVERTENCIA: este producto puede exponerlo a productos químicos, que
incluyen el plomo, reconocidos por el estado de California como causantes de cáncer y defectos congénitos u
otros daños en el aparato reproductivo. Para obtener más información, visite http://www.P65Warnings.ca.gov.
CAUTION:/PRECAUCIÓN:
• If you have any doubts about how to install this lighting fixture, or if the fixture fails to operate completely,
please contact a licensed electrical contractor./Si tiene dudas sobre la instalación de esta lámpara, o si el
funcionamiento de la misma falla por completo, póngase en contacto con un electricista con licencia.
• All parts must be used as indicated in these instructions. Do not substitute any parts, leave parts out, or use
any parts that are worn out or broken. Failure to obey this instruction could invalidate ETL listing and/or C.S.A.
certification of this fixture./Todas las piezas deben usarse como lo indican estas instrucciones. No reemplace
las piezas, no omita piezas durante la instalación ni utilice piezas gastadas o rotas. El incumplimiento de esta
indicación podría invalidar la homologación ETL o la certificación C.S.A. de esta lámpara.
SAFETY INFORMATION/INFORMACIÓN DE SEGURIDAD
TROUBLESHOOTING/SOLUCIÓN DE PROBLEMAS
CARE AND MAINTENANCE/CUIDADO Y MANTENIMIENTO
PROBLEM
PROBLEMA
POSSIBLE CAUSE
CAUSA POSIBLE
CORRECTIVE ACTION
ACCIÓN CORRECTIVA
Fixture does not light.
La lámpara no enciende.
1. Fixture may be wired incorrectly.
2. Worn or broken bulb.
1. Es posible que la lámpara esté conectada de
manera incorrecta.
2. La bombilla está quemada o rota.
1. Check wiring.
2. Replace bulb.
1. Revise el cableado.
2. Reemplace la bombilla.
• Always be certain that electric current is turned off before cleaning this item./Siempre asegúrese de que la corriente eléctrica esté desconectada antes de
limpiar este artículo.
• Use a soft, moist cloth with mild non-abrasive soap to clean fixture. Never use glass cleaner on fixture, as it will damage the metal finish./Utilice un paño
húmedo suave y jabón suave no abrasivo para limpiar la lámpara. Nunca utilice un limpiador para vidrio en la lámpara porque este dañará el acabado
metálico.
WARRANTY/GARANTÍA
• For full product warranty information, see warranty card included in the packaging./Para obtener información completa sobre la garantía del producto,
consulte la tarjeta de garantía incluida en el embalaje.
CAUTION – RISK OF SHOCK:/PRECAUCIÓN: RIESGO DE DESCARGA ELÉCTRICA.
• Disconnect Power at the main circuit breaker panel or main fusebox before starting and during the installation./
Desconecte la energía en el panel principal del interruptor de circuito o en la caja de fusibles principal antes de
comenzar y durante la instalación.
SAFETY INFORMATION/INFORMACIÓN DE SEGURIDAD
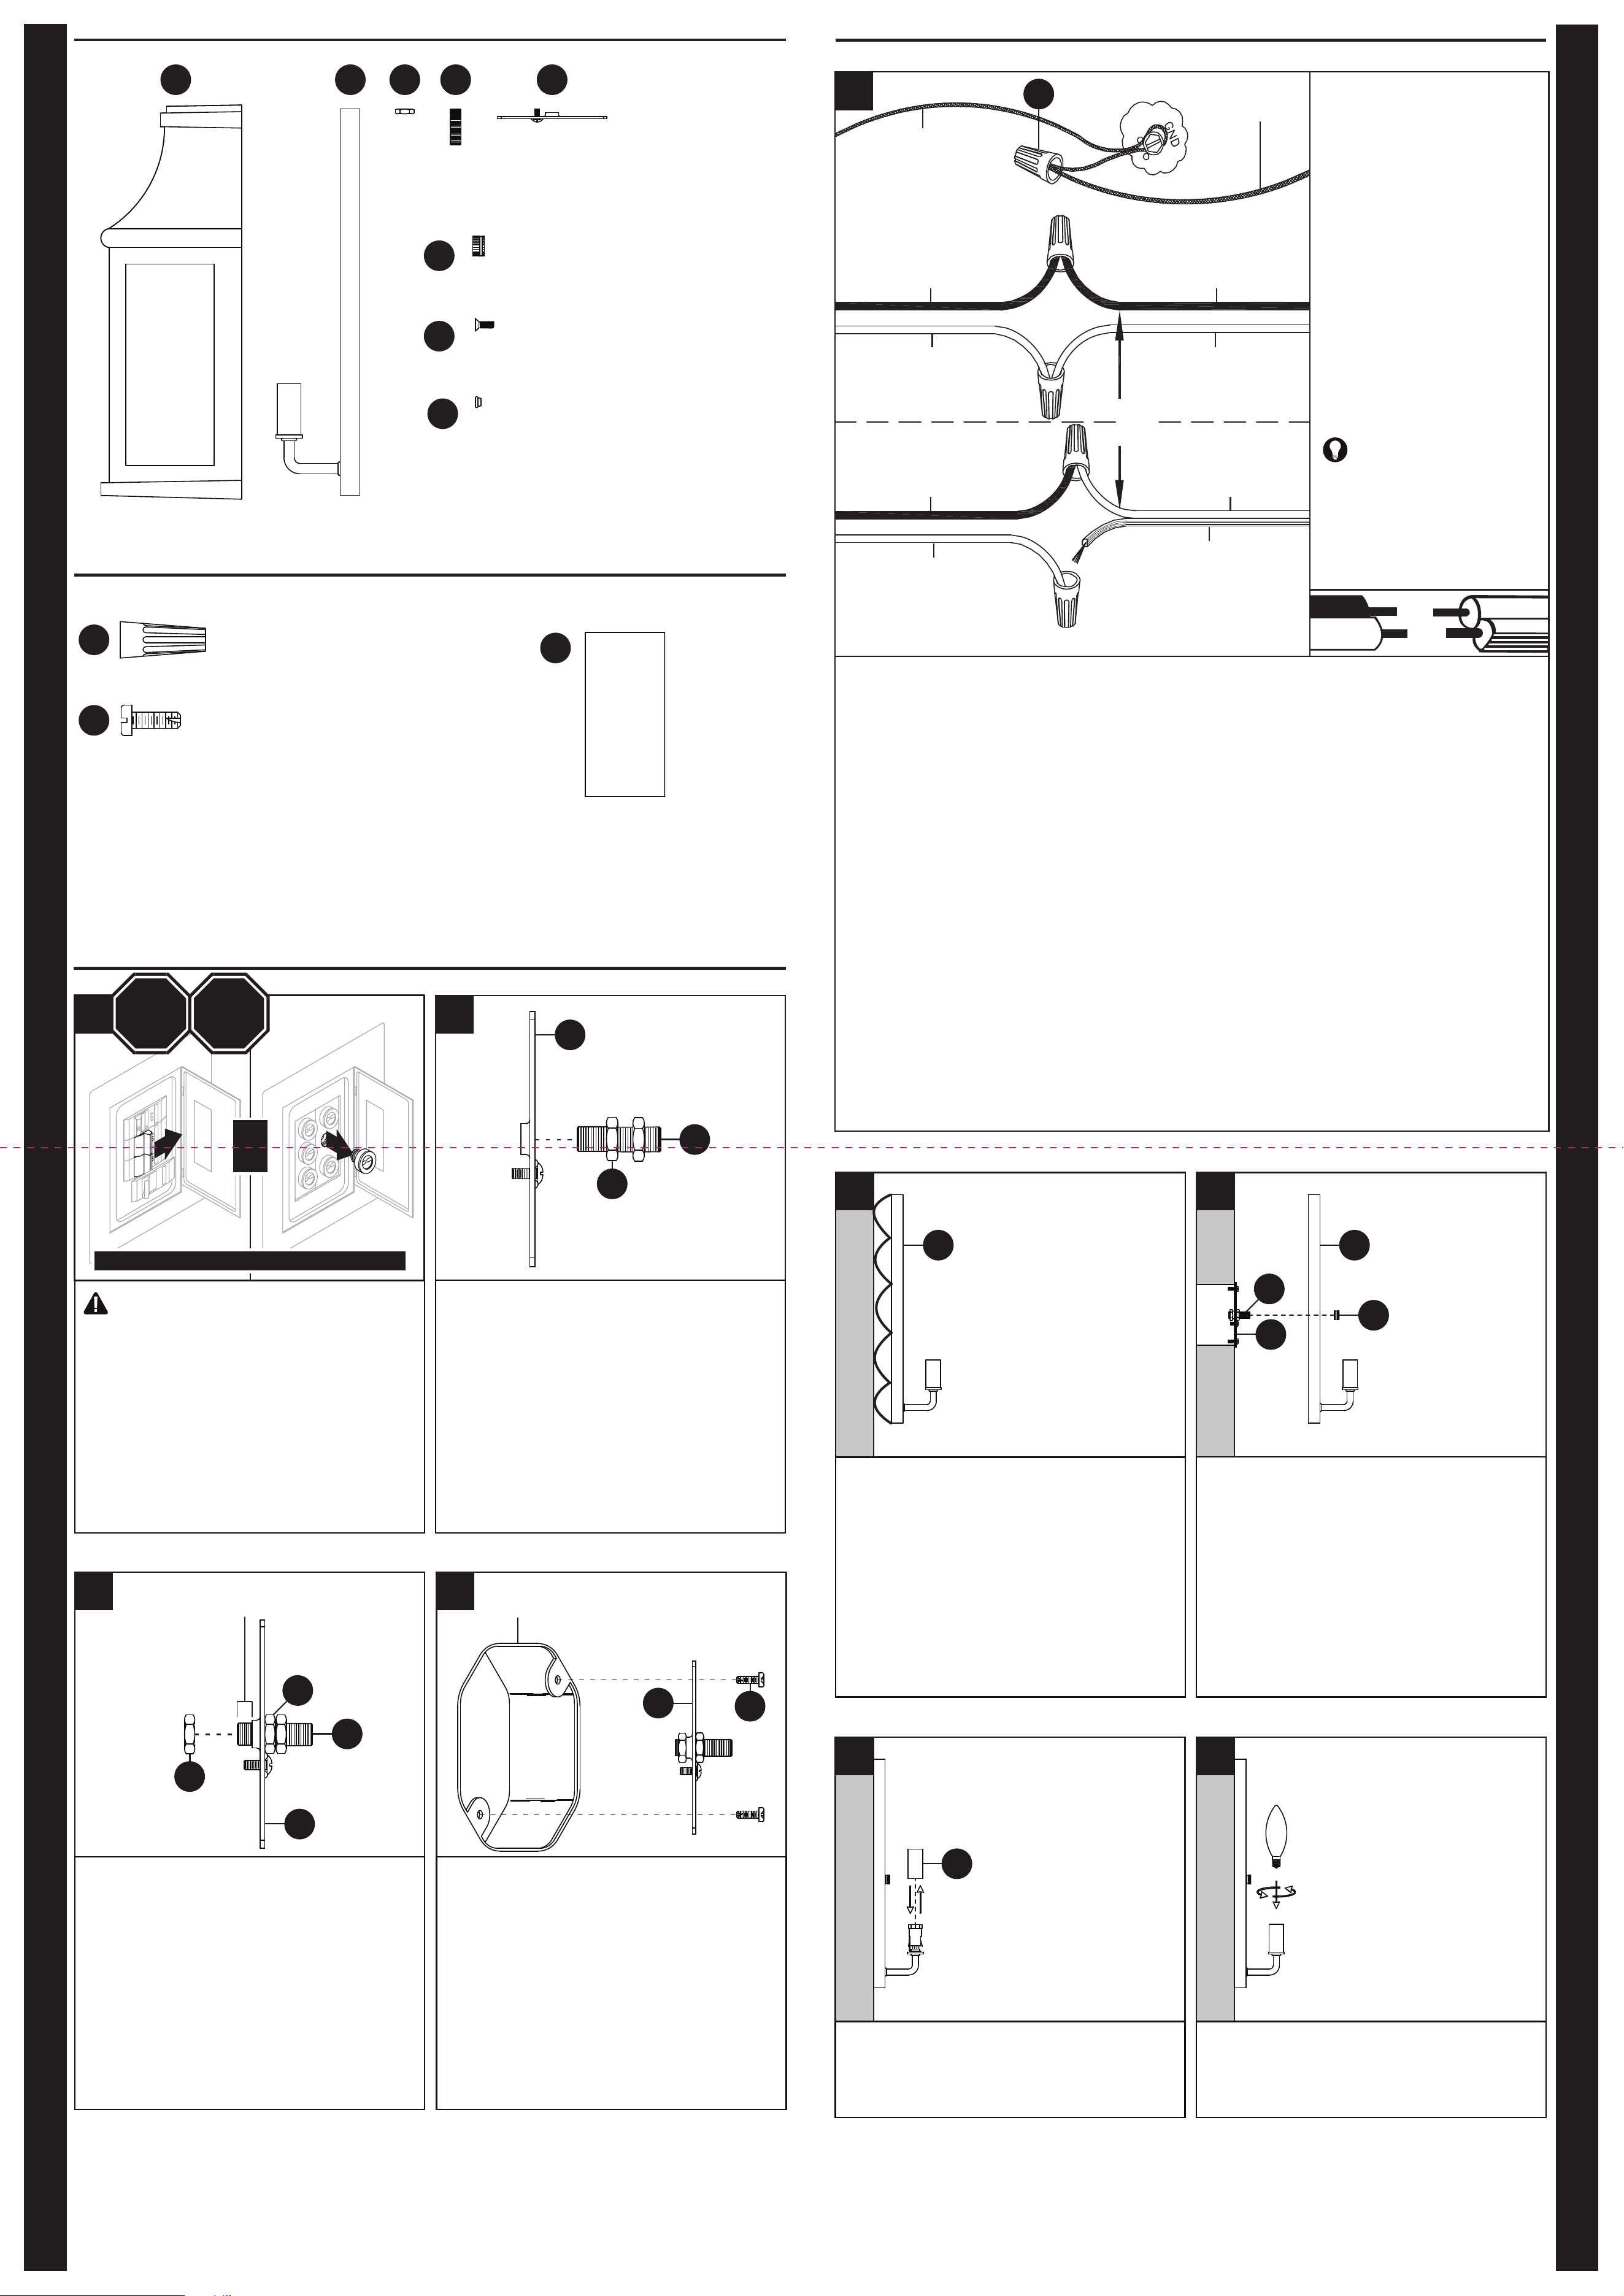
PACKAGE CONTENTS/CONTENIDO DEL PAQUETE
INSTALLATION OVERVIEW/DESCRIPCIÓN GENERAL DE LA INSTALACIÓN
HARDWARE CONTENTS/ADITAMENTOS
Note: Hardware shown actual size./Nota: los aditamentos se muestran en tamaño real.
7
x 2
x 1
x 3
A
AA
BB
B
C
D
E
2a
6
5
INSTALLATION OVERVIEW/DESCRIPCIÓN GENERAL DE LA INSTALACIÓN
Starting on the flat side of the mounting bracket (E), thread the
threaded pipe (D) (with a hex nut (C) preinstalled) approximately
1/3 of the way into mounting bracket (E).
Comenzando por el lado plano del soporte de montaje (E),
enrosque el tubo roscado (D) (con una tuerca hexagonal (C)
preinstalada) aproximadamente 1/3 del camino en el soporte de
montaje (E).
Mounting surface should be clean, dry, flat and 1/4 in. larger than
the canopy (B) on all sides. Any gaps between the mounting
surface and canopy (B) exceeding 3/16 in. should be corrected as
required with silicone caulking compound. Caulk completely
around where the back of canopy (B) meets the wall surface to
prevent water from seeping into outlet box.
La superficie de montaje debe estar limpia, seca y plana, y debe
ser 6.35 mm más larga que la base (B) en todos los lados. Si
queda algún espacio que supere los 4.76 mm entre la superficie
de montaje y la base (B), se debe corregir con un compuesto de
masilla para calafateo de silicona. Calafatee completamente
alrededor del punto donde la parte posterior de la base (B) se una
con la superficie de la pared, para evitar que el agua se filtre
dentro de la caja de salida.
Carefully pass the canopy (B) over the threaded pipe (D) protruding
from mounting bracket (E), making sure to align the threaded pipe
(D) with the hole in the canopy (B).
NOTE: Make sure all wires are inside of canopy (B) and do not get
pinched between canopy (B) and mounting bracket (E), or canopy
(B) and wall.
While holding canopy (B) in place, thread the threaded cap (CC)
onto the threaded pipe (D) and tighten to secure canopy (B) to wall.
Pase con cuidado la base (B) sobre el tubo roscado (D) que
sobresale del soporte de montaje (E), asegurándose de alinear el
tubo roscado (D) con el orificio en la base (B).
NOTA: asegúrese de que todos los conductores estén dentro de la
base (B) y que no queden atrapados entre la base (B) y el soporte
de montaje (E), o la base (B) y la pared.
Mientras sostiene la base (B) en su lugar, enrosque la tapa
roscada (CC) en el tubo roscado (D) y apriete para asegurar la
cubierta (B) a la pared.
To change candle cover option. NOTE: 1 pair pre-installed.
Carefully place candle covers (FF) over sockets.
Para cambiar la opción de cubierta de vela.
NOTA: 1 par preinstalado.
Coloque con cuidado las cubiertas de las velas (FF) sobre los
enchufes.
REV 02-NOV-2023
8
Insert 60-watt max E12 candelabra base bulb or LED equivalent
(not included) into socket. Repeat for remaining socket.
Coloque una bombilla de base candelabro E12 de 60 vatios como
máximo o una bombilla LED equivalente (no se incluyen) en el
portalámpara. Repita este procedimiento con el portalámpara
restante.
x 2 Pairs (Note: 1 pair pre-installed)
x 2 Pares (Nota: 1 par preinstalado)
FF
x 1
x 1
x 1
x 3
B B
E
CC
D
FF
QUICK REFERENCE GUIDE/GUÍA DE REFERENCIA RÁPIDA
QUICK REFERENCE GUIDE/GUÍA DE REFERENCIA RÁPIDA
CAUTION – RISK OF SHOCK: Disconnect
Power at the main circuit breaker panel or
main fusebox before starting and during the
installation.
PRECAUCIÓN: RIESGO DE DESCARGA
ELÉCTRICA. Desconecte la energía en el
panel principal del interruptor de circuito o en
la caja de fusibles principal antes de comen-
zar y durante la instalación.
1
OR
O
STOP ALTO
OFF/APAGADO
BARE COPPER OR GREEN
GROUND SUPPLY WIRE
CONDUCTOR DEL SUMINISTRO DE
PUESTA A TIERRA DE COBRE
DESNUDO O VERDE
BARE COPPER OR GREEN GROUND FIXTURE WIRE
CONDUCTOR VERDE DE PUESTA A TIERRA
O DE COBRE DESNUDO
DE LA LÁMPARA
BLACK FIXTURE WIRE
CONDUCTOR NEGRO DE LA LÁMPARA
OR
O
WHITE FIXTURE WIRE
CONDUCTOR BLANCO DE LA LÁMPARA
BLACK SUPPLY WIRE
CONDUCTOR DEL SUMINISTRO NEGRO
BLACK SUPPLY WIRE
CONDUCTOR DEL SUMINISTRO NEGRO
PARALLEL FIXTURE CORD
(ROUND AND SMOOTH)
CORDÓN EN PARALELO DE
LA LÁMPARA (REDONDO Y LISO)
PARALLEL FIXTURE CORD
(“D” SHAPED AND RIDGED)
CABLE PARALELO DE
LA LÁMPARA (EN “D” Y RUGOSO)
WHITE SUPPLY WIRE
CONDUCTOR DEL SUMINISTRO BLANCO
WHITE SUPPLY WIRE
CONDUCTOR DEL SUMINISTRO BLANCO
WIRE CONNECTION GUIDE:
Ground wire:
• For installation in the United States: Wrap ground wire from outlet box around ground screw preassembled on mounting bracket (E) no
less than 2 in. from wire end. Tighten ground screw. If fixture is supplied with a ground wire, connect to outlet ground wire with a wire
connector (AA).
• For installation in Canada: If fixture is supplied with ground wire, wrap ground wire around ground screw on mounting bracket (E). Tighten
ground screw. Connect fixture ground wire to outlet ground wire with a wire connector (AA).
Supply wires:
• Connect the Neutral (White) supply wire from the outlet box to the Neutral fixture wire (White or Parallel Cord “D” shaped and ribbed).
• Connect the Hot (Black) supply wire from the outlet box to the Hot fixture wire (Black or Parallel Cord round and smooth).
GUÍA PARA LA CONEXIÓN DE LOS CONDUCTORES:
Conductor de puesta a tierra:
• Para la instalación en los Estados Unidos: coloque el conductor de puesta a tierra de la caja de salida alrededor del tornillo de puesta a
tierra preensamblado en el soporte de montaje (E), a no menos de 5.08 cm del extremo del conductor. Apriete el tornillo de puesta a tierra. Si
la lámpara cuenta con un conductor de puesta a tierra, conéctelo al conductor de puesta a tierra de la caja de salida con un conector de
alambres (AA).
• Para la instalación en Canadá: si la lámpara cuenta con un conductor de puesta a tierra, enróllelo alrededor del tornillo de puesta a tierra
en el soporte de montaje (E). Apriete el tornillo de puesta a tierra. Conecte el conductor de puesta a tierra de la lámpara al conductor de
puesta a tierra de la caja de salida con un conector de alambres (AA).
Conductores del suministro:
• Conecte el conductor neutro del suministro de la caja de salida (blanco) al conductor neutro de la lámpara (blanco o cable paralelo “D” y
estriado).
• Conecte el conductor del suministro (negro) de la caja de salida al conductor de la lámpara (negro o cordón en paralelo redondo y liso).
AA
4
NOTE: Fixture wires will either be:
• Black and White.
• Parallel Cord SPT-1 lamp wire with
one round smooth wire and one “D”
shaped ribbed wire.
NOTA: los conductores de la lámpara
serán:
• Negro y blanco.
• Conductor de cable paralelo SPT-1
de la lámpara con un conductor liso
redondo y un conductor “D” estriado.
1/4 inch (6.35mm) minimum
6.35 mm (1/4 pulg.) como mínimo
3
Outlet Box
Caja de salida
NOTE: The mounting bracket (E) should be installed to the outlet
box (not included) with the raised center portion of the mounting
bracket (E) facing toward the outlet box (as shown).
Attach the mounting bracket (E) to the outlet box using the short
machine screws (BB).
NOTA: el soporte de montaje (E) debe instalarse en la caja de
salida (no se incluye) con la parte central elevada del soporte de
montaje (E) mirando hacia la caja de salida (como se muestra).
Fije el soporte de montaje (E) a la caja de salida con los tornillos
para metal cortos (BB).
BB
E
C
D
2b
NOTE: The threaded pipe (D) should protrude a minimum of 1/4
inch (6.35mm) past the raised center portion of the mounting
bracket (E) (as shown). Adjust short threaded pipe (D) and hex nut
(C) as needed.
On the side of the mounting bracket (E) with the raised center
portion, thread the remaining hex nut (C) onto the threaded pipe (D).
Tighten both of the hex nuts (C) against the mounting bracket until
snug to secure the threaded pipe (D) to the mounting bracket (E).
NOTA: el tubo roscado (D) debe sobresalir un mínimo de 6.35 mm
(1/4 pulg.) más allá de la parte central elevada del soporte de
montaje (E) (como se muestra). Ajuste el tubo roscado corto (D) y la
tuerca hexagonal (C) según sea necesario.
En el lado del soporte de montaje (E) con la parte central elevada,
enrosque la tuerca hexagonal restante (C) en el tubo roscado (D).
Apriete ambas tuercas hexagonales (C) contra el soporte de
montaje hasta que queden ajustadas para asegurar el tubo roscado
(D) al soporte de montaje (E).
E
D
C
C
E
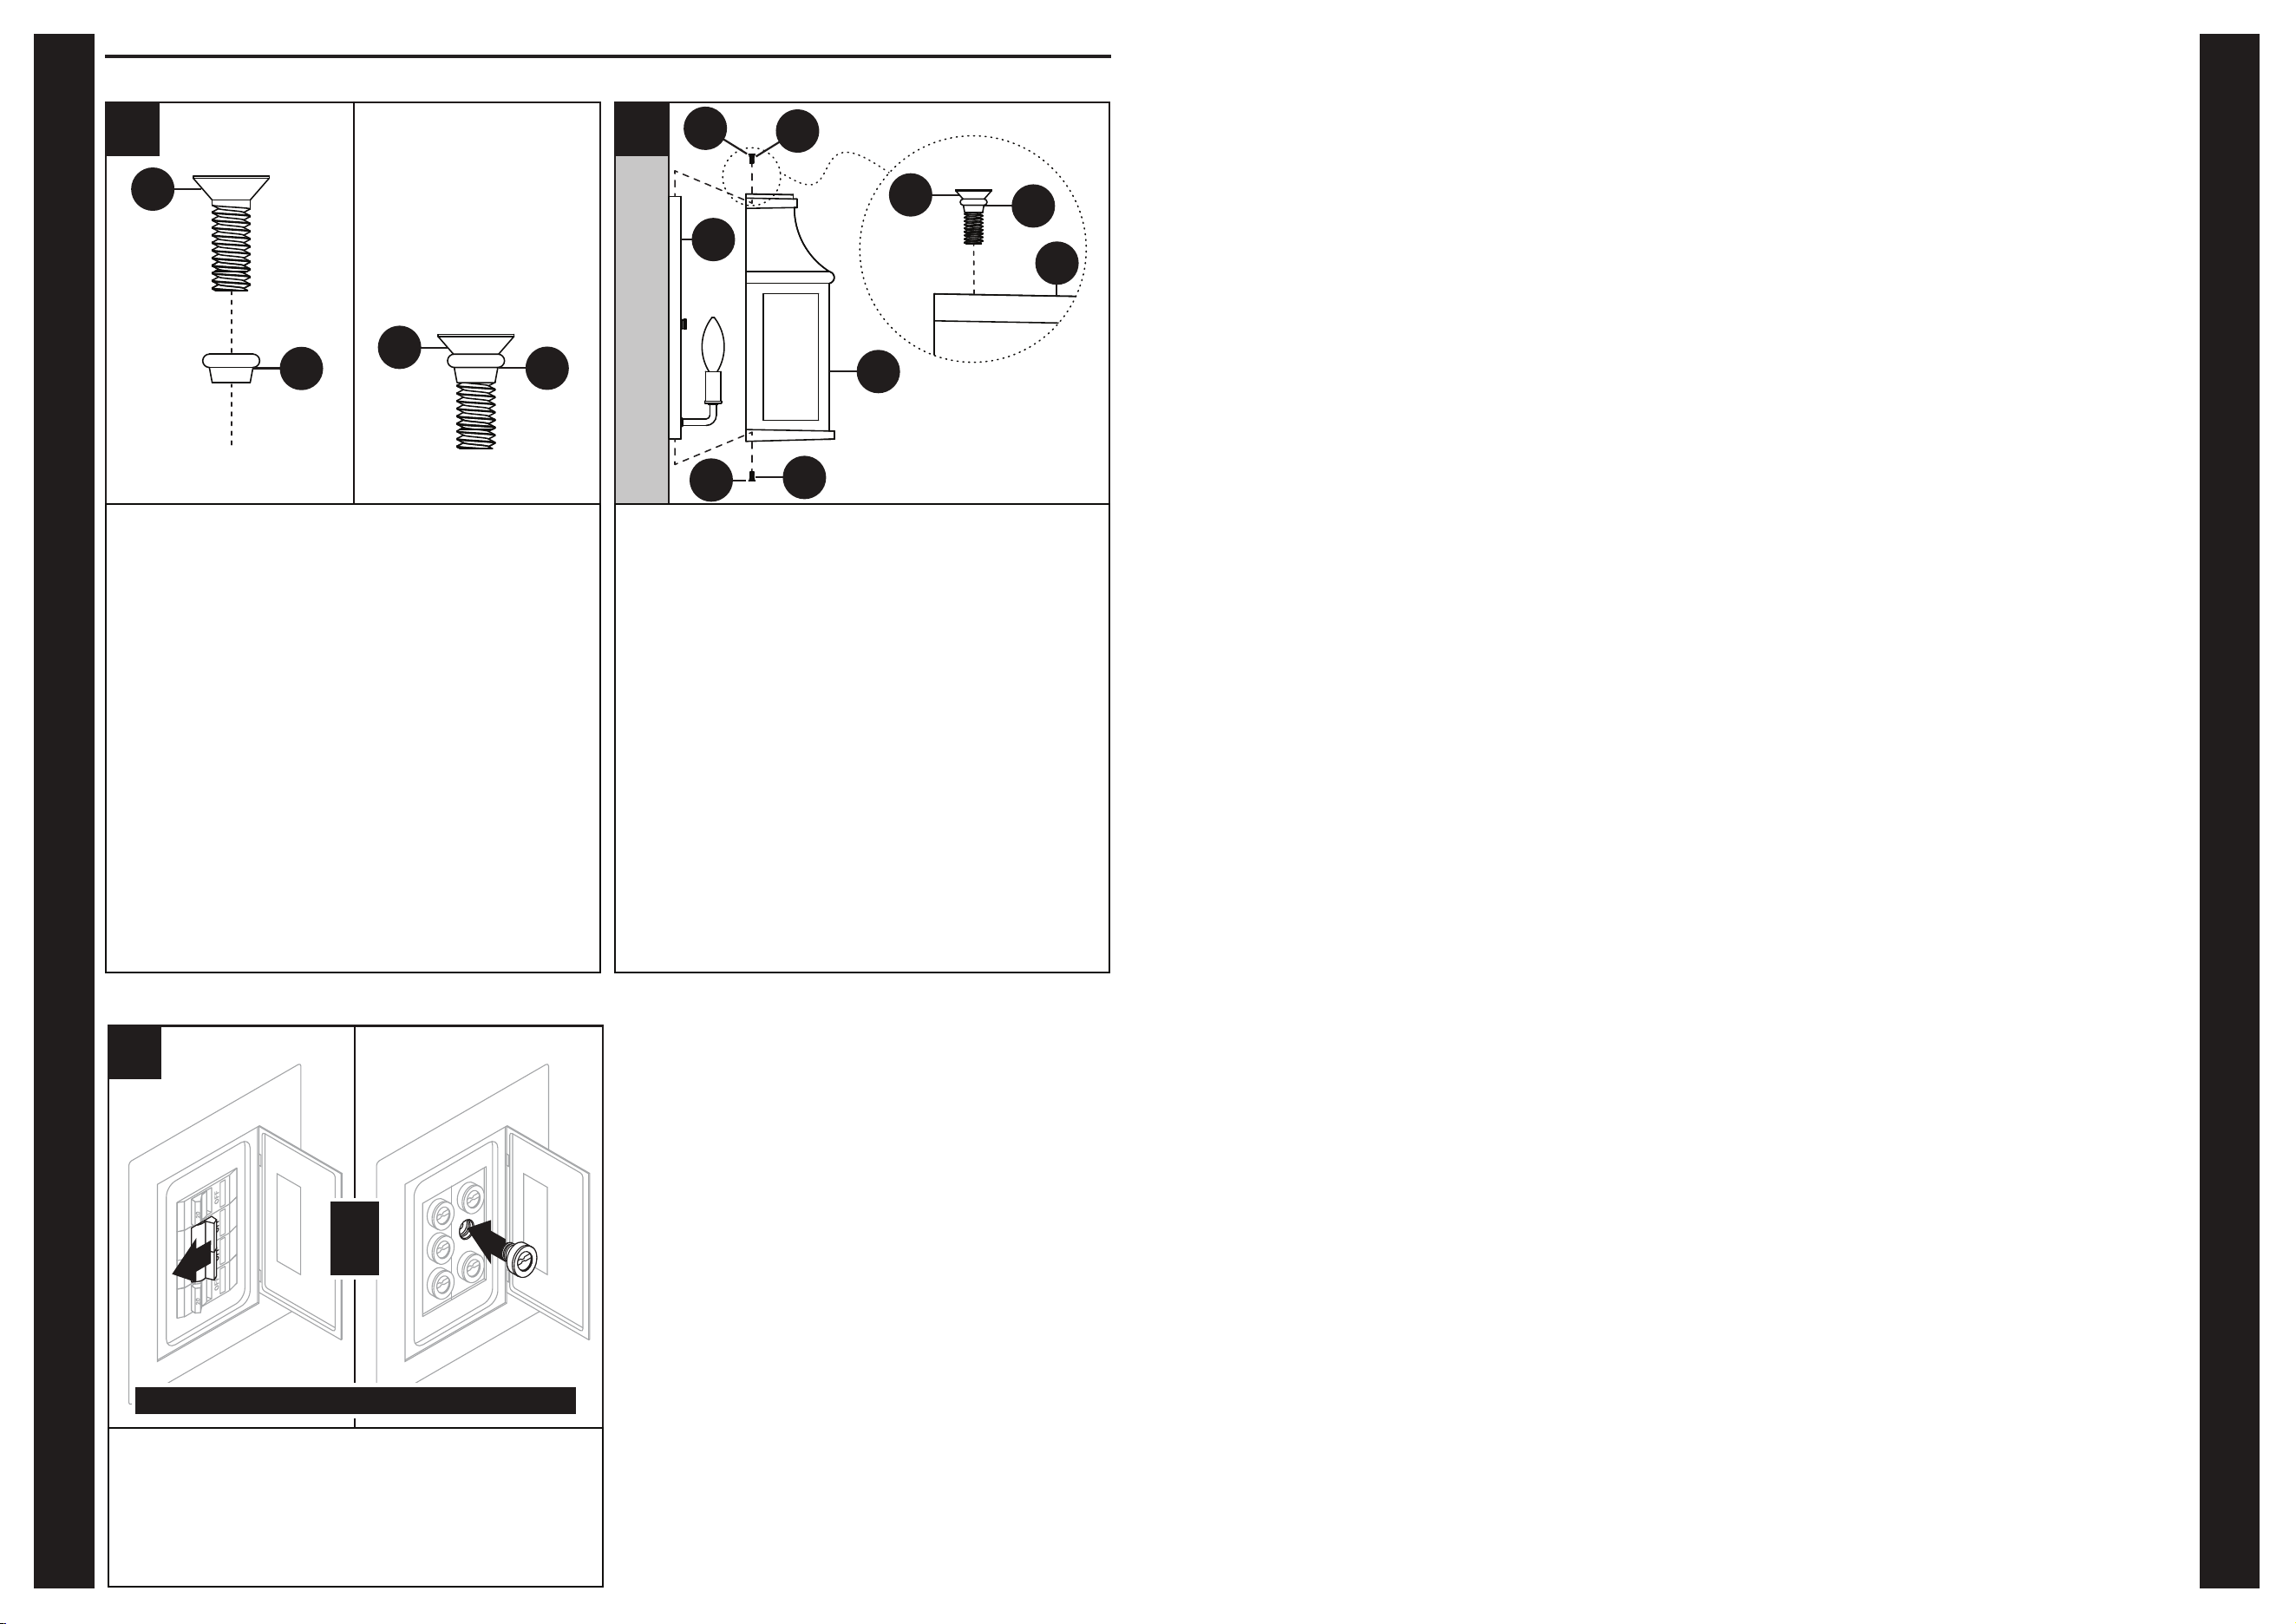
x 1
CC
x 2
DD
EE
x 2
9
Insert the mounting screws (DD) into the silicone washers (EE)
starting on the wider side of the silicone washers (EE).
Inserte los tornillos de montaje (DD) en las arandelas de silicona
(EE) comenzando por el lado más ancho de las arandelas de
silicona (EE).
INSTALLATION OVERVIEW/DESCRIPCIÓN GENERAL DE LA INSTALACIÓN
10
Carefully pass fixture body (A) over canopy (B), aligning the
mounting screw holes in the fixture body (A) with the mounting
screw holes in the canopy (B).
While holding fixture body (A) in place, thread the mounting screws
(DD) (with silicone washers (EE) preinstalled) into the aligned
mounting screw holes in the fixture body (A) and canopy (B). Tighten
mounting screws (DD) to secure fixture body (A) to canopy (B).
Pase con cuidado el cuerpo de la lámpara (A) sobre la base (B),
alineando los orificios para tornillos de montaje en el cuerpo de la
lámpara (A) con los orificios para tornillos de montaje en la base (B).
Mientras sostiene el cuerpo de la lámpara (A) en su lugar, enrosque
los tornillos de montaje (DD) (con arandelas de silicona (EE)
preinstaladas) en los orificios para tornillos de montaje alineados en
el cuerpo de la lámpara (A) y la base (B). Apriete los tornillos de
montaje (DD) para asegurar el cuerpo de la lámpara (A) a la base
(B).
EE
B
DD
DD
A
A
DD
EE
QUICK REFERENCE GUIDE/GUÍA DE REFERENCIA RÁPIDA
QUICK REFERENCE GUIDE/GUÍA DE REFERENCIA RÁPIDA
11
Reconnect power at the main circuit breaker panel or main fusebox.
Vuelva a conectar la alimentación en el panel del interruptor de
circuito principal o en la caja de fusibles principal.
OR
O
ON/ENCENDIDO
DD
EE
DD
EE
EE