Find additional instructions and support at www.current-usa.com
QUICK START
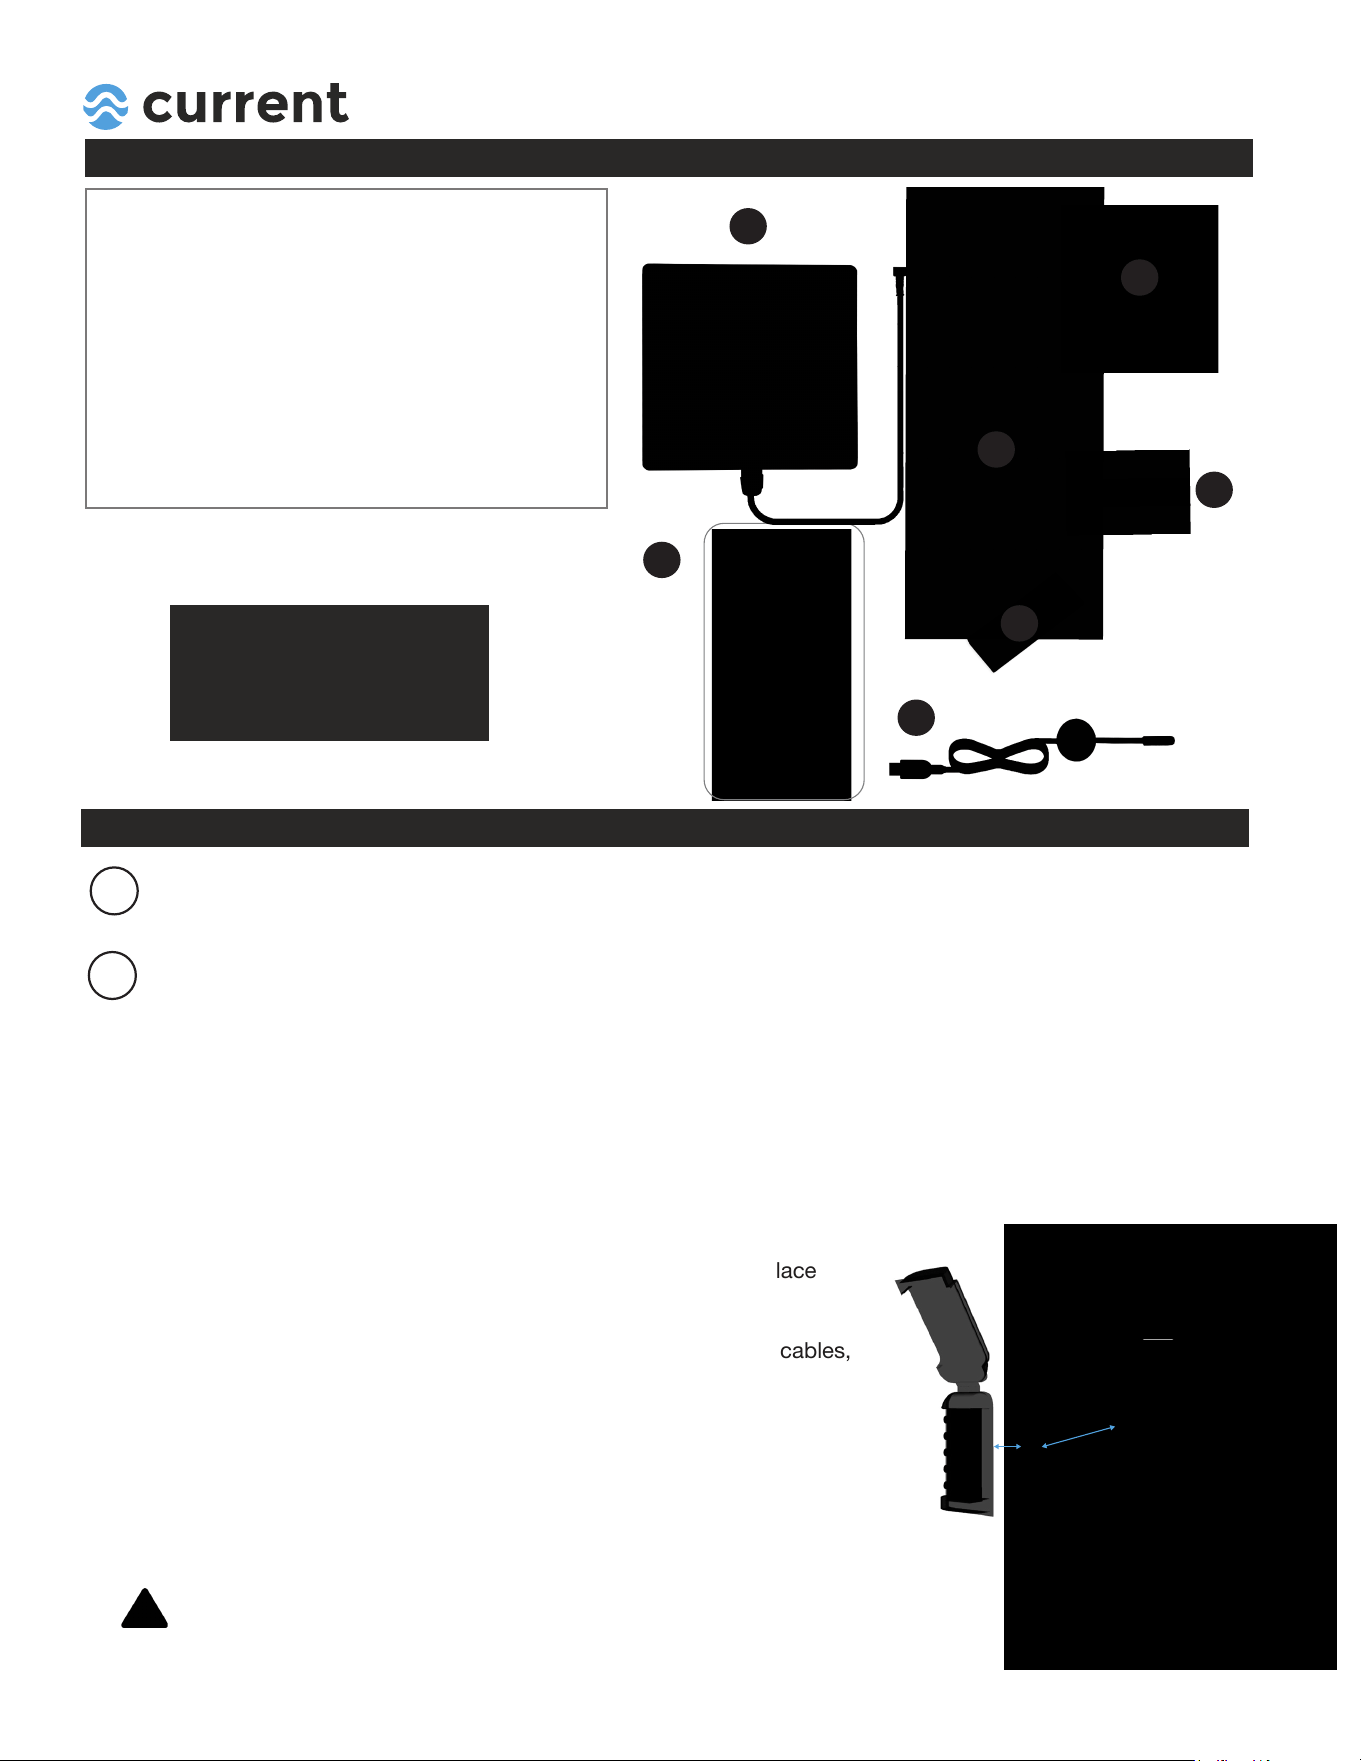
WHAT’S INCLUDED
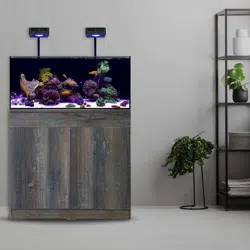
2 x Orbit REEF LED LOOP Bluetooth
INSTALLATION
1
Remove all items from packaging.
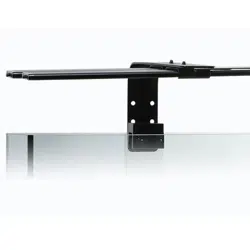
Mount LED light to either:
1. Flex Arm Tank Mount
2. Flex Arm Stand Mount
3. Hanging Kit
4. Swivel Bracket
UNPACK
MOUNT LIGHT*
**This light MUST be used with a mounting option (SOLD SEPARATELY).
2
1. Locate a mounting position for controller, ensuring it is in a dry place
away from dripping water or salt creep.
2. Clean mounting location of any dirt using a damp rag. Ensure all cables,
including temperature sensor, reach freely.
3. Attach Controller Adhesive (H) to back of controller cover.
Use the instructions included with each mounting method to install the selected mounting option to your LED light.
MOUNT CONTROLLER
4. Once all cables are connected (follow diagram & instructions),
place controller (F) in clear cover and snap cover closed.
Remove other side of controller adhesive and attach
controller to stand mounting location.
Each Orbit REEF LED includes:
Item
Description Quantity
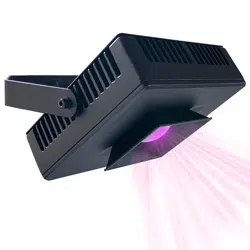
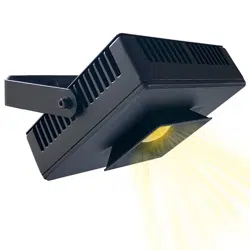
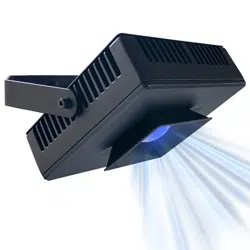
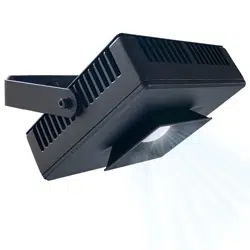
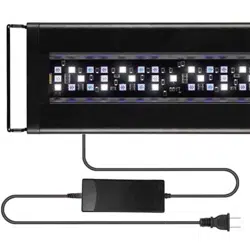
A Orbit REEF LED Light Fixture 2
B
12V DC Power Supply, UL® Listed 2
C 4
2
D Extension Cable
Cable Wraps
Note:
If your Orbit REEF LED is missing
any components, please contact
us directly at www.current-usa.com.
DO NOT RETURN TO RETAILER
A
B
D
C
Each LOOP BT Controller includes:
F
LOOP Controller w/Cover 1
G
Temperature Sensor 1
H 1
Controller Adhesive
F
G
H
DO NOT USE WITH LOOP IR
CONTROLLER OR REMOTE.
INST4421 4.21.21
QUICK START
2 x Orbit REEF LED LOOP Bluetooth
INSTALLATION
4
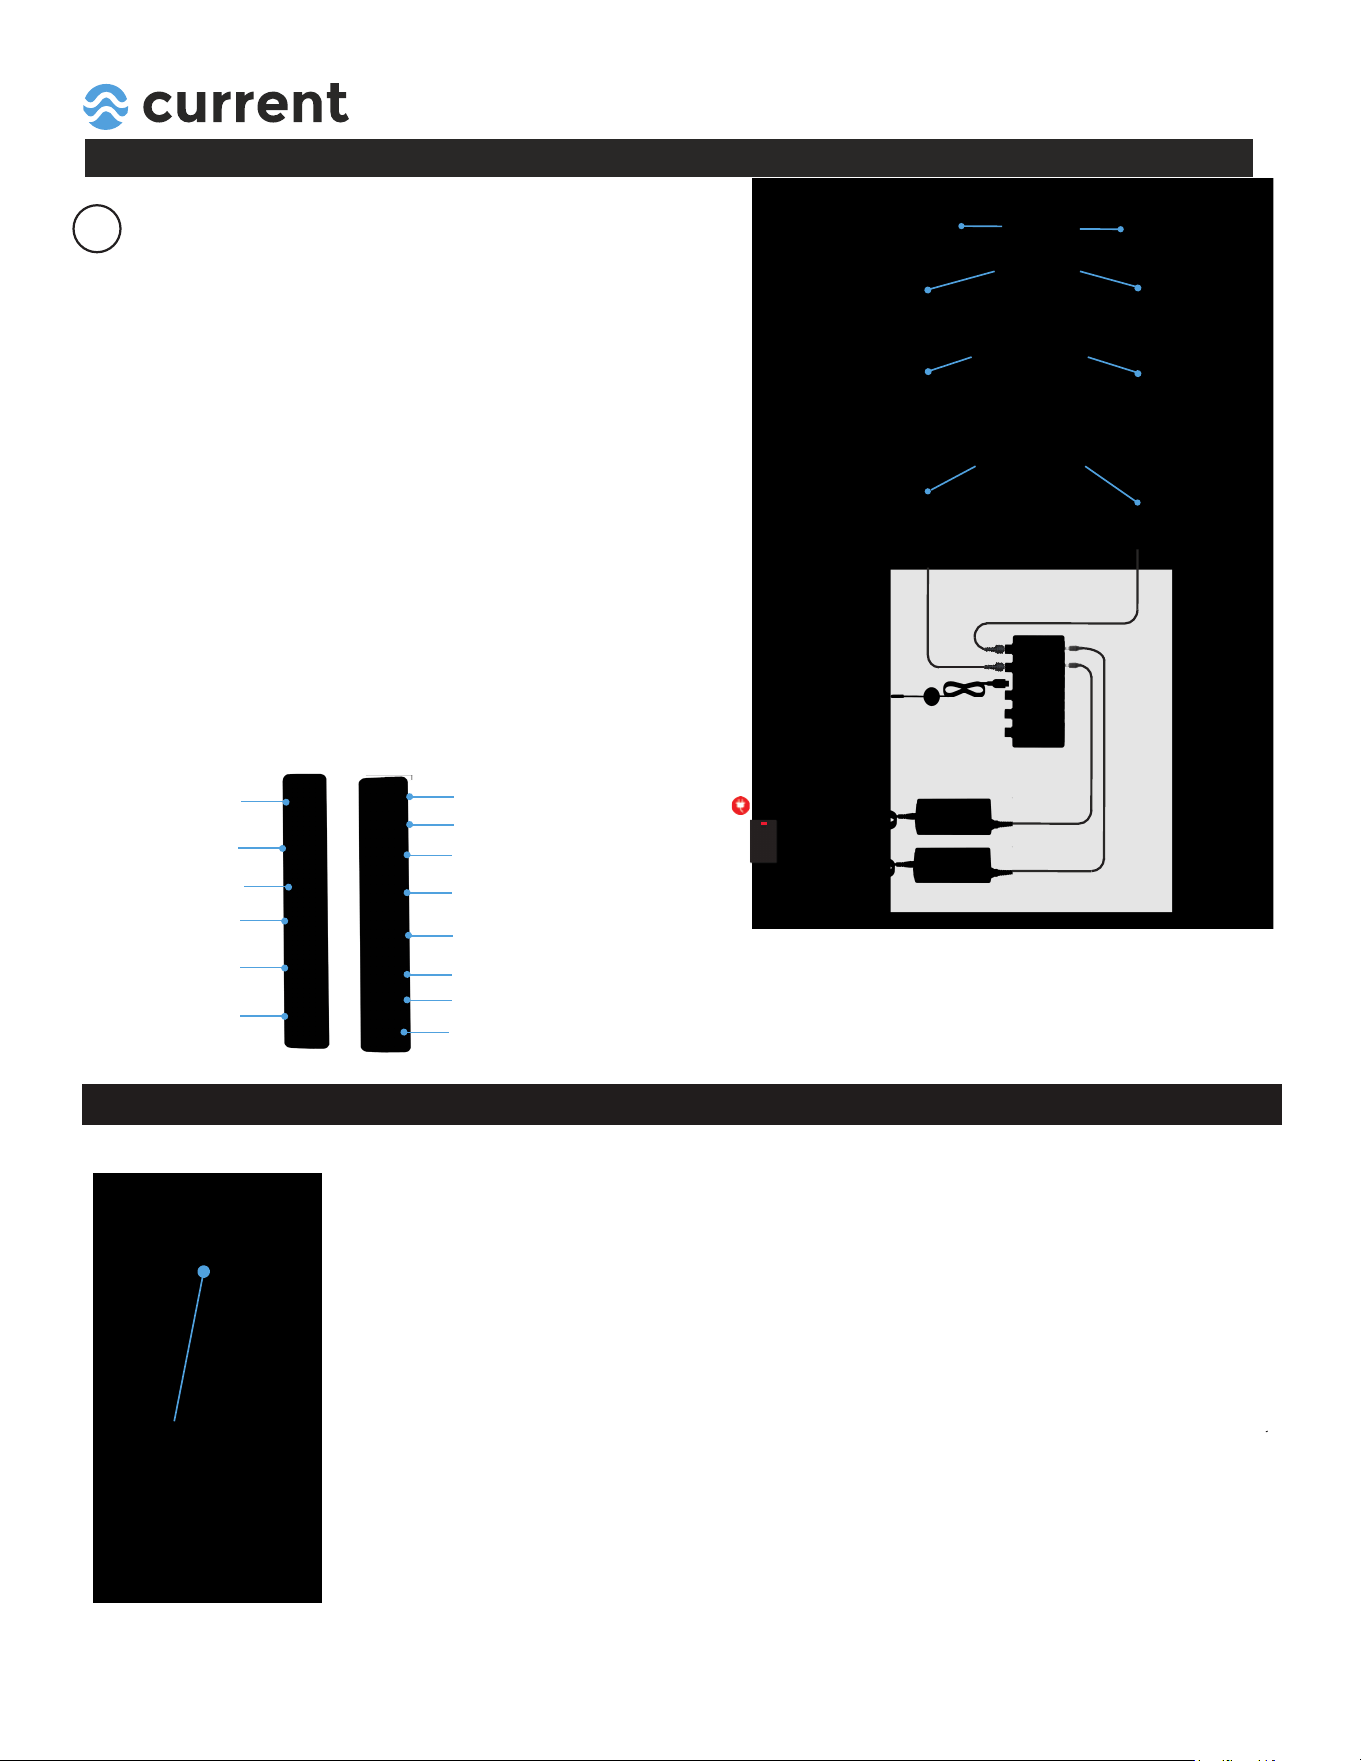
CONNECT
r
CONTROLLER OPERATION AND FEATURES
Controller Key Ring displays status of controller. There are 4 indicators/features using the Key Ring:
BLUE
- Indicates normal operation. Press once to activate feed mode.
RED
- Voltage issue. Ensure ONLY 12VDC power is connected.
GREEN
- LOCK feature, locks the controller settings and prevents other mobile
devices from connecting to controller. Press and hold Key for 6 sec.
to lock settings. Press and hold for 6 sec. to unlock.
- Indicates controller is in manual feed mode (will resume after 10 min.)
PURPLE
WHITE
- Indicates controller is in manual ON (Daylight setting) mode. Press
Key for 3 seconds, LED light will turn ON to Daylight setting. Press a
again for 3 seconds to resume app settings (Bluetooth.)
CONTROLLER
KEY RING
using suction cup.
bottom of controller.
6. Connect power supply plug to controller, controller key ring will BLUE
indicating power is now ON.
2. Connect REEF LED light to Bluetooth controller by gently
pushing LED cable into top 3-pin connector and tightening.
3. Place temperature sensor into sump or aquarium and attach
4. Connect Temperature sensor to Temperature USB port
1. Connect included Extension Cable to REEF LED Light.
5. Plug 12V DC power supply into a GFCI outlet, ensuring a drip loop.
AC Power
GFCI Outlet
REEF LED
EXTENSION CABLE
FLEX ARM
STAND ADAPTOR
(Sold Seperately)
FLEX ARM
Temperature
Sensor
LOOP
CONTROLLER
12V DC Power Supplies
7. Place Bluetooth controller into clear cover and mount to cabinet.
LED Light #1
LED Light #2
Audio Speakers
Wave Pump #1
Wave Pump #2
Wave Pump #3
(or accessory pump)
Note: Connection ports are labeled on back of the controller for
reference. When connecting LOOP products to controller, gently
slide connector in and tighten. Do not twist or rotate.
12V DC Power LED Light #1
12V DC Power LED Light #1
Temperature Sensor
microUSB Ports
(other HUBS or DC Pumps)
Expansion (Power) Port
24V DC Power Wave Pump #3
24V DC Power Wave Pump #2
24V DC Power Wave Pump #1
INST4421 4.21.21
QUICK START
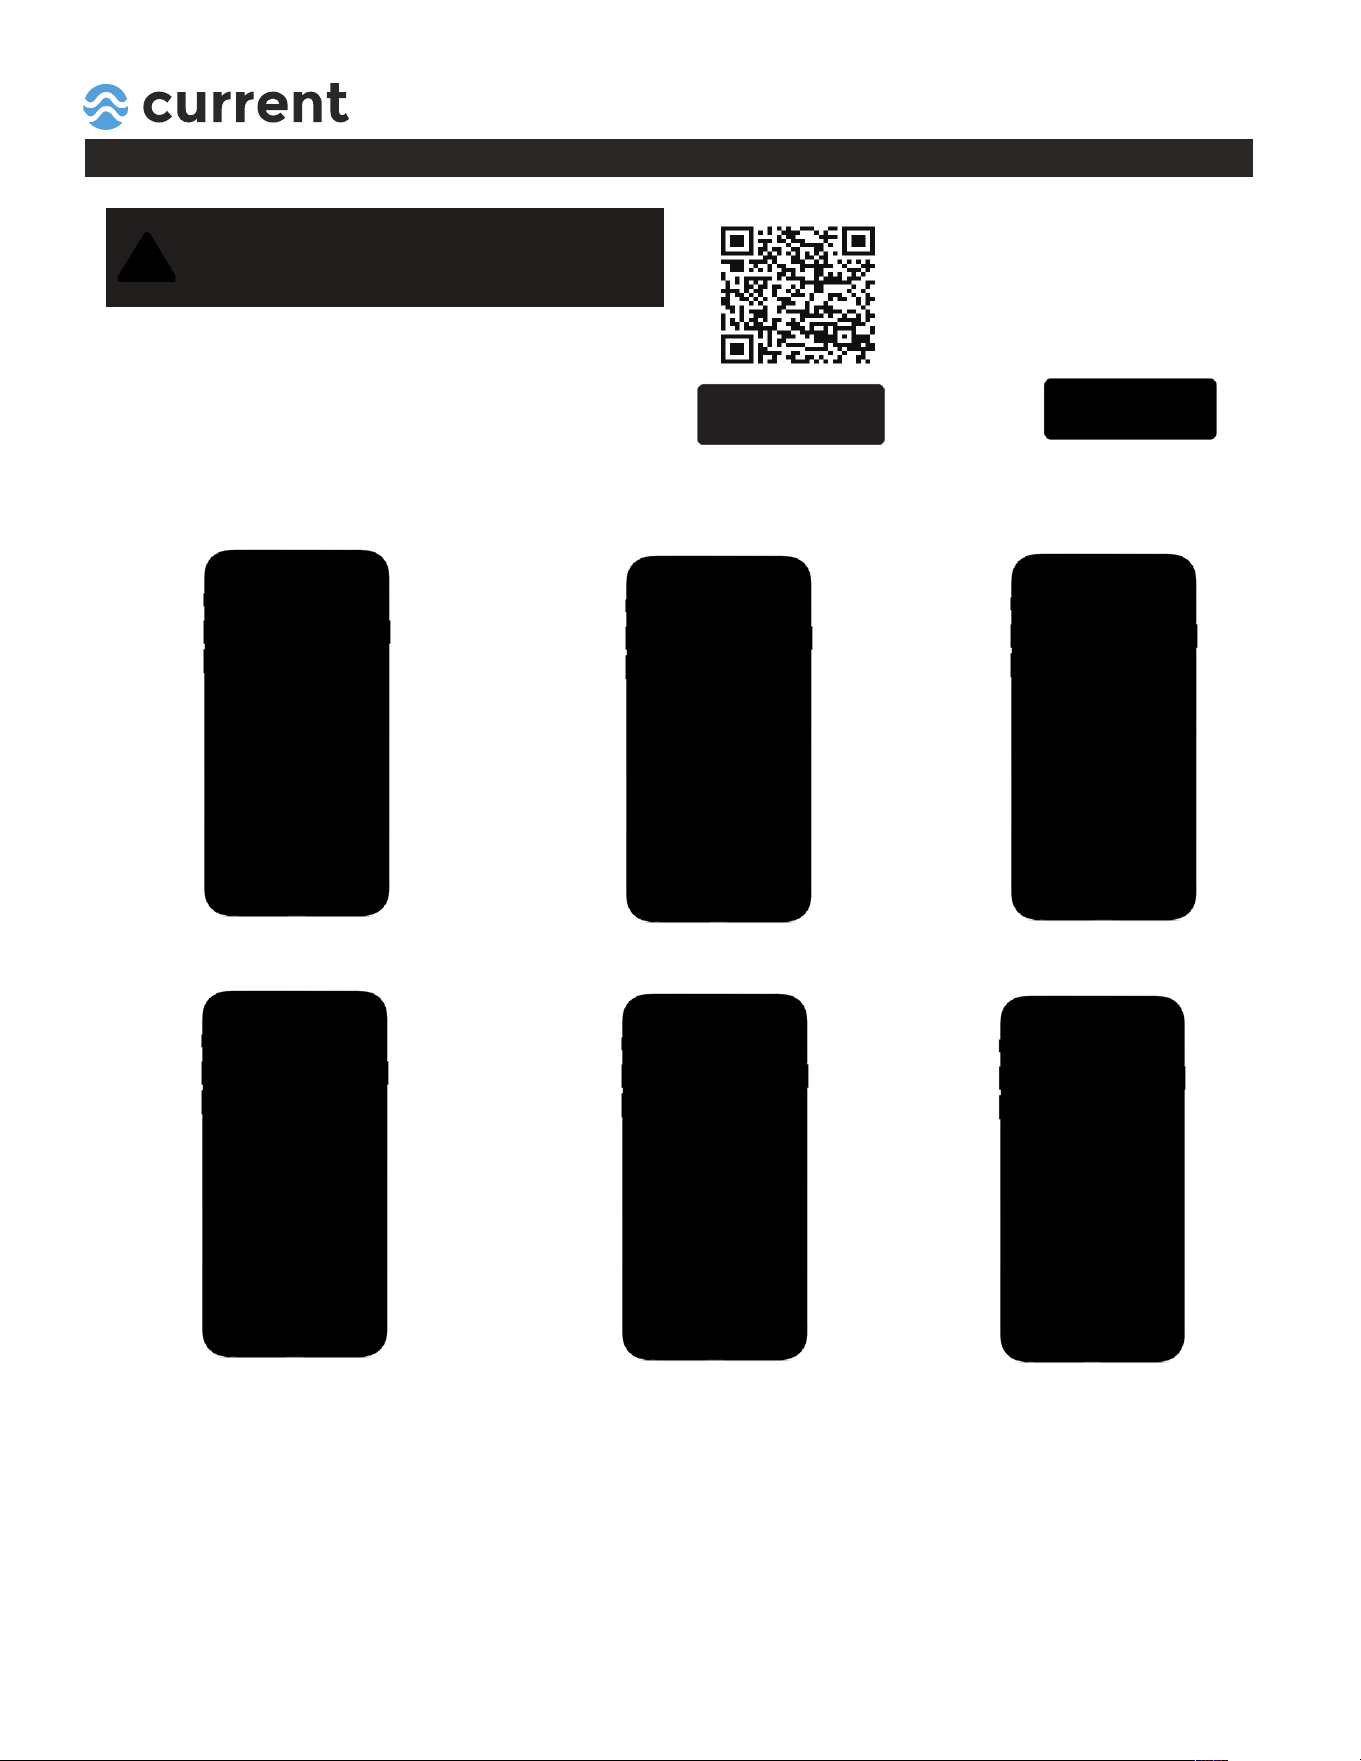
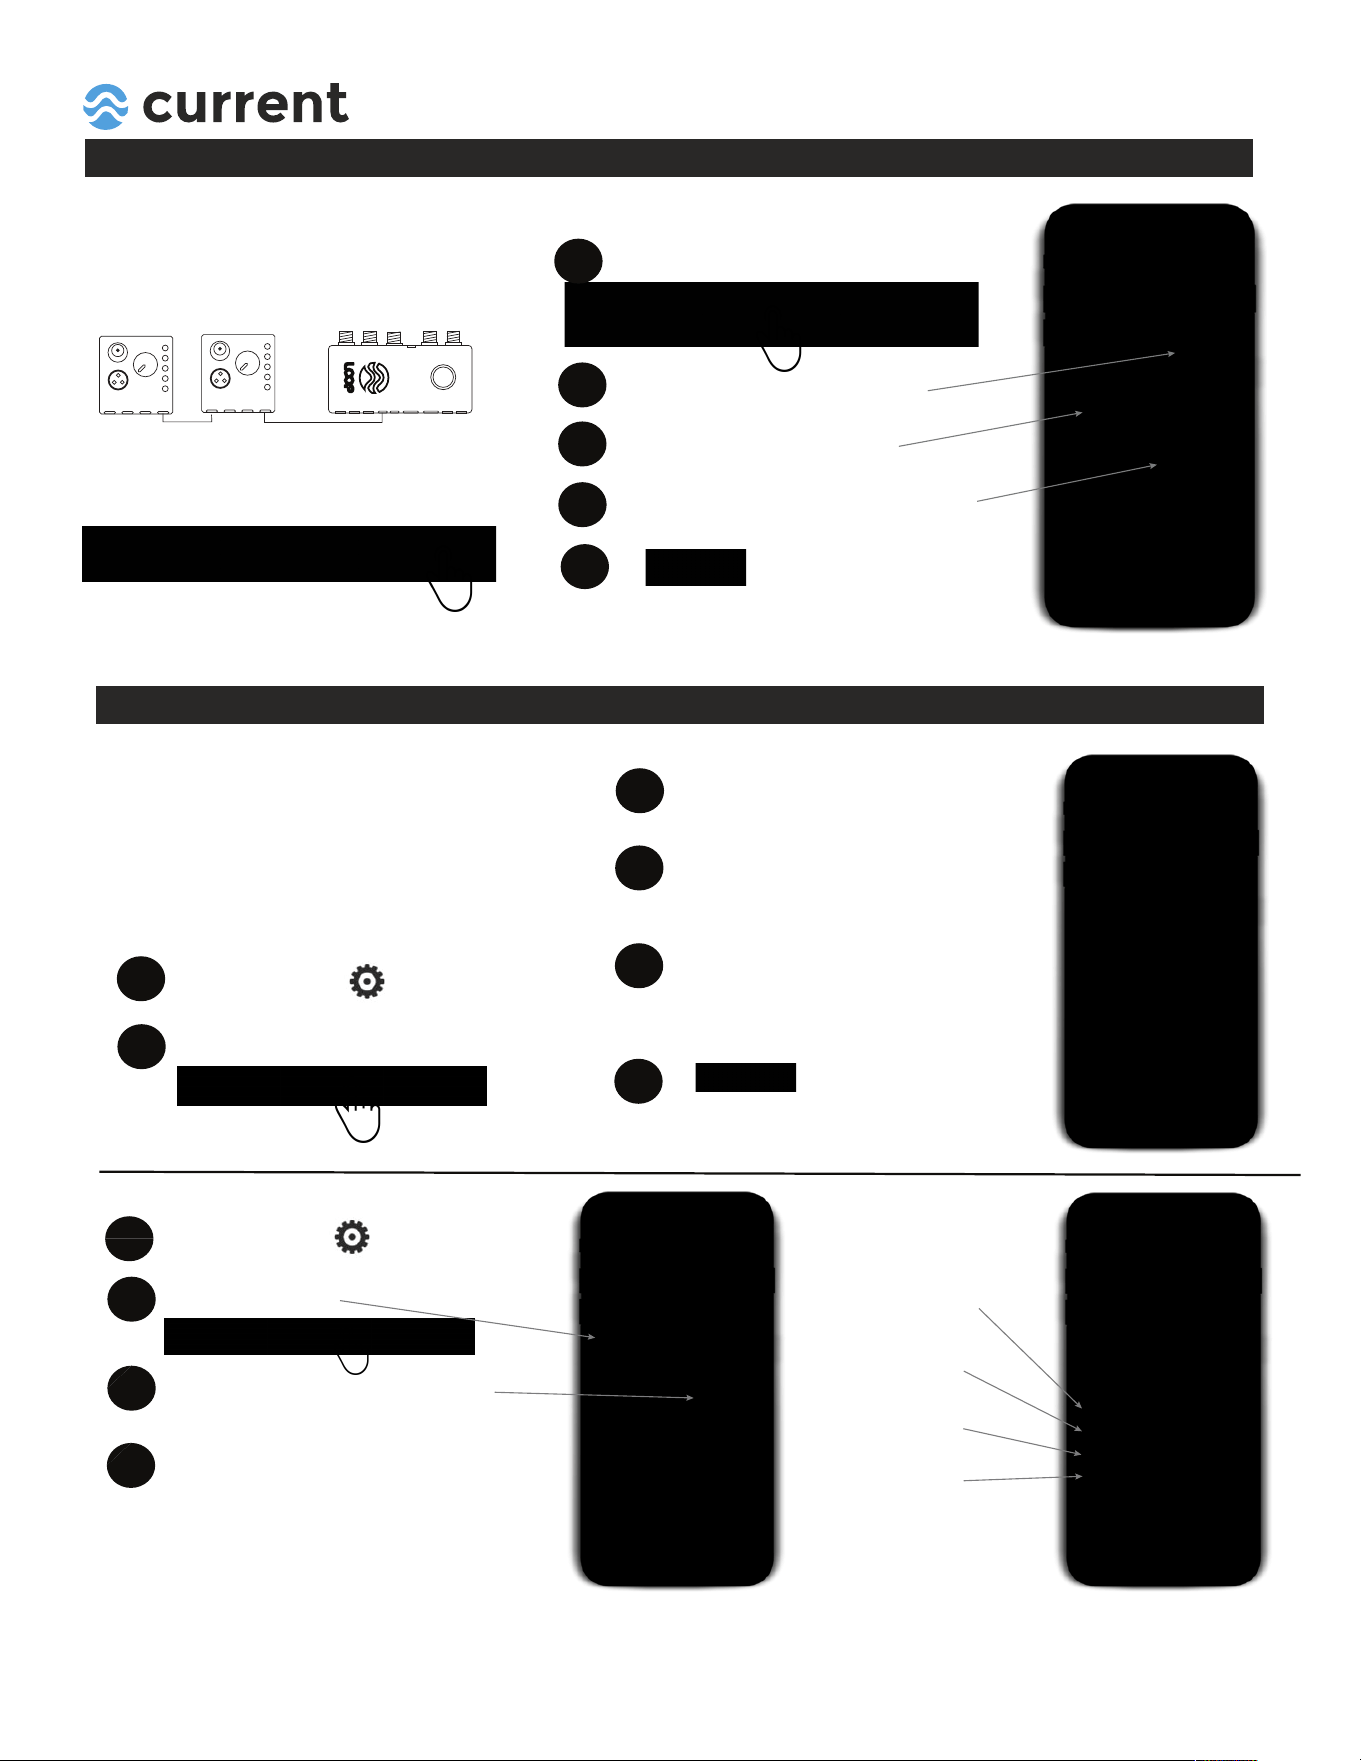
MOBILE DEVICE CONNECTION
1. Download the latest version of LOOP app:
2. From your phone's Settings screen, search for Bluetooth and make sure it is turned on by
moving the slider button to the right (please do not try to connect LOOP through this setting*.)
4. Press Add Device.
5. Select LOOP
7. Rename system
3. Open the LOOP App.
6. Select LOOP
8. Back to HOME
IMPORTANT! The LOOP APP does NOT
require a PIN code for Bluetooth connection.
Please use the connecting instructions below.
www.current-usa.com/app
The *LOOP app does NOT require a PIN code or use the built-in Bluetooth pairing in your
mobile device - the app itself will connect with your device using its own software.
For connection tips and troubleshooting, go to
www.current-usa.com/app

QUICK START
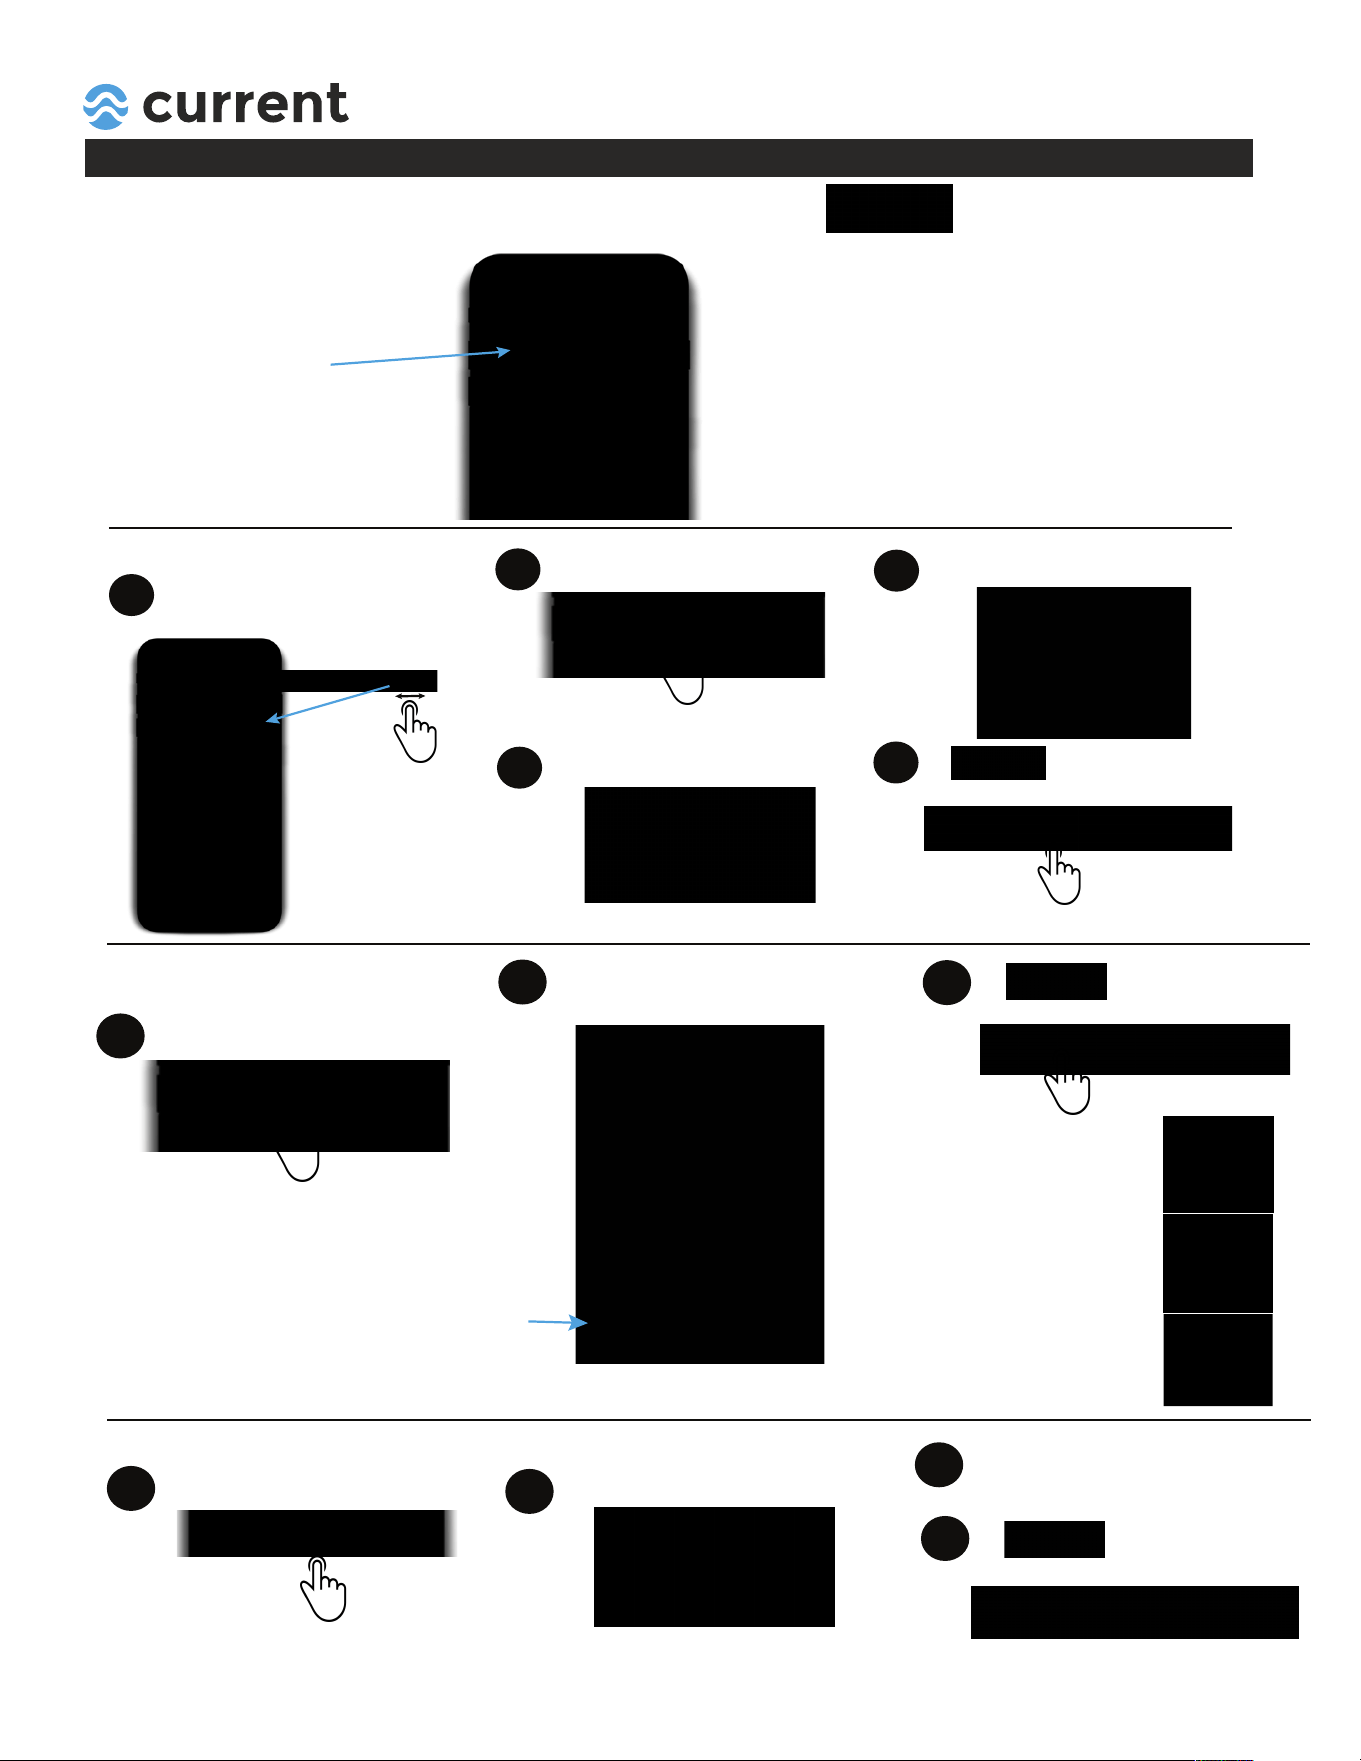
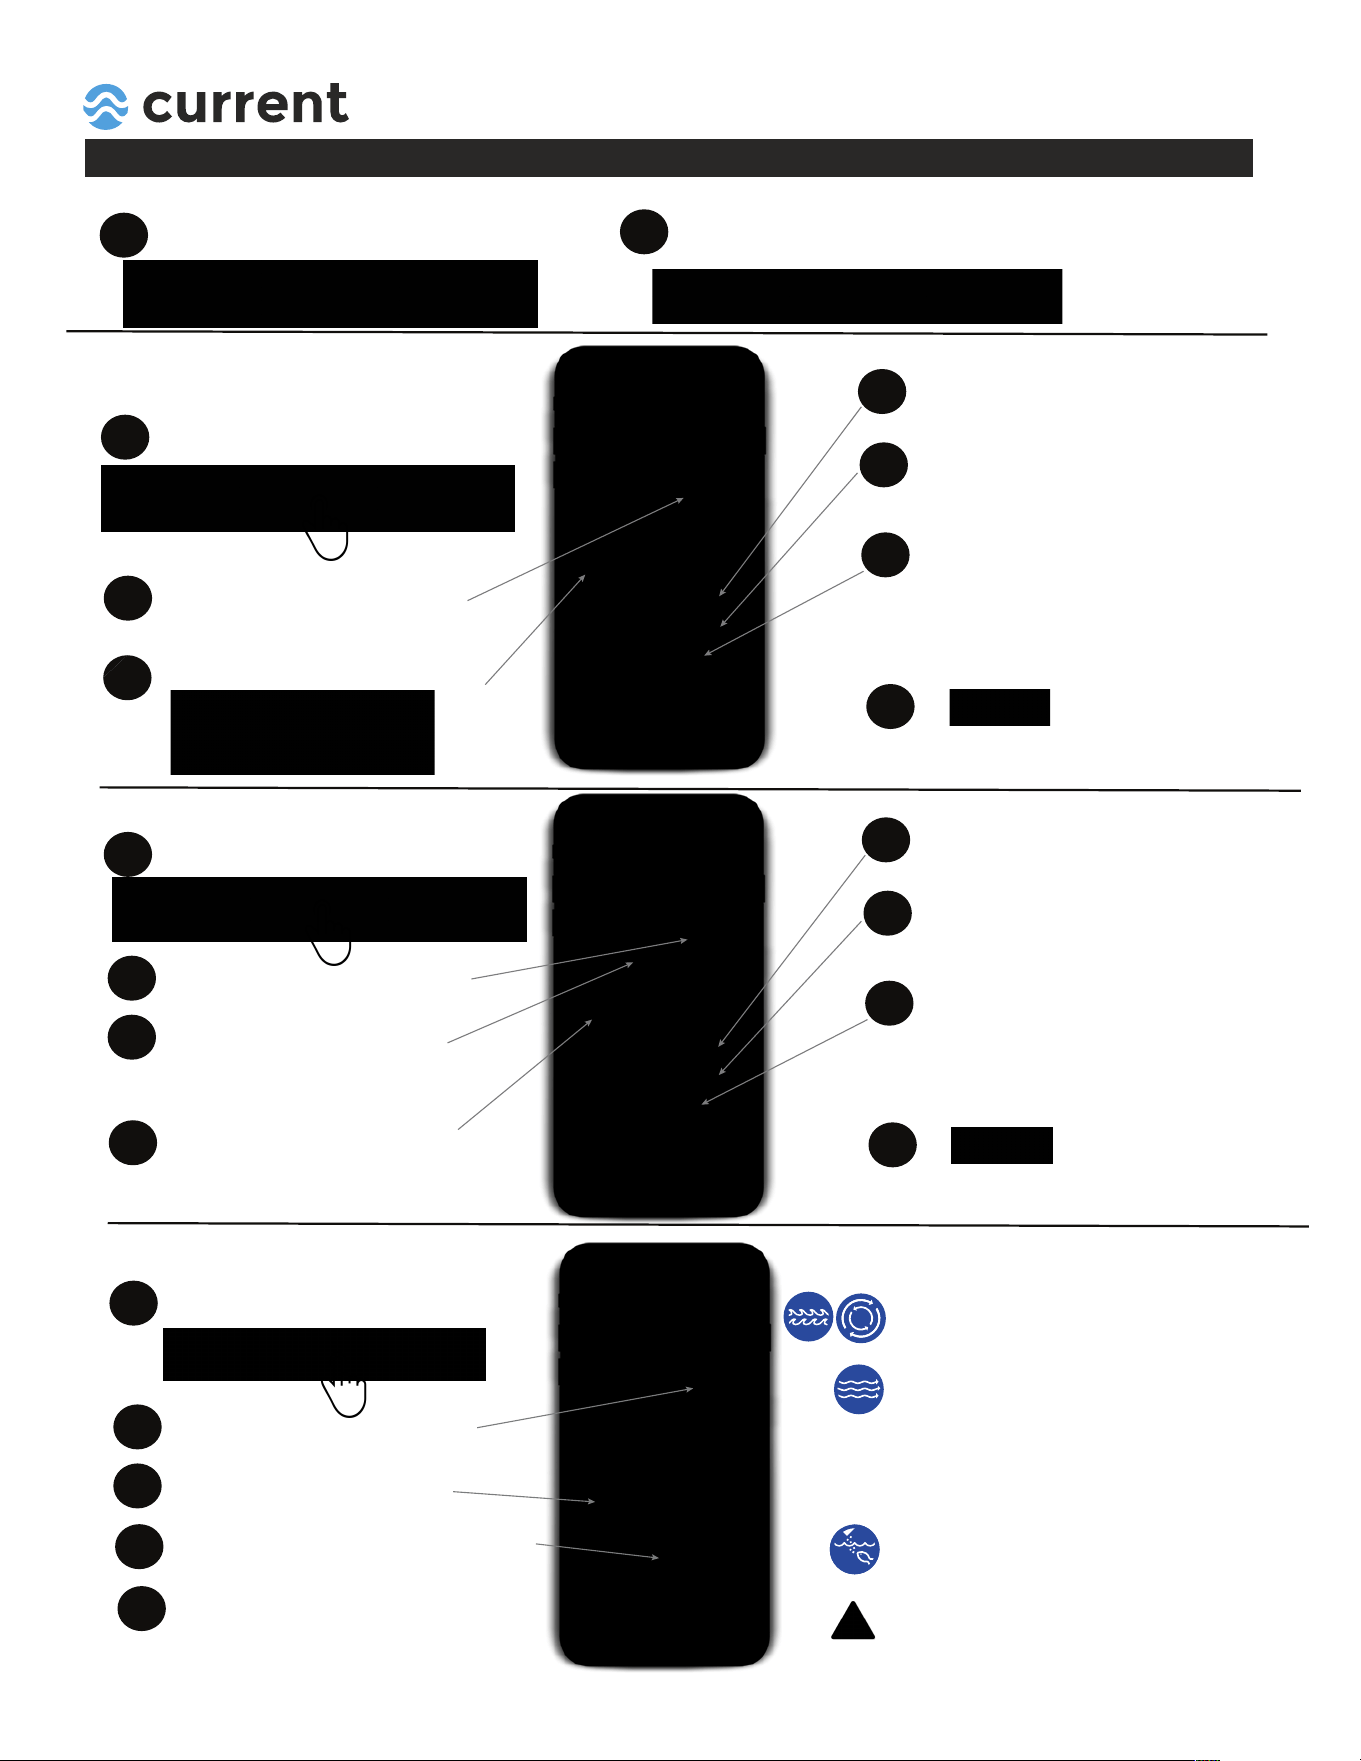
The Home screen provides an overview of your aquarium system, including daily light cycle, weather, water
temperature, wireless connection status, on-demand effects and access to programming features.
< Menu
Tap to return to system
selection screen and log out
Displays current
Weather Forecast
Wireless connection status
Sunrise ON Time
Moonlight Duration
RESUME
Tap to exit any on-demand
mode and return system to
timer mode.
Tap to enter System Settings
Sunset (Begin OFF) Time
Temperature
Green - within range
Red - outside range
Program
Tap to access lighting
& pump programming
ON-DEMAND Modes
Key On-Demand Mode Duration**
Custom Color 24/7
Feed Mode 10 min.
Clean Mode 10 min.
Fading Moonlight 30 min.
Moonlight 30 min.
Rolling Clouds 30 min.
Random Clouds 30 min.
Lightning Storm 30 min.
Full Storm 30 min.
Approaching Storm 30 min.
Moon Rays 30 min.
Sun Rays 30 min.
Partly Cloudy 30 min.
** Tap Resume to exit any mode
and return system to 24hr. Timer Mode
Blue indicates active Bluetooth connection
Programming LED Lights
The LOOP Marine controller features a pre-programmed 24-hour lighting cycle to mimic nature.
QUICK START
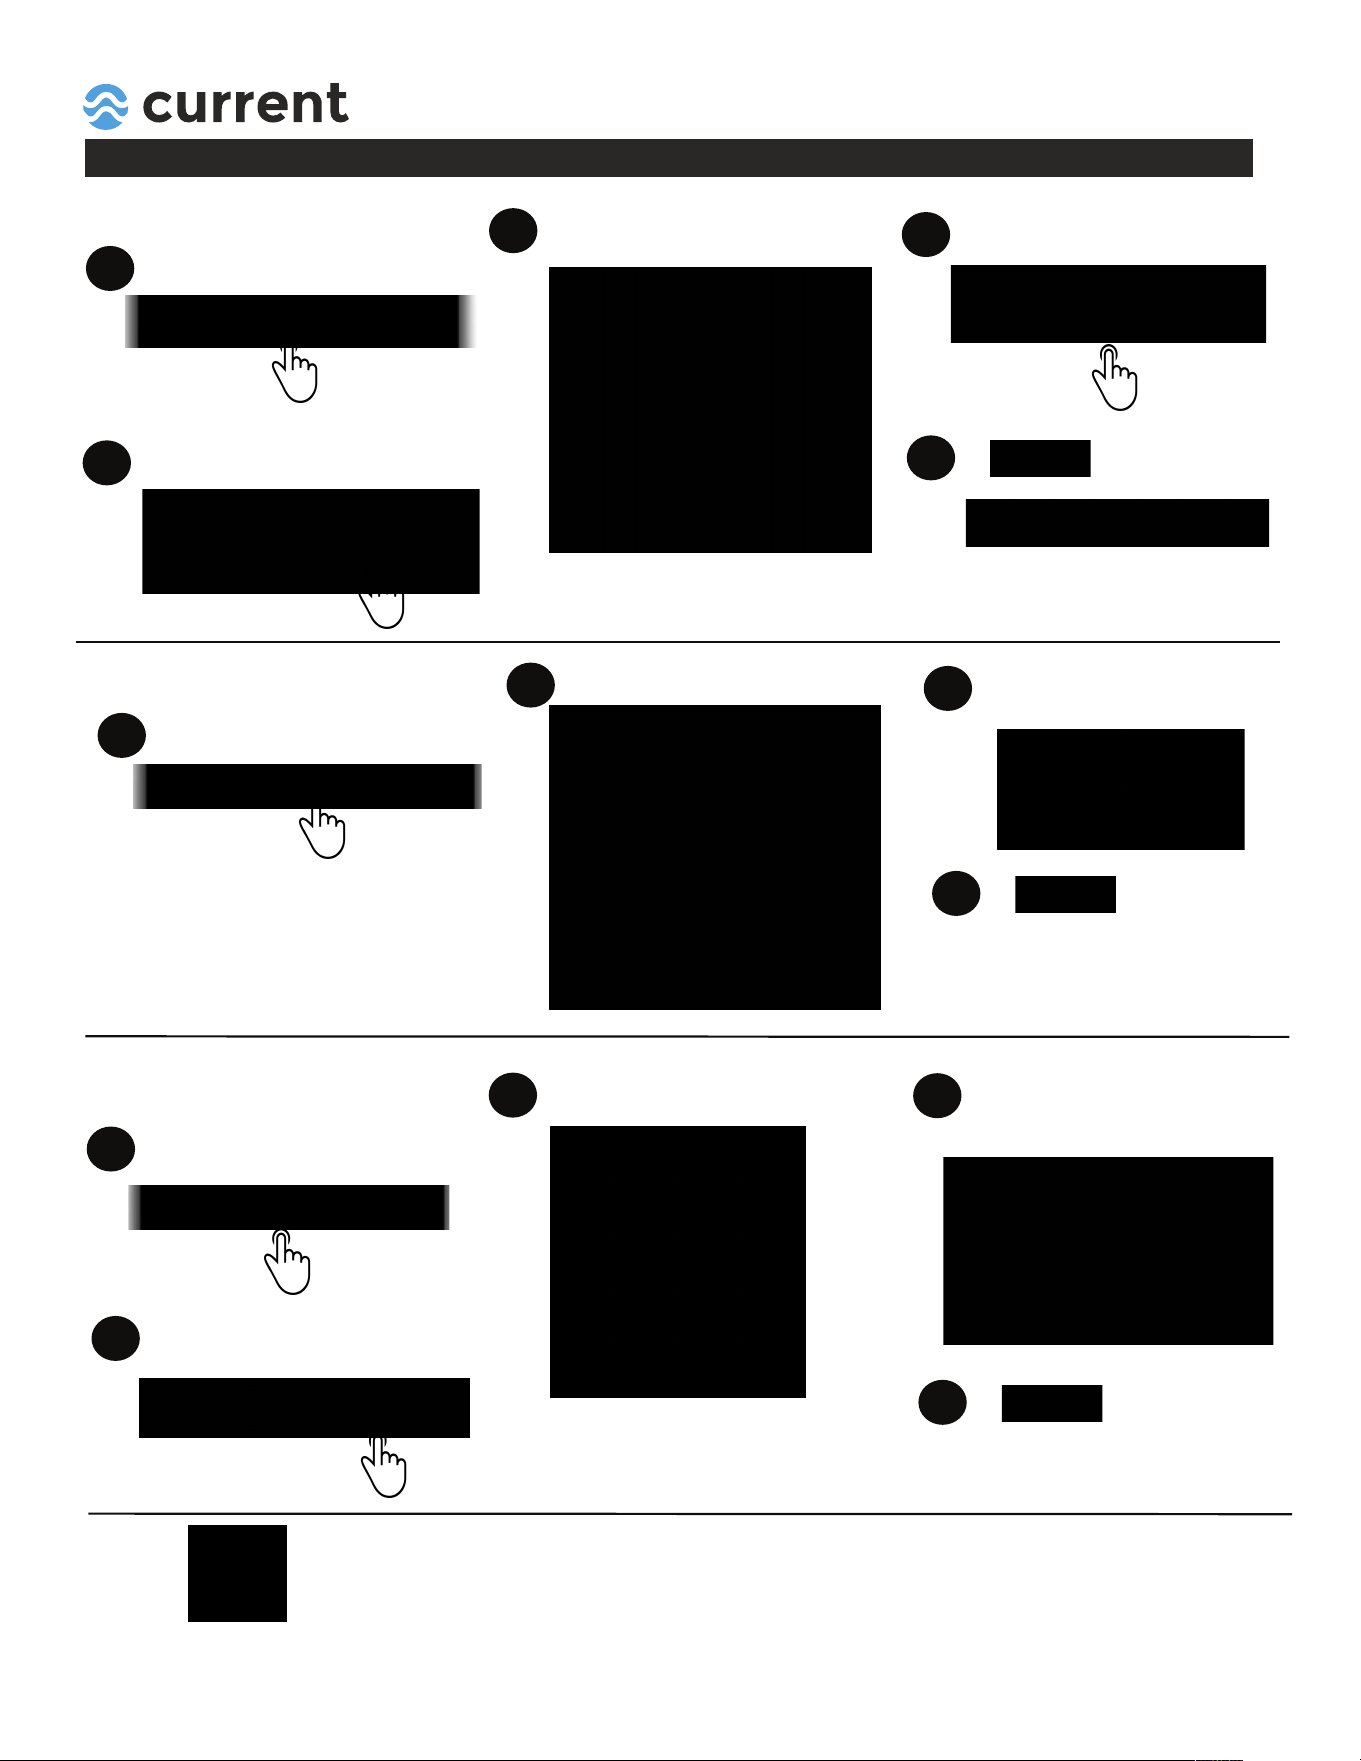
Programming LED Lights
To access lighting and pump programming, tap PROGRAM
]To program LED lights, tap
LIGHTS
Default Light Settings
(Pre-programmed)
Sunrise ON Time: 7:00 am
Sunrise Color Spectrum: B 50%, W 25%, R 45%, G 10%
Daylight Color Spectrum: B 90%, W 75%, R 85%, G 30%
Sunset OFF Time: 5:00 pm
Sunset Color Spectrum: B 75%, W 25%, R 65%, G 0%
Moonlight Duration: 2 Hours
Moonlight Color Spectrum: B 10%, W 0%, R 5%, G 0%
Weather Forecast: OFF
Custom Color
Spectrum: B 50%, W 50%, R 50%, G 50%
1
Use toggle to manually turn lights
On / Off.
2
Tap Sunrise.
3
Use scroll to select Sunrise ON time.
4
Use sliders to adjust color spectrum.
5
Tap to go back, or
select another program at bottom.
To program Sunrise:
6
Tap Daylight.
7
Use sliders to adjust color spectrum,
or select a base color at bottom.
8
Tap to go back, or
select another program at bottom.
Tap Sunset.
10
Use scroll to select Sunset OFF time.
11
Use sliders to adjust color spectrum.
12
Tap to go back, or
select another program at bottom.
9
To program Sunset:
To program Daylight:
Color Spectrum Tips:
Daylight
For healthy coral growth and
color, keep Blue high (90%+),
White a bit lower (75%+)
Sunrise/Sunset
To enhance colors in fish & coral,
turn White low (<20%), Blue at
50-75%) and Red higher (65%+)
Moonlight
Turn White, Red, Green off (0%)
and keep Blue low (10%).
Base colors automatically adjust each
color level to match spectrum, allowing
you to “fine tune” the color using sliders
QUICK START
Programming LED Lights
13
Tap Moonlight
15
Use sliders to adjust color spectrum.
17
Tap to go back, or
select another program at bottom.
Tap Custom Color.
3
Tap to go back to
light programming screen.
1
14
Use scroll to select Moonlight duration.
2
Use sliders to adjust color spectrum.
16
You can also choose an active
moonlight program featuring audio.
To program Moonlight:
To program Custom Color:
3
You can also choose an optional
base color, then adjust spectrum.
1
Tap Weather Forecast.
3
Use scroll to select weather mode.
4
Use right scroll to select % mode
to run during Daylight mode.
To program Weather:
2
Use toggle to manually turn weather
On / Off.
Tap to go back, or
select another program at bottom.
5
Once programming is complete, be sure to return to the Home screen and
press the RESUME TIMER to begin running your lighting program.
QUICK START
Programming Wave Pumps
1
Tap Pumps at top of programming screen.
2
Use toggle to manually turn all Wave
Pump On / Off.
To program Wave Pumps:
3
Tap Mode keys to select flow mode.
7
Tap to go back, or
select another pump at bottom.
2
Use toggle to turn pump On / Off.
4
Use slider to adjust Flow Rate.
To program Wave Pump 1:
Tap Wave Pump 1.
1
Wave
Surge
Stream
5
Use slider to adjust Frequency (Wave
and Surge Mode only)
6
Use toggle to turn Night Mode On / Off.
Note: Night mode is synced to Moonlight
period and reduces flow 30%. After
moonlight period ends, pump ramps back
to normal flow settings.
4
Tap Mode keys to select flow mode.
8
Tap to go back, or
select another pump at bottom.
2
Use toggle to turn pump On / Off.
5
Use slider to adjust Flow Rate.
To program Wave Pump 2:
Tap Wave Pump 2.
1
6
Use slider to adjust Frequency (Wave
and Surge Mode only)
7
Use toggle to turn Night Mode On / Off.
Note: Night mode is synced to Moonlight
period and reduces flow 30%. After
moonlight period ends, pump ramps back
to normal flow settings.
3
Use toggle to select Primary or
Secondary Mode
(Secondary Mode
syncs with Wave Pump 1 and runs in
tandem in the opposite flow).
5
Tap to go back, or
select another pump at bottom.
2
Use toggle to turn pump On / Off.
Use slider to adjust Flow Rate.
To program Wave Pump 3:
Tap Wave Pump 3.
1
4
Use toggle to turn Night Mode On / Off.
3
Wave / Pulse Mode
This mode simulates a thriving reef environment. Wave
pumps change speed frequently, simulating waves
or surging water currents. Great for mixed reef aquariums.
Stream Mode
This is the default flow mode, pumps create a steady stream
of water flow.
Night Mode
Turning on Night Mode will reduce water flow in wave
pumps by 30% during the moonlight setting. (Note:
Not recommended when regular flow setting is <50%).
Wave & Flow Pump Tips:
Feed Mode
Temporarily shuts wave pumps off and reduces flow pump
flow for 10 minutes, allowing fish and corals to feed. Pumps
ramp then ramp up to normal speed.
(Note: if using a sump protein skimmer which is water level
dependent, we recommend turning this mode OFF to
ensure your skimmer does not overflow.)
QUICK START
Programming Flow Pumps
5
Tap to go back, or
select another pump at bottom.
2
Use toggle to turn pump On / Off.
Use slider to adjust Flow Rate.
To program Flow Pump 1 or 2:
Tap Flow Pump 1 or Flow Pump 2.
1
4
Use toggle to turn Night Mode On / Off.
3
Use toggle to turn all flow pumps On / Off.
LOOP Controller
DC Pump
#2
DC Pump
#1
Note: Follow LOOP controller instructions to
ensure DC Flow pumps are properly connected
and manifold connection Hubs are compatible.
Temperature is currently set up as a visual
indication only. When temperature is within
your safe settings, it will be displayed in
Green on the Home screen. When out of
range, it will be displayed in Red.
Wave
4
Go to lighting and pump programs,
factory resets will take effect.
2
Tap Settings Reset
To reset app settings to factory default:
Tap Settings icon.
1
3
Tap OK to erase all previous settings
and return to app factory defaults.
4
Tap Minimum Temperature (down arrow)
and select the lowest temperature your
aquarium water should safely reach.
2
Tap Temperature.
Tap Settings icon.
1
3
Use toggle to select degrees F or C.
6
5
Tap Maximum Temperature (down arrow)
and select the highest temperature your
aquarium water should safely reach.
Tap to go back, or
select another pump at bottom.
To setup Temperature:
Additional Info:
Indicates what version App
your device is running
Link to Current USA
Privacy Policy
Link to Current USA
Terms of Service
Help Center Link
Temperature & Settings Reset
GFCI Outlet
Drip
Loop
P1P3
P2
Drip
Loop
D
C
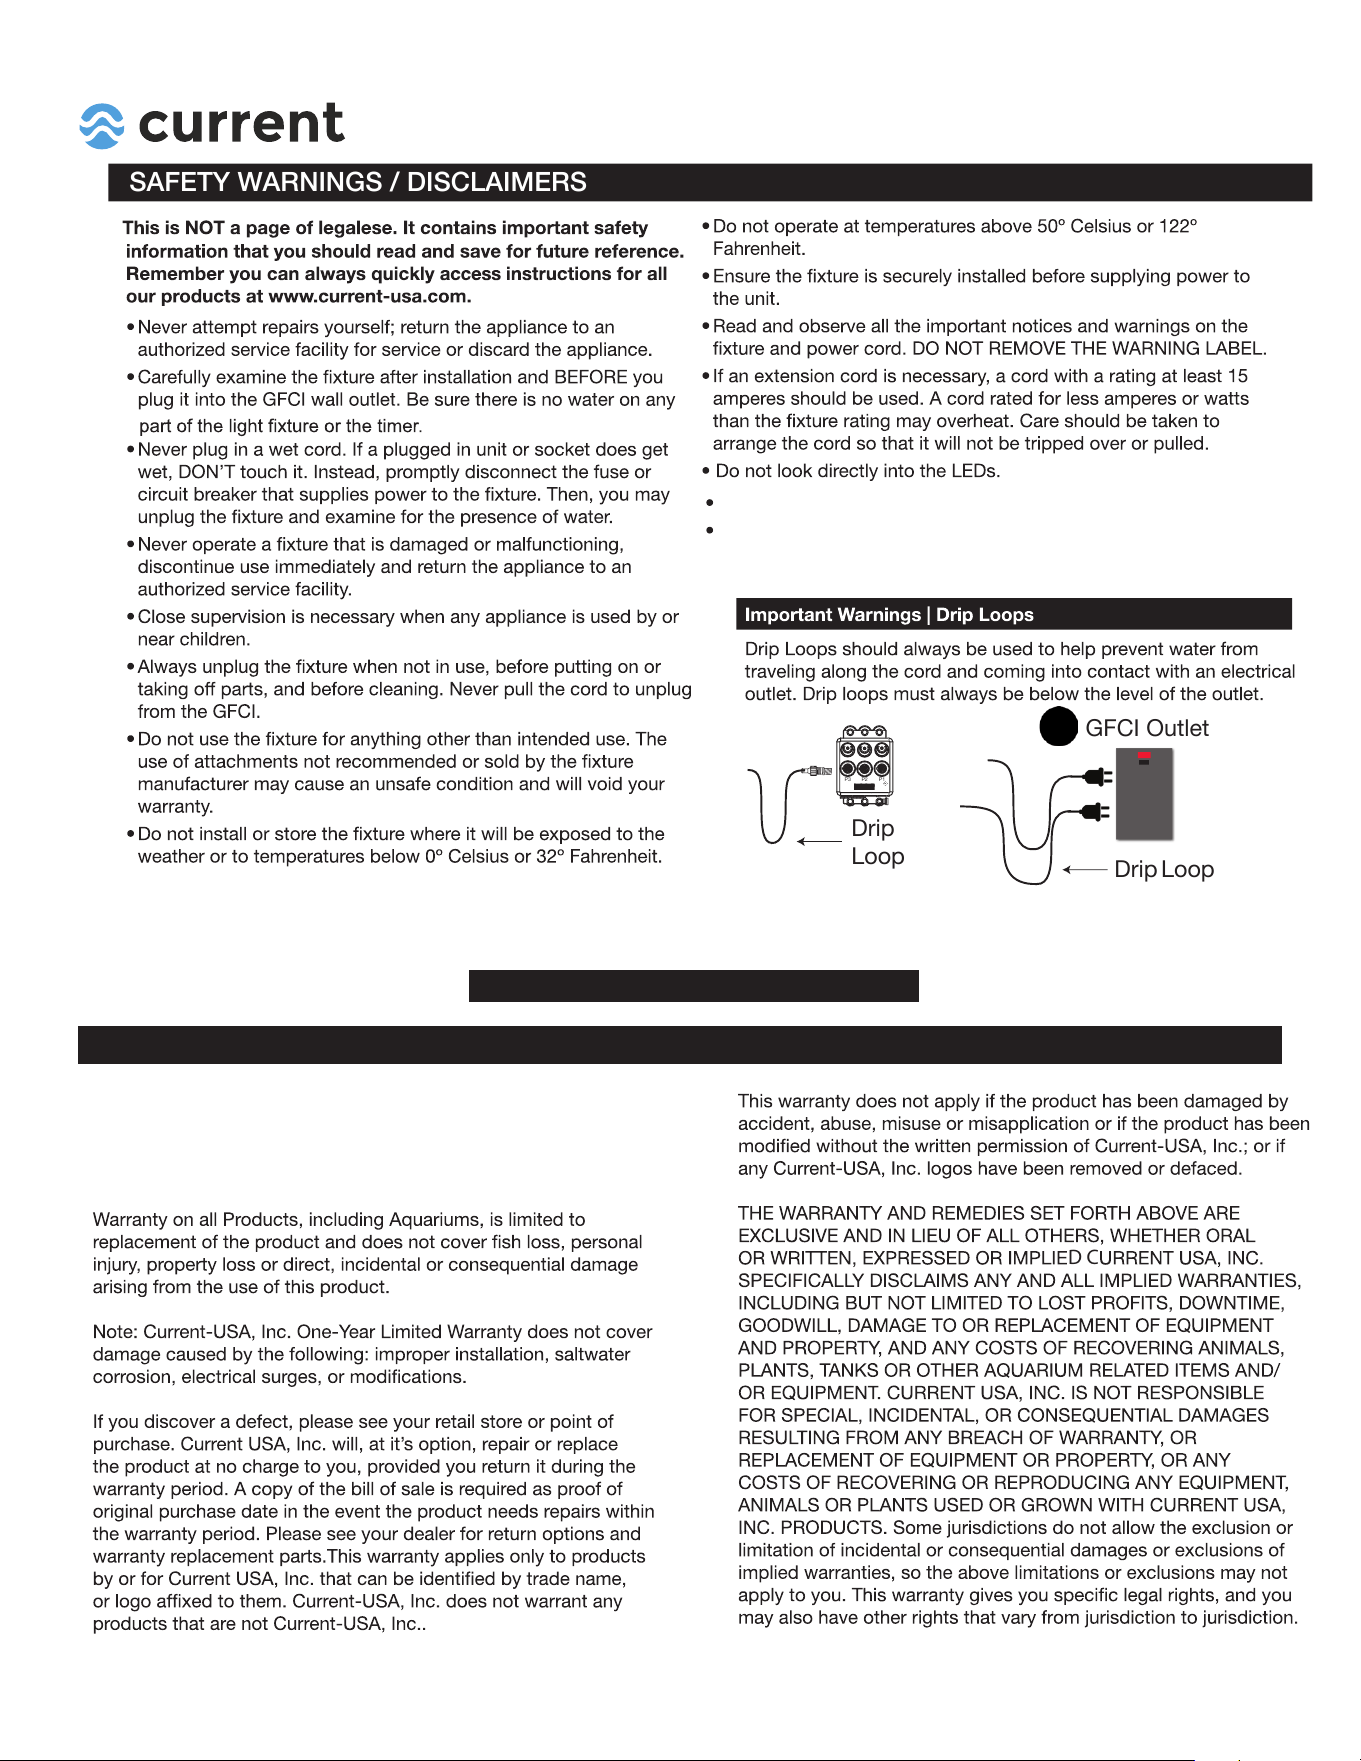
SAFETY WARNINGS / DISCLAIMERS
This product MUST be purchased from an authorized Current-USA
reseller. Visit our website for a list of unauthorized resellers.
Current USA, Inc. warrants this product against defects in
materials and worksmanship for ONE (1) YEAR from the date of
original retail purchase and is none transferable.
This product MUST be powered by a UL or ETL listed power supply.
To avoid possible electric shock, power supply MUST be plugged
into a GFCI wall outlet installed by a certified electrician in
accordance with all local codes. All products must have a drip loop.
WARRANTY
Register your product and nd additonal support at www.current-usa.com
SAVE THESE INSTRUCTIONS