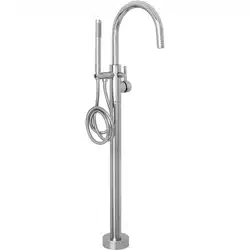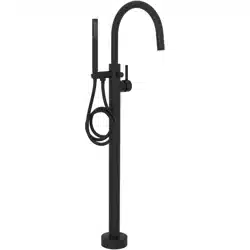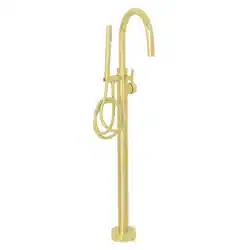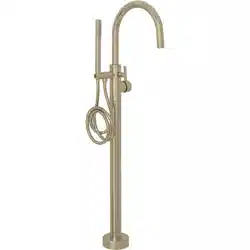

BATH TUB FILLER
www.zlinekitchen.com
Installation Manual

ZLINE Kitchen and Bath provides Attainable Luxury, where the kitchen and bath of your dreams
is never out of reach. Through our unique designs and unparalleled quality, we’re dedicated to
providing you an elevated experience in the heart of your home. With an endless selection of
features and finishes, our inspiration is your reality.

ZLINE is fueled by a passion for innovation; A relentless pursuit of bringing the highest end luxury
designs and professional features into everyone’s homes. Because we continually strive to improve
our products, we may change specifications and designs without prior notice.
WARNING: This product can expose you to chemicals including nickel, which is known to the
State of California to cause cancer. For more information, go to www.P65Warnings.ca.gov.


1
SAFETY INSTRUCTIONS
General Safety
PRIOR TO INSTALLATION
• We highly recommend using a plumber or certified professional for installation
of this product.
• To keep the faucet from clogging, flush the water pipe before installation.
• Wrap all threaded connections with plumber’s tape. Always wrap in a
clockwise direction.
• Do not disassemble the main faucet body, as it has been manufactured and
commissioned correctly and precisely before delivery to the factory.
• Please take note of different standards and regulations that are dictated by
your local plumbing codes. This product is certified in accordance with North
American building codes.
• Ensure the piping system is well secured to prevent rattling, vibration and
banging noises caused by a water hammer (a pressure surge or wave caused
when fluids change direction suddenly). We recommend plumbers use water
hammer arrestors.
• Lastly, remove the unit’s water cartridge in order to purge the water supply
system for at least 30 seconds. Do this by unscrewing the lever on the handle by
hand. Loosen set screw with a hex wrench. Remove the handle and unscrew trim
cap by hand. Unscrew the locking nut with an adjustable wrench to remove the
cartridge, then carefully reinstall.
INSTALLATION PREPARATION
1. Shut off hot and cold water lines and let the water in the current faucet drain.
2. Cover your drain to avoid losing parts.
3. Loosen the hardware that keeps the current faucet in place. Remove faucet.
2
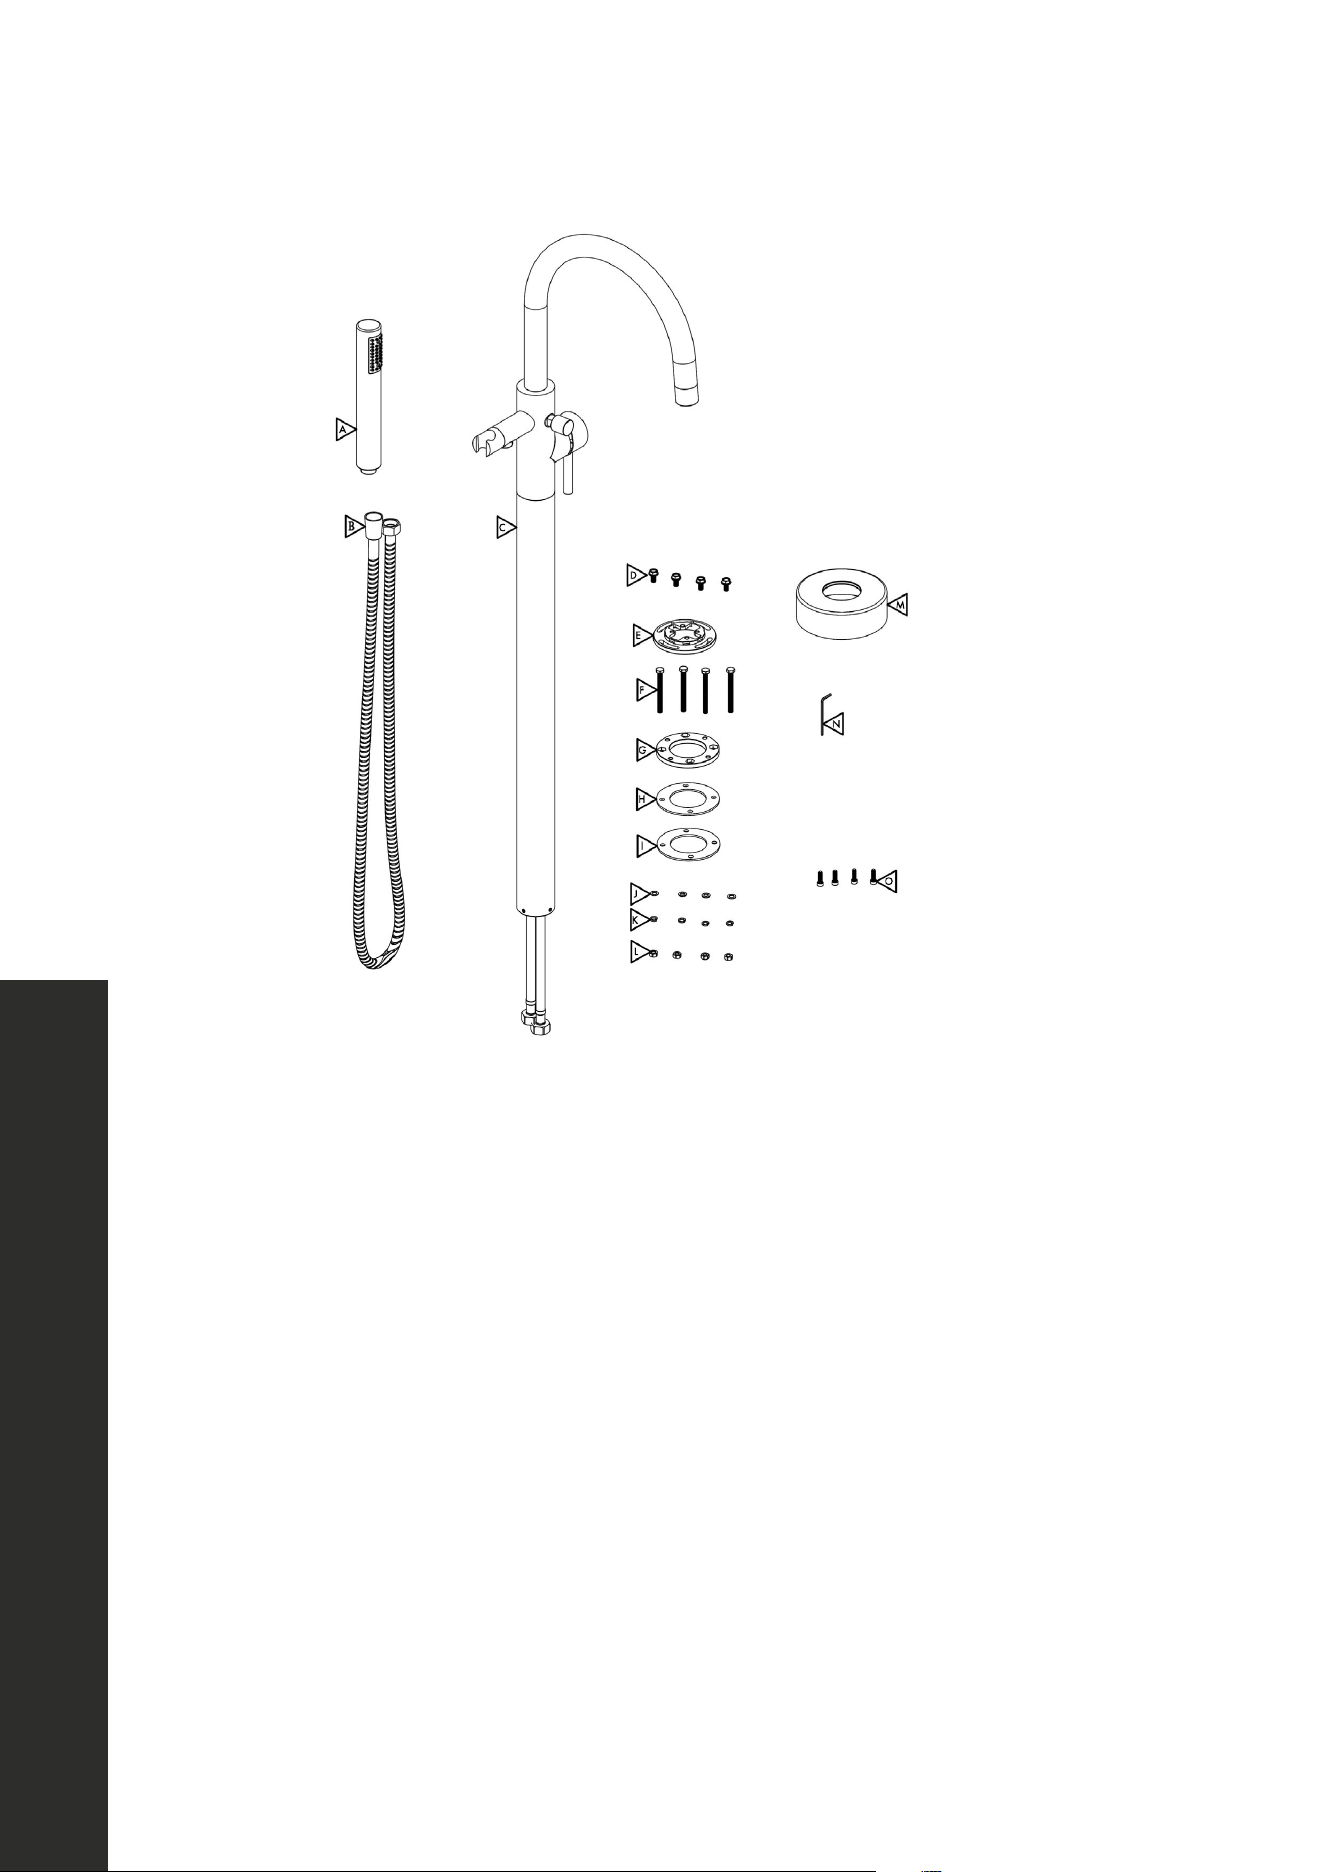
Product Specifications
L
O
N
M
K
J
I
H
G
F
E
D
C
A
A. Shower handle
B. Shower hose
C. Main tub filler body
D. Short bolts (4)
E. Brass mounting ring (1)
F. Long bolts (4)
G. 1/4” steel mounting plate (1)
H. Rubber gasket (1)
I. 1/16” steel mounting plate (1)
J. Flat washers (4)
K. Lock washers (4)
L. Fastening nuts (4)
M. Mounting cap
N. Hex wrench
O. Phillips-heading lock screws (4)
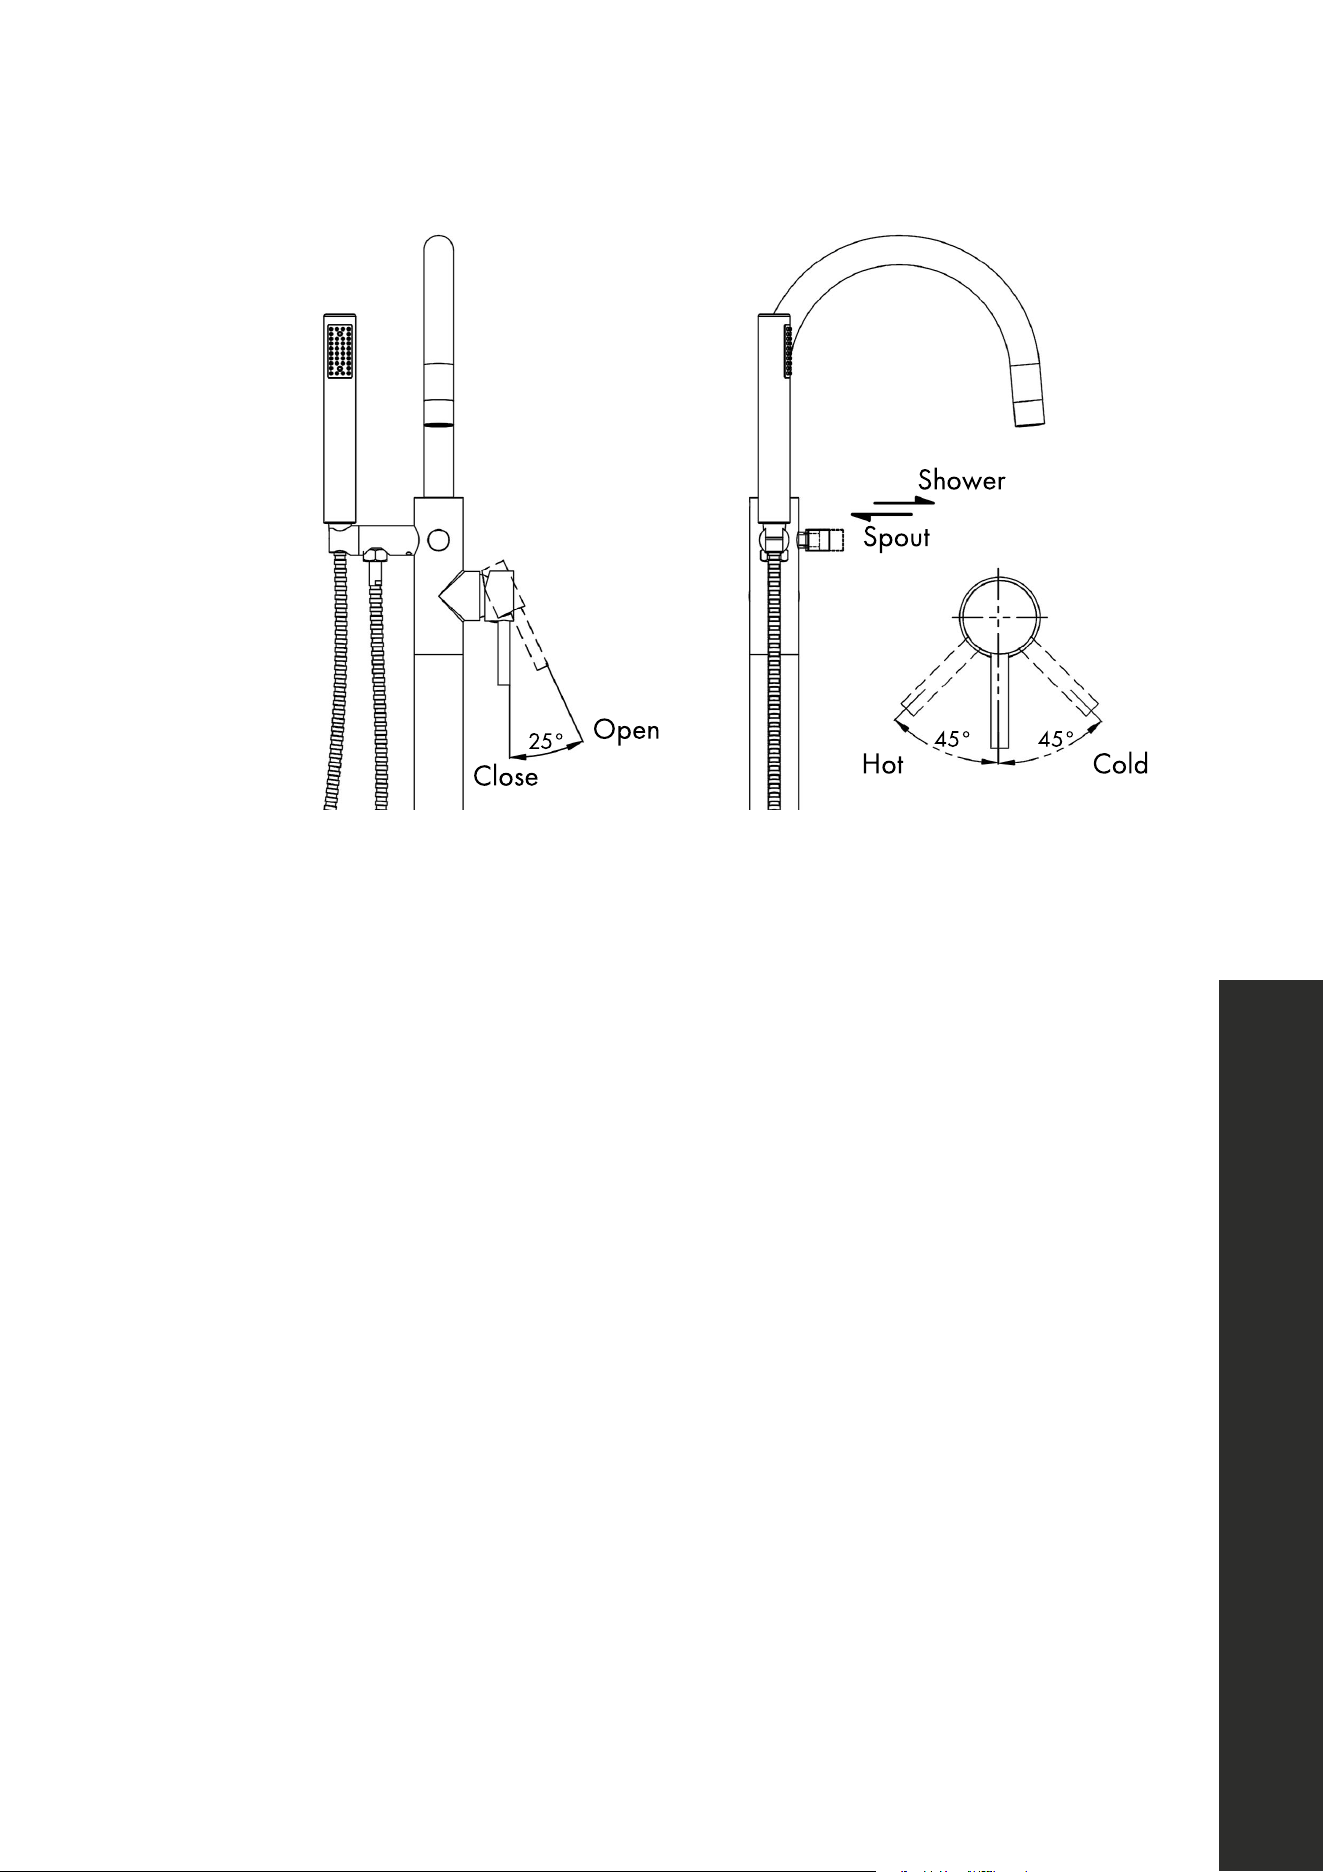
BEFORE INSTALLATION
3
Installation Preparation
BEFORE INSTALLATION
Open
Shower
Hot Cold
Spout
Close
25°
45° 45°
TOOLS NEEDED:
• Adjustable wrench or 10 mm socket wrench
• Phillips-head screwdriver
• Pencil
• Drill
4
Product Installation
INSTALLATION
STEP 1
1
G
F
H
I
J
K
L
D
C
M
M
A
B
E
0
O
5/16”
2”
Wooden subfloor
Cold
(Blue)
Hot
(Red)
Cold
water
inlet
Hot
water inlet
Tub
Rubber
gasket
Lock
washer
3
654
987
1211
10
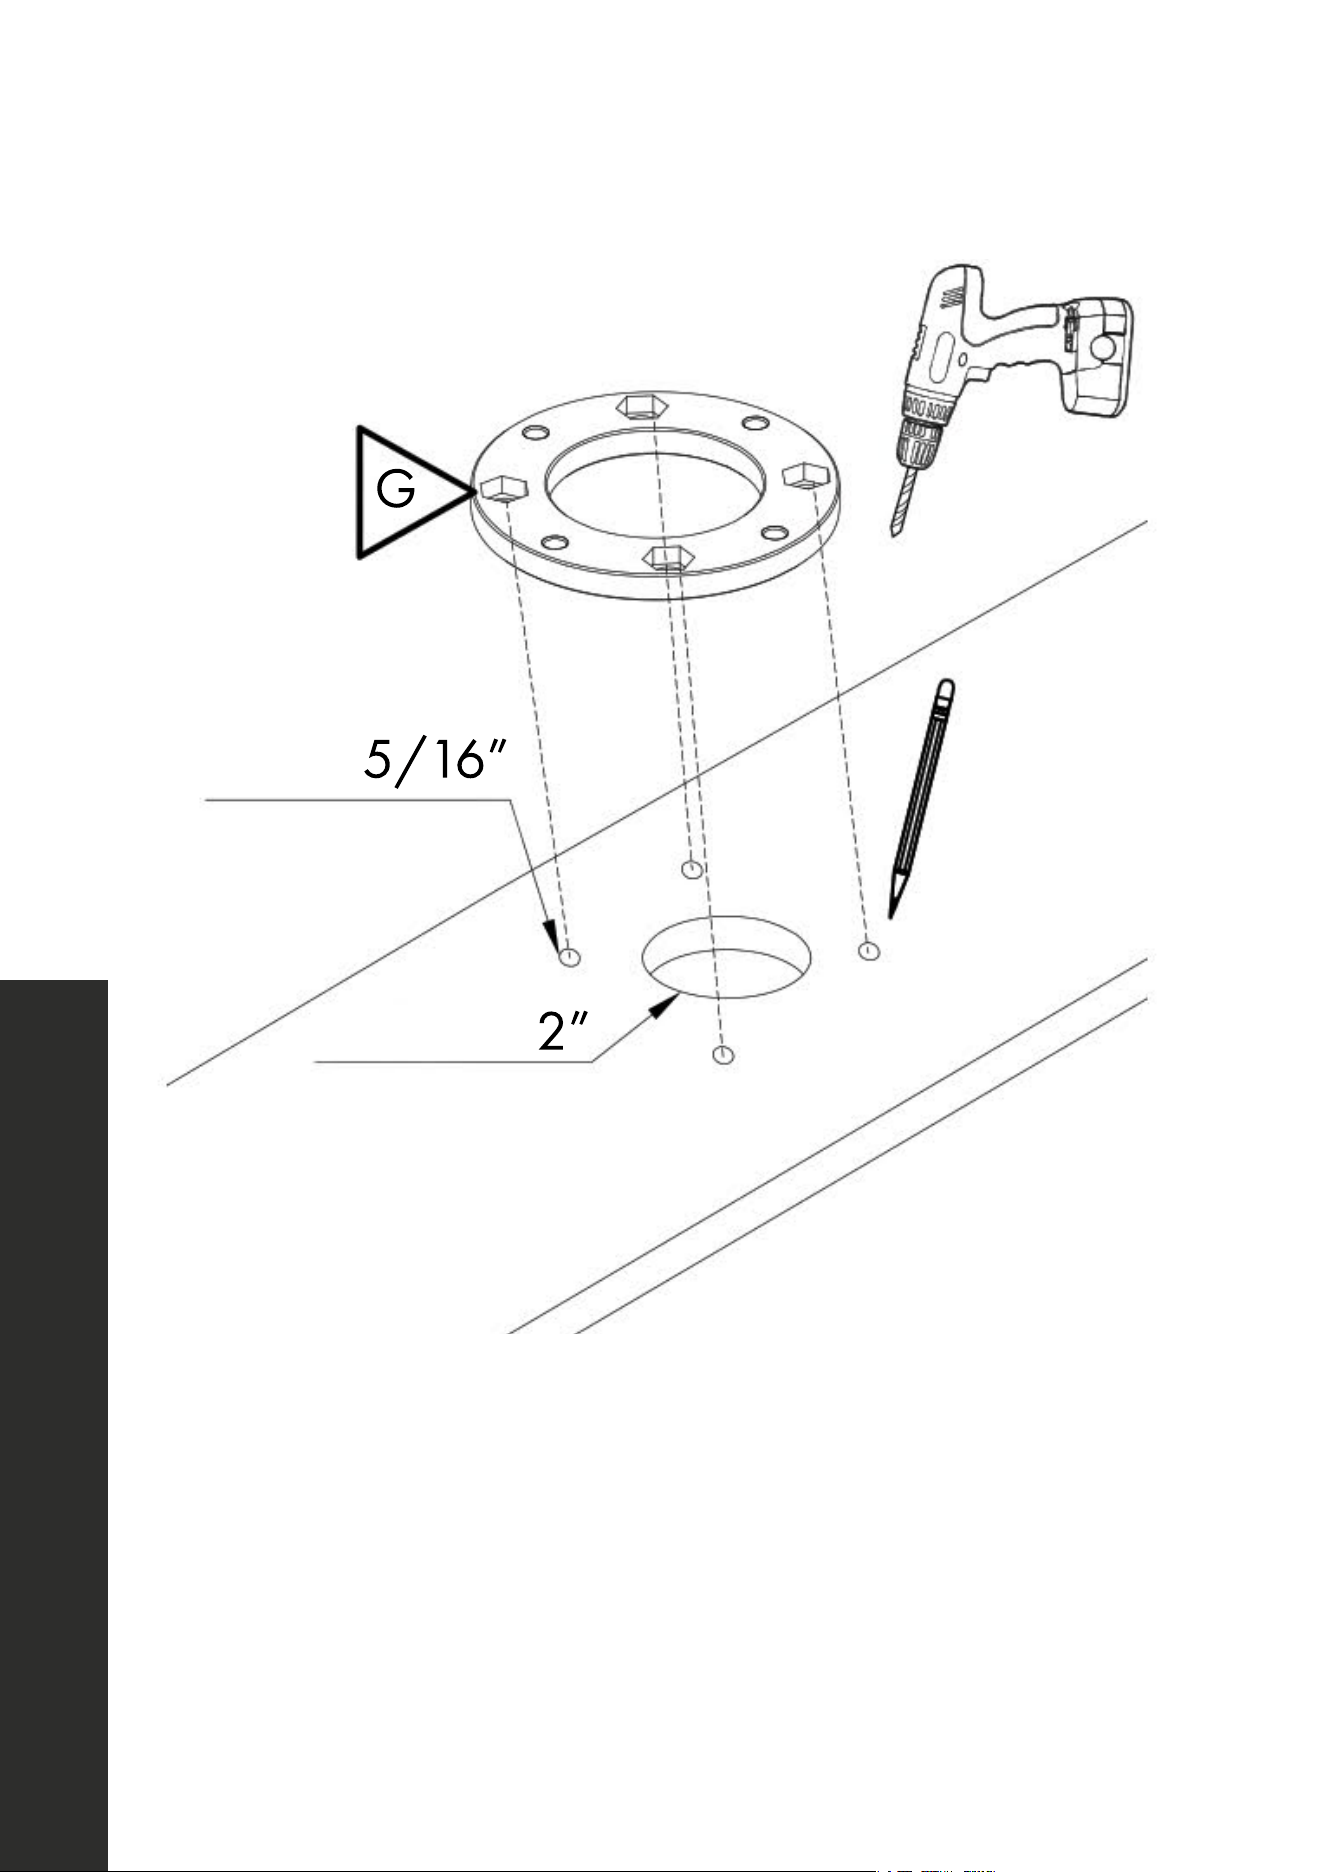
• Place the 1/4” steel mounting plate on the wooden subfloor where you plan to
install the filler and use a pencil to mark 4 holes.
• Remove the plate and pre-drill those 4 holes using a 5/16” bit.
• Drill a 2’’ wide hole for hot and cold water lines to pass through.
5
STEP 2
1
G
F
H
I
J
K
L
D
C
M
M
A
B
E
0
O
5/16”
2”
Wooden subfloor
Cold
(Blue)
Hot
(Red)
Cold
water
inlet
Hot
water inlet
Tub
Rubber
gasket
Lock
washer
3
654
987
1211
10
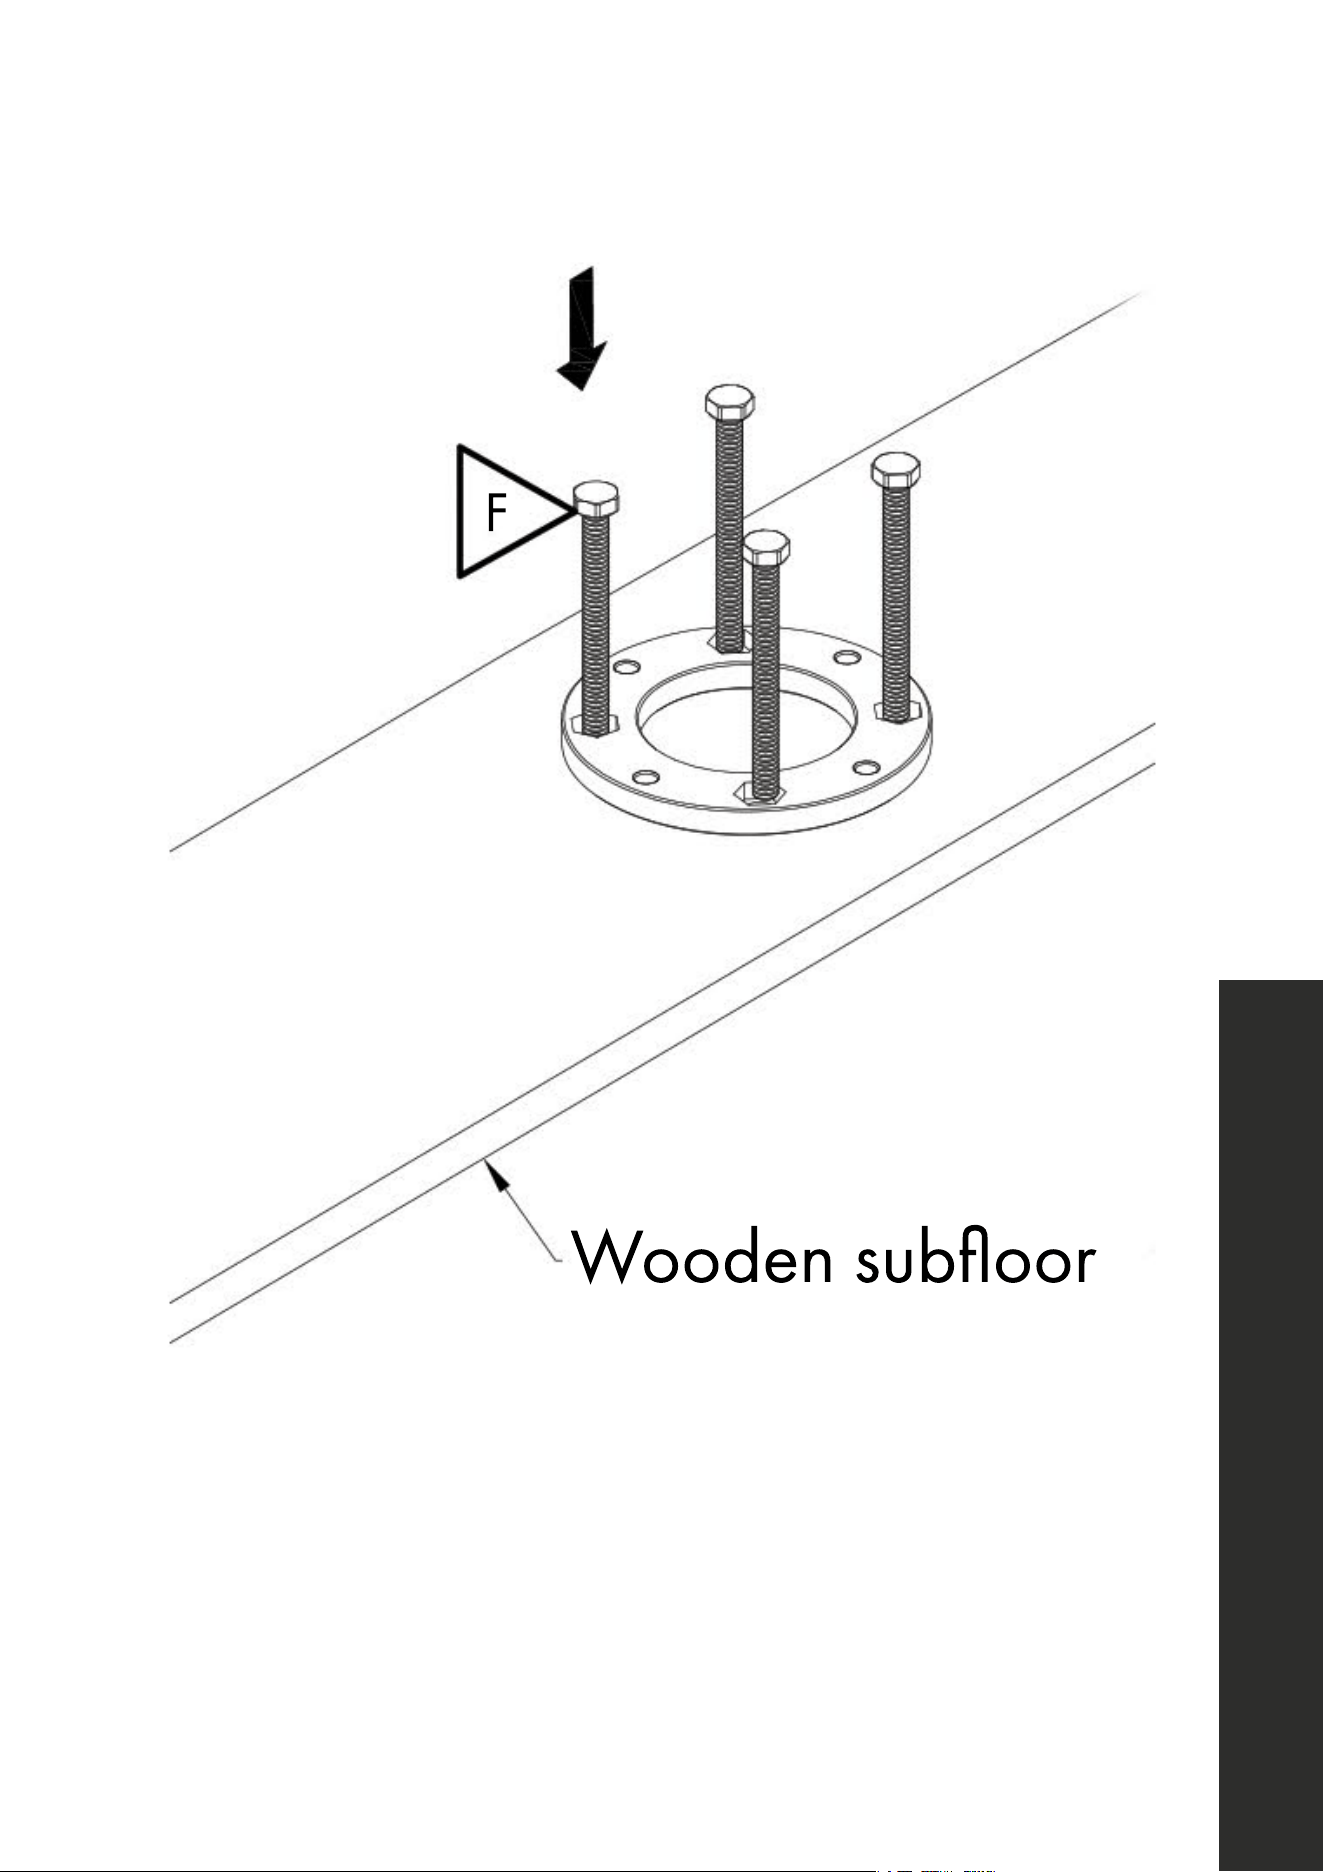
• Place your 1/4” steel mounting plate over the pre-drilled holes with the
recessed bolt fittings facing up.
• Insert long bolts through the mounting plate and through the wooden subfloor
where the tub filler will be mounted.
Product Installation
INSTALLATION
6
Product Installation
STEP 3
1
G
F
H
I
J
K
L
D
C
M
M
A
B
E
0
O
5/16”
2”
Wooden subfloor
Cold
(Blue)
Hot
(Red)
Cold
water
inlet
Hot
water inlet
Tub
Rubber
gasket
Lock
washer
3
654
987
1211
10
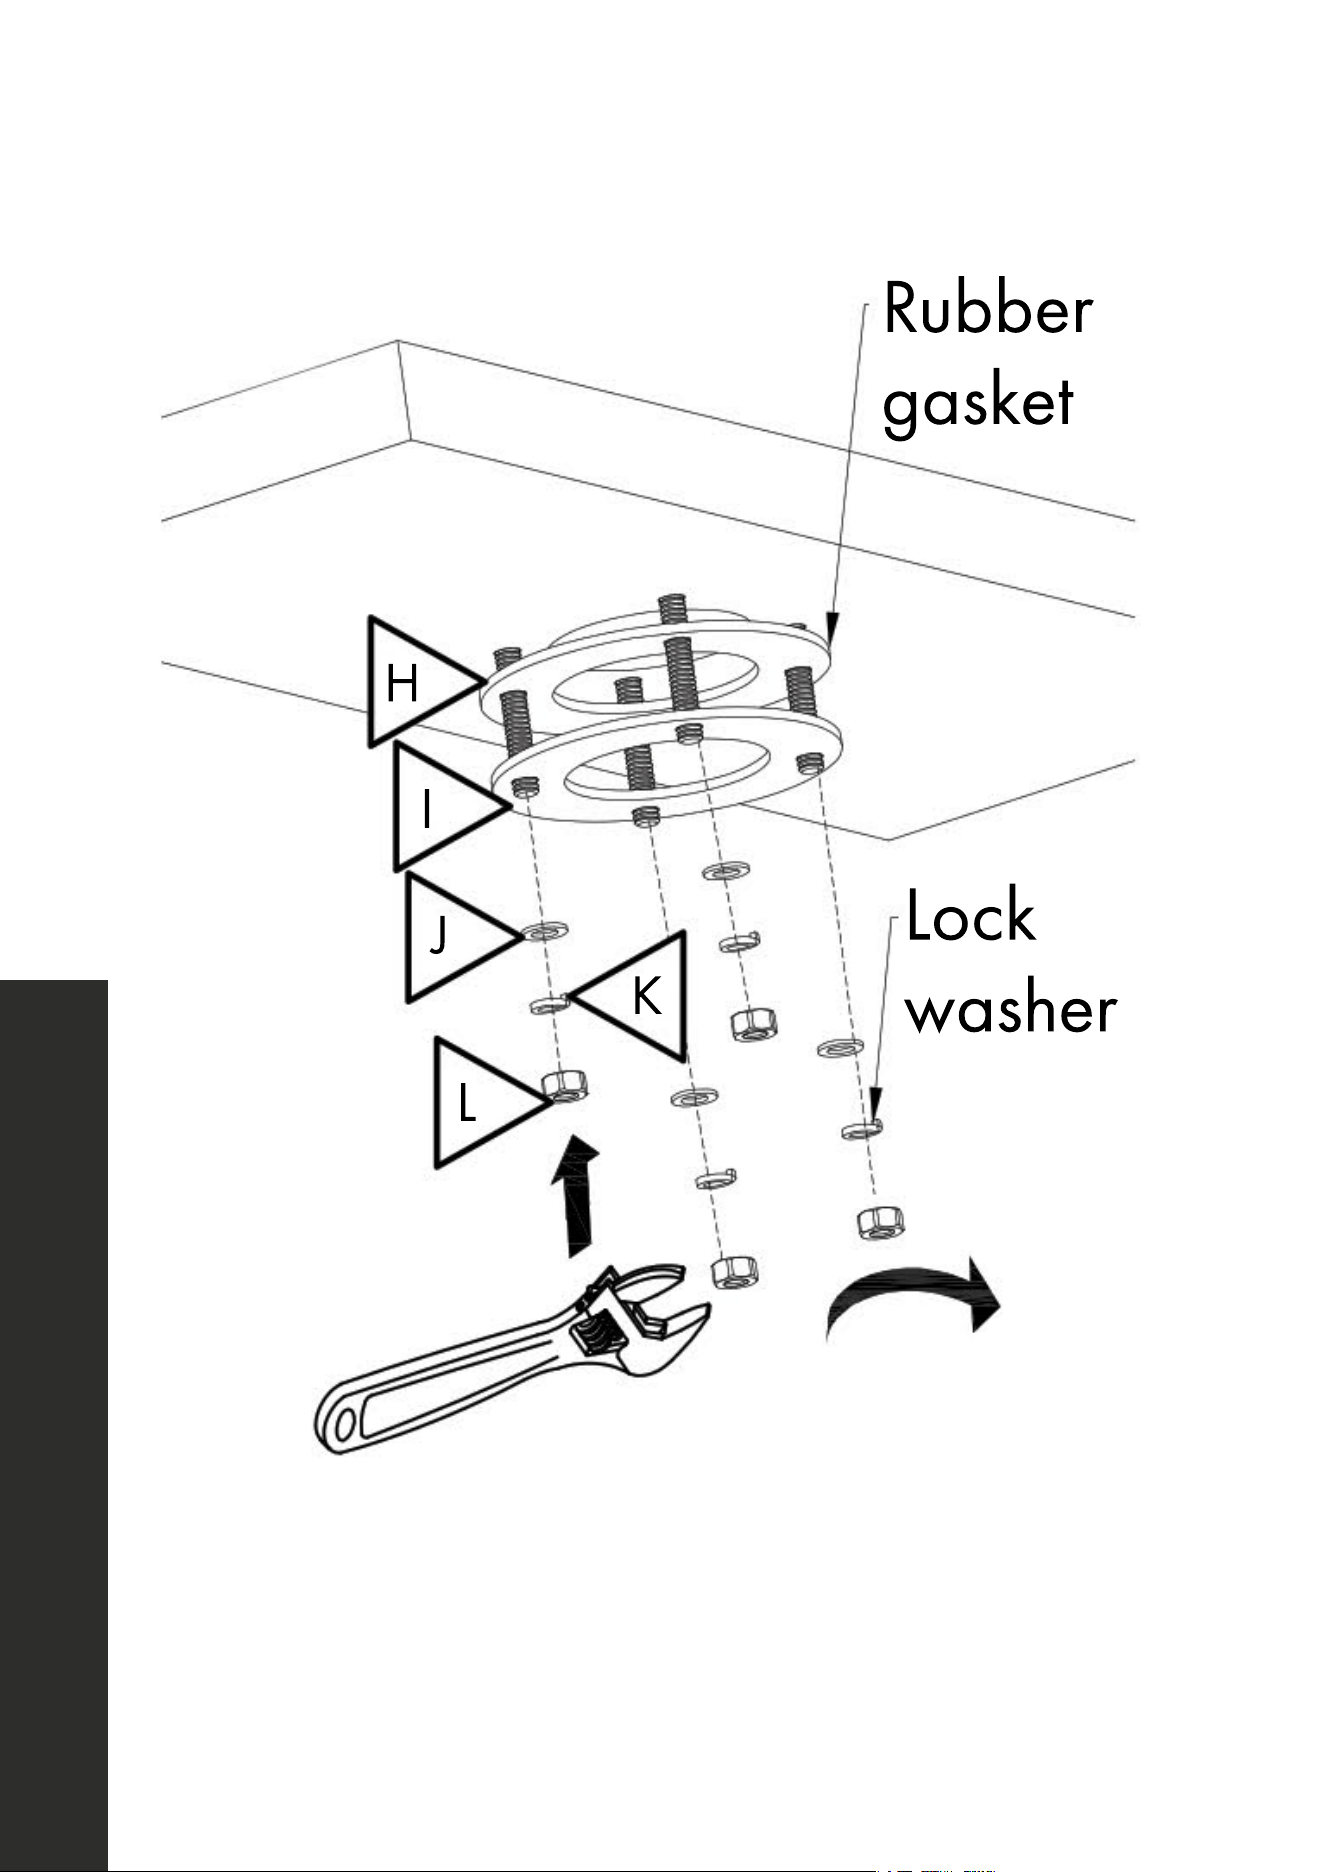
• Place your rubber gasket through the same long bolts on the underside of the subfloor.
• Next, slide in the 1/16” steel mounting plate.
• Place flat washers first, followed by lock washers, then hand screw fastening nuts.
• Use adjustable/socket wrench to tighten nuts and ensure everything is secure.
INSTALLATION
7
Product Installation
STEP 4
1
G
F
H
I
J
K
L
D
C
M
M
A
B
E
0
O
5/16”
2”
Wooden subfloor
Cold
(Blue)
Hot
(Red)
Cold
water
inlet
Hot
water inlet
Tub
Rubber
gasket
Lock
washer
3
654
987
1211
10
Next, on the main tub filler body, slide the mounting cap over the hot and cold water
lines at the bottom and up to the base. Use caution to avoid scratching or damaging
your equipment in the process.
INSTALLATION
8
INSTALLATION
Product Installation
STEP 5
1
G
F
H
I
J
K
L
D
C
M
M
A
B
E
0
O
5/16”
2”
Wooden subfloor
Cold
(Blue)
Hot
(Red)
Cold
water
inlet
Hot
water inlet
Tub
Rubber
gasket
Lock
washer
3
654
987
1211
10
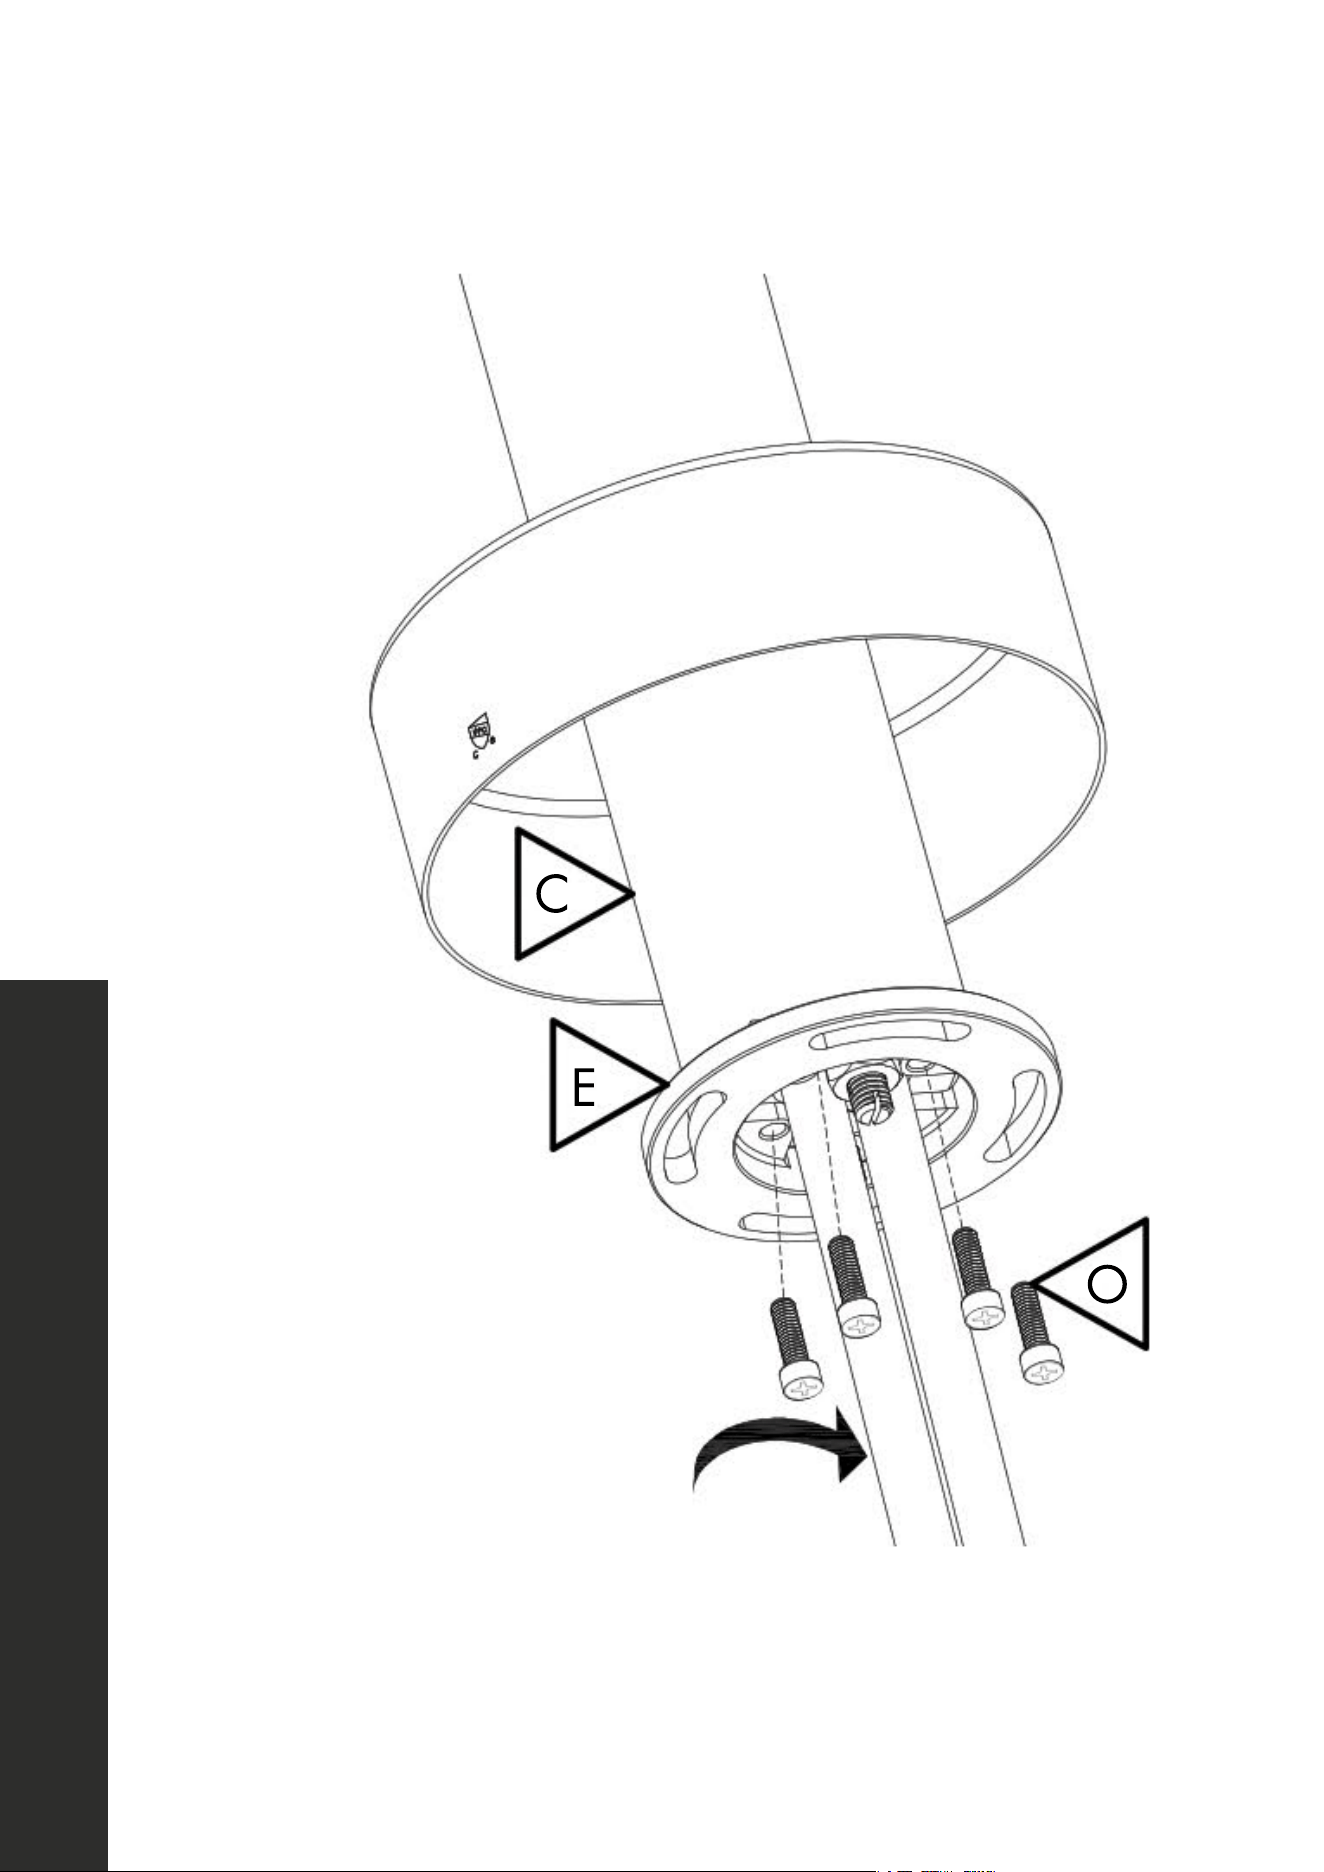
• Slide the brass mounting ring through the hot and cold water lines on the main
tub filler body at bottom (see arrow), ensuring extended portion with 4 screw
holes points up.
• Screw in 4 Phillips-head screws to connect brass mounting ring to tub filler.
• Place unit through the pre-drilled 2” hole and match to previous brackets.
9
INSTALLATION
Product Installation
STEP 6
1
G
F
H
I
J
K
L
D
C
M
M
A
B
E
0
O
5/16”
2”
Wooden subfloor
Cold
(Blue)
Hot
(Red)
Cold
water
inlet
Hot
water inlet
Tub
Rubber
gasket
Lock
washer
3
654
987
1211
10
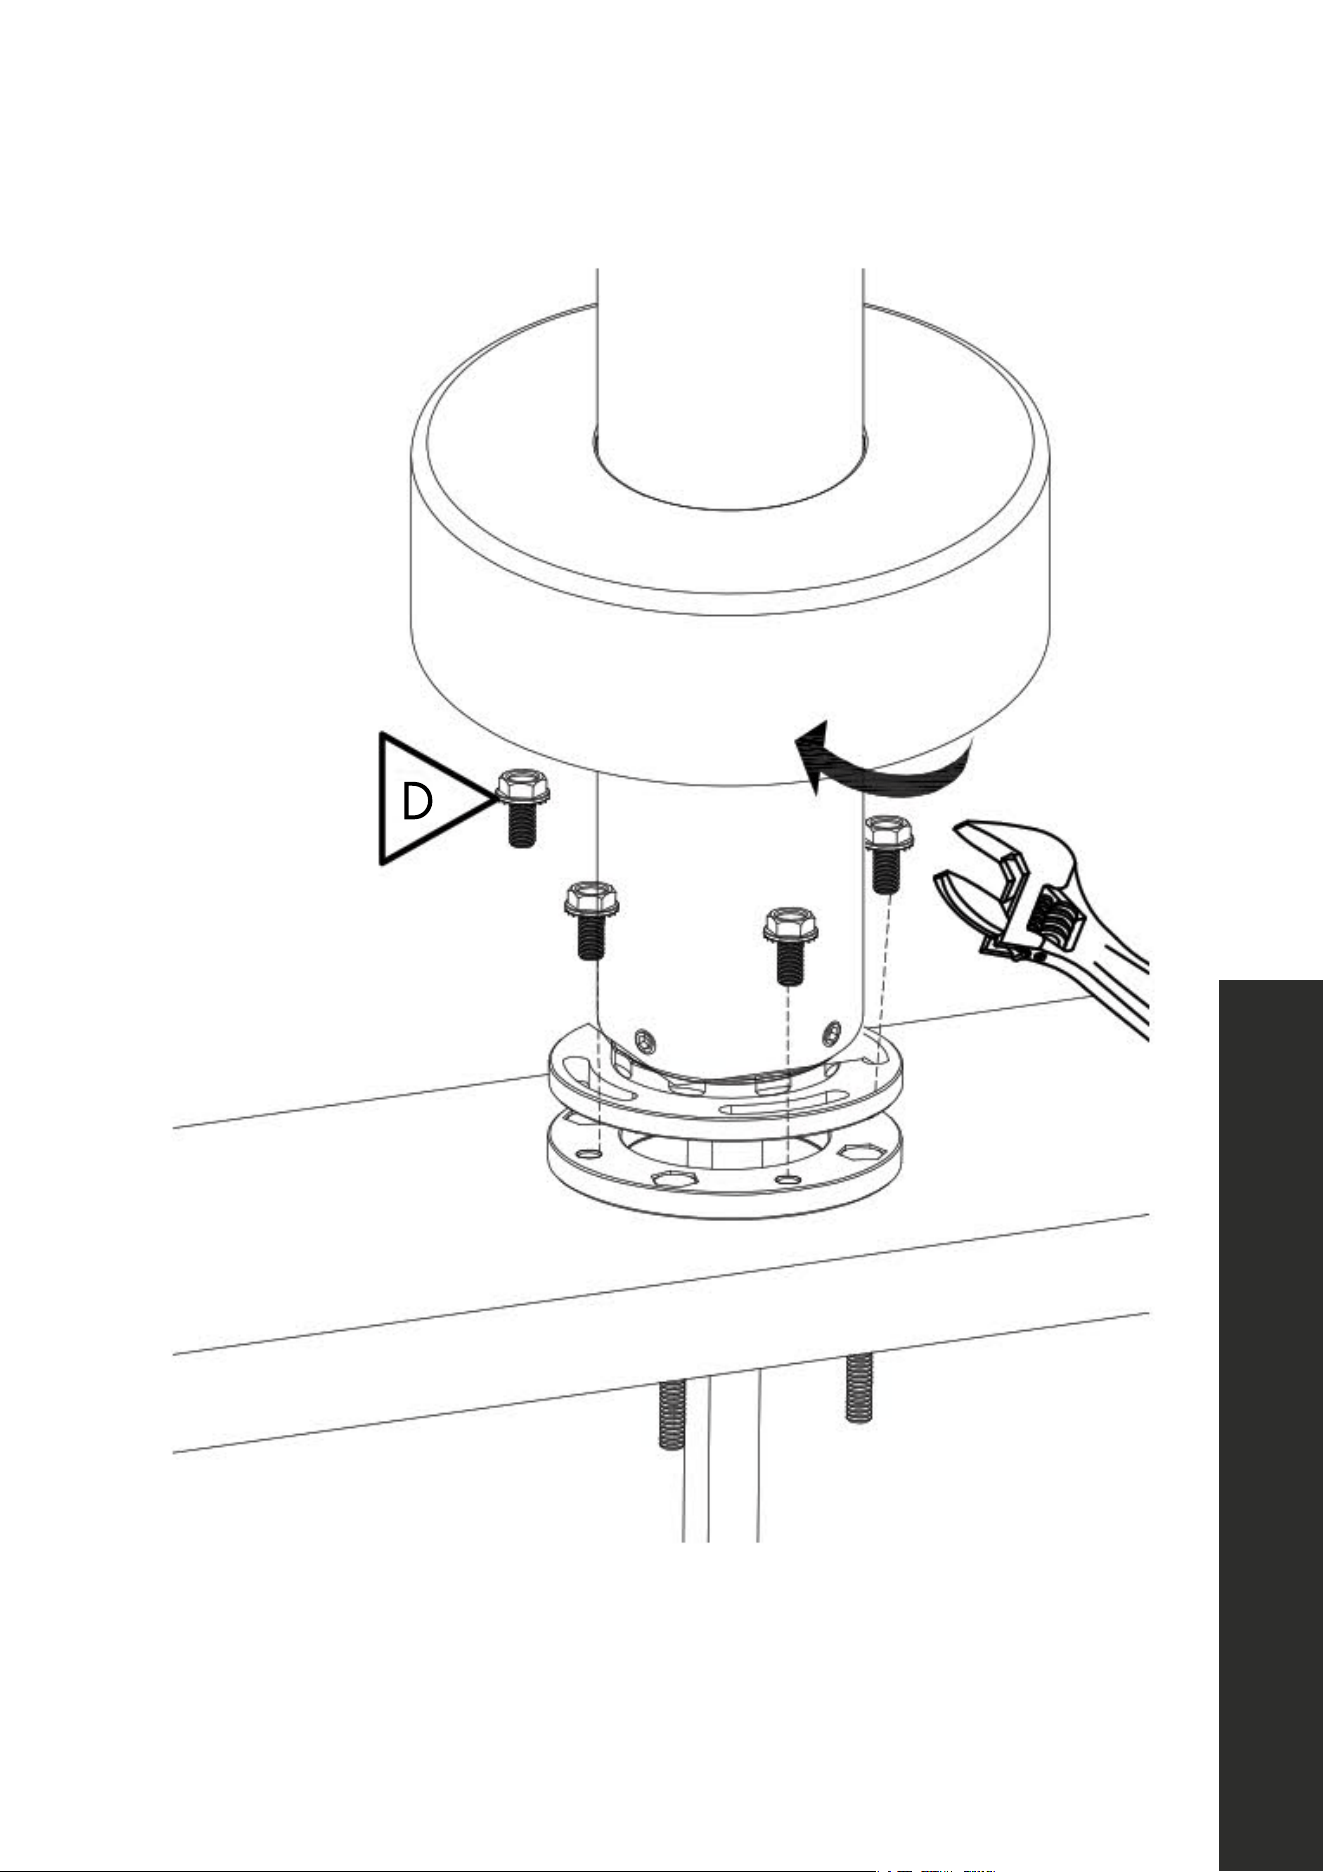
• Install short bolts through wider holes on brass mounting ring.
• Using adjustable/socket wrench, tighten bolts to attach to steel mounting plate.
10
STEP 7
1
G
F
H
I
J
K
L
D
C
M
M
A
B
E
0
O
5/16”
2”
Wooden subfloor
Cold
(Blue)
Hot
(Red)
Cold
water
inlet
Hot
water inlet
Tub
Rubber
gasket
Lock
washer
3
654
987
1211
10
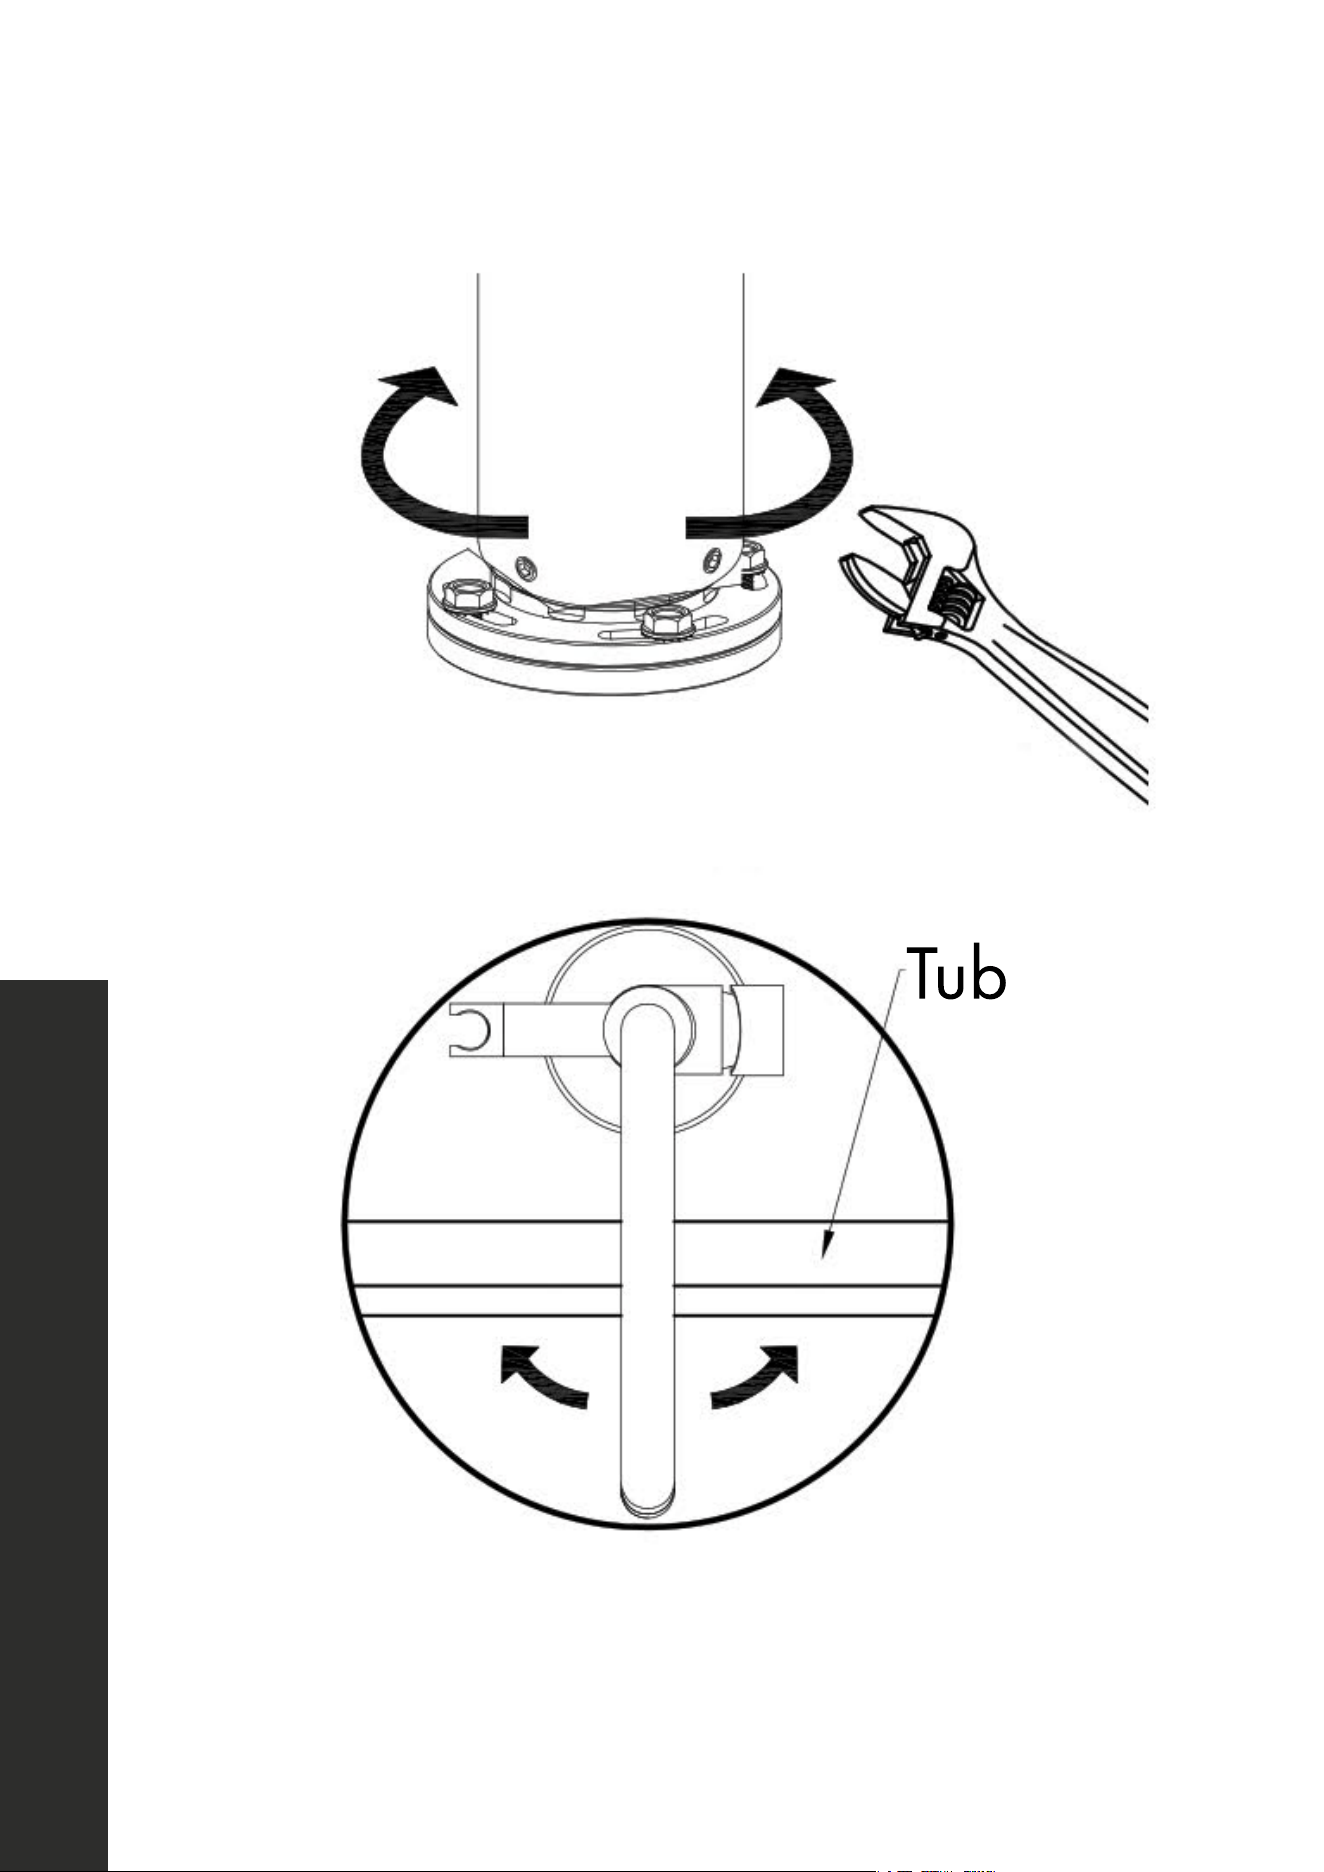
• Adjust the spout direction clockwise or counter clockwise to the proper position,
then tighten bolts into place with adjustable/socket wrench.
INSTALLATION
11
Product Installation
STEP 8
1
G
F
H
I
J
K
L
D
C
M
M
A
B
E
0
O
5/16”
2”
Wooden subfloor
Cold
(Blue)
Hot
(Red)
Cold
water
inlet
Hot
water inlet
Tub
Rubber
gasket
Lock
washer
3
654
987
1211
10
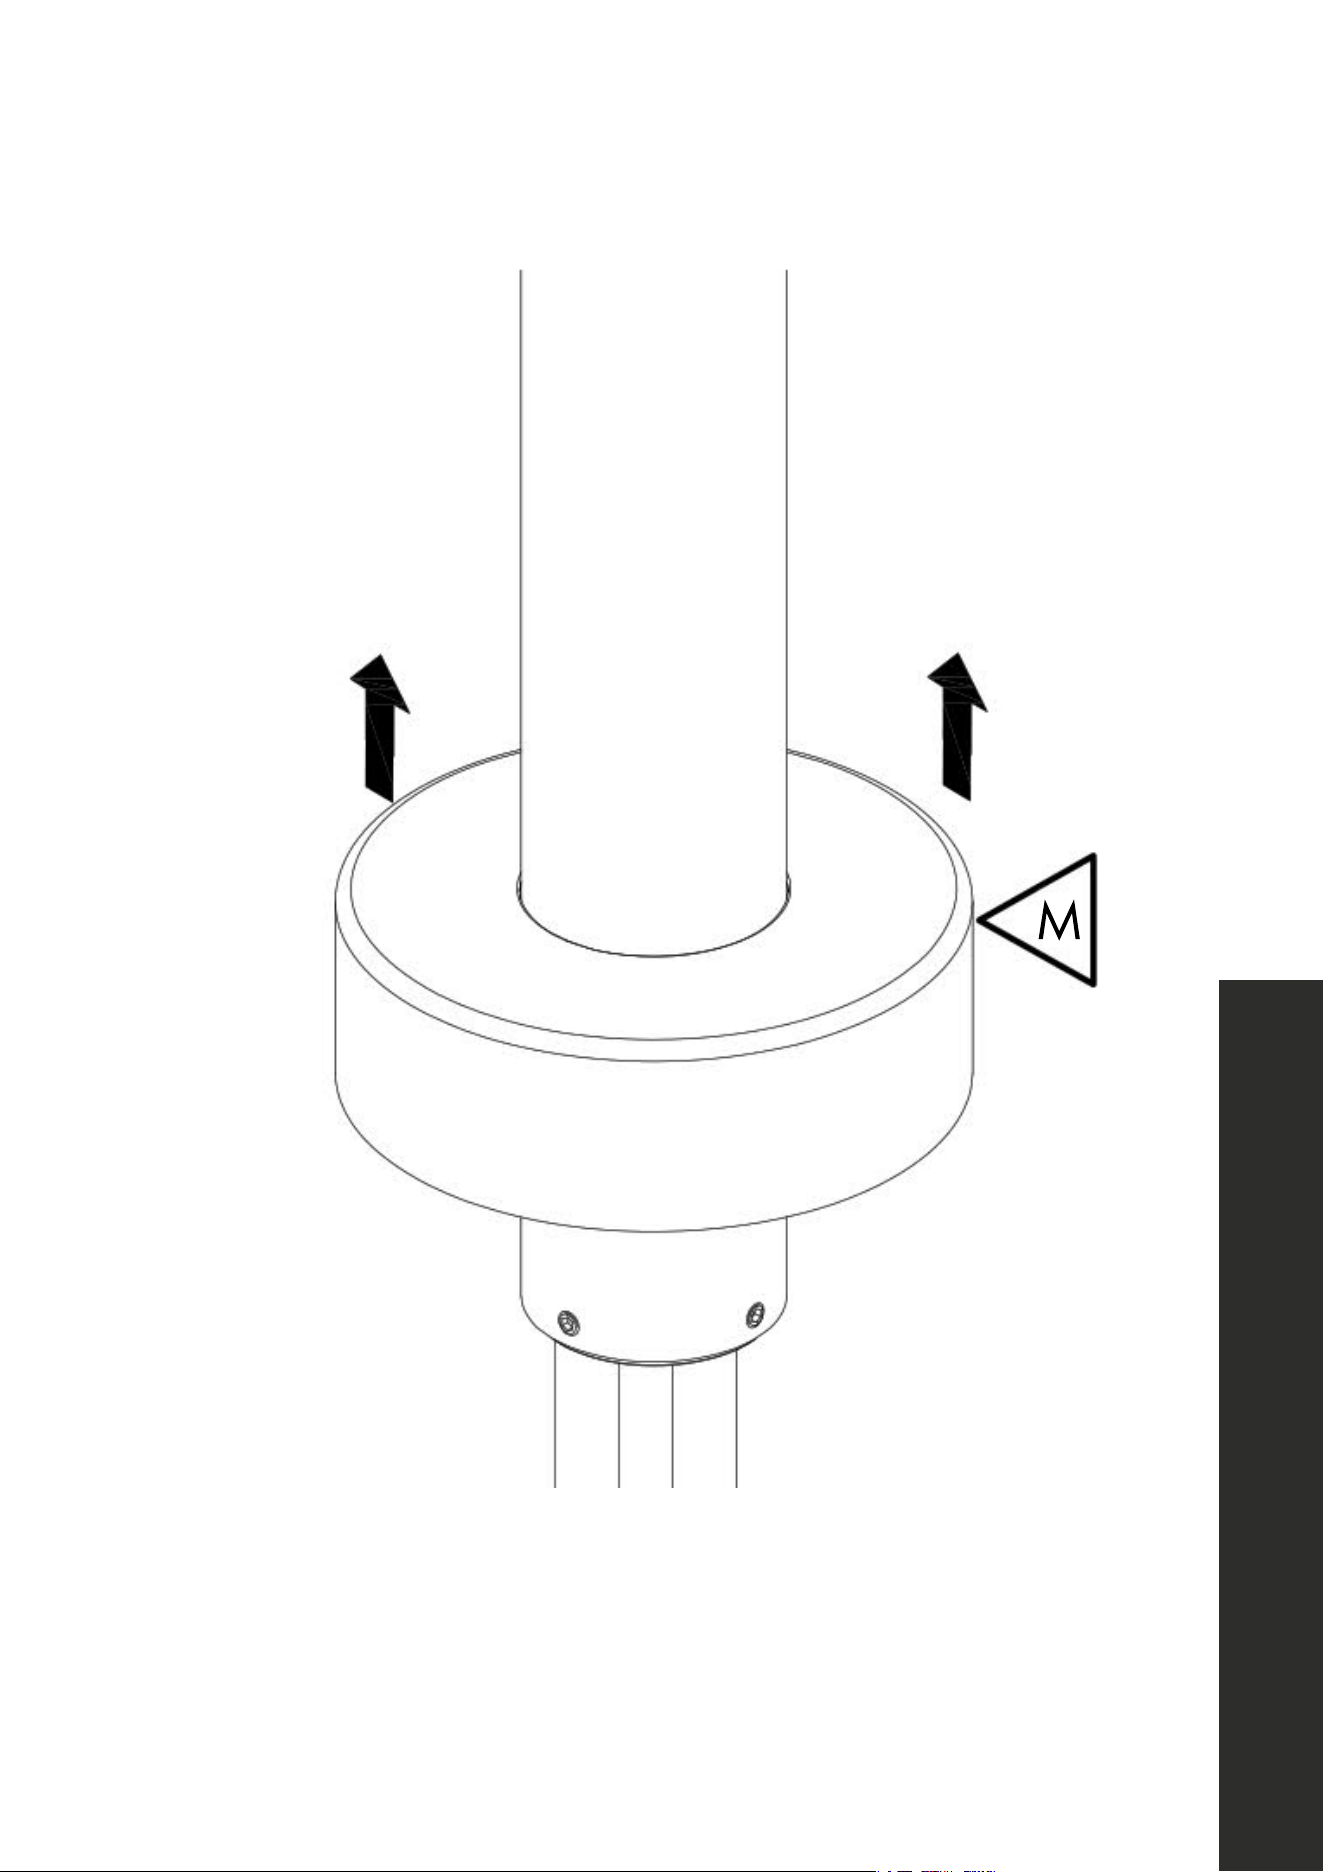
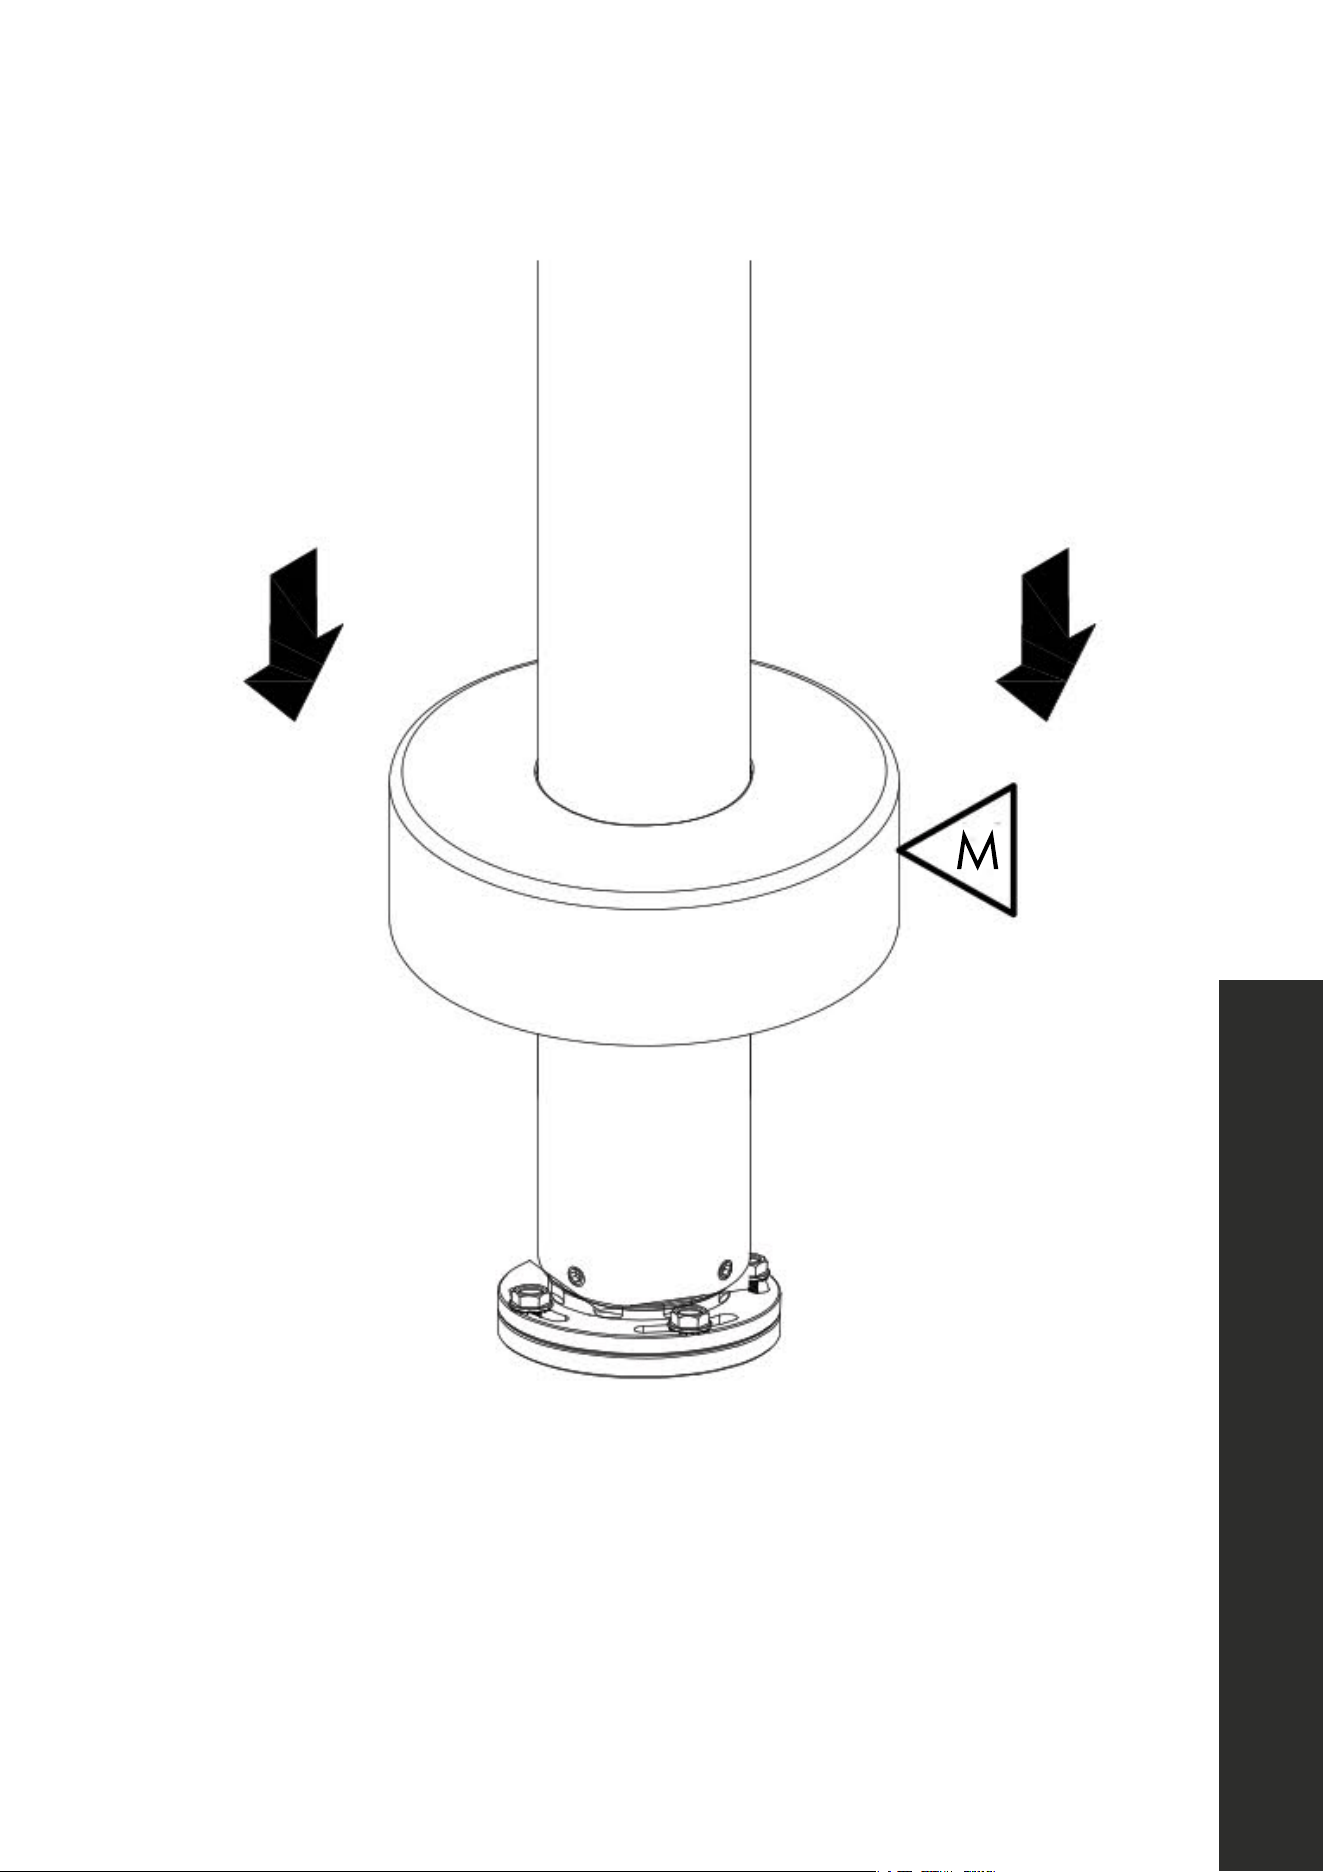
Lower mounting cap into position.
INSTALLATION
12
STEP 9
A
B
Hot
water
inlet
Cold
water
inlet
Cold
(Blue)
Hot
(Red)
M
Tub
Adjust the spout direction,
then lock screws
D
P
C
E
0
M
L
K
J
I
H
Back
Rubber
Spring
gasket
Wooden subfloor
F
2”
5/16”
G
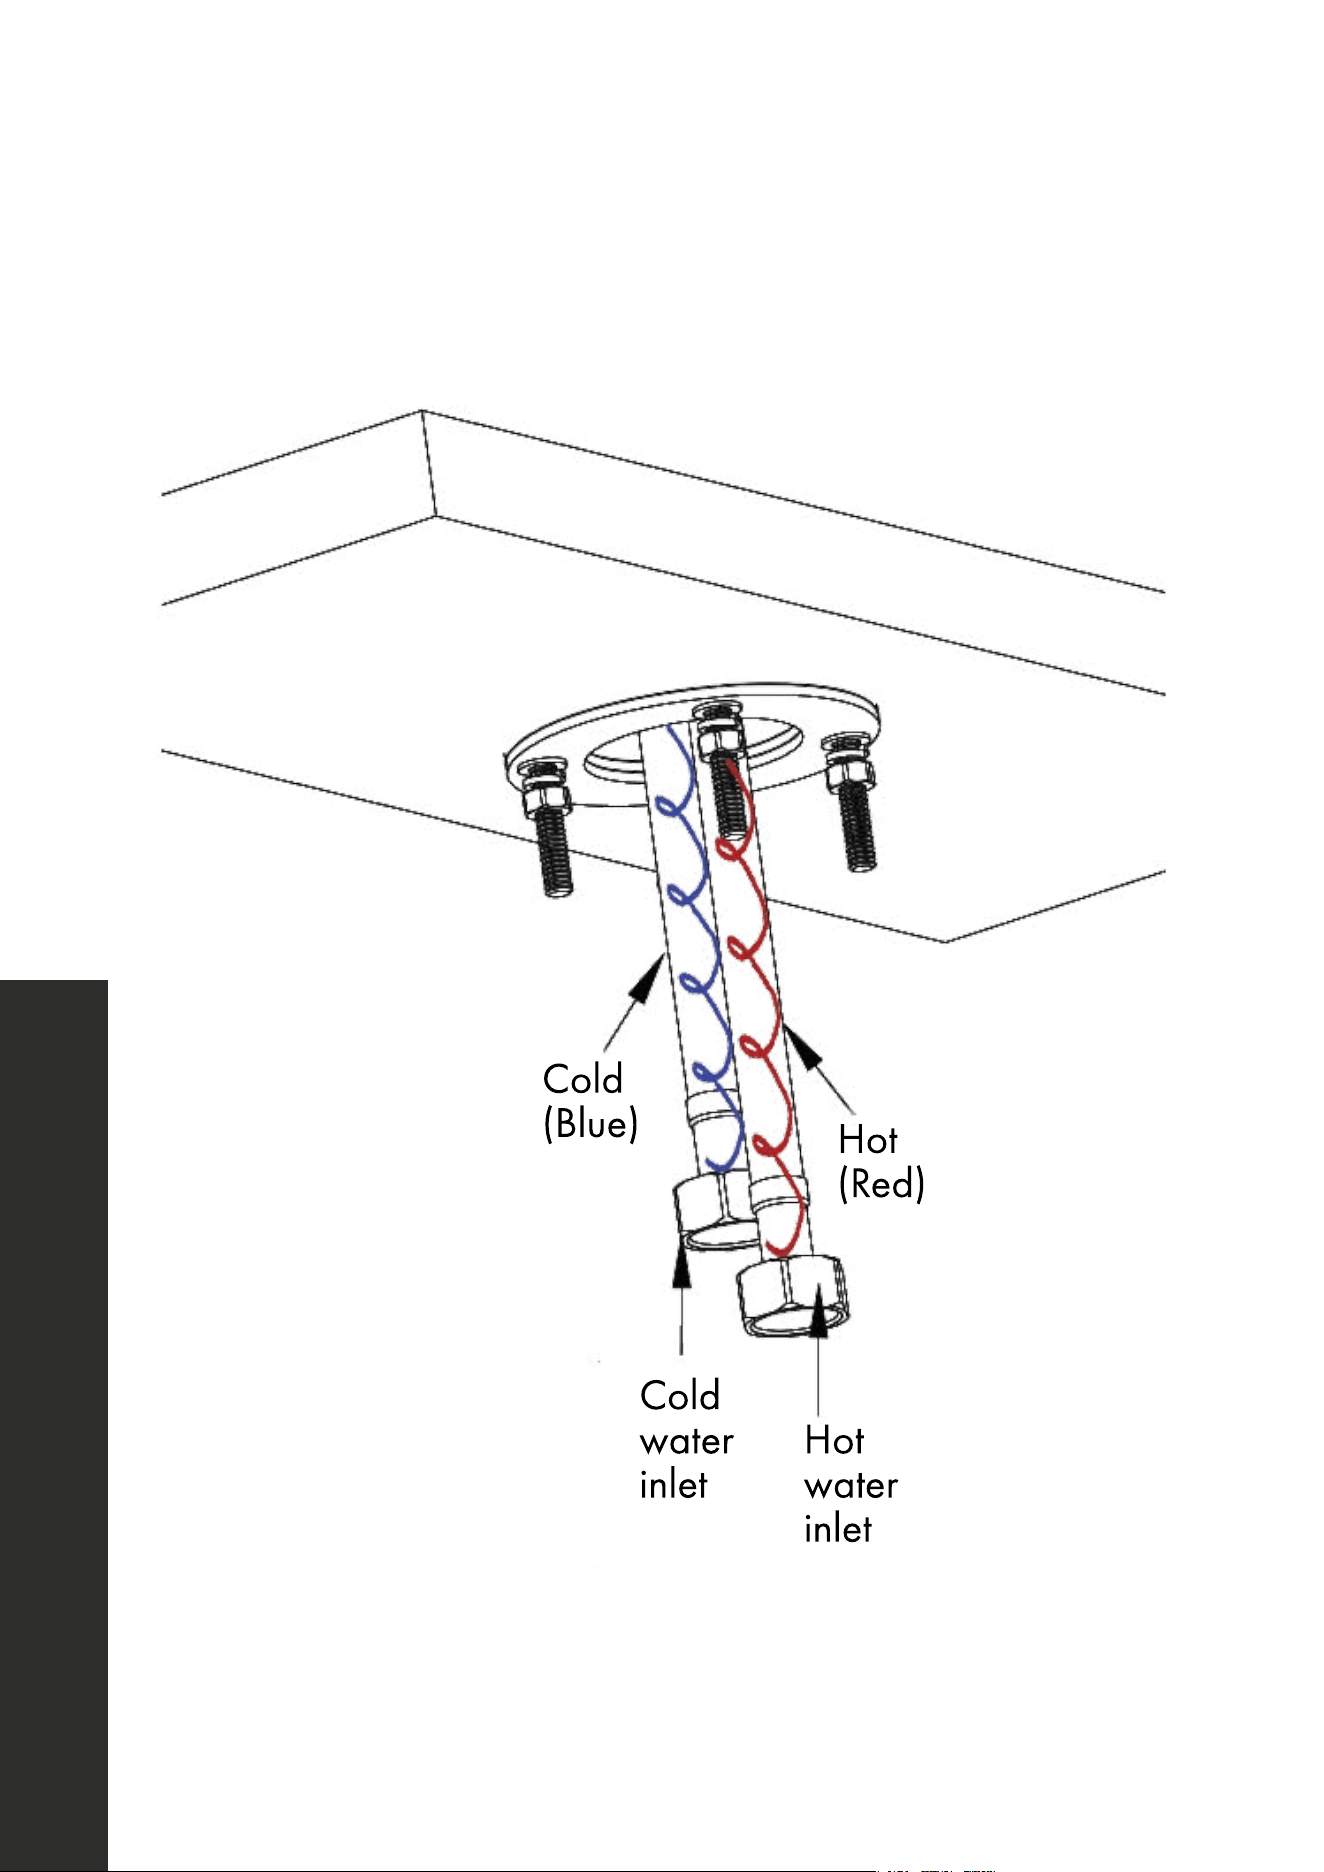
Carefully attach cold and hot water lines, ensuring connections are firm.
Product Installation
INSTALLATION
13
Product Installation
INSTALLATION
STEP 10
1
G
F
H
I
J
K
L
D
C
M
M
A
B
E
0
O
5/16”
2”
Wooden subfloor
Cold
(Blue)
Hot
(Red)
Cold
water
inlet
Hot
water inlet
Tub
Rubber
gasket
Lock
washer
3
654
987
1211
10
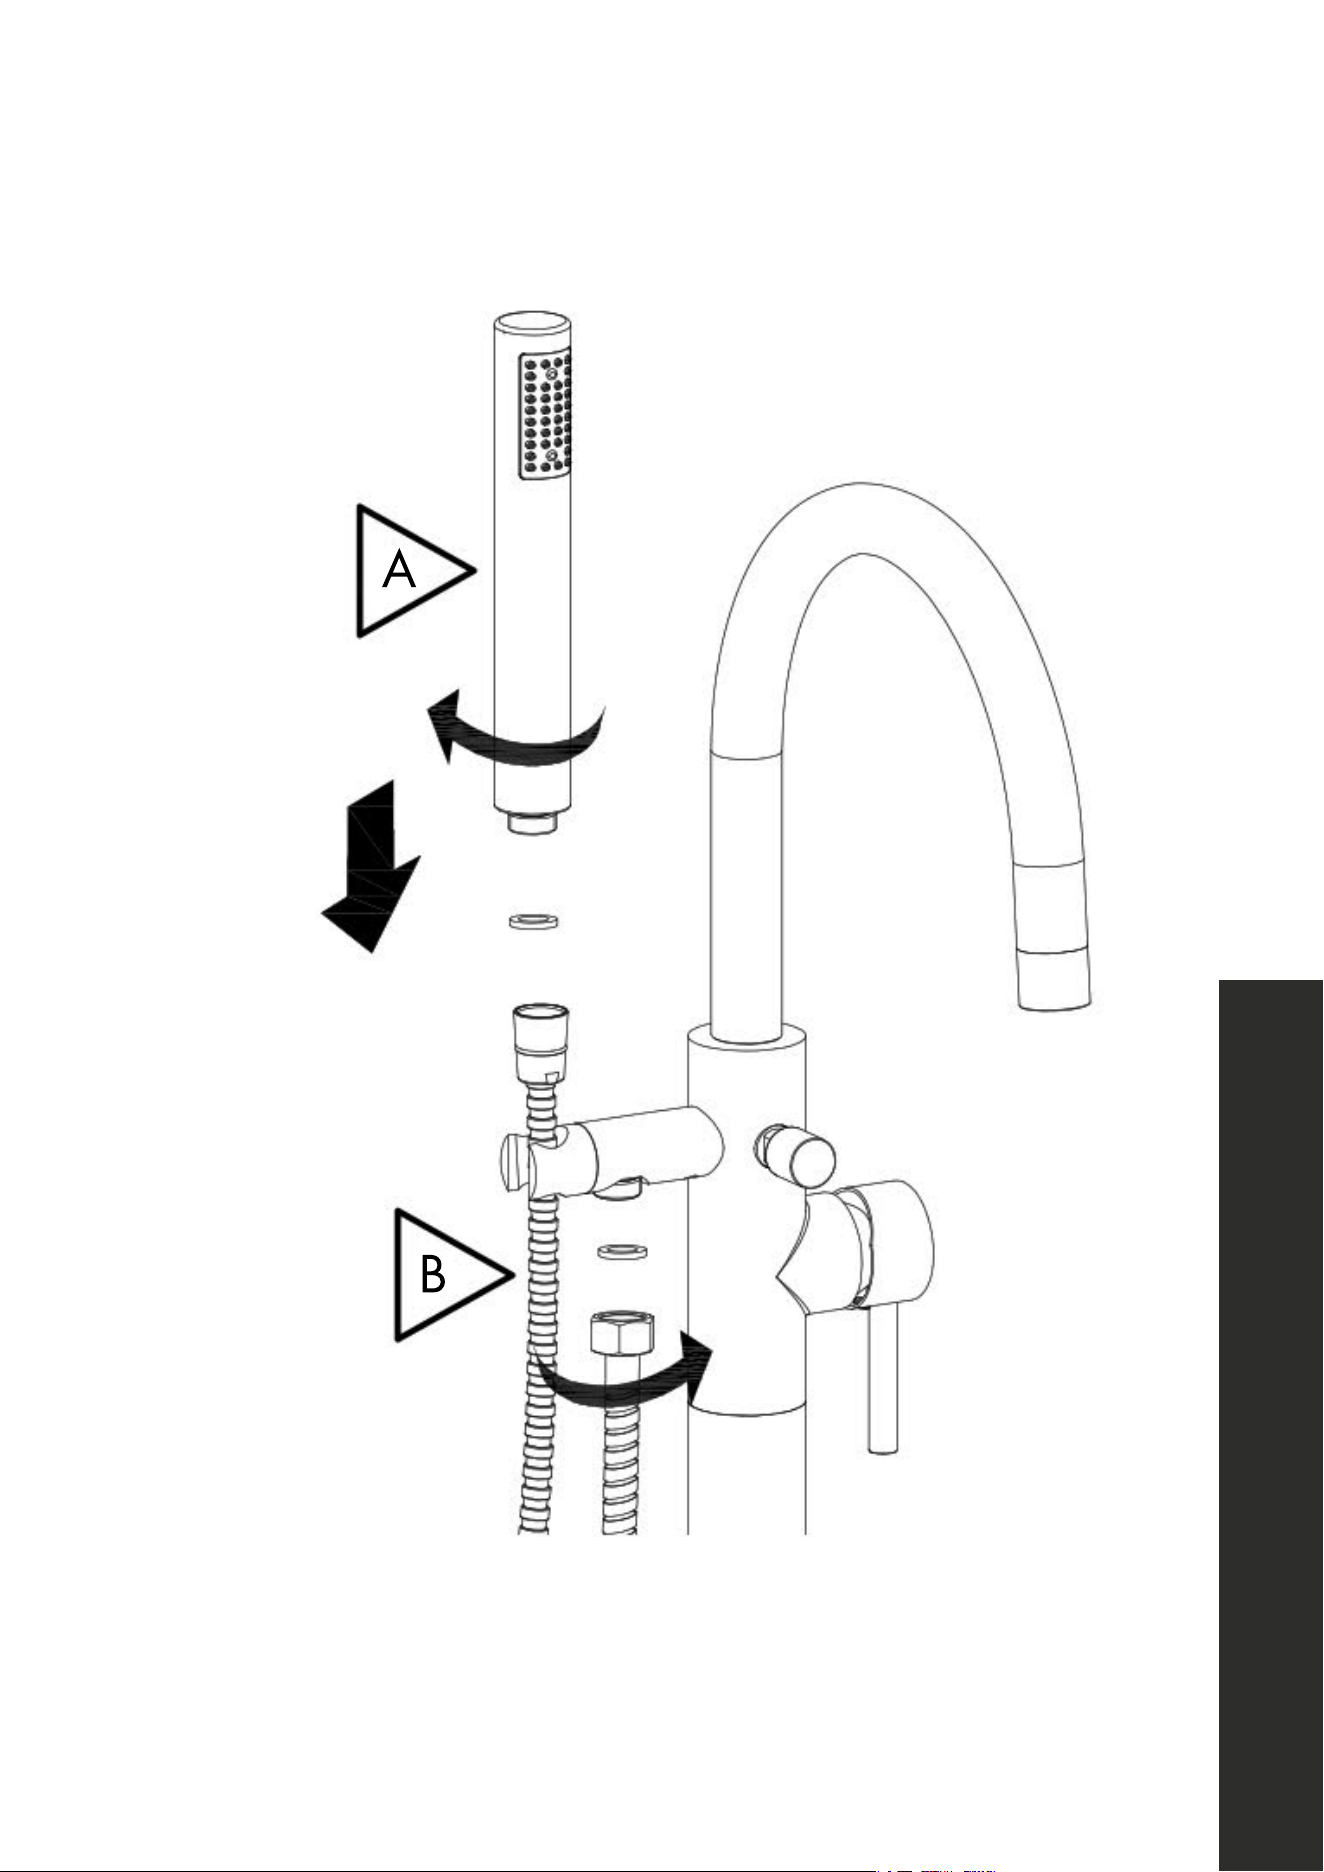
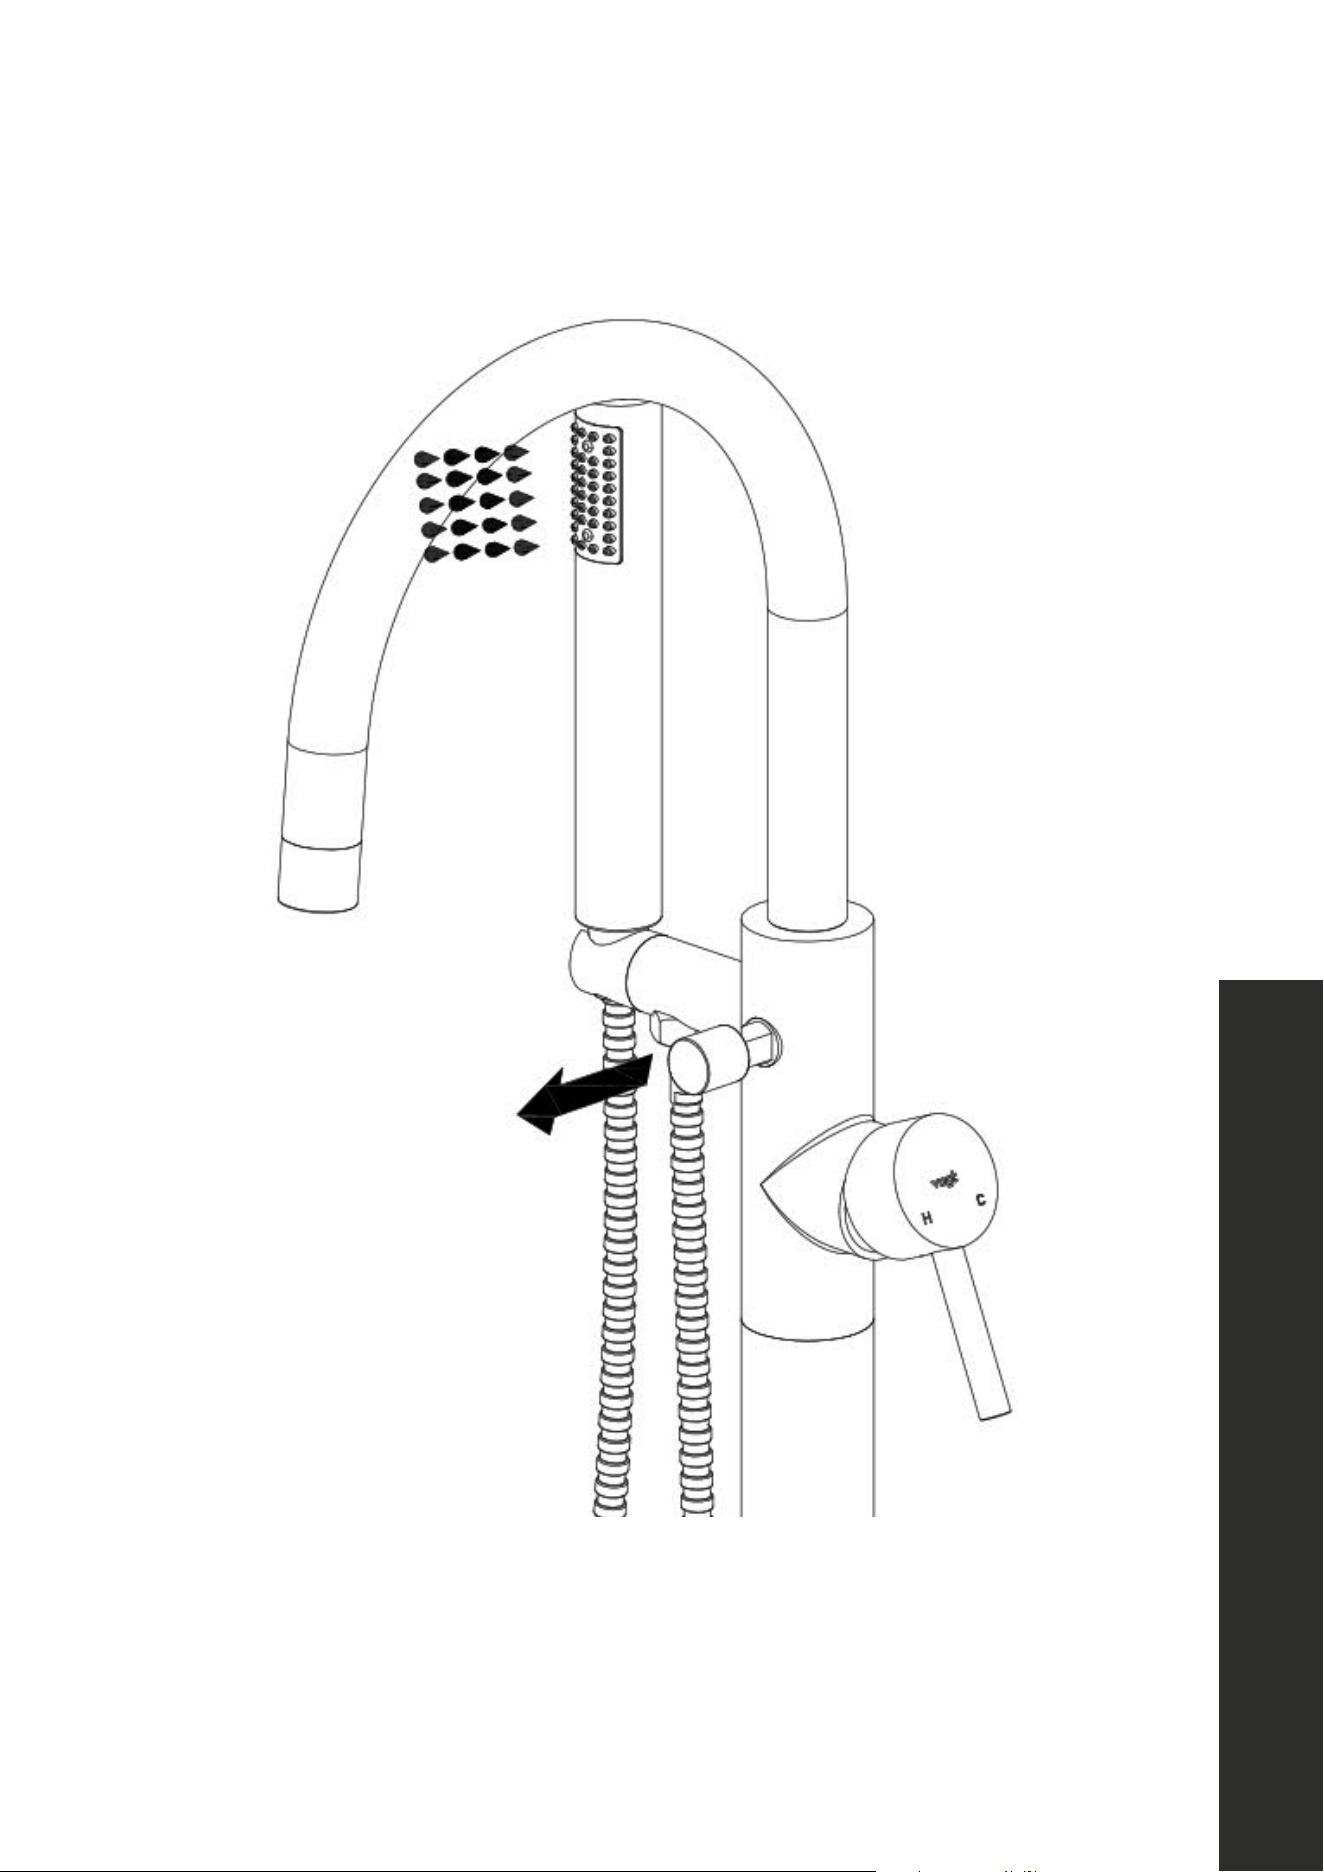
Remove plastic coverings on shower handle and shower hose and use washers to
connect to main tub filler body. Use care to not overtighten.
14
Product Installation
STEP 11
1
G
F
H
I
J
K
L
D
C
M
M
A
B
E
0
O
5/16”
2”
Wooden subfloor
Cold
(Blue)
Hot
(Red)
Cold
water
inlet
Hot
water inlet
Tub
Rubber
gasket
Lock
washer
3
654
987
1211
10
With installation now complete, turn hot and cold water lines back on to the unit, then
pull water valve lever.
Note: It may take a few seconds for water to fill the pipes and begin flowing.
INSTALLATION
15
Product Installation
STEP 12
1
G
F
H
I
J
K
L
D
C
M
M
A
B
E
0
O
5/16”
2”
Wooden subfloor
Cold
(Blue)
Hot
(Red)
Cold
water
inlet
Hot
water inlet
Tub
Rubber
gasket
Lock
washer
3
654
987
1211
10
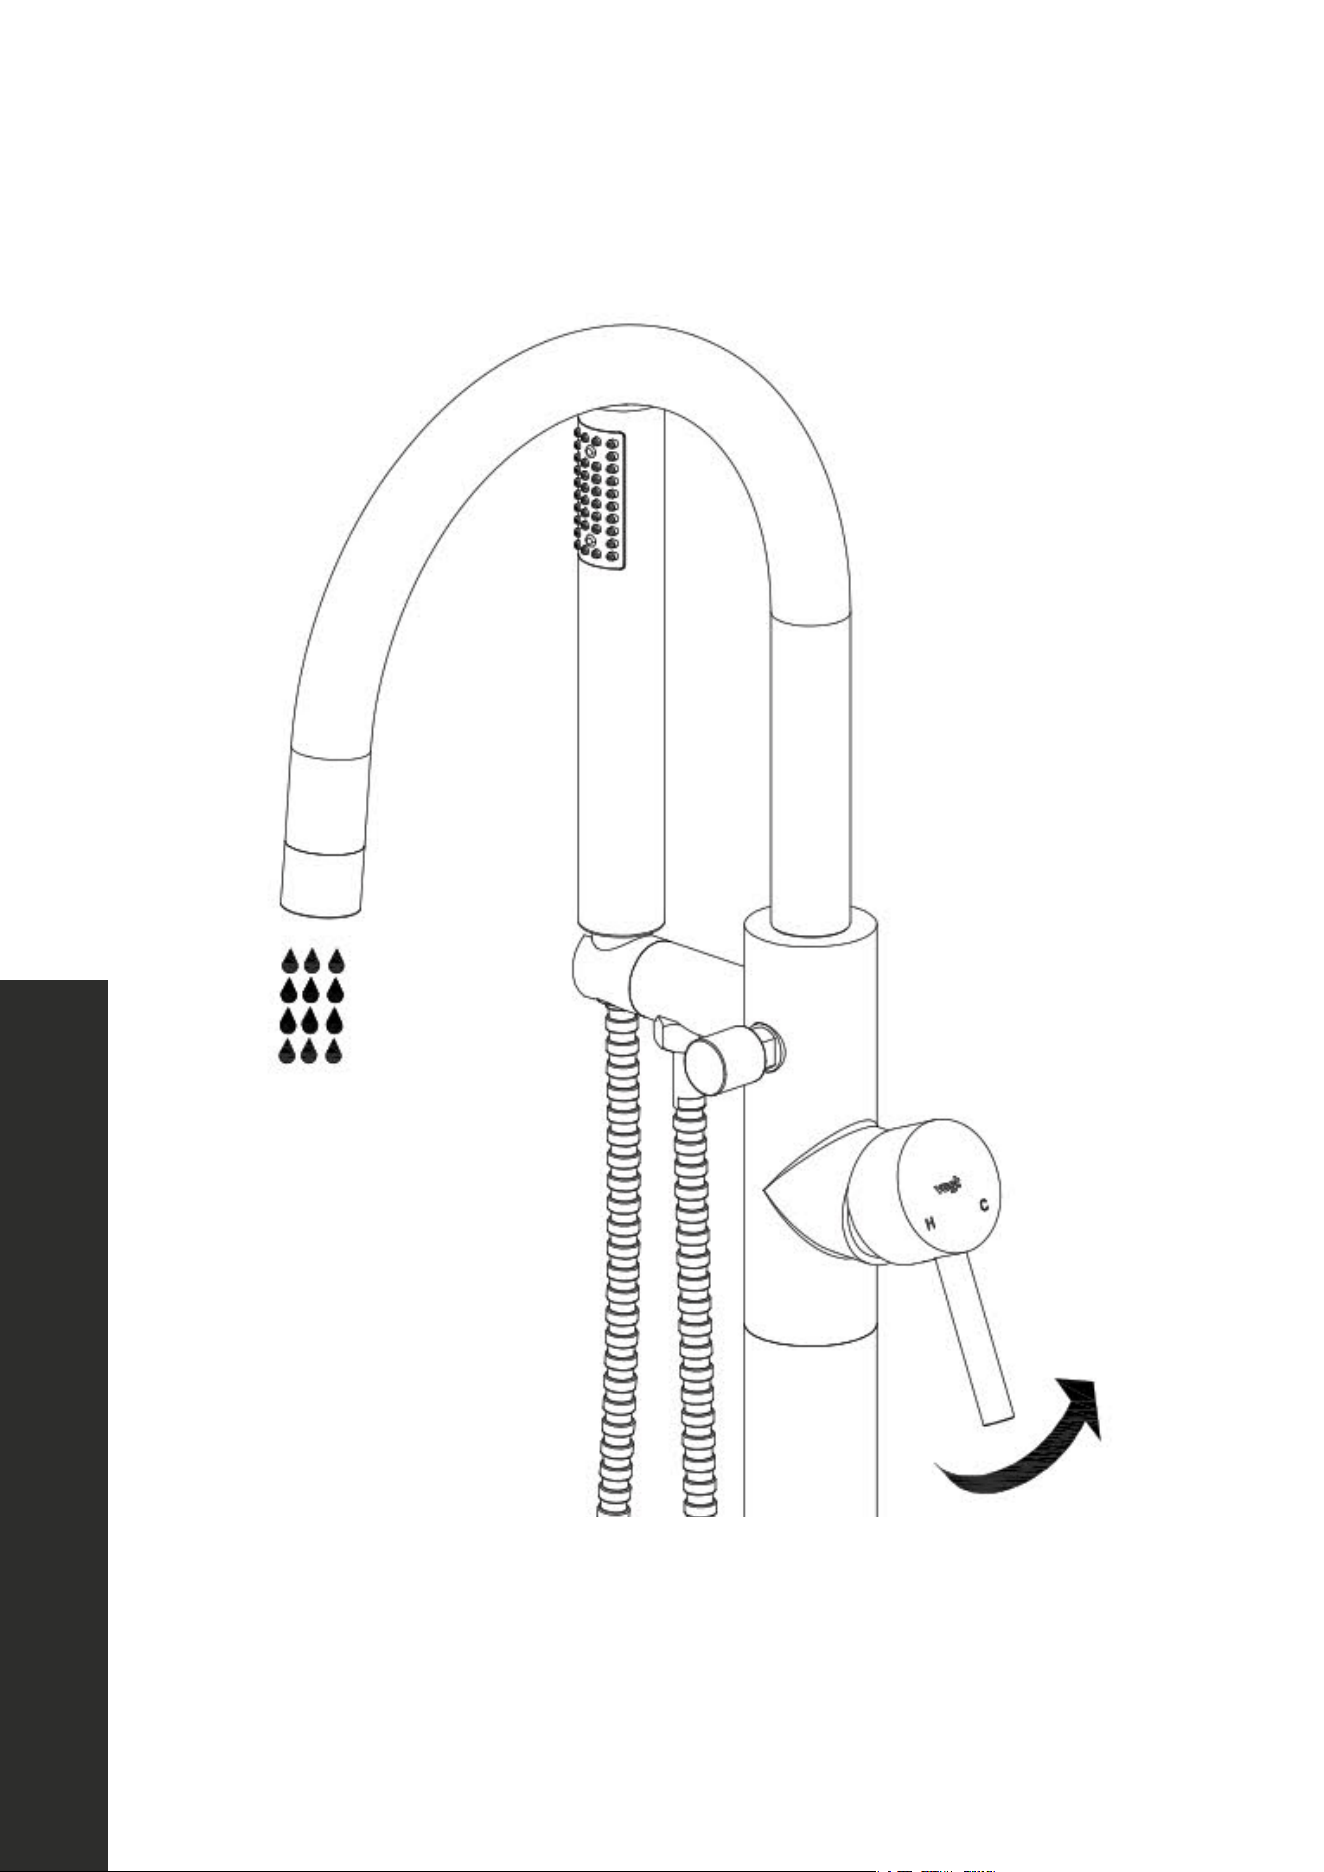
Lastly, to set the shower handle system, pull on the diverter valve knob with the water
on (see arrow).
INSTALLATION

16
Care and Maintenance
CARE AND MAINTENANCE
To keep the product clean and shiny, follow the steps below:
1. Rinse clean with water and dry with a soft cloth.
2. Do not clean with soaps, acid, polish, abrasives, or harsh cleaners.
3. Do not use any cloth with a coarse surface.
4. Clean the aerator at the end of the faucet of any debris.
Note: Do not over tighten screws/nuts on your tub filler. Finger tighten, then use a
wrench/screwdriver as needed to tighten until snug.
17
TROUBLESHOOTING
Troubleshooting
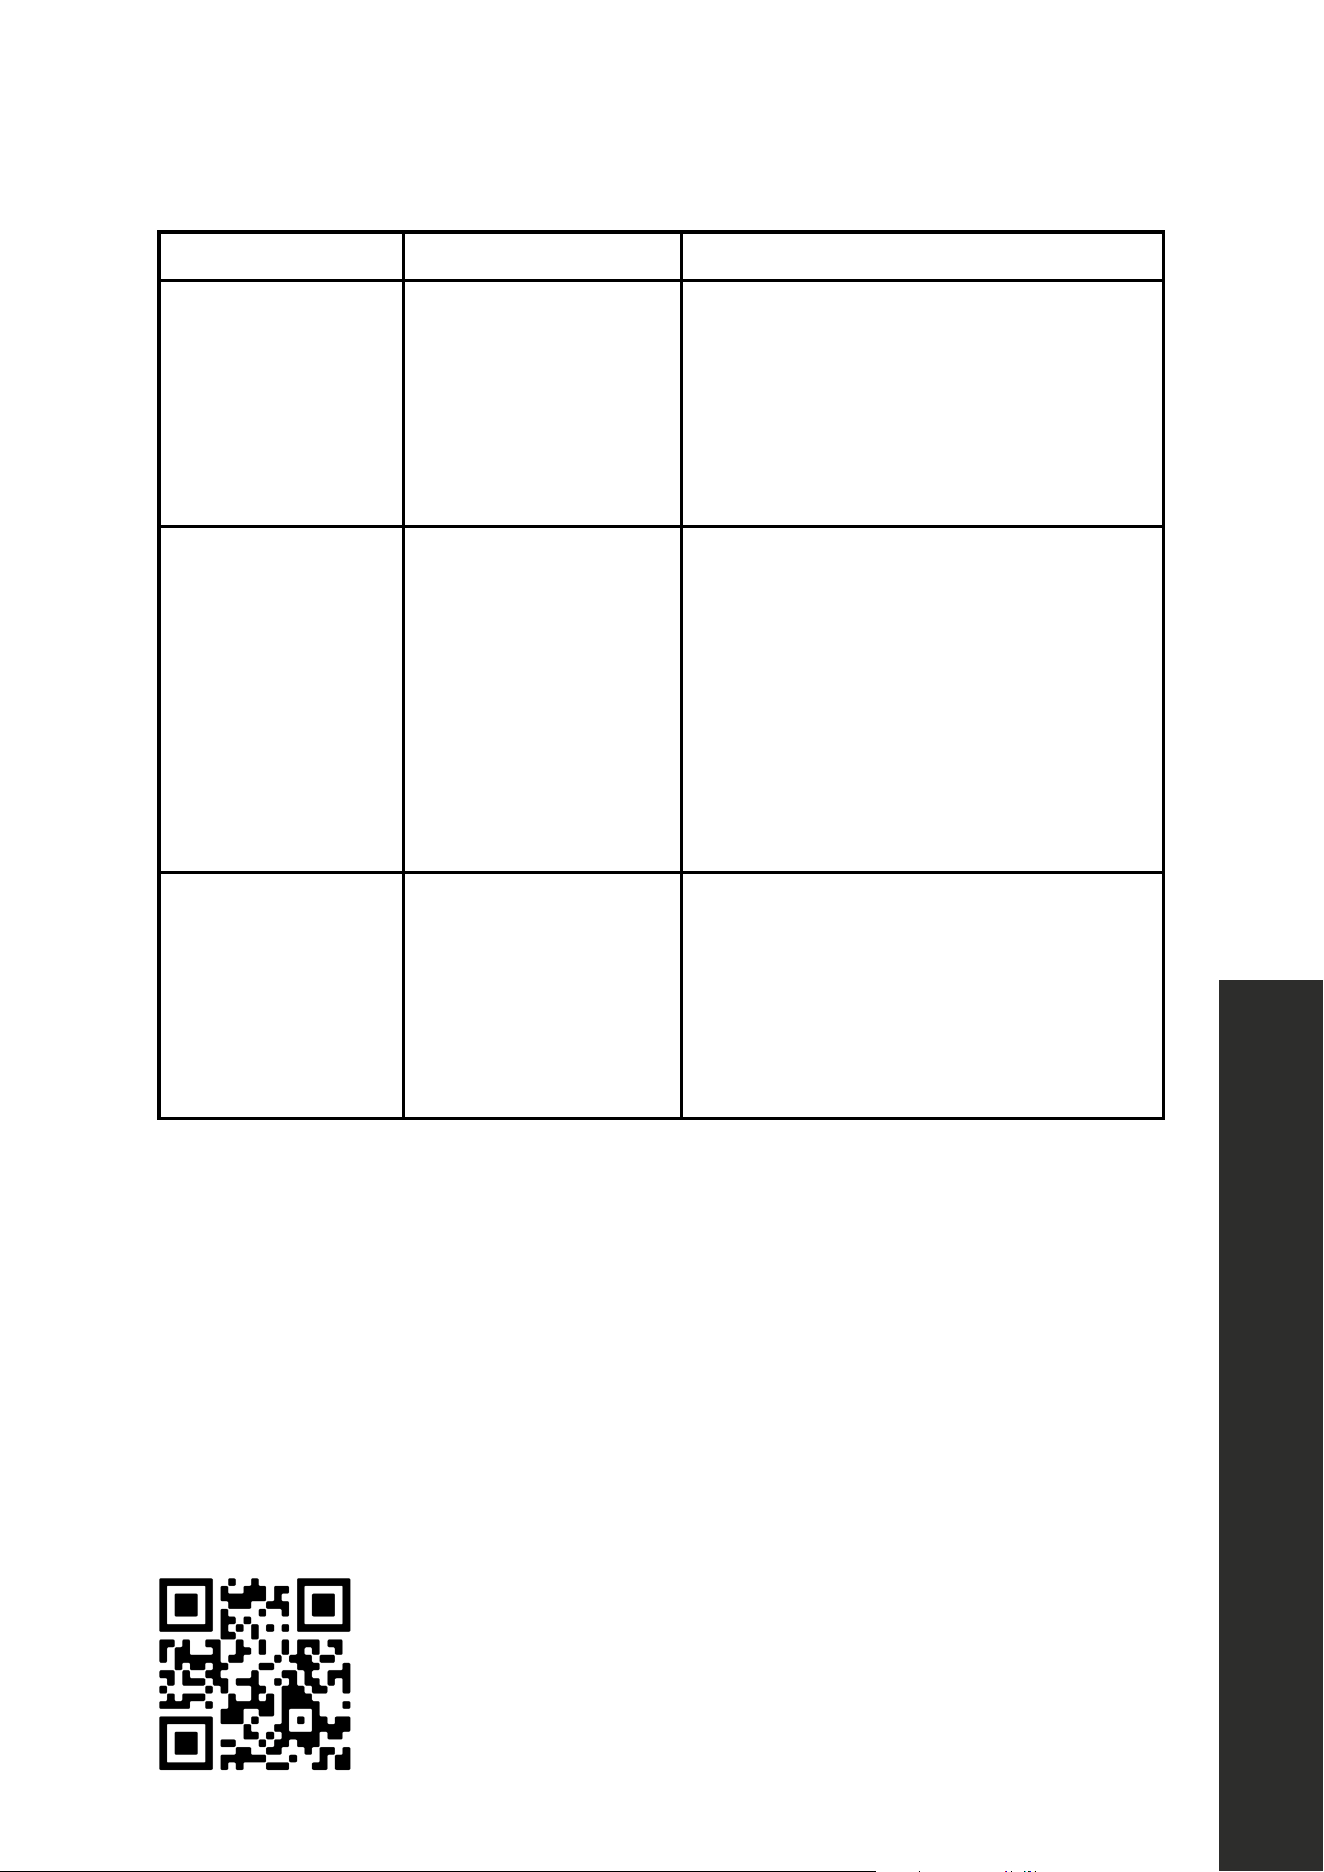
PROBLEM POSSIBLE CAUSE SOLUTION
There is leakage
under the handle.
The locking nut has
come loose.
Unscrew the lever on the handle by
hand. Loosen set screw with a hex
wrench. Remove the handle and
unscrew trim cap by hand. Tighten
locking nut with an adjustable wrench.
Water will not shut
off completely.
Water cartridge may
be defective.
Unscrew the lever on the handle by
hand. Loosen set screw with a hex
wrench. Remove the handle and
unscrew trim cap by hand. Unscrew
the locking nut with an adjustable
wrench. Remove ceramic disc
cartridge. Check for cracks.
There is a leak
between the
spray head and
the hose.
The spray head
may be loose or the
washer is not seated
correctly in the hose
connection.
Tighten the spray head by hand until
snug. Make sure the washer is seated
correctly. If you have troubleshooting
issues, call our Customer Service line
at 1-614-777-5004.
Need to purchase a part or accessory for your ZLINE product?
Visit ZLINEparts.com, ZLINE's official parts distribution partner.

WARRANTY
COVERAGE
ZLINE Kitchen and Bath bath tub fillers have a limited lifetime warranty from the original
purchase date for the original purchaser of the product.
TERMS
This warranty applies only to the original purchaser of a bath tub filler installed for normal
residential use. This is defined as a single-family, residential dwelling in a non-commercial
setting. Commercial settings include but are not limited to: schools, churches, hotels,
restaurants, vacation rentals such as Airbnb, day care centers, private clubs, fire stations,
common areas in multi-family dwellings, nursing homes, food service locations, and
institutional food service locations such as hospitals or correction facilities. This warranty is
non-transferable and will not be extended based on the date of installation. The warranty
applies only to products installed in the contiguous United States and the District of
Columbia.
Warranty shall not apply and ZLINE Kitchen and Bath is not responsible for damage
resulting from negligence, improper maintenance, misuse, abuse, alteration of or tampering
with the appliance, accident, natural disaster, improper installation, or installation not in
accordance with the instructions contained in the manual, or the local codes.
WHAT IS NOT COVERED
1. Installation or start-up damages or problems caused by improper installation or use.
2. Installation in any commercial or non-residential application.
3. Removal or re-installation cost.
4. Aesthetic damage, scratches, or natural wear caused by normal use.
5. Second-hand, open box products, or products purchased from an unauthorized retailer.