USER MANUAL
BUILT IN DOUBLE OVEN
Thank you for choosing electriQ.
Please read this user manual before using this cooker and keep it safe for future reference.
Visit our page www.electriQ.co.uk for our entire range of Intelligent Electricals
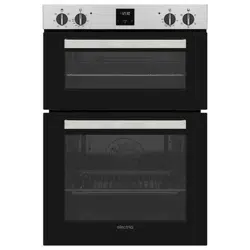
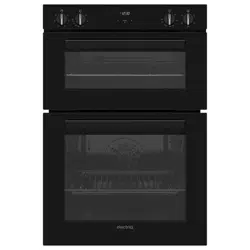
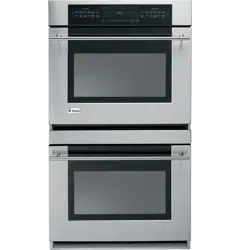
EQDO1BLACK
EQDO1STEEL
EQDO1LG
EQDO1DARKINOX
CONTENTS
2

CONTENTS
3
1
SAFETY INFORMATION
Safety information
4
2
GETTING TO KNOW YOUR BUILT-IN DOUBLE OVEN
Overview
6
Control panel
6
3
INSTALLING YOUR BUILT-IN DOUBLE OVEN
Installation
7
Electrical connection
8
4
USING YOUR BUILT-IN DOUBLE OVEN
Operation
9
Oven functions
10
Using the timer
11
General oven and cooking tips
13
5
CARE AND MAINTENANCE
Cleaning
15
Changing the oven lamp
15
Removing inner glass
16
Removing the oven door
16
6
PRODUCT SUPPORT
Troubleshooting
17
Technical specification
18
Help and assistance
19

SAFETY INFORMATION
Important – Please read these instructions fully before installing or operating.
4
INSTALLATION WARNINGS
IMPORTANT: Prior to Installation, ensure that
the local supply conditions (electricity voltage
and frequency) are compatible with the
requirements of your cooker.
IMPORTANT: Carefully unpack and examine the
appliance for any damage. If you think there is a
defect, do not use the appliance and contact
electriQ Product Support on 0333 305 2261
Packaging materials should be collected
together and disposed of immediately as they
may be harmful to children.
IMPORTANT: Keep the electrical cable (not
supplied) away from the hot areas of your
appliance, do not let the cable touch the
appliance. Keep the cable away from sharp
edges and heated surfaces.
IMPORTANT: Ensure that the electric supply
cable is not trapped or damaged during
installation.
IMPORTANT: If the supply cord is damaged, it
must be replaced by the manufacturer, its
service agent or similarly qualified persons in
order to avoid a hazard.
IMPORTANT: The means for disconnection
must be incorporated in the fixed wiring in
accordance with local regulations and wiring
rules.
IMPORTANT: Protect your cooker against
atmospheric effects. Do not expose your cooker
to effects such as sun, rain, snow etc.
IMPORTANT: The materials surrounding the
appliance (cabinets) must be able to withstand
a minimum temperature of 100°C.
IMPORTANT: When using the oven for the first
time it may give off an unusual odour. This is
normal and is from the heating elements and
insulation materials. To eliminate this odour run
the oven at 250 degrees for 40-60 minutes while
empty.
DURING USAGE
IMPORTANT: This appliance is not intended for
use by persons (including children) with reduced
physical, sensory or mental capabilities or lack
of experience and knowledge unless they have
been given supervision or instruction
concerning the use of the appliance by a person
responsible for their safety. Children should be
supervised to ensure that they do not play with
the appliance.
WARNING: The appliance and its accessible
parts become hot during use. Care should be
taken to avoid touching heating elements.
Children less than 8 years of age shall be kept
away unless continuously supervised.
WARNING: The appliance and its accessible
parts will become hot during use. Care should
be taken to avoid touching heating elements
inside the oven.
WARNING: NEVER try to extinguish a cooking
fire with water. Instead, switch off the appliance
and cover the flame, e.g. with a lid or a fire
blanket.
CAUTION: Do not allow children in the kitchen
after or during cooking, as the parts may still be
hot. Many parts of the cooker will become hot
and present a considerable hazard to children.
CAUTION: When the cooker is hot, never touch
the oven door by hand or with tools.
CAUTION: Before starting to use your appliance,
ensure curtains, paper or flammable items are
kept away from your appliance. Do not keep
flammable materials inside of or around your
cooker.
CAUTION: Take care when closing the oven door
that there is nothing obstructing it from closing
as this may break the glass door.
IMPORTANT: The oven door must be kept
closed while using the grill.

SAFETY INFORMATION
Important – Please read these instructions fully before installing or operating.
5
IMPORTANT: Make sure all the control dials are
in the off position when not in use.
IMPORTANT: If you do not intend to use your
cooker for a long period of time, the power
supply should be turned off.
IMPORTANT: The oven must not be placed
behind a decorative door to avoid overheating.
GENERAL SAFETY WARNINGS
IMPORTANT: This appliance has been designed
for non-professional, domestic use only. Do not
use this oven for commercial use or any other
application, e.g. room heating.
WARNING: Danger of fire: do not store
flammable items on or near the cooking
surfaces or within the oven cavity.
IMPORTANT: Do not try to lift or move the
appliance using the door handle.
WARNING: Ensure that the appliance is
switched off before replacing the lamp to avoid
the possibility of electric shock.
IMPORTANT: Your appliance is produced in
accordance with all applicable local and
international standards and regulations.
IMPORTANT: Maintenance and repair work
must only be performed by an authorised
service technician. Installation and repair work
that is carried out by unauthorised technicians
is dangerous and could invalidate your
guarantee.
IMPORTANT: When the oven door is open, do
not hang or lean anything on it. You may
unbalance your appliance or damage the door
or hinges.
IMPORTANT: Do not hang towels, dishcloths or
clothes from the oven or its handles.
IMPORTANT: Do not use harsh abrasive
cleaners or sharp metal scrapers to clean the
oven door glass since they can scratch the
surface, which may result in the shattering of
the glass.
CLEANING AND MAINTENANCE
IMPORTANT: Always turn off the appliance
before operations such as cleaning or
maintenance. You can do this using the isolation
switch.
IMPORTANT: Do not remove the dials from the
control panel during cleaning.
WARNING: Do not use harsh abrasive cleaners
or sharp metal scrapers to clean the glass as
they can scratch the surface, which may result
in shattering.
IMPORTANT: Steam cleaners must not be used
on or in the appliance.
TO MAINTAIN THE EFFICIENCY AND SAFETY OF
YOUR APPLIANCE, WE RECOMMEND YOU
ALWAYS USE OUR AUTHORISED SERVICE
AGENTS AND ORIGINAL SPARE PARTS. FOR
ASSISTANCE CALL electriQ PRODUCT SUPPORT
0333 305 2261.
IMPORTANT: Due to continuous product
development, all diagrams are for illustrative
purposes and may not match the final product.
GETTING TO KNOW YOUR BUILT-IN DOUBLE OVEN
6
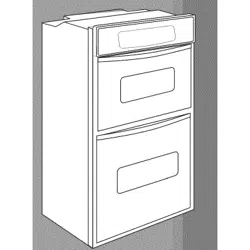
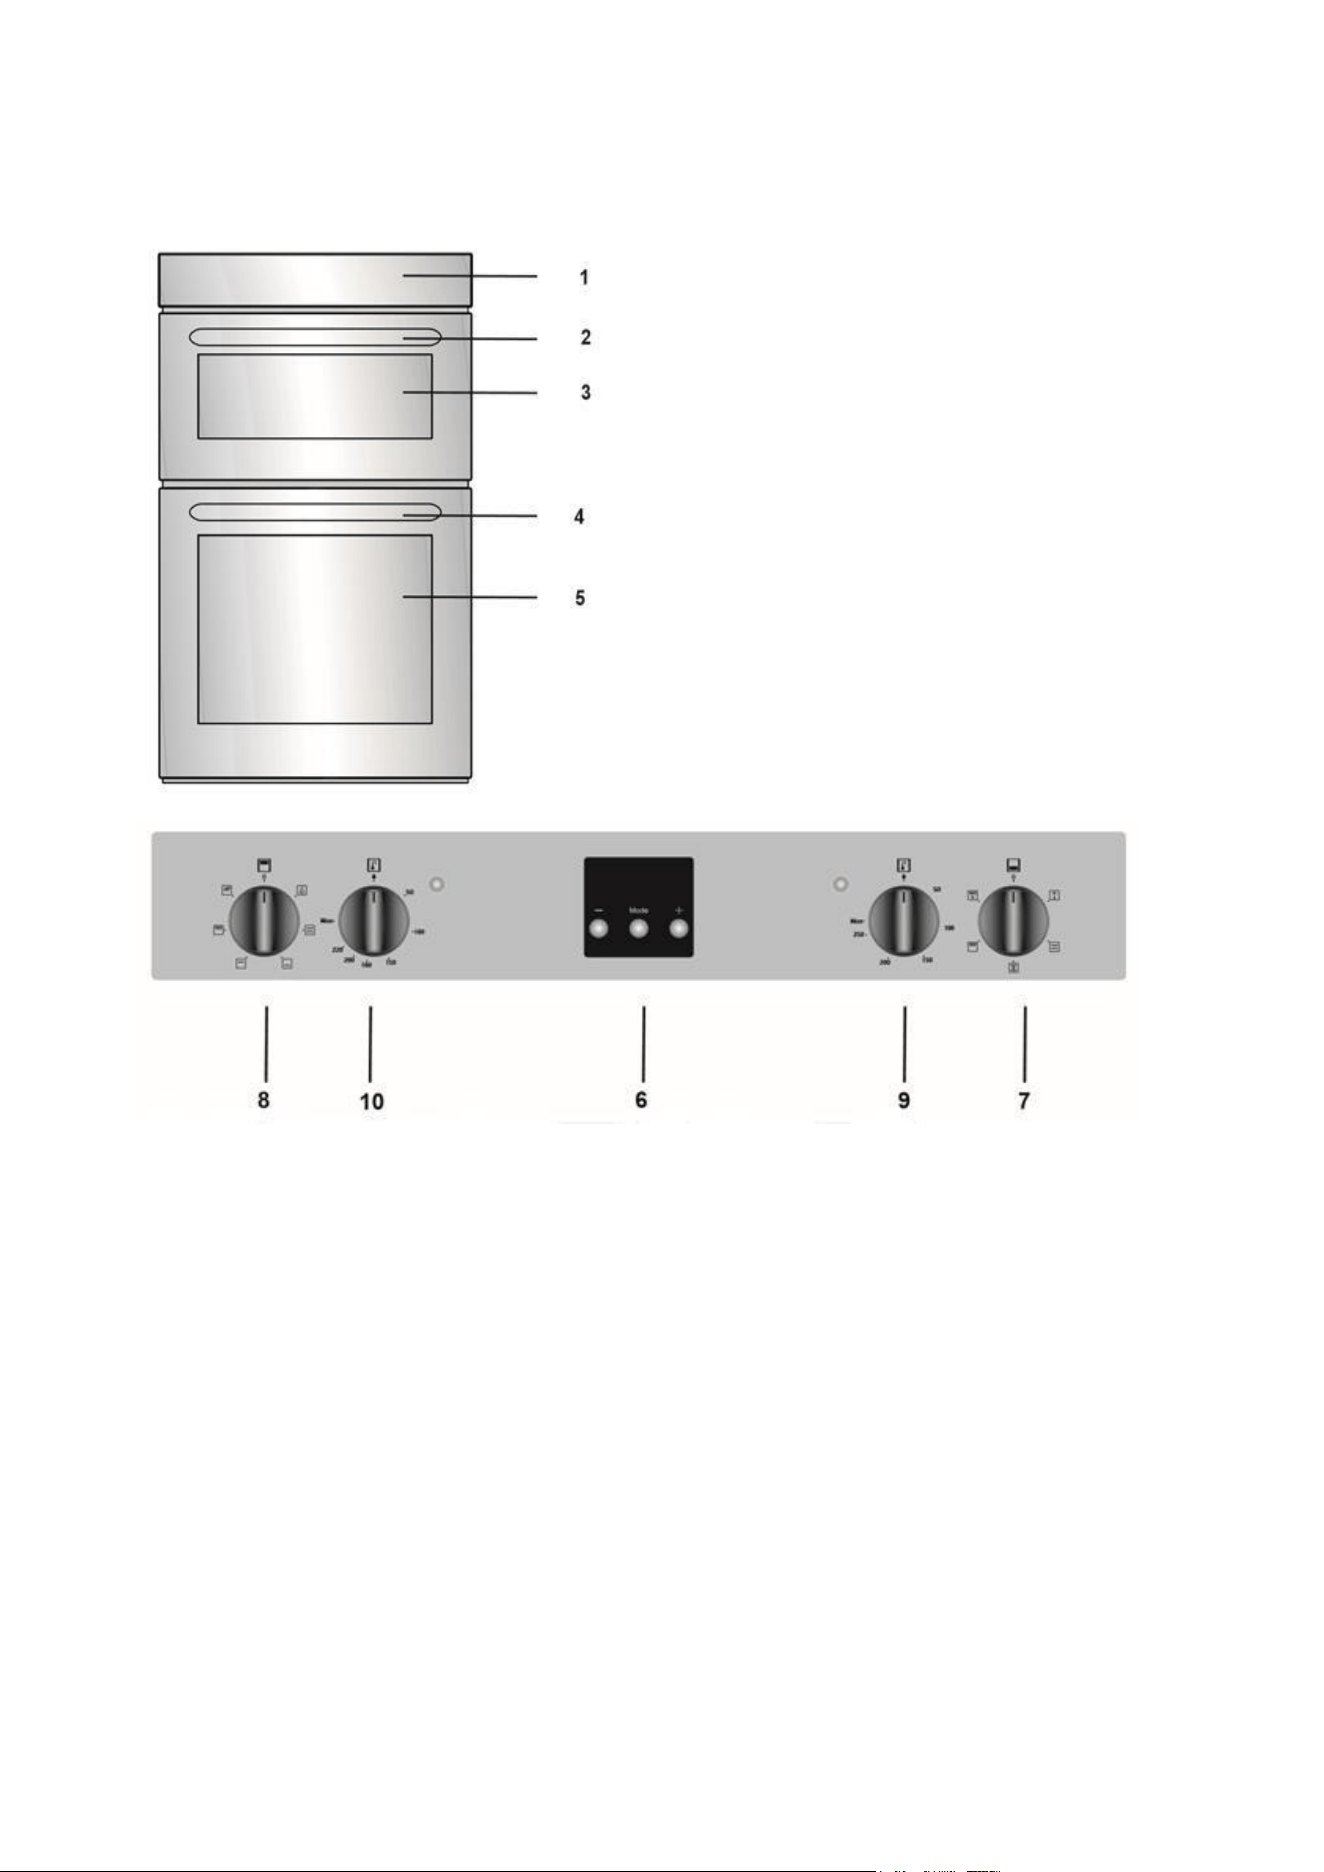
PRODUCT OVERVIEW
6. Timer
7. Main oven control dial
8. Top oven control dial
9. Main oven temperature dial
10. Top oven temperature dial
1.
Control panel.
2.
Top oven door handle
3.
Top oven door
4.
Main oven door handle
5.
Main oven door
USING YOUR BUILT-IN DOUBLE OVEN
7
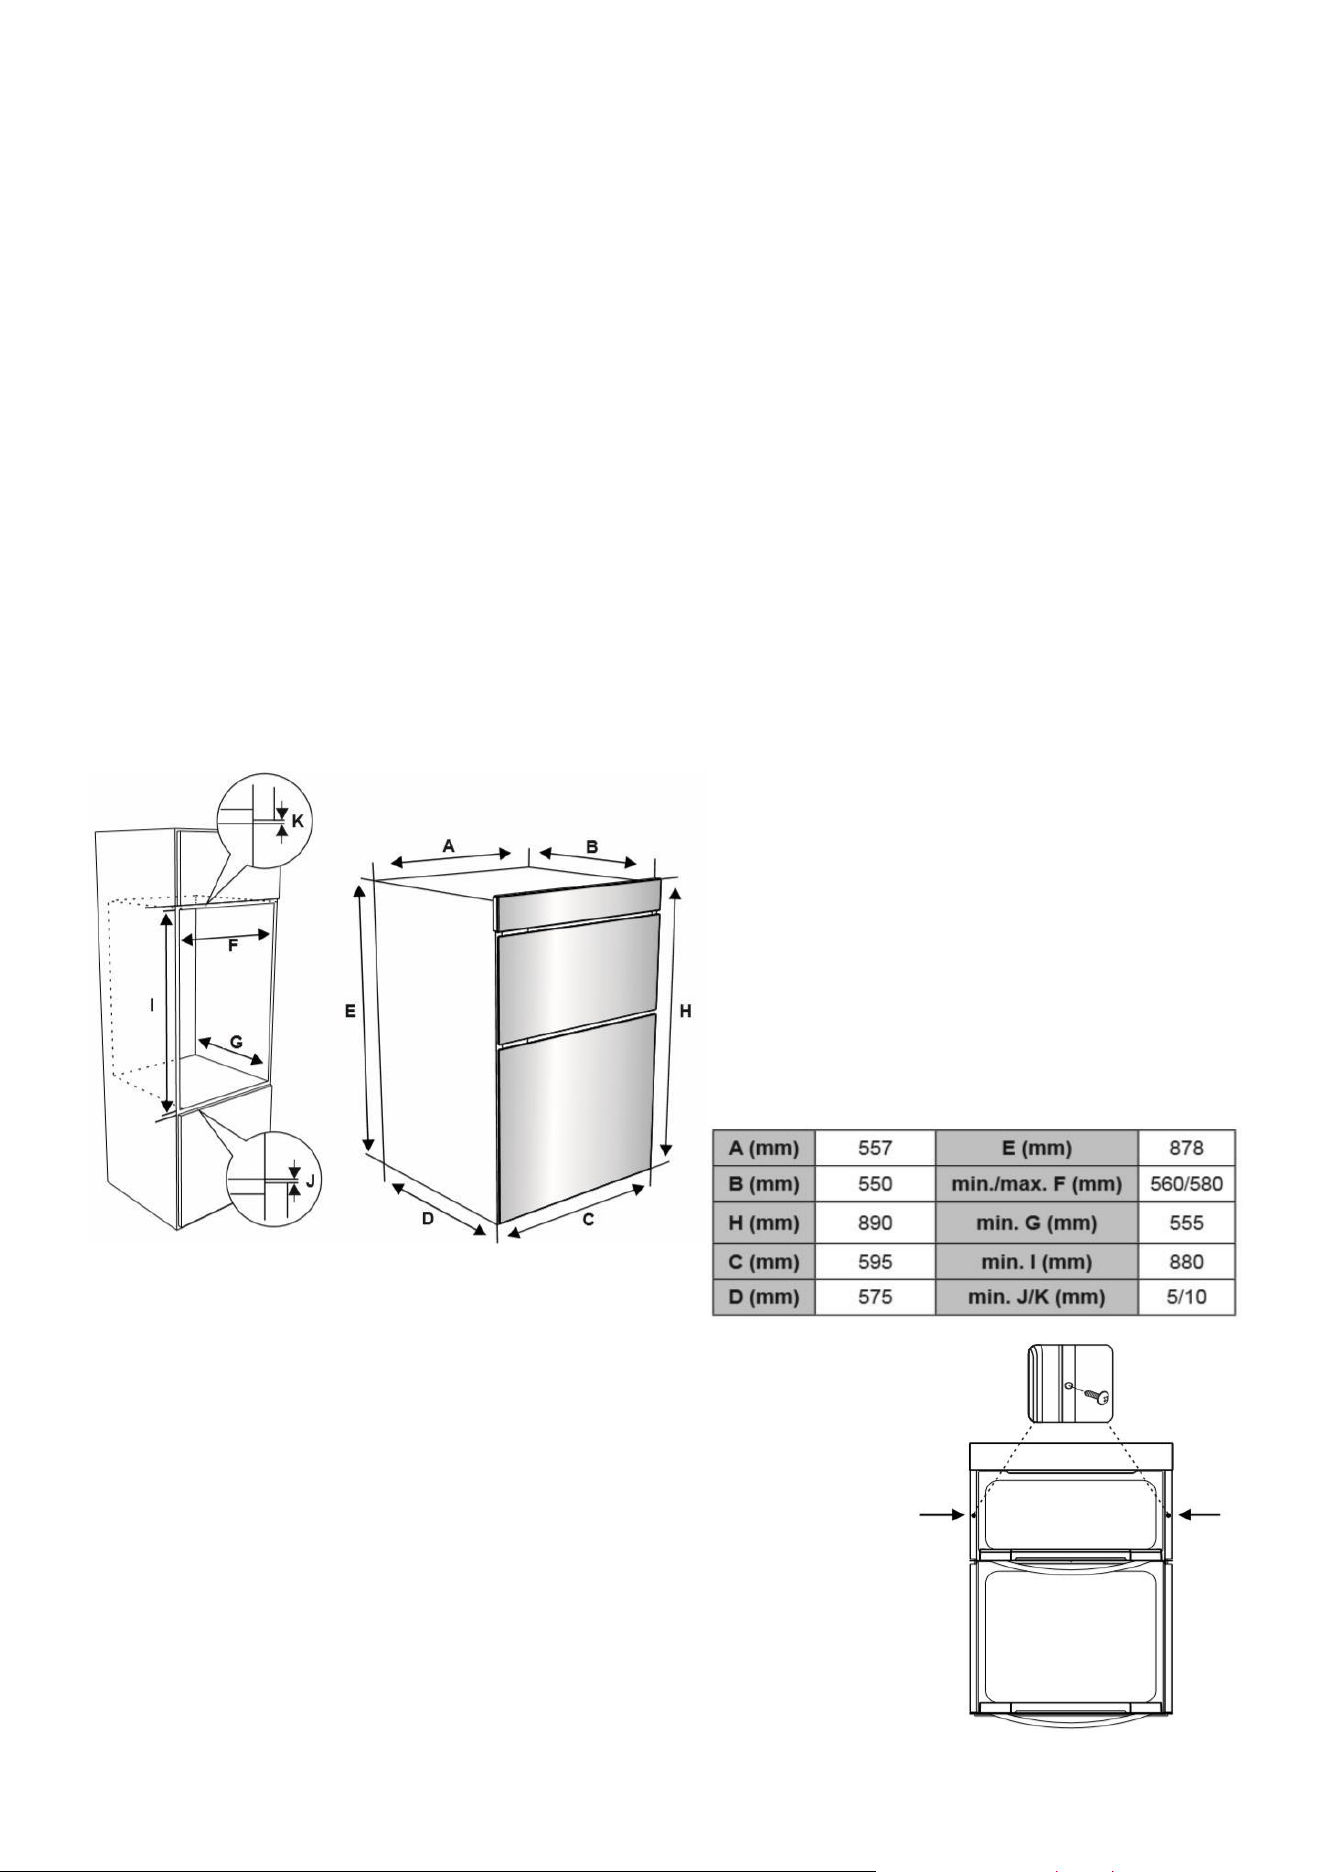
INSTALLATION
NOTE: The oven is built in. The appliance should only be installed by a qualified professional.
• Check the dimensions of the appliance and make sure the corresponding recess is
compatible.
• Never lift the appliance using the door handle, as this will cause the glass to break.
• Place the product in front of the opening and ensure the cable has room to be installed.
• Connect the cable to the mains.
• Put the product into the installation opening. Insert the screws with spaces into the holes in
the front frame and screw the oven into the cabinet. Then connect the caps on the screw
heads.
IMPORTANT: The kitchen unit where the oven is to be situated must be made of heat-resistant
material. Ensure that any panels close to the oven can withstand temperatures of at least 120
o
C. If
plastics or glues that form the cabinet cannot withstand such temperatures, they will melt and
deform the unit.
Ensure that there are no combustible or
flammable materials, such as curtains, in the
vicinity of the installation.
There must be at least 2cm of free space
between the back wall and the appliance's
rear to allow for ventilation and air
circulation.
After making the electrical connections (See next page), insert the
oven into the cabinet by pushing it forward. Open the oven door and
insert two screws in the holes located on the oven frame. While the
product frame touches the wooden surface of the cabinet, tighten
the screws.

USING YOUR BUILT-IN DOUBLE OVEN
8
ELECTRICAL CONNECTION
IMPORTANT! Electrical connection must be made by a suitable qualified person and in accordance with all
relevant local building and installation regulations.
CONNECTING THE POWER SUPPLY TERMINAL BOARD/ CONNECTOR BLOCK
• Using a screwdriver, release the tabs of the terminal board cover.
• Remove the wire clamp screw.
• Loosen the screws on the terminal block. DO NOT fully unfasten.
• Insert the wires beneath the corresponding screw heads and tighten them in position. The colour code is:
Blue = Neutral (N)
Brown = Live (L)
Yellow Green = Earth
• Fasten the cable clamp and close the cover of the terminal board.
• The power supply should be 220-240 V, 50/60 Hz, and a minimum of 2.5mm² cross sections area wire
should be used for the Live, Neutral and Earth connections.
CONNECTING THE SUPPLY CABLE TO THE MAIN CONSUMER UNIT (FUSE BOX)
An approved circuit breaker should supply the appliance with a minimum contact opening of 3 mm. The
circuit breaker should be sized according to the load, e.g., 16A, and should comply with current regulations.
The appliance requires an earth connection, and the earth wire should not be interrupted by the circuit
breaker.
The supply cable should be positioned so that it does not reach a temperature in excess of 50°c anywhere
along its length. Before connecting the power, ensure:
• Earth continuity. The electrical safety of this appliance can only be guaranteed if the cooker is correctly
installed and earthed in compliance with regulations on electrical installations.
• The electrical capacity of the system is suitable for the power of the appliance, as indicated on the data plate.
IMPORTANT! The oven must be installed to a switch that can cut all power to the appliance.
HOW TO
1. Create your desired cabinet following the dimensions and instructions provided. The cabinet must
be securely fixed to support the oven.
2. Cut out any space you need for adequate ventilation.
3. Brush away any shavings or dust to ensure this doesn’t affect the appliance.
4. You can connect the oven to the electricity supply now or after you have housed the unit depending
on your desired connection method and placement.
5. Place the oven into the cabinet and secure.
Check now if your plug or switch can be accessed once the oven is in place and the
cable will be free from any obstructions.
USING YOUR BUILT-IN DOUBLE OVEN
9
OPERATION
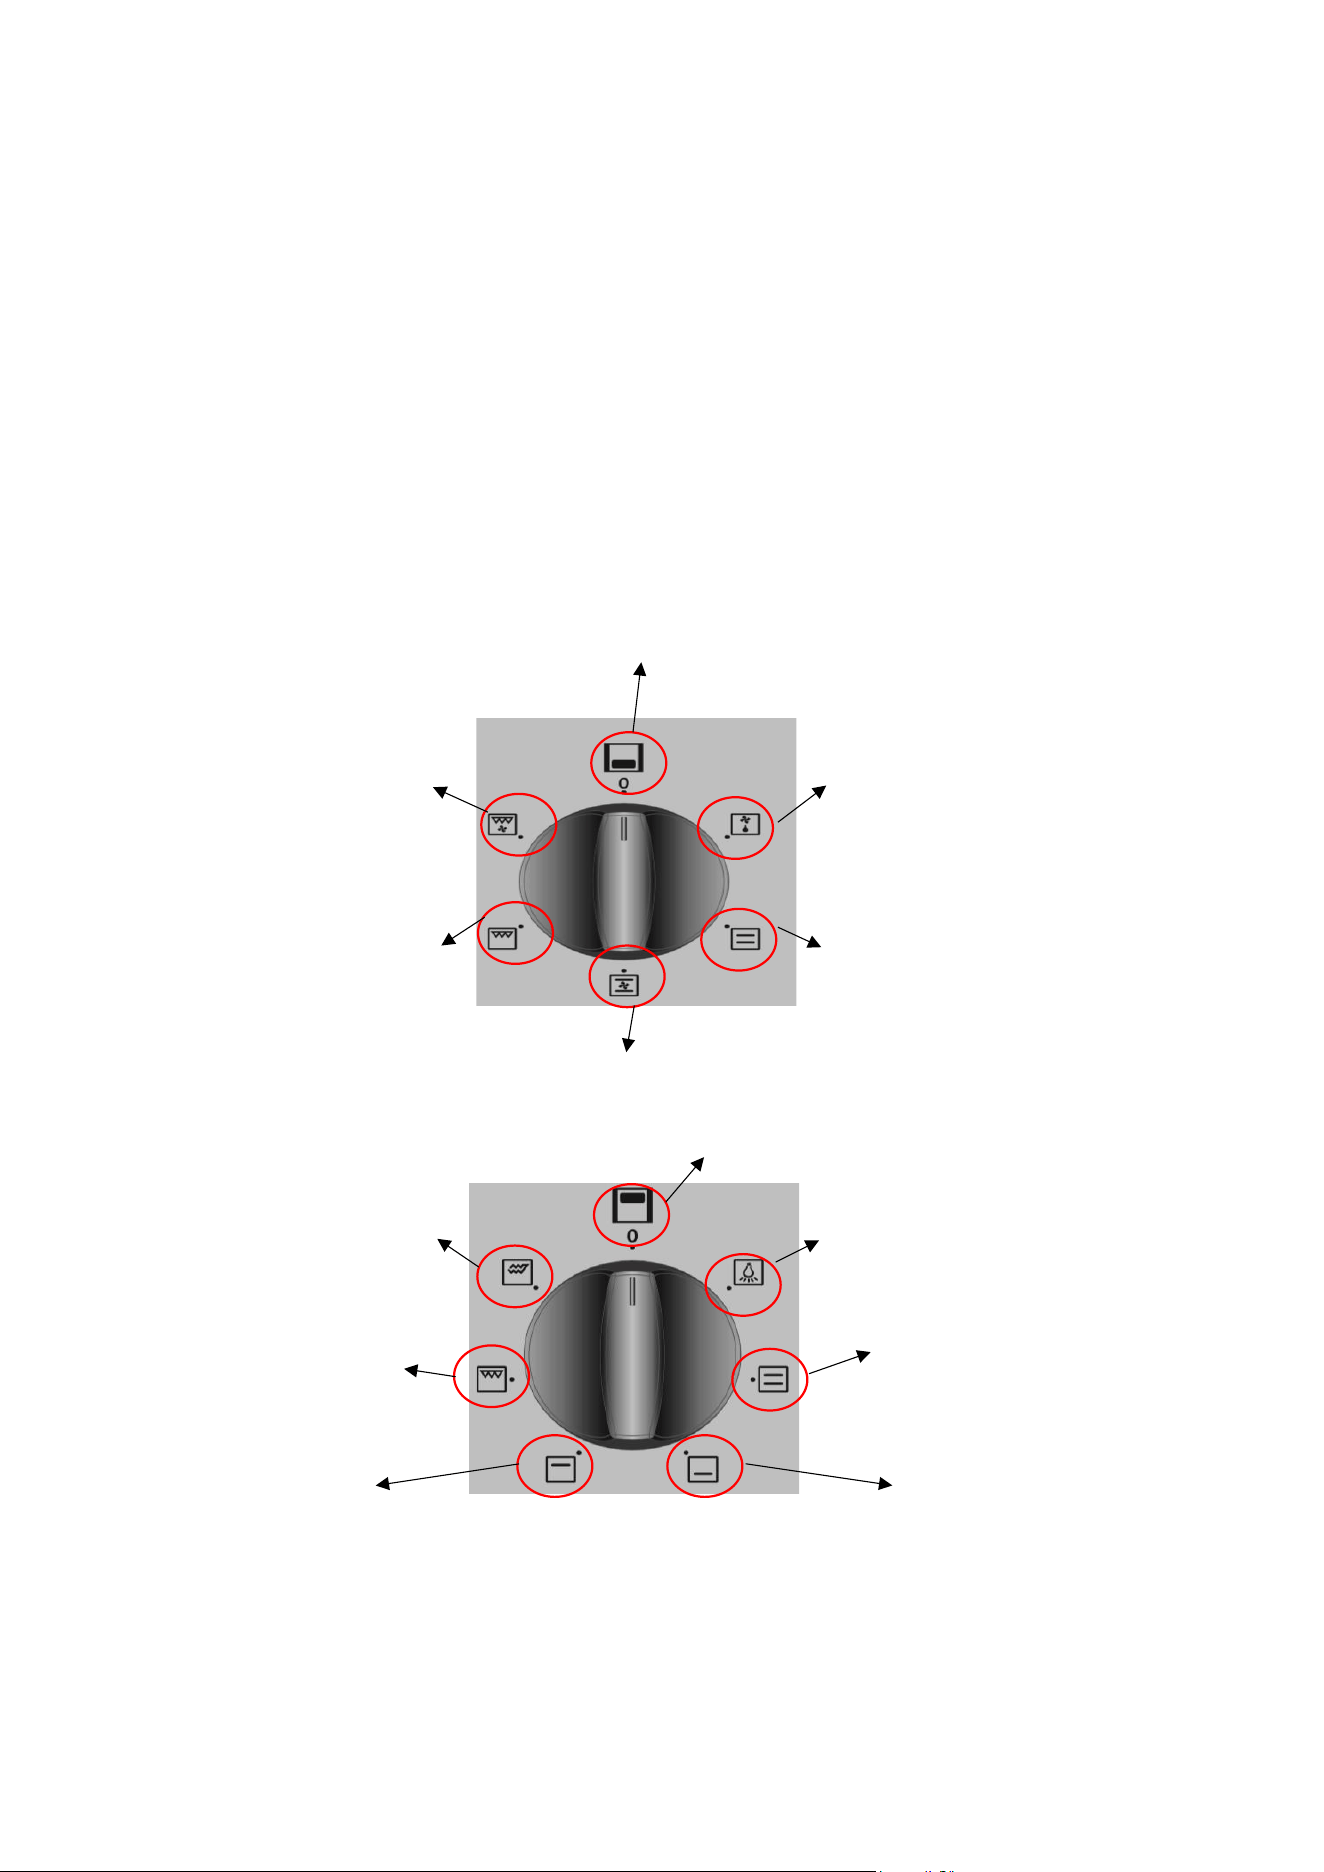
Oven temperature control dial
Turn the dial in either direction to the corresponding symbol of the desired cooking function. For
the details of different functions see ´Oven Functions`.
Oven temperature dial
After selecting a cooking function, turn this dial clockwise to set the desired temperature. The oven
thermostat light will illuminate whenever the cavity is heating, it will go out when the desired
temperature is reached.
Main Oven Functions
The functions available on your oven may differ from those listed below, depending on the model
purchased.
BOTTOM OVEN
TOP OVEN
FAN
FAN AND GRILL
GRILL
OFF
DEFROST
STATIC COOKING
OFF
OVEN LAMP
STATIC COOKING
LOWER COOKING
UPPER COOKING
GRILL
DOUBLE GRILL

USING YOUR BUILT-IN DOUBLE OVEN
10
DEFROST FUNCTION:
Switch on the DEFROST function using the main oven function control dial. The oven’s warning lights
will switch on, and the fan will start operating. To use the defrost function, place your frozen food
on a shelf in the middle of the oven. It is recommended that you put an oven tray under the
defrosting food to catch accumulated water due to melting ice. This function will not cook or bake
your food, it will only help to defrost it.
STATIC COOKING FUNCTION:
Switch on the STATIC function using the main oven function control dial. The oven’s thermostat and
warning lights will switch on, and the lower and upper heating elements will start operating. The
temperature can be adjusted using the main oven temperature control dial. The static cooking
function emits heat, ensuring even cooking of food. This is ideal for making pastries, cakes, baked
pasta, lasagne, and pizza. Preheating the oven for 10 minutes is recommended, and it is best to cook
on only one shelf at a time in this function.
FAN FUNCTION:
Switch on the FAN function using the main oven control dial. The oven’s thermostat and warning
lights will switch on, and the upper and lower heating elements and fan will start operating. The
temperature can be adjusted using the main oven temperature dial. Cooking is carried out by the
lower and upper heating elements within the oven while the fan provides air circulation, dispersing
the heat and giving the food a slightly grilled effect. It is recommended you preheat the oven for 10
minutes.
GRILLING FUNCTION:
Switch on the GRILLING function using the main oven control dial. The oven’s thermostat and
warning lights will switch on, and the grill heating element will start operating. The temperature can
be adjusted using the main oven temperature dial. This function is used for grilling and toasting
food. Use the upper shelves of the oven. Lightly brush the wire grid with oil to stop food from
sticking, and place food in the centre of the grid. Always place a tray beneath the food to catch any
drips of oil or fat.
GRILL AND FAN FUNCTION:
Switch on the GRILL AND FAN function using the main oven control dial. The oven’s thermostat and
warning lights will switch on, and the grill heating element and fan will start operating. The
temperature can be adjusted using the main oven temperature dial. This function is ideal for thicker
foods. When grilling, use the upper shelves of the oven. Lightly brush the wire grid with oil to stop
food from sticking, and place food in the centre of the grid.
OVEN LAMP: Only the oven light will switch on. It will remain on for the duration of the cooking
function.
STATIC COOKING FUNCTION: The oven’s thermostat and warning lights will switch on, and the
lower and upper heating elements will start operating. The static cooking function emits heat,
ensuring even cooking of food. This is ideal for making pastries, cakes, baked pasta, lasagne, and
pizza. Preheating the oven for 10 minutes is recommended, and it is best to use only one shelf at a
time for this function.
USING YOUR BUILT-IN DOUBLE OVEN
11
LOWER HEATING FUNCTION: The oven’s thermostat and warning lights will switch on, and the
lower heating element will start operating. The lower heating function is ideal for heating pizza as
the heat rises from the bottom of the oven and warms the food up. This function is appropriate for
heating food instead of cooking.
UPPER HEATING FUNCTION: The oven’s thermostat and warning lights will switch on, and the
upper heating element will start operating. The heat emanating from the upper heating element
will cook the upper side of the food. The upper heating function is ideal for frying the upper side of
already-cooked food and heating food.
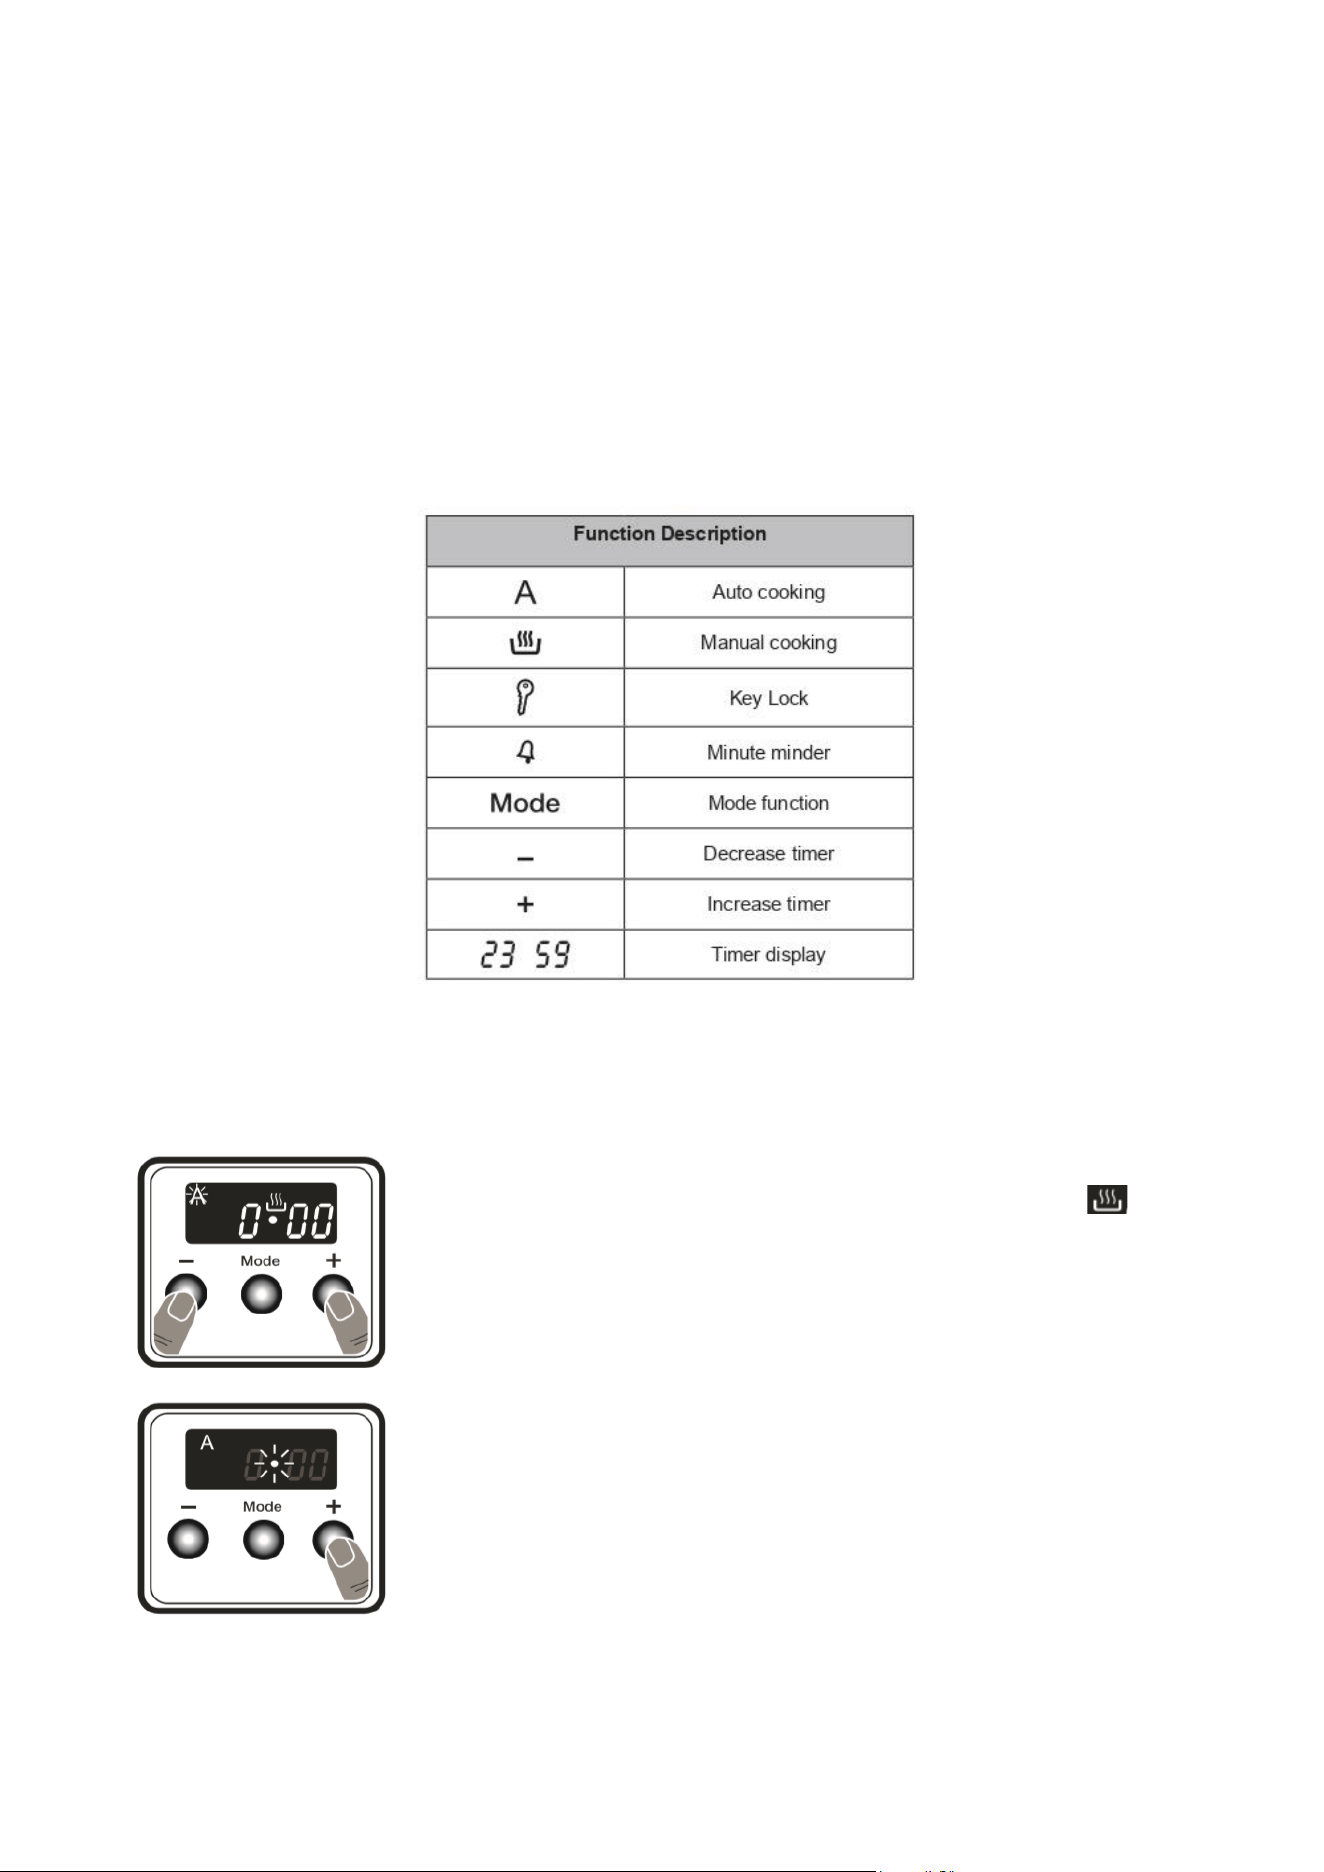
TIMER SETTINGS
SETTING THE TIMER
1. Press the + and – symbol at the same time. The
symbol will appear and the dot in the middle of the
screen will flash.
2. Adjust the time while the dot is flashing using the +
and – buttons.
USING YOUR BUILT-IN DOUBLE OVEN
12
SOUND ADJUSTMENT
The audible warning time setting can be set to anytime between 00:00 and 23:59 hours. This setting
does not affect the operation of the oven, the only function of this setting is an audible warning
noise.
To adjust the volume of the audible warning sound while the current time of day is displayed, press
and hold the “-” button for 1-2 seconds until an audible signal sounds. After this, each time the “-”
button is pressed, a different signal will sound. There are three different types of signal sounds.
Select the desired sound, and do not press any other buttons. After a short time, the selected sound
will be saved.
AUDIBLE TIMER FUNCTION
Press MODE and a bell symbol will flash on the screen, and 000 will
be displayed. Select how many hours you desire the cooker to be
working for using the + and – buttons. The bell symbol will remain
illuminated, and the timer will begin counting down.
When the timer reaches zero, a warning beep will sound, indicating
that the timer has reached its end.
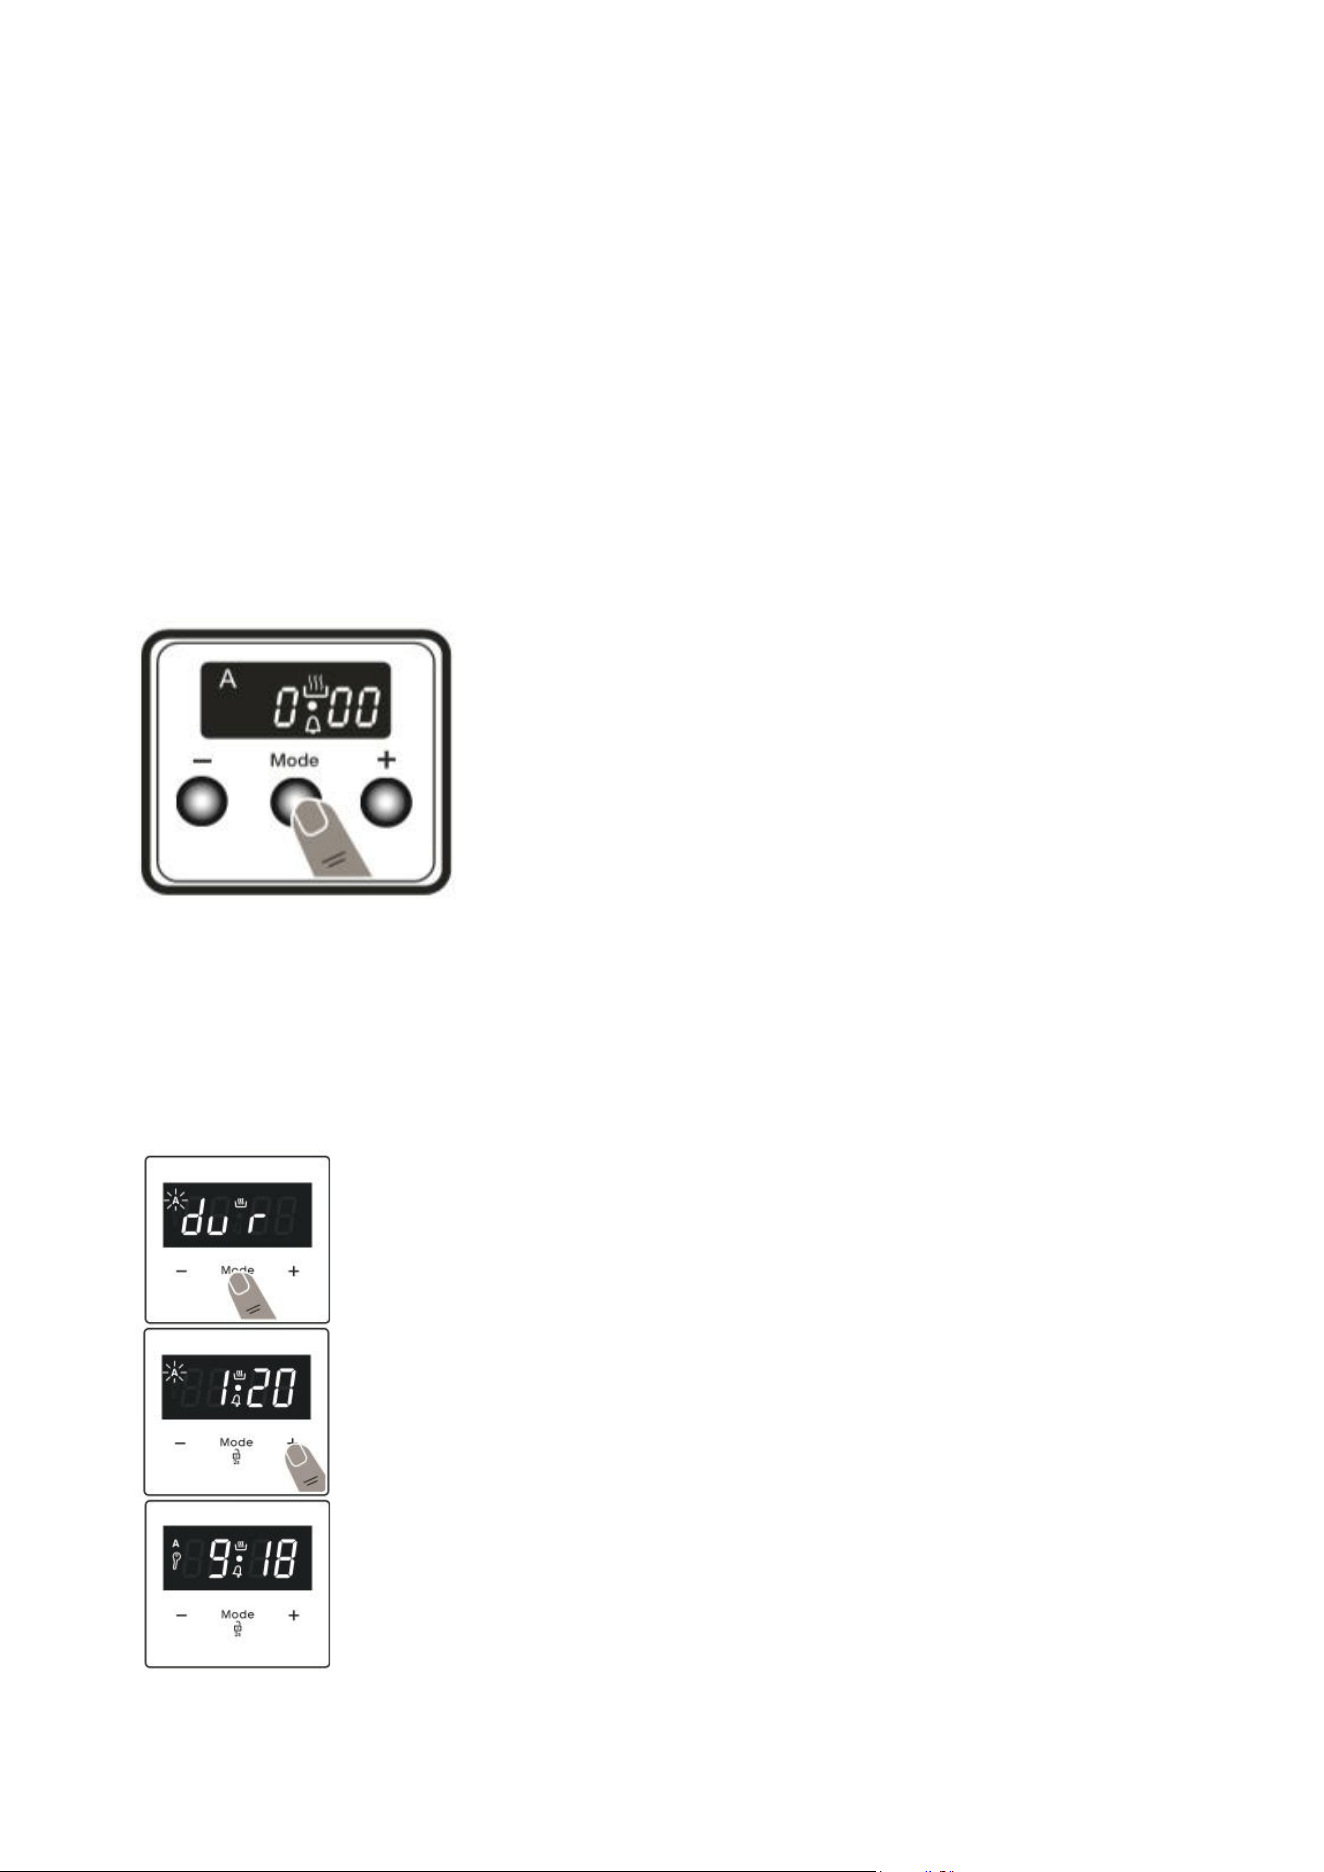
SEMI-AUTOMATIC TIME ADJUSTMENT (COOKING PERIOD)
This function helps you to cook for a fixed period of time. A time range between 0 and 10 hours can
be set. Prepare the food for cooking and put it in the oven. 1. Select the desired cooking function
and the temperature using the control dials.
Press “MODE” until you see “dur” and symbol on the display screen. The symbol
“A” will flash.
Select the desired cooking time period using the “+” and “-” buttons.
The current time will reappear on the screen, and the symbols “A”, and will >
remain illuminated.
When the timer reaches zero, the oven will switch off and an audible warning
will sound. The symbols “A” and > will flash.
Turn both control dials to the “0” position and press any button on the timer to
stop the warning sound. The symbols will disappear.

USING YOUR BUILT-IN DOUBLE OVEN
13
FIRST USE OF THE OVEN
The first time you use your appliance, we recommend that you set the oven to maximum temperature. Set
the function dial to cooking mode and leave the empty oven running for about 40-60 minutes with the oven
door shut. Then, open the oven door and allow the oven to cool. Any odour that may be detected during this
initial use is due to the evaporation of substances used to protect the oven during storage.
GENERAL OVEN AND COOKING TIPS
The wire shelves should always be pushed firmly to the back of the oven.
While cooking, baking trays should be placed level with the front edge of the oven’s wire shelves. Other
containers should be placed centrally. Keep all trays and containers away from the back of the oven, as over-
browning of the food may occur.
For even browning, the maximum recommended size of a baking tray is 340 mm (13½”) by 340 mm (13½”).
When the oven is on, do not leave the door open for longer than necessary. Otherwise, the controls may get
very hot.
• Always leave a 1cm gap between trays on the same shelf. This allows the heat to circulate freely around
them.
• To reduce fat splashing when you add vegetables to hot fat around a roast, dry them thoroughly or brush
lightly with cooking oil.
• Where dishes may boil and spill over during cooking, place them on a baking tray.
TIPS FOR ENERGY EFFICIENT COOKING
There are many actions that can be taken to reduce the energy usage of your cooker. Some examples are
given below:
• Cook as much as possible in the oven in one go to ensure all the space and heat is used.
• Keep the oven door closed while you are cooking. Each time you open the door the oven will use heat,
and the heating element will have to work for longer to replace the heat lost.
• Ensure the oven door is kept clean. That way you can check on the cooking progress without having to
open the door.
• Defrost frozen food in the fridge overnight before cooking. Defrosting will reduce the cooking time
required, and so reduce the energy used.
• Minimise the time taken to pre-heat. Your oven will only take around 5 minutes to pre heat, and once
up to temperature it is ready to cook.
• Use glass or ceramic dishes in the oven. They retain heat better than their metal counterparts, making
them the most efficient to use in the oven. You can even set the heat lower than needed (if you’re
confident enough to do so) because of the increased efficiency provided by these dishes.
• If you’re cooking large food like a joint of meat, it can be worth cutting it into smaller pieces so it will
cook more quickly. Additionally, if you use this method on meat, you should also be able to avoid
overcooking it.
• As the electric oven efficiently retains heat, you can consider turning it off around 5 minutes before you
have finished cooking to save energy.

USING YOUR BUILT-IN DOUBLE OVEN
14
COOKING ADVICE
The oven offers a wide range of options which allow you to cook any type of food in the best possible way.
With time, you will learn to make the best use of this versatile cooking appliance, and the following directions
are only guidelines which may be varied according to your own personal experience.
PREHEATING
You should always preheat your oven before placing food in it to cook. We advise the conventional cooking
function to be used for pre-heating. Once the food has been placed in the oven, the most appropriate cooking
mode can then be selected.
USING THE GRILL
Select the grill mode and place food under the centre of the grill due to the central part of the top heating
element being active.
Please use the grill pan set provided, ensuring that there are no unwanted spillages formed inside your oven.
When using this mode, we advise you to set the thermostat to 200℃, as it is the most efficient way to use
the grill. However, this does not mean you cannot use other temperatures, simply by adjusting the
thermostat to the desired temperature.
BAKING CAKES
When baking cakes, always place them in a preheated oven. Make sure you wait until the oven has been
preheated thoroughly. Do not open the oven door during baking to prevent cakes from dropping or sinking.
THE PASTRY IS TOO DRY
Increase the temperature by 10℃ and reduce the cooking time.
PASTRY DROPPED
Use less liquid or lower the temperature by 10℃. Do not open the oven door during cooking.
THE PASTRY IS TOO DARK ON TOP
Place it on a lower rack, lower the temperature, and increase the cooking time.
WELL-COOKED ON THE INSIDE BUT UNDERCOOKED ON THE OUTSIDE
Use less liquid, lower the temperature, and increase the cooking time.
THE PASTRY STICKS TO THE PAN
Grease the pan well and sprinkle it with a dusting of flour or use greaseproof paper. Use a lower temperature
setting. It is not necessary to remove all the food at the same time.
COOKING FISH AND MEAT
When cooking white meat, fowl, and fish, use a temperature between 180℃ and 200℃.
For red meat that should be well done on the outside while tender and juicy on the inside, it is a good idea
to start at a high temperature (200℃-220℃) for a short time, then turn the oven down.
In general, the larger the roast, the lower the temperature. Place the meat on the centre of the rack and
place a tray beneath it to catch the fat.
Make sure that the wire rack is inserted so that it is in the centre of the oven. If you would like to increase
the amount of heat from below, use the low rack heights. For savoury roasts (especially duck and wild game),
dress the meat with lard or bacon on the top.
CLEANING AND MAINTENANCE
15
BEFORE ATTEMPTING TO CLEAN YOUR COOKER
WARNING: Isolate the power supply and make sure that the oven is cool before attempting any cleaning or
maintenance.
Do not clean using caustic creams, abrasive cleaning powders, thick wire wool or hard tools. Enamelled parts
of the oven can be damaged if excess cleaning liquids are not immediately removed.
After cleaning the interior parts of the oven with a soapy cloth, rinse it and then dry thoroughly with a soft
cloth. Clean the glass surfaces with special glass cleaning agents. Never use flammable agents like acid,
thinner or petrol when cleaning your oven. Do not clean your oven with a steam cleaner. Do not wash any
part of your oven in a dishwasher.
ENAMELLED PARTS
In order to keep them as new, it is necessary to clean them frequently with mild, warm, soapy water and
then dry them with a cloth.
Do not wash them while hot, and never use abrasive powders or abrasive cleaning materials. Do not leave
anything spilt onto enamelled parts for long periods of time.
STAINLESS STEEL PARTS
These must be cleaned frequently with mildly warm soapy water and a soft sponge and then dried with a
soft cloth. Do not use abrasive powders or abrasive cleaning materials. Do not leave anything spilt onto
stainless steel parts for long periods of time.
CHANGING THE OVEN LAMP
WARNING: The maintenance of this appliance should be carried out by an authorised service person or
qualified technician only.
WARNING: Switch off the appliance and allow it to cool before cleaning your appliance.
NOTE: The lamp is designed specifically for use in household cooking appliances. It is not suitable for
household room illumination.
• Remove the glass lens, then remove the bulb.
• Insert the new bulb (resistant to 300 °C) to replace the bulb that you removed (230 V, 15-25-Watt,
Type E14).
• Replace the glass lens, and your oven is ready for use.
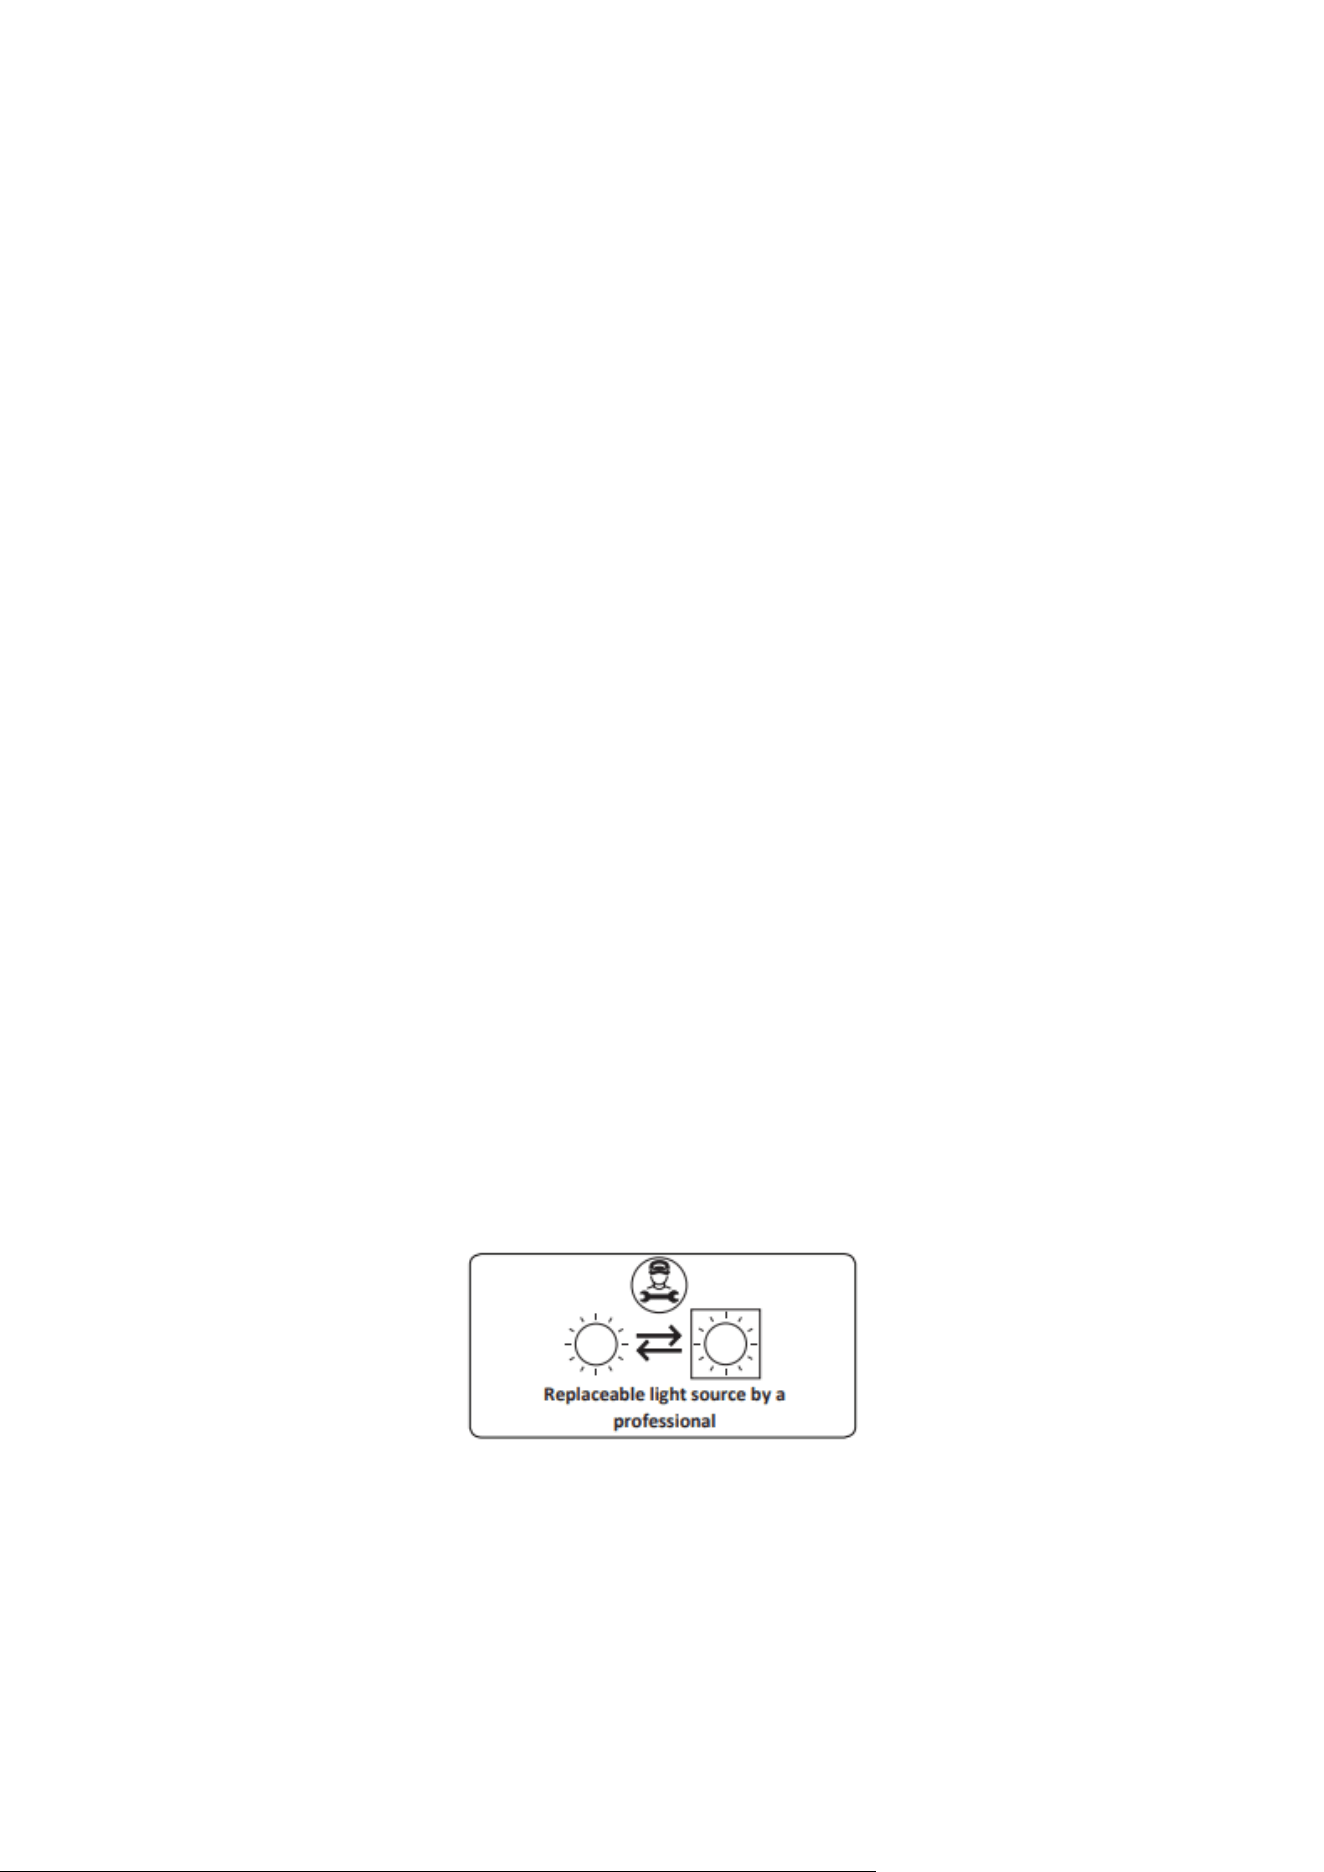
• The product contains a light source of energy efficiency class G.
• Light source cannot be replaced by end user. After-sales service is needed.
• The included light source is not intended for use in other applications.
CLEANING AND MAINTENANCE
16
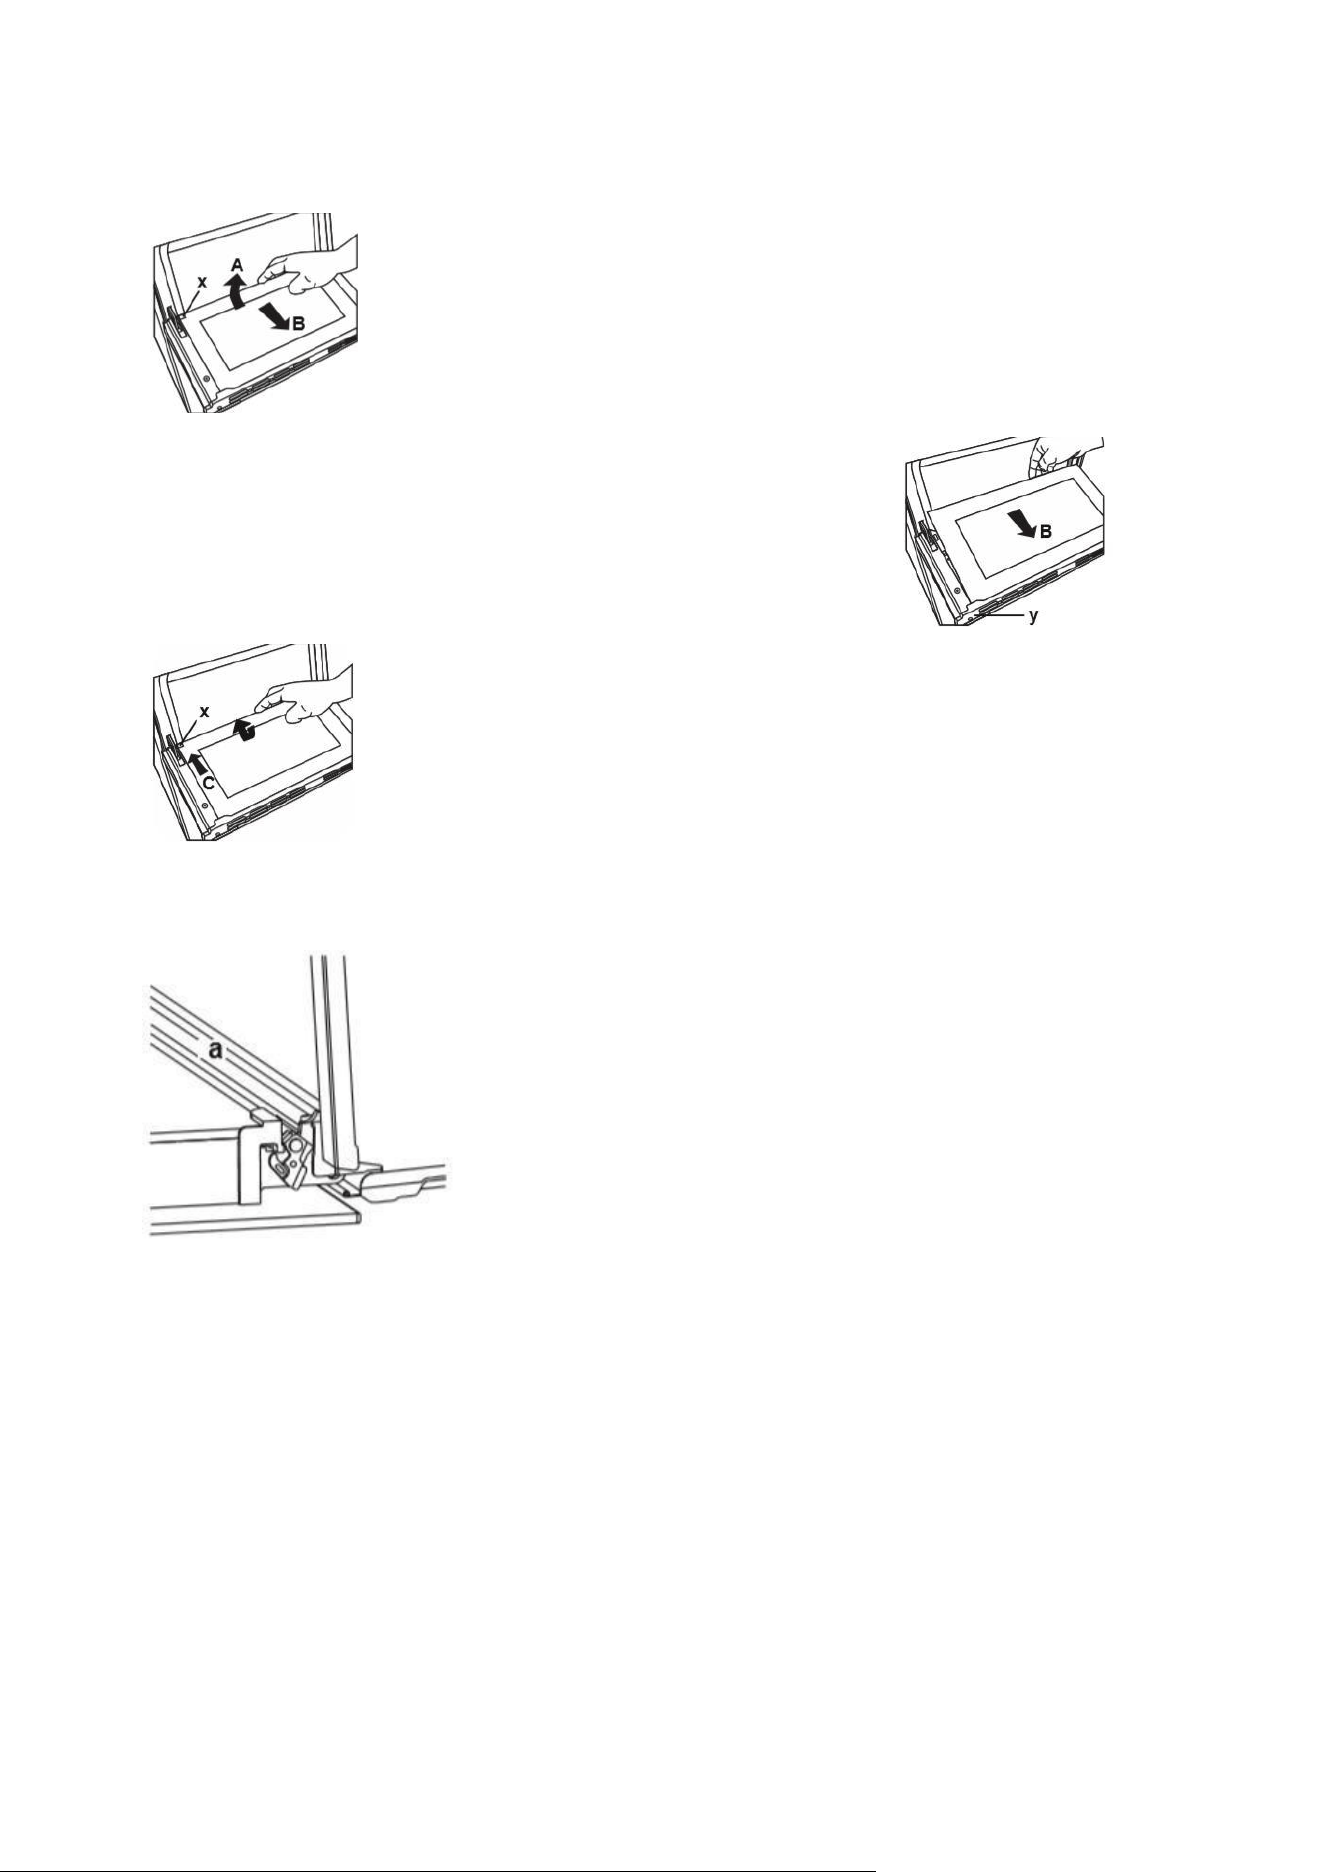
REMOVAL OF THE INNER GLASS
You must remove the oven door glass before cleaning. Push the glass in the
direction of B and release from the location bracket (x). Pull the glass out in
the direction of A.
To replace the glass, Push the glass towards and under the
location bracket (y) in the direction of B.
Place the glass under the location bracket (x) in the direction of C.
OVEN DOOR REMOVAL
Open the oven door and open the locking catch (a) with a
screwdriver, turning anti-clockwise. Begin to close the door until it is
almost closed, and then lift the door up to remove it.
THE WATER COLLECTOR
In some cases of cooking, condensation may appear on the inner glass of the oven door. This is not a
product malfunction. Open the oven door to the grilling position and leave it in this position for 20
seconds. Water will drip into the collector. Cool the oven and wipe the inside of the door with a dry
towel. This must be done regularly.
PRODUCT SUPPORT
17
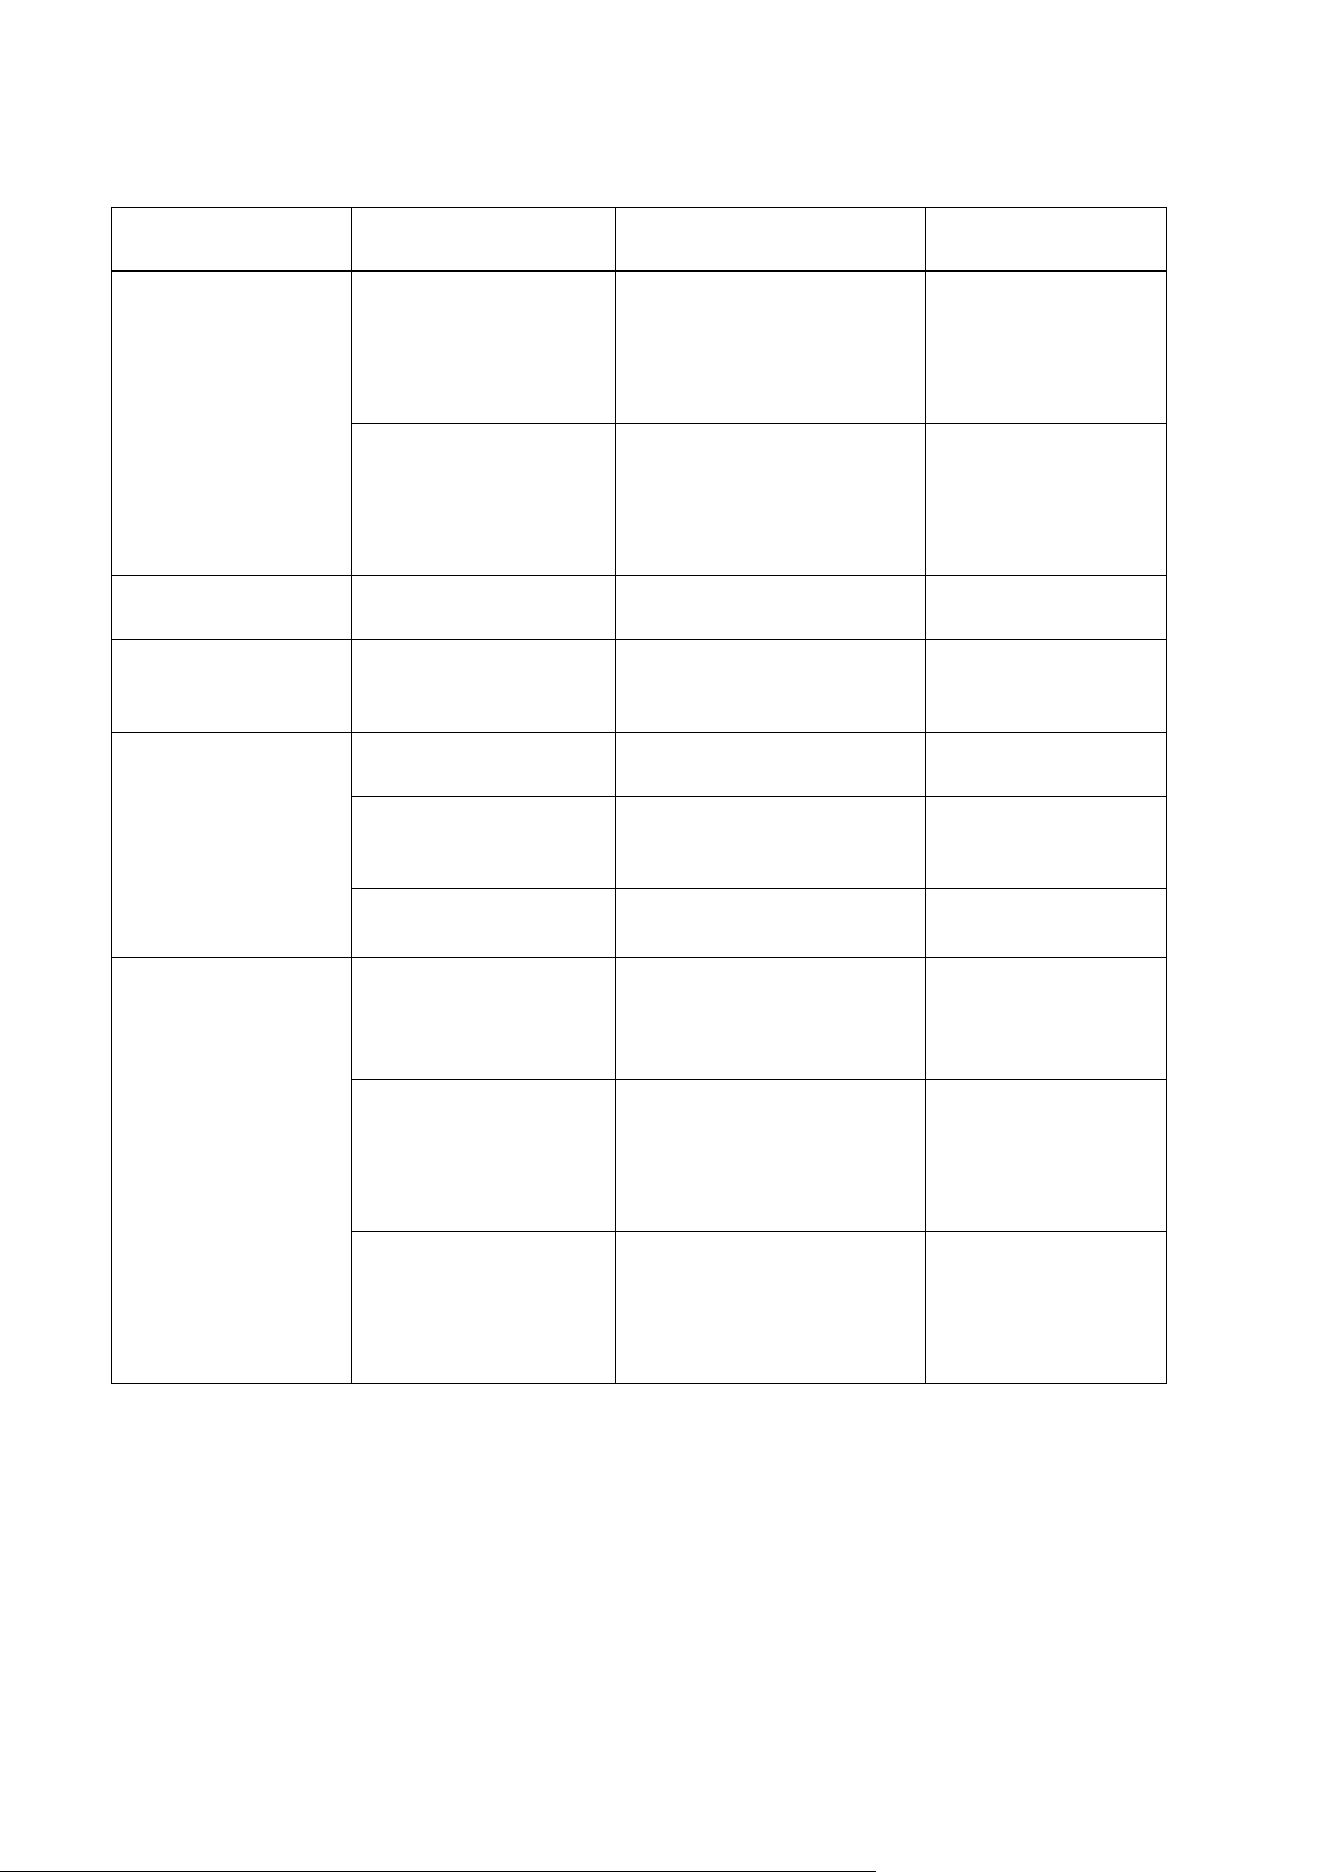
TROUBLESHOOTING
SYMPTOM
CAUSE /
SOURCE
TROUBLESHOOTING
CHECKS
SOLUTION
Oven not
heating
Open circuit on the
heating element
Check elements at
the harness
connection point.
Replace
elements or
replace
harnesses if
needed.
The door was not shut
tightly.
Check for
obstructions and
damage to the door
seal and close the
door tightly.
Check for
obstructions
and close the
door tightly.
Lamp not
working
The light bulb has
burned out.
Replace the light bulb.
Replace the light
bulb.
Outer Glass Broken.
Damaged after
shipping.
Check packaging condition
Replace door glass.
The Inner Door
Glass is Broken.
Damaged after
shipping.
Question for incident
details.
Replace door glass
Cold item placed
on hot glass
Question for incident
details.
Replace door glass
Item dropped on
window pack.
Question for incident
details.
Replace door glass
Food burnt or oven
bakes unevenly.
Food placed in the
oven during Pre-heat
Check the food is not in
the oven before Preheat
Do not put food
into the oven
during
preheating
Food may be too close
to the heating element.
Check the position of
the rack or baking tray
Make sure the food
is placed correctly in
the oven
Temperature setting
too high for recipe or
quantity of food
Check the
temperature setting.
Verify the
temperature setting
against the recipe.
Use the correct
temperature setting.
PRODUCT SUPPORT
18
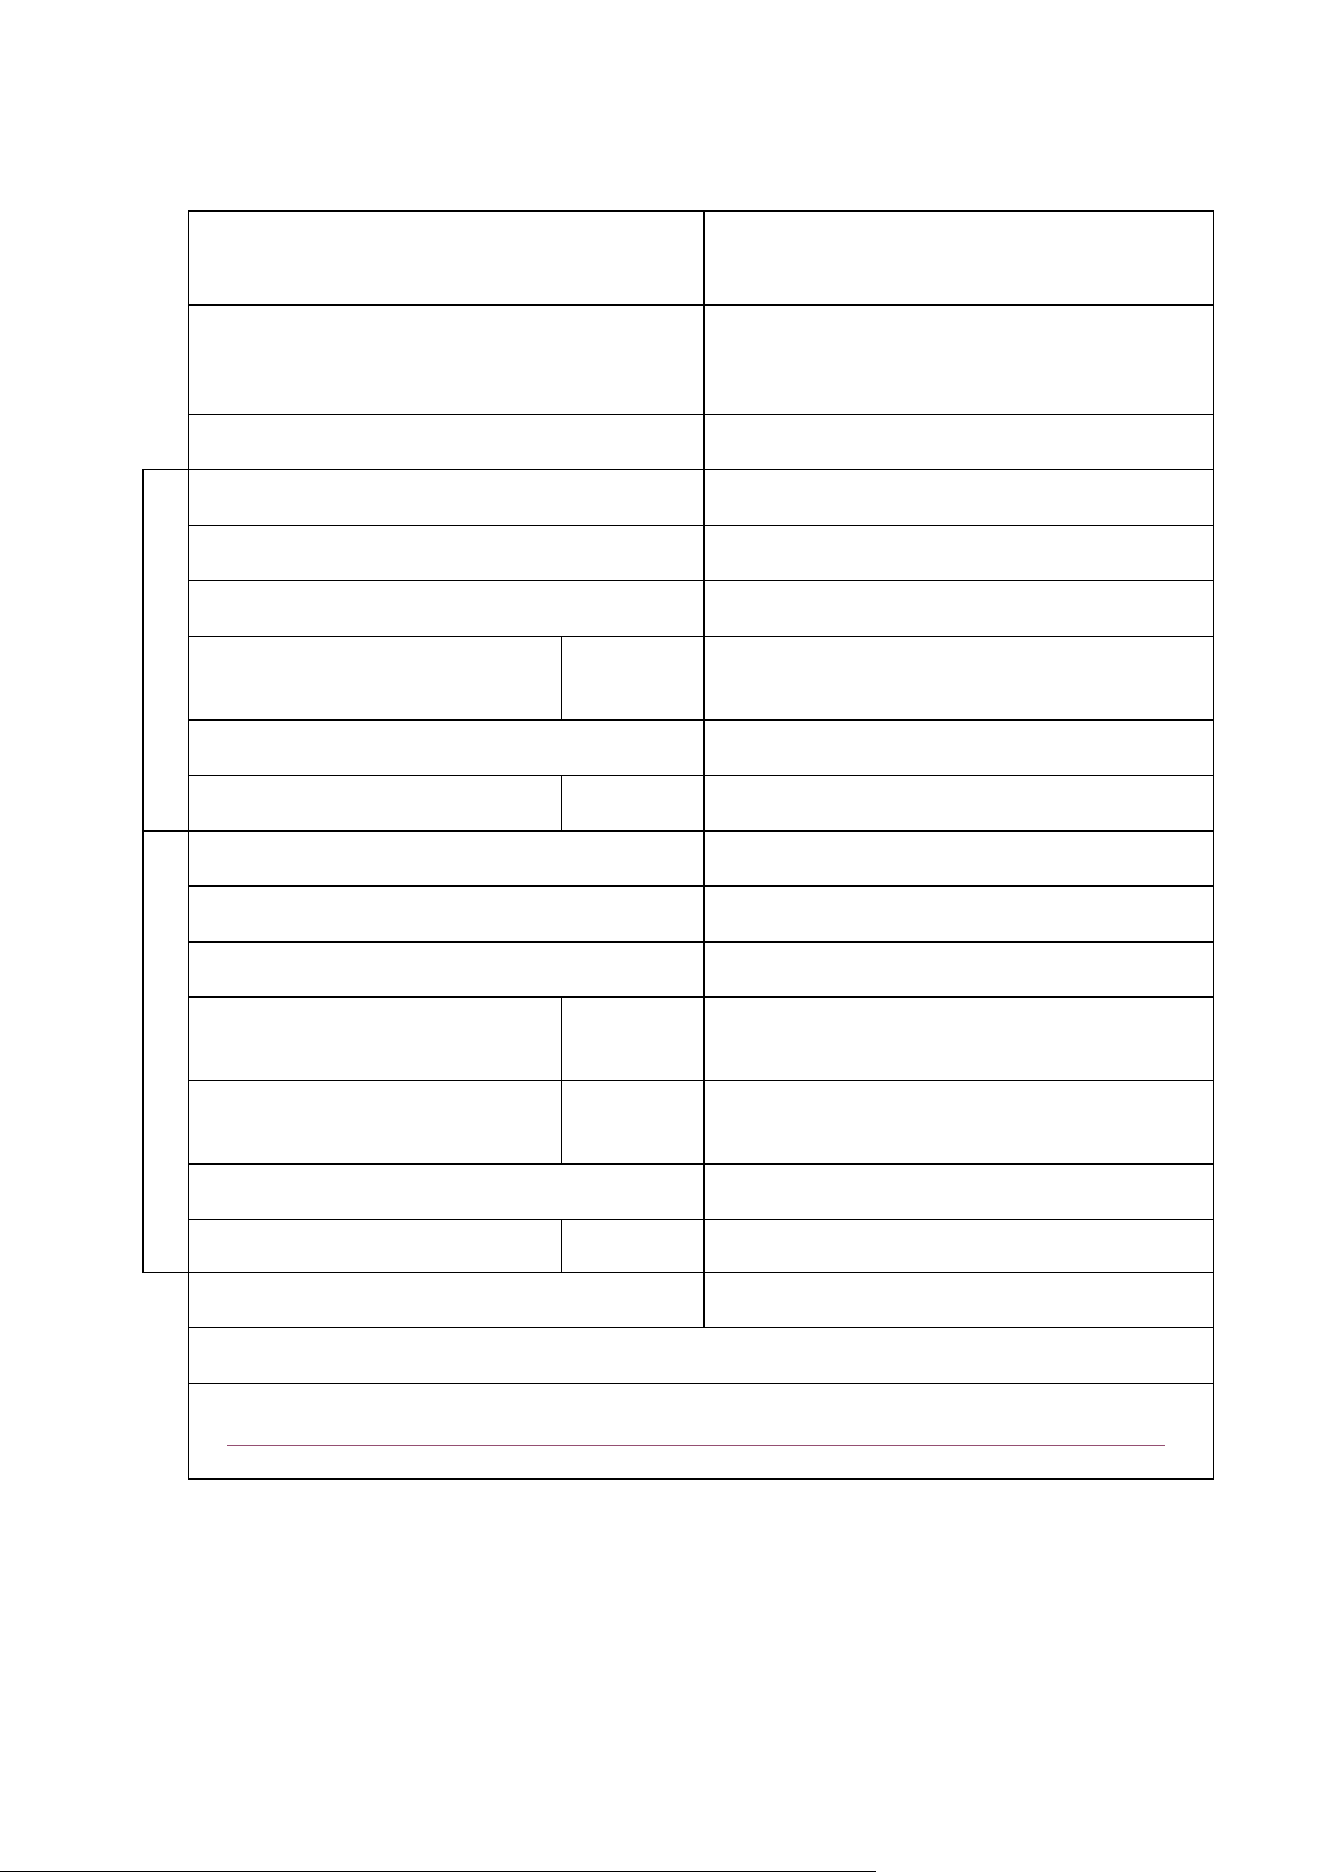
TECHNICAL SPECIFICATIONS
Brand
electriQ
Model
EQDO1LG EQDO1DARKINOX
EQDO1BLACK
EQDO1STEEL
Type of Oven
ELECTRIC
Energy Efficiency Index - conventional
0,67
Energy Efficiency Index - fan forced
-
Energy Class
A
Energy consumption
(electricity) - conventional
kWh/cycle
95,0
Heat Source
ELECTRIC
Volume
l
37
Energy Efficiency Index - conventional
0,82
Energy Efficiency Index - fan forced
0,80
Energy Class
A
Energy consumption
(electricity) - conventional
kWh/cycle
95.3
Energy consumption
(electricity) - fan forced
kWh/cycle
92.9
Heat Source
ELECTRIC
Volume
l
74
Number of cavities
2
This oven complies with EN 60350-1
Service manual:
https://www.electriq.co.uk/files/Compliance/Service%20Manuals/EQDO1%20SERVICE%20MANUAL.pdf
(For use of professional engineers only)
Lower capacity
Upper capacity
PRODUCT SUPPORT
19
electriQ UK SUPPORT
www.electriQ.co.uk/support
Call: 0333 305 2261
Office hours: 9AM - 5PM Monday to Friday
www.electriQ.co.uk
Unit 2A, Trident Business Park,
Neptune Way, Leeds Road,
Huddersfield, HD2 1UA.
Recycling facilities are now available for all customers at which you can deposit your old
electrical products. Customers will be able to take any old electrical equipment to
participating sites run by their local councils. Please remember that this equipment will be
further handled during the recycling process, so please be considerate when depositing
your equipment. Please contact the local council for details of your local household waste
recycling centres.