3RC-3010S
care & use manual
rice cooker
slow cooker
food steamer
yogurt maker

Published by:
Sherwood Marketing LLC
11417 West Bernardo Ct, Suite M
San Diego, CA 92127
© 2015 Sherwood Marketing LLC
We really appreciate you
bringing 3 Squares into
your kitchen.
That’s what
appliances are really
all about. We design
our products to bring
the best out of what
you put into them.
You don’t need to be a
chef to enjoy good home-
cooked food. Our products
make it easy for anyone to
make a delicious meal.
Eating is fun.
Cooking… well
not all of it. Our
products make
it easier to get
to the fun while
taking work off
your plate.
TM
You just bought a time machine.
Seriously.
How awesome is that?
Okay, so you can’t go back and make sure your parents get married.
Andyoucan’tgoforwardandseewhatyearwenallygetying
cars and hoverboards. But you know what you can do with it?
Make more time.
Because, unlike those as-yet-to-be-invented time machines
(c’mon science), this is actually a machine that makes time…
for you! Need a great meal for your family? Throw some quick
ingredients in, hit “white rice” and the ’ll make it
happen. Tired of breakfast being a cold bar of “fruit”? Add some
oatmeal and water at night and wake up with a nice hearty start
to your day. Want a healthy snack for the kids? Make your very
own organic yogurt with a couple button presses and not much
else. And that’s not even half the buttons on this thing!
So read on for more on how this machine can give you more
timeandgreatmeals—nouxcapacitornecessary.
Have a question on your product? Want tips on getting your
three squares? Just want to talk? Either way, look us up!
@Get3Squares FB/Get3Squares @Get3Squares
email: support@get3squares.com

Basic safety precautions should always be followed when
using electrical appliances, including the
following:
01. Important: read all instructions.
02. Do not touch hot surfaces. Use handles or knobs.
Use pot holders or another form of heat protection
when removing hot containers and parts.
03. To protect against the risk of electrical shock, do not
immerse cord, plug or base in water or any other
liquid.
04. Close supervision is necessary when any appliance is
used by or near children.
05. Unplug from outlet when not in use. Unplug and allow
to cool before putting on or taking off parts, and
before cleaning.
06. Do not operate any appliance with a damaged cord or
plug or after the appliance malfunctions, has been
dropped or damaged in any manner. Contact
3 Squares customer support for information on
examination,repairoradjustment.
07. The use of accessory attachments not recommended
by 3 Squares may cause injuries or damage to the
product.
08. Do not use outdoors.
09. Do not let cord hang over the edge of the table or
counter or touch hot surfaces, including the stove.
10. Do not place on or near a hot gas or electric burner
or in a heated oven.
11. Extremecautionmustbeusedwhenmovingthe
appliance containing hot oil, food, water or other
hot liquids.
12. To disconnect, press the power button ( );
IMPORTANT SAFEGUARDS
SAVE THESE INSTRUCTIONS
1

short cord instructions
A short power-supply cord is provided to reduce the risks
resulting from becoming entangled in or tripping over a
longercord.Longerextensioncordsareavailableand
maybeusedifcareisexercisedintheiruse.
Ifalongextensioncordisused,themarkedelectrical
ratingoftheextensioncordshouldbeatleastasgreatas
the electrical rating of the appliance, and the longer cord
should be arranged so that it will not drape over the
countertop or tabletop where it can be pulled on by
children or tripped over.
polarized plug
This appliance has a polarized plug (one blade is wider
thantheother).Asasafetyfeature,thisplugwilltina
polarizedoutletonlyoneway.Iftheplugdoesnottfully
intheoutlet,reversetheplug.Ifitstilldoesnott,contact
aqualiedelectrician.Donotattempttodefeatthissafety
feature.
FOR HOUSEHOLD USE ONLY
IMPORTANT SAFEGUARDS
then remove plug from wall outlet.
13. Do not use the appliance for other than its intended
use.
14. Lift and open cover carefully to avoid scalding from
escapingsteam.Allowanyexcesswatertodripinto
the cooker.
15. CAUTION: Risk of electric shock. Cook only in the
provided removable cooking pot.
16. Do not place the appliance directly under cabinets
when operating as this product produces large
amounts of steam. Avoid reaching over the product
when in operation.
2
6
4
3
7
2
1
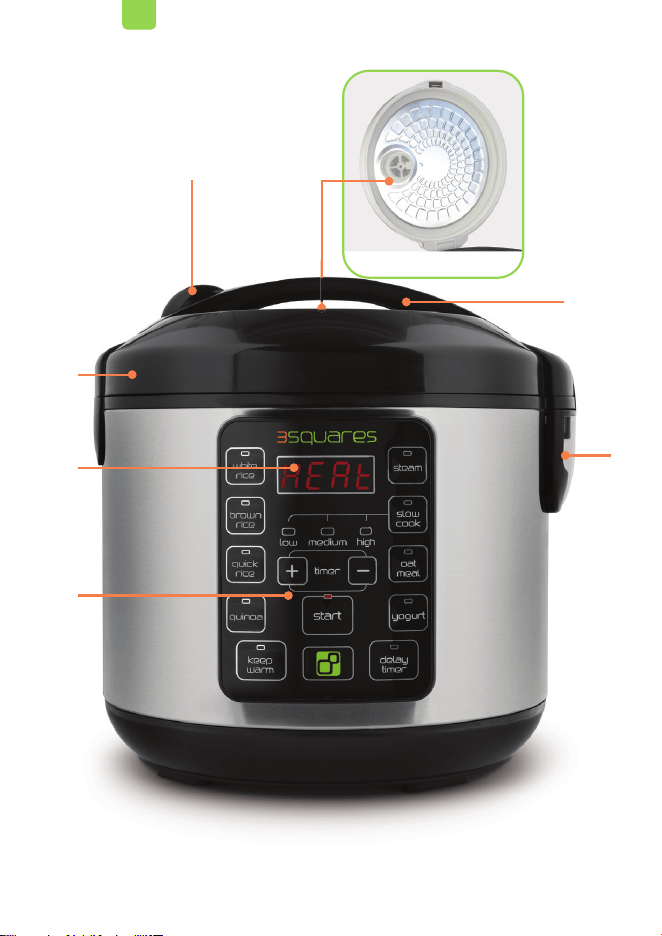
parts identifi cation
under the lid
3
5

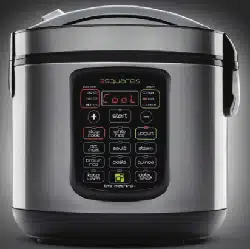
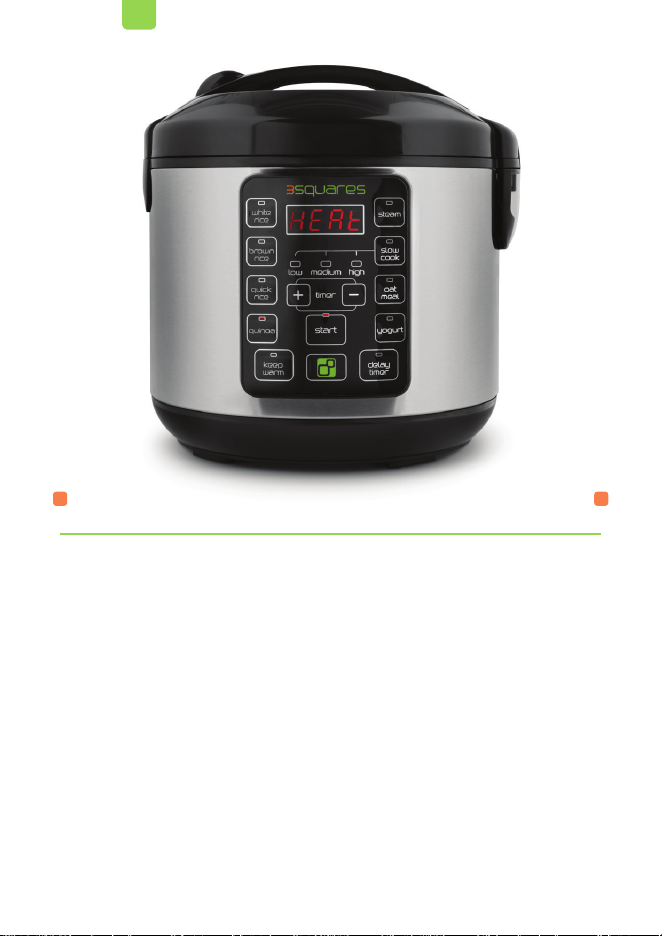
01. Control Panel
02. Digital Display
03. Lid
04. Lid Release
05. Steam Vent (Includes Silicone
Gasket)
06. Handle
07. Condensation Collector
08. Cooking Pot
09. Steam Tray
10.
™
Silicone Utensil
8 109
7
parts identifi cation
4
white rice
Uses 3 Squares’ advanced Fuzzy Logic 2.0
™
to cook
perfect rice every time.
brown rice
Specially programmed Fuzzy Logic 2.0
™
softens this
hard-to-cook whole grain.
quick rice
Short on time? This setting cooks rice as fast as possible.
quinoa
Tiredofbland,mushyquinoa?Thistoastsitrsttobring
outadeliciousnuttyavor.
5
what do all these buttons do?

keep warm
Well it keeps things warm… automatically switches to this
mode when cooking is done.
steam
Program the time for your food to steam. It won’t
countdown until the water boils.
slow cook
Low, medium or high settings work the same as an
advanced digital slow cooker.
oatmeal
Steel cut, rolled or quick, this will do the trick.
yogurt
Smoothest way to make yogurt at home. Heats milk.
Holds it. Cools it. Tells you when to add culture. Cooks it.
delay timer
Program when your rice or oatmeal will be done cooking–
leaving you with one less thing to worry about.
+
Adds more time for steam and delay timer.
-
Subtracts time for steam and delay timer.
start
The blast-off button to get your meal cooking.
Power button. Turns the machine on and off. We like
the look of our logo, so we used it.
6

01. Read all instructions and important safeguards.
02. Remove all packaging materials and check that all
items have been received in good condition.
03. Tear up all plastic bags. They can pose a risk
to children.
04. Wash the steam vent, cooking pot and all
accessories in warm, soapy water. Dry thoroughly
before adding back to rice cooker.
There may be an odor or bit of smoke that appear
duringrstuse.Thisisfromthemanufacturing
process and should dissipate quickly. We
recommendllingthecookingpotwithwater
to the “steam water line” and setting to steam for
10 minutes to quickly dissipate the odor.
Find recipes, accessories and more great 3
Squares products online at
www.Get3Squares.com.
Have a question? Email us at
support@Get3Squares.com or give us a call at
1-877-393-8936.
7
before first use

8
what’s the deal with the
lines in the pot?
We know, usually there are a bunch of little lines in
rice cooker cooking pots. They’ve always bugged us.
They’re tough to see. They can be confusing. They’re
pretty one dimensional. Our
™
does
so much, we didn’t want to bog things down with lines
all over the place. So we’ve added simple quart
measurementlines.The4quartlineisthemaximum
capacity while cooking.
So how much water do I use for rice (or
quinoa)?
Whether you’re cooking white rice, brown rice or
quinoa, the water used should be the same.
One cup water for every one cup grain; then top with
an additional half cup of water.
Cooking 2 cups brown rice? Add 2 and a half cups
water. 10 cups white rice? Add 10 and a half cups
water. 6 cups quinoa? Add 6 and a half cups water.
There’s also a nifty chart on page 14 that goes over
this in more detail.

9
There are a few steps you’ll go through to turn your rice
cooker on. We could list them each time, but that gets
really boring… and manuals are already boring enough.
So here’s what you’ll do no matter what function you use.
01. Connect the power cord to the rice cooker. Plug it in
to an available outlet. It won’t do you much good
with out power.
02. Make sure the condensation collector is attached (the
little clear plastic thingy on the right side). If it’s not, it
should snap right into place. Check that the steam
vent and silicone gasket are in place on the underside
of the lid as well.
03. Once the ingredients are all added to the cooking pot,
put it in the rice cooker.
04. Close the lid so it snaps securely shut.
05. Turn the rice cooker on by pressing the button.
It’ll beep and the screen will blink until you select
a function.
So, what are you cooking?
Jump ahead to that section for the rest:
white, brown or quick rice page 10
quinoa page 11
steam page 15
slow cook page 17
oatmeal page 18
yogurt page 19
delay timer page 22
getting started

01. Measure out the rice to be cooked using the included
measuring cup. Cook between 2 and 10 cups of rice.
It will roughly double once cooked.
02. Rinse the rice. This is super important, so RINSE
THERICE.You’llwanttoremovealltheexcessstarch
from your rice before cooking or you’ll never get the
best taste. You can do this directly in the cooking pot
by swirling water around and pouring it out. Or you
can use a mesh colander. Or you can even get a
specialized rice rinser.
03. With rinsed rice in the cooking pot, add water. Our
formula is one cup water for every one cup grain,
then top with an additional half cup of water. So 3
cups rice, 3-1/2 cups water.
Tip:Usebrothinsteadofwaterforextraavor!
04. Assuming your machine is now on and ready to go
(page 9), press the white rice, brown rice or quick rice
button, based on what you’re cooking. It won’t start
cooking yet.
Note: If you’re cooking brown rice with “Quick Rice”
function, you’ll need to add an additional 1 cup water
more, i.e. 4 cups brown rice and 5-1/2 cups water.
White rice is the regular ratio still.
05. Press the start button to begin cooking. The display
will show a “chasing” pattern while it cooks.
white, brown and quick rice
10

quinoa
01. Measure out the quinoa to be cooked with the
included measuring cup, between 2 and 10 cups.
02. RINSE IT! There’s a bitter coating on the outside of
quinoa that needs to be rinsed away. Don’t skip this
step or you’ll regret it. You can rinse it using the
cookingpotoranemeshstrainer.
11
Tip: How long will your rice take to cook? Check
out the “grain cooking times” chart on page 13.
06.Thedigitaldisplaywillcountdownthenal10minutes
of cook time.
07. When rice is ready, the machine will “beep” and
automatically switch to keep warm. The display will
show how long it has been on keep warm, we don’t
recommend keeping food warm longer than 12 hours.
08. When done serving, turn the machine off by pressing
the button. Unplug it.
Tip: Looking for recipe and meal ideas? Go to
www.Get3Squares.com. Or just ask us at
@Get3Squares or www.facebook.com/get3squares!

03. Have the rinsed quinoa in the cooking pot, in the
™
and have it on and ready to go
(page 9).
Note: Don’t add water yet!
04. Press the quinoa button. It won’t start cooking yet.
05.Pressthestartbuttontobegintoasting.Therststep
in quality quinoa is toasting it. The display will show
“heat” during this phase.
06. Stir the quinoa continuously with the included
™
as it toasts.
07. Once the moisture is evaporated, the machine will
“beep” and the display will change to “add.” It’s now
time to add the water to cook.
08. Add water. Our formula is one cup water for every one
cup quinoa, then top with an additional half cup of
water. So 5 cups quinoa, 5-1/2 cups water.
Tip:Usebrothinsteadofwaterforextraavor!
09. Close the lid and press the start button to begin
cooking. The digital display will show a chasing
pattern while it cooks.
Tip: How long will your quinoa take to cook?
Check out the “grain cooking time” chart on page 13.
12

cups white
rice
cook
time
brown
rice cook
time
quinoa
cook
time
quick
(white)
rice cook
time
quick
(brown)
rice cook
time
2-3 27-32
min.
42-47
min.
29-34
min.
22-27
min.
37-42
min.
4-5 32-37
min.
45-50
min.
35-40
min.
27-32
min.
40-45
min.
6-7 35-40
min.
55-60
min.
45-50
min.
30-35
min.
42-47
min.
8-10 38-43
min.
60-65
min.
48-53
min.
32-37
min.
48-53
min.
grain cooking times
13
10.Thedigitaldisplaywillcountdownthenal10minutes
of cook time.
11. When quinoa is ready, the machine will “beep” and
automatically switch to keep warm. The display will
show how long it has been on keep warm. We don’t
recommend keeping food warm longer than 12 hours.
12. When done serving, turn the machine off by pressing
the button. Unplug it.
Tip: Looking for recipe and meal ideas? Go to
www.Get3Squares.com/food. Or just ask us at
@Get3Squares or www.facebook.com/get3squares!

14
cups of
uncooked
grain
cups of water
white
rice
quick
(white)
rice
brown
rice
quick
(brown)
rice
quinoa
2 2-1/2 2-1/2 2-1/2 3-1/2 2-1/2
3 3-1/2 3-1/2 3-1/2 4-1/2 3-1/2
4 4-1/2 4-1/2 4-1/2 5-1/2 4-1/2
5 5-1/2 5-1/2 5-1/2 6-1/2 5-1/2
6 6-1/2 6-1/2 6-1/2 7-1/2 6-1/2
7 7-1/2 7-1/2 7-1/2 8-1/2 7-1/2
8 8-1/2 8-1/2 8-1/2 9-1/2 8-1/2
9 9-1/2 9-1/2 9-1/2 10-1/2 9-1/2
10 10-1/2 10-1/2 10-1/2 11-1/2 10-1/2
grain/ water ratio

01. Fill the cooking pot with water to the “steam water
line.”
02. Add food into the steam tray.
03. Put the cooking pot into the machine. Set the steam
tray into the cooking pot (it rests at the top).
04. Assuming your machine is now on and ready to go
(page 9), press the steam button. It won’t start
cooking yet.
05.Thedigitaldisplaywillshowaashing“0:10”forten
minutes of steam time. Adjust the time up (+) and
down (-) based on the recipe. It won’t start counting
down until water boils, so it’s the real time for
steaming versus a general countdown.
06. When the steaming time is set, press the start button
tobeginsteaming.Thedisplaywillstopashing.
07. Once water reaches a boil, the display will countdown
the cooking time.
08. When the cooking time has elapsed, the machine
will “beep” and switch to keep warm. The display will
now show how long it’s been on keep warm.
09. Remove the food as soon as possible and serve.
Turn off the machine by pressing the button and
unplug it.
steam
15

Tip: Looking for recipe and meal ideas? Go to
www.Get3Squares.com/food. Or just ask us at
@Get3Squares or www.facebook.com/get3squares!
16
Everyone’s tastes vary a little. The times here offer a range of suggested
cooking time. Like your food a bit crunchier? Go for the lower end of the
range. Like it soft and well-cooked? The upper end of the range is for
you.
Steaming meat is a great, healthy way to cook. Make sure your meat is
well-cooked before serving. Slightly undercooked asparagus is great…
chicken, not so much.
food time food time
asparagus 7-13 min peas 2-4 min
broccoli 5-10 min potatoes, whole 15-20 min
carrots 7-10 min spinach 3-5 min
celery 4-9 min sweet potatoes 8-12 min
corn on the cob 7-10 min Swiss chard 3-5 min
kale 4-7 min zucchini 5-8 min
meat cook time safe serving temperature
beef 25-30 min 160F
chicken 20-25 min 165F
sh 15-20 min 140F
pork 20-25 min 160F
steaming time suggestions
veggies
meat

01. Add food to be cooked to the cooking pot. Do not ll
past the 4 quart line of the pot.
02. Assuming your machine is now on and ready to go
(page 9), press the slow cook button. It won’t start
cookingyet.Aashing“8:00”willshowonthescreen
for the low setting.
03. Toggle between the low (8 hours), medium (6 hours)
and high (4 hours) settings by pressing the slow cook
button.
Note: Slow cook times are specially programmed
to slowly increase in temperature to the simmer point
over the set time. For best results when slow cooking
meat, we recommend using low.
Tip: What if I won’t be ready to eat at those
times? The machine will automatically switch to
keep warm after, so your food will be kept hot
and tasty until you are ready to serve it.
04. Press the start button to begin cooking. The machine
will “beep” and the display will turn solid.
05. The machine will countdown the cooking time in
minutes.
06.Whenthecookingtimeisnished,themachinewill
“beep” and automatically switch to keep warm.
The display will now show how long it has been on
keep warm.
slow cook
17

07. Whennishedserving,turnthemachineoffby
pressing the button and unplug it.
Tip: Looking for recipe and meal ideas? Go to
www.Get3Squares.com/food. Or just ask us at
@Get3Squares or www.facebook.com/get3squares!
18
01. Add oatmeal to the cooking pot, between 2 and
8 cups.
02. Add water to the cooking pot. Follow the package
instructions on your oatmeal for suggested water to
oatmeal ratio. We suggest a bit less water than their
recommendation, but we all know it’s all about your
personal preference.
Note: Use the provided measuring cup to measure
oats and water.
Tip: Want to wake up to a hot breakfast? Add oats
and water at night and set the delay timer to have
oatmeal ready in the morning. See the delay timer
instructions on page 22.
03. Assuming your machine is now on and ready to go
(page 9), press the oatmeal button. It won’t start
cooking yet.
04. Press the start button to begin cooking. The machine
oatmeal

will “beep” and the display will change to its chasing
pattern to show it’s cooking.
05.Thedisplaywillcountdownthenal10minutesbefore
the oatmeal is done.
06. When oatmeal is ready, the machine will “beep” and
automatically switch to keep warm. The display will
show how long it has been on keep warm, we don’t
recommend keeping it warm longer than 3-5 hours.
07. When done serving, turn the machine off by pressing
the button. Unplug it.
Tip: Looking for recipe and meal ideas? Go to
www.Get3Squares.com/food. Or just ask us at
@Get3Squares or www.facebook.com/get3squares!
yogurt
01. Fill the cooking pot with milk, between the 1 quart
and 4 quart lines.
Tip: Whole milk is the easiest for making yogurt,
thanks to the fat content. 2%, 1% and skim milk will
create a runnier yogurt.
02. Assuming your machine is now on and ready to go
(page 9), press the yogurt button. It won’t start
cooking yet.
03. Press the start button. The machine will “beep” and
thedisplaywillnowshow“heat.”Thisistherststage
of making yogurt, heating the milk.
19

20
04. Once the milk has reached the optimal heating
temperature, it will hold it there for ten minutes.
05. After the milk is done heating, it will “beep,” the
display will change to “cool” and the milk will begin to
cool.
Tip: To speed up cooling, open the lid.
06. Once the milk has properly cooled, the machine will
“beep” and the display will show “add.” It is now time
to add the yogurt culture. The machine will continue to
“beep” until the culture is added.
07. Theeasiestwaytoaddliveyogurtcultureisbymixing
in a tablespoon per quart of store-bought or
previously made yogurt. You can also use yogurt
culture (available at health food stores). Follow
manufacturer’s instructions for proper ratio.
Tip: To better distribute the culture, transfer a small
amountofmilkfromthecookingpottoabowl.Mixthe
culture in with the milk in the bowl, then pour it back
into the cooking pot. Stir in thoroughly to ensure even
distribution.
08. Once the culture has been added, close the lid and
presstheyogurtbutton.Thedisplaywillnowashan
“8:00” for eight hours of cooking time.
09. Adjust the cooking time with the + and – buttons,
from 8 to 12 hours.

Tip: The longer yogurt cooks, the thicker and more
tart it will become.
10. Once the desired time is selected, press the start
button to begin cooking. The display will countdown
the cooking time.
11. After the selected time has elapsed, the machine
will “beep” and stop heating. The digital display will
show “done.” The machine will continue to “beep” until
it is shut off.
12. Remove yogurt from the machine. Stir vigorously or
blend with processor. Pour into containers. Glass jars
are ideal, preferably fresh from the dishwasher.
Cover and refrigerate yogurt for 8 hours.
Note: Blending will cause yogurt to become runny, like
drinking yogurt or a smoothie.
Tip:Addextraavorbystirringinjelliesorjamsonce
yogurt is done. Go to www.Get3Squares.com for
avorsuggestions.
Tip Too: To make Greek-style yogurt, pour the
yogurt into a cheesecloth-lined colander set over
a bowl. Place it in the refrigerator and allow it to
drain for eight hours.
21

delay timer
The delay timer will only work with some functions
(leaving chicken in your machine for 10 hours before
steaming would just be gross).
The white rice, brown rice and oatmeal functions will work
with the delay timer. Follow the instructions for each
function, but BEFORE YOU PRESS THE
FUNCTION’S BUTTON:
01. Press the delay timer button. The display will show a
ashing“2:00”for2hoursofdelayedcooktime.
This means food will be ready 2 hours from now.
02. Adjust the delay time with the + and – buttons,
between 2 and 15 hours.
03. Once the right time is displayed, press the function’s
button then press start.
04. The machine will not cook right away. It will begin
cookingtonishoncetheselectedtimehaselapsed.
Tip: Want to cook quinoa with the delay timer? Use
thewhitericefunction.You’lllosethetoastyavor,but
it will be ready when you need it.
22

Be sure to allow the
™
and all parts to
cool completely before cleaning.
01. Remove the steam vent by twisting it to the left. Clean
the silicone gasket carefully, and make sure it is
reassembledandinstalledpriortonextuse.
02. Remove the condensation collector. Discard any
water and rinse thoroughly.
03. Wash the cooking pot, condensation collector, steam
vent and all accessories in warm, soapy water or
wash them in the top rack of the dishwasher.
Tip: The cooking pot,
™
, steam tray,
measuring cup, steam vent and condensation
collector are all dishwasher safe. All but the
cooking pot should be washed in top rack only.
Theymustbeputbackbeforenextuse!
Note: Do not use harsh, abrasive cleaners,
scouring pads or products not intended for use
on nonstick surfaces to clean.
04. Wipe the rice cooker body with a clean, damp cloth.
Dry cooking pot and all accessories thoroughly
before reassembly.
Warning: Do not immerse the
™
body, cord or plug in water or any other liquid.
Note: Any other servicing should be performed
by 3 Squares. Contact 3 Squares customer
support at 1-800-393-8936 or
support@get3squares.com.
23
cleaning

24
mode used: white rice
serves: 4
prep time: 5 minutes
cook time: 35 minutes
Eating at home doesn’t have to be hard work. Here’s
an easy work-around for a classic healthy at-home
meal.
Ingredients
3 cups white rice
3-1/2 cups water
1/2 pack frozen stir fry vegetables
10-ounce can chicken, drained
1/2 cup teriyaki sauce
Dash garlic powder
Add rinsed white rice to the cooking pot. Add water,
frozen vegetables, chicken and garlic to the pot. Follow
instructionsforcookingrice.Oncericeisnished,add
teriyakisauceandstirtomixwiththeincluded
™
.
We have many more available online, but here are
a few to whet your appetite. Visit www.Get3Squares.com
and click on “FOOD.”
easy teriyaki rice bowl
recipes

southwest brown rice bowl
mode used: brown rice
serves: 4
prep time: 10 minutes
cook time: 45 minutes
Looking for a healthy take on Taco Tuesday? How
about Taco Bowl Tuesday? Although this meal is so
easy to make, you probably won’t want to restrict it
to just Tuesdays.
Ingredients
3 cups brown rice
3-1/2 cups water
15 ounce can black beans
1/2 cup frozen corn
1 cup salsa
1/2 rotisserie chicken, shredded
1/2 cup cheddar cheese, shredded
1 avocado, sliced
2 tablespoons sour cream
Add rinsed brown rice to the cooking pot. Add in water,
black beans and corn. Pick up a rotisserie chicken from
the store (or better yet, make someone else do it. You’re
doing the cooking.). When rice is done, shred the chicken.
Mixinshreddedchickenandsalsawithrice.Topeach
bowl with equal parts avocado slices, sour cream and
shredded cheese. If you want make it a little more
portable,thisrecipealsoworksgreatasallingfortacos
or burritos too!
25

26
greek-ish quinoa salad
mode used: quinoa
serves: 4
prep time: 15 minutes
cook time: 30 minutes
A deliciously light and healthy salad option. Goes
great with grilled chicken or sh too.
Ingredients
2 cups quinoa
2-1/2 cups chicken broth
2tablespoons extravirginoliveoil
3 teaspoons lemon juice
2 teaspoons red wine vinegar
1/2 teaspoon salt
1 cup cherry tomatoes, halved
1/2 cup green bell pepper
1/2 cup yellow bell pepper
1/2 cup cucumber
1/3 cup feta cheese
1/4 cup black olives, chopped
Cook quinoa according to instructions, substituting
chickenbrothforwater.Whenquinoaisnishedcooking,
uffwiththeincluded
™
. Place in refrigerator and
allow to cool to room temperature.
Inalargemixingbowl,addtomatoes,bellpeppers,
cucumberandolive.Addcooledquinoaandmixwiththe
™
. Pour over olive oil, lemon juice, vinegar, salt
andcheese.Stirtomixthoroughlyandserve.

california pulled pork sandwiches
mode used: slow cook (low)
serves: 6
prep time: 10 minutes
cook time: 8 hours
It’s not the usual “California” recipe requisite of
adding avocado, but topping this pulled pork sandwich
with coleslaw adds a nice, cool touch.
Ingredients
3 lbs pork loin
3/4 cup barbeque sauce
1/4 cup apple cider vinegar
1/2 cup chicken broth
1/4 cup brown sugar
1 tablespoon Worcestershire sauce
1 tablespoon red chili powder
1 medium onion, chopped
2 cloves garlic, pressed
1teaspoon extravirginoliveoil
1 bag ready-made coleslaw
6 hamburger buns
Using a knife, create a “criss-cross” pattern on the fat of the
pork loin. Add the olive oil to the cooking pot. Place the pork
into the pot, fat side up. Drizzle barbecue sauce, vinegar and
chicken broth over the pork loin. Add the Worchestershire,
chili powder, onion and garlic. Cook on low slow cook for 8
hours.
When done, remove the roast from the cooking pot and shred
with two forks. Return the shredded pork to the cooking pot
and stir to coat in the remaining juices. Prepare the packaged
coleslaw according to instructions.
Add a generous amount of pulled pork to each hamburger
bun. Top pork with coleslaw and add the top bun. Serve with
plenty of napkins.
27

28
garlic oregano chicken + broccoli
mode used: steam
serves: 2
prep time: 5 minutes
cook time: 20 minutes
Just a bit of seasoning goes a long way. Steaming
the chicken cooks it without any added fats and
produces incredibly juicy results. You can even
steam while cooking rice below for a more lling
meal.
Ingredients
2 chicken breasts, boneless & skinless
1stalk broccoli,cutintoorets
1 teaspoon garlic powder
2 teaspoons dry oregano
Rub oregano and garlic evenly on the chicken breasts.
Place chicken breasts into the steam tray. Follow
instructions for steaming to set your machine. Set the
steaming time for 20 minutes. When the countdown
reaches 8 to 10 minutes, carefully open the lid and add
broccoli to the steam tray. Close the lid and allow the
machine to continue steaming until complete.
If you’d like to steam while cooking rice below, take a look
at how long your amount of rice will take to cook
according to our chart on page 13. Once there is roughly
20 minutes left in the rice cooking cycle, add your chicken
in the steam tray to the machine. Follow suit with the
broccoli as there are 8 to 10 minutes remaining.

mode used: oatmeal
serves: 4
prep time: 5 minutes
cook time: 45 minutes
It’s healthy. It’s tasty. It almost makes getting up in
the morning for work something to look forward to.
Add the ingredients at night and set the delay timer
to save that extra work in the morning.
Ingredients
2 cups steel cut oatmeal
3 tablespoons brown sugar
2-1/2 teaspoons cinnamon
1/2 teaspoon salt
3-1/2 cups water
1/2 cup apple cider
1 apple, diced
To taste syrup
Add oatmeal, cinnamon, brown sugar, salt, water and
apple cider to the cooking pot. Follow the instructions to
make oatmeal. When done, add in the apple pieces. Stir
using the
™
and transfer to bowls for serving.
Drizzle syrup over each bowl, to taste, and serve.
apple cinnamon steel cut oatmeal
29

30
mode used: yogurt
serves: 1
prep time: 5 minutes
cook time: 0 minutes (assuming yogurt is already made)
Breakfast is the most important meal of the day,
and it doesn’t need to be difcult to get a healthy
one. Have homemade yogurt on hand and throw this
energizing mix together in no time.
Ingredients
8ounces yogurt(orenoughtollyourbowl)
handful granola
2 tablespoons strawberry jam
Make yogurt according to instructions and store in your
refrigerator. Serve yogurt for one into a bowl. Add granola
andjellyandmixthoroughly.
yo morning yogurt

3 Squares warrants this product free from defects in
material and workmanship for one year from provable
date of purchase in the United States and Canada.
Within this warranty period, 3 Squares will repair or
replace, at its option, defective parts at no charge. Before
returning an item to a retailer, contact 3 Squares
support.
This warranty does not cover improper installation,
misuse, abuse or neglect on the part of the owner.
Warranty is also invalid in any case that the product is
taken apart or serviced by an unauthorized service
station.
Thiswarrantygivesyouspeciclegalrights,whichmay
vary from state to state, and does not cover areas
outside the United States and Canada.
This warranty is available to consumers only. A consumer
owns a 3 Squares product that was purchased at retail for
personal,familyorhouseholduse.Exceptas
otherwise required under applicable state law, this
warranty is not available to retailers or other commercial
purchasers or owners.
If the appliance should become defective within the
warranty period, do not return the appliance to the store.
Please contact 3 Squares customer service at the toll-
free number below or online at www.Get3Squares.com.
3 Squares Customer Support
Toll-Free: 1-877-393-8936
Hours: Mon-Fri, 9am to 5pm PST
Email: support@Get3Squares.com
warranty
31

simple. fun. food.
™
3 Squares
11417 West Bernardo Court, Suite M
San Diego, California 92127
1-877-393-8936
www.Get3Squares.com
32

www.Get3Squares.com
Register your product online. Go to
www.Get3Squares.com.
3RC-3010S