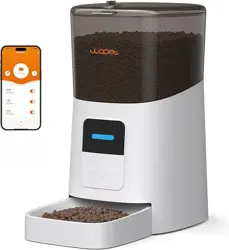
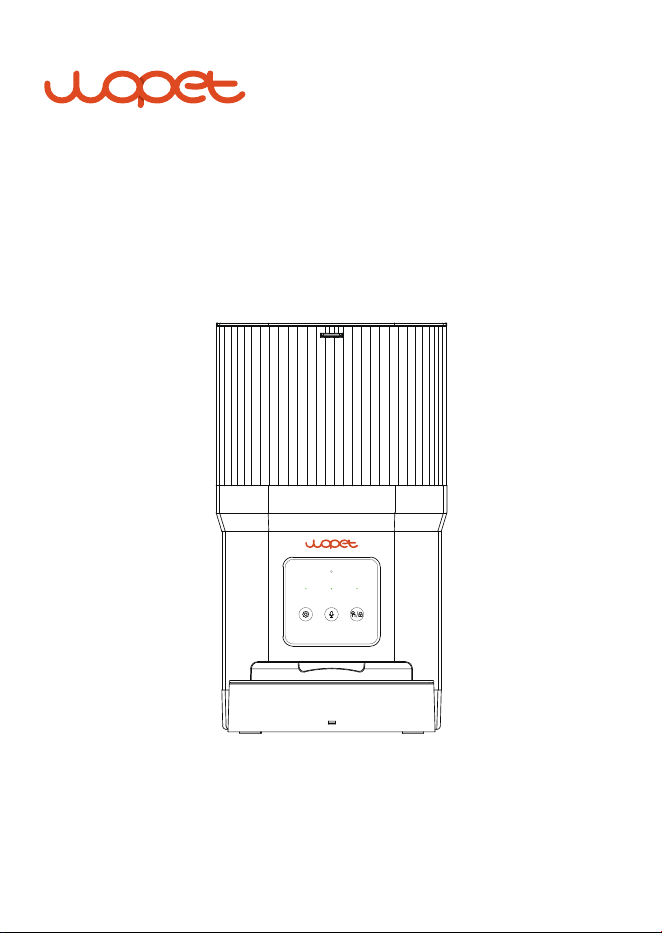
Cube Air 10
User Manual
* Figures and illustrations in this User Manual are provided for
reference only and may differ from actual product appearance.
Model: CA10


Scan code to learn how to set up your feeder.
Scan code to get the “WOpet Life” App

Warranty Information
Ask Us A Question
Product Specifications
Feeder Assembly
Take out the bowl
Load in desiccant
Insert batteries and power cable
Install the bowl
Install the hopper
Feeder Panel Introductions
FAQs
FCC Warnings
[CONTENTS]
1
3
3
4
5
6
6
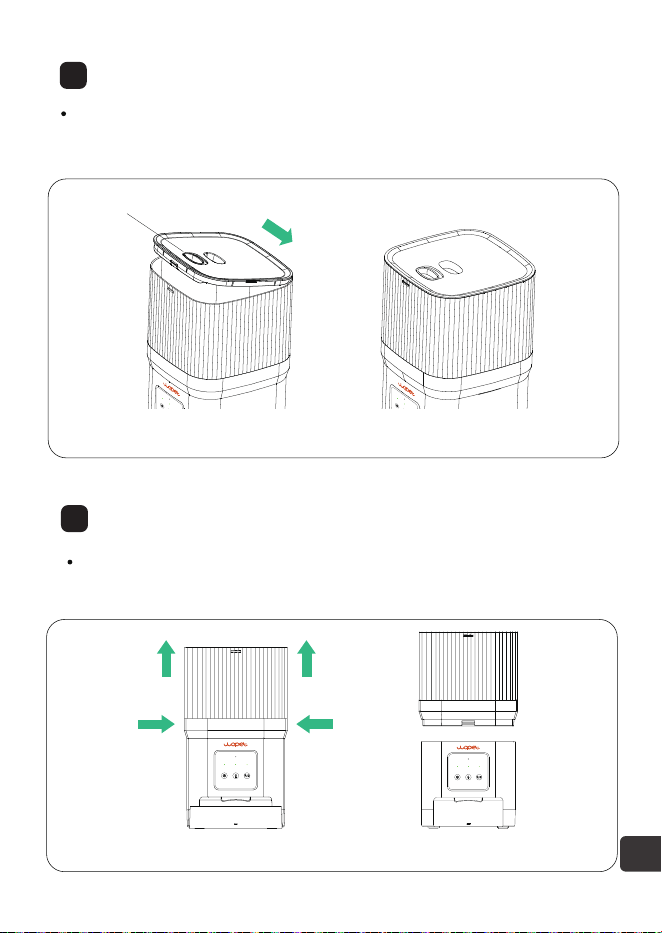
Install the lid
7
Clean the hopper
7
8
Buttons and Indicator Lights
9
13
15
17
18
Add a device
Download
“WOpet Life” APP
Register an account
WOpet APP Setup
10
10
10
10

PRODUCT SPECIFICATIONS
1
Model CA10
Capacity 4L
Meals 10 meals per day
Screen LED
One portion
10g / 0.35oz (8 portions
at most per meal)
Food size 2 - 12mm (dry food only)
Battery-powered supply
3 × alkaline D batteries
(not included)
Pet size
Small / medium-sized
dogs and cats
DC-powered supply 5V / 1A
Operating temperature -10℃ - 55℃ / 14°F - 131°F
Dimensions 18x18x20.4cm / 7.1x7.1x8.0in
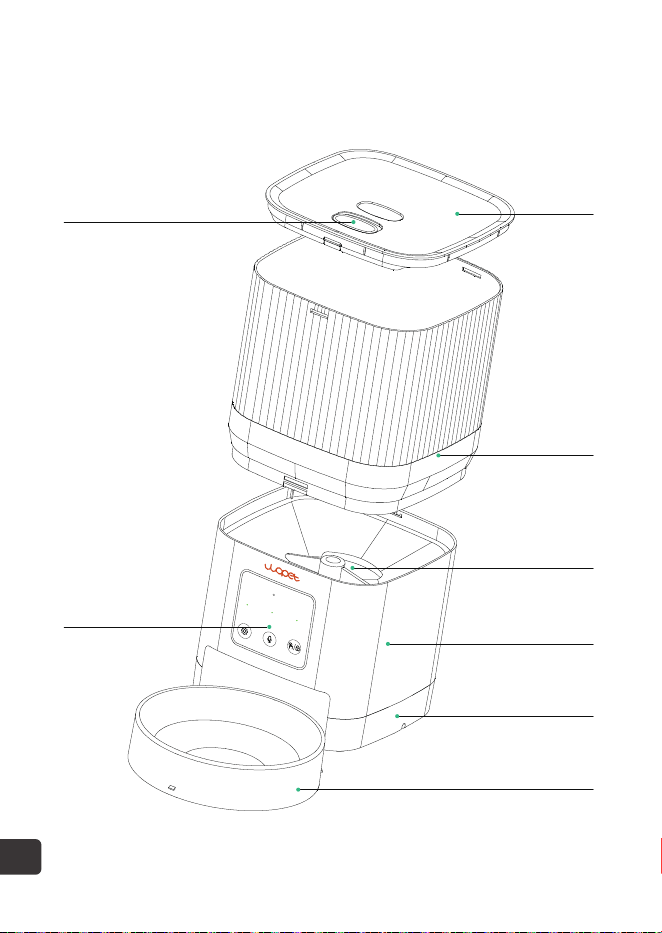
2
Lid
Feeder Base
Control Panel
Lock
Base
Food bowl
Hopper
Turnplate
FEEDER ASSEMBLY
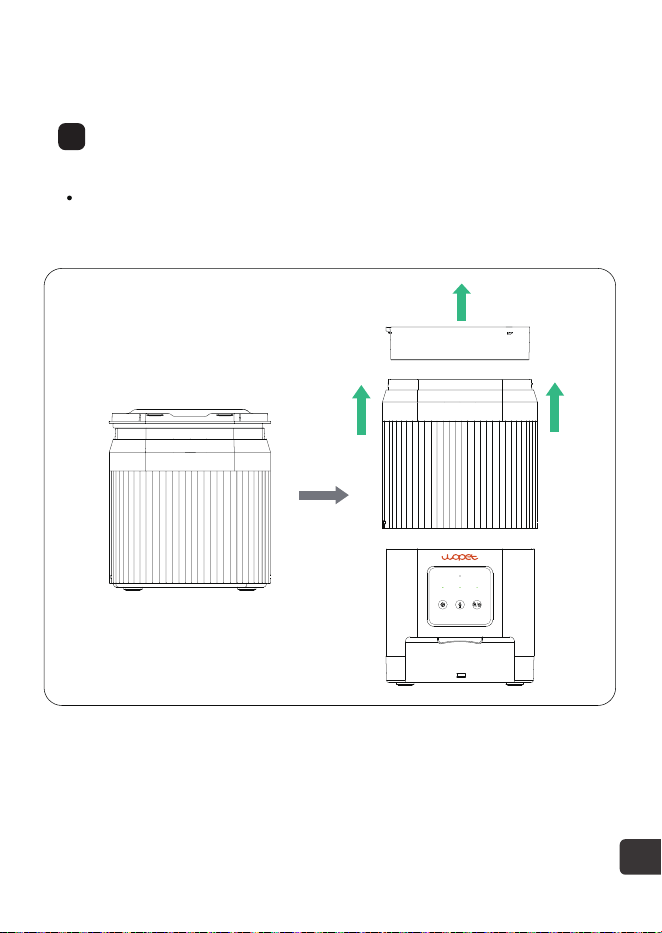
Take out the bowl
Take the bowl out and lift the hopper upwards, take out
the Type-C charging cable, desiccant, manual, etc.
1
3
4
2
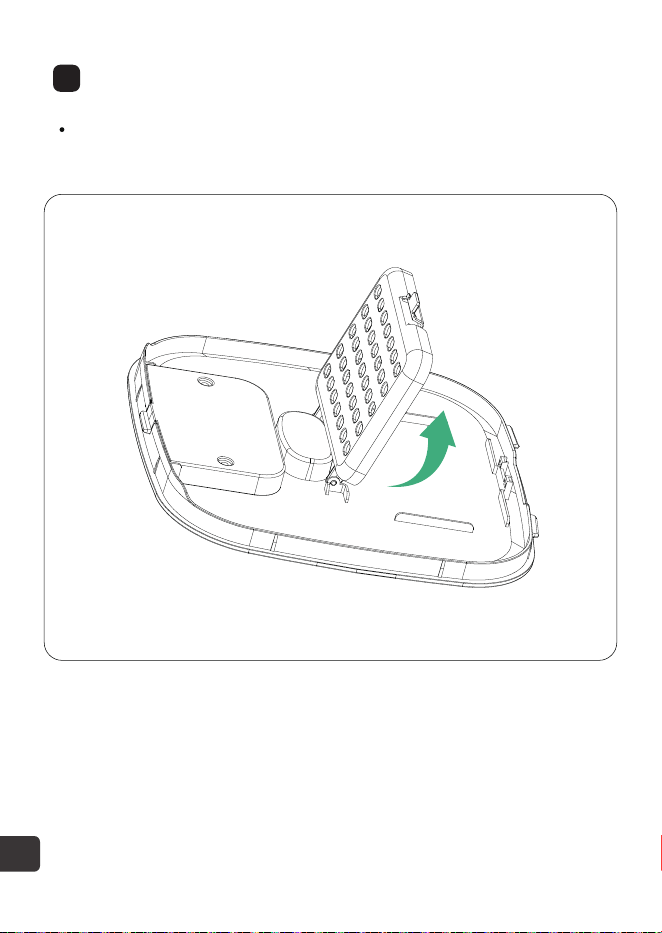
Load in desiccant
Open the desiccant cap, put in the desiccant bag, and then
close the cap.
5
3
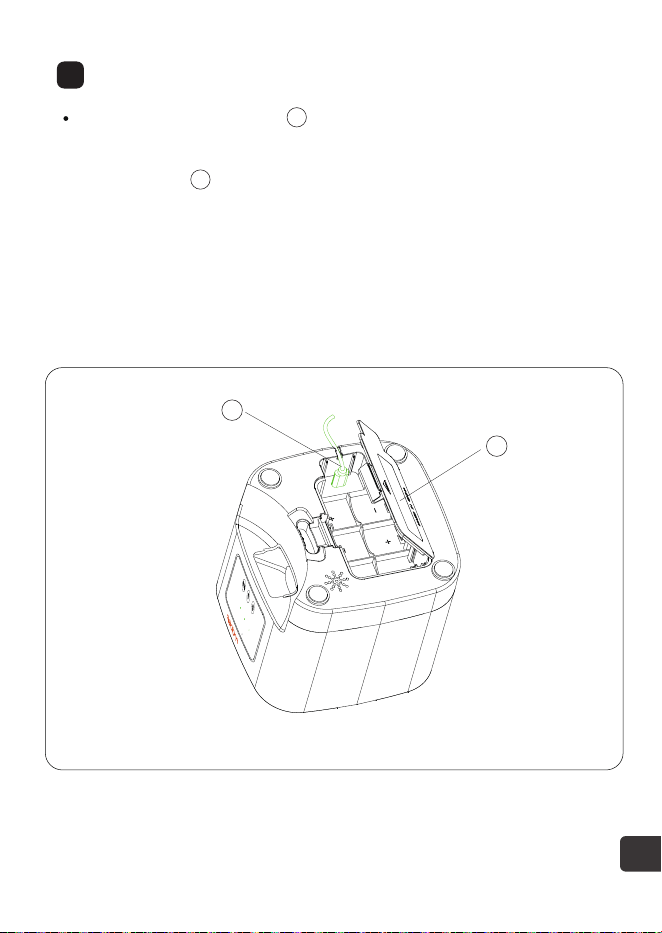
Insert batteries and power cable
Open the battery cover ① upward according to the indicated
position, put in 3D-type batteries, then insert the Type-C
power cable ②, put the cable into the cable slot, and finally
close the battery cover.
We highly recommend using dual power supply mode.
The machine will automatically reset after 48 hrs. of a
power outage and all data will be cleared.
Note:
2
1
2
1
6
4
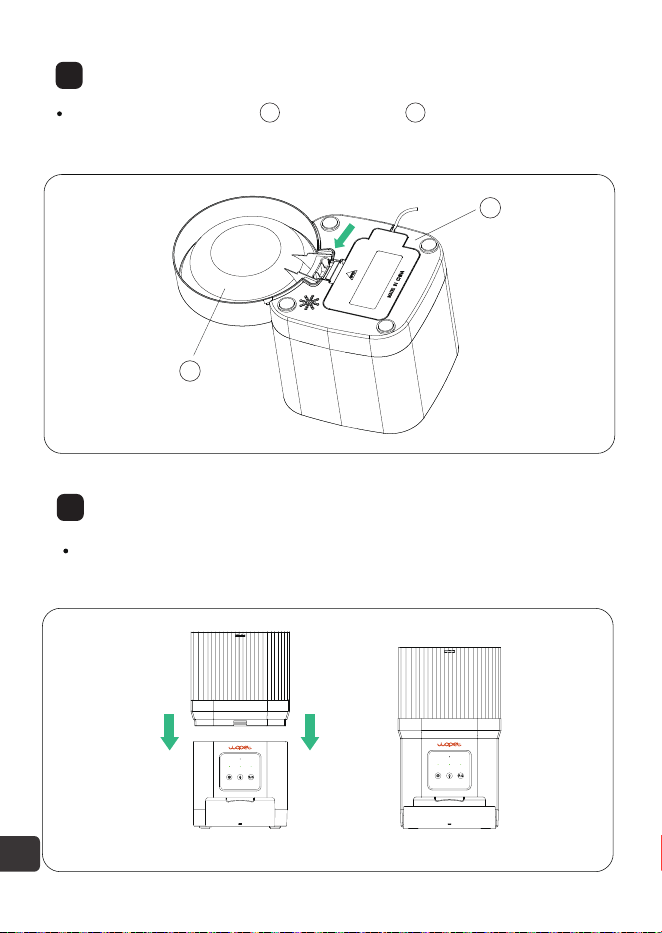
Install the bowl
Install the food bowl ③ into the base ④ in the direction of the
arrow as shown in the figure below.
5
Install the hopper
Install the hopper into the feeder base from top to bottom
according to the arrow shown in figure (1)(2).
(1) (2)
3
3 4
4
7
6
Install the lid
First tilt the cover into the slot, as shown in (3), and then
press "lock" to close the cover into place, as shown in (4).
7
Clean the hopper
Fix the base of the machine, lift the hopper upward and
take it out, as shown in (5)(6).
(3) (4)
(5) (6)
lock
8
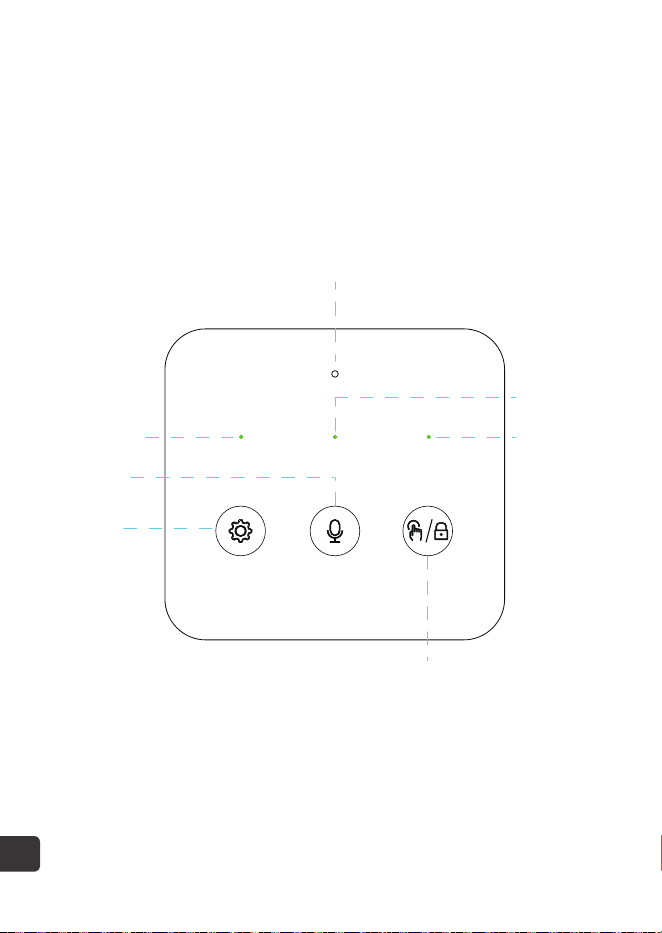
Feeder Panel Introductions
Wi-Fi
Indicator
Reset
Status
Indicator
Lock
Indicator
Unlock/Manual Feeding
Voice
Recorder
Microphone Recording
9
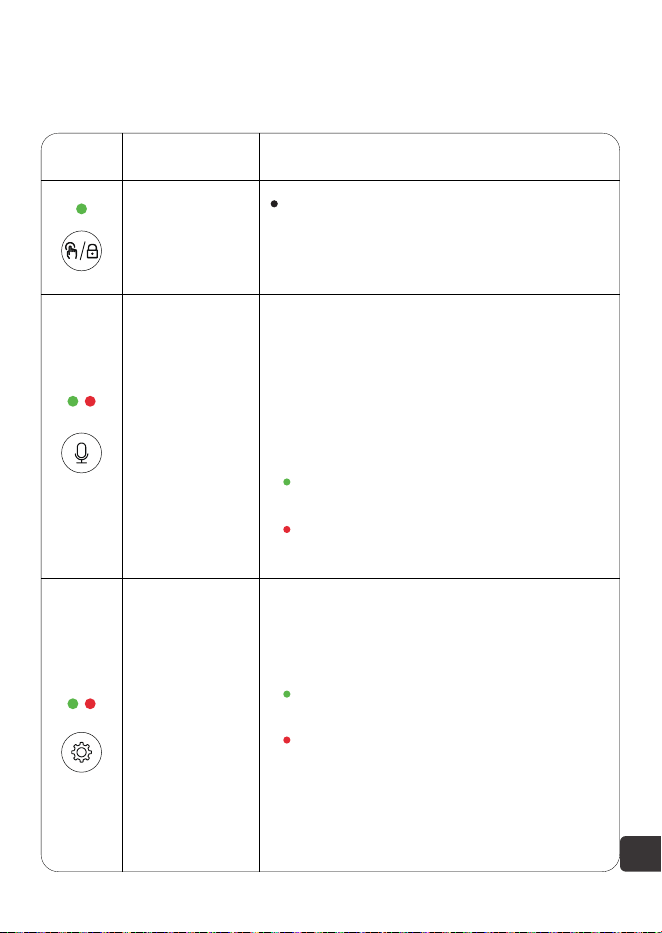
Buttons and Indicator Lights
Button Description
Unlock/
Manual Feed
Record
Reset
Hold for 2 seconds to lock/unlock.
Indicating light turns off in unlocked
state.
Click to dispense 1 portion.
Function Instructions
Status indicator:
Press and hold in unlocked state to
record (up to 10 seconds); release to
stop. Two beeps confirm saving.
Distance from the machine affects
recording volume.
Green light: The feeding process is
functioning correctly.
Red light: Motor stuck or other
failure.
Steady green light: The network is
normal.
Red light: Failed to connect to network.
Press and hold the button for 5
seconds until the indicator light flashes,
signaling a reset to factory settings.
Note: 1. Network pairing only in AC power
mode.
2. No App operations in battery mode.
3. Batteries are used ONLY as a backup power
source.

Note: Turn on Bluetooth and location services on your phone
before adding a device to control the device.
10
WOpet APP Setup
Download the “WOpet Life” APP
Register An Account
To download the “WOpet Life” app, scan the QR code
or search “WOpet Life” on App Store® for iOS or
Google Play Store for Android.
Open the “WOpet Life” app. If you already have an
account, tap "Log ln". To create a new account, tap "Sign
Up".
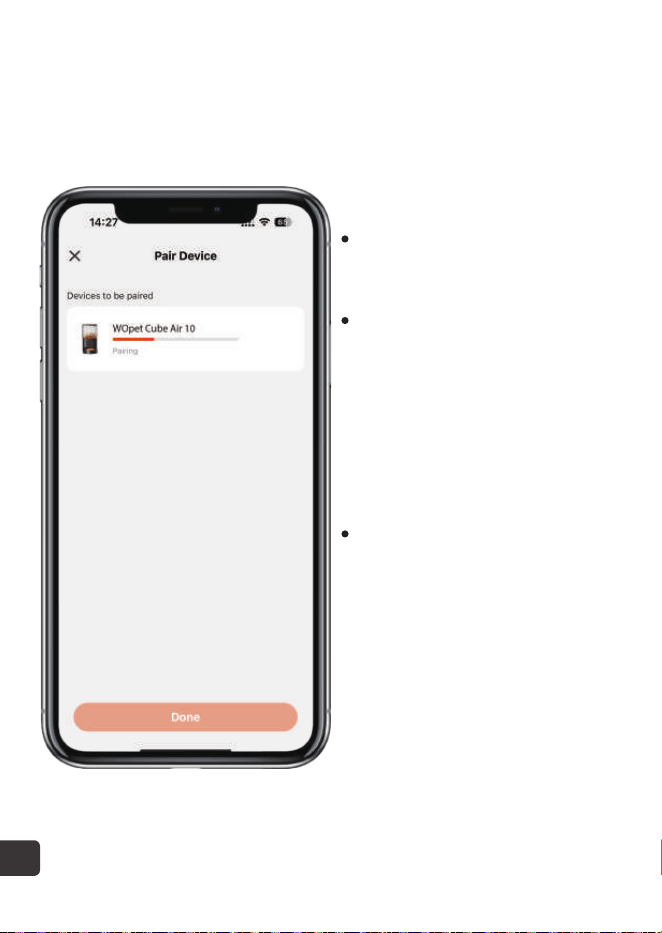
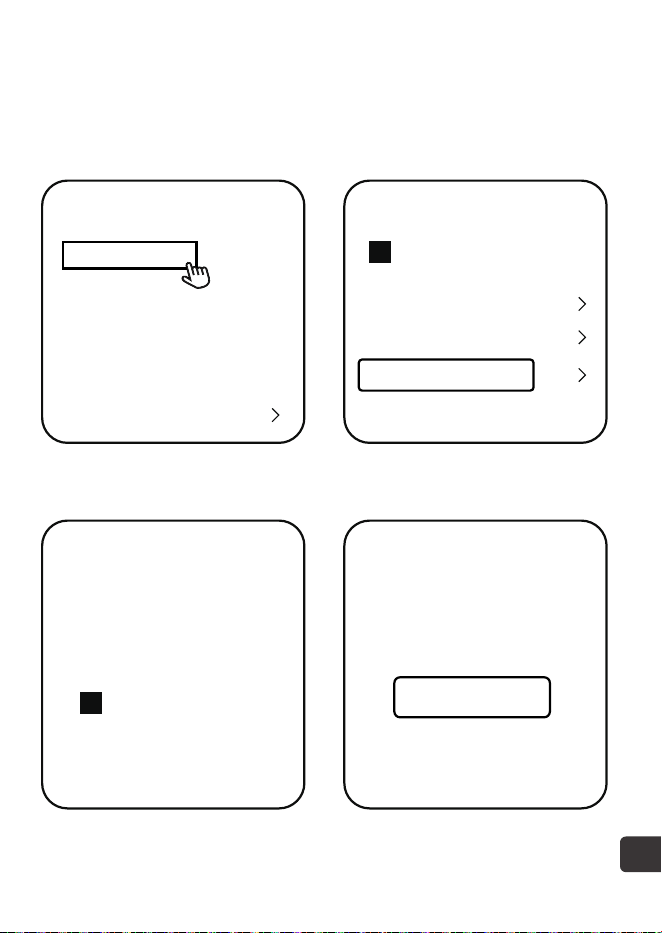
Add A Device
Tap "Set Up Device".
APP searches for nearby devices; click the desired
device and follow
the instructions.
1
2
3
Note: The mobile APP UI will be upgraded from time to
time, please refer to the actual interface for specific details.
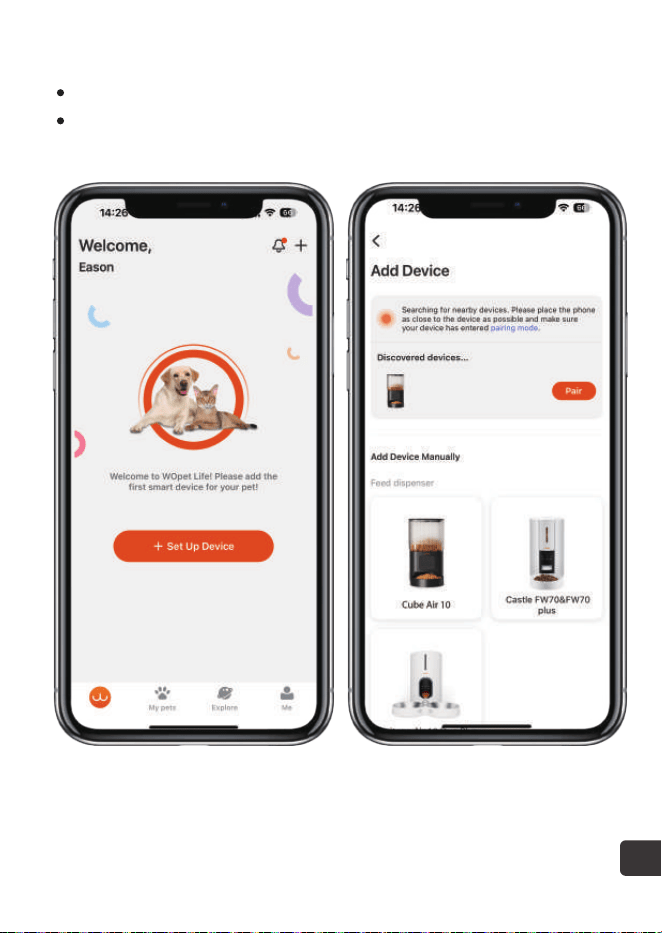
If not found, manually select from the device list.
Added devices appear on the homepage list.
11
This product is compatible
with 2.4GHz WiFi only and
does not support 5GHz WiFi.
For a stable WiFi connec-
tion, keep the device within
19.7ft (6m) of the router,
unobstructed by walls or
objects.
Network pairing works only
in power supply mode, not in
battery mode.
Note:
12

FAQs
Q: Icannotconnectthe feeder toWi-Fi.
A: 1.Check if connected to a 2.4GHz network, this product does
not support 5GHz network connections.
2.Check if the machine is powered correctly.
3.Check if the account and password are correct, and enter
the correct account and password.
(composed of letters, numbers, symbols, etc., 8~16 digits).
4.Check if the feeder is powered by batteries. App operation
is not supported when powered by batteries.
5.Resetthefeeder.
6. Email our customer service at [email protected] for
further assistance.
Q: The feeder shows offline.
Q: Theoperationbuttonsonthepaneldonotwork.
Q: The APP operation does not dispense food properly.
A: 1.Keepthefeederwithincloserangetotherouter
(within6m/19.7ft),withoutwallsorotherobjectscausinga
weaksignal.
2.Resetthefeeder.
A: Checkifthechildlocklightison.Exit child lock mode by
long-pressingtheunlockbutton for2seconds.
A: 1.Check if the power supply is normal, and if the battery
power is sufficient when powered by batteries
(indicated by the red light).
2.Check if the food bowl is overfilled.
13

Q: The amount of food dispensed is not the same.
A: When first add food to the machine, the initial serving might
be smaller. This is a normal occurrence. From the third serving
onwards, the machine will dispense consistent portions.
Q: What to do when the indicating light above“ ”flashes?
A: Keep the feeder within close range to the router
(within 19.7ft/6m), without walls or other objects causing a
weak signal.
Q: What to do when the indicating light above“ ”flashes?
A: Clear out food from the food tank, check if it is stuck in
between the turnplate.
Q: What if I receive a food blackage message in my feeding log?
A: 1. Check if food are clogged in the dispensing tunnel.
2. Manually clear out food from the tunnel, and check if food
is stuck at turnplate.
Q: Can we use battery as a primary power source?
A: Batteries are only a back-up power source.
14
3.Check if the hopper is empty.
4.Checkiftherotorisjammed.Iftheworkingindicatorlight is
constantlyred,removeandcleantherotortosolvethejam.
5.Check if the food size is too large which causes a blockage.
The feeder allows dry food with a diameter of 2-12mm
(0.08-0.47inch).

Scan the QR code to get help
For more questions, please email our support team:
FCC Warnings
Changes or modifications to this unit are not expressly
approved.
Non-compliance could void the user's authority to operate the
equipment.
Notes:
This equipment has been tested and found to comply with the
limits for a Class B digital device, pursuant to Part 15 of the
FCC Rules. These limits are designed to provide reasonable
protection against harmful interference in a residential
installation.
15

Reorient or relocate the receiving antenna.
Increase the distance between the equipment and the receiver.
Connect the equipment into an outlet on a different circuit from
that to which the receiver is connected.
Consult the dealer or an experienced radio/TV technician for
help. Shielded interface cables must be used with the
equipment in order to comply with the limits for a digital device
pursuant to Sub part B of Part 15 of FCC Rules. Specifications
and designs are subject to change without any notice or
obligation on the part of the manufacturer.
This equipment generates, uses and can radiate radio frequency
energy and, if not installed and used in accordance with the
instructions, may cause harmful interference to radio
communi-cations. However, there is no guarantee that
interference will not occur in a particular installation. lf this
equipment does cause harmful interference to radio or
television reception, which can be determined by turning the
equipment off and on, the user is encouraged to try to correct
the interference by one or more of the following Measures:
16
Ask Us A Question
Home
Your Order
Buy Again
Your Wish List
Your Account
Shop by Department
Order#
Order Total
Shipped
Product link
Qty: 1
Sold By: Seller
Your Orders
Product link
Buy it again
Write a product review
View order details
View order details BRAND
Have a question
for the seller?
Ask a question
1.Find your order 2.Click “View order details”
3.Click the Seller name 4.Click “Ask a question”
17

19
Warranty Information
Complimentary parts, replacements, consumable products
are not covered by the 2-year warranty.
Manufactures’ warranties may not apply in all cases, de-
pending on factors such as use of the product, where the
product was purchased, or who you purchase the product
from.
Please review the warranty carefully, and contact the
manufacture if you have any questions.
If you have any problems when using our products, please
send us an email at support@wopet.com
Standard Warranty: 1-Year product Warranty
2-Year Warranty Application: Please scan the
QR code to finish the registration form on our
official website within 30 days after you
received the items.
30 days free Return & Replacement
18