Instruction manual
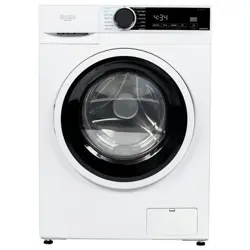
WDSAA86W
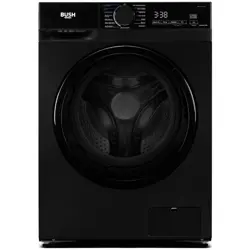
WDSAA86B

You’ll soon be enjoying your new washer-dryer.
It all begins here, with your instructions. Don’t worry,
there’s nothing too technical coming up. Just simple,
step-by-step guidance to get you up and running
quickly. Sound good? Then let’s get started.
Help and Guidance
We’re here to help you get the most from your . Should you require
washerdryer-
any guidance, a simple solution can often be found online at:
www.bush-support.com
If you still require further assistance, call one of our experts on 0345 257 7271.
Issue 1 10/05/2024

3
or online at www.bush-support.com If you still require further assistance, call one of our experts on 0345 257 7271.
Contents
Product support
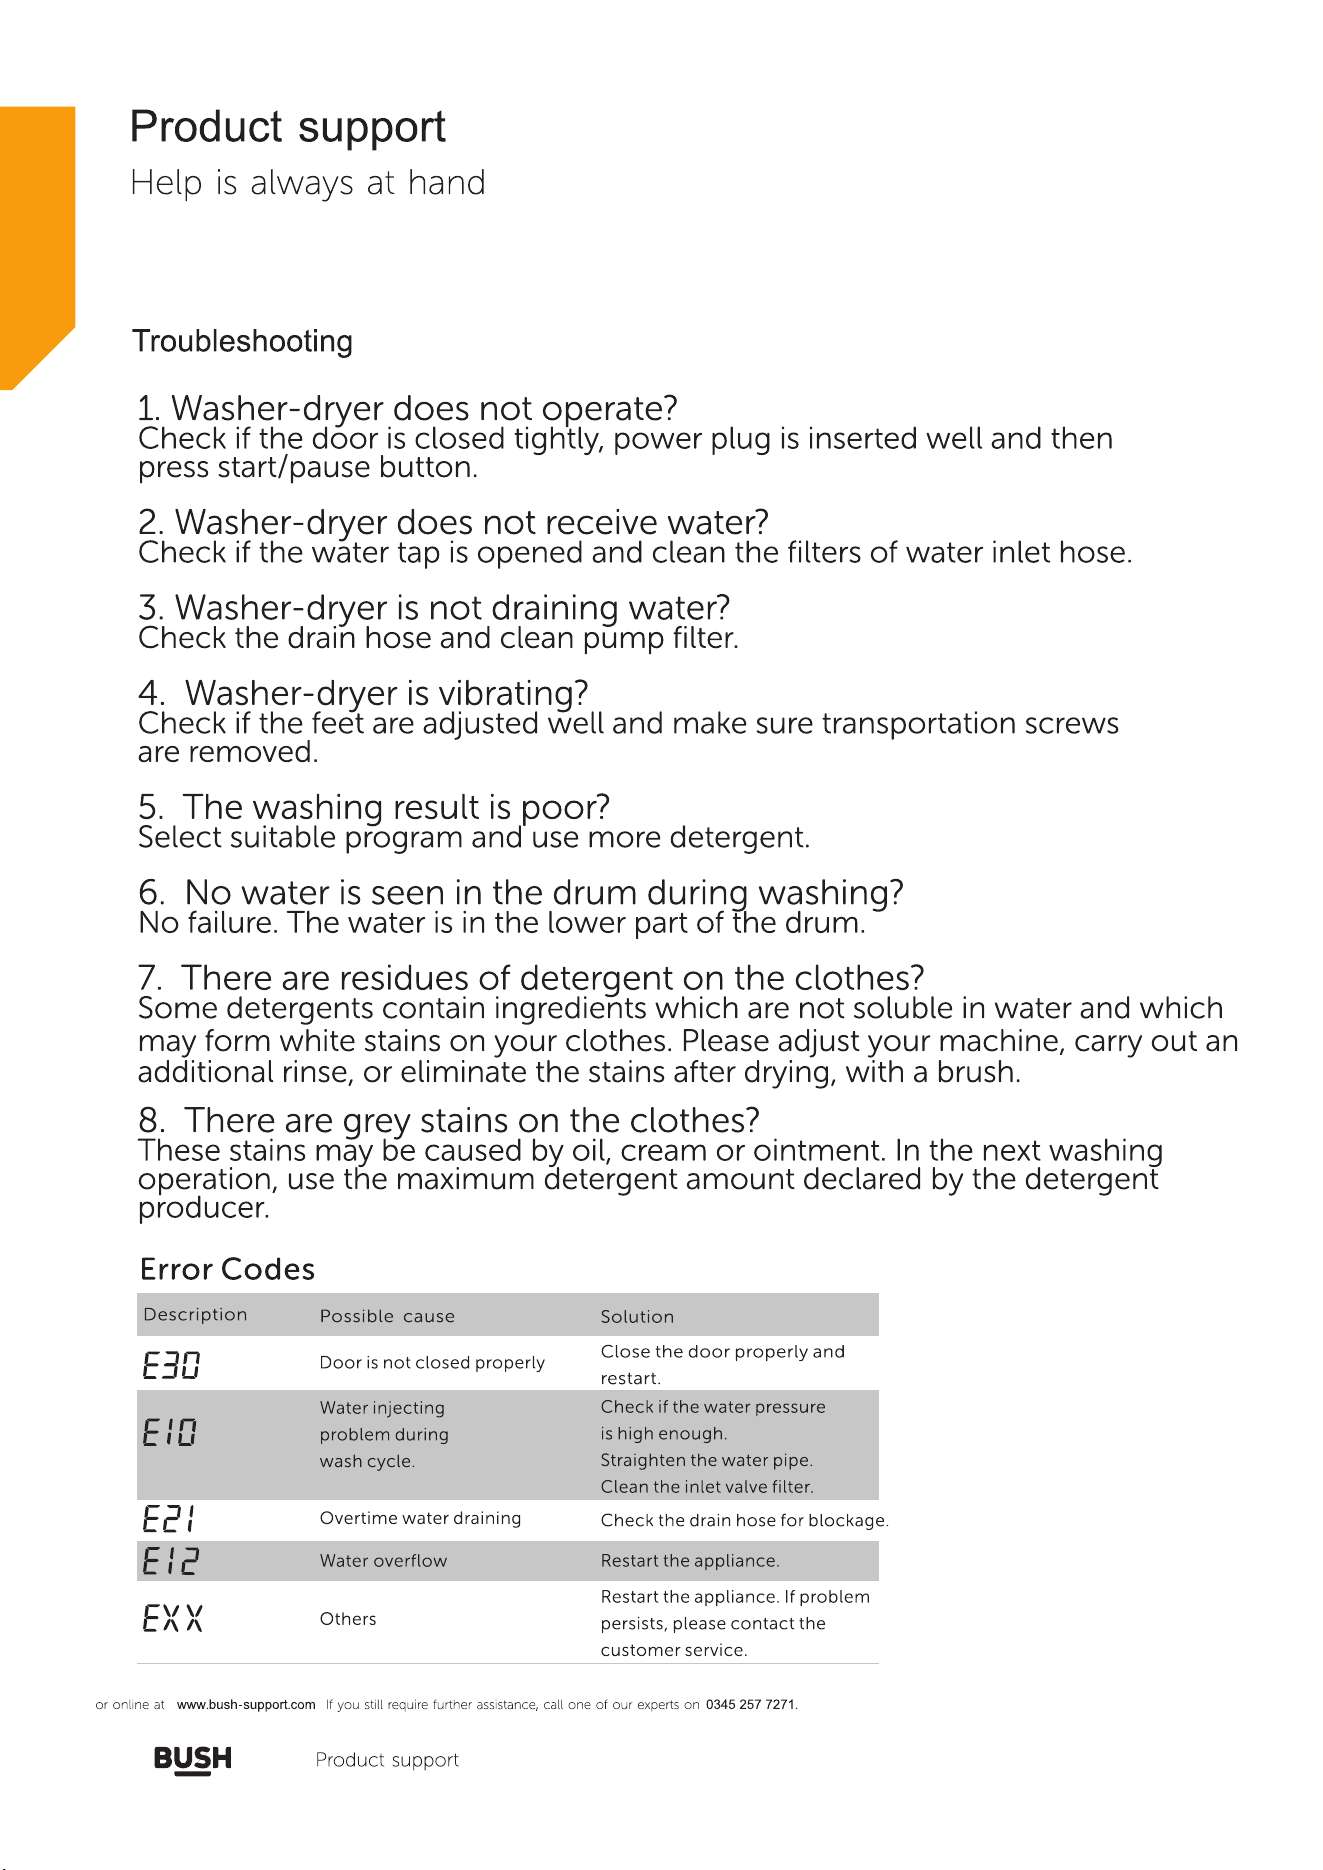
Troubleshooting
38
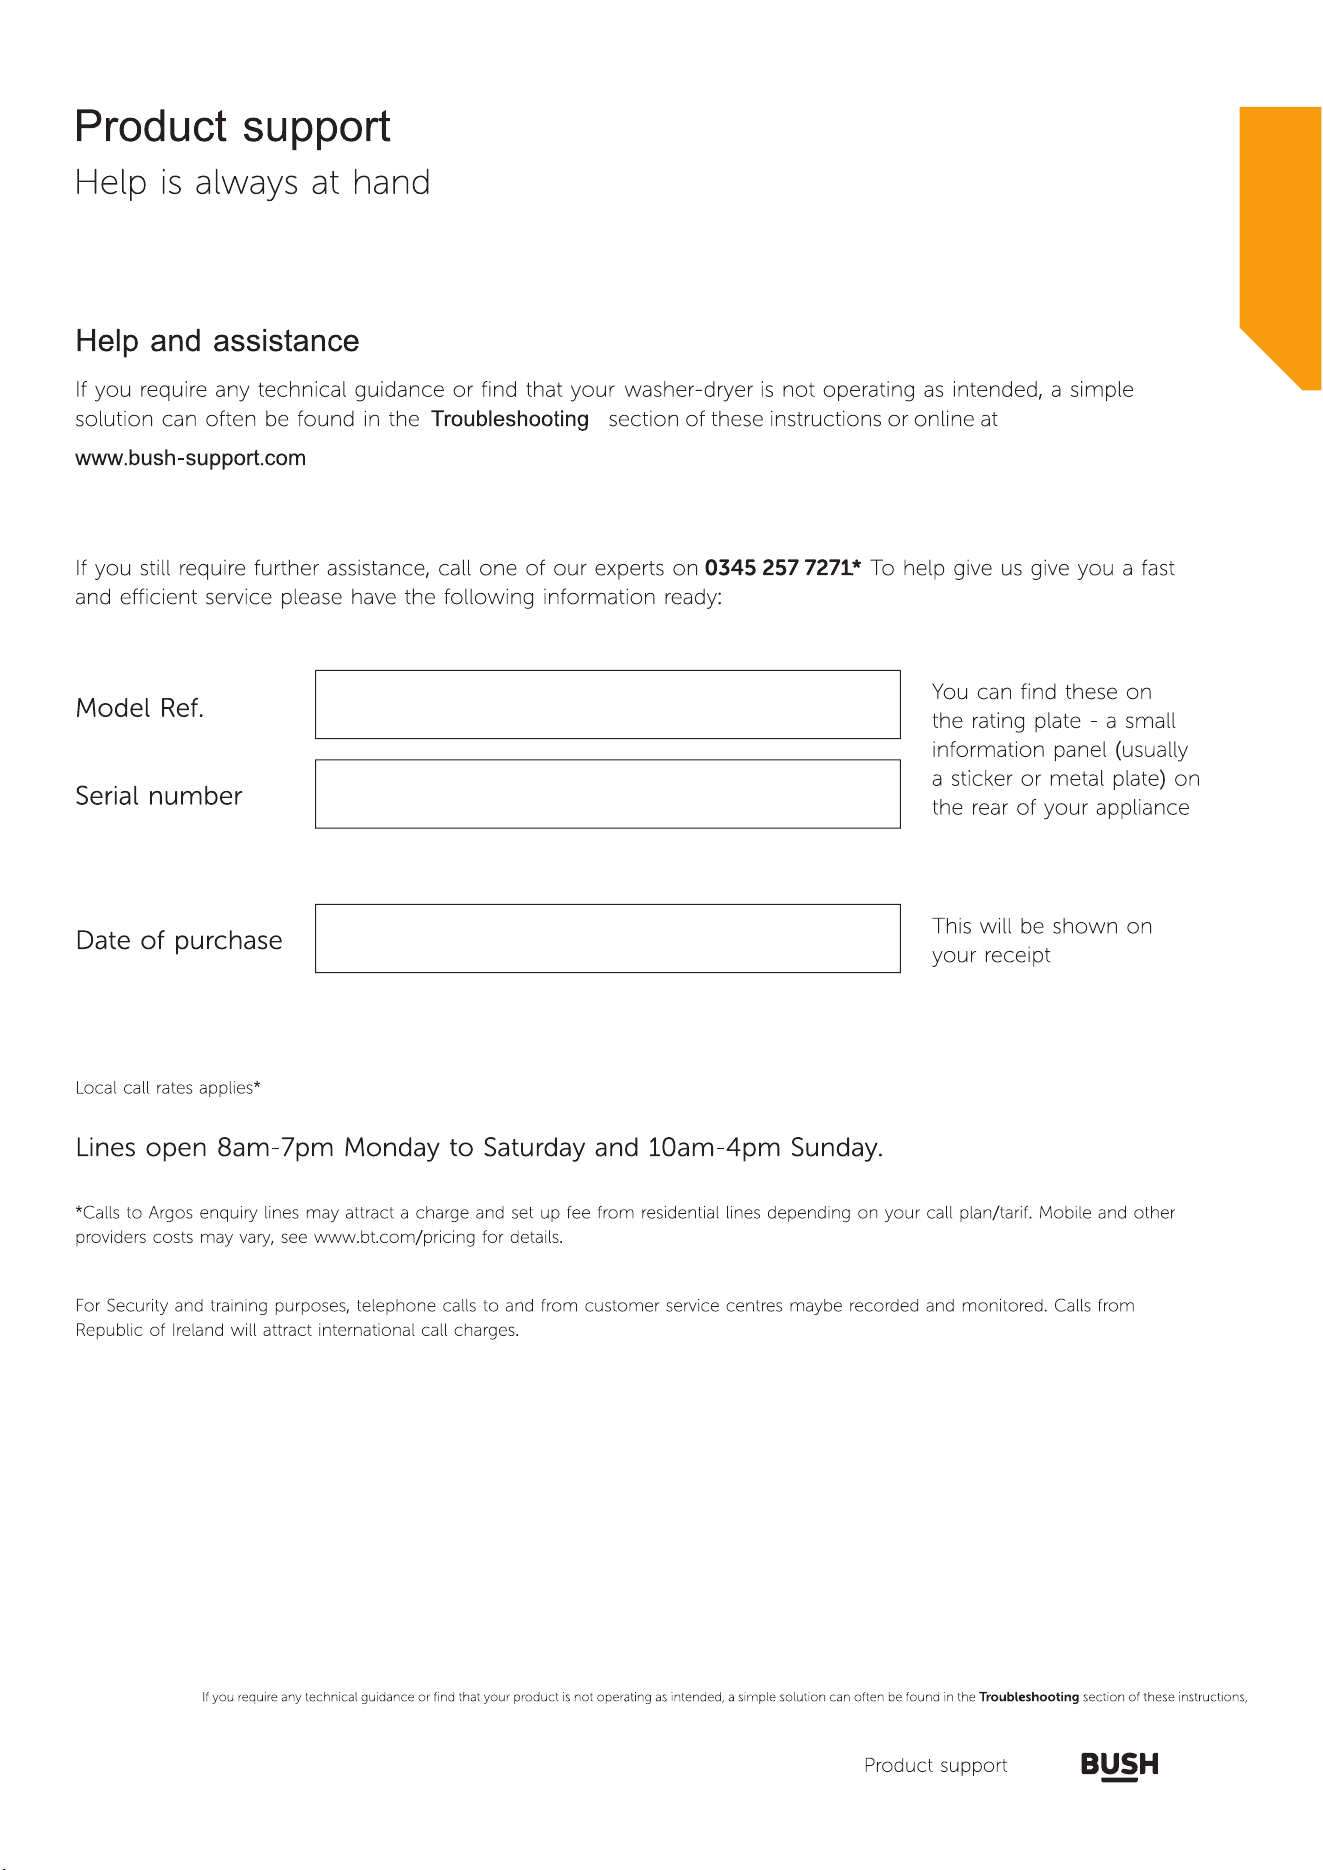
Help and assistance
39
Declaration of conformance to product
standards 40
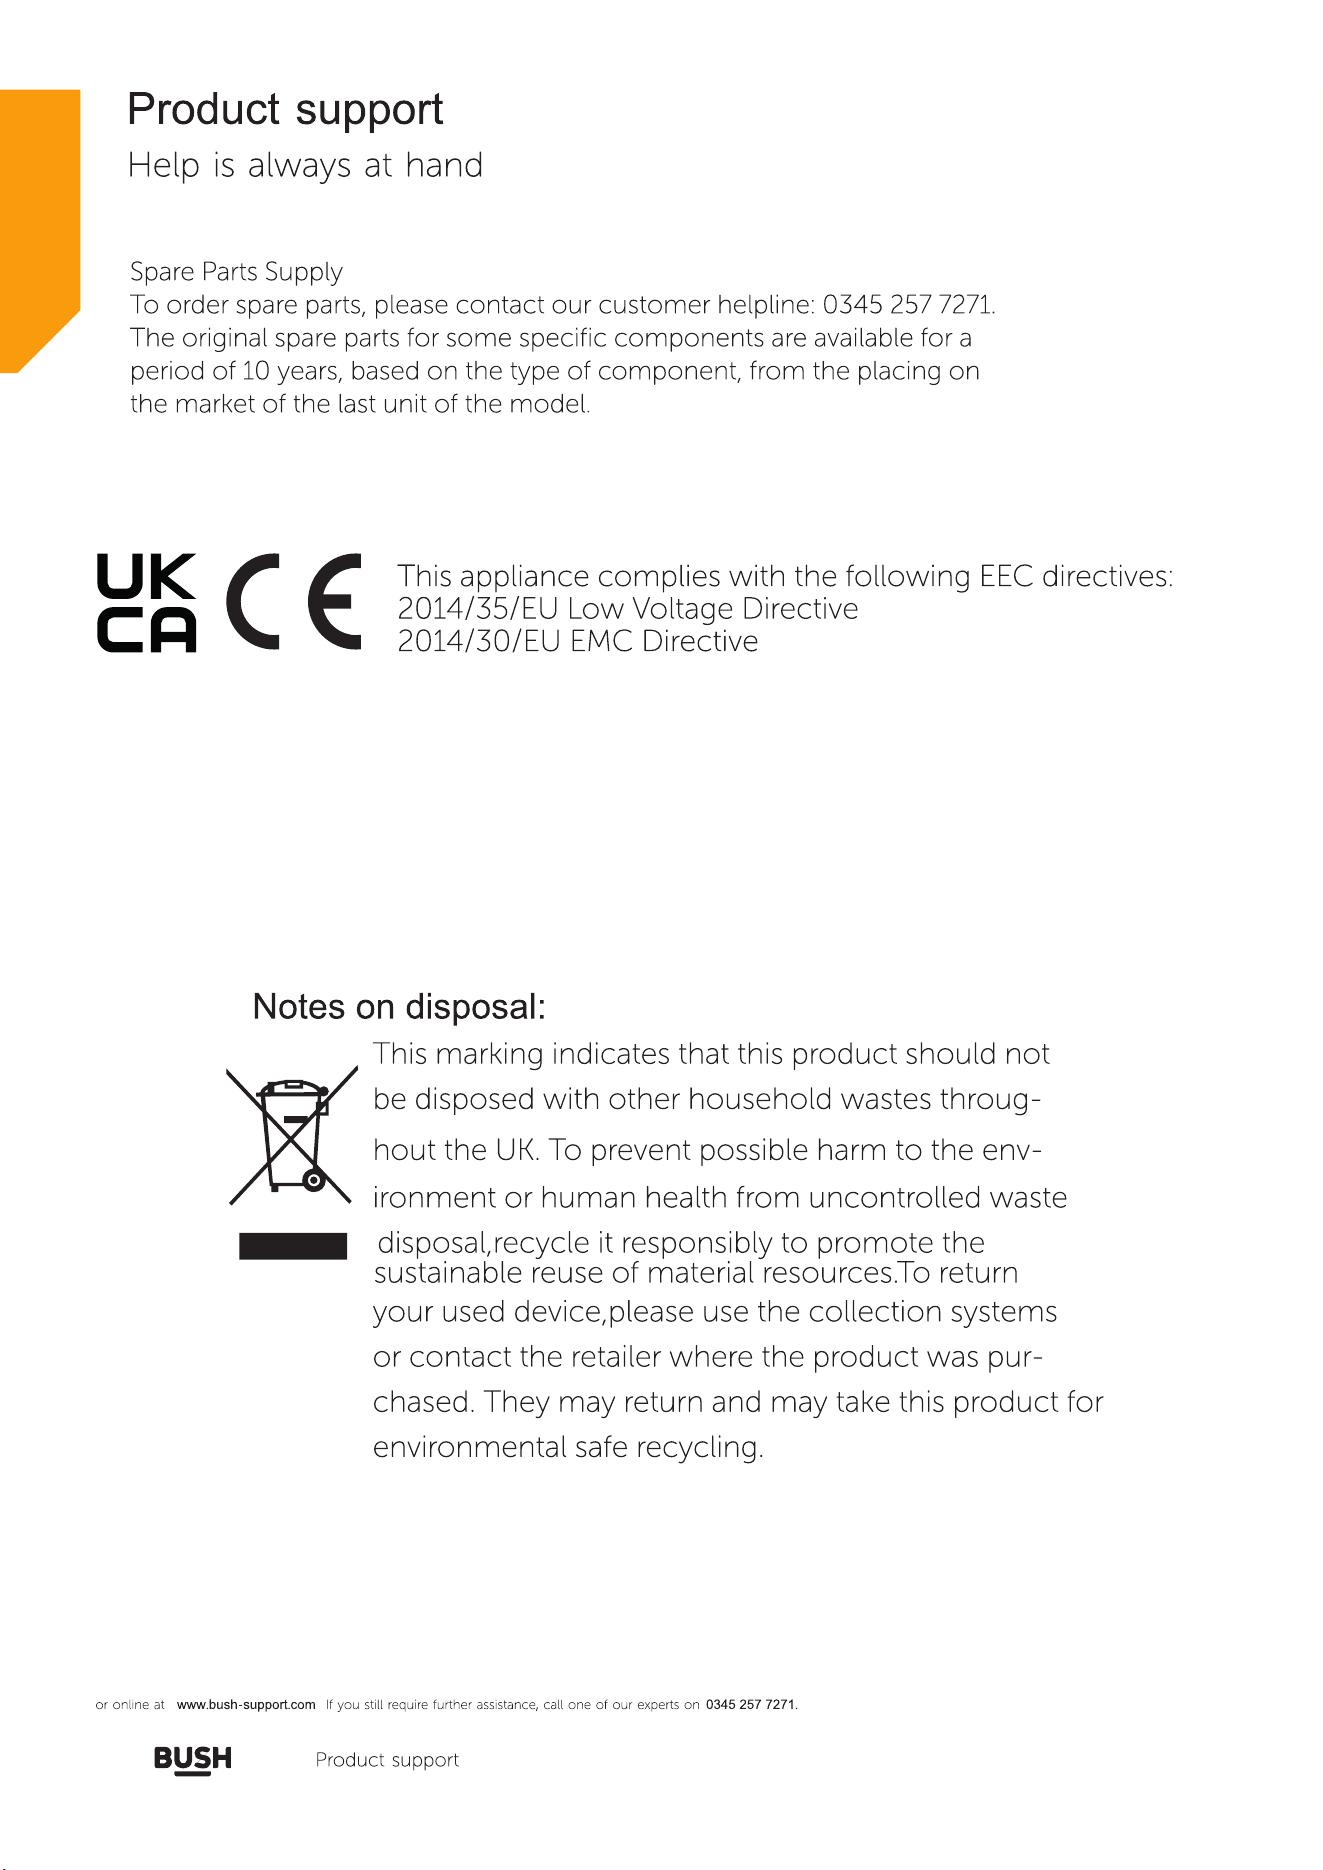
Disposal
41
7
Safety information
Safety information 6
Getting to know your
washer-dryer
Ready? Let’s begin 12
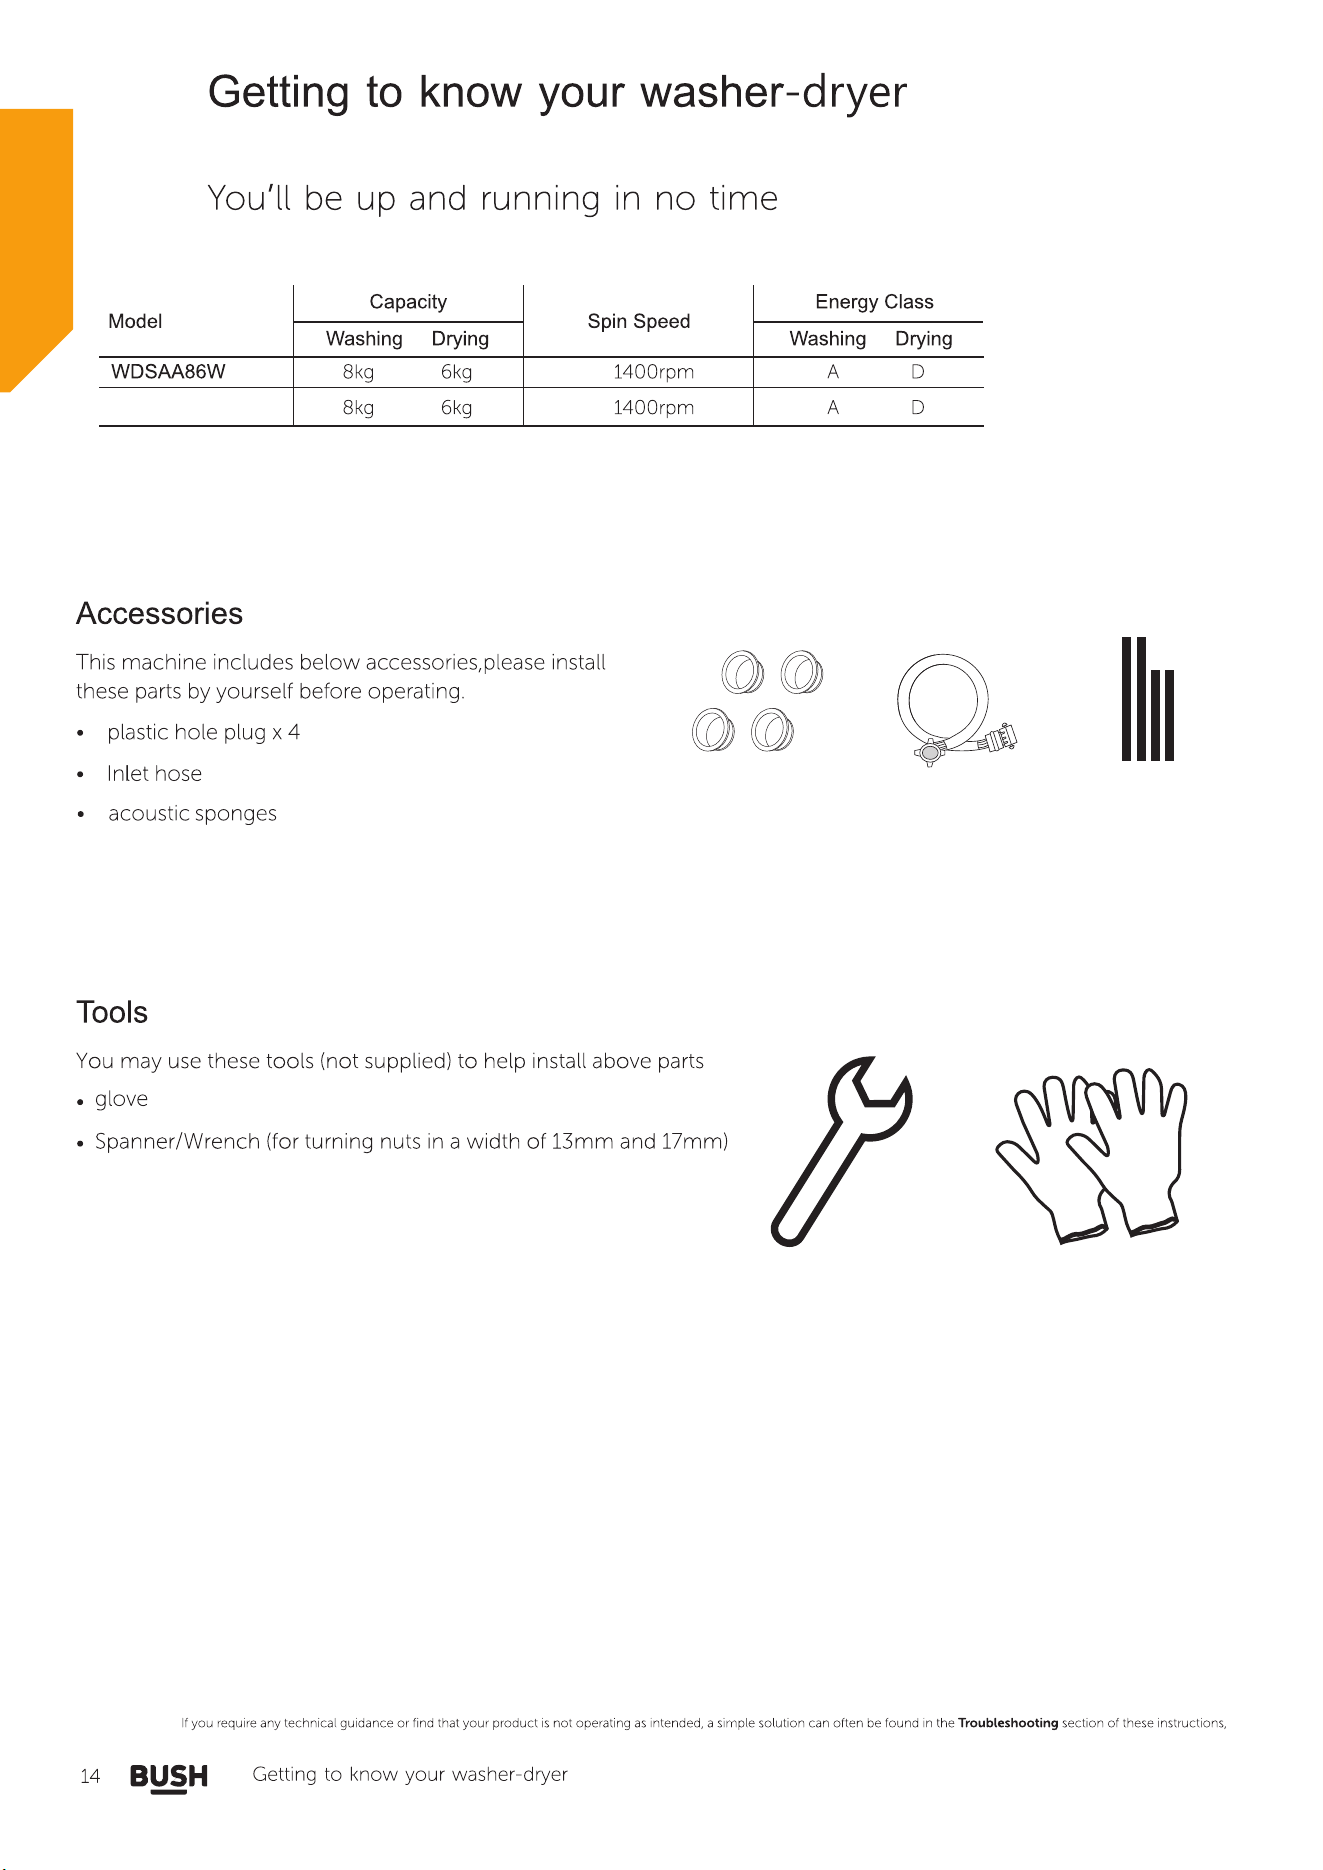
Accessories 14
Installing your washer-dryer
Installation requirements 16
Unpacking 16
Connections (electrical, water, gas) 17
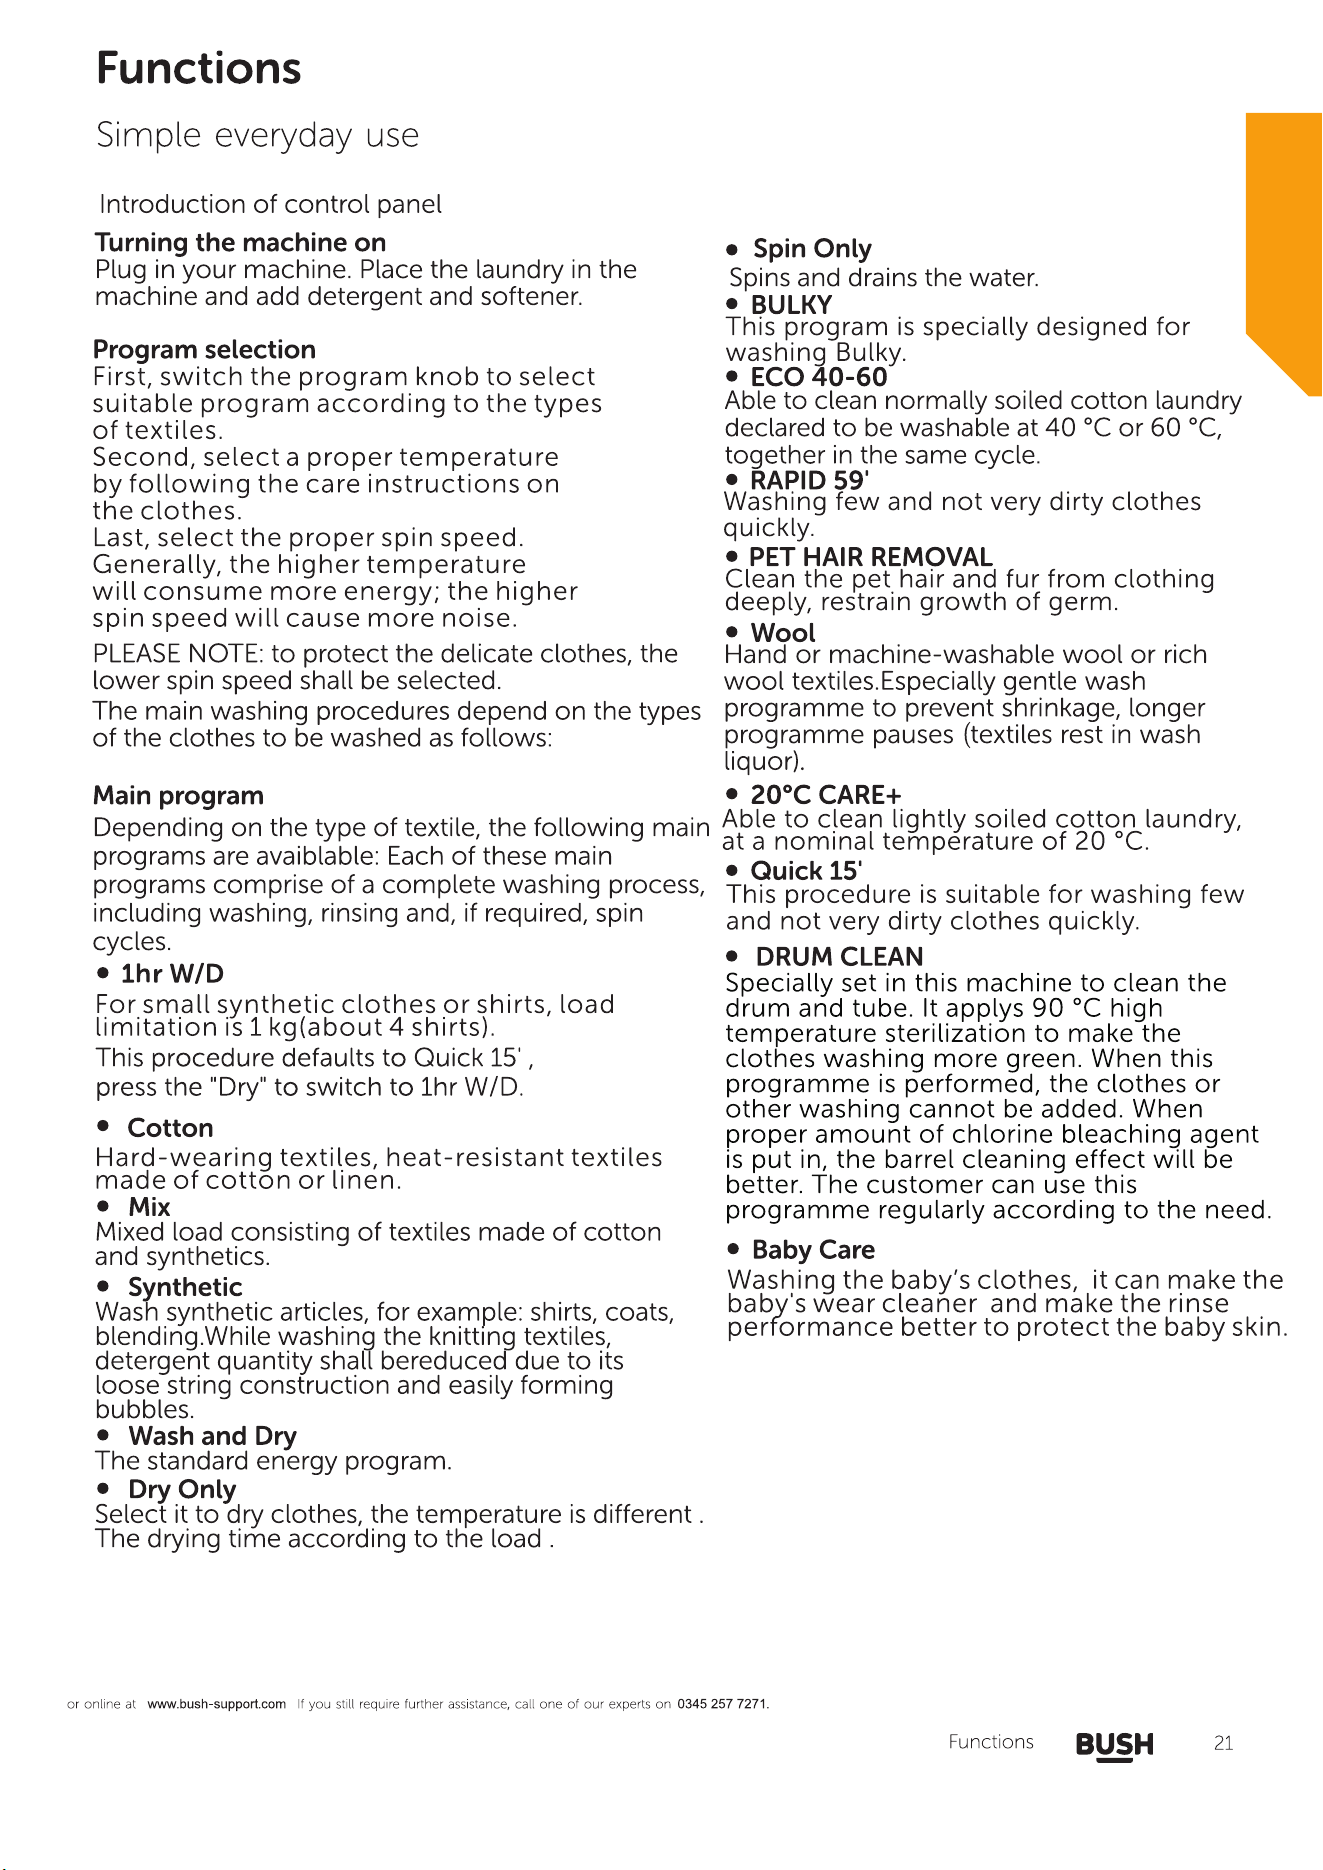
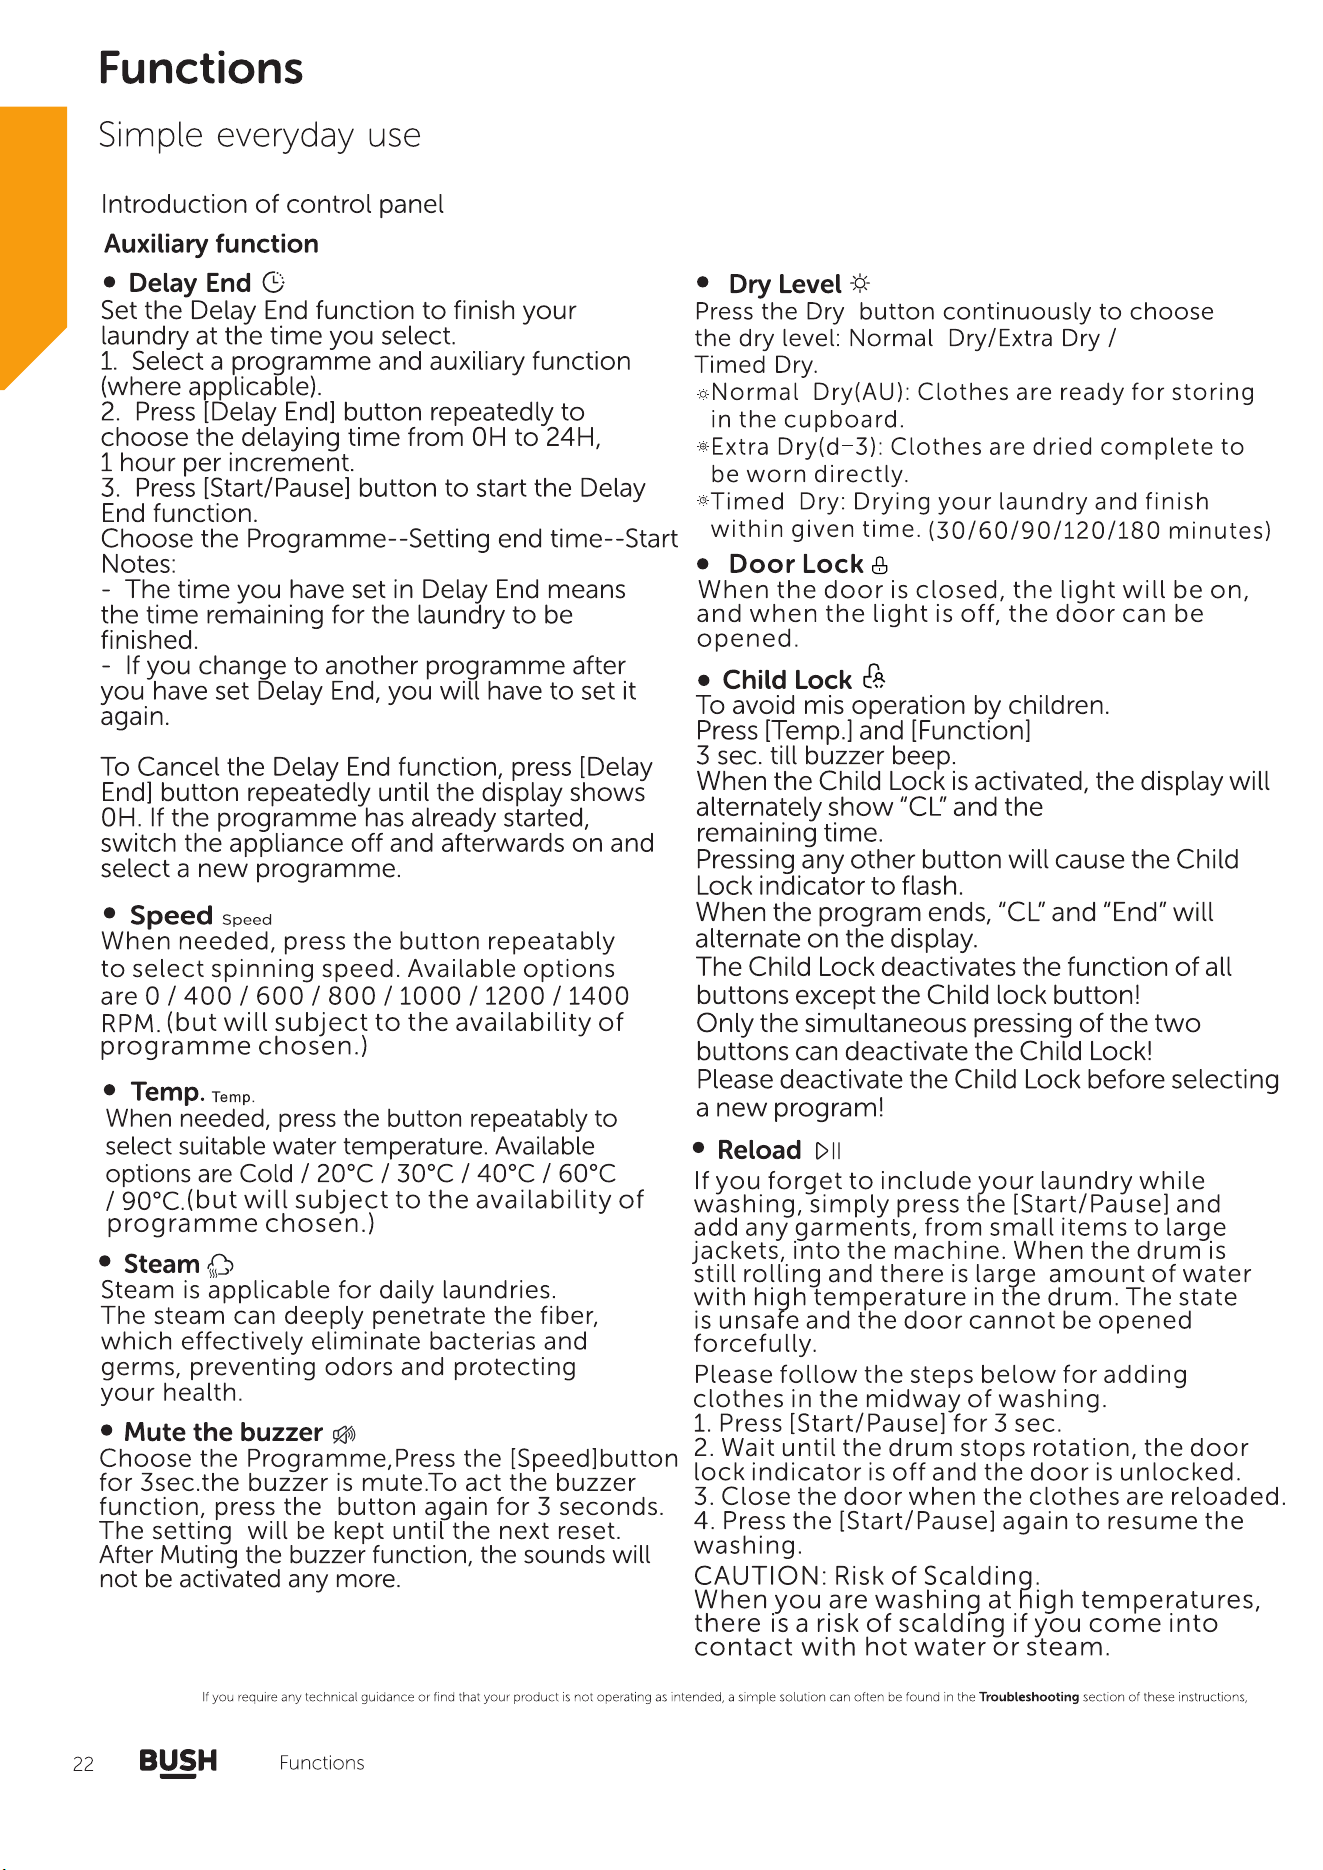
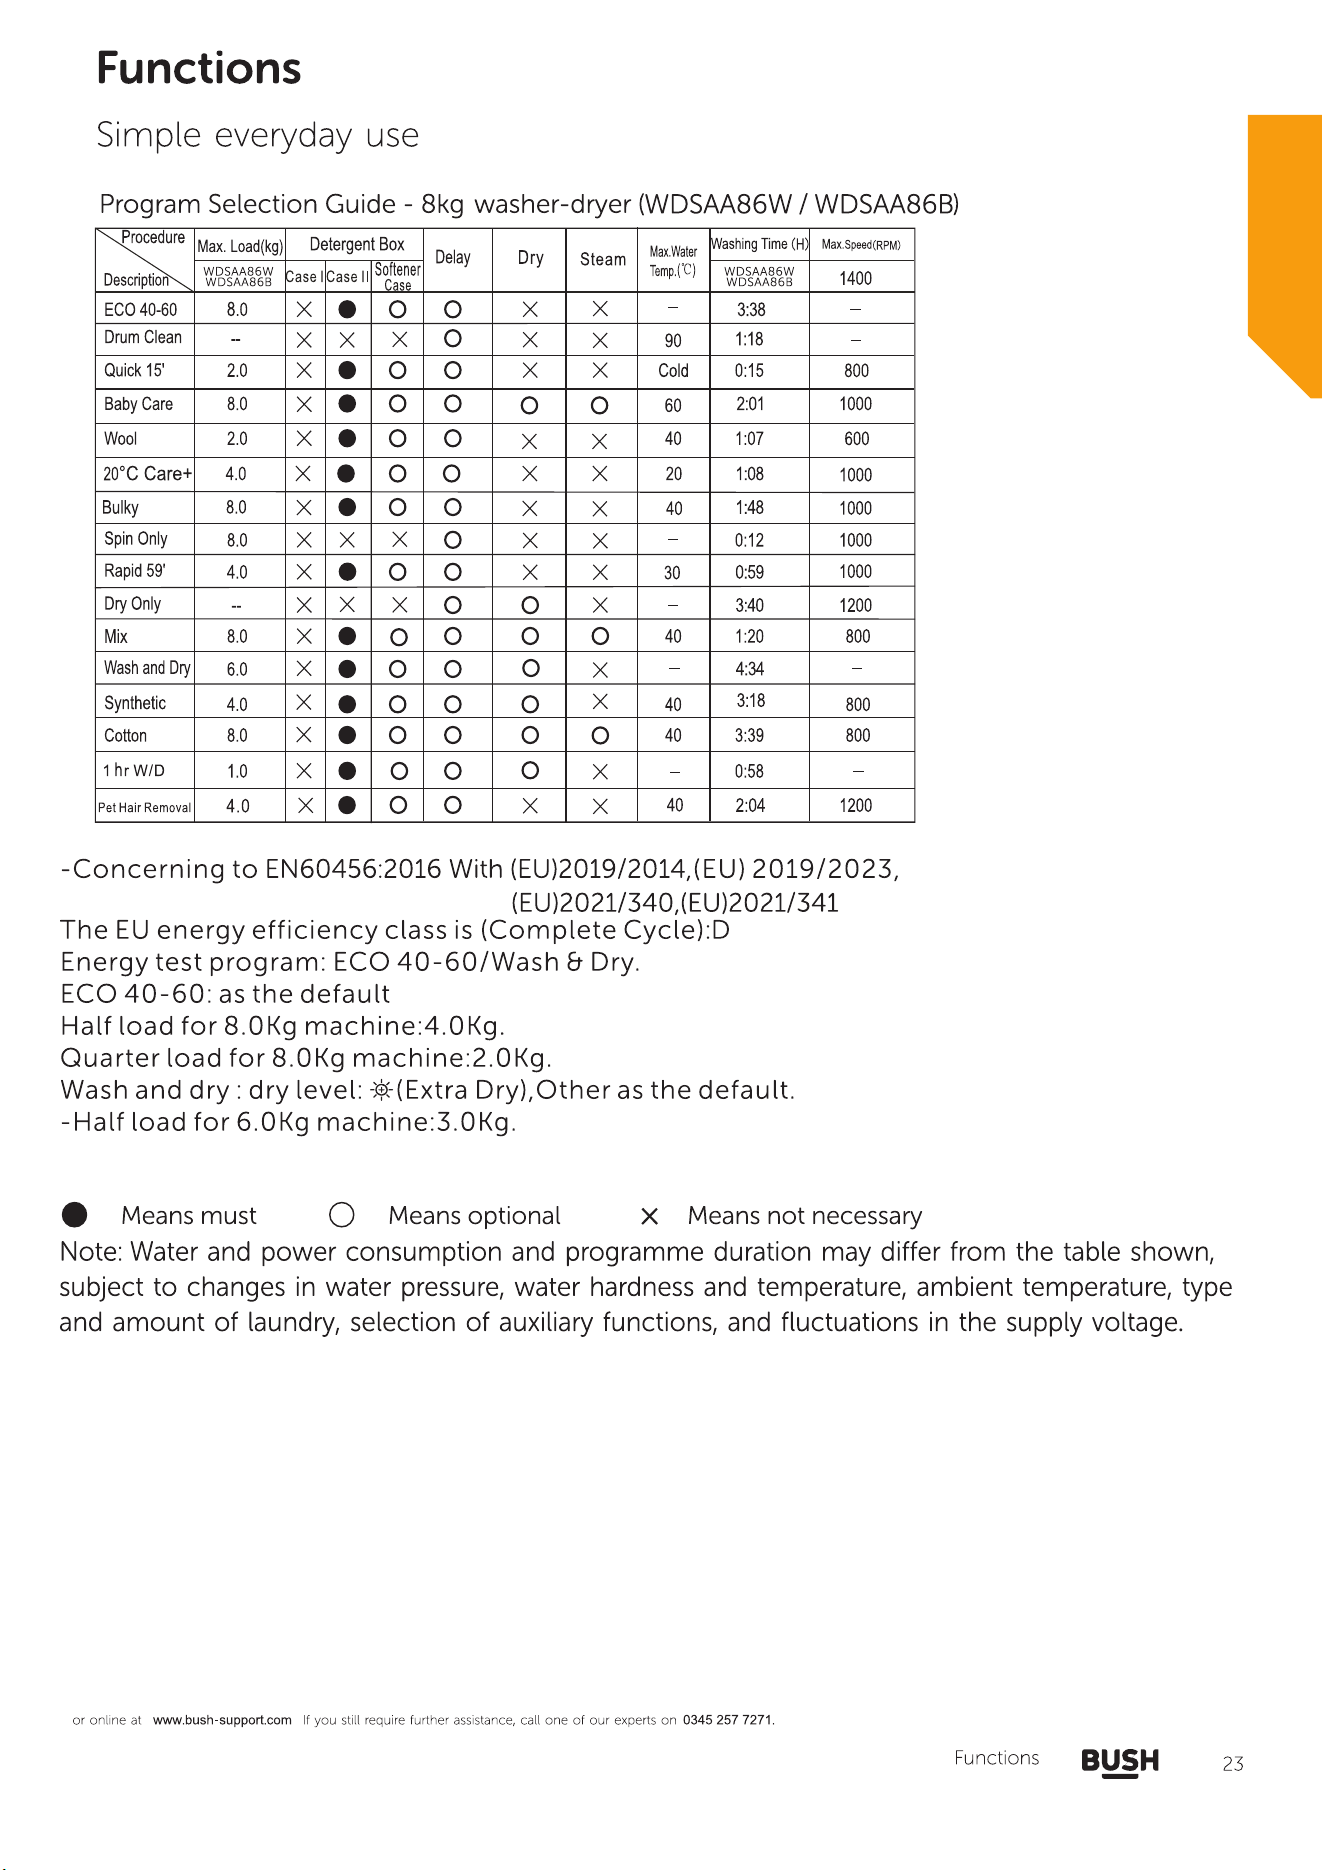
Functions
Functions 20
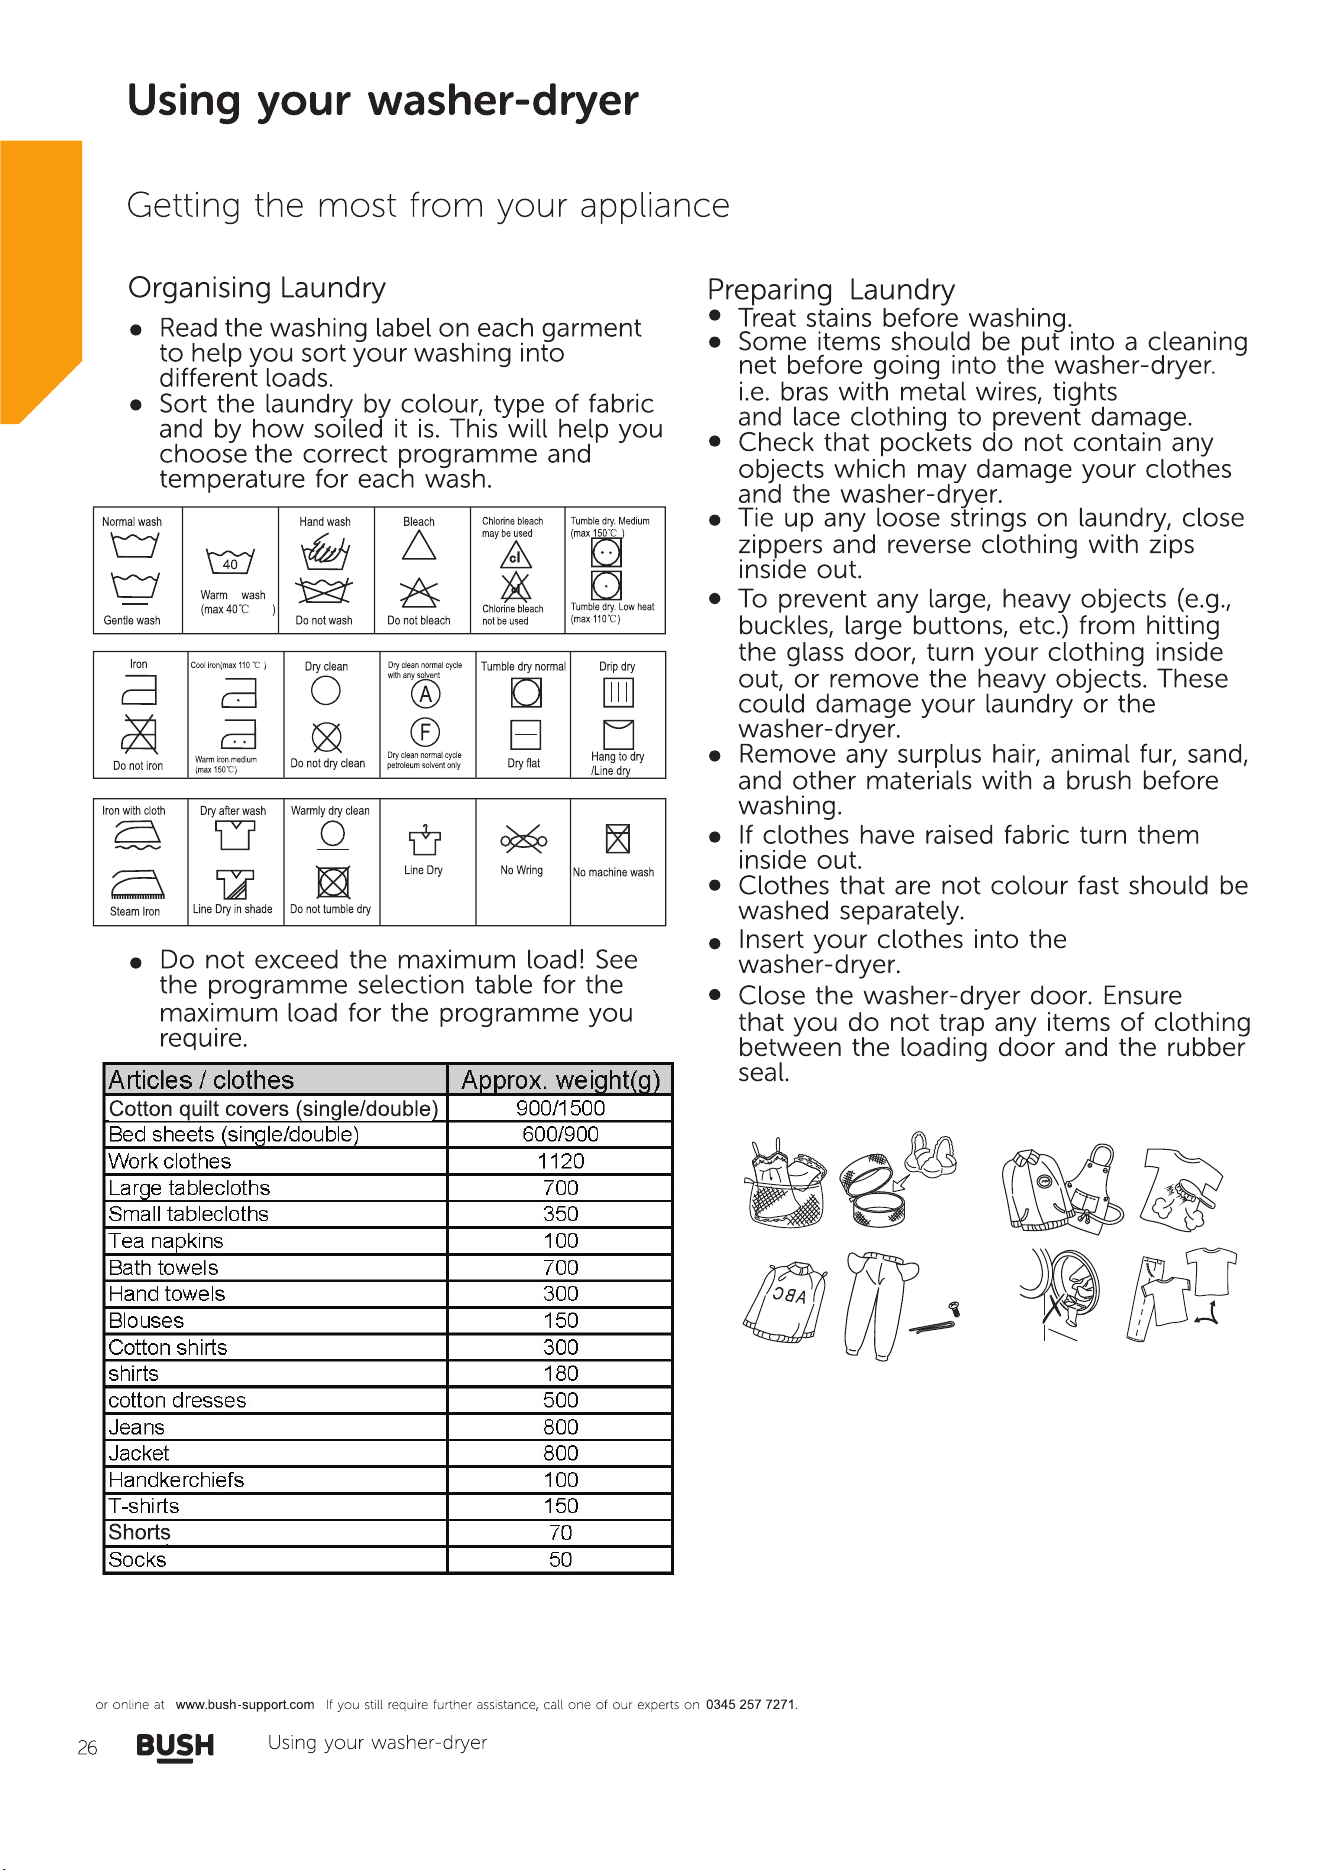
Using your washer-dryer
First
use of washer-dryer
26
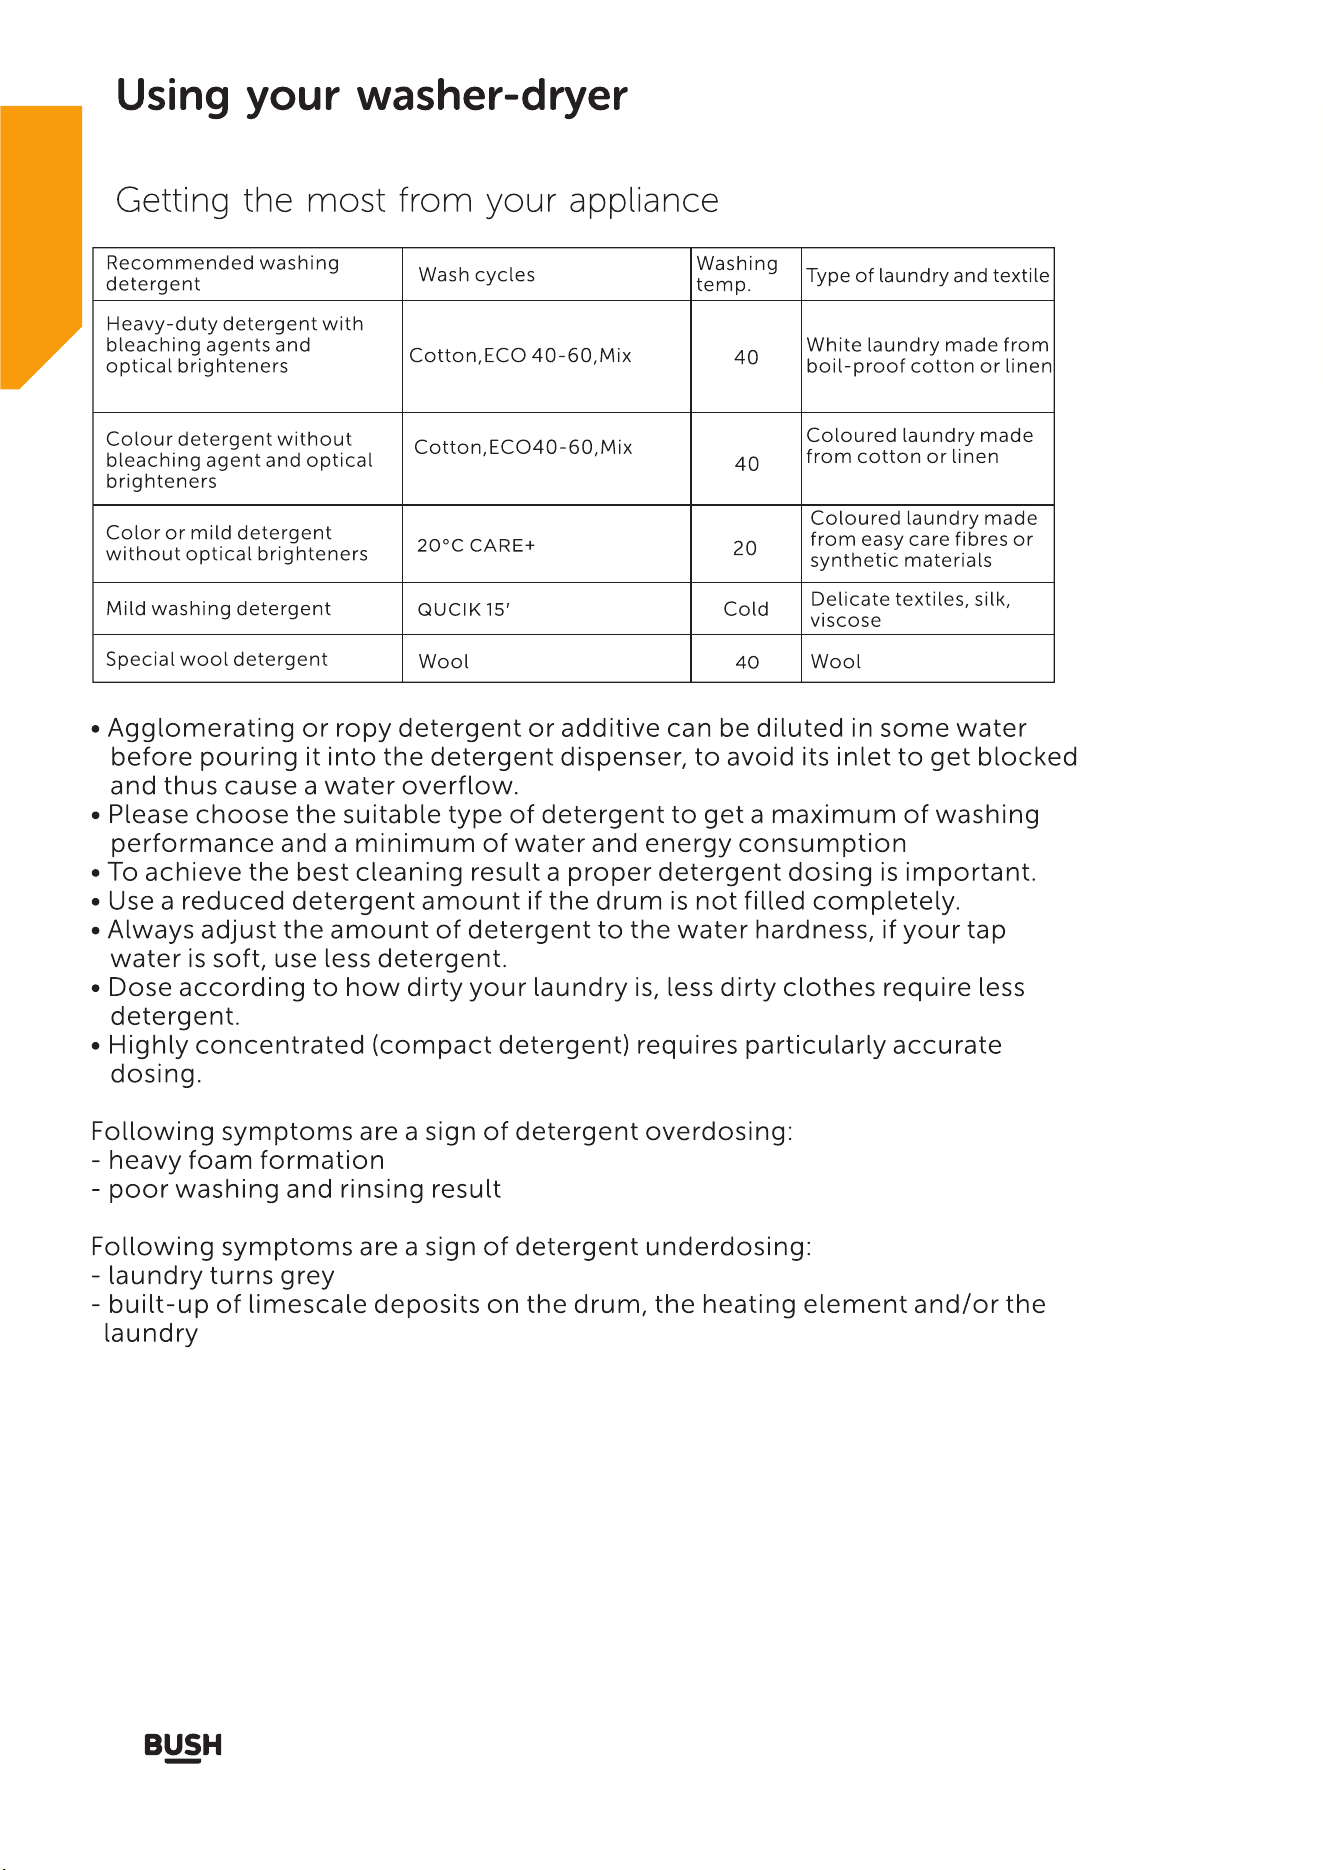
Guidelines of washing detergent 27
Care and Maintenance
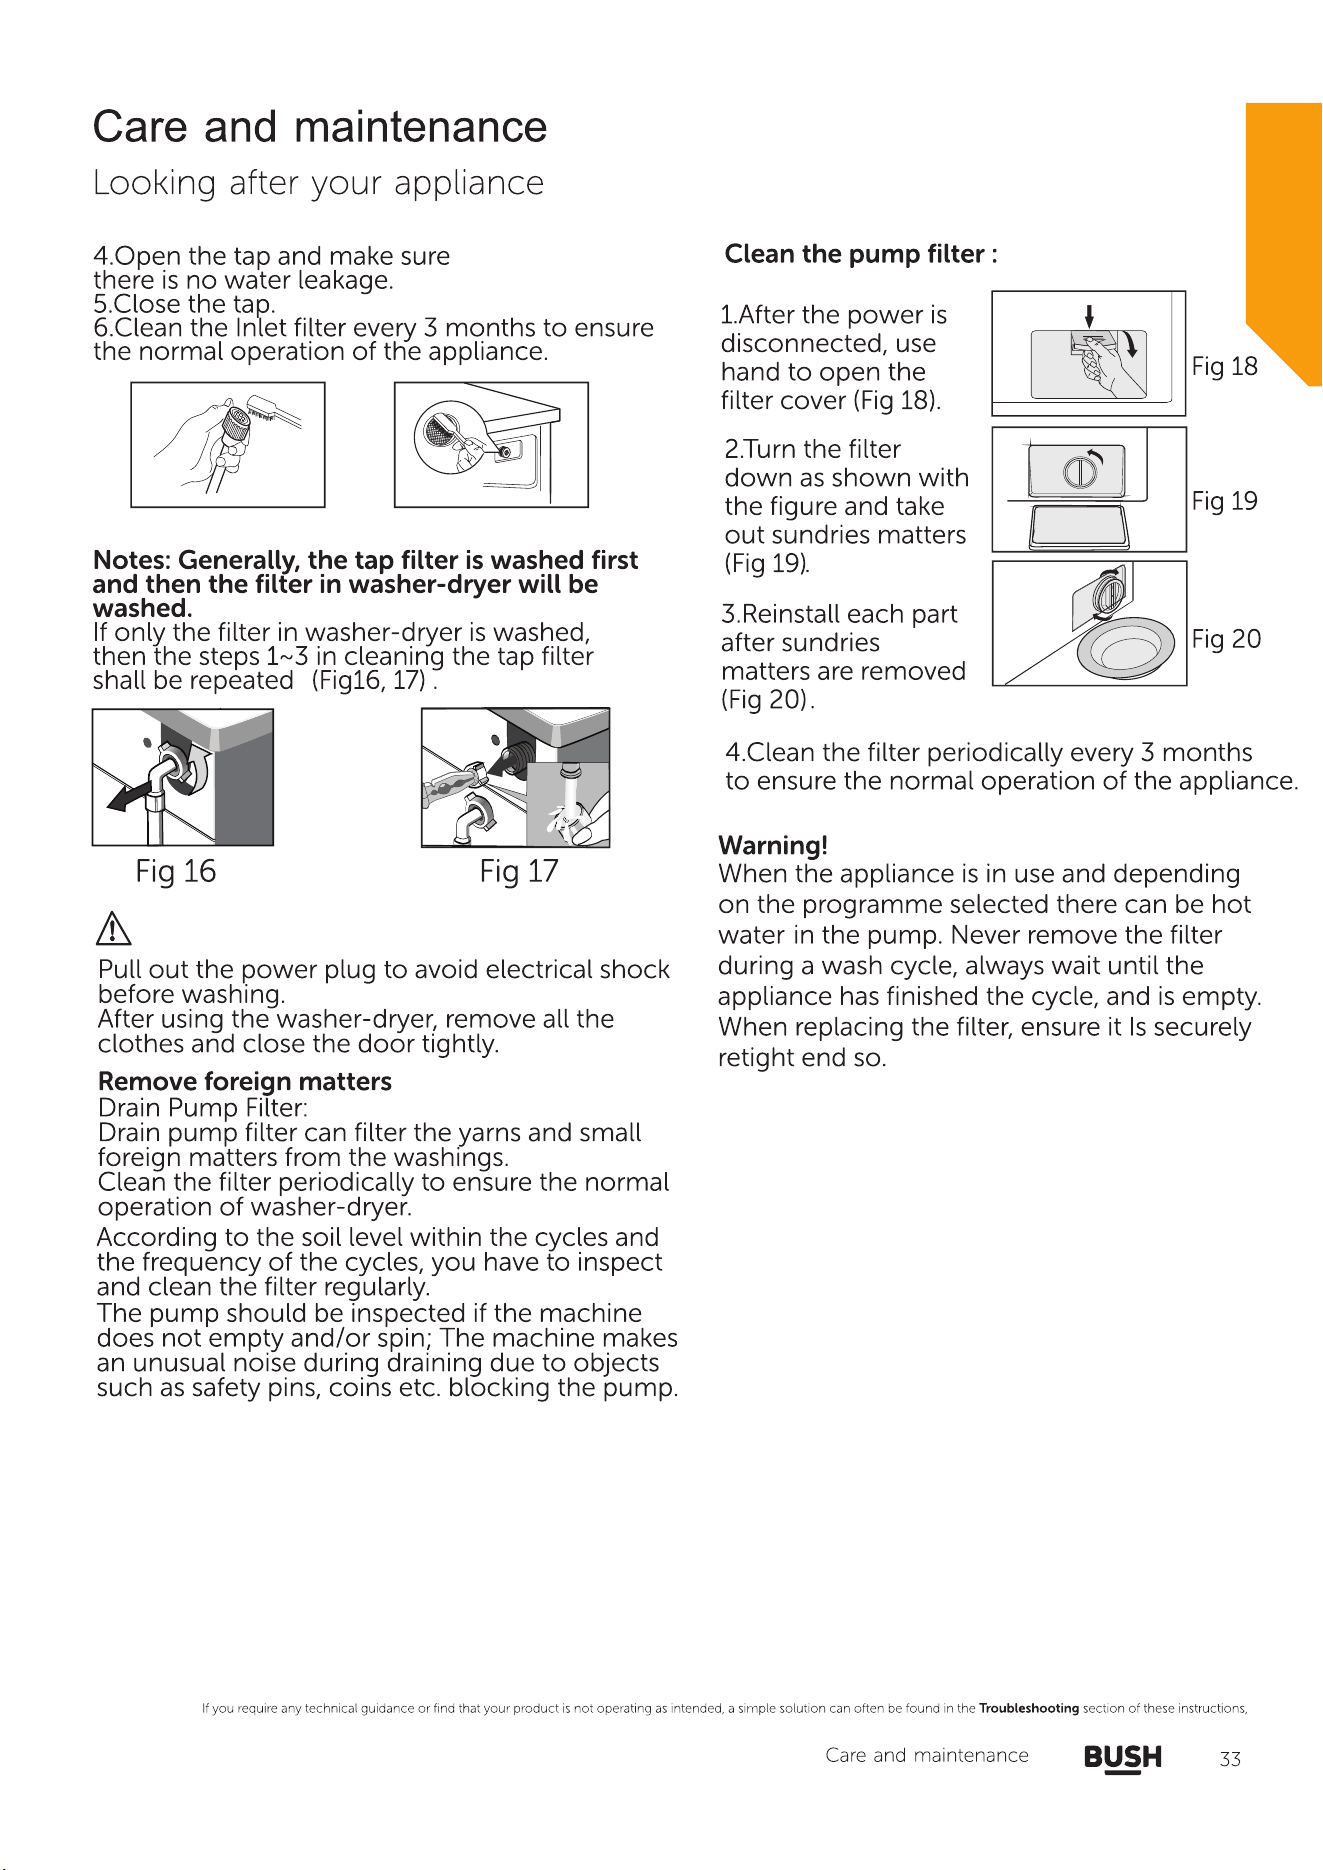
Cleaning 32
Maintenance actions 33
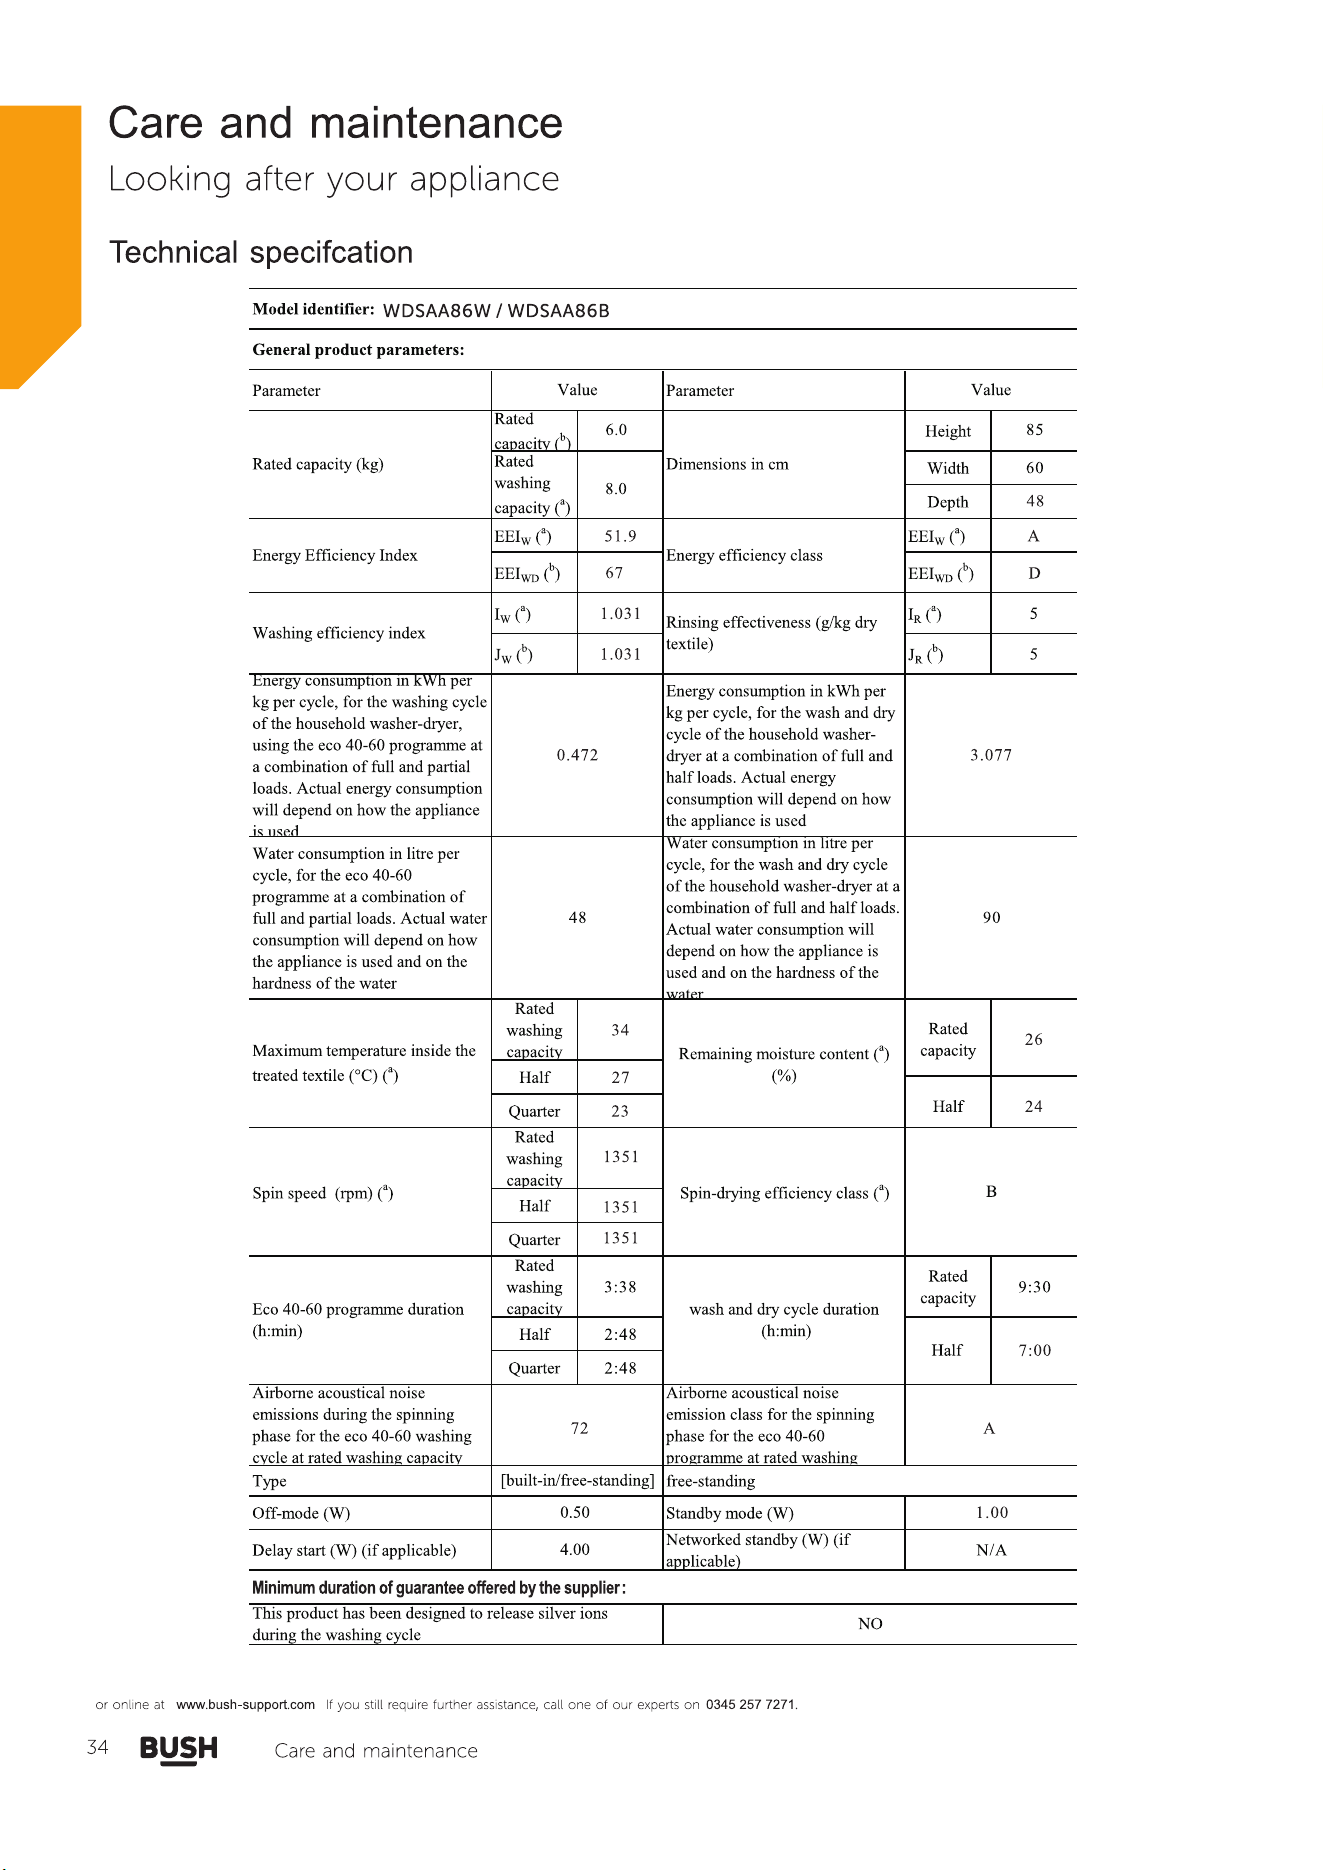
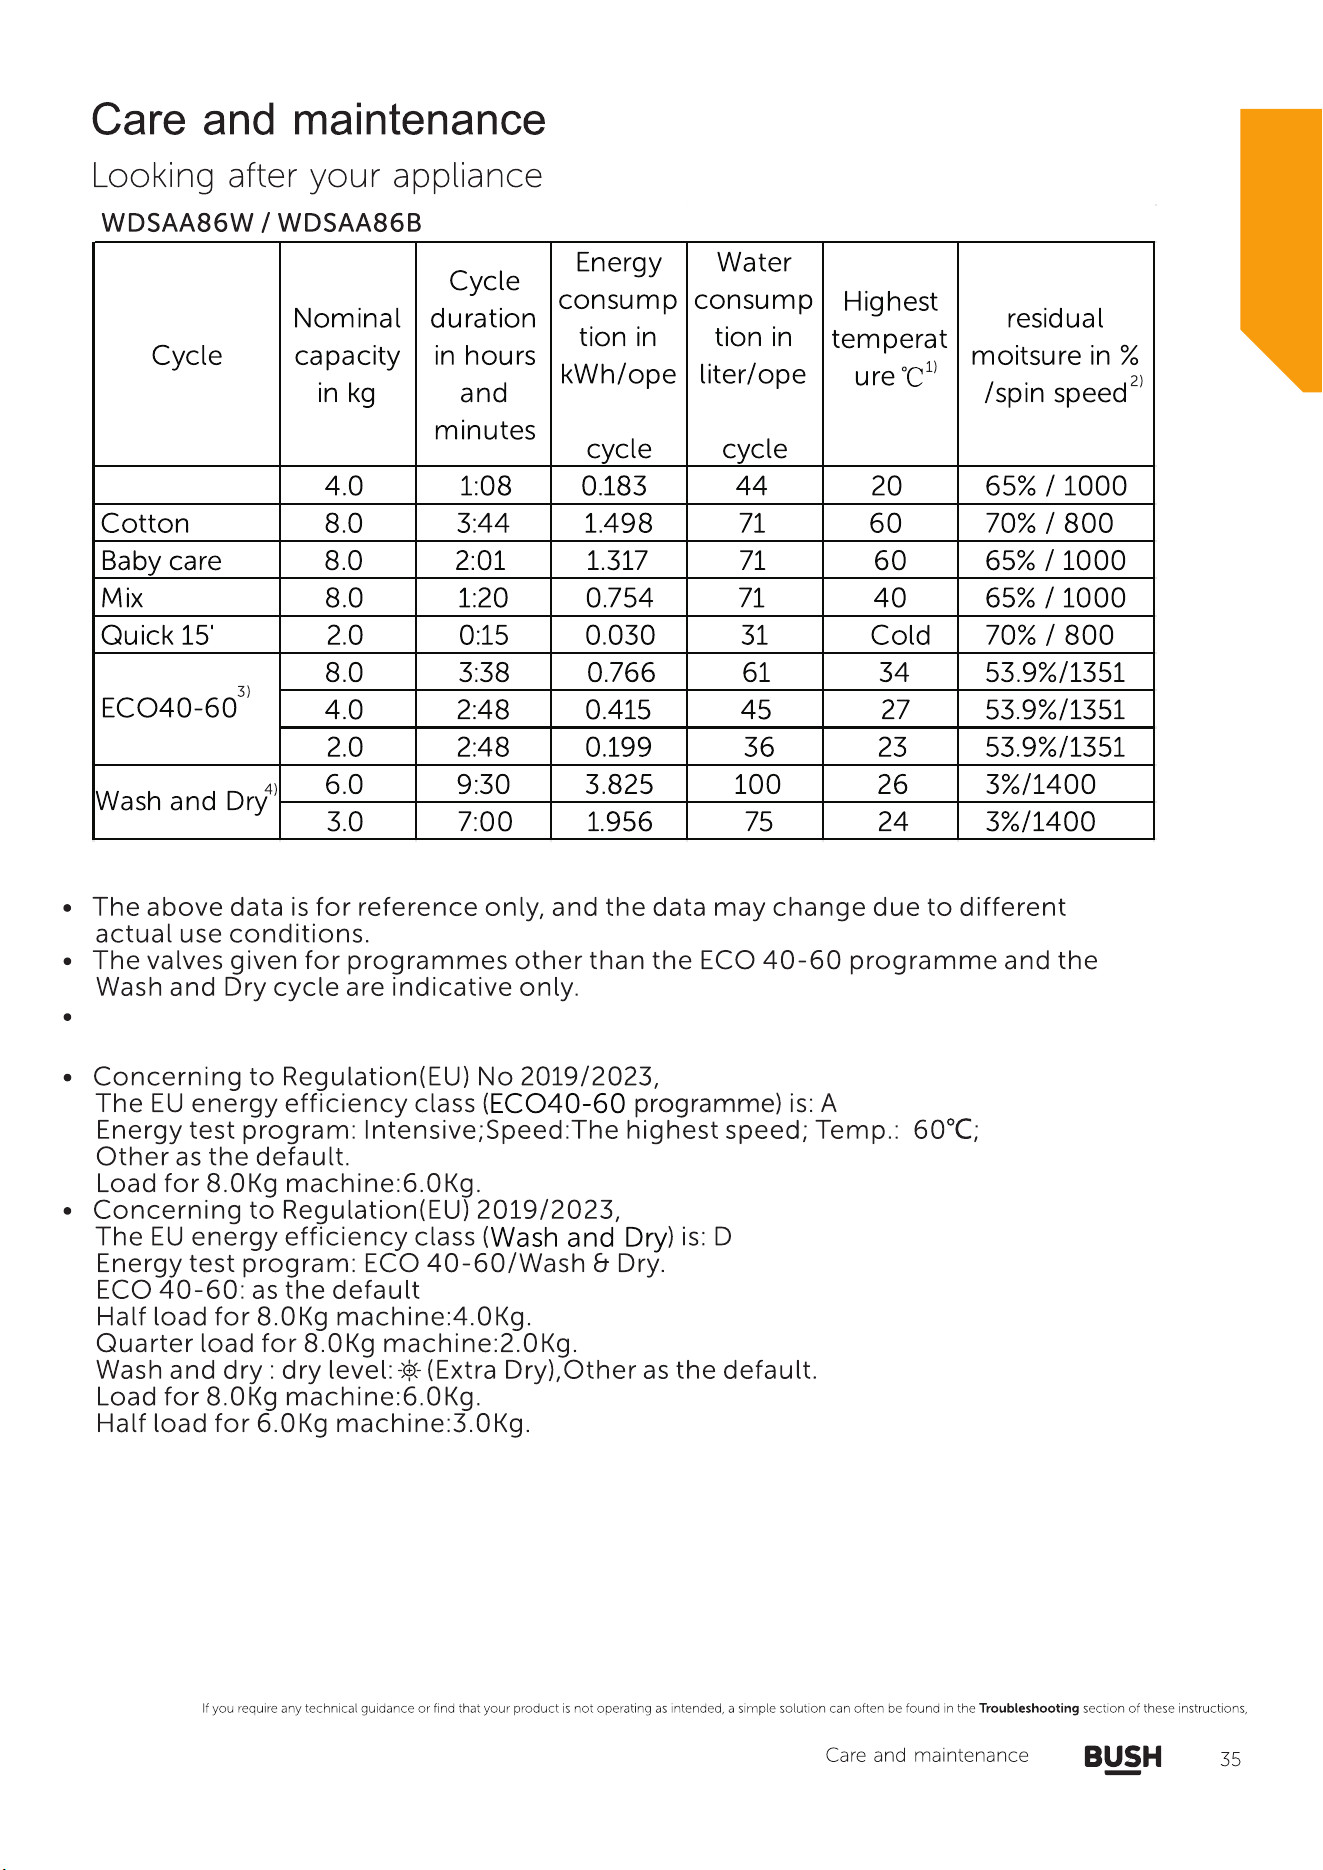
Technical specifications 34
1
2
3
4
5
6


1Safety information
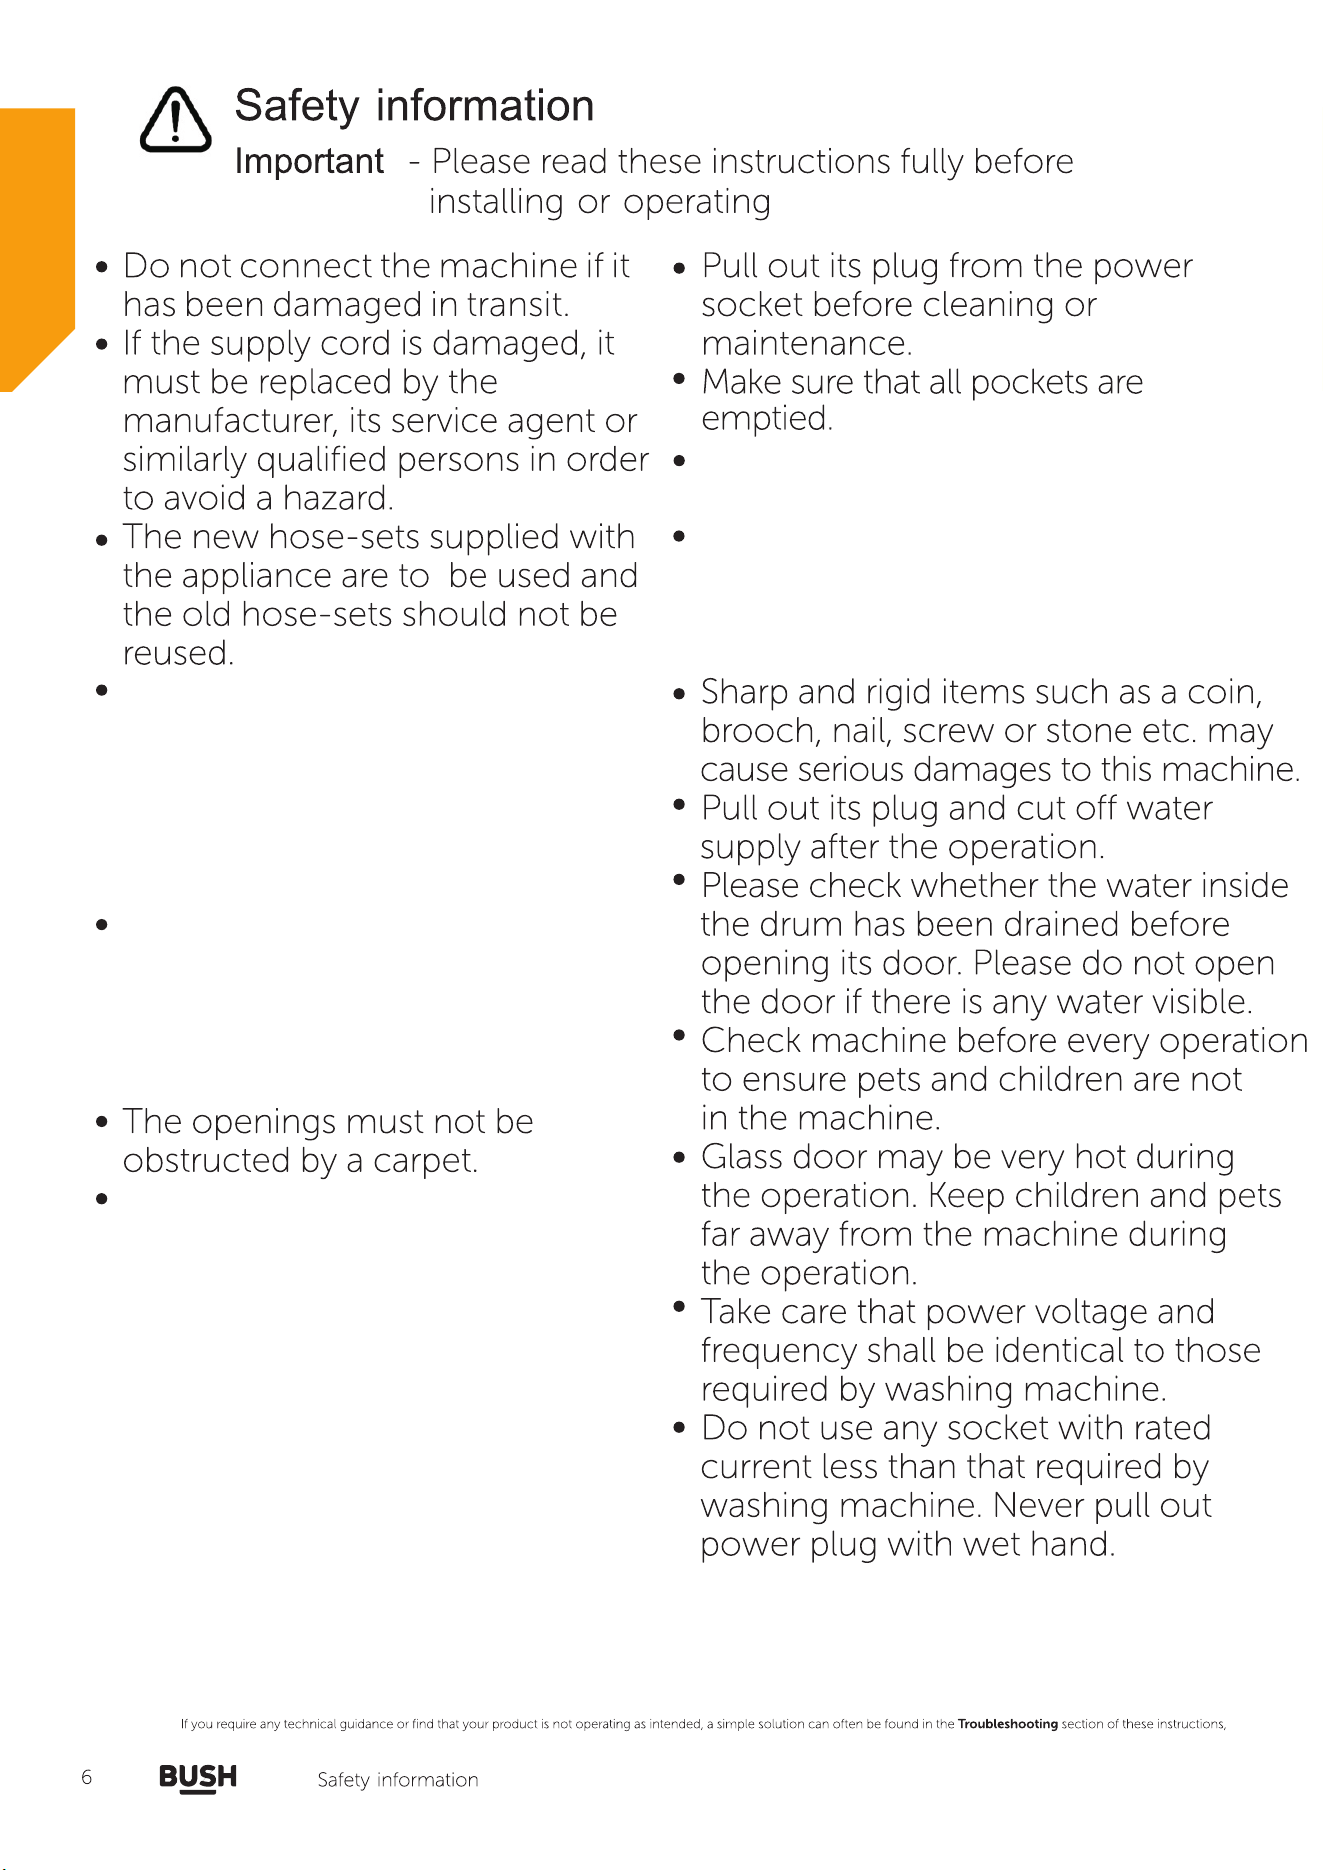
This washer-dryer is for indoor
use only and must be protected
from rain, moisture and extreme
temperature variations. Never
expose the machine to intense
heat or humidity.
This washer-dryer is designed
for household use only. Do not use
the machine for industrial and
commercial use, or any other
purpose.
This appliance can be used by
children aged from 8 years and
above and persons with reduced
physical, sensory or mental
capabilities or lack of experience
and knowledge if they have been
given supervision or instruction
concerning use of the appliance
in a safe way and understand the
hazards involved. Children shall
not play with the appliance.
Cleaning and user maintenance
shall not be made by children
without supervision.
This machine must be positioned
on a firm level base.
Do not splash water on the
machine. It may cause electrical
parts to fail and result in an electric
shock.
Machine shall not be installed in
bath room or very wet rooms as
well as in rooms with explosive or
caustic gases.
The machine with single inlet valve
only can be connected to the cold
water supply.
Your machine is only for home
use and is only designed for
textiles suitable for machine washing.
Be careful of burning when machine
drains hot washing water. Never refill
the water by hand during washing.

Do not dry unwashed items in the appliance.
Items that have been soiled with substances such as cooking oil, acetone,
alcohol, petrol, kerosene, spot removers, turpentine, waxes and wax
removers should be washed in hot water with an extra amount of
detergent before being dried in the appliance.
Items such as foam rubber (latex foam), shower caps, waterproof textiles,
rubber backed articles and clothes or pillows fitted with foam rubber pads
should not be dried in the appliance.
Fabric softeners, or similar products, should be used as specified by the
fabric softener instructions.
Remove all objects from pockets such as lighters and matches.
WARNING: Never stop the appliance before the end of the drying cycle
unless all items are quickly removed and spread out so that the heat is
dissipated.
WARNING: The appliance must not be supplied through an external
switching device, such as a timer, or connected to a circuit that is
regularly switched on and off by a utility.
The appliance must not be installed behind a lockable door, a sliding
door or a door with a hinge on the opposite side to that of the washer
dryer, in such a way that a full opening of the washer dryer door is
restricted.


Getting to know your
2
washer-dryer

Getting to know your washer-dryer
You’ll be up and running in no time
12
Ready? Let’s begin...
Please read these instructions carefully. They contain
important information which will help you get the best
from your and ensure safe
and washer-dryer
correct installation and operation.
If you require any further assistance, our technical
experts are happy to help. For full details, refer to
the product support section at the end of these
instructions.
Getting to know your washer-dryer
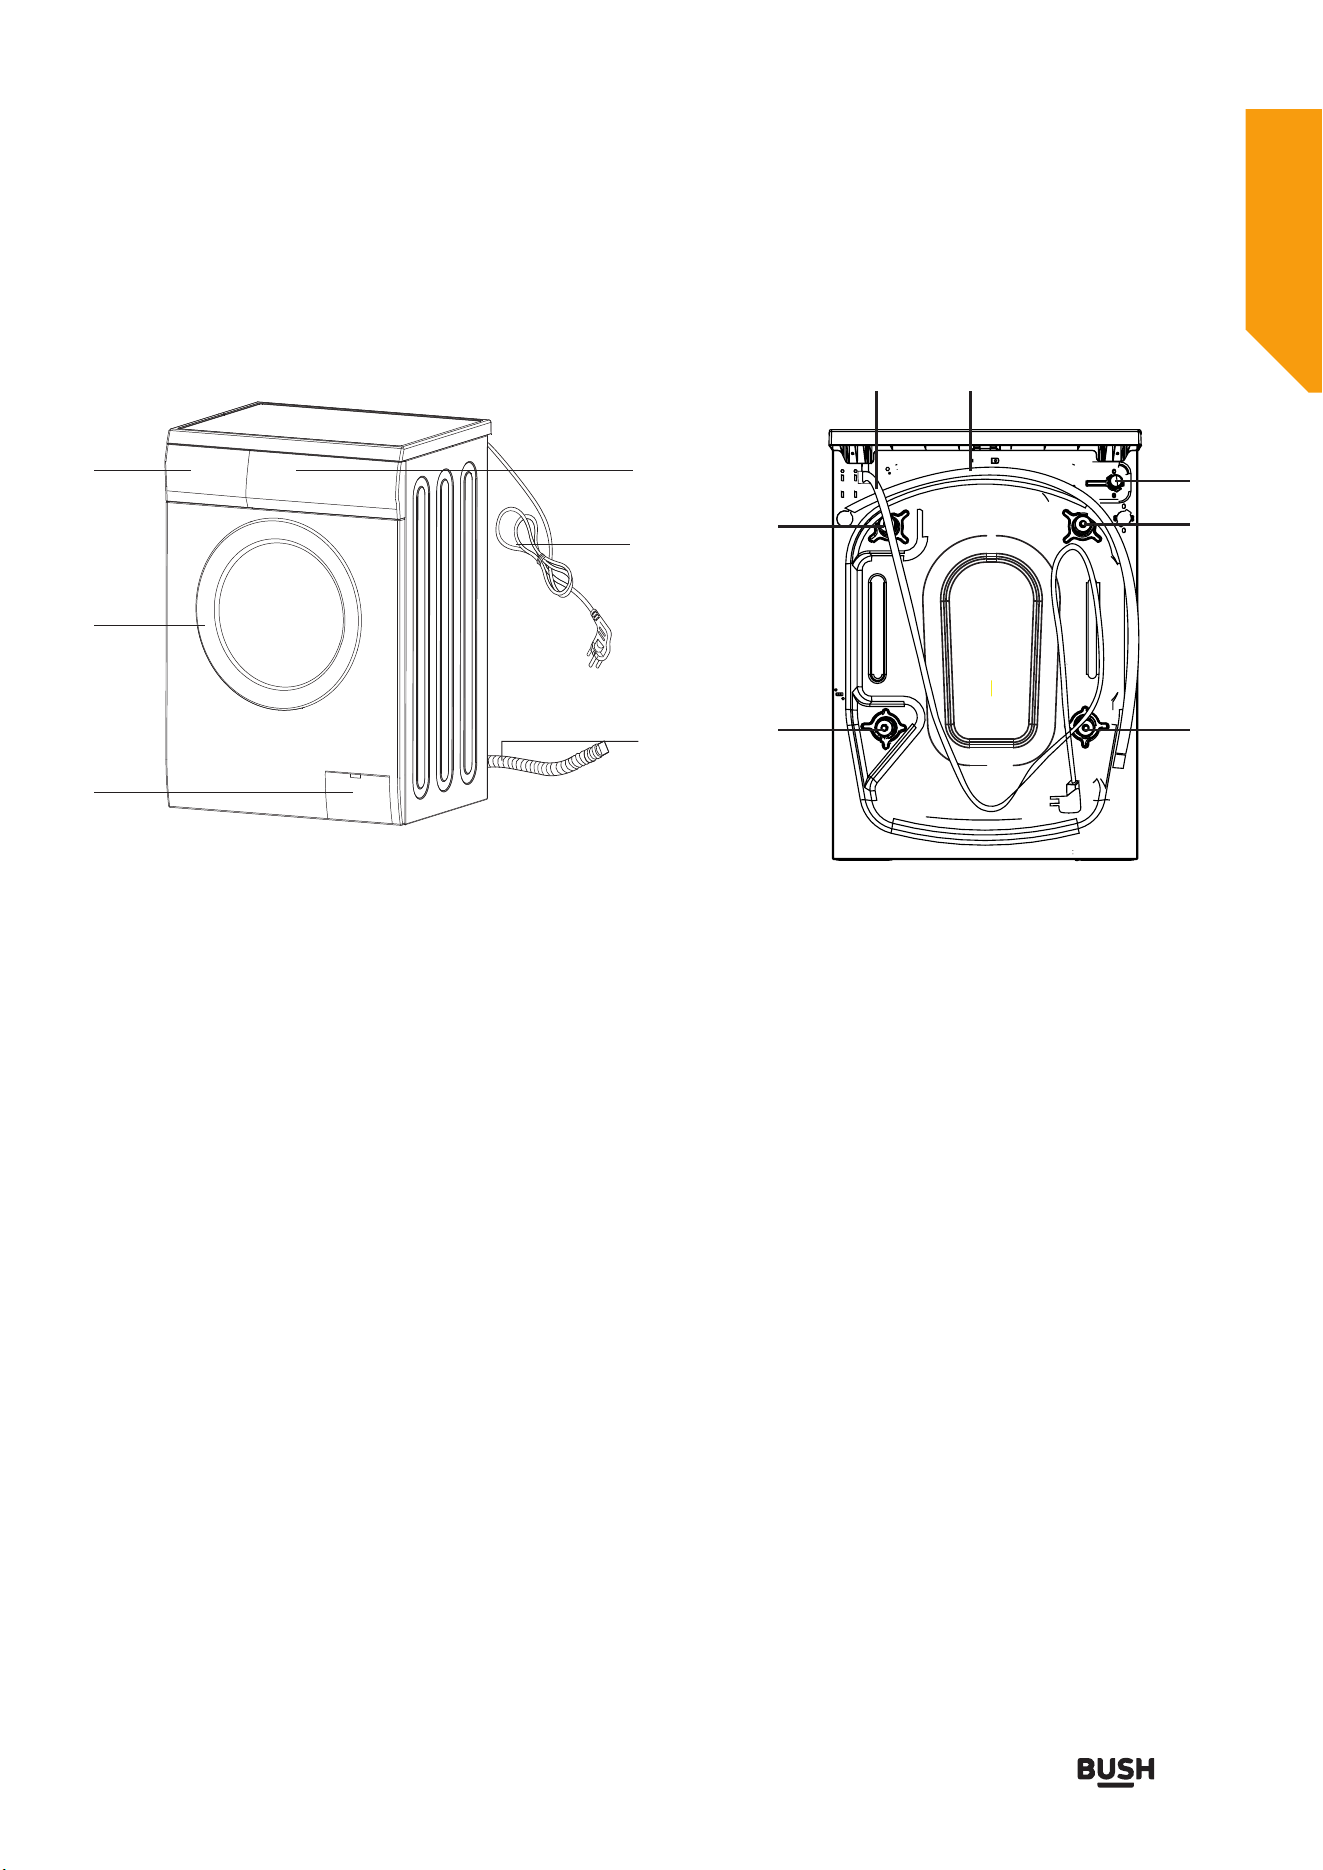
Component
1.Detergent Drawer
7.Transport bolt x 4
56
7
77
7
8
13
or online at www.bush-support.com If you still require further assistance, call one of our experts on 0345 257 7271.
4.Control Panel
5.Power lead
3.Filter
6.Drain hose
1
2
3
4
5
6
2.Door
Getting to know your washer-dryer
You’ll be up and running in no time
Getting to know your washer-dryer
8.Water inlet
WDSAA86B

3
Installing your washer-dryer
Installing your washer-dryer
Bringing it all together
16
Installation requirements
Levelling feet
In addition to the instructions mentioned here,
special regulations of the relevant water
companies may apply. If in doubt, have the
washer-dryer connected by a qualified
technician.
The is heavy - caution when washer-dryer
lifting it.
Do not lift by projecting components (e.g.
washer-drier door).
Warning: Frozen hoses may tear/burst. Do not
install in outdoor areas or washer-dryer
where there is a risk of frost.Please operate
washer-dryer above 0.°C
Lay hoses and cables in such a way that there
is
of tripping over them.no risk
An additional space (approximately 120mm) is
required at the rear
of the . washer-dryer
This is to allow
hose and drain hose connections.
enough space for the water
Unpacking
Unpacking your washer-dryer
Caution:2 people are required to unpack the
washer-dryer, it is recommended that gloves
are worn.
Carefully remove all packing materials including
the foam base, dispose of correctly.
Note: When opened,water droplets may be visible
in the drum etc. this is normal as each appliance
is tested before delivery.
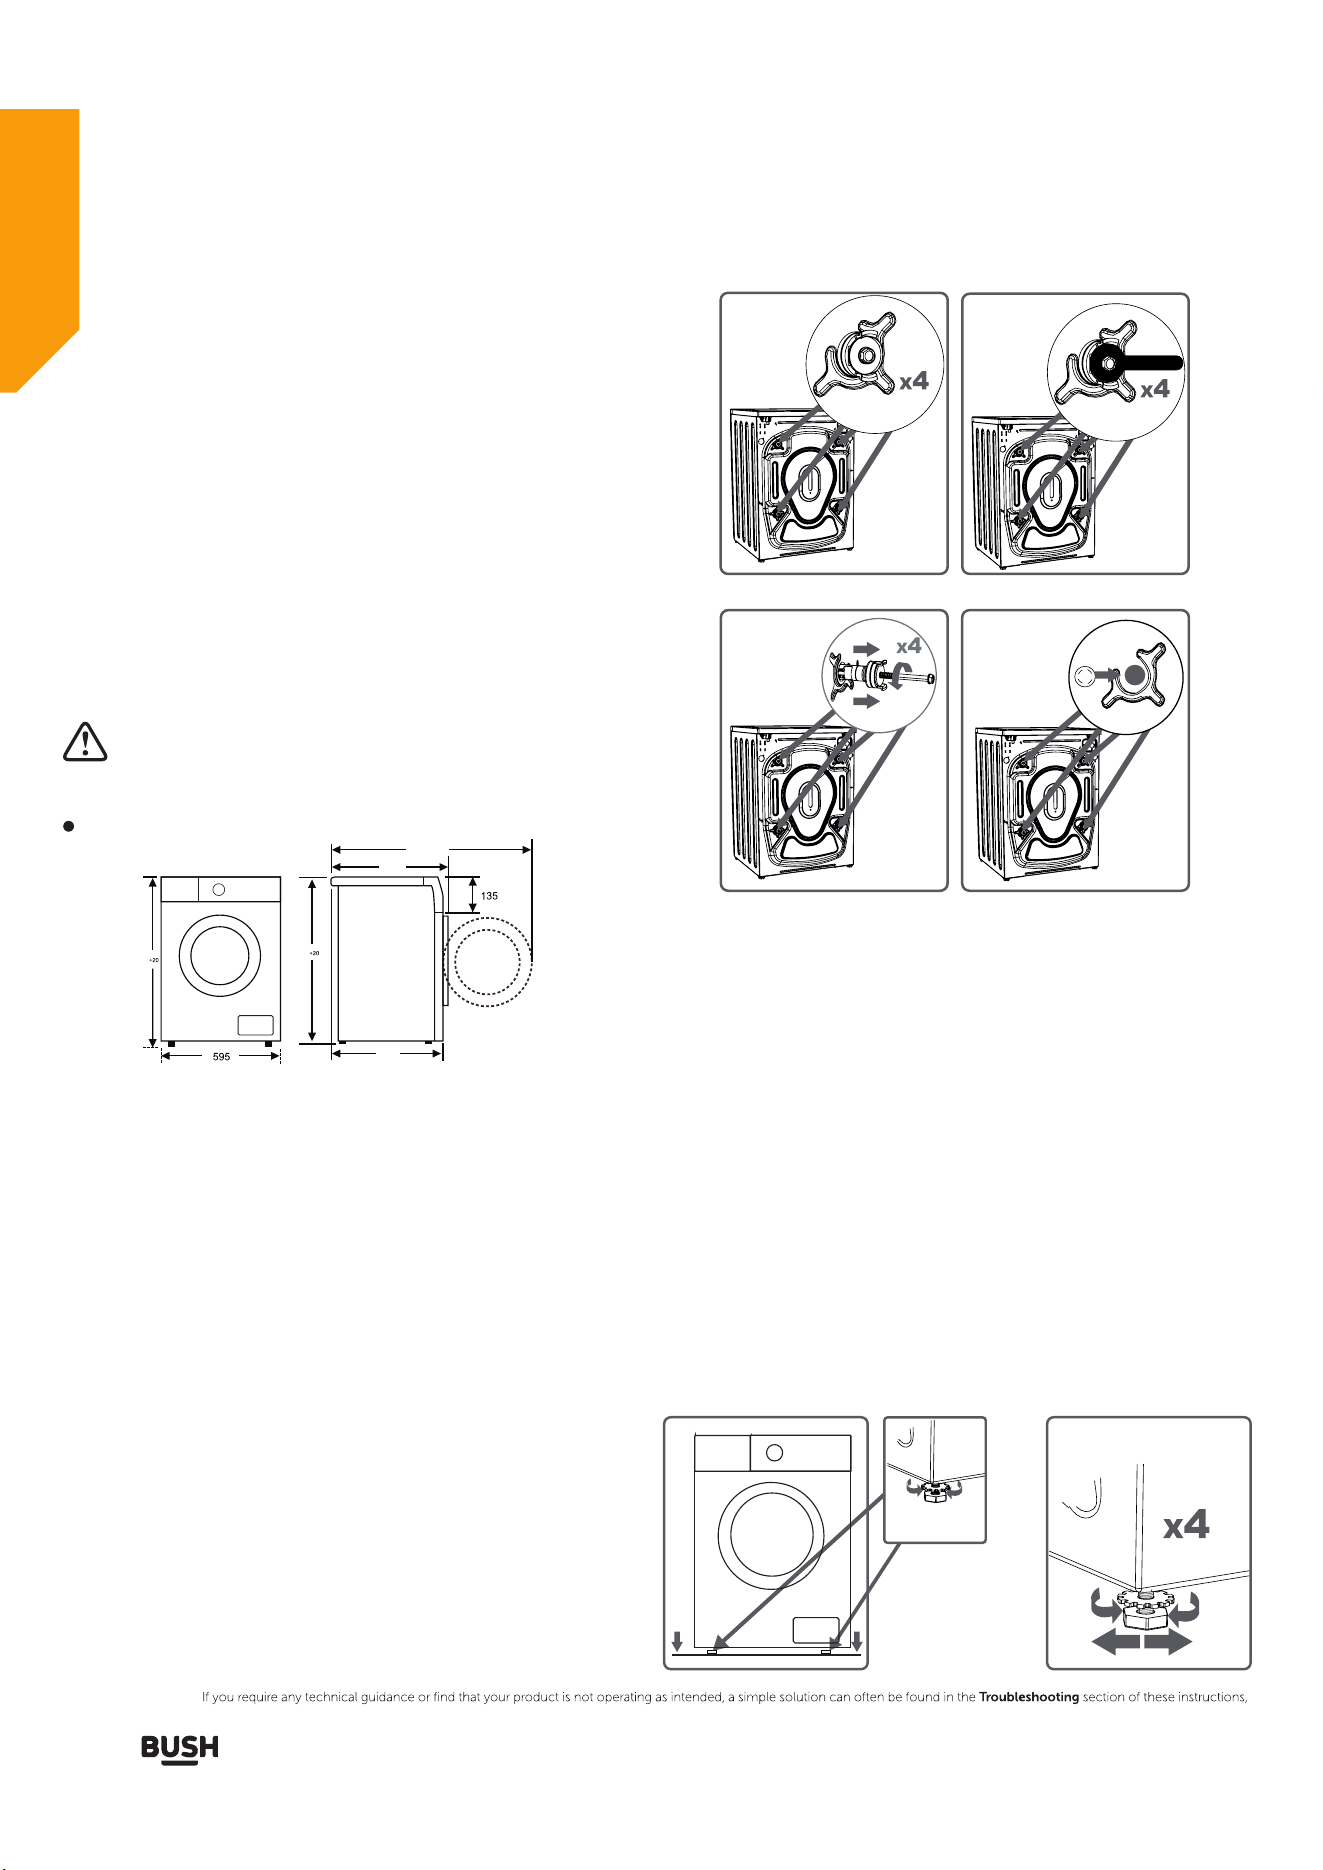
Removing the transport bolts
Important: The bolts are designed to
support the internal components during transit
these MUST be removed before use.
2: Remove the bolts by pulling them. (3)
transport
Fig
1:For your machine to work efficiently with
minimum vibration it should be settled on flat,
nonslippery,firm ground.
2:You can adjust the balance of your machine by
changing the positioning of its feet.
3:First,loosen the plastic adjustment nut. (Fig 5)
4:Adjust by rotating the feet upwards or
downwards. (Fig 6)
5:After the desired position has been reached,
tighten the plastic adjustment nut again by rotating
it upwards.
Note: Never put cartons,wooden blocks or similar
materials under the machine to balance
irregularities in the level of the ground.
Fig 1Fig 2
•
•
•
•
•
Fig 3Fig 4
Fig 5Fig 6
1: Loosen the screws by rotating counterclockwise
with a suiltable wrench. (Fig 1, 2)
3: When the transport bolts have been removed,
insert the plastic hole plugs found in
the accessories bag into the holes. (Fig 4)
Installing
your washer-dryer
Dimension of the machine with door open.
850
850
475
540
985
Installing your washer-dryer
Installing your washer-dryer
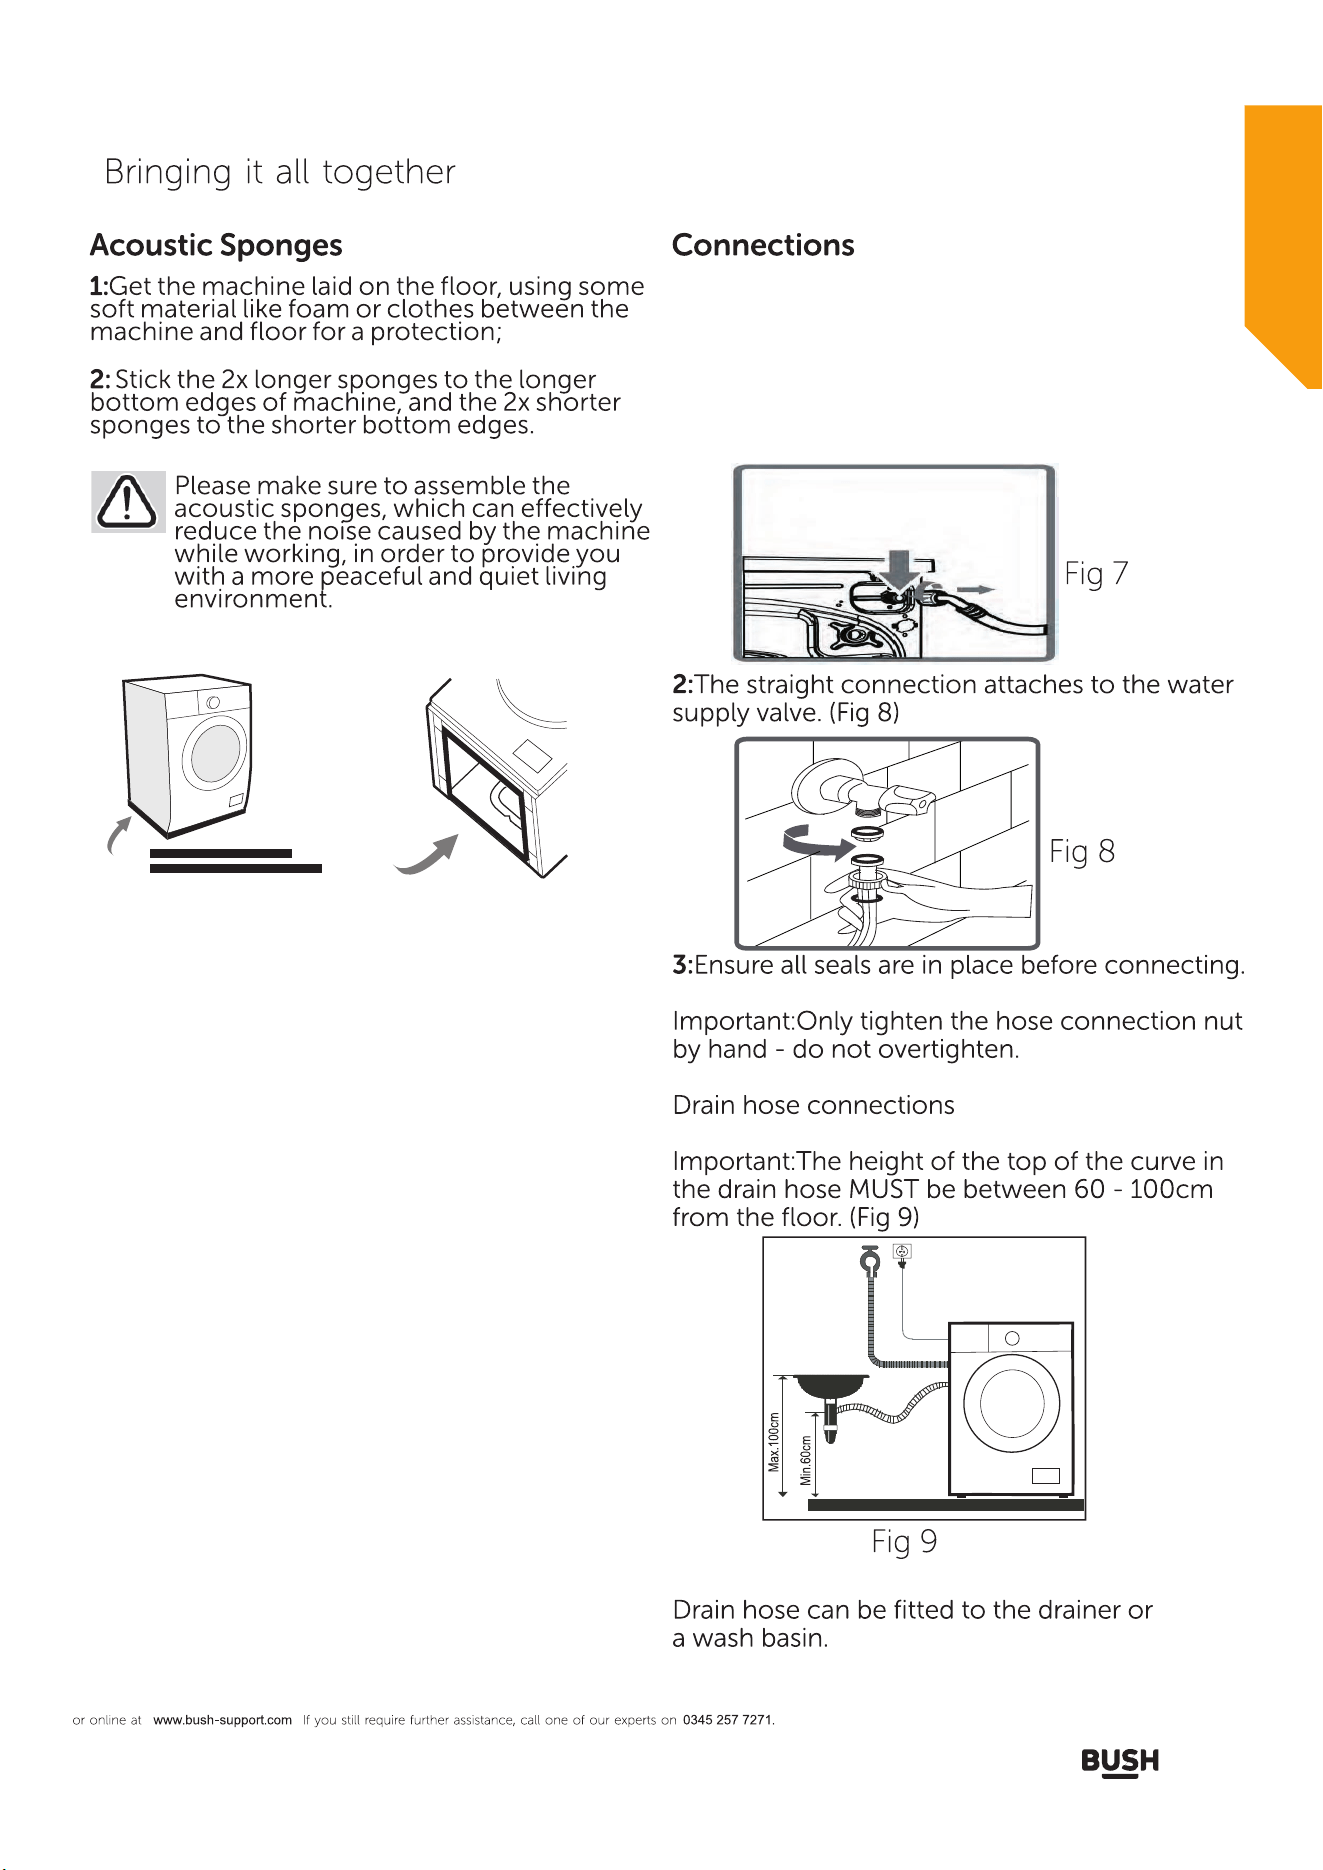
Water inlet hose connections
Important: This MUST only bewasher-dryer
connected to a cold water supply.
1: Connect the water inlet hose, the angled
connection attaches to the water inlet on the
back of the washer-dryer. (Fig 7)
2x
2x
17
Electrical
Installing your washer-dryer
Installing your washer-dryer

Set the Delay End function to finish your
laundry at the time you select.
1. Select a programme and auxiliary function
(where applicable).
2. Press [Delay End] button repeatedly to
choose the delaying time from 0H to 24H,
1 hour per increment.
3. Press [Start/Pause] button to start the Delay
End function.
Choose the Programme--Setting end time--Start
Notes:
- The time you have set in Delay End means
the time remaining for the laundry to be
finished.
- If you change to another programme after
you have set Delay End, you will have to set it
again.
To Cancel the Delay End function, press [Delay
End] button repeatedly until the display shows
0H. If the programme has already started,
switch the appliance off and afterwards on and
select a new programme.


Using your washer-dryer
5

or online at www.bush-support.com If you still require further assistance, call one of our experts on 0345 257 7271.
28
Using
your washer-dryer
If you need to change a setting after the wash
has started, press start/pause button and turn
the selector to OFF position, then re-select the
program, spin speed and optional functions, and
then press the Start / Pause button. (Ensure the
Child Lock is off, otherwise the original
program will continue.)
Using your washer-dryer
Getting the most from your appliance
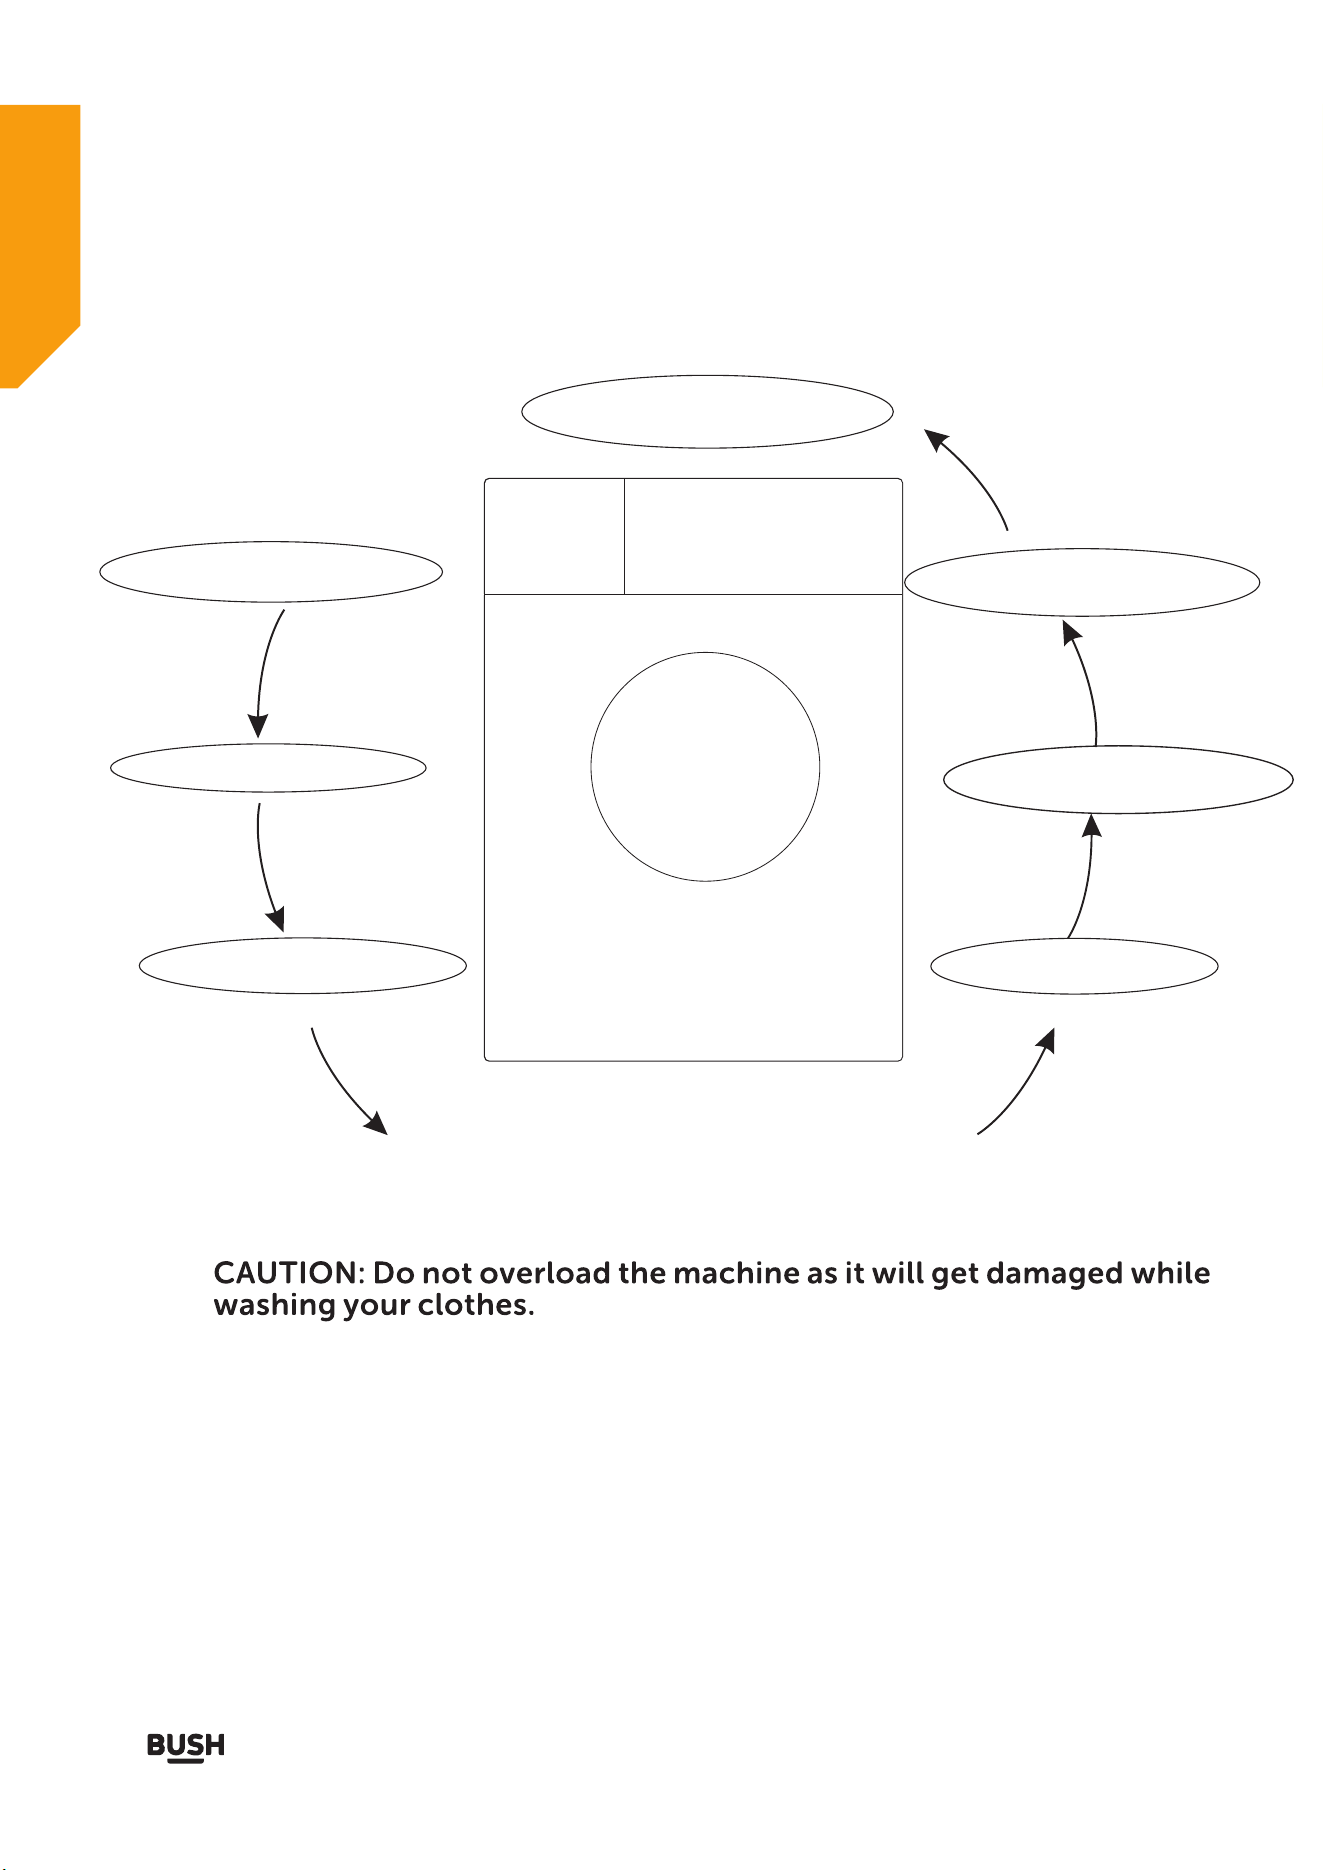
Quick start
1.The washer-dryer will sound several times for 5 seconds.
2.It is recommend to close the water tap and pull out the
After washing :
3. Close the door
7. Press the 【start/pause】
2. Measure out the
detergent
1. Open the door and
Load the laundry
4. Plug the power supply
6. Select the Auxiliary function
5. Select the desired programme
power plug.
3.The machine will empty most of the condensed water from
the dryer along with the washer waste water. Only very little
water will be remain inside the drum / cavity. Please open
the door for one or two hours to dry up the remaining
water. It is not necessary to remove the water manually.
or online at www.bush-support.com If you still require further assistance, call one of our experts on 0345 257 7271.
30
Using
your washer-dryer

Care and maintenance
6
12
20°C CARE+
20°C CARE+ is able to clean lightly soiled cotton laundry, at a nominal temperature
of 20°C, which complies with the regulation (EU) 2019/2023.
rating
rating

Product support
7
38
39
40

41