
15” & 24” REFRIGERATOR
USER MANUAL

AMD DIRECT REFRIGERATOR
INSTALLATION INSTRUCTIONS & OWNERS MANUAL
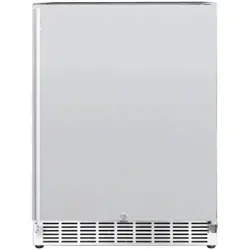
15” 3.2C OUTDOOR RATED REFRIGERATOR WITH STAINLESS DOOR
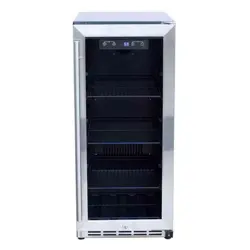
15” 3.2C OUTDOOR RATED REFRIGERATOR WITH GLASS DOOR
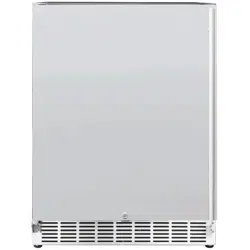
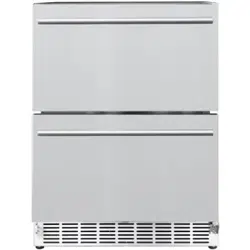
24” 5.3C OUTDOOR RATED REFRIGERATOR
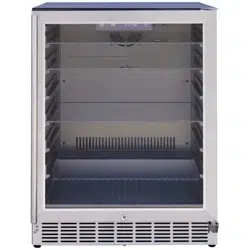
24” 5.3C DELUXE OUTDOOR RATED REFRIGERATOR
NAME:
RFR
15S / RFR 15G
RFR
24S / RFR 24SR / RFR
24D / RFR
24DR
PART #:
THANK YOU
Thank you for your purchase. We’d like to welcome you to the AMD Direct family of luxury
outdoor kitchen products and look forward to being a part of your home for years to
come. As a family business with over 20 years of industry experience, we aim to deliver
exceptional quality and personal service. Welcome to the AMD Direct family and we hope
you love your new refrigerator!
INSTALLER
Please leave this manual for the owner
Serial Number:
Model:
Date of Purchase:
Place of Purchase:
To view on your phone, scan the QR code on your camera app.
camera app. (For Android devices, use Google Lens)
For warranty information and to register your refrigerator visit,
www.amddirect.com/register
15” & 24” REFRIGERATOR USER MANUAL
SAFETY AND INSTALLATION INSTRUCTIONS
Most power failures are corrected within a few
hours and should not a
ect the temperature
of the appliance if the number of times the
drawer is opened is minimized. If the power
is going to be o
for a longer period of time,
take proper steps to protect the contents.
Short Vacations: Leave the appliance
operating during vacations of less than three
weeks.
Long Vacations: If the appliance will not be
used for several months, remove all items
and turn o
the appliance. Clean and dry the
interior thoroughly. To prevent odor and mold
growth, leave the door open slightly, blocking
it open if necessary.
• Remove all items.
• Securely tape down all loose items inside
your appliance.
• Turn the adjustable legs up to the base to
avoid damage.
• Tape the door shut.
• Be sure the appliance stays secure in the
upright position during transportation. Also
protect the outside of the appliance with a
blanket or similar item.
POWER FAILURE
VACATION TIME
MOVING YOUR APPLIANCE
1. Child entrapment and su ocation are not
problems of the past. Junked or abandoned
appliances are still dangerous, even if they
will “just sit for a few days.”
1. Stainless steel exposed to chlorine gas
and moisture from areas such as spas
or swimming pools may experience
discoloration. Discoloration from chlorine
gas is normal.
2. NEVER USE CHLORIDE TO CLEAN
STAINLESS STEEL.
RISK OF CHILD ENTRAPMENT
• Plug into a grounded 3-prong outlet, do not
remove prong, do not use an adapter and do
not use an extension cord.
• Replace all panels before operating.
• It is recommended that a separate circuit
serving only your appliance be provided. Use
receptacles that cannot be turned o
by a
switch or pull chain.
• Never clean appliance parts with flammable
fluids. These fumes can create a fire hazard or
explosion.
• Do not store or use gasoline or other
flammable vapors and liquids in the vicinity
of this or any other appliance. The fumes can
create a fire hazard or explosion.
• Do not connect or disconnect the electric plug
when your hands are wet.
• Unplug the appliance or disconnect power
before cleaning or servicing. Failure to do so
can result in electrical shock or death.
• Do not attempt to repair or replace any part
or your appliance unless it is specifically
recommended in this manual. All other
servicing should be referred to a qualified
technician.
Before the appliance is used, it must be properly
positioned and installed as described in this
manual, so read the manual carefully. To reduce
the risk of fire, electrical shock or injury when
using the appliance, follow basic precautions,
including the following:
WARNING
WARNING
WARNING

GENERAL SAFETY REQUIREMENTS
• The appliance should be located in the
coolest area of the room or outdoor
location, away from heat-producing
appliances and out of direct sunlight.
• Ensure that the unit is adequately
ventilated. Never cover air vents.
• Do not keep the door open any longer
than necessary.
• Let hot foods cool to room temperature
before placing in the unit. Overloading the
unit forces the compressor to run longer.
• Be sure to wrap foods properly and wipe
containers dry when placing them in the
unit. This cuts down on frost build up in
side the unit.
• Unit door should not be lined with
aluminum foil, wax paper or paper
toweling.
• Liners interfere with cold air circulation,
making the unit less e
cient.
• Organized and labeled stored items
reduce door openings and extended
searches.
• Remove as many items as needed at
one time and close the door as soon as
possible.
ENERGY SAVING TIPS
FOLLOW WARNING CALLOUTS BELOW
ONLY WHEN APPLICABLE TO YOUR
MODEL
• Use two or more people to move and install
the appliance. Failure to do so can result in
back or other injury.
• To ensure proper ventilation for your
appliance, the front of the unit must be
completely unobstructed.
• Choose a well-ventilated area with
temperatures above 50°F (10°C) and below
109.4°F (43°C).
• The appliance should not be located next to
ovens, grills, or other sources of high heat.
• The appliance must be installed with all
electrical, water, and drain connections in
accordance with state and local codes. A
standard electrical supply (115 V AC only,
60HZ), properly grounded in accordance with
the National Electrical Code and local codes
and ordinances is required.
• Do not kink or pinch the power supply cord of
the appliance.
• The size of the fuse (or circuit breaker) shoul
d
be 1.3 amperes.
• It is important that the appliance be leveled in
order to work properly. You may need to make
several adjustments to level it.
• All installations must be in accordance with
local plumbing code requirements.
• Never allow children to operate, play with or
crawl inside the appliance.
• Do not use solvent-based cleaning agents or
abrasives on the interior. These cleaners may
damage or discolor the interior.
• Use this appliance only for its intended
purposes as described in this instruction
manual.
• Keep fingers out of the “pinch point” areas.
Clearances between the door and cabinet
are necessarily small. Be careful closing door
when children are in the area.
WARNING


7
15” & 24” REFRIGERATOR
USER MANUAL
TABLE OF CONTENTS
BEFORE OPERATING
TROUBLESHOOTING
OPERATING YOUR APPLIANCE
INSTALLATION
WARRANTY
1
2
3
4
6
1
15” & 24” REFRIGERATOR USER MANUAL
BEFORE OPERATING
Shipment Arriving Damaged:
INTERIOR LIGHT
DEFROSTING
Important Notes:
VISIBLE DAMAGE
If your shipment arrives with visible damage to the
box/carton, be sure the damage is noted on the
bill of freight or express receipt and signed by the
person making the delivery. File a claim for damages
immediately, regardless of the extent of damage.
CONCEALED DAMAGE
If damages are unnoticed until the kegerator is
unpacked, notify the transportation company or
carrier immediately and file a concealed damage
claim with them. This should be done within (5)
days of the delivery date. Be sure to hold on to
the box/carton for inspection. We cannot assume
responsibility for damage or loss incurred in transit.
CONSTRUCTION NOTES
TEMPERATURE ALARM
CLEANING AND MAINTENANCE
Keep all stainless steel products away from
construction zones. Construction debris such as
(but not limited to) stone dust, stucco, and lime dust
could damage or permanently discolor stainless
steel products. Keep all caustic chemicals incl
uding
chlorine and pool cleaning products away from
stainless steel at all times.
An audible alarm sounds if the storage temperature
is not cold enough. The temperature display flashes
at the same time.
The cause of the temperature being too high may
be:
• Warm fresh food placed inside.
• Too much warm ambient air flow when rearranging
and removing stored items.
• Power failure for some time.
• The appliance is faulty.
The audible alarm is automatically silenced and
the temperature display stops flashing when the
temperature is su
ciently cold again.
Periodic cleaning and proper maintenance will
ensure e
ciency, top performance and long life.
The maintenance intervals listed are based on normal
conditions. You may want to shorten the intervals if
you have pets or other special considerations.
Exterior cleaning for your stainless steel model:
• Your stainless steel model may discolor when
exposed to chlorine gas, pool chemicals, salt
water or cleaners with bleach.
• Keep your stainless unit looking new by cleaning
with a high quality, all-in-one stainless steel
cleaner/polish on a monthly basis. Frequent
cleaning will remove surface contamination that
could lead to rust. Some installations will require
cleaning on a weekly basis.
• DO NOT CLEAN WITH STEEL WOOL PADS.
• DO NOT USE CLEANERS THAT ARE NOT
SPECIFICALLY INTENDED FOR STAINLESS STEEL
(This includes glass, tile and counter cleaners).
• If any surface discolor or rusting appears, clean
it quickly with Bon-Ami or Barkeepers Friend
Cleanser and a non-abbrasive cloth. Always clean
in the direction of the grain. Always finish this
process with a high quality, all in one stainless
cleaner/polish to prevent
further problems.
• USE OF ABRASIVE PADS SUCH AS
SCOTCHBRITE WILL CAUSE THE GRAINING IN
THE STAINLESS TO BECOME BLURRED.
• Rust that is allowed to linger can penetrate into
the surface of the stainless steel and become
impossible to remove.
This unit is equipped with an interior LED light which
will be turned ON when the door is open and the
interior fan is stopped at the same time. You can
press to manually turn on or turn o
the light.
The unit defrosts automatically in normal operating
conditions. The evaporator behind the rear wall of
the unit defrosts automatically. The condensation
collects in the drainage channel behind the rear wall
of the unit and flows through the drainage hole into
the drop tray by the compressor where it evaporates.
However, frost may accumulate on the evaporator
if the unit is repeatedly opened in a high heat or
high humidity location. If this frost pattern does not
clear within 24 hours, your unit will require manual
defrosting.
Press and hold for 6 seconds to defrost the unit.
To stop defrosting, repeat the same interaction.
Disconnect all power supplies and batteries
before servicing.
ELECTRICAL PARTS & COMPONENTS
WARNING
2
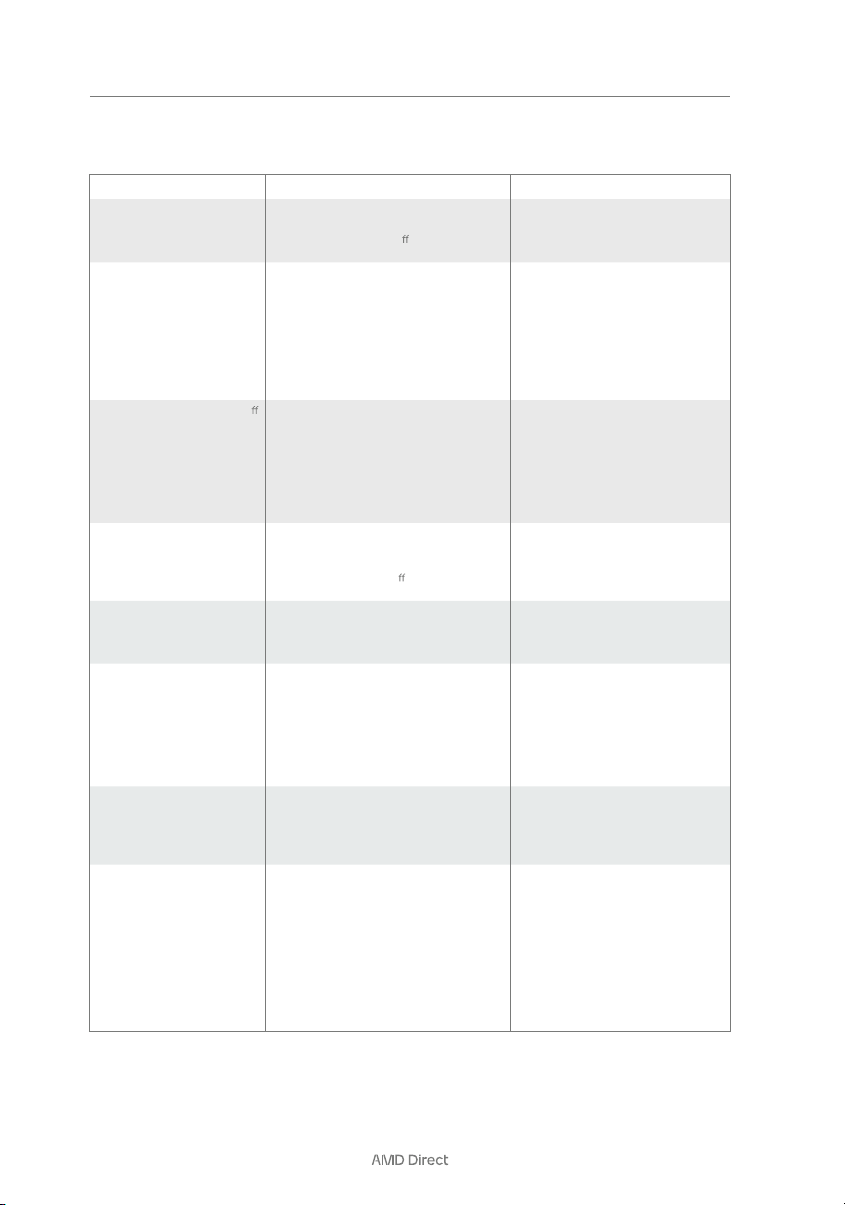
TROUBLESHOOTING
Many common problems can be solved easily, saving you the time spent communicating with customer service.
Try the suggestions below to see if the issue has a simple solution.
PROBLEM POSSIBLE CAUSE REMEDY
Appliance does not operate. Appliance is not connected to a power
supply.
The appliance is turned o
.
Tripped circuit breaker or a blown a fuse.
Connect the appliance.
Switch on the appliance.
Switch on the circuit breaker or replace
fuse.
Appliance is not cold enough. The temperature is not set correctly.
Temperature could require a lower
temperature setting.
The drawer was not closed completely.
Drawer is not hermetically sealed.
The condenser is too dirty.
The ventilation opening is blocked or too
dusty.
Check the set temperature.
Set a lower temperature.
Do not open the drawer more often than
necessary.
Close drawer properly.
Check the drawer seal and clean/
replace.
Clean the condenser when necessary.
Clear the obstructions, clean the dust.
Appliance turns itself on and o
frequently.
The room temperature is higher than
average.
A large amount of food has been added to
the unit.
The drawer is open too often.
The drawer is not closed completely.
The drawer gasket does not seal properly.
Put the appliance in a cooler place.
Leave the appliance to work for a while
until the set temperature has been
reached.
Do not open more than necessary.
Close drawer properly.
Check the drawer seal and clean/
replace.
The light does not work. Appliance is not connected to a power
supply.
Tripped circuit break or blown a fuse.
The light was switched o
on the control
panel.
Connect the appliance.
Switch on circuit breaker or replace
fuse.
Switch on the light.
Vibrations. The appliance is not properly leveled. Level the appliance with the adjustable
feet.
The appliance seems to make
too much noise.
The rattling may come from the flow of the
refrigerant, which is normal. As each cycle
ends, you may hear gurgling sounds caused
by the flow of refrigerant in your appliance.
If the temperature fluctuations occur, the
contraction and expansion of the inner walls
may cause popping and cracking noises.
The appliance is not properly level.
Level the appliance with the adjustable
feet.
The drawer will not close
properly.
The appliance is not properly level.
The drawer was reversed and not properly
installed.
The gasket is dirty.
Level the appliance with the adjustable
feet.
Check the drawer hinge and reassemble
correctly.
Clean the drawer gasket.
The alarm sounds and the
temperature display flashes.
Has the applia
nce drawer been open for
longer than 60 seconds? If not, then the
temperature has risen higher or fallen lower
than the temperature that has been set. This
could be due to:
The appliance drawers being opened too
often. The ventilation opening being covered
or too dusty.
A lengthy interruption in the power supply.
A large amount of food has been added to
the unit.
If yes, close the drawer.
Do not open the drawer more often than
necessary.
Clear the obstructions and clean the
dust.
Leave the appliance to work for a while
until the set temperature has been
reached.
3
15” & 24” REFRIGERATOR USER MANUAL
It is recommended that you install the appliance
in a place where the ambient temperature is
between 50°F and 109.4°F (10°C-43°C). If the ambient
temperature is above or below recommended
temperatures, the performance of the unit may
be a
ected. For example, placing your unit in
extremely cold or hot conditions may cause interior
temperatures to fluctuate. The operating temperature
range may not be reached.
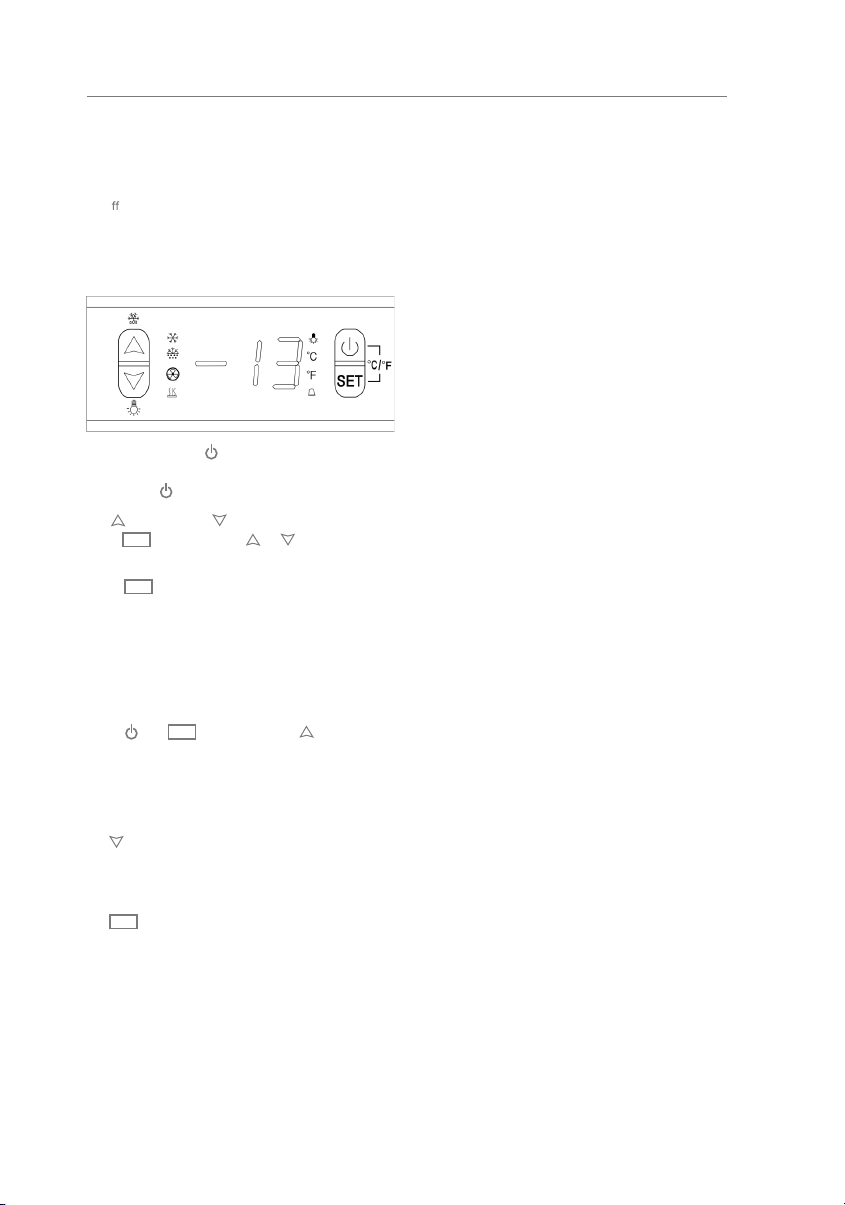
OPERATING YOUR APPLIANCE
Press first, then press or button
to increase (warm) or decrease (cool) the set
temperature by 1°C/ 1°F.
Press again, the temperature is selected and
shows the actual temperature. If no other further
operation in 6 seconds, display will show actual
temperature in the cooler
The temperature you are setting will increase by
one degree each time you press the key and
will decrease by one degree each time you press
the key.
The range of temperature control is from 32°F to 50°F.
To view the set temperature at any time, press
the key. The set temperature will flash in the
display window for 6 seconds. After 6 seconds, the
temperature inside the until will reappear in the
display window.
(The
temperature preset at the factory is 36°F)
°F/°C SELECTOR
SETTING THE TEMPERATURE CONTROL
ON/OFF POWER
CONTROL PANEL
To turn the appliance ON or OFF, press and hold the
POWER key for 5 seconds.
UP AND DOWN
SET
SET
SET
SET
Selects the temperature display setting in Fahrenheit
or Celsius degrees. To change the temperature from
Fahrenheit to Celsius or from Celsius to Fahrenheit,
press and at the same time, then hold for 6
seconds.
Remove the exterior and interior packing.
Before connecting the appliance to the power
source, let it stand upright for approximately 24
hours. This will reduce the possibility of a malfunction
in the cooling system from handling during
transportation.
Clean the interior surface with lukewarm water using
a soft cloth.
Install the handle on the door if not already attached.
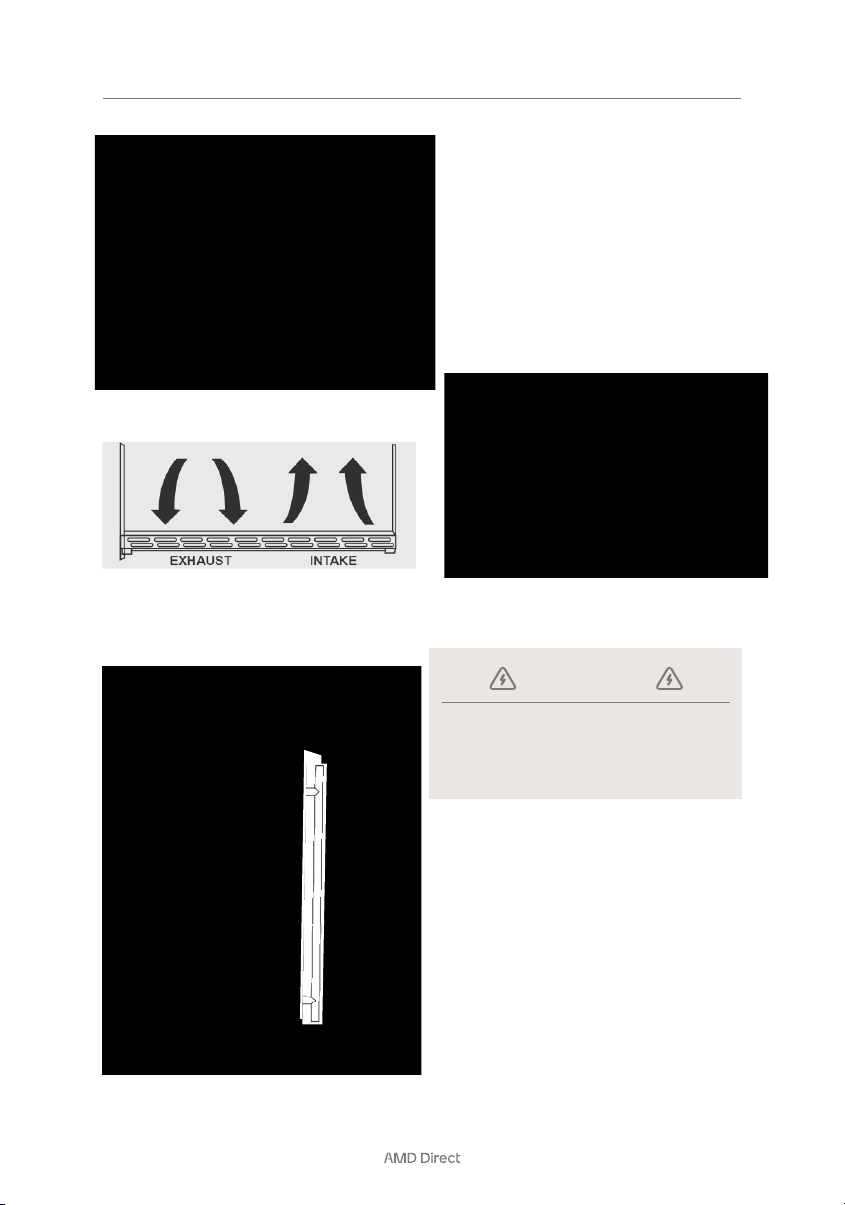
Your outdoor refrigerator has been designed for both
built-in and freestanding applications. When built-in,
your refrigerator door does not require additional air
space for top, side or rear. The front grille must not
be obstructed.
1. Position the unit on a flat, level surface capable
of supporting the entire weight of the unit.
Remember the unit will be significantly heavier
once it is fully loaded.
2. Connect the unit to a Ground Fault Interrupter
(GFI).
3. The unit must be installed according to your local
codes and ordinances.
4. ELECTROCUTION HAZARD!
• Electrical Grounding Req
uired - This appliance
is equipped with a 3-prong (grounding)
polarized plug for your protection against
possible shock hazards.
• NEVER remove the round grounding prong
from the plug.
• NEVER use a 2-prong grounding adapter.
• NEVER use an extension cord to connect
power to the unit.
• Where a 2-prong wall receptacle is
encountered or a longer power cord is
required, contact a qualified electrician to
have it replaced in accordance with applicable
electrical codes.
BEFORE USING YOUR APPLIANCE
INSTALLATION OF YOUR APPLIANCE
SITE PREPARATION
NOTE:
It is recommended that you do not install the
appliance near an oven, radiator or other heating
source, as heat sources may increase electrical
consumption. Do not install in a location where the
temperature will fall below 50°F (10°C). For best
performance, do not install the appliance behind
a cabinet door or block the base grille. Plug the
appliance into an exclusive properly grounded wa
ll
outlet.
4
INSTALLATION
To install the handle, follow the instructions below.
1. Position the unit to allow free air flow through the
front grille.
2. Wipe out inside of the unit with a damp cloth.
Remove the right side gasket.
Take out the screws from the bag in the cabinet. Put
the screws in the holes where the handle is to be
installed.
Align the handle with screws, tighten the screws
using a screwdriver until the handle is both flush
and secured tightly against the door side. (DO NOT
overtighten as this may cause damage to the door
surface).
LOCATION OF PARTS
INSTALLING THE STAINLESS STEEL HANDLE
Position the unit on a flat, level surface capable of
supporting the entire weight of the unit when full. The
unit contains four (4) adjustable leveling legs. Turn the
legs clockwise to raise and counterclockwise to lower.
LEVELING THE UNIT
Put the screws on top of the door where the handle is
to be installed. Align the handle with screws, tighten
the screws using the screwdrivers.
ELECTRICAL CONNECTION
Improper use of the grounded plug can result
in the risk of electrical shock. If the power
record is cord is damaged, have it replaced by a
qualified or an authorized service dealer.
WARNING

5
15” & 24” REFRIGERATOR USER MANUAL
Because of potential safety hazards under certain
conditions, it is strongly recommended that you
do not use an extension cord with this appliance.
However, if you must use an extension cord it is
absolutely necessary that it be a UL/CUL-Listed,
3-wire grounding type appliance extension cord
having a ground type plug and outlet and that the
electrical rating of the cord be 115 volts and at least
1.3 amperes.
EXTENSION CORD
INSTALLATION
This appliance should be properly grounded for your
safety. The power cord of this appliance is equipped
with a 3-prong plug which mates with a standard
3-prong wall outlet to minimize the possibility of
electrical shock.
Do not under any circumstance cut or remove the
3rd (ground) prong from the power cord supplied.
For personal safety, this appliance must be properly
grounded. Any questions concerning power and/
or grounding should be directed toward a certified
electrician or an authorized service center.
The appliance requires a standard 115/120 Volt AC-
60HZ three-prong grounded electrical outlet. Have
the wall outlet and circuit checked by a qualified
electrician to make sure they outlet is properly
grounded. When a standard 2-prong wall outlet is
encountered, it is your responsibility and obligation
to have it replaced with
a properly grounded 3-prong
wall outlet.
To prevent accidental injury, the cord should be
secured behind the appliance and not left exposed
or dangling.
The appliance should always be plugged into
its own individual electrical outlet which has a
voltage rating that matches the rating label on the
appliance. This provides the best performance and
also prevents overloading house wiring circuits that
could cause a fire hazard from over heating. Never
unplug the appliance by pulling on the power cord.
Always grip the plug firmly and pull straight out from
the receptacle. Repair or replace immediately all
power cords that have become frayed or otherwise
damaged. Do not use a cord that shows cracks
or abrasion damage along its length or at either
end. When moving the appliance, be careful not to
damage the power cord.
ELECTRICAL CONNECTION CONTINUED

6
THIS PAGE INTENTIONALLY LEFT BLANK

GOLD STANDARD WARRANTY
14520 DELTA LANE SUITE 105,
HUNTINGTON BEACH, CA 92647
800.966.8126
AMDDIRECT.COM
Your investment in AMD Direct products is backed by the strongest warranty in
the industry. In addition to precision engineering and outstanding performance,
AMD Direct products include our GOLD STANDARD LIFETIME WARRANTY with all
AMD Direct Warranty is valid for original purchaser at original site of delivery
with proof of purchase and photo documentation only. Registration form must
be submitted online within 30 days of the purchase date to validate the
warranty. Warranty is void upon transfer of ownership. Warranty does not apply
to products installed in any commercial, rental, or nonresidential application
that have not maintained proper upkeep. Warranty covers replacement parts
only. Manufacturer is not responsible for labor or labor-related costs. Warranty
does not cover discoloration, surface rust, corrosion, or oxid
ation, which may
occur due to harsh environments, chemicals, or overheating. Warranty will not
apply for damage resulting from improper installations, abuse, extreme
environments, grease fires, or misuse. Proof of regular and proper
maintenance is required. Coastal, humid, and/or salt environments are subject
to manufacturer review. All out-of-box claims must be made within 30 days of
purchase and must be made prior to installation. Any product installed
damaged will be considered damaged during installation and not covered
under warranty. Warranty and registration form
s are available at
www.amddirect.com/register. Please be advised - all display models are sold
“as is” and the warranty covers the following items only: main burners (Gold
Standard Lifetime Warranty), grates (Gold Standard Lifetime Warranty), burner
covers (Gold Standard Lifetime Warranty). All warranties are subject to the
review and approval of the manufacturer.
VER 10.25.23


VER.
062724
CONTACT US
14520 Delta Ln,
Suite 105
Huntington Beach, CA 92647
AMDDirect.com
(800) 966-8126
M–F 8:30 am – 5:00 pm (PST)