
Technical Support and E-Warranty Certificate www.vevor.com/support
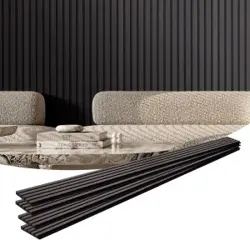
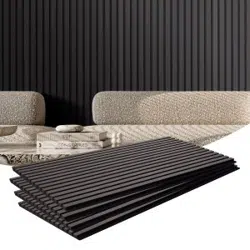
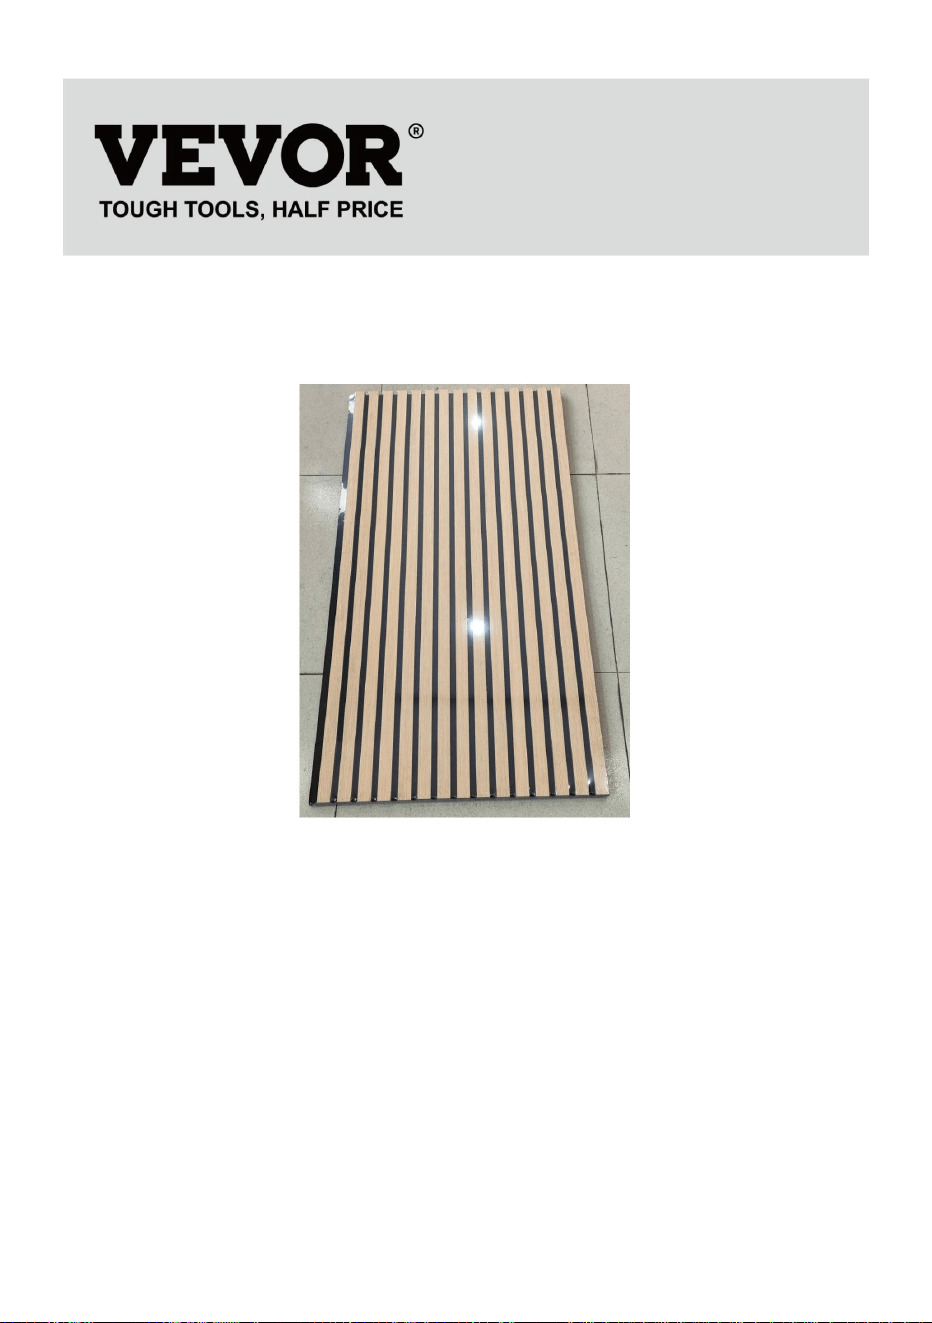
ACOUSTIC MDF SLAT WALL PANELS
MODEL:LYW8292C1206 /LYW8292C2402
/LYB8210C1206/LYB8210C2402/LYY8438S2402
/LYY8438S1206/LYS30942402
We continue to be committed to provide you tools with competitive price.
"Save Half", "Half Price" or any other similar expressions used by us only
represents an estimate of savings you might benefit from buying certain tools
with us compared to the major top brands and does not necessarily mean to cover
all categories of tools offered by us. You are kindly reminded to verify carefully
when you are placing an order with us if you are actually Saving
Half in comparison with the top major brands.


- 1 -
Model:LYW8292C1206/LYW8292C2402/LYB8210C1206/LYB8210C2402/
LYY8438S2402/LYY8438S1206/LYS30942402
NEED HELP? CONTACT US!
Have product questions? Need technical support? Please feel free to
contact us:
Technical Support and E-Warranty Certificate
www.vevor.com/support
This is the original instruction, please read all manual instructions
carefully before operating. VEVOR reserves a clear interpretation of our
user manual. The appearance of the product shall be subject to the
product you received. Please forgive us that we won't inform you again if
there are any technology or software updates on our product.
ACOUSTIC MDF SLAT WALL
PANELS
- 2 -
SAFETY INSTRUCTIONS
1.Please read and understand this manual carefully before using the
Acoustic MDF slat wall panels
The installation should be done by an adult, and children should not use it
without supervision.
2.Please ensure that the Acoustic MDF slat wall panels is firmly installed,
otherwise he may fall off and cause harm to people.
3.Check the stability and safety of the product fixation regularly. If the
product is loose, it should be strengthened immediately.
4.For safety purposes, prohibit separate glue to mounting panels on the
ceiling. Due to uneven glue or poor quality, the panel will be warped or fall
off.
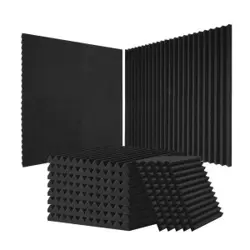
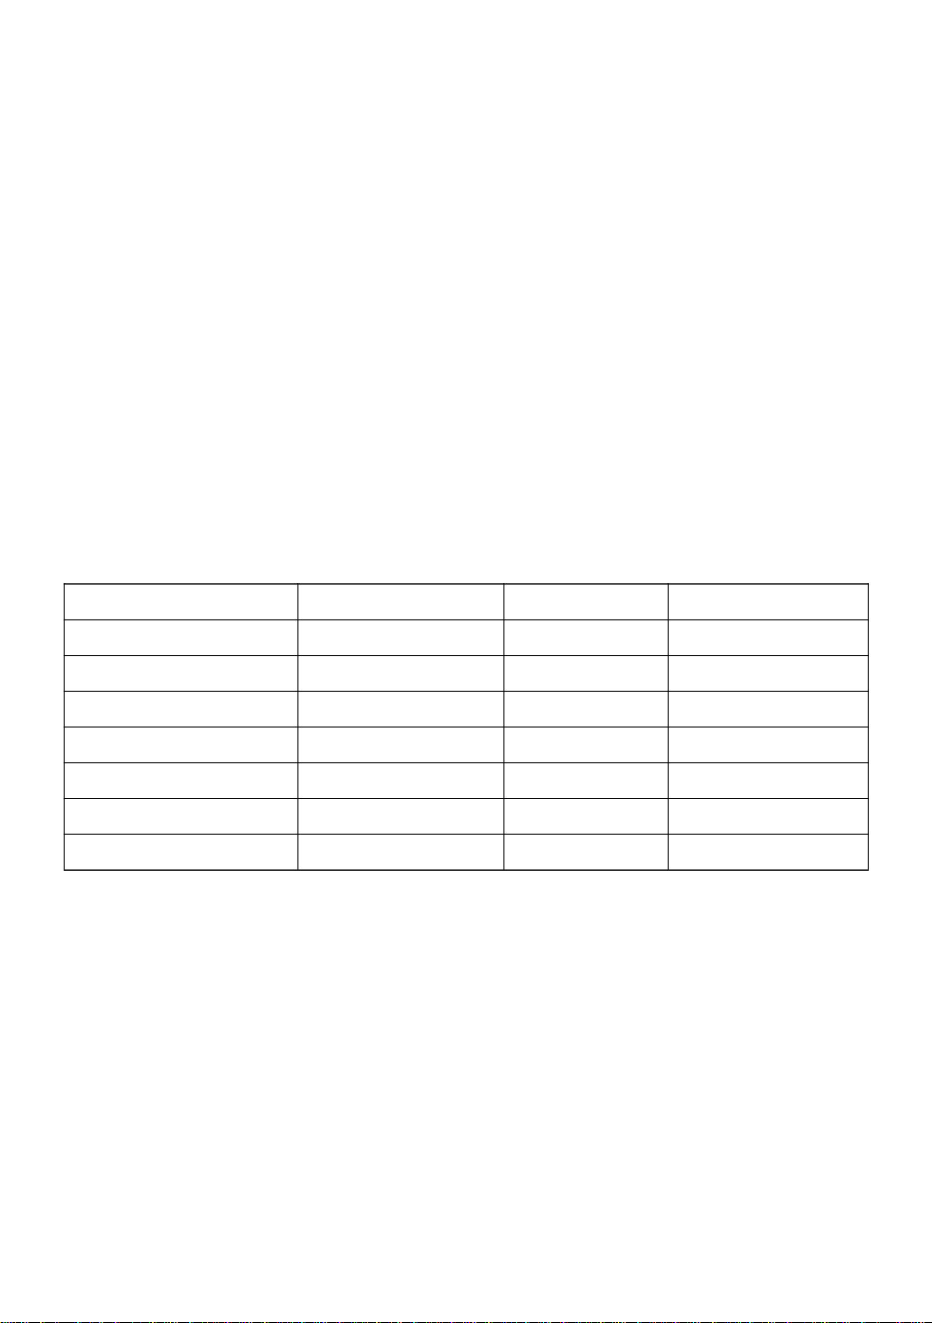
PARAMETER LIST
Model
Size
QTY
Color
LYW8292C1206
1200*600*21mm
4
walnut
LYW8292C2402
2400*200*21mm
4
walnut
LYB8210C1206
1200*600*21mm
4
black oak
LYB8210C2402
2400*200*21mm
4
black oak
LYY8438S2402
2400*200*21mm
4
Light oak
LYY8438S1206
1200*600*21mm
4
Light oak
LYS30942402
2400*200*21mm
4
Silver wood
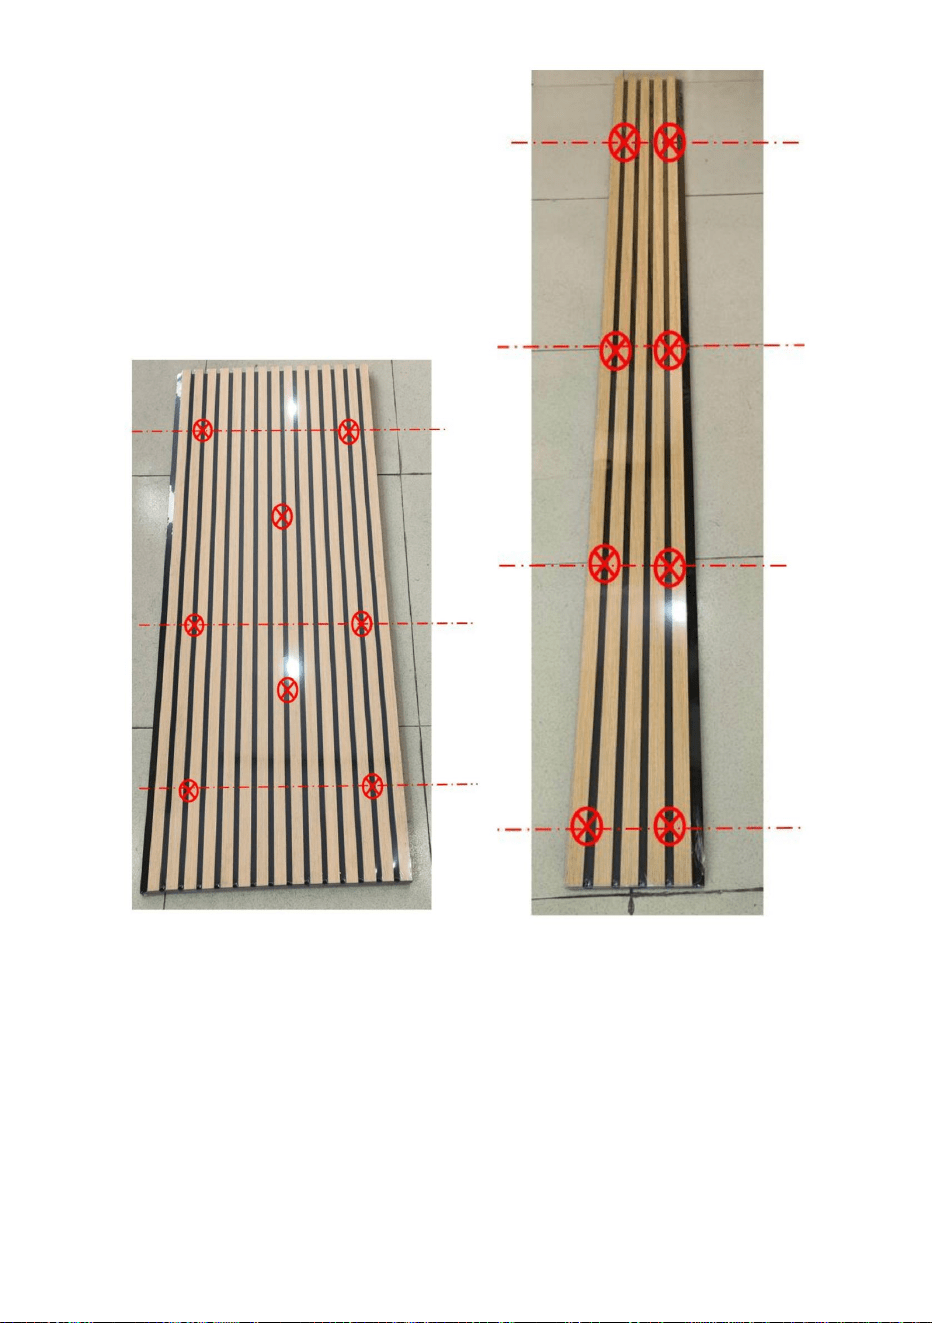
Note:This product is equipped with 34 screws;
If there is any difference between the color of this product and the picture in
the instruction manual, please refer to the physical object.
INSTRUCTIONS
Safety and Care Advice
• Check you have all the components and tools listed on the following
pages.

- 3 -
• Remove all fittings from the plastic bags and separate them into their
groups.
• Keep children and animals away from the work area, small parts could
choke if swallowed.
• Make sure you have enough space to layout the parts before starting.
• Parts of the assembly will be easier with 2 people.
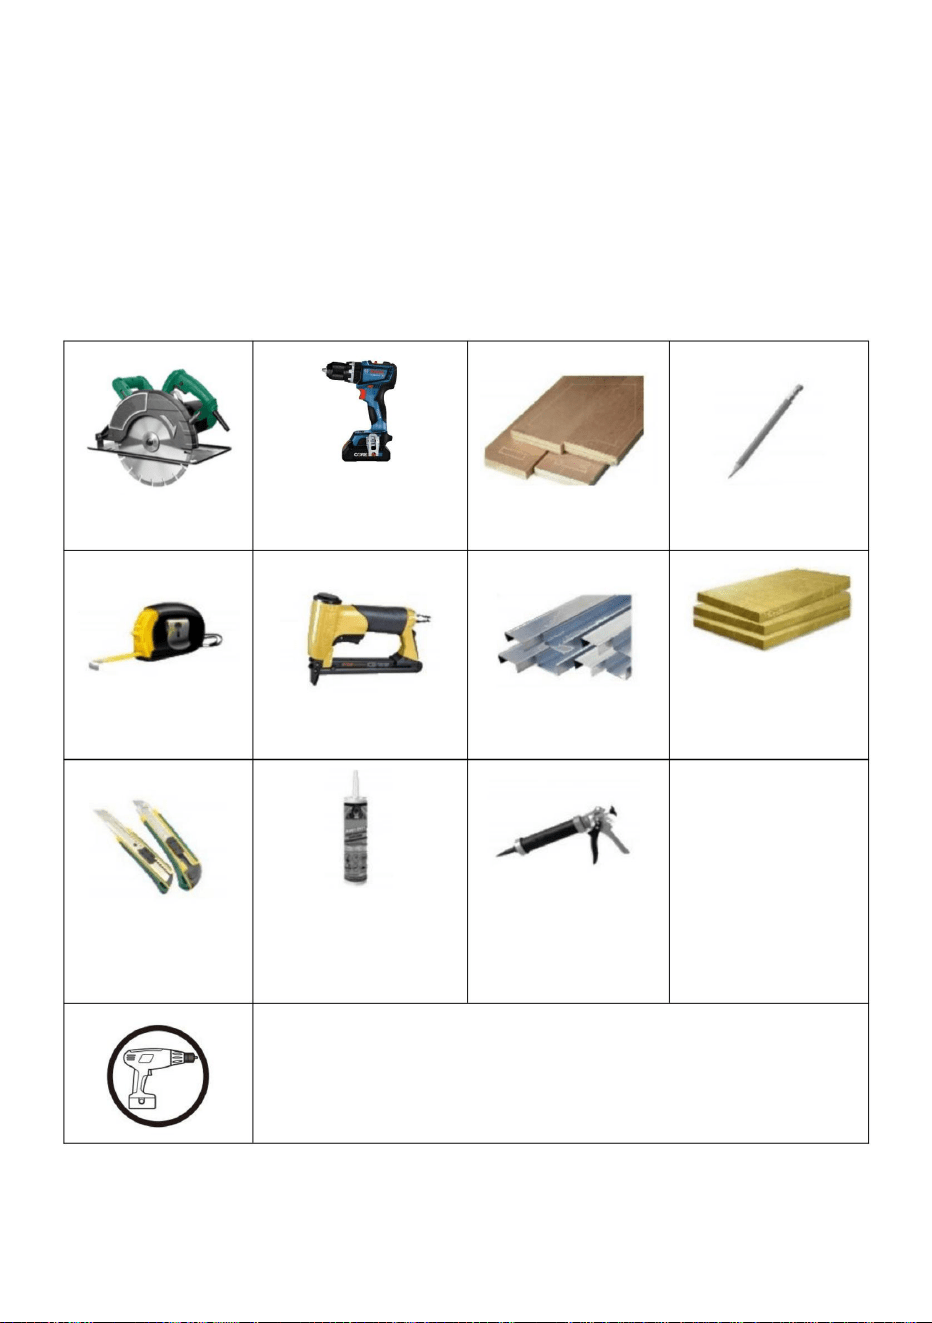
Install the required tools
Circular Saw
Electric
Screwdriver
Wooden racks
Pencil
Band Tape
Stapler
Keel
Sound
Absorption
Wool
Knife
Structural
Adhesive
Structural
Adhesive Gun
• To reduce the likelihood of damaging your product
please ensure that your power drill is set on a low
torque setting.

- 4 -
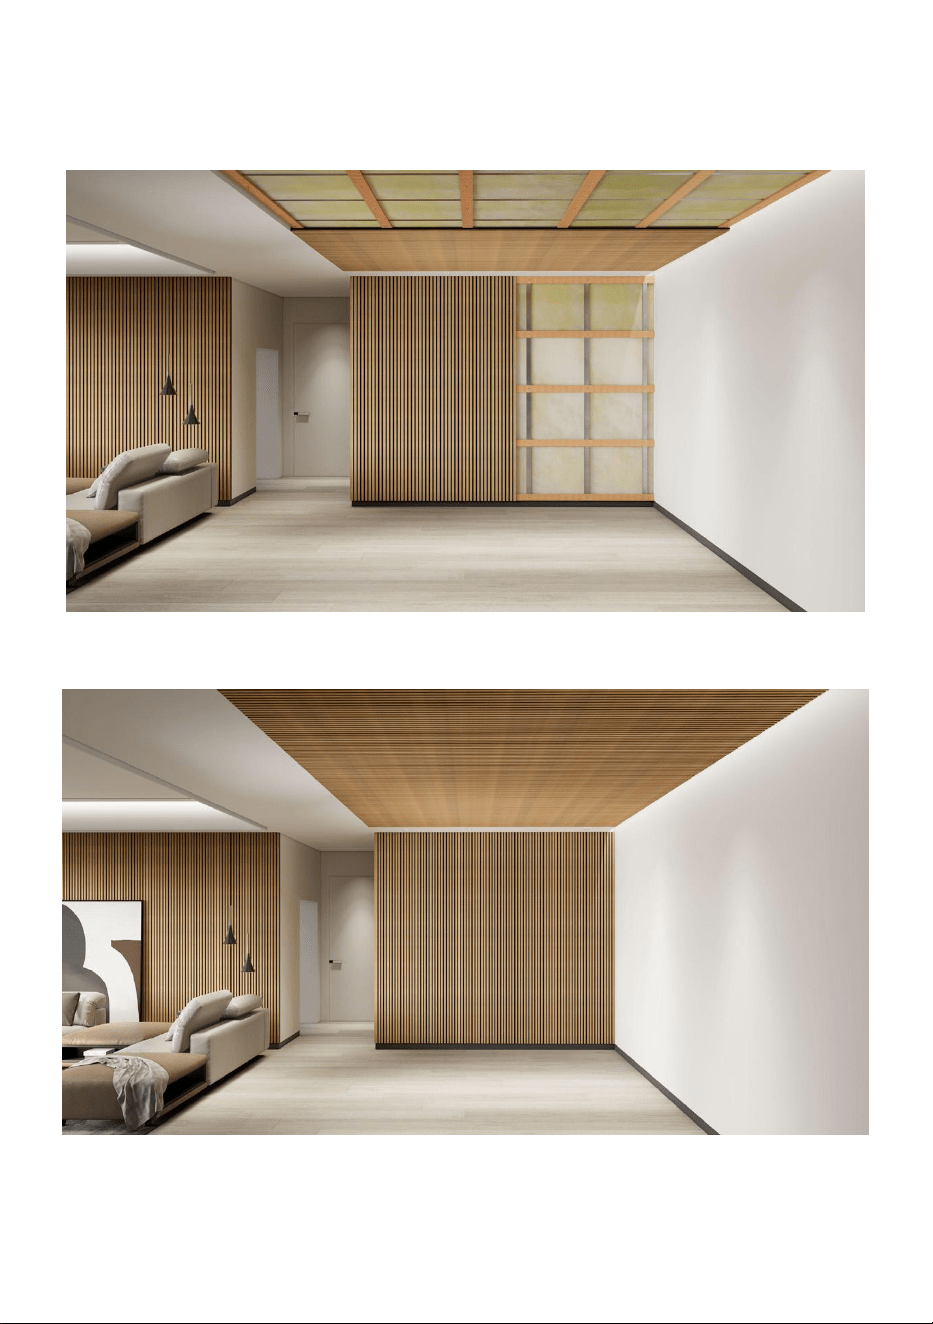
THE STANDARD INSTALLATION METHOD
Step1:Preparing the wall or ceiling
• Make sure the surfaces are clean and dry, without nails and screws
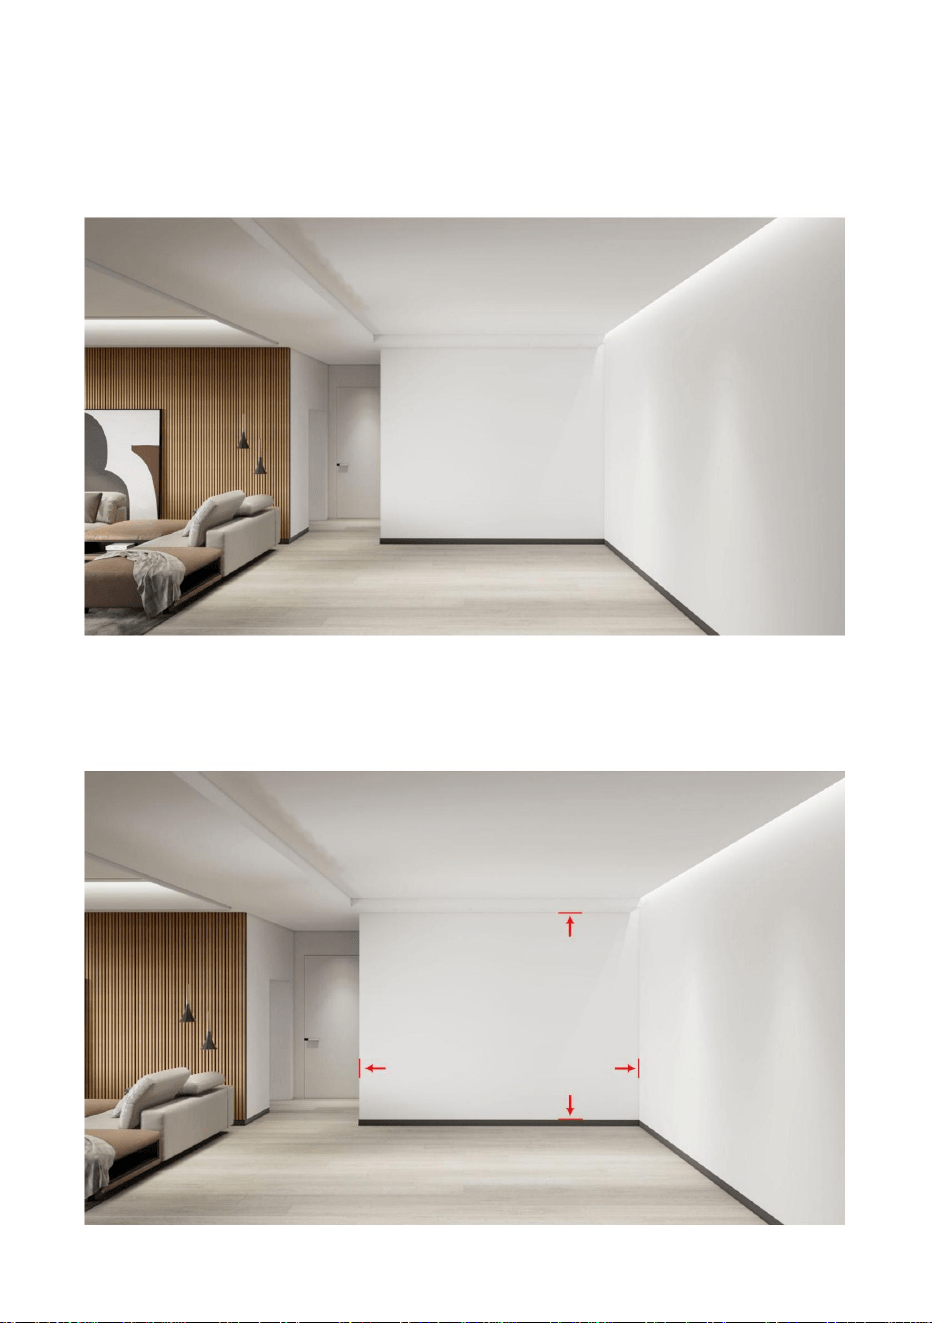
Step 2:
Measuring the height and width
high
width

- 5 -
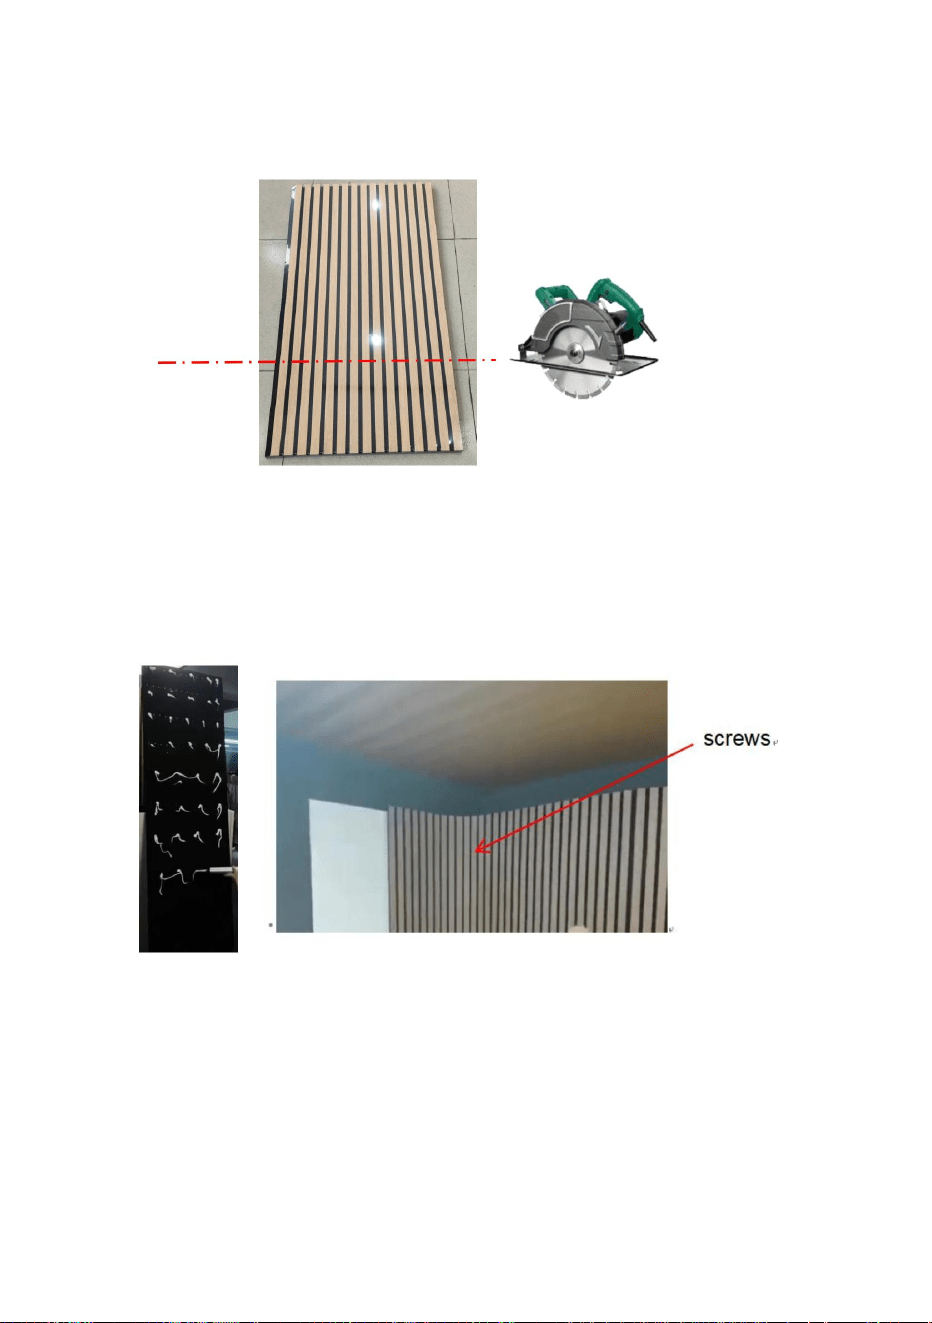
Step 3:Cutting the panels
• Cut products with circular saws and knives for your size requirements
need.
Step 4:Mounting the panel
A:Simple installed on the wall, can use the glue; first fix the glue on the
back of the product, and then paste on the wall;If pasted on a curved wall,
use screws in the curved position to attach the product to the wall.
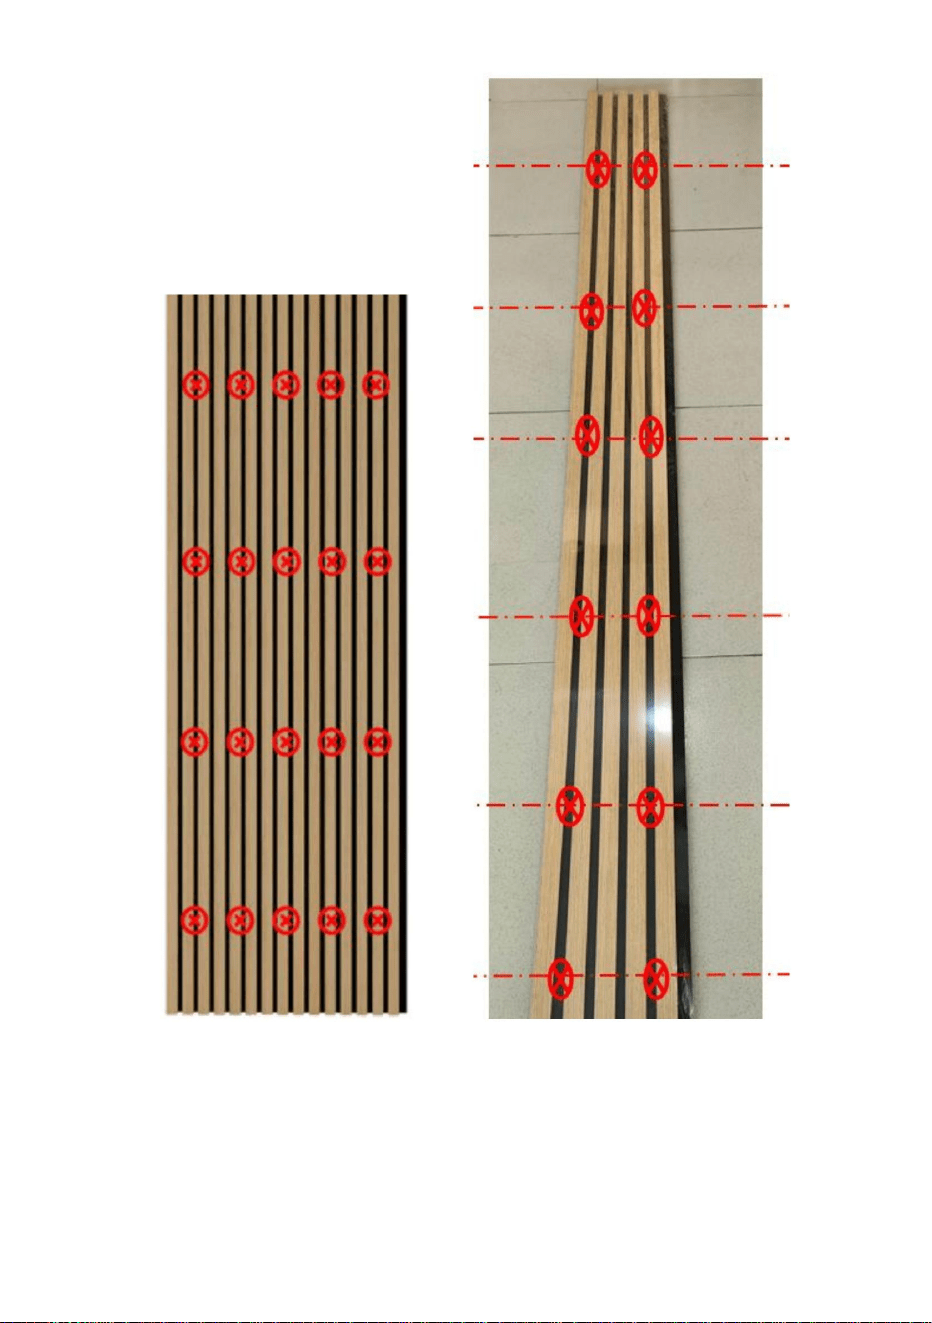
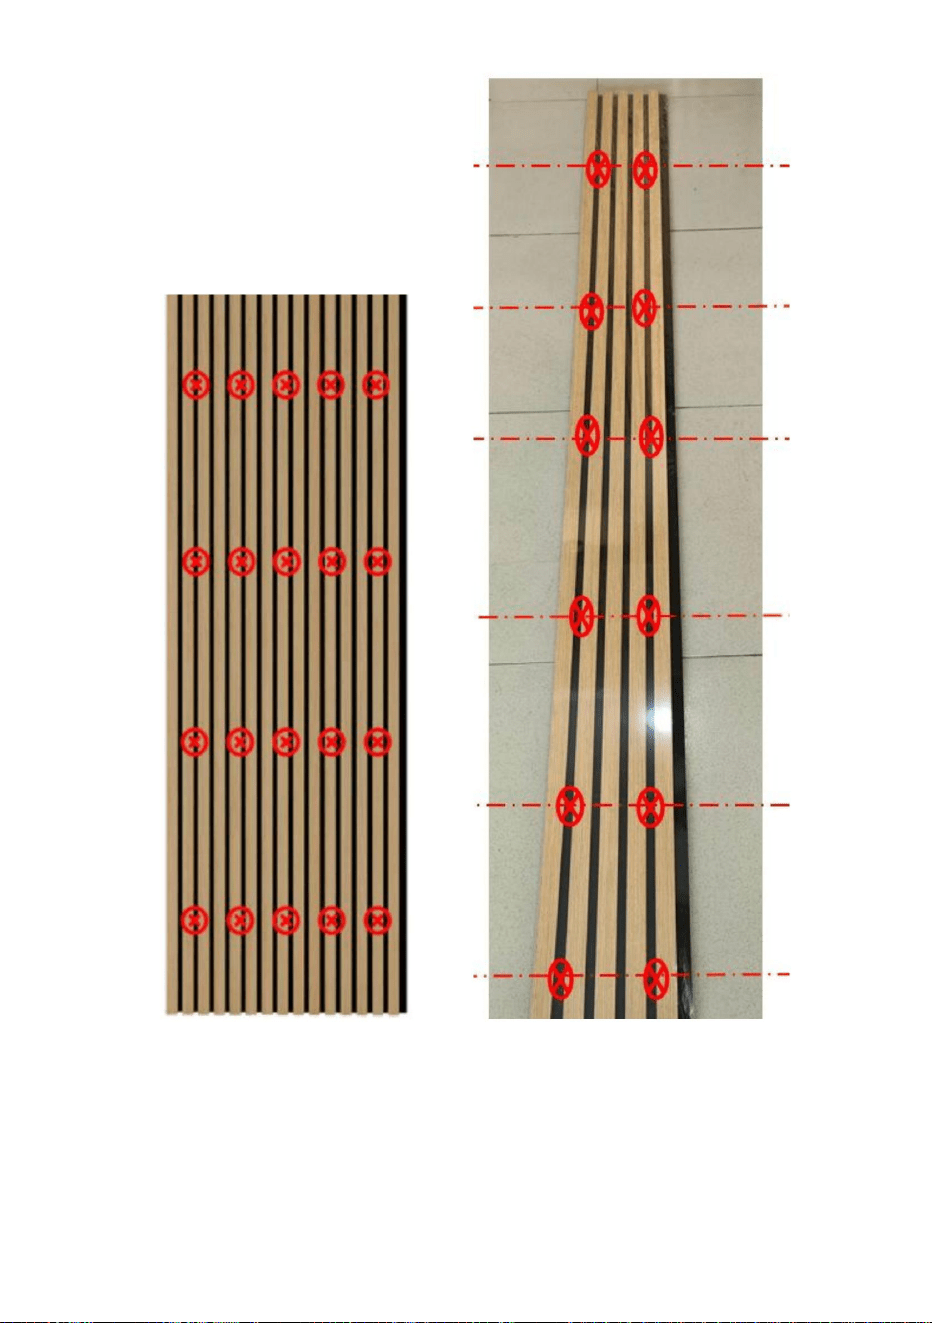
B.Use 8 screws to install on the wall;The screws should be fixed through
the black part, which is more beautiful.
Model LYW8292C2402, LYB8210C2402, LYY8438S2402, LYS30942402
And 8 screws are required.(Fig. 1);
Model LYW8292C1206, LYB8210C1206, LYY8438S1206 And 8 screws
are required. (Fig. 2.)

- 6 -
Fig.1 Fig.2
Note:If you need to install the product on the ceiling you need to buy
screws to reinforce the installation.
Model LYW8292C2402, LYB8210C2402, LYY8438S2402, LYS30942402
And 20 screws are required.(Fig. 3);
Model LYW8292C1206, LYB8210C1206, LYY8438S1206 And 12 screws
are required. (Fig. 4.)

- 7 -
Fig.3 Fig.4

- 8 -
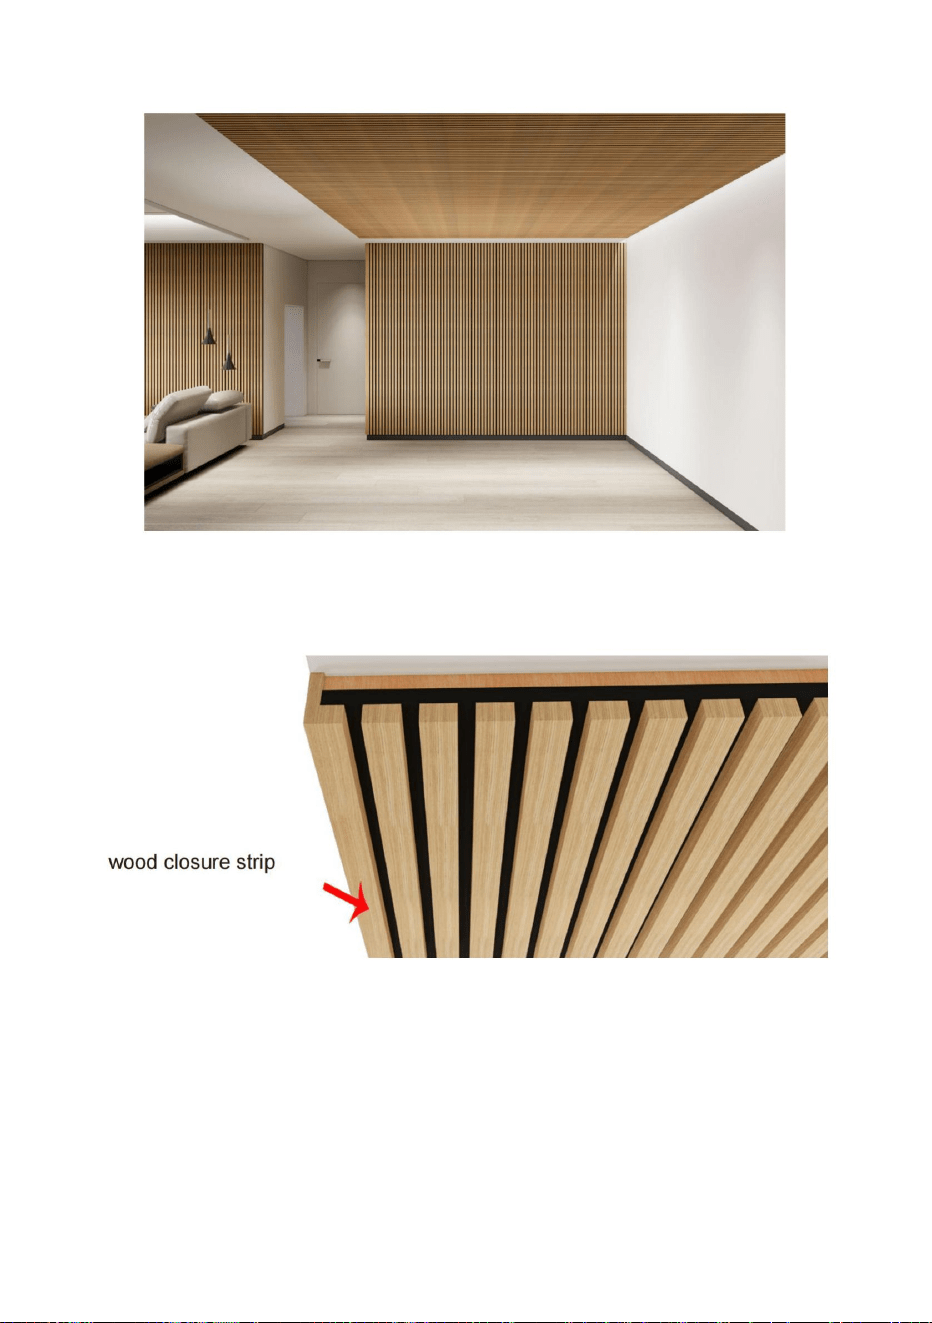
Step5:The end result of the installation
Note:If necessary, install a wooden seal at the end of the panel to ensure
aesthetics; but the wood seal shall be purchased extra yourself.
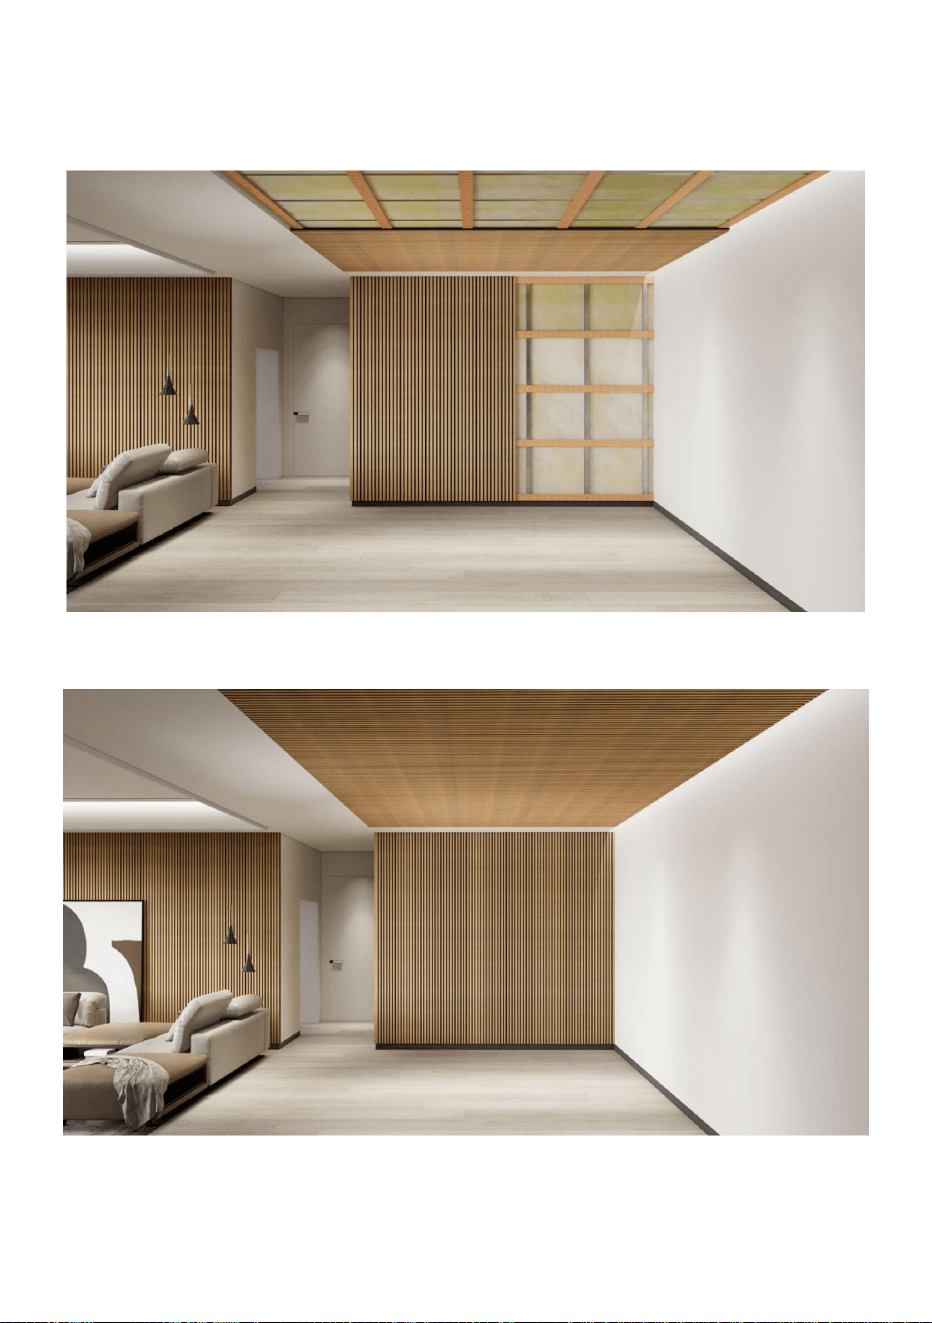
THE INSTALLATION METHOD FOR HIGHEST SOUND
ABSORPTION
Step 1: The preparation of wall or ceiling

- 9 -
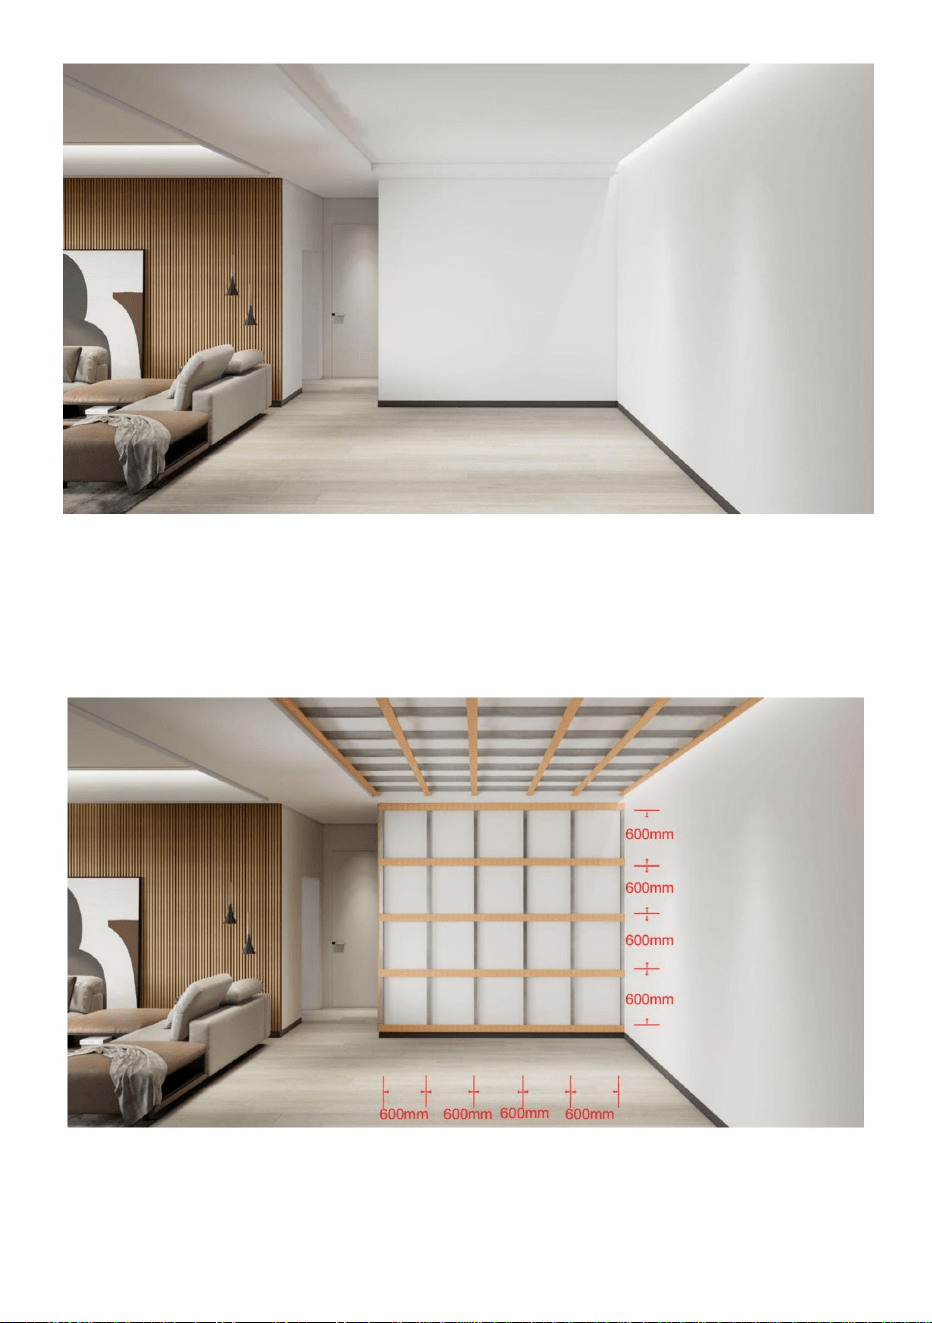
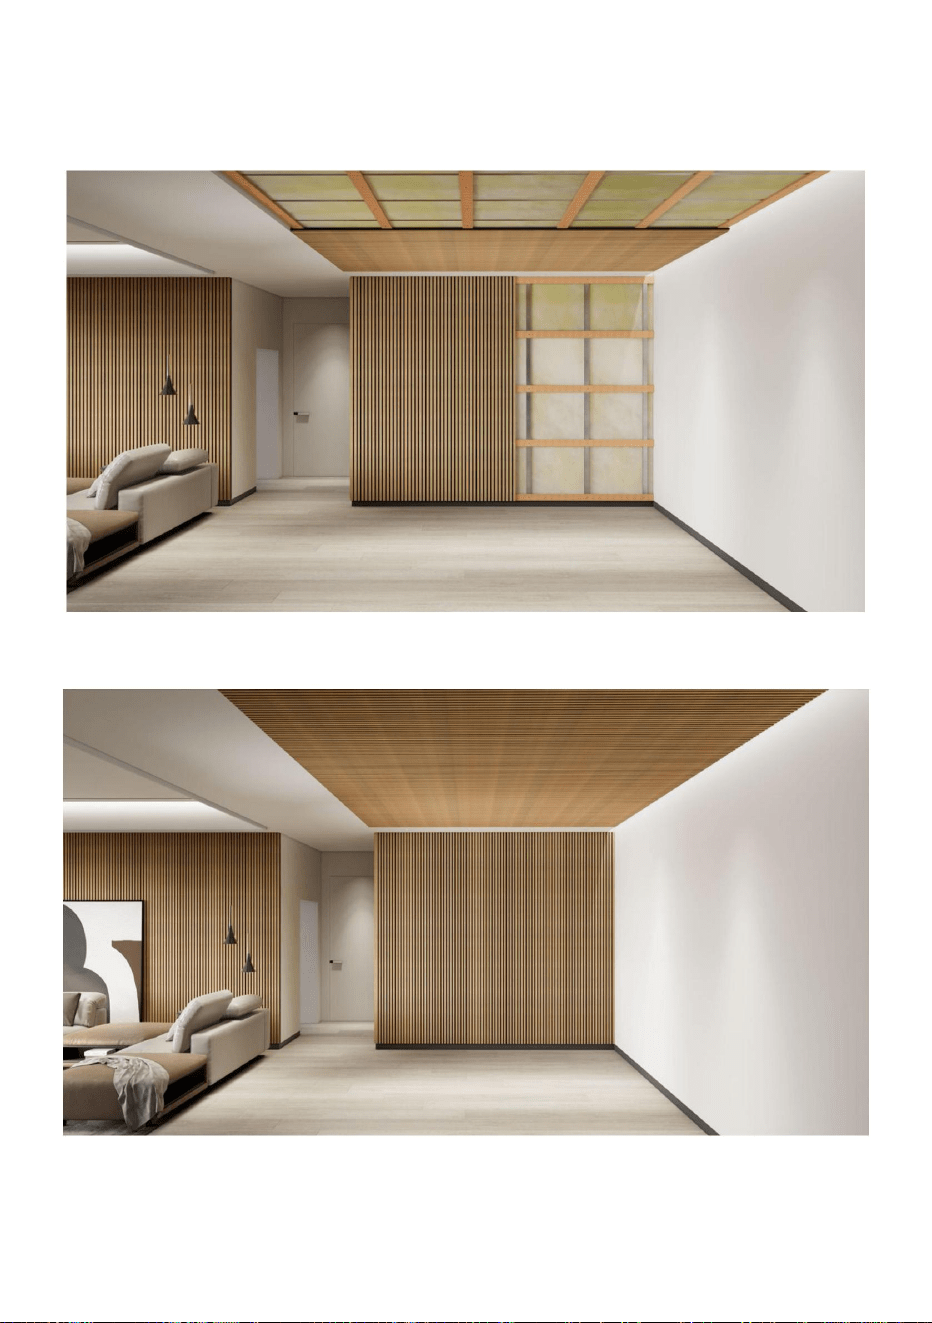
Step 2: Installing sound absorbing device;
A:We recommend installing the keel initially, then the sound absorption
wool, and then the wooden racks and panels. With this combination, you
will get the highest sound absorption.
B:Inserting the sound absorption wool between the keel and wooden racks.

- 10 -
Step 3:
Mounting the panel
•Using the electric screwdriver to screw through the black felt into the
wooden racks.
- 11 -
Note:Please refer to the above simple screw installation method
•When assembling in continuation to each other, please note that the felt
side of the one panel is seamless with the slat side of the following panel.
Step 4:The wall and ceiling are fully installed now.
.
- 12 -
Manufacturer: Shanghaimuxinmuyeyouxiangongsi
Address: Shuangchenglu 803nong11hao1602A-1609shi, baoshanqu,
shanghai 200000 CN.
Imported to AUS: SIHAO PTY LTD. 1 ROKEVA STREETEASTWOOD
NSW 2122 Australia
Imported to USA: Sanven Technology Ltd. Suite 250, 9166 Anaheim
Place, Rancho Cucamonga, CA 91730
REP
UK
YH CONSULTING LIMITED. C/O YH Consulting
Limited Office 147, Centurion House, London
Road, Staines-upon-Thames, Surrey, TW18 4AX
REP
EC
E-CrossStu GmbH
Mainzer Landstr.69,
60329 Frankfurt am Main.


/LYB8210C1206/LYB8210C2402/LYY8438S2402
Modèle:LYW8292C1206/LYW8292C2402.
/LYY8438S1206/LYS30942402
Nouscontinuonsànousengageràvousfournirdesoutilsàdesprixcompétitifs.
"Économisezlamoitié","Moitiéprix"outouteautreexpressionsimilairequenousutilisons
nereprésentequ'uneestimationdeséconomiesdontvouspourriezbénéficierenachetant
certainsoutilscheznousparrapportauxgrandesmarquesetnesignifiepasnécessairementcouvrir
touteslescatégoriesd'outilsproposés.parnous.Nousvousrappelonsdebienvouloirvérifier
attentivementlorsquevouspassezunecommandecheznoussivous
économisezréellementlamoitiéparrapportauxgrandesmarques.
PANNEAUXMURAUXÀLATTESACOUSTIQUESMDF
Assistancetechniqueetcertificatdegarantieélectroniquewww.vevor.com/support
Machine Translated by Google

Machine Translated by Google

Vousavezdesquestionssurlesproduits?Besoind'uneassistancetechnique?N'hésitez
pasànous
contacter:Supporttechniqueetcertificatdegarantieélectronique
www.vevor.com/support
Ils'agitdesinstructionsoriginales,veuillezlireattentivementtouteslesinstructions
dumanuelavantdel'utiliser.VEVORseréserveuneinterprétationclairedenotremanuel
d’utilisation.L'apparenceduproduitdépendduproduitquevousavezreçu.Veuillez
nouspardonnerdeneplusvousinformers'ilyadesmisesàjourtechnologiquesoulogicielles
surnotreproduit.
LYY8438S2402/LYY8438S1206/LYS30942402
Modèle:LYW8292C1206/LYW8292C2402/LYB8210C1206/LYB8210C2402/
PANNEAUX
MURACOUSTIQUEÀLATTESMDF
BESOIND'AIDE?CONTACTEZNOUS!
1
Machine Translated by Google
Conseilsdesécuritéetd'entretien
2
4
4
Taille
4
sanssurveillance.
LYY8438S24022400*200*21mm
Chêneclair
PanneauxmurauxacoustiquesàlattesMDF
chênenoir
4
S'ilyaunedifférenceentrelacouleurdeceproduitetl'imagedans
4.Pourdesraisonsdesécurité,interdisezlacolleséparéesurlespanneauxdemontagedu
LYW8292C24022400*200*21mm
Couleur
1.Veuillezlireetcomprendreattentivementcemanuelavantd'utiliserle
désactivé.
LYB8210C12061200*600*21mm
LYS309424022400*200*21mm
Chêneclair
•Vérifiezquevousdisposezdetouslescomposantsetoutilsrépertoriéscidessous.
3.Vérifiezrégulièrementlastabilitéetlasécuritédelafixationduproduit.Sile
LYW8292C12061200*600*21mm
4
4
LYY8438S12061200*600*21mm
2.VeuillezvousassurerquelespanneauxmurauxàlattesacoustiquesMDFsontfermementinstallés,
sinonilspourraienttomberetcauserdesdommagesauxpersonnes.
QTÉ
noyer
Remarque:ceproduitestéquipéde34vis;
L'installationdoitêtreeffectuéeparunadulteetlesenfantsnedoiventpasl'utiliser
Modèle
LYB8210C24022400*200*21mm chênenoir
lemanueld'instructions,veuillezvousréféreràl'objetphysique.
plafond.Enraisond'unecolleinégaleoud'unemauvaisequalité,lepanneausedéformeraoutombera
4
noyer
Boisargenté
pages.
leproduitestlâche,ildoitêtrerenforcéimmédiatement.
LISTEDESPARAMÈTRES
CONSIGNESDESÉCURITÉ
INSTRUCTIONS
Machine Translated by Google

Installerlesoutilsrequis
groupes.•
Gardezlesenfantsetlesanimauxéloignésdelazonedetravail,lespetitespiècespourraient
Son
Deconstruction
Adhésif
•Retireztouslesraccordsdessacsenplastiqueetséparezlesdansleur
Supportsenbois Crayon
Pistoletadhésif
Sciecirculaire
Deconstruction
Tournevis
Agrafeuse
réglageducouple.
Électrique
Bandedebande
Quille
veuillezvousassurerquevotreperceuseélectriqueestrégléesurunniveaubas
•Assurezvousd'avoirsuffisammentd'espacepourdisposerlespiècesavantdecommencer.•
Certainespartiesdumontageserontplusfacilesà2personnes.
Laine
•Pourréduirelerisqued'endommagervotreproduit
s'étoufferencasd'ingestion.
Absorption
Couteau
3
Machine Translated by Google
Mesurerlahauteuretlalargeur
Étape1:Préparationdumurouduplafond
•Assurezvousquelessurfacessontpropresetsèches,sansclousnivis.
Étape2:
4
largeur
haut
LAMÉTHODED'INSTALLATIONSTANDARD
Machine Translated by Google

Étape4:Montagedupanneau
A:Simpleinstallésurlemur,peututiliserlacolle;Fixezd'abordlacolleaudosdu
produit,puiscollezlasurlemur.Sicollésurunmurincurvé,utilisezdesvisenposition
incurvéepourfixerleproduitaumur.
ModèleLYW8292C2402,LYB8210C2402,LYY8438S2402,LYS30942402et8vissont
nécessaires.(Fig.1);Modèle
LYW8292C1206,LYB8210C1206,LYY8438S1206et8vissontnécessaires.(Fig.2.)
B.Utilisez8vispourinstallersurlemur;lesvisdoiventêtrefixéesàtraverslapartie
noire,cequiestplusbeau.
Étape3:Couperlespanneaux•Coupez
lesproduitsavecdessciescirculairesetdescouteauxselonvosbesoinsentermesdetaille.
5
Machine Translated by Google

6
ModèleLYW8292C2402,LYB8210C2402,LYY8438S2402,LYS30942402
Et20vissontnécessaires.(Fig.3);
ModèleLYW8292C1206,LYB8210C1206,LYY8438S1206et12vis
sontnécessaires.(Fig.4.)
Remarque:sivousdevezinstallerleproduitauplafond,vousdevezl'acheter.
vispourrenforcerl'installation.
Figure2Figure1
Machine Translated by Google
7
Figure4Figure3
Machine Translated by Google

ABSORPTION
LAMÉTHODED'INSTALLATIONPOURUNSONLEPLUSÉLEVÉ
Remarque:Sinécessaire,installezunjointenboisàl'extrémitédupanneaupourgarantir
l'esthétique;maislesceauenboisseraachetéensupplémentvousmême.
Étape5:Lerésultatfinaldel’installation
Étape1:Lapréparationdumurouduplafond
8
Machine Translated by Google
9
B:Insertiondelalained'absorptionacoustiqueentrelaquilleetlessupportsenbois.
Étape2:Installationdudispositifinsonorisant;
R:Nousvousrecommandonsd'installerd'abordlaquille,puislalained'absorption
acoustique,puislessupportsetpanneauxenbois.Aveccettecombinaison,vous
obtiendrezlameilleureabsorptionacoustique.
Machine Translated by Google
10
Étape3:
Montagedupanneau•Àl'aide
dutournevisélectrique,vissezlefeutrenoirdanslessupportsenbois.
Machine Translated by Google
11
Étape4:Lemuretleplafondsontmaintenantentièrementinstallés.
Remarque:veuillezvousréféreràlaméthoded'installationparvissimplecidessus.•
Lorsdel'assemblageencontinuationlesunsdesautres,veuilleznoterquelecôtéfeutred'un
panneauestsanscoutureaveclecôtélattesdupanneausuivant.
.
Machine Translated by Google

REPRÉSENTANTCE
REPRÉSENTANTDUROYAUMEUNI
ImportéauxÉtatsUnis:SanvenTechnologyLtd.Suite250,9166AnaheimPlace,
RanchoCucamonga,CA91730
YHCONSULTINGLIMITÉE.C/OYHConsultingLimited
Bureau147,CenturionHouse,LondonRoad,Staines
uponThames,Surrey,TW184AX
ImportéenAustralie:SIHAOPTYLTD.1ROKEVASTREETASTWOODNSW2122
Australie
Fabricant:ShanghaimuxinmuyeyouxiangongsiAdresse:
Shuangchenglu803nong11hao1602A1609shi,baoshanqu,shanghai200000CN.
ECrossStuGmbH
MainzerLandstr.69,
60329FrancfortsurleMain.
12
Machine Translated by Google

Machine Translated by Google


/LYB8210C1206/LYB8210C2402/LYY8438S2402
MODELL:LYW8292C1206 /LYW8292C2402
/LYY8438S1206/LYS30942402
„Sparen Sie die Hälfte“, „Halber Preis“ oder andere ähnliche Ausdrücke, die wir verwenden,
stellen nur eine Schätzung der Ersparnis dar, die Sie beim Kauf bestimmter Werkzeuge bei uns
im Vergleich zu den großen Topmarken erzielen können, und decken nicht unbedingt alle von uns
angebotenen Werkzeugkategorien ab. Wir möchten Sie freundlich daran erinnern, bei der
Bestellung bei uns sorgfältig zu prüfen, ob Sie im Vergleich zu den großen
Topmarken tatsächlich die Hälfte sparen.
Wir sind weiterhin bestrebt, Ihnen Werkzeuge zu wettbewerbsfähigen Preisen anzubieten.
AKUSTISCHE MDF-LAmellENWANDPANEELE
Technischer Support und E-Garantie-Zertifikat www.vevor.com/support
Machine Translated by Google

Machine Translated by Google

LYY8438S2402/LYY8438S1206/LYS30942402
Dies ist die Originalanleitung. Bitte lesen Sie alle Anweisungen sorgfältig durch, bevor
Sie das Gerät in Betrieb nehmen. VEVOR behält sich eine klare Auslegung unserer
Bedienungsanleitung vor. Das Erscheinungsbild des Produkts richtet sich nach dem
Produkt, das Sie erhalten haben. Bitte verzeihen Sie uns, dass wir Sie nicht erneut informieren,
wenn es Technologie- oder Software-Updates für unser Produkt gibt.
Haben Sie Fragen zum Produkt? Benötigen Sie technischen Support? Bitte kontaktieren Sie
uns:
Technischer Support und E-Garantie-Zertifikat www.vevor.com/
support
Modell:LYW8292C1206/LYW8292C2402/LYB8210C1206/LYB8210C2402/
PANEELE
AKUSTISCHE MDF-LAmellENWAND
Brauchen Sie Hilfe? Kontaktieren Sie uns!
- 1 -
Machine Translated by Google
Sicherheits- und Pflegehinweise
- 2 -
ohne Aufsicht.
LYY8438S2402 2400*200*21mm
Größe
4
Wenn es einen Unterschied zwischen der Farbe dieses Produkts und dem Bild in
Schwarzeiche
Akustische MDF-Lamellenwandpaneele
4
1.Bitte lesen Sie dieses Handbuch sorgfältig durch, bevor Sie das
aus.
LYB8210C1206 1200*600*21mm
4.Aus Sicherheitsgründen ist der separate Kleber für die Montageplatten auf der
LYW8292C2402 2400*200*21mm
Farbe
Helle Eiche
3.Überprüfen Sie regelmäßig die Stabilität und Sicherheit der Produktfixierung.
LYW8292C1206 1200*600*21 mm
4
LYS30942402 2400*200*21 mm
2. Bitte stellen Sie sicher, dass die akustischen MDF-Lamellenwandpaneele fest installiert sind, da
sie sonst herunterfallen und Personen verletzen könnten.
Menge
• Überprüfen Sie, ob Sie alle auf der folgenden Seite aufgeführten Komponenten und Werkzeuge haben
4
LYY8438S1206 1200*600*21mm
LYB8210C2402 2400*200*21mm
Die Installation sollte von einem Erwachsenen durchgeführt werden und Kinder sollten es nicht verwenden
Modell
Nussbaum
Schwarzeiche
Hinweis: Dieses Produkt ist mit 34 Schrauben ausgestattet;
Silbernes Holz
4
Nussbaum
Die Bedienungsanleitung finden Sie am physischen Objekt.
Decke. Aufgrund von ungleichmäßigem Kleber oder schlechter Qualität verzieht sich die Platte oder fällt
4
Wenn das Produkt locker ist, sollte es umgehend verstärkt werden.
4
Helle Eiche
Seiten.
PARAMETERLISTE
SICHERHEITSHINWEISE
ANWEISUNGEN
Machine Translated by Google

Installieren Sie die erforderlichen Tools
Erstickungsgefahr bei Verschlucken.
Strukturell
• Halten
Sie Kinder und Tiere vom Arbeitsbereich fern, Kleinteile könnten
Klang
Klebstoff
Holzregale
• Alle Armaturen aus den Plastiktüten entnehmen und in ihre
Bleistift
Strukturell
Kreissäge
KlebepistoleMesser
Schraubendreher
Hefter
Elektrisch
Kiel
Drehmomenteinstellung.
Bandband
Stellen Sie bitte sicher, dass Ihre Bohrmaschine auf eine niedrige
• Um die Wahrscheinlichkeit einer Beschädigung Ihres Produkts zu verringern
• Stellen Sie sicher, dass Sie genügend Platz haben, um die Teile auszubreiten, bevor Sie beginnen.
• Teile der Montage lassen sich mit zwei Personen einfacher durchführen.
Wolle
Absorption
- 3 -
Machine Translated by Google
Breite
hoch
- 4 -
Schritt 2:
Schritt 1:Vorbereitung der Wand oder Decke •
Stellen Sie sicher, dass die Oberflächen sauber und trocken sind und keine Nägel oder Schrauben aufweisen.
Messen der Höhe und Breite
DIE STANDARDINSTALLATIONSMETHODE
Machine Translated by Google

- 5 -
B. Verwenden Sie zur Montage an der Wand 8 Schrauben. Die Schrauben sollten durch den schwarzen
Teil befestigt werden, das sieht schöner aus.
Schritt 4: Anbringen des Panels A:
Einfache Installation an der Wand, Sie können Kleber verwenden. Tragen Sie zuerst den Kleber auf
der Rückseite des Produkts auf und kleben Sie es dann an die Wand. Wenn Sie es an einer gewölbten
Wand anbringen, befestigen Sie das Produkt mit Schrauben an der gewölbten Stelle an der Wand.
Schritt 3: Zuschneiden der Platten •
Schneiden Sie die Produkte mit Kreissägen und Messern auf die von Ihnen benötigte Größe zu.
Modell LYW8292C2402, LYB8210C2402, LYY8438S2402, LYS30942402. Es werden 8 Schrauben
benötigt. (Abb. 1); Modell LYW8292C1206,
LYB8210C1206, LYY8438S1206. Es werden 8 Schrauben benötigt. (Abb. 2.)
Machine Translated by Google
- 6 -
Schrauben zur Verstärkung der Installation.
Modell LYW8292C2402, LYB8210C2402, LYY8438S2402, LYS30942402
Modell LYW8292C1206, LYB8210C1206, LYY8438S1206 Und 12 Schrauben
erforderlich. (Abb. 4.)
Hinweis: Wenn Sie das Produkt an der Decke installieren müssen, müssen Sie kaufen
Und es werden 20 Schrauben benötigt. (Abb. 3);
Abb.2Abb.1
Machine Translated by Google

- 7 -
Abb.4Abb.3
Machine Translated by Google
Die Einbaumethode für höchsten Klang
ABSORPTION
Hinweis: Falls erforderlich, installieren Sie aus ästhetischen Gründen am Ende des
Paneels eine Holzdichtung. Diese Holzdichtung müssen Sie jedoch separat erwerben.
Schritt 5: Das Endergebnis der Installation
Schritt 1: Die Vorbereitung der Wand oder Decke
- 8 -
Machine Translated by Google

- 9 -
B: Einlegen der Schalldämmwolle zwischen Kiel und Holzgestell.
Schritt 2: Schallabsorbierendes Gerät
installieren; A: Wir empfehlen, zuerst den Kiel, dann die Schallabsorptionswolle
und dann die Holzgestelle und -platten zu installieren. Mit dieser Kombination
erreichen Sie die höchste Schallabsorption.
Machine Translated by Google

- 10 -
Schritt
3: Paneel montieren •Mit
dem Akkuschrauber durch den schwarzen Filz in die Holzgestelle schrauben.
Machine Translated by Google
Schritt 4: Wand und Decke sind jetzt vollständig installiert.
Hinweis: Bitte beachten Sie die oben beschriebene einfache Methode zur
Schraubmontage. •Beachten Sie bei der Montage hintereinander, dass die Filzseite
des einen Paneels nahtlos mit der Lamellenseite des nächsten Paneels abschließt.
.
- 11 -
Machine Translated by Google

- 12 -
Nach AUS importiert: SIHAO PTY LTD. 1 ROKEVA STREETEASTWOOD NSW 2122
Australien
Importiert in die USA: Sanven Technology Ltd. Suite 250, 9166 Anaheim Place,
Rancho Cucamonga, CA 91730
Hersteller: Shanghaimuxinmuyeyouxiangongsi Adresse:
Shuangchenglu 803nong11hao1602A-1609shi, baoshanqu, Shanghai 200000 CN.
YH CONSULTING LIMITED. C/O YH Consulting Limited
Office 147, Centurion House, London Road, Staines-
upon-Thames, Surrey, TW18 4AX
E-CrossStu GmbH
Mainzer Landstr.69,
60329 Frankfurt am Main.
UK REP
Vertreter der EG
Machine Translated by Google

Machine Translated by Google


PANNELLI PER PARETI ACUSTICI A DOGHE IN MDF
"Risparmia la metà", "Metà prezzo" o qualsiasi altra espressione simile da noi
utilizzata rappresenta solo una stima del risparmio che potresti trarre dall'acquistare
determinati strumenti con noi rispetto ai principali marchi più importanti e non significa
necessariamente coprire tutte le categorie di strumenti offerti da noi. Ti ricordiamo
gentilmente di verificare attentamente quando effettui un ordine con noi
se stai effettivamente risparmiando la metà rispetto ai migliori marchi principali.
Continuiamo a impegnarci per fornirvi strumenti a prezzi competitivi.
/LYY8438S1206/LYS30942402
MODELLO:LYW8292C1206/LYW8292C2402
/LYB8210C1206/LYB8210C2402/LYY8438S2402
Supporto tecnico e certificato di garanzia elettronica www.vevor.com/support
Machine Translated by Google

Machine Translated by Google
LYY8438S2402/LYY8438S1206/LYS30942402
Queste sono le istruzioni originali, leggere attentamente tutte le istruzioni del manuale
prima dell'uso. VEVOR si riserva una chiara interpretazione del nostro manuale d'uso. L'aspetto
del prodotto sarà soggetto al prodotto ricevuto. Ti preghiamo di perdonarci se non ti
informeremo più se sono presenti aggiornamenti tecnologici o software sul nostro prodotto.
Hai domande sul prodotto? Hai bisogno di supporto tecnico? Non esitate a contattarci:
Supporto
tecnico e certificato di garanzia elettronica www.vevor.com/
support
Modello:LYW8292C1206/LYW8292C2402/LYB8210C1206/LYB8210C2402/
HAI BISOGNO DI AIUTO? CONTATTACI!
PARETE ACUSTICA A DOGHE IN MDF
PANNELLI
- 1 -
Machine Translated by Google
Consigli per la sicurezza e la cura
-2-
Nota: questo prodotto è dotato di 34 viti;
il manuale di istruzioni, fare riferimento all'oggetto fisico.
1.Si prega di leggere e comprendere attentamente questo manuale prima di utilizzare il
spento.
LYB8210C1206 1200*600*21mm
4. Per motivi di sicurezza, vietare l'uso di colla separata sui pannelli di montaggio
LYW8292C2402 2400*200*21mm
Colore
Rovere chiaro
3.Verificare regolarmente la stabilità e la sicurezza del fissaggio del prodotto. Se il
LYW8292C1206 1200*600*21mm
4
LYS309424022400*200*21mm
• Verificare di disporre di tutti i componenti e gli strumenti elencati di seguito
senza supervisione.
Misurare
4
LYY8438S2402 2400*200*21 mm
Se c'è qualche differenza tra il colore di questo prodotto e l'immagine in
Pannelli murali acustici a doghe in MDF
4
noce
quercia nera
4
Legno argentato
soffitto. A causa di colla non uniforme o di scarsa qualità, il pannello si deformerà o cadrà
il prodotto è allentato, dovrebbe essere rinforzato immediatamente.
4
4
Rovere chiaro
pagine.
2. Assicurarsi che i pannelli murali a doghe in MDF acustico siano installati saldamente, altrimenti
potrebbero cadere e causare danni alle persone.
QUANTITÀ
4
LYY8438S1206 1200*600*21mm
L'installazione deve essere eseguita da un adulto e i bambini non dovrebbero utilizzarla
LYB8210C2402 2400*200*21 mm
Modello
noce
quercia nera
ISTRUZIONI
ISTRUZIONI DI SICUREZZA
ELENCO PARAMETRI
Machine Translated by Google

- 3 -
Elettrico
Chiglia
impostazione della coppia.
Nastro a fascia
assicurati che il tuo trapano elettrico sia impostato su un livello basso
• Per ridurre la probabilità di danneggiare il prodotto
• Assicurati di avere spazio sufficiente per disporre le parti prima di iniziare. • Parti
dell'assemblaggio saranno più facili con 2 persone.
Lana
Assorbimento
soffocare se ingerito.
Coltello
Strutturale
Suono
gruppi. •
Tenere i bambini e gli animali lontani dall'area di lavoro, piccole parti potrebbero
Adesivo
Scaffali in legno
• Rimuovere tutti gli accessori dai sacchetti di plastica e separarli nei rispettivi
Matita
Strutturale
Sega circolare
Pistola adesiva
Cacciavite
Cucitrice
Installare gli strumenti richiesti
Machine Translated by Google

Misurare l'altezza e la larghezza
Fase 1:Preparazione della parete o del
soffitto • Assicurarsi che le superfici siano pulite e asciutte, senza chiodi e viti
Passaggio 2:
-4-
alto
larghezza
IL METODO DI INSTALLAZIONE STANDARD
Machine Translated by Google

B.Utilizzare 8 viti per l'installazione a parete; le viti devono essere fissate attraverso la parte
nera, che è più bella.
Passaggio 4: Montaggio del
pannello A: Semplice installazione a parete, è possibile utilizzare la colla; fissare prima
la colla sul retro del prodotto, quindi incollarla sul muro; Se incollato su una parete curva,
utilizzare le viti nella posizione curva per fissare il prodotto alla parete.
Fase 3:Taglio dei pannelli •
Tagliare i prodotti con seghe circolari e coltelli in base alle vostre esigenze dimensionali.
Modello LYW8292C2402, LYB8210C2402, LYY8438S2402, LYS30942402 E sono
necessarie 8 viti.(Fig. 1); Sono necessarie il
modello LYW8292C1206, LYB8210C1206, LYY8438S1206 e 8 viti. (Fig. 2.)
-5-
Machine Translated by Google

-6-
Modello LYW8292C2402, LYB8210C2402, LYY8438S2402, LYS30942402
viti per rinforzare l'installazione.
E sono necessarie 20 viti.(Fig. 3);
Nota: se è necessario installare il prodotto a soffitto è necessario acquistarlo
Modello LYW8292C1206, LYB8210C1206, LYY8438S1206 E 12 viti
Fig.2Fig.1
sono richiesti. (Fig. 4.)
Machine Translated by Google
-7-
Fig.4Fig.3
Machine Translated by Google

ASSORBIMENTO
IL METODO DI INSTALLAZIONE PER IL SUONO PIÙ ALTO
Nota:Se necessario, installare una guarnizione in legno all'estremità del pannello per
garantire l'estetica; ma il sigillo in legno dovrà essere acquistato extra da te.
Passaggio 5: il risultato finale dell'installazione
Fase 1: Preparazione della parete o del soffitto
-8-
Machine Translated by Google

-9-
B:Inserimento della lana fonoassorbente tra la chiglia e le cremagliere in legno.
Passaggio 2: installazione del dispositivo
fonoassorbente; R: Consigliamo di installare inizialmente la chiglia, poi la lana
fonoassorbente e infine le rastrelliere e i pannelli in legno. Con questa
combinazione otterrai il massimo assorbimento acustico.
Machine Translated by Google

- 10 -
Fase 3:
Montaggio del pannello
•Utilizzare il cacciavite elettrico per avvitare il feltro nero nelle cremagliere di legno.
Machine Translated by Google

- 11 -
Passaggio 4: la parete e il soffitto sono ora completamente installati.
Nota: fare riferimento al semplice metodo di installazione con viti riportato sopra. •
Quando si assemblano uno dopo l'altro, tenere presente che il lato in feltro di un pannello è senza
giunture con il lato a doghe del pannello successivo.
.
Machine Translated by Google

REP.CE
REP. DEL REGNO UNITO
Importato negli Stati Uniti: Sanven Technology Ltd. Suite 250, 9166 Anaheim Place,
Rancho Cucamonga, CA 91730
Importato in Australia: SIHAO PTY LTD. 1 ROKEVA STREETEASTWOOD NSW 2122
Australia
Produttore: Shanghaimuxinmuyeyouxiangongsi Indirizzo:
Shuangchenglu 803nong11hao1602A-1609shi, baoshanqu, shanghai 200000 CN.
E-CrossStu GmbH
Mainzer Landstr.69,
60329 Francoforte sul Meno.
YH CONSULENZA LIMITATA. C/O YH Consulting Limited
Office 147, Centurion House, London Road, Staines-
upon-Thames, Surrey, TW18 4AX
- 12 -
Machine Translated by Google

Machine Translated by Google


PANELESDEPAREDACÚSTICOSDELAMASDEMDF
"Ahorreamitaddeprecio","Amitaddeprecio"ocualquierotraexpresiónsimilarutilizadapor
nosotrossolorepresentaunaestimacióndelosahorrosquepodríabeneficiarsealcomprarciertas
herramientasconnosotrosencomparaciónconlasprincipalesmarcasprincipalesynonecesariamente
significacubrirtodaslascategoríasdeherramientasofrecidas.pornosotros.Lerecordamosque,
cuandorealiceunpedidoconnosotros,verifiquecuidadosamentesirealmente
estáahorrandolamitadencomparaciónconlasprincipalesmarcas.
Seguimoscomprometidosaproporcionarleherramientasaprecioscompetitivos.
/LYB8210C1206/LYB8210C2402/LYY8438S2402
MODELO:LYW8292C1206/LYW8292C2402
/LYY8438S1206/LYS30942402
Soportetécnicoycertificadodegarantíaelectrónicawww.vevor.com/support
Machine Translated by Google

Machine Translated by Google

LYY8438S2402/LYY8438S1206/LYS30942402
Estassonlasinstruccionesoriginales;leaatentamentetodaslasinstruccionesdel
manualantesdeoperar.VEVORsereservaunainterpretaciónclaradenuestromanualde
usuario.Laaparienciadelproductoestarásujetaalproductoquerecibió.Perdoneque
noleinformaremosnuevamentesihayactualizacionesdetecnologíaosoftwareennuestro
producto.
¿Tienepreguntassobreelproducto?¿Necesitasoportetécnico?Nodudeencontactarnos:
Soporte
técnicoycertificadodegarantíaelectrónicawww.vevor.com/support
Modelo:LYW8292C1206/LYW8292C2402/LYB8210C1206/LYB8210C2402/
¿NECESITARAYUDA?¡CONTÁCTANOS!
PAREDACÚSTICADELAMASDEMDF
PANELES
1
Machine Translated by Google

Consejosdeseguridadycuidado
2
Nota:Esteproductoestáequipadocon34tornillos;
Elmanualdeinstrucciones,consulteelobjetofísico.
1.Leaycomprendaatentamenteestemanualantesdeutilizarel
4.Pormotivosdeseguridad,prohíbapegarporseparadolospanelesdemontajeenel
apagado.
LYW8292C24022400*200*21mm
LYB8210C12061200*600*21mm
Color
Robleclaro
4
3.Compruebeperiódicamentelaestabilidadyseguridaddelafijacióndelproducto.siel
LYW8292C12061200*600*21mm
LYS309424022400*200*21mm
•Verifiquequetengatodosloscomponentesyherramientasenumeradosacontinuación
sinsupervisión.
Tamaño
4
LYY8438S24022400*200*21mm
Sihayalgunadiferenciaentreelcolordeesteproductoylaimagenen
PanelesdeparedacústicosdelamasdeMDF
4
4
nuez
roblenegro
Maderaplateada
techo.Debidoaunpegamentodesigualodemalacalidad,elpanelsedeformaráocaerá.
Elproductoestásuelto,sedebereforzarinmediatamente.
4
4
Robleclaro
páginas.
2.AsegúresedequelospanelesdepareddelistonesacústicosdeMDFesténinstalados
firmemente;delocontrario,podríancaerseycausardañosalaspersonas.
CANTIDAD
4
LYY8438S12061200*600*21mm
Lainstalacióndebeserrealizadaporunadultoylosniñosnodebenutilizarla.
Modelo
LYB8210C24022400*200*21mm
nuez
roblenegro
LISTADEPARÁMETROS
INSTRUCCIONESDESEGURIDAD
INSTRUCCIONES
Machine Translated by Google

Instalelasherramientasnecesarias
Eléctrico
Quilla
ajustedepar.
Cintadebanda
asegúresedequesutaladroeléctricoestéconfiguradoabaja
•Asegúresedetenersuficienteespacioparadiseñarlaspiezasantesdecomenzar.•Partes
delmontajeseránmásfácilescon2personas.
Lana
•Parareducirlaprobabilidaddedañarsuproducto
ahogarsesiseingiere.
Absorción
Estructural
Cuchillo
grupos.•
Mantengaalosniñosyanimalesalejadosdeláreadetrabajo,laspiezaspequeñaspodrían
bastidoresdemadera
Sonido
Pistolaadhesiva
•Retiretodoslosaccesoriosdelasbolsasdeplásticoysepárelosensus
Sierracircular Lápiz
Estructural
Adhesivo
Destornillador
Grapadora
3
Machine Translated by Google

alto
ancho
4
Medirlaalturayelancho
Paso1:Preparacióndelaparedoeltecho
•Asegúresedequelassuperficiesesténlimpiasysecas,sinclavosnitornillos.
Paso2:
ELMÉTODODEINSTALACIÓNESTÁNDAR
Machine Translated by Google

5
Paso4:MontajedelpanelR:Fácil
deinstalarenlapared,puedeusarpegamento;primerofijeelpegamentoenlaparte
posteriordelproductoyluegopégueloenlapared;silopegaenunaparedcurva,usetornillos
enlaposicióncurvaparafijarelproductoalapared.
B.Utilice8tornillosparainstalarenlapared;lostornillosdebenfijarseatravésdelaparte
negra,queesmáshermosa.
Paso3:Cortarlospaneles•Corte
losproductosconsierrascircularesycuchillossegúnlosrequisitosdetamañoque
necesite.
ModeloLYW8292C2402,LYB8210C2402,LYY8438S2402,LYS30942402yserequieren8
tornillos(Fig.1);ModeloLYW8292C1206,
LYB8210C1206,LYY8438S1206yserequieren8tornillos.(Figura2.)
Machine Translated by Google

6
ModeloLYW8292C2402,LYB8210C2402,LYY8438S2402,LYS30942402
Tornillosparareforzarlainstalación.
Yserequieren20tornillos(Fig.3);
Fig.2
ModeloLYW8292C1206,LYB8210C1206,LYY8438S1206y12tornillos
Nota:Sinecesitainstalarelproductoeneltecho,debecomprar
Fig.1
sonrequeridos.(Figura4.)
Machine Translated by Google

7
Fig.4Fig.3
Machine Translated by Google

ABSORCIÓN
ELMÉTODODEINSTALACIÓNPARAELSONIDOMÁSALTO
Nota:Siesnecesario,instaleunsellodemaderaalfinaldelpanelparagarantizar
laestética;Peroelsellodemaderalodeberáscomprartúmismo.
Paso5:Elresultadofinaldelainstalación.
Paso1:Lapreparacióndelaparedoeltecho.
8
Machine Translated by Google

9
Paso2:Instalacióndeldispositivoabsorbente
desonido;R:Recomendamosinstalarinicialmentelaquilla,luegolalanade
absorciónacústicayluegolosbastidoresypanelesdemadera.Conesta
combinaciónconseguiráslamayorabsorciónacústica.
B:Insertarlalanadeabsorciónacústicaentrelaquillaylosbastidoresdemadera.
Machine Translated by Google

10
Paso3:
Montajedelpanel•Utilice
eldestornilladoreléctricoparaatornillarelfieltronegroalosbastidoresdemadera.
Machine Translated by Google
Paso4:Laparedyeltechoyaestáncompletamenteinstalados.
Nota:Consulteelmétododeinstalaciónsimplecontornillosanterior.•Cuando
realiceelmontajeunodetrásdelotro,tengaencuentaqueelladodefieltrodeunpanelno
coincideconelladodelistonesdelsiguientepanel.
.
11
Machine Translated by Google

12
ImportadoaEE.UU.:SanvenTechnologyLtd.Suite250,9166AnaheimPlace,
RanchoCucamonga,CA91730
ImportadoaAUS:SIHAOPTYLTD.1ROKEVASTREETASTWOODNSW2122
Australia
Fabricante:ShanghaimuxinmuyeyouxiangongsiDirección:
Shuangchenglu803nong11hao1602A1609shi,baoshanqu,shanghai200000CN.
ECrossStuGmbH
MainzerLandstr.69,
60329FráncfortdelMeno.
YHCONSULTINGLIMITADO.C/OYHConsultingLimited
Oficina147,CenturionHouse,LondonRoad,Staines
uponThames,Surrey,TW184AX
REPRESENTANTEDELACE
REPRESENTANTEDELREINOUNIDO
Machine Translated by Google

Machine Translated by Google


AKUSTYCZNE PANELE ŚCIENNE MDF
Nadal dokładamy wszelkich starań, aby zapewnić Państwu narzędzia w konkurencyjnej cenie.
„Zaoszczędź o połowę”, „o połowę ceny” lub inne podobne wyrażenia używane przez nas
przedstawiają jedynie szacunkową oszczędność, jaką możesz zyskać kupując u nas określone
narzędzia w porównaniu z głównymi najlepszymi markami i niekoniecznie oznaczają uwzględnienie
wszystkich kategorii oferowanych narzędzi przez nas. Przypominamy, aby podczas składania
zamówienia u nas dokładnie sprawdzić, czy faktycznie oszczędzasz połowę w
porównaniu z czołowymi markami.
/LYB8210C1206/LYB8210C2402/LYY8438S2402
MODELU: LYW8292C1206 /LYW8292C2402
/LYY8438S1206/LYS30942402
Wsparcie techniczne i certyfikat e-gwarancji www.vevor.com/support
Machine Translated by Google

Machine Translated by Google
Masz pytania dotyczące produktu? Potrzebujesz wsparcia technicznego? Prosimy o kontakt:
Wsparcie
techniczne i certyfikat e-gwarancji www.vevor.com/support
To jest oryginalna instrukcja. Przed przystąpieniem do obsługi prosimy o
dokładne zapoznanie się ze wszystkimi instrukcjami. VEVOR zastrzega sobie jasną
interpretację naszej instrukcji obsługi. Wygląd produktu zależy od produktu, który
otrzymałeś. Proszę wybaczyć nam, że nie będziemy ponownie informować Państwa,
jeśli pojawią się jakieś aktualizacje technologii lub oprogramowania naszego produktu.
LYY8438S2402/LYY8438S1206/LYS30942402
Modelu: LYW8292C1206/LYW8292C2402/LYB8210C1206/LYB8210C2402/
PANELE
ŚCIANA Z LISTW AKUSTYCZNYCH MDF
POTRZEBUJESZ POMOCY? SKONTAKTUJ SIĘ Z NAMI!
- 1 -
Machine Translated by Google

Wskazówki dotyczące bezpieczeństwa i pielęgnacji
- 2 -
Uwaga: ten produkt jest wyposażony w 34 śruby;
instrukcji obsługi, proszę zapoznać się z obiektem fizycznym.
1. Proszę uważnie przeczytać i zrozumieć niniejszą instrukcję przed użyciem
4. Ze względów bezpieczeństwa zabrania się oddzielnego klejenia paneli montażowych na płycie
wyłączony.
LYW8292C2402 2400*200*21mm
LYB8210C1206 1200*600*21mm
Kolor
Jasny dąb
4
3. Regularnie sprawdzaj stabilność i bezpieczeństwo mocowania produktu. Jeśli
LYW8292C1206 1200*600*21mm
LYS30942402 2400*200*21mm
• Sprawdź, czy masz wszystkie komponenty i narzędzia wymienione poniżej
bez nadzoru.
Rozmiar
4
LYY8438S2402 2400*200*21mm
Jeśli istnieje jakakolwiek różnica między kolorem tego produktu a zdjęciem
Panele ścienne z listew akustycznych MDF
4
4
orzech włoski
czarny dąb
Srebrne drewno
sufit. Z powodu nierównego kleju lub złej jakości panel zostanie wypaczony lub spadnie
produkt jest sypki, należy go natychmiast wzmocnić.
4
4
Jasny dąb
strony.
2. Upewnij się, że panele ścienne z listew Acoustic MDF są stabilnie zamontowane, w przeciwnym
razie mogą spaść i spowodować obrażenia u ludzi.
ILOŚĆ
4
LYY8438S1206 1200*600*21mm
Instalacja powinna być wykonana przez osobę dorosłą, a dzieci nie powinny z niej korzystać
Model
LYB8210C2402 2400*200*21mm
orzech włoski
czarny dąb
LISTA PARAMETRÓW
INSTRUKCJE BEZPIECZEŃSTWA
INSTRUKCJE
Machine Translated by Google
- 3 -
Elektryczny
Kil
ustawienie momentu obrotowego.
Taśma zespołu
upewnij się, że wiertarka jest ustawiona na niskim poziomie
• Przed rozpoczęciem upewnij się, że masz wystarczająco dużo miejsca na ułożenie części. •
Montaż części będzie łatwiejszy w przypadku 2 osób.
Wełna
• Aby zmniejszyć prawdopodobieństwo uszkodzenia produktu
udławić się w przypadku połknięcia.
Wchłanianie
Strukturalny
Nóż
grupy. •
Trzymaj dzieci i zwierzęta z dala od miejsca pracy, ponieważ mogą to być małe części
Drewniane stojaki
Dźwięk
Pistolet do klejenia
• Wyjąć wszystkie elementy z plastikowych torebek i rozdzielić je do osobnych
Piła tarczowa Ołówek
Strukturalny
Spoiwo
Śrubokręt
Zszywacz
Zainstaluj wymagane narzędzia
Machine Translated by Google

szerokość
wysoki
- 4 -
Pomiar wysokości i szerokości
Krok 1: Przygotowanie ściany lub
sufitu • Upewnij się, że powierzchnie są czyste i suche, bez gwoździ i śrub
Krok 2:
STANDARDOWA METODA MONTAŻU
Machine Translated by Google

- 5 -
Krok 4: Montaż panelu Odp.: Prosty
montaż na ścianie, można użyć kleju; najpierw przymocuj klej z tyłu produktu, a następnie
wklej na ścianę; w przypadku przyklejenia na zakrzywionej ścianie użyj śrub w zakrzywionej
pozycji, aby przymocować produkt do ściany.
B. Do montażu na ścianie użyj 8 śrub. Śruby należy przymocować przez czarną część, która
jest piękniejsza.
Krok 3: Cięcie paneli • Wytnij
produkty za pomocą pił tarczowych i noży zgodnie z wymaganiami dotyczącymi rozmiaru.
Wymagane są modele LYW8292C2402, LYB8210C2402, LYY8438S2402, LYS30942402 i 8 śrub.
(Rys. 1); Wymagane są modele LYW8292C1206,
LYB8210C1206, LYY8438S1206 i 8 śrub. (ryc. 2.)
Machine Translated by Google

- 6 -
Model LYW8292C2402, LYB8210C2402, LYY8438S2402, LYS30942402
śruby wzmacniające instalację.
Wymaganych jest 20 śrub. (ryc. 3);
są wymagane. (ryc. 4.)
Uwaga: jeśli chcesz zainstalować produkt na suficie, musisz go kupić
Model LYW8292C1206, LYB8210C1206, LYY8438S1206 i 12 śrub
Ryc.2Ryc.1
Machine Translated by Google

- 7 -
Ryc.4Ryc.3
Machine Translated by Google

METODA INSTALACJI DLA NAJWYŻSZEGO DŹWIĘKU
WCHŁANIANIE
Krok 1: Przygotowanie ściany lub sufitu
Krok 5: Efekt końcowy instalacji
Uwaga: W razie potrzeby dla zapewnienia estetyki zamontować na końcu panelu
uszczelkę drewnianą; ale uszczelkę drewnianą należy kupić dodatkowo samodzielnie.
- 8 -
Machine Translated by Google

B: Wkładanie wełny dźwiękochłonnej pomiędzy stępkę a drewniane stojaki.
Krok 2: Instalacja urządzenia pochłaniającego
dźwięk; Odp.: Zalecamy najpierw zainstalować stępkę, następnie wełnę
dźwiękochłonną, a następnie drewniane stojaki i panele. Dzięki takiemu
połączeniu uzyskasz najwyższą absorpcję dźwięku.
- 9 -
Machine Translated by Google

Krok 3:
Montaż panelu • Za
pomocą wkrętaka elektrycznego wkręć czarny filc w drewniane stojaki.
- 10 -
Machine Translated by Google
- 11 -
Krok 4: Ściana i sufit są już całkowicie zamontowane.
Uwaga: Proszę zapoznać się z powyższą prostą metodą montażu wkrętów. •
Podczas montażu obok siebie należy pamiętać, że filcowa strona jednego panelu łączy się
ze stroną listew następnego panelu.
.
Machine Translated by Google

REPREZENT KE
REPUBLIKA Wielkiej Brytanii
Import do USA: Sanven Technology Ltd. Suite 250, 9166 Anaheim Place, Rancho
Cucamonga, CA 91730
Import do Australii: SIHAO PTY LTD. 1 ROKEVA STREETEASTWOOD NSW 2122 Australia
Producent: Shanghaimuxinmuyeyouxiangongsi Adres:
Shuangchenglu 803nong11hao1602A-1609shi, baoshanqu, szanghaj 200000 CN.
E-CrossStu GmbH
Mainzer Landstr.69,
60329 Frankfurt nad Menem.
YH CONSULTING SPÓŁKA Z OGRANICZONĄ
ODPOWIEDZIALNOŚCIĄ. C/O YH Consulting Limited
Office 147, Centurion House, London Road, Staines-upon-Thames, Surrey, TW18 4AX
- 12 -
Machine Translated by Google

Machine Translated by Google


/LYY8438S1206/LYS30942402
MODEL:LYW8292C1206/LYW8292C2402
/LYB8210C1206/LYB8210C2402/LYY8438S2402
'Bespaar de helft', 'Halve prijs' of andere soortgelijke uitdrukkingen die door ons worden gebruikt
vertegenwoordigen slechts een schatting van de besparingen die u zou kunnen profiteren als u
bepaalde gereedschappen bij ons koopt in vergelijking met de grote topmerken en betekenen niet
noodzakelijkerwijs dat ze alle aangeboden categorieën gereedschappen dekken. door ons. U wordt er
vriendelijk aan herinnerd om, wanneer u een bestelling bij ons plaatst, zorgvuldig te
verifiëren of u daadwerkelijk de helft bespaart in vergelijking met de grote topmerken.
We blijven ons inzetten om u gereedschap tegen een concurrerende prijs te bieden.
AKOESTISCHE MDF LAMELLENWANDPANELEN
Technische ondersteuning en e-garantiecertificaat www.vevor.com/support
Machine Translated by Google

Machine Translated by Google
LYY8438S2402/LYY8438S1206/LYS30942402
Dit is de originele instructie. Lees alle instructies in de handleiding zorgvuldig door
voordat u ermee aan de slag gaat. VEVOR behoudt zich een duidelijke interpretatie van onze
gebruikershandleiding voor. Het uiterlijk van het product is afhankelijk van het product
dat u heeft ontvangen. Vergeef ons alstublieft dat we u niet opnieuw zullen informeren als er
technologie- of software-updates zijn voor ons product.
Heeft u productvragen? Technische ondersteuning nodig? Neem gerust contact met ons op:
Technische
ondersteuning en e-garantiecertificaat www.vevor.com/
support
Model:LYW8292C1206/LYW8292C2402/LYB8210C1206/LYB8210C2402/
PANELEN
AKOESTISCHE MDF LAMELLENWAND
HULP NODIG? NEEM CONTACT MET ONS OP!
- 1 -
Machine Translated by Google
Veiligheids- en verzorgingsadvies
- 2 -
4.Verbied om veiligheidsredenen aparte lijm op montagepanelen op de
Licht eiken
LYB8210C2402 2400*200*21mm
De installatie moet door een volwassene worden uitgevoerd en kinderen mogen er geen gebruik van maken
Model
okkernoot
zwarte eik
Opmerking: dit product is uitgerust met 34 schroeven;
2. Zorg ervoor dat de akoestische MDF-lamellenwandpanelen stevig zijn geïnstalleerd,
anders kan hij eraf vallen en schade aan mensen veroorzaken.
AANTAL
de handleiding, raadpleeg het fysieke object.
4
LYY8438S1206 1200*600*21mm
4
product los zit, moet het onmiddellijk worden verstevigd.
4
Licht eiken
pagina's.
Zilver hout
okkernoot
4
plafond. Door ongelijkmatige lijm of slechte kwaliteit zal het paneel kromtrekken of vallen
Als er een verschil is tussen de kleur van dit product en de afbeelding in
4
Akoestische MDF lamellenwandpanelen
zwarte eik
zonder toezicht.
LYY8438S2402 2400*200*21mm
Maat
4
3. Controleer regelmatig de stabiliteit en veiligheid van de productbevestiging. Als de
LYW8292C1206 1200*600*21mm
4
LYS30942402 2400*200*21mm
• Controleer of u over alle onderstaande onderdelen en gereedschappen beschikt
1.Lees en begrijp deze handleiding zorgvuldig voordat u het apparaat gebruikt
uit.
Kleur
LYW8292C2402 2400*200*21mm
LYB8210C1206 1200*600*21mm
INSTRUCTIES
VEILIGHEIDSINSTRUCTIES
PARAMETERLIJST
Machine Translated by Google

Installeer de benodigde gereedschappen
Potlood
Lijmpistool
• Om de kans op beschadiging van uw product te verkleinen
• Zorg ervoor dat u voldoende ruimte heeft om de onderdelen op te stellen voordat u begint.
• Delen van de montage zullen gemakkelijker zijn met 2 personen.
Wol
Absorptie
stikken als het wordt ingeslikt.
Elektrisch
Kiel
Mes
koppelinstelling.
Bandband
Structureel
Cirkelzaag
Zorg ervoor dat uw boormachine op een lage stand staat
Schroevendraaier
Nietmachine
Structureel
groepen.
• Houd kinderen en dieren uit de buurt van het werkgebied; kleine onderdelen kunnen beschadigd raken
Geluid
Kleefmiddel
Houten rekken
• Haal alle fittingen uit de plastic zakken en doe ze in hun aparte zakken
- 3 -
Machine Translated by Google

breedte
hoog
- 4 -
Stap 2:
Stap 1: Wand of plafond voorbereiden •
Zorg ervoor dat de oppervlakken schoon en droog zijn, zonder spijkers en schroeven
Het meten van de hoogte en breedte
DE STANDAARD INSTALLATIEMETHODE
Machine Translated by Google
- 5 -
B. Gebruik 8 schroeven om aan de muur te installeren; de schroeven moeten door het zwarte
gedeelte worden bevestigd, dat mooier is.
Stap 4: Het paneel monteren A:
Eenvoudig aan de muur te installeren, kan de lijm gebruiken; Bevestig eerst de lijm op de
achterkant van het product en plak het vervolgens op de muur. Als je het op een gebogen muur
plakt, gebruik dan schroeven in de gebogen positie om het product aan de muur te bevestigen.
Stap 3: Het snijden van de
panelen • Snij producten met cirkelzagen en messen volgens uw maatvereisten.
Model LYW8292C2402, LYB8210C2402, LYY8438S2402, LYS30942402. Er zijn 8 schroeven
nodig (Fig. 1); Model LYW8292C1206,
LYB8210C1206, LYY8438S1206. Er zijn 8 schroeven vereist. (Afb. 2.)
Machine Translated by Google

- 6 -
schroeven om de installatie te verstevigen.
ModelLYW8292C2402, LYB8210C2402, LYY8438S2402, LYS30942402
Model LYW8292C1206, LYB8210C1206, LYY8438S1206 En 12 schroeven
Opmerking: als u het product aan het plafond wilt installeren, moet u het kopen
En er zijn 20 schroeven nodig.(Fig. 3);
Afb.2Afb.1
zijn vereist. (Afb. 4.)
Machine Translated by Google

- 7 -
Afb.4Afb.3
Machine Translated by Google

ABSORPTIE
DE INSTALLATIEMETHODE VOOR HET HOOGSTE GELUID
Opmerking: Installeer indien nodig een houten afdichting aan het uiteinde van het paneel om
de esthetiek te garanderen; maar de houten afdichting moet u zelf extra aanschaffen.
Stap 5: Het eindresultaat van de installatie
Stap 1: De voorbereiding van muur of plafond
- 8 -
Machine Translated by Google

- 9 -
B: Het plaatsen van de geluidsabsorberende wol tussen de kiel en houten rekken.
Stap 2: Geluidsabsorberend apparaat
installeren; A: We raden aan om eerst de kiel te installeren, daarna de
geluidsabsorberende wol en vervolgens de houten rekken en panelen. Met
deze combinatie krijgt u de hoogste geluidsabsorptie.
Machine Translated by Google

- 10 -
Stap 3:
Het paneel monteren •
Schroef met de elektrische schroevendraaier het zwarte vilt in de houten rekken.
Machine Translated by Google

Stap 4: De muur en het plafond zijn nu volledig geïnstalleerd.
Opmerking: Raadpleeg de bovenstaande eenvoudige installatiemethode met
schroeven. • Houd er bij montage in het verlengde van elkaar rekening mee dat de
viltzijde van het ene paneel naadloos aansluit op de lamelzijde van het volgende paneel.
.
- 11 -
Machine Translated by Google

- 12 -
Geïmporteerd naar de VS: Sanven Technology Ltd. Suite 250, 9166 Anaheim Place,
Rancho Cucamonga, CA 91730
Geïmporteerd naar AUS: SIHAO PTY LTD. 1 ROKEVA STREETEASTWOOD NSW
2122 Australië
Fabrikant: Shanghaimuxinmuyeyouxiangongsi Adres:
Shuangchenglu 803nong11hao1602A-1609shi, baoshanqu, shanghai 200000 CN.
YH CONSULTING LIMITED. C/O YH Consulting Limited
Office 147, Centurion House, London Road, Staines-
upon-Thames, Surrey, TW18 4AX
E-CrossStu GmbH
Mainzer Landstr.69,
60329 Frankfurt am Main.
Britse REP
EG REP
Machine Translated by Google

Machine Translated by Google


/LYB8210C1206/LYB8210C2402/LYY8438S2402
MODELL:LYW8292C1206 /LYW8292C2402
/LYY8438S1206/LYS30942402
"Spara hälften", "halva priset" eller andra liknande uttryck som används av oss
representerar bara en uppskattning av besparingar du kan dra nytta av att köpa vissa
verktyg hos oss jämfört med de stora toppmärkena och betyder inte nödvändigtvis att täcka
alla kategorier av verktyg som erbjuds av oss. Du påminns om att noggrant kontrollera
när du gör en beställning hos oss om du verkligen sparar hälften i
jämförelse med de främsta varumärkena.
Vi fortsätter att vara engagerade i att ge dig verktyg till konkurrenskraftiga priser.
AKUSTISK MDF LABEL VÄGGPANELER
Teknisk support och e-garanticertifikat www.vevor.com/support
Machine Translated by Google

Machine Translated by Google

LYY8438S2402/LYY8438S1206/LYS30942402
Detta är den ursprungliga instruktionen, läs alla instruktioner noggrant innan du
använder den. VEVOR reserverar sig för en tydlig tolkning av vår användarmanual. Utseendet
på produkten är beroende av den produkt du fått. Ursäkta oss att vi inte kommer att
informera dig igen om det finns någon teknik eller mjukvaruuppdateringar på vår produkt.
Har du produktfrågor? Behöver du teknisk support? Kontakta oss gärna: Teknisk support och
e-
garanticertifikat www.vevor.com/support
Modell: LYW8292C1206/LYW8292C2402/LYB8210C1206/LYB8210C2402/
PANELER
AKUSTISK MDF-LAVVÄGG
BEHÖVER HJÄLP? KONTAKTA OSS!
- 1 -
Machine Translated by Google

Säkerhets- och skötselråd
- 2 -
tak. På grund av ojämnt lim eller dålig kvalitet kommer panelen att bli skev eller falla
Silver trä
valnöt
4
4
produkten är lös, bör den förstärkas omedelbart.
4
Ljus ek
sidor.
2. Se till att de akustiska MDF-lamellerna är ordentligt installerade, annars kan de
falla av och skada människor.
ANTAL
4
LYY8438S1206 1200*600*21mm
valnöt
Obs: Denna produkt är utrustad med 34 skruvar;
LYB8210C2402 2400*200*21mm
Installationen ska göras av en vuxen och barn ska inte använda den
Modell
4. Av säkerhetsskäl, förbjud separat lim till monteringspaneler på
LYW8292C2402 2400*200*21mm
Färg
svart ek
Ljus ek
1. Läs och förstå denna bruksanvisning noggrant innan du använder
av.
LYB8210C1206 1200*600*21mm
3. Kontrollera regelbundet stabiliteten och säkerheten för produktfixeringen. Om
LYW8292C1206 1200*600*21mm
4
LYS30942402 2400*200*21mm
bruksanvisningen, se det fysiska objektet.
• Kontrollera att du har alla komponenter och verktyg som anges nedan
utan tillsyn.
LYY8438S2402 2400*200*21mm
Storlek
4
4
Akustiska MDF lamellväggpaneler
svart ek
Om det är någon skillnad mellan färgen på denna produkt och bilden i
PARAMETERLISTA
SÄKERHETSINSTRUKTIONER
INSTRUKTIONER
Machine Translated by Google

Installera nödvändiga verktyg
Elektrisk
Köl
vridmomentinställning.
Bandtejp
Se till att din borrmaskin är inställd på ett lågt läge
• För att minska sannolikheten för att din produkt skadas
• Se till att du har tillräckligt med utrymme för att layouta delarna innan du
börjar. • Delar av monteringen blir lättare med 2 personer.
Ull
Absorption
kvävs vid förtäring.
Kniv
Strukturell
grupper.
• Håll barn och djur borta från arbetsområdet, små delar kan
Ljud
Lim
Träställ
• Ta bort alla beslag från plastpåsarna och separera dem i deras
Penna
Strukturell
Cirkelsåg
Självhäftande pistol
Skruvmejsel
Häftapparat
- 3 -
Machine Translated by Google

bredd
hög
- 4 -
Steg 2:
Steg 1:Förbereda väggen eller
taket • Se till att ytorna är rena och torra, utan spik och skruvar
Mätning av höjd och bredd
STANDARD INSTALLATIONSMETOD
Machine Translated by Google

Steg 4: Montering av panelen A:
Enkel installerad på väggen, kan använda limet; fixera först limmet på baksidan av produkten
och klistra sedan på väggen;Om den klistras på en krökt vägg, använd skruvar i krökt läge för att
fästa produkten på väggen.
B. Använd 8 skruvar för att installera på väggen; Skruvarna ska fästas genom den svarta delen,
vilket är vackrare.
Steg 3: Skärning av panelerna •
Skär produkter med cirkelsågar och knivar för dina storleksbehov.
Modell LYW8292C2402, LYB8210C2402, LYY8438S2402, LYS30942402 Och 8 skruvar krävs.
(Fig. 1); Modell LYW8292C1206,
LYB8210C1206, LYY8438S1206 Och 8 skruvar krävs. (Fig. 2.)
- 5 -
Machine Translated by Google

- 6 -
skruvar för att förstärka installationen.
Modell LYW8292C2402, LYB8210C2402, LYY8438S2402, LYS30942402
Modell LYW8292C1206, LYB8210C1206, LYY8438S1206 Och 12 skruvar
Obs: Om du behöver installera produkten i taket måste du köpa
Och 20 skruvar krävs.(Fig. 3);
Fig.2Fig.1
krävs. (Fig. 4.)
Machine Translated by Google

- 7 -
Fig.3 Fig.4
Machine Translated by Google

ABSORPTION
INSTALLATIONSMETOD FÖR HÖGSTA LJUD
Obs: Om det behövs, installera en trätätning i änden av panelen för att
säkerställa estetik; men trätätningen ska köpas extra själv.
Steg 5: Slutresultatet av installationen
Steg 1: Förberedelse av vägg eller tak
- 8 -
Machine Translated by Google

- 9 -
Steg 2: Installation av ljudabsorberande
enhet; S: Vi rekommenderar att du installerar kölen först, sedan den
ljudabsorberande ullen och sedan träställen och panelerna. Med denna
kombination får du den högsta ljudabsorptionen.
B:Införande av den ljuddämpande ullen mellan kölen och träställen.
Machine Translated by Google

- 10 -
Steg 3:
Montering av panelen •
Använd den elektriska skruvmejseln för att skruva igenom den svarta filten i träställen.
Machine Translated by Google

- 11 -
.
Obs: Se ovanstående enkla skruvmonteringsmetod •När montering
i fortsättning till varandra, observera att filtsidan på den ena panelen är
sömlös mot lamellsidan på följande panel.
Steg 4: Väggen och taket är helt installerade nu.
Machine Translated by Google

EC REP
UK REP
Importerad till USA: Sanven Technology Ltd. Suite 250, 9166 Anaheim Place,
Rancho Cucamonga, CA 91730
Importerad till AUS: SIHAO PTY LTD. 1 ROKEVA STREETEASTWOOD NSW 2122
Australien
Tillverkare: Shanghaimuxinmuyeyouxiangongsi Adress:
Shuangchenglu 803nong11hao1602A-1609shi, baoshanqu, shanghai 200000 CN.
YH CONSULTING LIMITED. C/O YH Consulting Limited
Office 147, Centurion House, London Road, Staines-
upon-Thames, Surrey, TW18 4AX
E-CrossStu GmbH
Mainzer Landstr.69,
60329 Frankfurt am Main.
- 12 -
Machine Translated by Google

Machine Translated by Google