USER MANUAL
For any service-related Issues, please contact
us: Phone Number: 718-576-6342
Email address: [email protected]
PIZZA OVEN
Model:
KM-OKS-WFPO
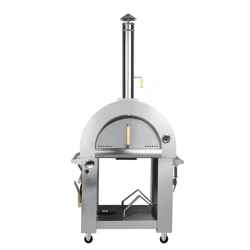
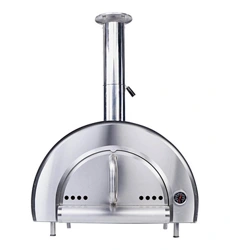
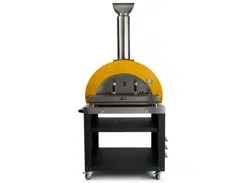
KoolMore Outdoor Kitchen System
Wood Fired Pizza Oven

1. Prior to Assembly and Use
Please ensure you fully read and understand the provided assembly and use instructions prior to the
construction and utilization of the Outdoor Wood Fired Pizza Oven.
2. Placement
Position the Outdoor Oven on a surface that is non-combustible to prevent any accidental fires. The
surface should be stable and level to ensure safe operation.
3. Appropriate Cooking Utensils
Utilize cooking utensils such as peels, brushes, and cookware that are specifically designed for
wood-fired cooking.
4. Initial Heat Up
For the initial cooking on the barbecue, heat the oven and maintain the fuel red hot for at least 30 min-
utes. This is crucial for your barbecue's optimal performance.
5. Temperature Management
Avoid overheating your Outdoor Oven as extreme temperatures can cause permanent damage. Gradual-
ly bring the oven to temperature by starting with a small fire at the center. Once stable, shift the fire to
the oven's left side, adding small amounts of wood until the oven reaches an even, high heat. An ideal
pizza baking temperature is achieved when the Cooking Stone is within the range of 620°F to 650°F.
6. Fuel Selection
Start your fire using small kindling and newspaper. Avoid using chemical fuel starters such as starting
fluids as they can contaminate the cooking surface and cause irreversible damage to your Outdoor
Oven.
7. Pre-Cooking Procedure
Prior to cooking, ensure the fuel is adequately covered with a coating of ash.
8. Cleaning
Only clean the oven once it is completely cool. Use a metal bristle brush or a damp cloth to clean the
Cooking Stone. Avoid using chemical cleaners to prevent any damage.
Safety Precautions
1

9. Lighting and Re-lighting
For safety reasons, do not use spirit or petrol for lighting or re-lighting your oven.
10. Child and Pet Safety
Always keep children and pets at a safe distance from the Outdoor Oven. It can become very hot during
operation and pose a burn risk.
11. Moving the Oven
Do not attempt to move the oven during operation due to high temperatures.
12. Approved Firelighters
Use only firelighters that comply with EN 1860-3 standards.
13. Indoor Use
The Outdoor Oven is strictly for outdoor use only.
14. Use in Confined Spaces
Avoid using the Outdoor Oven in confined or habitable spaces like houses, tents, caravans, motor
homes, or boats due to the risk of carbon monoxide poisoning.
Your safety is paramount. Always adhere to these precautions when using your Outdoor Wood Fired Pizza
Oven. Enjoy your cooking experience responsibly.
Safety Precautions
2
Assembly Instructions
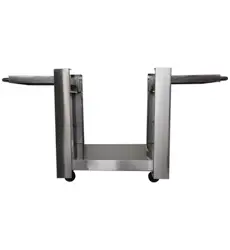
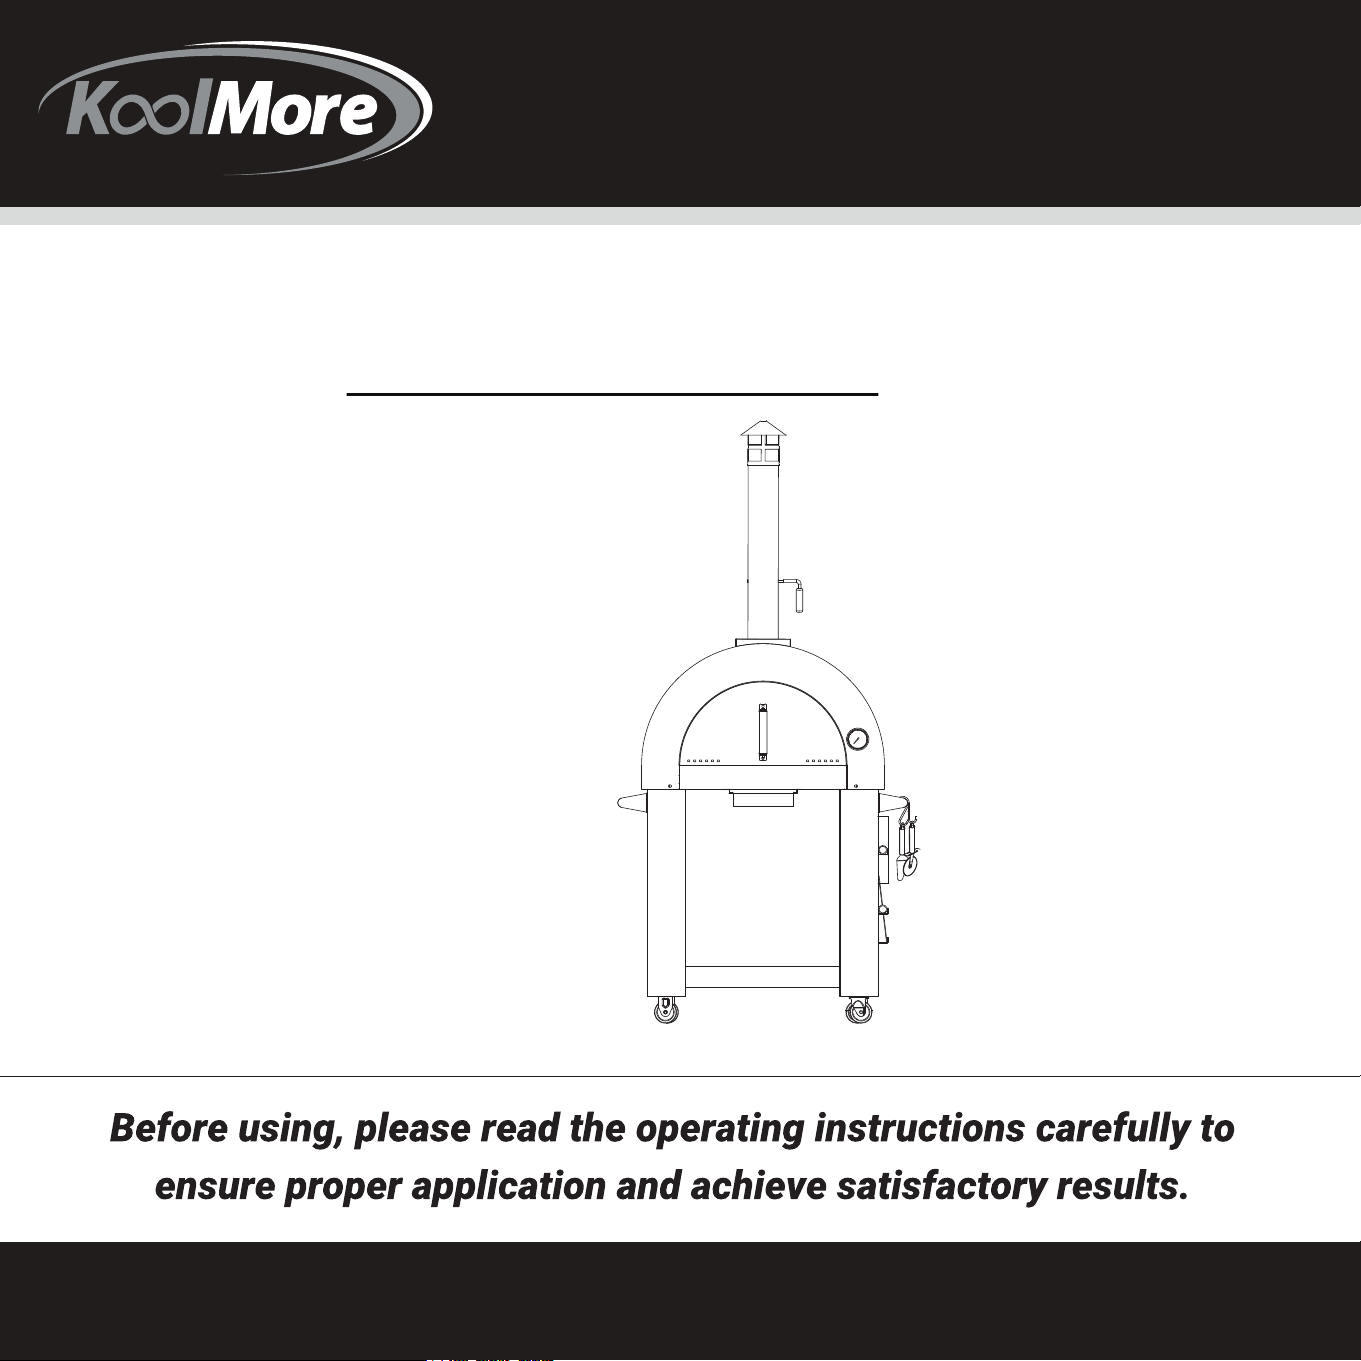
Step 1: Bottom Shelf Installation
Start by installing the bottom shelf using
sixteen 1/4" * 0.59" (15mm) screws.
* The bottom shelf provides stability and a
storage area for your cooking essentials.
* The legs are crucial in raising the oven off the
ground to an optimal cooking height.
Step 2: Attaching the Legs
Fasten the oven body to the legs using
twelve 1/4" * 0.59" screws.
1 2
3
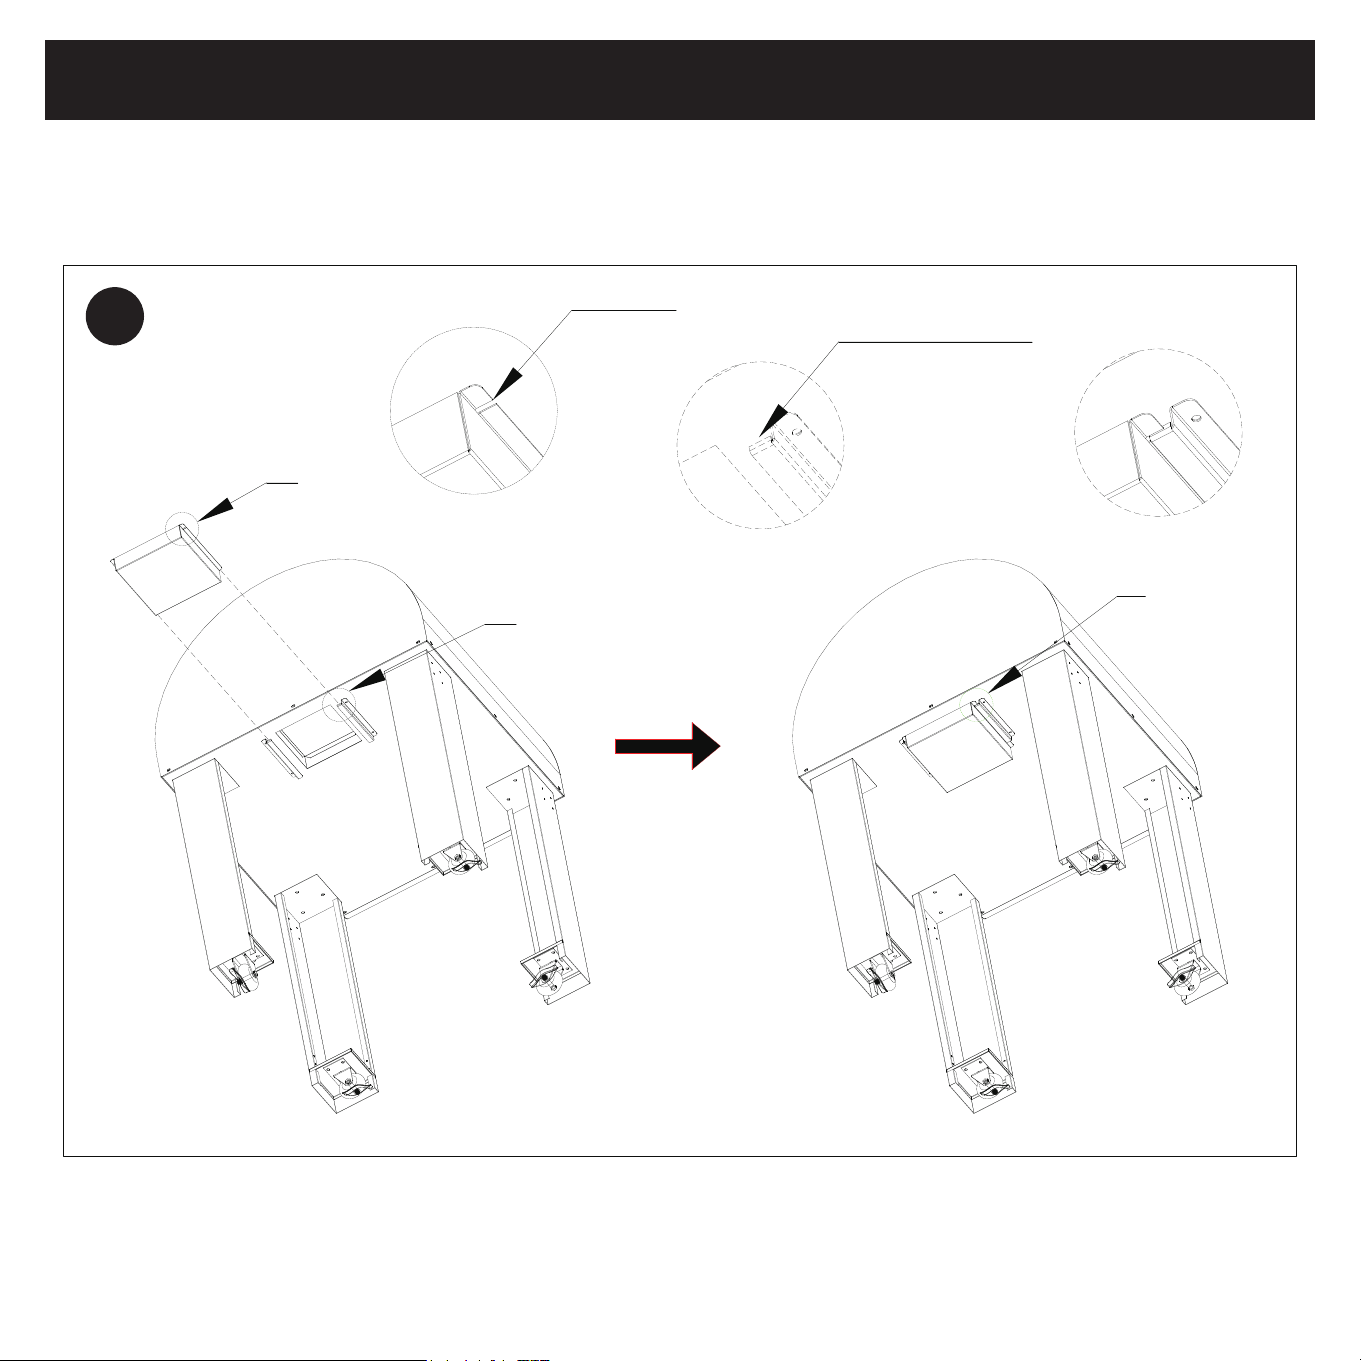
Assembly Instructions
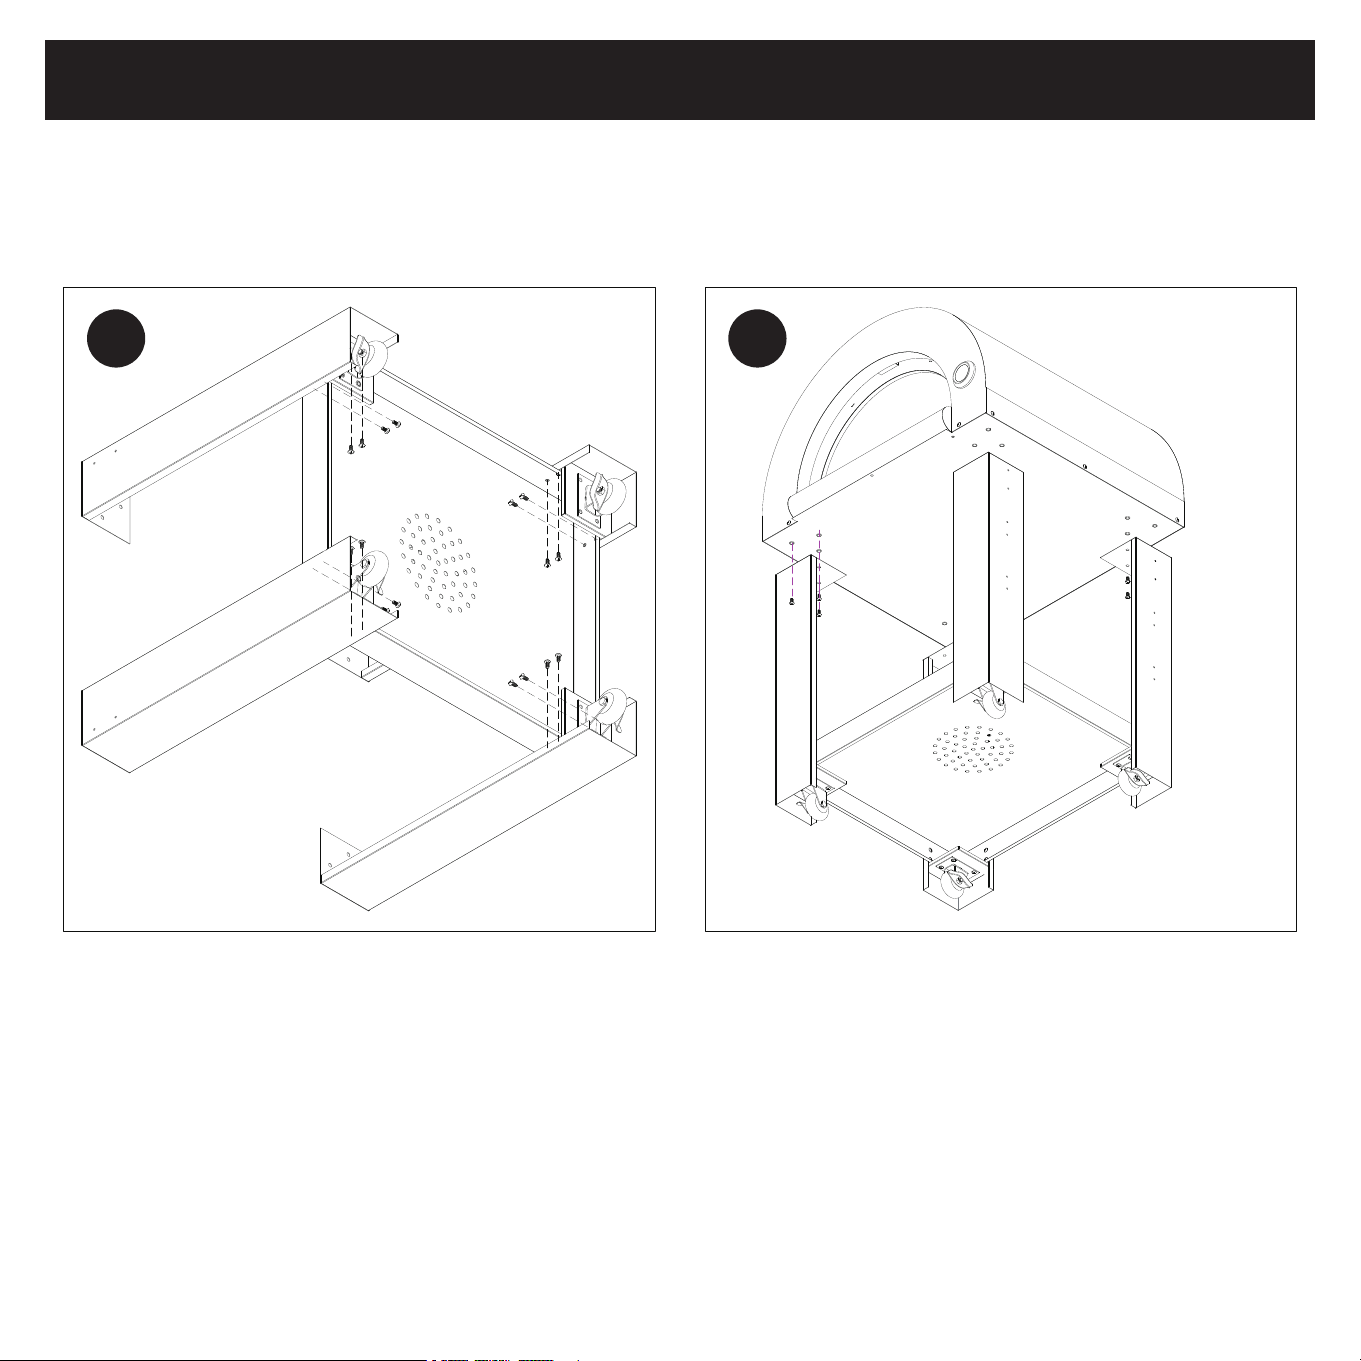
Step 3: Ash Support Installation
Install the ash support using four 1/4" * 0.59" screws.
a
View a magnified
Detail a:
Noted the position of ash support,
the outside as details picture
3
* The ash support holds the ash box, enabling easy cleanup after cooking.
4
Oil gathering box card slots
Oil gathering box around stents card buckle
b
a
c
View a magnified
Magnified view b
View c amplification
Assembly Instructions
Step 4: Installing the Ash Box
Place and secure the ash box on the bottom of the oven.
4
* Ensure the ash box fits snugly and securely in its designated spot.
Its proper placement is essential for the oven's safe and efficient operation.
5
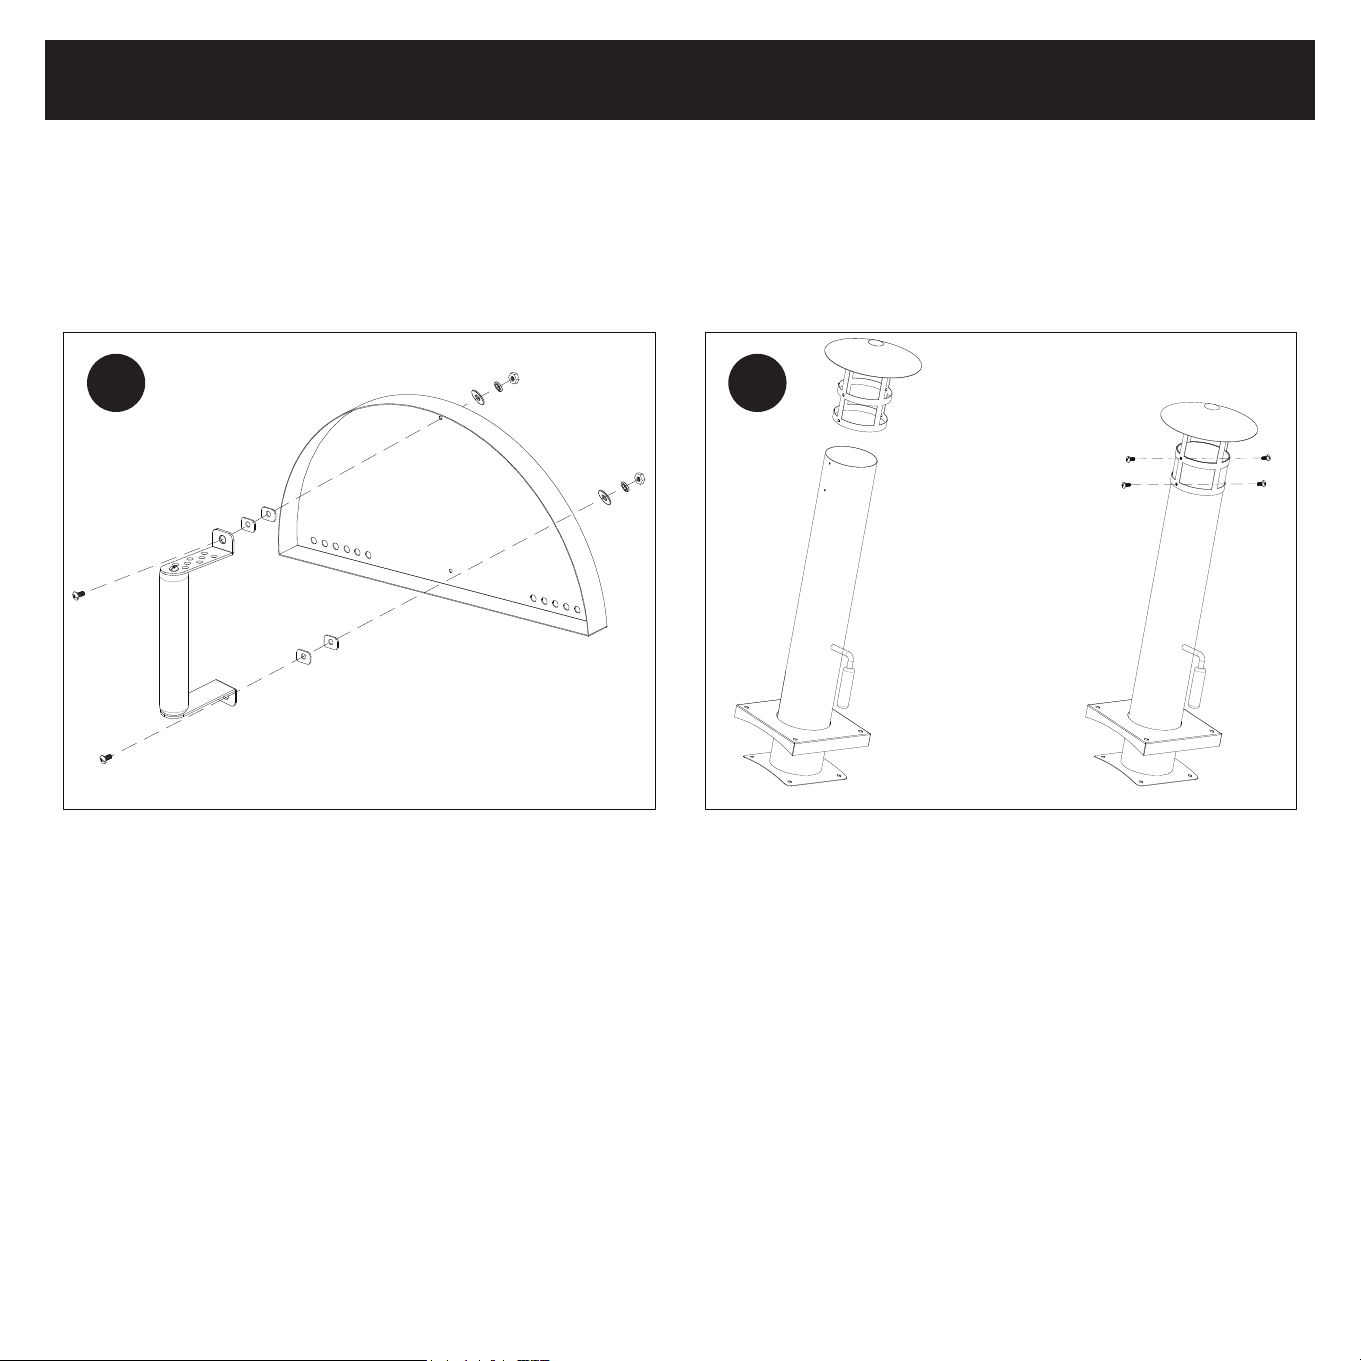
Assembly Instructions
Step 5: Door Handle Installation
Secure the door handle with two sets of 1/4" *
0.59" screws, insulation mat, flat washer, spring
washer, and 1/4" bolts.
Step 6: Chimney Cap Installation
Attach the chimney cap using
four 5/32" * 0.39" screws.
5 6
* This handle facilitates easy opening and
closing of the oven door.
* The chimney cap plays a key role in directing
smoke away from the oven and controlling draft.
6

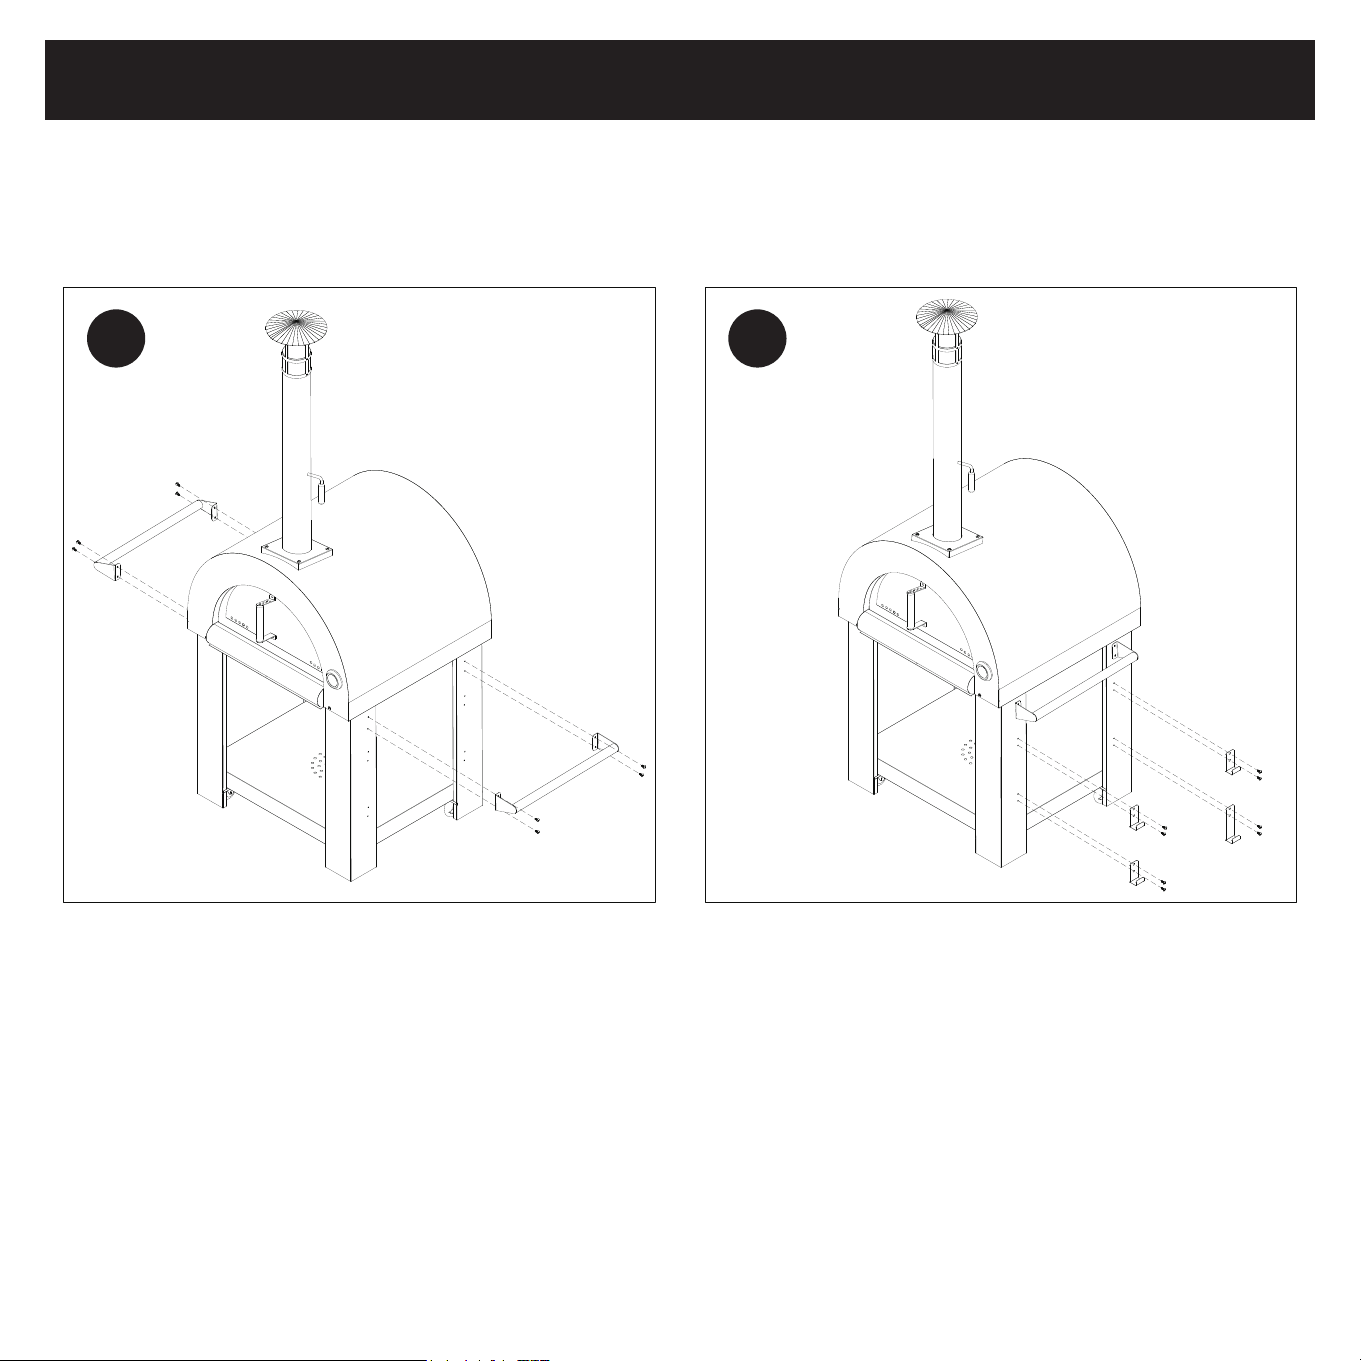
Assembly Instructions
Step 7: Chimney Installation
Install the chimney using four 1/4" * 0.59" screws.
Step 8: Chimney Box Installation
Secure the chimney box with four 1/4" * 1.18"
screws.
7 8
* This handle facilitates easy opening and
closing of the oven door.
* The chimney cap plays a key role in directing
smoke away from the oven and controlling draft.
7
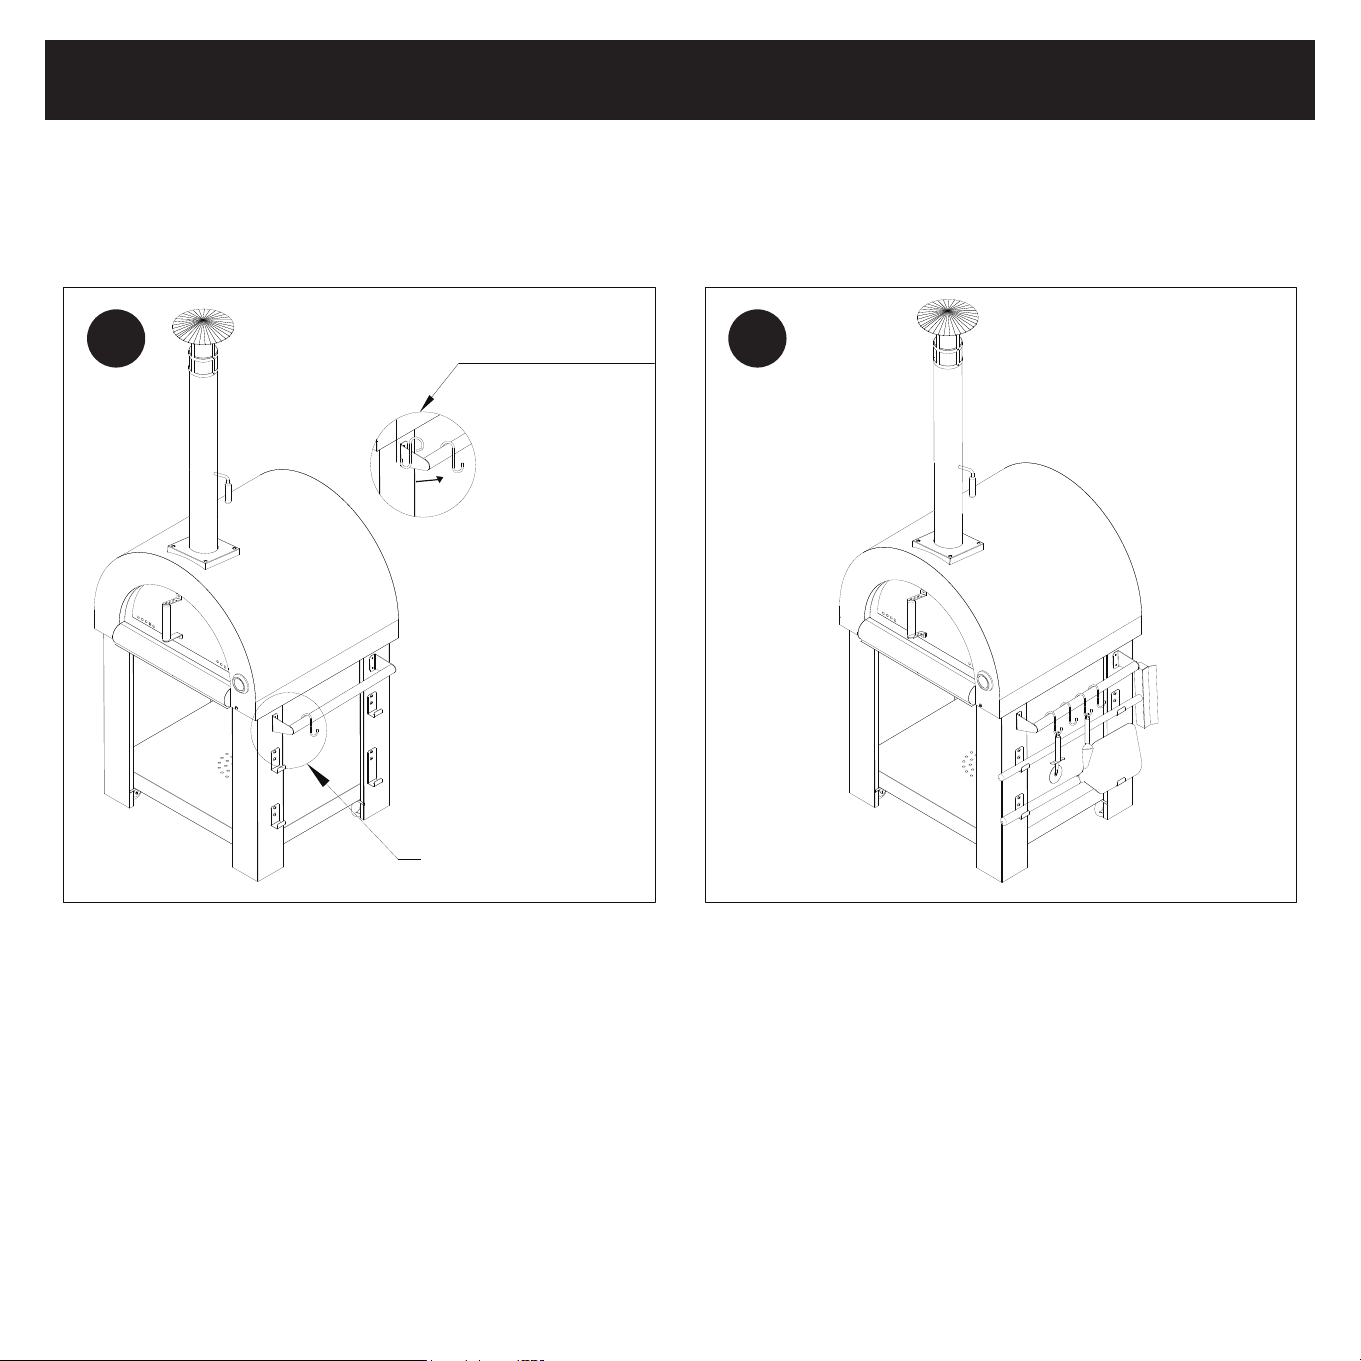
Assembly Instructions
Step 9: Installing Left and Right Handles
Fasten the left and right handles using eight 1/4" *
0.59" screws.
Step 10: Installing Hooks
Fix three hooks and one pc of hook using eight
1/4" * 0.59" screws.
9 10
* These handles are essential for maneuvering
and positioning the oven.
* These hooks offer convenient hanging storage
for cooking utensils.
8
Assembly Instructions
Step 11: Hanging 'S' Hooks
Attach four 'S' hooks onto the handle.
Step 12: Parts Placement
Follow the diagram to position the remaining
parts as indicated.
11
12
* These hooks provide additional storage space
and easy access to your cooking utensils
while using the oven.
* Proper placement ensures the best
performance and safety of your oven.
a
Details a: hanged the hooks from side
View a magnified
9
Assembly Instructions
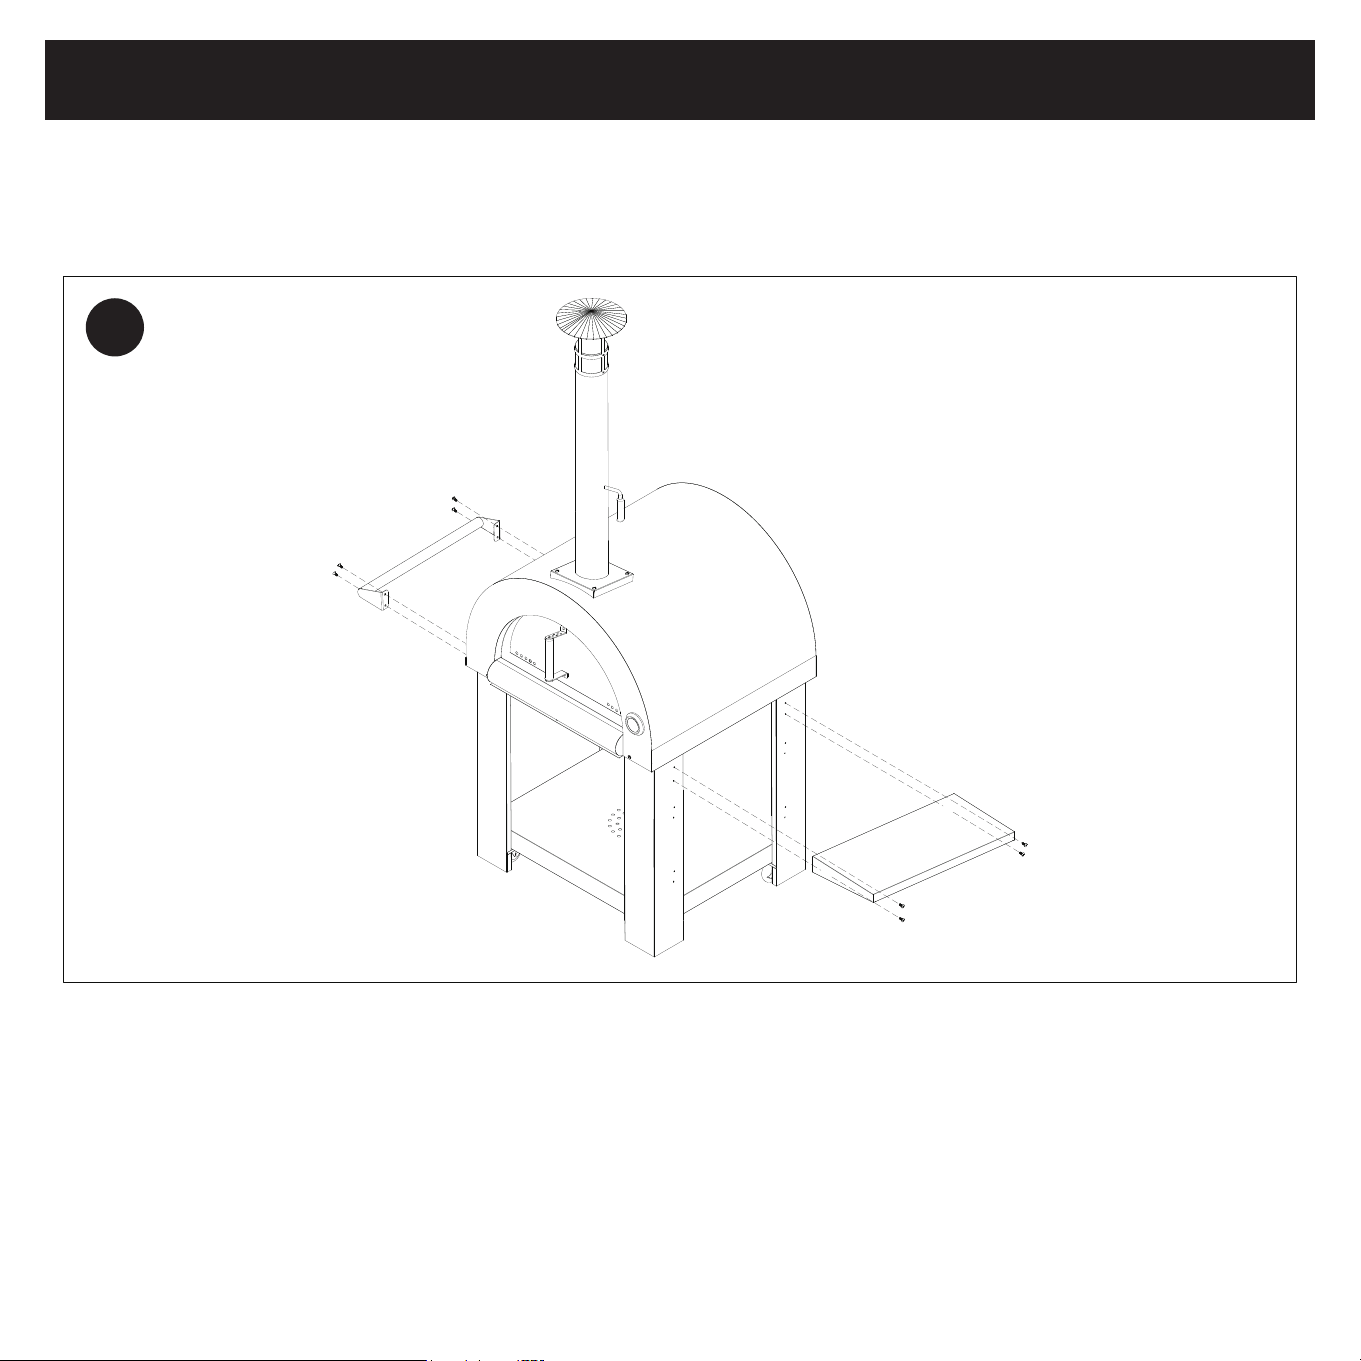
Step 13: Installing Handle and Side Table
Mount the handle and side table as shown in the illustration. Remember, the side table can be
installed on either the left or right side, based on your preference and convenience.
13
Double-check the stability of the handle and side table after installation. The handle ensures easy
maneuverability of your oven, and the side table provides additional space for your cooking supplies,
enhancing your overall cooking experience.
Congratulations! With these steps completed, you are ready to enjoy your KoolMore Outdoor Wood Fired
Pizza Oven. Please review all previous steps to confirm secure assembly, and ensure you understand the
safety precautions before use. Happy cooking!
10

Getting Started
Unpack your Wood-fired Outdoor Oven with care, using two people for safe lifting. Place the oven on a
non-combustible stand like the Kitchen Wood Box/Stand kit with granite top. Remove all protective film.
Assemble the oven as per the included instructions. Prior to its first use, 'season' your oven by heating it
to 650°F at least twice, letting the fire die down each time.
Introduction to Wood-Fired Cooking
Your Outdoor Oven operates similarly to a home oven, but adds unique flavor through wood-firing.
It allows for a variety of cooking methods, from baking pizzas and breads to roasting meats and vegetables.
The Cooking Stone and Dome radiate heat, creating a natural convection effect, while the side fire gives
a unique crisp, smoky taste.
Use oven-safe metal, ceramic, or glass pans, but ensure they're kept away from the flame and used
below 650°F.
Choosing the Right Wood
Use dry hardwoods like oak or beech. Avoid resinous wood like pine or spruce and never use treated
lumber. If you see a lot of black smoke, it usually indicates the wrong type of wood is being used.
Ignition and Heat Management
Mastering the fire-building art is key to achieving evenly distributed high temperatures on your Cooking
Stone. Start the fire an hour before cooking. Split wood into small, 10" long and 0.5" thick pieces.
Using kindling and newspaper, start a match-lit fire in the center of the Cooking Stone.
Once well-established, move it to the left side of the oven.
Aim for a Cooking Stone temperature between 620°F-650°F before cooking.
11

Cooking Guidelines
1. High-Temperature Cooking: Best suited for pizzas. Achieve this by heating your Cooking Stone
between 620°F and 650°F. For optimal cooking, place the pizza on the Cooking Stone using the 11.5"
Square Peel and rotate it during cooking with the 8.5" Round Peel.
2. Medium-Temperature Cooking: Perfect for roasting meats, vegetables, fish, and seafood. Aim for a
Cooking Stone temperature between 450°F and 600°F. Depending on your dish, it might be beneficial
to cover it initially for even cooking before removing the cover for browning. Remember to rotate your
dish periodically for uniform cooking.
3. Low-Temperature Cooking: Ideal for baking breads, pies, and other desserts. This is achieved when
your Cooking Stone is between 325°F and 425°F. Preheating the Cooking Stone to 500°F or higher for
at least 15 minutes is recommended before removing all embers for low-temperature cooking.
4. Safety Tips: Always use heat-resistant barbecue mitts when handling hot cookware or adjusting oven
vents. Also, ensure you're wearing grill gloves compliant with directive 89/686/EEC, for example:
performance level 2 for resistant contact heat, in accordance with DIN EN 407.
Cleaning and Maintenance
1. Oven Cleaning: Wait until your Outdoor Oven has cooled down before starting the cleaning process.
Use the 11.5" Square Peel and the Ash Sweep to brush off all ash and food debris from the Cooking
Stone. Avoid using water to extinguish the fire as it can cause damage to the oven.
2. Cooking Stone Cleaning: For cleaning the surface of your Cooking Stone, use a damp cloth or a soft
brush to gently remove any food residues. It's recommended to avoid any chemical cleaners as they
can affect the stone's surface and potentially impact the flavor of your food.
3. General Maintenance: Regular cleaning and maintenance of your Outdoor Oven will prolong its life
and ensure it remains safe and efficient. Keep an eye out for any potential wear and tear, particularly
on the door hinges, handles, and the vent.
12

WARRANTY
LIMITED WARRANTY
Koolmore Supply, Inc. extends a limited warranty to the original purchaser, guaranteeing that this Koolmore product is free from
manufacturing defects in material or workmanship for one year from the date of purchase.
Should you discover any such defect within the warranty period, Koolmore Supply, Inc., reserves the right to repair or replace the
product without charge, or to cover the cost of replacement parts and repair labor needed to correct defects present at the time of
purchase or resulting from regular usage, when the appliance has been installed, operated, and maintained as per the instructions
provided.
At its sole discretion, Koolmore Supply Inc. may decide to replace the product. In such an event, your replacement appliance will carry
the warranty for the remaining term of the original unit's warranty period.
This warranty is valid exclusively to the original purchaser of the product and only applicable within the United States. The warranty
commences from the date of original consumer purchase. Proof of the original purchase date will be required to obtain service under
this warranty.
Under this limited warranty, your sole and exclusive remedy will be product repair, as outlined above. All services must be provided by
a Koolmore-designated service company.
To claim warranty or request repair service:
Email [email protected]. Please include your name, address, phone number, warranty repair request, and a copy of your proof
of purchase receipt. Alternatively, visit koolmore.com and use the contact us page. A Koolmore customer service representative will
promptly arrange service for your appliance.
We thank you for choosing Koolmore.
WARRANTY EXCLUSIONS
This limited warranty will not cover:
1. Failure of the product to perform during power failures or interruptions, or due to inadequate electrical service.
2. Damage incurred during transportation or handling.
3. Damage caused by accidents, vermin, lightning, winds, fire, floods, or acts of God.
4. Damage resulting from accidents, alterations, misuse, abuse, improper installation, repair, or maintenance. This includes using
any external device that alters or converts the voltage or frequency of electricity.
5. Unauthorized product modifications, repairs by unauthorized centers, or use of non-approved replacement parts.
6. Abnormal cleaning and maintenance not aligned with the user's manual.
7. Use of incompatible accessories or components.
Any costs associated with repairs or replacements under these excluded circumstances shall be the responsibility of the consumer.
13