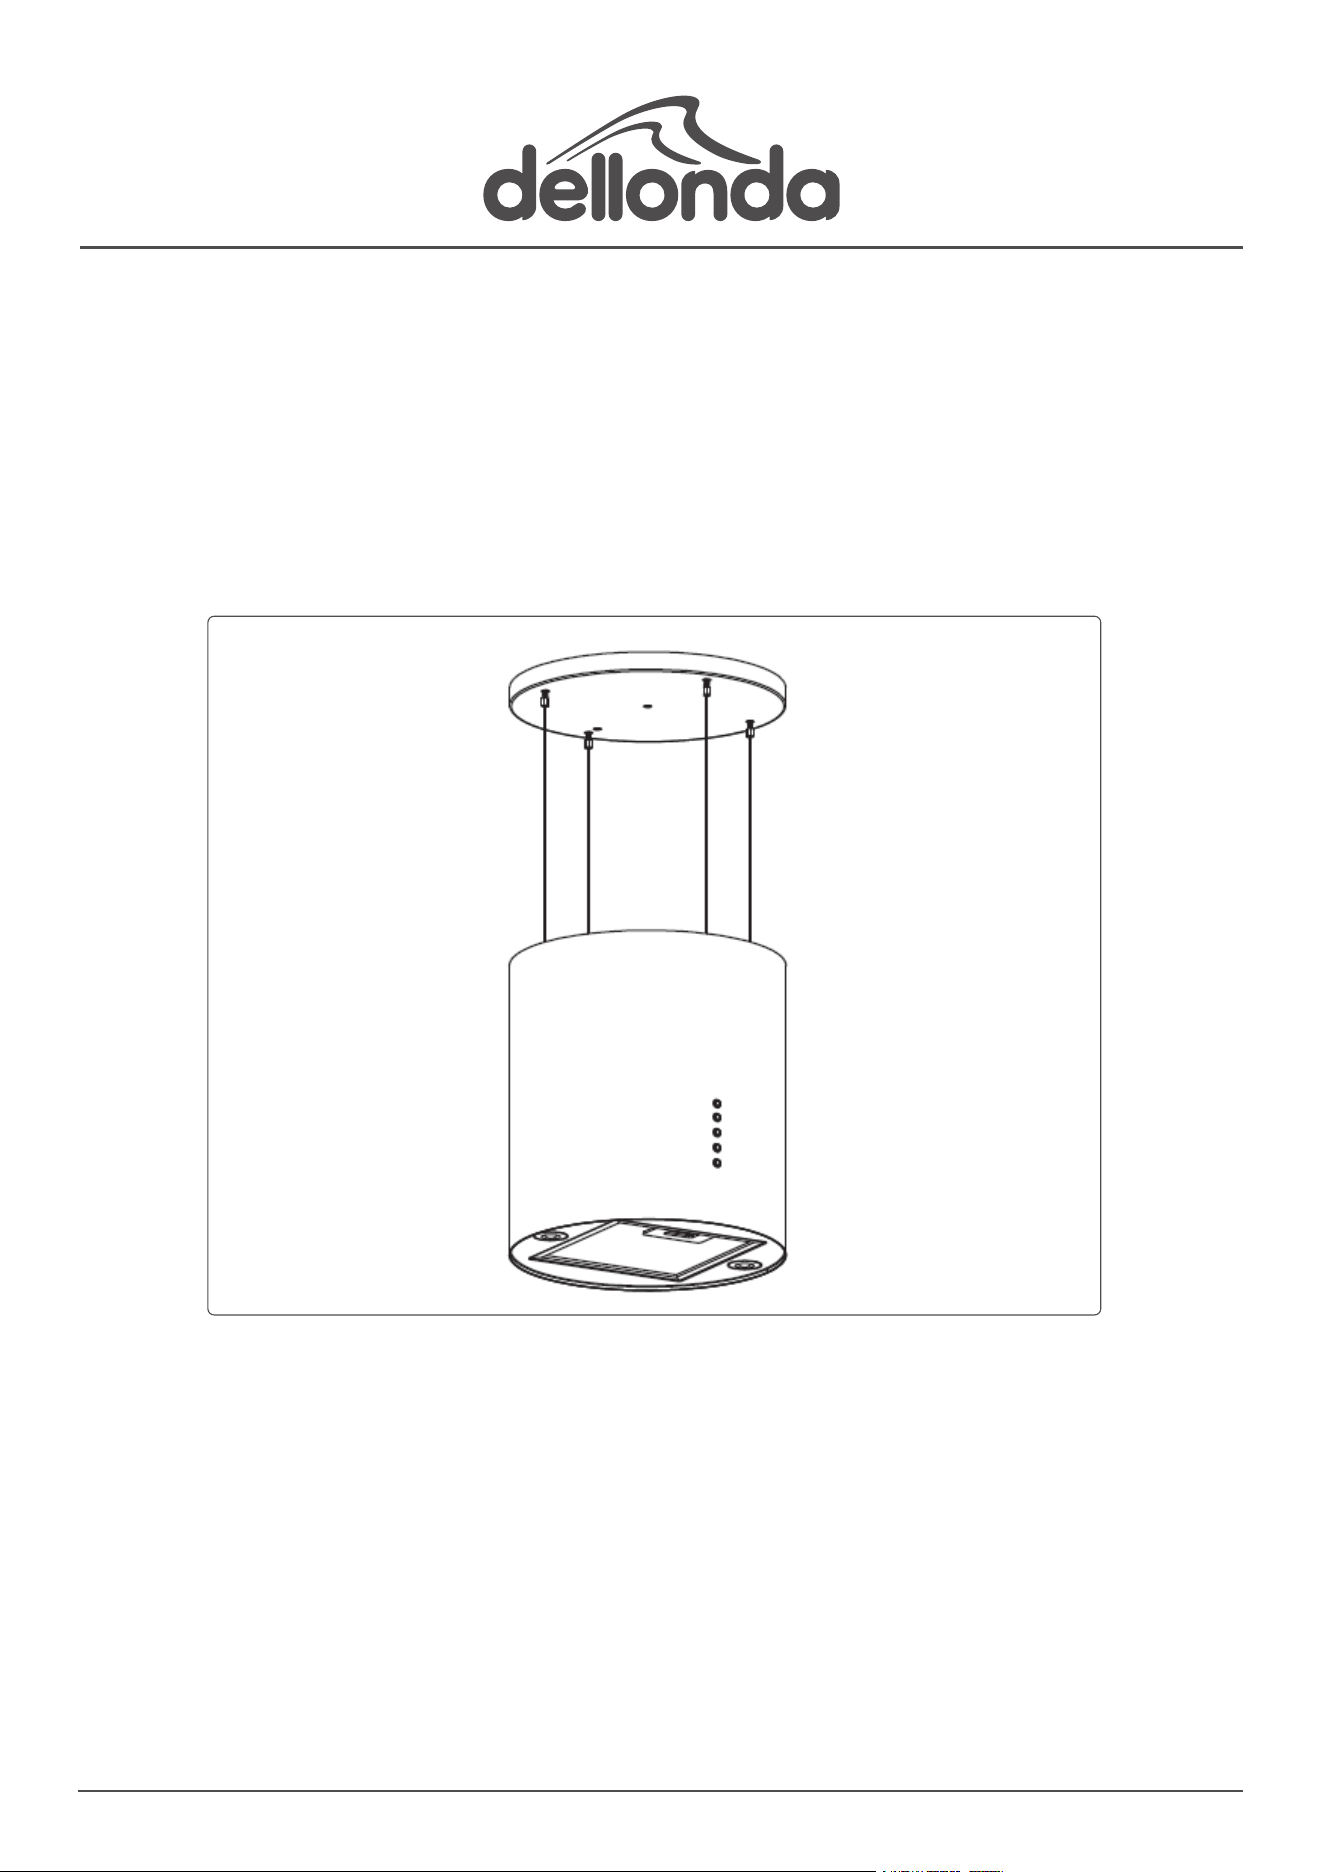
Island Cooker Hood, Pendant Style, Ø35cm, 3 Speed Black,
Stainless Steel, White
Model No’s DH219 DH220 DH221
Thank you for purchasing a Dellonda product. Manufactured to a high standard, this product will,
if used according to these instructions, and properly maintained, give you years of trouble free performance.
DH219 DH220 DH221 Issue:3 03/11/23
www.dellonda.co.uk
Important Information
Please read these instructions carefully. Note the safe operational requirements, warnings & cautions. Use the product correctly and with care
for the purpose for which it is intended. Failure to do so may cause damage and/or personal injury and will invalidate the warranty. Keep these
instructions safe for future use.
Refer to
instruction
manual
Warning:
Hot
Surface
Specication
Airow: 530m³/h
Cable Length: 2m
Colour: Black, Stainless Steel, White
Control: Push Button
Design: Island
Headroom: 65 - 75cm
Power: 78W
Product dimensions: 350 x 350 x 600/1600mm
Supply: 220V-240V
Type: Pendant
Safety Instructions
• ELECTRICAL SAFETY
• WARNING! It is the user’s responsibility to check the following:
• Check all electrical equipment and appliances to ensure that they are safe before using. Inspect power supply leads, plugs and all electrical
connections for wear and damage. Dellonda recommend that an RCD (Residual Current Device) is used with all electrical products. You may
obtain an RCD by contacting your local domestic stockist. If the product is used in the course of business duties, it must be maintained in a
safe condition and routinely PAT (Portable Appliance Test) tested.
• Electrical safety information: It is important that the following information is read and understood.
• Ensure that the insulation on all cables and on the appliance is safe before connecting it to the power supply.
• Regularly inspect power supply cables and plugs for wear or damage and check all connections to ensure that they are secure.
• Important: Ensure that the voltage rating on the appliance suits the power supply to be used and it is tted with the correct fuse.
• DO NOT pull or carry the appliance by the power cable.
• DO NOT use worn or damaged cables, plugs or connectors.
• Ensure that any faulty item is repaired or replaced immediately by a qualied electrician.
• Dellonda recommend that installation and repairs are carried out by a qualied electrician.
• GENERAL SAFETY
• This manual explains the proper installation and use of your cooker hood, please read it carefully before using even if you are familiar with the
product. The manual should be kept in a safe place for future reference.
• DO NOT try to use the cooker hood without the grease lters or if the lters are excessively greasy.
• DO NOT install above a cooker with a high level grill.
• DO NOT leave frying pans unattended during use because overheated fats or oils might catch re.
• Never leave naked ames under the cooker hood.
• If the cooker hood is damaged, do not attempt to use it.
• DO NOT ambé under the cooker hood.
• CAUTION: Accessible parts may become hot when used with cooking appliances.
• The minimum distance between the supporting surface for the cooking vessels on the hob and the lowest part of the cooker hood. (When the
cooker hood is located above a gas appliance), this distance shall be at least 65 cm.
• The air must not be discharged into a ue that is used for exhausting fumes from appliances burning gas or other fuels.
• Important! Always switch off the electricity supply at the mains during installation and maintenance such as light bulb replacement.
• The cooker hood must be installed in accordance with the installation instructions and all measurements followed.
• All installation work must be carried out by a competent person or qualied electrician.
• Please dispose of the packing material carefully. Children are vulnerable to it.
• Pay attention to the sharp edges inside the cooker hood especially during installation and cleaning.
• WARNING: Failure to install the screws or xing device in accordance with these instructions may result in electrical hazards.
• WARNING: Before obtaining access to terminals, all supply circuits must be disconnected.
• Always put lids on pots and pans when cooking on a gas cooker.
• There shall be adequate ventilation of the room when the hood is used at the same time as appliances burning gas or other fuels.
• The hood removes odours from room but not steam.
• Hood is for domestic use only.
• If the supply cord is damaged, it must be replaced by the manufacturer, its service agent or similarly qualied persons in order to avoid a hazard.
• This appliance can be used by children aged from 8 years and above and persons with reduced physical, sensory or mental capabilities or lack of
experience and knowledge if they have been given supervision or instruction concerning use of the appliance in a safe way and understand the
hazards involved. Children shall not play with the appliance. Cleaning and user maintenance shall not be made by children without supervision.
• WARNING: Before obtaining access to terminals, all supply circuits must be disconnected.
• There is a re risk if cleaning is not carried out in accordance with the instructions.
• Clean your appliance periodically by following the method given in the maintenance section.
• For safety reasons, please use only the same size of xing or mounting screws which are recommended in this instruction manual.
• Maintenance and cleaning: pay attention to the frequency and method detailed at the end of the manual.
• A steam cleaner is not to be used.
• NEVER try to extinguish a re with water, but switch off the appliance and then cover ame e.g. with a lid or a re blanket.
INSTALLATION
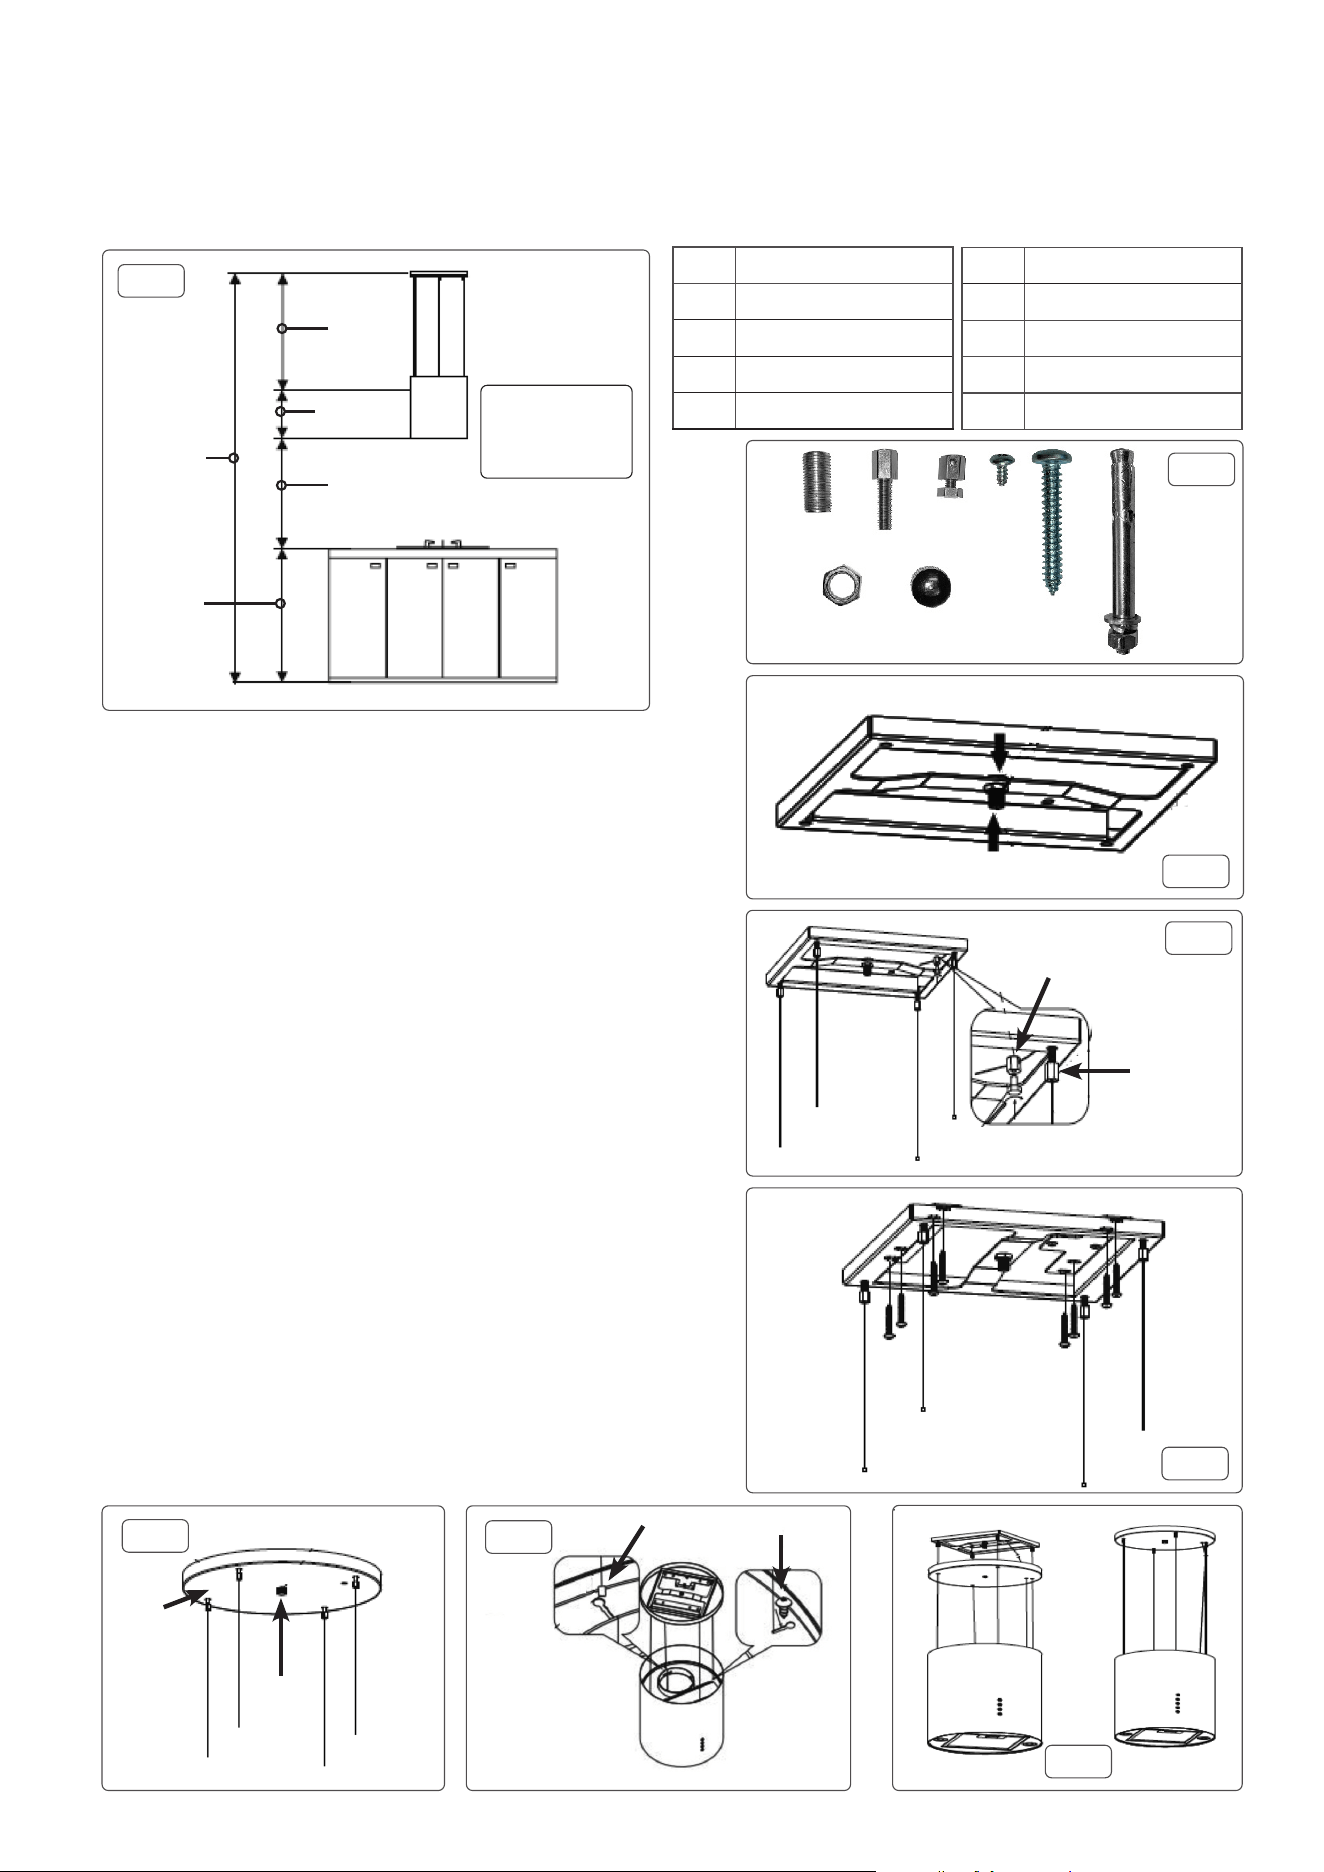
• Note the ceiling being xed to must bear at least 120kg and be of a thickness greater than or equal to 30mm.
• Before installation, ensure the switch is turned off and unplug from the mains supply.
• The cooker hood should be placed at a distance between 65 and 75cm above the cooking surface for best performance, g.1.
• Pass the M10 barrel through the centre hole of the mounting plate and x in
in place using the two M10 thin nuts on either side. On the upper most side
only, allow the barrel to protrude beyond the thin nut by only two threads.
This will allow sufcient thread below the plate for xing the decorative plate in
place using the domed nut. See g.3 and g.6.
• Install the four adjustable hangers in each corner of the mounting plate. Allow
approximately 5mm of thread to be below the mounting plate as this will allow
for height adjustment once the unit is mounted to the ceiling. See g.4.
• With the correct wire length calculated, pass the wires through the hangers and
lock in place using the locking screws. See g.4.
• Reconrm required wire length and cut to suit leaving sufcient tail to make
any future adjustment to hood height.
• If xing to a wooden ceiling use the paper template supplied to mark and drill
the 8 installation holes in the ceiling to suit the M6 Wood Screws supplied
(Recommended drill size Ø3mm). See g.5
• If xing to a concrete ceiling, drill 4 holes (one in each corner of template) to
suit the Rawlbolts supplied (Recommended drill size Ø8mm). See g.5.
• Lower the cable stop ends into the key-hole slots in the top of the hood and x
in place using the 4 small self-tapping screws in the holes provided within the
key-hole slot (Fig.7).
• Thread the power cable through the hole in the decorative cover plate and
t the electric plug. Tie the power cable to the relevant wire hanger using the
cable ties provided.
• Slide the decorative cover plate up the wires and t it in place to the mounting
plate using the domed nut screwed onto the protruding threaded barrel. See
g.8.
C = 65cm - 75cm
D=27.5cm
X = Wire
Length
A = Floor to
Ceiling height
B = Cabinet
Height
X = Wire length
X = A - (B+C+D)
Item Description
1 1 x M10 Barrel
2 4 x Adjustable hangers
3 4 x Locking screw
4 2 x M10 Thin nut
Fig.1
Fig.2
Fig.3
Fig.4
Fig.5
Adjustable
hangar
Locking
screw
Fig.6
Fig.7
Fig.8
Decorative
cover
M10 Domed
nut
Cable stop
Self tapper
Item Description
5 1 x M10 Domed nut
6 4 x Self-tapping Screws
7 8 x M6 Wood Screws
8 4 x Rawlbolts
1
2
3
4
5
6
7
8
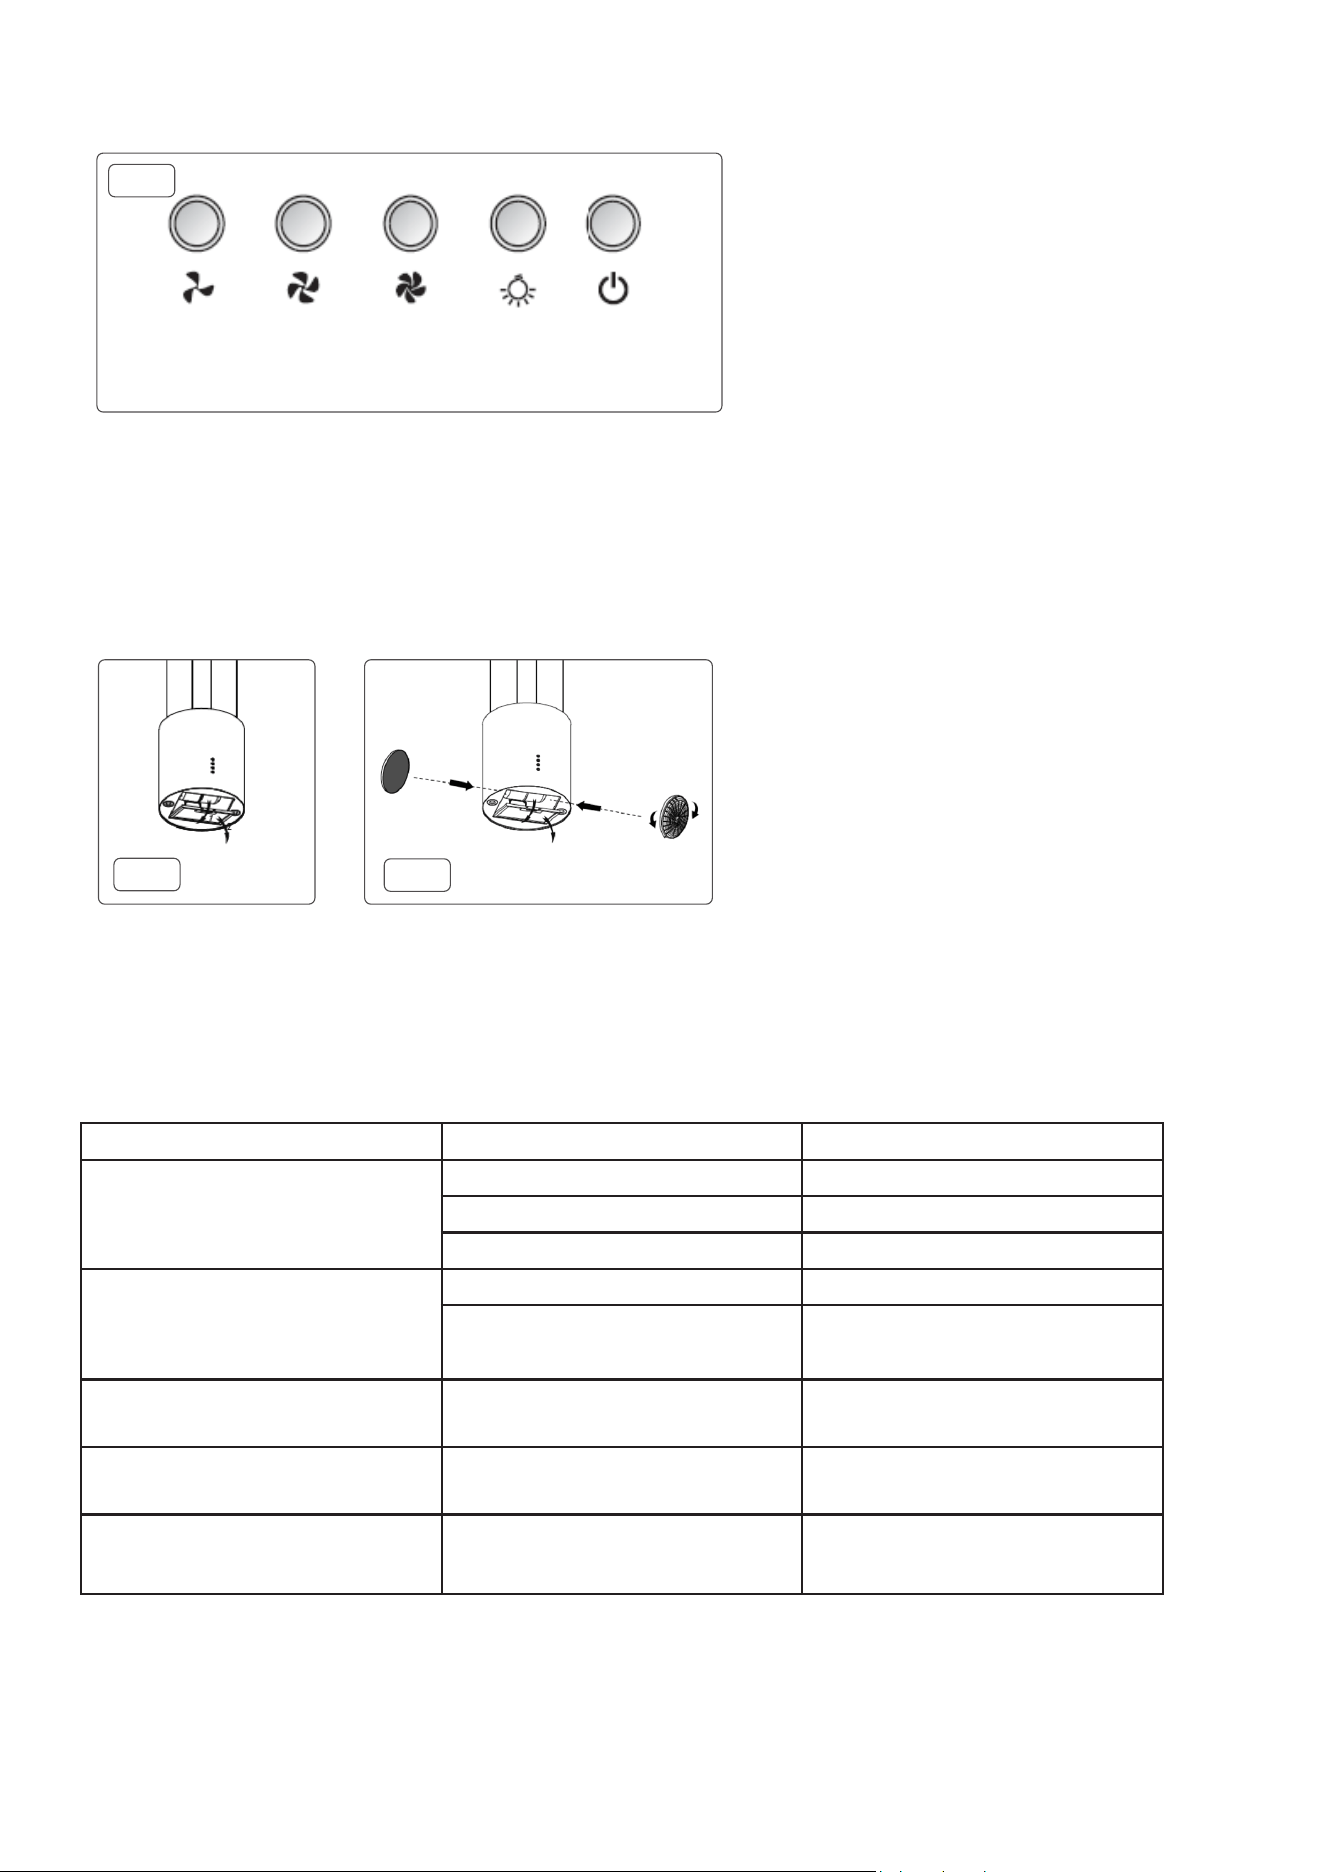
OPERATION
• With power supply switched on, press On/Off to start the unit. Select required function using appropriate button. See g.9.
MAINTENANCE
• WARNING: Always isolate from the power supply before any cleaning or maintenance is carried out.
• Cleaning and user maintenance shall not be made by children without supervision.
• To clean the wire mesh lter, depress the tab and withdraw it from the unit. See g.10.
• Wash in mild detergent and brush gently with a soft brush. DO NOT apply too much pressure.
• Leave the mesh to dry naturally out of direct sunlight.
• To replace the carbon lters, remove the wire mesh lter. The carbon lters are housed at both ends of the motor. See g.11.
• Unscrew the lter housings from the motor body by rotating them anti-clockwise. Replace the used lters.
• NOTE: Make sure the carbon lter housings are rmly in place or they might loosen and cause damage or poor performance.
• External surfaces are susceptible to scratches and abrasions, so please follow the cleaning instructions to ensure the best possible result is
achieved without damage.
• Cleaning and maintenance should be carried out with the appliance cold especially cleaning. Avoid leaving alkaline or acid substances (lemon
juice, vinegar etc.) on the surfaces.
• To change a light bulb, insert a thin, straight bladed screwdriver between the light bulb and the hood housing and gently lever the bulb out.
• Disconnect the wiring and replace the bulb.
TROUBLESHOOTING
On / OLights
High
Speed
Mid
Speed
Low
Speed
Fig.9
Fig.10
Fig.11
Fault Cause
Solution
Light on but motor does not work Fan switch turned off Select a fan switch position
Fan switch failed Contact service centre
Motor failed Contact service centre
Light does not work, motor does not work House fuses blown Reset/replace fuses
Mains cable loose or disconnected Ret mains power cable to power outlet.
Switch power on.
Lights not working Broken or faulty bulbs Replace bulbs as per instructions in this
manual
Insufcient suction Distance between the cooker hood and
the hob is too great
Ret the cooker hood to the correct
distance
Cooker hood inclines Fixing screws are not tight enough Tighten the hanging screw and make
horizontal

Dellonda Limited
Kempson Way, Suffolk Business Park, Bury St Edmunds, Suffolk. IP32 7AR
01284 757575 [email protected] www.dellonda.co.uk
Environment Protection and Waste Protection and Electrical Equipment Regulations (WEEE)
Recycle unwanted packaging materials. When this product is no longer required, or has reached the end of it’s useful life, please
dispose of it in an environmentally friendly way. Drain any uids (if applicable) into approved containers, in accordance with local
waste regulations. Under the Waste Batteries and Accumulators Regulations 2009, Dellonda would like to inform the user that
this product contains one or more batteries. It is our policy to continually improve products and we reserve the right to alter data,
specications and parts without prior notice. No liability is accepted for incorrect use of this product. Guarantee is 12 months from
purchase date, proof of which is required for any claim.