Quick Install Guide (with an Electric Water Heater):
Rheem
®
Water Heater Booster
™
This is a quick reference guide, you must follow the complete installation instructions and homeowner’s manual included with the unit
Step 3: SET UP
You can set, view or adjust a variety of settings with the control
knob, including but not limited to:
• Inlet/Outlet Temperature
• Flow
• Power Factor
• Setup
• Activation Temperature
• Max Temperature
• Vacation Mode
• Eco Mode
Your unit is preset at 120°F max temperature and 115°F activation
temperature. To cycle through menu options or adjust a setting,
rotate the knob. To enter a menu option press the control knob.
For more programming details, consult your unit’s Installation and
Homeowner’s Manual.
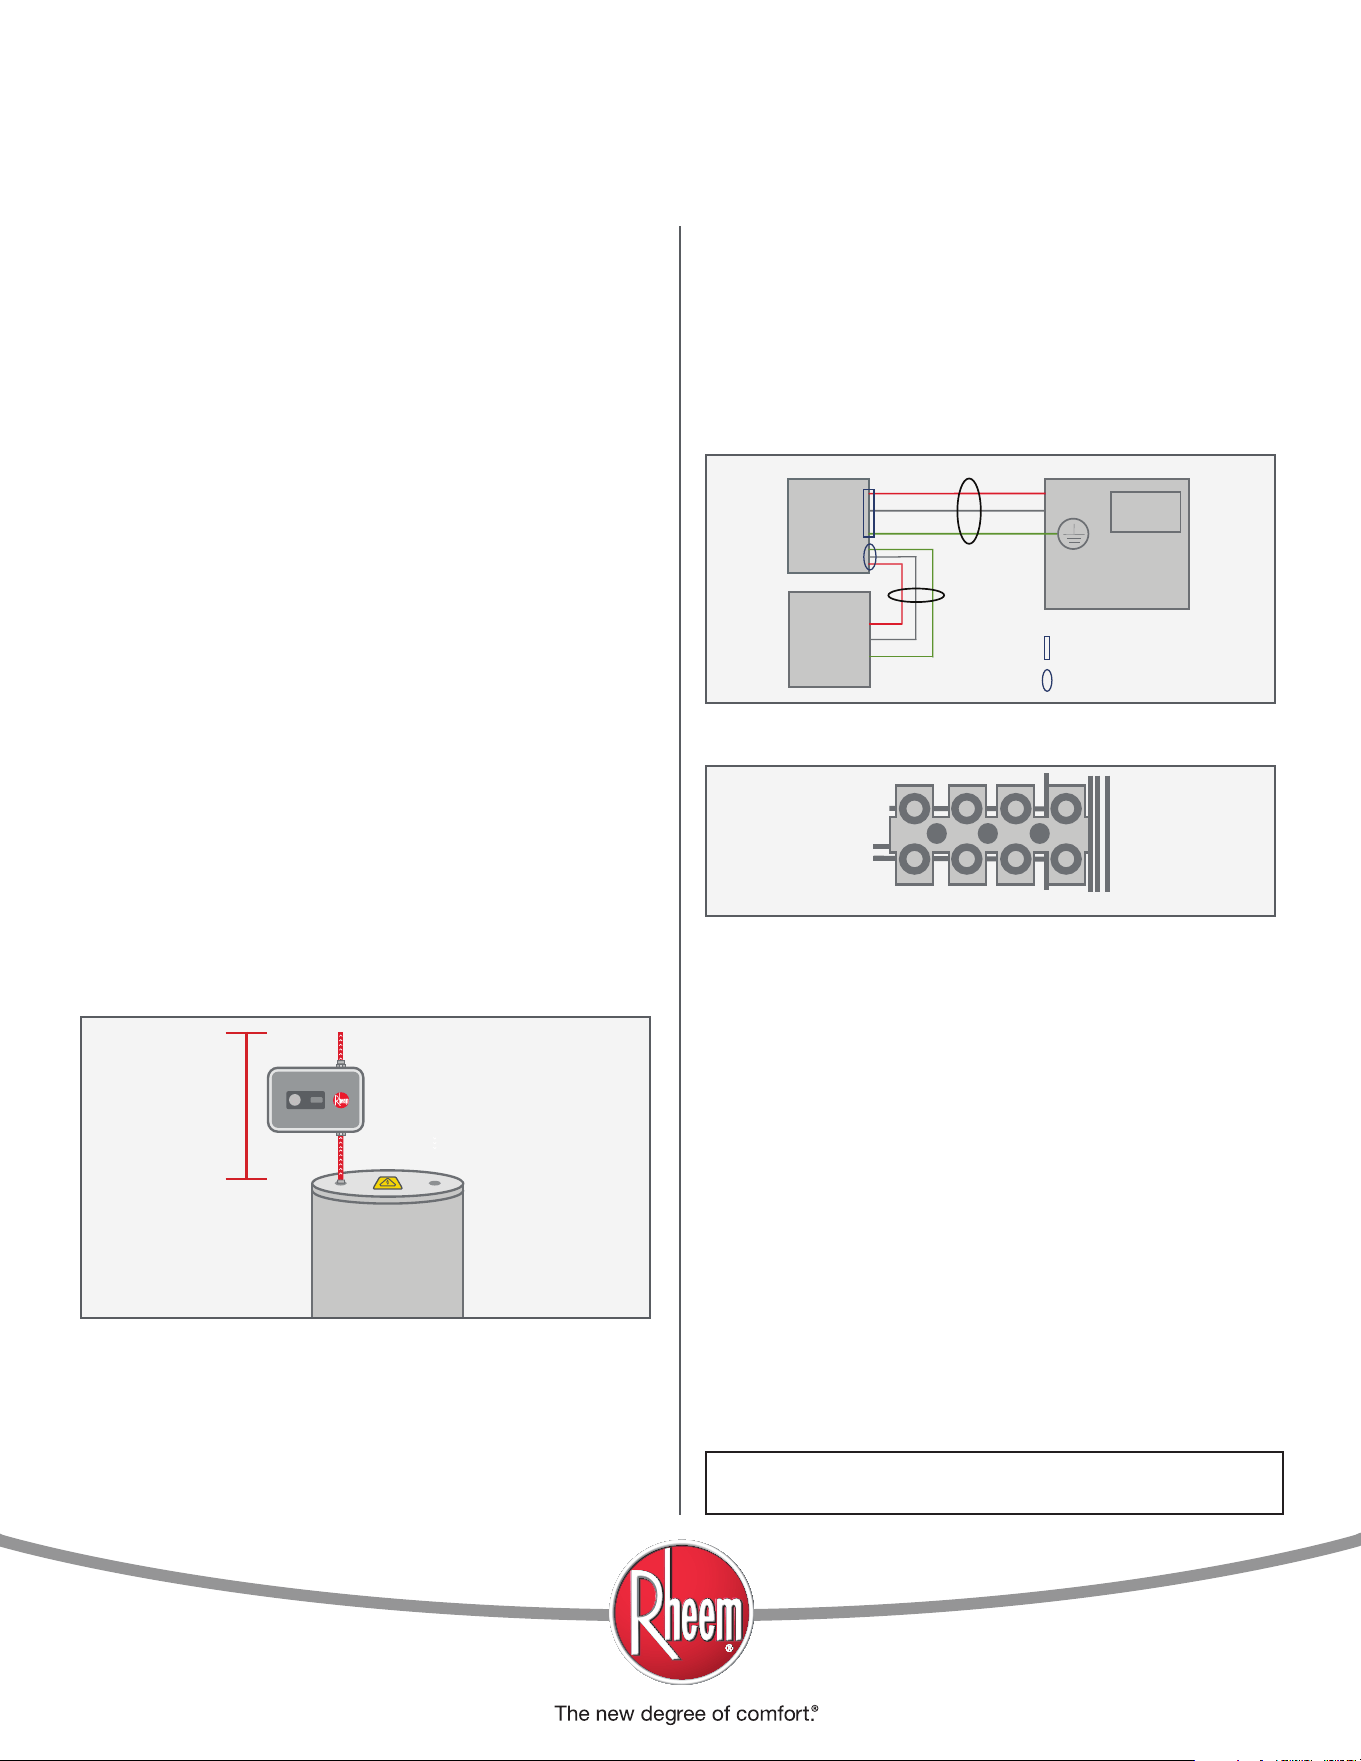
Step 2: ELECTRICAL CONNECTION
Using the images below as reference, connect your existing
service wires to the unit, and then connect unit’s pigtail
(found in box), to the existing water heater heater.
Important: Reference your water heater’s manual for
additional safety and wiring information.
QUESTIONS ON INSTALLATION:
Refer to your Installation & Homeowner's Manual
Step 1: PLUMBING
This water heater is supplied with ¾" fittings at the inlet and
outlet. DO NOT WELD or USE TEFLON TAPE or PIPE DOPE.
Connect the inlet of the unit to the outlet of the tank heater.
Connect the outlet of the unit to the hot water supply line.
Important: 14" of straight pipe clearance is required for
installation above the existing tank heater. 6" of clearance
is required to the front and sides of the unit for service
maintenance. If there is at least 1-½" of vertical pipe movement
available with your existing outlet pipe, cut the pipe 2" above the
connection fitting or any irremovable/essential union. If there is no
vertical pipe movement, connection hoses may be required.
Once both water lines are fastened and secured, you MUST RUN
WATER through the unit for at least 2 to 3 minutes to flush any air
pockets (purging) in the lines and make sure there are no leaks.
It is recommended that all faucets, showers etc. be run. Failure
to follow this step can cause permanent damage to the unit. This
procedure MUST be performed before any electrical power is
turned on.
IMPORTANT SAFETY INFORMATION
As when installing or using any high voltage electrical appliance, basic
safety precautions should always be followed. Under no circumstances
should you attempt to clean, install, inspect, repair, disassemble, or
otherwise service this water heater without first shutting off all power
to the unit directly at the breaker box. SERIOUS BODILY INJURY
OR DEATH COULD OCCUR IF YOU IGNORE THIS WARNING. THIS
PRODUCT MUST BE INSTALLED BY A QUALIFIED ELECTRICIAN
AND PLUMBER IN ACCORDANCE WITH ALL NATIONAL, STATE,
PROVINCIAL, AND LOCAL ELECTRICAL AND PLUMBING CODES.
PLEASE READ THE INSTALLATION INSTRUCTIONS & HOMEOWNER'S
MANUAL THOROUGHLY AND COMPLETELY BEFORE INSTALLATION
AND BEFORE USE. FAILURE TO DO SO COULD CAUSE PROPERTY
DAMAGE OR SERIOUS PERSONAL INJURY OR DEATH, AND VOID
YOUR WARRANTY. THIS WATER HEATER MUST BE INSTALLED BY A
LICENSED ELECTRICIAN AND PLUMBER. PROOF OF INSTALLATION
MUST ACCOMPANY THE WARRANY CARD.
WATER OUT
WATER IN FROM
TANK OUTLET
ELECTRIC
TANK
SPACING AND PLUMBING REFERENCE
L1 L1 T1 T2
TERMINAL BLOCK REFERENCE
UNIT
Existing Service
GND
T1
T2
GND
Wires from unit
ELECTRIC PANEL
= Connection reference 1
= Connection reference 2
TANK
L1
L2
Circuit
Breaker
WIRING REFERENCE
14"