INSTALLATION GUIDE
for the
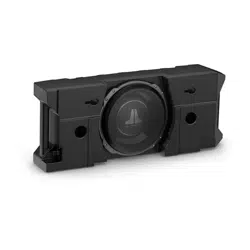
SBX-J-JLTAILGT/12TW3
SKU# 94790
2018-Up Jeep Wrangler JL
• Installation requires appropriate tools and safety equipment.
Professional installation is recommended.
• If you prefer to perform your own installation, please read this
installation guide completely before beginning.
• Before cutting or drilling, check for potential obstacles behind
mounting surfaces.
• Mount this product securely to prevent damage or injury in
severe conditions.
INSTALLATION
DIFFICULTY:
ESTIMATED TIME:
1 HOUR
Enclosure Type: Sealed
Driver Type: 12T W3-D4
Nominal Impedance: 2 ohms
Continuous Power Handling: 400 watts (RMS method)
Continued on Next Page
1
5
OUT
OF
SBX-J-JLTAILGT/12TW3 INSTR_SKU# 011790
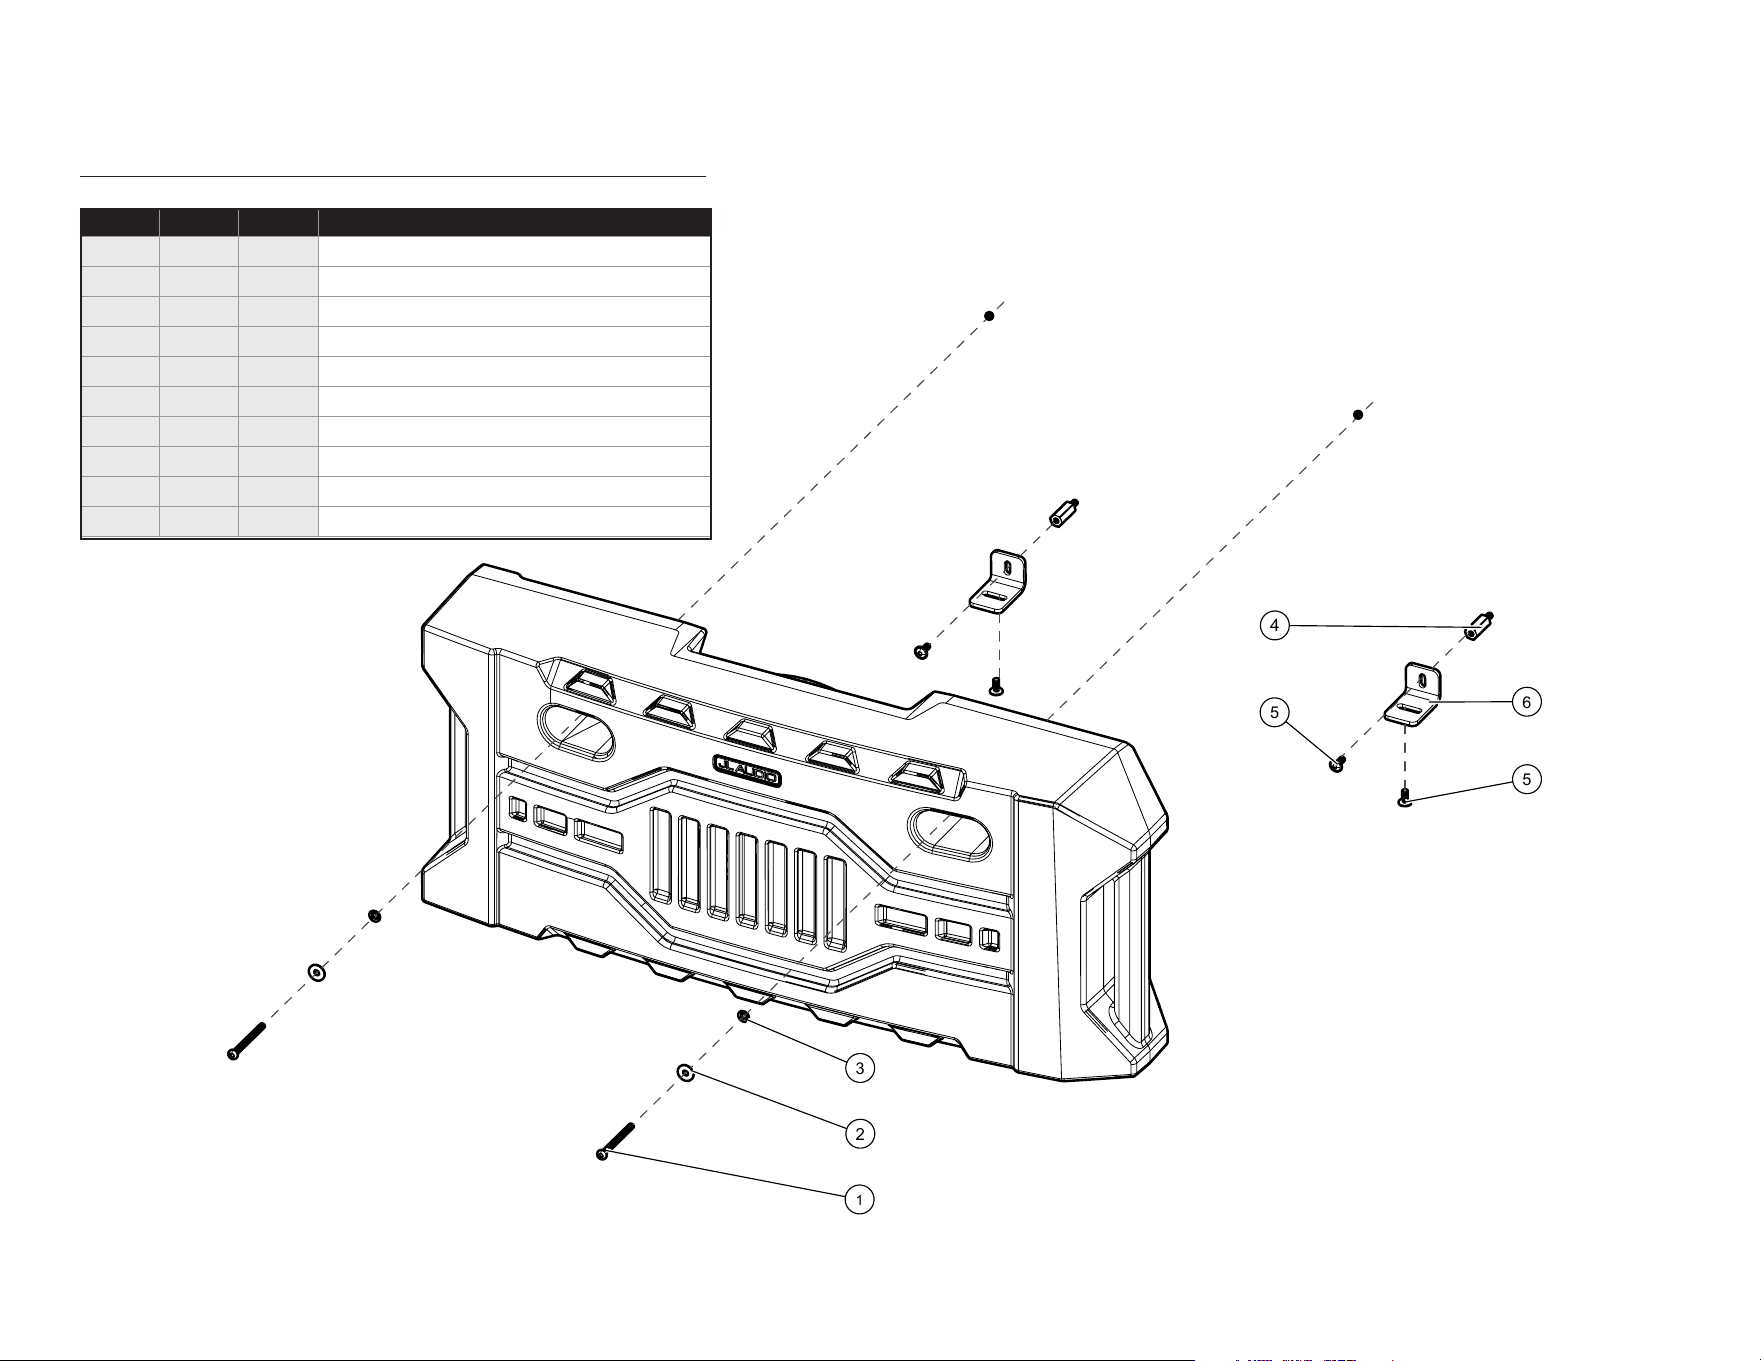
INCLUDED HARDWARE
4
5
6
5
3
2
1
Continued on Next Page
Page 2 • JL Audio, Inc., 2025
BOM ID Qty SKU Description
1 2 155436 M6 x 65mm Torx Button Head Screw
2 2 155437 M6 Flat Washer, 18mm OD
3 2 155438 M6 Retaining Washer
4 2 155440 M6 Male-Female Hex Stando
5 4 155439 M6 x 14mm Torx Button Head Screw
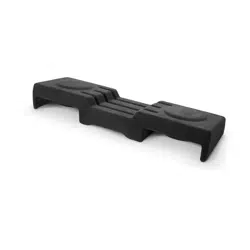
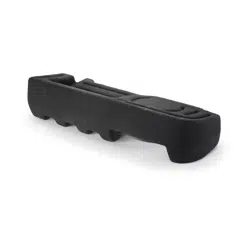
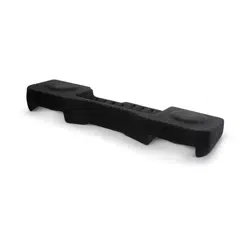
6 2 155441 Bracket
- 1 194157 Vibra-Tite 132 (not shown)
- 1 150249 Foam Tape Strip (not shown)
- 1 155442 6” T30 Torx Head Screwdriver Bit (not shown)
- 1 155411 Vehicle Harness (not shown)
SBX-J-JLTAILGT/12TW3 INSTR_SKU# 011790
Page 3 • JL Audio, Inc., 2025 Continued on Next Page
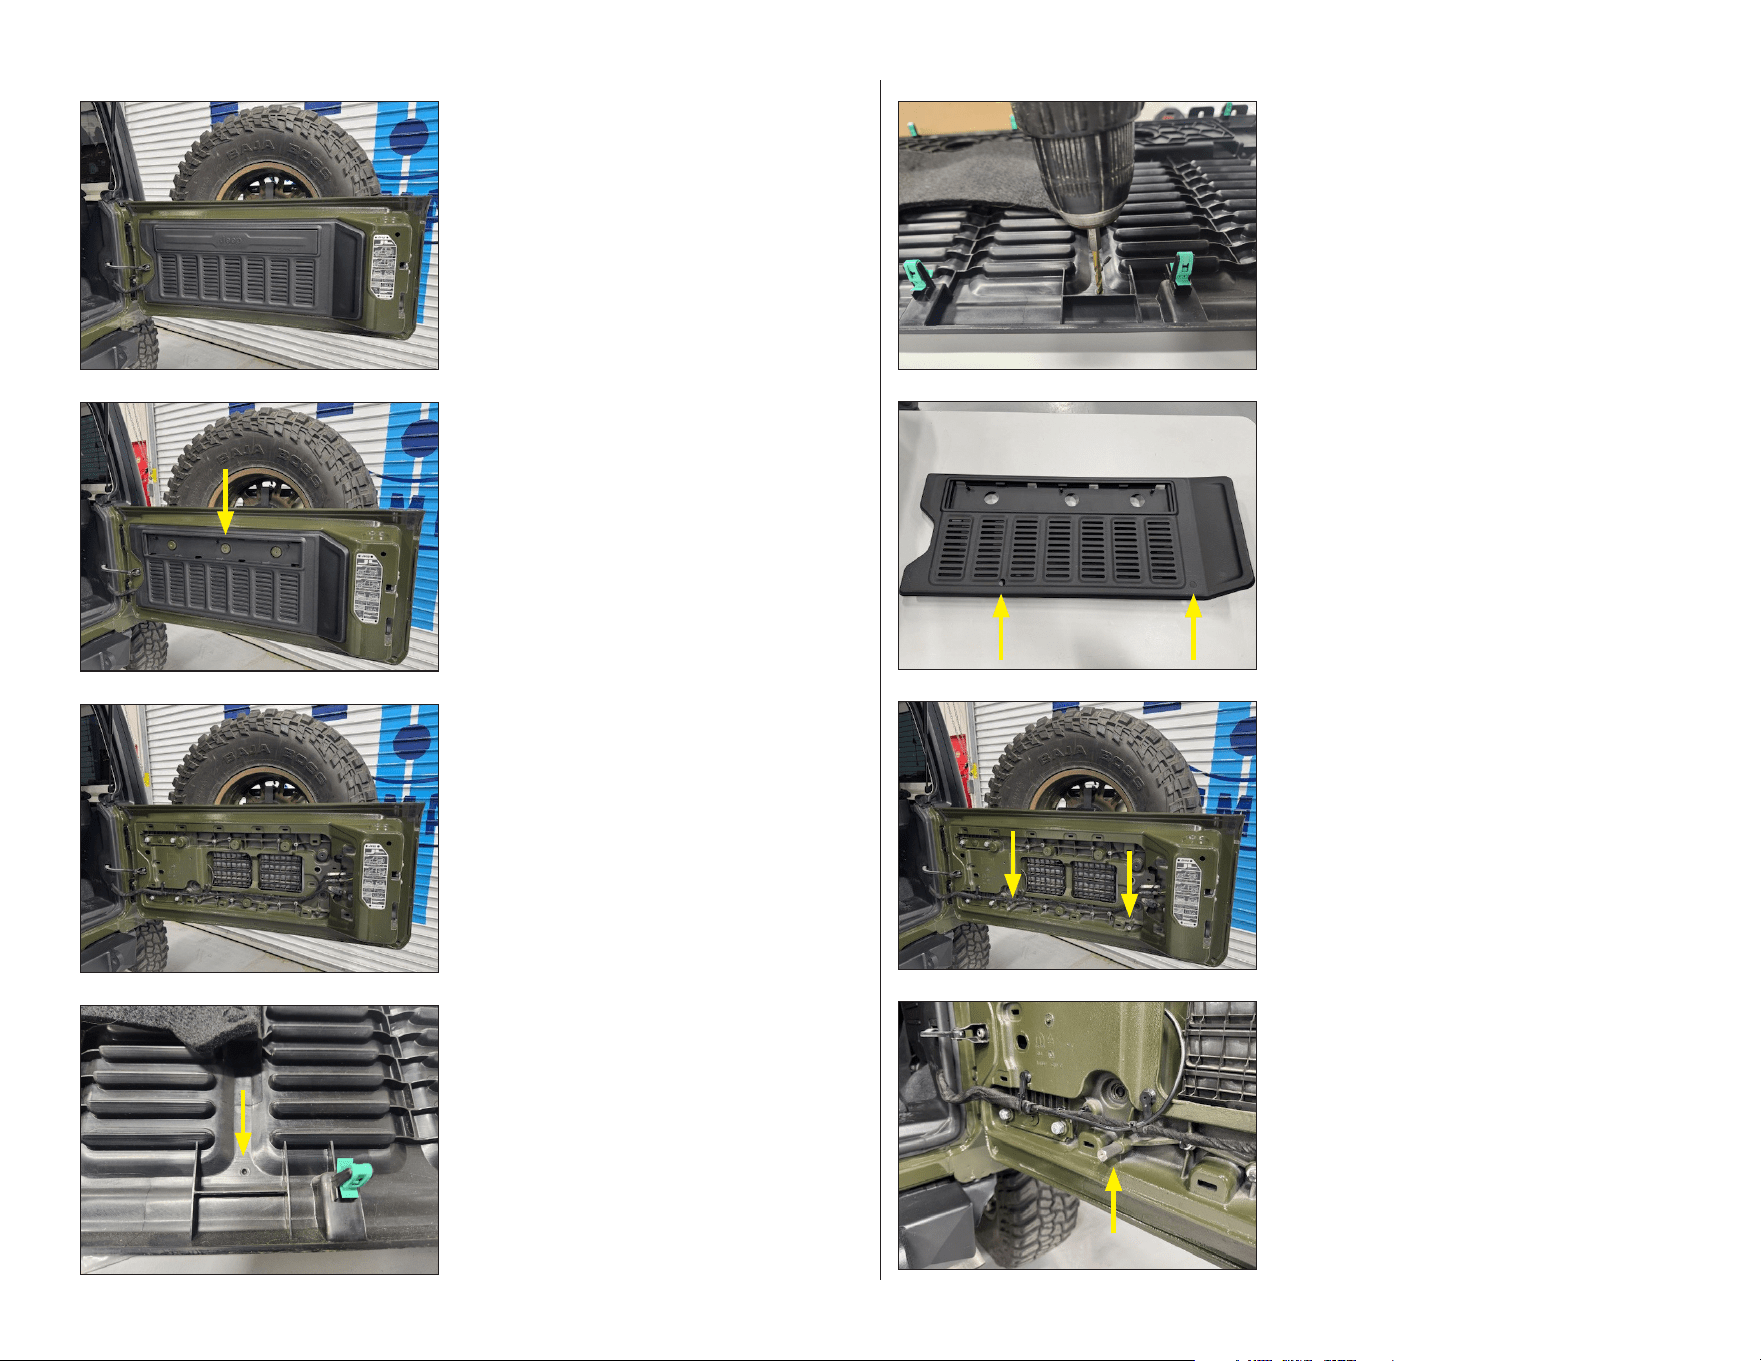
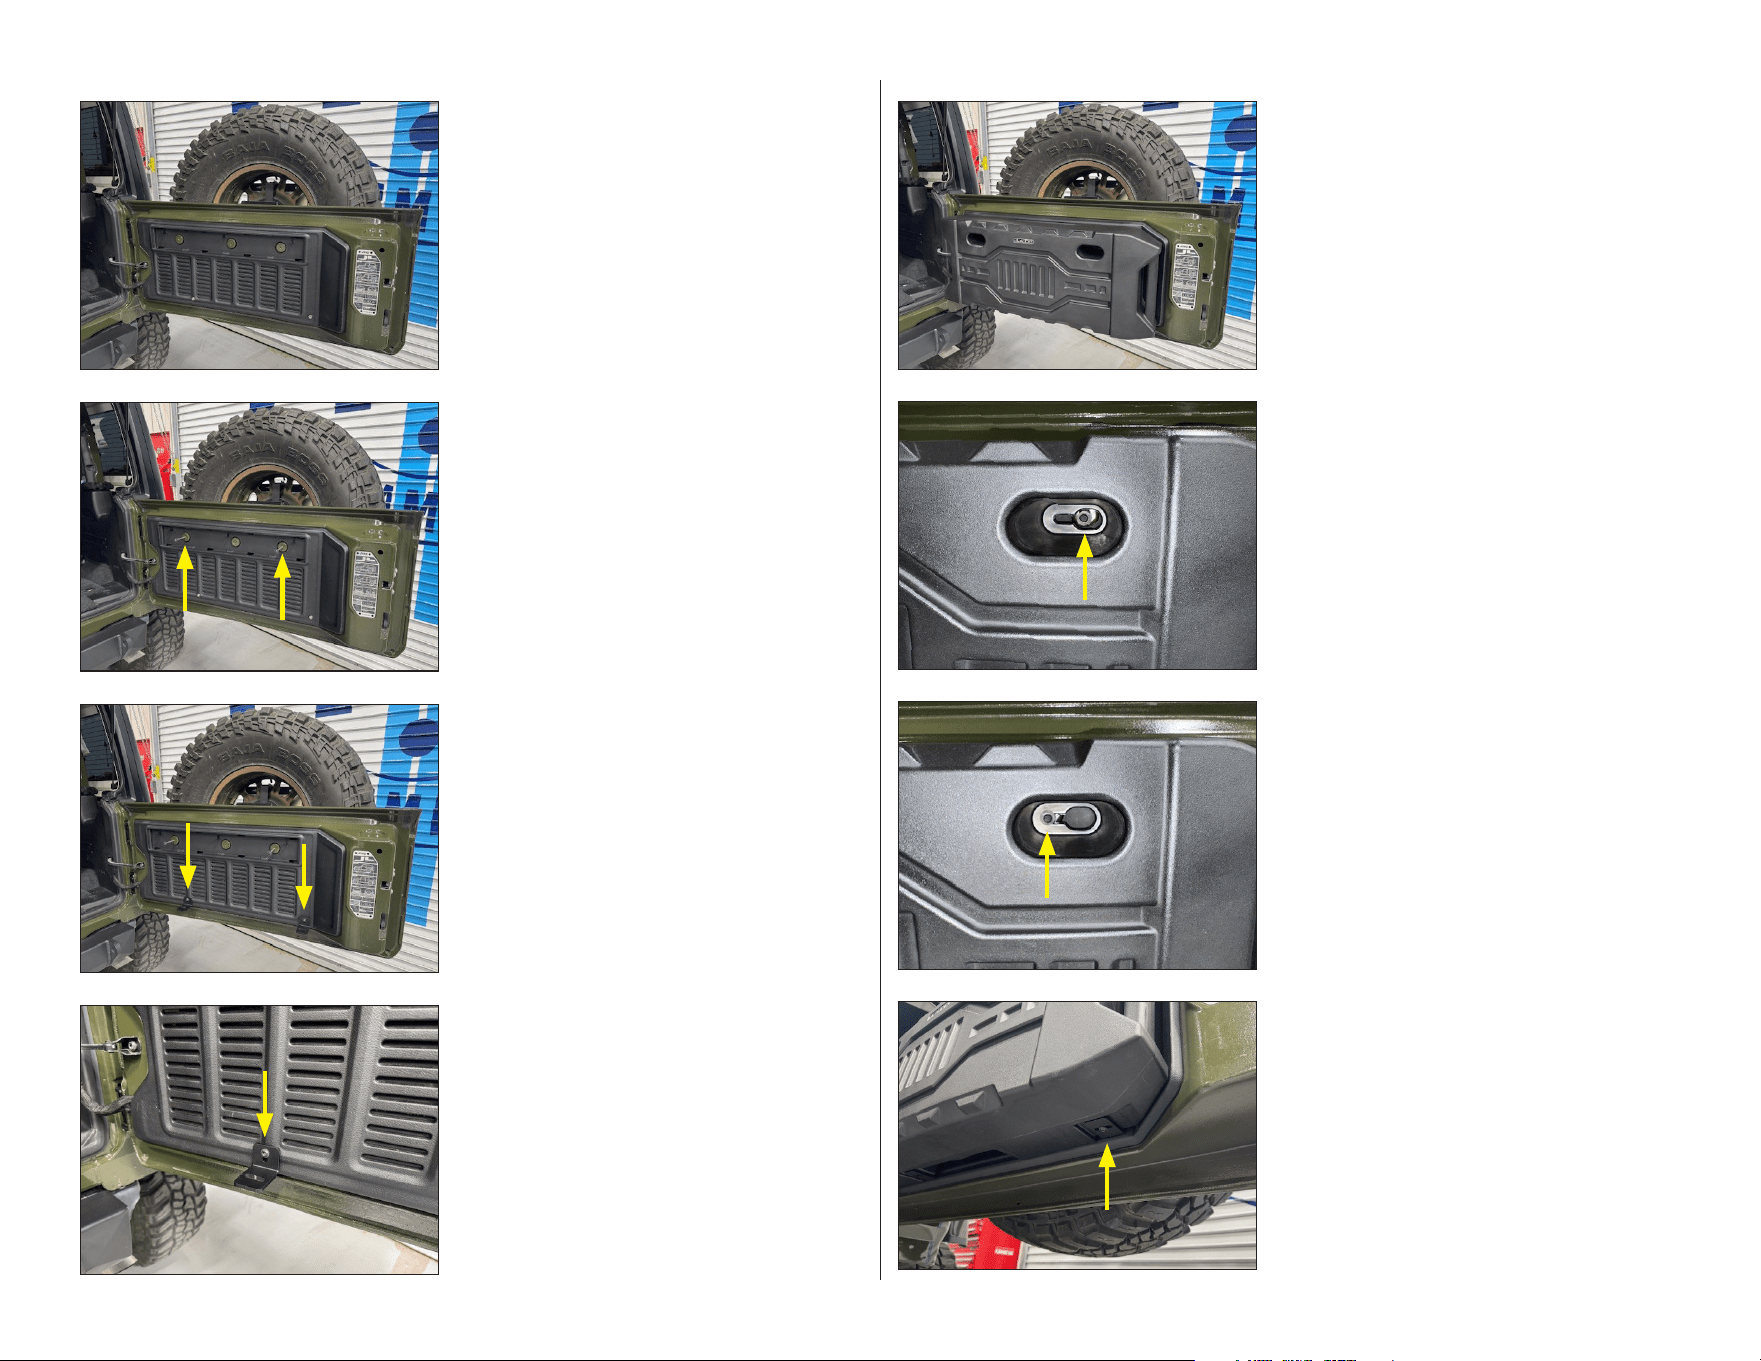
STEP 8
Fully tighten both of the M6 Male-Female Hex
Standoffs.
STEP 7
Apply Vibra-Tite 132 to each M6 Male-Female
Hex Standoff, and thread them into the
indicated factory threaded holes in the tailgate.
STEP 6
Pictured is the main tailgate panel with both
holes enlarged.
STEP 5
Using a 1/8” drill bit, carefully drill through each
dimple.
Using a step bit, carefully enlarge each hole to
5/8”.
STEP 4
On the back of the main tailgate panel, locate
the two small dimples near the bottom edge.
STEP 3
Carefully unclip and remove the main tailgate
panel from the tailgate.
STEP 2
Carefully unclip and remove the upper cover
panel from the tailgate.
STEP 1
Open the tailgate and empty the rear portion
of the cargo area.
SBX-J-JLTAILGT/12TW3 INSTR_SKU# 011790
Page 3 • JL Audio, Inc., 2025 Continued on Next Page
STEP 16
Align the slots in the Brackets with the
bottom enclosure inserts, then carefully
remove the enclosure from the tailgate. Fully
tighten the two M6 x 14mm Torx Button Head
Screws installed in Step 12. Reinstall the
enclosure. Apply Vibra-Tite 132 to two M6 x
14mm Torx Button Head Screws, then pass
them through each Bracket, into the enclosure
inserts, and fully tighten. Fully tighten the two
M6 x 65mm Torx Button Head Screws.
STEP 15
Slide the enclosure to the right until it fully
aligns with the tailgate. The M6 x 65mm Torx
Button Head Screws should be positioned in
the indicated narrow slots in the enclosure.
STEP 14
Allow each M6 x 65mm Torx Button Head
Screw to pass through the indicated large slots
in the enclosure.
STEP 13
Carefully place the enclosure onto the Brackets,
and guide the M6 x 65mm Torx Button Head
Screws through each enclosure keyway as
described in the following steps. A 6” T30 Torx
Head Screwdriver Bit is included for easy access
to these fasteners.
STEP 12
Align each Bracket, as shown, and hand-tighten
both M6 x 14mm Torx Button Head Screws.
STE P 11
Apply Vibra-Tite 132 to two M6 x 14mm Torx
Button Head Screws, pass them through the
vertical slot in each Bracket, and thread them
into the M6 Male-Female Hex Standoffs.
STEP 10
Slide an M6 Flat Washer, then an M6 Retaining
Washer over each of the two M6 x 65mm Torx
Button Head Screws. Apply Vibra-Tite 132 to
each screw, then loosely thread them into the
indicated factory threaded holes in the tailgate.
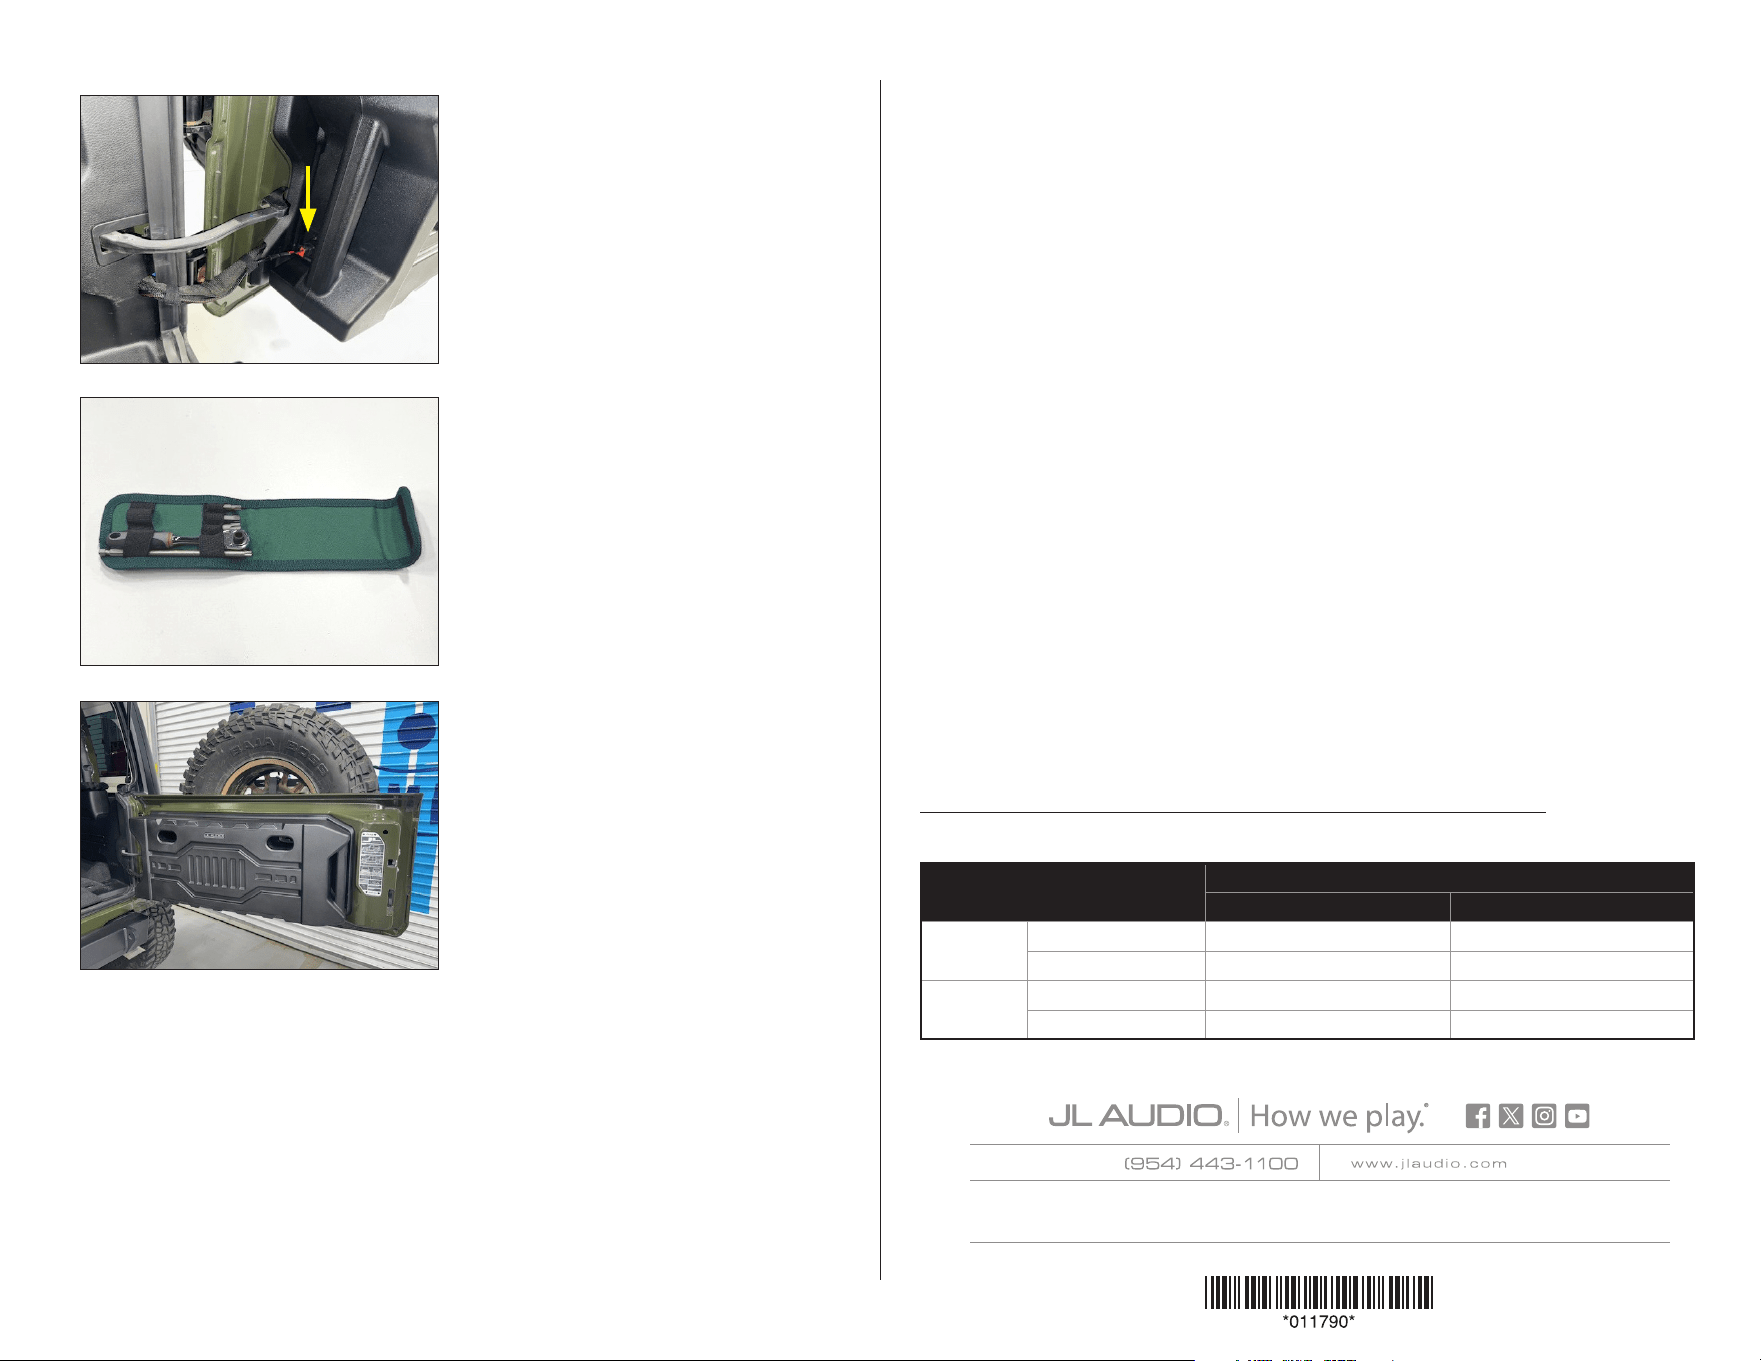
STEP 9
Carefully reinstall the main tailgate panel.
SBX-J-JLTAILGT/12TW3 INSTR_SKU# 011790
Page 4 • JL Audio, Inc., 2025
CONGRATULATIONS!
You have completed the installation for this model! Enjoy your new Stealthbox®!
STEP 18
The 6” T30 Torx Head Screwdriver Bit can be
stored in the factory tool kit.
STEP 17
Plug the Harness into the connector on the
side of the enclosure, secure it to the factory
tailgate harness with the two attached hook
and loop straps, and route the Harness as
necessary.
JLA-SKU# 011790 • ver. 06.10.2025 • 10369 NORTH COMMERCE PARKWAY • MIRAMAR, FLORIDA • 33025 • USA
Please review the warranty information included with each product for details. Warranty is valid only if the product was purchased from an Authorized JLAudio Dealer. Authorized dealer
status can be veried with the Dealer Locator on www.jlaudio.com. International Warranty: Please contact your country’s JLAudio distributor for specic warranty details.
© Garmin Ltd. or its subsidiaries. All rights reserved. • Garmin, JLAudio, Stealthbox, and How we play. are trademarks of Garmin Ltd. or its subsidiaries and are registered in one or more
countries, including the U.S. The JLAudio logo, the How we play logo, the Stealthbox logo, and the SBX logo are trademarks of Garmin Ltd. or its subsidiaries. Product images shown are for
illustrative purposes only and may differ from the actual product. Due to continuous product development, all specifications are subject to change without notice.
MID/HIGH FREQUENCY DRIVER FITMENT
A variety of JL Audio coaxial and component systems will t in the factory speaker locations of your vehicle.
1 - Installation may require adaptor, 2 - Component driver only
SBX-J-JLTAILGT/12TW3 INSTR_SKU# 011790
STEP 19
Be sure the rearmost section of the cargo area
is empty before closing the tailgate.
Location / OEM
Speaker Size
Suggested JL Audio Speaker Models
Coaxial Models Component Models
Dash
Upper / 3-1/2-inch C2-350x CF-350mt, C7-350cm
(2)
Lower / 4-inch C1-400x, C2-400x C7-350cm
(1,2)
Roll Bar
Outer / 3-1/2-inch C2-350x
CF-350mt, C7-350cm
(2)
Inner / 4-inch C1-400x, C2-400x C7-350cm
(1,2)