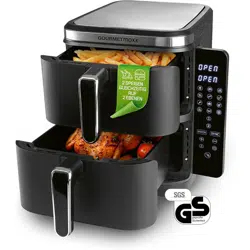
FryUp Vertikale Doppelkammer-Heißluftfritteuse
DE
1
INHALTSVERZEICHNIS
Auf einen Blick 1
Symbole 2
Signalwörter 2
Weitere Erläuterungen 2
Lieferumfang 2
Bestimmungsgemäßer Gebrauch 3
Sicherheitshinweise 3
Aufstellen und Anschließen 5
Vor dem ersten Gebrauch 6
Zubehör 6
Programme und Funktionen! 7
Benutzung 8
Reinigung und Aufbewahrung 11
Problembehebung 11
Entsorgung 12
Technische Daten 12
AUF EINEN BLICK
(Bild A)
1 Haupteinheit
2 Lüftungsöffnungen (Rückseite)
3 Bedienfeld (klappbar)
4 Lüftungsöffnungen (Unterseite)
5 Garräume 1 (oben) und 2 (unten)
6 Schublade
7 Griff
8 Einsatzrost für Schublade
9 Grillrost
(Bild B) – Bedienfeld
10 Anzeige der Temperatur( ) bzw.
Zeit( ) für Garraum1 (oben)
11 Anzeige der Temperatur( ) bzw.
Zeit( ) für Garraum2 (unten)
12 Programmtasten:
Pommes frites
Steak
Backen
Hähnchen
Bacon
Hähnchenkeule
Shrimps
Fisch
Pizza
Gemüse
Würstchen
Auftauen
13 Taste – Einstellmodus für Garraum1
aufrufen
14 Taste – Einstellmodus für Garraum2
aufrufen
15 Taste MATCH – alle Einstellungen von
Garraum1 für Garraum2 über nehmen
16 Taste SYNC – Garzeitende beider Gar-
räume synchronisieren
17 Taste – Wert erhöhen
18 Taste –
Wert verringern
19 Taste – Temperatur auswählen
20 Taste – Zeit auswählen
21 Taste – Gerät ein- / ausschalten;
Garvorgang starten / pausieren / stoppen
WICHTIGE HINWEISE!
UNBEDINGT AUFBEWAHREN!
15472_15471_15470_Inlay_DE-EN_A5_V1.1.indb 115472_15471_15470_Inlay_DE-EN_A5_V1.1.indb 1 13.12.2024 12:53:4913.12.2024 12:53:49

DE
2
Sehr geehrte Kundin, sehr geehrter Kunde,
wir freuen uns, dass Sie sich für diese GOURMETmaxx FryUp Vertikale Doppelkammer-
Heißluftfritteuse entschieden haben.
Sollten Sie Fragen zum Gerät sowie zu Ersatz- / Zubehörteilen haben, kontaktieren Sie den
Kundenservice über unsere Website: www.ds-group.de/kundenservice
Informationen zur Gebrauchsanleitung
Lesen Sie vor dem ersten Gebrauch des Gerätes diese Gebrauchsanleitung sorgfältig durch
und bewahren Sie diese für spätere Fragen und weitere Nutzer auf. Sie ist ein Bestandteil
des Gerätes. Hersteller und Importeur übernehmen keine Haftung, wenn die Angaben in
dieser Gebrauchsanleitung nicht beachtet werden.
SYMBOLE
Gefahrenzeichen: Diese Symbole
zeigen mögliche Gefahren an.
Die dazugehörenden Sicher heits-
hinweise aufmerksam lesen und
befolgen.
Ergänzende Informationen
Gebrauchsanleitung vor
Benutzung lesen!
Vorsicht: heiße Oberflächen!
Für Lebensmittel geeignet
Wechselstrom
SIGNALWÖRTER
Signalwörter bezeichnen Gefährdungen
bei Nichtbeachtung der dazugehörigen
Hinweise.
WARNUNG – mittleres Risiko, kann schwere
Verletzung oder Tod zur Folge haben
VORSICHT – niedriges Risiko, kann geringfü-
gige oder mäßige Verletzung zur Folge haben
HINWEIS – kann Risiko von Sachschäden
zur Folge haben.
WEITERE ERLÄUTERUNGEN
Legendennummern werden folgender-
maßen dargestellt: (1)
Bildverweise werden folgendermaßen
dargestellt: (Bild A)
LIEFERUMFANG
1 x Heißluftfritteuse
2 x Schublade
2 x Einsatzrost (klappbar)
2 x Grillrost
1 x Gebrauchsanleitung
Den Lieferumfang auf Vollständigkeit und
die Bestandteile auf Transportschäden
überprüfen. Bei Schäden nicht verwenden,
sondern den Kundenservice kontaktieren.
Eventuelle Folien, Aufkleber oder Transport-
schutz vom Gerät abnehmen. Niemals das
Typenschild und eventuelle Warnhinweise
entfernen!
15472_15471_15470_Inlay_DE-EN_A5_V1.1.indb 215472_15471_15470_Inlay_DE-EN_A5_V1.1.indb 2 13.12.2024 12:53:5013.12.2024 12:53:50
FryUp Vertikale Doppelkammer-Heißluftfritteuse
DE
3
BESTIMMUNGSGEMÄßER GEBRAUCH
■ Das Gerät ist zum Garen von Lebens-
mitteln durch Heißluft bestimmt.
■ Das Gerät arbeitet ausschließlich mit
Heißluft. Kein Öl oder Fett, wie bei
einer herkömmlichen Fritteuse, in
das Gerät geben!
■ Das Gerät eignet sich nicht zur Zube-
reitung von flüssigen Gerichten, wie
Suppen, Saucen oder Eintöpfen!
■ Das Gerät ist ausschließlich für den pri-
vaten Gebrauch geeignet, nicht für eine
gewerbliche oder haushalts ähnliche
Nutzung z. B. in Hotels, Frühstückspen-
sionen, Büros, Mitarbeiterküchen o. Ä.
■ Das Gerät nur für den angegebenen
Zweck und nur wie in der Gebrauchs-
anleitung beschrieben nutzen. Jede
weitere Verwendung gilt als bestim-
mungswidrig.
■ Von der Gewährleistung ausgeschlossen
sind alle Mängel, die durch unsach-
gemäße Behandlung, Beschädigung
oder Reparaturversuche entstehen. Dies
gilt auch für den normalen Verschleiß.
SICHERHEITSHINWEISE
WARNUNG: Alle Sicherheitshinweise, Anweisungen, Bebil-
derungen und technischen Daten, mit denen dieses Gerät
versehen ist, beachten. Versäumnisse bei der Einhaltung der
Sicherheitshinweise und Anweisungen können elektrischen
Schlag, Brand und / oder Verletzungen verursachen.
■ Dieses Gerät kann von Kindern ab 8Jahren sowie von Personen
mit reduzierten physischen, sensorischen oder mentalen Fähig keiten
oder Mangel an Erfahrung und / oder Wissen benutzt werden, wenn
sie beaufsichtigt oder bezüglich des sicheren Gebrauchs des Gerätes
unterwiesen wurden und die daraus resultierenden Gefahren ver-
standen haben.
■ Kinder dürfen nicht mit dem Gerät spielen.
■ Reinigung und Benutzer-Wartung dürfen nicht durch Kinder
durchgeführt werden, es sei denn, sie sind älter als 8Jahre und
werden beaufsichtigt.
■ Kinder jünger als 8Jahre und Tiere sind vom Gerät und der
Anschlussleitung fernzuhalten.
VORSICHT: heiße Oberflächen!
Das Gerät und Zubehör werden während des Gebrauchs sehr
heiß. Während und nach der Benutzung des Gerätes nicht mit
aufgeheizten Teilen in Berührung kommen! Ausschließlich Griffe
und Bedienfeld berühren, während das Gerät in Betrieb ist oder
15472_15471_15470_Inlay_DE-EN_A5_V1.1.indb 315472_15471_15470_Inlay_DE-EN_A5_V1.1.indb 3 13.12.2024 12:53:5013.12.2024 12:53:50
DE
4
unmittelbar nach dem Ausschalten. Warten, bis sich das Gerät
vollständig abgekühlt hat, bevor es transportiert, gereinigt oder
verstaut wird. Küchenhandschuhe im Umgang mit dem heißen
Zubehör benutzen.
■ Keine Flüssigkeiten (z. B. Öl oder Wasser) direkt in das Gerät oder
die Schublade schütten oder ein mit Flüssigkeit gefülltes Gefäß in
das Gerät stellen. Esarbeitet ausschließlich mit Heißluft.
■ Das Gerät ist bei nicht vorhandender Aufsicht, vor dem Trans-
portieren oder Reinigen stets vom Netz zu trennen.
■ Keine Veränderungen am Gerät vornehmen. Auch die
Anschlussleitung nicht selbst austauschen. Wenn das Gerät, die
Netzanschlussleitung oder das Zubehör des Gerätes beschädigt
wird, müssen diese durch den Hersteller, Kundenservice oder eine
Fachwerkstatt repariert bzw. ersetzt werden, um Gefährdungen
zu vermeiden.
■ Das Gerät ist nicht dazu bestimmt, mit einer externen Zeitschaltuhr
oder einem separaten Fernwirksystem betrieben zu werden.
■ Die Hinweise im Kapitel „Reinigung und Aufbewahrung“
beachten!
WARNUNG –
Stromschlaggefahr
■ Das Gerät nur in geschlossenen Räumen
verwenden und lagern.
■ Das Gerät nicht in Räumen mit hoher
Luftfeuchtigkeit benutzen und lagern.
■ Die Haupteinheit und die Anschluss-
leitung niemals in Wasser oder andere
Flüssigkeiten eintauchen und sicherstel-
len, dass diese nicht ins Wasser fallen
oder nass werden können. Es besteht
Stromschlaggefahr!
■ Sollte das Gerät ins Wasser fallen
während es an das Stromnetz ange-
schlossen ist, sofort den Netzstecker
aus der Steckdose ziehen. Erst danach
das Gerät aus dem Wasser herausholen.
Niemals versuchen, es aus dem Wasser
zu ziehen, während es an das Strom-
netz angeschlossen ist! Vor erneuter
Inbetriebnahme durch den Hersteller,
Kundenservice oder autorisierte Fach-
händler prüfen lassen, um eventuelle
Gefährdungen zu vermeiden.
■ Das Gerät und Anschlussleitung niemals
mit feuchten Händen berühren, wenn das
Gerät an das Stromnetz angeschlossen ist.
WARNUNG – Brandgefahr
■ Das Gerät nicht in der Nähe von brenn-
barem Material betreiben. Keine brenn-
baren Materialien (z. B. Pappe, Papier,
Kunststoff) auf oder in das Gerät legen.
■ Das Gerät während des Betriebes nicht
abdecken und die Lüftungsöffnungen
frei halten, um einen Gerätebrand zu
vermeiden.
■ Das Gerät nicht mit Verlängerungskabeln,
die länger als 3m sind, oder mit Kabel-
15472_15471_15470_Inlay_DE-EN_A5_V1.1.indb 415472_15471_15470_Inlay_DE-EN_A5_V1.1.indb 4 13.12.2024 12:53:5013.12.2024 12:53:50

FryUp Vertikale Doppelkammer-Heißluftfritteuse
DE
5
trommeln benutzen. Verlängerungskabel
vollständig abwickeln.
■ Im Brandfall: Nicht mit Wasser löschen!
Flammen z. B. mit einer Lösch decke
ersticken.
WARNUNG –
Verletzungs gefahr
■ Verpackungsmaterial von Kindern
und Tieren fernhalten. Es besteht
Erstickungs gefahr.
■ Sicherstellen, dass die Anschlussleitung
stets außer Reichweite von jungen
Kindern und Tieren ist. Es besteht Stran-
gulationsgefahr.
■ Während des Betriebes und beim Heraus-
ziehen der Schubladen kann heißer
Dampf entweichen. Kopf und Hände da-
her aus der Gefahrenzone fernhalten. Es
besteht Verbrühungsgefahr durch Hitze,
heißen Dampf oder Kondenswasser.
■ Das Gerät darf während des Betriebes
nicht bewegt werden. Es besteht Ver-
brennungsgefahr.
HINWEIS – Risiko von Material- und
Sachschäden
■ Darauf achten, dass der austretende
Dampf nicht direkt mit elektrischen Ge-
räten und Einrichtungen, die elektrische
Bauteile enthalten, in Kontakt kommt.
■ Wenn während des Betriebes ein Feh ler
auftritt, den Netzstecker ziehen. Ansons-
ten das Gerät immer erst ausschalten,
bevor der Netzstecker gezogen wird.
■ Das Gerät vor einem Gewitter oder
beim Stromausfall vom Stromnetz
trennen.
■ Wenn das Gerät vom Stromnetz getrennt
wird, immer am Netzstecker und nie am
Netzkabel ziehen.
■ Das Gerät nicht an der Anschluss leitung
ziehen oder tragen.
■ Das Gerät schützen vor: Feuer und ande-
ren Wärme quellen, lang anhaltender
Feuchtigkeit, lang anhaltender direkter
Sonnen einstrahlung und Stößen.
■ Das Gerät an einem trockenen Platz bei
Temperaturen zwischen 0und 40°C
aufbewahren.
■ Niemals Gegenstände auf das Gerät
oder die Anschlussleitung stellen.
■ Nur Original-Zubehörteile des Herstel lers
verwenden, um die Funktionsweise des
Gerätes nicht zu beeinträch tigen und
eventuelle Schäden zu verhindern.
■ Keine
scharfkantigen Gegenstände
zum
Wenden und Entnehmen der Speisen
benutzen. Sie
könnten die Beschichtung
beschädigen.
AUFSTELLEN UND
ANSCHLIEßEN
Beachten!
■ Das Gerät und die Anschlussleitung
vor jeder Inbetriebnahme auf Beschä-
digungen überprüfen. Das Gerät nur
benutzen, wenn es unbeschädigt und
funktionsfähig ist.
■ Das Gerät niemals auf einen weichen
Untergrund stellen. Die Lüftungsöff-
nungen auf der Unterseite des Gerätes
dürfen nicht abgedeckt sein.
■ Für ausreichend Freiraum zu allen Seiten
sorgen. Das Gerät nicht unter Küchen-
oberschränke o. Ä. stellen. Durch den
aufsteigenden Dampf könnten diese
Schaden nehmen!
■ Das Gerät nur an eine Steckdose, die
mit den technischen Daten des Gerätes
übereinstimmt, anschließen. Die Steck-
dose muss auch nach dem Anschließen
gut zugänglich sein, damit die Netzver-
bindung schnell getrennt werden kann.
■ Das Gerät nicht zusammen mit anderen
Verbrauchern (mit hoher Wattleistung)
an eine Mehrfachsteckdose anschließen,
um eine Überlastung und ggf. einen
Kurzschluss (Brand) zu vermeiden.
15472_15471_15470_Inlay_DE-EN_A5_V1.1.indb 515472_15471_15470_Inlay_DE-EN_A5_V1.1.indb 5 13.12.2024 12:53:5013.12.2024 12:53:50
DE
6
■ Darauf achten, dass die Anschlussleitung
keine Stolpergefahr darstellt. Sie darf
nicht von der Aufstellfläche herab hängen,
um ein Herunterreißen des Gerätes zu
verhindern.
■ Darauf achten, dass die Anschlussleitung
nicht gequetscht, geknickt oder über
scharfe Kanten gelegt wird und nicht mit
heißen Flächen in Berührung kommt.
1. Das Gerät auf die Küchenzeile oder eine
andere trockene, saubere, ebene und
hitzebeständige Arbeitsfläche stellen.
Für ausreichend Freiraum zu allen Seiten
sorgen (mind. 20 cm zu den Seiten und
50 cm nach oben).
2. Die Anschlussleitung vollständig ausei-
nanderwickeln und den Netzstecker in
eine Steckdose stecken.
Die Symbole des Bedienfeldes(3) leuch-
ten kurz auf und es ertönt ein Signal. Die
Taste (21) leuchtet dauerhaft, das
Gerät befindet sich im Standby-Modus.
VOR DEM ERSTEN
GEBRAUCH
Beachten!
■ Die erste Inbetriebnahme des Gerätes
sollte ohne Nahrungsmittel erfolgen, da
es aufgrund eventueller Beschichtungs-
rückstände zu einer Geruchs- oder
Rauchentwicklung kommen könnte.
1. Das Gerät ca. 10Minuten lang ohne
Inhalt auf höchster Temperaturstufe
aufheizen lassen. Dafür die Anweisungen
inden Kapiteln „Aufstellen und Anschlie-
ßen“ sowie „Benutzung“ befolgen.
2. Alle Zubehörteile mit Spülmittel und
warmem Wasser reinigen.
ZUBEHÖR
Schubladen
In den Schubladen(6) werden die Speisen
zubereitet. Sie müssen in die Garräume(5)
eingesetzt sein, wenn das Gerät in Betrieb
genommen wird.
Einsatzroste
Die beiden Einsatzroste(8) sollten bei der
Benutzung des Gerätes in die Schubla-
den(6) eingesetzt sein, damit die Umluft-
funktion nicht beeinträchtigt wird.
Optional können die Füße der Einsatzroste
ausgeklappt werden. Dadurch werden z. B.
Pommes frites noch knuspriger.
L
Für ein optimales Garergebnis soll-
ten keine Speisen unterhalb der
Einsatzroste platziert werden.
Grillroste
Die Grillroste(9) können zusätzlich über den
Einsatzrosten(8) platziert werden. Damit
lassen sich gleichzeitig zwei Speisen in einer
Schublade zubereiten.
L
Für die gleichzeitige Verwendung von
Grillrost und Einsatzrost in derselben
Schublade müssen die Füße des
Einsatzrostes eingeklappt sein.
15472_15471_15470_Inlay_DE-EN_A5_V1.1.indb 615472_15471_15470_Inlay_DE-EN_A5_V1.1.indb 6 13.12.2024 12:53:5113.12.2024 12:53:51
FryUp Vertikale Doppelkammer-Heißluftfritteuse
DE
7
PROGRAMME UND
FUNKTIONEN!
L
Die Schubladen müssen vollständig
eingesetzt sein, damit der jeweilige
Garraum bedient werden kann.
Standby-Modus
Durch Berühren der Taste (21) wird das
Gerät eingeschaltet. Anschließend kann der
gewünschte Garraum ausgewählt werden.
• Um das Gerät auszuschalten, die Taste
berühren und halten, bis das Bedien-
feld erlischt (Ausnahme: Taste ).
• Um nur einen der Garräume auszuschal-
ten, die entsprechende Taste (13)
bzw. (14) berühren.
Danach die Taste berühren und hal-
ten, bis auf der Anzeige(10 bzw. 11) des
gewählten Garraums – – – – erscheint.
Garräume
Das Gerät verfügt über zwei Garräume. Für
jeden Garraum kann ein anderes Programm
gewählt und die Temperatur sowie Zeit kön-
nen nach Wunsch angepasst werden.
Außerdem können die Garräume synchro-
nisiert werden. Dazu sind zwei Funktionen
vorhanden:
• Funktion MATCH – alle Temperatur- und
Garzeiteinstellungen sind für beide
Garräume identisch
• Funktion SYNC – das Garzeitende wird
aufeinander abgestimmt, damit die
Speisen gleichzeitig serviert werden
können.
Alternativ können die Garräume ohne
Synchronisierung unabhängig voneinander
betrieben werden. Auch die Benutzung von
nur einem Garraum ist möglich.
Um einen Garraum auszuwählen, die
entsprechende Taste (13) bzw. (14)
berühren.
Um einen ausgewählten Garraum zu deak-
tivieren, die entsprechende Taste bzw.
erneut berühren und halten, bis auf der
Anzeige(10 bzw. 11) – – – – erscheint .
Programme
Das Gerät verfügt über 12 voreingestellte
Programme(12) zur Zubereitung von
Speisen. Um ein Programm zu wählen, die
Programmtaste auf dem Bedienfeld(3) be-
rühren. Blinkt ein Symbol, ist das Programm
aus gewählt.
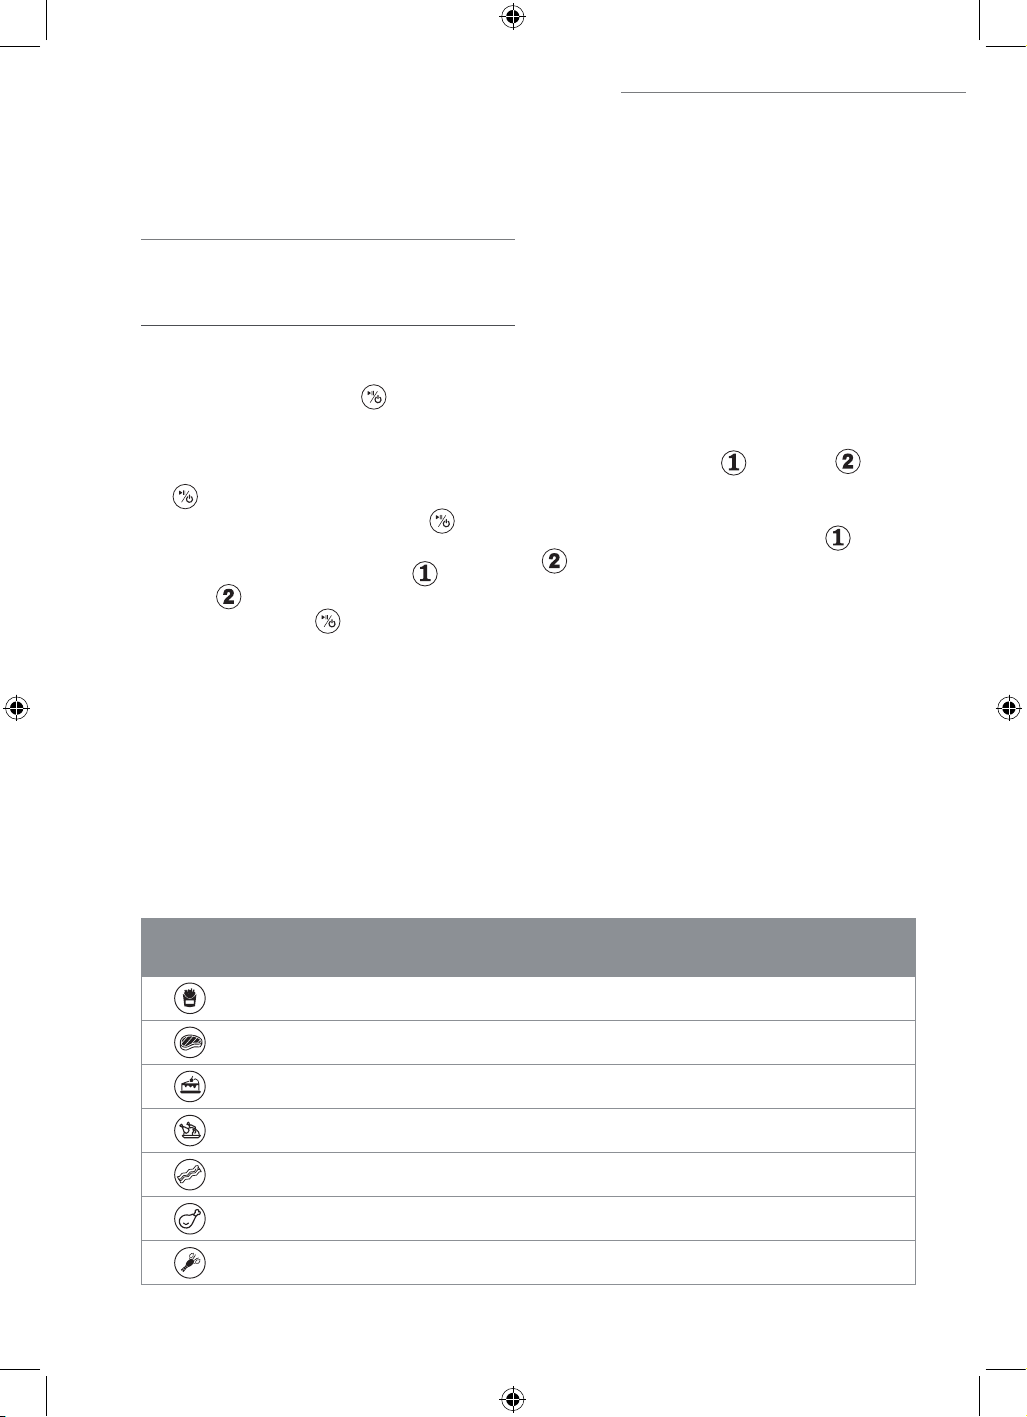
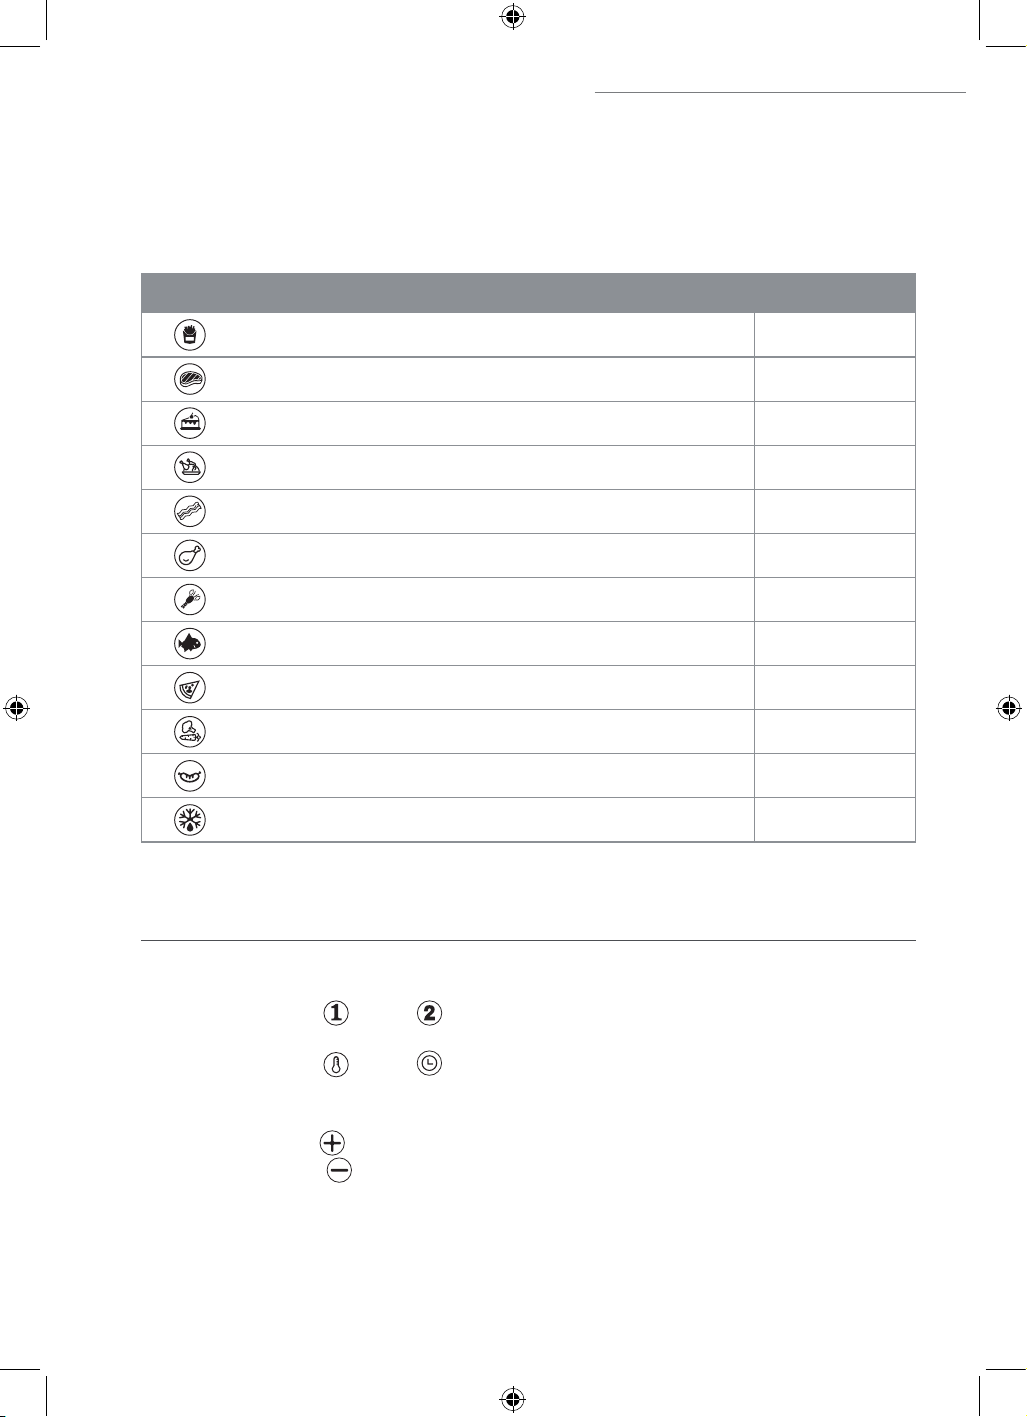
Die Symbole stehen für die folgenden
Programme:
Symbol Programm Temperatur (°C) Zeit (Min.)
Erinnerung
(Durchmengen)
Pommes frites (gefroren) 200 22 ja
Steak 200 17 ja
Backen 170 15 –
Hähnchen 200 45 ja
Bacon 170 20 ja
Hähnchenkeule 200 25 ja
Shrimps 200 14 ja
15472_15471_15470_Inlay_DE-EN_A5_V1.1.indb 715472_15471_15470_Inlay_DE-EN_A5_V1.1.indb 7 13.12.2024 12:53:5913.12.2024 12:53:59
DE
8
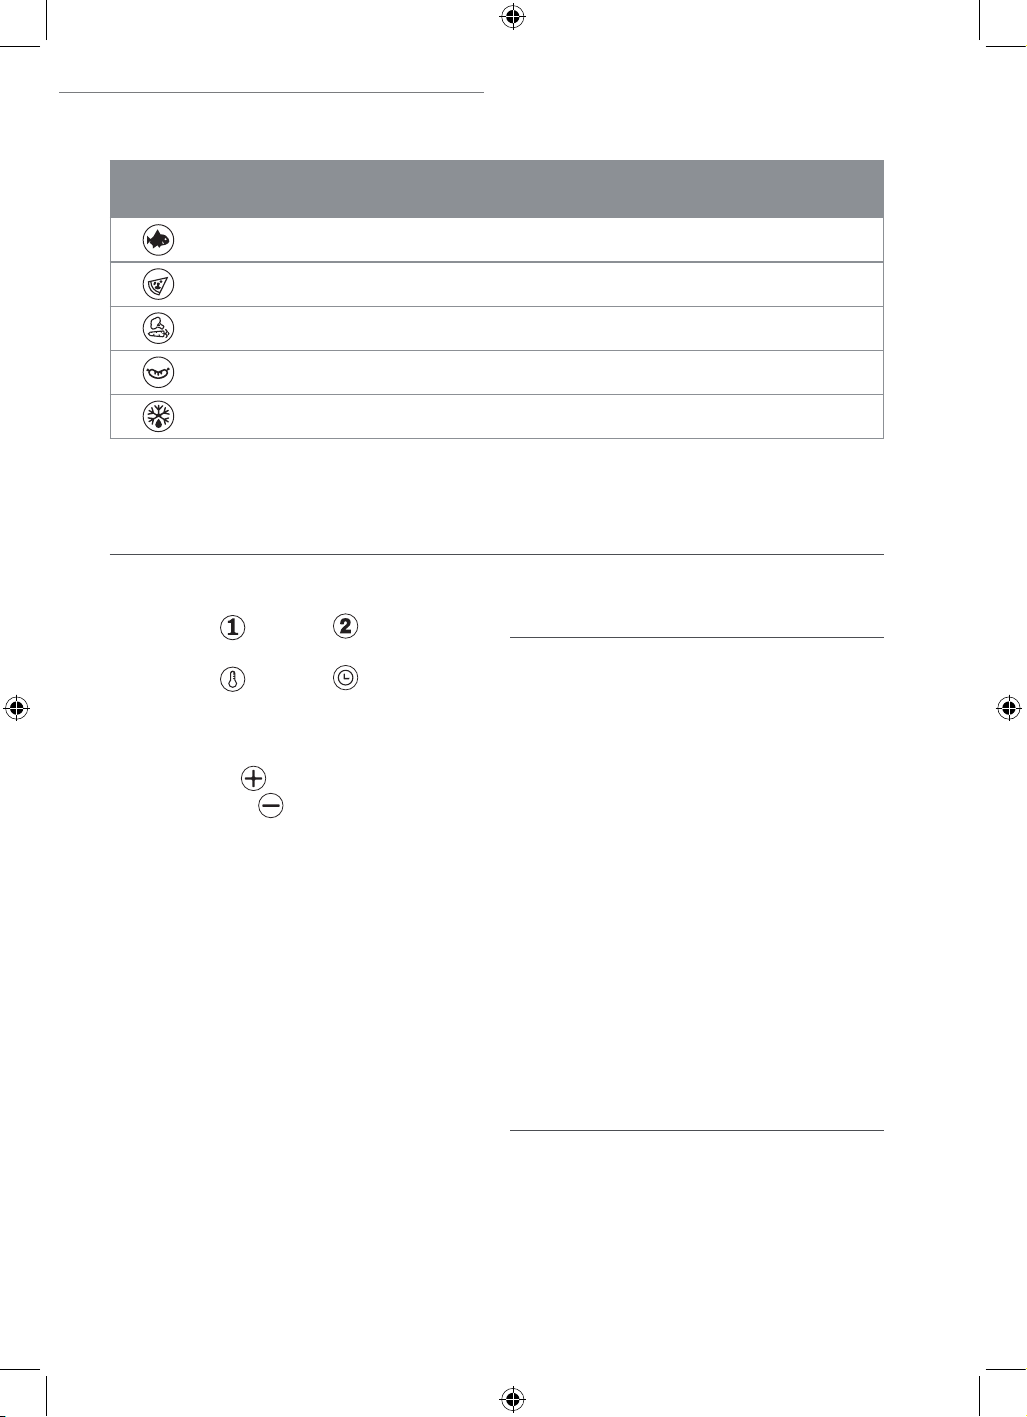
Symbol Programm Temperatur (°C) Zeit (Min.)
Erinnerung
(Durchmengen)
Fisch 200 18 ja
Pizza 180 17 –
Gemüse 160 8 ja
Würstchen 180 23 ja
Auftauen 80 5 –
L
Die bei den Programmen hinterlegten Zeiten und Temperaturen sollten bei Bedarf
angepasst werden, um sicherzustellen, dass die Lebensmittel (insbesondere Geflügel)
durchgegart sind. Anpassungen können auch während des Garvorganges vor-
genommen werden.
Temperatur und Zeit anpassen
1. Die Taste (13) bzw. (14) berühren,
um einen Garraum auszuwählen.
2. Die Taste (19) bzw. (20) berüh ren,
um die Temperatur bzw. Zeit auszu-
wählen.
3. Den angezeigten Wert anpassen:
○ Erhöhen: (17) berühren
○ Verringern: (18) berühren
○ Für einen Schnelldurchlauf der Werte
das jeweilige Symbol berühren und
halten.
Erinnerung an das Durchmengen
Diese Funktion erinnert an das Durch mengen
der Lebensmittel nach der Hälfte der Garzeit.
Die Funktion ist bei bestimmten Programmen
(siehe Tabelle) automatisch aktiv.
Sobald die Hälfte der Garzeit verstrichen ist,
erklingt ein Signal und turn
erscheint auf der
Anzeige(10 bzw. 11)
. Der Garvorgang wird
nicht automatisch pausiert.
BENUTZUNG
Beachten!
■ Nahrungsmittel nicht in Frischhalte folie
oder in Plastikbeuteln verpackt in das
Gerät legen.
■ Für die gleichzeitige Verwendung von
Grillrost und Einsatzrost in derselben
Schublade müssen die Füße des Einsatz-
rostes eingeklappt sein.
■ Darauf achten, dass die Speisen nicht
die Heizelemente berühren.
■ Die Schubladen nicht überfüllen, damit
die heiße Luft optimal in den Garräu-
men zirkulieren kann.
■ Darauf achten, dass öl- und fettreiche
Speisen nicht überhitzt werden. Sie
könnten sich entzünden.
■ Die heißen Schubladen nach der Benut-
zung immer auf einer hitzebeständigen
Unterlage abstellen.
• Die Garzeit ist abhängig von Größe so-
wie Menge der Lebensmittel und von der
Temperatur. Mit einer kürzeren Garzeit
anfangen und bei Bedarf nach und nach
verlängern.
15472_15471_15470_Inlay_DE-EN_A5_V1.1.indb 815472_15471_15470_Inlay_DE-EN_A5_V1.1.indb 8 13.12.2024 12:54:0413.12.2024 12:54:04
FryUp Vertikale Doppelkammer-Heißluftfritteuse
DE
9
• Bei der Zubereitung von industriell her-
gestellten Tiefkühlprodukten sollte man
sich nach den Zeit- und Temperatur-
vorgaben des Herstellers richten. Vor
Ablauf der angegebenen Garzeit prüfen,
ob die Speisen durchgegart sind.
• Bei einigen Lebensmitteln (z. B. Pommes
frites o. Ä.) empfiehlt es sich, die Lebens-
mittel von Zeit zu Zeit durchzumengen,
um ein gleichmäßiges Garergebnis zu
erhalten.
Beginn
Je Garraum (5):
• Sicherstellen, dass ein Einsatzrost(8) in
die Schublade(6) eingesetzt ist.
• Lebensmittel in die Schublade geben.
• Bei Bedarf: Zusätzlich einen Grillrost(9)
einsetzen und eine das gewünschte
Lebensmittel darauf legen.
• Die Schublade in den Garraum1 bzw. 2
ein setzen.
Die Garräume können auf verschiedene Arten
verwendet werden. Je nach gewünschter
Verwendung die Anweisungen in den nach-
folgenden Abschnitten befolgen.
1. Nur einen Garraum verwenden
Wenn nur einer der beiden Garräume ver-
wendet werden soll:
1. Die Taste (21) berühren, um das
Gerät einzuschalten.
2. Den gewünschten Garraum auswählen:
• Garraum1 – Taste
(13)
berühren.
• Garraum2 – Taste
(14)
berühren.
Die Taste
bzw.
blinkt und der
Einstellmodus für den ausgewählten
Garraum wird aufgerufen.
3. Die Garzeit und Temperatur entweder
manuell anpassen oder eines der 12Pro-
gramme(12) wählen (siehe Kapitel
„ Programme und Funktionen“).
4. Mit der Taste den Garvorgang
starten.
2.1 Beide Garräume verwenden –
Programm kopieren
Wenn für beide Garräume die gleichen Ein-
stellungen vorgenommen werden sollen:
1. Die gewünschte Temperatur und Garzeit
für einen der Garräume einstellen (siehe
Abschnitt „1. Nur einen Garraum ver-
wenden“ – Schritte 1 – 3).
2. Die Taste MATCH(15) berühren. Die
Taste blinkt. Die Einstellungen werden
für den anderen Garraum kopiert.
3. Mit der Taste (21) den Garvorgang
starten.
2.2 Beide Garräume verwenden–
Unterschiedliche Programm-
dauer
1. Die Taste (21) berühren, um das
Gerät einzuschalten.
2. Die Taste (13) berühren, um Gar-
raum1 auszuwählen. Die Taste
blinkt und der Einstellmodus für Gar-
raum1 wird aufgerufen.
3. Die Garzeit und Temperatur für Garraum1
entweder manuell anpassen oder eines
der 12Programme(12) wählen (siehe
Kapitel „ Programme und Funktionen“).
4. Taste
(14)
berühren, um Garraum2
auszuwählen. Die Taste
blinkt und
der Einstellmodus für Garraum2 wird
aufgerufen.
5. Die Garzeit und Temperatur für Garraum2
entweder manuell anpassen oder eines
der 12Programme wählen (siehe Kapitel
„ Programme und Funktionen“).
6. Mit der Taste den Garvorgang starten.
15472_15471_15470_Inlay_DE-EN_A5_V1.1.indb 915472_15471_15470_Inlay_DE-EN_A5_V1.1.indb 9 13.12.2024 12:54:1013.12.2024 12:54:10
DE
10
2.3 Beide Garräume verwenden–
Gleichzeitiges Garzeitende
Wenn für beide Garräume unterschiedliche
Einstellungen vorgenommen wurden, aber
die Garzeit gleichzeitig zu Ende gehen soll:
1. Die gewünschten Temperaturen und
Garzeiten für beide Garräume einstel-
len (siehe Abschnitt „2.2 Beide Gar-
räume verwenden– Unterschiedliche
Programm dauer“ – Schritte 1 – 5).
2. Die Taste SYNC(16) berühren. Die Taste
blinkt.
3. Mit der Taste (21) den Garvorgang
starten.
L
Das Programm mit der kürzeren
Laufzeit zeigt HOLD an, bis beide
Garräume zeitgleich enden.
Erinnerung an das Durchmengen
Nach der Hälfte der Garzeit ertönt ein
Signal und auf der Anzeige(10 bzw. 11) er-
scheint turn. Der Garvorgang wird nicht
auto matisch pausiert.
Die Schublade(6) herausziehen, die Lebens-
mittel durchmengen und die Schublade
wieder einsetzen.
Garzeitende
Auf der Anzeige(10 bzw. 11) kann die
verbleibende Garzeit abgelesen werden.
Nach Ablauf der Garzeit ertönen Signaltöne
und es wird OFF angezeigt. Der Lüfter läuft
noch einige Sekunden nach.
1. Die Schublade(6) herausziehen und
auf einer hitze beständigen Unterlage
abstellen. Nicht auf das Gerät stellen!
2. Die Lebensmittel aus der Schublade
nehmen.
3. Das Gerät vom Stromnetz trennen.
4. Nach dem Abkühlen das Gerät und die
Zubehörteile reinigen (siehe Kapitel
„Reinigung und Aufbewahrung“).
Garvorgang kurz unterbrechen
• Beide Garräume: Die Taste (21)
berühren. Der Countdown der Garzeit
wird angehalten. Der Lüfter läuft noch
einige Sekunden nach. Um den Garvor-
gang fortzusetzen, die Taste erneut
berühren.
• Ein Garraum: Die entsprechende Taste
(13)
bzw.
(14)
berühren. Danach
die Taste (21) berühren. Der Count-
down der Garzeit wird im ausgewählten
Garraum angehalten. Um den Garvor-
gang fortzusetzen, die Taste erneut
berühren.
Optional kann auch die jeweilige Schub-
lade(6) herausgezogen werden. Nach
dem Einsetzen der Schublade wird der
Countdown der Garzeit fortgesetzt.
L
Wenn die Funktion SYNC ausge-
wählt wurde und der Garvorgang
für nur einen Garraum unterbrochen
wurde, muss die Funktion nach
dem Fortsetzen des Garvorgangs
ggf. erneut aktiviert werden.
Dazu die Taste berühren, um
den Einstellmodus aufzurufen. An-
schließend die Taste SYNC(16) be-
rühren, um die Funktion wieder zu
aktivieren. Die Taste SYNC blinkt.
Mit der Taste den Garvorgang
fortsetzen.
Garvorgang manuell stoppen
• Beide Garräume: Die Taste (21)
berühren und halten, bis auf den Anzei-
gen(10 und 11) OFF erscheint.
• Ein Garraum: Die entsprechende Taste
(13)
bzw.
(14)
berühren. Dann
die Taste berühren und halten, bis
auf der Anzeige(10 bzw. 11) des ge-
wählten Garraums OFF erscheint.
15472_15471_15470_Inlay_DE-EN_A5_V1.1.indb 1015472_15471_15470_Inlay_DE-EN_A5_V1.1.indb 10 13.12.2024 12:54:1613.12.2024 12:54:16

FryUp Vertikale Doppelkammer-Heißluftfritteuse
DE
11
REINIGUNG UND
AUFBEWAHRUNG
Beachten!
■ Zum Reinigen keine scharfen oder scheu-
ernden Reinigungsmittel oder Reinigungs-
pads verwenden. Diese können die
Oberflächen beschädigen.
1. Sicherstellen, dass das Gerät vom Strom-
netz getrennt und abgekühlt ist.
2. Die Grillroste (9), die Einsatzroste(8)
und die Schubladen(6) mit Spülmittel
und warmem Wasser reinigen.
Bei hartnäckigen Verschmutzungen
zuvor in warmem Wasser und Spülmittel
einweichen.
3. Das Gehäuse des Gerätes sowie die
Garräume(5) und die Heizelemente bei
Bedarf mit einem sauberen, feuchten
Tuch abwischen. Nicht in der Ge-
schirrspülmaschine reinigen oder in
Wasser tauchen!
4. Alle Teile vollständig trocknen lassen
oder abtrocknen.
5. Das Gerät an einem sauberen, trockenen,
für Kinder und Tiere unzugäng lichen Ort
aufbewahren.
PROBLEMBEHEBUNG
Sollte das Gerät nicht ordnungsgemäß funk-
tionieren, überprüfen, ob ein Problem selbst
behoben werden kann. Lässt sich mit den
nachfolgenden Schritten das Problem nicht
lösen, den Kunden service kontaktieren.
Nicht versuchen, ein elektrisches
Gerät selbst zu reparieren!
Das Gerät funktioniert nicht.
Der Netzstecker steckt nicht richtig in der
Steckdose.
► Den Sitz des Netzsteckers korrigieren.
Die Schubladen sind nicht richtig eingesetzt.
► Die Schubladen vollständig in das Gerät
schieben.
Die Sicherung im Sicherungskasten
wird ausgelöst.
Zu viele Geräte sind am selben Stromkreis
angeschlossen.
► Die Anzahl der Geräte im Stromkreis
reduzieren.
Die Lebensmittel sind nicht gleich-
mäßig gegart.
Die Schubladen sind zu voll.
► Die Lebensmittelmenge verringern.
Die Lebensmittel liegen aufeinander.
► Lebensmittel verteilen und von Zeit zu
Zeit durchmengen.
Es wurden verschiedene Lebensmittel mit
unterschiedlichen Garzeiten oder Tempera-
turen in einem Garraum zubereitet.
► Die Lebensmittelsorten trennen und
auf beide Garräume aufteilen. Für diese
die richtige Temperatur und Garzeit
einstellen. Mit der FunktionSYNC
werden sie zur gleichen Zeit gar.
Die eingestellte Garzeit war zu kurz oder
dieTemperatur zu niedrig.
► Die Garzeit bzw. Temperatur erhöhen.
Während des Gebrauchs lässt sich ein
unangenehmer Geruch feststellen. /
Es kommt Qualm aus dem Gerät.
Das Gerät / Zubehör ist verschmutzt.
► Die Anweisungen im Kapitel „Reinigung
und Aufbewahrung“ befolgen.
Das Gerät wird zum ersten Mal verwendet.
Eine Geruchsentwicklung tritt bei der ersten
Benutzung neuer Geräte häufig auf.
► Die Anweisungen im Kapitel „Vor dem
ersten Gebrauch“ befolgen.
15472_15471_15470_Inlay_DE-EN_A5_V1.1.indb 1115472_15471_15470_Inlay_DE-EN_A5_V1.1.indb 11 13.12.2024 12:54:1613.12.2024 12:54:16
DE
12
ENTSORGUNG
Das Verpackungsmaterial umweltgerecht entsorgen und der Wertstoffsammlung
zuführen.
Das nebenstehende Symbol (durchgestrichene Mülltonne mit Unterstrich) bedeutet,
dass Altgeräte nicht in den Hausmüll, sondern in spezielle Sammel- und Rückgabe-
systeme gehören.
Besitzer von Altgeräten aus privaten Haushalten können diese bei den Sammel-
stellen der öffentlich-rechtlichen Entsorgungsträger oder bei den von Herstellern
und Vertreibern im Sinne des ElektroG eingerichteten Rücknahmestellen
unentgeltlich abgeben. Rücknahmepflichtig sind auch Geschäfte, die Elektro- und
Elektronikgeräte auf dem Markt bereitstellen.
Die Abfallvermeidung leistet einen noch wertvolleren Beitrag zum Umweltschutz. So-
fern möglich, ist daher neben einer weiteren eigenen Nutzung oder Reparatur auch
die Abgabe an Zweitnutzer eine ökologisch wertvolle Alternative zur Entsorgung.
TECHNISCHE DATEN
Artikelnummer: 15470 (weiß)
15471 (grau)
15472 (schwarz)
Modellnummer: ZHAF-960A
Stromversorgung: 220 – 240 V ~ 50 – 60 Hz
Leistung:
2800 W
Schutzklasse: I
Fassungsvermögen: ca. 10 L (ca. 5 L je Schublade)
Temperaturbereich: 60 – 200°C
Timer: 1 – 60 min
ID Gebrauchsanleitung: Z 15472_15471_15470 M DS V1.1 1224 as
Alle Rechte vorbehalten.
15472_15471_15470_Inlay_DE-EN_A5_V1.1.indb 1215472_15471_15470_Inlay_DE-EN_A5_V1.1.indb 12 13.12.2024 12:54:1713.12.2024 12:54:17
Vertical double chamber hot air frying machine
EN
1
LIST OF CONTENTS
At A Glance 13
Symbols 14
Signal Words 14
Further Explanations 14
Items Supplied 14
Intended Use 15
Safety Notices 15
Set-Up and Connection 17
Before Initial Use 18
Accessories 18
Programmes and Functions 18
Use 20
Cleaning and Storage 22
Troubleshooting 22
Disposal 23
Technical Data 23
AT A GLANCE
(Picture A)
1 Main unit
2 Ventilation openings (back)
3 Control panel (foldable)
4 Ventilation openings (bottom)
5 Cooking chambers 1 (top) and 2 (bot-
tom)
6 Drawer
7 Handle
8 Insert rack for drawer
9 Grill rack
(Picture B) – Control Panel
10 Display for temperature
( )
and
time
( ) for cooking chamber1 (top)
11 Display for temperature
( )
and
time
( ) for cooking chamber2 (bot-
tom)
12 Program buttons:
French fries (frozen)
Steak
Bake
Chicken
Bacon
Drumsticks
Shrimps
Fish
Pizza
Vegetables
Sausages
Defrost
13 Button – Call up setting mode for
cooking chamber1
14 Button – Call up setting mode for
cooking chamber2
15 Button MATCH – Apply all settings for
cooking chamber1 to cooking cham-
ber2
16 Button SYNC – Synchronise the end
of the cooking time for both cooking
chambers
17 Button – Increase value
18 Button – Decrease value
19 Button – Select temperature
20 Button – Select time
21 Button – Switch device on / off;
start / pause / stop cooking process
IMPORTANT NOTICES!
PLEASE KEEP FOR REFERENCE!
15472_15471_15470_Inlay_DE-EN_A5_V1.1.indb 1315472_15471_15470_Inlay_DE-EN_A5_V1.1.indb 13 13.12.2024 12:54:2913.12.2024 12:54:29
EN
2
SYMBOLS
Danger symbols: These symbols
indicate possible dangers. Read the
associated safety notices carefully
and follow them.
Supplementary information
Read the operating instructions
before use!
Caution: hot surfaces!
Suitable for use with food
Alternating current
SIGNAL WORDS
Signal words indicate hazards if the
associated notices are not followed.
WARNING – medium risk, may result
in serious injury or death
CAUTION – low risk, may result in minor
or moderate injury
NOTICE – may result in risk of damage
to material.
FURTHER EXPLANATIONS
Key numbers are shown as follows: (1)
Picture references are shown as follows:
(Picture A)
ITEMS SUPPLIED
1 x hot air frying machine
2 x drawer
2 x insert rack (foldable)
2 x grill rack
1 x operating instructions
Check the items supplied for completeness
and the components for transport damage. If
you find any damage, do not use the device
but contact our customer service department.
Remove any possible films, stickers or trans-
port protection from the device. Never
remove the rating plate and any possible
warnings!
Dear Customer,
We are delighted that you have chosen this GOURMETmaxx vertical double chamber
hot air frying machine. If you have any questions about the device and about spare
parts/ accessories, please contact the customer service department via our website:
www.ds-group.de/kundenservice
Information About the Operating Instructions
Before using the device for the first time, please read through these operating instructions
carefully and keep them for future reference and other users. They form an integral part of
the device. The manufacturer and importer do not accept any liability if the information in
these operating instructions is not complied with.
15472_15471_15470_Inlay_DE-EN_A5_V1.1.indb 1415472_15471_15470_Inlay_DE-EN_A5_V1.1.indb 14 13.12.2024 12:54:3013.12.2024 12:54:30
Vertical double chamber hot air frying machine
EN
3
INTENDED USE
■ The device is intended to be used to cook
food using hot air.
■ The device operates exclusively with
hot air. Do not pour any oil or fat
into the device, as you would do
with a conventional fryer!
■ The device is not suitable for preparing
liquid dishes such as soups, sauces or
stews!
■ The device is for personal use only and is
not intended for commercial or domestic-
like applications, e.g. in hotels, bed and
breakfasts, oces, staff kitchens or
similar places.
■ Use the device only for the specified pur-
pose and as described in the operating
instructions. Any other use is deemed to
be improper.
■ The warranty does not cover faults
caused by incorrect handling, damage
or attempted repairs. The same applies
to normal wear and tear.
SAFETY NOTICES
WARNING: Note all safety notices, instructions, illustra-
tions and technical data provided with this device. Failure
to follow the safety notices and instructions may result in electric
shock, fire and / or injuries.
■ This device may be used by children aged 8 and over and by
people with reduced physical, sensory or mental abilities or a lack
of experience and/or knowledge if they are supervised or have
received instruction on how to use the device safely and have
understood the dangers resulting from this.
■ Children must not play with the device.
■ Cleaning and user maintenance must not be carried out
by children, unless they are older than 8 years of age and are
supervised.
■ Children younger than 8 years of age and animals must be kept
away from the device and the connecting cable.
CAUTION: hot surfaces!
The device and accessories will become very hot during use.
Do not come into contact with heated parts while or after
using the device! Only ever touch the handles and control panel
while the device is in operation or immediately after it has been
switched off. Wait until the device has cooled down fully before
it is transported, cleaned or stored away. Use oven gloves when
handling the hot accessories.
15472_15471_15470_Inlay_DE-EN_A5_V1.1.indb 1515472_15471_15470_Inlay_DE-EN_A5_V1.1.indb 15 13.12.2024 12:54:3013.12.2024 12:54:30
EN
4
■ Do not pour any liquids (e.g. oil or water) directly into the device
or the drawer or place a liquid-filled vessel into the device. It works
exclusively with hot air.
■ The device must always be disconnected from the mains power
when it is left unattended and before transporting or cleaning the
device.
■ Do not make any modifications to the device. Also do not replace
the connecting cable yourself. If the device, the power connecting
cable or the accessories of the device are damaged, they must be
repaired or replaced by the manufacturer, customer service depart-
ment or aspecialist workshop in order to avoid any hazards.
■ The device is not designed to be operated with an external timer
ora separate remote control system.
■ Follow the instructions in the “Cleaning and Storage” chapter!
WARNING – Danger
of Electric Shock
■ Use and store the device only in closed
rooms.
■ Do not use and store the device in
rooms with high humidity.
■ Never immerse the main unit and the
connecting cable in water orother liq-
uids, and ensure that these components
cannot fall into water or become wet.
There is a danger of electric shock!
■ If the device falls into water while it
is connected to the mains power, pull
the mains plug out of the plug socket
immediately. Only after this should you
pull the device out of the water. Never
attempt to pull it out of the water while
it is connected to the mains power!
Before using it again, have it checked
by the manufacturer, customer service
department or an authorised distributor
in order to avoid possible hazards.
■ Never touch the device and the con-
necting cable with wet hands when the
device is connected to the mains power.
WARNING – Danger of Fire
■ Do not operate the device in the vicinity
of combustible material. Do not place any
combustible materials (e.g. cardboard,
paper, plastic) on or in the device.
■ Do not cover the device during operation
and keep the ventilation openings clear
in order to prevent it from catching fire.
■ Do not use the device with extension
cables which are longer than 3 m or
with cable extension reels. Fully unwind
extension cables.
■ In the event of a fire: Do not extinguish
with water! Smother the flames with
e. g. afireproof blanket.
WARNING – Danger of Injury
■ Keep the packaging material away from
children and animals. There is adanger
of suffocation.
■ Make sure that the connecting cable is
always kept out of the reach of young
children and animals. There is adanger
of strangulation.
15472_15471_15470_Inlay_DE-EN_A5_V1.1.indb 1615472_15471_15470_Inlay_DE-EN_A5_V1.1.indb 16 13.12.2024 12:54:3113.12.2024 12:54:31

Vertical double chamber hot air frying machine
EN
5
■ Hot steam can escape from the device
during operation and when the drawers
are pulled out. You should therefore keep
your head and hands out of the danger
zone. There is a danger of scalding from
heat, hot steam or condensation.
■ The device must not be moved during
operation. There is a danger of burns.
NOTICE – Risk of Damage to
Material and Property
■ Make sure that the steam which emerges
does not come into direct contact with
electrical devices and equipment contain-
ing electrical components.
■ If a fault occurs during operation, pull
out the mains plug. Otherwise always
switch off the device first before the
mains plug is pulled out of the plug
socket.
■ Disconnect the device from the mains
power before a thunderstorm or when
there is a power cut.
■ Always pull the mains plug and never
the mains cable when disconnecting the
device from the mains power.
■ Do not pull or carry the device by the
connecting cable.
■ Protect the device from: fire and other
heat sources, persistent moisture, per-
sistent direct sunlight and impacts.
■ Keep the device in a dry place at tem-
peratures of between 0 and 40°C.
■ Never place objects on the device or the
connecting cable.
■ Use only original accessories from the
manufacturer in order to guarantee that
there is no interference that may prevent
the device from working and to avoid
possible damage.
■ Do not use any sharp-edged objects to
turn or remove the food. They could
damage the coating.
SET-UP AND CONNECTION
Please Note!
■ Check the device and the connecting
cable for damage each time before put-
ting it into operation. The device should
only be used when it is undamaged and
in working order.
■ Never place the device on a soft surface.
The ventilation openings on the bottom
of the device must not be covered.
■ Ensure there is sucient clear space on
all sides. Do not place the device below
kitchen wall units or similar cupboards.
The rising steam could cause damage
to them!
■ Only connect the device to a plug socket
that matches the technical data of the
device. The plug socket must also be
readily accessible after connection so
that the connection to the mains can
quickly be isolated.
■ Do not connect the device along with
other consumers (with a high wattage) to
a multiple socket in order to prevent over-
loading and a possible short circuit (fire).
■ Make sure that the connecting cable does
not present a trip hazard. It should not
hang down from the surface on which
the device is placed in order to prevent
the device from being pulled down.
■ Make sure that the connecting cable is
not squashed, bent or laid over sharp
edges and does not come into contact
with hot surfaces.
1. Place the device on the kitchen unit or
another dry, clean, flat and heat-resistant
work surface. Ensure there is sucient
clear space on all sides (at least 20 cm to
the sides and 50 cm above).
2. Fully unwind the connecting cable and
plug the mains plug into a plug socket.
The symbols on the control panel(3)
light up briefly and a beep is heard. The
button (21) lights up constantly and
the device is in standby mode.
15472_15471_15470_Inlay_DE-EN_A5_V1.1.indb 1715472_15471_15470_Inlay_DE-EN_A5_V1.1.indb 17 13.12.2024 12:54:3113.12.2024 12:54:31
EN
6
BEFORE INITIAL USE
Please Note!
■ The device should be used for the first
time without any food in it as it may
produce some smoke or odours due to
coating residues.
1. Allow the device to heat up on the
highest temperature setting for approx.
10 minutes without any food in it. To do
this, follow the instructions in the “Set-
Up and Connection” and “Use” chapters.
2. Clean all accessories with detergent and
warm water.
ACCESSORIES
Drawer
The food is prepared in the drawers(6). They
must be inserted in the cooking chambers(5)
when the device is put into operation.
Insert Racks
The two insert racks(8) should be inserted
in the drawers(6) when the device is in use
so that the air circulation function is not
impaired.
Optionally, the feet of the insert racks can
be folded out. This makes French fries, for
example, even crispier.
L
For optimal cooking results, no
food should be placed under the
insert racks.
Grill racks
The grill racks(9) can additionally be placed
over the insert racks (8), if required. This
allows two dishes to be prepared in one
drawer at the same time.
L
To use a grill rack and an insert rack
in the same drawer at the same
time, the feet of the insert rack
must be folded in.
PROGRAMMES AND
FUNCTIONS
L
The drawers must be fully inserted
to allow the respective cooking
chamber device to be used.
Standby Mode
The device is switched on by touching the
button (21). You can then select the
cooking chamber you want.
• To switch off the device, touch the
button and hold it until the control
panel goes out (exception: button ).
• To switch off just one of the cooking
chambers, touch the corresponding
button (13) or (14).
Then touch and hold the button until
– – – – appears on the display(10 or 11)
forthe chosen cooking chamber.
Cooking Chambers
The device has two cooking chambers. A
different programme can be selected for
each cooking chamber and the temperature
and time can be adjusted as you wish.
The cooking chambers can also be synchro-
nised. There are two functions that allow
you to do this:
• MATCHFUNCTION – all temperature
and cooking time settings are identical
for both cooking chambers
• SYNCFUNCTION – the end of the
cooking time is synchronised so that
the different foods can be served at the
same time.
Alternatively, the cooking chambers can be
operated independently without synchro-
nisation. It is also possible to use just one
cooking chamber.
To select a cooking chamber, touch the
corresponding button (13) or (14).
To deactivate a selected cooking chamber,
touch and hold the corresponding button
or again
until – – – – appears on the
display
.
15472_15471_15470_Inlay_DE-EN_A5_V1.1.indb 1815472_15471_15470_Inlay_DE-EN_A5_V1.1.indb 18 13.12.2024 12:54:3613.12.2024 12:54:36
Vertical double chamber hot air frying machine
EN
7
Programmes
The device features 8preset programmes(12). To select a programme, touch the program
button on the control panel(3). When a symbol flashes, the programme is selected.
The symbols represent the following programmes:
Symbol
Programme Temperature (°C)
Time (min.)
Turn reminder
French fries (frozen) 200 22 Yes
Steak 200 17 Yes
Bake 170 15 –
Chicken 200 45 Yes
Bacon 170 20 Yes
Drumsticks 200 25 Yes
Shrimps 200 14 Yes
Fisch 200 18 Yes
Pizza 180 17 –
Vegetables 160 8 Yes
Sausages 180 23 Yes
Defrost 80 5 –
L
The times and temperatures which are set for the programmes should be adjusted if
necessary to ensure that the food (in particular poultry) is fully cooked. Adjustments
can also be made during the cooking process.
Adjusting the Temperature and Time
1. Touch the button (13) or (14)
toselect a cooking chamber.
2. Touch the button (19) or (20)
toselect temperature or time.
3. Adjust the shown value:
○ Increase value: Touch(17)
○ Decrease value: Touch(18)
○ To scroll through the values quickly,
press and hold down the respective
symbol.
Turn reminder
This function reminds you to mix around
the food once half the cooking time has
elapsed.
The function is automatically active with
certain programmes (see the table).
As soon as half the cooking time has elapsed,
you will hear a beep and trun appears on the
display (10 or 11). The cooking process is
not paused automatically.
15472_15471_15470_Inlay_DE-EN_A5_V1.1.indb 1915472_15471_15470_Inlay_DE-EN_A5_V1.1.indb 19 13.12.2024 12:54:4413.12.2024 12:54:44
EN
8
USE
Please Note!
■ Do not place food that is still wrapped in
cling film or plastic bags in the device.
■ To use a grill rack and an insert rack in
the same drawer at the same time, the
feet of the insert rack must be folded in.
■ Make sure that the food does not come
into contact with the heating elements.
■ Do not overfill the drawers so that the
hot air can circulate optimally inside the
cooking chambers.
■ Make sure that foodstuffs containing oil
and fats are not overheated. They could
ignite.
■ Always place the hot drawers down on
aheat-resistant surface after use.
• The cooking time is dependent on the
size and quantity of the food and on the
temperature. Start with a shorter cooking
time and gradually increase it if required.
• When preparing mass-produced frozen
products, you should follow the times
and temperatures specified by the manu-
facturer. Check whether your food is fully
cooked before the stated cooking time
has expired.
• With some food (e.g. chips and similar
items), it is advisable to mix the food
around from time to time to obtain an
even cooking result.
Start
For each cooking chamber (5):
• Make sure that an insert rack(8)
isplaced in the drawer(6).
• Place food in the drawer.
• If necessary: Additionally insert a grill
rack(9) and place the desired food on it.
• Insert the drawer into the cooking
chamber1 or 2.
• Cooking chamber2 (2):
1. Make sure that the drip tray(3) has
been inserted right at the bottom
ofcooking chamber2.
2. Spread food around on the baking
mesh tray(4).
3. Place the baking mesh tray containing
the food in cooking chamber2 and
close the door(5).
The cooking chambers can be used in
different ways. Follow the instructions in
the sections below according to the use
yourequire.
1. Using Just One Cooking Chamber
If just one of the two cooking chambers is
to be used:
1. Touch the button (21) to switch on
the device.
2. Select the cooking chamber you want:
• Cooking chamber1:
Touch the button
(13)
.
• Cooking chamber2:
Touch the button
(14)
.
The button
or
flashes and the
setting mode for the selected cooking
chamber is called up.
3. Either manually adjust the cooking time
and temperature or select one of the
12programmes(12) (see the “Pro-
grammes and Functions” chapter).
4. Use the button to start the cooking
process.
2.1 Using Both Cooking Chambers–
Copying Programme
If the same settings are to be made for both
cooking chambers:
1. Set the temperature and cooking time
you want for one of the cooking cham-
bers (see section “1. Using Just One
Cooking Chamber” – steps 1 – 3).
2. Touch the MATCHbutton (15). The
button flashed. The settings are copied
for the other cooking chamber.
3. Use the button (21) to start the
cooking process.
15472_15471_15470_Inlay_DE-EN_A5_V1.1.indb 2015472_15471_15470_Inlay_DE-EN_A5_V1.1.indb 20 13.12.2024 12:54:4713.12.2024 12:54:47
Vertical double chamber hot air frying machine
EN
9
2.2 Using Both Cooking Chambers–
Different Programme Duration
1. Touch the button (21) to switch on
the device.
2. Touch the button
(13)
to select
cooking chamber1. The button
flashes and the setting mode for cooking
chamber1 is called up.
3. Either manually adjust the cooking time
and temperature for cooking chamber1
or select one of the 12programmes(12)
(see the “Programmes and Functions”
chapter).
4. Touch the button
(14)
to select
cooking chamber2. The button
flashes and the setting mode for cooking
chamber2 is called up.
5. Either manually adjust the cooking time
and temperature for cooking chamber2
or select one of the 12programmes
(see the “Programmes and Functions”
chapter).
6. Use the button to start the cooking
process.
2.3 Using Both Cooking Chambers–
Simultaneous End of Cooking
Time
If different settings have been made for both
cooking chambers, but the cooking times
should end simultaneously:
1. Set the temperatures and cooking times
you want for both cooking chambers
(see section “2.2 Using Both Cooking
Chambers– Different Programme Dura-
tion” – steps 1 – 5).
2. Touch the SYNCbutton (16). The button
flashes.
3. Use the button (21) to start the
cooking process.
L
The programme with the shorter
run time displays HOLD until both
cooking chambers end at the same
time.
Turn reminder
Once half the cooking time has elapsed,
a beep is heard and turn is shown on the
display (10 or 11). The cooking process is
not paused automatically.
Pull out the drawer(6), mix around the food
you are cooking and reinsert the drawer.
End of Cooking Time
The remaining cooking time can be read off
the display(10 or 11). Once the cooking
time has elapsed, beeps are heard and OFF
is shown. The fan continues to run for a few
more seconds.
1. Pull out the drawer(6) and place it on a
heat-resistant surface. Do not place it
on the device!
2. Remove the food from the drawer.
3. Disconnect the device from the mains
power.
4. After it has cooled down, clean the
device and the accessories (see the
“Cleaning and Storage” chapter).
Briefly Pausing the Cooking Process
• Both cooking chambers: Touch the
button (21). The countdown of the
cooking time is paused. The fan contin-
ues to run for a few more seconds. To
resume the cooking process, touch the
button again.
• One cooking chamber: Touch the
corresponding button
(13)
or
(14)
. Then touch the button
(21)
.
The countdown of the cooking time is
paused in the selected cooking chamber.
To resume the cooking process, touch
the button
again.
Optionally, the drawer(6) can alsobe
pulled out. The countdown of the
cooking time resumes after the drawer
is inserted.
L
If the SYNC function has been
selected and the cooking process
was paused for just one cooking
chamber, the function may need
15472_15471_15470_Inlay_DE-EN_A5_V1.1.indb 2115472_15471_15470_Inlay_DE-EN_A5_V1.1.indb 21 13.12.2024 12:54:5313.12.2024 12:54:53
EN
10
to be activated again once the
cooking process resumes.
To do this, touch the button
to call up the setting mode. Then
touch the button SYNC(16) to
reactivate the function. The button
SYNC flashed. Use the button to
resume the cooking process.
Stopping the Cooking Process
Manually
• Both cooking chambers: Touch and
hold the button (21) until OFF
appears on the displays(10 and 11).
• One cooking chamber: Touch the cor-
responding button
(13)
or
(14)
.
Then touch and hold the button until
OFF appears on the display(10 or 11)
for the chosen cooking chamber.
CLEANING AND STORAGE
Please Note!
■ Do not use any sharp or abrasive clean-
ing agents or cleaning pads to clean the
device. These may damage the surfaces.
1. Make sure that the device has been
disconnected from the mains power
andhas cooled down.
2. Clean the grill racks(9), the insert
racks(8) and the drawers(6) with deter-
gent and warm water.
In the case of stubborn dirt, soak in
warm water and detergent beforehand.
3. Wipe down the outside of the device and
the cooking chambers(5) and heating
elements with a clean, damp cloth if nec-
essary.
Do not clean in the dishwash-
er or immerse in water!
4. Allow all parts to dry completely or dry
them off.
5. Store the device in a clean, dry place so
that it is out of the reach of children and
animals.
TROUBLESHOOTING
If the device does not work properly, check
whether you are able to rectify the problem
yourself. If the problem cannot be solved
with the steps below, contact the customer
service department.
Do not attempt to repair an
electrical device yourself!
The device does not work.
The mains plug is not inserted in the plug
socket correctly.
► Correct the fit of the mains plug.
The drawers are not inserted correctly.
► Slide the drawers fully into the device.
The fuse in the fuse box is triggered.
Too many devices are connected to the
same circuit.
► Reduce the number of devices in the
circuit.
The food has not been cooked evenly.
The drawers are too full.
► Reduce the amount of food.
The items of food are piled on top of one
another.
► Spread the food and mix it around from
time to time.
Different foods with different cooking times
or temperatures have been prepared in one
cooking chamber.
► Separate the different foods and
spread them across both cooking
chambers. Set the correct temperature
and cooking time for them. With the
SYNCfunction they will be ready at
the same time.
The set cooking time was too short or the
temperature too low.
► Increase the cooking time or tempera-
ture.
15472_15471_15470_Inlay_DE-EN_A5_V1.1.indb 2215472_15471_15470_Inlay_DE-EN_A5_V1.1.indb 22 13.12.2024 12:54:5613.12.2024 12:54:56
Vertical double chamber hot air frying machine
EN
11
During use, an unpleasant smell is
detected. / Smoke emerges from the
device.
The device / accessory is dirty.
► Follow the instructions in the “Cleaning
and Storage” chapter.
The device is being used for the first time.
Asmell often develops when new devices
are first used.
► Follow the instructions in the “Before
Initial Use” chapter.
DISPOSAL
Dispose of the packaging material in
an environmentally friendly manner
so that it can be recycled.
The adjacent symbol (crossed-out bin
underlined) means that used devices
should not be disposed of in the
domestic waste, but should instead
be taken to special collection and
return systems.
Owners of used devices from private
households can take them free of
charge to the collection points of the
public waste disposal authorities or
the disposal points which are set up
by manufacturers and distributors un-
der the Electrical Equipment Act. Busi-
nesses which market electrical and
electronic devices are also obliged to
take back used devices.
Waste prevention makes an even more
valuable contribution to protecting the
environment. This means if possible,
as well as continuing to use or repair a
device yourself, passing it on to another
user also represents an ecologically
beneficial alternative to disposal.
TECHNICAL DATA
Article number: 15470 (white)
15471 (grey)
15472 (black)
Model number: ZHAF-960A
Power supply:
220 – 240 V ~
50 – 60 Hz
Power:
2800 W
Protection class: I
Capacity: approx. 10 L
(approx.5 L per drawer)
Temperature range: 60 – 200°C
Timer: 1 – 60 minutes
ID of operating
instructions:
Z 15472_15471_15470
M DS V1.1 1224 as
All rights reserved.
15472_15471_15470_Inlay_DE-EN_A5_V1.1.indb 2315472_15471_15470_Inlay_DE-EN_A5_V1.1.indb 23 13.12.2024 12:54:5713.12.2024 12:54:57

15472_15471_15470_Inlay_DE-EN_A5_V1.1.indb 2415472_15471_15470_Inlay_DE-EN_A5_V1.1.indb 24 13.12.2024 12:54:5713.12.2024 12:54:57