INSTRUCTION MANUAL
EN
BLENDER
MANUEL D’UTILISATION
FR
MIXEUR
MANUAL DE USO
ES
LICUADORA
Important information for the user
Informations importantes pour l’utilisateur
Información importante para el usuario
Instructions / Instructions / Instrucciones
Description / Description / Descripción
Use / Usage / Uso
Cleaning and maintenance / Nettoyage et entretien / Limpieza y mantenimiento
Safety instructions / Directives de sécurité / Instrucciones de seguridad
Information / Informations / Información
Advice / Conseil / Recomendaciones

Dear Customer, Thank you for purchasing one of our appliances. Our products are unique because they combine iconic
style with innovative technical solutions. They match perfectly with other products in our range and work equally well as a
standalone design objects in your kitchen. We hope you enjoy using your new appliance!
Cher client, merci beaucoup pour votre achat. Nos produits sont uniques car ils combinent une forte recherche esthétique
avec une conception technique innovante. Ils sont coordonnés avec d‘autres produits de la gamme et peuvent constituer des
éléments de design pour votre cuisine. Nous espérons que vous aimerez utiliser votre nouvel appareil !
Estimado Cliente, Le agradecemos por haber comprado uno de nuestros aparatos. Nuestros productos son únicos porque
combinan un estilo icónico con soluciones técnicas innovadoras. Combinan perfectamente con otros productos de nuestra
gama y trabajan igual de bien como objetos independientes en su cocina. Le deseamos que pueda aprovechar plenamente
su nuevo electrodoméstico.
SMEG S.p.A.
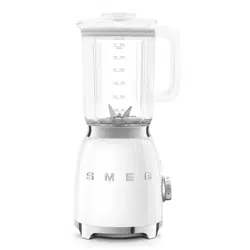
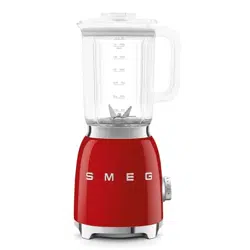
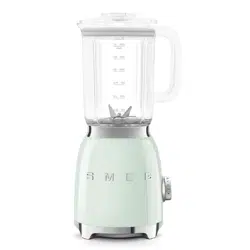
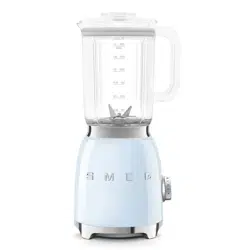
Model: BLF03
1
2
9
11
3
4
8
7
6
5
A
B
C
10

1
EN
IMPORTANT SAFEGUARDS
WARNING: If the instructions contained in this manual are not followed
precisely, fire or explosion may result causing property damage,
personal injury or death.
READ AND SAVE THESE INSTRUCTIONS
Your safety and the safety of others are very important.
We have provided many important safety messages throughout this
manual and on the appliance.
Read all the instructions before using the appliance and always obey all
safety messages.
RECOGNIZE SAFETY INFORMATION
This is a safety alert symbol. This symbol alerts you to potential hazards
that can result in severe personal injury or death.
UNDERSTAND SIGNAL WORDS
A signal word - DANGER, WARNING or CAUTION - is used with
the safety alert symbol. DANGER denotes the most serious hazards. It
means you could be killed or seriously injured if you do not immediately
follow the instructions. WARNING means you could be killed or
seriously injured if the instructions are not followed. CAUTION indicates
a potentially hazardous situation, which, if not avoided, could result in
minor to moderate injury.
WARNING
• This appliance is intended for use in the home only.
• Use this appliance only for its intended purpose. The
manufacturer cannot be held liable for damage caused by
improper use of this appliance.
• This appliance complies with current safety regulations.
Improper use of this appliance can result in personal injury
and material damage.
• Read all the instructions before installing or using the
appliance for the rst time.
• Keep these operating instructions in a safe place and pass
them on to any future user.

2
IMPORTANT SAFEGUARDS
The safety messages will inform you of potential hazards, on how to avoid the risk of injury
and what can occur if the instructions are not followed.
IMPORTANT: Observe all codes and ordinances in force.
WARNING: For your safety, the instructions contained in this manual must be
followed to minimize the risk of fire or explosion and to prevent property damage,
personal injury or death.
Do not store or use gasoline or other flammable vapors, liquids or materials near this or any
other appliance.
NOTE: This appliance is NOT designed for installation in manufactured
(mobile) homes or in recreational vehicles (RVs).
DO NOT install this appliance outdoors.
WARNING
To reduce the risk of fire, electrical shock, personal injury, or
damage when using the appliance, follow basic safety precautions,
including the following:

3
EN
IMPORTANT SAFEGUARDS
1 Instructions
When using electrical appliances, basic
safety precautions should always be
followed including the following: this user
manual is an integral part of the appliance
and must therefore be kept in its entirety
and in an accessible place for the whole
working life of the appliance.
1.1 Intended use
Failure to comply with the safety instructions
and failure to read the instructions manual
may lead to the appliance being used
incorrectly and cause personal injury.
• Do not use the appliance for purposes
other than those for which it was
designed. The appliance must only be
used for mixing, blending and emulsifying
ingredients and crushing ice. Every other
use is considered improper.
• The appliance is not designed to operate
with external timers or with remote-control
systems.
• Only use the appliance indoors.
• In order to avoid hazards due
to the inadvertent resetting of the
thermal cut-out, this appliance
must not be powered through
an external switching device,
such as a timer, or connected
to a circuit that is regularly
switched on and off by the
utility.
• This appliance and the bottle accessory*
are intended for household use.
• Any other use, for example in restaurants,
coffee bars and coffee shops is
considered improper.
• The bottle accessory can only be used
in combination with the BLF03 blender.
The accessory can be used to blend,
mix and emulsify various ingredients for
preparing drinks, juices and smoothies to
be enjoyed indoors or out.
• Do not use the appliance for anything
other than its intended use.
• Appliances can be used by persons with
reduced physical, sensory or mental
capabilities or lack of experience and
knowledge if they have been given
supervision or instruction concerning use
of the appliance in a safe way and if they
understand the hazards involved.
• This appliance must not be used by
children. Keep the appliance and its cord
out of reach of children.
• Close supervision is necessary when any
appliance is near children.
• Children must not play with the appliance.
1.2 General safety instructions
Follow all safety instructions in order to use
the appliance safely:
• Read this user manual carefully before
using the appliance.
• Do not leave the appliance unattended
while it is in operation.
• To protect against risk of electrical shock,
do not immerse the appliance, the power
cord or the plug in water or any other
liquid.
• Do not use the appliance when the
power cord or the plug is damaged or
when the appliance has been dropped
or is damaged in any manner.
• If the power cable is damaged, contact
technical support immediately to arrange
replacement.
* Standard on some models. Also available as an
optional accessory.

4
IMPORTANT SAFEGUARDS
• If the supply cord is damaged, it must be
replaced by the manufacturer, its service
agent or similarly qualified persons in
order to avoid a hazard.
• The cable is short to prevent accidents.
Do not use an extension cord.
• Do not let cord hang over edge of table
or counter to ensure that it does not come
into contact with sharp edges.
• To unplug, grasp the plug and pull from
the outlet. Never pull from the power cord.
• Do not place the appliance and its cord
above or near other heat sources.
• Do not let cord contact hot surface,
including the stove.
• This appliance is fitted with a ground
connection for functional purposes only.
• Do not attempt to repair or make
modifications to the appliance yourself:
in the event of a fault, it should only be
repaired by a qualified technician or
contact the technical assistance service.
• Never try to put out a fire or flames with
water: turn off the appliance, remove
the plug from the outlet and smother
the flames with a fire blanket or other
appropriate cover.
• Do not touch moving parts while the
appliance is in operation. Keep hands,
hair and clothing, and utensils away from
moving parts during operation, to prevent
personal injury and/or damage to the
appliance.
• Always turn OFF and disconnect the
appliance from the power supply when
it is not in use, left unattended or faulty.
• Always disconnect the appliance from
the power supply before installing and
removing the components.
• Always disconnect the appliance from
the power supply and let it cool down
before cleaning it.
• Always operate the blender with the lid
in place.
• Check that the lid is correctly closed
before turning on the blender.
• Do not overfill the blender (max. 1.5 liters).
• The use of attachments, including
canning jars, not recommended by the
manufacturer may cause a risk of injury
to persons.
• Only use original spare parts. The use
of spare parts not approved by the
manufacturer could lead to fires, electric
shocks or personal injury.
• Only place the blender on level and dry
surfaces.
• Do not operate the blender empty as this
could permanently damage the blade
assembly.
• Do not use the blender as a storage
compartment. Keep it empty before and
after use.
1.3 Caution
• Let hot liquids cool down to room
temperature before pouring them into the
jug or in the bottle accessory.
• Risk of thermal burn injury due to
excessive pressure in the jug and bottle.
Do not blend hot liquids.
• To avoid the risk of cuts, and damage to the
blender, do not put your hands or tools like
cutlery, etc. into the blender jug while it is
operating. You can use a wood or plastic
spatula only when the blender is off.
• Do not use harsh detergents or sharp
objects to wash or remove residues from
the blender jug.
• Be careful when handing the sharp
* Standard on some models. Also available as an
optional accessory.
5
EN
IMPORTANT SAFEGUARDS
cutting blades, emptying the jug and
during cleaning.
• Make sure that the bottle accessory and
its blade assembly are fixed correctly.
• Do not overfill the bottle accessory
(maximum 600 ml).
• The blades are sharp: Cutting hazard!
Never touch the blades with your hands.
Take great care when installing, removing
and cleaning the bottle accessory blade
assembly.
• Switch off the appliance and disconnect
from supply before changing accessories or
approaching parts that move when in use.
• Avoid touching movable parts, such as
the blade assembly.
• Always operate blender with cover in
place.
• Do not operate the blender without the
jug or bottle accessory mounted.
• Instructions for cleaning of the appliance
can be found in the “5 Cleaning and
Care” section.
1.4 Connecting the appliance
Make sure that the voltage and frequency
of the power supply correspond to those
indicated on the identification plate on the
bottom of the appliance.
If the plug of the appliance is not compatible
with the socket, contact Technical Assistance
service for replacement.
1.5 Manufacturer liability
The manufacturer shall not be liable for
injuries or property damage caused by:
• Use of the appliance other than as
envisaged
• Not having read the user manual
• Tampering with any part of the appliance
• Use of non-original spare parts
• Failure to observe the safety instructions
Please keep these instructions
carefully. If the appliance is passed
on to others, they should also be
given this instructions booklet.
These instructions can be downloaded from
the Smeg website “www.smeg.com”.
1.6 Disposal
This appliance must be disposed
of separately from other refuse
(Directive 2012/19/EU).
• The appliance does not contain
substances in quantities sufficient to be
considered hazardous to health and the
environment, in accordance with current
European directives.
• Old appliances do not belong in
household waste! To comply with current
legislation, old appliances, on reaching
the end of their useful lives, should be
taken to a disposal facility where they can
be sorted. The relevant local authorities
or their waste disposal operators can
provide further information.
• Dispose of the packing materials at an
appropriate disposal facility.
SAVE THESE INSTRUCTIONS
6
Description
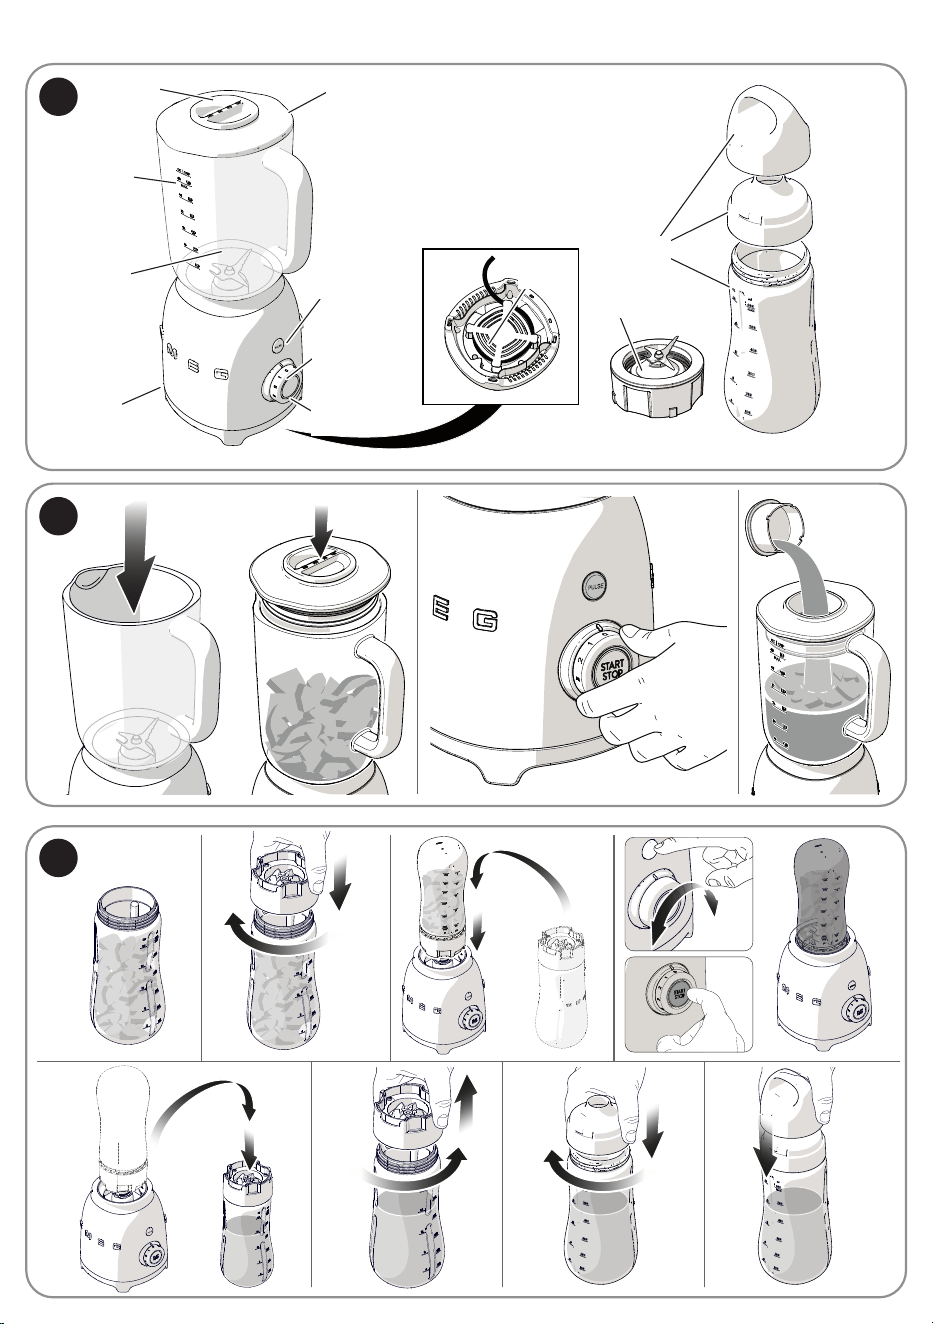
2.2 Description of parts (Fig. A)
Measuring cup (1)
Can be used for dosing the ingredients.
Lid with pouring hole (2)
The lid has a seal that closes the jug tightly.
It has a pouring hole in the center to make
it easier to add ingredients safely when in
operation.
1.5 liter Tritan™ Renew jug (3)
Jug with lip and graduated scale marked
in liters and cups. Minimum capacity 0.25
liters (1 cup), maximum capacity 1.5 liters
(6 cups).
Jug blades (4)
Stainless steel blade assembly for crushing
ice cubes and preparing delicious
smoothies, milkshakes, cocktails etc.
2 Appliance description
(Fig. A)
1) Measuring cup
2) Lid with pouring hole
3) 1.5 liter jug
4) Jug blades
5) Control knob
6) START/STOP button
7) Pulse button
8) Motor base
9) Built-in cord wrap
10) 600 ml bottle accessory with cap and
cover *
11) Bottle accessory blade assembly
2.1 Before rst use
Danger of electrocution
Plug into a grounded 3-pin outlet.
• Do not remove the earth pin.
• Do not use an adapter.
• Do not use an extension cord.
• Failure to follow these
instructions could result in death,
fire, or electrical shock.
• Remove all stickers and labels from the
blender and clean the motor base with a
damp cloth.
• Remove the jug from the blender.
• Wash and dry thoroughly (see “5.2
Cleaning the parts”).
Danger of sudden start-up
• Make sure the blender is
unplugged before fitting or
removing the blade assembly.
* Standard on some models. Also available as an
optional accessory.
7
EN
Description
2.3 Description of controls
Control knob (5)
The knob allows you to select one of the
four manual speeds available or to start the
four pre-set programs: Smoothie, Green
Smoothie, Ice Crush and Self-Clean.
See “4.1 Speed setting suggestions when
using the pre-set programs” for further
information on which speed to use.
START/STOP button (6)
The button is used to start/stop blender.
Pulse button (7)
This function allows you to use maximum
blending speed when using manual mode
or it can be used on its own at different
speeds (See “4 Functions”).
* Standard on some models. Also available as an
optional accessory.
2.4 Description of accessories*
600 ml bottle accessory, cap with spout
and cover (10)
Tritan™ Renew bottle, cap with spout and
cover with silicone seal.
Bottle accessory blade assembly (11)
Stainless steel blade assembly for preparing
delicious smoothies, milkshakes, cocktails
etc.
Sharp blades
Danger of cuts
• Never touch the blades with
your hands.
• Take great care when installing
and removing the blade
assembly.
• The accessories intended to
come into contact with food are
made of materials that comply
with the provisions of current
legislation.
8
Use
3 Use
3.1 First use
Thoroughly wash and dry the components
as indicated in section “5 Cleaning and
care”.
3.2 Using the blender (Fig. B)
• Insert the blender jug (3) onto the motor
base (8).
• Place the ingredients in the jug (3),
taking care not to exceed the maximum
capacity (1.5 liters - 6 cups).
• Position the lid (2) with the measuring cup
(1) fitted onto the blender jug (3). Ensure
the lid (2) is tightly closed.
• Insert the plug of the blender into the
power outlet. The red LED will flash to
indicate the power is on.
• Use the control knob (5) to select the
required speed or one of the preset
programs.
The PULSE button can be used in
combination with speeds 1 to 3.
• Press the START button to
start blending. See the table
“4.1 Speed setting suggestions when
using the pre-set programs”.
Speeds 1 - 4 allow continuous
blending. You can stop the blender
by pressing the STOP button.
The speed can be changed at
any time during blending.
Important
Do not operate at speeds 1-4 for
more than one minute at a time
(TBC).
• You can add additional ingredients whilst
blending by removing the measuring cup
(1) and pouring in ingredients through the
hole in the lid (2).
Danger
The blender is not intended
for blending or grinding dry
foods. Only add dry ingredients
together with a sufficient amount
of liquid to prevent the blender
from overheating, which could
permanently damage the blade
unit.
• If you have selected a speed between
1 and 4, when you have finished
blending, press the STOP button, turn the
control knob (5) to ‘0’ and unplug the
blender. If one of the pre-set programs
has been selected, the appliance will
stop automatically. Refer to section “4
Functions” for further information.
Canceling/stopping the
blending cycle
The blending cycle can be
canceled or stopped at any time
pressing the START/ STOP button.
9
EN
Use
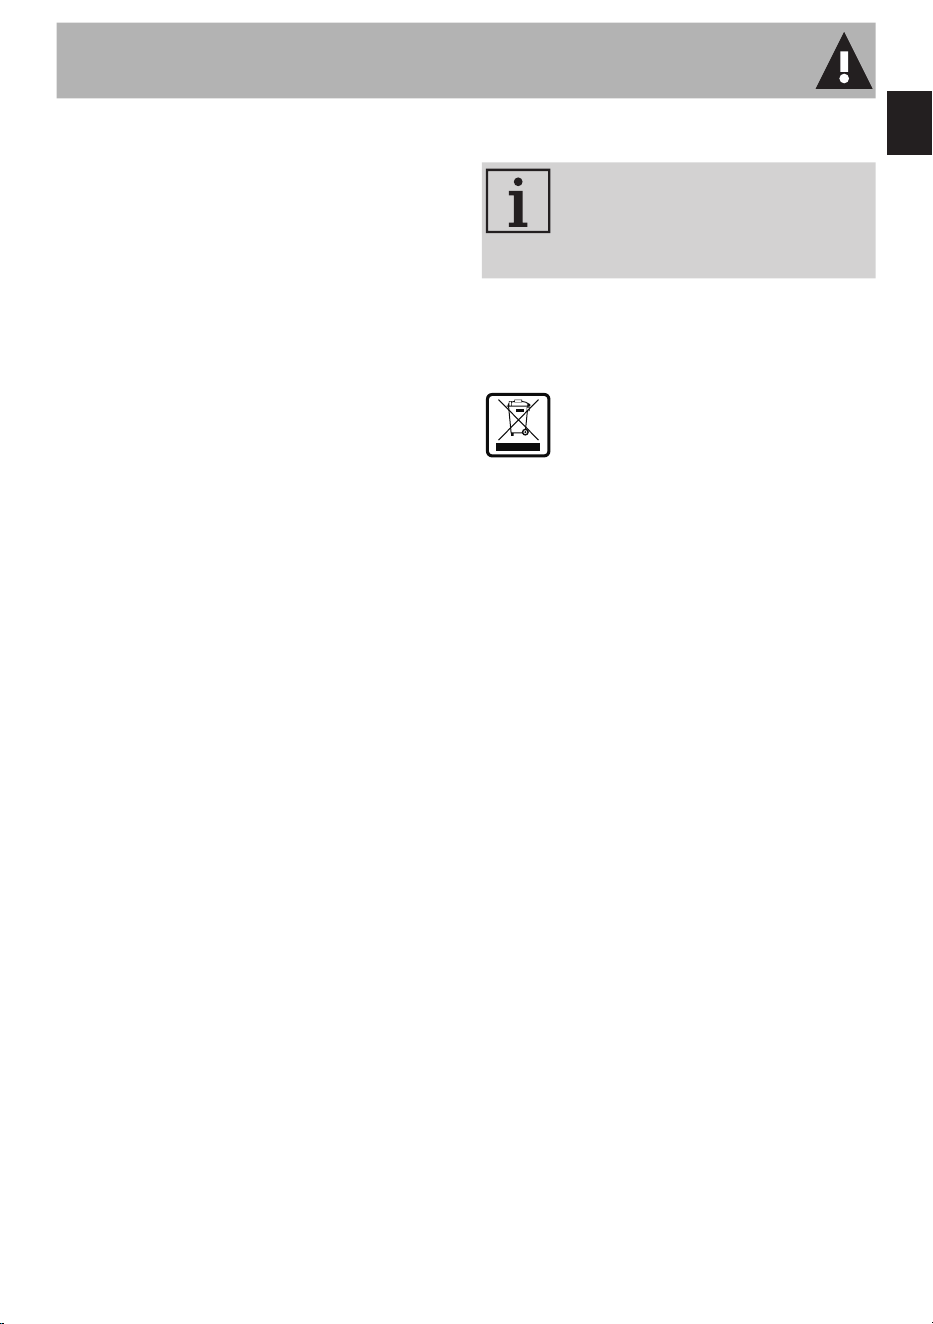
3.3 How to use the bottle
accessory * (Fig. C)
Sharp blades
Danger of cuts
• Never touch the blades with
your hands.
• Take great care when installing
and removing the blade
assembly.
• Place the ingredients into the bottle (10),
taking care not to exceed the maximum
capacity (600 ml).
For best results, we recommend
that you:
• add the hard ingredients first,
then the soft ones and then the
liquids;
• make sure that the liquid
ingredients do not exceed
400 ml;
• do not to exceed the maximum
capacity (600 ml).
Risk of damage to the accessory
• The Ice Crush program
cannot be used with the bottle
accessory. If you wish to add
ice, crush it in the blender jug
and then transfer it to the bottle.
• Secure the blade support (11) to the
bottle by turning it clockwise. Make sure
that it is fastened tightly.
• Place the base of the blender on a flat
horizontal surface. Plug it into the power
outlet.
• Turn the bottle over (10) and connect it to
the motor base (8).
• Use the control knob (5) to select the
required speed or one of the four pre-
set programs according to the result you
wish to obtain and start the blender to
prepare the drink.
• If you have selected a speed between 1
and 4, when you have finished blending,
press the STOP button, turn the knob to
‘0’ and unplug the blender. If one of the
pre-set programs has been selected,
the appliance will stop automatically.
Refer to section “4 Functions” for further
information.
* Standard on some models. Also available as an
optional accessory.

10
Use
4 Functions
Safety lock system
The blender is fitted with a safety
lock system that automatically
switches off the blender when the
jug is removed. It also features a
motor safety cutout which trips if
the motor is overloaded.
Smooth Start System
When the appliance is started, the
speed gradually increases until the
set speed is reached. This prevents
damage to the appliance and
accessories, prevents ingredient
spillage and improves mixing.
The Smooth Start system only
works when a speed between 1
and 4 is selected and does not
work in PULSE mode or with pre-
set programs.
PULSE function
When the product is operating at speeds
1-3, pressing the PULSE button will run the
blender at maximum speed.
The device will return to the initial speed that
was selected when the button is released.
When the product is off, turning the knob
to one of the 4 speeds and pressing the
PULSE button will make the blender run at
the selected speed.
The PULSE function does not work
in combination with the pre-set
programs.
Pre-set programs
When one of the four above mentioned
pre-set programs is selected, after you have
pressed the START button, the blender
will start to operate automatically and the
central button LED will light up to indicate
that the cycle is running. The button LED
switches off at the end of the cycle.
For further information, see the table “4.1
Speed setting suggestions when using the
pre-set programs”.
11
EN
Use
* Standard on some models. Also available as an
optional accessory.
4.1 Speed setting suggestions when using the pre-set programs
Function Description Time Suggested preparations
Manual
1-4
Variable speeds 1-4
allow maximum control
of the blender.
60 sec
Fruit or vegetable puree,
soups, smoothies, sauces
and dressings, whipped
cream, blended crushed
ice drinks, batters,
mousses, sorbets.
Allows you accurately
control the mixing
duration and frequency.
5 sec
Ice cubes, chopped
meat/fish.
PULSE
The blender operates
at the correct speed
to achieve thick and
creamy results.
50 sec
Smoothies/milkshakes
made with fresh or frozen
fruit.
SMOOTHIE
Allows you to make
delicious healthy
smoothies.
50 sec
Green smoothies made
with spinach, kale, fruit and
leafy green vegetables.
GREEN
SMOOTHIE
The blender operates
with short bursts of
power to crush the ice
until it becomes slush.
40 sec
Crushed ice cubes,
chopped frozen fruit and
vegetables.
ICE CRUSH
The blender has a self-cleaning function:
Function Description Time User instructions
Self-cleaning
Short bursts of power
and high speed, allows
you to clean the jug and
the bottle accessory.
60 sec
See section “5.3 Using the
jug / bottle accessory self-
clean option” for detailed
instructions.
The speeds indicated in the table are approximate and can vary depending on
the recipe, the interaction of the different ingredients used and the consistency you
wish to obtain.

12
Cleaning and care
Tips for using your blender
• For best results, we recommend that you:
- dice the food to be blended.
- first add the liquids, then the leafy
green vegetables and then the
soft ingredients followed by dried
fruit / seeds / cereals and lastly ice /
frozen ingredients.
- you might have to stop mixing in order
to push the ingredients down the sides
of the blender jug with a spatula.
• When blending liquid and dry
ingredients, blend liquids first and then
add the dry ingredients.
• Remove any hard parts from foods to be
blended (e.g. cores or stones from fruit,
bones from meat etc.).
• Do not allow food residues to dry inside
the jug and blades for too long, as they
could become difficult to remove. If you
cannot clean it right away, pour a little
warm water and let it soak.
• Do not process hot food. Let it cool to
room temperature before blending.
5 Cleaning and care
Improper use. Danger of
electrocution
• Make sure the blender is
unplugged before fitting or
removing the blade assembly.
Improper use. Risk of damage
to surfaces.
• Do not use steam jets to clean
the appliance.
• Do not use cleaning products
containing chlorine, ammonia
or bleach on parts with metallic
finishes (e.g. anodized, nickel-
or chrome-plated).
• Do not use abrasive or corrosive
detergents (e.g. powder
products, stain removers and
metallic scourers).
• Do not use rough or abrasive
materials or sharp metal
scrapers.
5.1 Cleaning the motor base
To keep the outer surface of the blender
motor base in good condition, it should
be cleaned regularly after use. Let the
appliance cool down first. Use a damp and
soft cloth with mild detergent.

13
EN
Cleaning and care
* Standard on some models. Also available as an
optional accessory.
5.2 Cleaning the parts
Sharp blades
Danger of cuts
• Never touch the blades with
your hands.
• Take great care when installing
and removing the blade
assembly.
Blender
• Wash the jug in warm soapy water or use
the pre-set SELF-CLEAN program. DO
NOT wash in a dishwasher.
• The blender lid (2) and measuring cup
(1) can be washed by hand in warm
water and a mild detergent or in the
dishwasher.
• Make sure that the parts are completely
dry before putting them back on the
blender.
Bottle accessory*
• The bottle (10) can be washed by hand
or in a dishwasher, making sure that you
remove the blade assembly (11), or
using the pre-set SELF-CLEAN program.
• The blade assembly (11) should only be
washed by hand in warm water and a
mild detergent.
• Make sure that the parts are completely
dry before putting them back on the
blender.
• Any other servicing should be performed
by an authorized service representative.
5.3 Using the jug / bottle
accessory self-clean option
• Place a few drops of warm water
and mild detergent in the jug / bottle
accessory.
• Select the pre-set SELF-CLEAN program.
• Press the START button.
• Remove the jug/bottle accessory, empty
and rinse.
• Dry thoroughly.
14
What to do if...
Problem Cause Solution
The motor will not start.
The motor has overheated.
Unplug the blender and allow
the motor to cool.
The plug is not properly
inserted in the power outlet.
Insert the plug into the power
outlet. Do not use adapters or
extensions.
Check that the house main
breaker is on.
The cable is defective.
Contact an Authorized
Service Center.
No power.
Check that the house main
breaker is on.
The blender vibrates.
The blender is not resting
on a stable surface.
Place the blender on a flat,
stable surface.
The anti-slip rubber feet are
worn.
Have them replaced at an
Authorized Service Center.
The speed used is too high
or the load is excessive.
Set a lower speed and ensure
the jug has not been overfilled.
The blender switches on,
but the blades do not
turn.
The jug has not been
correctly locked into its
base.
Remove the jug from its base
and lock it into place.
The blender stops while
operating.
The motor has overheated.
Unplug the blender and allow
the motor to cool down.
The blender stops during
operation and the white
LED flashes.
The blades may have
jammed.
Unplug and free the blades
using a spatula.
If the problem has not been resolved or in the event of another type of fault,
contact your local technical support center.

15
EN
Recipes
6 Recipes
Smoothie
Ingredients:
2 nectarines, pitted (or tinned peaches in
syrup) and cut into pieces
125 g frozen raspberries
125 g frozen strawberries
125 ml orange juice
125 ml apple juice
Method:
1. Put the nectarine pieces and the juices
into the blender jug.
2. Add the frozen fruit.
3. Turn the control knob to the Smoothie
program and start the blender by
pressing the START button.
Green Smoothie
Ingredients:
240 ml water
300 g green grapes
180 g pineapple, peeled, halved
120 g fresh spinach
110 g small banana, peeled
130 g ice cubes
Method:
1. Put the pieces of fruit and the water into
the blender jug.
2. Add the ice cubes.
3. Turn the control knob to the Green
Smoothie program and start the
blender by pressing the START button.
Whipped cream
Ingredients:
500 g cold whipping cream
50 g icing sugar
Method
1. Whip the cream in the blender at speed
3 for approximately 30 seconds.
2. You can stop the blender by pressing
the STOP button.
3. Add the icing sugar.
4. Select speed 4 and whip for a further
15 seconds, until the cream is fully
whipped. The cream can also be
whipped without icing sugar. In this
case, select speed 4 and whip for 40
seconds.
Vegetable puree
Ingredients:
300 g zucchini (or vegetables of your
choice)
100 g water or vegetable stock
Method
1. Steam the vegetables and cut them into
rounds.
2. Put the pieces in the blender and blend
for 45 seconds at speed 4, adding a
little water or vegetable stock at a time
until you obtain a homogeneous puree.

The manufacturer reserves the right to make any changes deemed necessary for the improvement of its products without
prior notice. The illustrations and descriptions contained in this manual are therefore not binding and are merely indicative.
Le fabricant se réserve le droit d’apporter, sans préavis, toutes les modifications qu’il jugera utiles pour l’amélioration de
ses produits. Les illustrations et les descriptions figurant dans ce manuel ne sont pas contraignantes et n’ont qu’une valeur
indicative.
El fabricante se reserva el derecho a aportar sin aviso previo todas las modificaciones que considere necesarias para la
mejora de sus propios productos. Las ilustraciones y las descripciones contenidas en este manual no comprometen, por
tanto, al fabricante y tienen un valor meramente indicativo.