Brand:amzchef
Model:UL-21BIAM30-TS-PA
120V~ 60Hz 193W
Instrution Manual
RANGE HOOD

IMPORTANT SAFEGUARDS
PRODUCT INFORMATION
PARTS INCLUDED
AIR OUT LET INSTALLATION METHOD
INSTALLATION INSTRUCTIONS
OPERATION
MAINTENANCE
TO REPLACE LIGHT
TO REPLACE FILTER
TROUBLESHOOTING
WARRANTY
1
3
4
5
5
11
13
13
14
15
16
5004880

IMPORTANT SAFEGUARDS
WARNING:
1.Installation Work and electric wiring (including switch location) must be done by
the qualifed person(s) in accordance with local applicable codes and stan-
dards,including fre-rated construction.
2 .This hood may have sharp edges.Becarefu to avoid cuts and abrasions during
insallation and cleaning.
3. Thehoodmust be placed at a minimum distance of 650mm(25.6inch) from the
cook panel.
4. Suffcient air is needed for proper combustion and exhausting of gases through
the chimney toprevent back drafting.Follow the heating equipment manufacturer 's
guideline and safety standards such as Rerigeration and Air conditioning Engi-
neer(ASHRAE),and the loca lcode authorities.
5.Ducted fans must always be vented to the outdoors.
6 . This appliance is designed to be operated by adults. Children were notallowe
to tempe with the controls or play with this appliance.
7 . WARNING: To reduce the risk offre or electric shock, donot use thisfan with
any solid-state speed contro device.
8. when cutting ordrilling into wall or ceiling,donot damage electrica wiring and
other hidden cables .
WARNING:TO REDUCE THE RISK OF FIRE,USE ONLY THE METAL
DUCTWORK
WARNING TO REDUCE THE RISK OF INJURY IN THE EVENT OF A RANGE
T OP FIRE,OBSERVE THE FOLLOWING:
1 . SMOTHER FLAMES with a Close-ftting lid cookie sheet or metal tray If the
fames donot go out immediately, EVACUATE AND CALL THE FIRE DEPART-
MENT.
2 . NEVER PICK UP A FLAMING PAN , you may be shock.
3 . DONOT USE WATER,including wet dishcloths or towels a violent steam
explosive wil result
1

4 . use an extinguisher ONLY if:
. You know you have a Class ABC extinguisher, and you already know how to
operate it;
. The fre is small and contained in the area where it started;
. The fre department is being called;
. You can fight the fire with your back to an exit.
WARNING: TO REDUCE THE RISK OF A RANGE TOP GREASE FIRE:
1.Never leave surface units unattended at high settings.Boil overs cause smoking
and greasy spillovers that may ignite.Heat oils slowly on low or medium settings.
2. Always turn hood ON when cooking at high heat or when flaming food.
3.Clean ventilating fans frequently.Grease should not be allowed to accumulate on
fan or flter.
4.Use proper pan size.Always use cookware appropriate for the size of the
element.
WARNING TO REDUCE THE RISK OF FIRE,ELECTRIC SHOCK,ORINJURY TO
PERSON, KEEP IN MIND THE FOLLOWING:
1. Use this unit only in the manner intended by the manufacturer. lf you have
questions, contact the manufacturer.
2.Before servicing or cleaning unit, s witch power off at service panel and lock the
service disconnecting, to prevent powerfrom being switch on accidently. When
service disconnectingmeans cannot be locked, securely fasten a prominent
warningdevice, such as a tag, to the front panel.
2
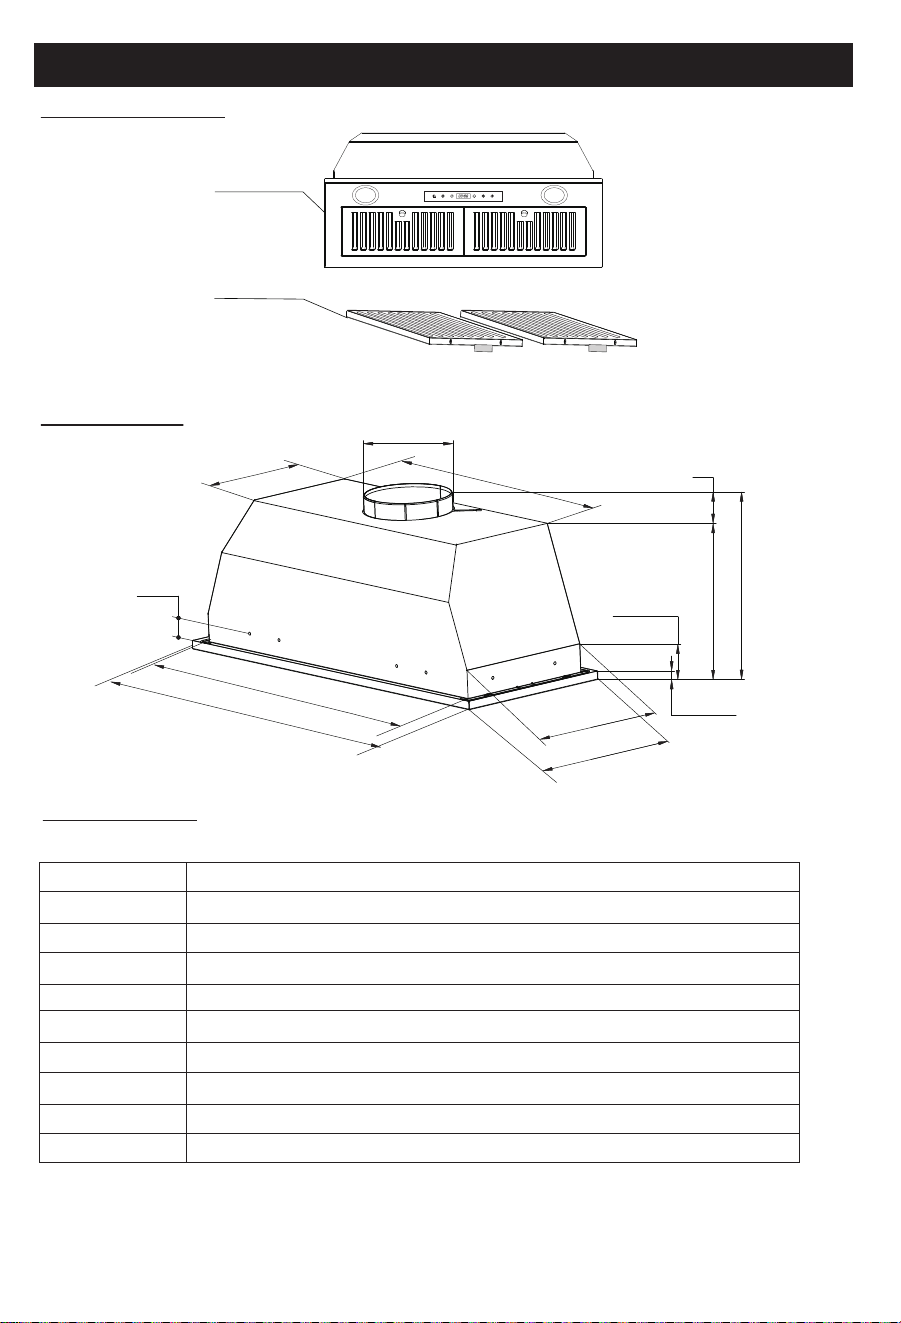
27.8"(705mm)
26"(660mm)
1.1"(27.7mm)
11.5"(291mm)
10.1"(256mm)
0.6"(15mm)
2.4"(62mm)
10.2"(260mm)
11.4"(288.5mm)
1.1"(28.5mm)
20.3"(516mm)
φ5.9"(150mm)
8"(205mm)
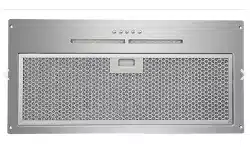
PRODUCT INFORMATION
Main Parts Name
Opening Size
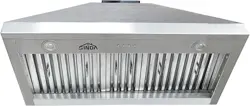
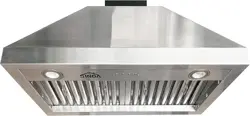
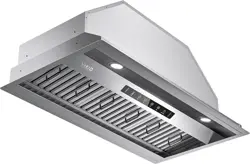
Hood Body
Baffle filters
Specifications
Model
Item Model
Voltage
Air exit
Light
Motor power
Total power
Filter
Control
Charcoal filter
UL-21BIAM30-TS-PA
UL-21BIHD30-TS-PA/UL-21BIWF30-TS-PA/UL-21BIWM30-TS-PA
120V~ 60Hz
5.9” Duct
2*1.5W LED
190w
193w
Baffle filter
3 speed touch switch with remote control
2 pcs
3
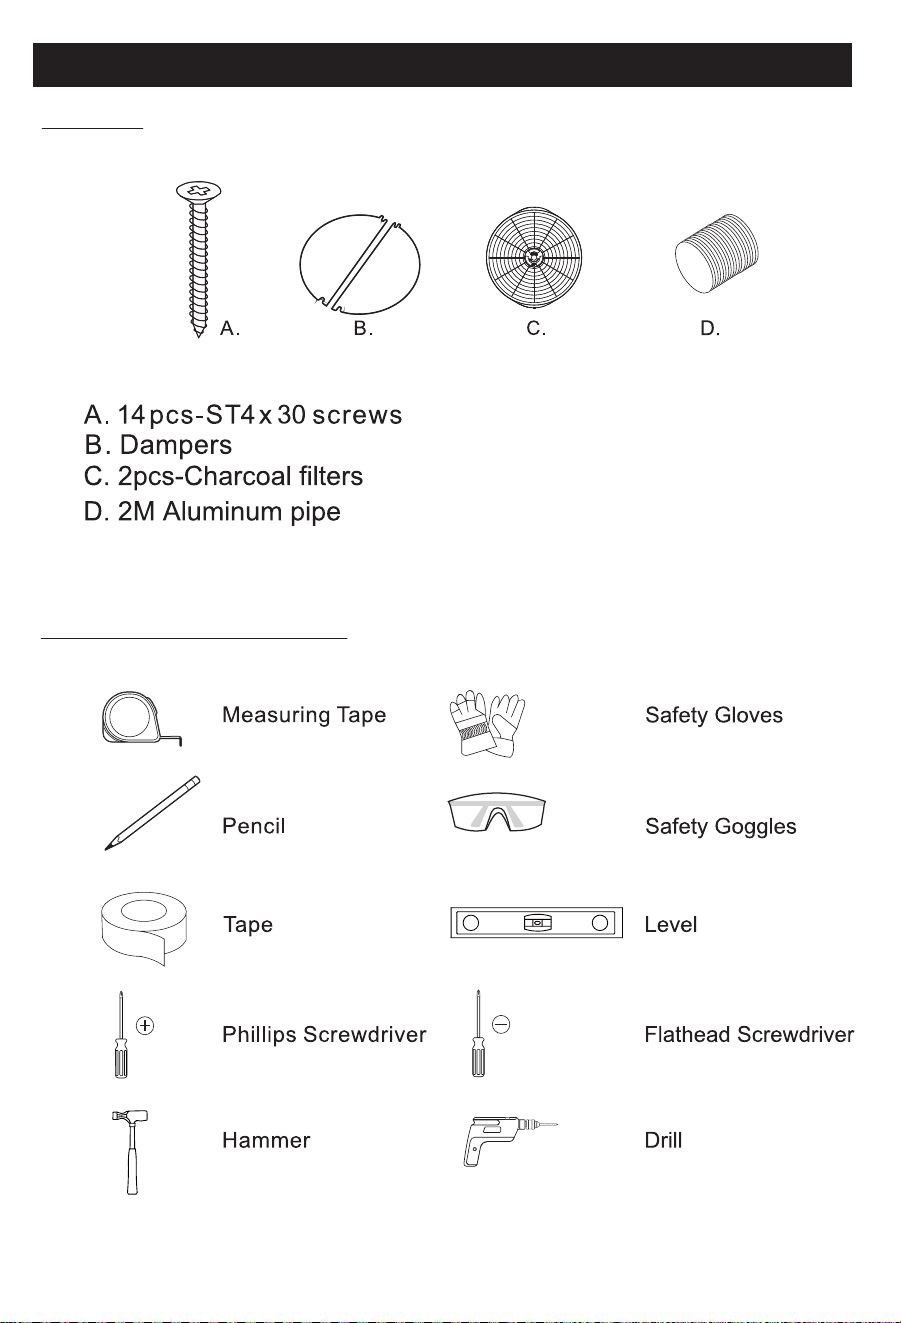
PARTS INCLUDED
Parts List
Tools Needed(not included)
4
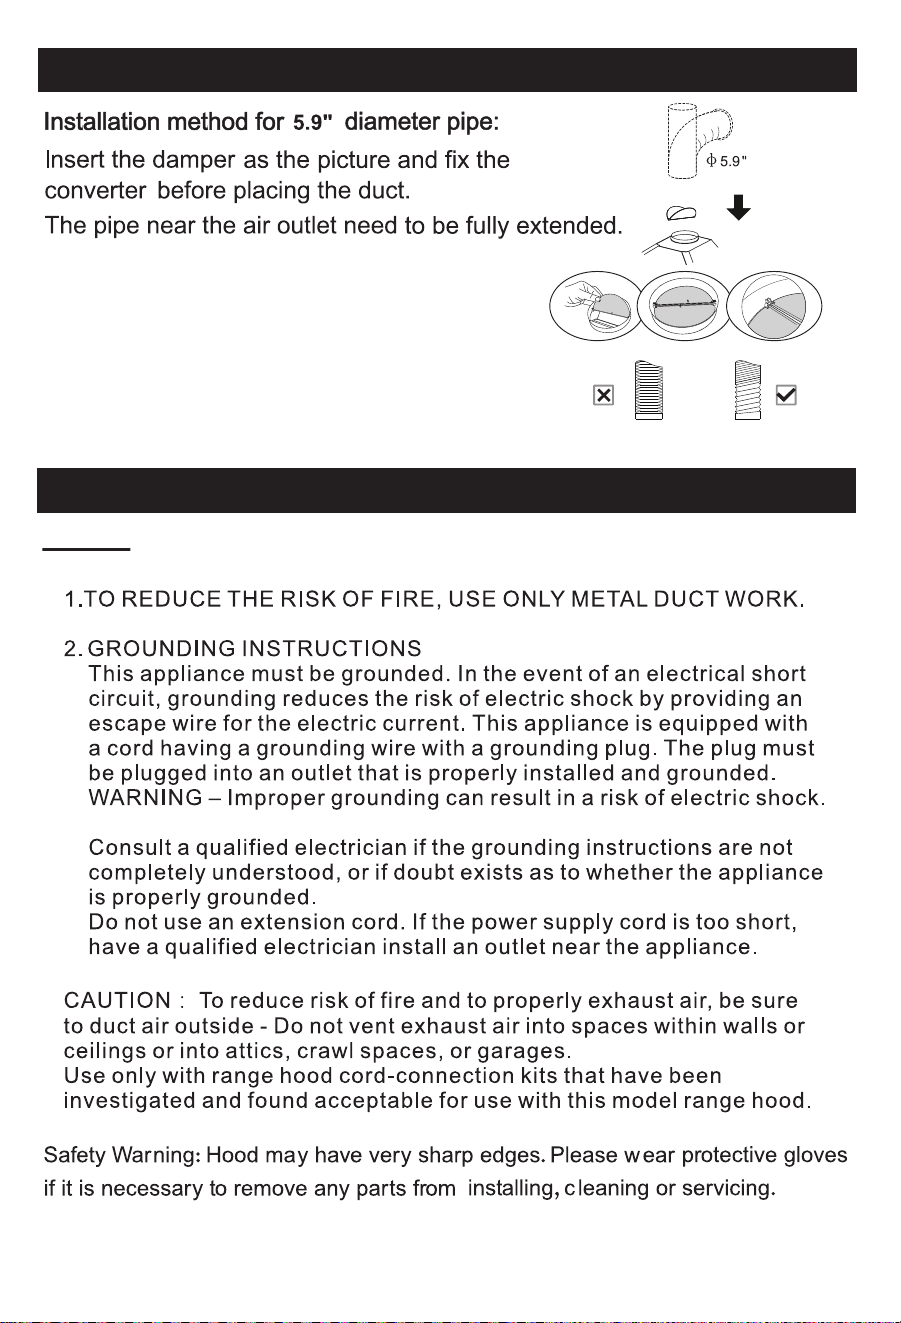
AIR OUT LET INSTALLATION METHOD
INSTALLATION INSTRUCTIONS
Warning
5
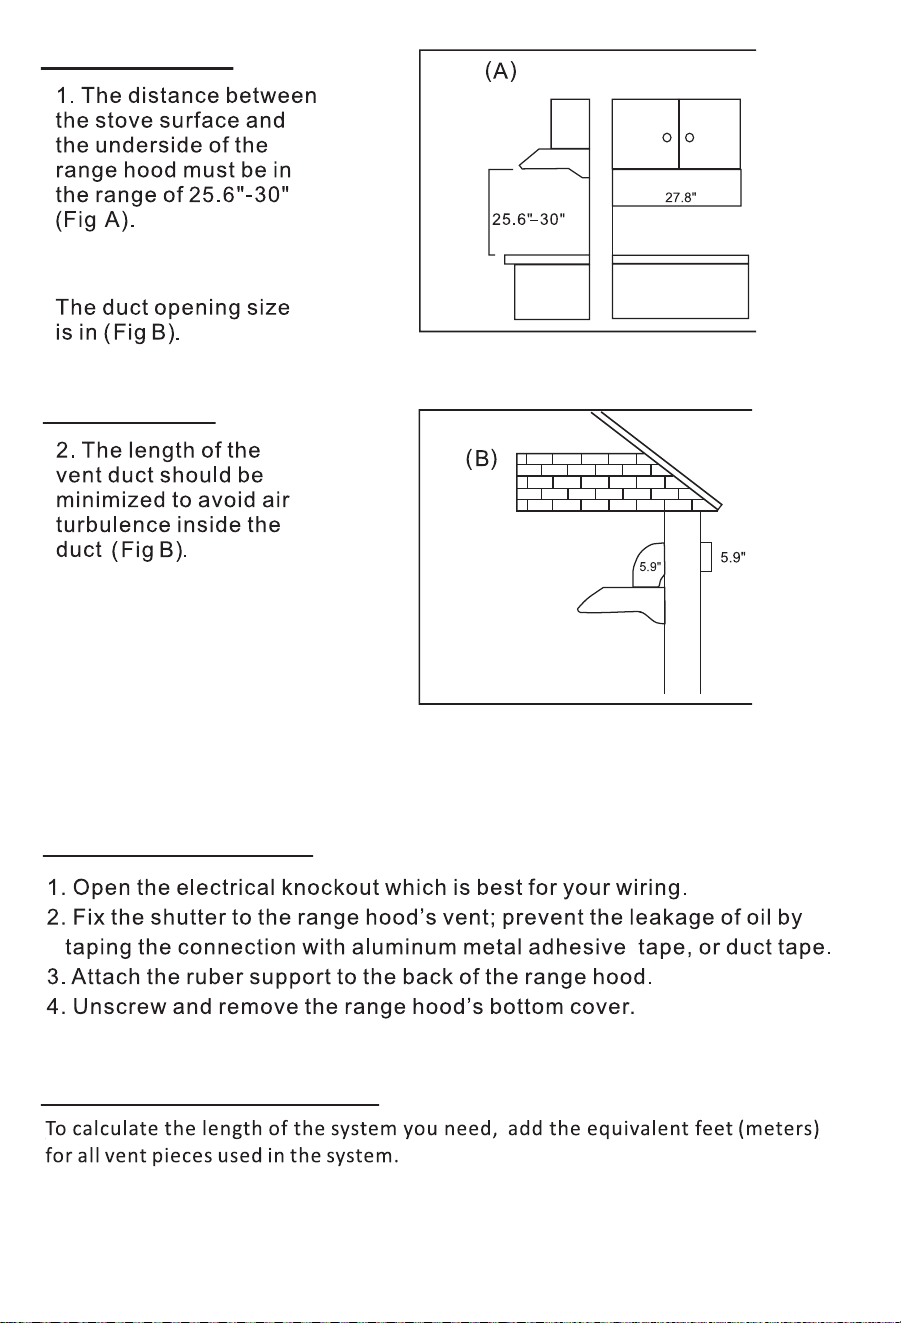
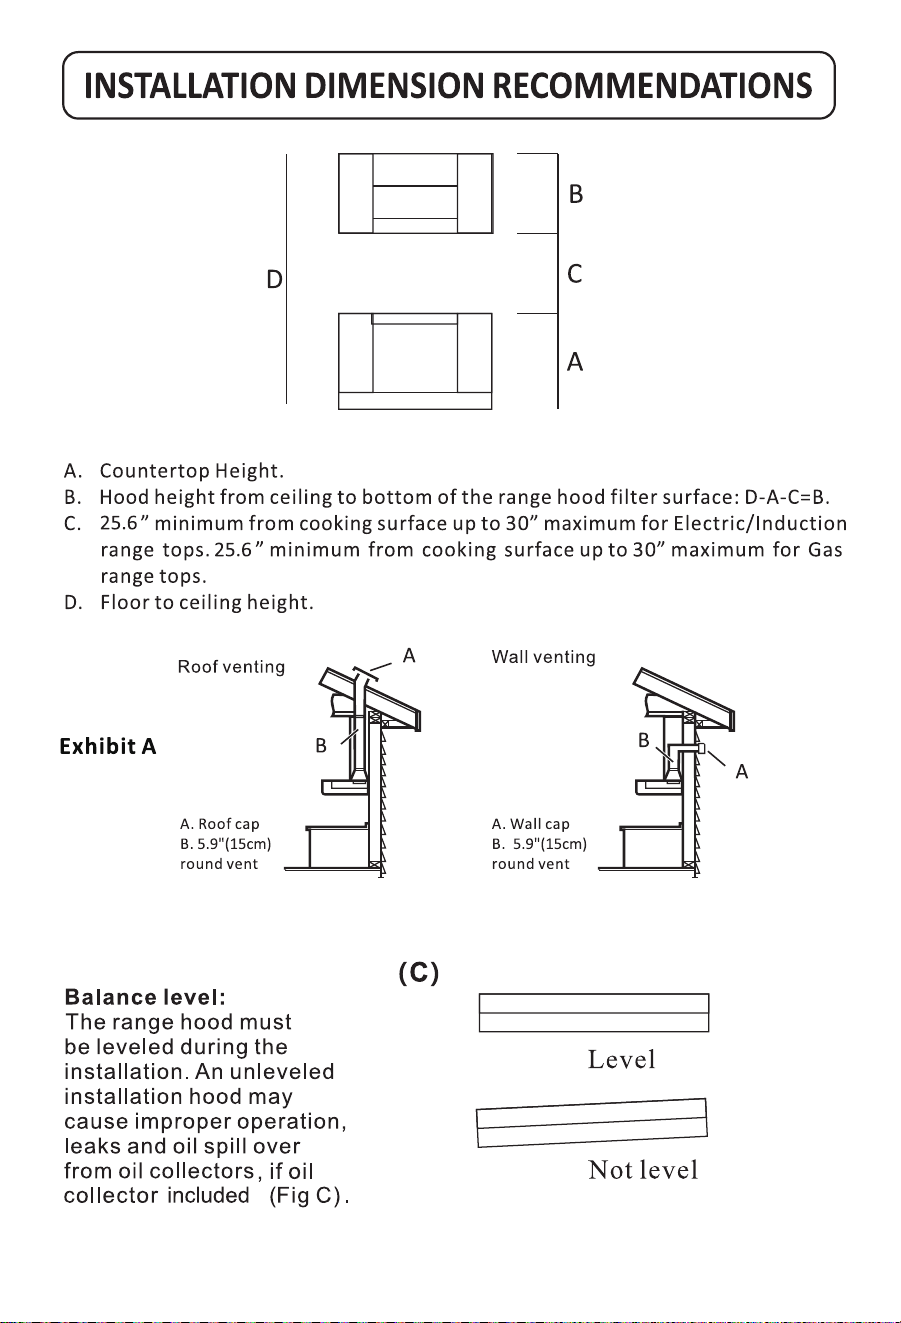
Installation Height
Vent duct length
Preparing the range hood
Calculating Vent System Length
6
7
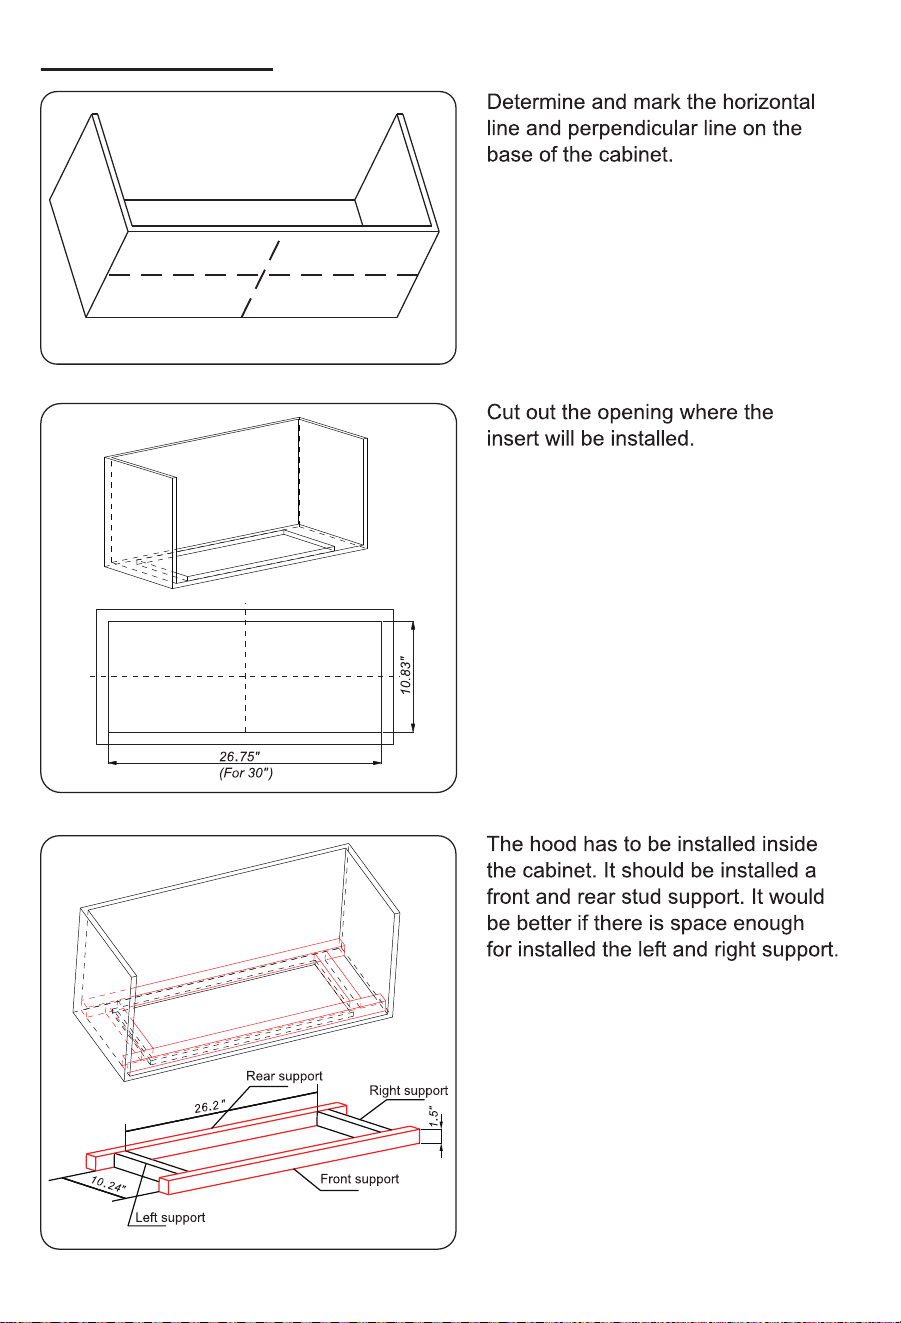
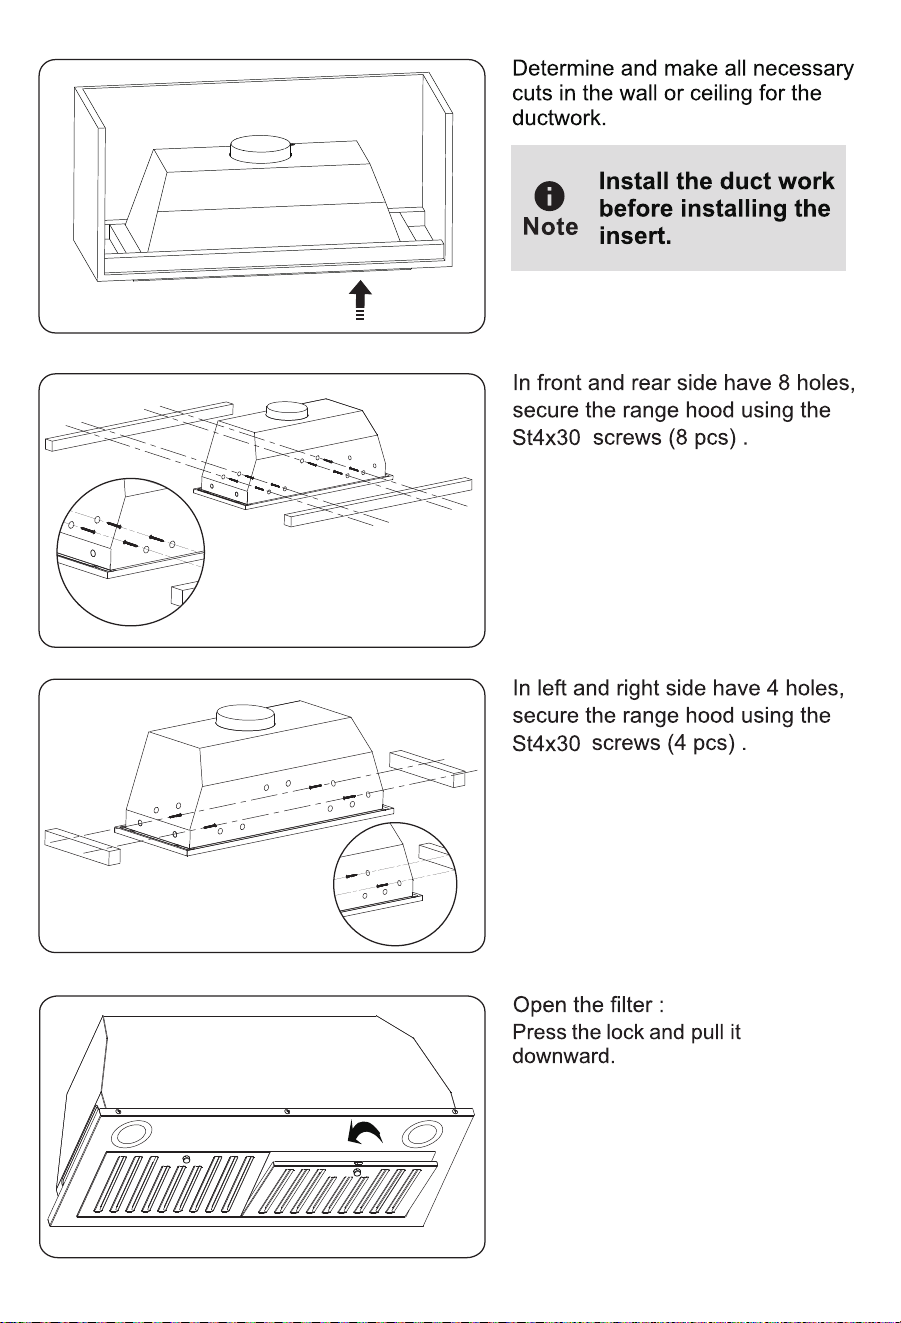
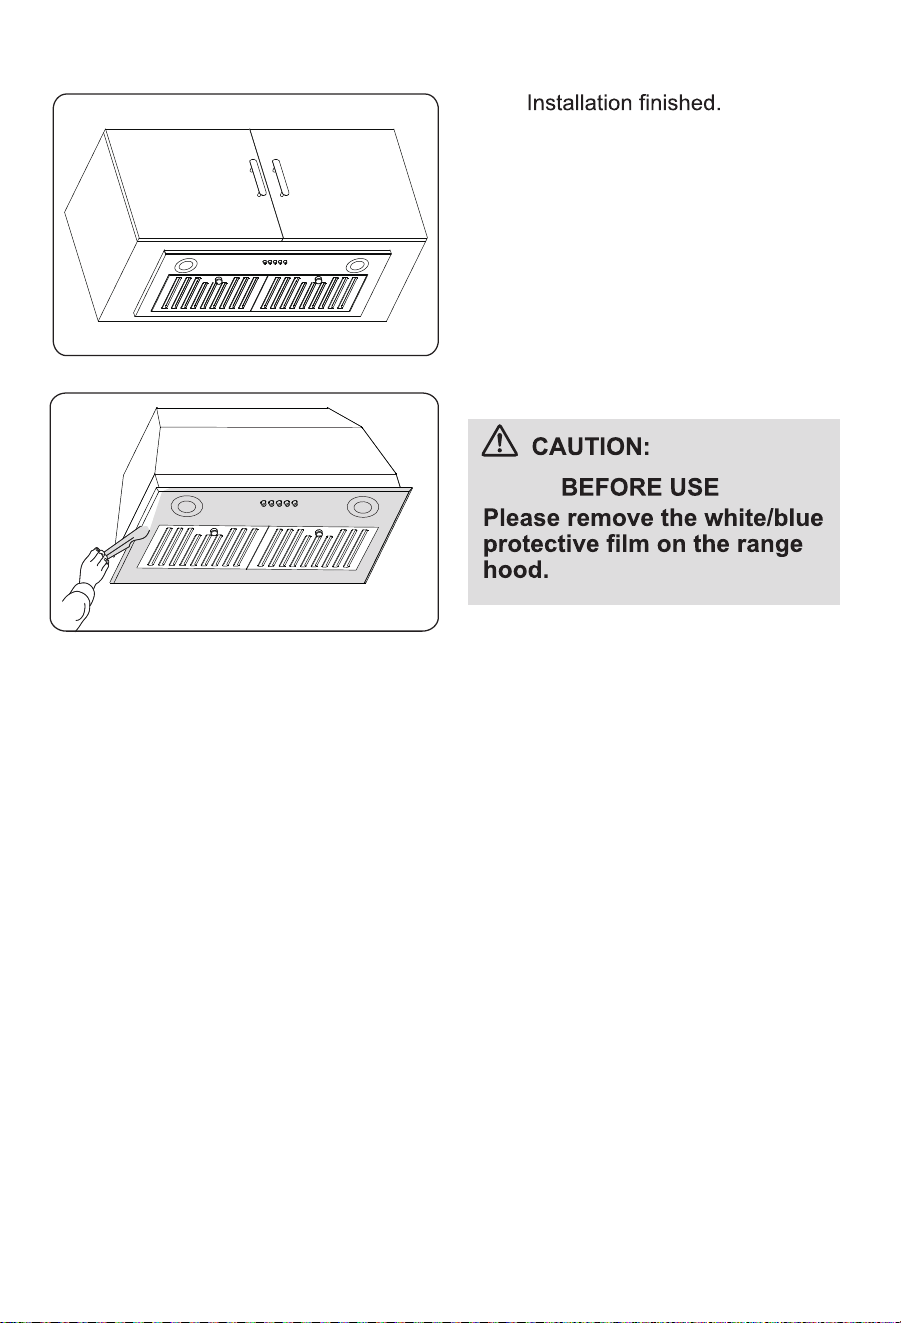
installation procedure
8
9
10
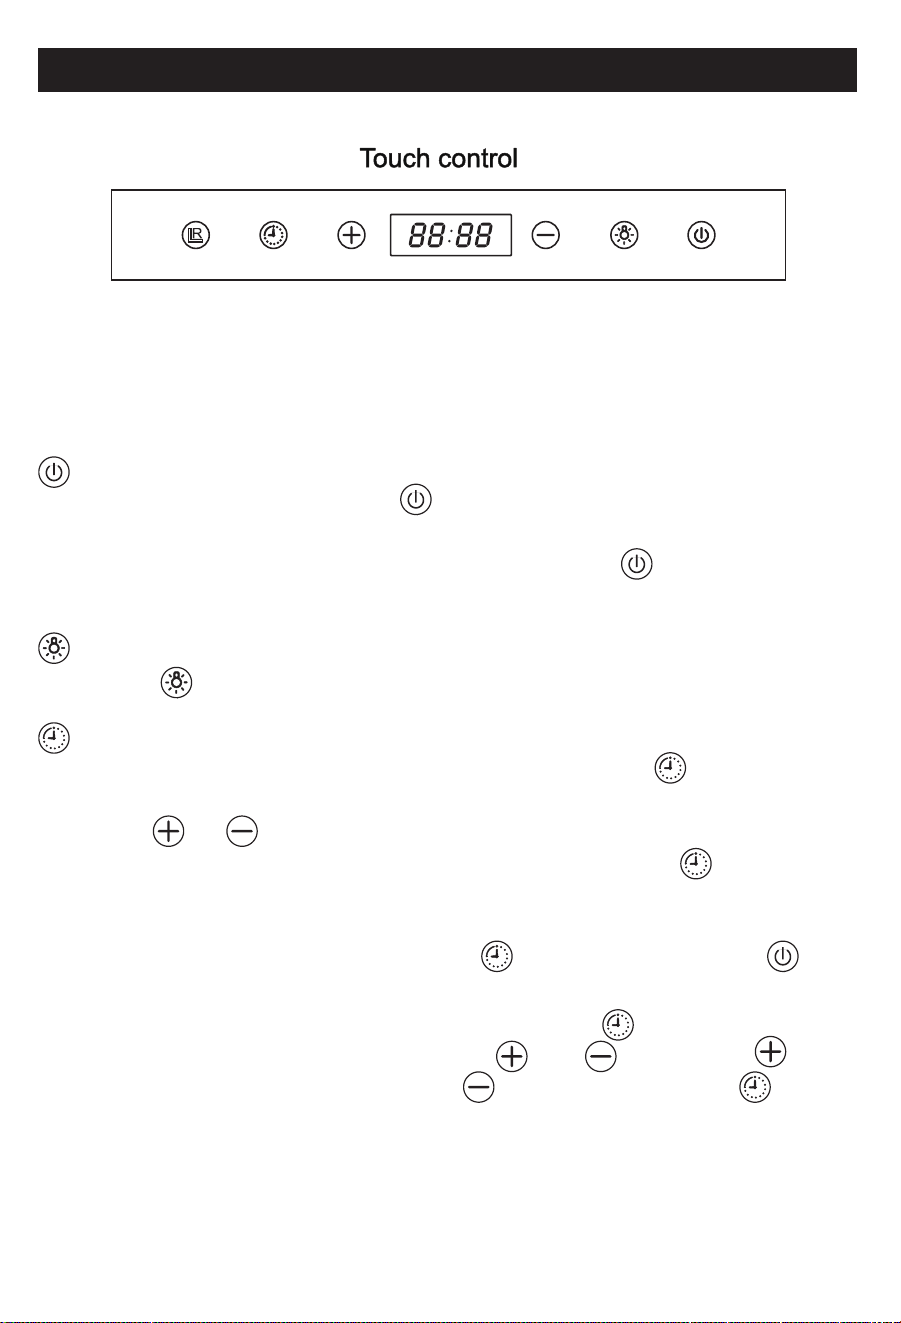
Electrify function
After connecting to the power, the indicator will be power-on and
off after 1 second. Display show up system time ( Default 00:00)
and then enter to the shutdown mode.
ON/OFF Key
During shutdown mode, press , the indicator is on, and then enter
into standby mode.
During standby mode or the motor is running, press to shutdown
the motor. ( Light is not effected)
Light key
Press to control the light ON and OFF.
Timer setting
1.Delay time function: During the motor is running, press for 2 seconds
with indicator on, display shows “01:00” and flash ( Default delay time is 1 minu
te).
Press or to adjust your desire time ( 1-60 minutes, long press can
adjust continuously). 10 seconds without operation or press , the display
stops flashing and starts countdown. The hood will back to shutdown mode
with countdown finish ( During countdown, it would not be influenced with
speed shift or lights ON/OFF. And press to exit countdown, press to
access to shutdown mode.)
2.Clock setting: During shutdown mode, long press for 2 seconds to
access into clock setting with indicator on, and flash. Press
to adjust hour (24-hour system), press to adjust minute. Press
again or without operation after 10 seconds, the data will be saved and exit.
(No memory function, need to reset the clock if the hood unplugged)
OPERATION
11
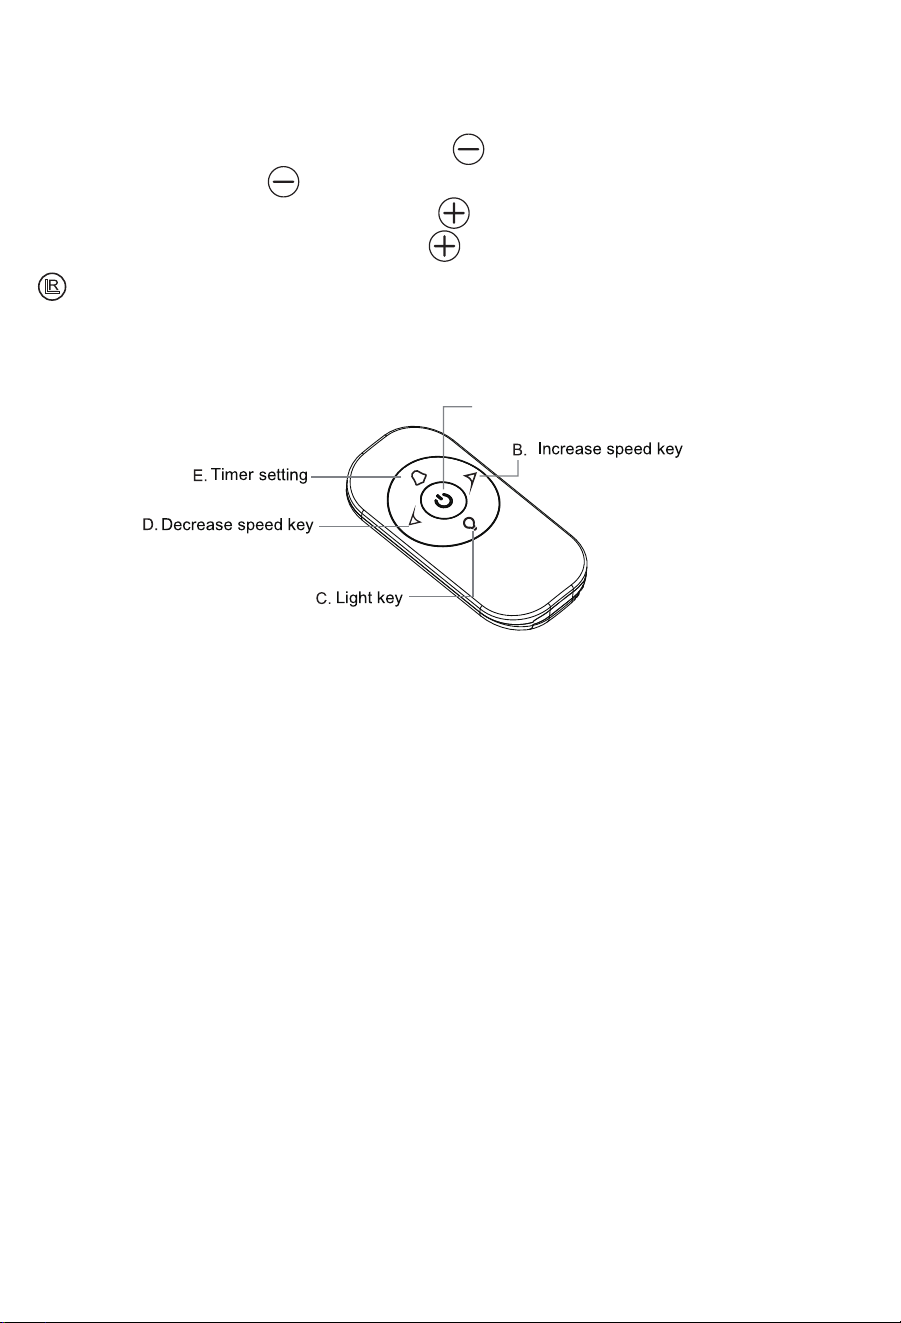
Remote function:
ON/OFF key: Press this button to control the hood ON/OFF. ( Light is not effected)
Decrease speed key: When the motor is running, press this button to decrease
the speed. During its low speed, press it, the motor stops running and back to
shutdown mode.
Increase speed key: During the standby mode, press this button, motor will run
at low speed. When the motor is running, press it to increase the speed.
Light key: Press this button to control the lights ON/OFF at any state.
Timer setting: When the motor is running, press this button, timer indicator on,
display shows “01:00” and flash. Press this button to adjust the shutdown time
( 1-60 minutes, can not long press for adjusting continuously).
Without operation after 10 seconds, the motor will start countdown.
(Remark: Remote can not set the clock individually.)
Motor function
1.When the motor is running, press to decrease the speed. During its
low speed, press to back to standby mode, the motor stops running.
2.During the standby mode, press , motor will run at low speed.
When the motor is running, press to increase the speed.
A. ON/OFF Key
Remote control
12
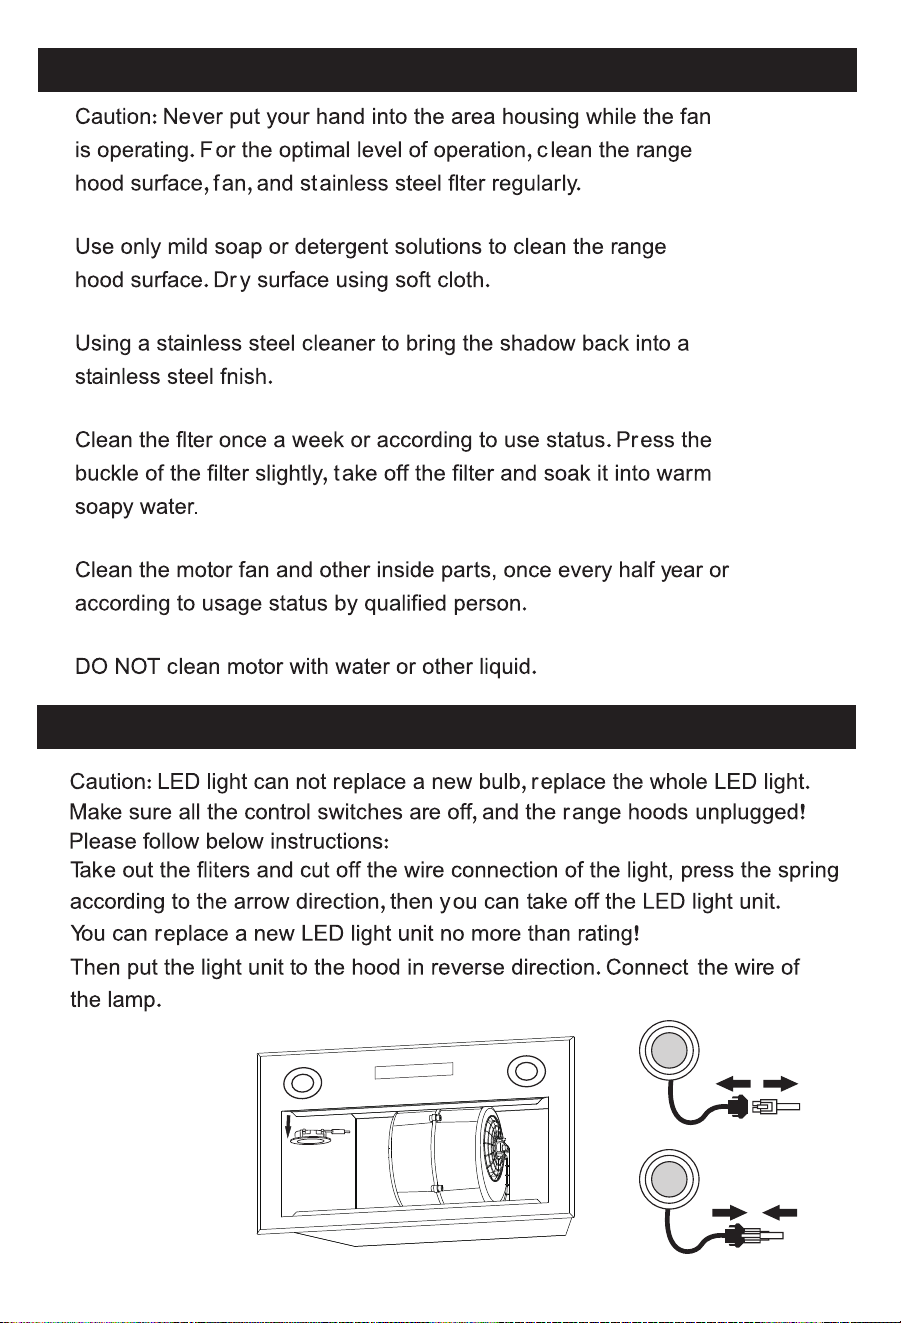
MAINTENANCE
TO REPLACE LIGHT
13
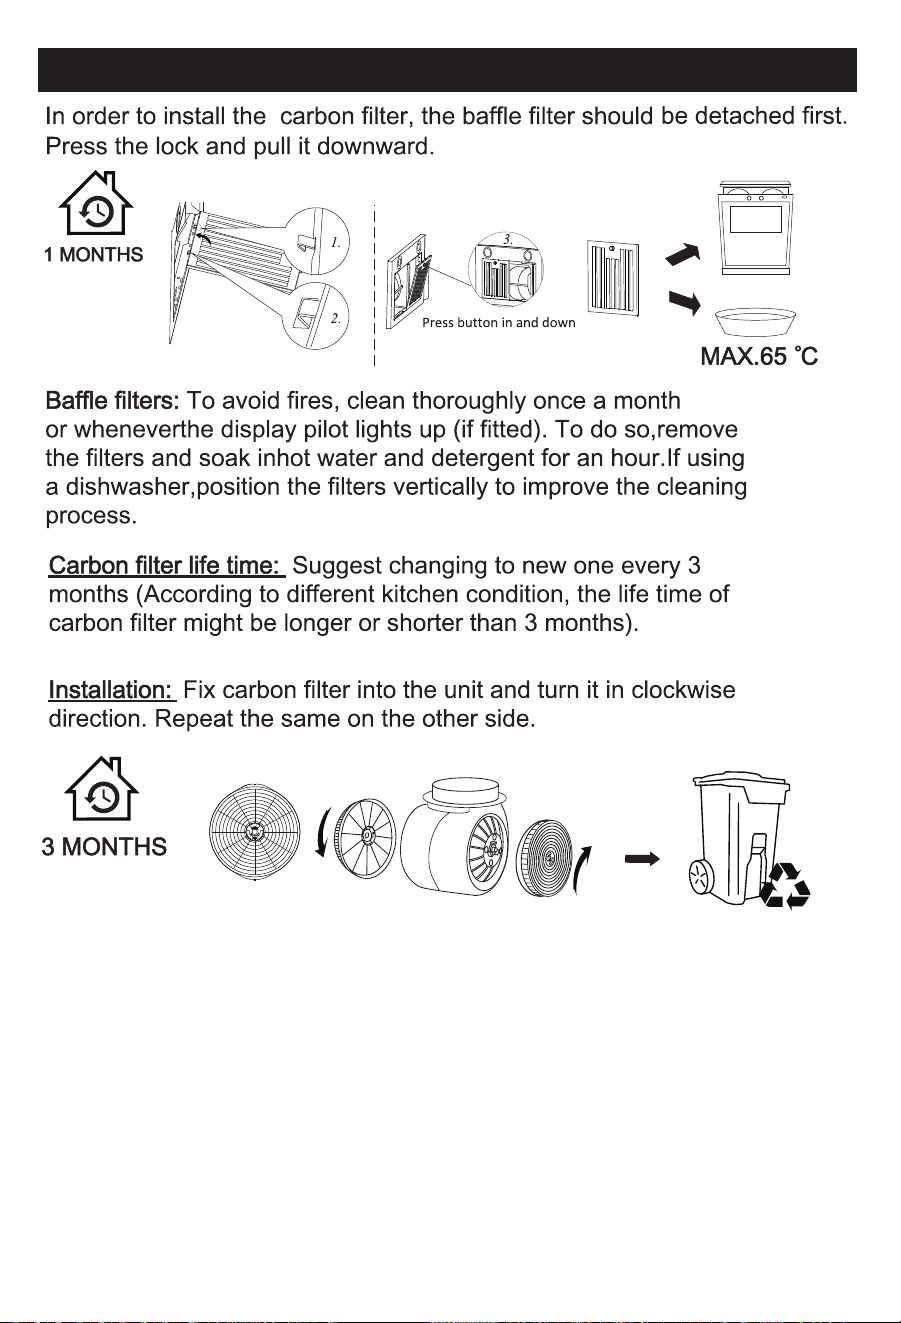
TO REPLACE FILTER
14
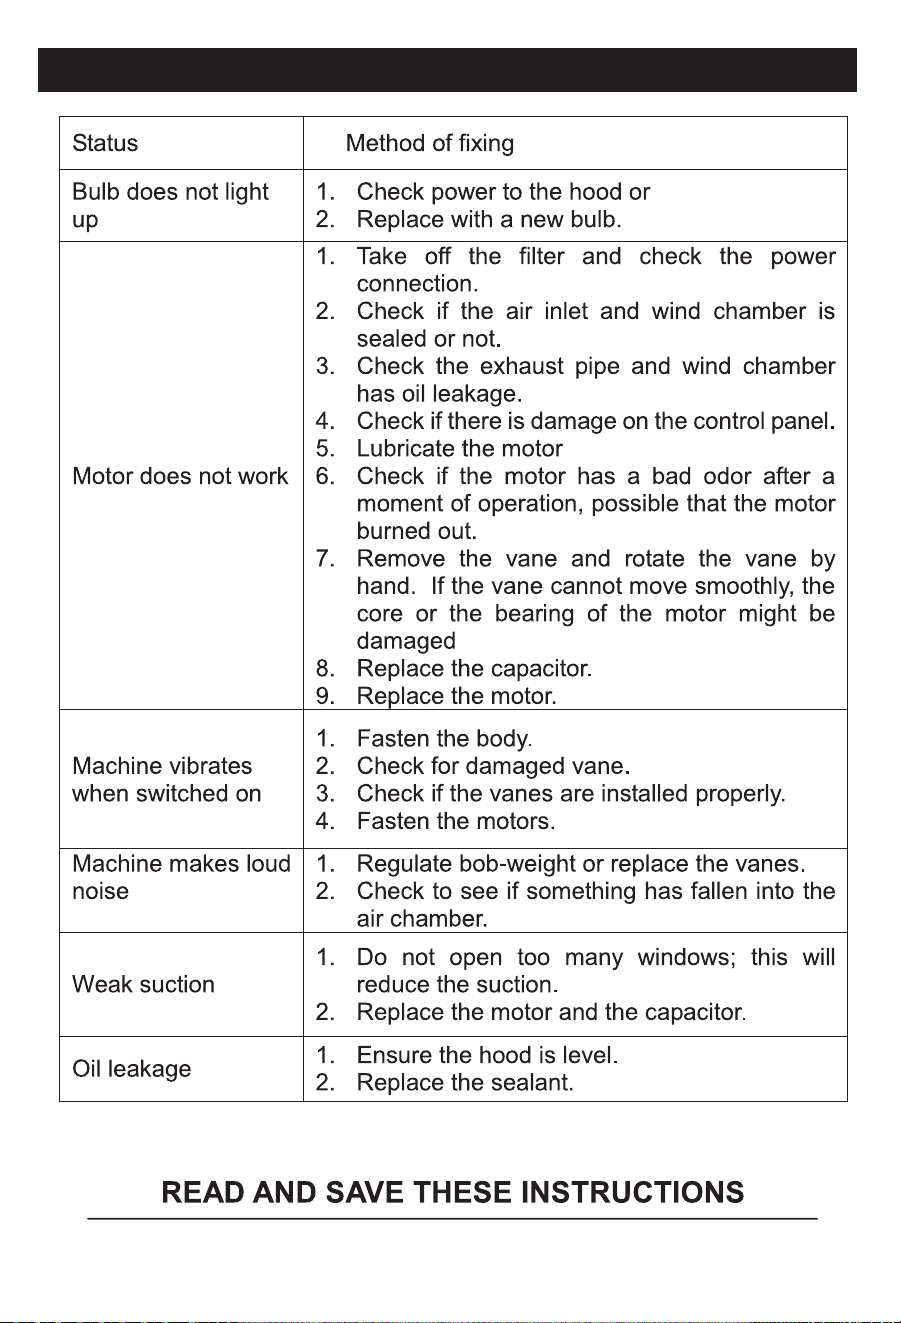
TROUBLESHOOTING
15

16