Contents
Precautions
Operating Precautions
User Maintenance
Battery
Mobile Link Precautions
Easy Operation
Performing Activity Measurement with the
Watch
Using the Phone App to View Activity Results
Recover Support and Health Management
Before Using the Watch
About This Watch
Charging the Watch
Charging with the Charger Cable
Solar Charging
Checking the Charge Level
Charging Time Guidelines
Power Saving
Connecting with a Phone
Pairing the Watch with Your Phone
Connecting with a Phone Paired With the
Watch
Unpairing
After Purchasing Another Phone
Creating Your Profile
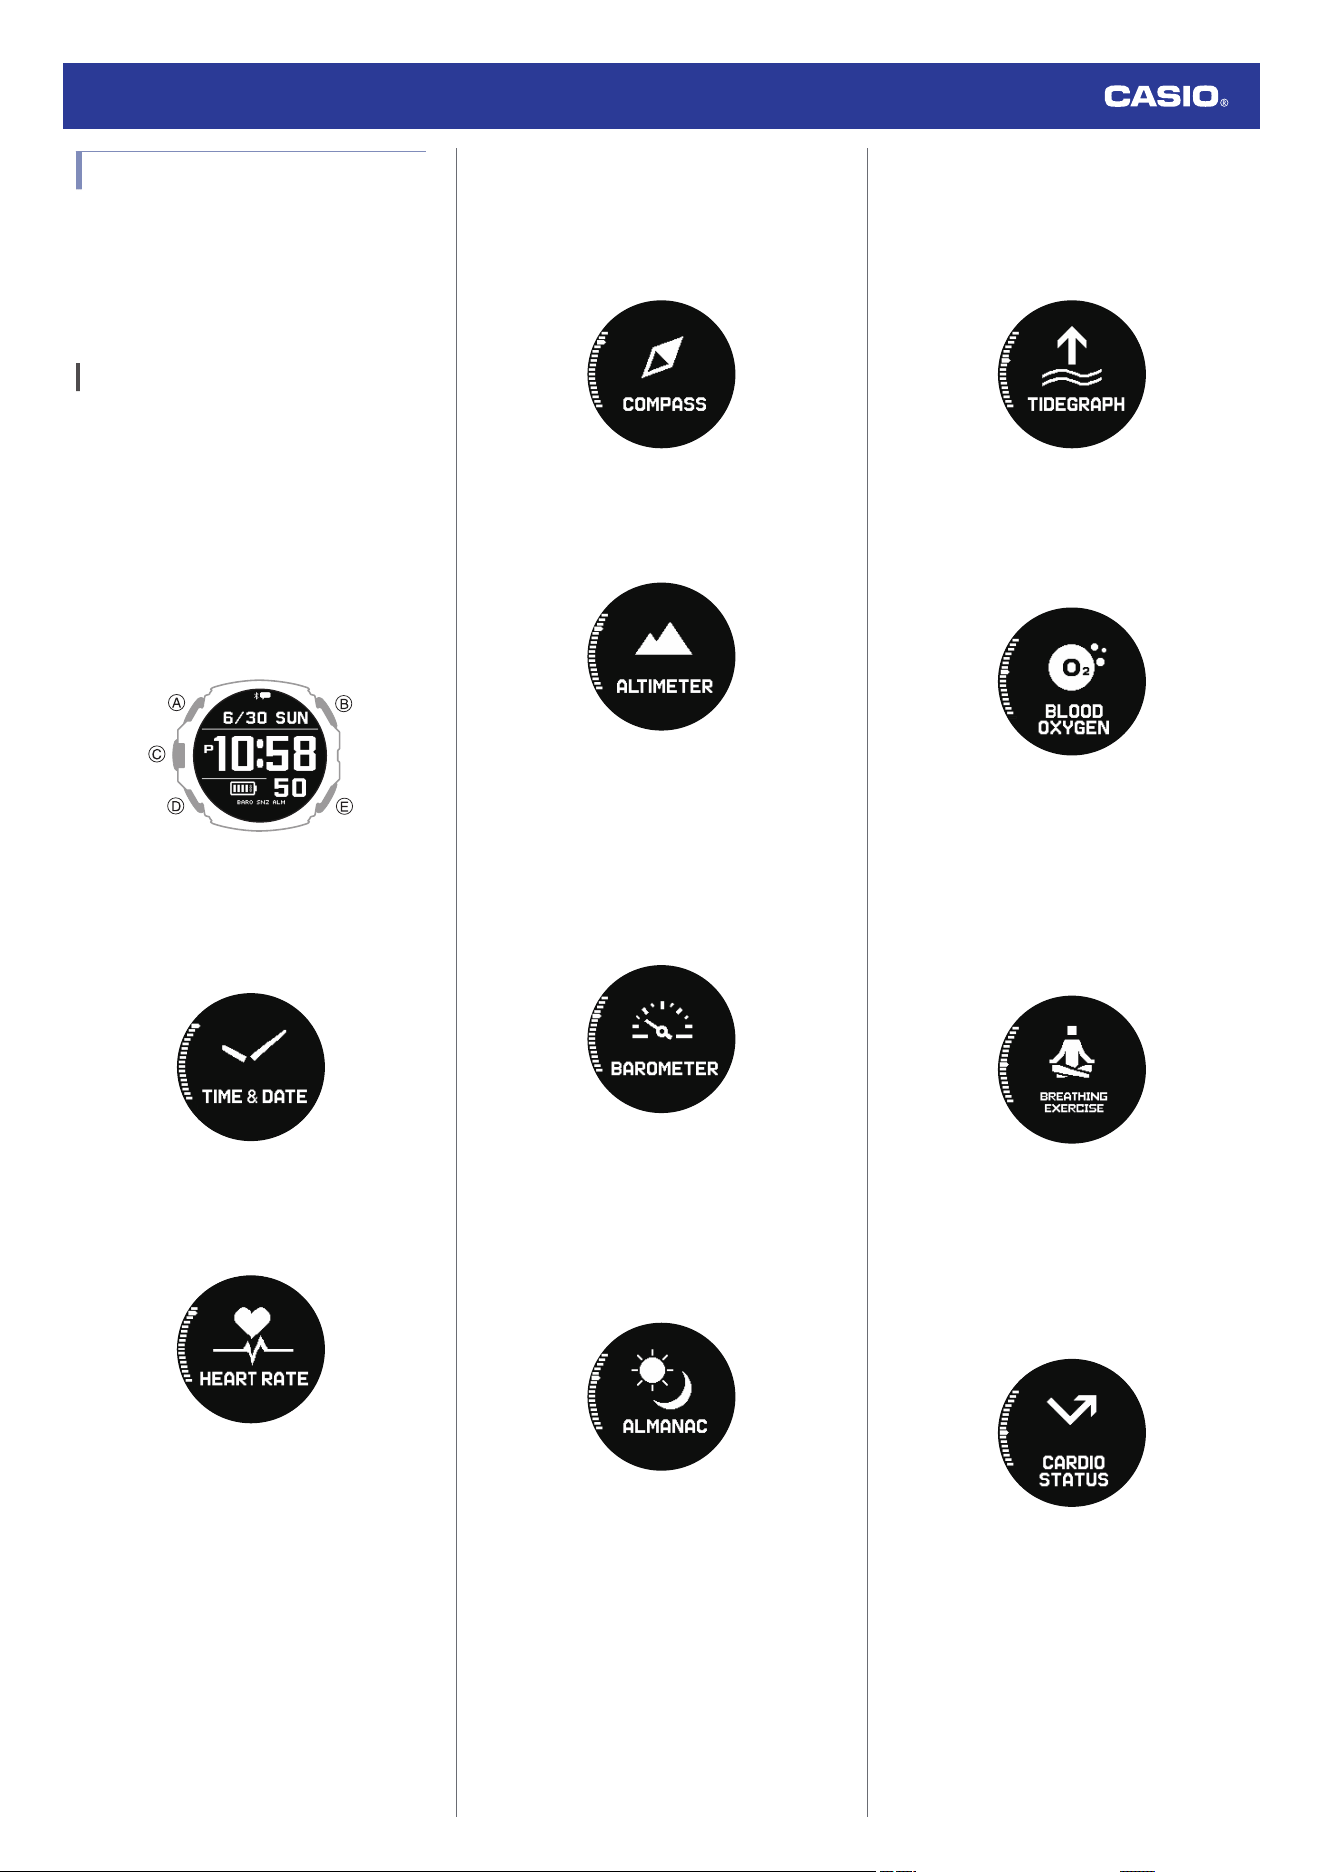
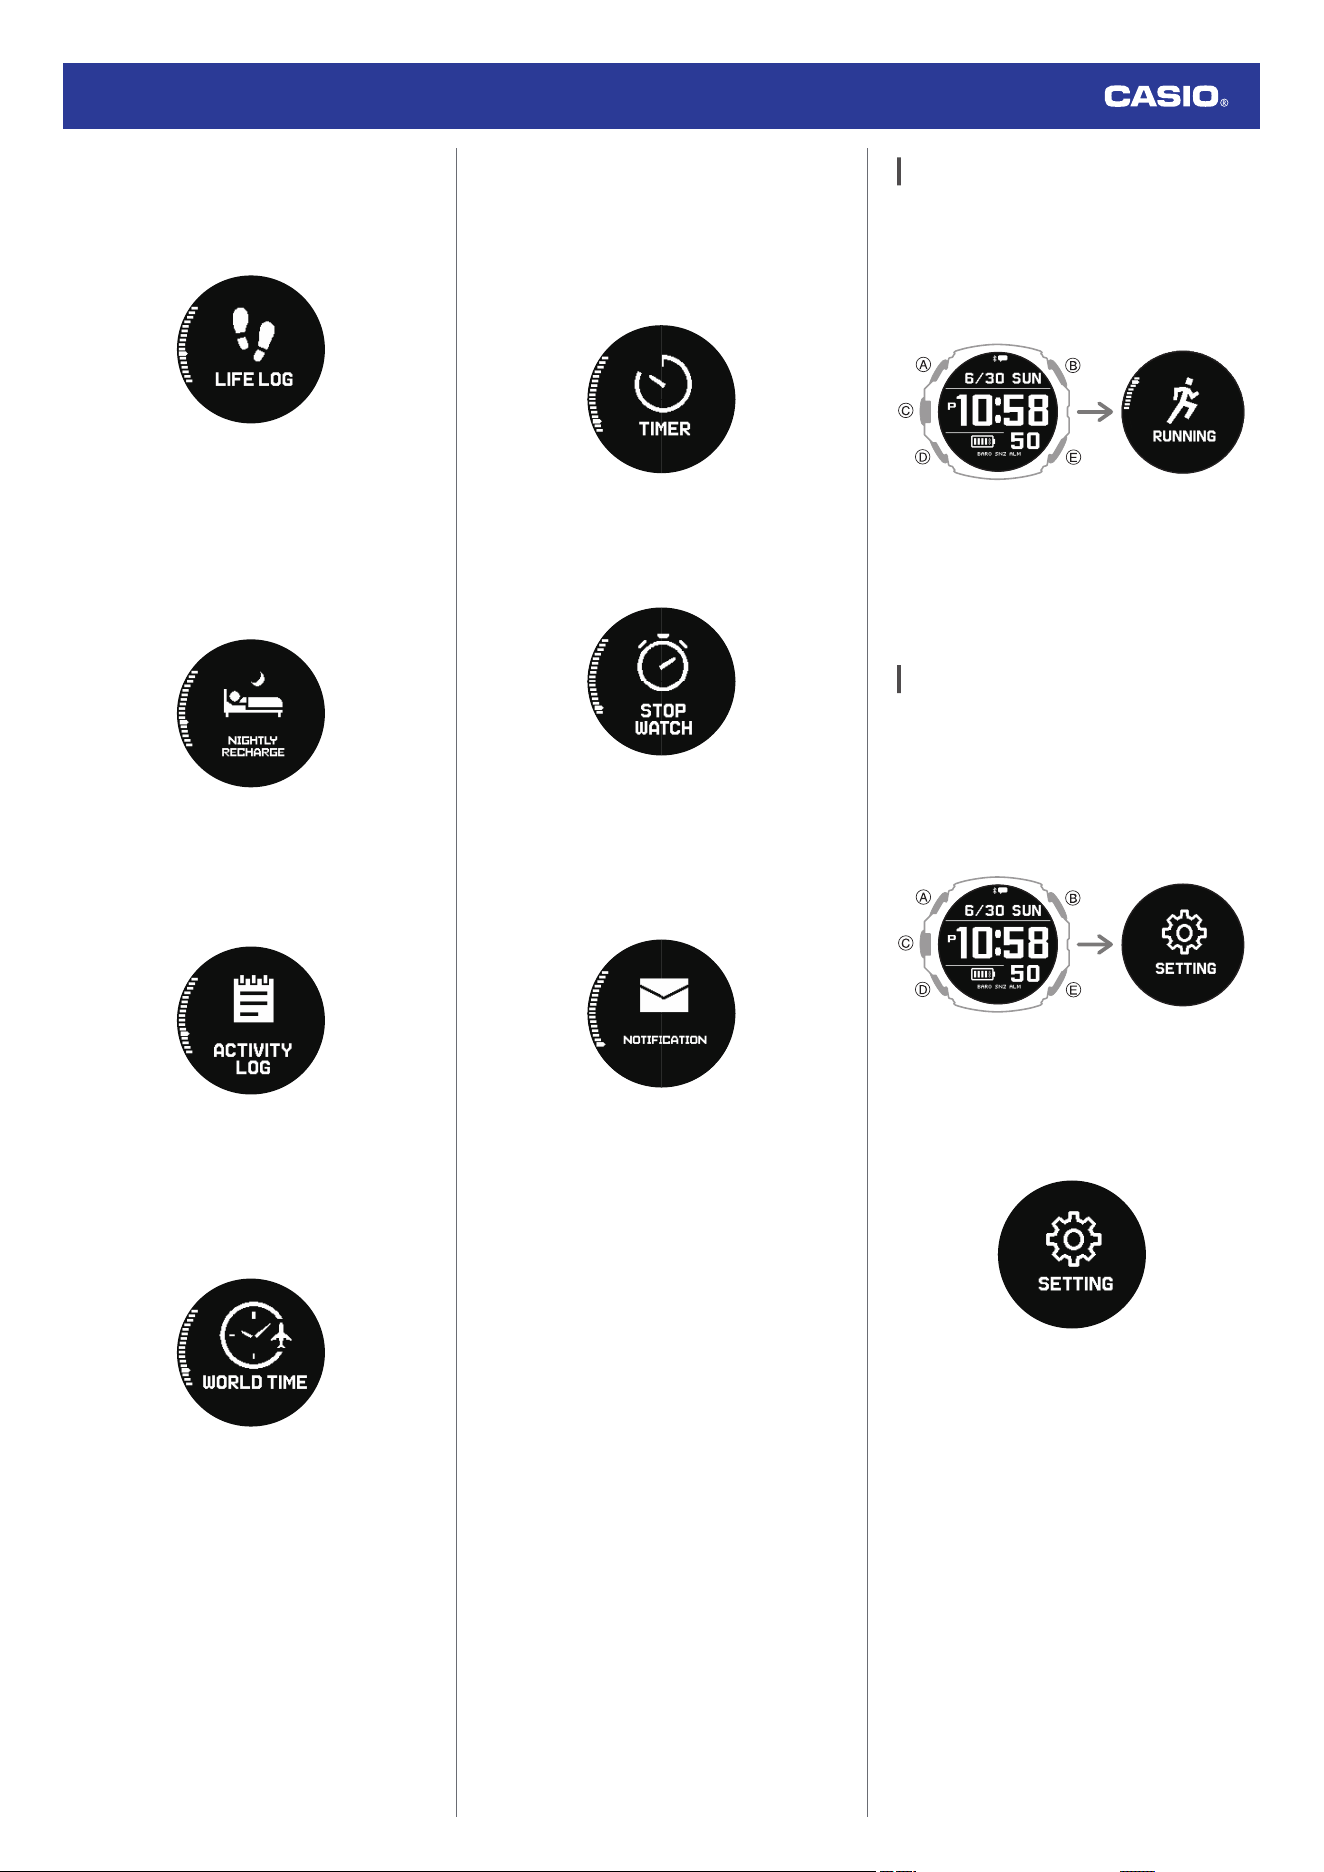
Mode Overview
Watch Mode
Activity Mode
Control Mode
Performing Activity
Measurement
Activity Overview
Activity Measurement that Supports GPS
Reception
Activities that Support Measurement
Without GPS Signal Reception
Performing Activity Measurement
Before Using Pool Swimming (POOL
SWIMMING)
Using the Timer for Interval Training
Overview
Timing with Interval Timers
Pausing and Resetting the Timer
Starting Heart-rate Training
Activity Measurement Precautions
Viewing Activity Log Records
Viewable Activity Log Items
Viewing Activity Records
Deleting Activity Records
Deleting Specific Data
Deleting All Activity Data
Viewing Your Training
Performance Condition
Viewing Your Cardio Load Status
Using Nightly Recharge™ to
Check Your Recovery Status
Checking Nightly Recharge™ Status
Breathing Exercises
Setting a Breathing Exercise Duration
Measuring a Breathing Exercise
Smart Alarm
Configuring Smart Alarm Settings
Turning Off Smart Alarm
Measuring Your Heart Rate
Checking Your Current Heart Rate
Using Heart Rate Measurement
Heart Rate Measurement Precautions
Blood Oxygen Level
Measurement
Measuring Your Blood Oxygen Level
Viewing Life Log Data
Viewing Life Log Data
Compass Reading
Taking a Compass Reading
Calibrating the Compass
Calibrating Compass Readings
Setting Up for True North Readings
(Magnetic Declination Calibration)
Magnetic North and True North
Digital Compass Reading Precautions
Watch Operation Guide 3554
1
MA2501-EE
OPUM-I
© 2023 CASIO COMPUTER CO., LTD.
Altitude Measurement
Checking the Current Altitude
Setting a Reference Altitude and Taking
Altitude Differential Readings
Calibrating Altitude Readings
Setting the Auto Measurement Interval
Altitude Reading Precautions
Barometric Pressure and
Temperature Measurement
Checking the Current Barometric Pressure
and Temperature
Barometric Pressure Change Indications
Calibrating Barometric Pressure Readings
Calibrating Temperature Readings
Barometric Pressure and Temperature
Reading Precautions
Almanac (Sunrise and Sunset
Times, and Moon Age)
Checking Sunrise and Sunset Times, and
Moon Age
Specifying a Location to Look Up Its Sunrise/
Sunset Times and Moon Age
Tide Function
Specifying a Port
Viewing the Tide Information for the Specified
Port
Time Adjustment
Automatically Connecting with a Phone to
Sync the Current Watch’s Time Setting
Auto Time Adjustment
Manually Connecting with a Phone to
Sync the Watch’s Time Setting
Adjusting the Watch’s Current Time Setting
Using GPS
Appropriate Signal Reception Location
Adjusting Time Settings by Performing a
Manual GPS Signal Receive Operation
Leap Second Reception
Signal Reception Precautions
Using GPS Outside Your Country
Using Watch Operations to Adjust the Time
Setting
World Time
Configuring World Time Settings
Alarm
Configuring Alarm Settings
Enabling the Hourly Time Signal
Turning Off an Alarm
Stopwatch
Measuring Elapsed Time
Measuring a Split Time
Timer
Setting a Start Time
Using the Timer
Pedometer
Counting Steps
Causes of Incorrect Step Count
Receiving Phone Notifications
Enabling and Disabling Incoming Call
Notifications
Displaying Notification Contents
Cycling Between Notification Cut-in Displays
Deleting a Notification
Deleting a Particular Notification
Deleting All Notifications
Activity Measurement
Settings
Enabling Auto Lap Timing
Setting the Swimming Pool Length
Enabling Auto Pause
Changing the GPS Receive Interval
Configuring Training Alert Settings
Training Alert Screen Indicators
Alert Screen Switching
Configuring Distance Measurement Settings
Configuring Interval Timer Settings
Using the Application to
Configure Settings
Specifying a Watch Face
Customizing the Watch Mode and Activity
Mode Functions
Configuring Activity Measurement Display
Settings
Specifying Checkpoints Along a Training
Course (Altitude Navigation)
Enabling the Wrist Sensor
Specifying Your Desired Bedtime and Wake-
Up Time
Specifying a Daily Step Count Target
Configuring Watch Settings
Watch Operation Guide 3554
2
Other Settings
Changing the Watch Face
Turning On Silent Mode
Enabling Step Reminder
Specifying the Night Time
Configuring Sound and Vibration Settings
Configuring Operation Sound and
Vibration Settings
Configuring Notification Sound and
Vibration Settings
Configuring the Auto Light Setting
Specifying the Illumination Duration
Enabling Power Saving
Disabling Power Saving
Changing the Length and Weight Units
Specifying the Calorie Display Unit
Specifying the Barometric Pressure Unit
Specifying the Temperature Unit
Basic Information
General Guide
Indicators
Viewing the Face in the Dark
Fastening the Watch to Your Wrist
Updating the Watch’s Software Version
Resetting Watch Settings
Phone Finder
Entering the Watch Airplane Mode
Other Information
City Table
Summer Time Table
Fitness Categories
Supported Phones
Specifications
Message Screen List
Checking Wireless Compliance Information
Copyrights and Registered Copyrights
Software
Troubleshooting
Watch Operation Guide 3554
3
Precautions
Operating Precautions
●
Water Resistance
●
The information below applies to watches
with WATER RESIST or WATER
RESISTANT marked on the back cover.
Water Resistance Under Daily Use
Marking on watch front or on
back cover
No BAR
mark
Example of Daily Use
Hand washing, rain Yes
Water-related work, swimming No
Windsurfing No
Skin diving No
Enhanced Water Resistance Under Daily
Use
5 Atmospheres
Marking on watch front or on
back cover
5BAR
Example of Daily Use
Hand washing, rain Yes
Water-related work, swimming Yes
Windsurfing No
Skin diving No
10 Atmospheres
Marking on watch front or on
back cover
10BAR
Example of Daily Use
Hand washing, rain Yes
Water-related work, swimming Yes
Windsurfing Yes
Skin diving Yes
20 Atmospheres
Marking on watch front or on
back cover
20BAR
Example of Daily Use
Hand washing, rain Yes
Water-related work, swimming Yes
Windsurfing Yes
Skin diving Yes
●
Do not use your watch for scuba diving or
other types of diving that requires air tanks.
●
Watches that do not have WATER RESIST
or WATER RESISTANT marked on the
back cover are not protected against the
effects of sweat. Avoid using such a watch
under conditions where it will be exposed to
large amounts of sweat or moisture, or to
direct splashing with water.
●
Even if a watch is water resistant, note the
usage precautions described below. Such
types of use reduce water resistance
performance and can cause fogging of the
glass.
ー
Do not operate the crown or buttons while
your watch is submersed in water or wet.
ー
Avoid wearing your watch while in the
bath.
ー
Do not wear your watch while in a heated
swimming pool, sauna, or any other high
temperature/high humidity environment.
ー
Do not wear your watch while washing
your hands or face, while doing
housework, or while performing any other
task that involves soaps or detergents.
●
After submersion in seawater, use plain
water to rinse all salt and dirt from your
watch.
●
To maintain water resistance, have the
gaskets of your watch replaced periodically
(about once every two or three years).
●
A trained technician will inspect your watch
for proper water resistance whenever you
have its battery replaced. Battery
replacement requires the use of special
tools. Always request battery replacement
from your original retailer or from an
authorized CASIO service center.
●
Some water-resistant watches come with
fashionable leather bands. Avoid
swimming, washing, or any other activity
that causes direct exposure of a leather
band to water.
●
The inside surface of the watch glass may
fog when the watch is exposed to a sudden
drop in temperature. No problem is
indicated if the fogging clears up relatively
quickly. Sudden and extreme temperature
changes (such as coming into an air
conditioned room in the summer and
standing close to an air conditioner outlet,
or leaving a heated room in the winter and
allowing your watch to come into contact
with snow) can cause it to take longer for
glass fogging to clear up. If glass fogging
does not clear up or if you notice moisture
inside of the glass, immediately stop using
your watch and take it to your original
retailer or to an authorized CASIO service
center.
●
Your water-resistant watch has been tested
in accordance with International
Organization for Standardization
regulations.
●
Band
●
Tightening the band too tightly can cause
you to sweat and make it difficult for air to
pass under the band, which can lead to skin
irritation. Do not fasten the band too tightly.
There should be enough room between the
band and your wrist so you can insert your
finger.
●
Deterioration, rust, and other conditions can
cause the band to break or come off of your
watch, which in turn can cause band pins to
fly out of position or to fall out. This creates
the risk of your watch falling from your wrist
and becoming lost, and also creates the risk
of personal injury. Always take good care of
your band and keep it clean.
●
Immediately stop using a band if you even
notice any of the following: loss of band
flexibility, band cracks, band discoloration,
band looseness, band connecting pin flying
or falling out, or any other abnormality. Take
your watch to your original retailer or to a
CASIO service center for inspection and
repair (for which you will be charged) or to
have the band replaced (for which you will
be charged).
Watch Operation Guide 3554
4

●
Temperature
●
Never leave your watch on the dashboard
of a car, near a heater, or in any other
location that is subject to very high
temperatures. Do not leave your watch
where it will be exposed to very low
temperatures. Temperature extremes can
cause your watch to lose or gain time, to
stop, or otherwise malfunction.
●
Leaving your watch in an area hotter than
+60 °C (140 °F) for long periods can lead to
problems with its LCD. The LCD may
become difficult to read at temperatures
lower than 0 °C (32 °F) and greater than
+40 °C (104 °F).
●
Impact
●
Your watch is designed to withstand impact
incurred during normal daily use and during
light activity such as playing catch, tennis,
etc. Dropping your watch or otherwise
subjecting it to strong impact, however, can
lead to malfunction. Note that watches with
shock-resistant designs (G‑SHOCK,
BABY‑G, G‑MS) can be worn while
operating a chain saw or engaging in other
activities that generate strong vibration, or
while engaging in strenuous sports
activities (motocross, etc.)
●
Magnetism
●
Though operation of your watch normally is
not affected by magnetism, its accuracy
may be affected if the watch itself becomes
magnetized. Also, very strong magnetism
(from medical equipment, etc.) should be
avoided because it can cause malfunction
of your watch and damage to electronic
components.
●
Electrostatic Charge
●
Exposure to very strong electrostatic
charge can cause your watch to display the
wrong time. Very strong electrostatic
charge even can damage electronic
components.
●
Electrostatic charge may cause temporary
blotching in blank areas of the LCD.
●
Chemicals
●
Do not allow your watch to come into
contact with thinner, gasoline, solvents,
oils, or fats, or with any cleaners, adhesives,
paints, medicines, or cosmetics that contain
such ingredients. Doing so can cause
discoloration of or damage to the resin
case, resin band, leather, and other parts.
●
Storage
●
If you do not plan to use your watch for a
long time, thoroughly wipe it free of all dirt,
sweat, and moisture, and store it in a cool,
dry place.
●
Resin Components
●
Allowing your watch to remain in contact
with other items or storing it together with
other items for long periods while it is wet
can cause color on resin components to
transfer to the other items, or the color of the
other items to transfer to the resin
components of your watch. Be sure to dry
off your watch thoroughly before storing it
and make sure it is not in contact with other
items.
●
Leaving your watch where it is exposed to
direct sunlight (ultraviolet rays) for long
periods or failure to clean dirt from your
watch for long periods can cause it to
become discolored.
●
Friction caused by certain conditions
(strong external force, sustained rubbing,
impact, etc.) can cause discoloration of
painted components.
●
If there are printed figures on the band,
strong rubbing of the printed area can cause
discoloration.
●
Leaving your watch wet for long periods can
cause fluorescent color to fade. Wipe the
watch dry as soon as possible after it
becomes wet.
●
Semi-transparent resin parts can become
discolored due to sweat and dirt, and if
exposed to high temperatures and humidity
for long periods.
●
Daily use and long-term storage of your
watch can lead to deterioration, breaking, or
bending of resin components. The extent of
such damage depends on usage conditions
and storage conditions.
●
Leather Band
●
Allowing your watch to remain in contact
with other items or storing it together with
other items for long periods while it is wet
can cause the color of the leather band to
transfer to the other items or the color of the
other items to transfer to the leather band.
Be sure to dry off your watch thoroughly with
a soft cloth before storing it and make sure
it is not in contact with other items.
●
Leaving a leather band where it is exposed
to direct sunlight (ultraviolet rays) for long
periods or failure to clean dirt from a leather
band for long periods can cause it to
become discolored.
CAUTION:
Exposing a leather band to rubbing or dirt
can cause color transfer and discoloration.
●
Metal Components
●
Failure to clean dirt from metal components
can lead to formation of rust, even if
components are stainless steel or plated. If
metal components exposed to sweat or
water, wipe thoroughly with a soft,
absorbent cloth and then place the watch in
a well-ventilated location to dry.
●
Use a soft toothbrush or similar tool to scrub
the metal with a weak solution of water and
a mild neutral detergent, or with soapy
water. Next, rinse with water to remove all
remaining detergent and then wipe dry with
a soft absorbent cloth. When washing metal
components, wrap the watch case with
kitchen plastic wrap so it does not come into
contact with the detergent or soap.
●
Bacteria and Odor Resistant Band
●
The bacteria and odor resistant band
protects against odor generated by the
formation of bacteria from sweat, which
ensures comfort and hygiene. In order to
ensure maximum bacteria and odor
resistance, keep the band clean. Use an
absorbent soft cloth to thoroughly wipe the
band clean of dirt, sweat, and moisture. A
bacteria and odor resistant band
suppresses the formation of organisms and
bacteria. It does not protect against rash
due to allergic reaction, etc.
Watch Operation Guide 3554
5
●
Liquid Crystal Display
●
Display figures may be difficult to read when
viewed from an angle.
●
Watch with Data Memory
●
Allowing the battery to go dead, replacing
the battery, or having your watch repaired
can cause all data in watch memory to be
lost. Note that CASIO Computer Co., Ltd.
assumes no responsibility for any damages
or losses caused by data lost due to
malfunction or repair of your watch,
replacement of the battery, etc. Be sure to
keep separate written copies of all
important data.
●
Watch Sensors
●
A watch sensor is a precision instrument.
Never try to take it apart. Never try to insert
any objects into the openings of a sensor,
and take care to ensure that dirt, dust, or
other foreign matter does not get into it.
After using your watch where it has been
immersed in saltwater, rinse it thoroughly
with fresh water.
●
Heart Rate Monitor Functions
●
The back cover of the watch has a built-in
sensor that detects your pulse. This is used
to calculate and display an approximate
heart rate value. The factors below can
cause error in the displayed heart rate
value.
ー
How the watch is affixed to the wrist
ー
Individual wrist characteristics and
conditions
ー
Training type and intensity
ー
Sweat, dirt, and/or other foreign matter
near the sensor
All of this means that heart rate values
displayed by the watch are approximate,
and no guarantees are made concerning
their accuracy.
●
The heart rate monitor function of this watch
is intended for recreational purposes, and
should not be used in any way for medical
purposes.
●
Chargeable Battery Handling (Please
recycle!)
The built-in lithium-ion battery includes
valuable resources. When you are ready to
discard your watch, follow proper procedures
in order to recycle resources. For information
about the proper procedure to follow when
discarding the watch, contact an authorized
CASIO service center or your original retailer.
Important!
●
Do not try to replace batteries by
yourself. Request battery replacement
from an authorized CASIO service
center or your original retailer.
●
Personal Information Protection
Precautions
To protect your personal information, be sure
to perform the operation under “Resetting
Watch Settings” before transferring
ownership of this watch to another party or
before disposing of it.
Note that CASIO Computer Co., Ltd.
assumes no responsibility for any
damage or loss suffered by you or any
third party arising through the use of your
watch or its malfunction.
User Maintenance
●
Caring for Your Watch
Remember that you wear your watch next to
your skin, just like a piece of clothing. To
ensure your watch performs at the level for
which it is designed, keep it clean by
frequently wiping with a soft cloth to keep your
watch and band free of dirt, sweat, water and
other foreign matter.
●
Whenever your watch is exposed to sea
water or mud, rinse it off with clean fresh
water.
●
For a metal band or a resin band with metal
parts, use a soft toothbrush or similar tool to
scrub the band with a weak solution of water
and a mild neutral detergent, or with soapy
water. Next, rinse with water to remove all
remaining detergent and then wipe dry with
a soft absorbent cloth. When washing the
band, wrap the watch case with kitchen
plastic wrap so it does not come into contact
with the detergent or soap.
●
For a resin band, wash with water and then
wipe dry with a soft cloth. Note that
sometimes a smudge like pattern may
appear on the surface of a resin band. This
will not have any effect on your skin or
clothing. Wipe with a cloth to remove the
smudge pattern.
●
Clean water and sweat from a leather band
by wiping with a soft cloth.
●
Not operating a watch crown, buttons, or
rotary bezel could lead to later problems
with their operation. Periodically rotate the
crown and rotary bezel, and press buttons
to maintain proper operation.
Watch Operation Guide 3554
6

●
Dangers of Poor Watch Care
Rust
●
Though the metal steel used for your watch
is highly rust-resistant, rust can form if your
watch is not cleaned after it becomes dirty.
ー
Dirt on your watch can make it impossible
for oxygen to come into contact with the
metal, which can lead to breakdown of
the oxidization layer on the metal surface
and the formation of rust.
●
Rust can cause sharp areas on metal
components and can cause band pins to fly
out of position or to fall out. If you ever notice
any abnormality immediately stop using
your watch and take it to your original
retailer or to an authorized CASIO service
center.
●
Even if the surface of the metal appears
clean, sweat and rust in crevasses can soil
the sleeves of clothing, cause skin irritation,
and even interfere with watch performance.
Premature Wear
●
Leaving sweat or water on a resin band or
bezel, or storing your watch an area subject
to high moisture can lead to premature
wear, cuts, and breaks.
Skin Irritation
●
Individuals with sensitive skin or in poor
physical condition may experience skin
irritation when wearing a watch. Such
individuals should keep their leather band
or resin band particularly clean. Should you
ever experience a rash or other skin
irritation, immediately remove your watch
and contact a skin care professional.
Battery
●
The special rechargeable battery used by
your watch is not intended to be removed or
replaced by you. Use of a rechargeable
battery other than the special one specified
for your watch can damage your watch.
●
The rechargeable (secondary) battery can
be charged by using the charging cable to
connect the watch to a device equipped
with a USB terminal, so it does not require
regular replacement as the primary battery
requires. Note, however, that long use or
operating conditions can cause the
capacity or charging efficiency of the
rechargeable battery to deteriorate. If you
feel that the amount of operation provided
by charging is too short, contact your
original retailer or CASIO service center.
●
Regular, once-a-month charging is
recommended to extend the service life of
the watch’s battery.
Mobile Link Precautions
●
Legal Precautions
●
This watch complies with or has received
approval under the radio laws of various
countries and geographical areas. Using
this watch in an area where it does not
comply with or has not received approval
under applicable radio laws may be a
criminal offense. For details, visit the CASIO
Website.
https://world.casio.com/ce/BLE/
●
Use of this watch inside of aircraft is
restricted under the aviation laws of each
country. Be sure to follow the instructions of
airline personnel.
●
Precautions when using Mobile Link
●
When using this watch in combination with
a phone, keep the watch and phone close
to each other. A range of two meters is
recommended as a guideline, but the local
environment (walls, furniture, etc.), the
structure of a building, and other factors
may require a much closer range.
●
This watch can be affected by other devices
(electrical devices, audio-visual equipment,
office equipment, etc.) In particular, it can
be affected by operation of a microwave
oven. The watch may not be able to
communicate normally with a phone if a
microwave oven is operating nearby.
Conversely, this watch may cause noise in
radio reception and the video image of a TV.
●
Bluetooth of this watch uses the same
frequency band (2.4 GHz) as wireless LAN
devices, and use of such devices in close
proximity of this watch may result in radio
interference, slower communication
speeds and noise for the watch and the
wireless LAN device, or even
communication failure.
●
Stopping Radio Wave Emission by This
Watch
The watch is emitting radio waves while
e
is
on the display or while GPS is in use.
When in a hospital, on an aircraft, or in any
other area where the use of radio waves is not
allowed, enable the Airplane Mode.
l
Entering the Watch Airplane Mode
Watch Operation Guide 3554
7

Easy Operation
Performing Activity
Measurement with the Watch
You can use the watch to view activity data
measured while wearing the watch.
The flow of this operation is shown below.
●
Measurement Flow (Running
Measurement)
1. Affix the watch correctly to your wrist.
l
Fastening the Watch to Your Wrist
2. Perform the required watch operations to
select [RUNNING] from among the activity
measurement options.
l
Performing Activity Measurement
3. Start running.
Perform the required watch operation to
start measurement.
l
Performing Activity Measurement
4. Finish running.
l
To pause or end a measurement
operation
5. Save the measured data.
l
To pause or end a measurement
operation
6. Use the watch to view the measured data.
l
Viewing Activity Log Records
Note
●
When measuring an activity other than
running, select an option other than
[RUNNING] in step 2, above.
●
Useful Functions
You can customize the activity measurement
settings below to allow more effective
measurement.
●
Auto lap measurement, Auto lap distance
●
Auto pause
●
Heart Rate Zone
Besides these, other settings can be
customized. For details, see the information
below.
l
Performing Activity Measurement
l
Activity Measurement Settings
l
Starting Heart-rate Training
Using the Phone App to View
Activity Results
You can use the “CASIO WATCHES” phone
app to view activity data you measured with
the watch.
The flow of this operation is shown below.
●
Getting Ready
Before measuring activity data for the first
time, you need to prepare by performing the
following steps. You do not need to perform
these steps again for subsequent activity
measurements.
●
Connecting with a Phone
ー
Install the “CASIO WATCHES” phone
app on your phone
ー
Pair the watch with your phone
l
Pairing the Watch with Your Phone
●
Measurement Flow (Running
Measurement)
1. Affix the watch correctly to your wrist.
l
Fastening the Watch to Your Wrist
2. Perform the required watch operations to
select [RUNNING] from among the activity
measurement options.
l
Performing Activity Measurement
3. Start running.
Perform the required watch operation to
start measurement.
l
Performing Activity Measurement
4. Finish running.
l
To pause or end a measurement
operation
5. Save the measured data.
l
To pause or end a measurement
operation
6. Check the measured data with the watch
or the CASIO WATCHES phone app.
l
Viewing Activity Log Records
Note
●
When measuring an activity other than
running, select an option other than
[RUNNING] in step 2, above.
●
Measured data is transferred from the
watch to CASIO WATCHES phone
app at the timing noted below.
ー
Immediately after a measurement
operation, while connected to the
phone, is complete
ー
If you are not connected to your
phone during measurement,
immediately after reconnecting
ー
If your phone is turned off,
immediately after it is turned on, and
CASIO WATCHES phone app is
started up
●
If you cannot connect to your phone or
transfer data, restart CASIO
WATCHES phone app.
●
Useful Functions
You can customize the activity measurement
settings below to allow more effective
measurement.
●
Activity Measurement Screen
●
Auto lap measurement, Auto lap distance
●
Auto pause
●
Training Alert
●
Heart Rate Zone
Besides these, other settings can be
customized. For details, see the information
below.
l
Performing Activity Measurement
l
Activity Measurement Settings
l
Starting Heart-rate Training
Watch Operation Guide 3554
8

Recover Support and Health
Management
This section explains the operation flow for
operations for functions that support the body.
●
Blood Oxygen Level Measurement
This function measures your blood oxygen
level. You can view measurement results on
your watch.
●
Sleep Measurement (Nightly Recharge™)
If you wear your watch in bed, you can keep
track of your physical condition while you
are sleeping and the quality of your sleep.
You can view measurement results on your
watch and with the phone app.
●
Breathing Exercise (Breathing Exercise)
This mode supports stress reduction using
guidance that promotes breathing at a slow
and stable rhythm. You can view
measurement results on your watch.
●
Step Reminder
When the watch detects that your step
count over a certain period is low, it notifies
you and encourages you to walk more. If the
watch performs this Step Reminder
notification operation, try walking for about
five minutes.
●
Blood Oxygen Level Measurement
1. Affix the watch correctly to your wrist.
l
Fastening the Watch to Your Wrist
2. Start blood oxygen level measurement.
After the measurement operation is
complete, the watch displays the
measurement result.
l
Measuring Your Blood Oxygen Level
3. View the measurement results on your
watch.
Note
●
For details about blood oxygen level
measurements, see the information
below.
l
Blood Oxygen Level
Measurement
●
Sleep Measurement (Nightly
Recharge™)
* Powered by Polar
1. Specify your night time.
l
Specifying the Night Time
2. Specify your bedtime and wake-up time.
l
Specifying Your Desired Bedtime and
Wake-Up Time
3. Select [ON] or [ACTIVITY & NIGHT TIME
ON] for the heart rate measurement
setting.
l
To enable or disable heart rate
measurement
4. Affix the watch correctly to your wrist.
l
Fastening the Watch to Your Wrist
5. Get your normal sleep.
Measurement will automatically end when
the watch detects that you have woken
up.
6. View the measurement results on your
watch.
l
Checking Nightly Recharge™ Status
Note
●
You cannot use watch operations to
configure bedtime and wake-up time
settings. To configure bedtime and
wake-up time settings, pair the watch
with your phone and then use CASIO
WATCHES phone app to configure
settings.
l
Pairing the Watch with Your Phone
●
For information on sleep
measurement, see the information
below.
l
Using Nightly Recharge™ to
Check Your Recovery Status
●
You can view sleep measurement
results on your watch. Note that you
cannot view sleep analysis results on
your watch. Use the CASIO
WATCHES phone app to view sleep
analysis results.
●
To improve sleep analysis accuracy, it
may take about one to two hours after
you wake up for measurement results
to be displayed on the watch.
●
For details about sleep support
functions, see the information below.
l
Smart Alarm
●
Breathing Exercise (Breathing
Exercise)
* Powered by Polar
1. Affix the watch correctly to your wrist.
l
Fastening the Watch to Your Wrist
2. Start the breathing exercise.
Take deep breaths following the
animation on the watch screen.
The watch displays the status of your
mind and body in real time.
When you finish your breathing exercise,
the watch displays measurement results.
l
Measuring a Breathing Exercise
3. View the measurement results on your
watch.
Note
●
For information about breathing
exercises, see the information below.
l
Breathing Exercises
l
Setting a Breathing Exercise
Duration
●
Step Reminder
1. Enable Step Reminder.
l
Enabling Step Reminder
2. The watch notifies you when it detects that
your step count over a certain period is
low.
Press any button to clear the notification.
Note
●
If behavior analysis does not detect
walking and running, the watch may
notify you that step reminder has
determined that your step count is low.
Watch Operation Guide 3554
9
Before Using the
Watch
About This Watch
Watch Features
●
Phone Linking
You can transfer activity data to a
Bluetooth
®
capable phone and work with it
using phone applications.
●
Activity Function
Use this function to measure and record
distance, elapsed time, pace, and other
activity data.
●
Activity Log
Activity Log can store up to 100 records of
data acquired during activity measurement.
●
Life Log
You can use Life Log to check your step
count, calories burned, active time results,
and other information.
●
Heart Rate Measurement
This function measures your estimated
heart rate.
●
Blood Oxygen Level Measurement
This function measures your blood oxygen
level.
●
Breathing Exercise
This function guides you through breathing
exercises.
●
Nightly Recharge™
This function analyzes your sleep and
provides information about your physical
recovery.
●
Compass Reading
You can use the compass function to
determine the direction of north, and to
check your bearing to a destination.
●
Altitude Measurement
You can use this function to take an altitude
reading at your current location.
You can record the altitude, along with the
date and time of the measurement.
You can also measure the altitude
differential between two points.
●
Barometric Pressure and Temperature
Measurement
You can display the current barometric
pressure tendency, which helps you be on
the alert for noteworthy pressure changes.
The watch can be used to take current air
temperature readings.
●
Tide Function
You can view tide information (Tide Graph)
for the port you specified.
Important!
●
This watch is not a special-purpose
measuring instrument. Measurement
function readings are intended for
general reference only.
●
When using this watch for serious
trekking, mountain climbing, or other
activities, always take along another
compass to confirm readings. If the
readings produced by this watch are
different from those of the other
compass, perform figure 8-calibration
of the watch’s compass to ensure
better accuracy.
ー
Compass readings and calibration
will not be possible if the watch is in
the vicinity of a permanent magnet
(magnetic accessory, etc.), metal
objects, high-voltage wires, aerial
wires, or electrical household
appliances (TV, computer,
cellphone, etc.)
l
Compass Reading
●
The watch’s altimeter function
calculates and displays relative
altitude based on barometric pressure
readings produced by its pressure
sensor. Because of this, altitude
values displayed by the watch may be
different from your actual elevation
and/or sea level elevation indicated for
the area where you are located.
Regular calibration in accordance with
the local altitude (elevation)
indications is recommended.
l
Altitude Measurement
Note
●
The illustrations included in this
operation guide have been created to
facilitate explanation. An illustration
may differ somewhat from the item it
represents.
●
You can obtain more accurate display
values by creating a profile before
measuring your heart rate or activity
data.
l
Creating Your Profile
●
Depending on the version of your
watch’s software, its operations and
display contents may differ from those
described in this Operation Guide.
●
You may need to upgrade your watch
software to use the functions and to
display the screens described in this
Operation Guide. Use of the latest
software version is recommended.
l
Updating the Watch’s Software
Version
Watch Operation Guide 3554
10
Charging the Watch
The charging cable can be used to charge the
watch. The watch can also be charged by
sunlight or other light, in addition to electrical
power.
Charging with the Charger Cable
Charging with the charger cable is faster than
solar charging.
Important!
●
Use only the supplied charger cable for
charging.
●
A device with a USB port (Type-A) can
also be used for charging.
●
Note that no guarantees are made
concerning the suitability of all types of
USB ports for charging. If charging is
not possible for some reason,
disconnection from the USB port is
recommended.
●
Place the charger on a desk or other
stable surface, making sure there is
plenty of open space around it.
Charging with the charger and watch in
a bag or some other enclosed space
can cause overheating of the watch.
●
Should water or any other liquid get
onto the watch or charger cable during
charging, immediately unplug the
charger cable from the power source.
●
Perform charging in an environment
where ambient temperature is
between 5 °C and 35 °C (41 °F and
95 °F).
●
Avoid pinching your hands or fingers in
the gap of the clip of the charging
cable.
●
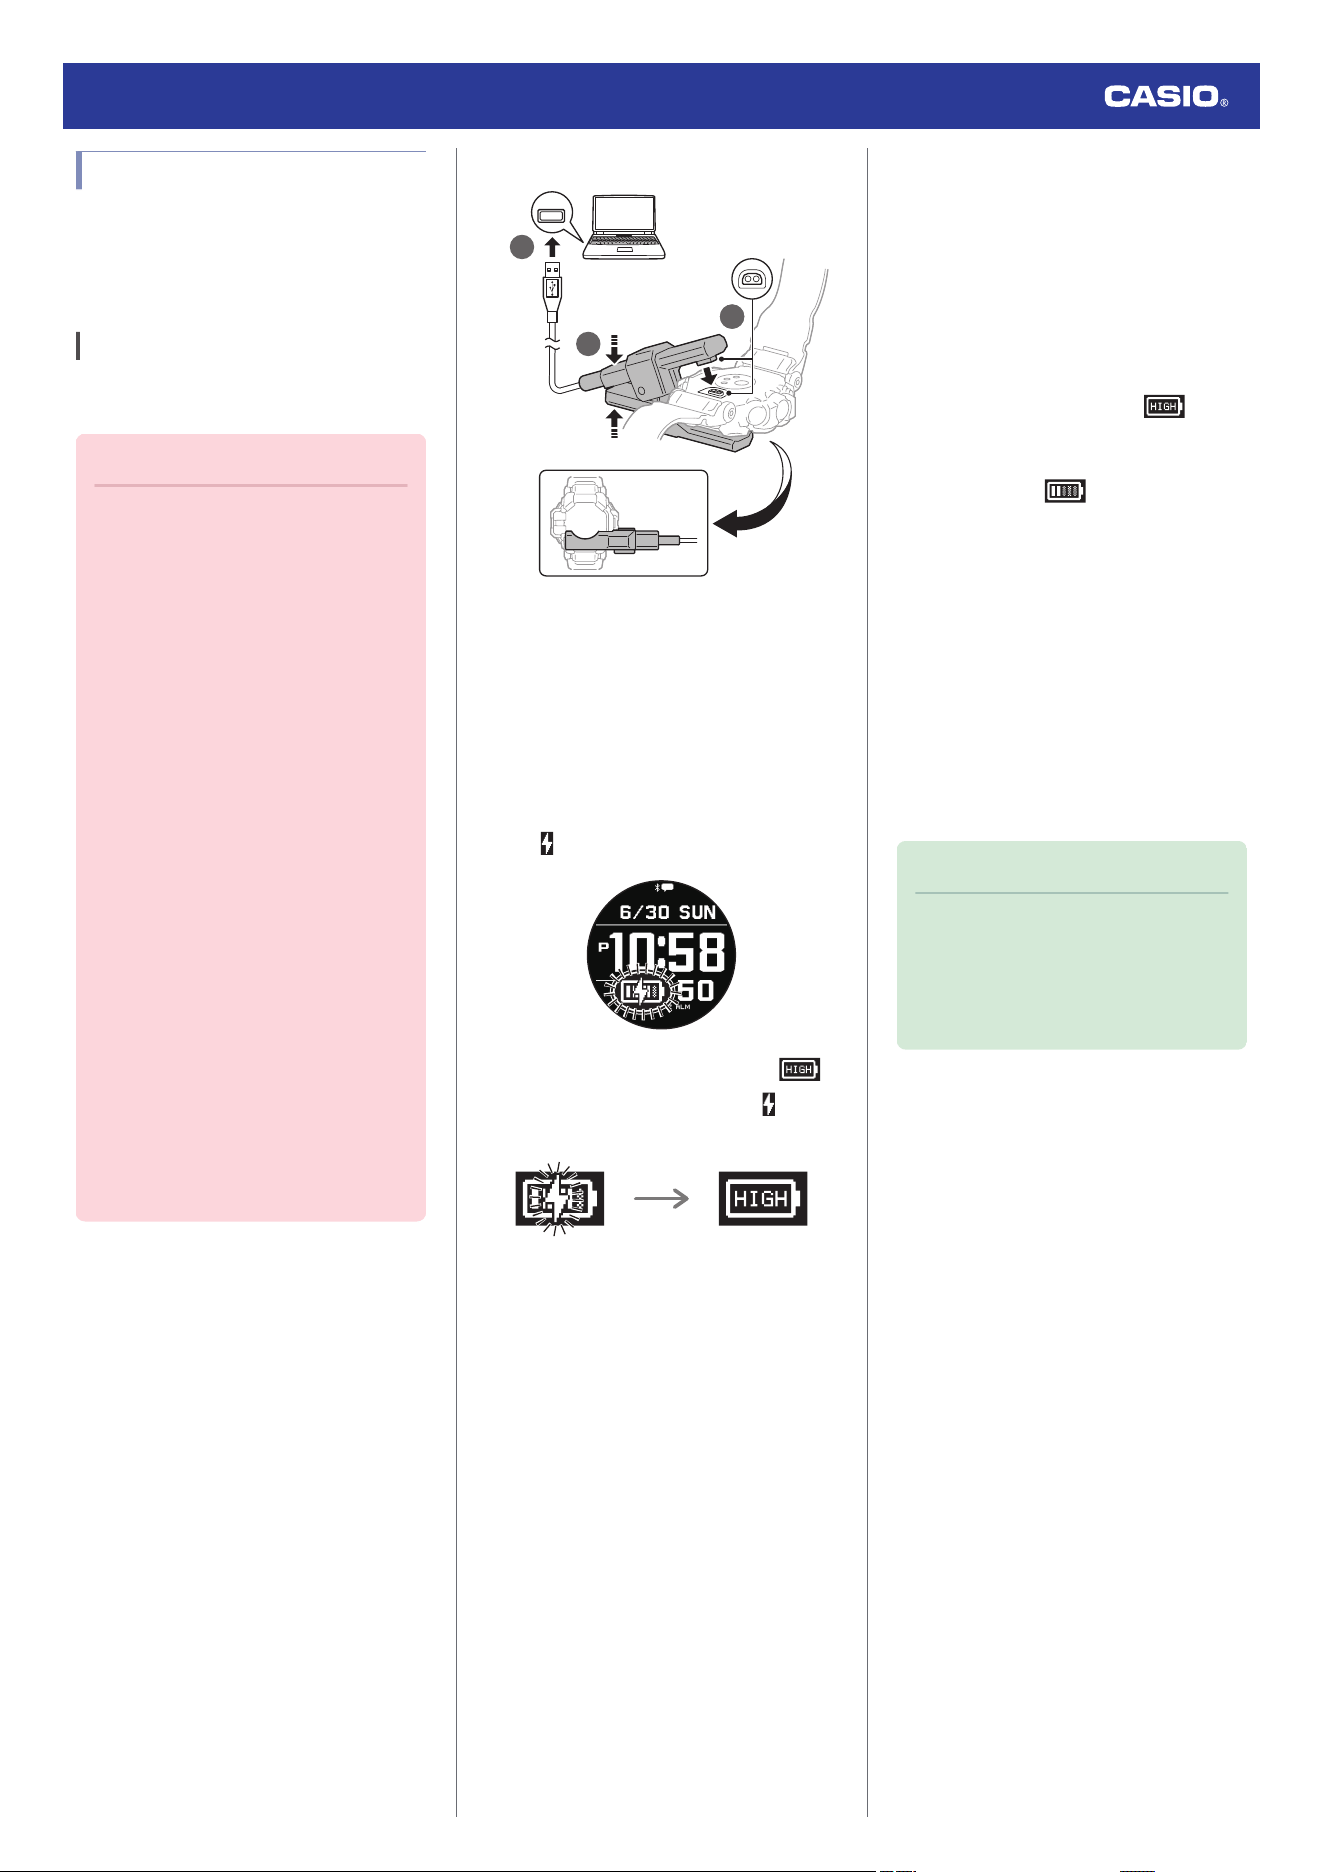
Charging the Watch
1
2
33
USB
1. Turn on your computer or other device
with a USB port (power source), and
connect the charger cable to it.
2. Open the charging cable clip.
3. Align the electrodes of the clip with the
charging terminals of the watch, and
fasten the clip to the watch.
●
flashes when charging starts.
●
When a full charge is reached,
appears on the display, and
disappears. Charging stops at this time.
●
Charging from a Non-computer
Device’s USB Port
You can charge using power from a USB port
(Type-A) that meets USB standards.
●
Voltage: 5 V
●
Current: 0.5 A min.
●
Precautions When Charging
●
A charging operation will not start while the
battery level indicator shows . To
prolong the life of the watch’s rechargeable
battery, charge only while the battery level
indicator shows or lower.
●
Do not attempt charging at high ambient
temperatures of 35 °C (95 °F) or greater.
The watch becomes hot during charging,
which can cause charging to stop
automatically. High ambient temperature
may result in a less than full charge.
●
Operation on a custom computer or a
computer that has been modified from its
original configuration is not guaranteed.
●
The watch may become warm during
charging. This is normal and does not
indicate malfunction.
Note
●
Starting from a blank display, it takes
about 3.2 hours to achieve a full
charge.
●
Charging time depends on ambient
temperature and other factors.
Watch Operation Guide 3554
11

Solar Charging
Power generated by the solar panel powers
watch operations and also is used to charge a
rechargeable (secondary) battery. The solar
panel is integrated into the LCD of the watch,
and power for charging is generated
whenever the face is exposed to light.
●
Charging the Watch
When you are not wearing the watch, put it in
a location where it is exposed to bright light.
While you are wearing the watch, make sure
that its LCD (solar panel) is not blocked from
light by the sleeve of your clothing. Power
generation efficiency is reduced even when
the LCD is blocked only partially.
NOYES
Important!
●
Depending on light intensity and local
conditions, the watch may become hot
to the touch when exposed to light for
charging. Take care to avoid burn
injury after charging. Also, avoid
charging the watch under high-
temperature conditions like the ones
described below.
ー
On the dashboard of a vehicle
parked in the sun
ー
Near an incandescent light bulb or
other source of heat
ー
Under direct sunlight or in other hot
areas for long periods
Checking the Charge Level
You can determine the watch’s current charge
level by checking the battery indicator.
Level Indicator Usable Functions
HIGH
All
5
4
3
2
1
LOW
Current time screen,
stopwatch, timer,
World Time, alarm
CHG
●
Normally (not charging):
Blank display
●
During USB charging
(charging in progress):
[CHARGING BATTERY] only
displayed
●
The display goes blank when the battery
goes dead.
Important!
●
Available watch functions are limited
when the battery indicator shows
. Connect the charging cable
and charge the watch as soon as
possible after the battery indicator
shows
.
●
Charge the watch as soon as possible
after the battery indicator becomes
or lower. Leaving the watch
without charging for several months
results in over-discharge and may
make future charging impossible. If
this happens, contact your original
retailer.
●
Only the following functions are
available while the battery indicator
shows
: current time display,
stopwatch, timer, World Time, alarms.
●
Even when the battery indicator shows
, the current time can be
maintained by solar charging.
●
If the battery is dead and the watch
display is blank, use the charger cable
to charge the watch.
●
Regular charging at least once a month
is recommended to extend battery life,
even if you do not use the watch during
that time.
Note
●
Solar charging cannot charge the
battery up to level .
Watch Operation Guide 3554
12
Charging Time Guidelines
Charging the watch daily for the approximate
times shown below should maintain a charge
of
or higher.
When the charge level is , you will still
be able to use the current time screen, and
stopwatch, timer, world time, and alarm
functions.
l
Checking the Charge Level
Note
●
Actual charging time depends on the
charging environment, watch settings,
and other factors.
●
Charging with the Charging Cable
Charge Recovery Times
Blank display
n
HIGH
(Full charge)
Approx. 3.2
hours *
CHG
n
LOW
Approx. 10
minutes
LOW
n
Level 1
Approx. 15
minutes
Level 1
n
HIGH (Full
charge)
Approx. 3.1
hours
* Approx. 6 hours when ambient temperature
is 5°C to 10°C (41°F to 50°F)
●
Solar Charging
Time required to maintain the current time
display by solar charging even when the
battery level is “LOW”
Light Level (Lux)
Approximate
Charging Time
50,000 lux
(Sunny day outdoors,
etc.)
9 minutes
10,000 lux
(Sunny day near a
window, etc.)
42 minutes
5,000 lux
(Overcast day near a
window, etc.)
83 minutes
500 lux
(Indoor fluorescent
lighting, etc.)
14 hours
Note
●
Charging is performed even with
exposure to indoor fluorescent lighting
(500 lux). The watch will be able to
maintain a charge of or higher if
it is exposed to indoor fluorescent
lighting for eight hours a day, in
addition to light near a window on a
sunny day (10,000 lux) for two hours a
week.
Power Saving
If there is no movement for a certain period,
the watch will disconnect from your phone and
enter sleep mode.
●
You can put the watch into a power saving
mode manually.
l
Enabling Power Saving
Display Sleep
Leaving the watch in the dark for about an hour
between 10 pm and 5:50 am causes the
screen to go blank.
Function Sleep
If the watch is left in display sleep for seven
days, sensor measurement and other
functions will become disabled.
●
To exit power saving (sleep state)
Press any button or perform any watch
operation to exit power saving (sleep state).
Connecting with a Phone
To use your watch in combination with a
phone, you first need to pair them.
You can get the most out of the functions of
this watch by using it in combination with your
phone.
Pairing the Watch with Your Phone
To use your watch in combination with a
phone, you first need to pair them. Perform the
steps below to pair the watch with a phone.
●
A
Install the required app on your
phone.
In Google Play or the App Store, search for the
“CASIO WATCHES” phone app and install it
on your phone.
●
B
Turn on location services
Turn on your phone’s location services.
Note
●
For details about setting procedures,
see your phone documentation.
●
C
Configure Bluetooth settings
Enable the phone’s Bluetooth.
Note
●
For details about setting procedures,
see your phone documentation.
Watch Operation Guide 3554
13
●
D
Pair the watch with your phone
Before you can use the watch in combination
with a phone, you first need to pair them.
Perform the operation below to pair the watch
with your phone for the first time.
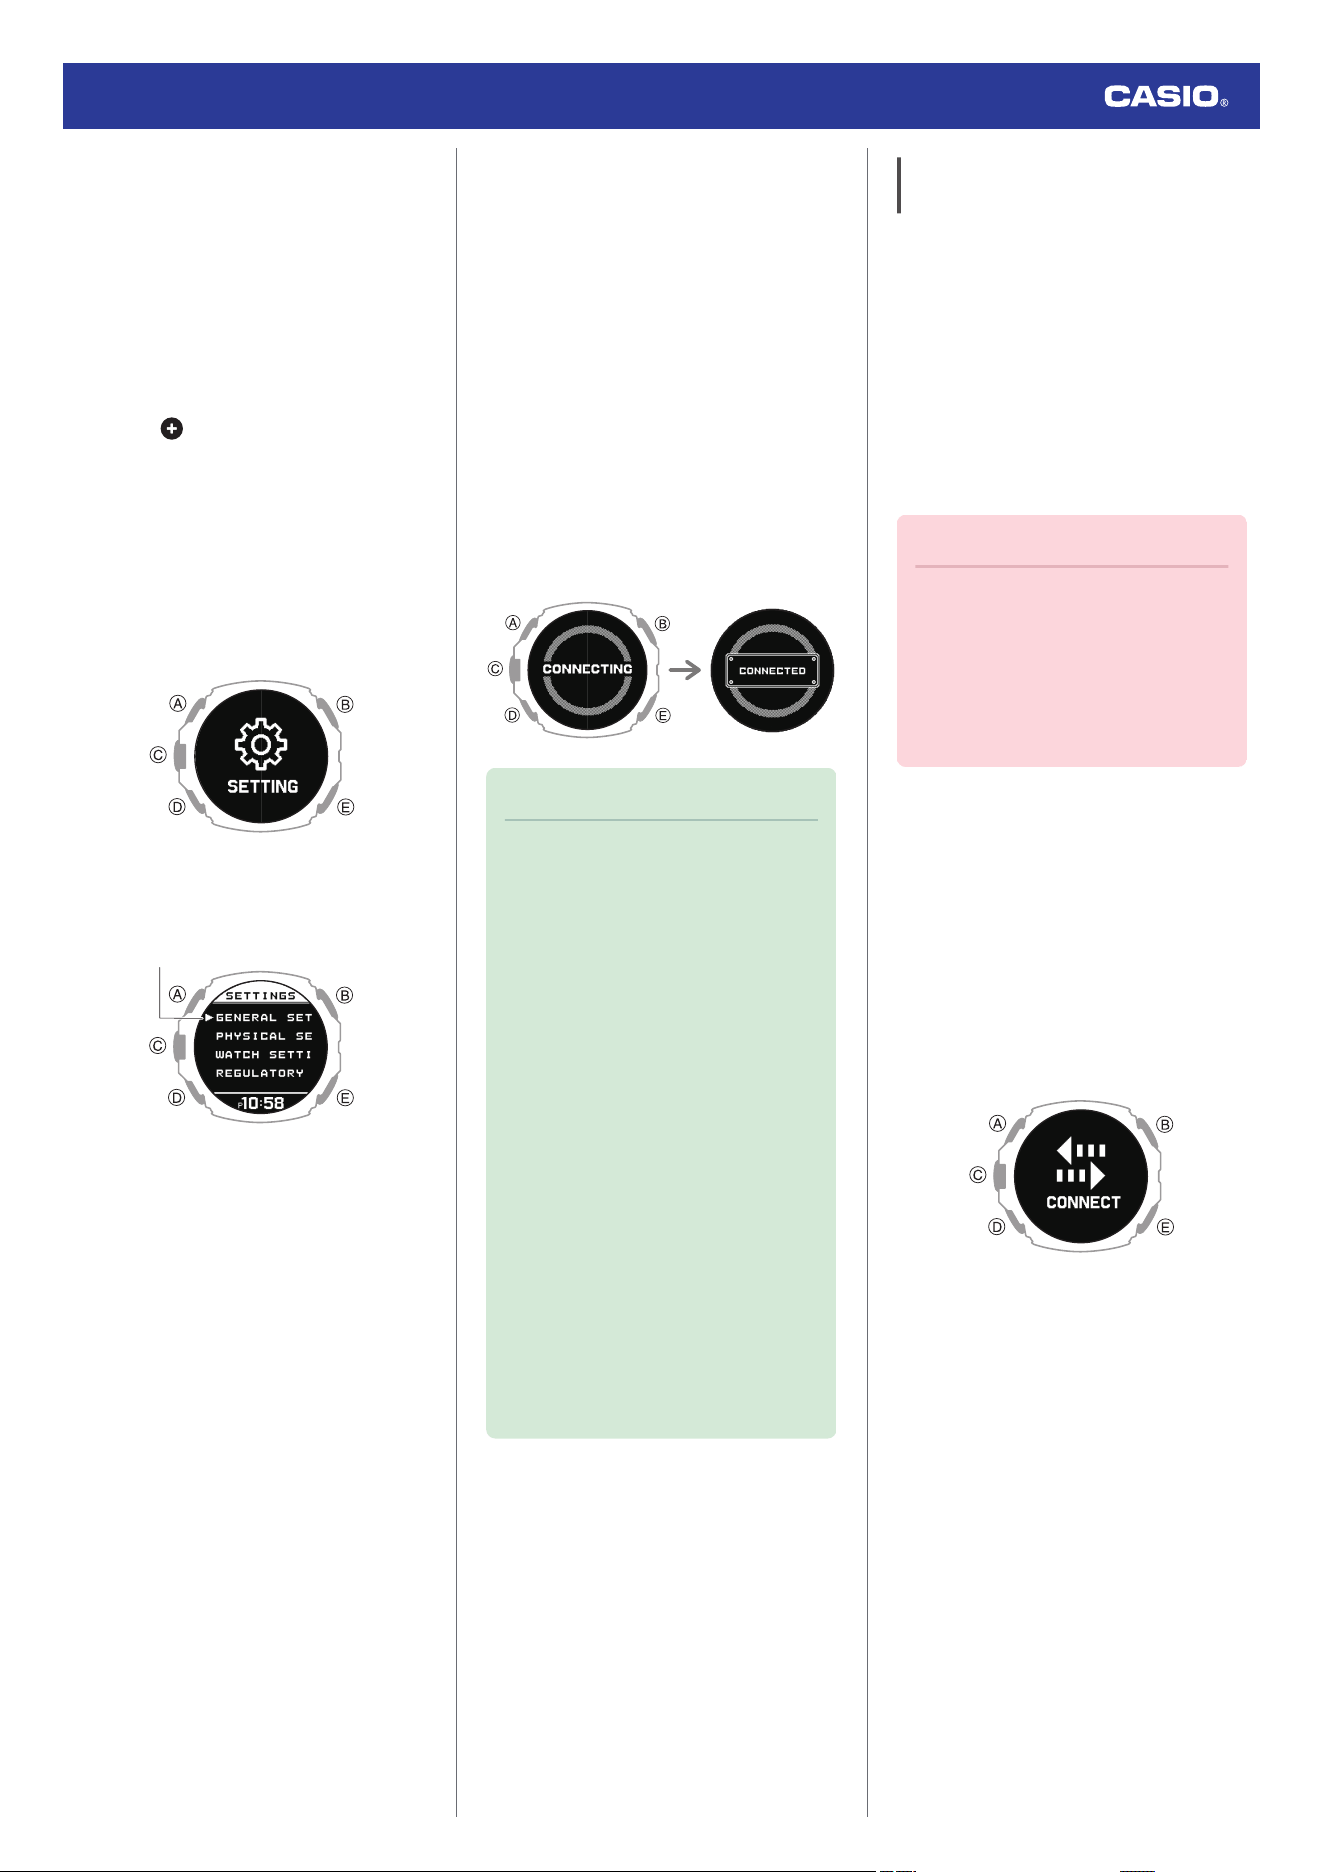
1. Move the phone to be paired with close to
(within one meter of) the watch.
2.
Y
Tap the “CASIO WATCHES” icon.
●
Tap on the “My Watch” tab. Next,
select the applicable product name.
3.
X
Display the current time.
l
Watch Mode
4.
X
Hold down (A) for at least two seconds.
This enters the Control Mode.
5.
X
Use (A) and (D) to select [SETTING].
6.
X
Press (C).
This displays the setting menu screen.
Pointer
7.
X
Use (A) and (D) to move the pointer to
[GENERAL SETTINGS].
8.
X
Press (C).
9.
X
Use (A) and (D) to move the pointer to
[PAIRING].
10.
X
Press (C).
11.
X
Use (A) and (D) to move the pointer to
[PAIRING].
12.
X
Press (C).
13.
Y
When the watch you want to pair with
appears, follow the instructions on the
display to pair with it.
●
If a pairing prompt message appears,
perform the operation shown on the
phone screen.
●
If pairing fails, the watch returns to the
state in step 9 of this procedure.
Perform the pairing procedure again
from the beginning.
Pairing completePairing started
Note
●
The first time you start up the CASIO
WATCHES phone app, a message will
appear on your phone asking if you
want to enable location information
acquisition. Configure settings to allow
background use of location
information.
●
For information about what to do when
pairing is unsuccessful, see the
information below.
l
I can’t pair the watch with a phone.
●
If your watch is already paired with
another phone, you won’t be able to
select [PAIRING] on the screen in step
11. Unpair your watch from the other
phone before pairing it with your
phone.
l
Unpairing
●
If this watch is already registered with
CASIO WATCHES phone app, select
it from the registered watches
displayed on the “My Watch” tab in
step 2 of this procedure and pair it.
Connecting with a Phone Paired
With the Watch
Your watch automatically connects with its
paired phone.
The
e
symbol is displayed at the top of the
watch screen while the watch is connected
with a phone.
e
flashes when there is no
connection between the watch and a phone.
●
If the watch is not paired with the phone you
want to connect with, refer to the information
below and pair them.
l
D
Pair the watch with your phone
Important!
●
If you have problems establishing a
connection, it could mean that CASIO
WATCHES phone app is not running
on your phone. On your phone’s home
screen, tap the “CASIO WATCHES”
icon. Perform the operation shown on
the screen to pair with the watch.
If you cannot connect to the paired phone and
data such as activities are not transferred to
the phone, perform the procedure below to
reconnect.
1. Display the current time screen.
l
Watch Mode
2. Hold down (A) for at least two seconds.
This enters the Control Mode.
3. Use (A) and (D) to select [CONNECT].
4. Press (C).
This establishes a Bluetooth connection.
●
When the connection is established,
[CONNECTED] appears and is then
replaced by [CONNECT] after a few
seconds.
The data is transferred to your phone.
●
If the connection fails, [FAILED]
appears on the display.
Watch Operation Guide 3554
14
Note
●
The watch stores up to three days of
lifelog data.
Connect the watch and smartphone
once every three days to transfer the
data to the CASIO WATCHES phone
app.
●
The more often you connect the watch
and your smartphone, the less time it
will take to receive GPS signals at the
start of activity measurements.
Unpairing
Unpairing the watch from a phone requires
both the CASIO WATCHES phone app and
watch operations.
Note
●
If there is any pairing information
remaining on your phone, delete that
information as well.
●
The watch cannot be unpaired from a
phone while the watch’s Airplane
Mode is enabled. To unpair from your
phone, disable the watch’s Airplane
Mode.
l
Entering the Watch Airplane Mode
●
Deleting Pairing Information from the
CASIO WATCHES phone app
1.
Y
Tap the “CASIO WATCHES” icon.
2.
Y
Tap the “My Watch” tab.
3.
Y
Tap the watch you want to unpair.
4.
Y
Tap the “ ”.
5.
Y
Perform the operation shown on the
phone screen to unpair.
Note
●
Deleting pairing information from the
CASIO WATCHES phone app does
not delete data previously transferred
from your watch to the app.
●
Deleting Pairing Information from the
Watch
1.
X
Display the current time.
l
Watch Mode
2.
X
Hold down (A) for at least two seconds.
This enters the Control Mode.
3.
X
Use (A) and (D) to select [SETTING].
4.
X
Press (C).
This displays the setting menu screen.
Pointer
5.
X
Use (A) and (D) to move the pointer to
[GENERAL SETTINGS].
6.
X
Press (C).
7.
X
Use (A) and (D) to move the pointer to
[PAIRING].
8.
X
Press (C).
9.
X
Use (A) and (D) to move the pointer to
[UNPAIRING].
Pointer
10.
X
Press (C).
11.
X
Use (A) and (D) to select whether or not
you want to delete the pairing information.
[YES] Deletes pairing information.
[NO] Does not delete pairing information.
12.
X
Press (C).
After deletion of the pairing information is
complete, [UNPAIRED] appears for a few
seconds, and then the display returns to
the screen in step 9 of this procedure.
13.
X
Display the current time.
l
Watch Mode
●
Deleting the phone’s pairing
information
For details about setting procedures, see your
phone documentation.
“Settings”
n
“Bluetooth”
n
Cancel the
watch’s device registration.
After Purchasing Another Phone
You need to perform the pairing operation
whenever you want to establish a Bluetooth
connection with a phone for the first time.
l
Deleting Pairing Information from the
Watch
l
D
Pair the watch with your phone
Watch Operation Guide 3554
15
Creating Your Profile
Profile settings (weight, height, date of birth,
gender, etc.) must be configured before the
watch can display activity logs and calculate
accurate heart rate zones.
1. Display the current time screen.
l
Watch Mode
2. Hold down (A) for at least two seconds.
This enters the Control Mode.
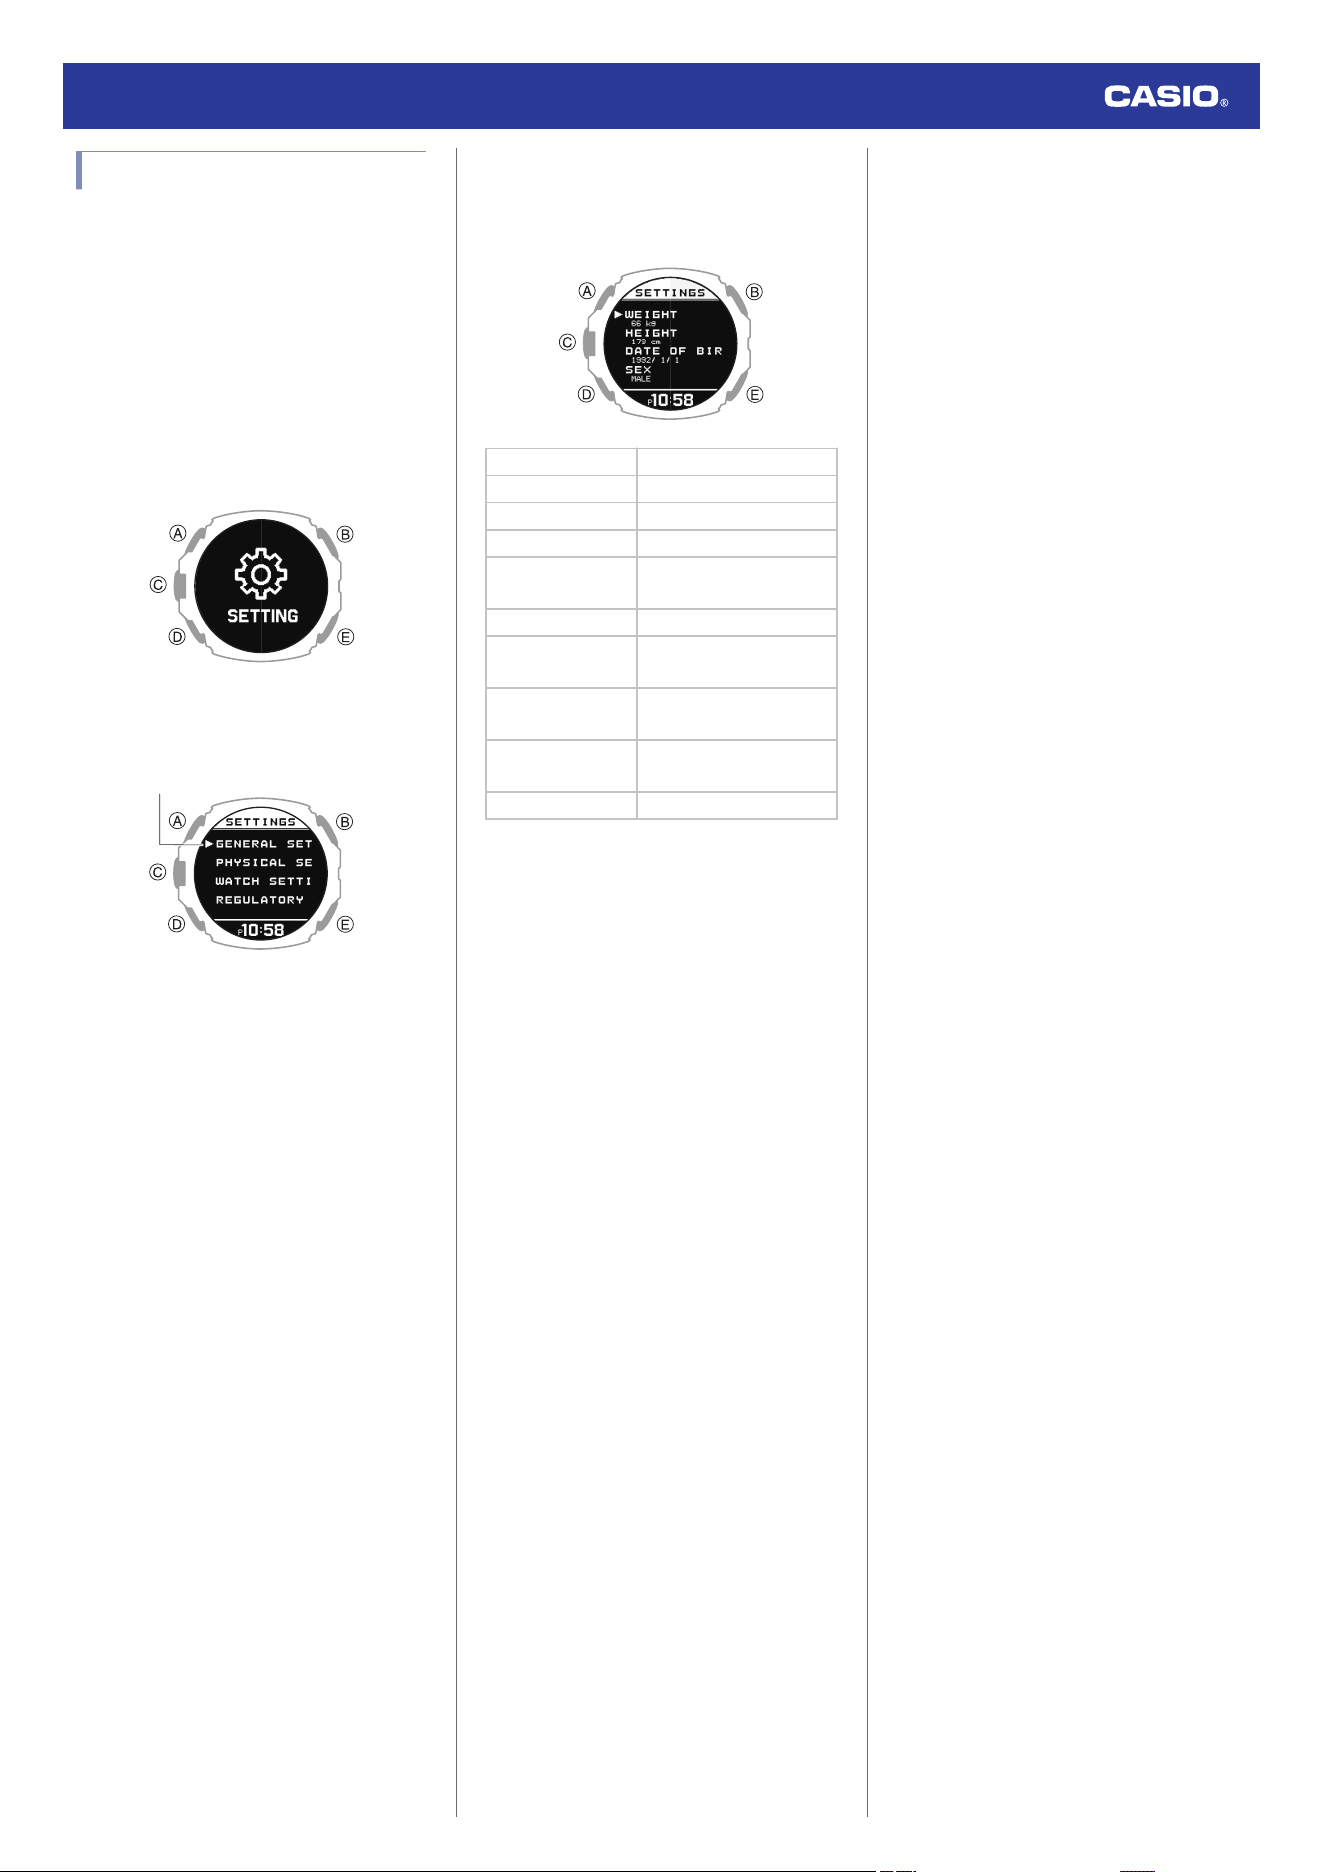
3. Use (A) and (D) to select [SETTING].
4. Press (C).
This displays the setting menu screen.
Pointer
5. Use (A) and (D) to move the pointer to
[PHYSICAL SETTINGS].
6. Press (C).
This displays the profile item selection
screen.
[WEIGHT] Weight
[HEIGHT] Height
[DATE OF BIRTH] Date of birth
[SEX] Gender
[WRIST]
Wrist where you wear the
watch
[STRIDE RESET] Stride reset
[TRAINING
BACKGROUND]
Training frequency
[MAXIMUM
HEART RATE]
Maximum heart rate
[RESTING
HEART RATE]
Resting heart rate
[VO2MAX] VO2MAX
7. Use (A) and (D) to select the item you want
to input.
8. Press (C).
9. Record your weight.
●
On the profile item selection screen,
select [WEIGHT].
A
Use (A) and (D) to input your weight.
B Press (C) to register your weight.
After the registration operation is
complete, a check mark appears for a
few seconds, and then the profile item
selection screen re-appears.
10. Record your height.
●
On the profile item selection screen,
select [HEIGHT].
A
Use (A) and (D) to input your height.
B Press (C) to register your height.
After the registration operation is
complete, a check mark appears for a
few seconds, and then the profile item
selection screen re-appears.
11. Specify your date of birth.
●
On the profile item selection screen,
select [DATE OF BIRTH].
A Use (A) and (D) to specify a year.
B Press (C).
C Use (A) and (D) to specify a month.
D Press (C).
E Use (A) and (D) to specify a day.
F Press (C) to register your date of birth.
After the registration operation is
complete, a check mark appears for a
few seconds, and then the profile item
selection screen re-appears.
12. Specify your gender.
●
On the profile item selection screen,
select [SEX].
A Use (A) and (D) to move the pointer to
[MALE] or [FEMALE].
B Press (C) to register your gender.
After the registration operation is
complete, a check mark appears for a
few seconds, and then the profile item
selection screen re-appears.
13. Specify the wrist where you wear the
watch.
●
On the profile item selection screen,
select [WRIST].
A
Use (A) and (D) to move the pointer to
[LEFT] or [RIGHT].
B Press (C) to register your wrist setting.
After the registration operation is
complete, a check mark appears for a
few seconds, and then the profile item
selection screen re-appears.
14. Reset the stride.
●
This returns your stride to a value
calculated based on your height.
●
On the profile item selection screen,
select [STRIDE RESET].
A
Press (C) to reset the stride.
After the reset operation is complete,
a check mark appears for a few
seconds, and then the profile item
selection screen re-appears.
Watch Operation Guide 3554
16
15. Registering your training frequency.
●
On the profile item selection screen,
select [TRAINING BACKGROUND].
A Use (A) and (D) to specify your
training frequency
Training frequency is an evaluation of
your long-term physical activity level.
Select the option that best describes
the amount and intensity of your
physical activity over the past three
months.
[OCCASIONAL]
●
Occasional (0 to 1
hour/week)
Rare physical
activity requiring
heavy breathing
or sweating.
[REGULAR]
●
Regular (1 to 3
hours/week)
Regular physical
activity such as
running 5 to 10 km
(3 to 6 miles) per
week or
equivalent
physical activity
for 1 to 3 hours per
week. Could also
be work that
requires
moderate
physical activity.
[FREQUENT]
●
Frequent (3 to 5
hours/week)
Running 20 to 50
km (12 to 31
miles) per week or
engaging in
strenuous
exercise at least 3
times per week.
Could also be
equivalent
physical activity of
3 to 5 hours per
week.
[HEAVY]
●
Heavy (5 to 8
hours/week)
Vigorous exercise
5 times or more
per week, or
training to
improve
competition
performance.
[SEMI-PRO]
●
Semi-pro (8 to 12
hours/week)
High-intensity
physical exercise
almost daily and
exercise to
improve athletic
performance.
[PRO]
●
Pro (12 hours or
more/week)
Endurance
athlete engaging
in vigorous
physical activity to
improve
competition
performance.
B Press (C) to exit training frequency
registration.
After the registration operation is
complete, a check mark appears for a
few seconds, and then the profile item
selection screen re-appears.
16. Register a maximum heart rate.
●
On the profile item selection screen,
select [MAXIMUM HEART RATE].
A Use (A) and (D) to select a maximum
heart rate registration method.
[AUTO]
Automatically sets a
maximum heart rate
based on your date of
birth
[MANUAL] Manual
●
The currently selected setting is
indicated by a check mark ( ) to
the left.
B If you selected [MANUAL], use (A)
and (D) to specify a maximum heart
rate value.
●
If you selected [AUTO], advance to
step
C
.
C Press (C) to exit maximum heart rate
registration.
After the registration operation is
complete, a check mark appears for a
few seconds, and then the profile item
selection screen re-appears.
17. This registers your resting heart rate.
●
On the profile item selection screen,
select [RESTING HEART RATE].
A
Use (A) and (D) to select a resting
heart rate registration method.
[AUTO] Auto update
[MANUAL] Manual
●
The currently selected setting is
indicated by a check mark ( ) to
the left.
B If you selected [MANUAL], use (A)
and (D) to specify a resting heart rate
value.
●
If you selected [AUTO], advance to
step
C
.
C Press (C) to exit resting heart rate
registration.
After the registration operation is
complete, a check mark appears for a
few seconds, and then the profile item
selection screen re-appears.
18. Register your VO2MAX.
●
On the profile item selection screen,
select [VO2MAX].
A Use (A) and (D) to select a VO2MAX
registration method.
[AUTO] Auto update
[MANUAL] Manual
●
The currently selected setting is
indicated by a check mark ( ) to
the left.
Note
●
With [AUTO], VO2MAX is calculated
based on your profile.
●
If you know your VO2MAX value as
calculated by a breath gas analyzer
or another device, select [MANUAL]
and enter the value.
B If you selected [MANUAL], use (A)
and (D) to specify a VO2MAX value.
●
If you selected [AUTO], advance to
step
C
.
C Press (C) to register your VO2MAX.
After the registration operation is
complete, a check mark appears for a
few seconds, and then the profile item
selection screen re-appears.
19. Press (E) twice to exit the setting screen.
Watch Operation Guide 3554
17
Mode Overview
Your watch has a Watch Mode and Activity
Mode, and a Control Mode.
You can access the functions in each mode to
perform measurements, view measurement
results, and configure settings.
Watch Mode
You can use the Watch Mode to access basic
watch functions, body recovery support
functions, and other functions and use them
during your daily life.
To enter the Watch Mode from another mode,
hold down (E) for at least one second.
●
If activity measurement is in progress, you
can switch to the Watch Mode by resetting
the measurement and then holding down
(E) for at least one second.
●
Use (A) and (D) to select a function within a
mode.
●
Current Time Screen
Shows the current date and time.
●
Heart Rate Measurement
This mode shows your current heart rate.
l
Measuring Your Heart Rate
●
Compass Reading
Use this function to determine the northerly
direction, and to take direction and bearing
angle readings.
l
Compass Reading
●
Altitude Measurement
Measures the altitude at your current location.
l
Altitude Measurement
●
Barometric Pressure and Temperature
Measurement
Use this function to take your current
location’s barometric pressure and
temperature readings.
l
Barometric Pressure and Temperature
Measurement
●
Almanac (sunrise and sunset times,
Moon age)
Use this function to check sunrise and sunset
times, and the Moon age.
l
Almanac (Sunrise and Sunset Times, and
Moon Age)
●
Tide Graph
This graph shows a tide graph, tide cycle, and
other tide information for the port you
specified.
l
Tide Function
●
Blood Oxygen Level
This function measures your blood oxygen
level.
l
Blood Oxygen Level Measurement
●
Breathing Exercise (Breathing
Exercise)
* Powered by Polar
This mode supports stress reduction by
guidance that promotes breathing at a slow
and stable rhythm.
l
Breathing Exercises
●
Cardio Load Status (Cardio Load
Status)
* Powered by Polar
Use this function to keep track of your training
status.
l
Viewing Your Cardio Load Status
Watch Operation Guide 3554
18
●
Life Log
Use this function to check Life Log data, such
as your step count and calories burned.
l
Viewing Life Log Data
●
Nightly Recharge™
* Powered by Polar
Use this function to check your recovery status
during sleep.
l
Using Nightly Recharge™ to Check Your
Recovery Status
●
Activity Log
Use this function to view recorded activity
measurements.
l
Viewing Activity Log Records
●
World Time
This function shows the current time in 38
cities around the globe and UTC (Coordinated
Universal Time) time.
l
World Time
●
Timer
The timer counts down from a start time
specified by you. The watch performs a sound
and/or vibration operation when the end of the
countdown is reached.
l
Timer
●
Stopwatch
Use this function to measure elapsed time.
l
Stopwatch
●
Notification Checking Function
This function lets you check calls, mail, SNS
notifications, and other information that
comes in on your phone.
l
Receiving Phone Notifications
Activity Mode
In the Activity Mode, you can measure data for
a selected training type or activity, and view
the measurement results.
To enter the Activity Mode, press (C) while the
current time screen is displayed.
●
Use (A) and (D) to select a function within a
mode.
For information about activities, see the
information below.
l
Activity Overview
Control Mode
In the Control Mode, you can control various
watch settings and communication with your
phone.
To enter the Control Mode, hold down (A) for
at least two seconds while the current time
screen is displayed.
●
Use (A) and (D) to select a function within a
mode.
●
SETTING
Use this function to configure watch settings.
●
While the [SETTING] screen is displayed,
pressing (C) displays the setting menu.
For details about the settings, see the
operating instructions for each function.
Watch Operation Guide 3554
19

●
Connect
You can use this function to reconnect
manually with the phone that is paired with the
watch.
l
Connecting with a Phone Paired With the
Watch
●
Phone Finder
You can use phone finder to trigger a sound
on the phone that is paired with the watch to
help you find it.
l
Phone Finder
●
Time Adjustment
This function lets you acquire time data from
the phone paired with the watch or from GPS
and adjust the watch’s time setting with the
press of a watch button.
l
Manually Connecting with a Phone to Sync
the Watch’s Time Setting
l
Adjusting the Watch’s Current Time Setting
Using GPS
●
Airplane Mode
You can use this function to turn the Airplane
Mode on or off.
l
Entering the Watch Airplane Mode
Performing Activity
Measurement
The watch uses GPS and an accelerometer to
measure and record the distance, step count,
elapsed time, pace, and other data while
running, walking, or engaging in other
activities.
You can review recorded data on the watch or
with CASIO WATCHES phone app.
l
Viewing Activity Log Records
Before using activity measurements, it is
recommended that you configure the settings
required for measurement.
l
Activity Measurement Settings
Activity Overview
Your watch has nine Activity Mode functions
(activities).
●
You can use CASIO WATCHES phone app
to add, remove, or rearrange Activity Mode
functions.
l
Customizing the Watch Mode and
Activity Mode Functions
Activity Measurement that Supports
GPS Reception
GPS signals are used to measure distance,
time, and speed.
TREKKING (Trekking)
Performs mountain climbing
measurements.
RUNNING (Running)
Performs running
measurements.
BIKING (Biking)
Performs biking
measurements.
OPEN WATER SWIMMING
(Open Water Swimming)
Performs swimming
measurements in the
ocean, rivers, etc.
TRAIL RUNNING (Trail
Running)
Performs trail running
measurements.
WALKING (Walking)
Performs walking
measurements.
OTHER ACTIVITY (Other
Activities)*
Measurements for skiing,
snowboarding, SUP, and
other outdoor activities.
* Use the CASIO WATCHES phone app to
add this activity category.
l
Customizing the Watch Mode and
Activity Mode Functions
Watch Operation Guide 3554
20
Activities that Support
Measurement Without GPS Signal
Reception
These measurements can be performed by
the watch without GPS.
GYM WORKOUT (Strength
Training, etc.)
For workout
measurements.
INTERVAL TIMER (Interval
Timer)
You can use the interval
timer for your training.
POOL SWIMMING (Pool
Swimming)
For pool swimming
measurements.
Performing Activity
Measurement
Use the procedures in this section to select an
activity and measure it.
●
To select an activity
1. Display the current time screen.
l
Watch Mode
2. Press (C).
This enters the Activity Mode.
Example:
3. Use (A) and (D) to select an activity.
●
For information about activity items, see
the information below.
l
Activity Overview
●
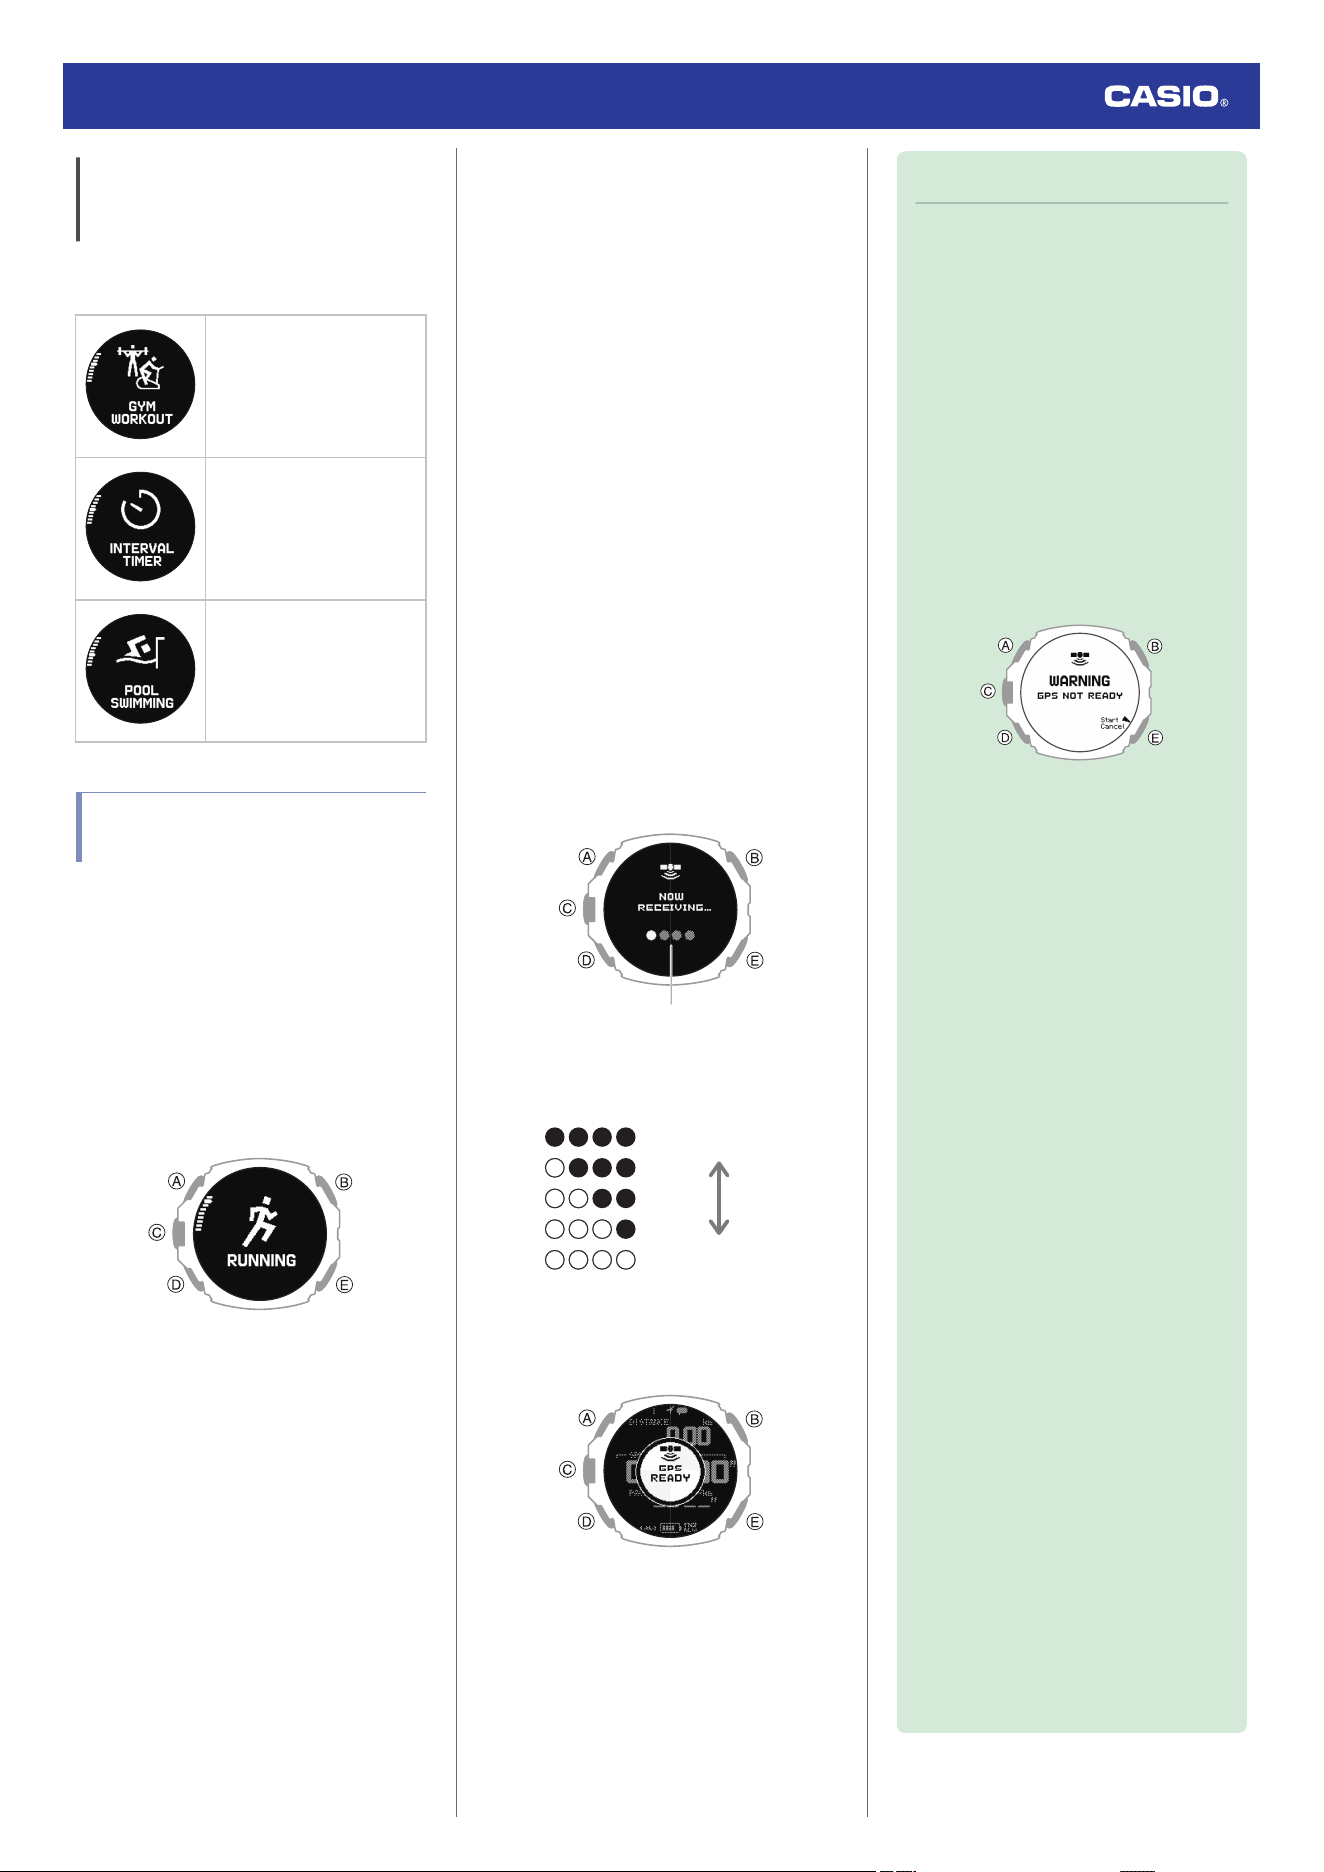
To receive GPS signals
Before performing measurements for the
activities below, you should start the GPS
signal receive operation before starting
measurement.
●
TREKKING
●
RUNNING
●
BIKING
●
OPEN WATER SWIMMING
●
TRAIL RUNNING
●
WALKING
●
OTHER ACTIVITY*
* Use the CASIO WATCHES phone app to
add this activity category.
l
Customizing the Watch Mode and
Activity Mode Functions
If you are having trouble receiving GPS
signals, move to a suitable location and try
again.
l
Appropriate Signal Reception Location
1. Press (C).
This causes the watch to start searching
for GPS signals.
Receive level
●
The progress indicator shows the GPS
signal level.
GPS receive complete
GPS receive start
When [GPS READY] appears on the
watch display, the watch is ready to
perform activity measurement using GPS.
Note
●
Connect with CASIO WATCHES
frequently to obtain GPS assist data
automatically. This shortens the time
required to receive GPS signals at the
start of activity measurements.
●
If you press (C) without waiting for
[GPS READY] to appear, a warning
screen appears and then activity
measurement starts using the watch’s
accelerometer.
When performing measurements
using the accelerometer, your
movements are not tracked. To track
your movements during an activity,
make sure that [GPS READY] is shown
on the display before you start activity
measurement.
Warning Screen
Press (E) to cancel the measurement
startup and return to the GPS
reception screen.
●
It takes about 15 seconds to about two
minutes after you press (C) in step 1
until activity measurement using GPS
signals becomes enabled. Under
some signal reception conditions, it
may take more than five minutes.
●
OPEN WATER SWIMMING uses GPS
to measure the distance you swim.
However, since GPS signals are
affected by the external factors
described below, it may not be
possible to record distances you swim
accurately.
ー
Water surface reflects GPS signals,
which affects measurement
accuracy.
ー
GPS signals are difficult to receive
underwater, so GPS signals are lost
whenever the watch is submerged.
To improve distance and route
measurement accuracy using GPS,
refer to the points below.
ー
After successfully receiving GPS
signals, wait a few minutes before
starting activity measurement. This
will allow the GPS sensor to warm up
and provide time for the watch to
download the necessary GPS
information.
ー
When swimming, make sure that the
wrist where you are wearing the
watch is above the surface of the
water. Depending on your
swimming style, distance and
trajectory may not be recorded
accurately.
ー
Specify [HIGH] for the GPS signal
receive interval.
l
Changing the GPS Receive
Interval
Watch Operation Guide 3554
21
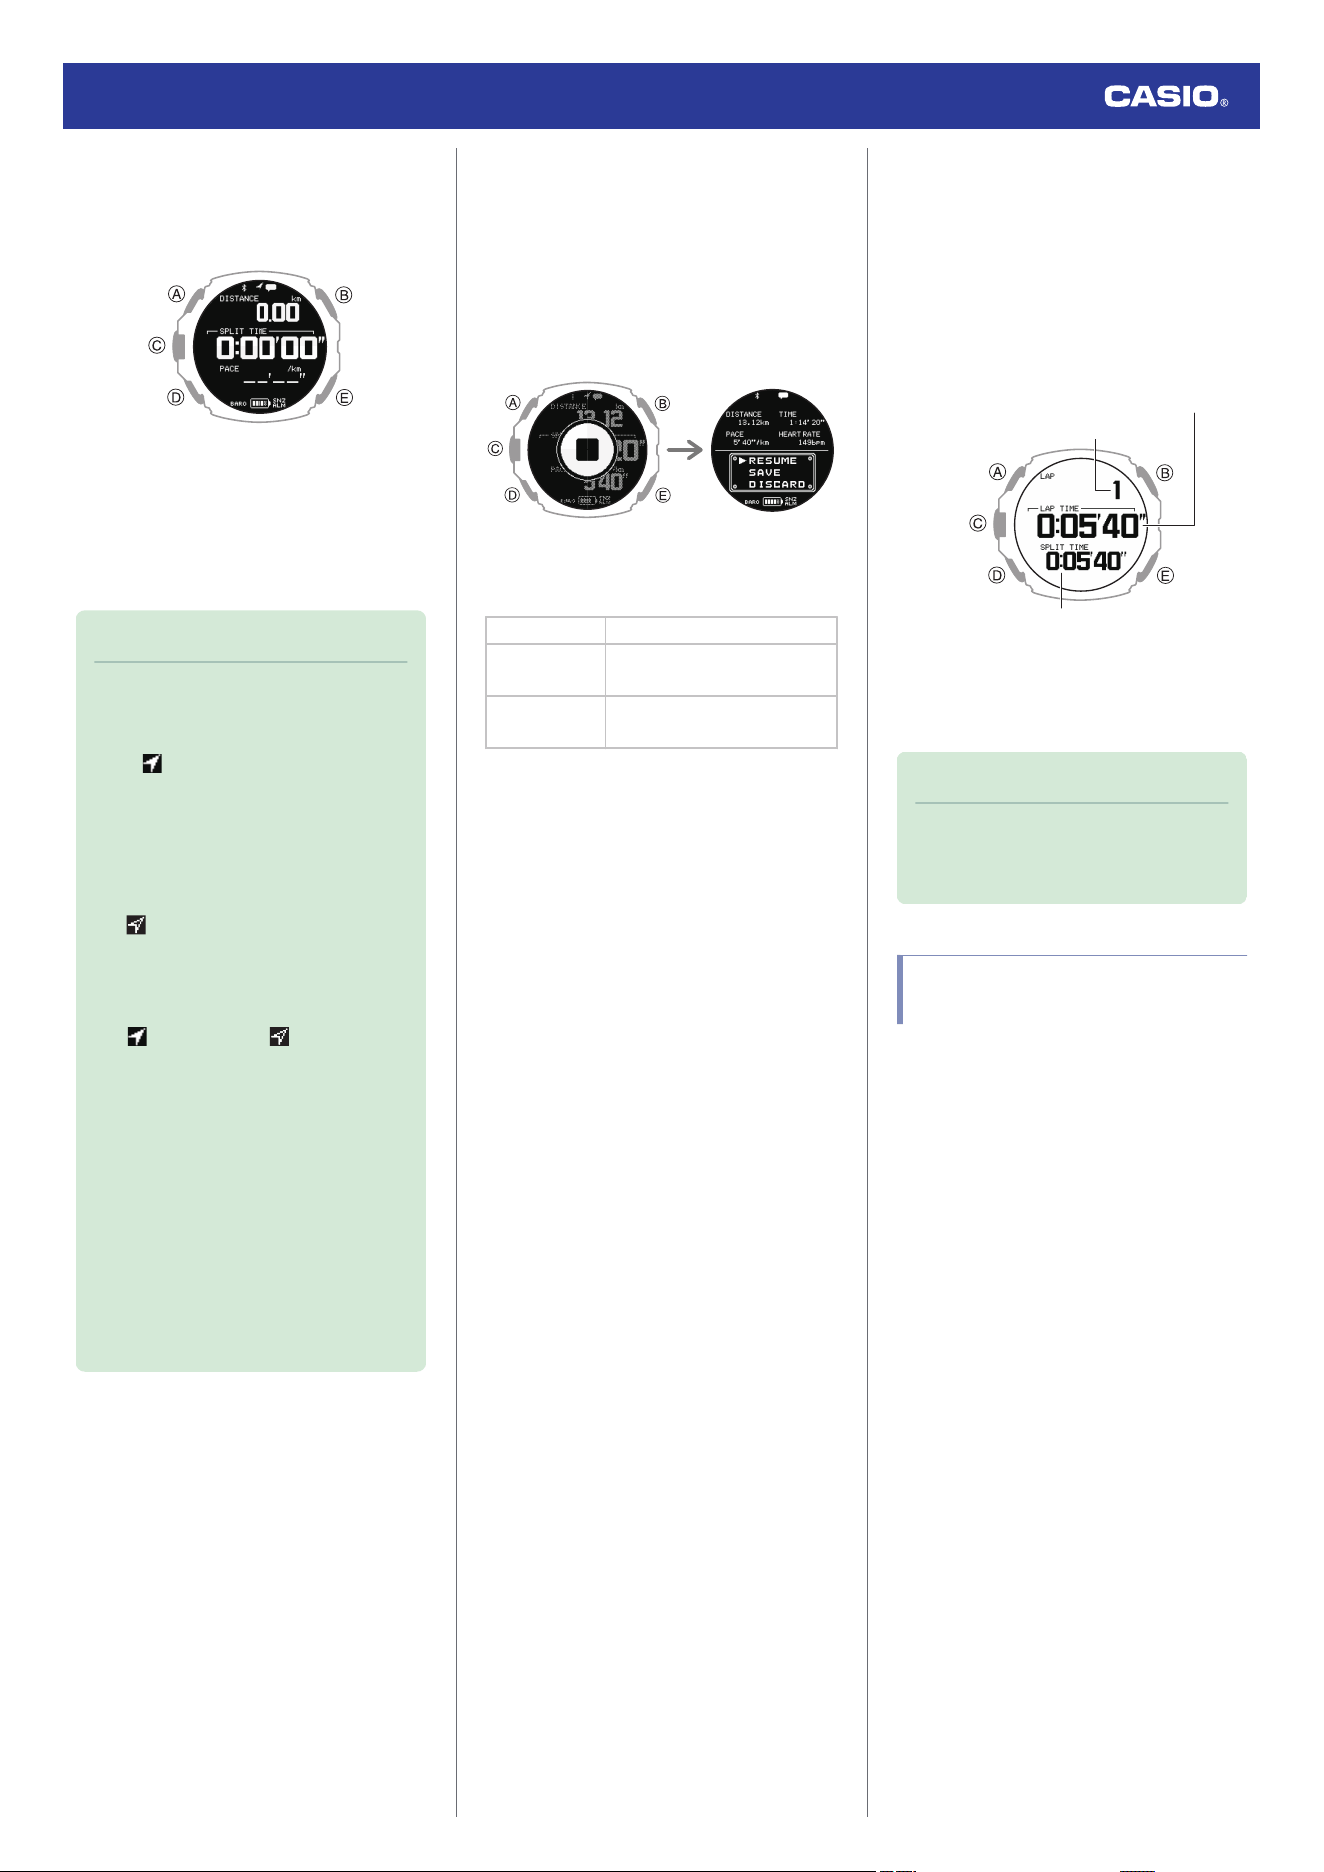
●
To start measurement
1. Press (C).
This starts activity measurement.
●
This displays a screen of the
measurement being performed for the
activity you specified with CASIO
WATCHES phone app.
l
Configuring Activity Measurement
Display Settings
Note
●
For activities that require GPS signal
reception, you can determine if GPS
measurement is possible by checking
the
icon.
Not Flashing: GPS measurement is
possible
Flashing: GPS measurement is not
possible (Watch is searching for GPS
signals.)
●
If appears on the display after [GPS
READY] is displayed, it means the
GPS signal has been lost, and the
watch is searching for it.
●
If
is flashing or if is displayed
while activity measurement is in
progress, tracking of the activity will not
be recorded.
●
If you enter the function settings before
starting an activity measurement
operation, GPS measurement pauses
temporarily. The watch starts
searching for GPS signals again when
you exit the settings.
When using GPS for run timing, wait
until [GPS READY] appears on the
display before you start.
●
To pause or end a measurement
operation
1. While an activity measurement operation
is in progress, press (C).
This pauses activity measurement and
opens the pause menu screen.
Pause menuPause
2. Use (A) and (D) to choose what to do with
the activity data that was being measured.
[RESUME] Resumes timing.
[SAVE]
Saves the data and ends the
measurement.
[DISCARD]
Ends the measurement
without saving the data.
3. Press (C).
●
Choosing to save the data causes the
activity measurement result screen to
appear.
You can use (A) and (D) to scroll
between summary screens.
The display returns to the screen for the
selected activity after a short while or
when you press (E).
●
Choosing to delete the data causes the
screen for the selected activity to
appear.
●
To measure lap times
1. This starts activity measurement.
l
To start measurement
2. Press (E).
Each press of (E) displays the elapsed
time of the current section (lap time) to
appear.
Split time
Lap time
Number of Laps
3. Press (C) to pause activity measurement.
l
To pause or end a measurement
operation
Note
●
In the case of POOL SWIMMING, lap
measurement cannot be performed
using the above operation.
Before Using Pool Swimming
(POOL SWIMMING)
You need to configure the settings before
using the POOL SWIMMING activity.
●
Specify the length of the pool to be used
l
Setting the Swimming Pool Length
ー
The pool length you specify is used to
calculate the distance swum each time
you perform a turn, which is interpreted
as a lap.
ー
After you stop swimming, a lap will be
obtained after about six seconds.
●
Specify the arm where you wear the watch
This is necessary to detect the number of
strokes and other data.
l
Creating Your Profile
Watch Operation Guide 3554
22
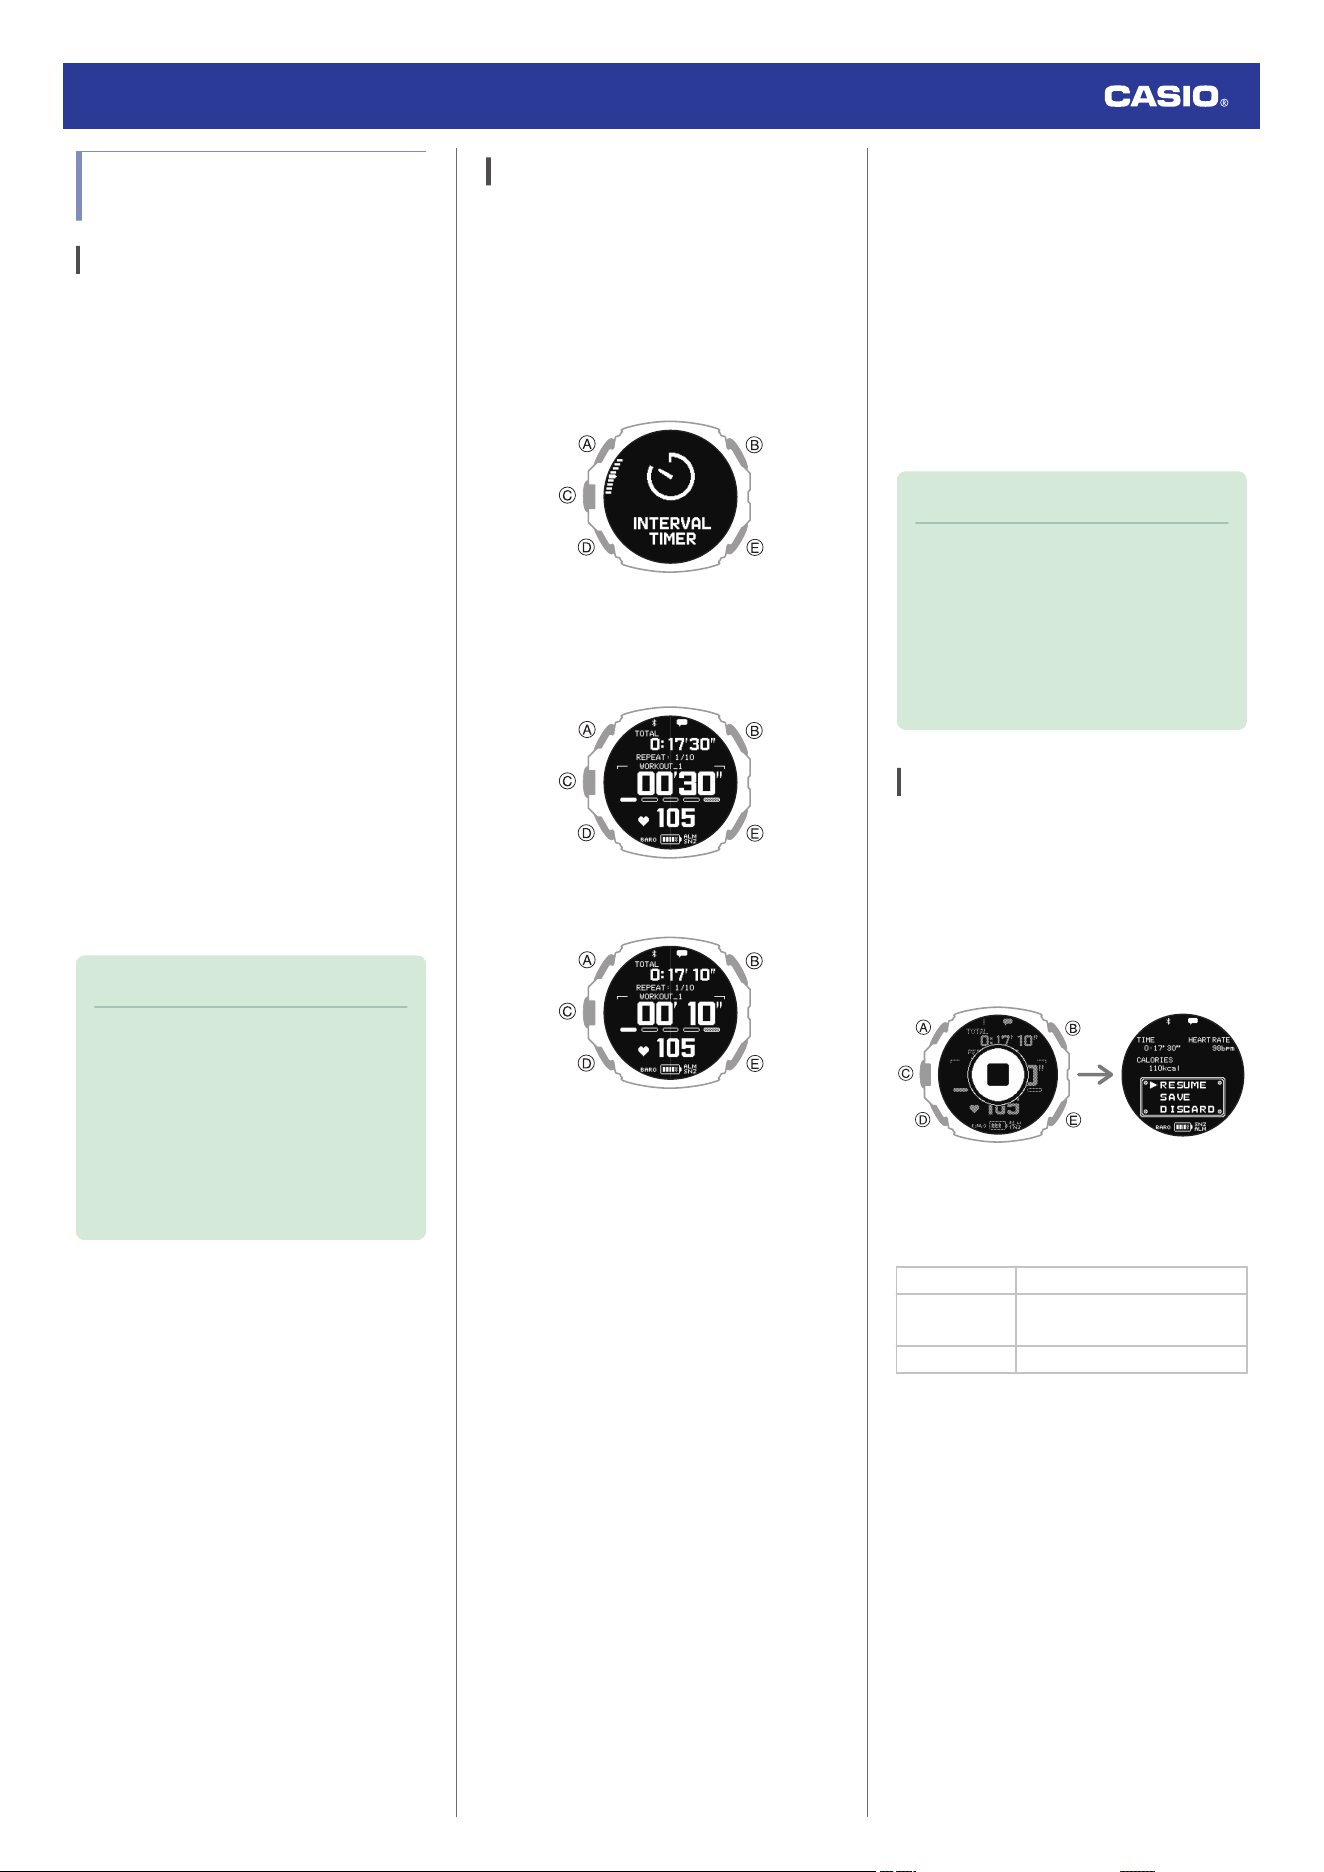
Using the Timer for Interval
Training
Overview
Multiple timers can be used for the timing of
consecutive segments of an activity (interval
timers). You can use an interval timer to
control how much time you spend doing push-
ups, squats, or other exercises that make up
a fitness workout.
For example, you could configure an interval
timer as shown below and have intervals
A
through
D
automatically repeat ten times.
Timer Settings
●
[TIMER1]: 30 seconds
●
[TIMER2]: 20 seconds
●
[TIMER3]: 30 seconds
●
[TIMER4]: 25 seconds
●
Sets: 10
Interval Training Workout
A Push-ups: 30 seconds
B Rest: 20 seconds
C Squats: 30 seconds
D Rest: 25 seconds
Note
●
The interval timer can repeat up to five
timers up to ten times (auto repeat
timer).
●
For information about configuring
interval timer settings, see the
information below.
l
Configuring Interval Timer
Settings
Timing with Interval Timers
1. Display the current time screen.
l
Watch Mode
2. Press (C).
This enters the Activity Mode.
3. Use (A) and (D) to select [INTERVAL
TIMER].
4. Press (C).
This displays the measurement operation
ready screen.
5. Press (C) to start the timer countdown.
●
A 10-second sound or vibration alert
notifies you when the interval timer
operation is complete.
6. Press any button to stop the sound and/or
vibration operation.
This displays the summary
(measurement result) screen.
●
The watch will automatically store
measurement data and display the
summary (measurement result) screen
if you do not perform any operation
during the 10 seconds that an interval
timer end notification operation is being
performed.
Note
●
Interval timers count down the final five
seconds with sound/vibration.
●
Holding down (E) for at least one
second while a timer operation is in
progress stops the current timer and
starts measurement with the next
timer.
Pausing and Resetting the Timer
1. While a timer operation is in progress,
press (C).
This pauses the time operation. After a
few seconds, the pause menu screen
appears.
Pause menuPause
2. Use (A) and (D) to select what to do with
the interval training data measured by the
timer.
[RESUME] Resumes the timer operation.
[SAVE]
Saves the data and ends the
timer operation.
[DISCARD] Resets the timer.
3. Press (C).
●
If you selected [SAVE], your interval
training results appear on the display.
You can use (A) and (D) to switch
summary screens.
Press (E) to return to the current time
screen.
Watch Operation Guide 3554
23

Starting Heart-rate Training
With heart-rate training, you measure your
heart rate and then use the resulting value as
a benchmark for training. You can monitor
your heart rate levels and keep your exercise
intensity in line with your training goals, which
contributes to more efficient training,
improved cardiopulmonary function, and
better health.
* Heart Rate Zone (HR zones)
Powered by Polar
●
To specify a target heart rate zone
Specify a target heart rate zone that matches
your training objectives.
The range from 50% to 100% of your
maximum heart rate is divided into five heart
rate zones. You can easily control the intensity
of your training by keeping your heart rate
within a particular zone. Each heart rate zone
has a main effect, and understanding these
effects can enhance the effectiveness of your
training.
●
Zone 1 (50 to 60% of maximum heart rate):
Very light training
Zone 1 training improves overall health and
helps you recover from more strenuous
training.
You can continue training in this zone for
long periods.
●
Zone 2 (60 to 70% of maximum heart rate):
Light training
Zone 2 training increases general stamina.
It uses fat as an energy source, improving
the body’s ability to burn fat.
You can continue training comfortably in
this zone for long periods.
●
Zone 3 (70 to 80% of maximum heart rate):
Moderate training
Zone 3 training improves aerobic fitness. It
causes lactic acid to begin to accumulate in
the bloodstream, but the body can reuse the
lactic acid for energy, so it does not affect
performance.
Since Zone 3 training requires deeper
breathing, you will feel the need for a
moderate amount of effort.
●
Zone 4 (80 to 90% of maximum heart rate):
Hard training
Zone 4 training improves speed endurance
and enhances the ability of the body to use
protein (sugar) for energy. In addition, Zone
4 training allows you to tolerate high levels
of lactic acid in the blood.
Zone 4 training results in muscle fatigue and
rough breathing.
●
Zone 5 (90 to 100% of maximum heart rate):
Very hard training
Zone 5 training improves maximum
performance. Large amounts of lactic acid
are accumulated, so long-term training is
not possible.
Zone 5 training results in labored breathing
and muscle fatigue.
1. Configure CASIO WATCHES phone app
settings so the heart rate measurement
screen is displayed as an activity
measurement screen.
l
Configuring Activity Measurement
Display Settings
2. Display the current time screen.
l
Watch Mode
3. Press (C).
This enters the Activity Mode.
Example:
4. Use (A) and (D) to select an activity.
●
Heart rate training is not available for
POOL SWIMMING and OPEN WATER
SWIMMING.
5. Press (C).
This displays the GPS signal receiving
screen or returns to the activity
measurement operation ready screen.
6. Use (A) and (D) to select the heart rate
measurement screen.
7. Hold down (A) for at least two seconds.
This displays the HEART RATE (heart
rate measurement) setting screen.
Pointer
8. Use (A) and (D) to move the pointer to [HR
TARGET ZONE].
9. Press (C).
10. Use (A) and (D) to move the pointer to the
heart rate zone you want to specify as your
target.
11. Press (C) to complete the setting
operation.
After the setting operation is complete, a
check mark appears for a few seconds,
and then the HEART RATE (heart rate
measurement) function setting screen re-
appears.
12. Press (E) to exit the setting screen.
Watch Operation Guide 3554
24
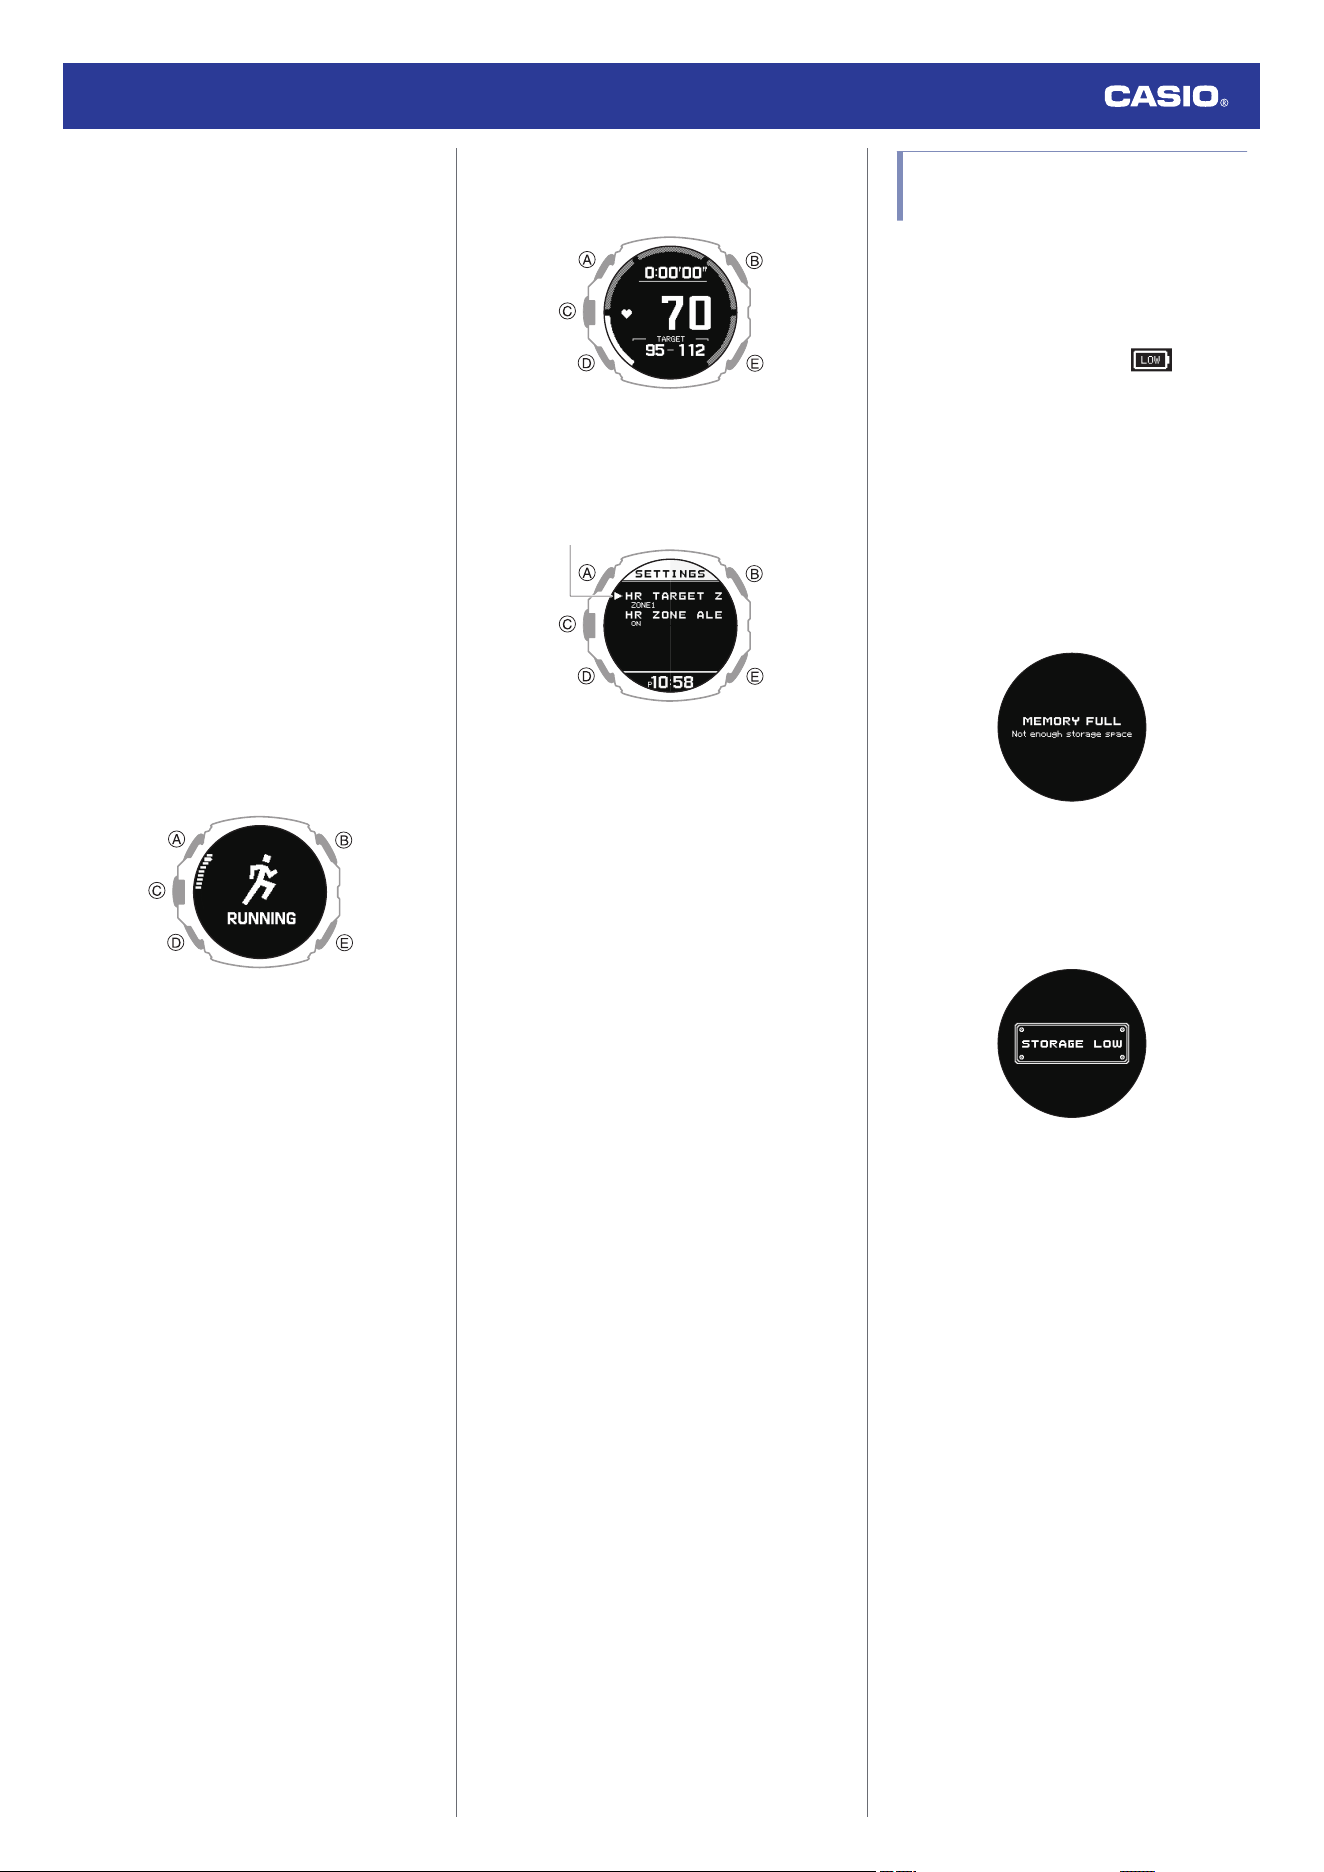
●
To set up the heart rate zone alert
If you engage in heart-rate training while the
heart rate zone alert is enabled, the watch will
perform a sound and/or vibration operation to
let you know when your current heart rate is
outside your target zone. If you do not re-enter
the target zone after the alert, an out-of-zone
notification operation will be performed at one-
minute intervals.
Heart rate zone alert performs notification only
while the heart rate measurement screen is
displayed.
1. Configure CASIO WATCHES phone app
settings so the heart rate measurement
screen is displayed as an activity
measurement screen.
l
Configuring Activity Measurement
Display Settings
2. Display the current time screen.
l
Watch Mode
3. Press (C).
This enters the Activity Mode.
Example:
4. Use (A) and (D) to select an activity.
●
Heart rate training is not available for
POOL SWIMMING and OPEN WATER
SWIMMING.
5. Press (C).
This displays the GPS signal receiving
screen or returns to the activity
measurement operation ready screen.
6. Use (A) and (D) to select the heart rate
measurement screen.
7. Hold down (A) for at least two seconds.
This displays the HEART RATE (heart
rate measurement) setting screen.
Pointer
8. Use (A) and (D) to move the pointer to [HR
ZONE ALERT].
9. Press (C).
10. Use (A) and (D) to move the pointer to
[ON] (enabled) or [OFF] (disabled).
11. Press (C) to complete the setting
operation.
After the setting operation is complete, a
check mark appears for a few seconds,
and then the HEART RATE (heart rate
measurement) function setting screen re-
appears.
12. Press (E) to exit the setting screen.
Activity Measurement
Precautions
●
After using an activity function, use the
charging cable to charge the watch.
l
Charging with the Charger Cable
●
Activity measurement is not possible while
the battery indicator shows or lower.
Charging before performing an activity
measurement is recommended.
l
Charging the Watch
●
If [MEMORY FULL] appears on the display
while an activity measurement operation is
in progress, the measurement operation
stops.
Measurement also stops automatically
whenever a single activity measurement
operation exceeds 80 hours.
●
You may not be able to save measurement
results if the remaining activity log capacity
is low. If this happens, delete log data you
no longer need to make room for more data.
l
Deleting Activity Records
●
For information about the summary
(Measurement Result) screen that appears
after an activity measurement operation is
complete, see the information below.
l
Viewable Activity Log Items
●
Activities that use GPS cannot be selected
while Airplane Mode is turned on.
l
To select an activity
l
Entering the Watch Airplane Mode
Watch Operation Guide 3554
25
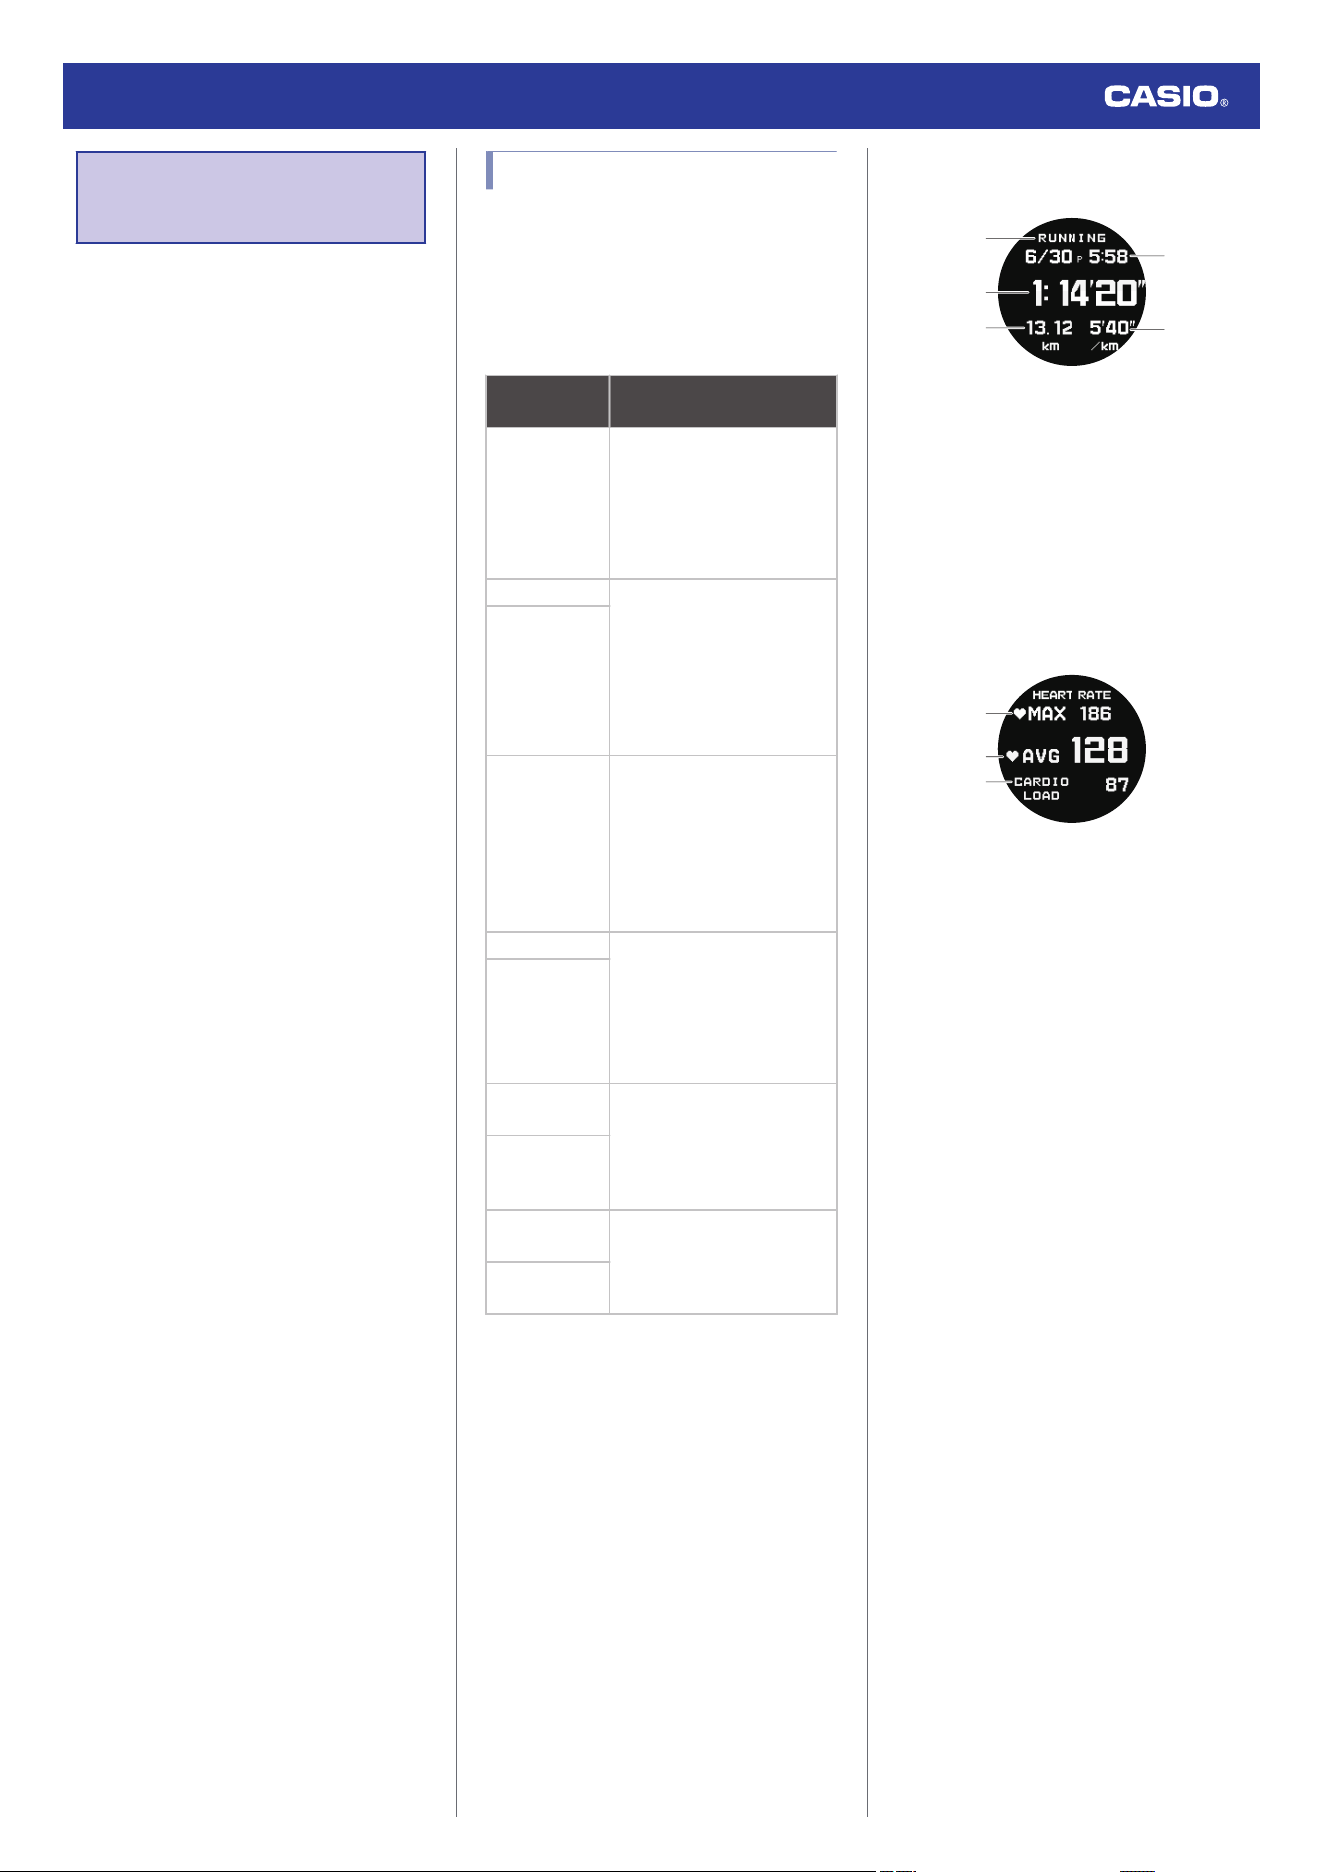
Viewing Activity Log
Records
After an activity measurement operation is
completed, a summary (measurement
results) is displayed and saved in watch
memory as log data.
There is enough memory to store up to 100 log
records.
Measurement Data Accuracy
●
The sensors of your watch calculate your
step count, calories burned, heart rate,
running index, and other data. No
guarantees are made concerning the
accuracy of the statistics and values
calculated by this watch, so they should be
used as general reference information only.
Viewable Activity Log Items
The summaries (measurement results) in the
table below can be viewed after an activity
measurement is complete or by accessing the
activity log.
The summary screens that are displayed
depend on the activity.
Activity
Summary (Measurement
Result) Screen
TREKKING
Measurement Result Details
Heart Rate
Calories burned
Pace
Altitude
Lap
RUNNING Measurement Result Details
Heart Rate
Calories burned
Cadence
Pace
Altitude
Lap
TRAIL
RUNNING
WALKING
Measurement Result Details
Heart Rate
Calories burned
Cadence
Speed
Altitude
Lap
BIKING Measurement Result Details
Heart Rate
Calories burned
Speed
Altitude
Lap
OTHER
ACTIVITY
OPEN WATER
SWIMMING
Measurement Result Details
Calories burned
Strokes
Pace
Lap
POOL
SWIMMING
GYM
WORKOUT
Measurement Result Details
Heart Rate
Calories burned
Segments
INTERVAL
TIMER
●
Summary Screen Details
Measurement Result Details Summary
①
②
③
④
⑤
A Activity name
B Split time
C Running distance
D Activity start date and time
E Pace
Heart Rate Summary
②
③
①
A Maximum heart rate
B Average heart rate
C Cardio load *1
*1 Cardio Load (CARDIO LOAD)
Powered by Polar
Cardio load measures the load your
training session places on your
cardiovascular system. Cardio load
measurement values are displayed up to
999. The CASIO WATCHES phone app
shows values greater than 999.
Watch Operation Guide 3554
26
Burned calorie summary
②
③④ ⑤
①
A Calories burned during measurement
period
B Graph
C Carbohydrate percentage
D Protein percentage
E Fat percentage
* Analysis of Energy Consumption by Three
Major Nutrients
Energy source used (Energy Used)
Powered by Polar
The energy sources used breakdown
shows how much of each energy source
(fats, carbs, protein) you used during your
session. These are indicated as
percentages of the total calories burned.
If the heart rate sensor is not being used, the
calories burned are output but the energy
source used is not output.
In the case of POOL SWIMMING and OPEN
WATER SWIMMING, the percentages of
total calories burned are not displayed.
Cadence Summary
②
①
③
A Maximum cadence
B Average cadence
C Average Stride
Stroke Summary
②
③
①
④
A Total strokes *2
B Average strokes *2
C Best SWOLF *3
D Average SWOLF *3
*2 For the crawl stroke and backstroke, the
strokes are counted for one arm only.
*3 SWOLF is an index of swimming
efficiency.
SWOLF = number of strokes per pool
length + time required to swim pool length
Note
●
How POOL SWIMMING lap times are
acquired
A lap is automatically acquired about
six seconds after either of the following
occurs: the swimmer makes a turn or
completes a distance equivalent to the
pool length setting.
●
Stroke/SWOLF average
An average value is calculated each
time the swimmer completes a
distance equivalent to the pool length
setting. If you stop measurement
without swimming a distance
equivalent to the pool length setting,
the strokes/SWOLF from your last lap
to the point where you stopped the
measurement will not be included in
the average value.
Pace Summary
②
④
③
①
A Best pace
B Average pace
C Running index *4 *5
D Evaluation *6
*4 Running index (RUNNING INDEX)
Powered by Polar
The Running Index provides your maximal
aerobic fitness when running. This
calculation is calculated for each run
based on your heart rate and speed data
measured during the run.
This item is displayed only when
RUNNING is selected.
*5 The Running Index is calculated when the
GPS reception interval setting is [HIGH] or
[NORMAL].
*6 The evaluation is shown as one of the
following: VERY LOW (Very Low), LOW
(Low), FAIR (Fair), MODERATE
(Moderate), GOOD (Good), VERY GOOD
(Very Good), ELITE (Elite).
You can also check age-specific reference
values.
l
Fitness Categories
Speed Summary
②
①
A Maximum speed
B Average speed
Watch Operation Guide 3554
27
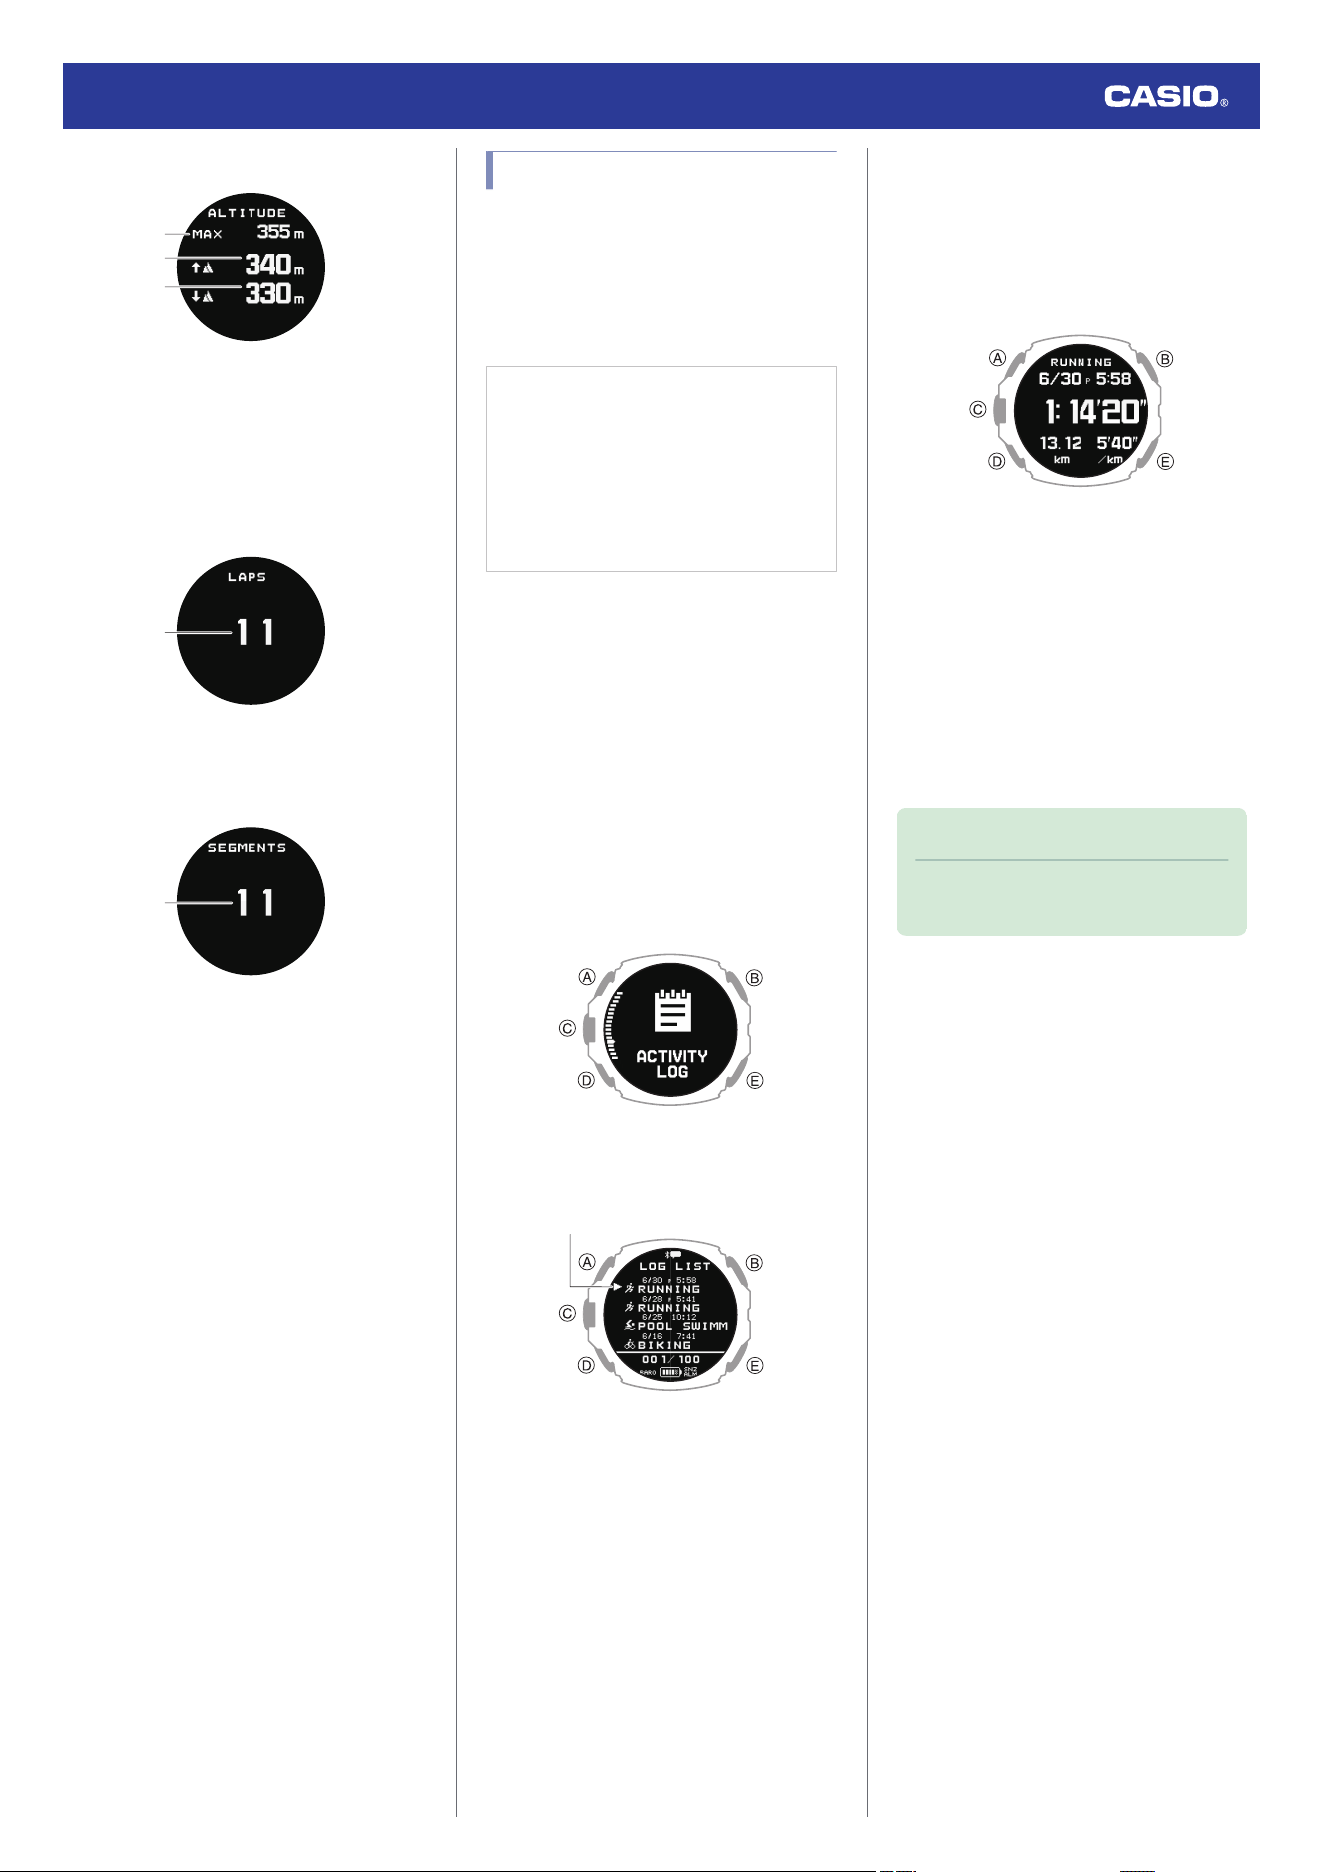
Altitude Summary
②
③
①
A Maximum elevation
B Cumulative ascent
C Cumulative descent
Lap Summary
①
A Number of Laps
Segment Summary
①
A Segment repeats
Viewing Activity Records
You can view recorded activity log data on the
watch or with the CASIO WATCHES phone
app.
●
To view activity records with the CASIO
WATCHES phone app
Check the connection
●
Make sure the
e
symbol is shown on the
watch display when you perform the
procedure below. If
e
is not displayed,
refer to the information at the link below.
l
Connecting with a Phone Paired
With the Watch
1.
Y
Tap the “CASIO WATCHES” icon.
2.
Y
Tap the “My Page” tab.
3.
Y
Scroll the screen and then tap the history
of the activity whose data you want to
view.
●
To view activity records with the watch
1. Display the current time screen.
l
Watch Mode
2. Use (A) and (D) to select [ACTIVITY
LOG].
3. Press (C).
This displays the activity log list.
Pointer
4. Use (A) and (D) to move the pointer to the
log data record you want to view.
5. Press (C).
This displays the detailed summary
screens of the selected log data.
6. Use (A) and (D) to display the summary
screen you want to view.
●
For details about summary screens,
see the information below.
l
Viewable Activity Log Items
●
To view the details of individual lap data,
press (C) while a lap summary or
segment summary screen is displayed.
7. To return to the activity log list screen,
press (E).
Note
●
Pressing (E) during the above
procedure will go back one screen.
Watch Operation Guide 3554
28
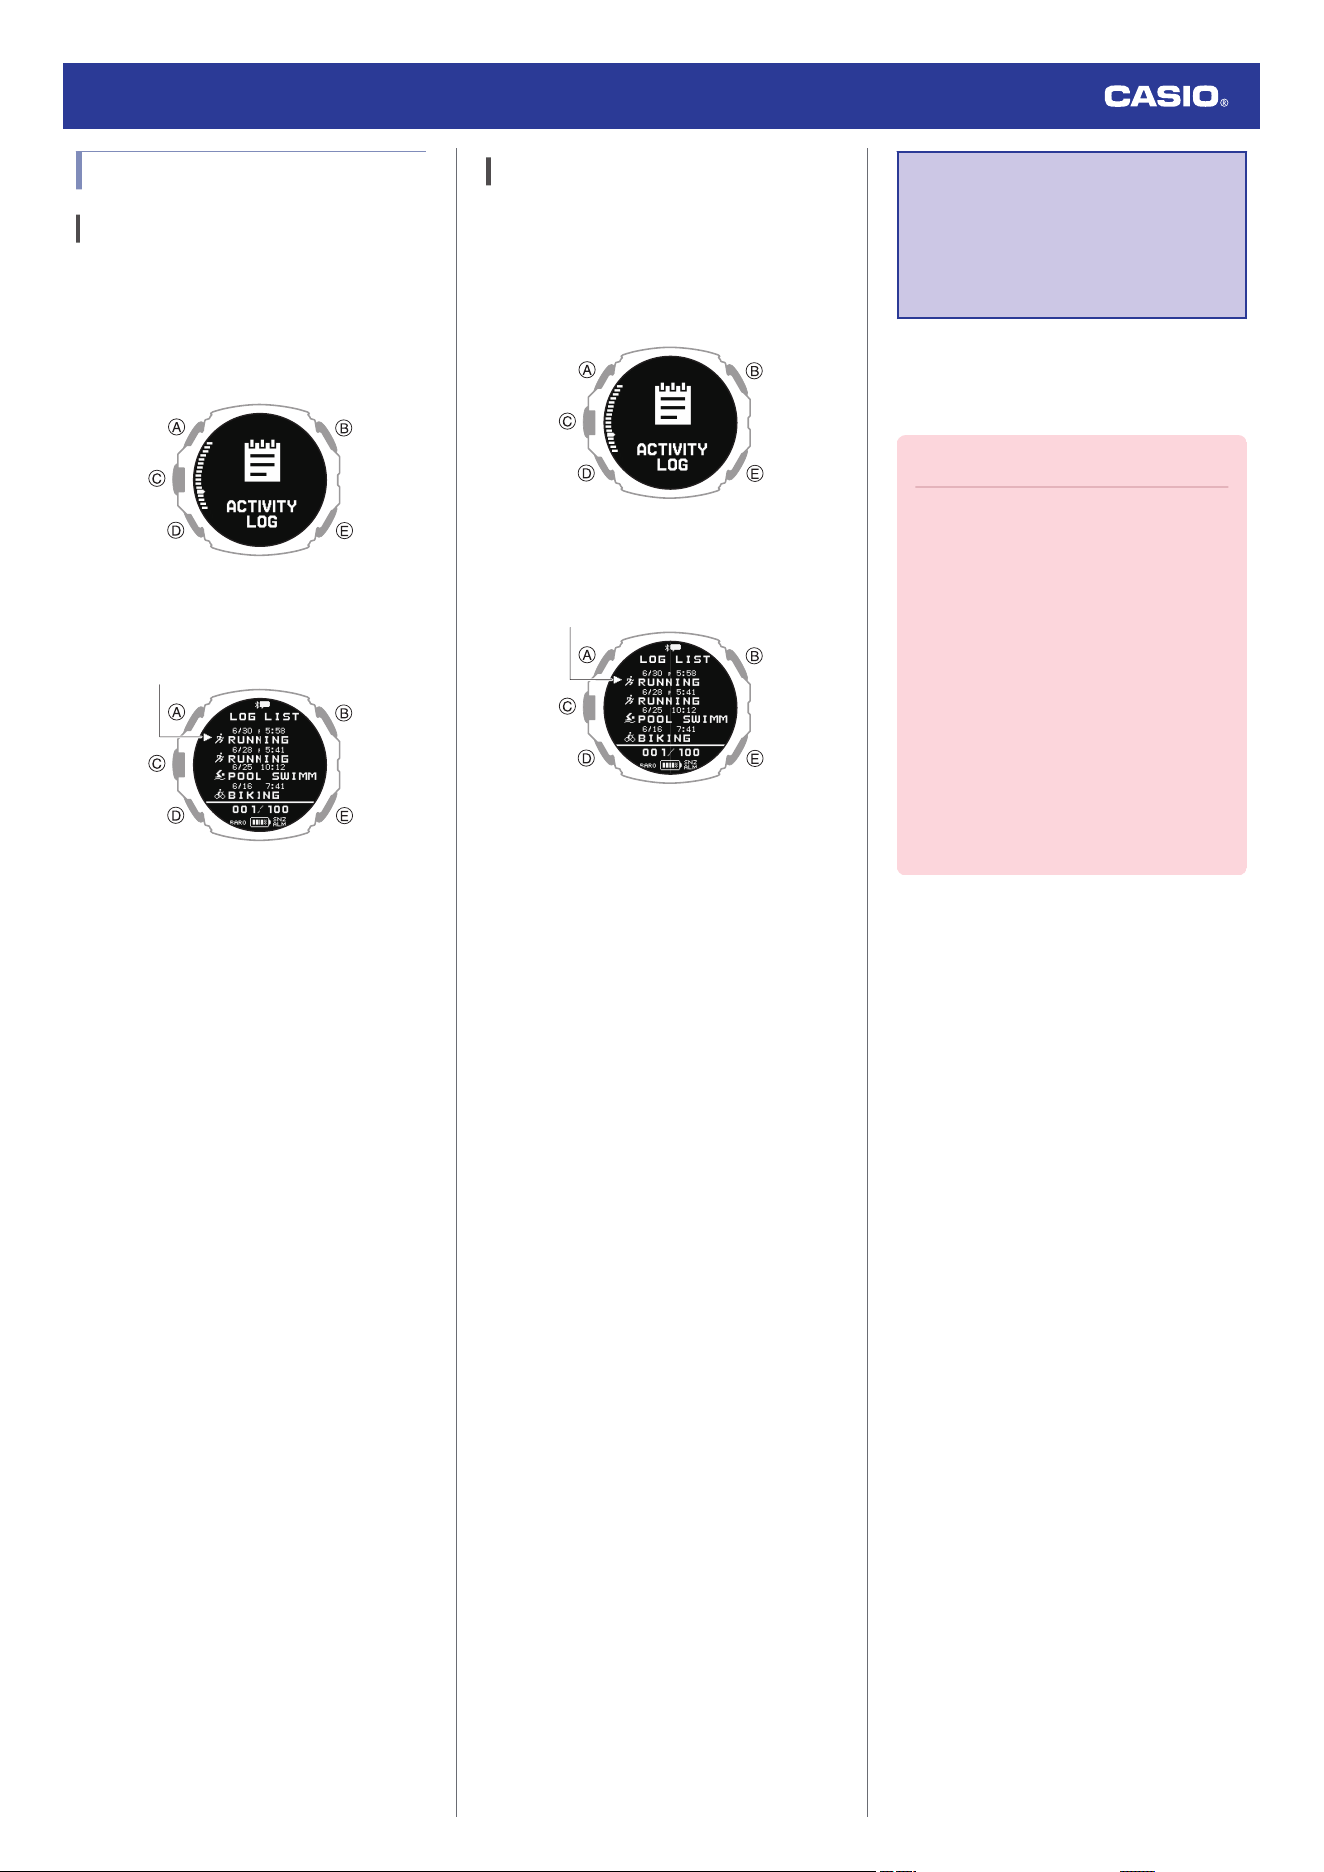
Deleting Activity Records
Deleting Specific Data
1. Display the current time screen.
l
Watch Mode
2. Use (A) and (D) to select [ACTIVITY
LOG].
3. Press (C).
This displays the activity log list.
Pointer
4. Use (A) and (D) to move the pointer to the
data you want to delete.
5. Press (C).
This displays the detailed summary
screen of the selected log data.
6. Hold down (A) for at least two seconds.
This displays a delete menu.
7. Use (A) and (D) to move the pointer to
[YES].
To cancel log data deletion, move the
pointer to [NO].
8. Press (C).
After the data delete operation is
complete, a check mark appears for a few
seconds, and then the activity log list
screen re-appears.
9. Press (E) twice to return to the current time
screen.
Deleting All Activity Data
1. Display the current time screen.
l
Watch Mode
2. Use (A) and (D) to select [ACTIVITY
LOG].
3. Press (C).
This displays the activity log list.
Pointer
4. Hold down (A) for at least two seconds.
This displays a delete menu.
5. Use (A) and (D) to move the pointer to
[YES].
To cancel log data deletion, move the
pointer to [NO].
6. Press (C).
After the data delete operation is
complete, a check mark appears for a few
seconds, and then [NO DATA] appears.
7. Press (E) twice to return to the current time
screen.
Viewing Your
Training
Performance
Condition
You can use your watch to measure your heart
rate, running speed, and altitude, and display
your cardio load status.
Important!
●
To measure your cardio load status,
you need to measure your heart rate
and set up your profile.
l
Using Heart Rate Measurement
l
Creating Your Profile
●
Activities with POOL SWIMMING and
OPEN WATER SWIMMING are not
reflected in your cardio load status.
●
If the heart rate measurement setting
is turned off for activities other than
POOL SWIMMING and OPEN
WATER SWIMMING, your activities
are not reflected in your cardio load
status.
Watch Operation Guide 3554
29
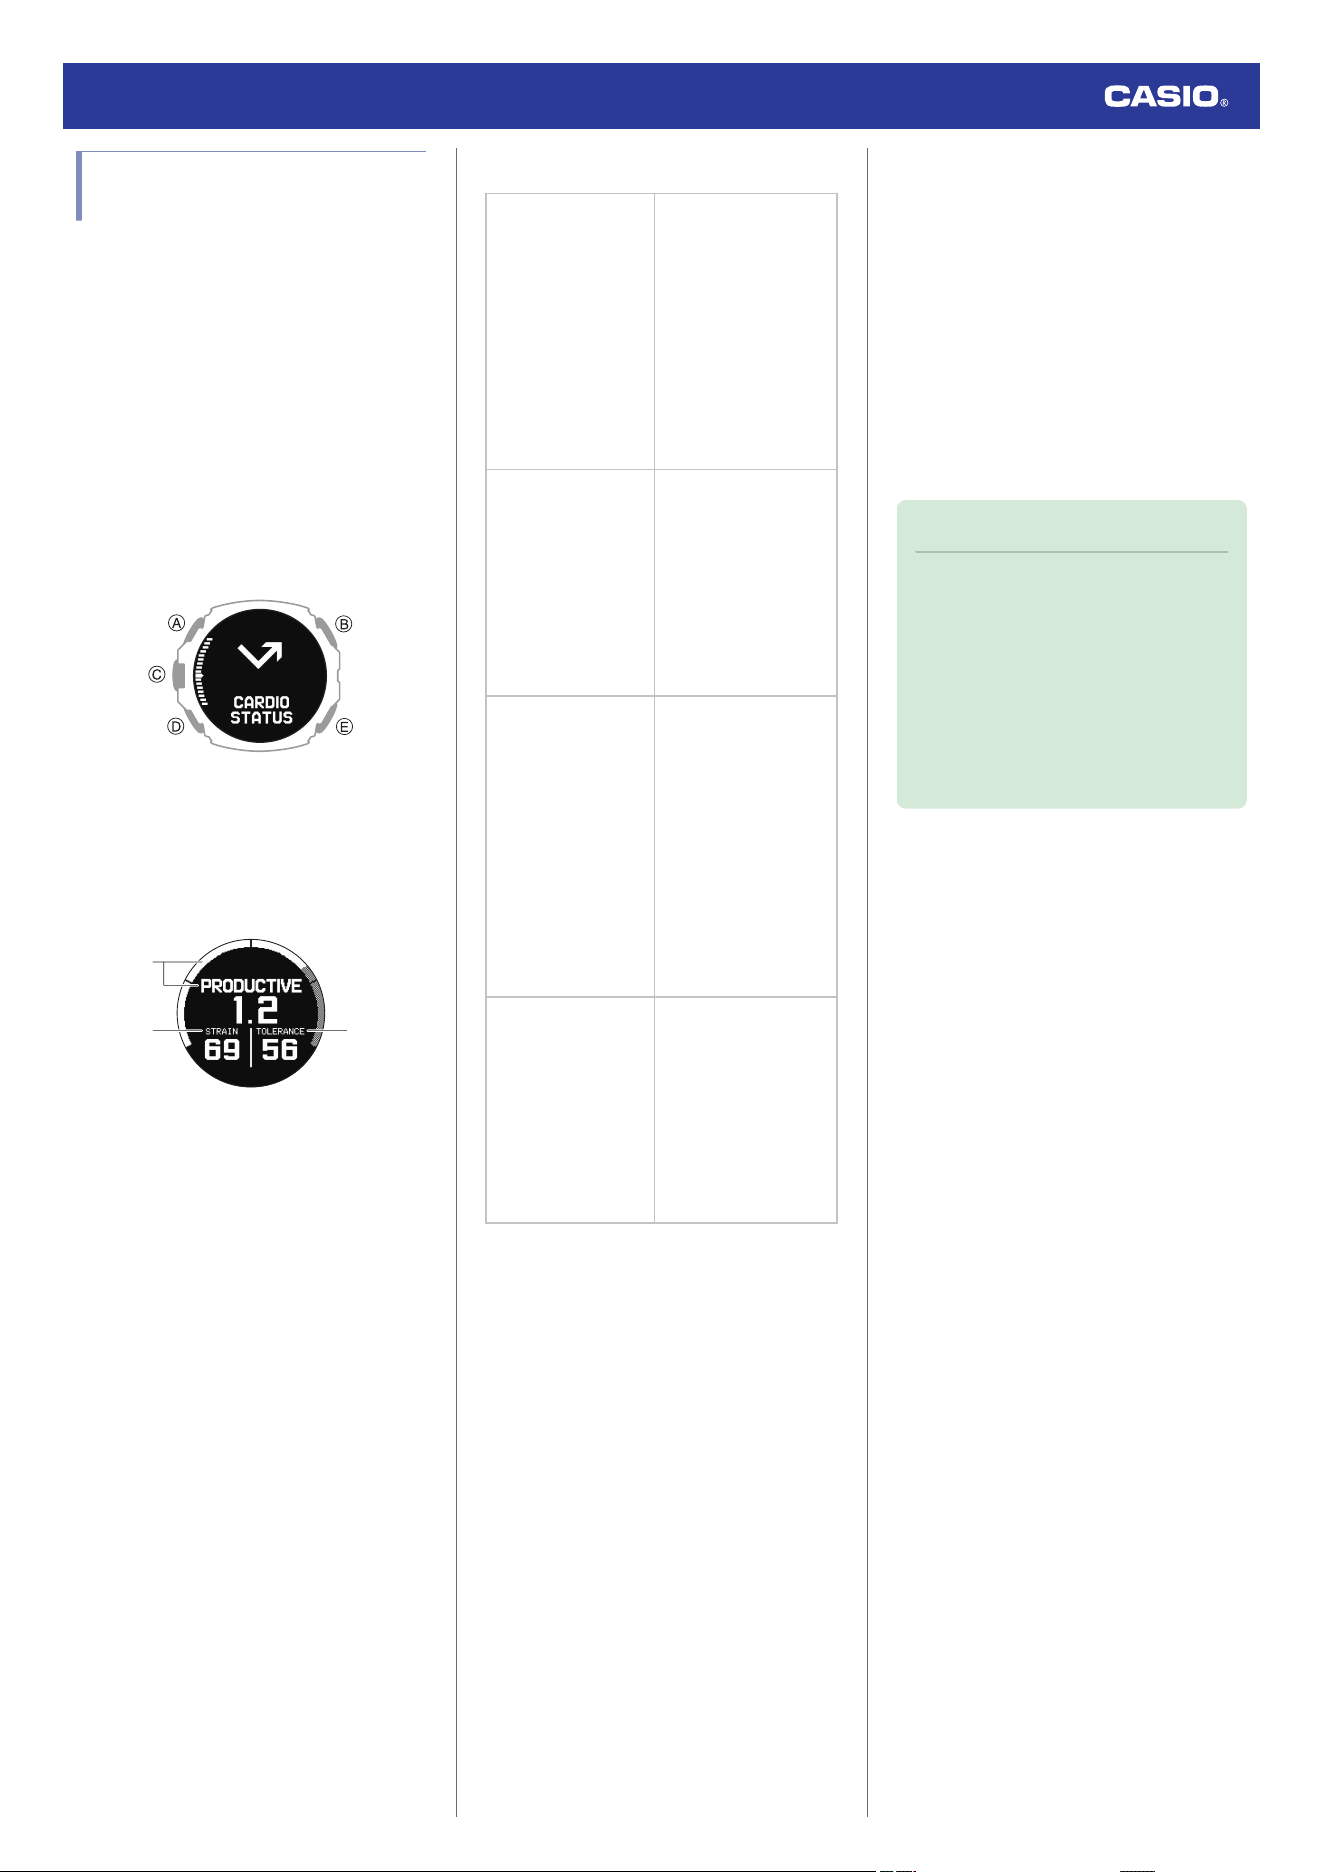
Viewing Your Cardio Load
Status
The cardio load status compares your load
(STRAIN) with your endurance
(TOLERANCE) to see how your training is
affecting your body. You can control your total
training volume in the short and long term by
checking your cardio load status.
* Cardio Load Status (Cardio Load Status)
Powered by Polar
1. Display the current time screen.
l
Watch Mode
2. Use (A) and (D) to select [CARDIO
STATUS].
3. Press (C).
This displays the cardio load status
screen.
●
The message [NO DATA] appears if
there is no data available.
②
①
③
A
Cardio load status
[DETRAINING]
●
< 0.8
Training at a load
that is less than
recommended has
continued for one
week or longer,
which is affecting
your fitness level.
Correct by
increasing your
training load.
[MAINTAINING]
●
0.8 to 1.0
Training load
suitable for
maintaining your
fitness level. For
better effect, try
other types of
training or increase
the training volume.
[PRODUCTIVE]
●
1.0 to 1.3
Maintain this status.
The training load is
either laying a
foundation for
fitness or guiding
you in the right
direction for fitness.
To maintain this
status, schedule
recovery time
between training.
[OVERREACHING]
●
> 1.3
This status has a
high training load,
which is
counterproductive.
Rest is required.
Create recovery
time by including
low-load training.
●
The displayed value is calculated by
dividing the strain by the tolerance.
B
Strain
Shows the load of your most recent training.
This value shows the average daily load for the
past seven days.
C
Tolerance
Shows how ready you are to endure cardio-
strength training.
This value shows the average daily load for the
past 28 days.
4. Press (E) twice to return to the current time
screen.
Note
●
At least three days of activity
measurements within the past 28 days
are required to display your cardio load
status.
●
Your cardio load status is updated after
you activate the heart rate
measurement and perform an activity
measurement, or every day at
midnight (12:00 am).
Watch Operation Guide 3554
30
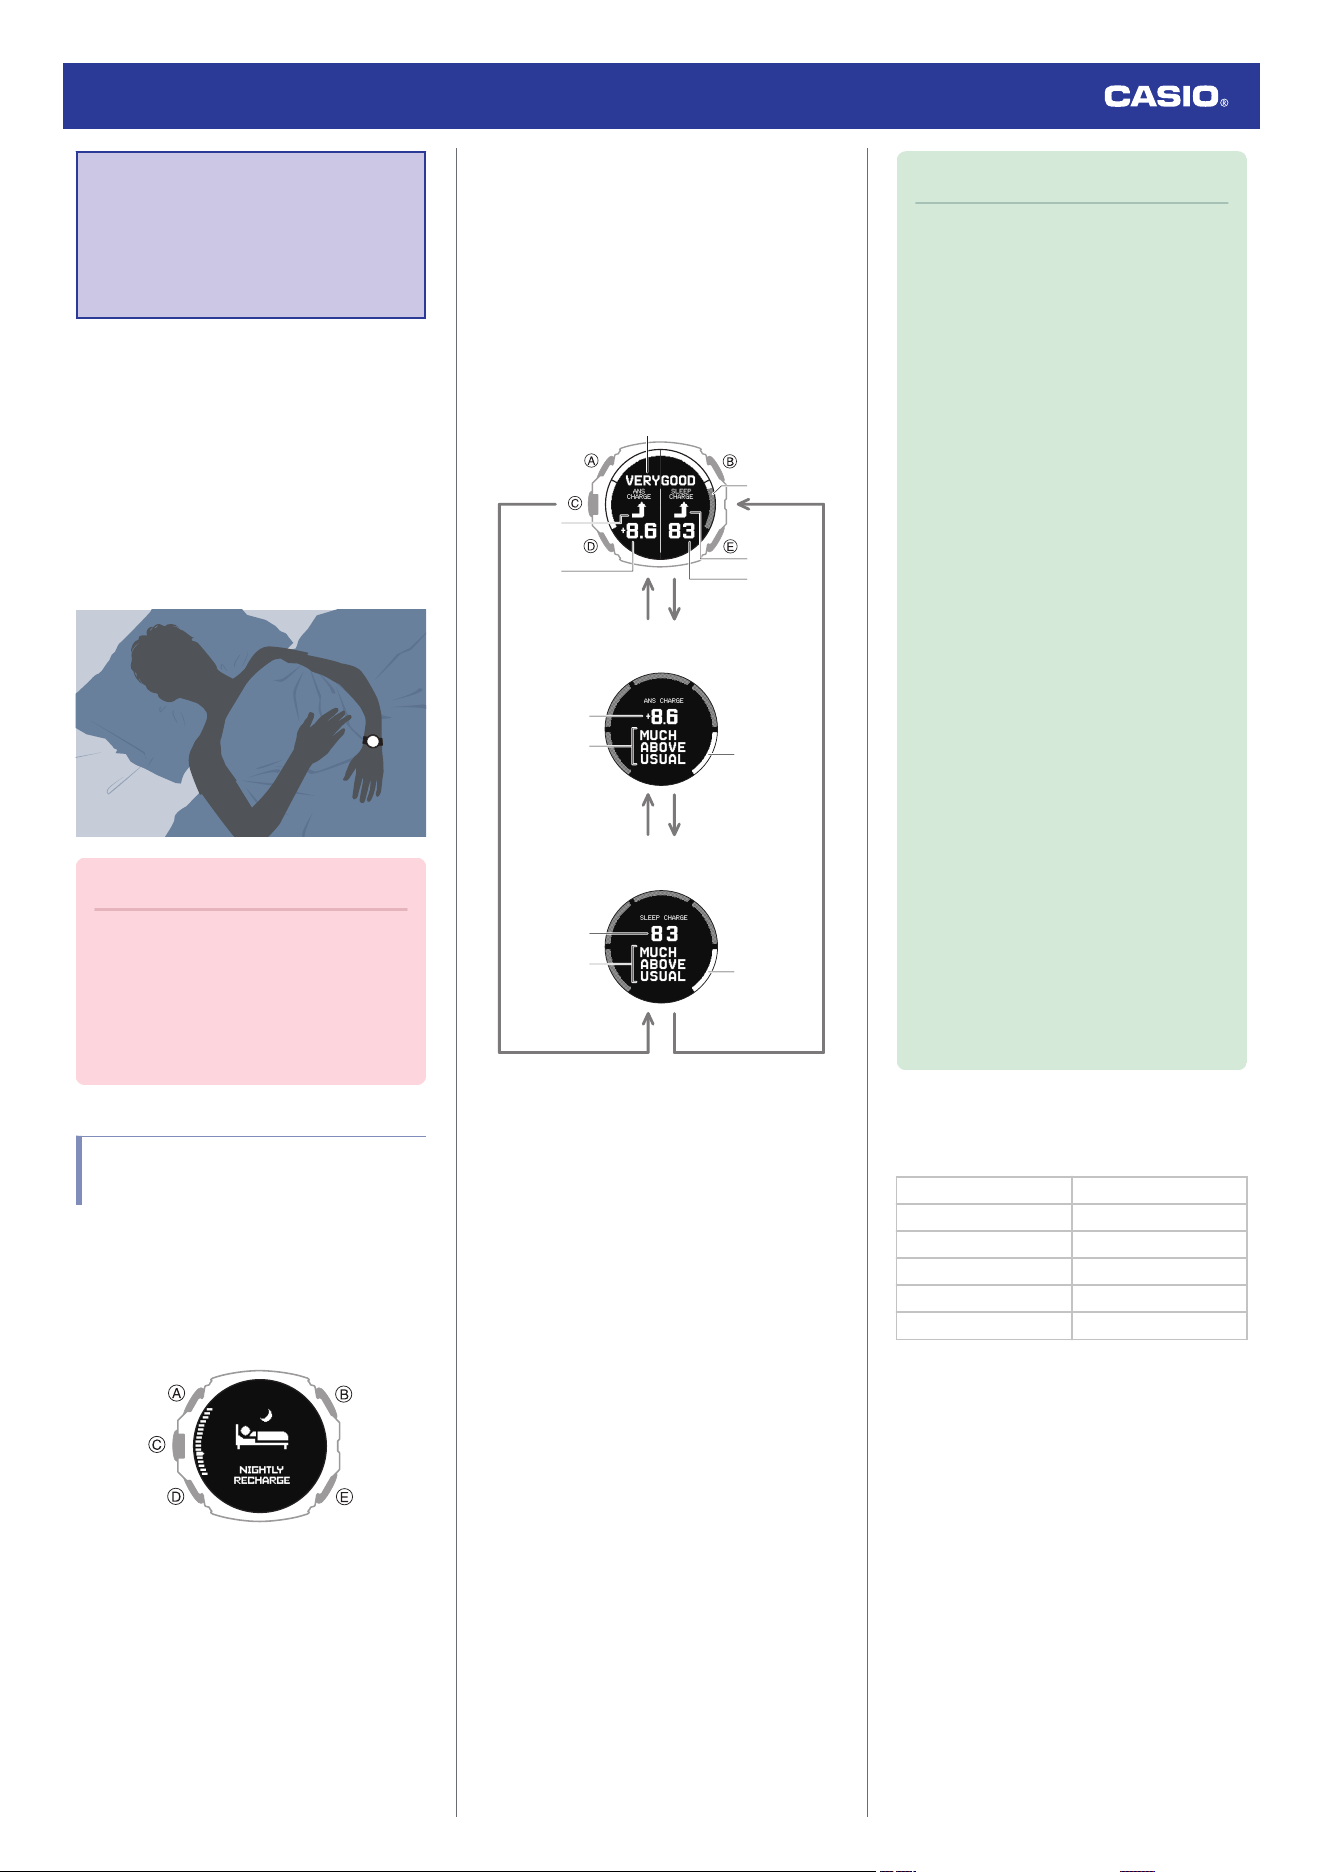
Using Nightly
Recharge™ to Check
Your Recovery
Status
With Nightly Recharge™, you can check how
much you have recovered from the load
placed on your body during the day.
The Nightly Recharge™ status is based on
two factors: Sleep Charge (the quality of your
sleep) and ANS Charge (how calm your
autonomic nervous system is during the early
hours of your sleep).
* Nightly Recharge™
Powered by Polar
Important!
●
Wearing the watch for long periods,
sweat, or certain usage environments
create the risk of skin rash. To prevent
skin problems, regularly remove your
watch from your wrist to give your skin
some time to rest.
Checking Nightly
Recharge™ Status
1. Display the current time screen.
l
Watch Mode
2. Use (A) and (D) to select [NIGHTLY
RECHARGE].
3. Press (C).
This displays the Nightly Recharge™
status summary screen.
●
The message [NO DATA] appears if
there is no data available.
Each press of (A) or (D) cycles between
screens as described below.
③
①
②
③
⑥
⑤
⑥
DA
A
DA
D
④
⑦
⑨
⑩
⑧
ANS Charge
(Autonomic Nerve Status)
Sleep Charge
(Sleep Status)
Nightly Recharge™ Status
A Nightly Recharge™ Status
B Status Icons (ANS Charge)
C ANS Charge Score
D Indicator level
E Status Icons (Sleep Charge)
F Sleep Charge Score
G Autonomic nerve status
H ANS Charge Status
I Sleep status
J Sleep Charge Status
Note
●
In the following situations, sleep data
cannot be acquired, so [NO DATA] is
shown on the display, or the accuracy
of sleep analysis may be decreased.
ー
Sleep (from bedtime to wake up) of
less than 4 hours
ー
Constantly moving or barely moving
during sleep
ー
Wearing the watch only while asleep
and taking it off immediately after
awaking
●
Nightly Recharge™ can be used when
the conditions below are satisfied.
ー
Heart rate measurement is set to
[ON] or [ACTIVITY & NIGHT TIME
ON], enabling continuous heart rate
measurement.
l
Using Heart Rate Measurement
With [ACTIVITY & NIGHT TIME
ON], sleep measurement starts
from the time set for NIGHT TIME.
For the NIGHT TIME time setting,
specify your normal sleep time
(bedtime and wake-up time).
ー
The watch is firmly attached to your
wrist when you go to bed.
ー
At least three sleep measurements
in the past 28 days (one of which was
the night before)
●
To improve sleep analysis accuracy, it
may take about one to two hours after
you wake up for measurement results
to be displayed on the watch.
●
To interpret a status
Nightly Recharge™ Status
[VERY GOOD] Very Good
[GOOD] Good
[OK] OK
[COMPROMISED] Compromised
[POOR] Poor
[VERY POOR] Very Poor
Watch Operation Guide 3554
31
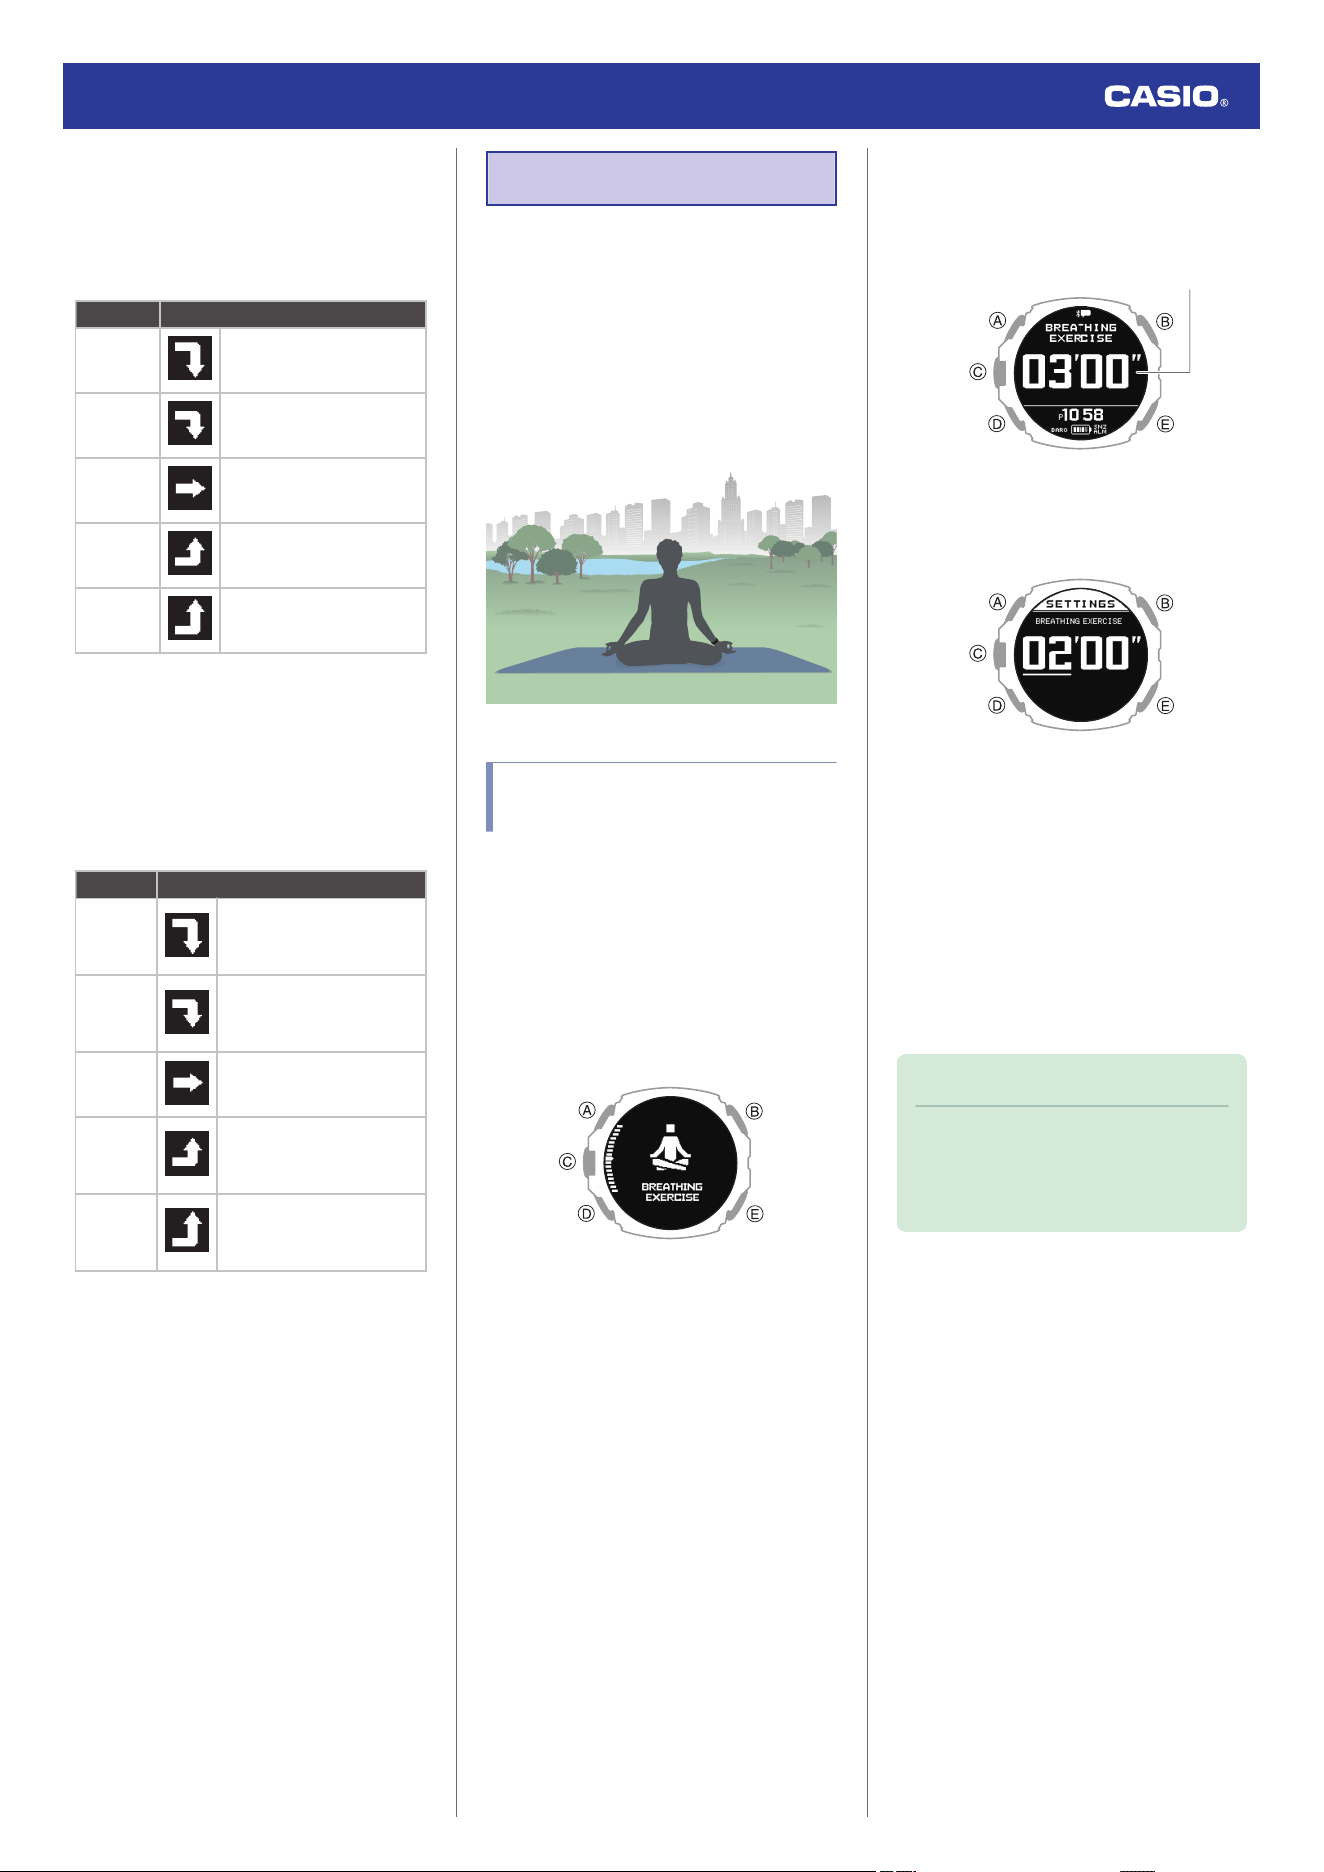
ANS Charge (Autonomic Nerve Status)
This function quantifies to how much your
autonomic nerve system calms down during
the night.
Score range: -10 to 10
Score Status
-6 or
below
[MUCH BELOW USUAL]
(Much Below Usual)
-6 to -2
[BELOW USUAL] (Below
Usual)
-2 to 2 [USUAL] (Usual)
2 to 6
[ABOVE USUAL] (Above
Usual)
6 or
above
[MUCH ABOVE USUAL]
(Much Above Usual)
Sleep Charge (Sleep Status)
This function evaluates and quantifies your
sleep time and sleep status.
Your score and index are determined by
comparing the previous night’s sleep to your
average score for the previous 28 days.
Score range: 1 to 100
Score Status
-10 or
less of
average
[MUCH BELOW USUAL]
(Much Below Usual)
-3.33 to
-10 of
average
[BELOW USUAL] (Below
Usual)
± 3.33 of
average
[USUAL] (Usual)
+3.33 to
+10 of
average
[ABOVE USUAL] (Above
Usual)
+10 or
more of
average
[MUCH ABOVE USUAL]
(Much Above Usual)
Breathing Exercises
The breathing exercise function provides
guidance for deep breathing exercises. The
guidance teaches you how to breathe slowly
and at a stable rhythm.
Breathing exercises help you relax your body
and mind, and deal with stress.
* Breathing Exercise (Breathing Exercise)
Powered by Polar
Setting a Breathing Exercise
Duration
Use this procedure to set the duration (in
minutes) of the breathing exercise.
Setting range: 02’00” to 20’00”
1. Display the current time screen.
l
Watch Mode
2. Use (A) and (D) to select [BREATHING
EXERCISE].
3. Press (C).
This displays the breathing exercise reset
screen.
Exercise time
4. Hold down (A) for at least two seconds.
This displays the breathing exercise
duration setting screen.
5. Use (A) and (D) to change the duration
(minute) setting.
●
You can set a time from 2 to 20 minutes
in 1-minute increments.
6. Press (C) to complete the setting
operation.
After the setting operation is complete, a
check mark appears for a few seconds,
and then the breathing exercise reset
screen re-appears.
Note
●
While the setting is being configured,
the watch will exit the setting operation
automatically after about two or three
minutes of non-operation.
Watch Operation Guide 3554
32
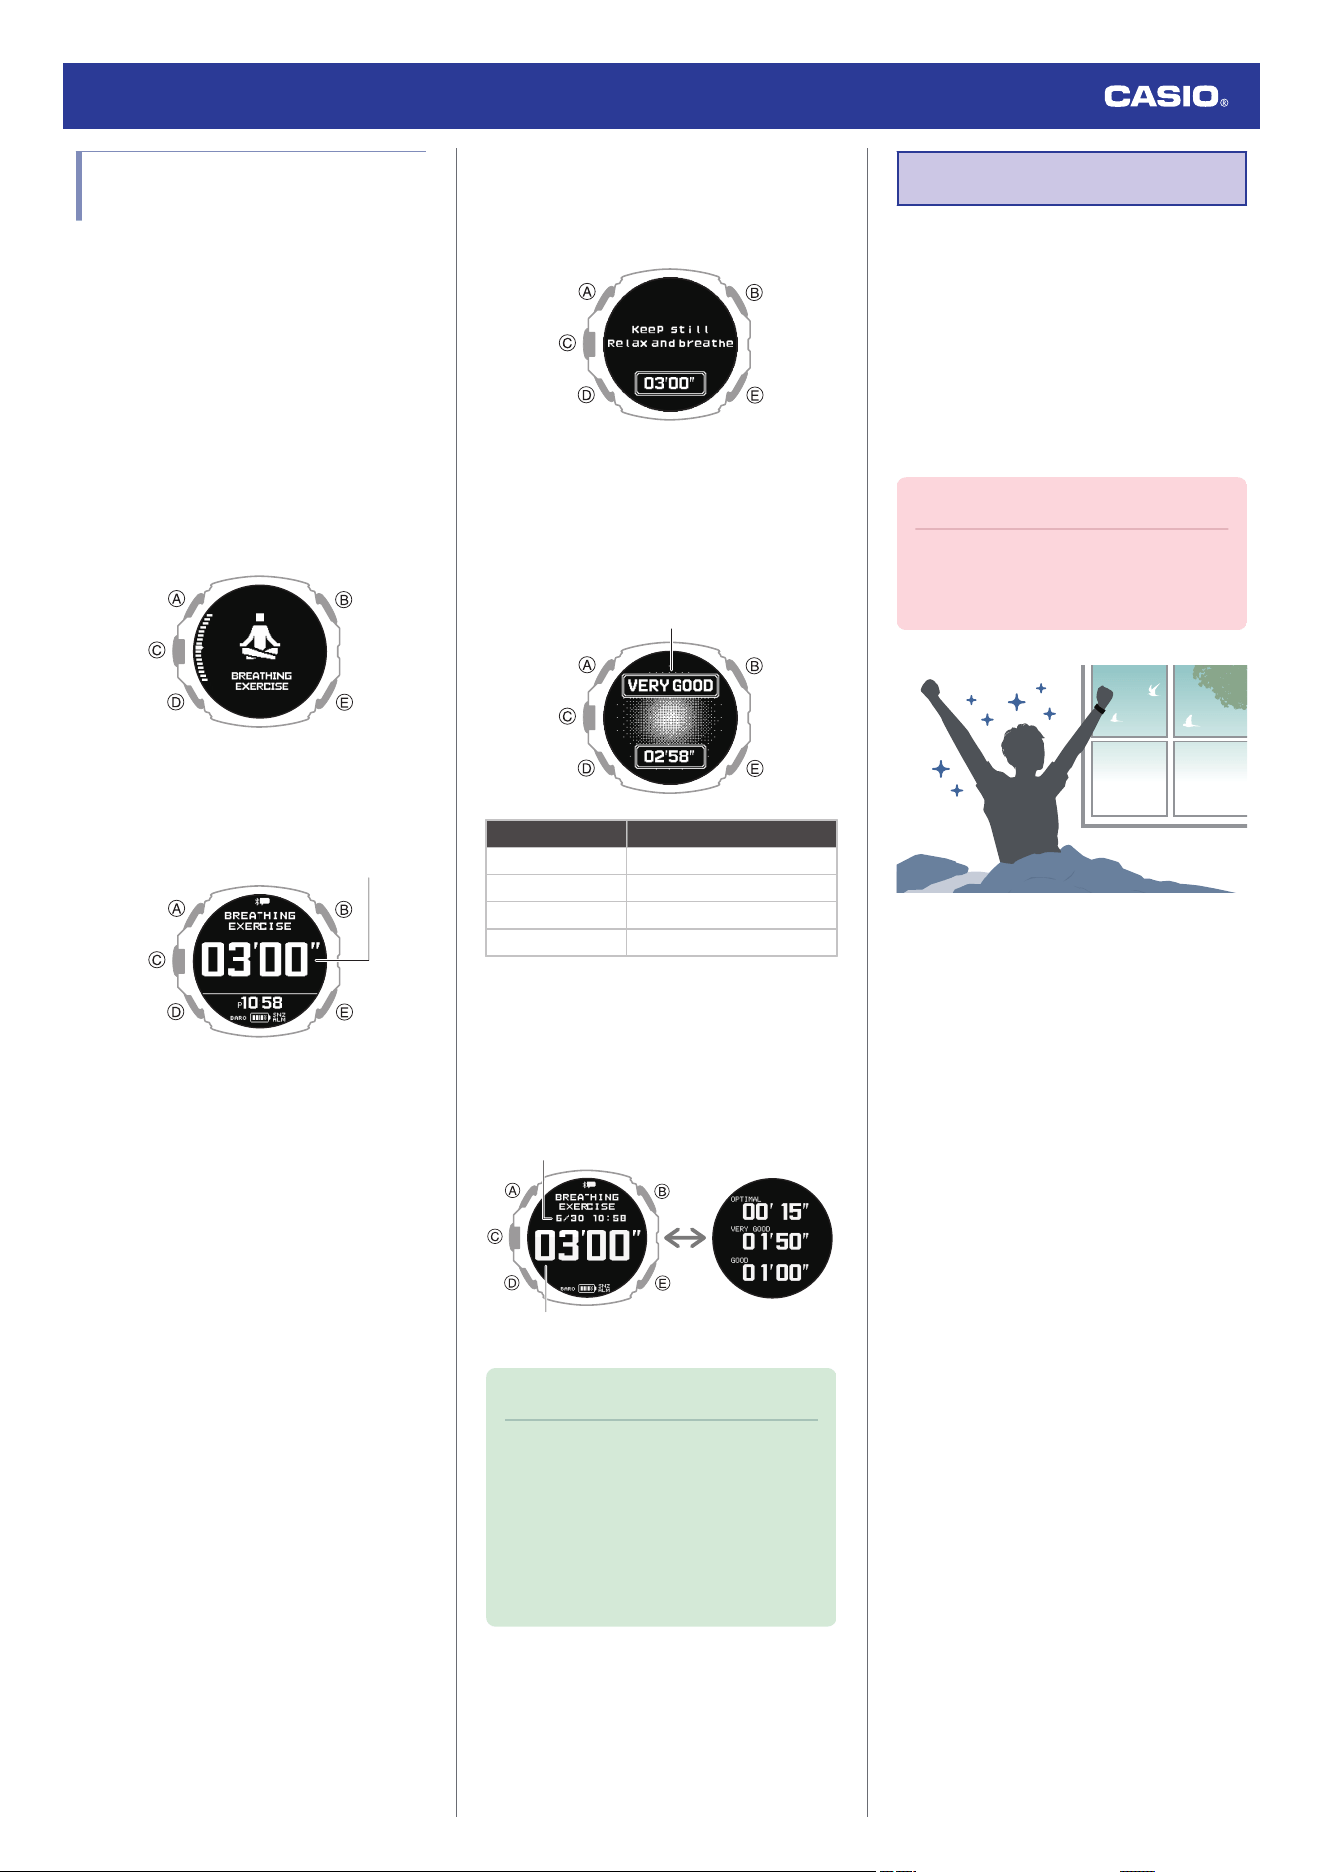
Measuring a Breathing
Exercise
During your breathing exercise, the watch
measures the time you spend in the calm zone
(the time you spend breathing slowly so your
breathing rhythm and your heart are in sync
with each other).
Keep your arms still during breathing exercise
measurement.
1. Display the current time screen.
l
Watch Mode
2. Use (A) and (D) to select [BREATHING
EXERCISE].
3. Press (C).
This displays the breathing exercise reset
screen.
Exercise time
4. Sit or lie down.
Relax your arm and adjust your posture so
you can keep your hand still.
5. Press (C).
This displays the breathing exercise
preparation screen.
After the preparation is completed, the
watch starts breathing exercise
measurement.
6. Breathe slowly (inhale and exhale)
according to the animation.
Current calm zone
Calm zone Meaning
(No display) Good zone not reached.
[GOOD] Good
[VERY GOOD] Very Good
[OPTIMAL] Optimal
After the measurement operation is
complete, the watch displays the result.
●
Each press of (A) or (D) switches
between result screens.
Result 2Result 1
Measurement start
date and time
Elapsed time
Time in each calm
zone
Note
●
To reach the [OPTIMAL] zone,
maintain a pace of six breaths (inhale,
exhale) per minute.
●
[ERROR] appears on the display if you
remove the watch from your wrist while
the preparation screen is displayed or
if a stable signal cannot be obtained.
Smart Alarm
The smart alarm uses the watch’s
accelerometer and heart rate sensor to
estimate your sleep state and notify you by a
10-second sound or vibration operation when
your sleep is light during a specified period.
For example, if you set an alarm time of 7:30
and a smart period of 60 minutes, the alarm
alerts you to a good time to awake between
the hours of 6:30 and 7:30.
Important!
●
Make sure you leave the watch affixed
to your wrist when using the smart
alarm.
Watch Operation Guide 3554
33
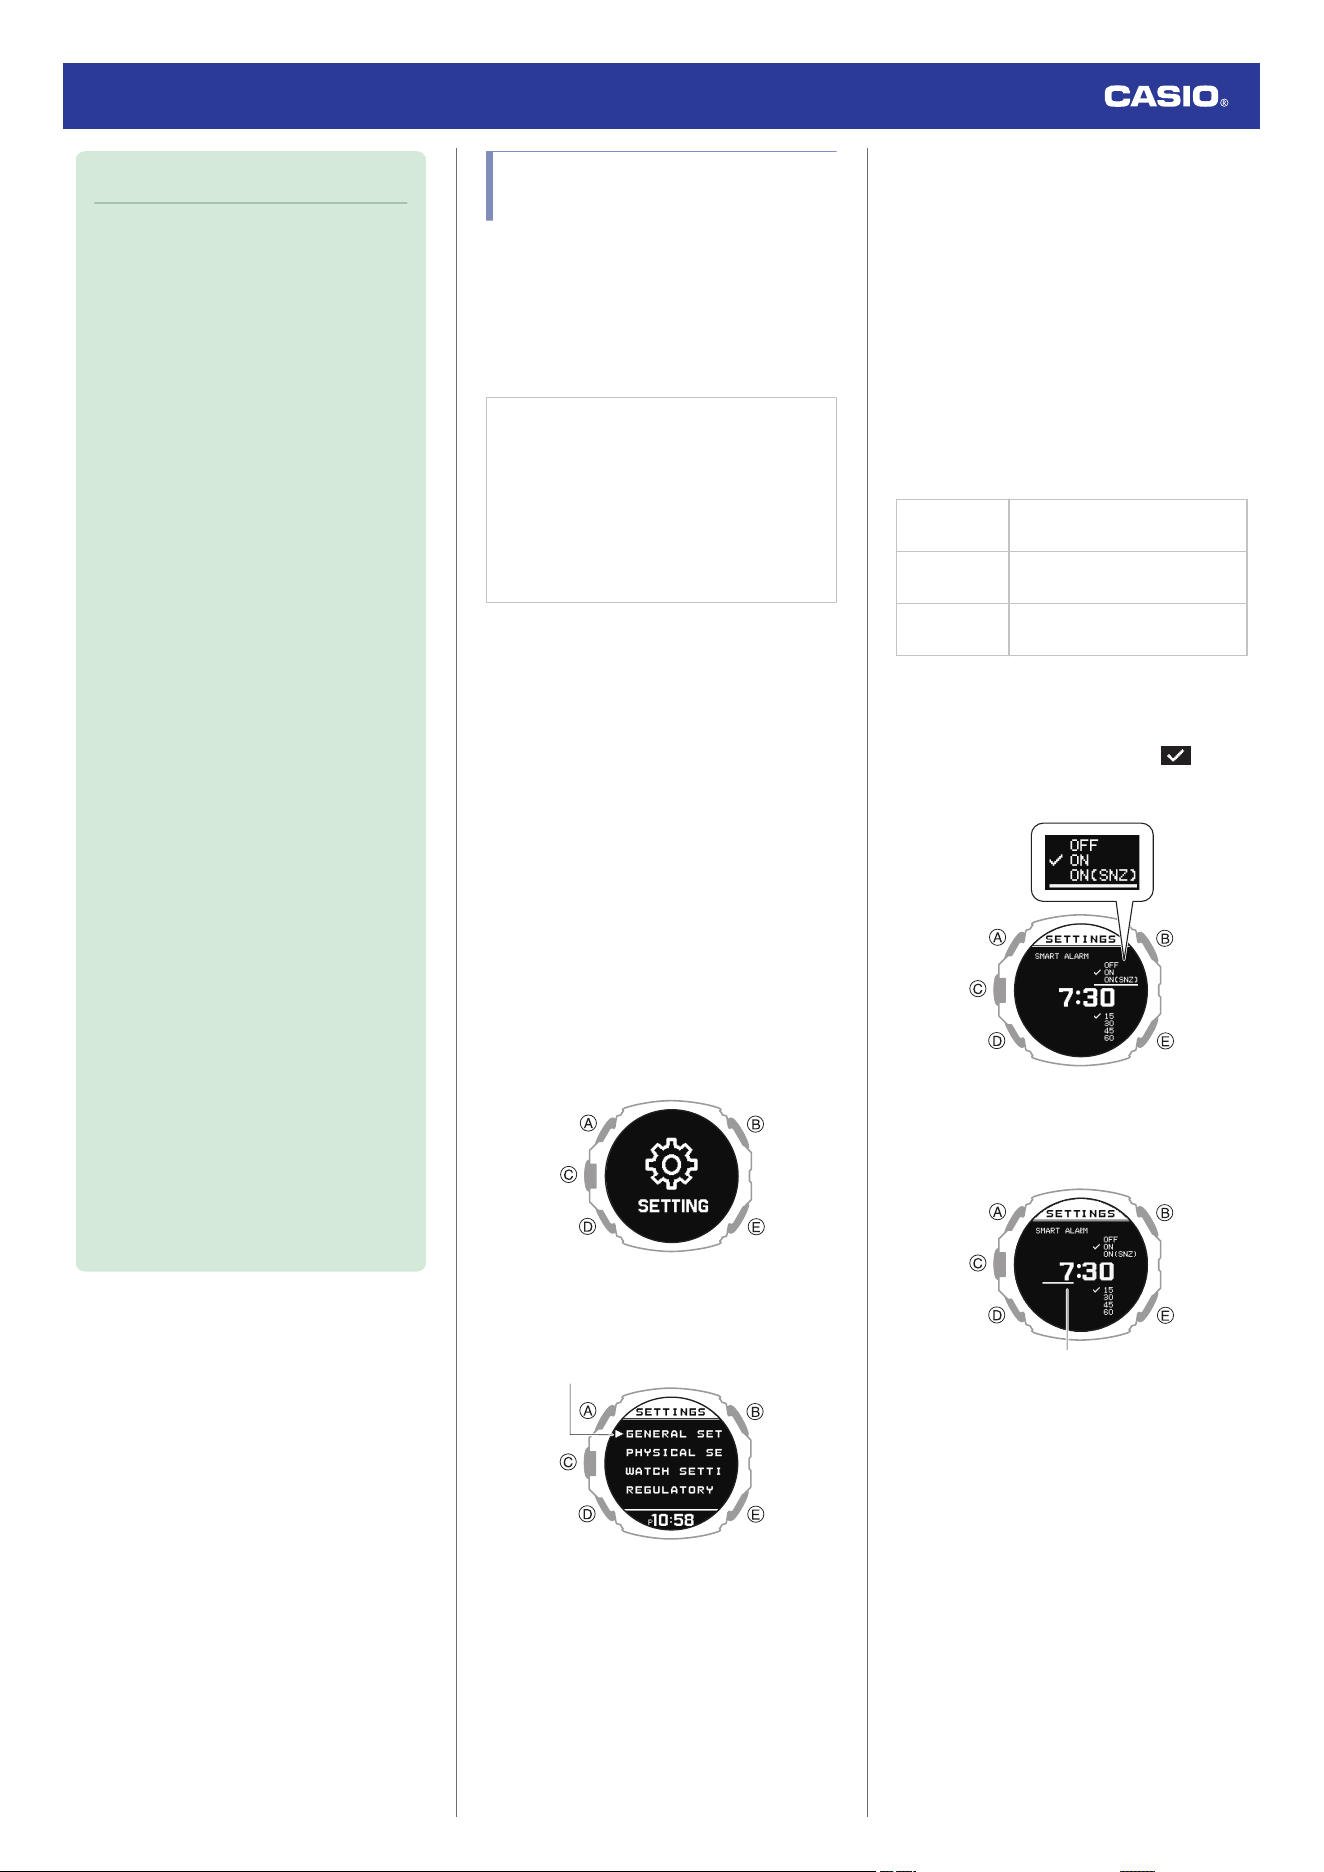
Note
●
To use the smart alarm, select [ON] or
[ACTIVITY & NIGHT TIME ON] for
heart rate measurement to enable
continuous heart rate measurement.
When [OFF] is selected for heart rate
measurement, the smart alarm
functions as a normal alarm.
l
Using Heart Rate Measurement
●
Note that no guarantees how you will
feel when you wake up by the smart
alarm. Depending on your physical
makeup and condition, the watch may
not be able to determine your sleep
state accurately.
●
The smart alarm is a function that helps
you wake up. It does not improve your
sleep quality. To improve your sleep
quality, you need to adjust your life
rhythm and ensure you get enough
sleep.
●
Sleeping for shorter periods can cause
sleep status measurement to be less
accurate.
●
Your sleep state cannot be determined
if your sleep time, excluding the alarm
time, is less than two hours. The watch
performs a sound and/or vibration
operation when the alarm time is
reached.
●
You can enable or disable sound and
vibration alert as required.
l
Configuring Sound and Vibration
Settings
●
Sound and vibration alert is not
performed while the battery indicator is
“CHG” or lower.
●
For information about using an alarm
for a purpose other than waking up,
see the information below.
l
Alarm
Configuring Smart Alarm
Settings
Use the CASIO WATCHES phone app or
watch operations to configure smart alarm
settings.
●
To configure smart alarm settings with
the CASIO WATCHES phone app
Check the connection
●
Make sure the
e
symbol is shown on the
watch display when you perform the
procedure below. If
e
is not displayed,
refer to the information at the link below.
l
Connecting with a Phone Paired
With the Watch
1.
Y
Tap the “CASIO WATCHES” icon.
2.
Y
Tap the “My Watch” tab.
3.
Y
Select “GPR-H1000” and tap it.
4.
Y
Select the setting you want to change
and then perform the operation shown on
the screen.
●
To configure smart alarm settings with
the watch
1. Display the current time screen.
l
Watch Mode
2. Hold down (A) for at least two seconds.
This enters the Control Mode.
3. Use (A) and (D) to select [SETTING].
4. Press (C).
This displays the setting menu screen.
Pointer
5. Use (A) and (D) to move the pointer to
[WATCH SETTINGS].
6. Press (C).
This displays the watch setting screen.
7. Use (A) and (D) to move the pointer to
[SMART ALARM].
8. Press (C).
9. Use (A) and (D) to select the smart alarm
and snooze function ON/OFF setting you
want.
[OFF]
Disables smart alarm,
disables snooze
[ON]
Enables smart alarm, disables
snooze
[ON (SNZ)]
Enables smart alarm, enables
snooze
●
The snooze function on/off setting you
configure is for the smart alarm only.
●
The currently selected setting is
indicated by a check mark ( ) to the
left.
10. Press (C).
11. Use (A) and (D) to set the alarm time hour.
Hours
12. Press (C).
This causes the cursor to move to the
minute setting of the time.
Watch Operation Guide 3554
34
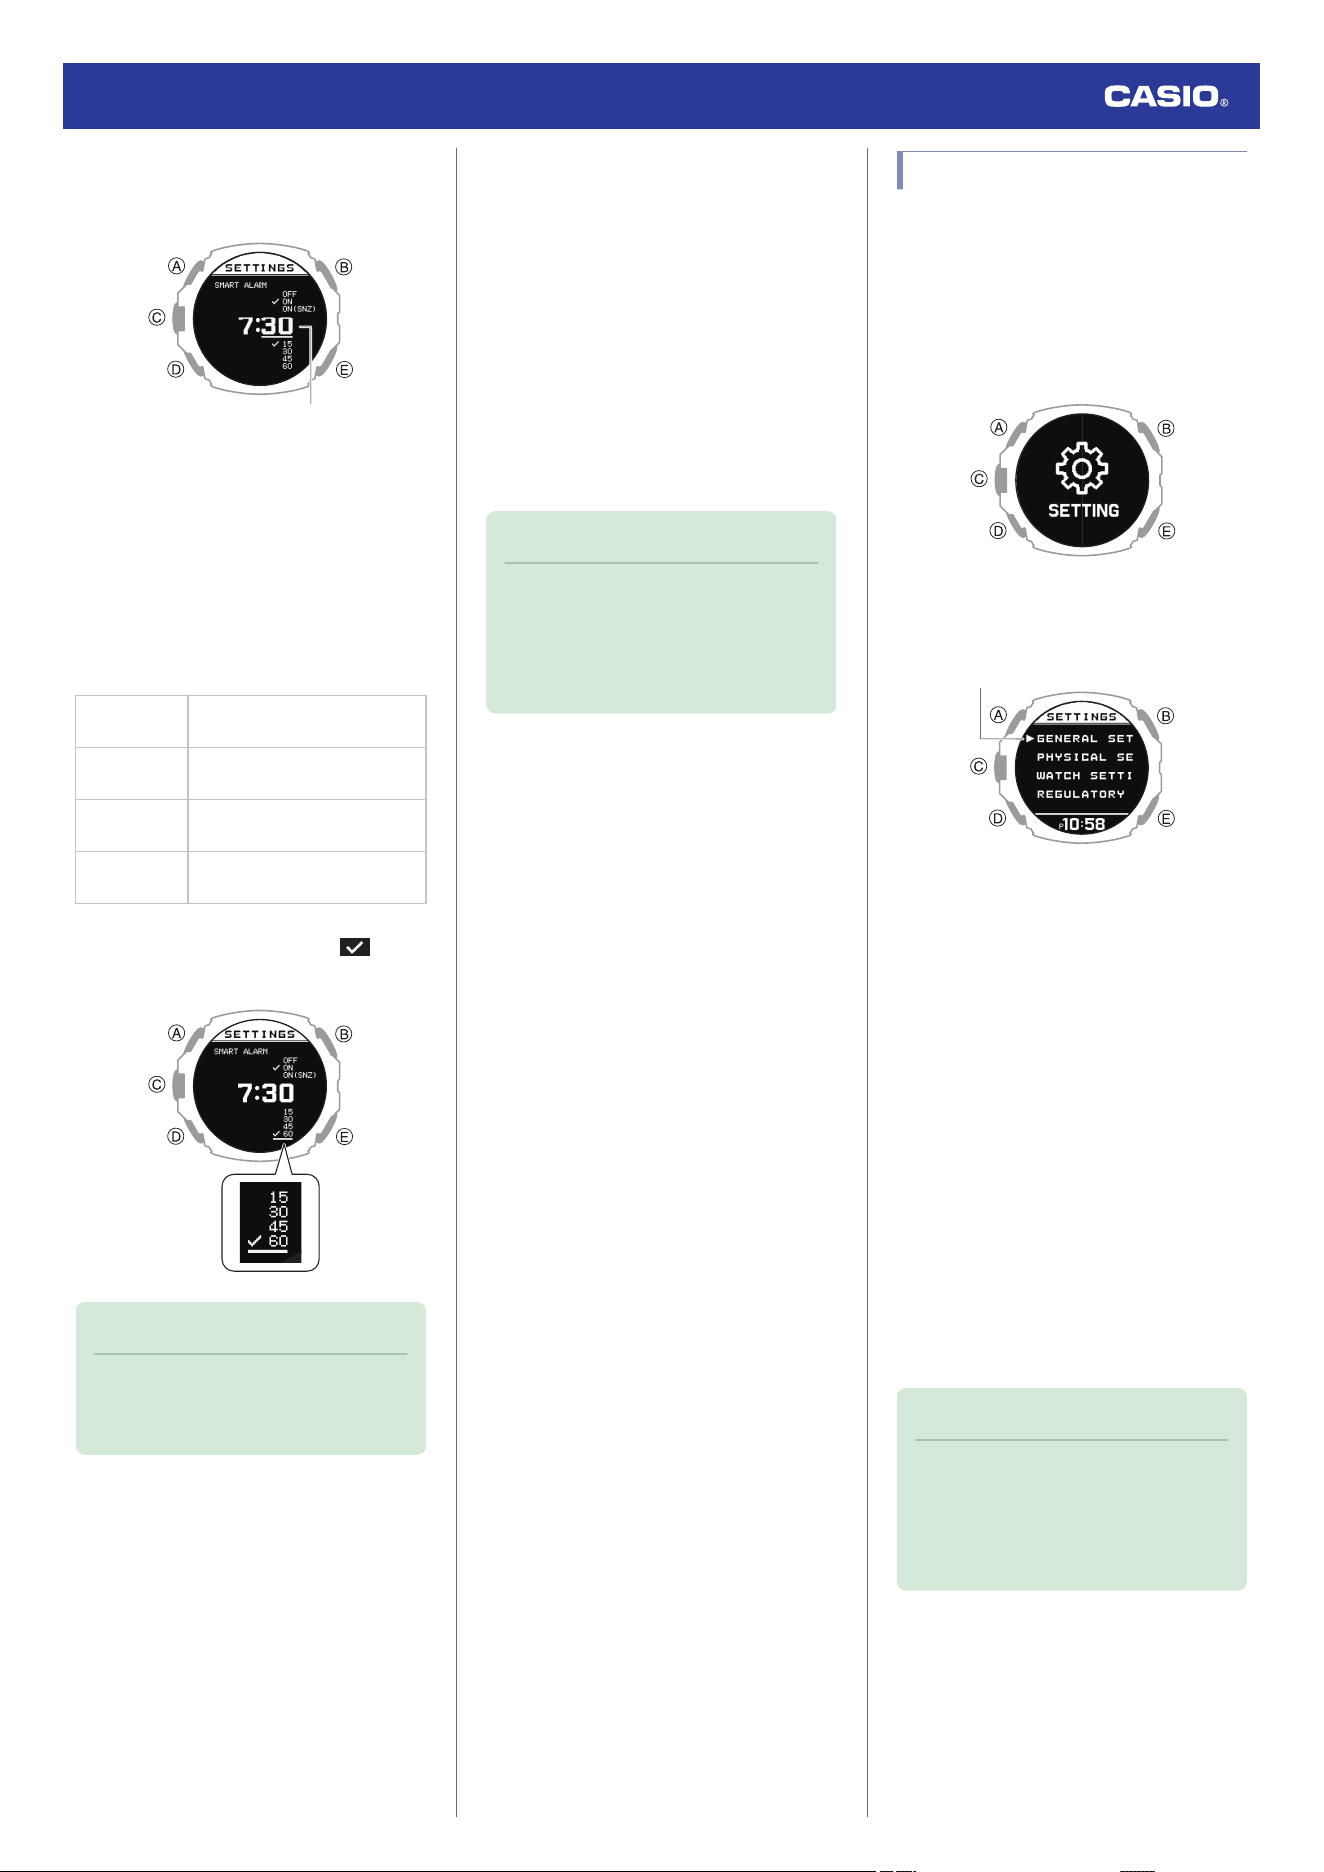
13. Use (A) and (D) to set the alarm time
minute.
Minutes
14. Press (C).
This moves the cursor to the smart period
setting.
●
A smart alarm sounds when the watch
determines you are lightly asleep during
the smart period.
15. Use (A) and (D) to specify a smart period
setting.
[15]
From 15 minutes before alarm
time, to alarm time
[30]
From 30 minutes before alarm
time, to alarm time
[45]
From 45 minutes before alarm
time, to alarm time
[60]
From 60 minutes before alarm
time, to alarm time
●
The currently selected setting is
indicated by a check mark ( ) to the
left.
Note
●
The shorter the smart time period, the
higher the probability that the alarm will
sound at the alarm time.
16. Press (C) to complete the setting
operation.
After the setting operation is complete, a
check mark appears for a few seconds,
and then the watch setting screen re-
appears.
●
You can view the setting time of the
smart alarm and whether the smart
alarm setting and snooze setting are on
or off.
17. Hold down (E) for at least one second to
return to the current time screen.
Note
●
If you do not perform any operation for
two or three minutes while the smart
alarm setting screen is displayed, the
watch automatically returns to the
current time screen.
Turning Off Smart Alarm
1. Display the current time screen.
l
Watch Mode
2. Hold down (A) for at least two seconds.
This enters the Control Mode.
3. Use (A) and (D) to select [SETTING].
4. Press (C).
This displays the setting menu screen.
Pointer
5. Use (A) and (D) to move the pointer to
[WATCH SETTINGS].
6. Press (C).
This displays the watch setting screen.
7. Use (A) and (D) to move the pointer to
[SMART ALARM].
8. Press (C).
9. Use (A) and (D) to select [OFF].
10. Press (C) to complete the setting
operation.
After the setting operation is complete, a
check mark appears for a few seconds,
and then the watch setting screen re-
appears.
11. Hold down (E) for at least one second to
return to the current time screen.
Note
●
If you do not perform any operation for
two or three minutes while the smart
alarm setting screen is displayed, the
watch automatically returns to the
current time screen.
Watch Operation Guide 3554
35
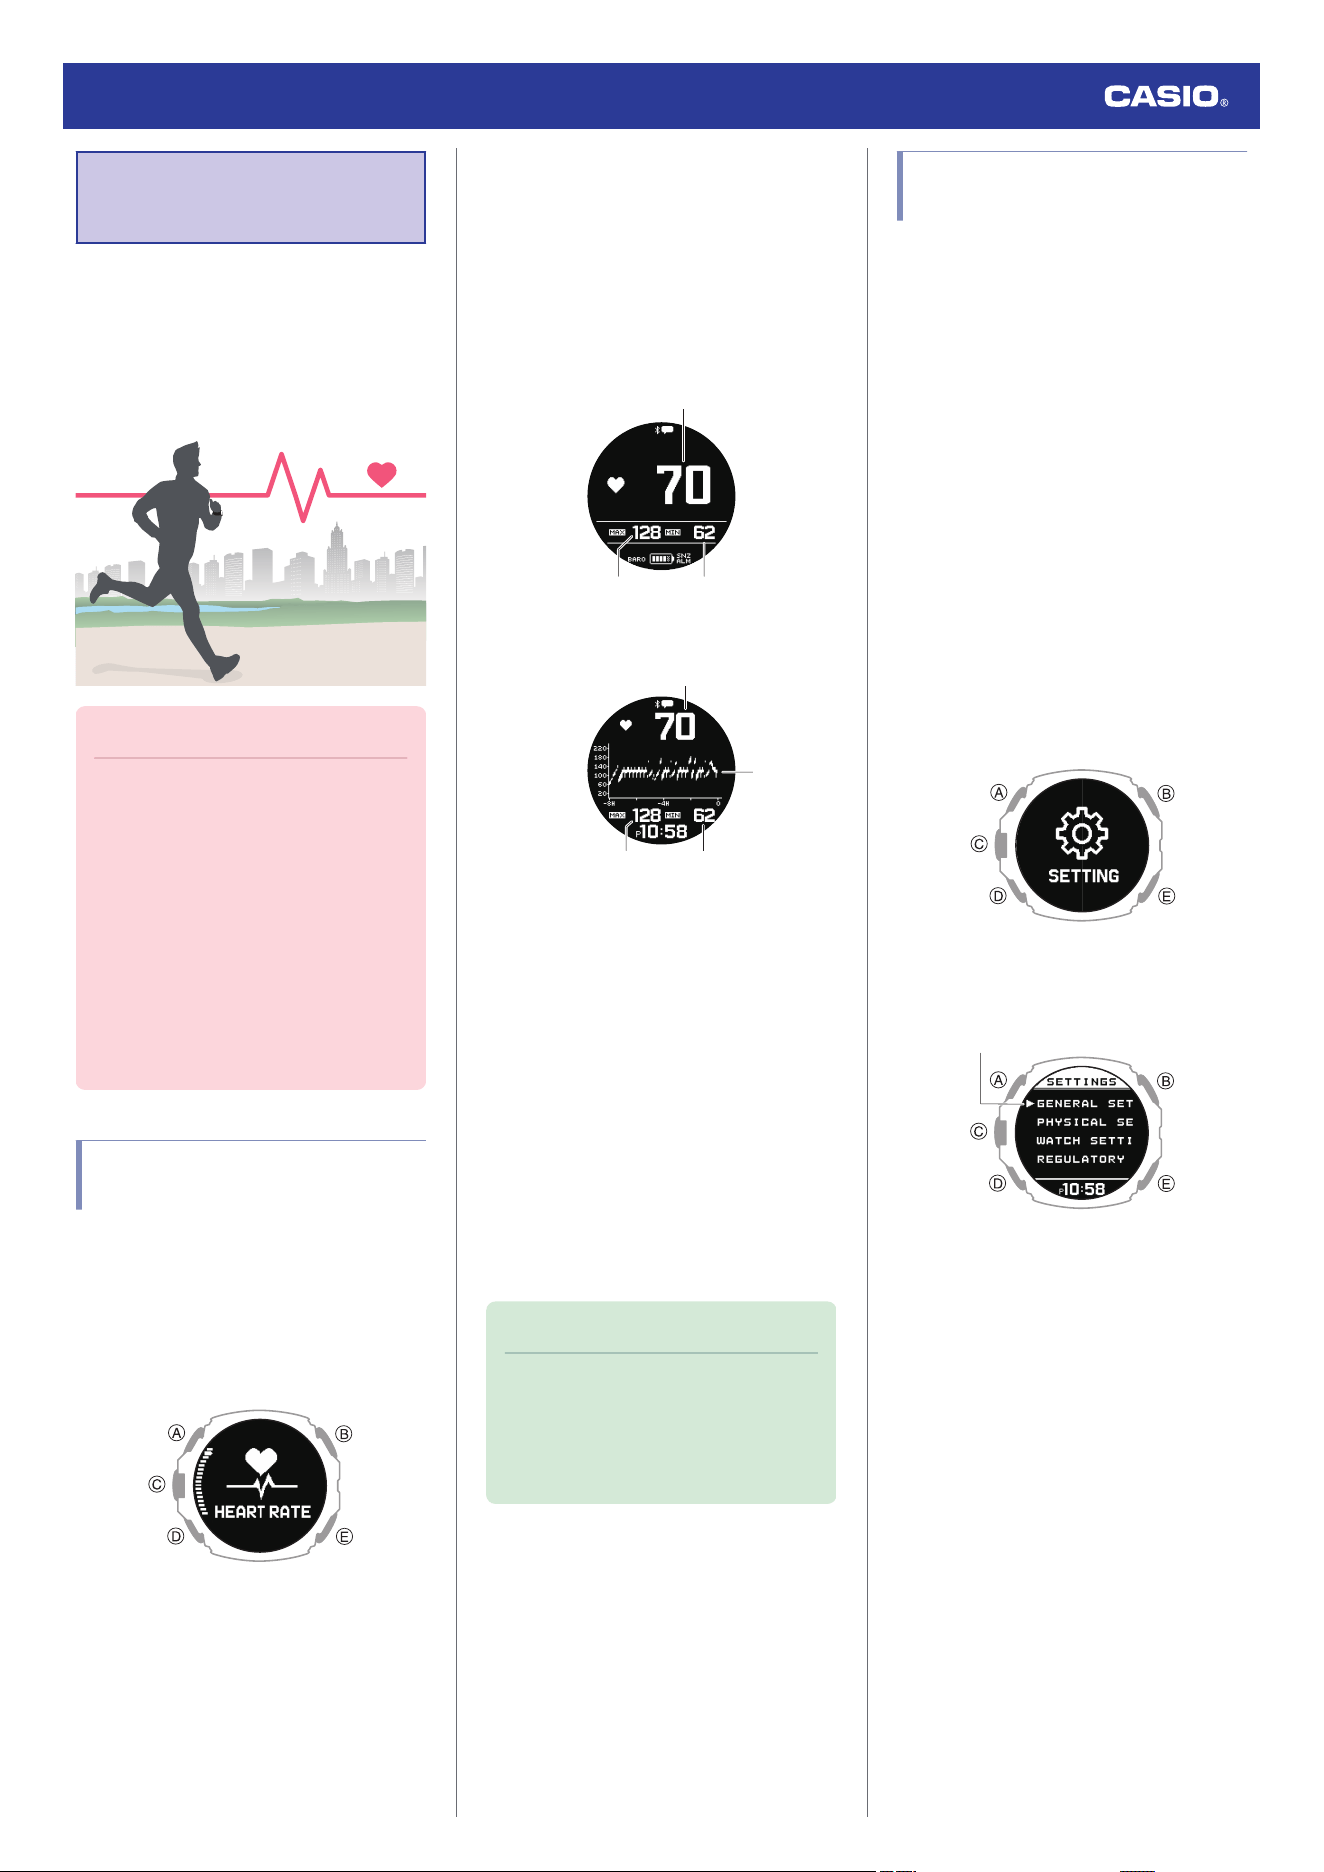
Measuring Your
Heart Rate
While wearing the watch on your wrist, you can
use it to perform approximate measurement of
your heart rate.
You can use heart rate measurements to
monitor your daily health and to make your
training more effective.
Important!
●
For more accurate measurement
results, configure your profile settings
before using the heart rate
measurement function.
l
Creating Your Profile
●
Be sure to affix the watch to your wrist
before starting a heart rate
measurement operation. Starting a
measurement operation and then
affixing the watch to your wrist may
make correct measurement
impossible.
Checking Your Current Heart
Rate
The HEART RATE (heart rate measurement)
function lets you check your current heart rate.
1. Display the current time screen.
l
Watch Mode
2. Use (A) and (D) to select [HEART RATE].
3. Press (C).
This displays the current heart rate
screen.
●
Each press of (A) or (D) toggles
between the value screen and graph
screen.
Value Screen
①
③②
With heart rate graph
①
③
④
②
A Current heart rate
B Maximum heart rate
Current day’s high heart rate
C Minimum heart rate
Current day’s low heart rate
D Heart rate graph
●
The heart rate graph shows data for up
to eight hours.
●
One division of the heart rate graph
shows the range of maximum and
minimum values measured over four
minutes.
Note
●
If you do not perform any operation for
about one hour while using the HEART
RATE (heart rate measurement)
function, the watch will return to the
current time screen.
Using Heart Rate
Measurement
During heart rate measurement, your current
heart rate is shown on other screens besides
the HEART RATE (heart rate measurement)
function screen.
●
For more accurate display values, create
your profile before using heart rate
measurement.
l
Creating Your Profile
●
To enable or disable heart rate
measurement
While heart rate measurement is enabled, the
watch displays your current heart rate.
1. Display the current time screen.
l
Watch Mode
2. Hold down (A) for at least two seconds.
This enters the Control Mode.
3. Use (A) and (D) to select [SETTING].
4. Press (C).
This displays the setting menu screen.
Pointer
5. Use (A) and (D) to move the pointer to
[GENERAL SETTINGS].
6. Press (C).
Watch Operation Guide 3554
36
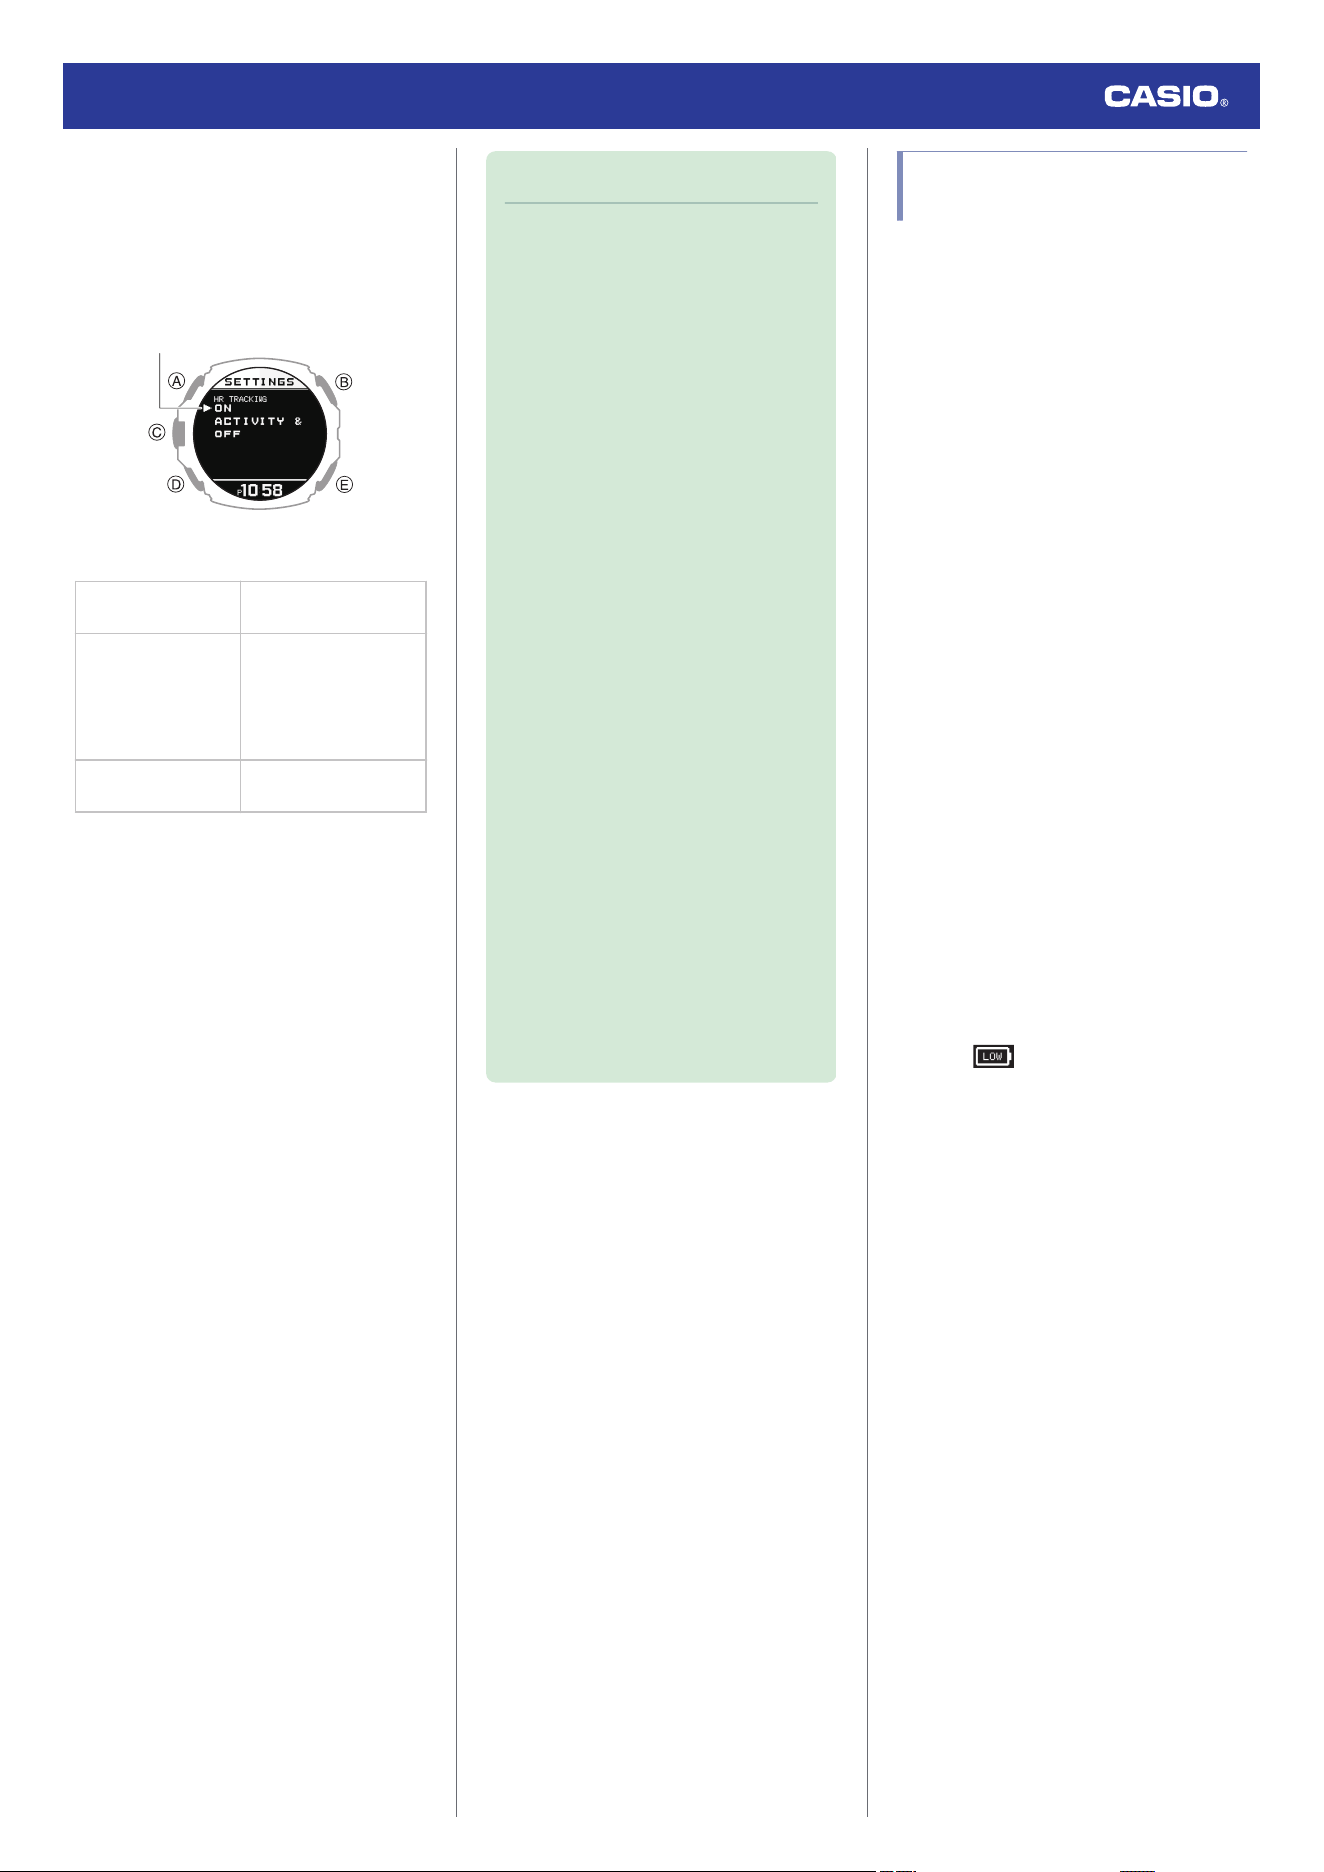
7. Use (A) and (D) to move the pointer to [HR
TRACKING].
8. Press (C).
This displays the heart rate measurement
enable/disable screen.
Pointer
9. Use (A) and (D) to select ON/OFF setting.
[ON]
Enables heart rate
measurement
[ACTIVITY & NIGHT
TIME ON]
Enables heart rate
measurement during
activity measurement,
within the specified
night time only
[OFF]
Disables heart rate
measurement
10. Press (C) to complete the setting
operation.
After the setting operation is complete, a
check mark appears for a few seconds,
and then the GENERAL SETTINGS
screen re-appears.
11. Hold down (E) for at least one second to
return to the current time screen.
Note
●
Even if heart rate measurement is set
to [OFF], your heart rate is displayed
by the HEART RATE (heart rate
measurement) function.
●
Available functions and battery
consumption depend on the heart rate
measurement settings. Configure
settings to suit your specific needs.
ー
[ON]: Enables full use of the
functions of your watch: heart rate
measurement during the day,
accurate calories burned
measurement and sleep
measurement at night. Battery
consumption is high with this setting.
ー
[ACTIVITY & NIGHT TIME ON]:
Performs measurement during
activities and at night (Sleep
Measurement) only. Heart rate
measurement during the daytime
and other functions are limited.
Battery consumption is moderate
with this setting.
For information about configuring
night time settings, see the
information below.
l
Specifying the Night Time
ー
[OFF]: Heart rate measurement is
not performed with this setting.
Accurate calories burned
measurement, sleep, running index,
cardio load, and other functions are
limited. Battery consumption is low
with this setting.
Heart Rate Measurement
Precautions
Heart Rate Measurement Functions
●
The back cover of the watch has a built-in
sensor that detects your pulse. This is used
to calculate and display an approximate
heart rate value. The factors below can
cause error in the displayed heart rate
value.
ー
How the watch is affixed to the wrist
ー
Individual wrist characteristics and
condition
ー
Training type and/or intensity
ー
Sweat, dirt, and/or other foreign matter
around the sensor
All of this means that heart rate values
displayed by the watch are approximate,
and no guarantees are made concerning
their accuracy.
●
The conditions below may make accurate
pulse detection impossible.
ー
Exercising in a low-temperature
environment or under other conditions
that reduce blood flow
ー
Arm tattoos
ー
Use of sunblock cream or lotion, insect
repellent, etc.
●
The heart rate measurement function of this
watch is intended for recreational purposes,
and should not be used in any way for
medical purposes.
●
Heart rate measurement is automatically
disabled when the battery level indicator
shows
or lower.
Watch Operation Guide 3554
37
Movements that Affect Heart Rate
Measurement
●
Activities that involve vigorous movement of
the arms only or other certain movements*
may affect heart rate measurement and
cause errors in the heart rate data displayed
by the watch.
* Activities involving vigorous wrist
movements or wrist rolling such as
playing a percussion instrument, tennis,
etc.
Warming Up Before Training
●
Weak blood circulation due to low
temperatures or cold hands may affect
heart rate measurement.
●
When performing training that involves
heart rate measurement, make sure to
warm up appropriately.
Measurement while [ON] is selected for
the heart rate measurement setting
While [ON] is selected for the heart rate
measurement setting, your heart rate is
measured intermittently (every two minutes).
If the watch determines that you are
performing some activity (based on behavior
analysis by the acceleration sensor), heart
rate measurement will be performed
continuously (every second).
Blood Oxygen Level
Measurement
Your watch can measure your blood oxygen
level.
A normal blood oxygen level is said to be 95%
to 100%, but this varies depending on your
activity level and physical condition.
Note
●
Note that values displayed by this
watch are for reference only. Should
you feel any abnormalities, consult
with your doctor immediately.
Important!
●
Before starting a blood oxygen level
operation, be sure to affix this watch to
your wrist. Starting a measurement
operation and then affixing the watch
to your wrist may make correct
measurement impossible.
●
The blood oxygen level measurement
function is not intended as a medical
device for diagnosing specific
diseases. It is intended for general
health maintenance only.
Measuring Your Blood
Oxygen Level
Important!
●
It may not be possible to obtain blood
oxygen level measurement results if
you are in a cold location and your wrist
is cold. Warm your wrist before
attempting measurement.
●
If measurement at the same location
on your wrist fails continuously or if
measured values fluctuate widely,
change the location on your wrist
where you are wearing the watch. You
can also try moving the watch to your
opposite wrist for measurement.
●
Take several measurements under
identical conditions, moving the watch
around your wrist. Find the wrist
location where measurement is most
stable.
●
Do not take measurements
immediately after exercising. Wait until
your breathing stabilizes.
●
During measurement, keep your arm
still and do not move it.
●
During measurement, refrain from
talking and do not hold your breath.
Watch Operation Guide 3554
38
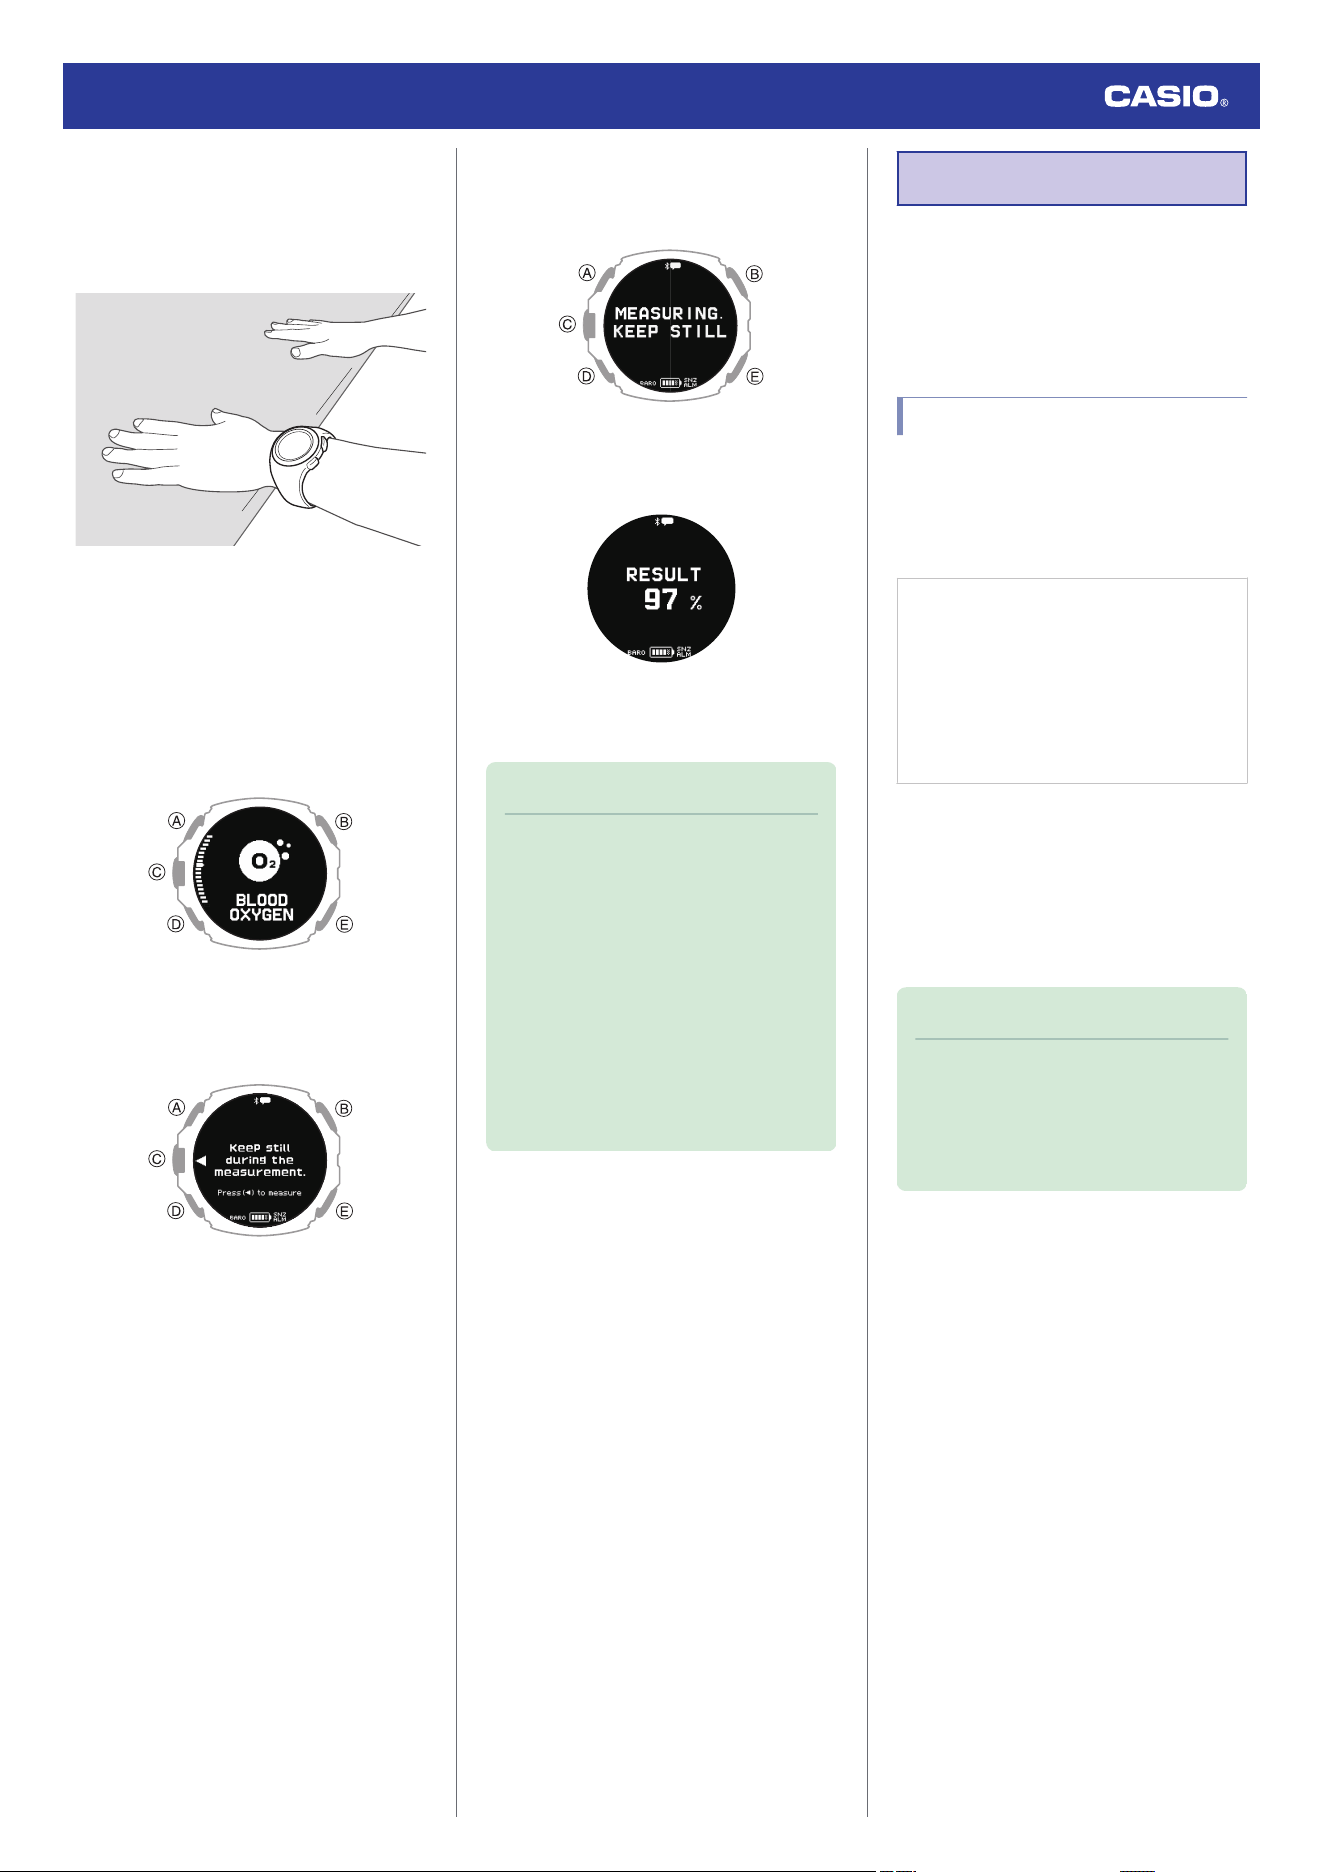
1. While seated, place your arm on a table or
some other flat surface.
2. Keep your elbow and wrist as unbent and
straight as possible.
3. Make sure the band is not contact with the
surface below your arm and not pressed
against your wrist.
4. Display the current time screen.
l
Watch Mode
5. Use (A) and (D) to select [BLOOD
OXYGEN].
6. Press (C).
This displays the blood oxygen level
measurement screen.
7. Press (C).
Start blood oxygen level measurement.
The measurement result is displayed after
a blood oxygen level measurement
operation is complete.
8. Hold down (E) for at least one second to
return to the current time screen.
Note
●
The message [ERROR] appears on
the display if a blood oxygen level
measurement error occurs.
●
The message [- - -%] appears on the
display if the measured value is
outside the allowable measurement
range.
●
The watch automatically returns to the
current time screen if you do not
perform any operation for about one
hour while using the blood oxygen
level measurement function.
Viewing Life Log Data
Life Log lets you view the information below.
●
Step count target value and daily target
achievement rate
●
Step count
Viewing Life Log Data
●
To view lifelog related data with the
CASIO WATCHES phone app
You can use the CASIO WATCHES phone
app to view data measured by the watch.
Check the connection
●
Make sure the
e
symbol is shown on the
watch display when you perform the
procedure below. If
e
is not displayed,
refer to the information at the link below.
l
Connecting with a Phone Paired
With the Watch
1.
Y
Tap the “CASIO WATCHES” icon.
2.
Y
Tap the “My Page” tab.
3.
Y
Tap the “LIFE LOG” widget.
Open the LIFE LOG page and check the
details.
Note
●
You can also use the CASIO
WATCHES phone app to specify a
daily step target.
l
Specifying a Daily Step Count
Target
Watch Operation Guide 3554
39
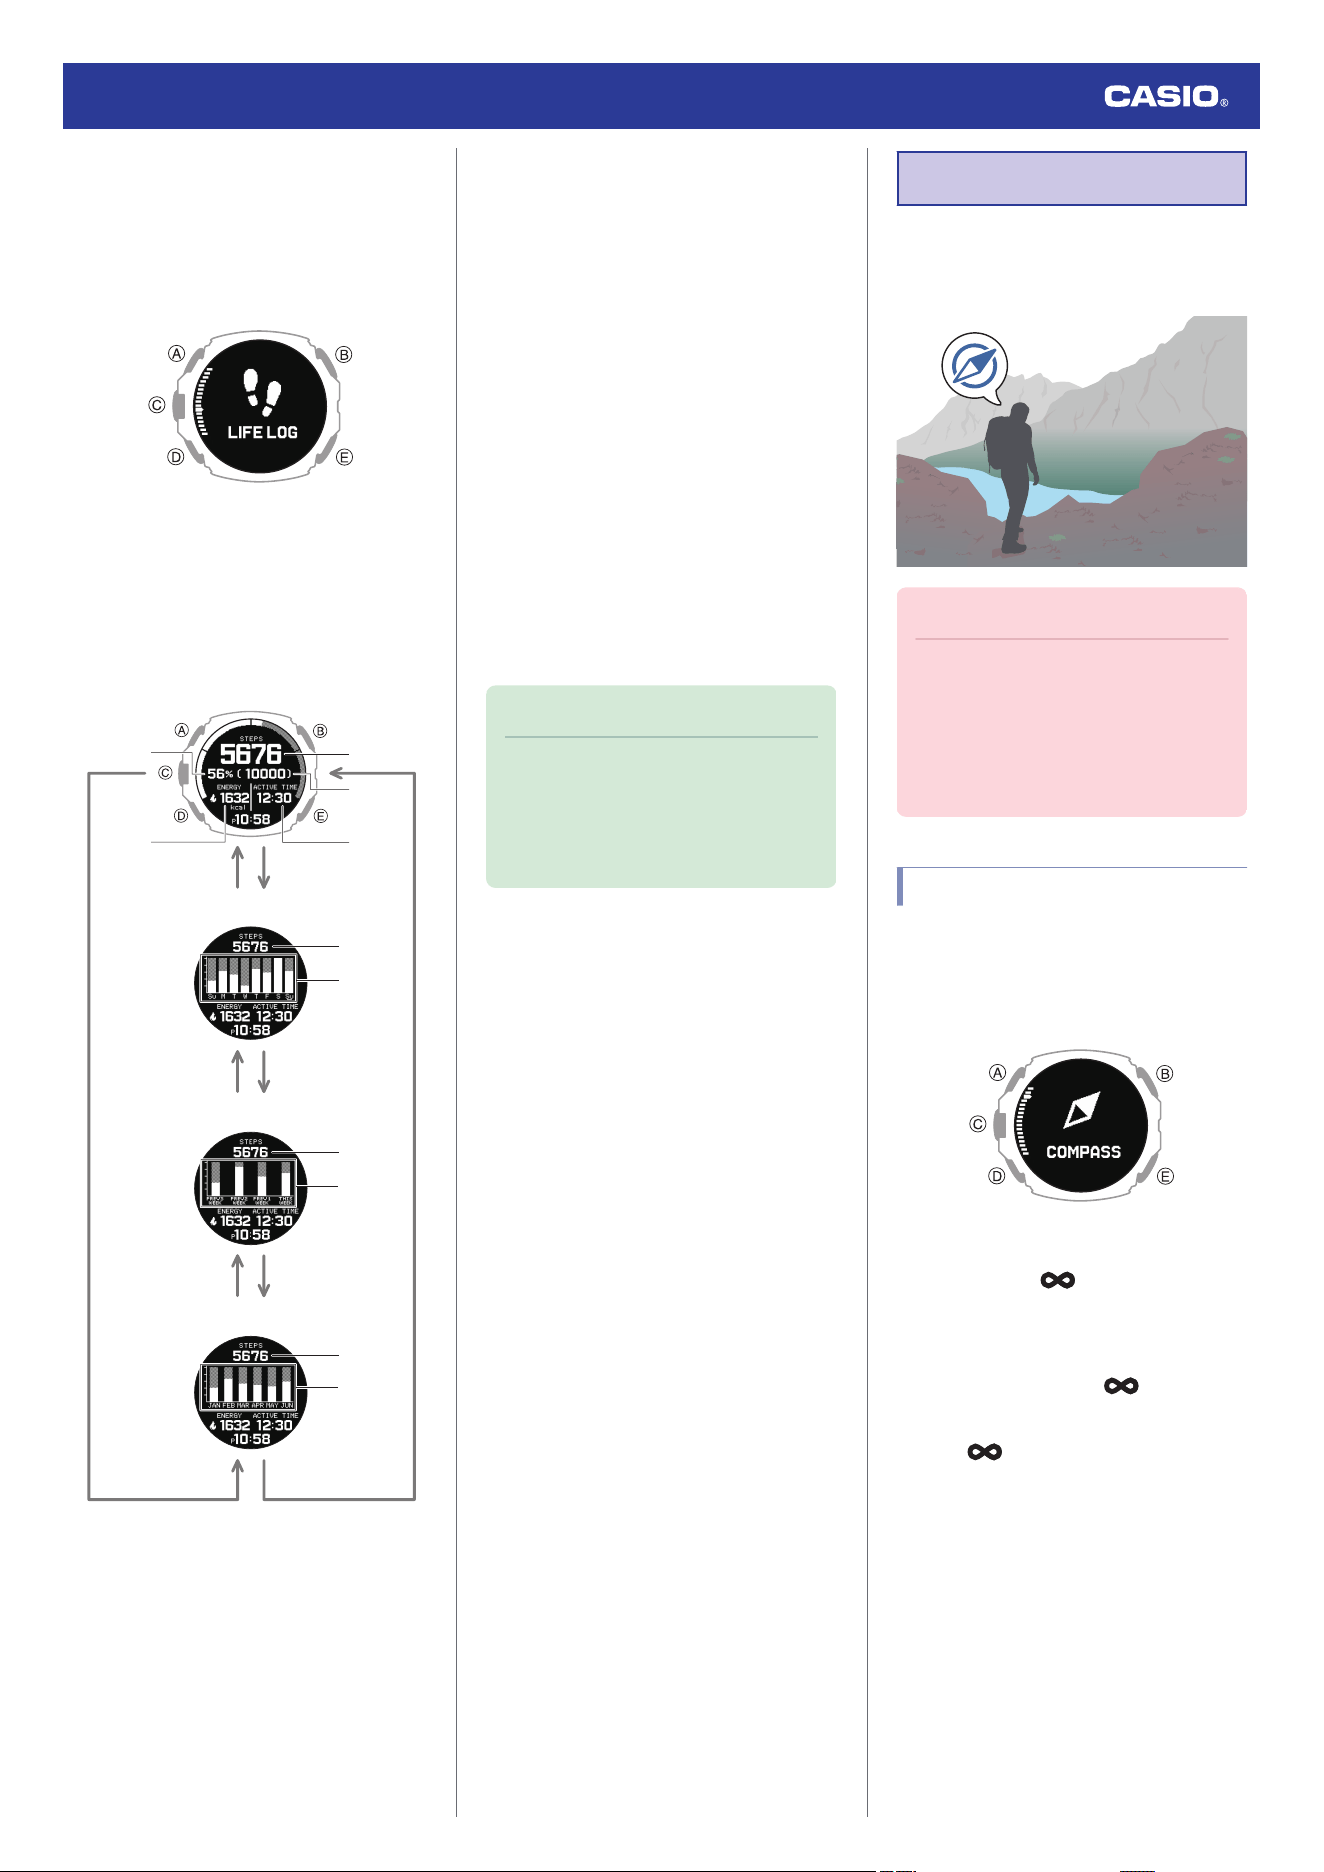
●
To view lifelog related data with the
watch
1. Display the current time screen.
l
Watch Mode
2. Use (A) and (D) to select [LIFE LOG].
3. Press (C).
This displays the Life Log data summary
screen.
4. Use (A) and (D) to select the screen you
want to view.
①
⑤
④
②
③
A
D
DA
DA
③
⑥
DA
③
⑦
③
⑧
To d a y
Weekly
Monthly
6 months
A Step count target achievement
B Current day’s burned calories
C Today’s step count
D Target value
E Current day’s active time
F Daily step count target achievement
rate
G Weekly step count target
achievement rate
H Monthly step count target
achievement rate
5. Press (E) twice to return to the current time
screen.
Note
●
If you do not perform any operation for
two or three minutes while the Life Log
screen is displayed, the watch
automatically returns to the current
time screen.
Active Time
Your watch analyzes the measurement values
of the acceleration sensor to determine
whether you are walking, running, biking or
performing another activity, or standing still.
Your active time is the total time you spend
walking, running, biking, or doing other
activities during the day.
When you are not measuring your heart rate,
calorie consumption is also calculated based
on behavior analysis.
Compass Reading
You can use the compass function to
determine the direction of north, and to check
your bearing to a destination.
Important!
●
Check the information at the link below
to find out how to ensure correct
readings.
l
Calibrating Compass Readings
l
Digital Compass Reading
Precautions
Taking a Compass Reading
1. Display the current time screen.
l
Watch Mode
2. Use (A) and (D) to select [COMPASS].
3. Press (C).
This displays [ ] in the bearing display
area.
4. Move your arm in a figure eight.
This normally causes [ ] to disappear
and starts compass measurement.
●
If [ ] does not disappear, perform
bearing calibration.
l
Calibrating Compass Readings
Watch Operation Guide 3554
40
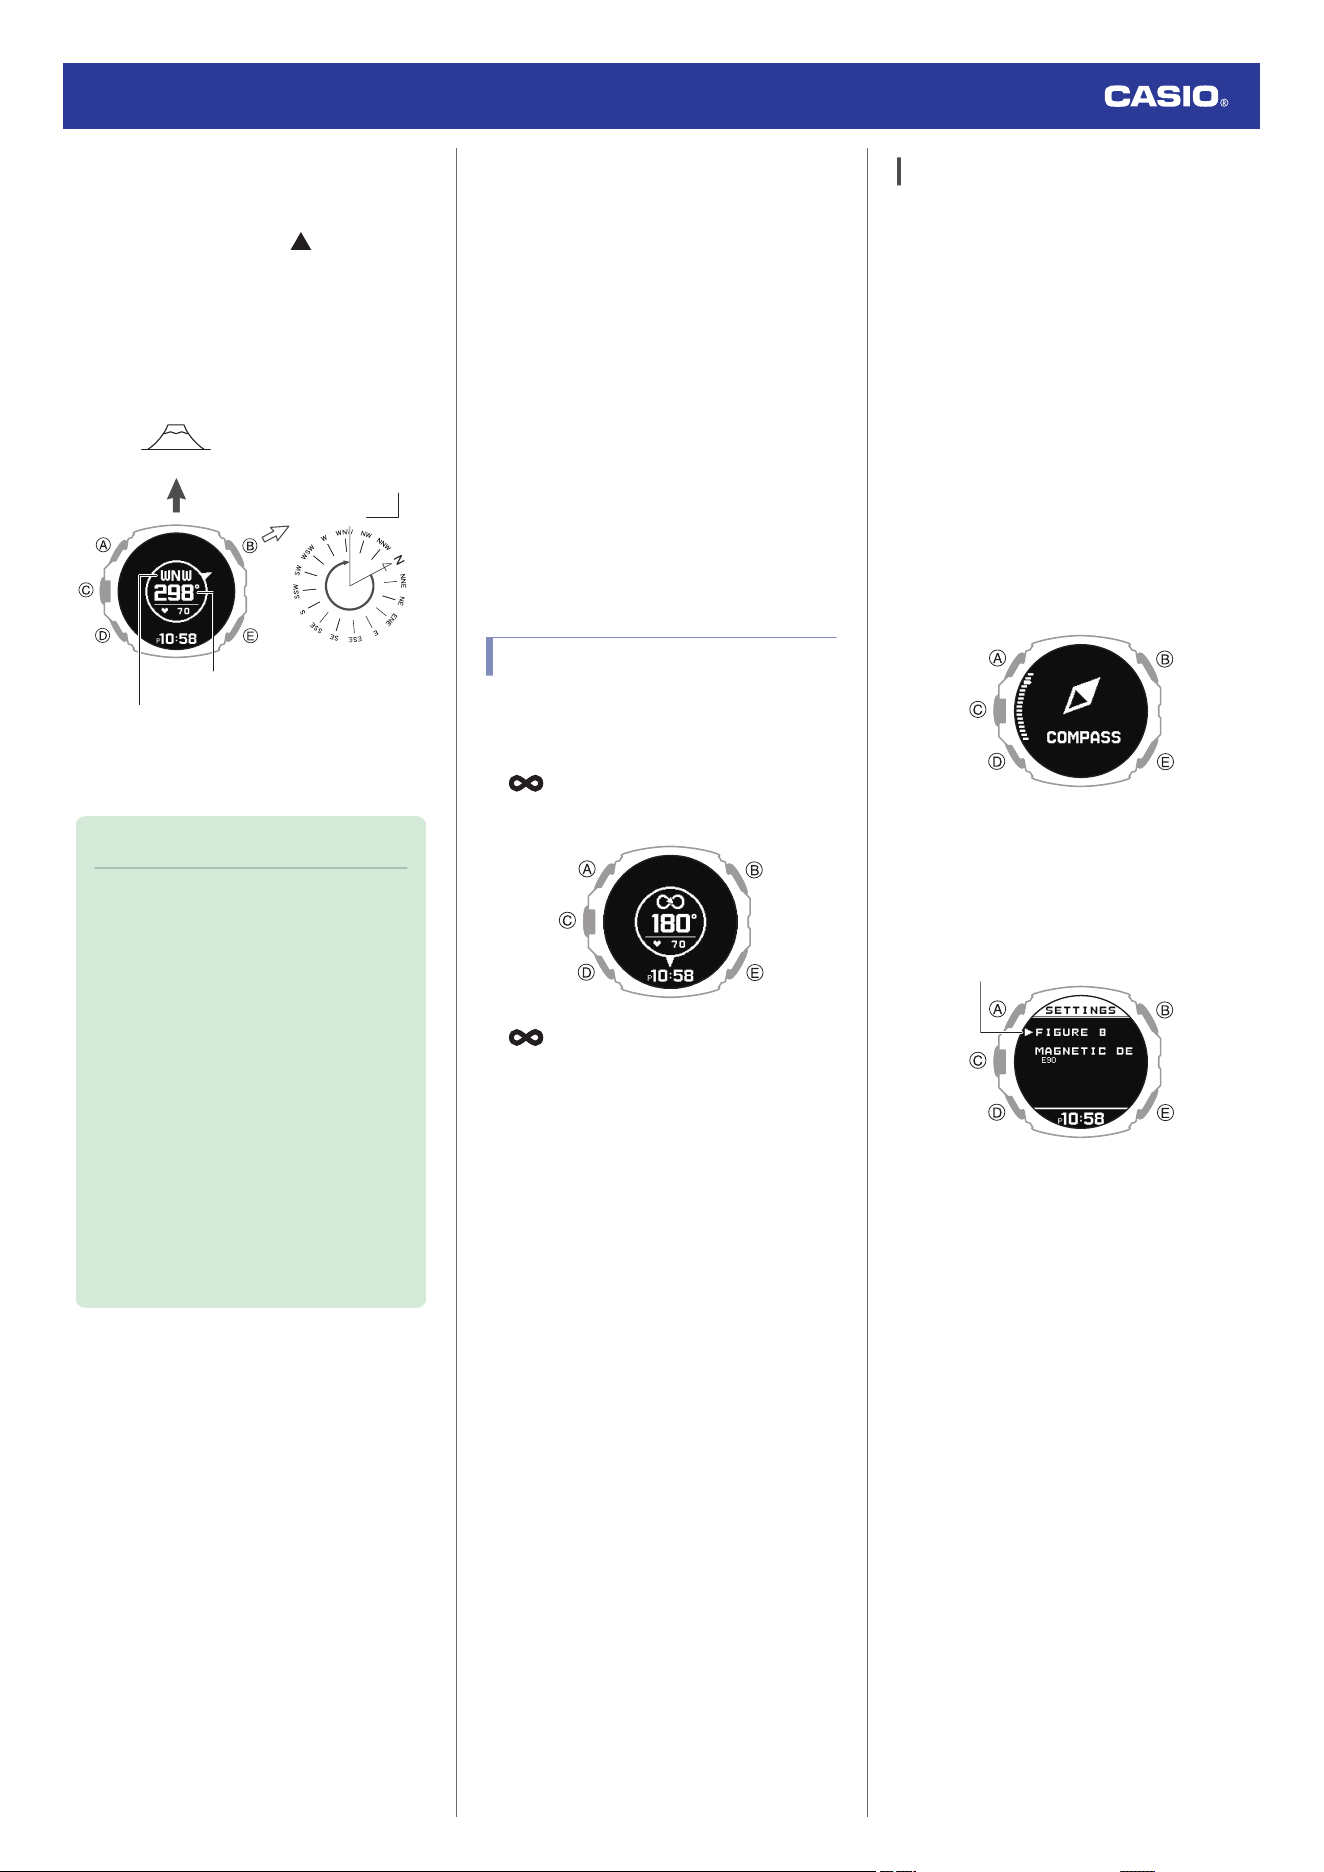
5. Keeping the watch level, point 12 o’clock
in the direction of your desired objective.
●
North is indicated by . The bearing
and bearing angle to your objective will
also appear on the display.
●
To retrigger the compass operation,
press (C).
Interpreting Bearing Readings
298°
0°
Bearing angle
Bearing angle to objective
Bearing to objective
North
Objective
Directions: N (North), E (East), W (West), S
(South)
Note
●
Normally the compass indicates
magnetic north. You can also
configure settings to indicate true
north.
l
Setting Up for True North
Readings (Magnetic Declination
Calibration)
l
Magnetic North and True North
●
After the initial reading is displayed, the
watch continues to take readings
about every second for about 60
minutes.
●
The watch automatically returns to the
current time screen if you do not
perform any operation for about one
hour during direction reading.
●
Aligning a Map with Actual
Surroundings (Setting a Map)
Setting a map means to align the map so the
directions indicated on it are aligned with the
actual directions of your location. Once you
set a map, you can more easily get a grasp of
the relationship between map markings and
actual geographic contours. To set a map with
this watch, align north on the map with the
north indication of the watch. Once you set the
map, you can compare your bearing on the
map with your surroundings, which will help
you determine your current location and
destination.
●
Note that map reading skills and experience
are required to determine your current
location and destination on a map.
Calibrating the Compass
Your watch constantly performs direction
correction with the Watch Mode compass
function and in the Activity Mode.
If [ ] is displayed in the direction display
area, move your arm in a figure eight.
If [ ] is still displayed, follow the steps
below to perform direction correction.
Calibrating Compass Readings
In order to ensure that the watch is performing
direction measurements correctly, be sure to
perform figure 8 calibration whenever the
measurement results produced by the watch
are different from readings produced by
another compass. You should also perform
figure 8 calibration before setting out on a
climb.
●
Note that accurate compass readings
and/or calibration will not be possible in an
area where strong magnetism is present.
l
Digital Compass Reading Precautions
1. Display the current time screen.
l
Watch Mode
2. Use (A) and (D) to select [COMPASS].
3. Press (C).
4. Hold down (A) for at least two seconds.
This displays the direction measurement
setting screen.
Pointer
Watch Operation Guide 3554
41

5. Use (A) and (D) to move the pointer to
[FIGURE 8].
6. Press (C).
This displays the figure 8 calibration
screen.
When the screen shown above appears,
move your arm in a figure 8 pattern as
shown in the illustrations below.
●
Allow your wrist to twist.
●
Keep your arm as far as possible from
your body as you move it.
●
After calibration is successful, a check
mark appears for a few seconds, and
then the setting screen re-appears.
Note
●
The message [FAILED RETRY?]
appears on the display if calibration
fails.
Press (A) or (D) to select [YES] (Re-
calibrate) or [NO] (Stop calibration),
and then press (C).
●
To return to the direction measurement
setting screen during the above
procedure, press (E).
Setting Up for True North Readings
(Magnetic Declination Calibration)
If you want the watch to indicate true north
instead of magnetic north, you need to specify
your current location’s magnetic declination
direction (east or west) and declination angle.
l
Magnetic North and True North
●
The magnetic declination angle value can
be set in 1° (degree) units only. Use a value
that is closest to the angle you want to set.
Example: For an angle of 7.4°, set 7°.
Example: For an angle of 7°40’ (7 degrees,
40 minutes), set 8°.
Note
●
Magnetic declination angles (east or
west) and angle degree values for
specific locations can be found on
geographic maps, mountain climbing
maps, and other maps that include
contour lines.
1. Display the current time screen.
l
Watch Mode
2. Use (A) and (D) to select [COMPASS].
3. Press (C).
4. Hold down (A) for at least two seconds.
This displays the direction measurement
setting screen.
Pointer
5. Use (A) and (D) to move the pointer to
[MAGNETIC DECLINATION].
6. Press (C).
7. Press (A) (West) or (D) (East) to change
the magnetic declination direction and
angle.
Setting range: 90° west to 90° east
[0° (OFF)] Magnetic north
[E]
Magnetic north east of true
north (East declination)
[W]
Magnetic north west of true
north (West declination)
Magnetic declination direction
Magnetic declination angle
●
To stop the setting operation, press (E)
and advance to step 9.
8. Press (C) to complete the setting
operation.
After the setting operation is complete, a
check mark appears for a few seconds,
and then the bearing measurement
setting screen re-appears.
9. Hold down (E) for at least one second to
return to the current time screen.
Watch Operation Guide 3554
42
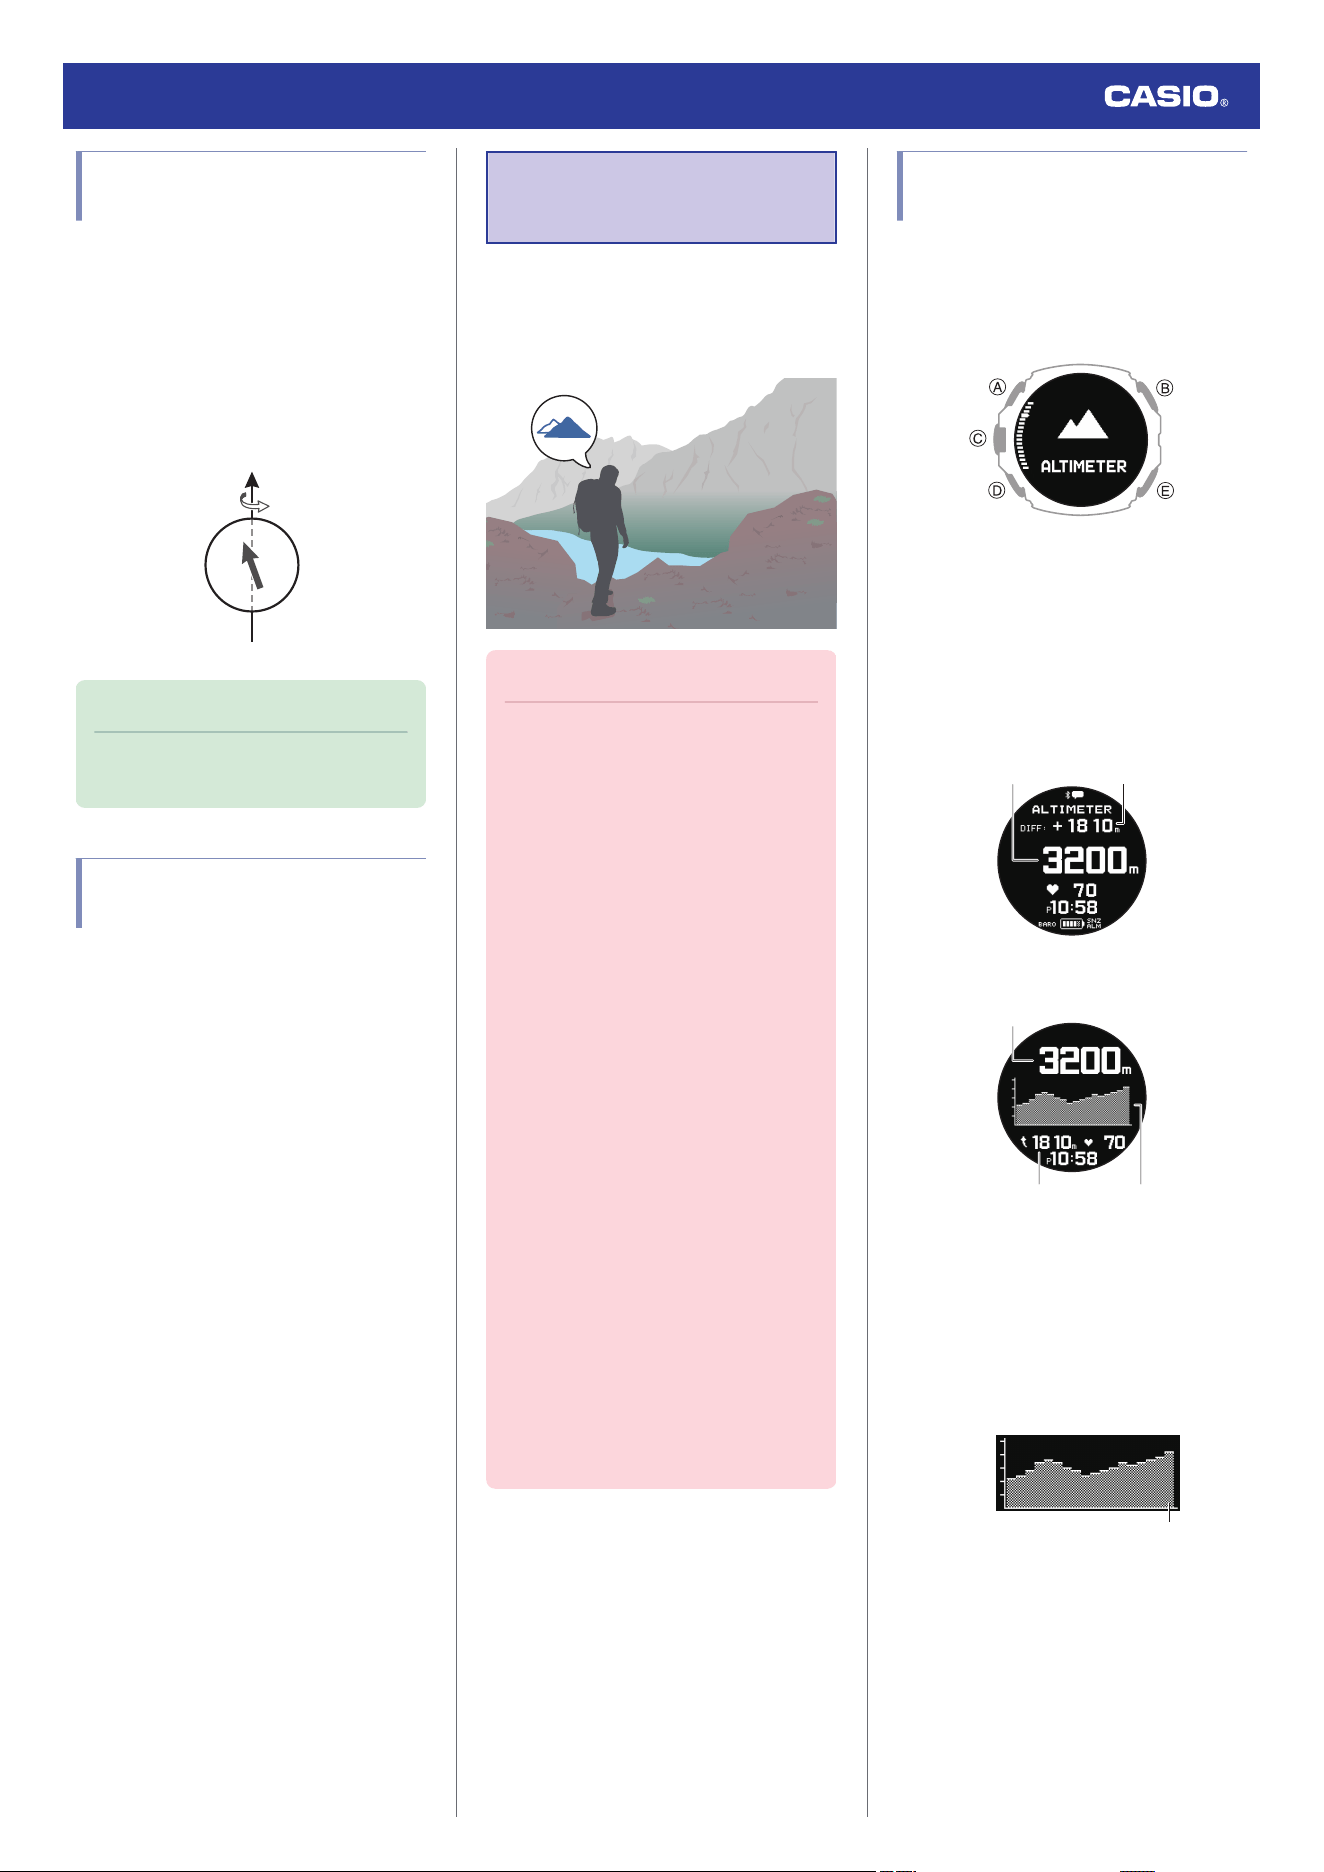
Magnetic North and True
North
There are actually two types of north:
magnetic north and true north.
Magnetic north: North indicated by the needle
of a compass
True north: Direction to the North Pole
As shown in the illustration below, magnetic
north and true north are not the same.
Earth
Magnetic north
True north
Note
●
The north indicated on commercially
available maps is normally true north.
Digital Compass Reading
Precautions
Location During Use
Taking readings near sources of strong
magnetism can cause reading error. Keep the
watch away from the following types of items.
Permanent magnets (magnetic accessories,
etc.), metal objects, high-voltage wires, aerial
wires, electrical household appliances (TVs,
computers, cellphones, etc.)
●
Note that correct direction readings are not
possible indoors, especially inside of
reinforced concrete structures.
●
Accurate direction readings are not
possible on electric trains, on boats, on
aircraft, etc.
Storage Location
Exposure of the watch to magnetism can
affect the accuracy of digital compass
readings. Keep the watch away from the types
of items below.
Permanent magnets (magnetic accessories,
etc.), metal objects, electrical household
appliances (TVs, computers, cellphones, etc.)
Altitude
Measurement
The watch takes altitude readings and
displays results based on air pressure
measurements taken by a built-in pressure
sensor.
Important!
●
The altitude readings displayed by the
watch are relative values that are
calculated based on barometric
pressure measured by the watch’s
pressure sensor. This means that
barometric pressure changes due to
weather can cause altitude readings
taken at the same location to be
different. Also note that the value
displayed by the watch may be
different from the actual elevation and/
or sea level elevation indicated for the
area where you are located. When
using the watch’s altimeter while
mountain climbing, it is recommended
that you regularly calibrate its readings
in accordance with local altitude
(elevation) indications.
l
Calibrating Altitude Readings
●
The altitude correction value you
specify and/or barometric pressure
changes may cause a negative value
to be displayed.
●
Check the information at the link below
to find out about how to minimize
differences between readings
produced by the watch, and values
provided by local altitude (elevation)
indications.
l
Altitude Reading Precautions
Checking the Current
Altitude
1. Display the current time screen.
l
Watch Mode
2. Use (A) and (D) to select [ALTIMETER].
3. Press (C).
This displays the altitude for your current
location.
●
Each press of (A) or (D) toggles
between the value display and graph
display.
Value Screen
①②
Graph Screen
①
②③
A Current location altitude
B Differential between reference
altitude and current altitude
C Altitude graph
Current reading
Watch Operation Guide 3554
43
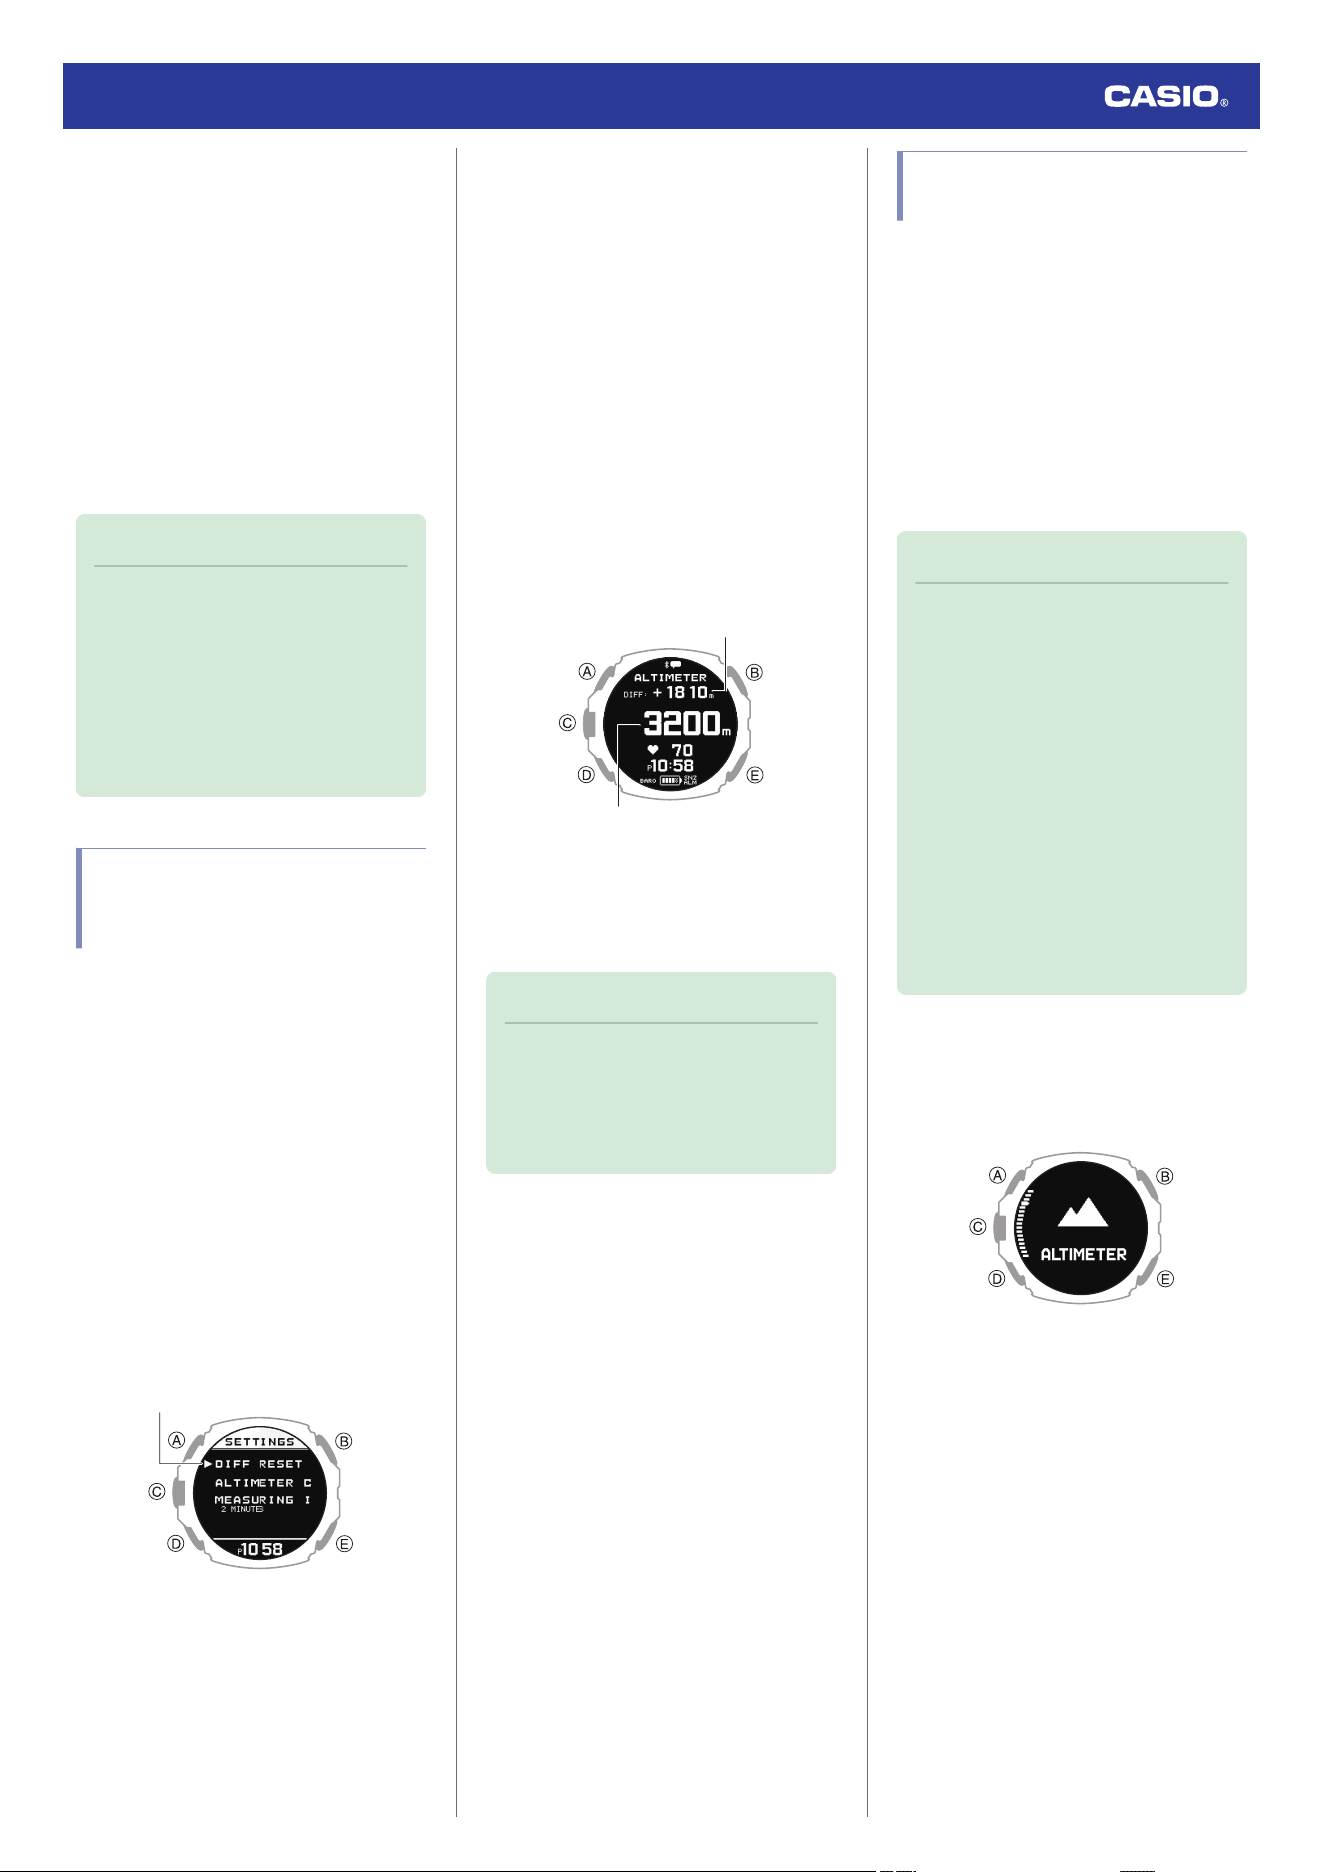
●
The watch takes altitude readings every
second for about the first three minutes.
After that, it takes readings according to
the watch’s auto measurement interval
setting.
●
Check the information at the link below
to find out how to configure the auto
measurement interval.
l
Setting the Auto Measurement
Interval
●
To retrigger measurement, press (C).
●
To return to the current time screen,
hold down (E) for at least one second.
Note
●
Measurement range: -10,000 m to
10,000 m (-32,800 to 32,800 feet)
(Measurement unit: 1 meter (5 feet))
Note that calibrating altitude readings
will cause a change in the
measurement range.
●
[- - - - -] appears for the measured value
if it is outside the allowable range.
Setting a Reference Altitude
and Taking Altitude
Differential Readings
You can use the procedure below to display
the differential between a reference altitude
and another altitude. This makes it easy to
measure the altitude differential between two
points while climbing or trekking.
1. Use the contour lines on your map to
determine the altitude differential between
your current location and your destination.
2. Take an altitude reading of your current
location.
l
Checking the Current Altitude
3. Hold down (A) for at least two seconds.
This displays the altitude measurement
setting screen.
Pointer
4. Use (A) and (D) to move the pointer to
[DIFF RESET].
5. Use (C) to set your current location’s
altitude as the reference altitude.
After the setting operation is complete, a
check mark appears for a few seconds,
and then the altitude measurement
setting screen re-appears.
6. Press (E).
This returns to the altitude measurement
screen.
7. While comparing the difference between
the altitude you found on the map and the
altitude differential displayed by the
watch, advance towards your destination.
Altitude differential indicator
Current location altitude
●
When the altitude differential you found
on the map is the same as that
displayed by the watch, it means you
are close to your destination.
Note
●
[- - - - -] is displayed when a reading is
outside the allowable altitude
measurement range (±3,000 m
(±9,840 feet)) or if a measurement
error occurs.
Calibrating Altitude
Readings
To minimize the difference between locally
indicated and measured values, you should
update the reference altitude value before
setting off on and during treks or any other
activities where you take altitude readings.
Also, you can ensure accurate measurements
by checking a map local altitude indications or
some other source for your current location’s
altitude, and regularly calibrating watch
readings with the latest information while
mountain climbing.
Note
●
You can find out the altitude at your
current location from signs, maps, on
the Internet, etc.
●
Differences between actual altitude
and watch readings can be caused by
the factors below.
ー
Changes in barometric pressure
ー
Changes in temperature caused by
variations in barometric pressure
and by elevation
●
Though altitude readings can be taken
without calibration, doing so may
produce readings that are very
different from indications by altitude
markers, etc.
1. Display the current time screen.
l
Watch Mode
2. Use (A) and (D) to select [ALTIMETER].
3. Press (C).
Watch Operation Guide 3554
44
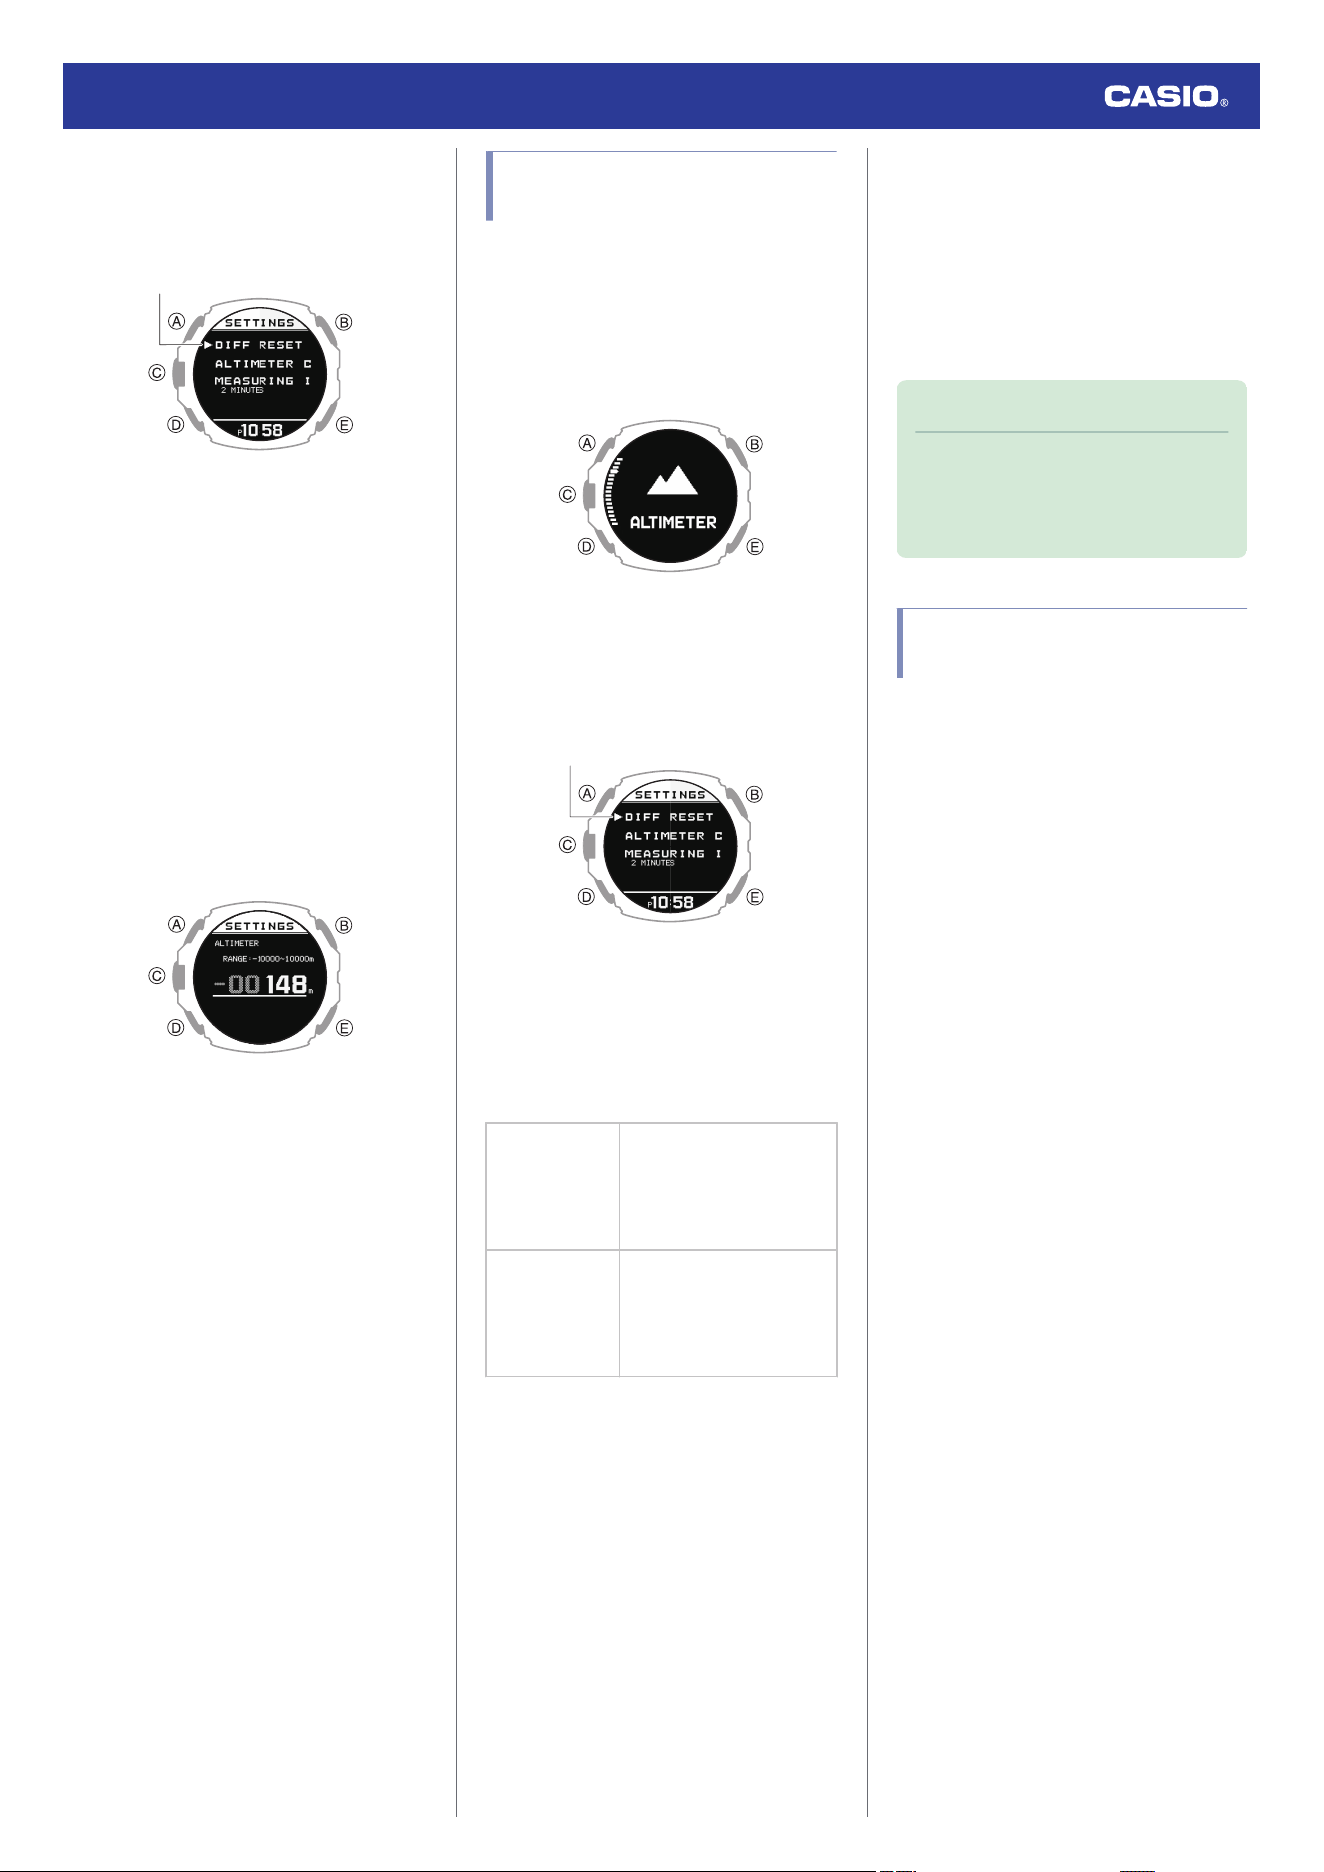
4. Hold down (A) for at least two seconds.
This displays the altitude measurement
setting screen.
Pointer
5. Use (A) and (D) to move the pointer to
[ALTIMETER CALIBRATION].
6. Press (C).
7. Use (A) and (D) to move the pointer to
[MANUAL].
●
To return the altitude setting to its initial
factory default value, select [OFFSET
OFF].
8. Press (C).
This displays the manual correction
screen.
9. Use (A) and (D) to input the altitude at your
current location.
10. Press (C) to complete the setting
operation.
After the setting operation is complete, a
check mark appears for a few seconds,
and then the altitude measurement
setting screen re-appears.
11. Press (E) to exit the setting screen.
Setting the Auto
Measurement Interval
You can select an auto measurement interval
of either five seconds or two minutes.
1. Display the current time screen.
l
Watch Mode
2. Use (A) and (D) to select [ALTIMETER].
3. Press (C).
4. Hold down (A) for at least two seconds.
This displays the altitude measurement
setting screen.
Pointer
5. Use (A) and (D) to move the pointer to
[MEASURING INTERVAL].
6. Press (C).
7. Use (A) and (D) to select an auto
measurement interval.
[2 MINUTES]
Readings taken every
second for the first three
minutes, and then every
two minutes for about the
next 12 hours.
[5 SECONDS]
Readings taken every
second for the first three
minutes, and then every
five seconds for about one
hour.
8. Press (C) to complete the setting
operation.
After the setting operation is complete, a
check mark appears for a few seconds,
and then the altitude measurement
setting screen re-appears.
9. Press (E) to exit the setting screen.
Note
●
The watch automatically returns to the
current time screen if you do not
perform any operation for about one
hour during altitude measurement.
Altitude Reading
Precautions
Effects of Temperature
When taking altitude readings, take the steps
below to keep the watch at as stable a
temperature as possible. Changes in
temperature can affect altitude readings.
●
Take readings with the watch on your wrist.
●
Take readings in an area where
temperature is stable.
Altitude Readings
●
Do not use this watch while skydiving, hang
gliding, paragliding, gyrocopter flying, glider
flying, or engaged in other activities where
altitude changes suddenly.
●
Altitude readings produced by this watch
are not intended for special-purpose or
industrial level use.
●
In an aircraft, the watch measures the in-
cabin pressurized air pressure, so readings
will not match altitudes announced by the
crew.
Altitude Readings (Relative Altitude)
This watch uses International Standard
Atmosphere (ISA) relative altitude data
defined by the International Civil Aviation
Organization (ICAO). Barometric pressure
generally becomes lower as altitude
increases.
Correct measurement may not be possible
under the conditions below.
●
During unstable atmospheric conditions
●
During sudden temperature changes
●
After the watch has been subjected to
strong impact
Watch Operation Guide 3554
45
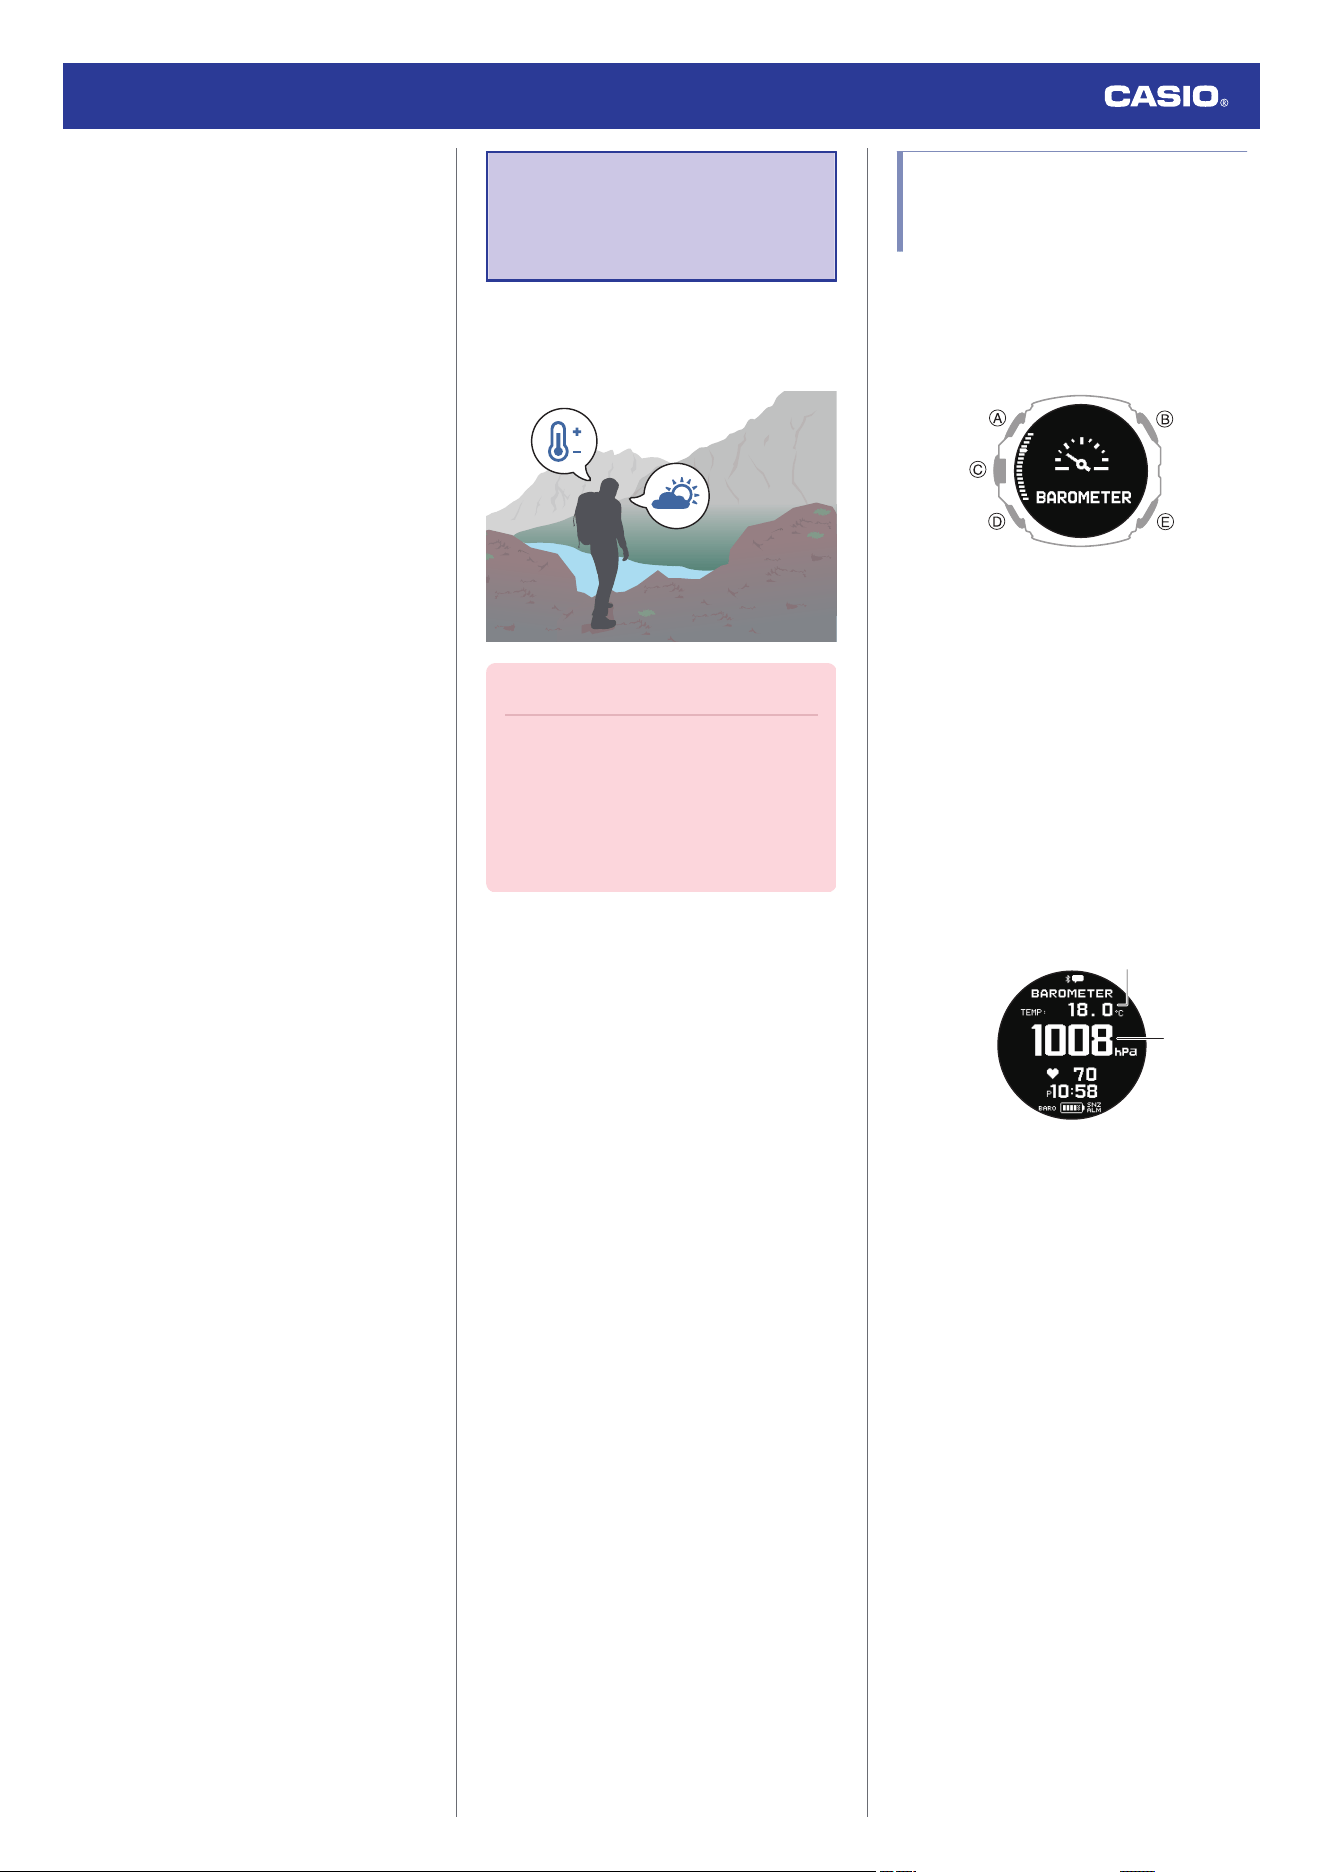
Measured Altitude Value Adjustment
Using GPS Signal Data
If you performed a GPS signal receive
operation before starting measurement of an
activity that uses GPS signals for
measurement, the measured altitude value
will be automatically corrected when the
watch receives correction information. Note,
however, that this also may result in some
difference between the measured value and
the actual altitude.
Also note that the measured altitude value
adjustment operation using GPS signal data
may take a few minutes. The adjustment
operation may take even longer, depending
on your current environment. Regular manual
adjustment of the measured altitude value
using locally available information is
recommended. The watch will not use GPS
signal data to adjust measured altitude values
for one hour after you adjust the measured
altitude value manually.
Barometric Pressure
and Temperature
Measurement
You can use the watch to take barometric
pressure and temperature readings for your
current location.
Important!
●
Check the information at the link below
to find out how to ensure correct
readings.
l
Barometric Pressure and
Temperature Reading
Precautions
Checking the Current
Barometric Pressure and
Temperature
1. Display the current time screen.
l
Watch Mode
2. Use (A) and (D) to select [BAROMETER].
3. Press (C).
This displays the current barometric
pressure and temperature.
●
Each press of (A) or (D) toggles
between the value display and graph
display.
●
After you switch to barometer/
temperature measurement, the watch
takes readings about every five
seconds for three minutes. After that, a
measurement is taken about every two
minutes.
Value Screen
①
②
Watch Operation Guide 3554
46
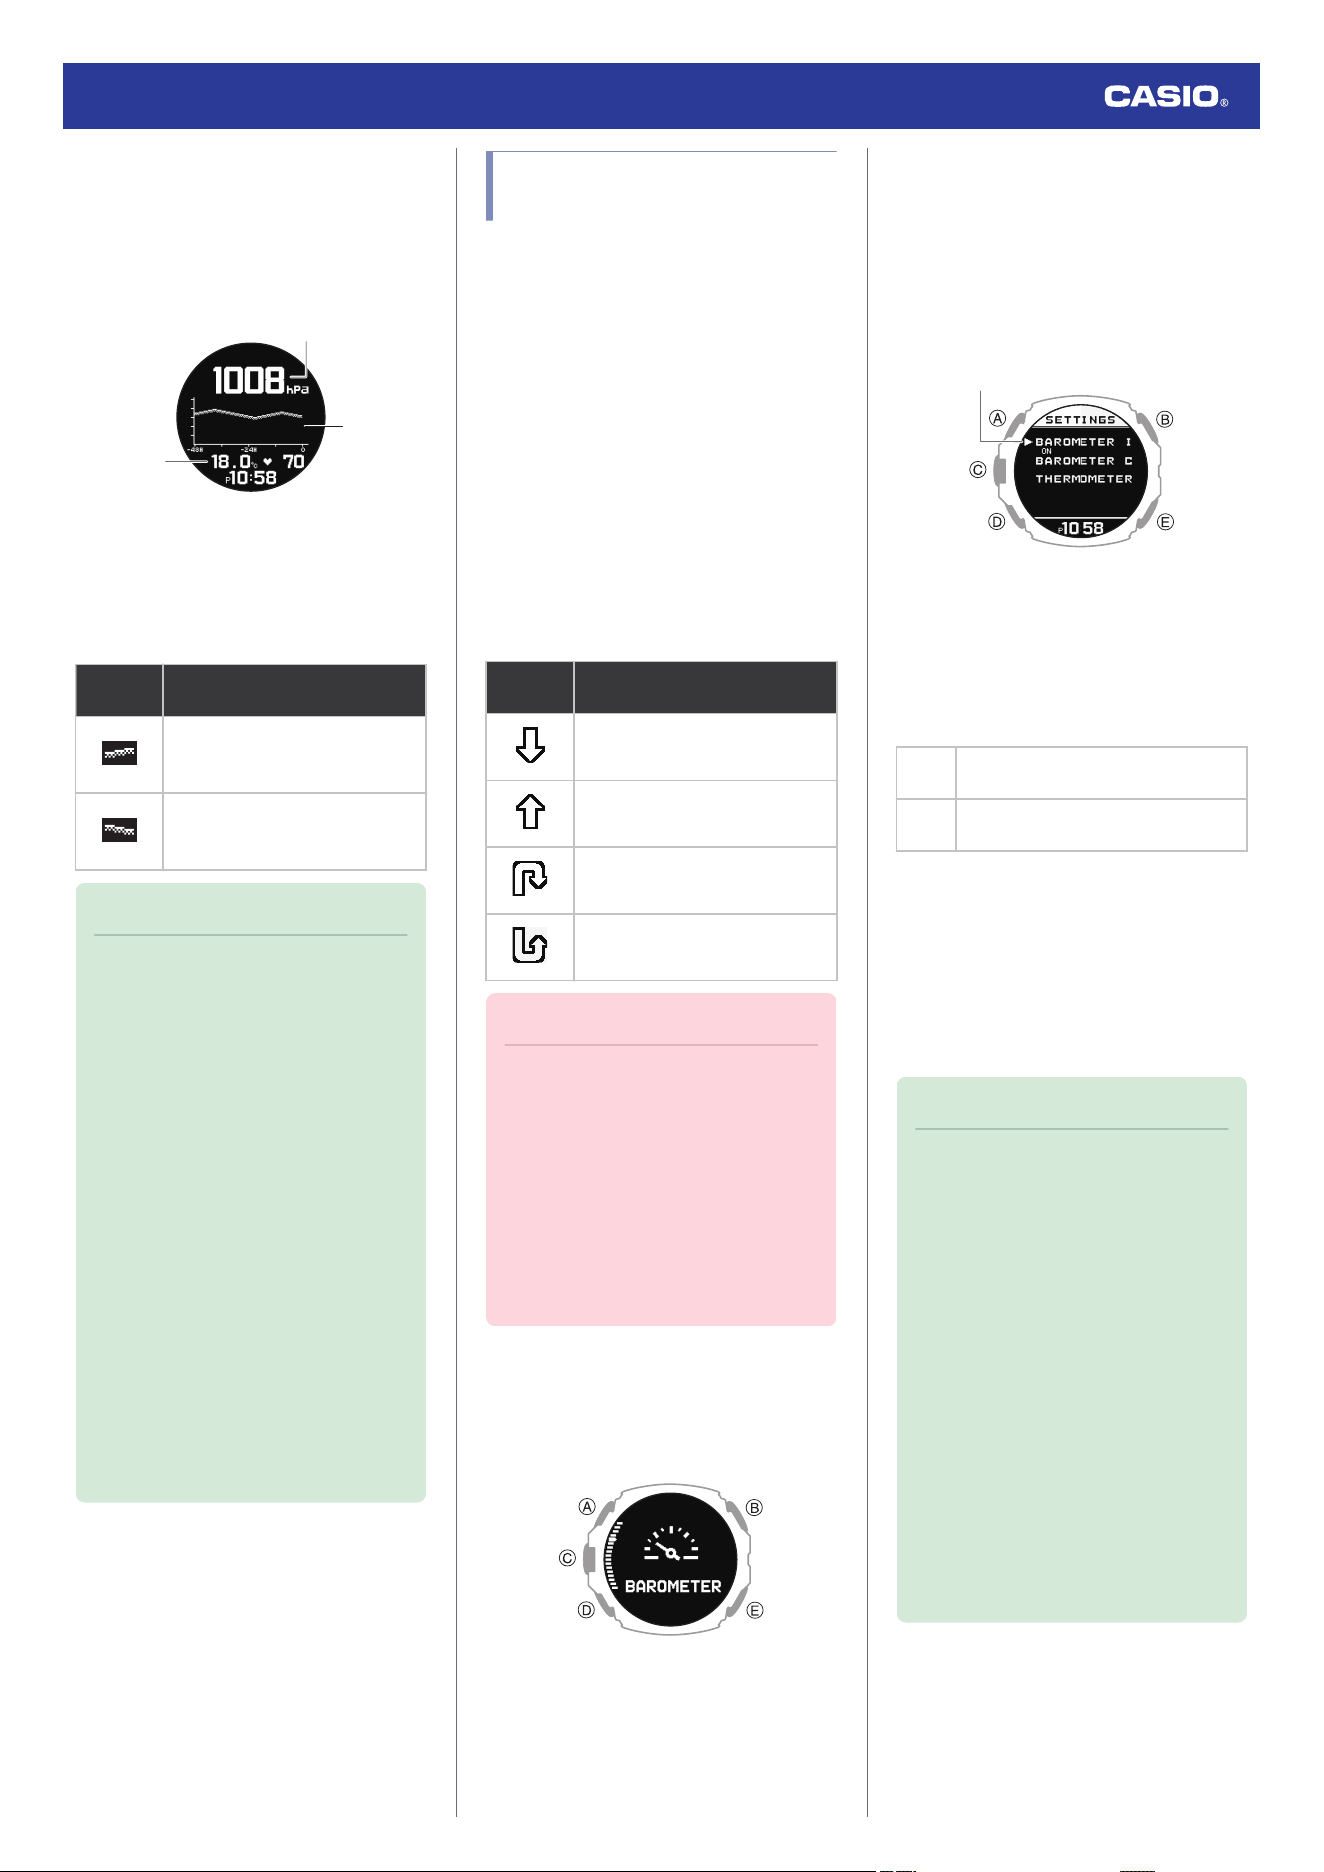
Barometric Pressure Graph Screen
The graph shows barometric readings taken
every two hours. You can use the graph to
view changes in barometric pressure over the
past 72 hours, which can be used to predict
upcoming weather.
②
③
①
A Temperature
B Barometric pressure
C Barometric pressure graph
A trend
like this:
Means this:
Rising barometric pressure,
which indicates that upcoming
weather probably will be fair.
Falling barometric pressure,
which indicates that upcoming
weather probably will be bad.
Note
●
To retrigger measurement, press (C).
●
The watch will automatically return to
the current time screen if you do not
perform any operation for about one
hour during barometer/temperature
measurement.
●
Measurement ranges are shown
below. [- - -] will appear for the
measured value if it is outside the
allowable range.
Barometric pressure measurement:
260 hPa to 1,100 hPa (7.65 inHg to
32.45 inHg)
Thermometer measurement: -10.0 °C
to 60.0 °C (14.0 °F to 140.0 °F)
●
Large changes in barometric pressure
and/or temperature can cause past
data readings to be plotted outside of
the visible area of the graph. Though
plots are not visible, the data is still
maintained in watch memory.
Barometric Pressure Change
Indications
Whenever the watch detects a significant
change in air pressure readings (due to
sudden altitude change, or to the passage of
a low pressure or high pressure area), it will
perform a sound and/or vibration operation
and display a flashing arrow to let you know.
The arrow that appears shows the direction of
the pressure change. These alerts are called
“Barometric Pressure Change Indications”.
●
The watch will notify you by a 10-second
sound/vibration operation when there is a
sudden drop in atmospheric pressure.
●
A four-second sound/vibration operation
will notify you when there is a sudden rise in
atmospheric pressure, or the passage of
high or low pressure.
This
indication:
Means this:
Sudden drop in pressure
Sudden rise in pressure
Sustained rise in pressure,
shifting to a fall
Sustained fall in pressure, shifting
to a rise
Important!
●
To ensure correct barometric pressure
change indication operation, enable it
in a location where the altitude is
constant (such as a lodge, camp area,
or on the ocean).
●
A change in altitude causes a change
in air pressure. Because of this, correct
readings are impossible. Do not take
readings while ascending or
descending a mountain, etc.
1. Display the current time screen.
l
Watch Mode
2. Use (A) and (D) to select [BAROMETER].
3. Press (C).
This displays the current barometric
pressure and temperature.
4. Hold down (A) for at least two seconds.
This displays the barometer/temperature
measurement setting screen.
Pointer
5. Use (A) and (D) to move the pointer to
[BAROMETER INFORMATION].
6. Press (C).
7. Use (A) and (D) to select a barometric
pressure change indication setting.
[ON]
Enables the barometric pressure
change indication.
[OFF]
Disables the barometric pressure
change indication.
8. Press (C) to complete the setting
operation.
After the setting operation is complete, a
check mark appears for a few seconds,
and then the barometric pressure/
temperature setting screen re-appears.
9. Press (E) to exit the setting screen.
Note
●
If the barometric pressure change
indication is enabled, readings are
taken every two minutes even while the
watch is performing an operation other
than barometric pressure and
temperature measurement.
●
The barometric pressure change
indication becomes disabled
automatically 24 hours after it is
enabled.
●
Power Saving is disabled while
barometric pressure change indication
is enabled.
l
Power Saving
●
The barometric pressure change
indication will become disabled
automatically when the battery
becomes [CHG] or lower.
Watch Operation Guide 3554
47
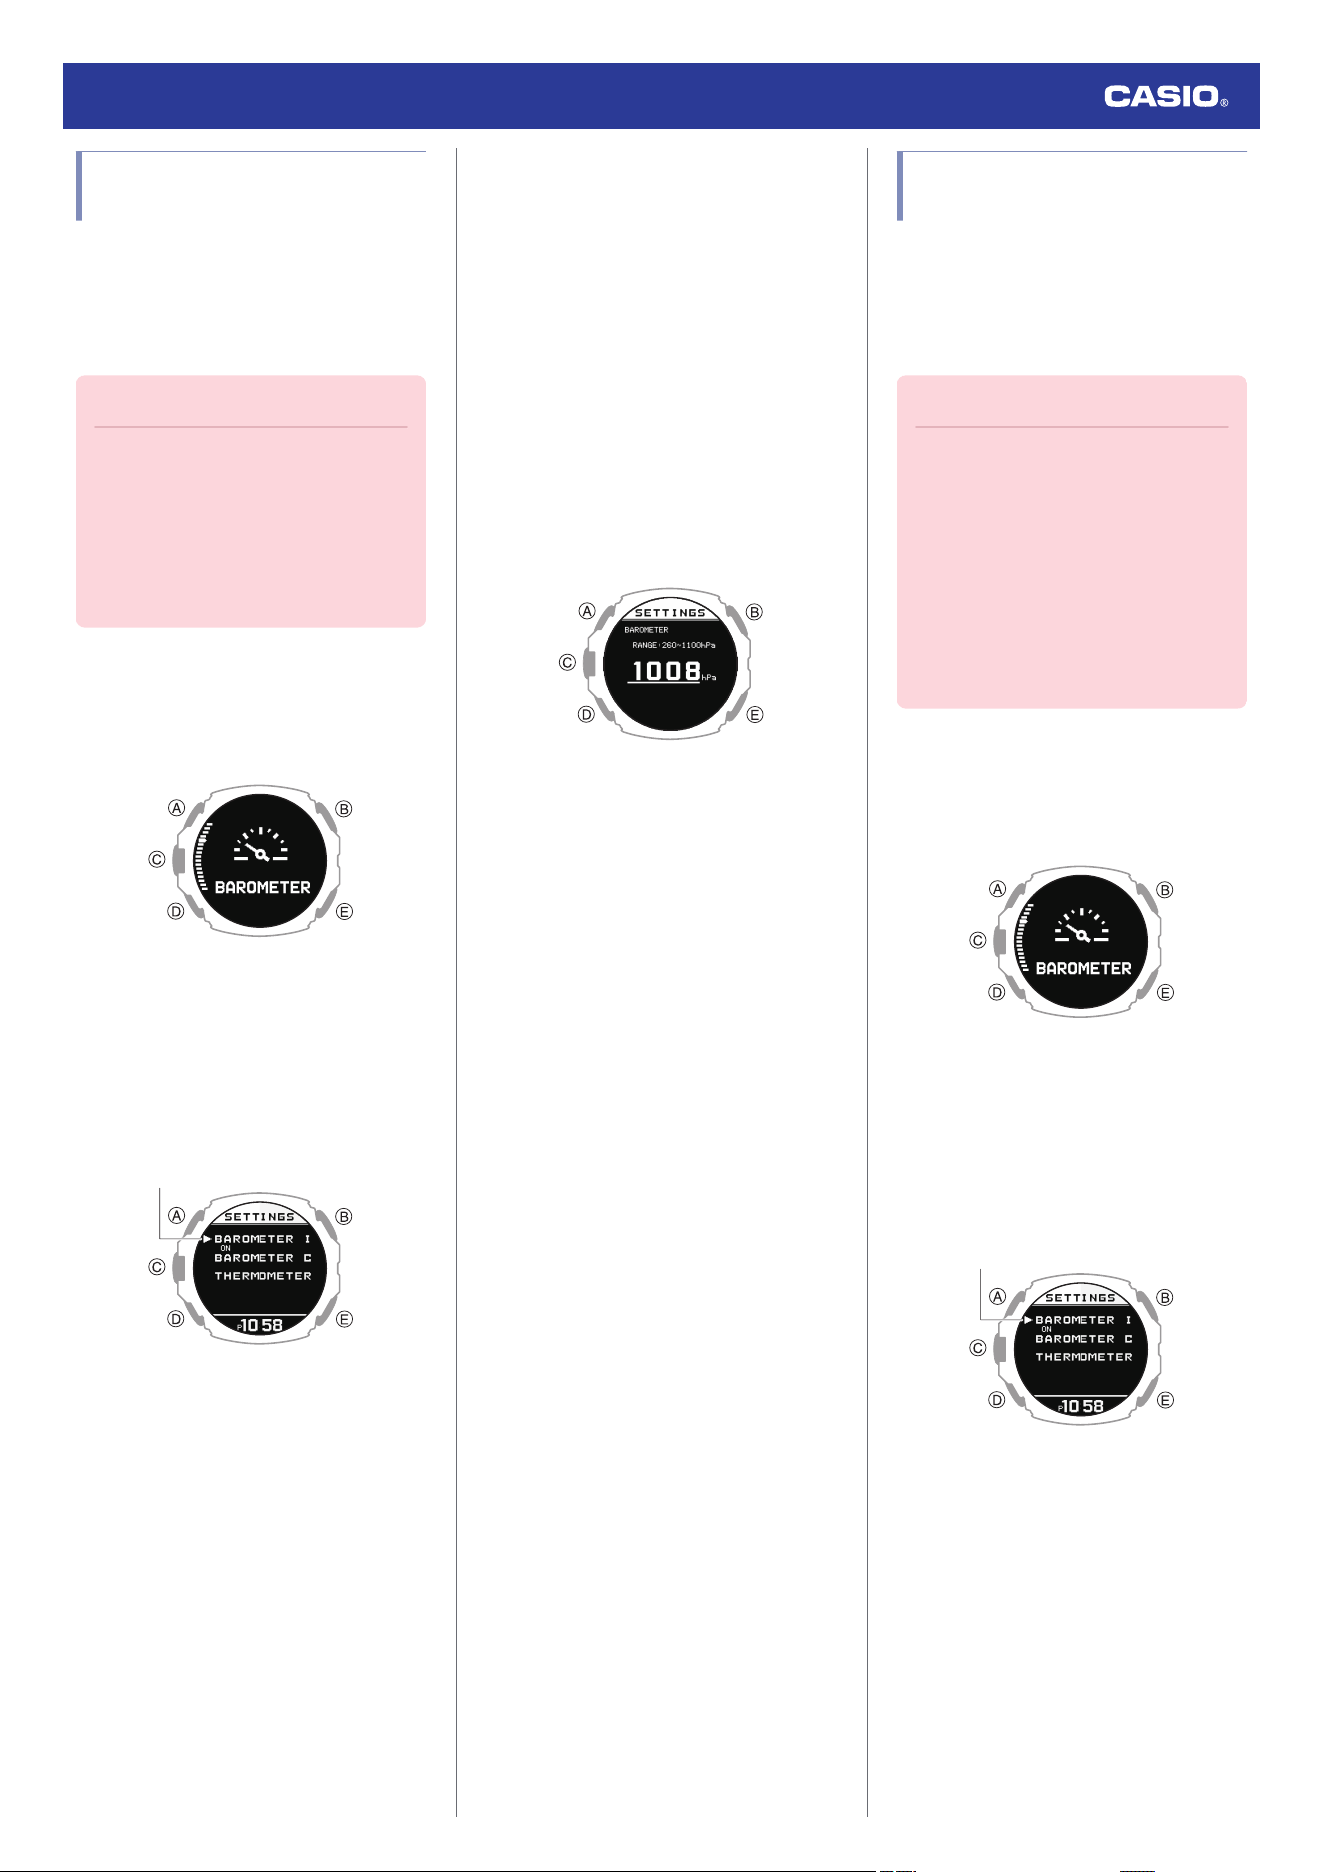
Calibrating Barometric
Pressure Readings
The watch’s pressure sensor is adjusted at the
factory and normally does not require
calibration. However, you can calibrate the
displayed value if you notice major errors in
readings.
Important!
●
The watch will not be able to produce
correct barometric pressure readings if
you make a mistake during the
calibration procedure. Check to make
sure that the value you use for
calibration produces correct pressure
readings.
1. Display the current time screen.
l
Watch Mode
2. Use (A) and (D) to select [BAROMETER].
3. Press (C).
This displays the current barometric
pressure and temperature.
4. Hold down (A) for at least two seconds.
This displays the barometer/temperature
measurement setting screen.
Pointer
5. Use (A) and (D) to move the pointer to
[BAROMETER CALIBRATION].
6. Press (C).
7. Use (A) and (D) to move the pointer to
[MANUAL].
●
Selecting [OFFSET OFF] returns
barometric pressure calibration to its
factory default state.
8. Press (C).
This displays the manual correction
screen.
9. Use (A) and (D) to input the current
barometric pressure.
10. Press (C) to complete the setting
operation.
After the setting operation is complete, a
check mark appears for a few seconds,
and then the barometric pressure/
temperature setting screen re-appears.
11. Press (E) to exit the setting screen.
Calibrating Temperature
Readings
The watch’s temperature sensor is adjusted at
the factory and normally does not require
calibration. However, you can calibrate the
displayed value if you notice major errors in
readings.
Important!
●
Check to make sure that the value you
use for calibration produces correct
temperature readings.
●
Before calibrating the temperature
reading, remove the watch from your
wrist and leave it in the area where you
plan to measure temperature for about
20 or 30 minutes to allow the case
temperature to become the same as
the air temperature.
1. Display the current time screen.
l
Watch Mode
2. Use (A) and (D) to select [BAROMETER].
3. Press (C).
This displays the current barometric
pressure and temperature.
4. Hold down (A) for at least two seconds.
This displays the barometer/temperature
measurement setting screen.
Pointer
5. Use (A) and (D) to move the pointer to
[THERMOMETER CALIBRATION].
6. Press (C).
Watch Operation Guide 3554
48

7. Use (A) and (D) to move the pointer to
[MANUAL].
●
Selecting [OFFSET OFF] returns
barometric pressure calibration to its
factory default state.
8. Press (C).
This displays the manual correction
screen.
9. Use (A) and (D) to input the current
temperature.
10. Press (C) to complete the setting
operation.
After the setting operation is complete, a
check mark appears for a few seconds,
and then the barometric pressure/
temperature setting screen re-appears.
11. Press (E) to exit the setting screen.
Barometric Pressure and
Temperature Reading
Precautions
●
Barometric Pressure Reading
Precautions
●
The barometric pressure graph produced
by this watch can be used to obtain an idea
of upcoming weather conditions. However,
this watch should not be used in place of
precision instruments required for official
weather prediction and reporting.
●
Pressure sensor readings can be affected
by sudden changes in temperature.
Because of this, there may be some error in
the readings produced by the watch.
●
Temperature Reading Precautions
Body temperature, direct sunlight, and
humidity all have an effect on temperature
readings. To help ensure more accurate
temperature readings, remove the watch from
your wrist, wipe it dry of any moisture, and
place it in a well-ventilated location not
exposed to direct sunlight. You should be able
to take temperature readings after about 20 to
30 minutes.
Almanac (Sunrise
and Sunset Times,
and Moon Age)
You can view the sunrise/sunset times and
moon age for a location acquired via
smartphone connection or GPS reception, for
a Home City specified manually, or for a port
specified with Tide function.
Checking Sunrise and
Sunset Times, and Moon Age
1. Display the current time screen.
l
Watch Mode
2. Use (A) and (D) to select [ALMANAC].
3. Press (C).
4. Use (A) and (D) to select the day.
This displays the sunrise and sunset
times, and the Moon age.
①
③
④
②
A Moon Graph + Moon Age
l
Interpreting the Moon Graph and
Moon Age Indicator
B Day
C Sunrise time
D Sunset time
Note
●
Sunrise and sunset times are
calculated internally by the watch.
Calculation results may contain errors,
with greater errors occurring at higher
latitudes.
●
[--:--] is displayed when calculation
results cannot be output for some
reason or in regions outside of 65.0°
south to 65.0° north latitude.
●
If you do not perform any operation for
two or three minutes while the Almanac
screen is displayed, the watch
automatically returns to the current
time screen.
Watch Operation Guide 3554
49

Interpreting the Moon Graph and Moon
Age Indicator
Moon phase Moon age
This
indicator:
New Moon
0.0 to 0.9
28.7 to 29.8
1.0 to 2.7
2.8 to 4.6
4.7 to 6.4
First Quarter 6.5 to 8.3
8.4 to 10.1
10.2 to 12.0
12.1 to 13.8
Full Moon 13.9 to 15.7
15.8 to 17.5
17.6 to 19.4
19.5 to 21.2
Last Quarter 21.3 to 23.1
23.2 to 24.9
25.0 to 26.8
26.9 to 28.6
●
The indicators in the above table show
approximate phase forms when facing
south to look up at the Moon in the Northern
Hemisphere.
They are intended only to indicate whether
the Moon's left or right side is darkened, and
the Moon's actual appearance may be
different. Also, in the Southern Hemisphere
or near the equator, the Moon will appear in
the northern sky, so the light and dark
portions of the Moon will be opposite those
shown by the watch’s indicator.
Specifying a Location to
Look Up Its Sunrise/Sunset
Times and Moon Age
1. Display the current time screen.
l
Watch Mode
2. Use (A) and (D) to select [ALMANAC].
3. Press (C).
4. Hold down (A) for at least two seconds.
This displays the almanac setting screen.
5. Press (C).
6. Use (A) and (D) to move the pointer to the
location whose almanac you want to view.
[LATEST
POSITION]
Use any one of the sources
below to configure the
latest location setting.
●
Location information
obtained by GPS signal
reception.
●
Location information
obtained by Bluetooth
connection.
●
Manually configured
Home City setting.
[SAME AS TIDE
SETTINGS]
Specifies the same location
as the Tide Graph setting.
7. Press (C) to complete the setting
operation.
After the setting operation is complete, a
checkmark appears for a few seconds,
and then the almanac setting screen re-
appears.
Note
●
If you do not perform any operation for
two or three minutes while the Almanac
screen is displayed, the watch
automatically returns to the current
time screen.
Watch Operation Guide 3554
50
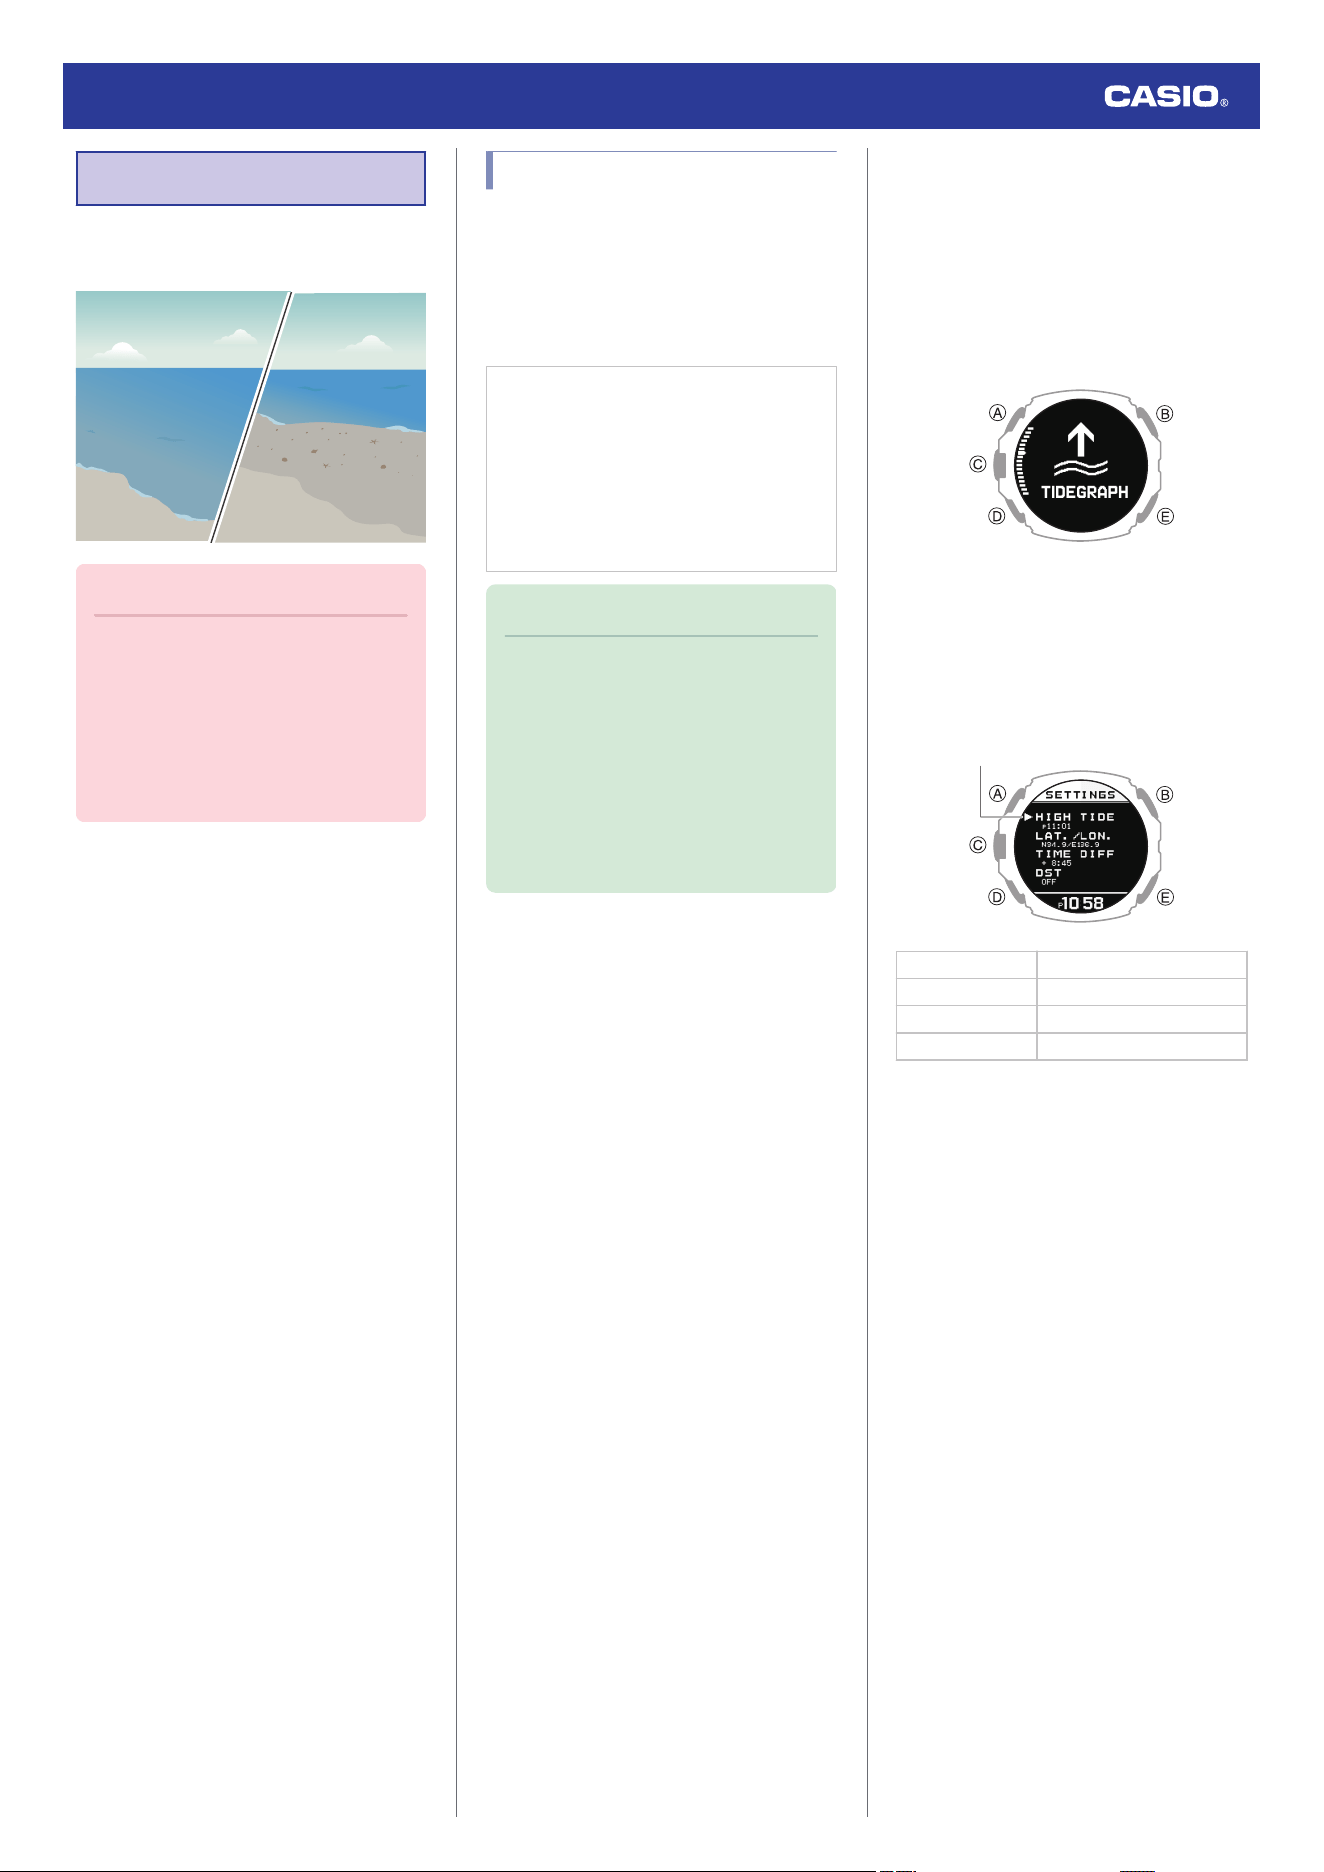
Tide Function
You can look up tide information (Tide Graph)
of a port you specified.
Important!
●
Displayed information is intended for
reference only. Do not use it for
maritime navigation, etc.
●
To look up tide information, use the
CASIO WATCHES phone app or
watch operations to specify the port
whose information you want to view.
Specifying a Port
Use the CASIO WATCHES phone app or
watch operations to specify the port whose
tide information you want to view.
●
To use the CASIO WATCHES phone app
to specify a port
Check the connection
●
Make sure the
e
symbol is shown on the
watch display when you perform the
procedure below. If
e
is not displayed,
refer to the information at the link below.
l
Connecting with a Phone Paired
With the Watch
Note
●
You can use CASIO WATCHES to
specify any one of 3,300 points around
the world as the port.
●
You can use the CASIO WATCHES
phone app to specify any location you
want as a port. A user-specified port is
indicated by an underline character
(“_”) at the beginning of its displayed
port name.
1.
Y
Tap the “CASIO WATCHES” icon.
2.
Y
Tap the “My Watch” tab.
3.
Y
Select “GPR-H1000” and tap it.
4.
Y
Select the setting you want to change
and then perform the operation shown on
the screen.
●
To use phone operations to specify a
port
You can use watch operations to register any
location you want (custom point).
1. Display the current time screen.
l
Watch Mode
2. Use (A) and (D) to select [TIDEGRAPH].
3. Press (C).
This displays a Tide Graph.
4. Hold down (A) for at least two seconds.
This displays the custom point item
selection screen.
Pointer
[HIGH TIDE] High tide time
[LAT./LON.] Latitude and longitude
[TIME DIFF] Time offset
[DST] Summer time
5. Use (A) and (D) to move the pointer to the
item whose setting you want to change.
6. Press (C).
Watch Operation Guide 3554
51

7. Specify the high tide time of the custom
point.
●
On the custom point item selection
screen, select [HIGH TIDE].
A Use (A) and (D) to change the high
tide time hour setting.
B Press (C).
C Use (A) and (D) to change the high
tide time minute setting.
D Press (C) to complete the high tide
time registration.
After registration of the information is
complete, a checkmark appears for a
few seconds and then the custom
point item selection screen re-
appears.
Note
●
Pressing (E) during the above
procedure will go back one screen.
8. Specify the latitude and longitude of the
custom point.
●
On the custom point item selection
screen, move the pointer to [LAT./
LON.].
A Use (A) and (D) to specify [N] (north)
or [S] (south) as the latitude direction.
B Press (C).
C Use (A) and (D) to specify a latitude
value.
D Press (C).
E Use (A) and (D) to specify [E] (east) or
[W] (west) as the longitude direction.
F Press (C).
G Use (A) and (D) to specify a longitude
value.
H Press (C) to complete the latitude and
longitude registration.
After registration of the information is
complete, a checkmark appears for a
few seconds and then the custom
point item selection screen re-
appears.
Note
●
Pressing (E) during the above
procedure will go back one screen.
9. Specify the UTC time offset of the custom
point.
●
On the custom point item selection
screen, move the pointer to [TIME
DIFF].
A Use (A) and (D) to change the UTC
time offset.
B Press (C) to complete time offset
registration.
After registration of the information is
complete, a checkmark appears for a
few seconds and then the custom
point item selection screen re-
appears.
Note
●
Pressing (E) during the above
procedure will go back one screen.
10. Specify the DST on/off setting for the
custom point.
●
On the custom point item selection
screen, move the pointer to [DST].
A
Use (A) and (D) to specify [OFF]
(standard time display) or [ON]
(summer time display).
B Press (C) to complete the DST on/off
registration.
After registration of the information is
complete, a checkmark appears for a
few seconds and then the custom
point item selection screen re-
appears.
Watch Operation Guide 3554
52
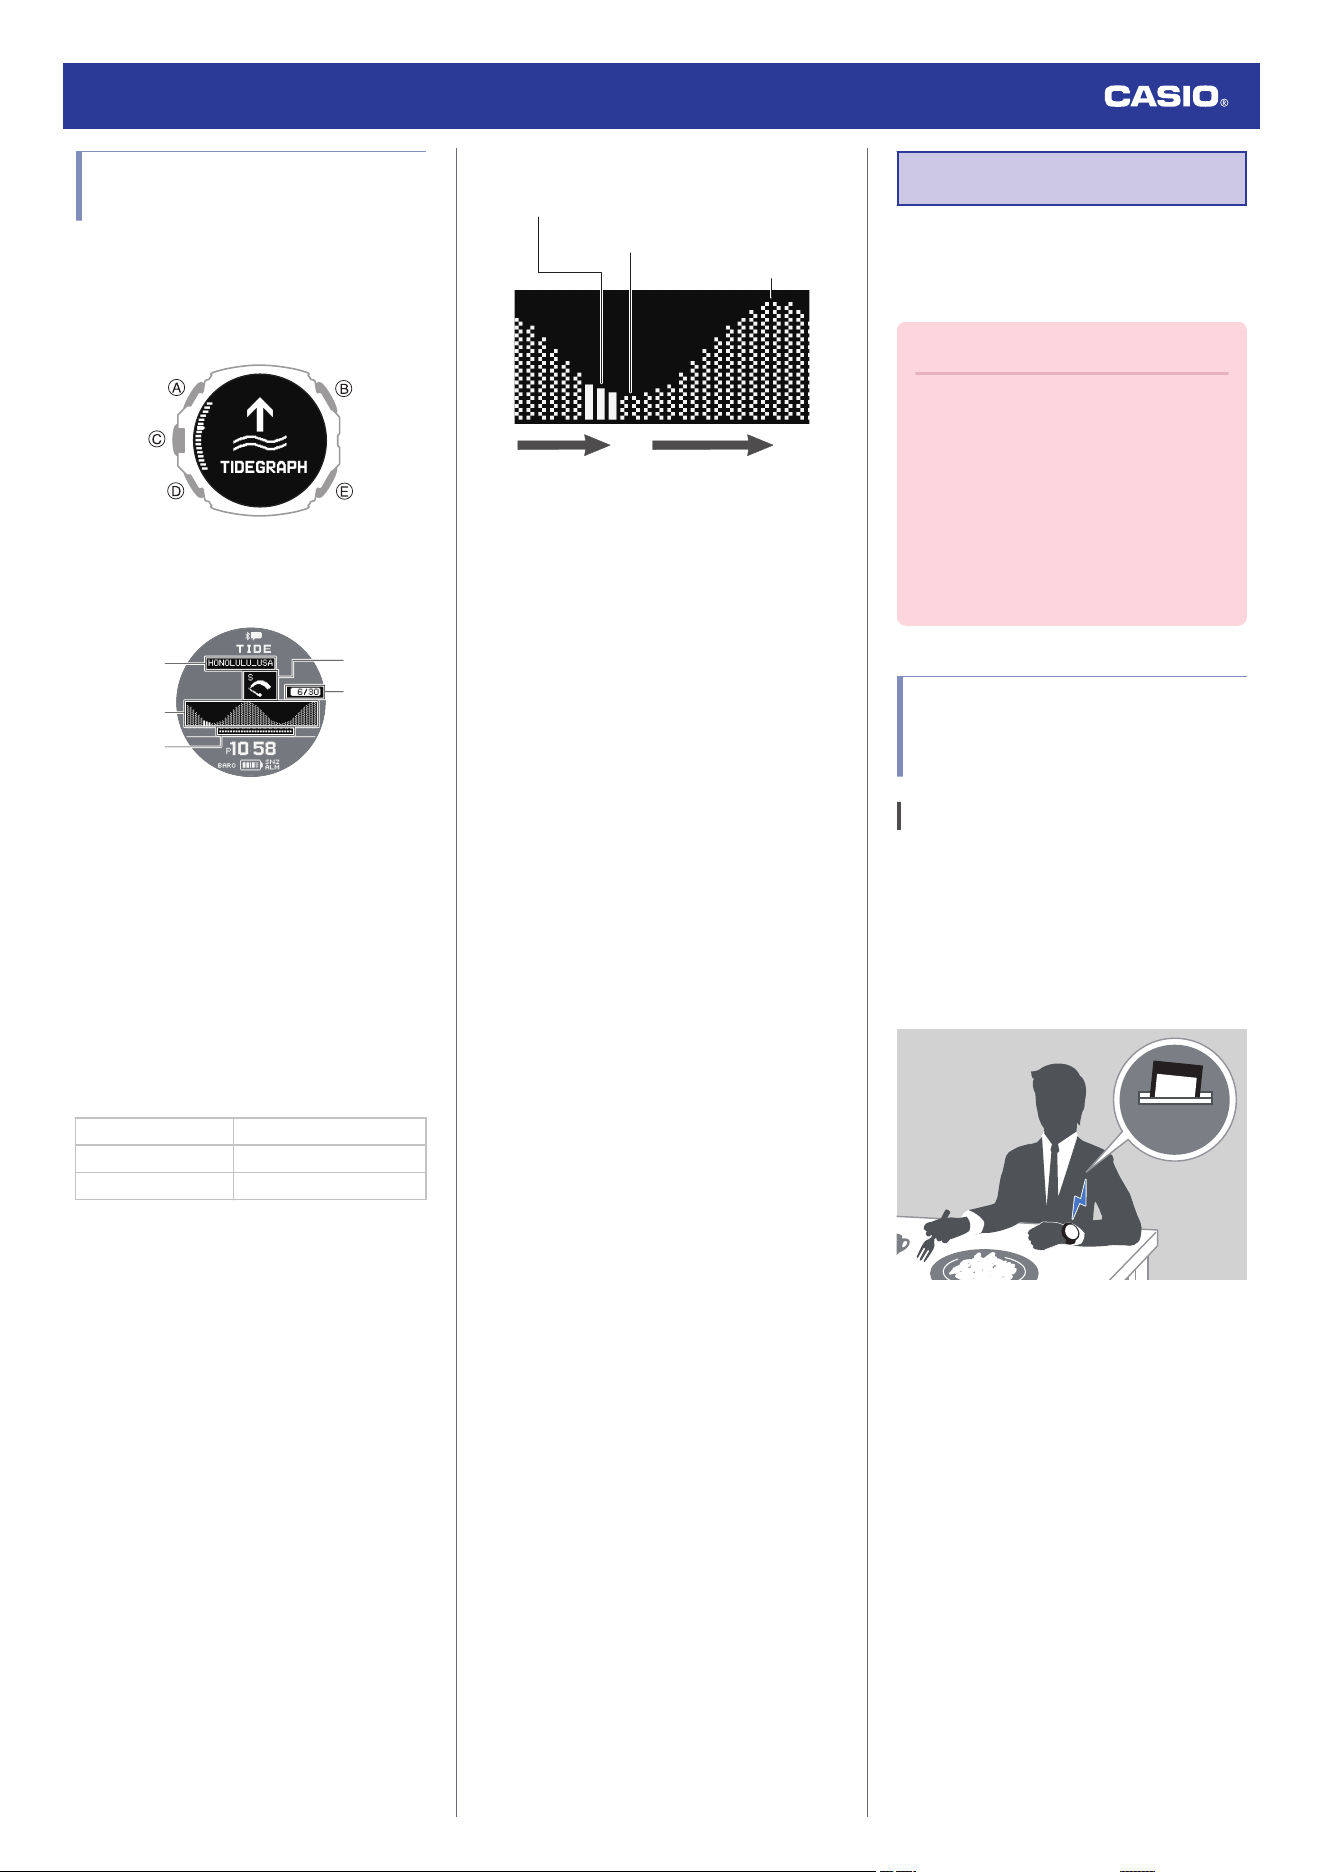
Viewing the Tide Information
for the Specified Port
1. Display the current time screen.
l
Watch Mode
2. Use (A) and (D) to select [TIDEGRAPH].
3. Press (C).
This displays a Tide Graph.
⑤
④
①
②
③
A Port name
Shows the name of the port specified with
the CASIO WATCHES phone app.
The name of a port specified using watch
operations is not displayed.
B Tide Graph (24 hours)
l
Interpreting Tide Graph Information
C Sunshine hours
D Tide cycle
[L] (Large) Spring tide
[M] (Medium) Half tide
[S] (Small) Neap tide
E Day
Date at the specified port
Interpreting Tide Graph Information
Current time in the specified port
High tide
Low tide
Rising tideFalling tide
●
The graph shows tide information from 0:00
to 23:30 (24 hours).
Time Adjustment
Your watch can connect to a phone or receive
GPS signals to adjust its date and time
settings.
Important!
●
Switch to Airplane Mode and use
watch operations for time adjustment
whenever you are inside an aircraft or
any other area where phone use or
GPS signal reception is prohibited or
restricted.
l
Entering the Watch Airplane Mode
l
Using Watch Operations to Adjust
the Time Setting
Automatically Connecting
with a Phone to Sync the
Current Watch’s Time Setting
Auto Time Adjustment
Your watch can connect with your phone to
adjust the watch’s time setting.
If you leave your watch with the current time
screen displayed, it will perform the
adjustment operation automatically as you go
about your daily life, without any operation
required by you.
12:30
Watch Operation Guide 3554
53
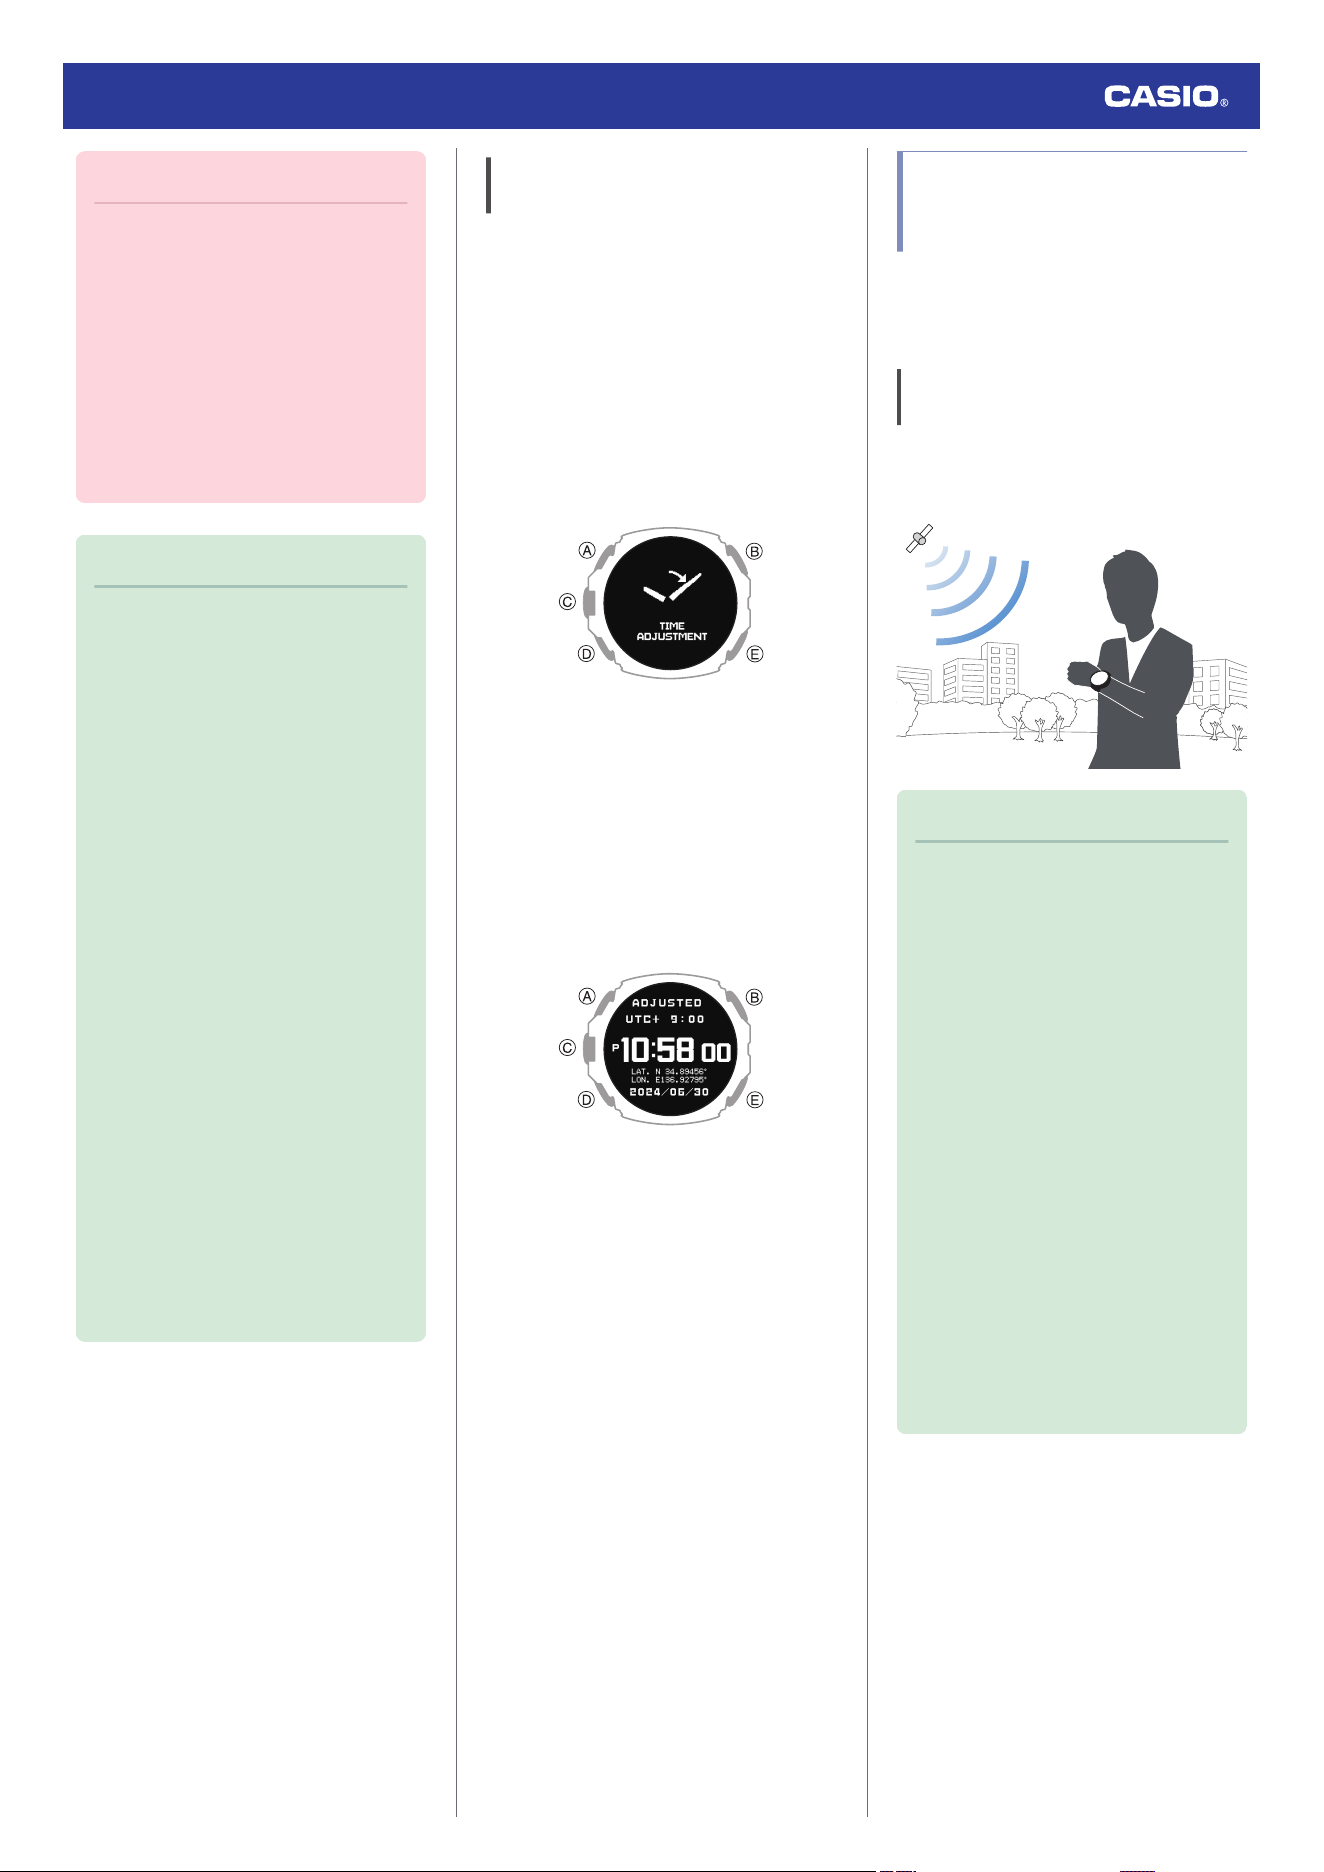
Important!
●
The watch may not be able to perform
auto time correction under the
conditions described below.
ー
While the watch is too far away from
its paired phone
ー
While communication is not possible
due to radio interference, etc.
ー
While the phone is updating its
system
ー
While the CASIO WATCHES phone
app is not running on the phone
Note
●
If there is a World Time City specified
with the CASIO WATCHES phone
app, its time will also be corrected
automatically.
●
Auto time adjustment is performed at
the times described below.
ー
After your phone’s time zone or
summer time setting is changed
ー
After 24 hours or more have passed
since the last time adjustment using
Bluetooth connection
ー
After 24 hours or more have passed
since the last home city change or
time adjustment using watch
operation
●
The watch remains connected with
your phone even after time adjustment
is complete.
●
If time adjustment fails for some
reason, [FAILED] will appear.
●
Watch operation can be performed
even while it is connected with your
phone.
●
Connection with your phone is not
possible while the watch’s Airplane
Mode is enabled. To connect with your
phone, disable the Airplane Mode.
l
Entering the Watch Airplane Mode
Manually Connecting with a Phone
to Sync the Watch’s Time Setting
You can use the procedure below to connect
manually with a phone that is already paired
with the watch.
1. Display the current time screen.
l
Watch Mode
2. Hold down (A) for at least two seconds.
This enters the Control Mode.
3. Use (A) and (D) to select [TIME
ADJUSTMENT].
4. Press (C).
5. Use (A) and (D) to move the pointer to
[BLUETOOTH].
6. Press (C).
This starts Bluetooth connection.
●
The acquired information appears on
the watch display when time acquisition
is successful.
●
[FAILED] appears if acquisition fails.
7. Press any button and return to step 5 of
this procedure.
8. Press (E) twice to complete the setting
operation.
Adjusting the Watch’s
Current Time Setting Using
GPS
The watch’s time and day settings can be
configured in accordance with your current
time zone by receiving a GPS signal.
Appropriate Signal Reception
Location
GPS signal reception is possible outdoors
where the sky is visible and not blocked by
buildings, trees, or other objects.
Note
●
In areas where reception is poor, keep
the watch LCD pointed upwards and
do not move the watch.
●
When the watch receives GPS signals,
avoid covering its LCD with the sleeve
of your clothing.
●
GPS signal reception is not possible in
the areas described below.
ー
Where the sky is not visible
ー
Indoors (Reception may be possible
near a window.)
ー
Near wireless communication
equipment or other devices that
generate magnetism.
●
You may experience GPS signal
reception problems in the areas
described below.
ー
Where the view of the sky above is
narrow
ー
Near trees or buildings
ー
Near a train station, airport, or other
congested areas
Watch Operation Guide 3554
54
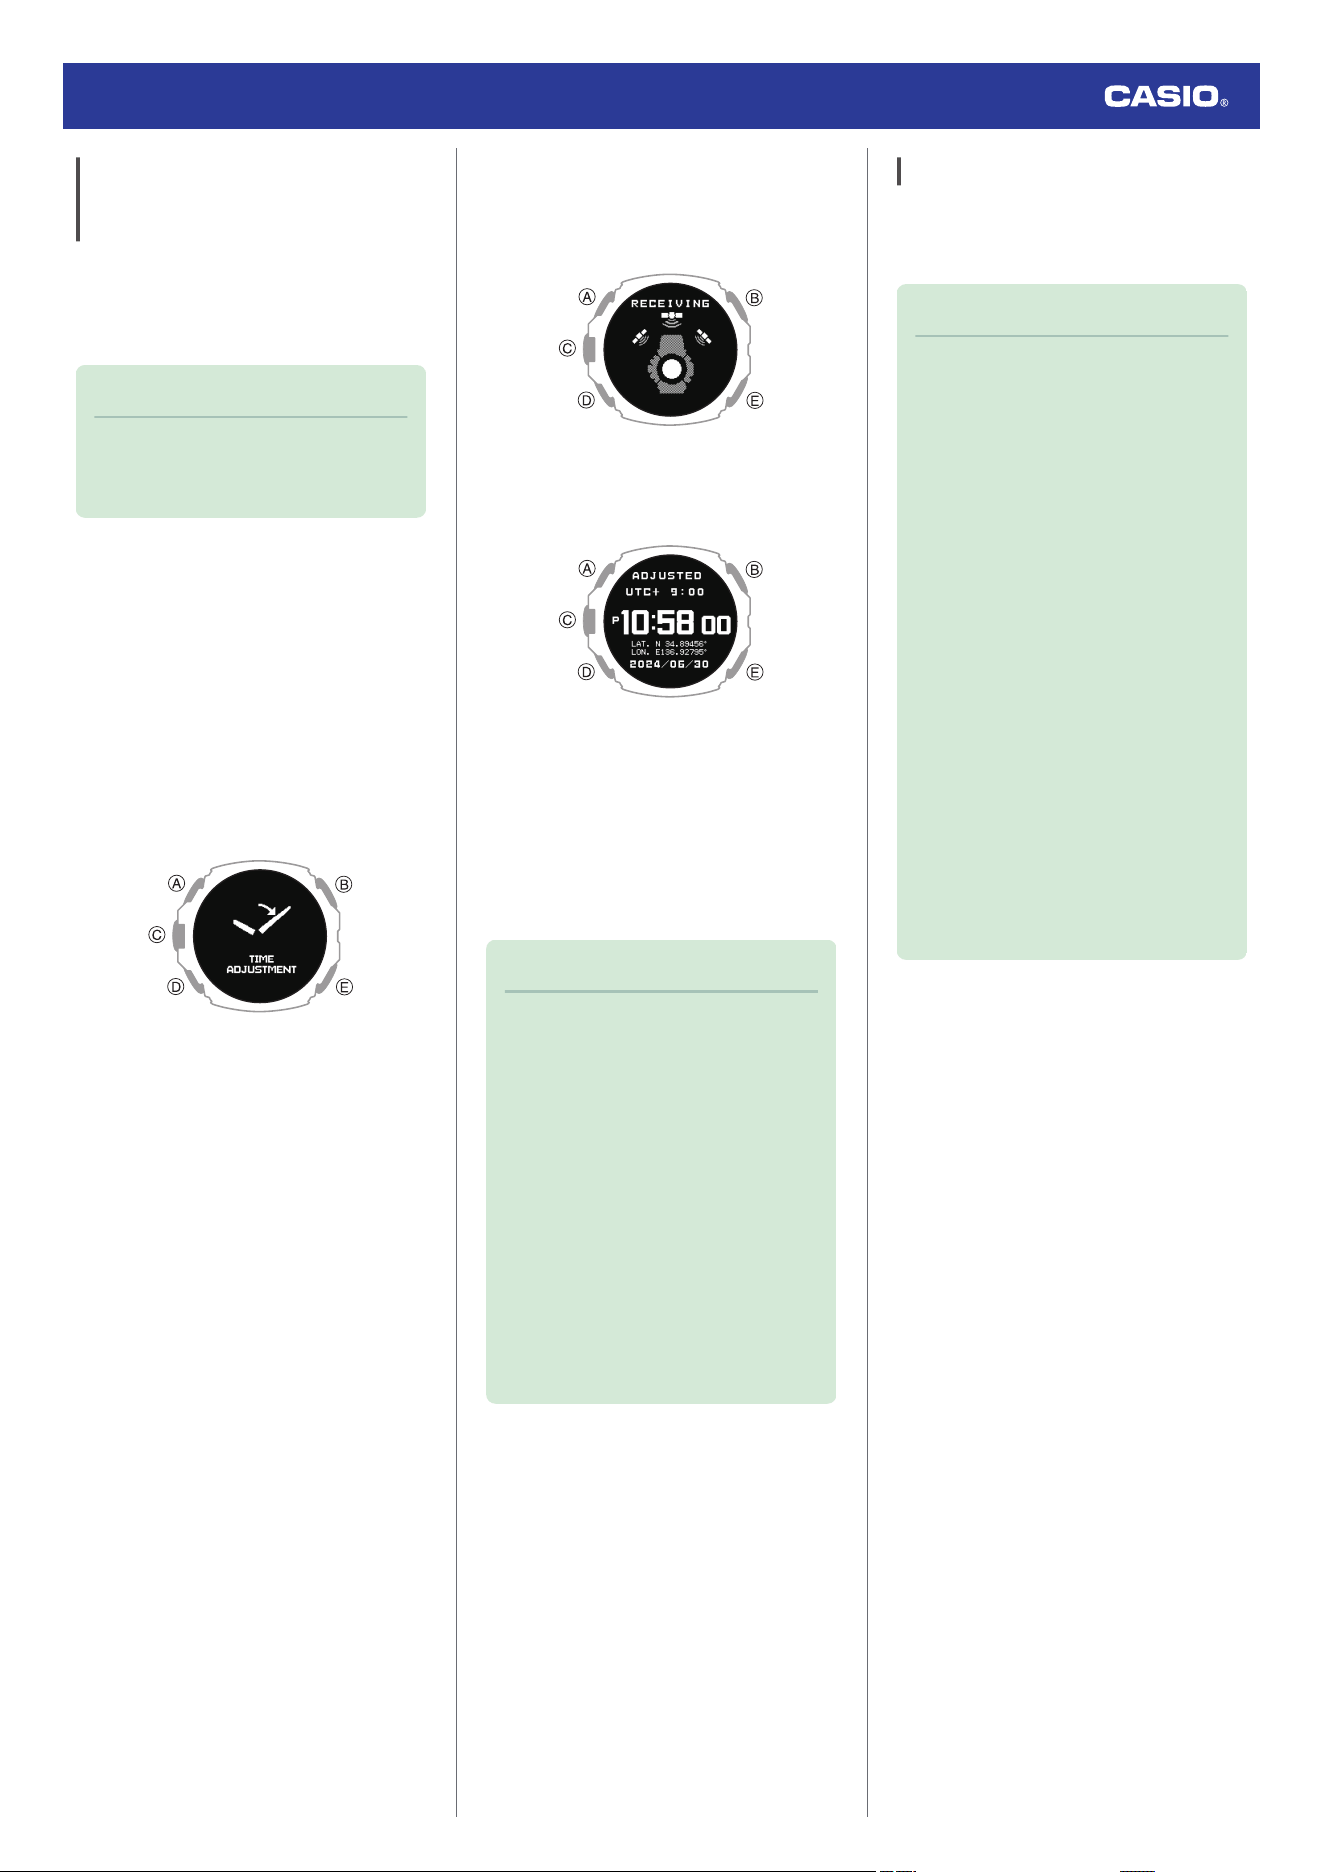
Adjusting Time Settings by
Performing a Manual GPS Signal
Receive Operation
You can use a button operation to acquire
GPS location information and adjust your time
zone, time, and day settings in accordance
with your current location.
Note
●
GPS signal reception requires large
amounts of power. Perform it only
when necessary.
1. Move to a location appropriate for signal
reception and point the LCD of the watch
straight up at the sky.
2. Display the current time screen.
l
Watch Mode
3. Hold down (A) for at least two seconds.
This enters the Control Mode.
4. Use (A) and (D) to select [TIME
ADJUSTMENT].
5. Press (C).
6. Use (A) and (D) to move the pointer to
[GPS].
7. Press (C).
This starts location information
acquisition.
●
The acquired information will appear on
the watch display when location
acquisition is successful.
●
[FAILED] will appear on the display if
location information acquisition fails for
some reason.
8. Press any button and return to step 6 of
this procedure.
9. Press (E) twice to complete the setting
operation.
Note
●
Reception takes anywhere from about
30 seconds to about two minutes.
●
The receive operation can take as long
as 15 minutes when leap second
information is included.
●
You may experience location
information acquisition problems in the
vicinity of a city borderline.
The watch’s time and day is not be
indicated correctly if the time zone
setting is not right for your location. If
this happens, move to a location near
the center of the city you want to set as
your Home City and acquire location
information again.
Leap Second Reception
GPS signal reception each year on June 1 or
later and on December 1 or later also receives
leap second information.
Note
●
It can take as long as 15 minutes to
complete the leap second information
receive operation.
●
The leap second information receive
operation is repeated until information
receipt is complete.
●
Once the leap second information
receive operation is complete, the
watch will not make any attempt to
receive it again until the following June
1 or December 1.
●
When connecting with a phone to
adjust the watch date and time
settings, leap seconds will also be
received along with the time
information. If this happens, leap
seconds may not be received when
receiving a GPS signal.
●
The first GPS signal receive operation
after the watch’s current time and/or
date setting has been changed
manually will include receipt of leap
second information.
Watch Operation Guide 3554
55
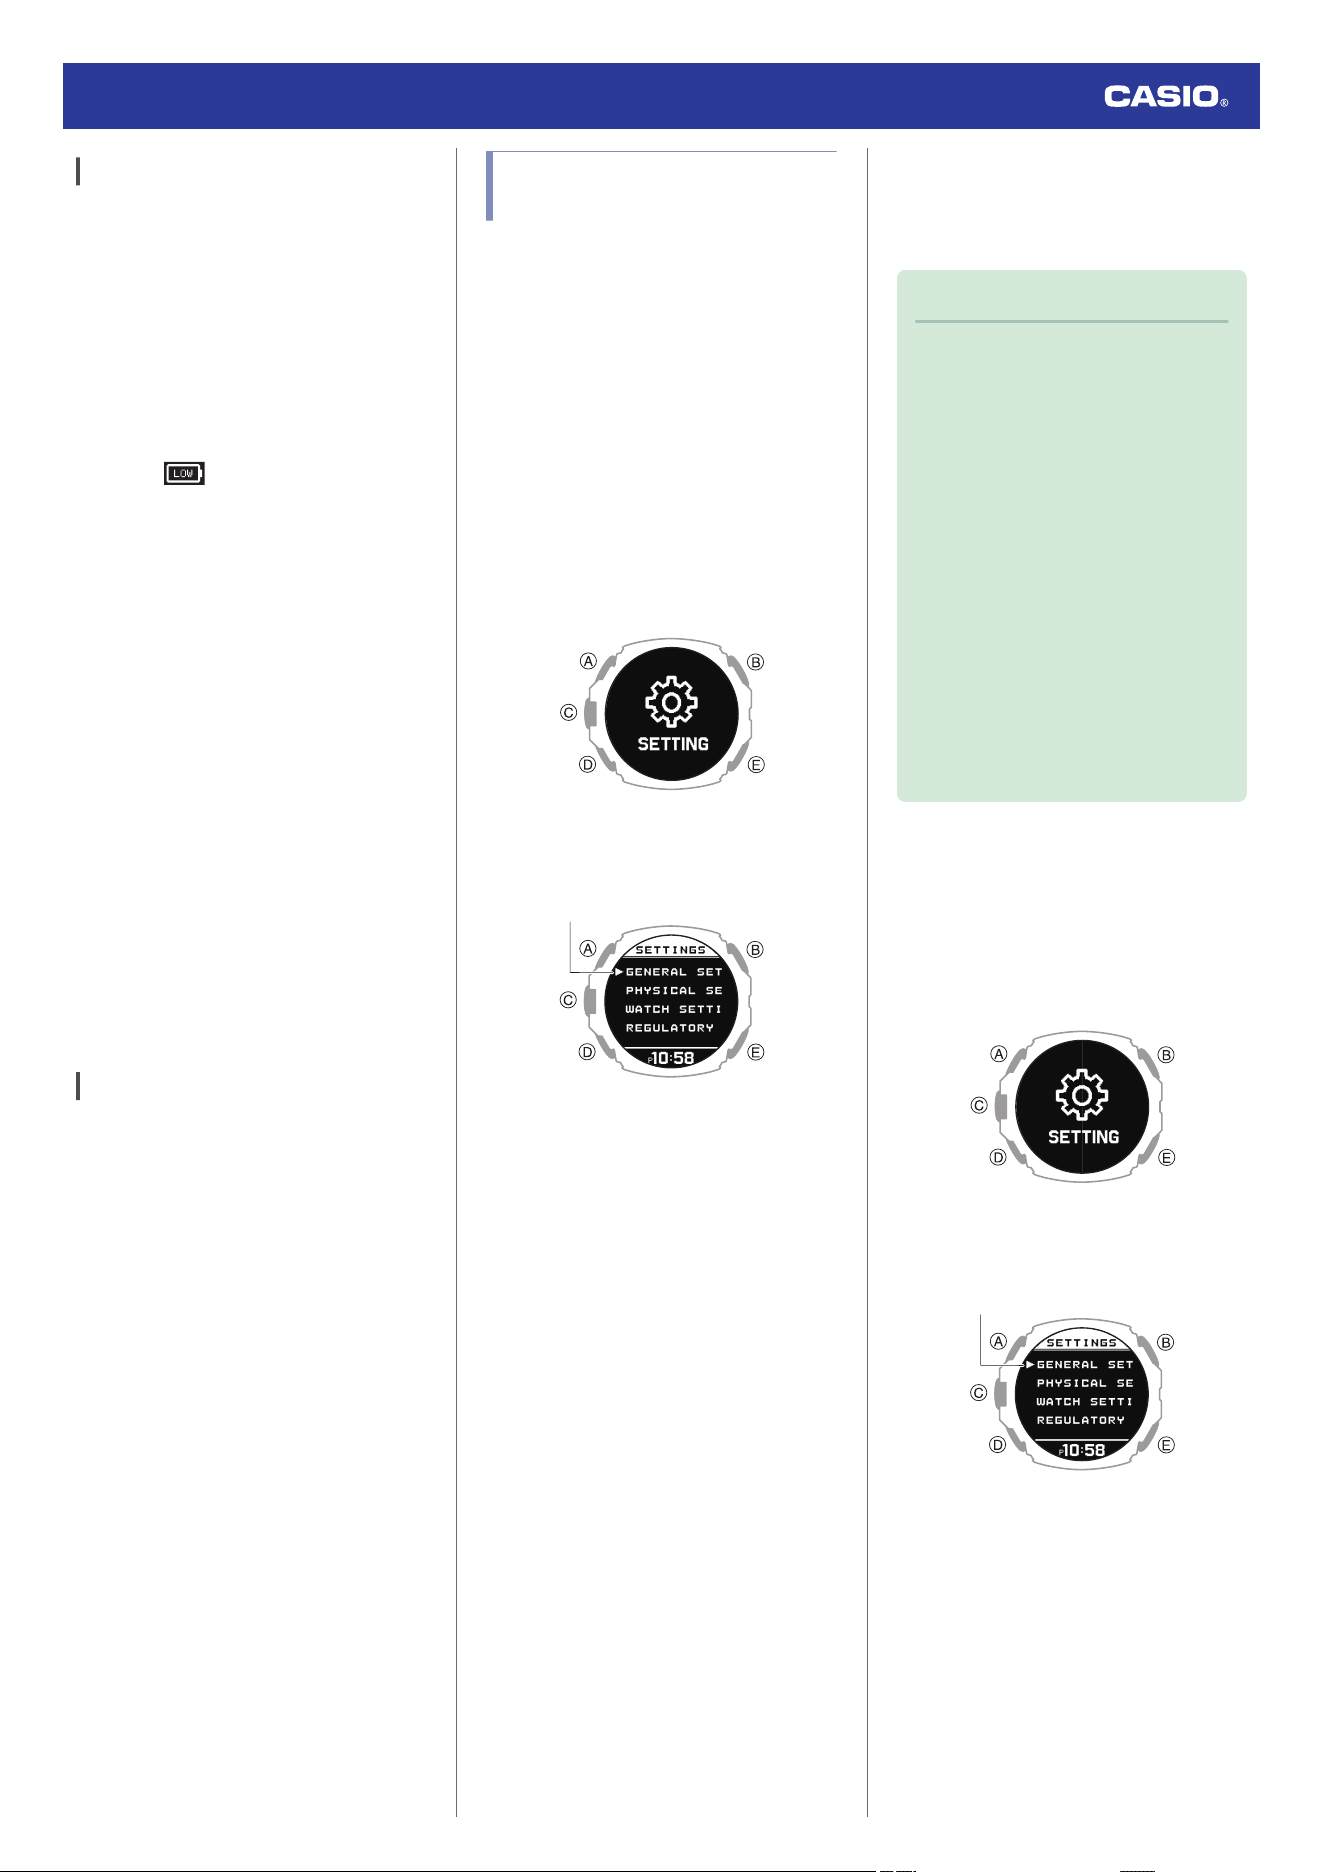
Signal Reception Precautions
●
When the watch is unable to adjust its time
in accordance with a GPS signal for some
reason, average timekeeping accuracy is
within ±15 seconds per month.
●
Note that an internal decoding process the
watch performs after it receives a GPS
signal may cause the time setting to be
slightly off (by less than one second).
●
GPS signal reception is not possible under
the conditions described below.
ー
While
or lower is displayed for the
battery level
ー
While the watch is connected with a
phone and data communication is in
progress
ー
While the watch’s Airplane Mode is
enabled
ー
While sleep measurement is in progress
●
If the receive operation is successful, the
time and day settings will be adjusted
automatically in accordance with the Home
City (time zone) and summer time settings.
Summer time will not be applied correctly in
the cases described below.
ー
When the summer time start date and
time, end date and time, or other rules are
changed by authorities
ー
When location information is received,
but it is not location information for your
actual location (For example, when you
are near a borderline of a city and the
acquired location information is for a
neighboring city, etc.)
Using GPS Outside Your Country
Some countries or geographic areas put legal
restrictions on the use of GPS, on the
collection and logging of location information,
etc. Your watch has built-in GPS functionality,
so before embarking on international travel to
a country or area outside of the country where
you purchased your watch, you should check
with the embassy of the countries you plan to
visit, your travel agency, or some other reliable
source of information to find out if there are any
prohibitions or restrictions on bringing in
devices with GPS functionality, or on the
logging of location information, etc.
Using Watch Operations to
Adjust the Time Setting
When your watch cannot communicate with
your phone or receive GPS signals for some
reason, you can adjust date and time settings
on the watch manually.
●
Setting a Home City
Use the procedure in this section to select a
city to use as your Home City.
1. Display the current time screen.
l
Watch Mode
2. Hold down (A) for at least two seconds.
This enters the Control Mode.
3. Use (A) and (D) to select [SETTING].
4. Press (C).
This displays the setting menu screen.
Pointer
5. Use (A) and (D) to move the pointer to
[WATCH SETTINGS].
6. Press (C).
7. Use (A) and (D) to move the pointer to
[HOME TIME].
8. Press (C).
9. Use (A) and (D) to move the pointer to
[HOME TIME CITY].
10. Press (C).
11. Use (A) and (D) to move the pointer to the
city you want to use as your Home City.
12. Press (C) to complete the setting
operation.
After the setting operation is complete, a
check mark appears for a few seconds,
and then the home time setting screen re-
appears.
13. Hold down (E) for at least one second to
return to the current time screen.
●
Configuring the Summer Time Setting
If you are in an area that observes summer
time, you can also enable or disable summer
time.
Note
●
The initial factory default summer time
setting for all cities is [AUTO]. In many
cases, [AUTO] lets you use the watch
without switching manually between
summer time and standard time.
●
In the cases described below,
receiving location information by GPS
will cause [AUTO] to be automatically
selected for the summer time setting.
ー
When the time zone of the current
receive operation is different from
the watch’s time zone setting prior to
the receive operation.
ー
When the time zone is unchanged,
but the acquired location information
is for a geographic area with
different summer time rules (start
date, end date)
1. Display the current time screen.
l
Watch Mode
2. Hold down (A) for at least two seconds.
This enters the Control Mode.
3. Use (A) and (D) to select [SETTING].
4. Press (C).
This displays the setting menu screen.
Pointer
5. Use (A) and (D) to move the pointer to
[WATCH SETTINGS].
6. Press (C).
7. Use (A) and (D) to move the pointer to
[HOME TIME].
Watch Operation Guide 3554
56
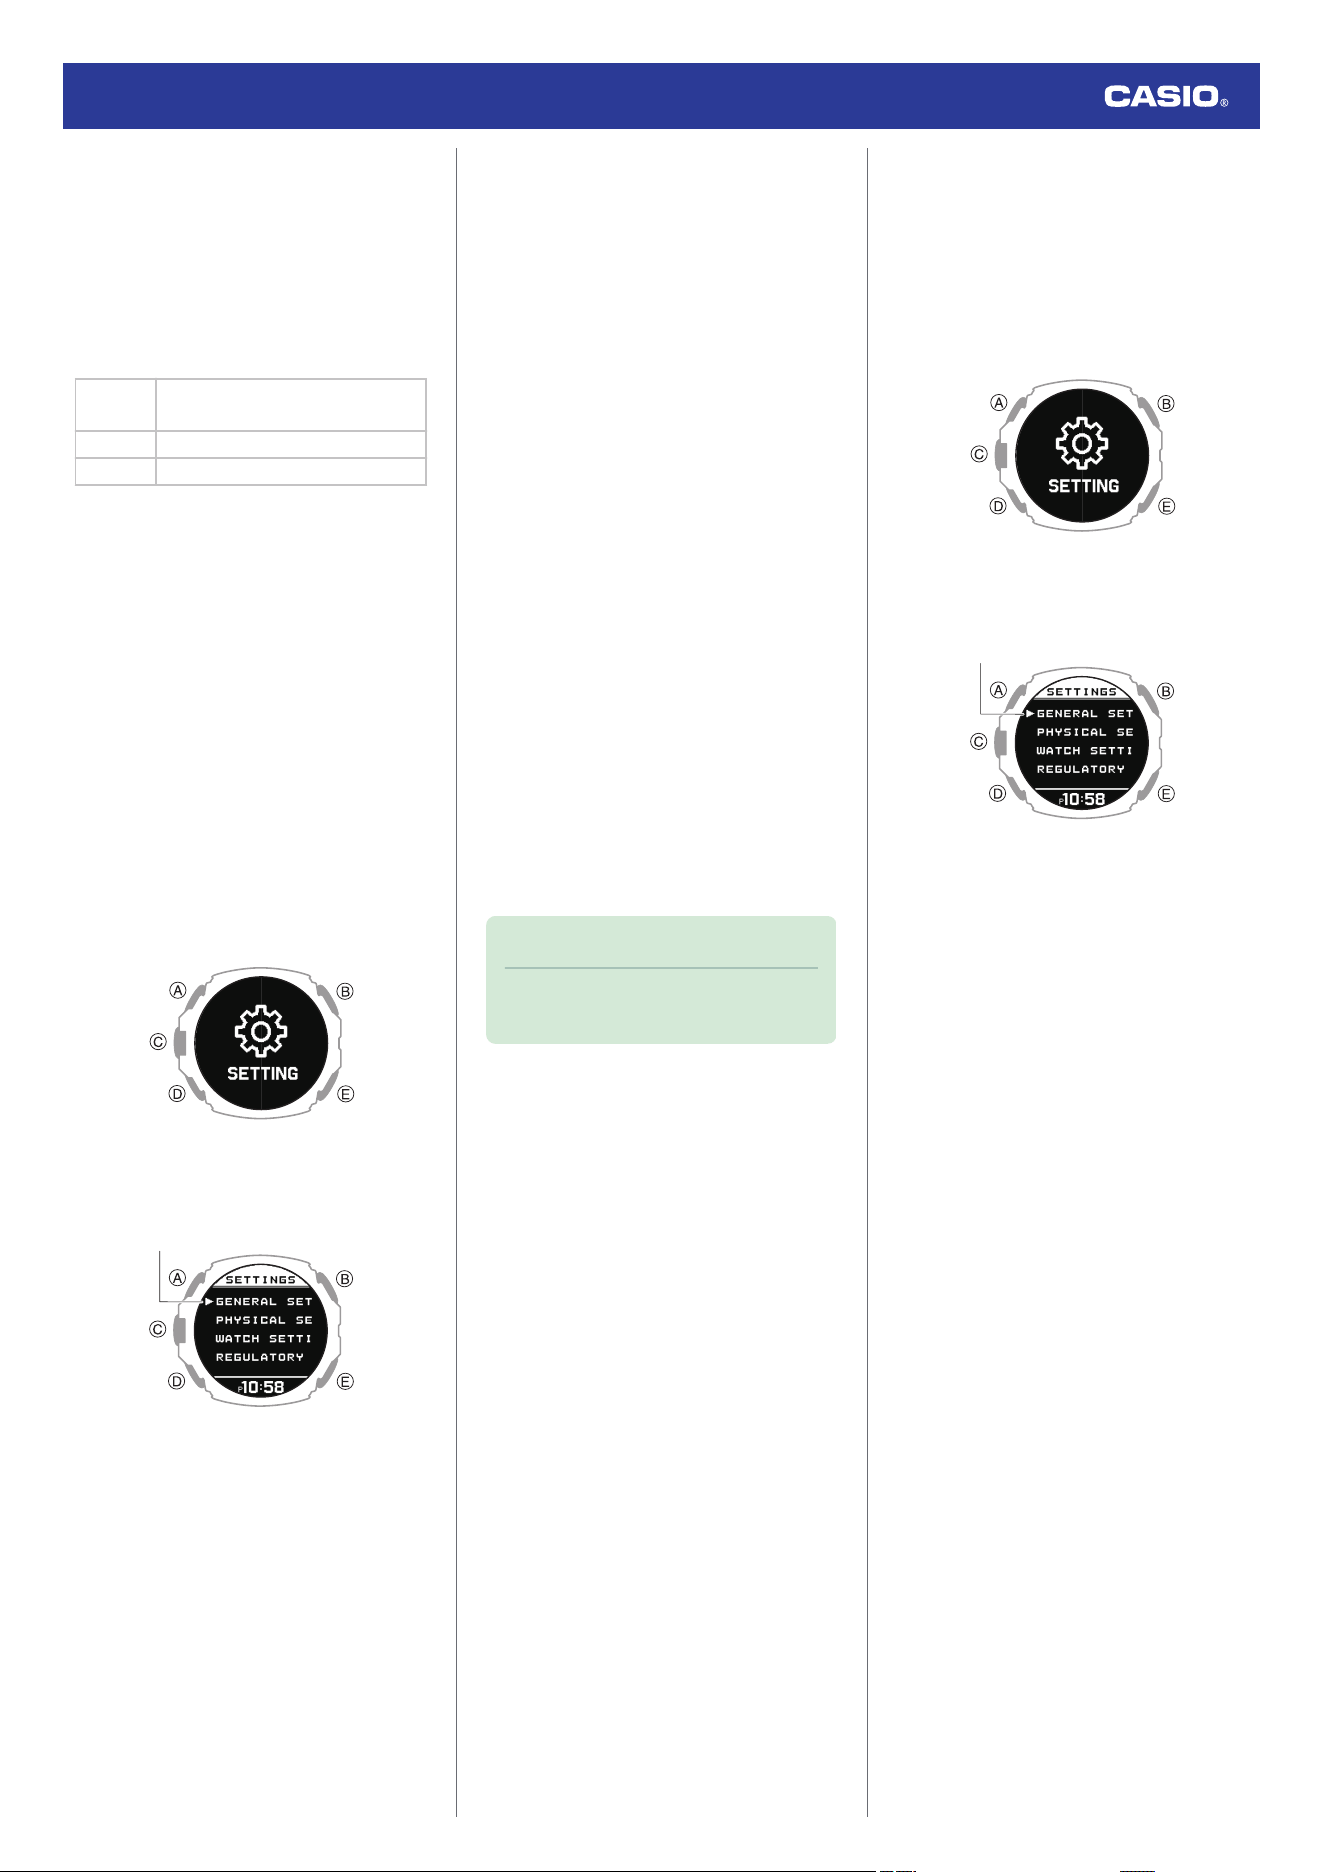
8. Press (C).
9. Use (A) and (D) to move the pointer to
[DST].
10. Press (C).
11. Use (A) and (D) to select a summer time
setting.
[AUTO]
Auto switching between standard
time and summer time
[OFF] Always standard time
[ON] Always summer time
12. Press (C) to complete the setting
operation.
After the setting operation is complete, a
check mark appears for a few seconds,
and then the home time setting screen re-
appears.
13. Hold down (E) for at least one second to
return to the current time screen.
●
To adjust the date manually
1. Display the current time screen.
l
Watch Mode
2. Hold down (A) for at least two seconds.
This enters the Control Mode.
3. Use (A) and (D) to select [SETTING].
4. Press (C).
This displays the setting menu screen.
Pointer
5. Use (A) and (D) to move the pointer to
[WATCH SETTINGS].
6. Press (C).
7. Use (A) and (D) to move the pointer to
[DATE & TIME].
8. Press (C).
9. Use (A) and (D) to move the pointer to
[DATE SETTING].
10. Press (C).
This causes a cursor to appear under the
year setting.
11. Use (A) and (D) to change the year setting.
12. Press (C).
This moves the cursor to the month
setting.
13. Use (A) and (D) to change the month
setting.
14. Press (C).
This moves the cursor to the day setting.
15. Use (A) and (D) to change the day setting.
16. Press (C) to complete the setting
operation.
After the setting operation is complete, a
check mark appears for a few seconds,
and then the current time setting screen
re-appears.
17. Hold down (E) for at least one second to
return to the current time screen.
Note
●
Pressing (E) during the above
procedure will go back one screen.
●
To correct the time manually
1. Display the current time screen.
l
Watch Mode
2. Hold down (A) for at least two seconds.
This enters the Control Mode.
3. Use (A) and (D) to select [SETTING].
4. Press (C).
This displays the setting menu screen.
Pointer
5. Use (A) and (D) to move the pointer to
[WATCH SETTINGS].
6. Press (C).
7. Use (A) and (D) to move the pointer to
[DATE & TIME].
8. Press (C).
9. Use (A) and (D) to move the pointer to
[TIME SETTING].
10. Press (C).
This causes a cursor to appear under the
hour setting.
11. Use (A) and (D) to change the current time
hour setting.
12. Press (C).
This moves the cursor to the minute
setting.
13. Use (A) and (D) to change the current time
minute setting.
14. Press (C) to complete the setting
operation.
After the setting operation is complete, a
check mark appears for a few seconds,
and then the current time setting screen
re-appears.
15. Hold down (E) for at least one second to
return to the current time screen.
Watch Operation Guide 3554
57
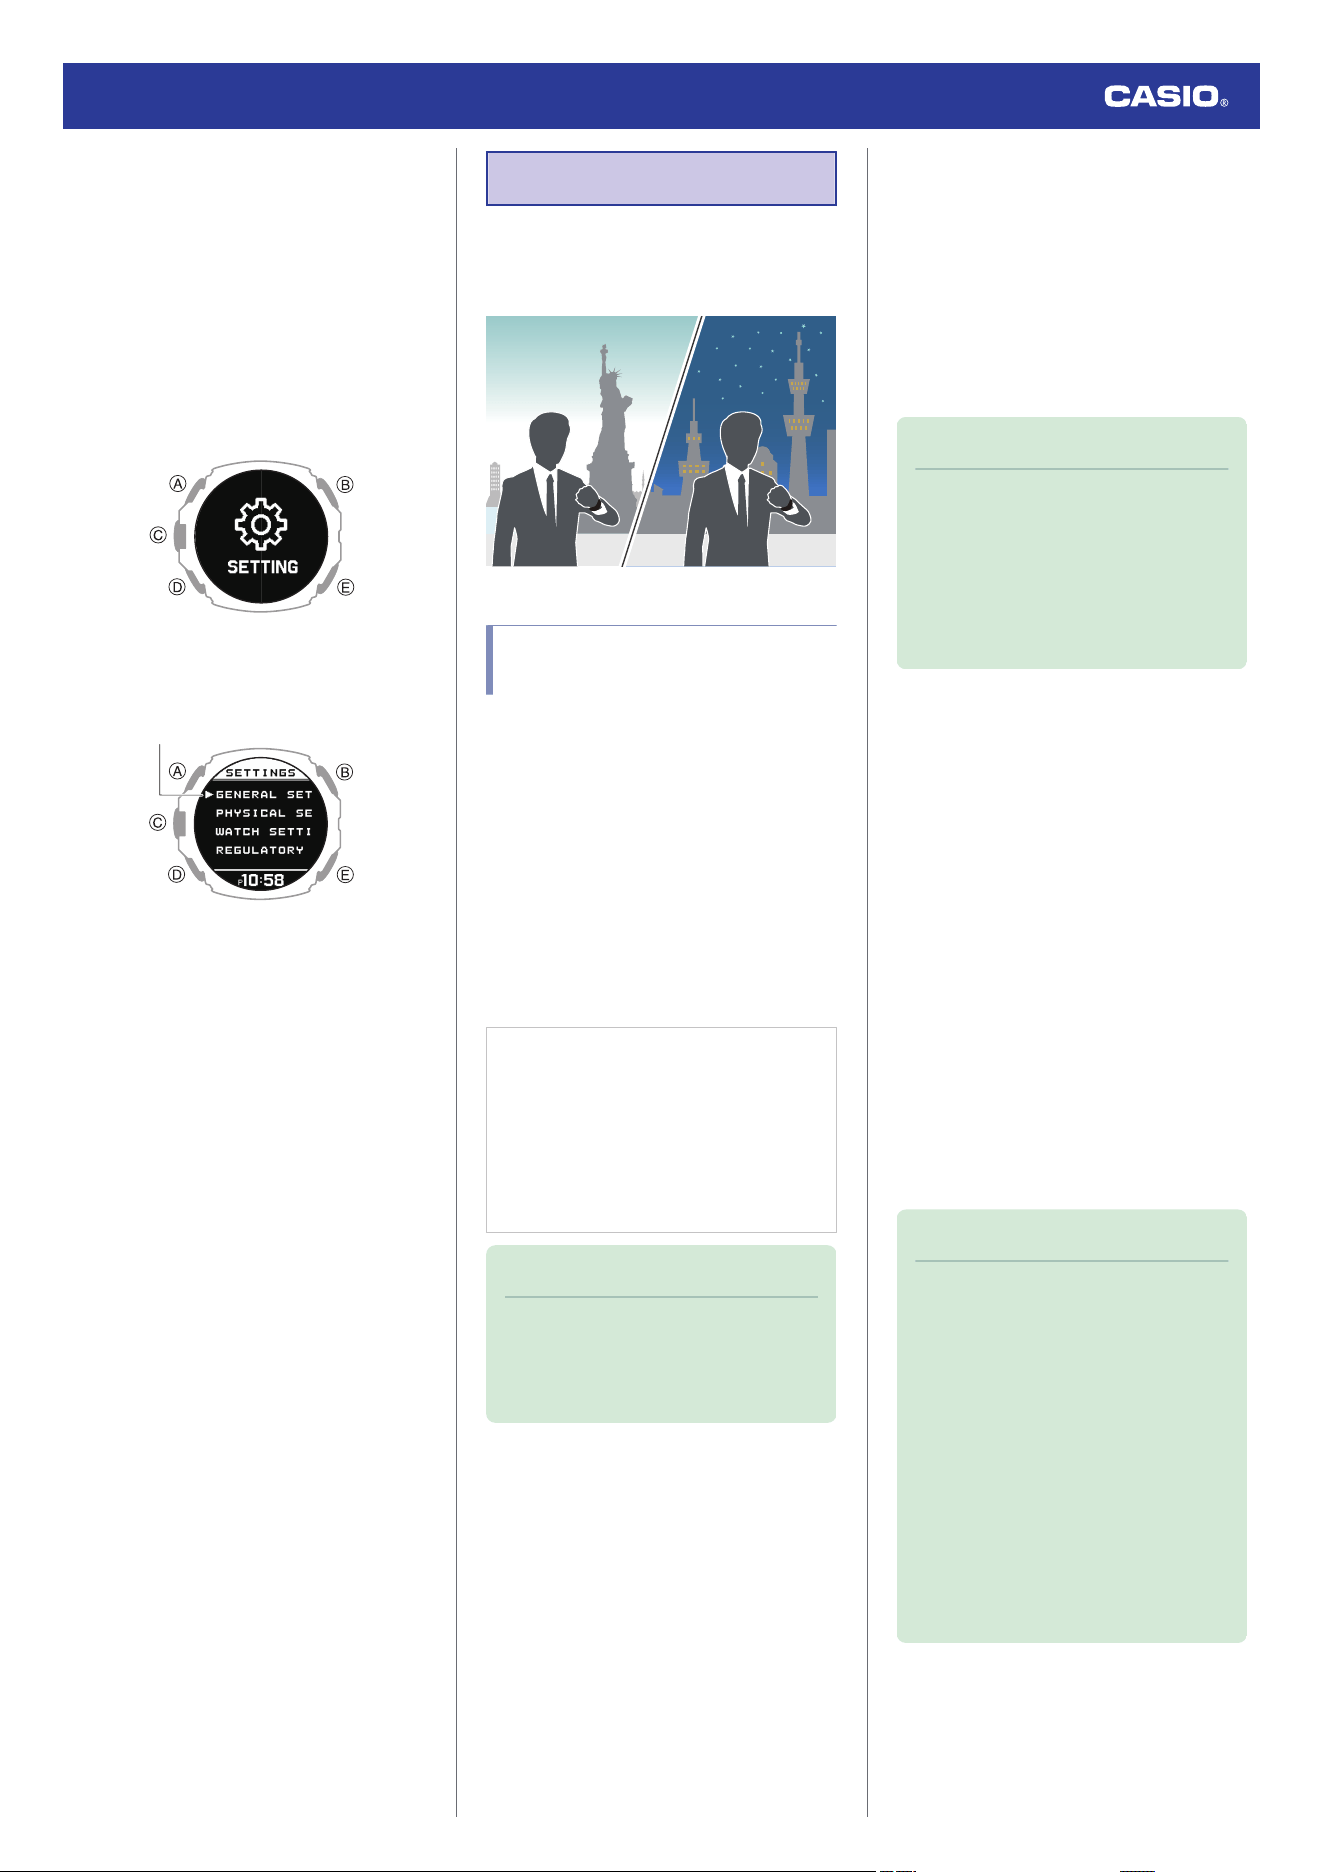
●
Switching between 12-hour and 24-
hour Timekeeping
You can specify either 12-hour format or 24-
hour format for the time display.
1. Display the current time screen.
l
Watch Mode
2. Hold down (A) for at least two seconds.
This enters the Control Mode.
3. Use (A) and (D) to select [SETTING].
4. Press (C).
This displays the setting menu screen.
Pointer
5. Use (A) and (D) to move the pointer to
[WATCH SETTINGS].
6. Press (C).
7. Use (A) and (D) to move the pointer to
[DATE & TIME].
8. Press (C).
9. Use (A) and (D) to move the pointer to
[TIME FORMAT].
10. Press (C).
11. Use (A) and (D) to select [12H] (12-hour
timekeeping) or [24H] (24-hour
timekeeping).
12. Press (C) to complete the setting
operation.
After the setting operation is complete, a
check mark appears for a few seconds,
and then the current time setting screen
re-appears.
13. Hold down (E) for at least one second to
return to the current time screen.
●
While 12-hour timekeeping is selected,
[P] will be displayed for p.m. times.
World Time
World Time lets you look up the current time
in any one of 38 cities around the globe, and
UTC (Coordinated Universal Time).
Configuring World Time
Settings
Perform the required operations with the
CASIO WATCHES phone app or the watch to
configure world time settings.
●
To configure World Time settings with
the CASIO WATCHES phone app
Specifying a World Time City with the CASIO
WATCHES phone app causes the watch’s
World Time City to change accordingly.
Settings can be configured to perform auto
summer time switching for the World Time
City.
Check the connection
●
Make sure the
e
symbol is shown on the
watch display when you perform the
procedure below. If
e
is not displayed,
refer to the information at the link below.
l
Connecting with a Phone Paired
With the Watch
Note
●
The CASIO WATCHES phone app
World Time lets you select from among
approximately 300 cities as the World
Time City.
●
To select a World Time City
1.
Y
Tap the “CASIO WATCHES” icon.
2.
Y
Tap the “My Watch” tab.
3.
Y
Select “GPR-H1000” and tap it.
4.
Y
Select the setting you want to change
and then perform the operation shown on
the screen.
Note
●
You can use the CASIO WATCHES
phone app to configure settings for
user cities that are not included in the
watch’s built-in World Time Cities. You
must use the CASIO WATCHES
phone app to select a user city as your
World Time City.
●
Configuring the Summer Time Setting
1.
Y
Tap the “CASIO WATCHES” icon.
2.
Y
Tap the “My Watch” tab.
3.
Y
Select “GPR-H1000” and tap it.
4.
Y
Select the setting you want to change
and then perform the operation shown on
the screen.
●
“AUTO”
The watch switches between standard
time and summer time automatically.
●
“OFF”
The watch always indicates standard
time.
●
“ON”
The watch always indicates summer
time.
Note
●
While the summer time setting is
“AUTO”, the watch switches between
standard time and summer time
automatically. You do not need to
switch between standard time and
summer time manually. Even if you are
in an area that does not observe
summer time, you can leave the
watch’s summer time setting as
“AUTO”.
●
For information about summer time
periods, refer to the “Summer Time
Table”.
l
Summer Time Table
Watch Operation Guide 3554
58
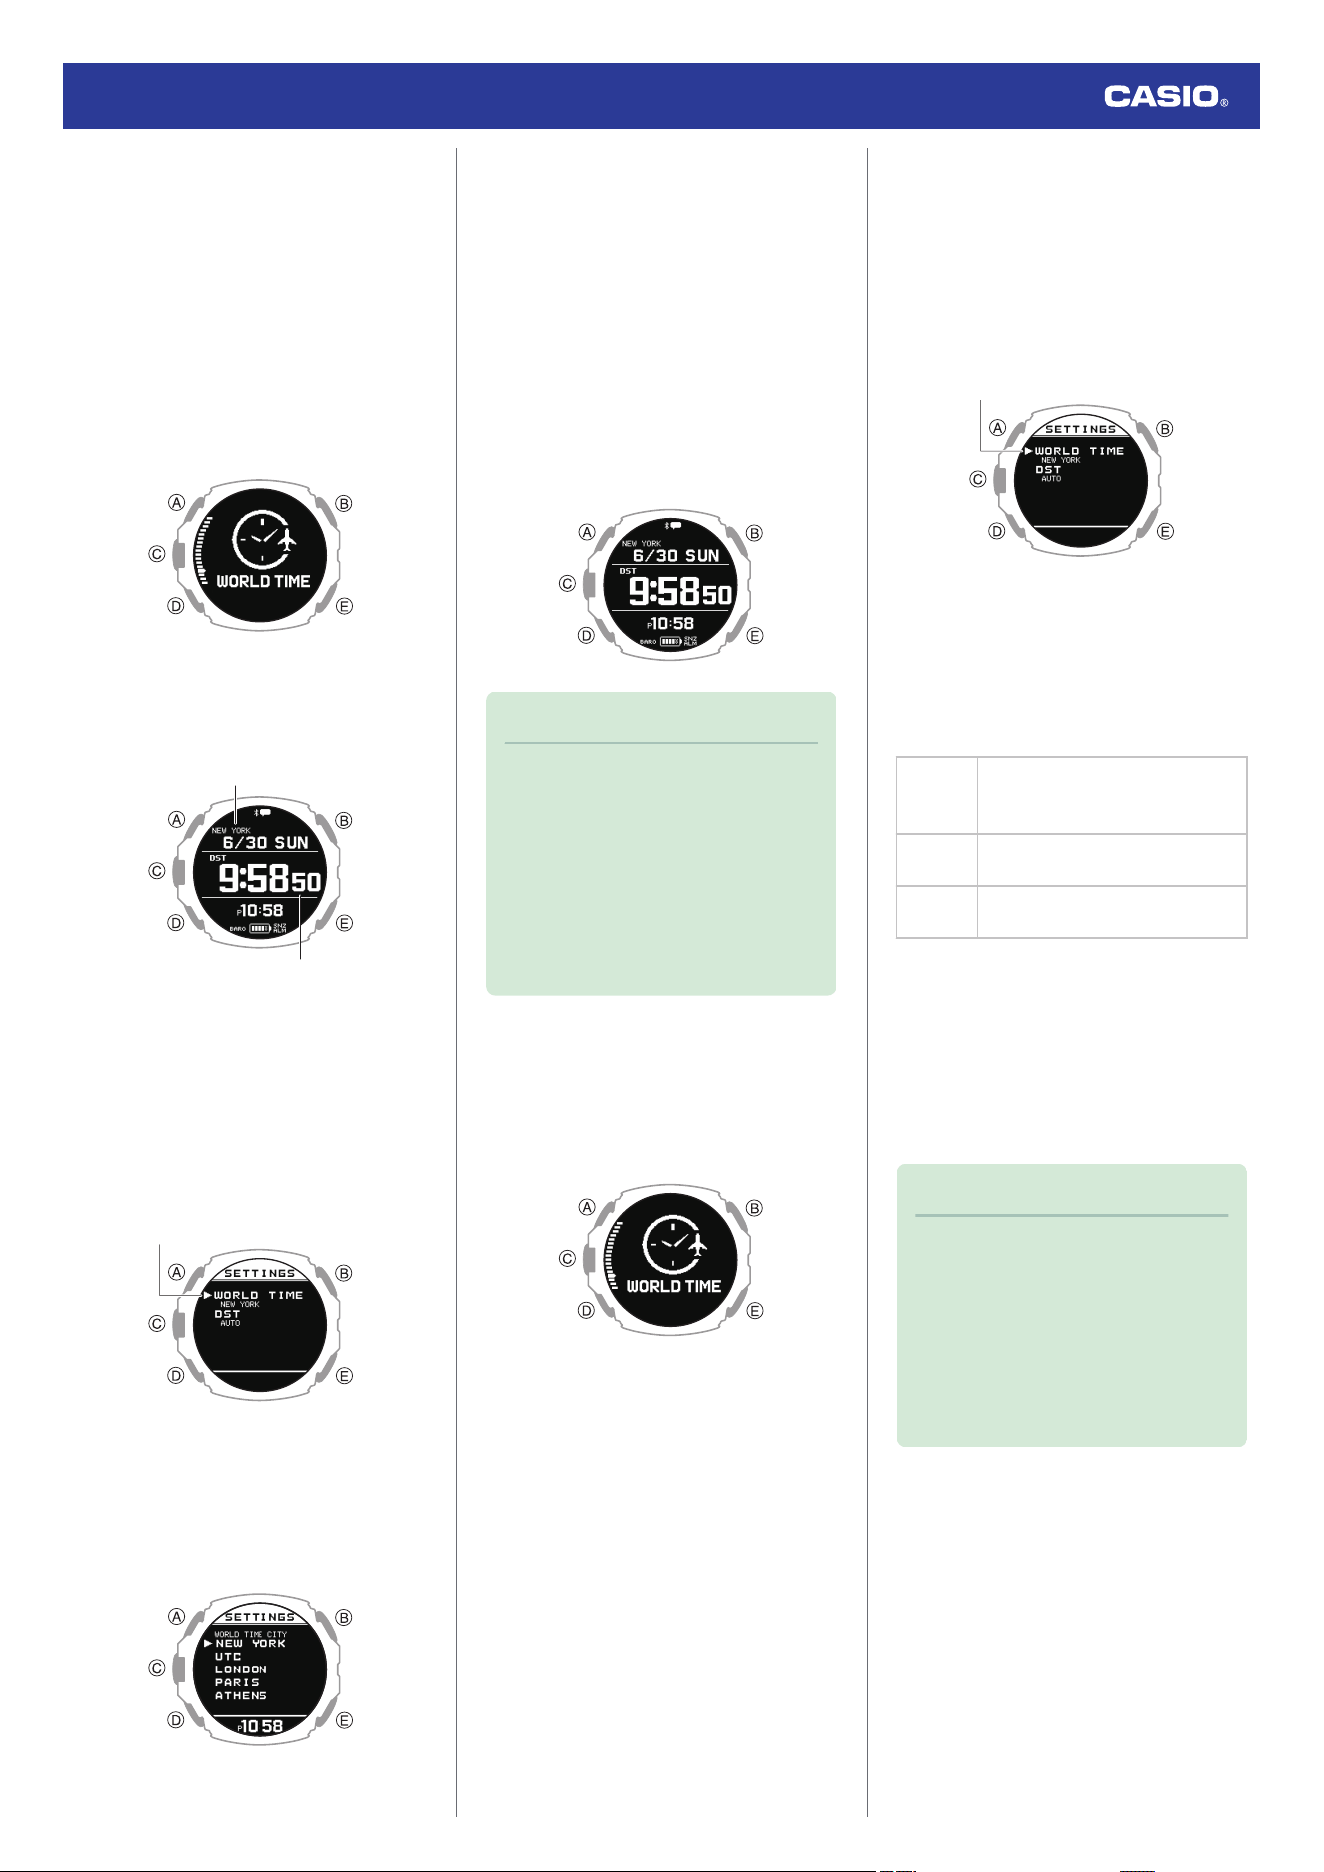
●
Configuring World Time Settings with
the Watch
Perform the required operations on the watch
to select a World Time City and to configure
summer time settings for your World Time
City.
●
To select a World Time City
1. Display the current time screen.
l
Watch Mode
2. Use (A) and (D) to select [WORLD TIME].
3. Press (C).
This displays the current World Time City
and the current time there.
World Time City
World Time
4. Hold down (A) for at least two seconds.
This displays the World Time setting
screen.
●
While the setting is being configured,
the watch will exit the setting operation
automatically after about two or three
minutes of non-operation.
Pointer
5. Use (A) and (D) to move the pointer to
[WORLD TIME CITY].
6. Press (C).
This displays a menu of World Time
Cities.
7. Use (A) and (D) to move the pointer to the
city you want to use.
8. Press (C) to complete the setting
operation.
After the setting operation is complete, a
check mark appears for a few seconds,
and then the World Time setting screen
re-appears.
9. Press (E) to exit the setting screen.
This displays the current time and date in
the selected city.
Note
●
If you select a World Time City with the
CASIO WATCHES phone app and
then change to a different city with a
watch operation, the CASIO
WATCHES city information is deleted
from the watch.
l
To configure World Time settings
with the CASIO WATCHES phone
app
●
Configuring Summer Time Settings
1. Display the current time screen.
l
Watch Mode
2. Use (A) and (D) to select [WORLD TIME].
3. Press (C).
This displays the current World Time City
and the current time there.
4. Hold down (A) for at least two seconds.
This displays the World Time setting
screen.
●
While the setting is being configured,
the watch will exit the setting operation
automatically after about two or three
minutes of non-operation.
Pointer
5. Use (A) and (D) to move the pointer to
[DST].
6. Press (C).
7. Use (A) and (D) to select a summer time
setting.
[AUTO]
The watch switches between
standard time and summer time
automatically.
[OFF]
The watch always indicates
standard time.
[ON]
The watch always indicates
summer time.
8. Press (C) to complete the setting
operation.
After the setting operation is complete, a
check mark appears for a few seconds,
and then the World Time setting screen
re-appears.
9. Press (E) to exit the setting screen.
Note
●
The initial factory default summer time
setting for all cities is [AUTO]. In many
cases, [AUTO] lets you use the watch
without switching manually between
summer time and standard time.
●
While [UTC] is selected as the city, you
will not be able to change or check the
summer time setting.
Watch Operation Guide 3554
59
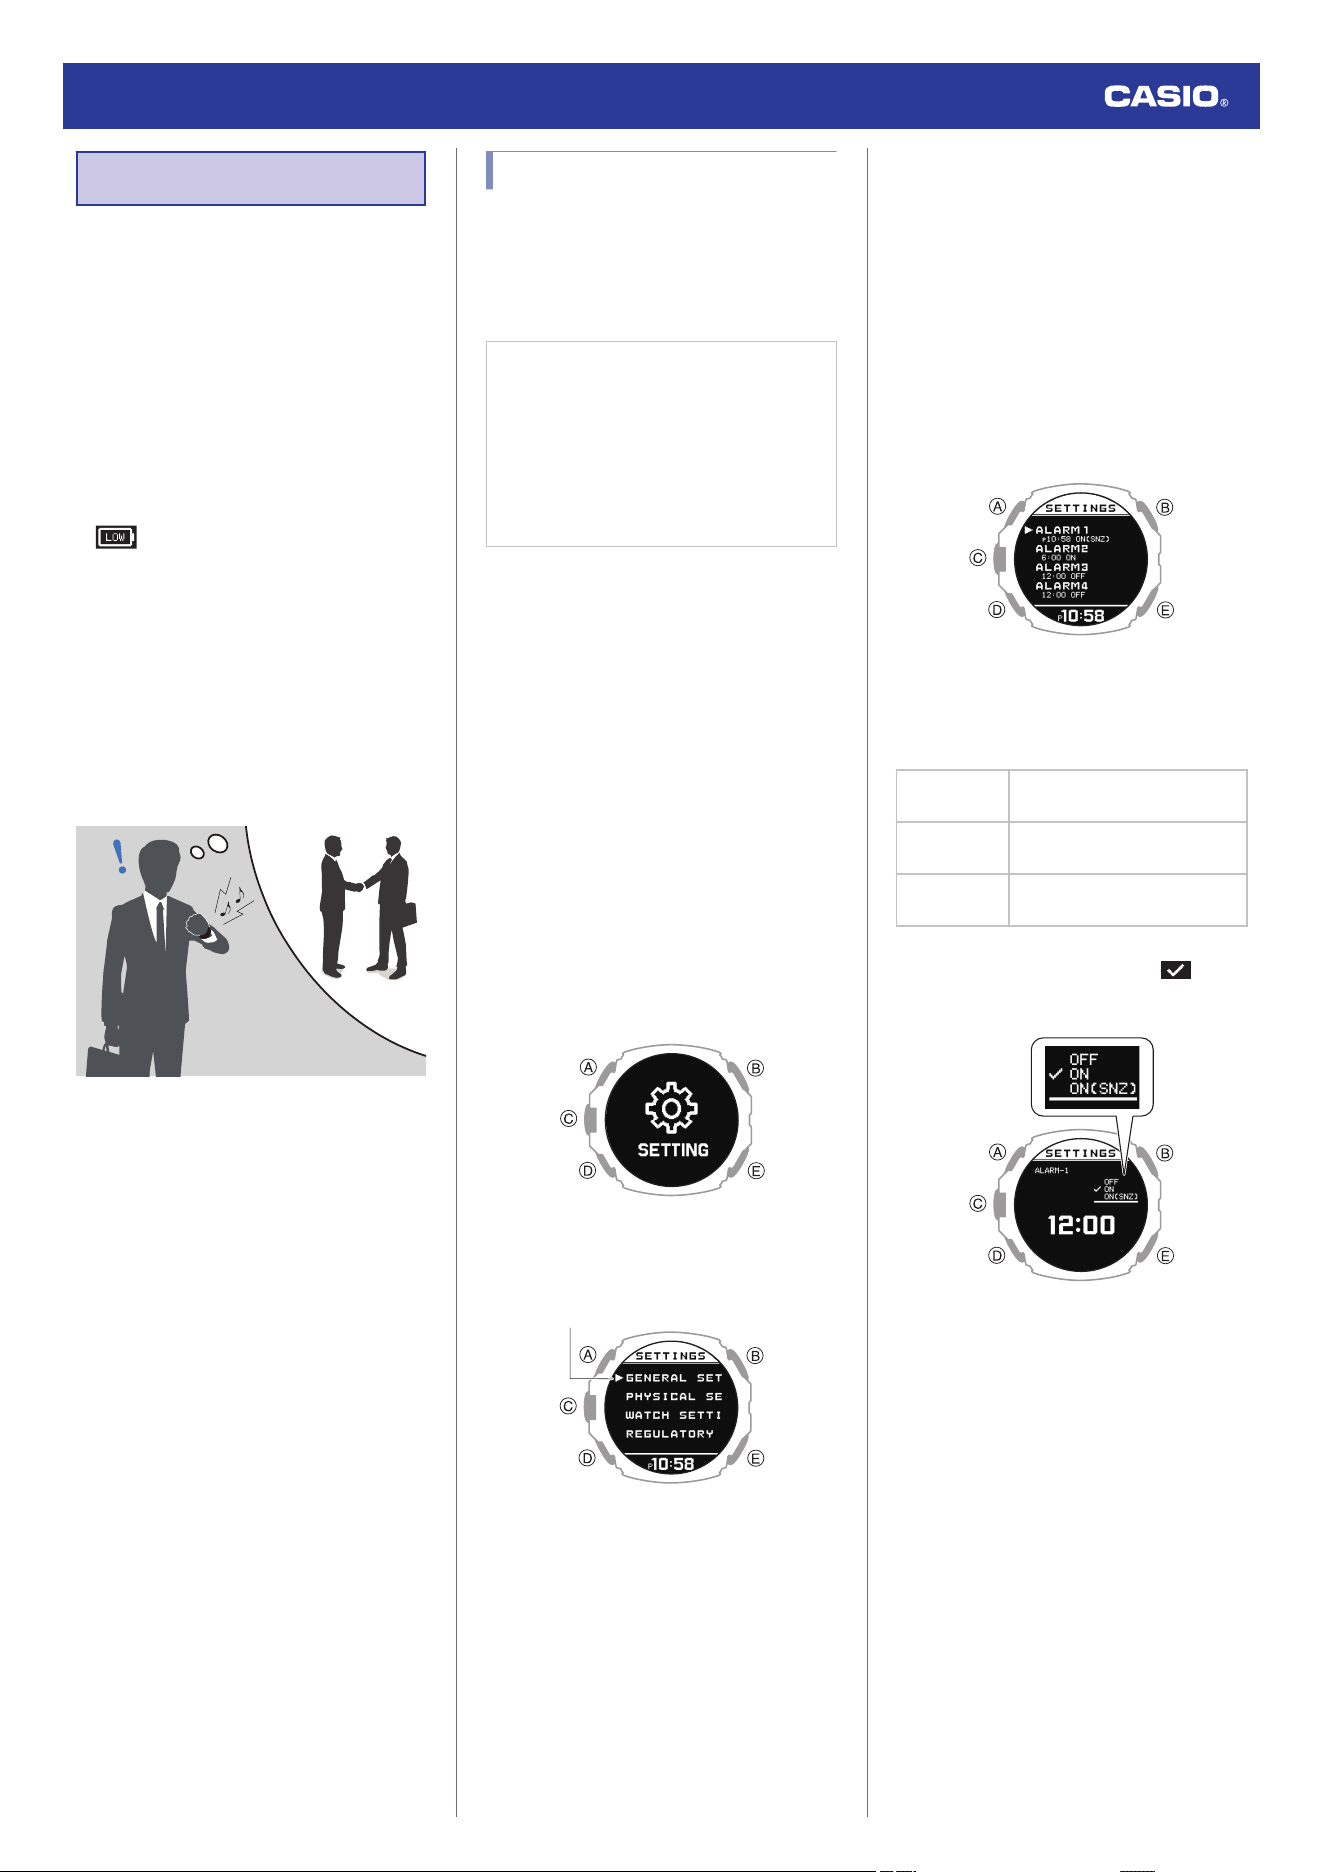
Alarm
The watch performs a beep or vibration alert
operation when an alarm time is reached. You
can set up to four different alarms. The hourly
time signal causes the watch to beep every
hour on the hour.
●
You can enable the beep and vibration
alerts as required.
l
Configuring Sound and Vibration
Settings
●
The watch does not perform a vibration alert
while the battery level indicator shows
. The watch does not perform a beep
alert while the battery level indicator is
“CHG” or lower.
●
While the snooze function is turned on, the
alert operation is performed up to seven
times every five minutes.
●
For information about a smart alarm that
detects your sleep status and alerts you
when your sleep is light, see the information
below.
l
Smart Alarm
Configuring Alarm Settings
Use the CASIO WATCHES phone app or
watch operations to configure alarm settings.
●
To configure alarm settings with the
CASIO WATCHES phone app
Check the connection
●
Make sure the
e
symbol is shown on the
watch display when you perform the
procedure below. If
e
is not displayed,
refer to the information at the link below.
l
Connecting with a Phone Paired
With the Watch
1.
Y
Tap the “CASIO WATCHES” icon.
2.
Y
Tap the “My Watch” tab.
3.
Y
Select “GPR-H1000” and tap it.
4.
Y
Select the setting you want to change
and then perform the operation shown on
the screen.
●
To configure alarm settings with the
watch
1. Display the current time screen.
l
Watch Mode
2. Hold down (A) for at least two seconds.
This enters the Control Mode.
3. Use (A) and (D) to select [SETTING].
4. Press (C).
This displays the setting menu screen.
Pointer
5. Use (A) and (D) to move the pointer to
[WATCH SETTINGS].
6. Press (C).
This displays the watch setting screen.
7. Use (A) and (D) to move the pointer to
[ALARM].
8. Press (C).
9. Use (A) and (D) to move the pointer to the
alarm you want to set.
10. Press (C).
11. Use (A) and (D) to select an alarm and
snooze function ON/OFF setting.
[OFF]
Disables alarm, disables
snooze
[ON]
Enables alarm, disables
snooze
[ON (SNZ)]
Enables alarm, enables
snooze
●
The currently selected setting is
indicated by a check mark ( ) to the
left.
12. Press (C).
Watch Operation Guide 3554
60
13. Use (A) and (D) to set the alarm hour.
14. Press (C).
15. Use (A) and (D) to set the alarm minute.
16. Press (C) to complete the setting
operation.
After the setting operation is complete, a
check mark appears for a few seconds,
and then the alarm selection screen re-
appears.
●
You can view the setting time of the
alarm and whether the alarm setting and
snooze setting are on or off.
17. Hold down (E) for at least one second to
return to the current time screen.
Note
●
If you want to exit the alarm setting
operation at any time, press (E) several
times to return to the watch setting
screen.
●
To stop a sounding alarm
While an alarm sound and/or vibration
operation is being performed, press any
button to stop it.
Note
●
The watch performs a 10-second
sound/vibration operation when a
preset alarm time is reached.
●
When snooze is enabled for an alarm,
alarm sound and/or vibration will
repeat every five minutes, up to seven
times. To stop an alarm’s ongoing
snooze operation, turn off the alarm.
●
If you do not perform any operation for
two or three minutes while the setting
screen is displayed, the watch
automatically returns to the current
time screen.
Enabling the Hourly Time
Signal
Use the CASIO WATCHES phone app to turn
the hourly time signal on or off.
Important!
●
You cannot change the hourly time
signal setting using a watch operation.
Use the CASIO WATCHES phone app
to change the setting.
Check the connection
●
Make sure the
e
symbol is shown on the
watch display when you perform the
procedure below. If
e
is not displayed,
refer to the information at the link below.
l
Connecting with a Phone Paired
With the Watch
1.
Y
Tap the “CASIO WATCHES” icon.
2.
Y
Tap the “My Watch” tab.
3.
Y
Select “GPR-H1000” and tap it.
4.
Y
Select the setting you want to change
and then perform the operation shown on
the screen.
Note
●
The hourly time signal is disabled
during the period you have set as
NIGHT TIME.
Turning Off an Alarm
To stop an alarm sound and/or vibration
operation, perform the steps below to turn it
off.
●
To reactivate an alarm sound and/or
vibration operation, turn it back on.
Note
●
An indicators is displayed while any
one of the alarms is turned on.
●
The alarm indicator is not displayed
while all of the alarms are turned off.
1. Display the current time screen.
l
Watch Mode
2. Hold down (A) for at least two seconds.
This enters the Control Mode.
3. Use (A) and (D) to select [SETTING].
4. Press (C).
This displays the setting menu screen.
Pointer
5. Use (A) and (D) to move the pointer to
[WATCH SETTINGS].
6. Press (C).
This displays the watch setting screen.
Watch Operation Guide 3554
61
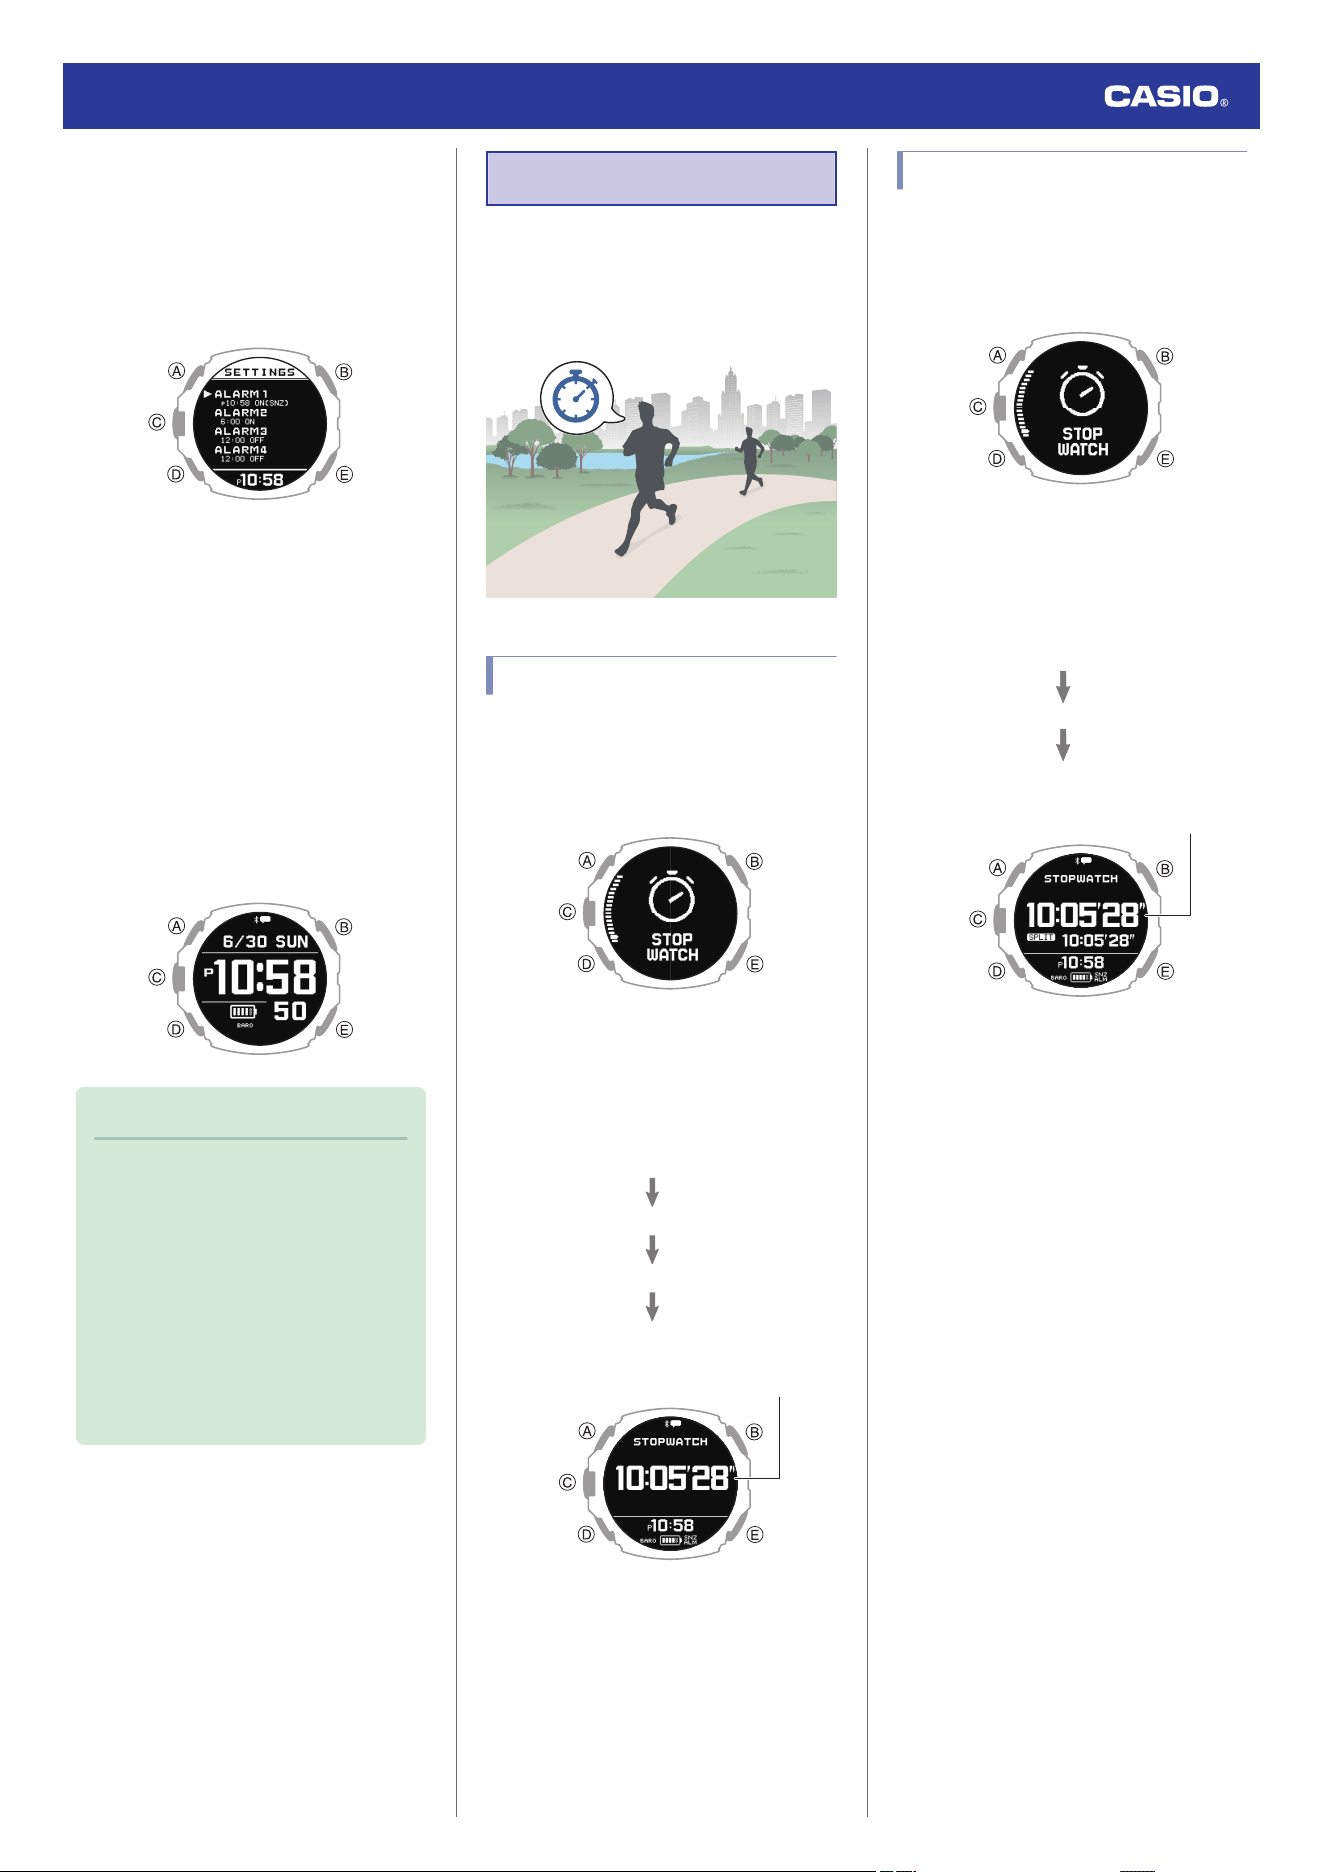
7. Use (A) and (D) to move the pointer to
[ALARM].
8. Press (C).
9. Use (A) and (D) to move the pointer to the
alarm you want to turn off.
10. Press (C).
11. Use (A) and (D) to select [OFF].
12. Press (C) to complete the setting
operation.
After the setting operation is complete, a
check mark appears for a few seconds,
and then the alarm selection screen re-
appears.
13. Hold down (E) for at least one second to
return to the current time screen.
●
Turning off all alarms causes [ALM]
(alarm) to disappear from the display.
Note
●
If [ALM] (alarm) is still displayed after
you turn off an alarm, it means at least
one of the other alarms is still turned
on. To turn off all alarms, repeat steps
8 through 11 until the [ALM] (alarm)
indicator is no longer displayed.
●
If [ALM] (alarm) is still displayed even
after you turn off all the alarms, it
means the smart alarm is turned on.
Turn off the smart alarm.
l
Turning Off Smart Alarm
Stopwatch
The stopwatch can be used to perform 1-
second unit elapsed time measurement up to
99 hours, 59 minutes, 59 seconds.
It can also measure split times.
Measuring Elapsed Time
1. Display the current time screen.
l
Watch Mode
2. Use (A) and (D) to select [STOPWATCH].
3. Press (C).
This displays the stopwatch screen.
4. Use the operations below to measure
elapsed time.
C
C
C
C
Stop
Resume
Stop
Start
Hour, minute, second
5. Press (E) to reset the stopwatch to all
zeros.
Measuring a Split Time
1. Display the current time screen.
l
Watch Mode
2. Use (A) and (D) to select [STOPWATCH].
3. Press (C).
This displays the stopwatch screen.
4. Use the operations below to measure
elapsed time.
C
E
C
Stop
Split
Start
Hour, minute, second
5. Press (E) to reset the stopwatch to all
zeros.
Watch Operation Guide 3554
62
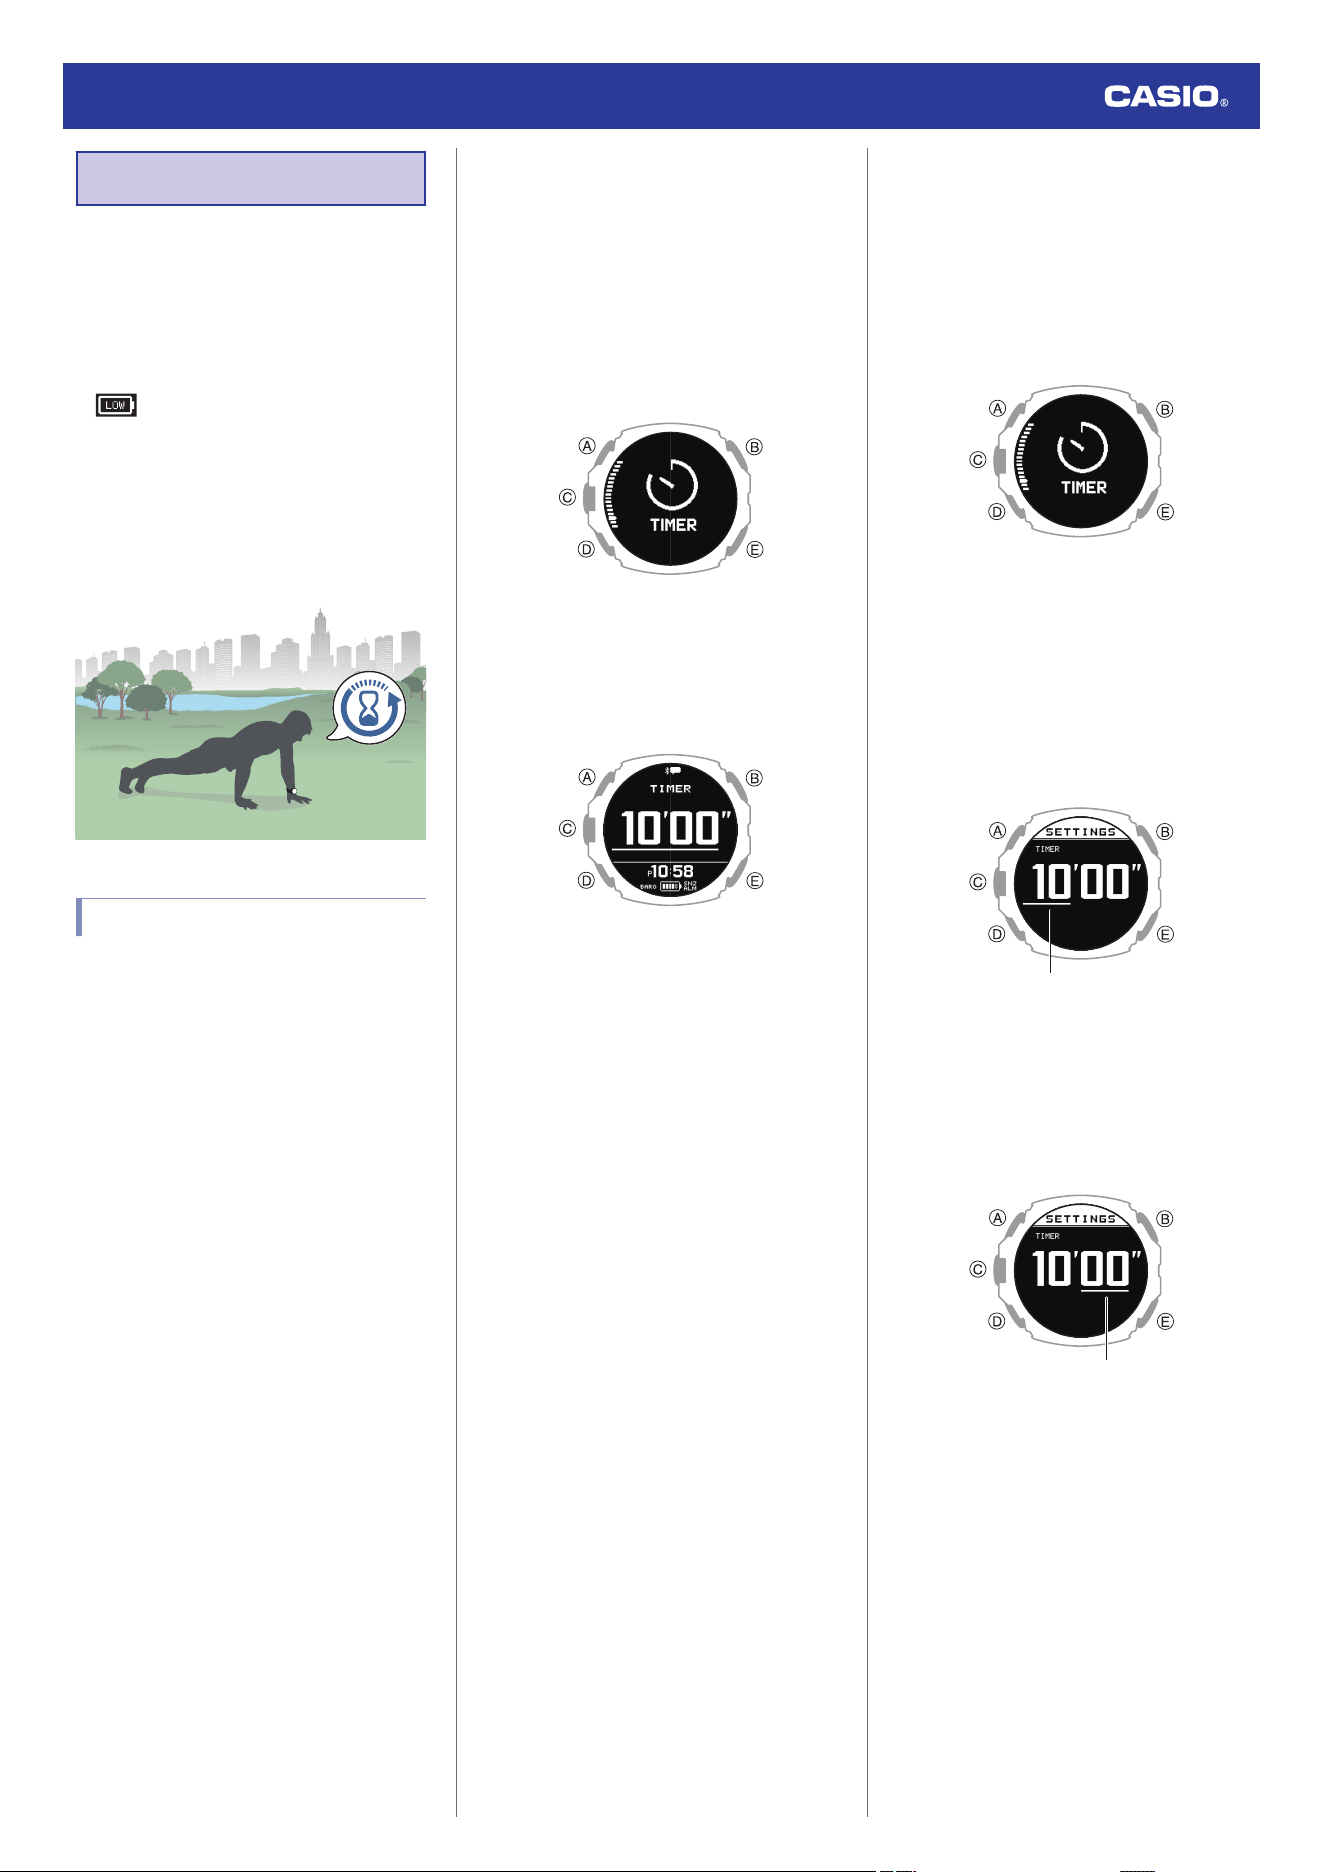
Timer
The timer counts down from a start time
specified by you. The watch performs a sound
and/or vibration operation when the end of the
countdown is reached.
●
The watch does not perform a vibration alert
while the battery level indicator shows
. The watch does not perform a beep
alert while the battery level indicator is
“CHG” or lower.
●
You can enable the beep and vibration
alerts as required.
l
Configuring Sound and Vibration
Settings
Setting a Start Time
The start time can be set in 1-second units up
to 60 minutes.
●
To configure timer settings with the
CASIO WATCHES phone app
If the watch is paired with a phone, you can
also use the CASIO WATCHES phone app to
set the timer start time.
l
Configuring Watch Settings
●
To configure timer settings with the
watch
EZ Settings
Use this procedure to change the timer start
time setting in 30-second increments.
1. Display the current time screen.
l
Watch Mode
2. Use (A) and (D) to select [TIMER].
3. Press (C).
This displays the TIMER screen.
4. Press (A) or (D).
This returns to the EZ setting screen.
5. Use (A) and (D) to change the timer start
time setting.
●
Each press of (A) changes the setting
by -30 seconds, while (D) changes it by
+30 seconds.
6. Press (C).
This starts the timer operation.
Minute and Seconds Setting
You can use the steps below to change the
timer start time setting in one-second
increments up to 60 minutes.
1. Display the current time screen.
l
Watch Mode
2. Use (A) and (D) to select [TIMER].
3. Press (C).
This displays the TIMER screen.
4. Hold down (A) for at least two seconds.
This causes a cursor to appear under the
minutes setting.
5. Use (A) and (D) to change the minutes
setting.
Minutes
6. Press (C).
This moves the cursor to the seconds
setting.
7. Use (A) and (D) to change the seconds
setting.
Seconds
●
To return to the minute setting, press
(E).
8.
Press (C) to complete the setting
operation.
After the setting operation is complete, a
check mark appears for a few seconds,
and then the TIMER screen re-appears.
Watch Operation Guide 3554
63
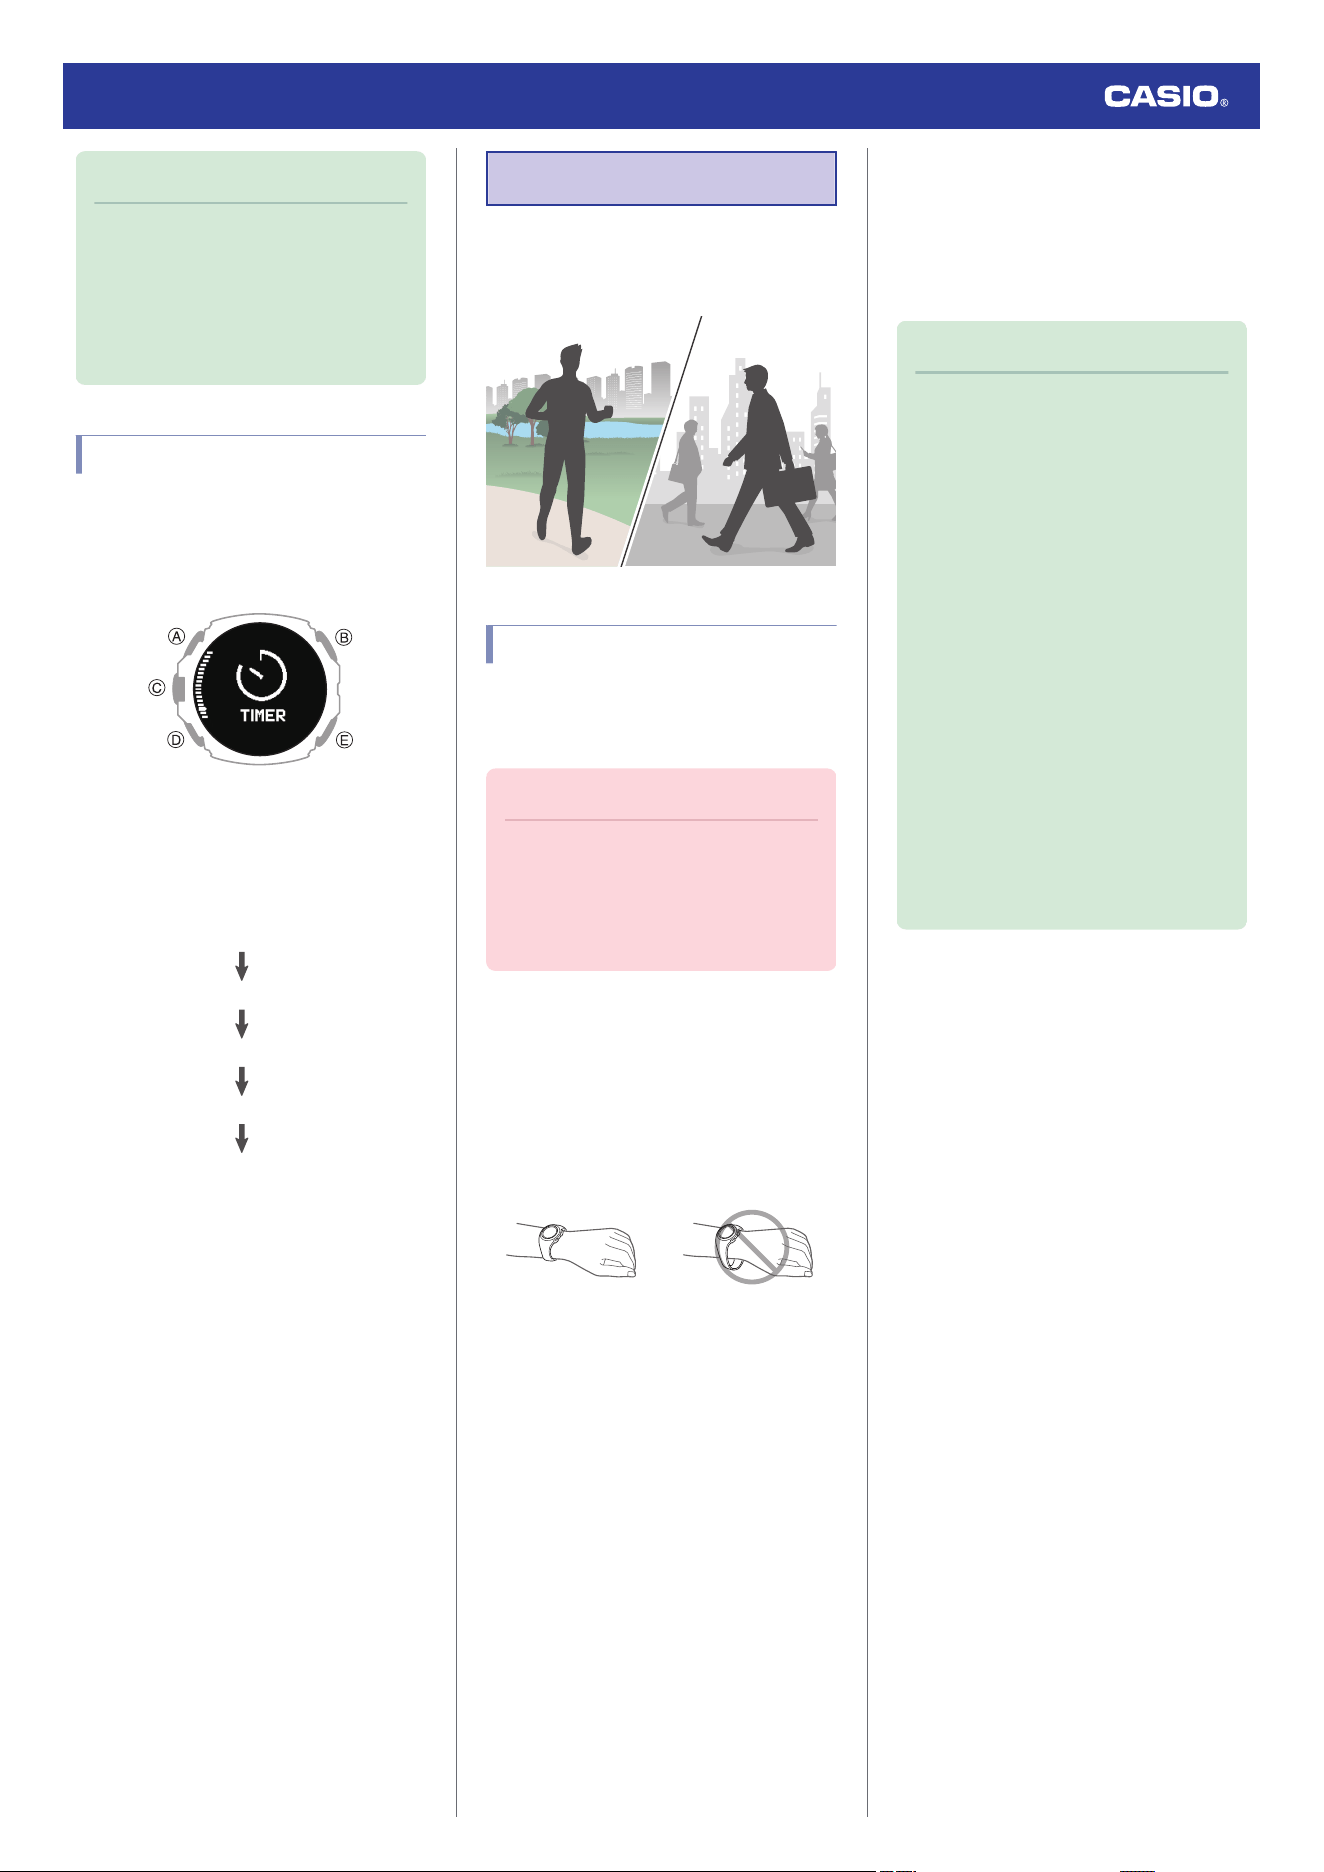
Note
●
To exit the timer setting operation at
any point, press (E).
●
While the setting is being configured,
the watch will exit the setting operation
automatically after about two or three
minutes of non-operation.
Using the Timer
1. Display the current time screen.
l
Watch Mode
2. Use (A) and (D) to select [TIMER].
3. Press (C).
This displays the TIMER screen.
4. Use the operations below to perform a
timer operation.
C
C
C
(Time up)
Resume
Pause
(Countdown starts)
Start
●
The watch performs a sound and/or
vibration operation for 10 seconds
when the end of the countdown is
reached.
●
You can reset a paused countdown to
its start time, by pressing (E).
5. Press any button to stop the sound and/or
vibration operation.
Pedometer
You can use the pedometer to keep track of
your step count while walking, running,
engaging in your normal daily activities, etc.
Counting Steps
If you are wearing the watch correctly, the
pedometer counts your steps as you walk, run,
or engage in your normal daily activities.
Important!
●
Since this watch is a wrist-worn device,
it may detect non-step movements and
count them as steps. Also, abnormal
arm movements while walking may
cause a miss count of steps.
●
Getting Ready
To enable the most accurate step count, wear
the watch with the face on the outside of your
wrist and tighten the band securely. A loose
band may make it impossible to obtain correct
measurement.
NOYES
●
Counting Steps
The pedometer will start counting your steps
when you start walking.
●
To check the step count
You can check your step count on the watch’s
current time screen, with the Life Log function
or with the CASIO WATCHES phone app.
l
Specifying a Watch Face
l
Viewing Life Log Data
Note
●
The step count can show a value up to
99,999 steps. [- - - - -] is displayed when
the step count exceeds 99,999.
●
To avoid miscounting of non-walking
movements, the step count is not
displayed immediately after you start
moving.
●
The step count is reset to zero at
midnight each day.
●
The watch can store up to three days
of step counts.
●
Step count results are transferred to
the CASIO WATCHES phone app
when the watch is connected to the
app or when the app is started up.
●
You can also use the CASIO
WATCHES phone app to specify a
daily step target.
l
Specifying a Daily Step Count
Target
Watch Operation Guide 3554
64
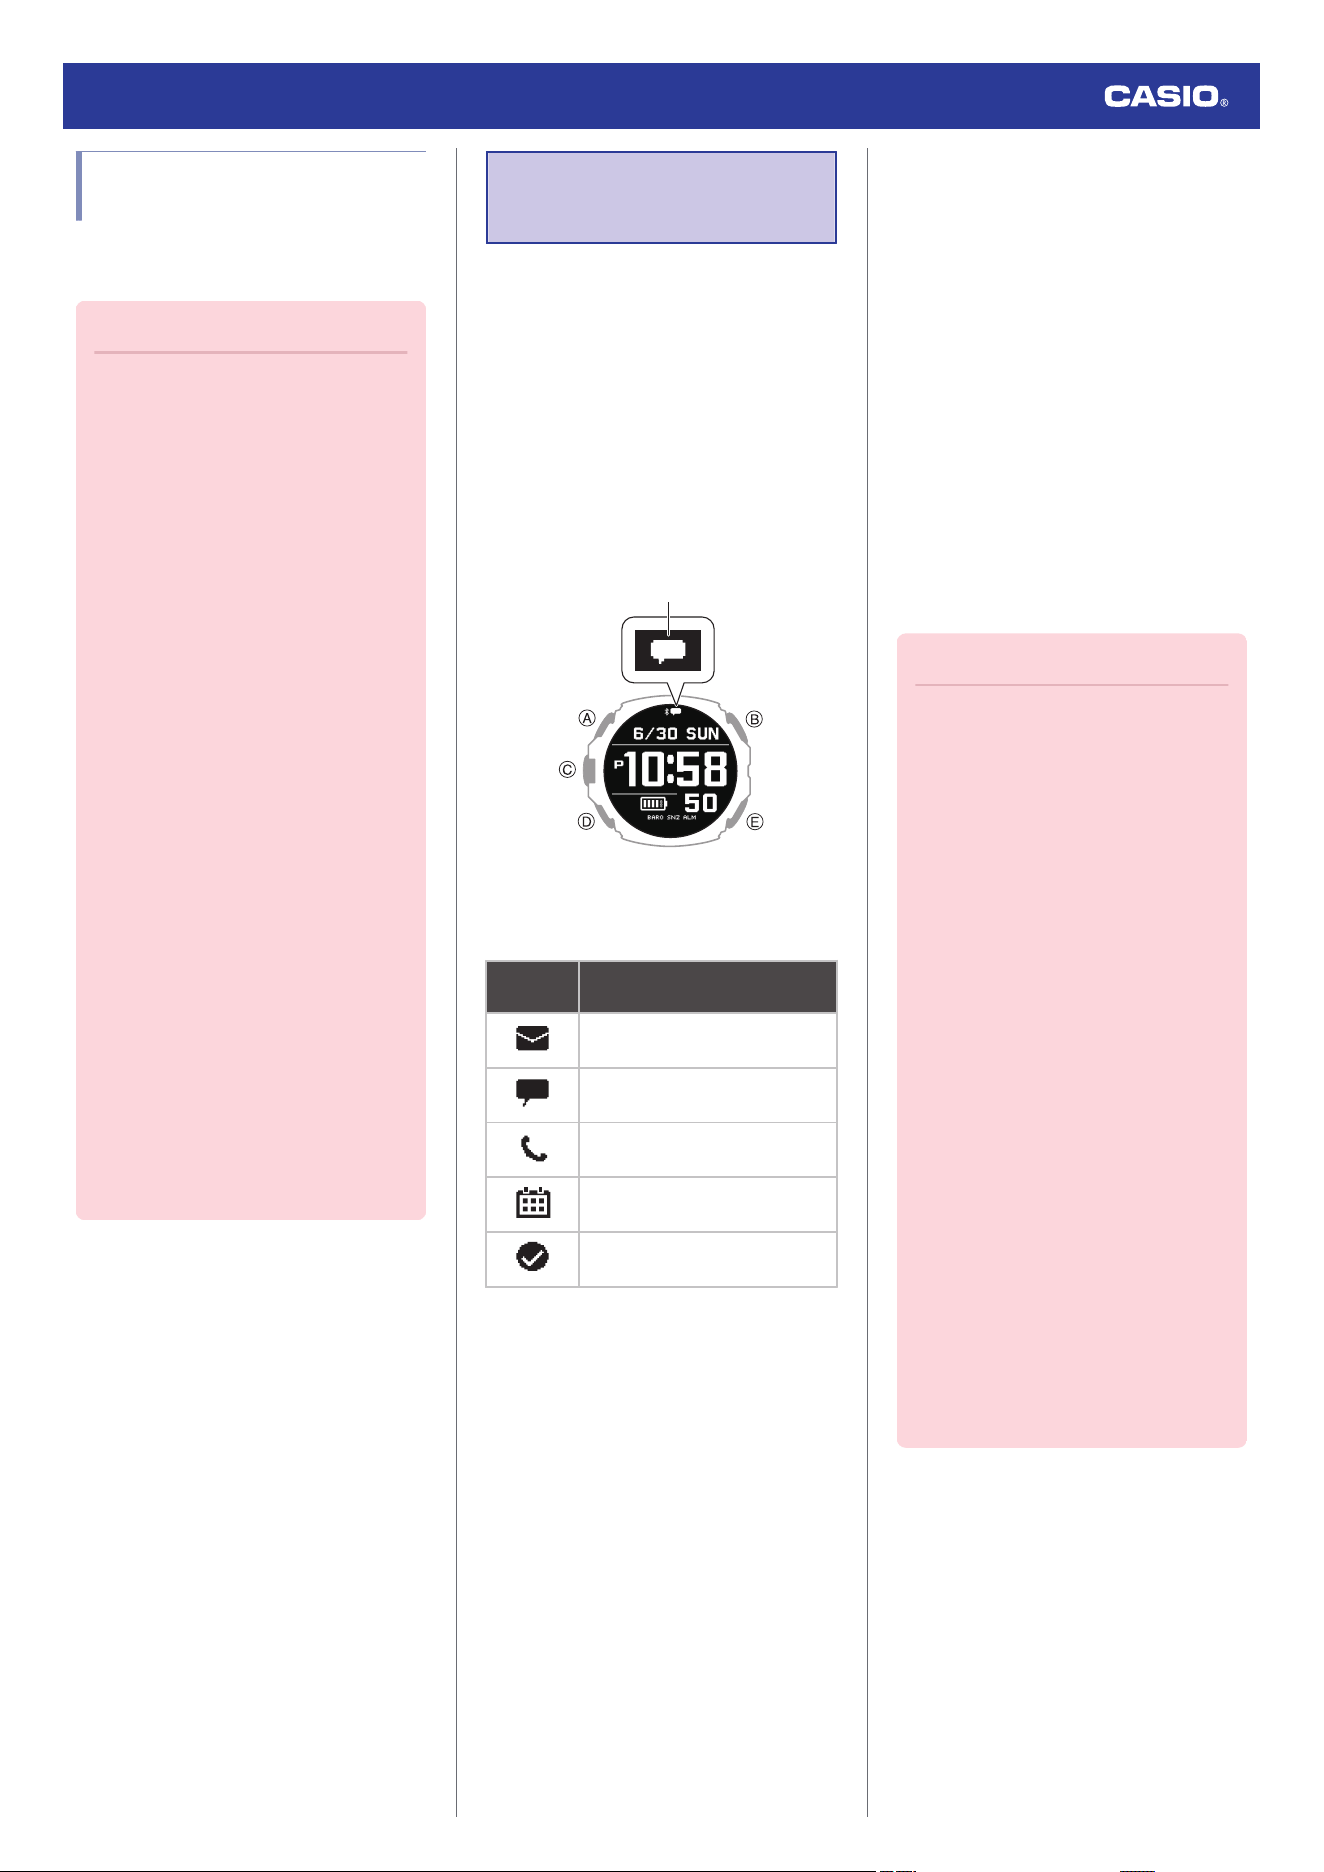
Causes of Incorrect Step
Count
Certain conditions may make correct step
counting impossible.
Important!
Any of the conditions below may make
proper counting impossible.
●
Walking while wearing slippers,
sandals, or other footwear that
encourages a shuffling gait
●
Walking on tile, carpeting, snow, or
other surface that causes a shuffling
gait
●
Irregular walking (in a crowded
location, in a line where walking stops
and starts at short intervals, etc.)
●
Extremely slow walking or extremely
fast running
●
Pushing a shopping cart or baby
stroller
●
In a location where there is a lot of
vibration or riding on or in a vehicle
●
Frequent movement of the hand or arm
(clapping, fanning movement, etc.)
●
Walking while holding hands, walking
with a cane or stick, or engaging in any
other movement in which your hand
and leg movements are not
coordinated with each other
●
Normal daily non-walking activities
(cleaning, etc.)
●
Wearing the watch on the wrist that is
not the one you specified with your
profile’s WRIST setting
l
Creating Your Profile
●
Walking for 20 seconds or less
Receiving Phone
Notifications
You can use your watch to check the details
of incoming calls, mail, and SNS alerts and
information that are received by a phone
connected to the watch by Bluetooth. The
watch can have up to 10 notifications stored in
its memory.
●
To receive notifications from your phone,
you need to pair the watch with it.
l
Pairing the Watch with Your Phone
You can check for new notifications on the
current time screen and in the Activity Mode.
New notification
With the notification list, you can check the
notification type, and the date and time the
notification was received.
This
indicator:
Means this:
Mail
SNS
Incoming calls, missed calls
Schedule
Other
●
The message [NO DATA] will appear if
there are no new messages.
●
While notification receive is enabled,
reception of a notification causes its
contents to appear on the display,
regardless of the mode (Notification Cut-in).
l
Enabling and Disabling Incoming Call
Notifications
●
The watch performs a sound and/or
vibration operation when a notification is
received. You can enable or disable sound
and vibration alert as required.
l
Configuring Sound and Vibration
Settings
●
The sound/vibration operation for incoming
phone call notifications lasts up to 20
seconds, while all other notifications last
one second.
Important!
●
To receive phone notifications,
configure the settings below on your
phone.
iPhone: Configure all of the settings
below.
ー
Enable CASIO WATCHES phone
app notifications.
ー
Turn on “Settings”
n
“Bluetooth”
n
“CASIO GPR-H1000”
n
“Share
System Notifications”.
ー
Allow notifications for each app you
want to be notified about, and make
sure all of the following boxes are
checked (selected): Notifications
Lock Screen, Notification Center,
Banners.
Example: Mail app: “Settings”
n
“Mail”
n
“Notifications”
Android: Enable all the items below.
ー
Notification access
ー
Contacts access
ー
Call history access
●
After the notification cut-in is displayed
for 1 minute, the display returns to the
screen that was shown before the cut-
in appeared. While a notification cut-in
is displayed, press (A) or (D) to check
the notification content.
Watch Operation Guide 3554
65

Enabling and Disabling
Incoming Call Notifications
You can enable or disable notification receive
as required.
1. Display the current time screen.
l
Watch Mode
2. Hold down (A) for at least two seconds.
This enters the Control Mode.
3. Use (A) and (D) to select [SETTING].
4. Press (C).
This displays the setting menu screen.
Pointer
5. Use (A) and (D) to move the pointer to
[GENERAL SETTINGS].
6. Press (C).
7. Use (A) and (D) to move the pointer to
[NOTIFICATIONS].
8. Press (C).
9. Use (A) and (D) to select a notification
receive ON/OFF setting.
[OFF]
Notifications are turned
off, and notification cut-
ins do not appear.
[ACTIVITY OFF]
Notification receive is
turned off during
activity measurement
only.
[NIGHT TIME OFF]
Notification receive is
turned off during the
specified night time.
[ACTIVITY & NIGHT
TIME OFF]
Notification receive is
turned off during
activity measurement
and the specified night
time.
[ON]
Enables receive and
notification cut-in
display.
●
Notification cut-ins display the details of
a received notification.
●
After about one minute, the watch
returns to the screen that was shown
before the notification cut-in appeared.
10. Press (C) to complete the setting
operation.
After the setting operation is complete, a
check mark appears for a few seconds,
and then the GENERAL SETTINGS
screen re-appears.
11. Hold down (E) for at least one second to
return to the current time screen.
Note
●
If you do not perform any operation for
two or three minutes while the setting
screen is displayed, the watch
automatically returns to the current
time screen.
Displaying Notification
Contents
1. Display the current time screen.
l
Watch Mode
2. Use (A) and (D) to select
[NOTIFICATION].
3. Press (C).
This displays the notification list.
●
The notification list can contain up to 10
notifications.
●
Addition of a notification to the list when
it already contains 10 notifications, will
cause the oldest notification in the list to
be deleted to make room for the new
one.
4. Use (A) and (D) to move the pointer to the
title of the notification you want to view.
5. Press (C).
This displays the details of the notification.
●
You can use (A) and (D) to scroll.
●
To return to the notification list, press
(E).
●
To return to the current time screen,
hold down (E) for at least one second.
Watch Operation Guide 3554
66
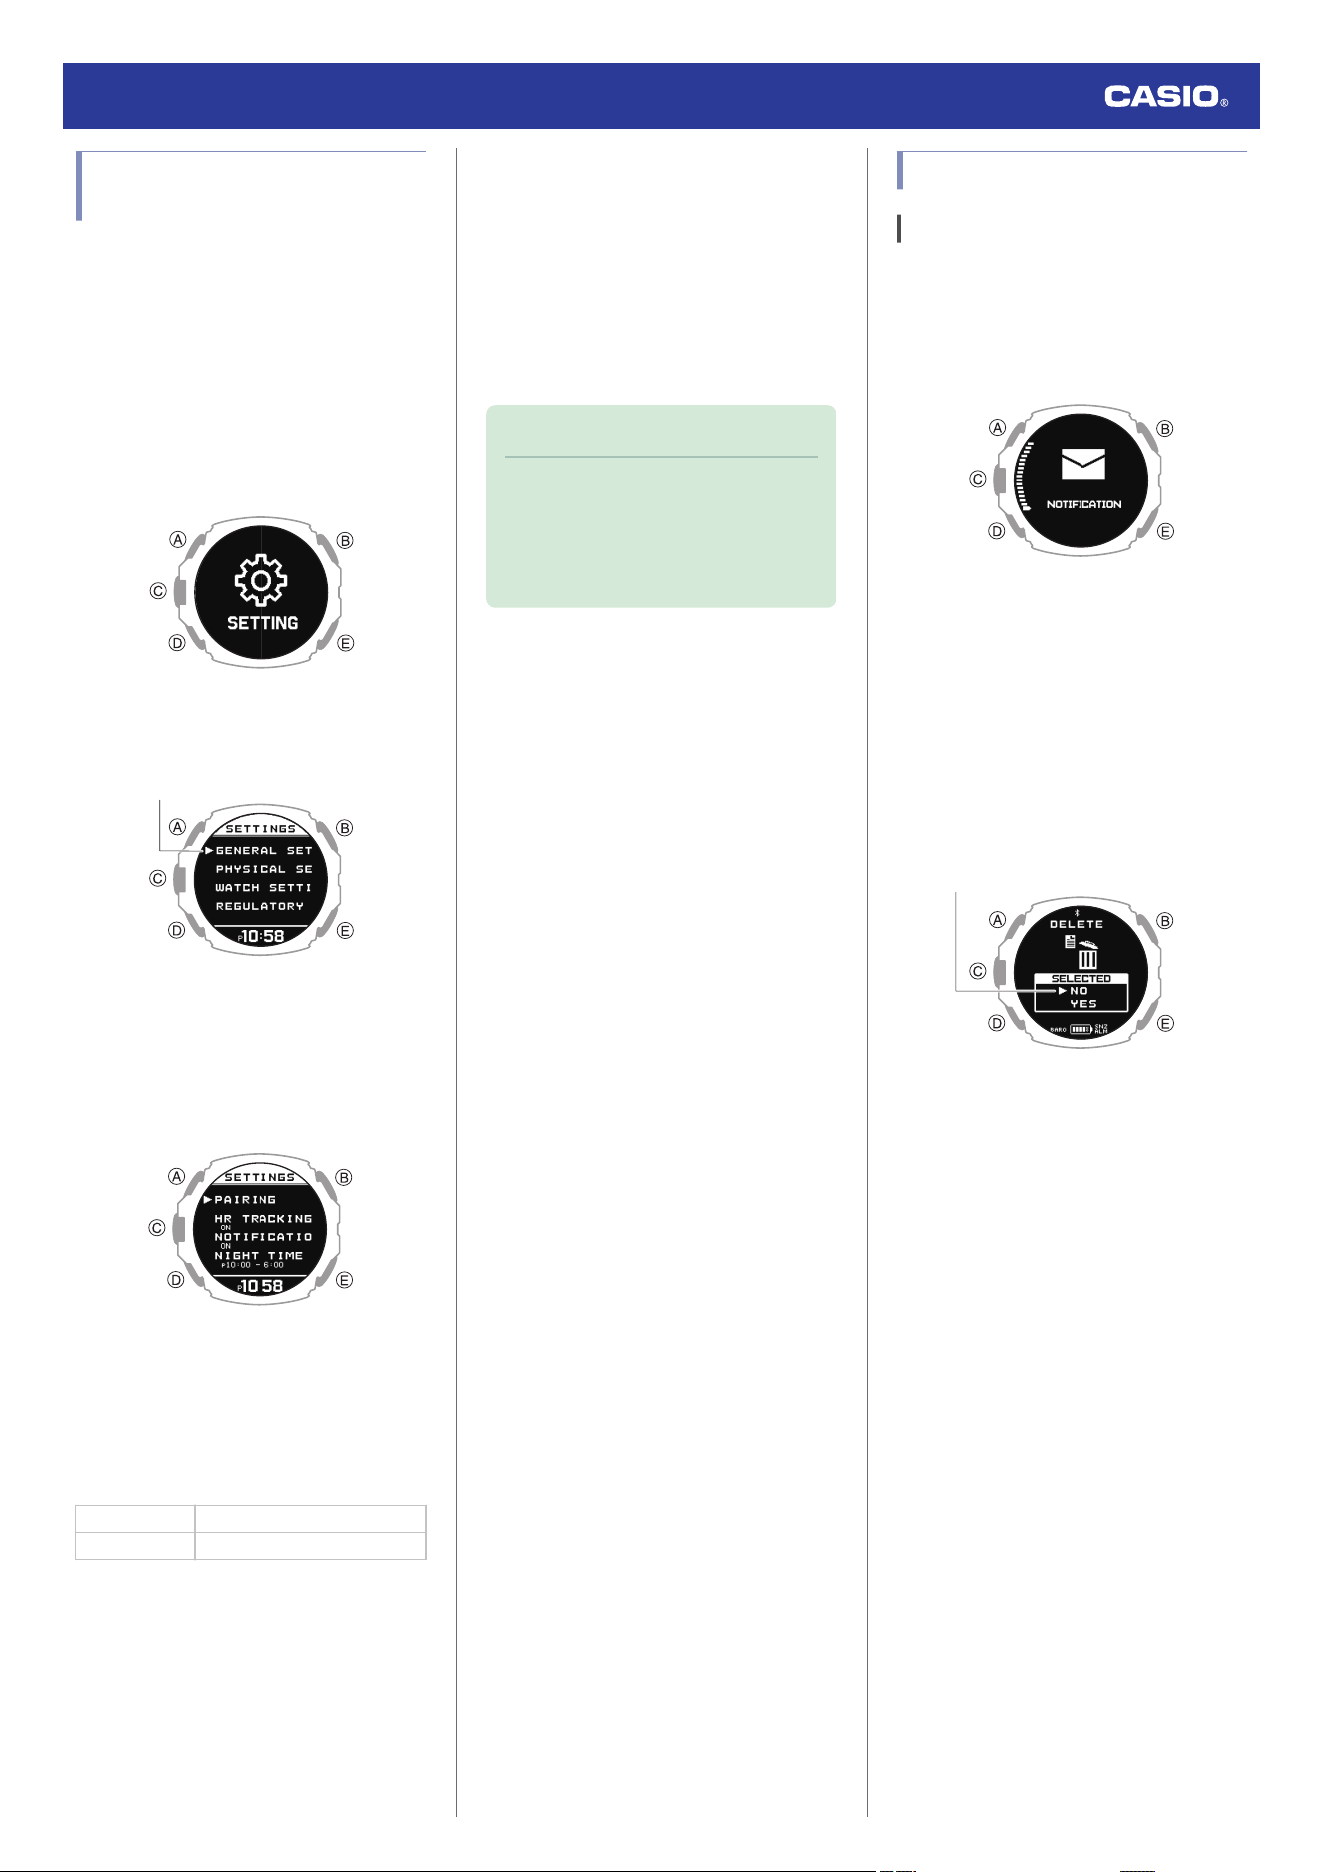
Cycling Between Notification
Cut-in Displays
You can use this procedure to specify either
simple display or full display of notification cut-
in.
1. Display the current time screen.
l
Watch Mode
2. Hold down (A) for at least two seconds.
This enters the Control Mode.
3. Use (A) and (D) to select [SETTING].
4. Press (C).
This displays the setting menu screen.
Pointer
5. Use (A) and (D) to move the pointer to
[GENERAL SETTINGS].
6. Press (C).
This displays the GENERAL SETTINGS
screen.
7. Use (A) and (D) to move the pointer to
[NOTIFICATION PATTERN].
8. Press (C).
9. Use (A) and (D) to change the display type
setting.
[SIMPLE] Simple display
[FULL] Full display
10. Press (C) to complete the setting
operation.
After the setting operation is complete, a
check mark appears for a few seconds,
and then the GENERAL SETTINGS
screen re-appears.
11. Hold down (E) for at least one second to
return to the current time screen.
Note
●
If you do not perform any operation for
two or three minutes while the setting
screen is displayed, the watch
automatically returns to the current
time screen.
Deleting a Notification
Deleting a Particular Notification
1. Display the current time screen.
l
Watch Mode
2. Use (A) and (D) to select
[NOTIFICATION].
3. Press (C).
This displays the notification list.
4. Use (A) and (D) to move the pointer to the
title of the notification you want to delete.
5. Press (C).
This displays the details of the notification.
6. Hold down (A) for at least two seconds.
This displays the data delete screen.
Pointer
7. Use (A) and (D) to move the pointer to
[YES].
●
To cancel data deletion, move the
pointer to [NO].
8. Press (C).
After the data delete operation is
complete, a check mark appears for a few
seconds, and then the notification list
screen re-appears.
Watch Operation Guide 3554
67
Deleting All Notifications
1. Display the current time screen.
l
Watch Mode
2. Use (A) and (D) to select
[NOTIFICATION].
3. Press (C).
This displays the notification list.
4. Hold down (A) for at least two seconds.
This displays the data delete screen.
Pointer
5. Use (A) and (D) to move the pointer to
[YES].
●
To cancel data deletion, move the
pointer to [NO].
6. Press (C).
After the data delete operation is
complete, a check mark appears for a few
seconds, and then [NO DATA] appears.
Activity
Measurement
Settings
This section explains how to configure
settings related to activity measurement.
The setting menu that is displayed depends
on the activity.
●
Activity-specific Setting Menu
Activity Setting Menu
POOL SWIMMING
TRAINING ALERT
POOL LENGTH
GYM WORKOUT TRAINING ALERT
INTERVAL TIMER
TRAINING ALERT
INTERVAL TIMER
RUNNING GPS TRACKING
AUTO LAP
AUTO PAUSE
TRAINING ALERT
WALKING
BIKING
TREKKING
GPS TRACKING
AUTO LAP
TRAINING ALERT
OPEN WATER
SWIMMING
TRAIL RUNNING
Enabling Auto Lap Timing
While auto lap timing is enabled, a lap is
recorded each time you run the lap distance
you specified.
Perform the required operations with the
CASIO WATCHES phone app or on the watch
to configure auto lap measurement settings.
You can set a lap measurement distance up
to 10.0 km, in increments of 0.1 km.
●
To configure auto lap settings with the
CASIO WATCHES phone app
Before using Auto Lap Timing, you need to
use the CASIO WATCHES phone app to
specify the Auto Lap Timing distance.
Check the connection
●
Make sure the
e
symbol is shown on the
watch display when you perform the
procedure below. If
e
is not displayed,
refer to the information at the link below.
l
Connecting with a Phone Paired
With the Watch
1.
Y
Tap the “CASIO WATCHES” icon.
2.
Y
Tap the “My Watch” tab.
3.
Y
Select “GPR-H1000” and tap it.
4.
Y
Select the setting you want to change
and then perform the operation shown on
the screen.
Watch Operation Guide 3554
68
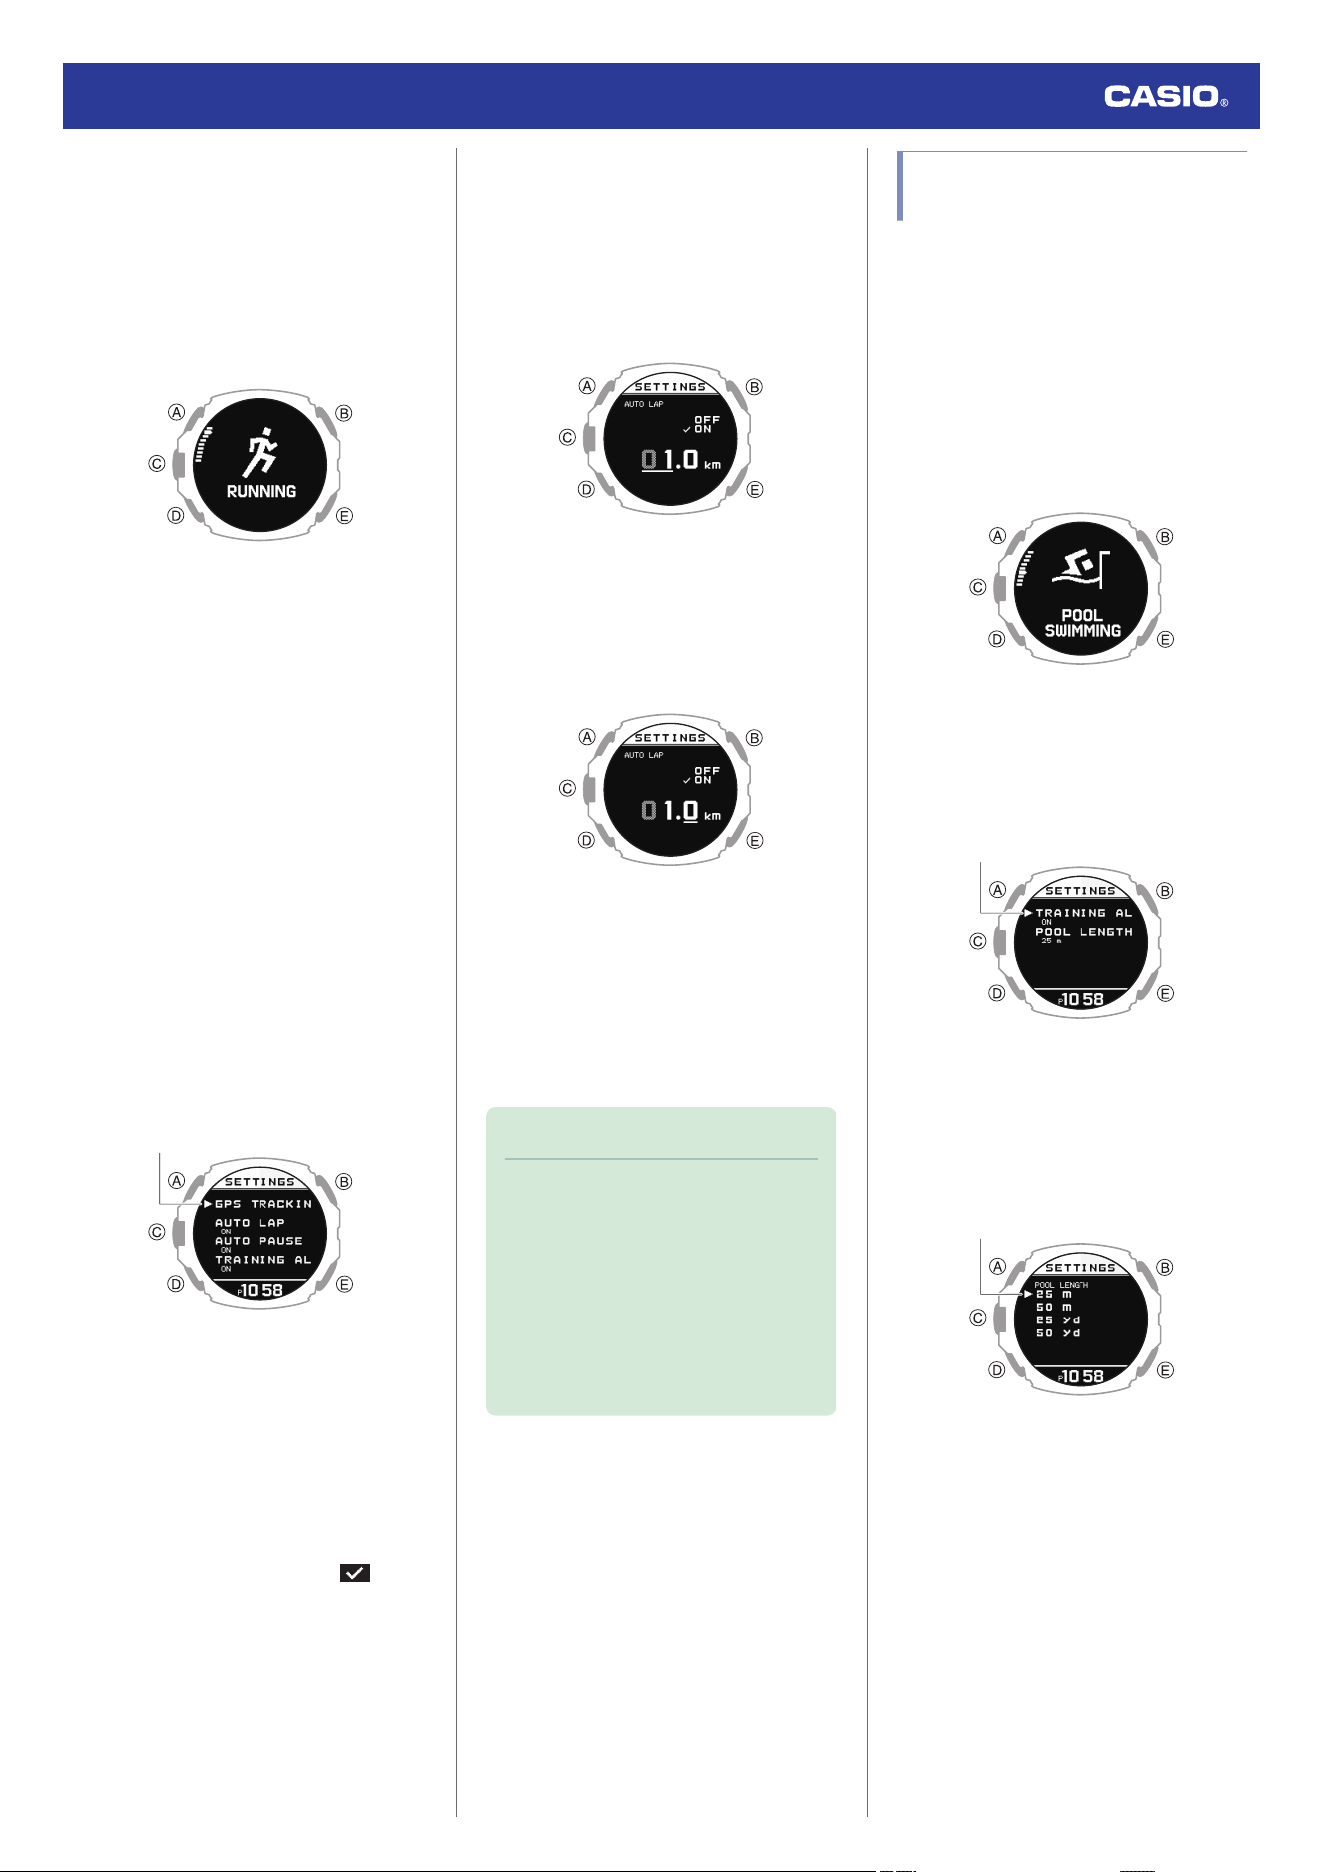
●
To configure auto lap settings with the
watch
1. Display the current time screen.
l
Watch Mode
2. Press (C).
This enters the Activity Mode.
Example:
3. Use (A) and (D) to select an activity.
4. Press (C).
●
For activities that can be measured
without receiving GPS signals, this
operation returns to the measurement
operation ready screen. In this case,
advance to step 6.
●
If you selected an activity that receives
GPS signals for measurement, this
operation starts the GPS signal receive
operation.
5. If you selected an activity that receives
GPS signals for measurement, press (A)
or (D).
This displays the measurement operation
ready screen.
6. Hold down (A) for at least two seconds.
This displays the activity measurement
setting screen.
Pointer
7. Use (A) and (D) to move the pointer to
[AUTO LAP].
8. Press (C).
9. Use (A) and (D) to select [ON].
●
To disable auto lap measurement,
select [OFF].
●
The currently selected setting is
indicated by a check mark (
) to the
left.
10.
Press (C).
This causes a cursor to appear, which you
can use to set the auto lap measurement
distance.
11. Use (A) and (D) to specify the integer part
of the distance value.
12. Press (C).
This moves the cursor to the decimal part
of the distance value.
13. Use (A) and (D) to specify the decimal part
of the distance value.
14. Press (C) to complete the setting
operation.
After the setting operation is complete, a
check mark appears for a few seconds,
and then the activity measurement setting
screen re-appears.
15. Press (E) to exit the setting screen.
Note
●
If GPS is being used for Auto Lap
measurement, the Auto Lap
measurement timing may be
somewhat different from the distance
setting.
●
While the setting is being configured,
the watch will exit the setting operation
automatically after about two or three
minutes of non-operation.
Setting the Swimming Pool
Length
Specifying a pool length helps when
measuring lap times.
1. Display the current time screen.
l
Watch Mode
2. Press (C).
This enters the Activity Mode.
3. Use (A) and (D) to select [POOL
SWIMMING].
4. Press (C).
5. Hold down (A) for at least two seconds.
This displays the pool swimming setting
screen.
Pointer
6. Use (A) and (D) to move the pointer to
[POOL LENGTH].
7. Press (C).
This displays the pool length setting
screen.
Pointer
Watch Operation Guide 3554
69
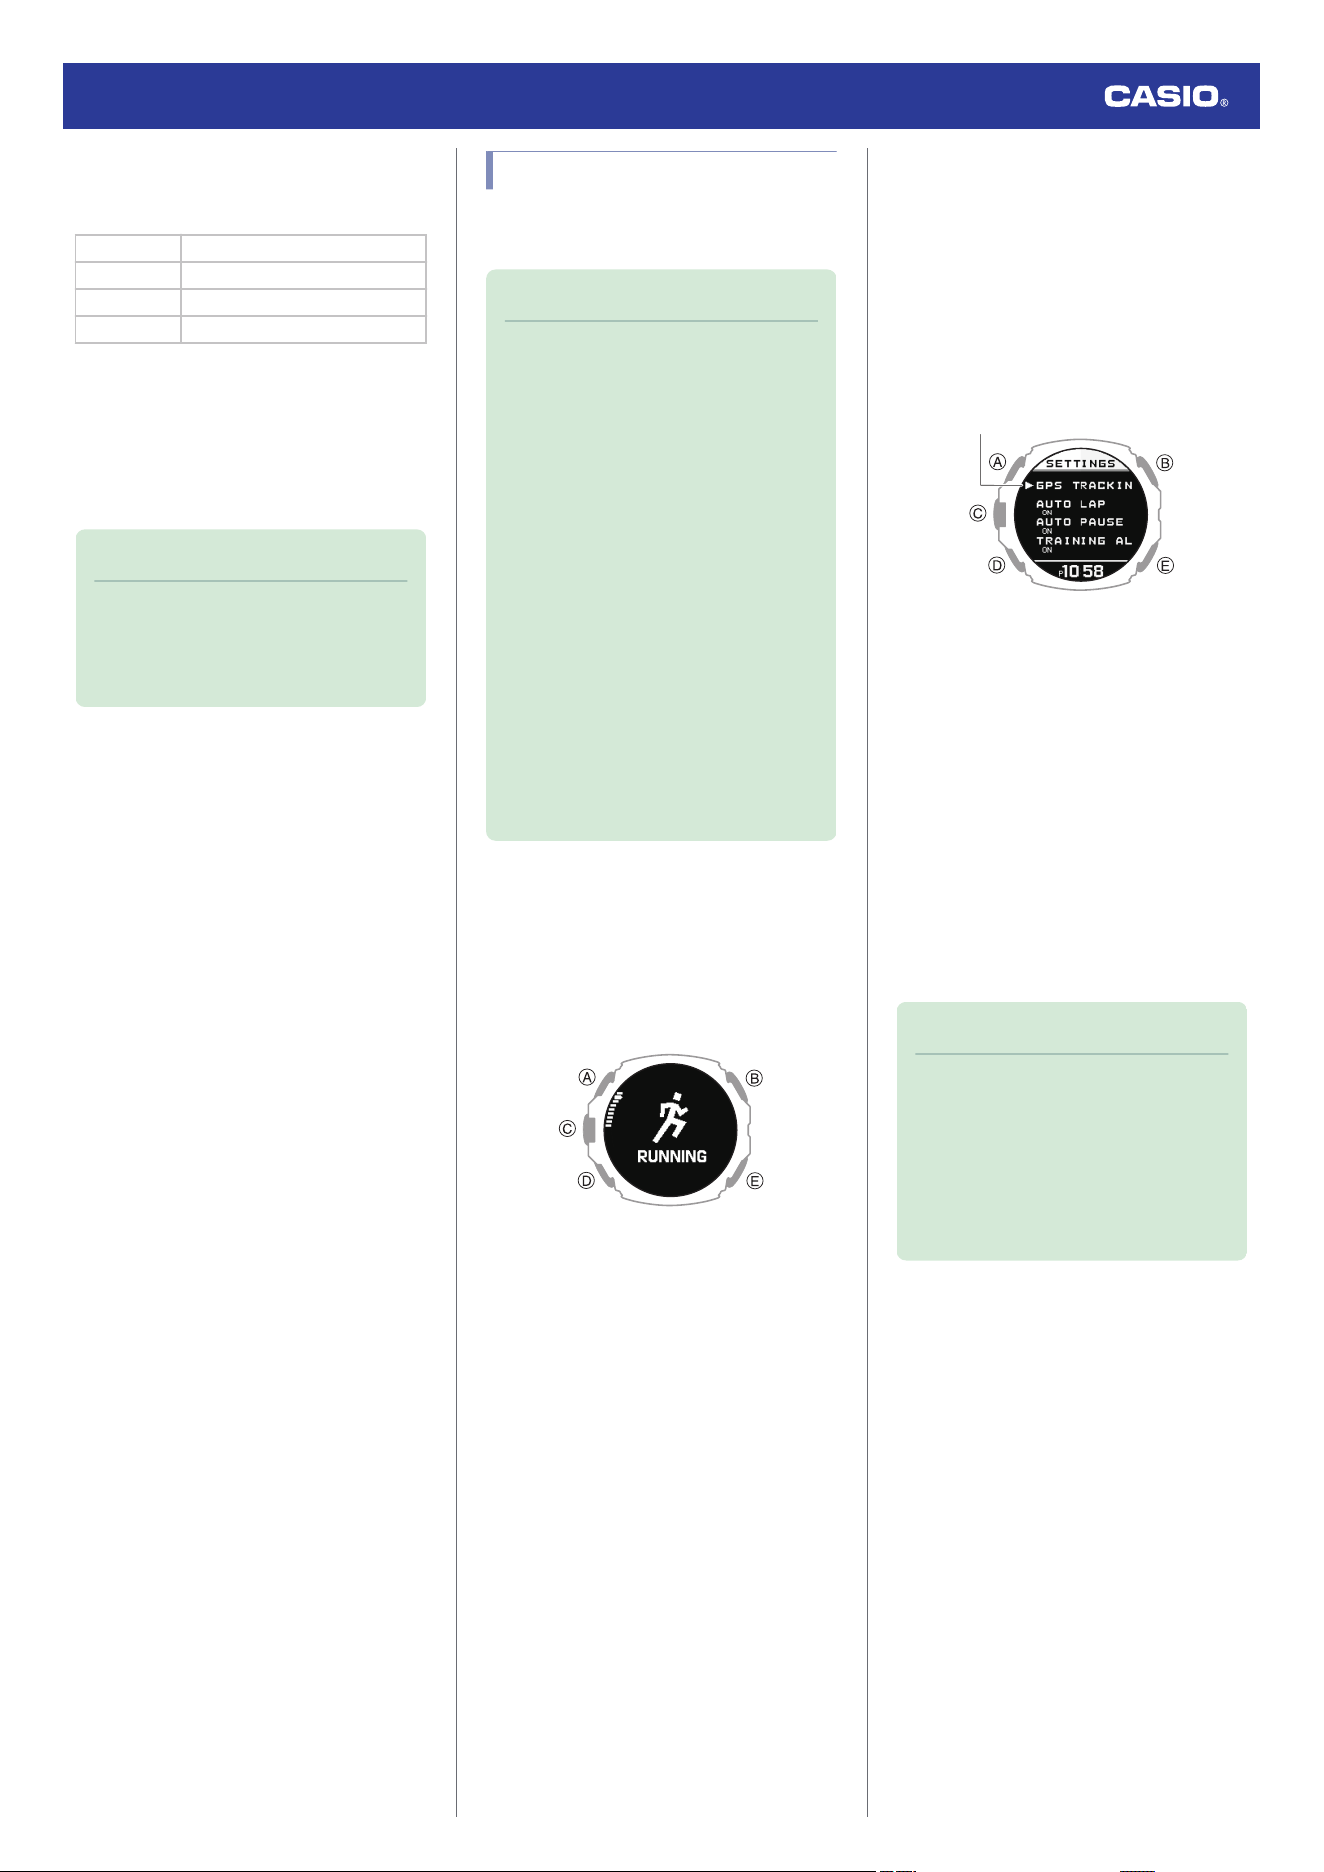
8. Use (A) and (D) to select the pool length
you want.
[25m] 25 meters
[50m] 50 meters
[25yd] 25 yards
[50yd] 50 yards
9. Press (C) to complete the setting
operation.
After the setting operation is complete, a
check mark appears for a few seconds,
and then the pool swimming setting
screen re-appears.
Note
●
While the setting is being configured,
the watch will exit the setting operation
automatically after about two or three
minutes of non-operation.
Enabling Auto Pause
While Auto Pause is enabled, timing will pause
whenever you stop running.
Note
●
When a measurement operation is
restarted from auto pause, the watch
display will be delayed from the actual
start, but the time and distance being
measured are not affected.
●
For RUNNING and WALKING, Auto
Pause becomes difficult to work while
the GPS reception interval is [OFF] or
if the GPS signal is lost.
●
For BIKING, Auto Pause does not work
while the GPS reception interval is set
to [LONG] or [OFF], or if the GPS signal
is lost.
l
Changing the GPS Receive
Interval
●
If auto pause does not work after it is
enabled or if measurement does not
resume, pause and resume
measurement manually.
1. Display the current time screen.
l
Watch Mode
2. Press (C).
This enters the Activity Mode.
Example:
3. Use (A) and (D) to select an activity.
4. Press (C).
●
For activities that can be measured
without receiving GPS signals, this
operation returns to the measurement
operation ready screen. In this case,
advance to step 6.
●
If you selected an activity that receives
GPS signals for measurement, this
operation starts the GPS signal receive
operation.
5. If you selected an activity that receives
GPS signals for measurement, press (A)
or (D).
This displays the measurement operation
ready screen.
6. Hold down (A) for at least two seconds.
This displays the activity measurement
setting screen.
Pointer
7. Use (A) and (D) to move the pointer to
[AUTO PAUSE].
8. Press (C).
9. Use (A) and (D) to move the pointer to
[ON] (enabled) or [OFF] (disabled).
10. Press (C) to complete the setting
operation.
After the setting operation is complete, a
check mark appears for a few seconds,
and then the activity measurement setting
screen re-appears.
11. Press (E) to exit the setting screen.
Note
●
While the setting is being configured,
the watch will exit the setting operation
automatically after about two or three
minutes of non-operation.
●
You can also use the CASIO
WATCHES phone app to enable or
disable Auto Pause.
Watch Operation Guide 3554
70
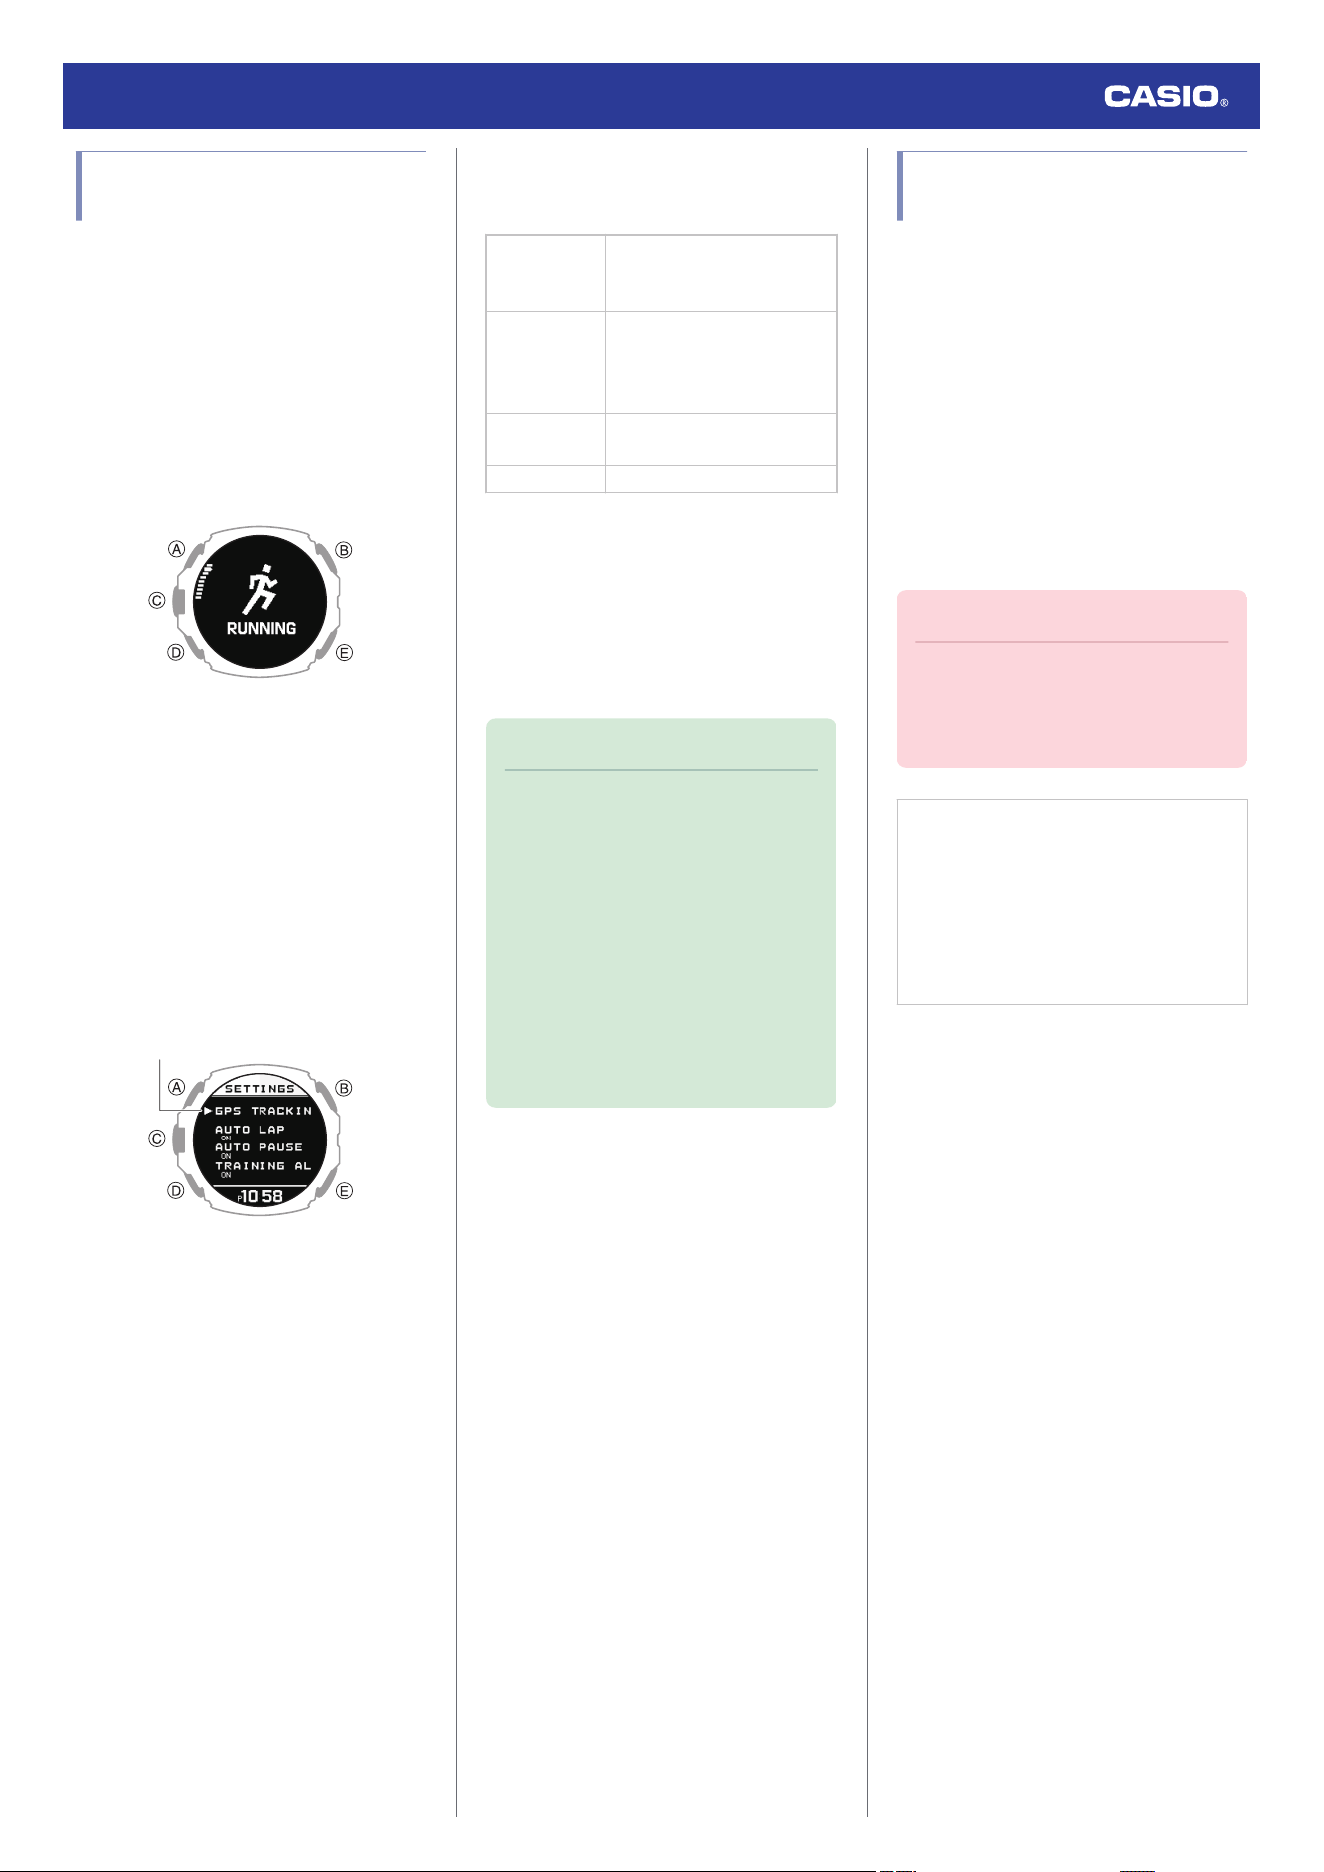
Changing the GPS Receive
Interval
Use the procedure below to specify the
interval for receiving GPS signals and to
acquire location information during activity
measurement.
1. Display the current time screen.
l
Watch Mode
2. Press (C).
This enters the Activity Mode.
Example:
3. Use (A) and (D) to select an activity.
4. Press (C).
This displays the GPS signal receive start
screen.
5. Press (A) or (D).
This displays the measurement operation
ready screen.
6. Hold down (A) for at least two seconds.
This displays the activity measurement
setting screen.
Pointer
7. Use (A) and (D) to move the pointer to
[GPS TRACKING].
8. Press (C).
9. Use (A) and (D) to move the pointer to
[GPS].
10. Press (C).
11. Use (A) and (D) to select a GPS receive
interval.
[HIGH]
Receive interval: Every
second
Positioning accuracy: High
[NORMAL]
Receive interval: Every
second
Positioning accuracy: Lower
than [HIGH]
[LONG]
Receive interval: Every
minute
[OFF] GPS not used.
12. Press (C) to complete the setting
operation.
After the setting operation is complete, a
check mark appears for a few seconds,
and then the GPS setting screen re-
appears.
13. Press (E) twice to exit the setting screen.
Note
●
While the setting is being configured,
the watch will exit the setting operation
automatically after about two or three
minutes of non-operation.
●
You can also change the GPS receive
interval using the CASIO WATCHES
phone app.
●
With BIKING or OPEN WATER
SWIMMING, distance traveled is not
displayed in the measurement results
when the GPS reception interval is
[LONG] or [OFF].
Configuring Training Alert
Settings
You can use the CASIO WATCHES phone
app to specify target alert intervals to inform
you of your calories burned, elapsed time,
distance traveled, and altitude climbed during
training. Every time an alert target value is
reached during activity measurement, a
sound or vibration operation is performed, and
an alert screen appears to notify you.
You can use a single watch operation to toggle
all the alerts you configured with the CASIO
WATCHES phone app between on and off.
●
To specify training alert target values
with the CASIO WATCHES phone app
Important!
●
Note that you cannot specify alert
target values using watch operations.
Use the CASIO WATCHES phone app
to configure settings.
Check the connection
●
Make sure the
e
symbol is shown on the
watch display when you perform the
procedure below. If
e
is not displayed,
refer to the information at the link below.
l
Connecting with a Phone Paired
With the Watch
1.
Y
Tap the “CASIO WATCHES” icon.
2.
Y
Tap the “My Watch” tab.
3.
Y
Select “GPR-H1000” and tap it.
4.
Y
Select the setting you want to change
and then perform the operation shown on
the screen.
Watch Operation Guide 3554
71
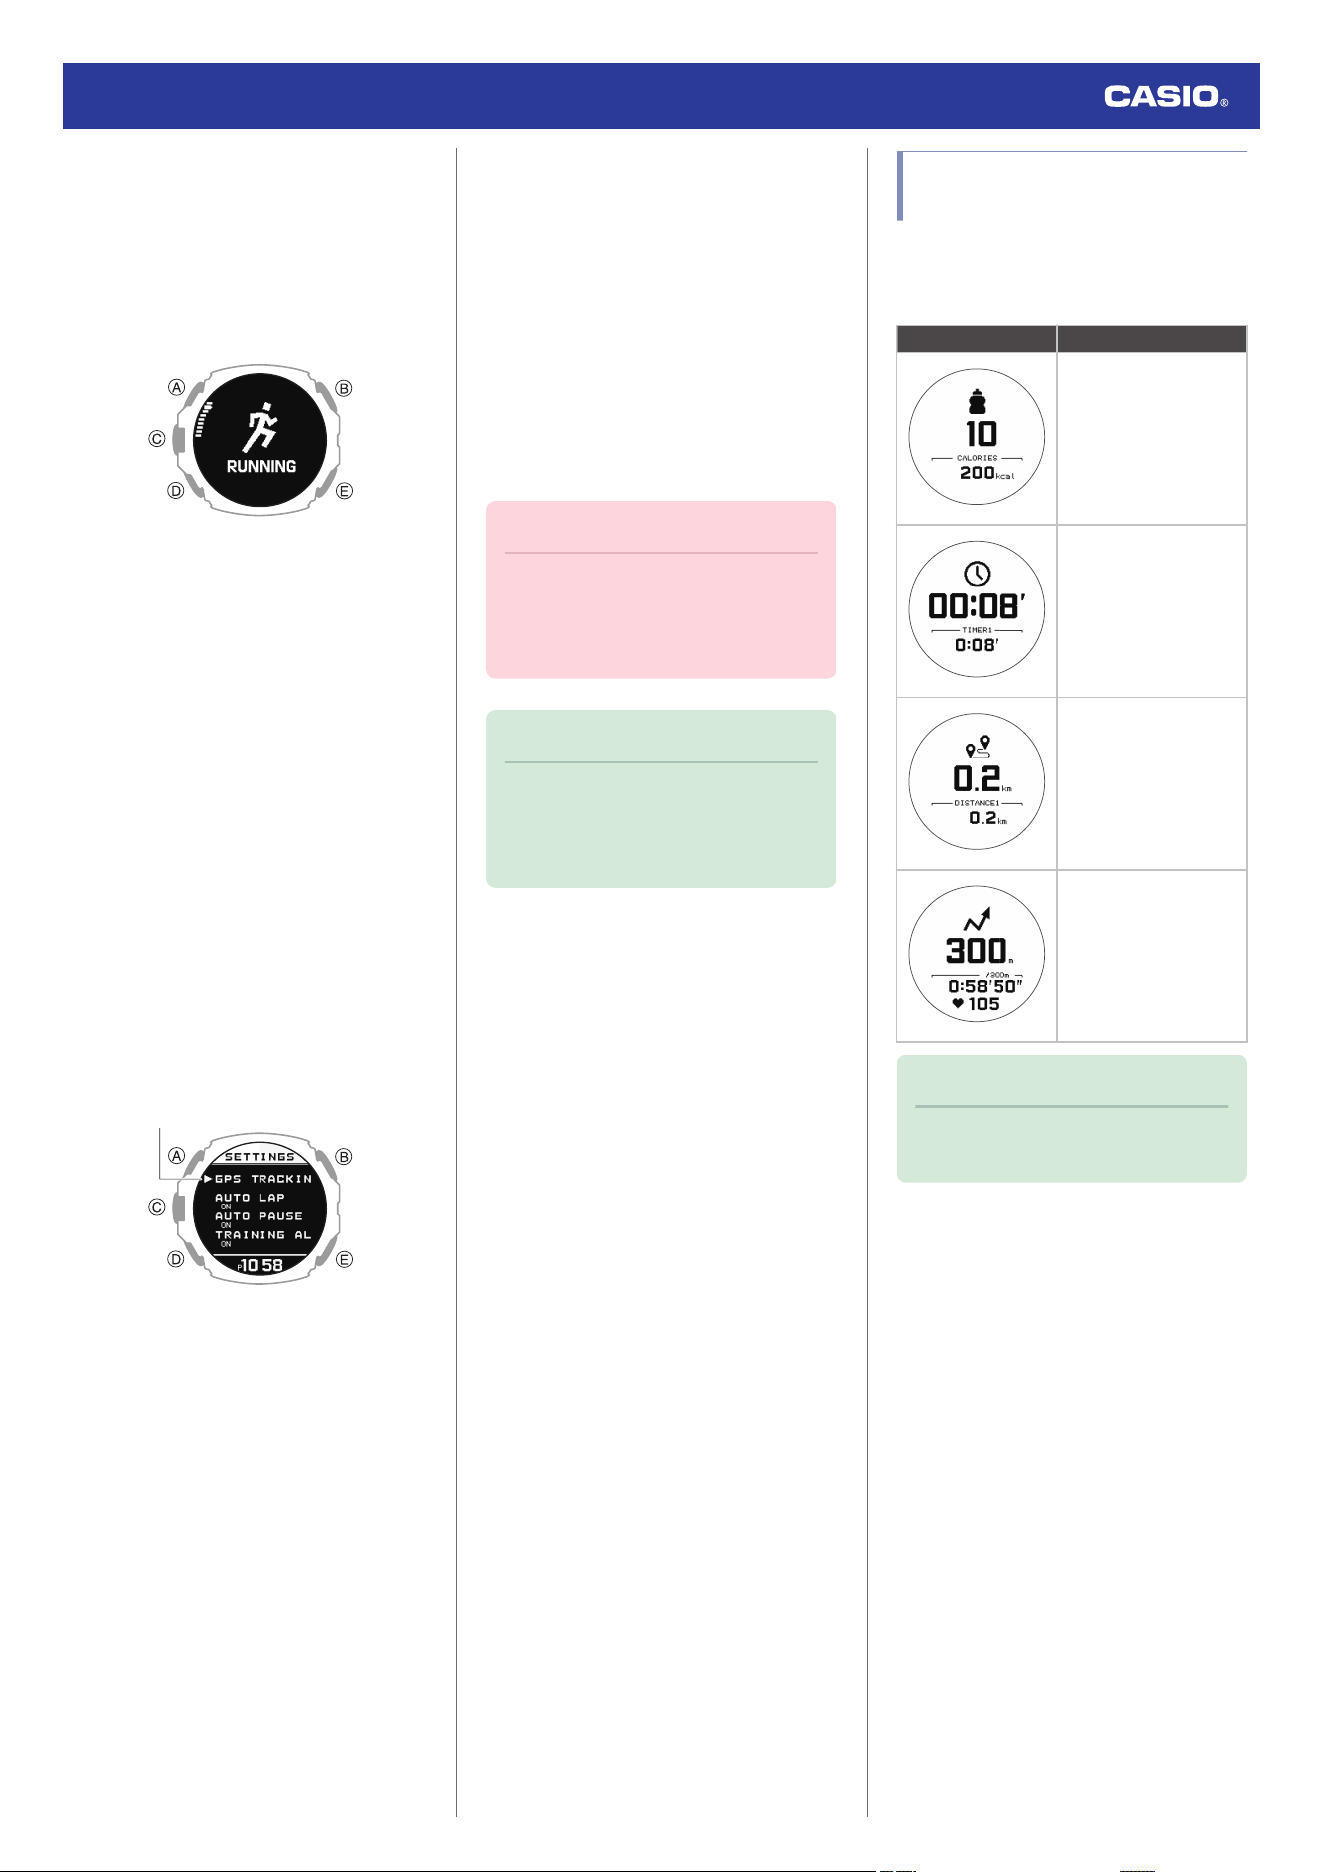
●
To enable training alert with the watch
1. Display the current time screen.
l
Watch Mode
2. Press (C).
This enters the Activity Mode.
Example:
3. Use (A) and (D) to select an activity.
4. Press (C).
●
For activities that can be measured
without receiving GPS signals, this
operation returns to the measurement
operation ready screen. In this case,
advance to step 6.
●
If you selected an activity that receives
GPS signals for measurement, this
operation displays the GPS signal
reception start screen.
5. If you selected an activity that receives
GPS signals for measurement, press (A)
or (D).
This displays the measurement operation
ready screen.
6. Hold down (A) for at least two seconds.
This displays the activity measurement
setting screen.
Pointer
7. Use (A) and (D) to move the pointer to
[TRAINING ALERT].
8. Press (C).
9. Use (A) and (D) to move the pointer to
[ON].
●
If you want to disable training alerts,
move the pointer to [OFF].
10. Press (C) to complete the setting
operation.
After the setting operation is complete, a
check mark appears for a few seconds,
and then the activity measurement setting
screen re-appears.
11. Press (E) to exit the setting screen.
Important!
●
Use the CASIO WATCHES phone app
to specify an alert target value for each
item. You cannot use watch operations
to configure alert target value settings.
Note
●
While the setting is being configured,
the watch will exit the setting operation
automatically after about two or three
minutes of non-operation.
Training Alert Screen
Indicators
A training alert screen appears on the watch
when a specified target value is reached
during activity measurement.
Indicator: Meaning:
Calories burned target
value reached.
Elapsed time target
value reached.
Travel distance target
value reached.
Cumulative altitude
target value reached.
Note
●
Alerts that can be configured depend
on the activity.
Watch Operation Guide 3554
72
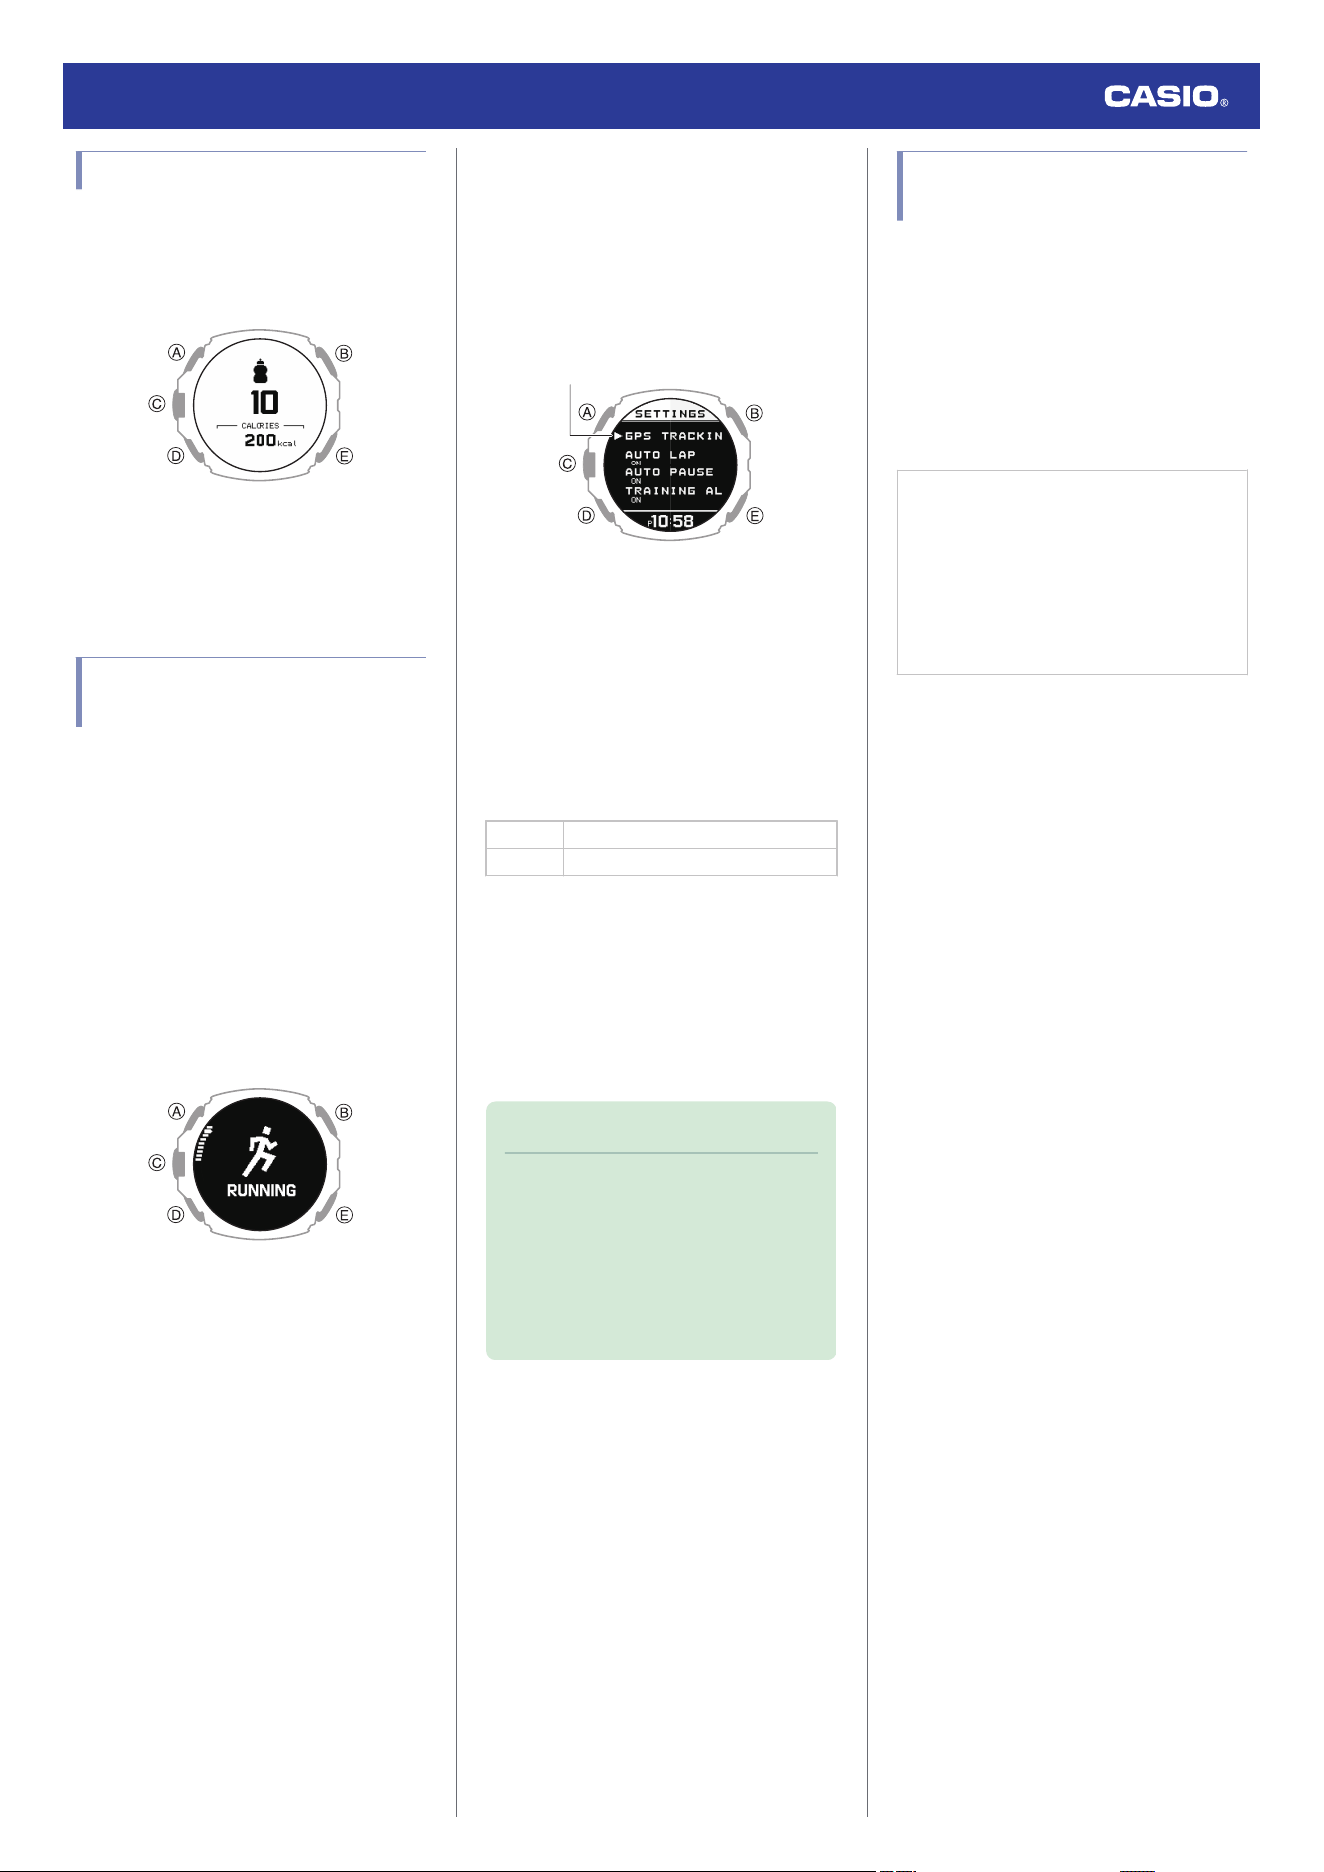
Alert Screen Switching
A training alert screen appears when a
specified target value is reached during
activity measurement.
Example:
●
The watch returns to the running
measurement screen if you press (C) or if
you do not perform any operation for about
nine seconds.
Configuring Distance
Measurement Settings
You can select measurement of either linear
distance (straight-line distance) or surface
distance (actual distance).
Surface distance measurements are
calculated by taking horizontal travel as well
as vertical movement into consideration.
1. Display the current time screen.
l
Watch Mode
2. Press (C).
This enters the Activity Mode.
Example:
3. Use (A) and (D) to select an activity.
4. Press (C).
This displays the GPS signal receive start
screen.
5. Press (A) or (D).
This displays the measurement operation
ready screen.
6. Hold down (A) for at least two seconds.
This displays the activity measurement
setting screen.
Pointer
7. Use (A) and (D) to move the pointer to
[GPS TRACKING].
8. Press (C).
9. Use (A) and (D) to move the pointer to [3D
DISTANCE].
10. Press (C).
11. Use (A) and (D) to select a setting.
[ON] Surface distance measurement
[OFF] Linear distance measurement
12. Press (C) to complete the setting
operation.
After the setting operation is complete, a
check mark appears for a few seconds,
and then the GPS setting screen re-
appears.
13. Press (E) to exit the setting screen.
Note
●
While the setting is being configured,
the watch will exit the setting operation
automatically after about two or three
minutes of non-operation.
●
You can also use the CASIO
WATCHES phone app to change the
distance measurement type.
Configuring Interval Timer
Settings
●
To configure interval timer settings with
the CASIO WATCHES phone app
You can use the CASIO WATCHES phone
app to configure an interval timer that
combines multiple types of timers.
●
For information about interval timers, see
the information below.
l
Overview
Check the connection
●
Make sure the
e
symbol is shown on the
watch display when you perform the
procedure below. If
e
is not displayed,
refer to the information at the link below.
l
Connecting with a Phone Paired
With the Watch
1.
Y
Tap the “CASIO WATCHES” icon.
2.
Y
Tap the “My Watch” tab.
3.
Y
Select “GPR-H1000” and tap it.
4.
Y
Select the setting you want to change
and then perform the operation shown on
the screen.
Watch Operation Guide 3554
73
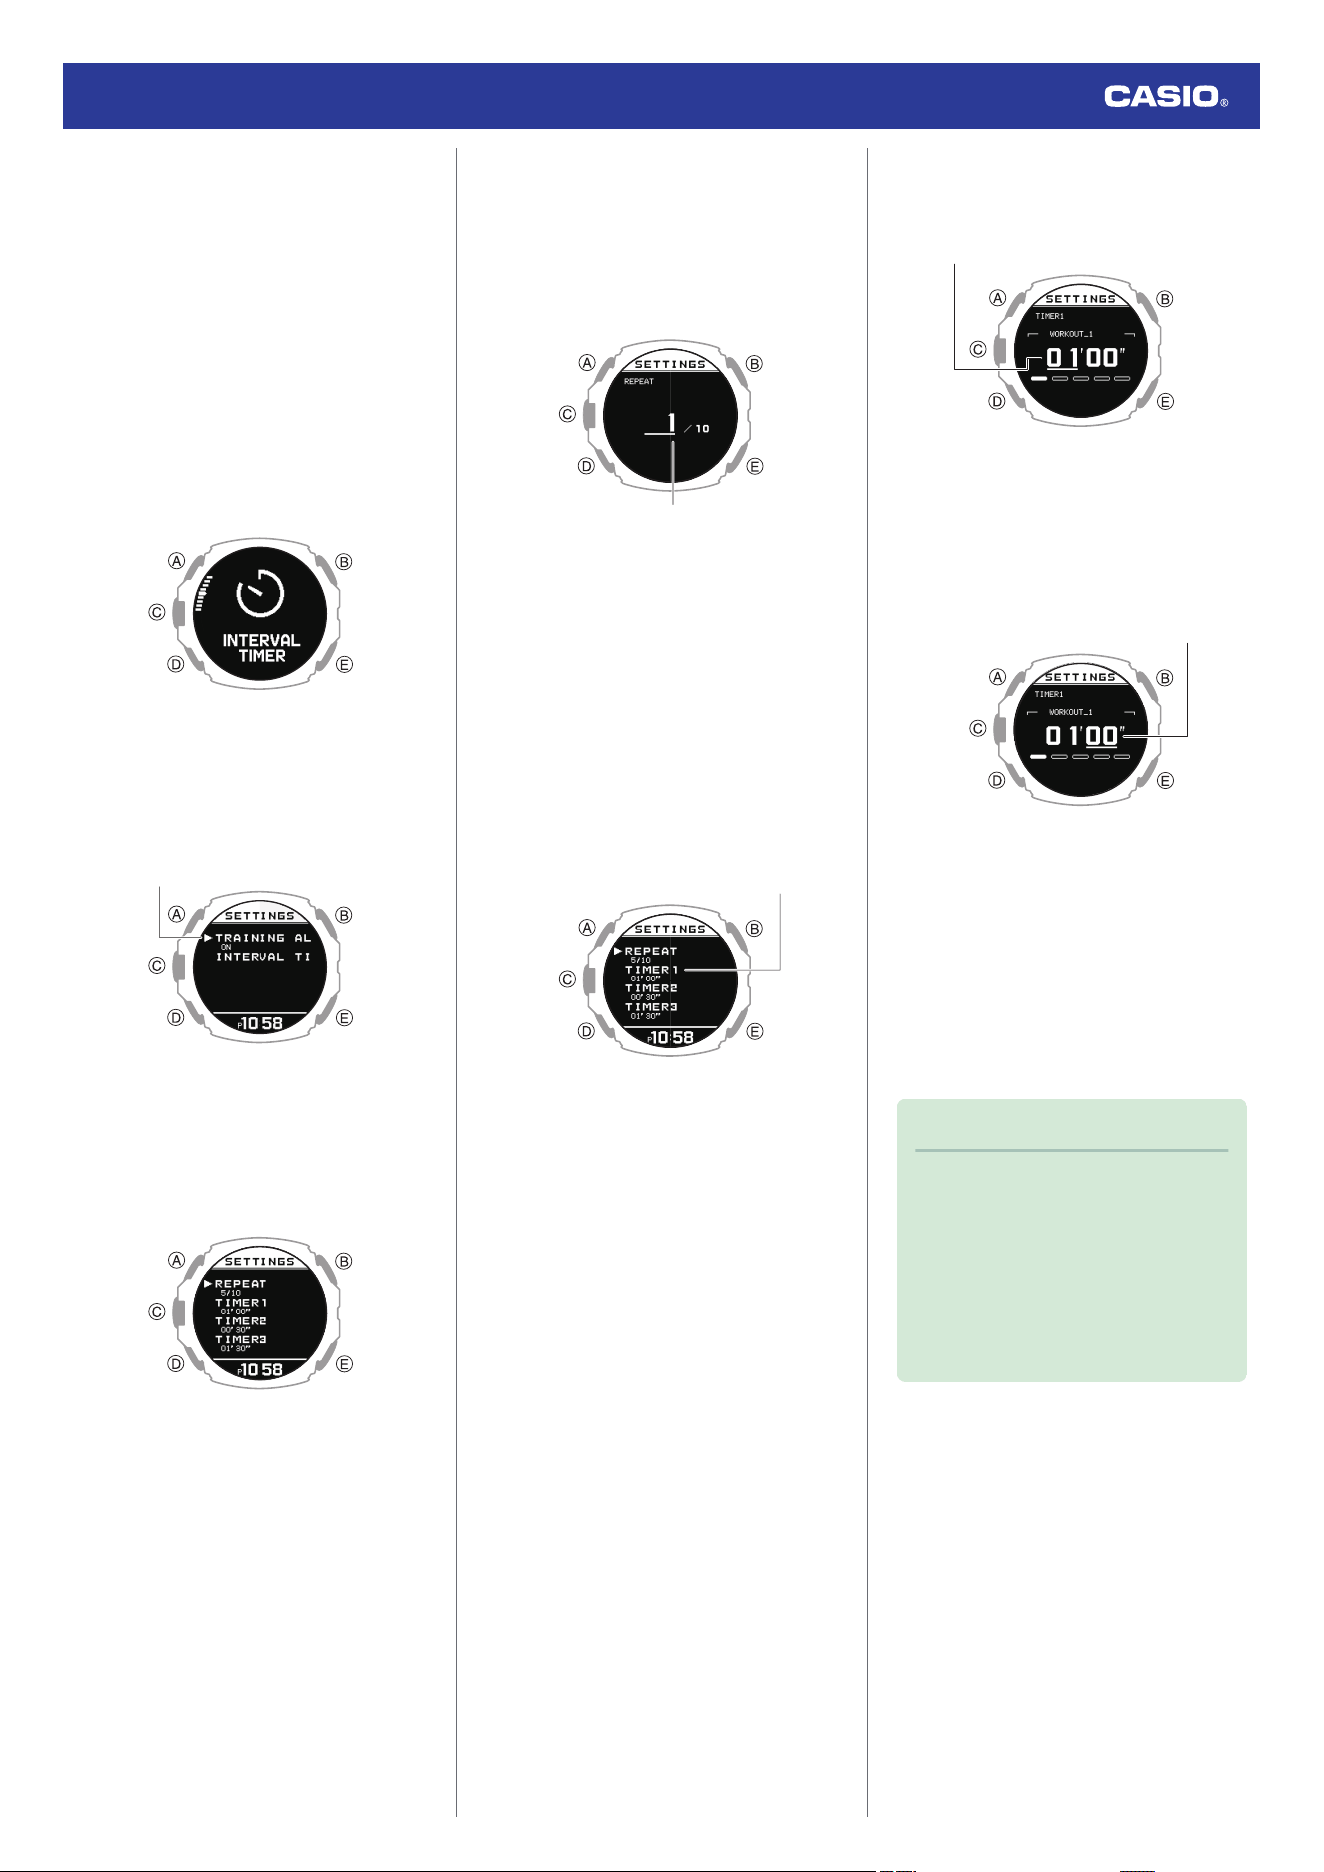
●
To configure interval timer settings with
the watch
●
If a timer countdown operation is in
progress, reset the timer to its current start
time before performing this operation.
l
Using the Timer
1. Display the current time screen.
l
Watch Mode
2. Press (C).
This enters the Activity Mode.
3. Use (A) and (D) to select [INTERVAL
TIMER].
4. Press (C).
5. Hold down (A) for at least two seconds.
This displays the interval training setting
screen.
Pointer
6. Use (A) and (D) to move the pointer to
[INTERVAL TIMER].
7. Press (C).
This displays the interval timer setting
screen.
8. Use (A) and (D) to move the pointer to
[REPEAT].
9. Press (C).
This displays the number of timer repeats
(1 to 10) setting screen.
Number of repeats
10. Use (A) and (D) to specify the number of
timer repeats (Auto Repeat).
11. Press (C).
After the setting operation is complete, a
check mark appears for a few seconds,
and then the interval timer setting screen
re-appears.
12. Use (A) and (D) to specify the sequence
of the timers.
●
To setup the first timer, setup [TIMER1].
Timer sequence
13. Press (C).
This causes the cursor to appear at the
minutes setting of the first timer.
14. Use (A) and (D) to change the minutes
setting.
Minutes
15. Press (C).
This causes the cursor to move to the
seconds setting of the first timer.
16. Use (A) and (D) to change the seconds
setting.
Seconds
17. Press (C) to complete the setting
operation.
After the setting operation is complete, a
check mark appears for a few seconds,
and then the interval timer setting screen
re-appears.
18. Repeat steps 11 through 16 as many
times as necessary to configure the
settings of other timers.
Note
●
Pressing (E) during the above
procedure goes back one screen.
●
You can use the CASIO WATCHES
phone app to change timer names. A
timer name can include a combination
of up to 14 alphabetic letters (A to Z),
numbers (0 to 9), and symbols (/+-_?
&).
Watch Operation Guide 3554
74
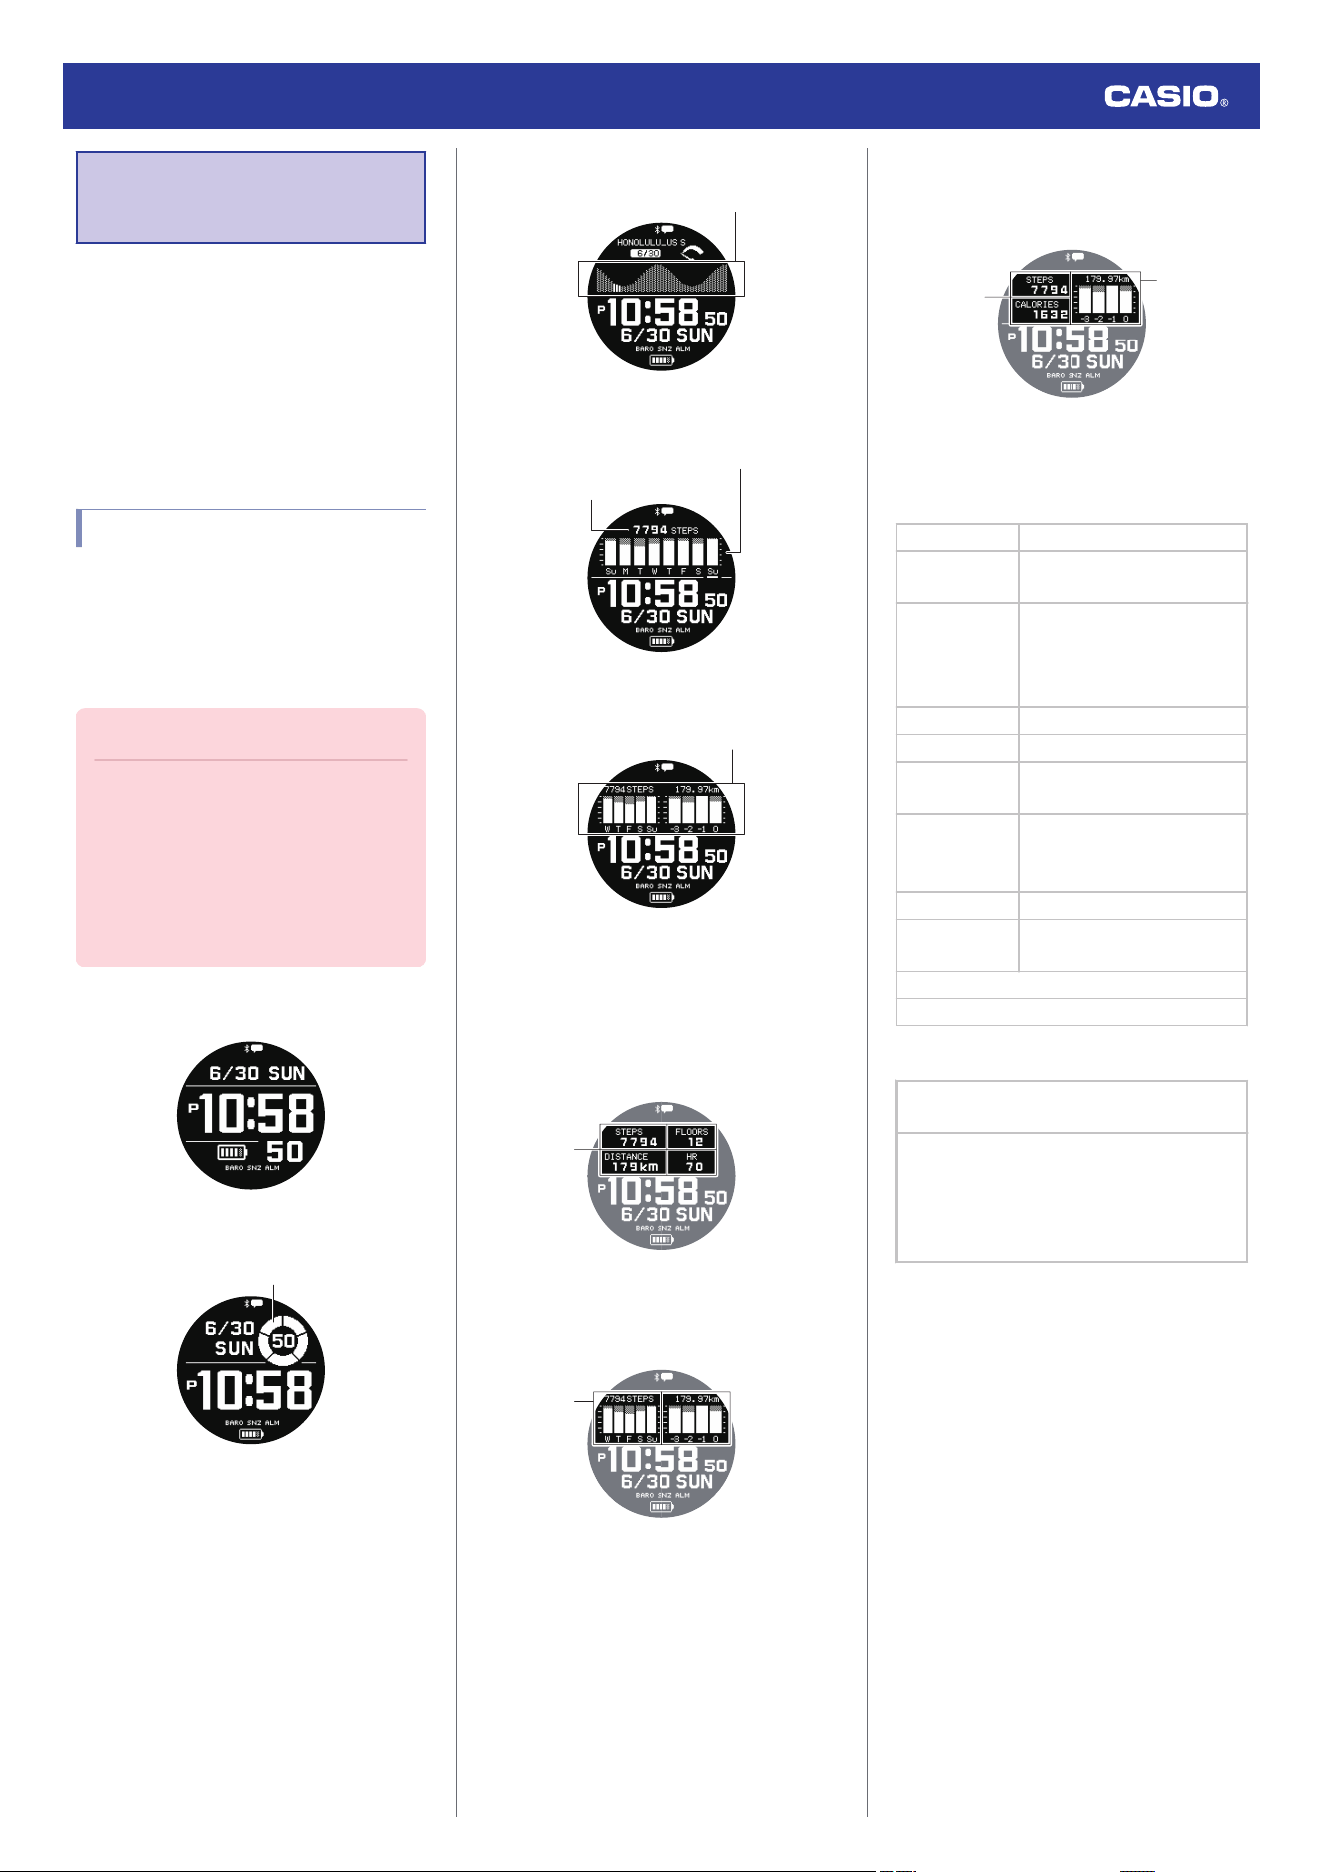
Using the Application
to Configure Settings
This section explains the main watch settings
that can be changed only with the “CASIO
WATCHES” phone app.
To use the settings in this section, you need to
install the “CASIO WATCHES” phone app on
your phone.
l
A
Install the required app on your phone.
Specifying a Watch Face
There are five patterns that you can use for the
current time screen. You can select the
pattern that suits your current lifestyle.
You can customize the display items for Face
5.
Important!
●
You cannot use watch operations to
customize the Face 5 display items.
Use the CASIO WATCHES phone
app.
●
You can use watch operations to select
a watch face.
l
Changing the Watch Face
Face 1
Face 2
Graphic *
* Graphic area operation is linked with the
timekeeping seconds.
Face 3
Tide Graph
Face 4
Today’s step count
Daily step count goal progress
Face 5
Customizable Display
You can specify text-plus-value display or
graphic display for the customizable display.
Custom Pattern 1
●
You can specify up to four different text-and-
value display items.
①
Custom Pattern 2
●
You can specify up to two graph display
items.
②
Custom Pattern 3
●
You can specify two text-plus-value display
items and one graph display item.
①
②
You can select from among the display items
below when customizing a display.
A
Text-Plus-Value Items
[STEPS] Today’s step count
[STATUS]
Cardio Load Status (Cardio
Load Status)
[DISTANCE]
Monthly running distance
●
RUN
●
WALK
●
BIKE
[FLOORS]
Current day’s floor count
[HR] Heart rate
[MAX MIN]
Maximum/Minimum heart
rate
[SLEEP]
●
Sleep score + level display
●
Sleep time
●
Sleep evaluation
[CALORIES] Calories burned
[ACTIVE]
Current day’s physical
exercise time
Sunrise and sunset times
Moon age
B
Graph Items
Step count target achievement graph (5
days)
Monthly running distance change graph (4
months)
●
RUN
●
WALK
●
BIKE
Watch Operation Guide 3554
75
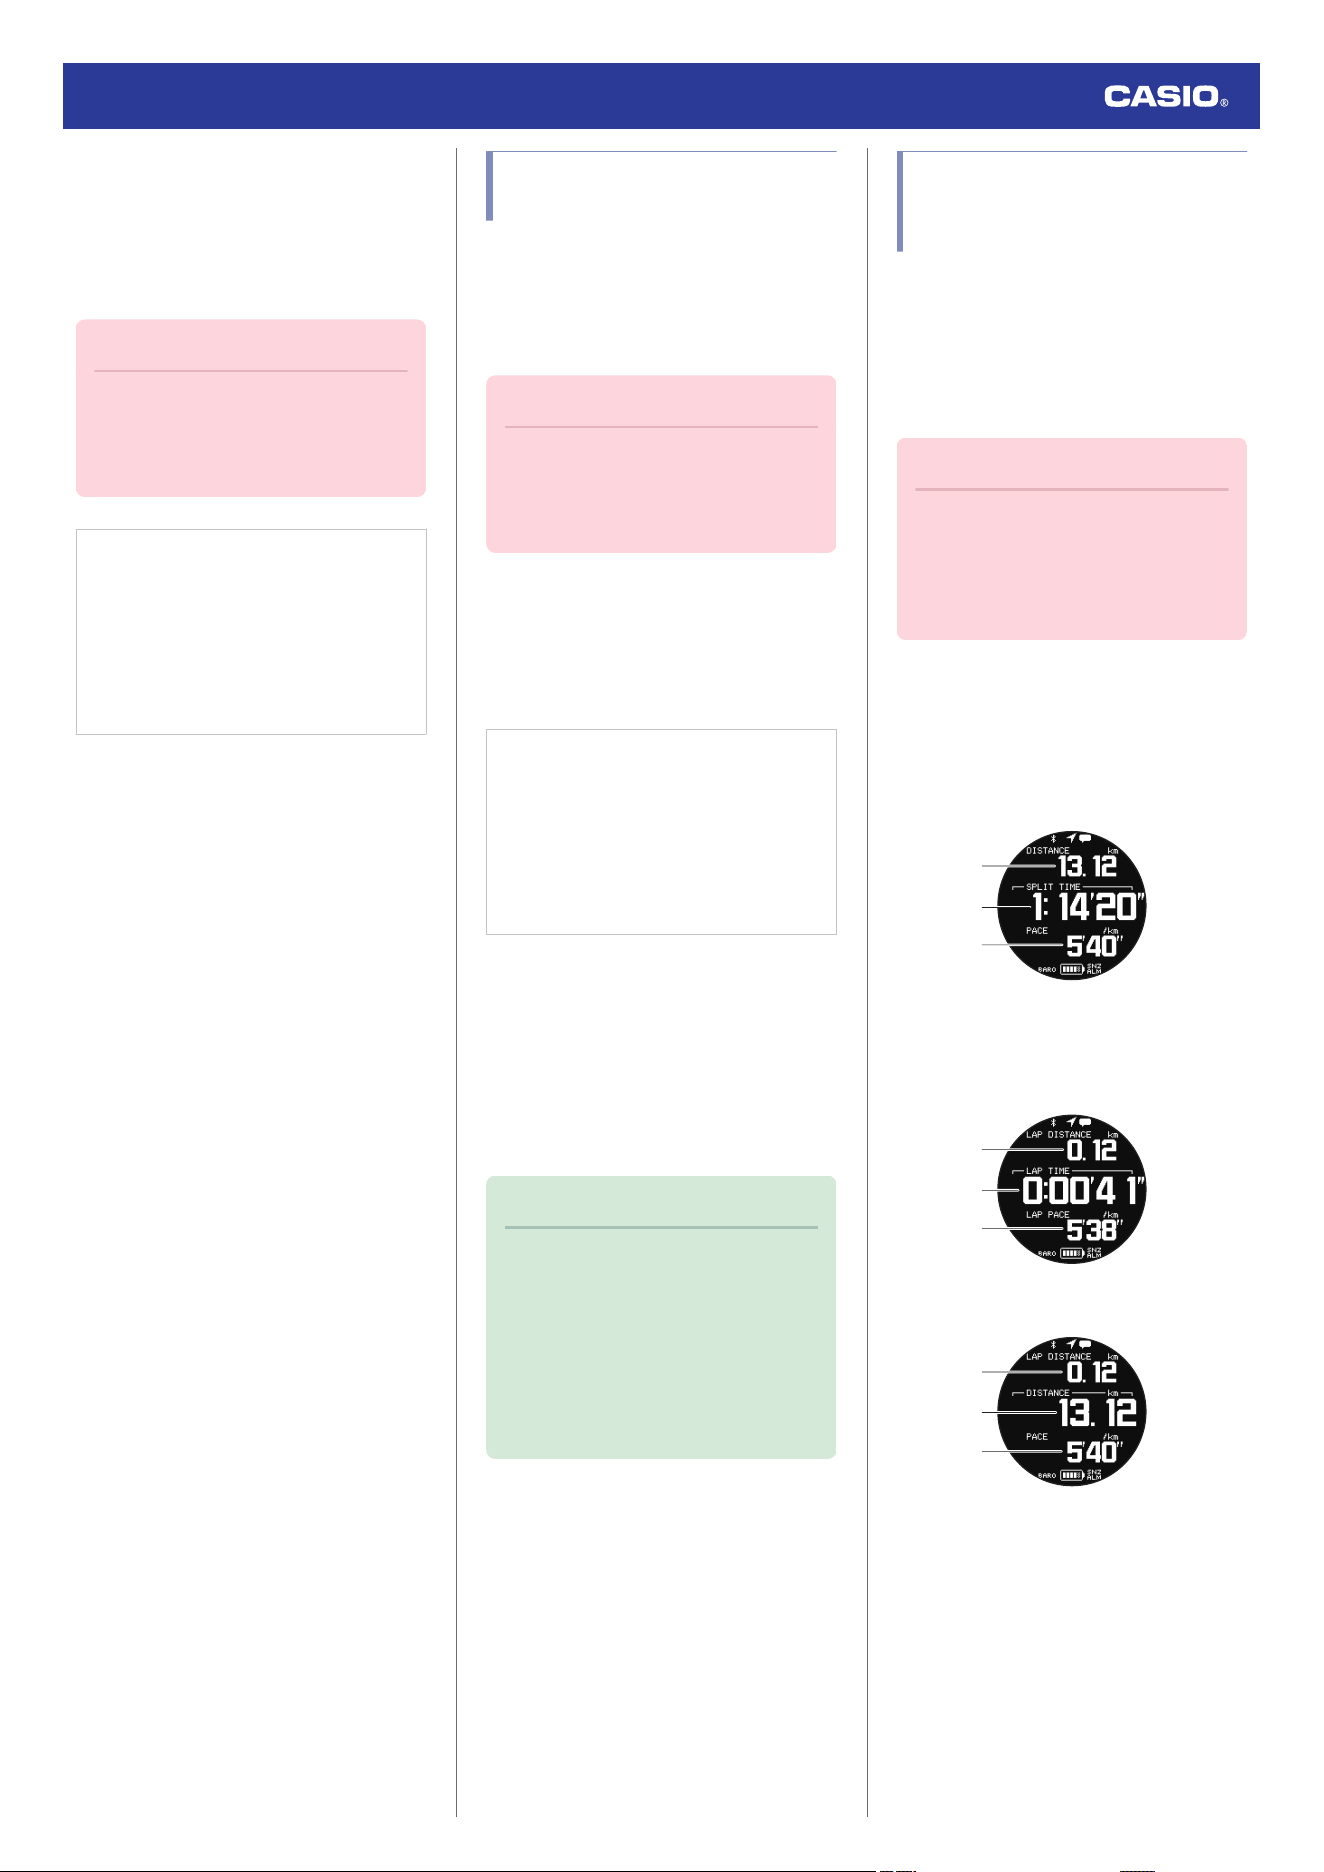
Configuring Settings
Use the CASIO WATCHES phone app to
specify which current time screen you want to
display. In the case of the customizable
display, you can specify the items you want to
include on the display.
Important!
●
You cannot use watch operations to
customize the Face 5 display items.
Use the CASIO WATCHES phone
app.
Check the connection
●
Make sure the
e
symbol is shown on the
watch display when you perform the
procedure below. If
e
is not displayed,
refer to the information at the link below.
l
Connecting with a Phone Paired
With the Watch
1.
Y
Tap the “CASIO WATCHES” icon.
2.
Y
Tap the “My Watch” tab.
3.
Y
Select “GPR-H1000” and tap it.
4.
Y
Select the setting you want to change
and then perform the operation shown on
the screen.
Customizing the Watch Mode
and Activity Mode Functions
You can use the CASIO WATCHES phone
app to specify the sequence that functions
appear in the Watch Mode and Activity Mode.
You can also add or delete functions as
desired.
Important!
●
You cannot perform function
customization operations on the
watch. Use the CASIO WATCHES
phone app to configure settings.
For information about functions that can be
rearranged and deleted, see the information
below.
l
Watch Mode
l
Activity Overview
Check the connection
●
Make sure the
e
symbol is shown on the
watch display when you perform the
procedure below. If
e
is not displayed,
refer to the information at the link below.
l
Connecting with a Phone Paired
With the Watch
1.
Y
Tap the “CASIO WATCHES” icon.
2.
Y
Tap the “My Watch” tab.
3.
Y
Select “GPR-H1000” and tap it.
4.
Y
Select the setting you want to change
and then perform the operation shown on
the screen.
Note
●
Adding or deleting functions may
change settings.
●
Even if you delete the almanac
(sunrise, sunset times, Moon age)
function and Tide function, you can still
display sunrise and sunset times and
the Tide Graph on the current time
screen.
Configuring Activity
Measurement Display
Settings
There are various types of activity
measurement screens, and up to 9 screens
can be registered for each activity.
From among the registered screens, you can
specify which one should be displayed while
each activity measurement is in progress.
Important!
●
You can specify activity measurement
screens using the CASIO WATCHES
phone app. You cannot use watch
operations to configure activity
measurement screen settings.
●
Screen 1 is fixed as “Measurement Screen
1”. Select screens 2 to 9 from among
screens that are other than “Measurement
Screen 1”.
Measurement Screen 1
②
③
①
From among the following, select the screens
to be displayed for screens 2 through 9.
Measurement Screen 2
②
③
①
Measurement Screen 3
②
③
①
●
You can customize the items that appear in
the
A
upper,
B
middle, and
C
lower
sections of the measurement screen 1 to 3.
You can specify customization items using
the CASIO WATCHES phone app.
Watch Operation Guide 3554
76
Heart Rate Measurement Screen
②
③
①
A Movement time from measurement start
B Current heart rate
C Target HR zone value
Current time screen
②
①
A Current time
B Movement time from measurement start
Altitude screen
③
④
②
①
A Altitude of current location
B Current heart rate
C [DIFF RESET] (Altitude Differential Reset)
and the altitude differential
D Movement time from measurement start
Barometric pressure screen
③
④
②
①
⑤
②
④
⑤
①
A Current barometric pressure
B Current temperature
C Barometric pressure graph
D Current heart rate
E Movement time from measurement start
Bearing screen
④
②
③
①
A Current bearing
B Current bearing angle
C Current heart rate
D Movement time from measurement start
Almanac screen
③
④
⑤
②
①
A Date of measurement
B Measurement day Moon age
C Measurement day sunrise time
D Measurement day sunset time
E Movement time from measurement start
Altitude navigation screen
③
④
⑤
⑥
②
①
A Shows the current altitude at the scale
location
B Currently displayed checkpoints
C Altitude set for the currently displayed
checkpoint
D Altitude difference between current
altitude and checkpoint
E Movement time from measurement start
F Current heart rate
●
A pointer ( ) to the right of the scale along
the left of the screen also indicates the
altitude differential between the checkpoint
and current altitude. The appearance of the
pointer changes as described below.
This
pointer:
Means this:
Altitude differential of +100 m (Or:
+100 ft) or more
Altitude differential within -100 to
100 m (Or: -100 to 100 ft)
Altitude differential of -100 m (Or:
-100 ft) or more
●
For information about advanced navigation
settings, see the information below.
l
Specifying Checkpoints Along a Training
Course (Altitude Navigation)
Note
●
Holding down (D) for at least two
seconds switches the checkpoint
display.
Watch Operation Guide 3554
77
Interval timer screen
④
③
①
②
A Total measurement time
B Interval timer value
C Number of repeats
D Current heart rate
Note
●
In the case of INTERVAL TIMER,
Screen 1 shows the interval timer
screen.
Configuring Settings
Check the connection
●
Make sure the
e
symbol is shown on the
watch display when you perform the
procedure below. If
e
is not displayed,
refer to the information at the link below.
l
Connecting with a Phone Paired
With the Watch
1.
Y
Tap the “CASIO WATCHES” icon.
2.
Y
Tap the “My Watch” tab.
3.
Y
Select “GPR-H1000” and tap it.
4.
Y
Select the setting you want to change
and then perform the operation shown on
the screen.
Specifying Checkpoints
Along a Training Course
(Altitude Navigation)
You can use the CASIO WATCHES phone
app to specify checkpoints along a running
course. You can use the watch to check the
altitude differential between a checkpoint and
your current location.
l
Configuring Activity Measurement Display
Settings
Important!
●
Note that you cannot specify
checkpoints using watch operations.
Use the CASIO WATCHES phone app
to configure settings.
Check the connection
●
Make sure the
e
symbol is shown on the
watch display when you perform the
procedure below. If
e
is not displayed,
refer to the information at the link below.
l
Connecting with a Phone Paired
With the Watch
1.
Y
Tap the “CASIO WATCHES” icon.
2.
Y
Tap the “My Watch” tab.
3.
Y
Select “GPR-H1000” and tap it.
4.
Y
Select the setting you want to change
and then perform the operation shown on
the screen.
Enabling the Wrist Sensor
You can use the CASIO WATCHES phone
app to enable or disable the wrist sensor so
the watch can detect whether or not it is
attached to your wrist.
●
The wrist sensor is enabled under initial
factory default settings.
Important!
●
You cannot change the wrist sensor
setting using watch operations. Use
the CASIO WATCHES phone app to
configure settings.
Check the connection
●
Make sure the
e
symbol is shown on the
watch display when you perform the
procedure below. If
e
is not displayed,
refer to the information at the link below.
l
Connecting with a Phone Paired
With the Watch
1.
Y
Tap the “CASIO WATCHES” icon.
2.
Y
Tap the “My Watch” tab.
3.
Y
Select “GPR-H1000” and tap it.
4.
Y
Tap “Watch Settings”.
5.
Y
Tap “Find Worn Watch”.
6.
Y
Enable “On”.
Watch Operation Guide 3554
78
Specifying Your Desired
Bedtime and Wake-Up Time
You can use the CASIO WATCHES phone
app to specify your bedtime and wake-up
time.
Important!
●
You cannot use watch operations to
configure bedtime and wake-up time
settings. Use the CASIO WATCHES
phone app to configure settings.
Check the connection
●
Make sure the
e
symbol is shown on the
watch display when you perform the
procedure below. If
e
is not displayed,
refer to the information at the link below.
l
Connecting with a Phone Paired
With the Watch
1.
Y
Tap the “CASIO WATCHES” icon.
2.
Y
Tap the “My Watch” tab.
3.
Y
Select “GPR-H1000” and tap it.
4.
Y
Tap “LIFE LOG”.
5.
Y
Tap “Sleep”.
6.
Y
Configure “Sleeping Time” and “Waking
Time” settings.
Specifying a Daily Step
Count Target
You can use CASIO WATCHES to specify
daily step count target values.
Important!
●
A target value cannot be specified
using watch operations. Use the
CASIO WATCHES phone app to
configure settings.
Check the connection
●
Make sure the
e
symbol is shown on the
watch display when you perform the
procedure below. If
e
is not displayed,
refer to the information at the link below.
l
Connecting with a Phone Paired
With the Watch
1.
Y
Tap the “CASIO WATCHES” icon.
2.
Y
In the upper right corner of the screen,
tap .
3.
Y
Tap “User Profile”.
4.
Y
Select the setting you want to change
and then perform the operation shown on
the screen.
Note
●
In addition to target values, you can
also configure settings to alert you
when a target is reached.
Configuring Watch Settings
After establishing a connection between the
watch and the CASIO WATCHES phone app,
you can use the phone app to configure
various watch function settings and to view
information acquired by the watch.
Check the connection
●
Make sure the
e
symbol is shown on the
watch display when you perform the
procedure below. If
e
is not displayed,
refer to the information at the link below.
l
Connecting with a Phone Paired
With the Watch
1.
Y
Tap the “CASIO WATCHES” icon.
2.
Y
Tap the “My Watch” tab.
3.
Y
Select “GPR-H1000” and tap it.
4.
Y
Select the setting you want to change
and then perform the operation shown on
the screen.
Watch Operation Guide 3554
79
Other Settings
This section explains other watch settings you
can configure.
Changing the Watch Face
There are five patterns that you can use for the
current time screen. You can select the
pattern that suits your current lifestyle.
For details about the five watch faces, see the
information below.
l
Specifying a Watch Face
1. Display the current time screen.
l
Watch Mode
2. Hold down (A) for at least two seconds.
This enters the Control Mode.
3. Use (A) and (D) to select [SETTING].
4. Press (C).
This displays the setting menu screen.
Pointer
5. Use (A) and (D) to move the pointer to
[WATCH SETTINGS].
6. Press (C).
7. Use (A) and (D) to move the pointer with
[WATCH FACE].
8. Press (C).
9. Use (A) and (D) to move the pointer with
the watch face you want to select.
●
For details about displaying and
customizing each watch face, see the
information below.
l
Specifying a Watch Face
10. Press (C) to complete the setting
operation.
After the setting operation is complete, a
check mark appears for a few seconds,
and then the watch face setting screen re-
appears.
11. Hold down (E) for at least one second to
return to the current time screen.
Turning On Silent Mode
While the silent mode is turned on, the watch
only vibrates for notifications regardless of the
beep and vibration notification settings.
Illumination will not turn on while a notification
or button operation is in progress.
1. Display the current time screen.
l
Watch Mode
2. Hold down (E) for at least three seconds
to toggle silent mode on or off.
●
Turning on silent mode causes [ ] to
appear on the display.
Enabled
Note
●
If the beeper alert and vibration are
turned off and silent mode is turned on,
beeper, vibration, and light notification
operations are not performed.
Enabling Step Reminder
Step Reminder displays an indicator and
performs a sound or vibration alert when the
watch determines you have not walked
enough during a specific period. This is
valuable feedback that helps you achieve your
exercise goals.
If the watch performs this Step Reminder alert
operation, try walking for about five minutes.
1. Display the current time screen.
l
Watch Mode
2. Hold down (A) for at least two seconds.
This enters the Control Mode.
3. Use (A) and (D) to select [SETTING].
Watch Operation Guide 3554
80
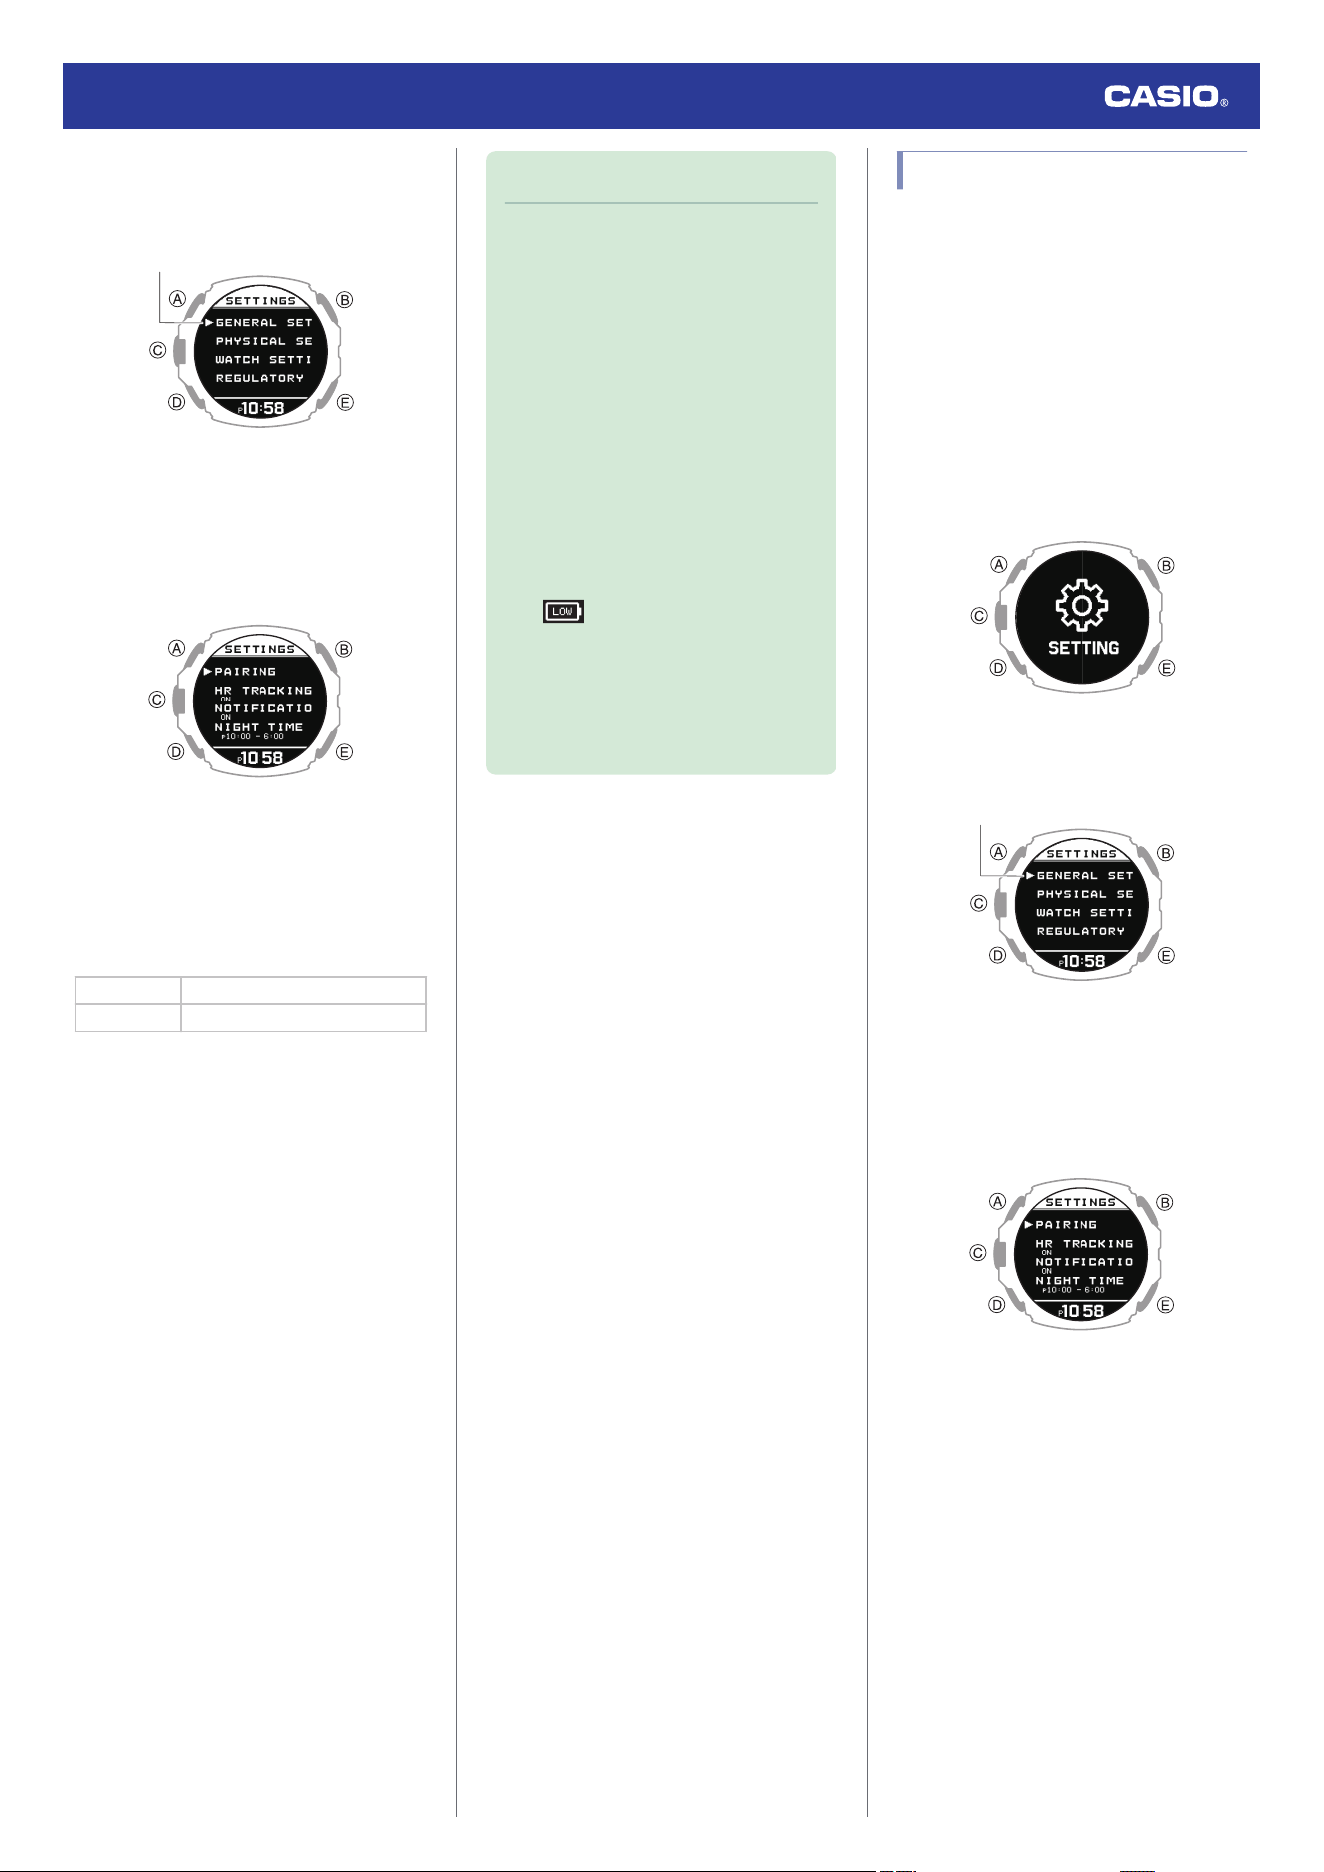
4. Press (C).
This displays the setting menu screen.
Pointer
5. Use (A) and (D) to move the pointer to
[GENERAL SETTINGS].
6. Press (C).
This displays the GENERAL SETTINGS
screen.
7. Use (A) and (D) to move the pointer to
[STEP REMINDER].
8. Press (C).
9. Use (A) and (D) to select the step reminder
ON/OFF setting you want.
[OFF] Step reminder function off
[ON] Step reminder function on
10. Press (C) to complete the setting
operation.
After the setting operation is complete, a
check mark appears for a few seconds,
and then the step reminder function
setting screen re-appears.
11. Hold down (E) for at least one second to
return to the current time screen.
Note
●
If you do not perform any operation for
two or three minutes while the setting
screen is displayed, the watch
automatically returns to the current
time screen.
●
Even if step reminder is turned on, the
watch will not perform notification if any
one of the conditions below exists.
ー
When the watch detects it is not
being worn
ー
While the current time is within the
period defined by the bedtime and
wake-up times you specified
ー
While an activity is in progress
ー
While the battery level indicator is
or lower
ー
When there is a sensor error
●
If behavior analysis does not detect
walking and running, the watch may
notify you that step reminder has
determined that your step count is low.
●
Clearing an Ongoing Notification
Press any button to clear an ongoing step
reminder notification.
Specifying the Night Time
Specify your night time.
After you specify your night time, you can link
notification reception from your phone and
your heart rate measurement settings NIGHT
TIME.
1. Display the current time screen.
l
Watch Mode
2. Hold down (A) for at least two seconds.
This enters the Control Mode.
3. Use (A) and (D) to select [SETTING].
4. Press (C).
This displays the setting menu screen.
Pointer
5. Use (A) and (D) to move the pointer to
[GENERAL SETTINGS].
6. Press (C).
This displays the GENERAL SETTINGS
screen.
Watch Operation Guide 3554
81
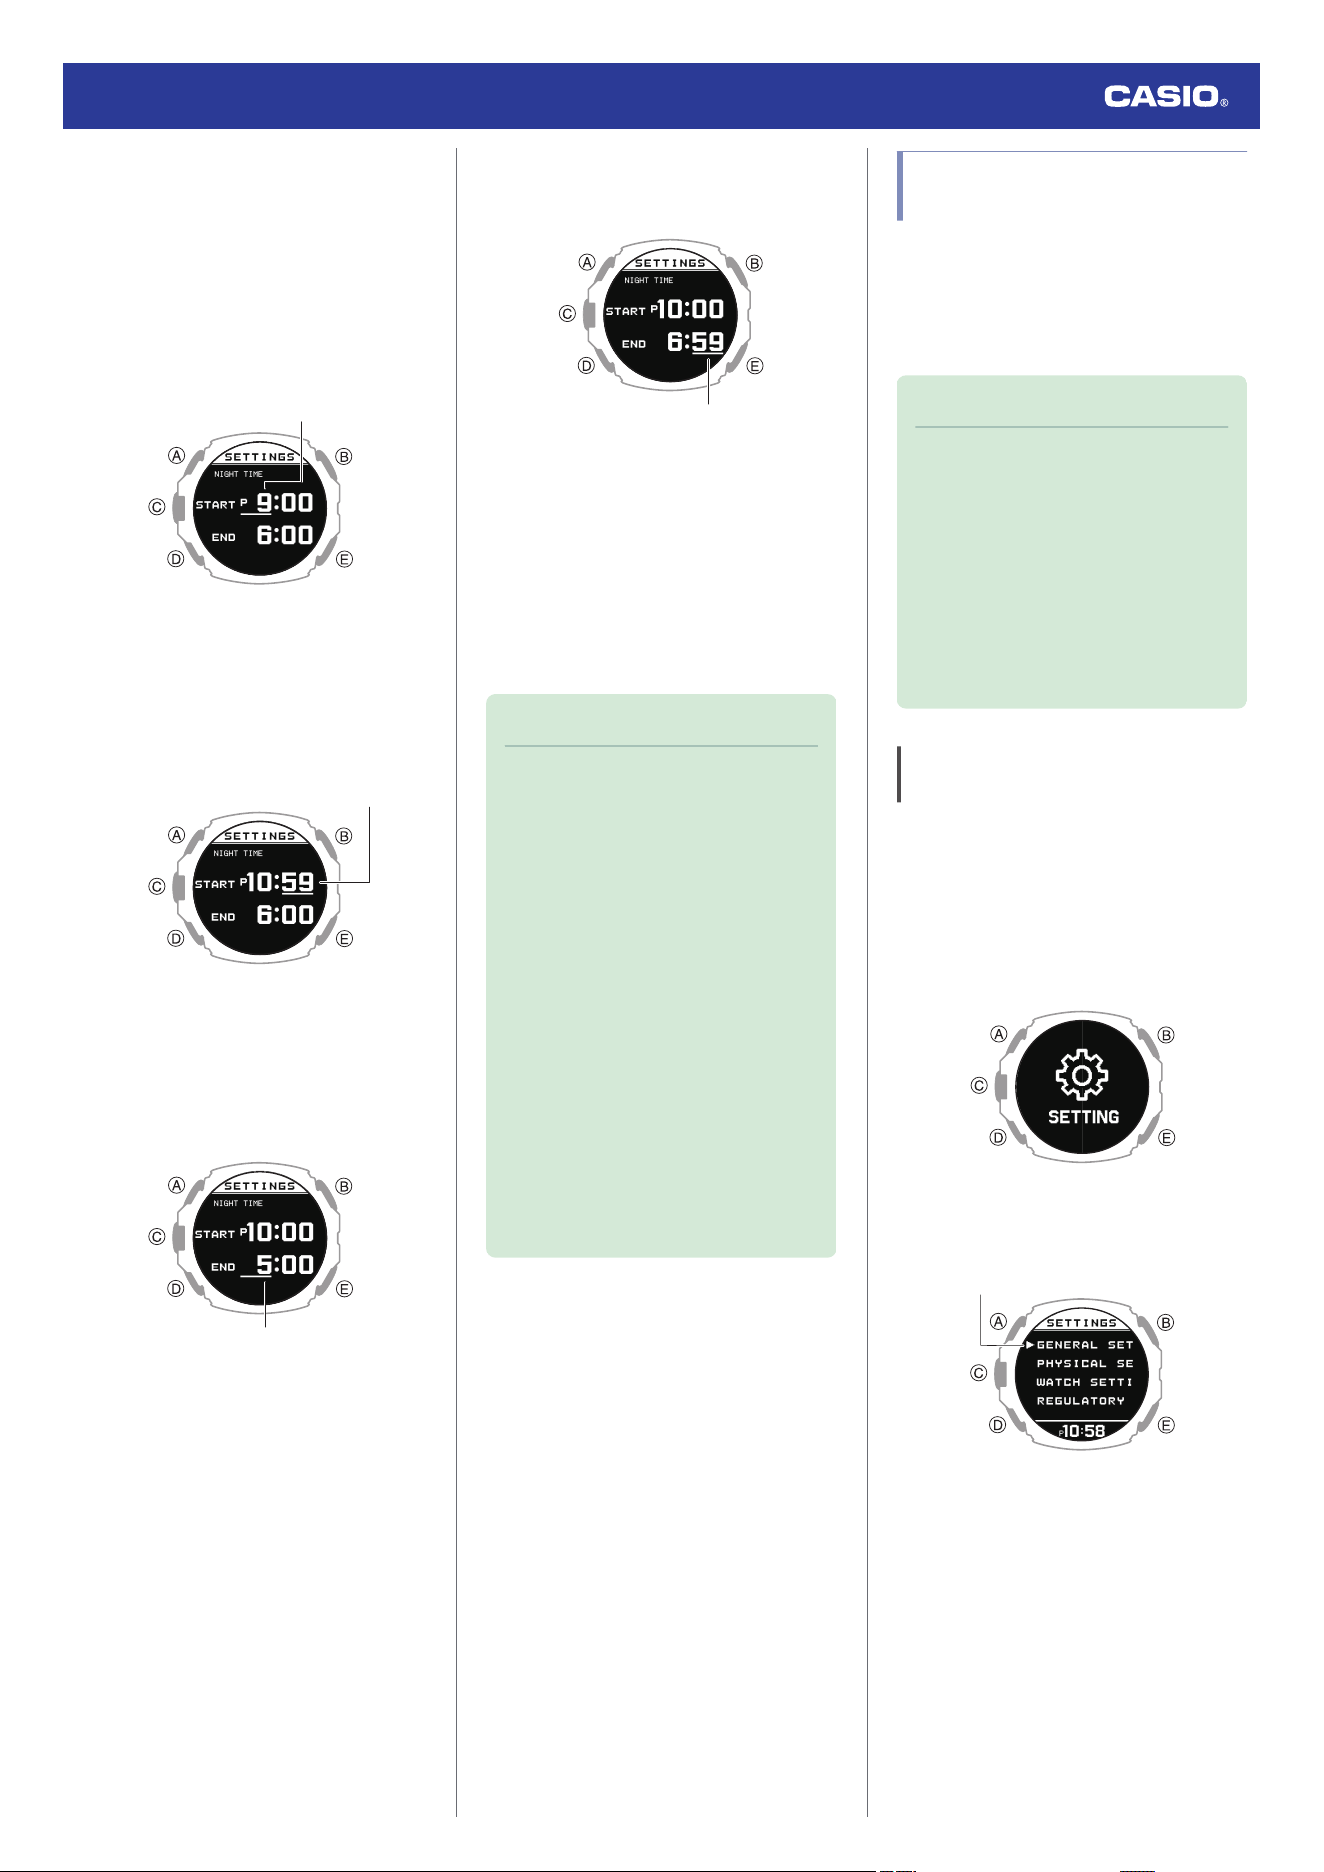
7. Use (A) and (D) to move the pointer to
[NIGHT TIME].
8. Press (C).
This causes a cursor to appear at the hour
setting of the night time start time.
9. Use (A) and (D) to change the start time
hour setting.
Hours
10. Press (C).
This causes the cursor to move to the start
time minute setting.
11. Use (A) and (D) to change the start time
minute setting.
Minutes
12. Press (C).
This causes the cursor to move to the end
time hour setting
13. Use (A) and (D) to change the end time
hour setting.
Hours
14. Press (C).
This causes the cursor to move to the end
time minute setting.
15. Use (A) and (D) to change the end time
minute setting.
Minutes
16. Press (C) to complete the setting
operation.
After the setting operation is complete, a
check mark appears for a few seconds,
and then the night time setting screen re-
appears.
17. Hold down (E) for at least one second to
return to the current time screen.
Note
●
The allowable night time setting range
is no shorter than six hours and no
longer than 12 hours. If you configure
a setting outside this range, the end
time is automatically corrected, so the
setting is within the allowable range.
●
If you do not perform any operation for
two or three minutes while the setting
screen is displayed, the watch
automatically returns to the current
time screen.
●
If sleep measurement is performed
while [ACTIVITY & NIGHT TIME ON] is
selected for heart rate measurement,
sleep measurement will start from the
time set for NIGHT TIME. For the
NIGHT TIME time setting, specify your
normal sleep time (bedtime and wake-
up time).
Configuring Sound and
Vibration Settings
In addition to button operation and notification
sounds and vibration, your watch also uses
sound and vibration for alerts. You can use the
procedure below to enable or disable sound
and vibration.
Note
●
The pattern and duration of the sound
or vibration cannot be changed.
●
Regardless of the beeper and vibration
alert settings, illumination turns on
when you perform a button operation
or when an alert operation starts.
Illumination that is turned on when a
button operation is performed or by a
notification operation cannot be turned
off.
Configuring Operation Sound and
Vibration Settings
1. Display the current time screen.
l
Watch Mode
2. Hold down (A) for at least two seconds.
This enters the Control Mode.
3. Use (A) and (D) to select [SETTING].
4. Press (C).
This displays the setting menu screen.
Pointer
5. Use (A) and (D) to move the pointer to
[GENERAL SETTINGS].
Watch Operation Guide 3554
82
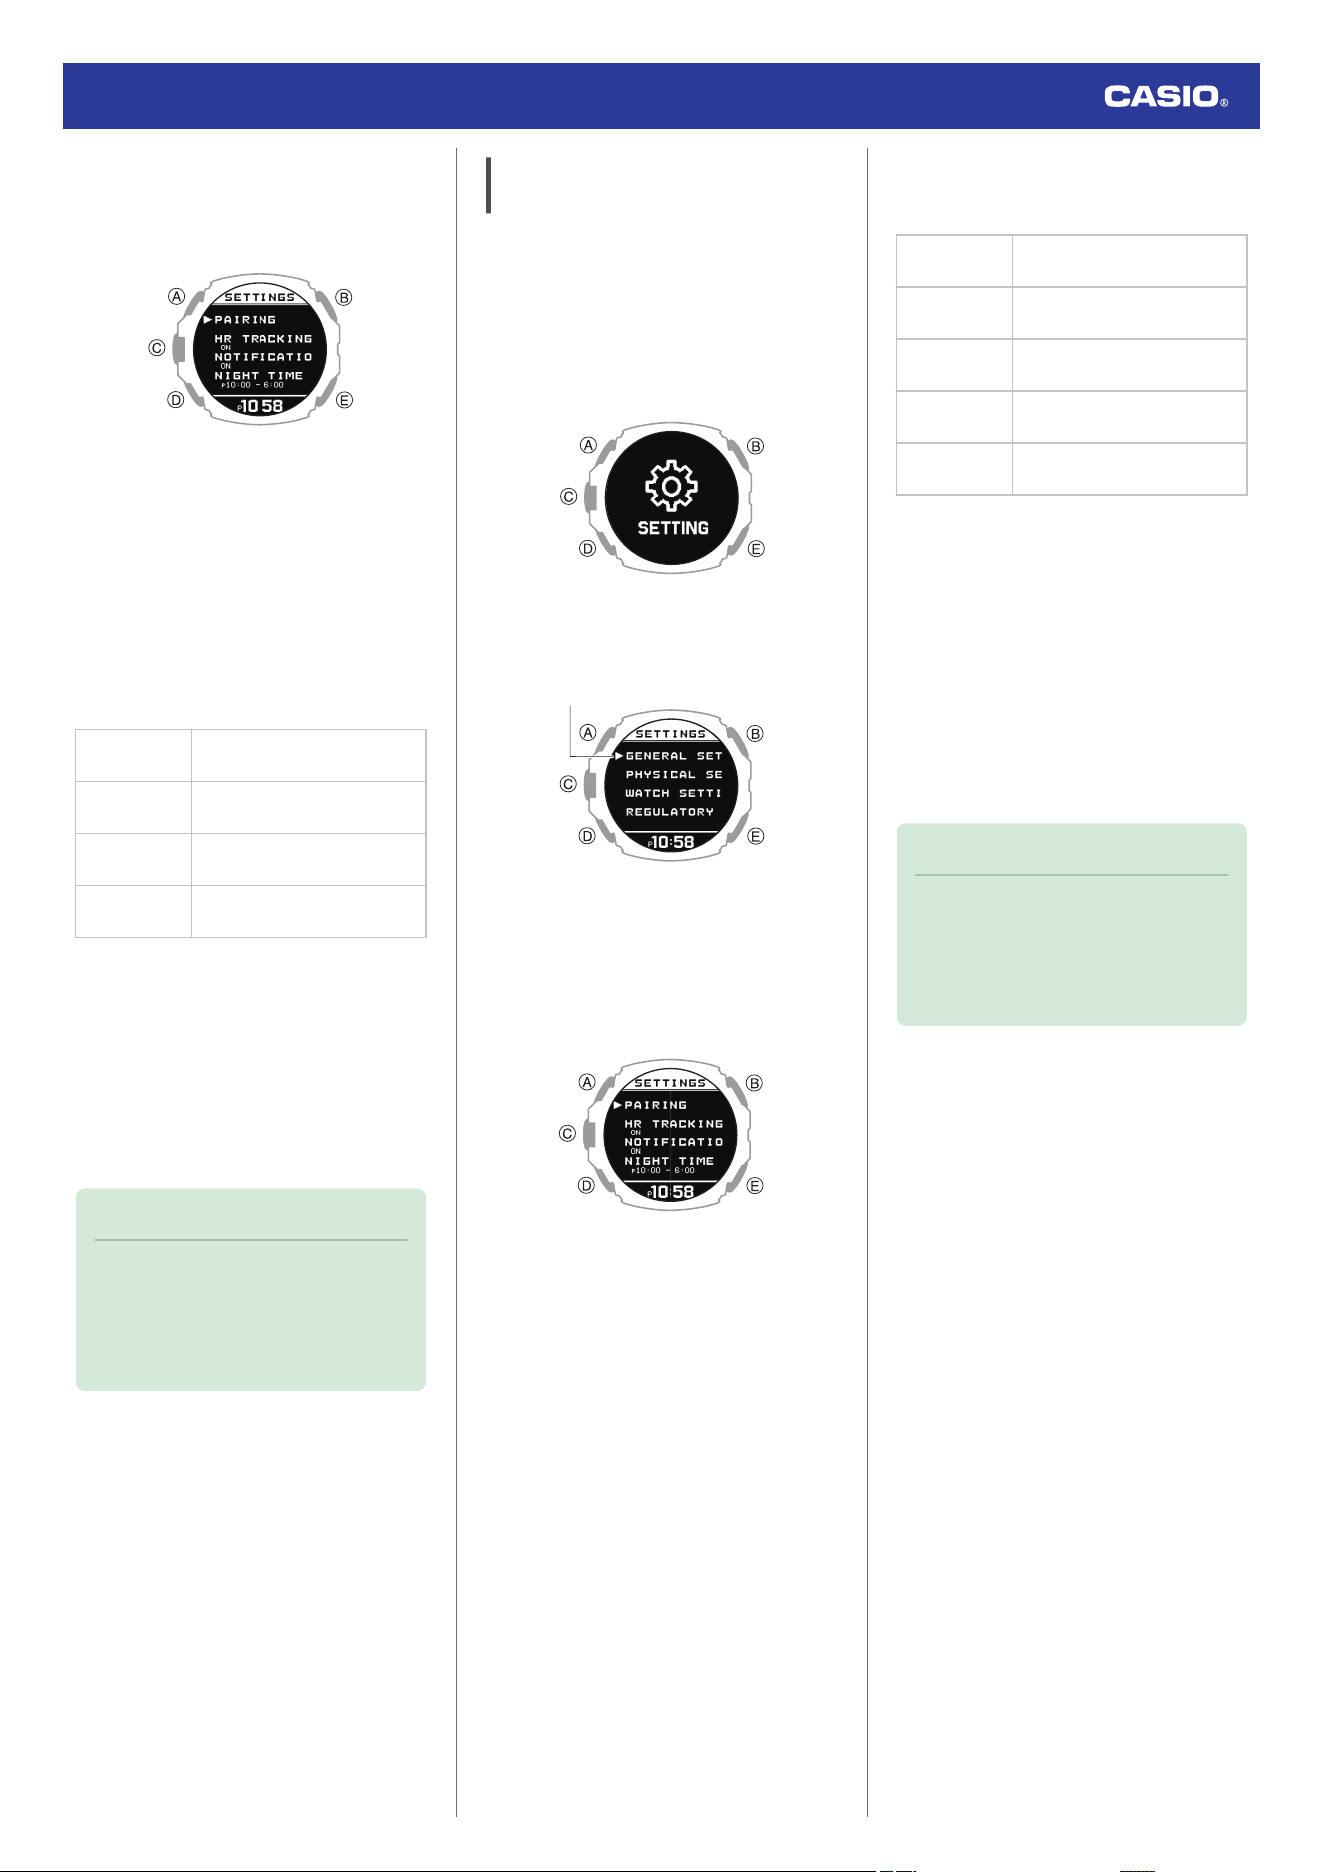
6. Press (C).
This displays the GENERAL SETTINGS
screen.
7. Use (A) and (D) to move the pointer to
[BEEP/VIBE].
8. Press (C).
9. Use (A) and (D) to move the pointer to
[BUTTON OPERATION].
10. Press (C).
11. Use (A) and (D) to select operation sound
and vibration settings.
[BEEP+VIBE]
Operation sound on,
Operation vibration on
[BEEP]
Operation sound on,
Operation vibration off
[VIBE]
Operation sound off,
Operation vibration on
[OFF]
Operation sound off,
Operation vibration off
12. Press (C) to complete the setting
operation.
After the setting operation is complete, a
check mark appears for a few seconds,
and then the sound and vibration setting
screen re-appears.
13. Hold down (E) for at least one second to
return to the current time screen.
Note
●
If you do not perform any operation for
two or three minutes while the setting
screen is displayed, the watch
automatically returns to the current
time screen.
Configuring Notification Sound and
Vibration Settings
1. Display the current time screen.
l
Watch Mode
2. Hold down (A) for at least two seconds.
This enters the Control Mode.
3. Use (A) and (D) to select [SETTING].
4. Press (C).
This displays the setting menu screen.
Pointer
5. Use (A) and (D) to move the pointer to
[GENERAL SETTINGS].
6. Press (C).
This displays the GENERAL SETTINGS
screen.
7. Use (A) and (D) to move the pointer to
[BEEP/VIBE].
8. Press (C).
9. Use (A) and (D) to move the pointer to
[NOTIFICATIONS].
10. Press (C).
11. Use (A) and (D) to select a notification
sound and vibration settings.
[BEEP+VIBE]
Notification sound on,
notification vibration on
[BEEP]
Notification sound on,
notification vibration off
[VIBE]
Notification sound off,
notification vibration on
[USER]
On only for user-specified
setting items
[OFF]
Notification sound off,
notification vibration off
●
[USER] setting items can be changed
using the CASIO WATCHES phone
app.
12. Press (C) to complete the setting
operation.
After the setting operation is complete, a
check mark appears for a few seconds,
and then the sound and vibration setting
screen re-appears.
13. Hold down (E) for at least one second to
return to the current time screen.
Note
●
If you do not perform any operation for
two or three minutes while the setting
screen is displayed, the watch
automatically returns to the current
time screen.
Watch Operation Guide 3554
83
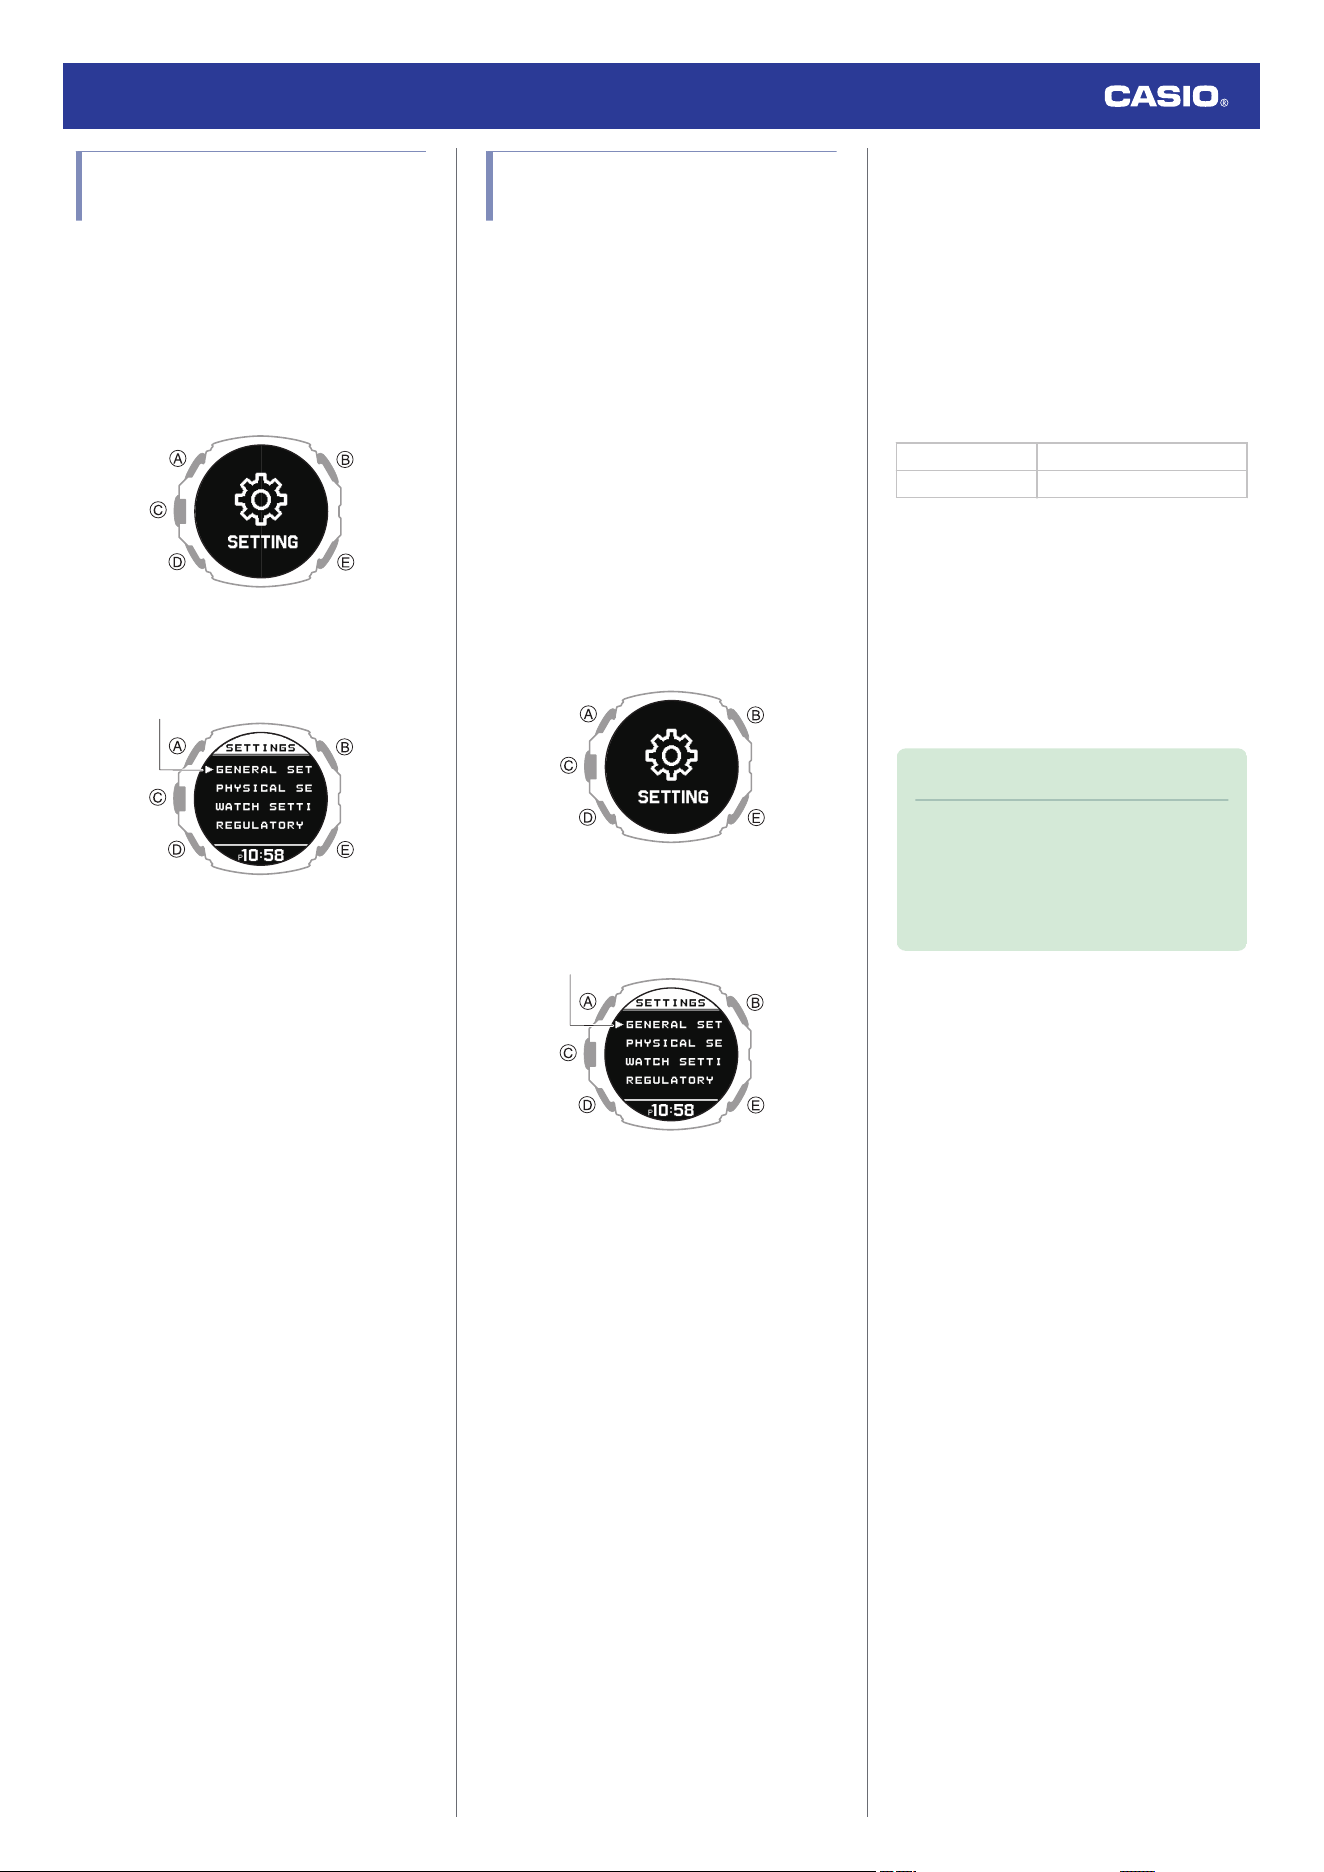
Configuring the Auto Light
Setting
1. Display the current time screen.
l
Watch Mode
2. Hold down (A) for at least two seconds.
This enters the Control Mode.
3. Use (A) and (D) to select [SETTING].
4. Press (C).
This displays the setting menu screen.
Pointer
5. Use (A) and (D) to move the pointer to
[GENERAL SETTINGS].
6. Press (C).
This displays the GENERAL SETTINGS
screen.
7. Use (A) and (D) to move the pointer to
[LIGHT].
8. Press (C).
9. Use (A) and (D) to move the pointer to
[AUTO LIGHT].
10. Press (C).
11. Use (A) and (D) to move the pointer to
[OFF] (disabled) or [ON] (enabled).
12. Press (C) to complete the setting
operation.
After the setting operation is complete, a
check mark appears for a few seconds,
and then the auto light setting screen re-
appears.
13. Hold down (E) for at least one second to
return to the current time screen.
Specifying the Illumination
Duration
You can select either 1.5 seconds or five
seconds as the illumination duration.
The illumination duration setting is applied as
described below.
●
Illumination triggered by a button operation
●
Auto Light illumination
●
Illumination that is triggered by Auto Lap, a
notification, an alarm or some other
notification operation
1. Display the current time screen.
l
Watch Mode
2. Hold down (A) for at least two seconds.
This enters the Control Mode.
3. Use (A) and (D) to select [SETTING].
4. Press (C).
This displays the setting menu screen.
Pointer
5. Use (A) and (D) to move the pointer to
[GENERAL SETTINGS].
6. Press (C).
This displays the GENERAL SETTINGS
screen.
7. Use (A) and (D) to move the pointer to
[LIGHT].
8. Press (C).
9. Use (A) and (D) to move the pointer to
[DURATION].
10. Press (C).
11. Use (A) and (D) to select an illumination
duration.
[1.5s] 1.5-second illumination
[5.0s] 5-second illumination
12. Press (C) to complete the setting
operation.
After the setting operation is complete, a
check mark appears for a few seconds,
and then the illumination duration setting
screen re-appears.
13. Hold down (E) for at least one second to
return to the current time screen.
Note
●
If you do not perform any operation for
two or three minutes while the setting
screen is displayed, the watch
automatically returns to the current
time screen.
Watch Operation Guide 3554
84
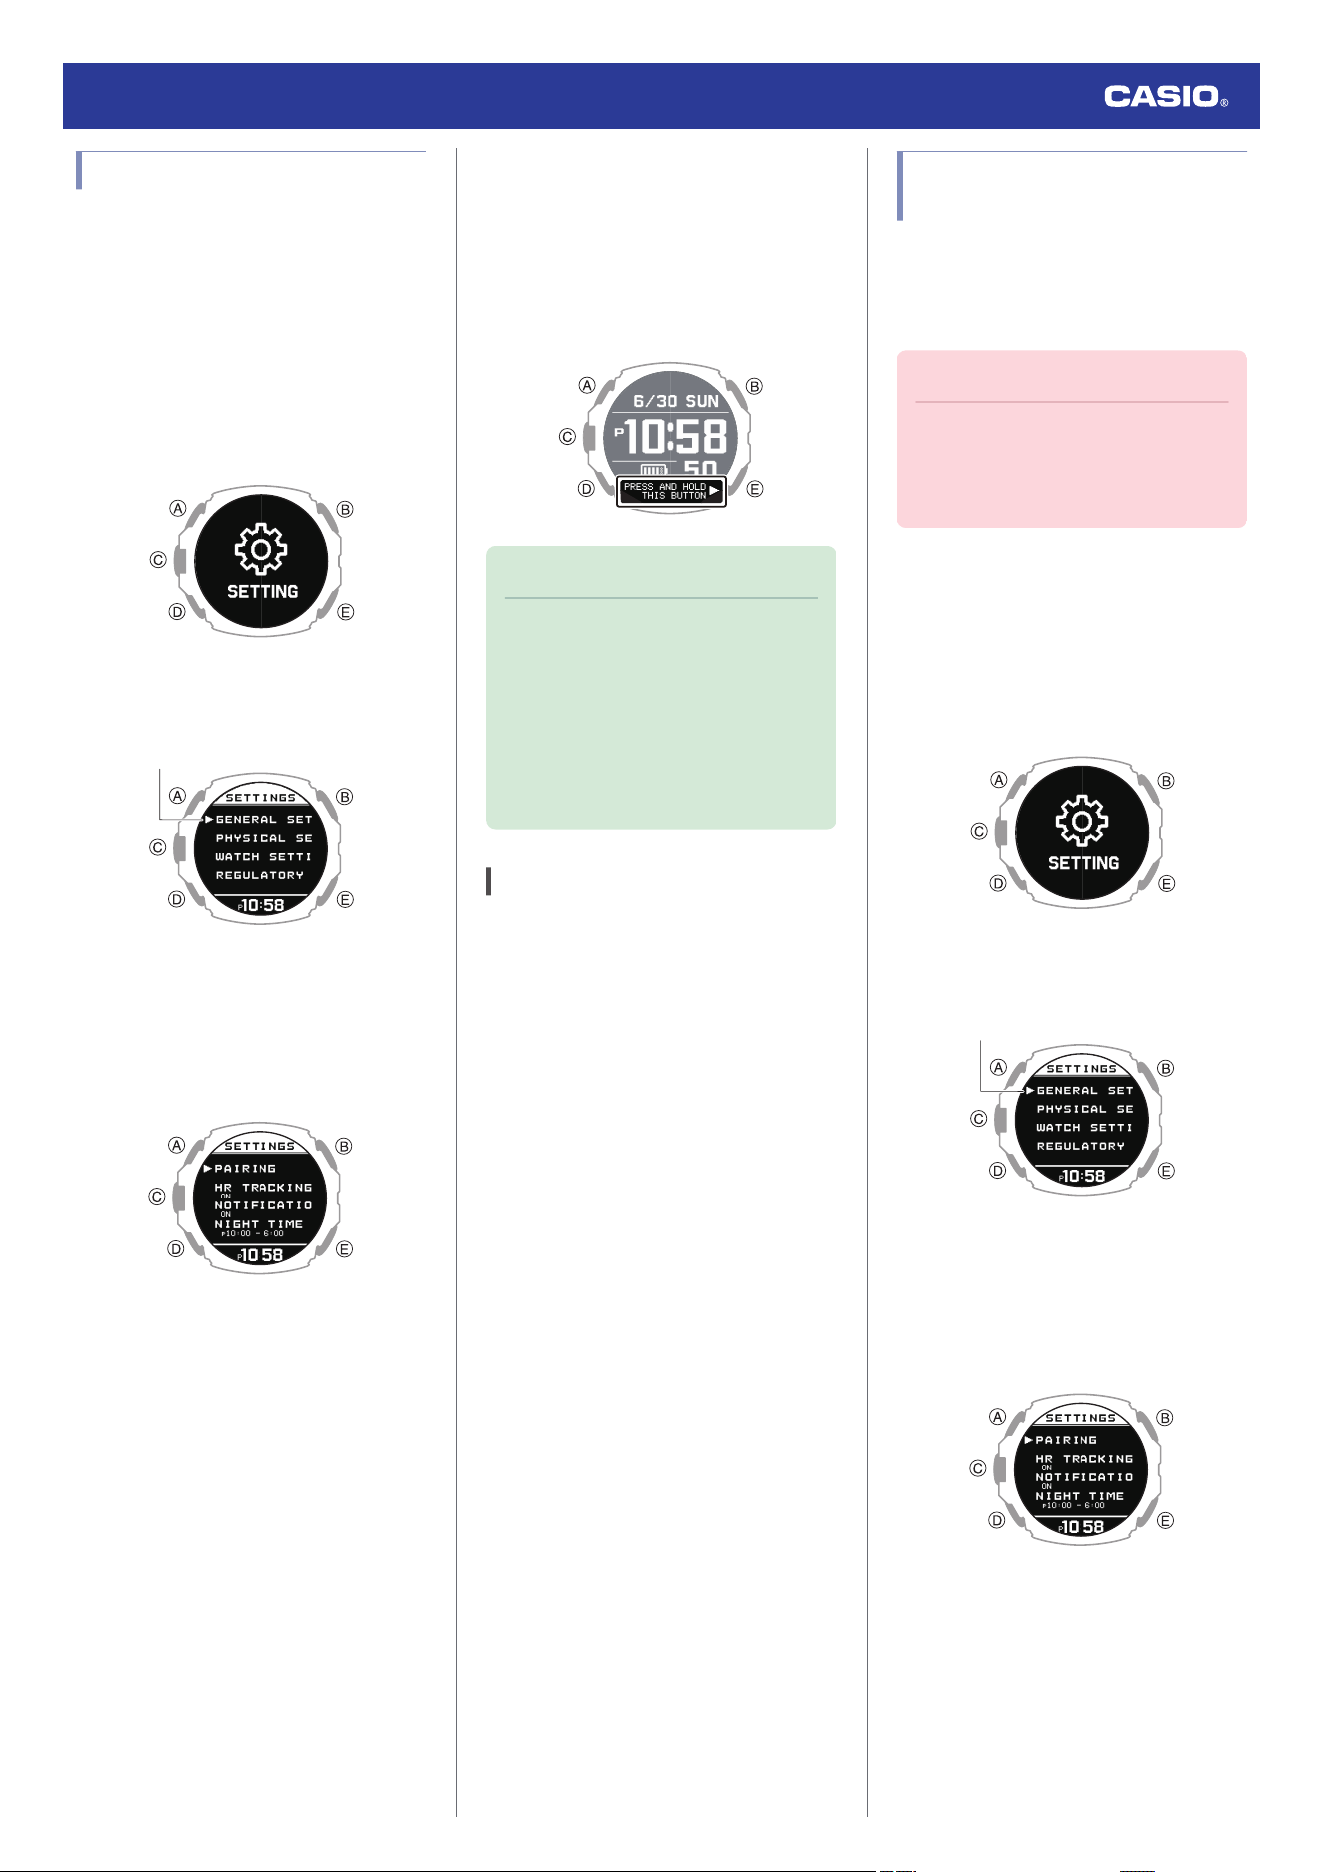
Enabling Power Saving
If you do not plan to use the product for a long
time, you can conserve power by switching to
power saving mode.
1. Display the current time screen.
l
Watch Mode
2. Hold down (A) for at least two seconds.
This enters the Control Mode.
3. Use (A) and (D) to select [SETTING].
4. Press (C).
This displays the setting menu screen.
Pointer
5. Use (A) and (D) to move the pointer to
[GENERAL SETTINGS].
6. Press (C).
This displays the GENERAL SETTINGS
screen.
7. Use (A) and (D) to move the pointer to
[POWER SAVING].
8. Press (C).
This enables power saving and displays
[PRESS AND HOLD THIS BUTTON] at
the bottom of the screen.
Note
●
If you do not perform any operation for
two or three minutes while the setting
screen is displayed, the watch
automatically returns to the current
time screen.
●
Alarm and hourly time signal
notification operations are disabled in
Power Saving mode.
Disabling Power Saving
Hold down (E) for at least two seconds to
disable power saving.
●
Disabling power saving causes [PRESS
AND HOLD THIS BUTTON] to disappear at
the bottom of the screen.
Changing the Length and
Weight Units
You can select metric units (km, m, cm, kg) or
imperial units (mile, yd, ft, lb) for length (height,
distance, altitude) and weight (body weight)
values.
Important!
●
When Tokyo (TOKYO) is the Home
City, value units are fixed as metric
(km, m, cm, kg) and cannot be
changed.
1. Display the current time screen.
l
Watch Mode
2. Hold down (A) for at least two seconds.
This enters the Control Mode.
3. Use (A) and (D) to select [SETTING].
4. Press (C).
This displays the setting menu screen.
Pointer
5. Use (A) and (D) to move the pointer to
[GENERAL SETTINGS].
6. Press (C).
This displays the GENERAL SETTINGS
screen.
Watch Operation Guide 3554
85
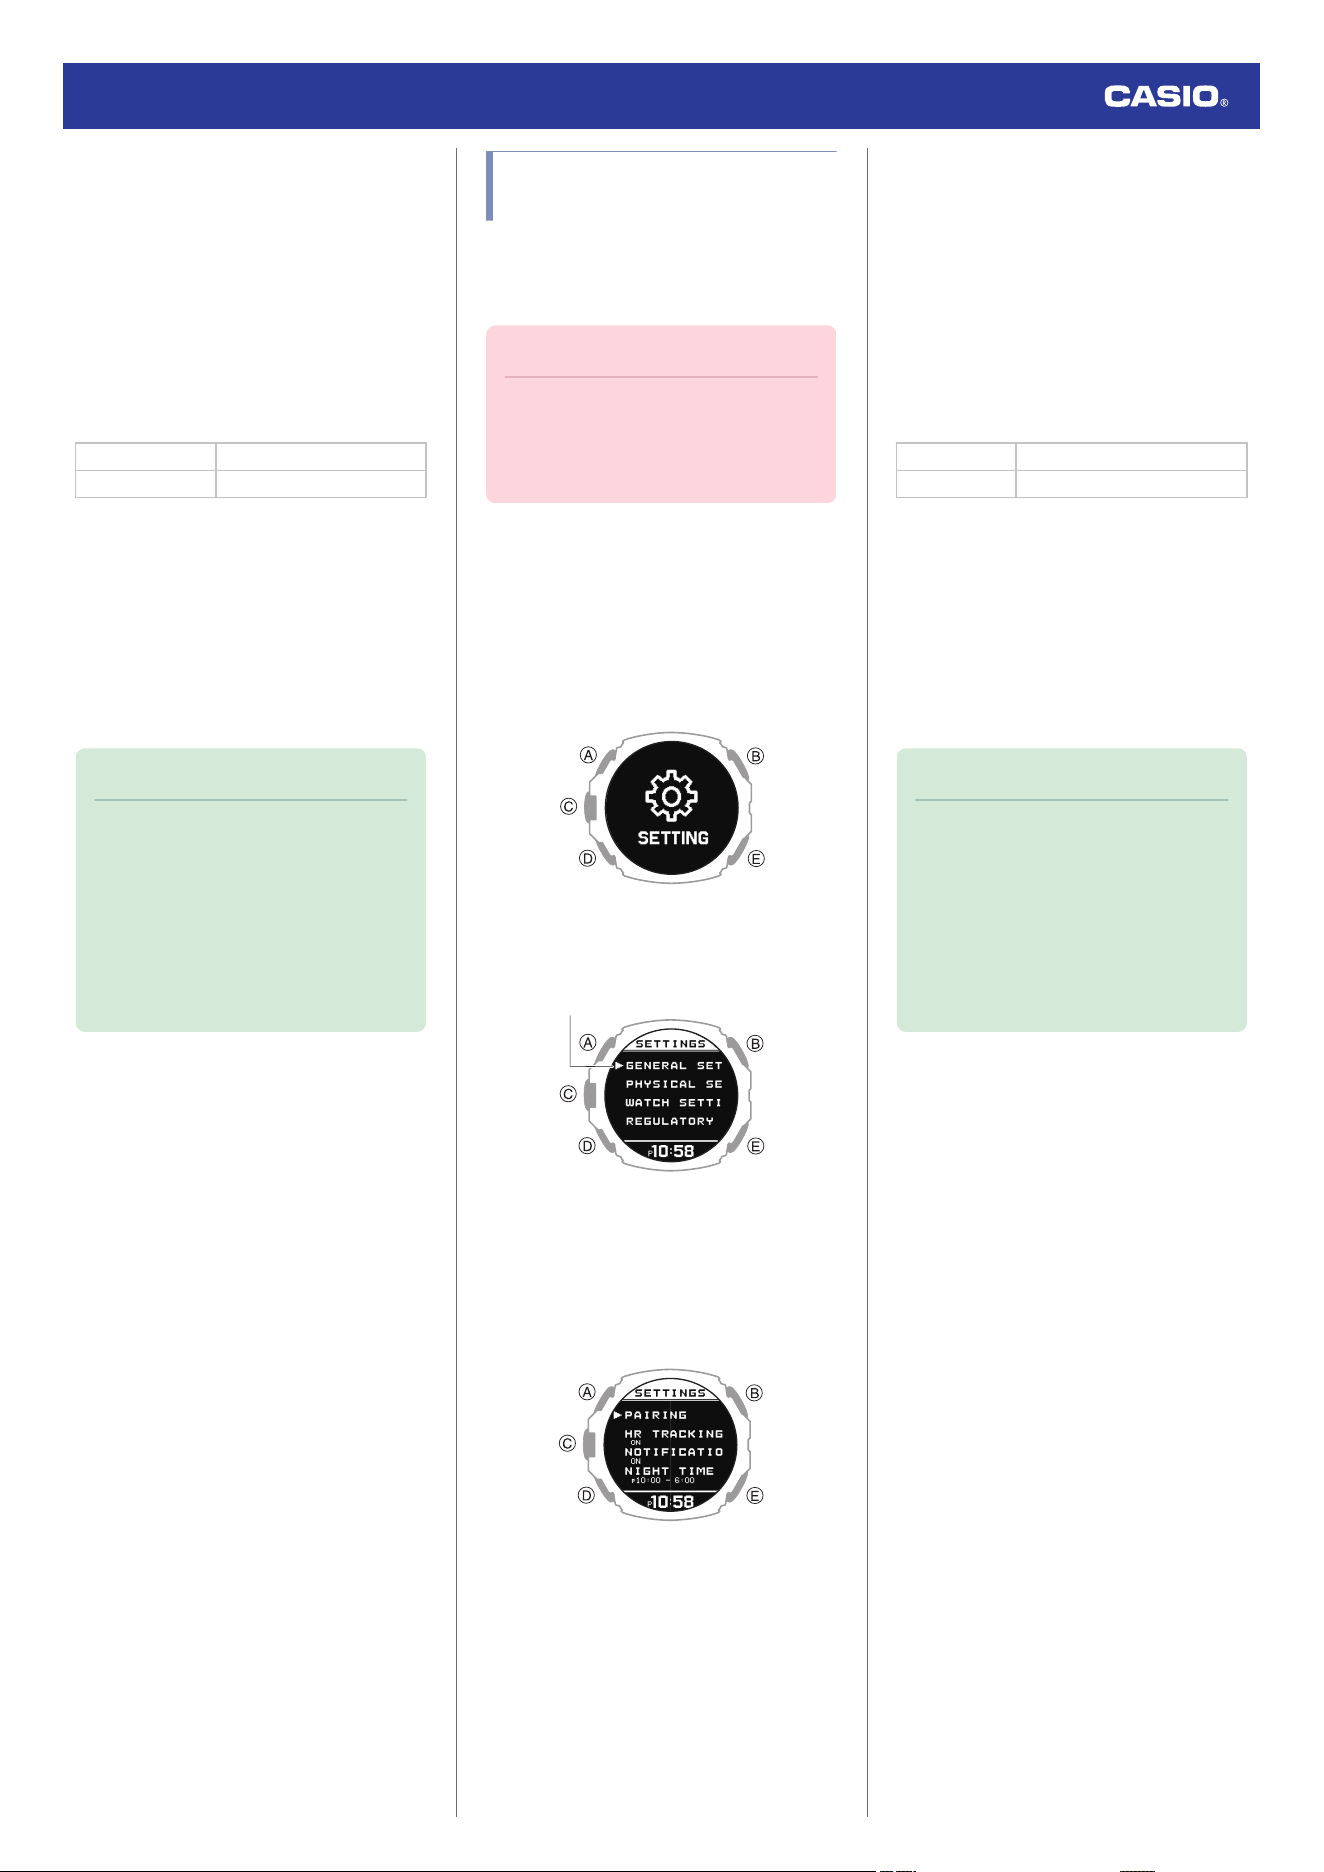
7. Use (A) and (D) to move the pointer to
[UNITS].
8. Press (C).
9. Use (A) and (D) to move the pointer to
[LENGTH & WEIGHT].
10. Press (C).
11. Use (A) and (D) to select the length and
weight units you want.
[km/m/cm & kg] Metric System
[mile/yd/ft & lb] Imperial System
12. Press (C) to complete the setting
operation.
After the setting operation is complete, a
check mark appears for a few seconds,
and then the unit setting screen re-
appears.
13. Hold down (E) for at least one second to
return to the current time screen.
Note
●
If you do not perform any operation for
two or three minutes while the setting
screen is displayed, the watch
automatically returns to the current
time screen.
●
You can also use the CASIO
WATCHES phone app to change the
length unit.
Specifying the Calorie
Display Unit
You can use the procedure below to select
either calories (kcal) or joules (kJ) as the
calories burned unit.
Important!
●
When Tokyo (TOKYO) is the Home
City, the calories burned unit is fixed as
kilocalories (kcal) and cannot be
changed.
1. Display the current time screen.
l
Watch Mode
2. Hold down (A) for at least two seconds.
This enters the Control Mode.
3. Use (A) and (D) to select [SETTING].
4. Press (C).
This displays the setting menu screen.
Pointer
5. Use (A) and (D) to move the pointer to
[GENERAL SETTINGS].
6. Press (C).
This displays the GENERAL SETTINGS
screen.
7. Use (A) and (D) to move the pointer to
[UNITS].
8. Press (C).
9. Use (A) and (D) to move the pointer to
[ENERGY].
10. Press (C).
11. Use (A) and (D) to select the calorie unit
you want.
[kcal] Kilocalories
[kJ] Kilojoules
12. Press (C) to complete the setting
operation.
After the setting operation is complete, a
check mark appears for a few seconds,
and then the unit setting screen re-
appears.
13. Hold down (E) for at least one second to
return to the current time screen.
Note
●
If you do not perform any operation for
two or three minutes while the setting
screen is displayed, the watch
automatically returns to the current
time screen.
●
You can also use the CASIO
WATCHES phone app to change the
calories burned unit.
Watch Operation Guide 3554
86
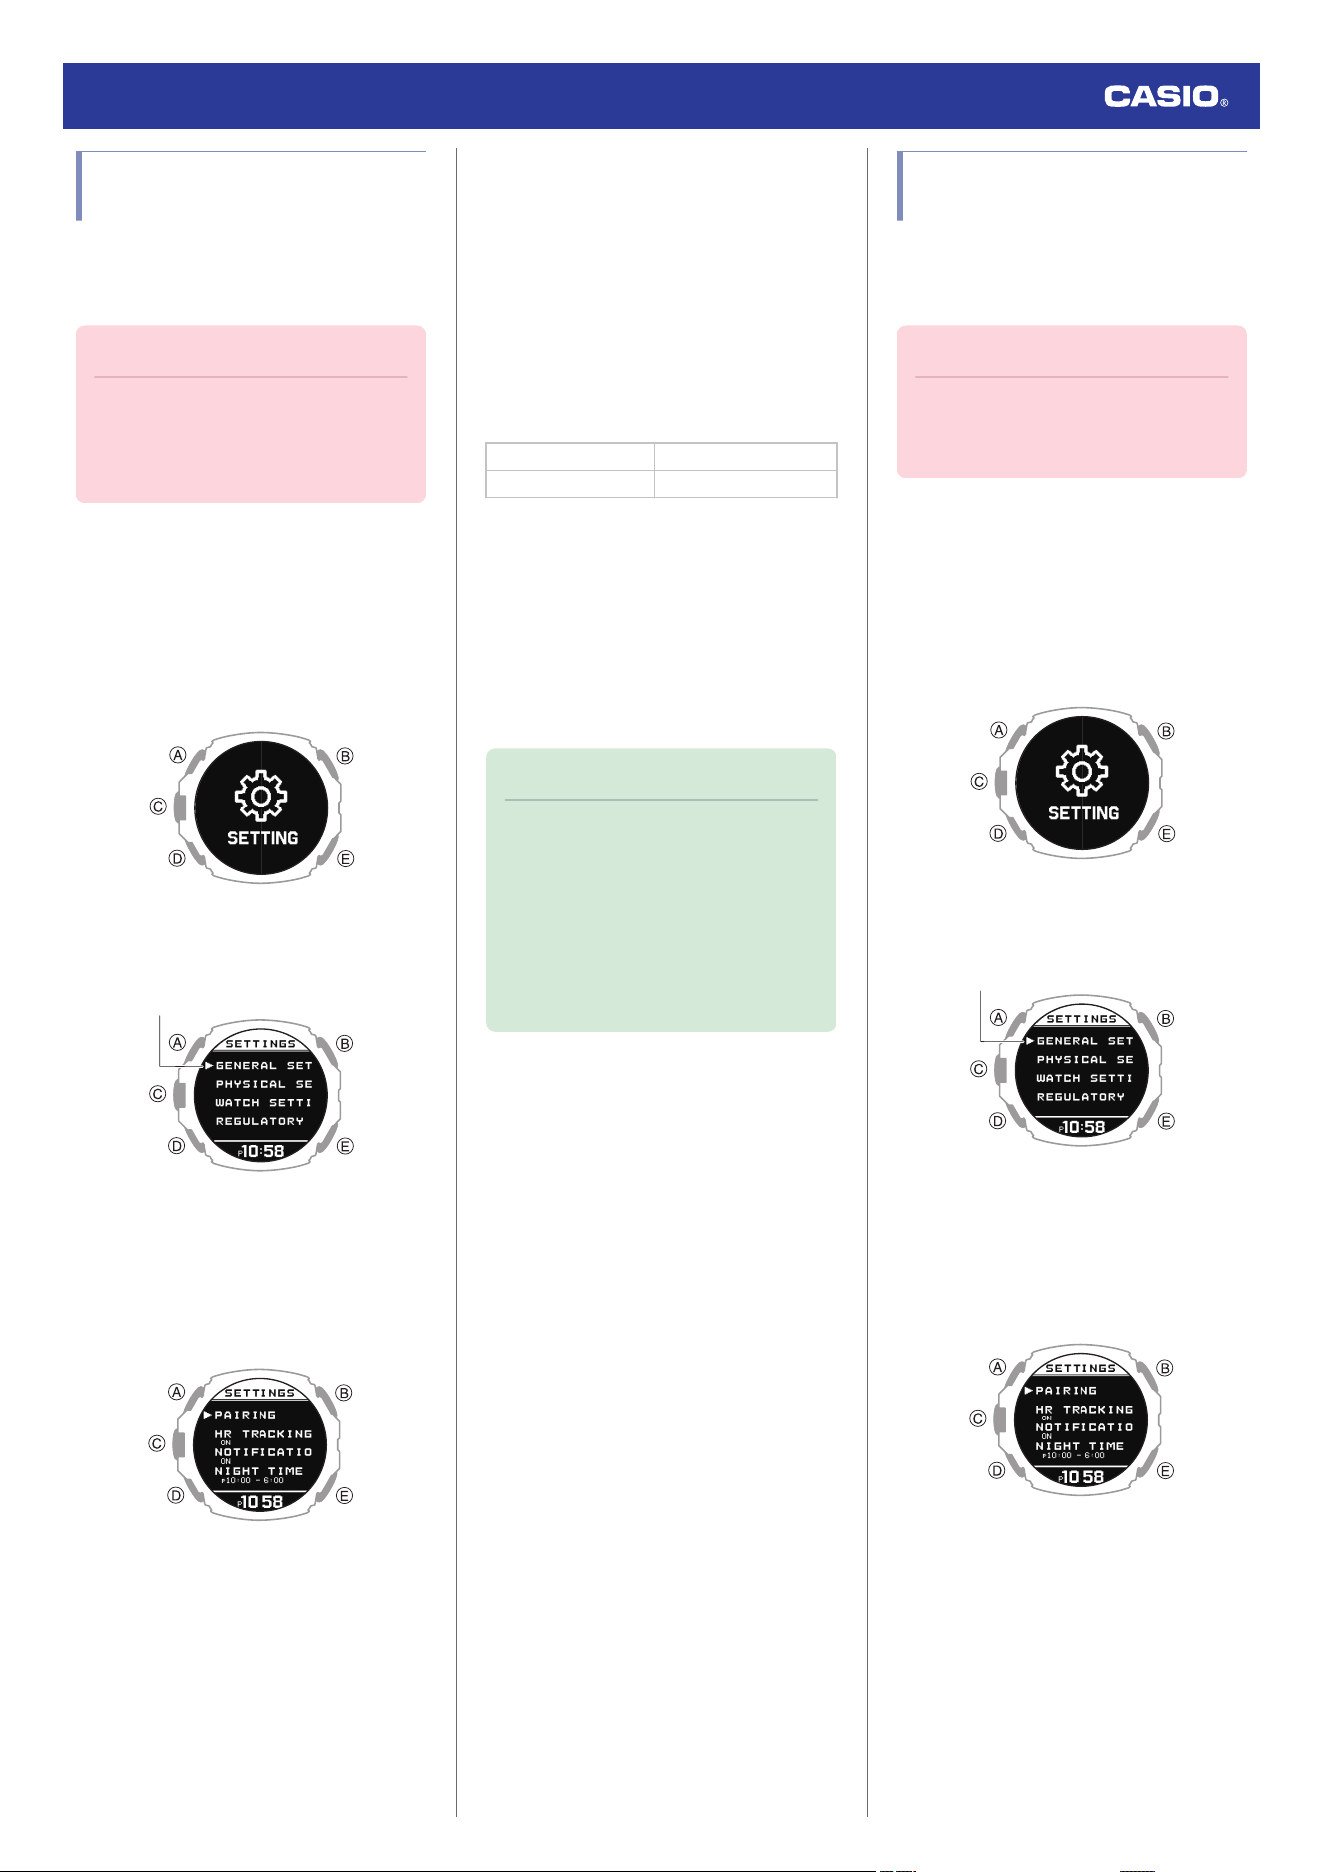
Specifying the Barometric
Pressure Unit
You can specify either hectopascals (hPa) or
inches of mercury (inHg) as the display unit for
barometric pressure values.
Important!
●
When Tokyo (TOKYO) is the Home
City, the barometric pressure unit is
fixed as hectopascals (hPa) and
cannot be changed.
1. Display the current time screen.
l
Watch Mode
2. Hold down (A) for at least two seconds.
This enters the Control Mode.
3. Use (A) and (D) to select [SETTING].
4. Press (C).
This displays the setting menu screen.
Pointer
5. Use (A) and (D) to move the pointer to
[GENERAL SETTINGS].
6. Press (C).
This displays the GENERAL SETTINGS
screen.
7. Use (A) and (D) to move the pointer to
[UNITS].
8. Press (C).
9. Use (A) and (D) to move the pointer to
[BAROMETER].
10. Press (C).
11. Use (A) and (D) to select a barometric
pressure unit.
[hPa] Hectopascals
[inHg] Inches of mercury
12. Press (C) to complete the setting
operation.
After the setting operation is complete, a
check mark appears for a few seconds,
and then the unit setting screen re-
appears.
13. Hold down (E) for at least one second to
return to the current time screen.
Note
●
If you do not perform any operation for
two or three minutes while the setting
screen is displayed, the watch
automatically returns to the current
time screen.
●
You can also use the CASIO
WATCHES phone app to change the
barometric pressure unit.
Specifying the Temperature
Unit
You can select either Celsius (°C) or
Fahrenheit (°F) as the temperature display
unit.
Important!
●
When Tokyo (TOKYO) is the Home
City, the temperature unit is fixed as
Celsius (°C) and cannot be changed.
1. Display the current time screen.
l
Watch Mode
2. Hold down (A) for at least two seconds.
This enters the Control Mode.
3. Use (A) and (D) to select [SETTING].
4. Press (C).
This displays the setting menu screen.
Pointer
5. Use (A) and (D) to move the pointer to
[GENERAL SETTINGS].
6. Press (C).
This displays the GENERAL SETTINGS
screen.
Watch Operation Guide 3554
87
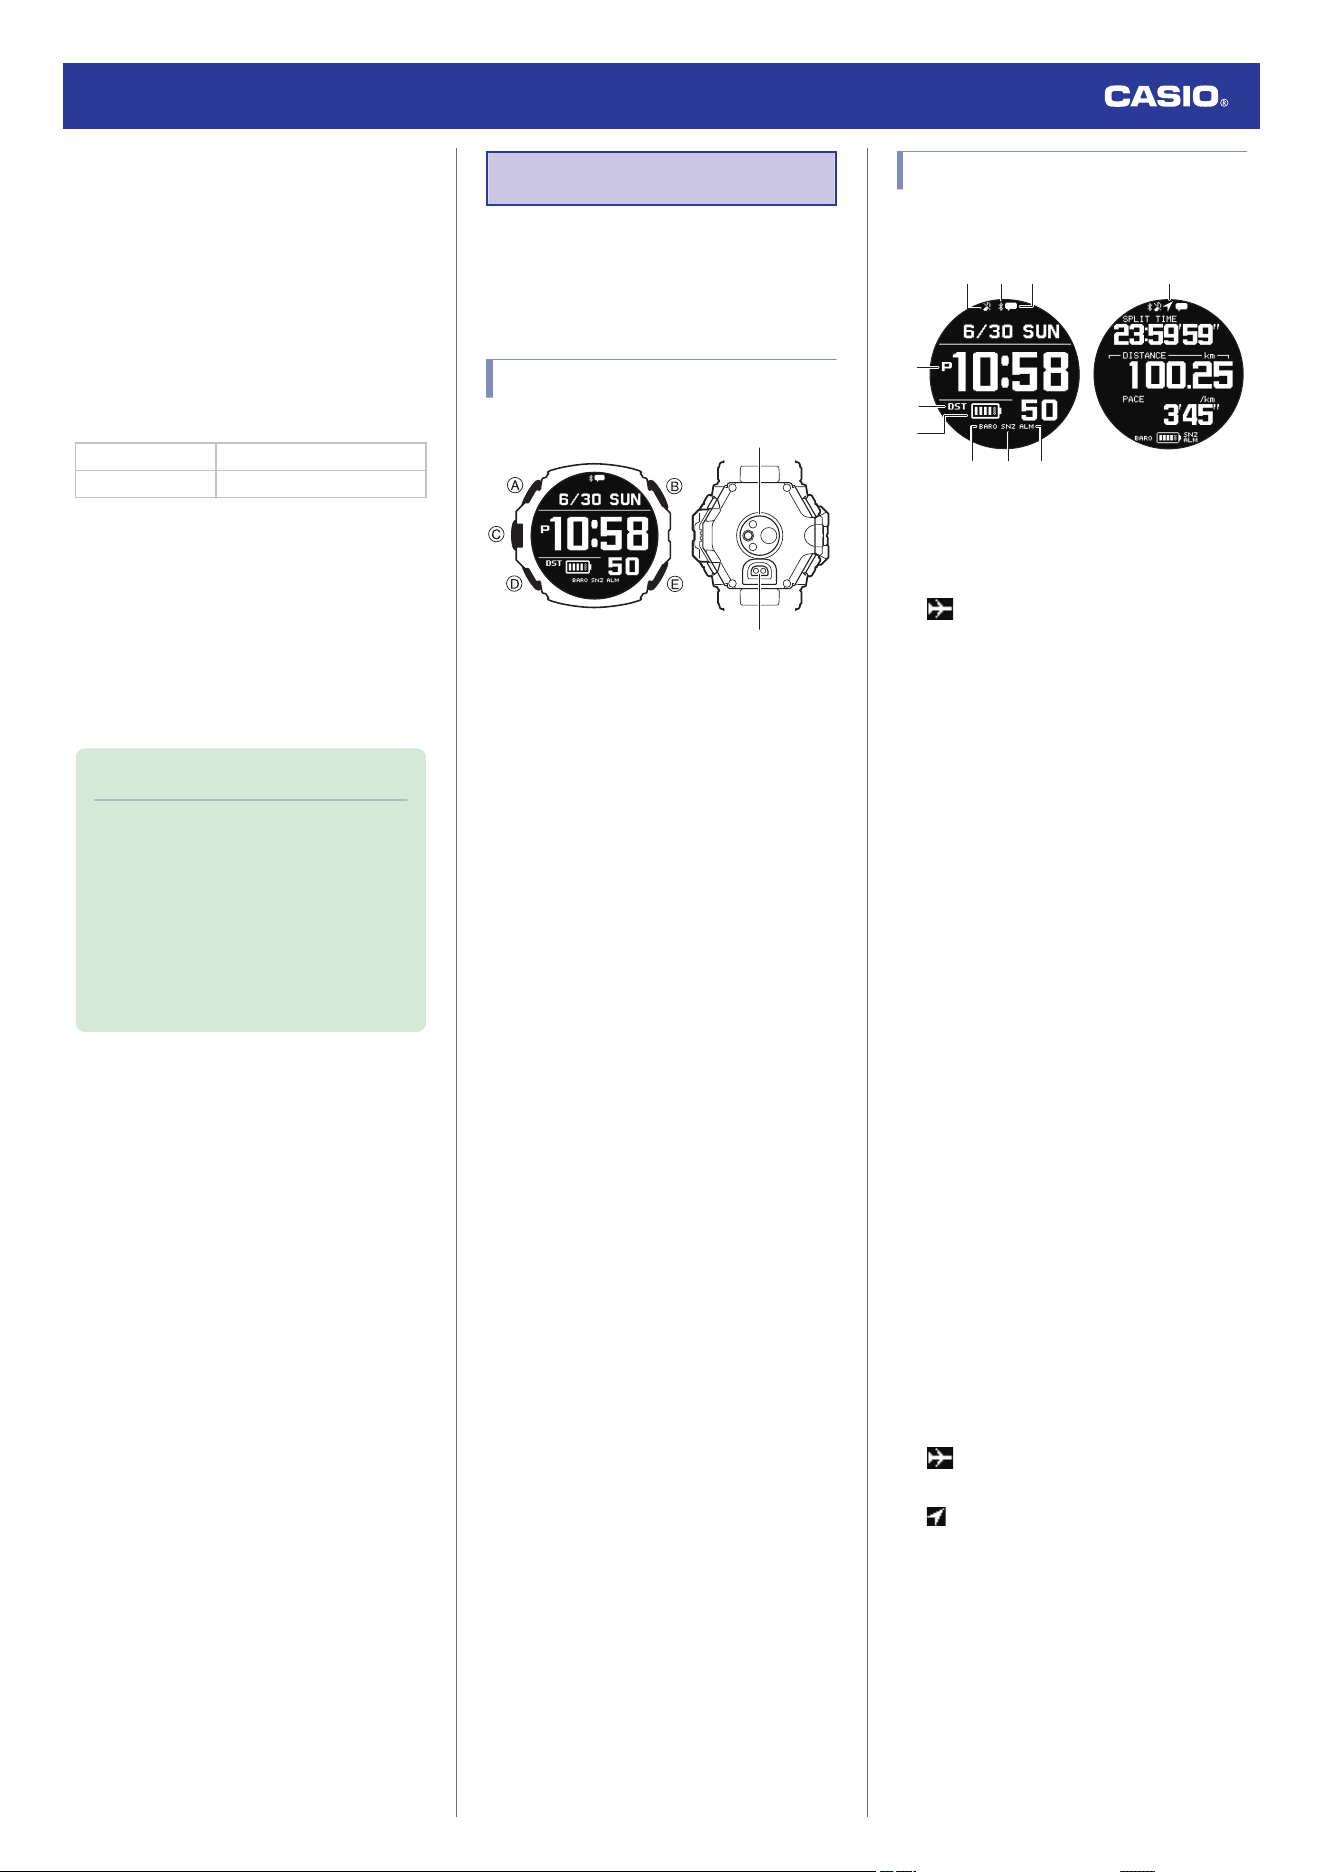
7. Use (A) and (D) to move the pointer to
[UNITS].
8. Press (C).
9. Use (A) and (D) to move the pointer to
[TEMPERATURE].
10. Press (C).
11. Use (A) and (D) to select a temperature
unit.
[°C] Celsius
[°F] Fahrenheit
12. Press (C) to complete the setting
operation.
After the setting operation is complete, a
check mark appears for a few seconds,
and then the unit setting screen re-
appears.
13. Hold down (E) for at least one second to
return to the current time screen.
Note
●
If you do not perform any operation for
two or three minutes while the setting
screen is displayed, the watch
automatically returns to the current
time screen.
●
You can also use the CASIO
WATCHES phone app to change the
temperature unit.
Basic Information
This section provides the names of each
watch part, as well as basic information and
operations you need to know.
General Guide
①
②
A button
While the current time screen is displayed,
press and hold this button for at least two
seconds to switch to the Control Mode.
While a setting screen is displayed, pressing
this button scrolls available menu items
upwards.
B button
Press to turn on illumination.
C button
Press this button while the current time screen
is displayed to switch to Activity Mode.
Pressing this button while any mode setting
screen is displayed applies all of the screen’s
pending settings and changes.
D button
Pressing this button while a setting screen is
displayed scrolls available menu items
downwards.
E button
Hold down this button for at least one second
to return to the current time screen.
While configuring settings, pressing this
button goes back to the previous screen.
A
Optical sensor (heart rate detection)
Detects your pulse for heart rate
measurement.
B
Charging terminal
Plug in the charger cable here to connect to a
device with a USB terminal for charging.
l
Charging with the Charger Cable
Indicators
③⑩
⑨
④
⑥
⑤
⑦
⑧
① ②
Activity ModeWatch Mode
A Indicates the watch is in Silent Mode.
B Airplane Mode/Bluetooth icon
: Displayed while the Airplane Mode is
enabled.
e
: Displayed while there is a connection
between the watch and a phone.
●
While re-connection with your phone is
being attempted after loss of the
connection, this indicator flashes at
one-second intervals.
●
While re-connection with your phone is
not being attempted after loss of the
connection, this indicator flashes at
two-second intervals.
C Appears when there are new notifications
on your phone.
D Displayed during p.m. times while 12-hour
timekeeping is being used.
E Displayed when the indicated time is
summer time.
F Shows the current battery level.
G Displayed while barometric pressure
change indication is enabled.
H Displayed when an alarm or the smart
alarm snooze function is turned on.
I Displayed when an alarm or the smart
alarm is turned on.
J Airplane Mode/GPS icon
: Displayed while the Airplane Mode is
enabled.
: Indicates GPS receive is in progress.
Watch Operation Guide 3554
88
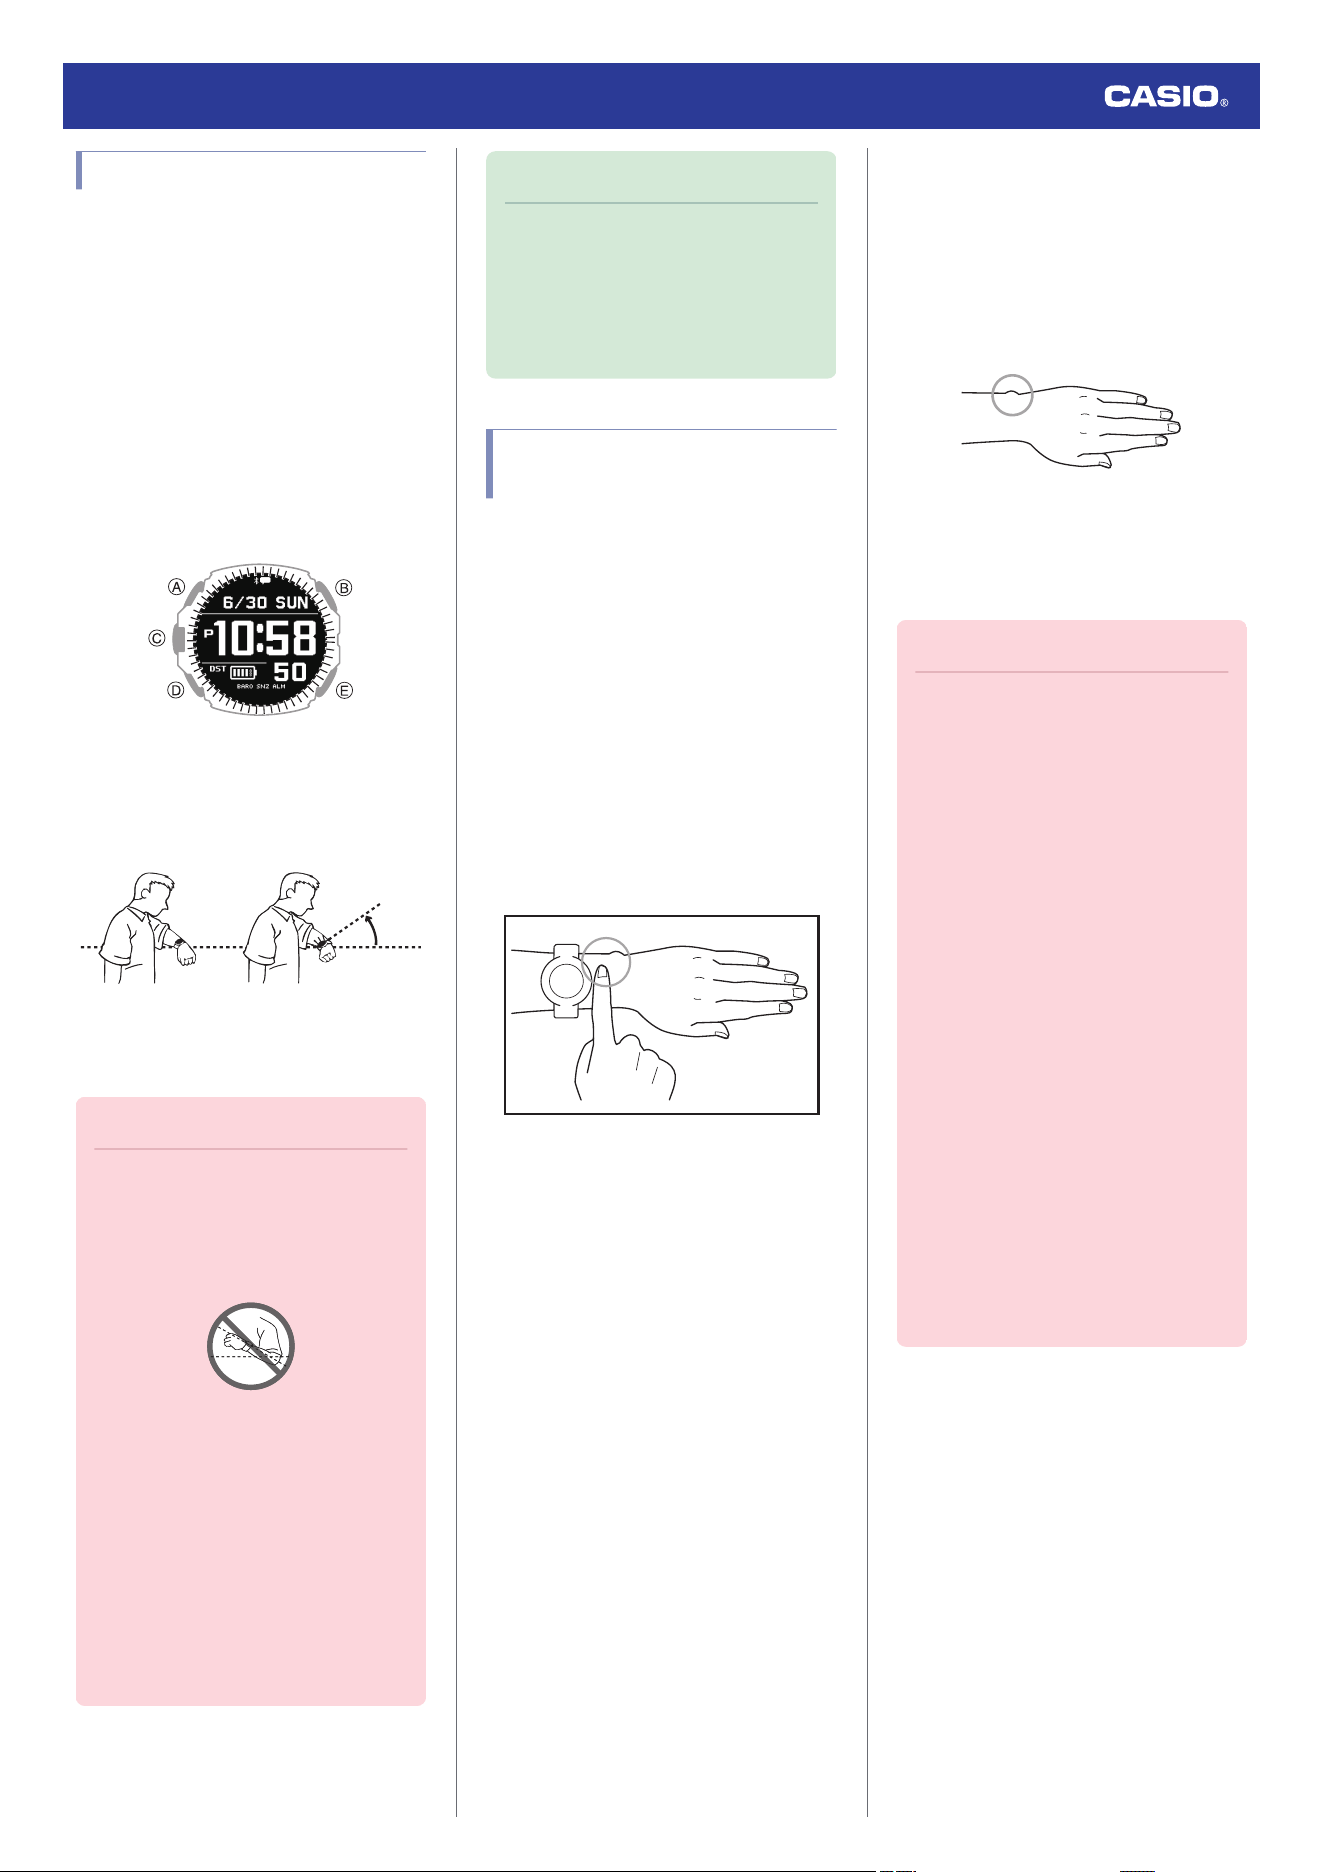
Viewing the Face in the Dark
The watch has a light that illuminates the face
for viewing in the dark.
●
The light turns on each time you perform a
button operation.
●
Illumination is turned on when the sounds or
vibrations start by Auto Lap, notification or
alarm etc. Illumination that is turned on by a
notification operation cannot be turned off.
●
To illuminate the face manually
Press (B) to turn on illumination.
●
Illumination will turn off automatically if an
alarm starts to sound.
●
Using Auto Light
If Auto Light is enabled, face illumination will
turn on automatically whenever the watch is
positioned at an angle of 40 degrees or more.
40
degrees
or more
For information about enabling Auto Light, see
the information below.
l
Configuring the Auto Light Setting
Important!
●
Auto Light may not operate properly
when the watch is at a horizontal angle
of 15 degrees or greater from
horizontal as shown in the illustration
below.
●
Electro-static charge or magnetism
can interfere with proper auto light
operation. If this happens, try lowering
your arm and then angle it towards
your face again.
●
When moving the watch you may note
a slight rattling sound. This is due to
operation of the auto light switch,
which determines the current
orientation of the watch. It does not
indicate malfunction.
Note
●
If Auto Light is enabled, face
illumination may be delayed if you
angle the watch towards your face
while a compass, altitude, barometric
pressure, or temperature reading
operation is being performed.
Fastening the Watch to Your
Wrist
Correctly wearing the watch on your wrist is
essential to obtain accurate heart rate,
breathing exercise, and sleep measurements.
Especially when using the watch while running
or performing other strenuous exercises,
make the adjustments described below to
ensure that the watch does not shake or shift.
1. With the watch fastened loosely on your
wrist, place at least one finger to the right
of the watch* (Figure).
* If you wear the watch on your right wrist,
place your finger(s) to the left of the (C)
button (left side of the watch).
Figure
2. Position the watch so there is at least one
finger width between it and the bone that
protrudes from the side of your wrist
(Figure).
●
The location and shape of this bone
(circled in the illustration) differ from
person to person.
3. After you determine the best wrist position
for the watch, tighten the band securely
enough to keep the watch from sliding on
your wrist.
Important!
●
A band that is snugly tightened for
heart rate or other measurements can
make it difficult for air to pass under the
band and cause you to sweat, which
can lead to skin irritation. After
measuring your heart rate, loosen the
band enough so you can insert a finger
between it and your wrist.
●
Wearing the watch for long periods,
sweat, or certain usage environments
create the risk of skin rash. To prevent
skin problems, regularly remove your
watch from your wrist to give your skin
some time to rest.
●
The watch is not fastened correctly to
your wrist if you can see green light
coming out from behind the watch.
●
Keep your arms still during breathing
exercise measurement.
●
For details about how to wear the
watch during blood oxygen level
measurements, see the information
below.
l
Measuring Your Blood Oxygen
Level
Watch Operation Guide 3554
89
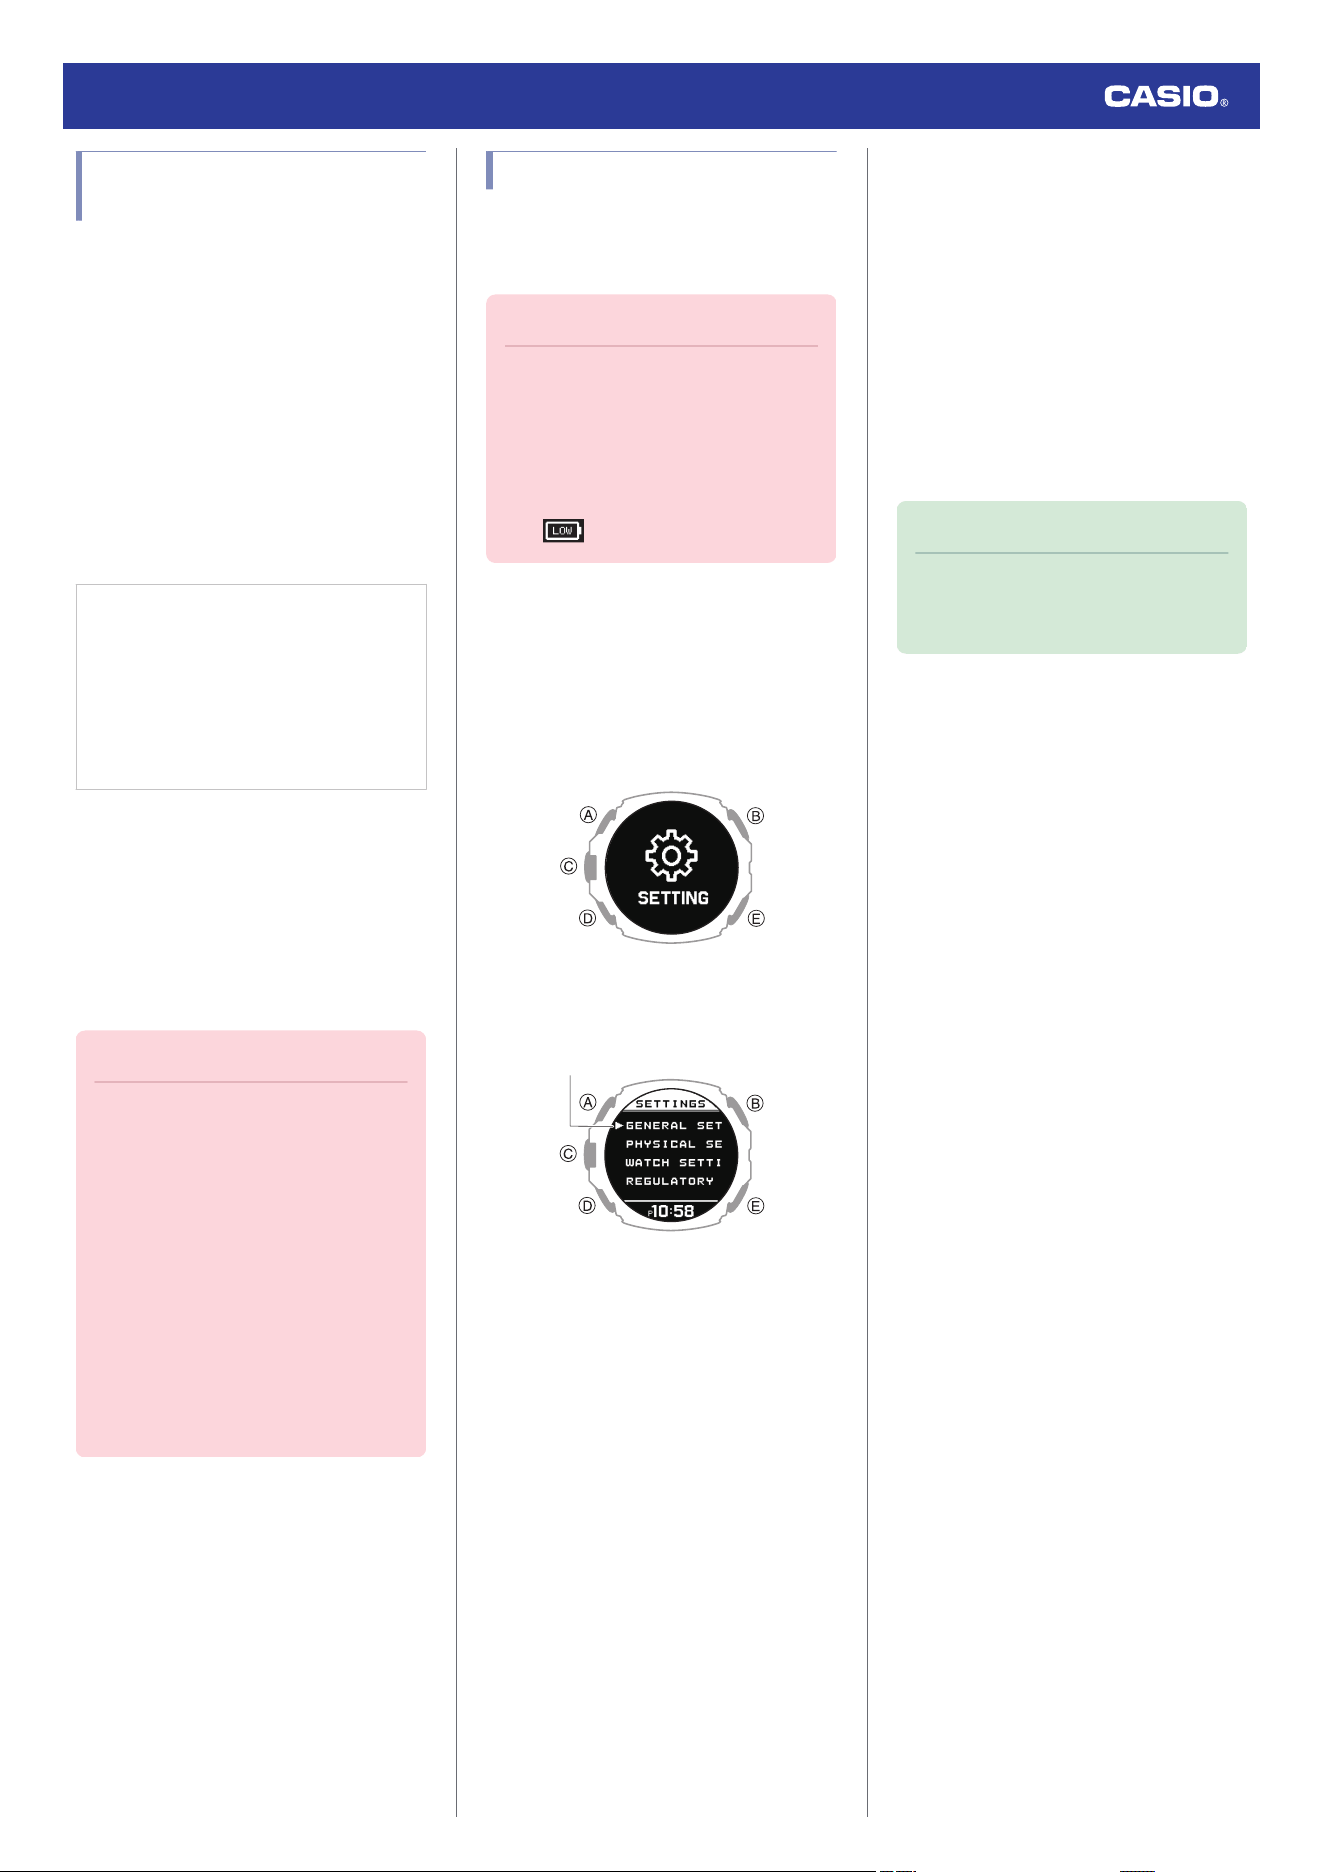
Updating the Watch’s
Software Version
Updating (upgrading) the watch software
improves function and watch operation.
Makes sure that you keep watch software
updated to the latest version.
●
Updating Watch Software
You should use the CASIO WATCHES phone
app to update (upgrade) your watch’s
software.
A notification on the CASIO WATCHES phone
app screen lets you know when a software
update is available. Follow the instructions on
the screen to update the software.
Check the connection
●
Make sure the
e
symbol is shown on the
watch display when you perform the
procedure below. If
e
is not displayed,
refer to the information at the link below.
l
Connecting with a Phone Paired
With the Watch
1.
Y
Tap the “CASIO WATCHES” icon.
2.
Y
Tap the “My Watch” tab.
3.
Y
Select “GPR-H1000” and tap it.
4.
Y
Perform the operation shown on the
screen to update the watch software
version.
Important!
●
Ensure the Watch Mode timekeeping
screen is displayed when updating the
watch software.
●
Software updating can take up to 30
minutes.
●
It is recommended that you have the
watch connected to its charging cable
and charging before you start a
software update operation.
●
If you are unable to update the
software for some reason, visit the
website below.
https://support.casio.com/wat/app/3554/en/
Resetting Watch Settings
This section explains how to return the watch
time, date, and other settings, as well as the
log to their initial factory defaults.
Important!
●
Once you perform a reset operation,
you cannot restore pre-reset settings.
●
Reset the watch settings is not
possible under the conditions
described below.
ー
While the battery level indicator is
or lower
1. Display the current time screen.
l
Watch Mode
2. Hold down (A) for at least two seconds.
This enters the Control Mode.
3. Use (A) and (D) to select [SETTING].
4. Press (C).
This displays the setting menu screen.
Pointer
5. Use (A) and (D) to move the pointer to
[GENERAL SETTINGS].
6. Press (C).
This displays the GENERAL SETTINGS
screen.
7. Use (A) and (D) to move the pointer to
[RESET].
8. Press (C).
9. Use (A) and (D) to move the pointer to
[YES].
●
To stop the reset operation, move the
pointer to [NO].
10. Press (C).
After the reset operation is complete, the
watch will return to the current time
screen. The reset operation is complete
when [AC] appears in the lower right
corner of the display.
11. Press (A) to clear [AC] from the display.
Note
●
Resetting the watch will also delete
information for pairing the watch with a
phone, and unpair them.
Watch Operation Guide 3554
90
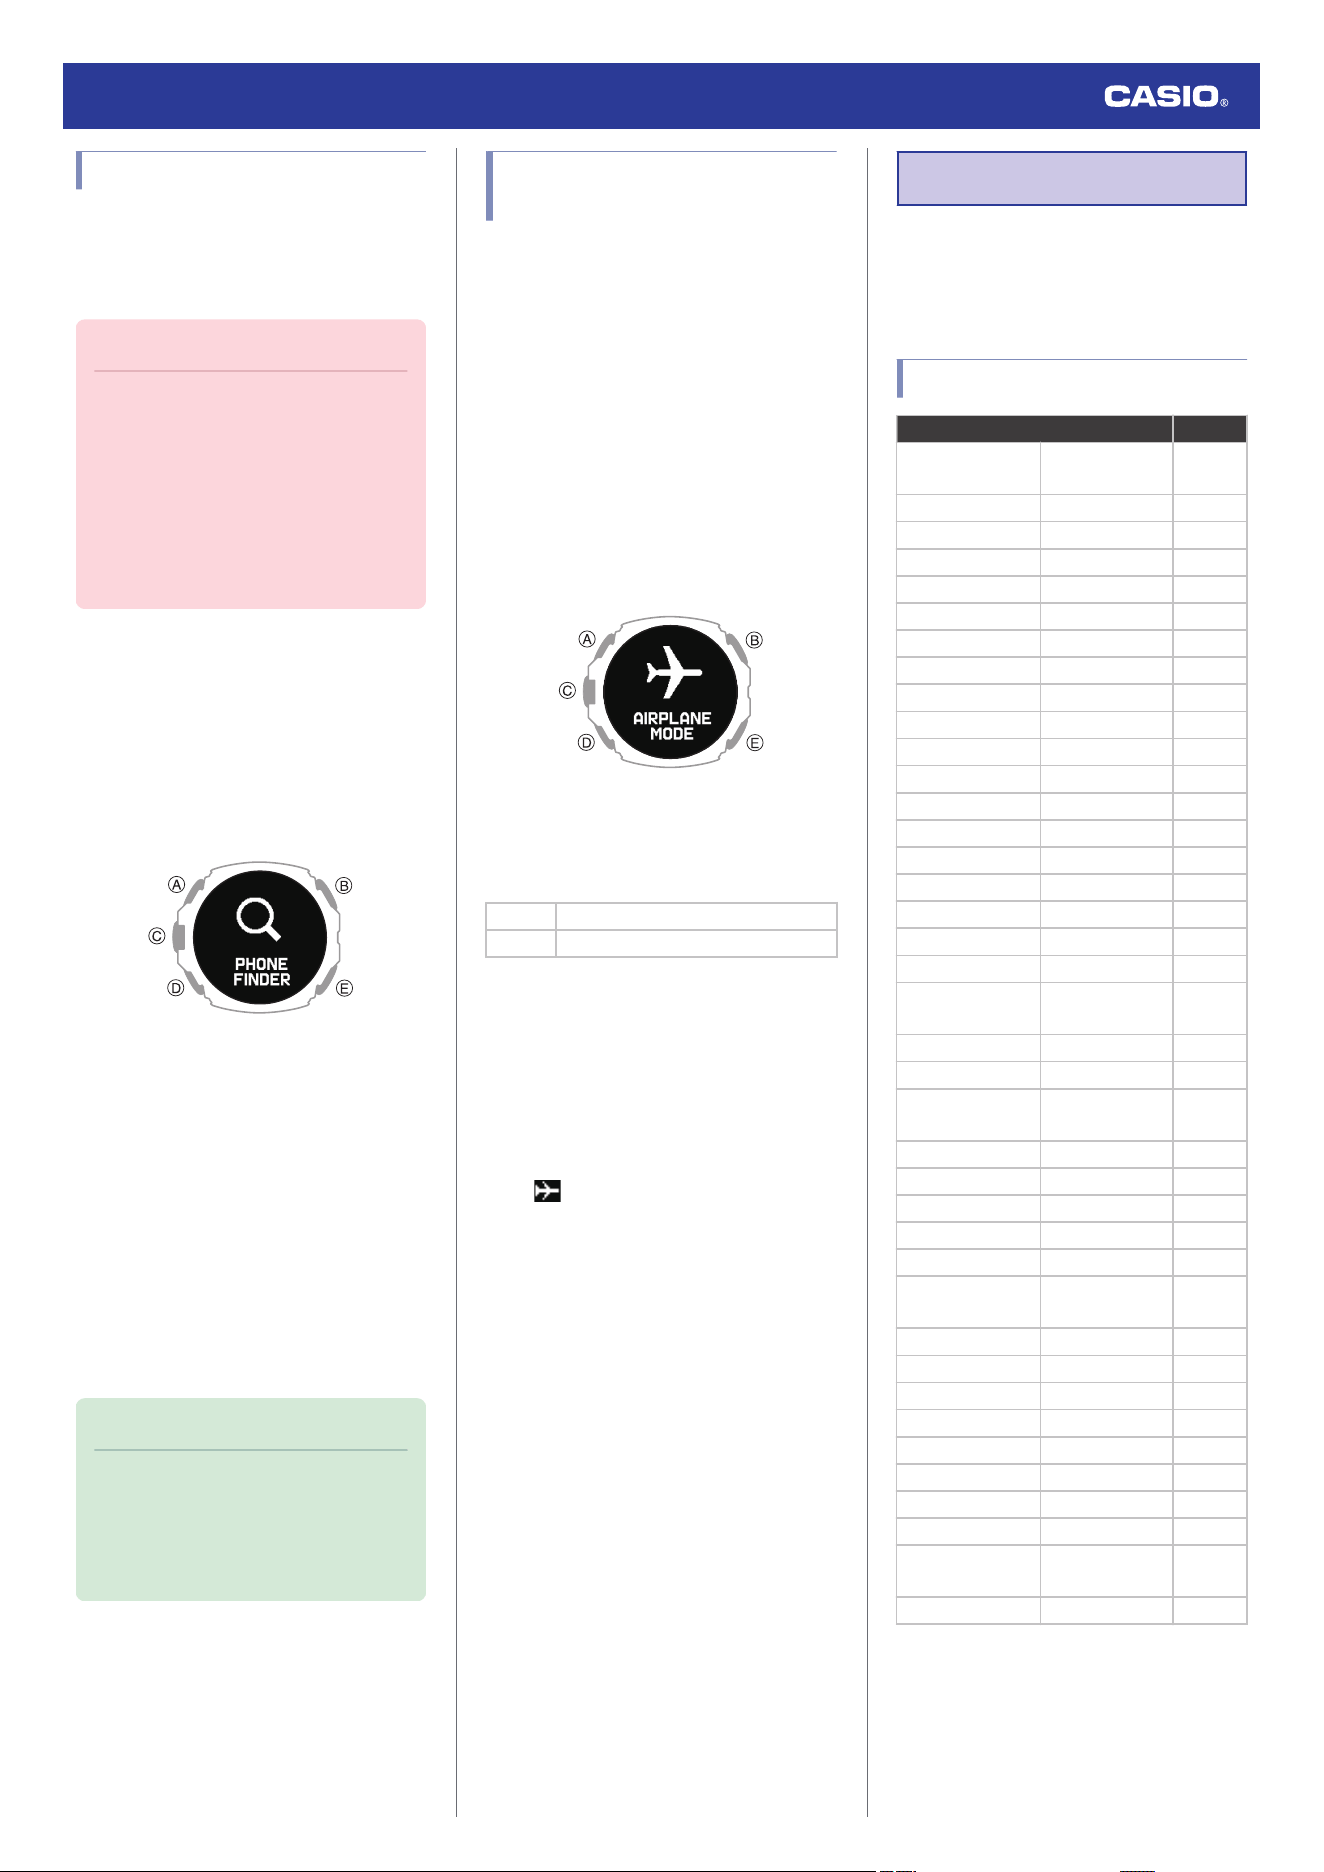
Phone Finder
You can use phone finder to trigger a sound
on the paired phone to help you find it. The
sound operation is performed even if your
phone is in vibrate mode.
Important!
●
Phone finder will not sound the tone
unless the CASIO WATCHES phone
app is running on the phone.
●
Do not use this function in areas where
phone call tones are restricted.
●
The tone sounds at a high volume. Do
not use this function when listening to
phone output over earphones.
1. Display the current time screen.
l
Watch Mode
2. Hold down (A) for at least two seconds.
This enters the Control Mode.
3. Use (A) and (D) to move the pointer to
[PHONE FINDER].
4. Press (C).
This will establish a connection between
the watch and phone, and sound the
phone’s ringtone.
●
It will take a few seconds before the
phone tone sounds.
●
[FAILED] appears when a phone finder
operation is unsuccessful.
5. Press any button to stop the sound.
●
You can press any watch button to stop
the phone tone only during the first 30
seconds after it starts to sound.
Note
●
Connection with your phone is not
possible while the watch’s Airplane
Mode is enabled. To connect with your
phone, disable the Airplane Mode.
l
Entering the Watch Airplane Mode
Entering the Watch Airplane
Mode
When you are in a hospital, on an aircraft, or
in any other location where connection with a
phone or reception of GPS signals may cause
problems, turn on the watch’s Airplane Mode.
To turn off the Airplane Mode, perform the
same operation again.
1. Display the current time screen.
l
Watch Mode
2. Hold down (A) for at least two seconds.
This enters the Control Mode.
3. Use (A) and (D) to select [AIRPLANE
MODE].
4. Press (C).
5. Use (A) and (D) to select an Airplane
Mode setting.
[OFF] Exits Airplane Mode.
[ON] Enables Airplane Mode.
6. Press (C) to complete the setting
operation.
After the setting operation is complete, a
check mark appears for a few seconds,
and then the Airplane Mode screen re-
appears.
7. Press (E) to exit the setting screen.
●
is displayed while the watch is in the
Airplane Mode.
Other Information
This section provides non-operational
information you also need to know. Refer to
this information as required.
City Table
City Offset
UTC
Coordinated
Universal Time
0
LONDON London 0
PARIS Paris +1
ATHENS Athens +2
JEDDAH Jeddah +3
TEHRAN Tehran +3.5
DUBAI Dubai +4
KABUL Kabul +4.5
KARACHI Karachi +5
DELHI Delhi +5.5
KATHMANDU Kathmandu +5.75
DHAKA Dhaka +6
YANGON Yangon +6.5
BANGKOK Bangkok +7
HONG KONG Hong Kong +8
EUCLA Eucla +8.75
TOKYO Tokyo +9
ADELAIDE Adelaide +9.5
SYDNEY Sydney +10
LORD HOWE
ISLAND
Lord Howe
Island
+10.5
NOUMEA Noumea +11
WELLINGTON Wellington +12
CHATHAM
ISLAND
Chatham
Islands
+12.75
NUKU’ALOFA Nuku’alofa +13
KIRITIMATI Kiritimati +14
BAKER ISLAND Baker Island -12
PAGO PAGO Pago Pago -11
HONOLULU Honolulu -10
MARQUESAS
ISLANDS
Marquesas
Islands
-9.5
ANCHORAGE Anchorage -9
LOS ANGELES Los Angeles -8
DENVER Denver -7
CHICAGO Chicago -6
NEW YORK New York -5
HALIFAX Halifax -4
ST. JOHN’S St. John’s -3.5
RIO DE JANEIRO Rio de Janeiro -3
FERNANDO DE
NORONHA
Fernando de
Noronha
-2
PRAIA Praia -1
Watch Operation Guide 3554
91
●
The information in the above table is current
as of July 2023.
●
Time zones may change and UTC
differentials may become different from
those shown in the table above. If this
happens, connect the watch with a phone
to update the watch with the latest time zone
information.
Summer Time Table
When [AUTO] is selected for a city that
observes summer time, switching between
standard time and summer time will be
performed automatically at the timing shown
in the table below.
Note
●
Summer time start and end dates for
your current location may be different
from those shown below. If this
happens, you can have new summer
time information for your Home City
and World Time City sent to the watch
by connecting the watch with a phone.
If the watch is not connected with a
phone, you can change the summer
time setting manually.
City Name
Summer Time
Start
Summer Time
End
London
01:00, last
Sunday in March
02:00, last
Sunday in
October
Paris
02:00, last
Sunday in March
03:00, last
Sunday in
October
Athens
03:00, last
Sunday in March
04:00, last
Sunday in
October
Tehran
00:00, March 22
or 21
00:00,
September 22 or
21
Sydney,
Adelaide
02:00, first
Sunday in
October
03:00, first
Sunday in April
Lord Howe
Island
02:00, first
Sunday in
October
02:00, first
Sunday in April
Wellington
02:00, last
Sunday in
September
03:00, first
Sunday in April
Chatham
Islands
02:45, last
Sunday in
September
03:45, first
Sunday in April
Anchorage
02:00, second
Sunday in March
02:00, first
Sunday in
November
Los
Angeles
02:00, second
Sunday in March
02:00, first
Sunday in
November
Denver
02:00, second
Sunday in March
02:00, first
Sunday in
November
Chicago
02:00, second
Sunday in March
02:00, first
Sunday in
November
New York
02:00, second
Sunday in March
02:00, first
Sunday in
November
Halifax
02:00, second
Sunday in March
02:00, first
Sunday in
November
St. John’s
02:00, second
Sunday in March
02:00, first
Sunday in
November
●
The information in the above table is current
as of July 2023.
Fitness Categories
Men
Age Evaluation Value
24 or below
VERY LOW <32
LOW 32-37
FAIR 38-43
MODERATE 44-50
GOOD 51-56
VERY GOOD 57-62
ELITE >62
25-29
VERY LOW <31
LOW 31-35
FAIR 36-42
MODERATE 43-48
GOOD 49-53
VERY GOOD 54-59
ELITE >59
30-34
VERY LOW <29
LOW 29-34
FAIR 35-40
MODERATE 41-45
GOOD 46-51
VERY GOOD 52-56
ELITE >56
35-39
VERY LOW <28
LOW 28-32
FAIR 33-38
MODERATE 39-43
GOOD 44-48
VERY GOOD 49-54
ELITE >54
40-44
VERY LOW <26
LOW 26-31
FAIR 32-35
MODERATE 36-41
GOOD 42-46
VERY GOOD 47-51
ELITE >51
45-49
VERY LOW <25
LOW 25-29
FAIR 30-34
MODERATE 35-39
GOOD 40-43
VERY GOOD 44-48
ELITE >48
50-54
VERY LOW <24
LOW 24-27
FAIR 28-32
MODERATE 33-36
GOOD 37-41
VERY GOOD 42-46
ELITE >46
55-59
VERY LOW <22
LOW 22-26
FAIR 27-30
MODERATE 31-34
GOOD 35-39
VERY GOOD 40-43
ELITE >43
Watch Operation Guide 3554
92
Age Evaluation Value
60 or above
VERY LOW <21
LOW 21-24
FAIR 25-28
MODERATE 29-32
GOOD 33-36
VERY GOOD 37-40
ELITE >40
Women
Age Evaluation Value
24 or below
VERY LOW <27
LOW 27-31
FAIR 32-36
MODERATE 37-41
GOOD 42-46
VERY GOOD 47-51
ELITE >51
25-29
VERY LOW <26
LOW 26-30
FAIR 31-35
MODERATE 36-40
GOOD 41-44
VERY GOOD 45-49
ELITE >49
30-34
VERY LOW <25
LOW 25-29
FAIR 30-33
MODERATE 34-37
GOOD 38-42
VERY GOOD 43-46
ELITE >46
35-39
VERY LOW <24
LOW 24-27
FAIR 28-31
MODERATE 32-35
GOOD 36-40
VERY GOOD 41-44
ELITE >44
40-44
VERY LOW <22
LOW 22-25
FAIR 26-29
MODERATE 30-33
GOOD 34-37
VERY GOOD 38-41
ELITE >41
45-49
VERY LOW <21
LOW 21-23
FAIR 24-27
MODERATE 28-31
GOOD 32-35
VERY GOOD 36-38
ELITE >38
50-54
VERY LOW <19
LOW 19-22
FAIR 23-25
MODERATE 26-29
GOOD 30-32
VERY GOOD 33-36
ELITE >36
Age Evaluation Value
55-59
VERY LOW <18
LOW 18-20
FAIR 21-23
MODERATE 24-27
GOOD 28-30
VERY GOOD 31-33
ELITE >33
60 or above
VERY LOW <16
LOW 16-18
FAIR 19-21
MODERATE 22-24
GOOD 25-27
VERY GOOD 28-30
ELITE >30
Source:
Shvartz E Reibold RC: Aerobic fitness norms
for males and females aged 6 to 75 years: a
review. Aviat Space Environ Med;61:3-11
1990 Shvartz E, Reibold RC.
Supported Phones
For information about phones that can
connect with the watch, visit the CASIO
website.
https://world.casio.com/os_mobile/wat/
Specifications
Accuracy :
±15 seconds per month when time adjustment
by communication with a phone is not
possible.
Basic Functions :
Hour, minute, second, month, day, day of
the week
a.m./p.m. (P), 24-hour timekeeping
Full Auto Calendar (2000 to 2099)
GPS :
GNSS
GPS, QZSS, Galileo, Beidou, GLONASS
Bandwidth
L1/L5
Mobile Link :
Function linking by wireless connection with
Bluetooth
®
compatible devices*
* Operation enhanced by Mobile Link
Auto Time Correction
Simple time setting
Function re-ordering and number of
function specification
World Time: Current time in 300 cities (38
time zones, auto summer time switching),
and UTC (Coordinated Universal Time)
time
Watch settings
Tide Graph: Information on
approximately 3,300 global points
Data updating
Updating of time zone and summer time
rule information
Activity function setup
Activity re-ordering and number of activity
Activity display customization
Target alert setting (time, distance,
altitude, calories burned)
Altitude navigation settings
Activity log data management
Activity log data, lap data management
Training analysis results
Notifications
Phone finder
Communication Specifications
Bluetooth
®
Frequency band: 2400 MHz to 2480 MHz
Transmission power: 1.6 mW (2 dBm)
Communication range: Up to 2 meters
(depends on environment)
Watch Operation Guide 3554
93

Activity Function :
Multi-sports (running, trekking, walking,
biking, swimming, etc.)
Distance, speed, pace, and other
information calculated using GPS and
accelerometer data
Auto/Manual lap
Auto Pause
Training Analysis :
Cardio load status
Activity log data :
Up to 100 runs, up to 200 lap records per
run
Measurement time, distance, pace, running
index, calories burned, energy source used,
heart rate, maximum heart rate, cardio load,
cadence, maximum cadence, stride,
altitude gained, stroke count, SWOLF
Digital Compass :
Measurement range: 0° to 359°
16-direction display
Auto level correction
Barometric Pressure Measurement :
Measurement range: 260 to 1,100 hPa (or
7.65 to 32.45 inHg)
Display range: 260 to 1,100 hPa (or 7.65 to
32.45 inHg)
Measurement unit: 1 hPa (or 0.05 inHg)
Auto measurement interval: 2 hours
Barometric pressure graph
Barometric pressure change indication
Temperature Measurement :
Measuring range: -10.0 to 60.0 °C (or 14.0
to 140.0 °F)
Display range: -10.0 to 60.0 °C (or 14.0 to
140.0 °F)
Measuring unit: 0.1 °C (or 0.2 °F)
Altimeter :
Measuring range: -700 to 10,000 m (or
-2,300 to 32,800 ft.)
Display range: -10,000 to 10,000 m (or
-32,800 to 32,800 ft.)
Measuring unit: 1 m (or 5 ft.)
Measuring interval: 2 minutes/5 seconds
Altitude differential measurement: -3,000 to
+3,000 m (or -9,840 to 9,840 ft.)
Altitude graph
Wrist heart rate measurement :
Measurement range: 30 to 220 bpm
Target heart rate setting
Graphic heart rate zones
Heart rate graph
Maximum/minimum heart rate
Sensor Accuracy :
Temperature
Measurement accuracy: Within ±2.0 °C
(±3.6 °F)
Guaranteed accuracy temperature
range: -10 to 60 °C (14 to 140 °F)
Pressure
Measurement accuracy: Within ±3 hPa
(0.1 inHg) (Altimeter measurement
accuracy: Within ±75 meters (246 ft.))
Accuracy guaranteed temperature
range: -10 to 40 °C (14 to 104 °F)
Step Count :
Step count measurement using a 3-axis
accelerometer
Step count display range: 0 to 99,999 steps
Step count reset: Auto reset at midnight
each day
Blood Oxygen Level* :
Measurement range: 80% to 100%
Measurement unit: 1%
* The blood oxygen level measurement
function is not intended as a medical device
for diagnosing specific diseases. It is
intended for general health maintenance
only.
Sleep Measurement :
Sleep recovery status: 6 stages
Sleep recovery level display
Sleep status: 5 stages
Sleep score display range: 1 to 100
Measurement unit: 1
Autonomic nerve status: 5 stages
ANS score range: -10 to +10
Measurement unit: 0.1
Breathing Exercise :
Setting range: 2 to 20 minutes
Setting unit: 1 minute
Biofeedback
Summary of time spent in each zone
Life Log :
Step Count
Step graph (week, month, 6 months)
Calories burned measurement
Active time measurement
Almanac :
Sunrise/Sunset times display ([--:--]
displayed when calculation results cannot
be output for some reason or in regions
outside of 65.0° south to 65.0° north
latitude.)
Moon age
Tide Function :
Tide Graph
Stopwatch :
Measuring unit: 1 second
Measuring capacity: 99:59’59” (100 hours)
Split times
Timer :
Setting unit: 1 second
Measuring unit: 1 second
Maximum setting: 60 minutes
World Time :
Displays current time in 38 cities (38 time
zones)* and UTC, Auto DST
* Subject to updates by connection
between the watch and a phone.
Other :
Power Saving
LED backlight (Full Auto Light, Super
Illuminator, afterglow, 1.5 or 5-second
selectable illumination duration)
Charge Level Indication
Operation sound enable/disable
Vibration
Airplane Mode
4 alarms (with snooze)
Smart alarm (with snooze)
Step reminder
Floor elevation measurement
Accessories :
Charger cable
When unpackaging, check to make sure
everything is included. If something is
missing, contact your original retailer.
Power Supply :
Lithium-ion battery
Power Consumption :
0.0W*
* Measured standby power
measurement per (EU)2023/826
Watch Operation Guide 3554
94
Battery Operating Time :
The battery operating times in the table below
are intended as general guidelines. Operating
time differs according display time and how
the watch is used.
Watch Mode
Settings
Battery
Operating
Time
(Approx.)
Heart rate *1 + Sleep
[ACTIVITY & NIGHT TIME ON]
+ Worn during sleep (8 hours)
14 days
[ACTIVITY & NIGHT TIME ON]
+ Not worn during sleep
2 months
[ON] + Worn during sleep (8
hours)
7 days
[ON] + Not worn during sleep 10 days
[OFF] 2 months
Activity Mode
●
RUNNING/WALKING group, TREKKING,
BIKING, OTHER ACTIVITY
Settings
Battery
Operating
Time
(Approx.)
Heart Rate *1 GPS *2
[ACTIVITY & NIGHT
TIME ON] or [ON]
[HIGH] 14 hours
[NORMAL]
16 hours
[LONG] 19 hours
●
GYM WORKOUT
Settings
Battery
Operating
Time
(Approx.)
Heart Rate *1 GPS *2
[ACTIVITY & NIGHT
TIME ON] or [ON]
- 79 hours
●
POOL SWIMMING
Settings
Battery
Operating
Time
(Approx.)
Heart Rate *1 GPS *2
- - 50 hours
●
OPEN WATER SWIMMING
Settings
Battery
Operating
Time
(Approx.)
Heart Rate *1 GPS *2
-
[NORMAL]
15 hours
*1 Heart rate measurement settings
●
[ACTIVITY & NIGHT TIME ON]: Enable
during activities and night time only
●
[ON]: Always enabled
●
[OFF]: Always off (No measurement
while sleeping.)
*2 GPS
●
[HIGH]: Continuous measurement with
Band L1 or L5
●
[NORMAL]: Continuous measurement
with Band L1
●
[LONG]: Intermittent measurement with
Band L1 + Turn angle judgment
Specifications are subject to change without
notice.
Message Screen List
Indicator: Meaning:
Watch battery level is low.
Charge the watch.
Insufficient remaining
memory capacity.
Memory is full.
GPS signal reception
starting
GPS signal reception in
progress
Receiving GPS
GPS receive complete
Warning!
GPS preparation failed
Bluetooth reception in
progress
Watch Operation Guide 3554
95
Indicator: Meaning:
Phone connection
complete.
Phone connection/pairing,
or GPS signal reception
failed. Try again.
Keep the watch still during
measurement.
Press (C) to start
measurement.
Measurement in progress.
Please wait.
Please wait
No data
Watch error. There may be
a problem with the sensor.
Remeasure or re-calibrate.
Watch setup reset in
progress
Checking Wireless
Compliance Information
1. Display the current time screen.
l
Watch Mode
2. Hold down (A) for at least two seconds.
This enters the Control Mode.
3. Use (A) and (D) to select [SETTING].
4. Press (C).
This displays the setting menu screen.
Pointer
5. Use (A) and (D) to move the pointer to
[REGULATORY].
6. Press (C).
7. Use (A) and (D) to select the information
you want to view.
8. Hold down (E) for at least one second to
return to the current time screen.
Copyrights and Registered
Copyrights
●
The Bluetooth
®
word mark and logos are
registered trademarks owned by the
Bluetooth SIG, Inc. and any use of such
marks by CASIO Computer Co., Ltd. is
under license.
●
iPhone and App Store are trademarks of
Apple Inc. in the United States and other
countries.
●
iOS is a trademark or registered trademark
of Cisco Systems, Inc.
●
Android and Google Play
TM
are trademarks
or registered trademarks of Google LLC.
●
Nightly Recharge
TM
and
Sleep Plus Stages
TM
are registered
trademarks of Polar Electro Oy.
●
Other company names and product names
used herein are trademarks or registered
trademarks of their respective companies.
Software
Use the URL below to access information
about software.
https://s.casio.jp/w/10382en/
Watch Operation Guide 3554
96
Troubleshooting
Charging with the Charger
Cable
Q1
The watch won’t charge with the
charger cable.
Is the end of the charger cable with the
special watch connector securely aligned
with the watch charger terminal?
Charging may fail if there is space
between the terminals.
l
Precautions When Charging
Did you leave the watch attached to the
charger cable after charging was
complete?
Charging stops automatically after the
watch becomes fully charged. If you want
to charge again, unplug the charger cable
from the watch and then re-attach it.
Is charging still impossible after checking
the above points?
Check to make sure that the USB device
or power source is functioning normally.
Q2
Charging stops before it is complete.
Charging may stop if some temporary
abnormality occurs. Unplug the charger cable
from the watch and check for abnormalities. If
there is nothing wrong, try charging again.
If the above does not eliminate the problem,
contact your original retailer or a CASIO
service center.
GPS Signals
Q1
The watch cannot perform a GPS
signal receive operation.
Is the watch’s battery charged?
GPS signal reception is not possible while
the battery indicator is or lower.
Charge the watch.
l
Charging the Watch
Is the watch’s Airplane Mode enabled?
GPS signal reception is not possible while
the watch’s Airplane Mode is enabled.
Disable the Airplane Mode.
l
Entering the Watch Airplane Mode
After checking the above, the watch still
cannot perform a GPS signal receive
operation.
GPS signal reception is not possible
under the conditions described below.
●
During power saving
Q2
The GPS signal receive operation
always fails.
Is the watch in a location that is appropriate
for signal reception?
Check your surroundings and move the
watch to a location where GPS signal
reception is better.
l
Appropriate Signal Reception Location
Is the LCD of the watch pointed straight up
at the sky?
Minimize movement of the watch while the
receive operation is in progress.
Also, avoid covering the watch LCD with
the sleeve of your clothing.
Adjusting Current Time
Settings Using GPS
Q1
The watch is not receiving time
information.
This model does not support auto GPS signal
reception for time adjustment. If you want to
receive GPS signals for time adjustment,
perform a manual receive operation.
l
Adjusting Time Settings by Performing a
Manual GPS Signal Receive Operation
Q2
A screen showing that a receive
operation is in progress has been on
the display for a long time.
The watch may be receiving leap second
information.
l
Leap Second Reception
Q3
Signal reception should have been
successful, but the watch’s time and/
or day is wrong.
Is your Home City (time zone) setting
correct for your location?
Change your Home City (time zone)
setting so it correctly indicates your
location.
l
Adjusting Time Settings by Performing
a Manual GPS Signal Receive
Operation
l
Setting a Home City
After checking the above, the time and/or
day settings is still wrong.
Adjust time and day settings manually.
Watch Operation Guide 3554
97
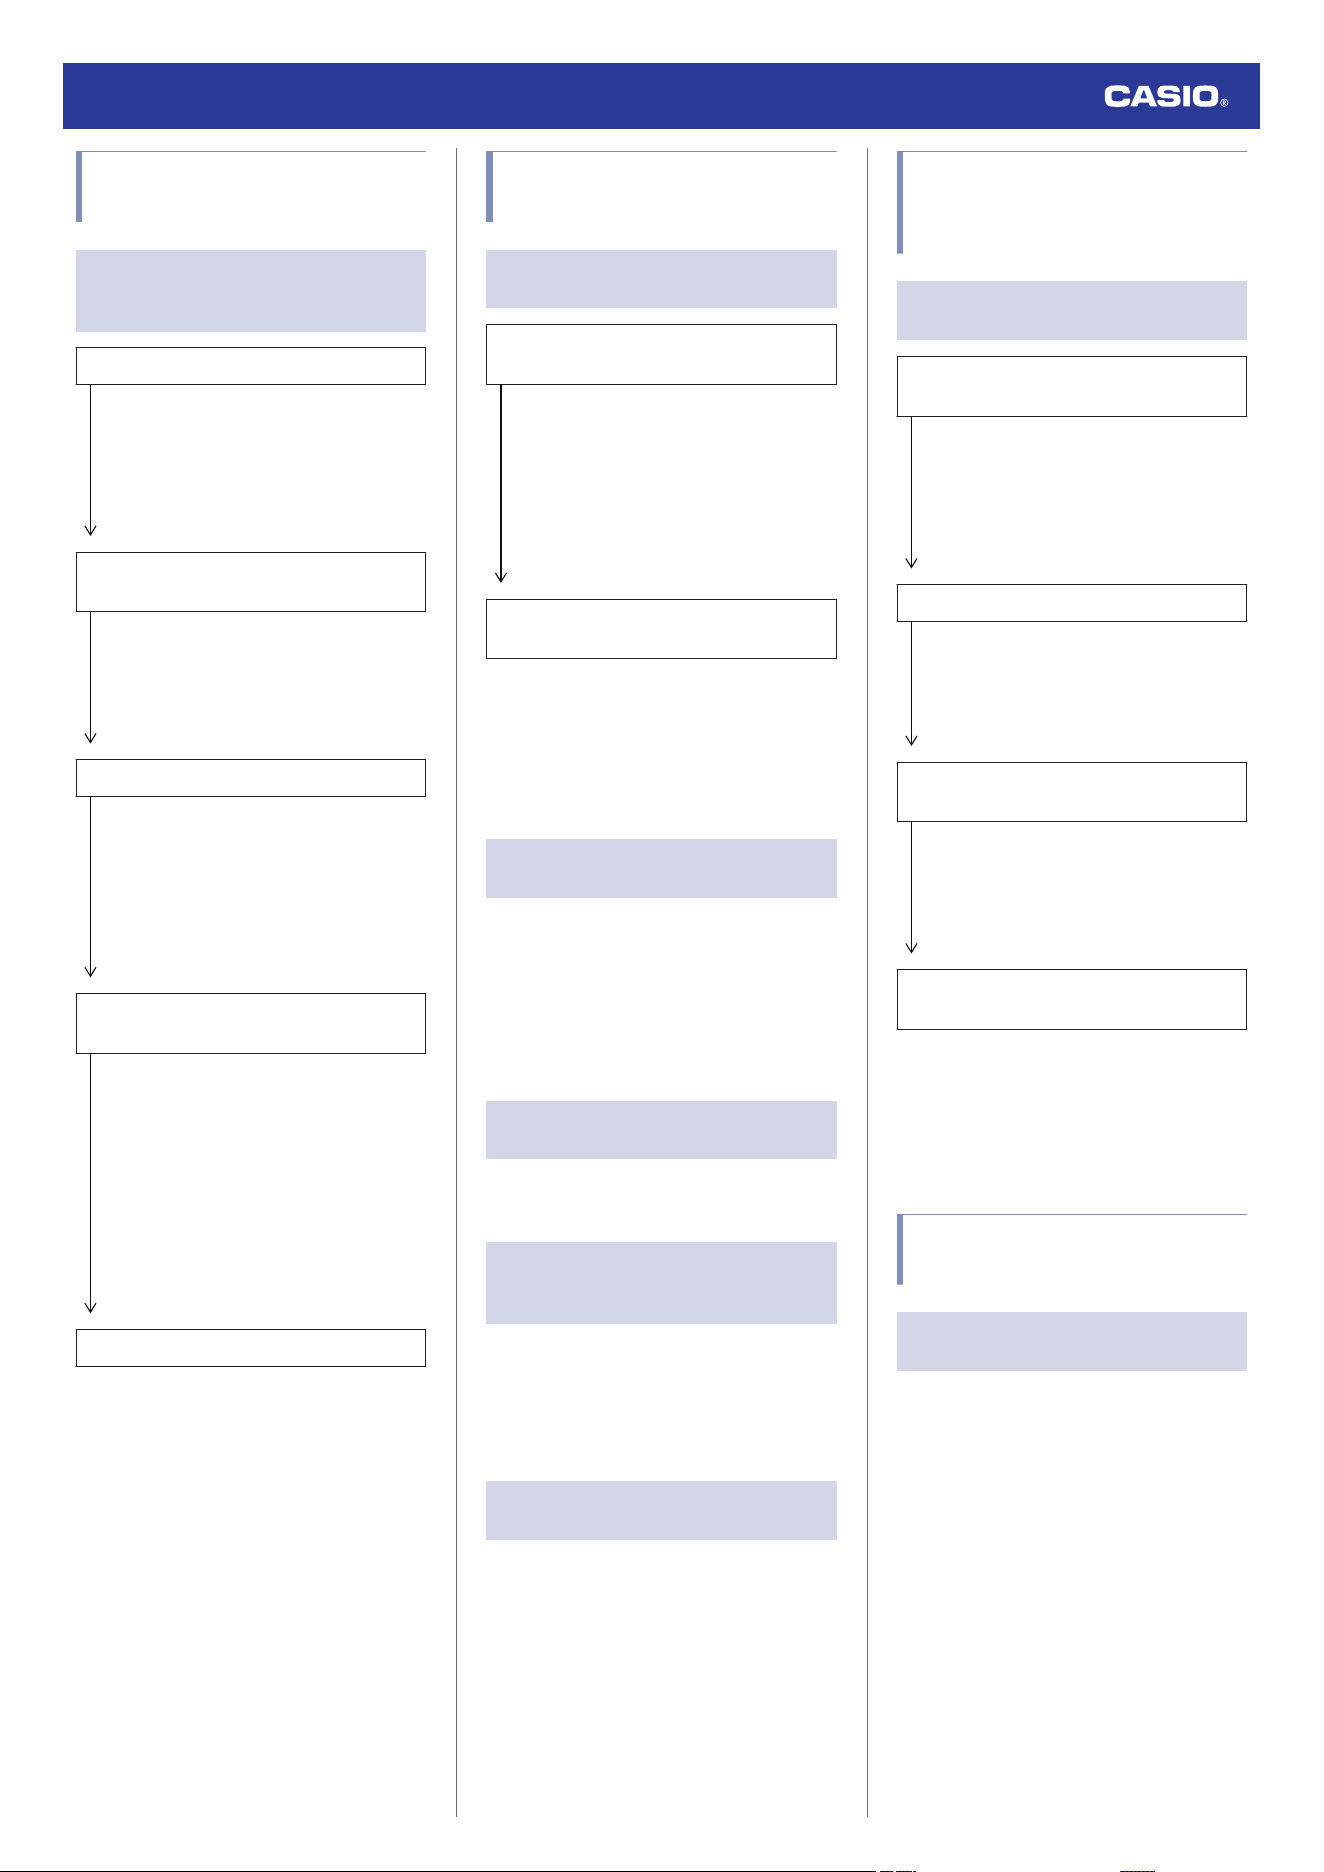
I can’t pair the watch with a
phone.
Q1
I’ve never been able to establish a
(pairing) connection between the
watch and phone.
Are you using a supported phone model?
Check if the phone model and its
operating system are supported by the
watch.
For information about supported phone
models, visit the CASIO Website.
https://world.casio.com/os_mobile/wat/
Did you install the CASIO WATCHES
phone app on your phone?
The CASIO WATCHES phone app needs
to be installed on your phone in order to
connect with the watch.
l
A
Install the required app on your
phone.
Did you enable location services?
On your phone, configure the settings
below. For details about setting
procedures, see your phone
documentation.
●
Enable your phone’s location services.
●
Give your phone rights to use the phone
app’s location information.
Are your phone’s Bluetooth settings
configured correctly?
Configure the phone’s Bluetooth settings.
For details about setting procedures, see
your phone documentation.
iPhone Users
●
“Settings”
n
“Bluetooth”
n
On
●
“Settings”
n
“Privacy”
n
“Bluetooth”
n
“CASIO WATCHES”
n
On
Android Users
●
Enable Bluetooth.
Other than the above.
Some phones need to have BT Smart
disabled to use the CASIO WATCHES
phone app. For details about setting
procedures, see your phone
documentation.
On the Home Screen, tap: “Menu”
n
“Settings”
n
“Bluetooth”
n
“Menu”
n
“BT Smart settings”
n
“Disable”.
I can’t reconnect the watch
and phone.
Q1
The watch will not re-connect with the
phone after they are disconnected.
Is the CASIO WATCHES phone app
running?
The watch cannot re-connect with your
phone unless the CASIO WATCHES
phone app is running on the phone. On
your phone’s home screen, tap the CASIO
WATCHES icon. Perform the operation
shown on the screen that appears to pair
with the watch.
l
D
Pair the watch with your phone
Have you tried turning your phone off and
then back on again?
Turn your phone off and then back on
again, and then tap the CASIO
WATCHES icon. Perform the operation
shown on the screen to pair with the
watch.
l
D
Pair the watch with your phone
Q2
I can’t connect while my phone is in
the Airplane Mode.
Connection with the watch is not possible
while the phone’s Airplane Mode is enabled.
Disable your phone’s Airplane Mode. On it’s
home screen, tap the “CASIO WATCHES”
icon. Next, perform the operation shown on
the screen to pair with the watch.
l
D
Pair the watch with your phone
Q3
I can’t connect while the watch is in
the Airplane Mode.
Exit the watch’s Airplane Mode.
l
Entering the Watch Airplane Mode
Q4
I changed the phone’s Bluetooth
from enabled to disabled, and now I
can’t connect anymore.
On your phone, turn on Bluetooth. Then on its
home screen, tap the “CASIO WATCHES”
icon. Next, perform the operation shown on
the screen to pair with the watch.
l
D
Pair the watch with your phone
Q5
I can’t connect after turning off the
phone.
Turn on your phone. On its home screen, tap
the CASIO WATCHES icon. Next, perform the
operation shown on the screen to pair with the
watch.
l
D
Pair the watch with your phone
I can’t seem to be able to
connect, or connection is
unstable.
Q1
I can’t establish a connection
between the phone and watch.
Have you tried turning your phone off and
then back on again?
Turn your phone off and then back on
again, and then tap the CASIO
WATCHES icon. Perform the operation
shown on the screen to pair with the
watch.
l
D
Pair the watch with your phone
Is the watch in the Airplane Mode?
Connection with your phone is not
possible while the watch’s Airplane Mode
is enabled. To connect with your phone,
disable the Airplane Mode.
l
Entering the Watch Airplane Mode
Has the watch been re-paired with the
phone?
After deleting the pairing information from
the CASIO WATCHES phone app and
your phone, re-pair the watch and phone.
l
Unpairing
l
D
Pair the watch with your phone
If you are unable to establish a
connection...
After deleting pairing information from the
watch, re-pair it with your phone.
l
Deleting Pairing Information from the
Watch
l
D
Pair the watch with your phone
Changing to a Different
Phone Model
Q1
How do I connect my watch to a
different phone?
Pair the watch with the phone.
l
After Purchasing Another Phone
Watch Operation Guide 3554
98
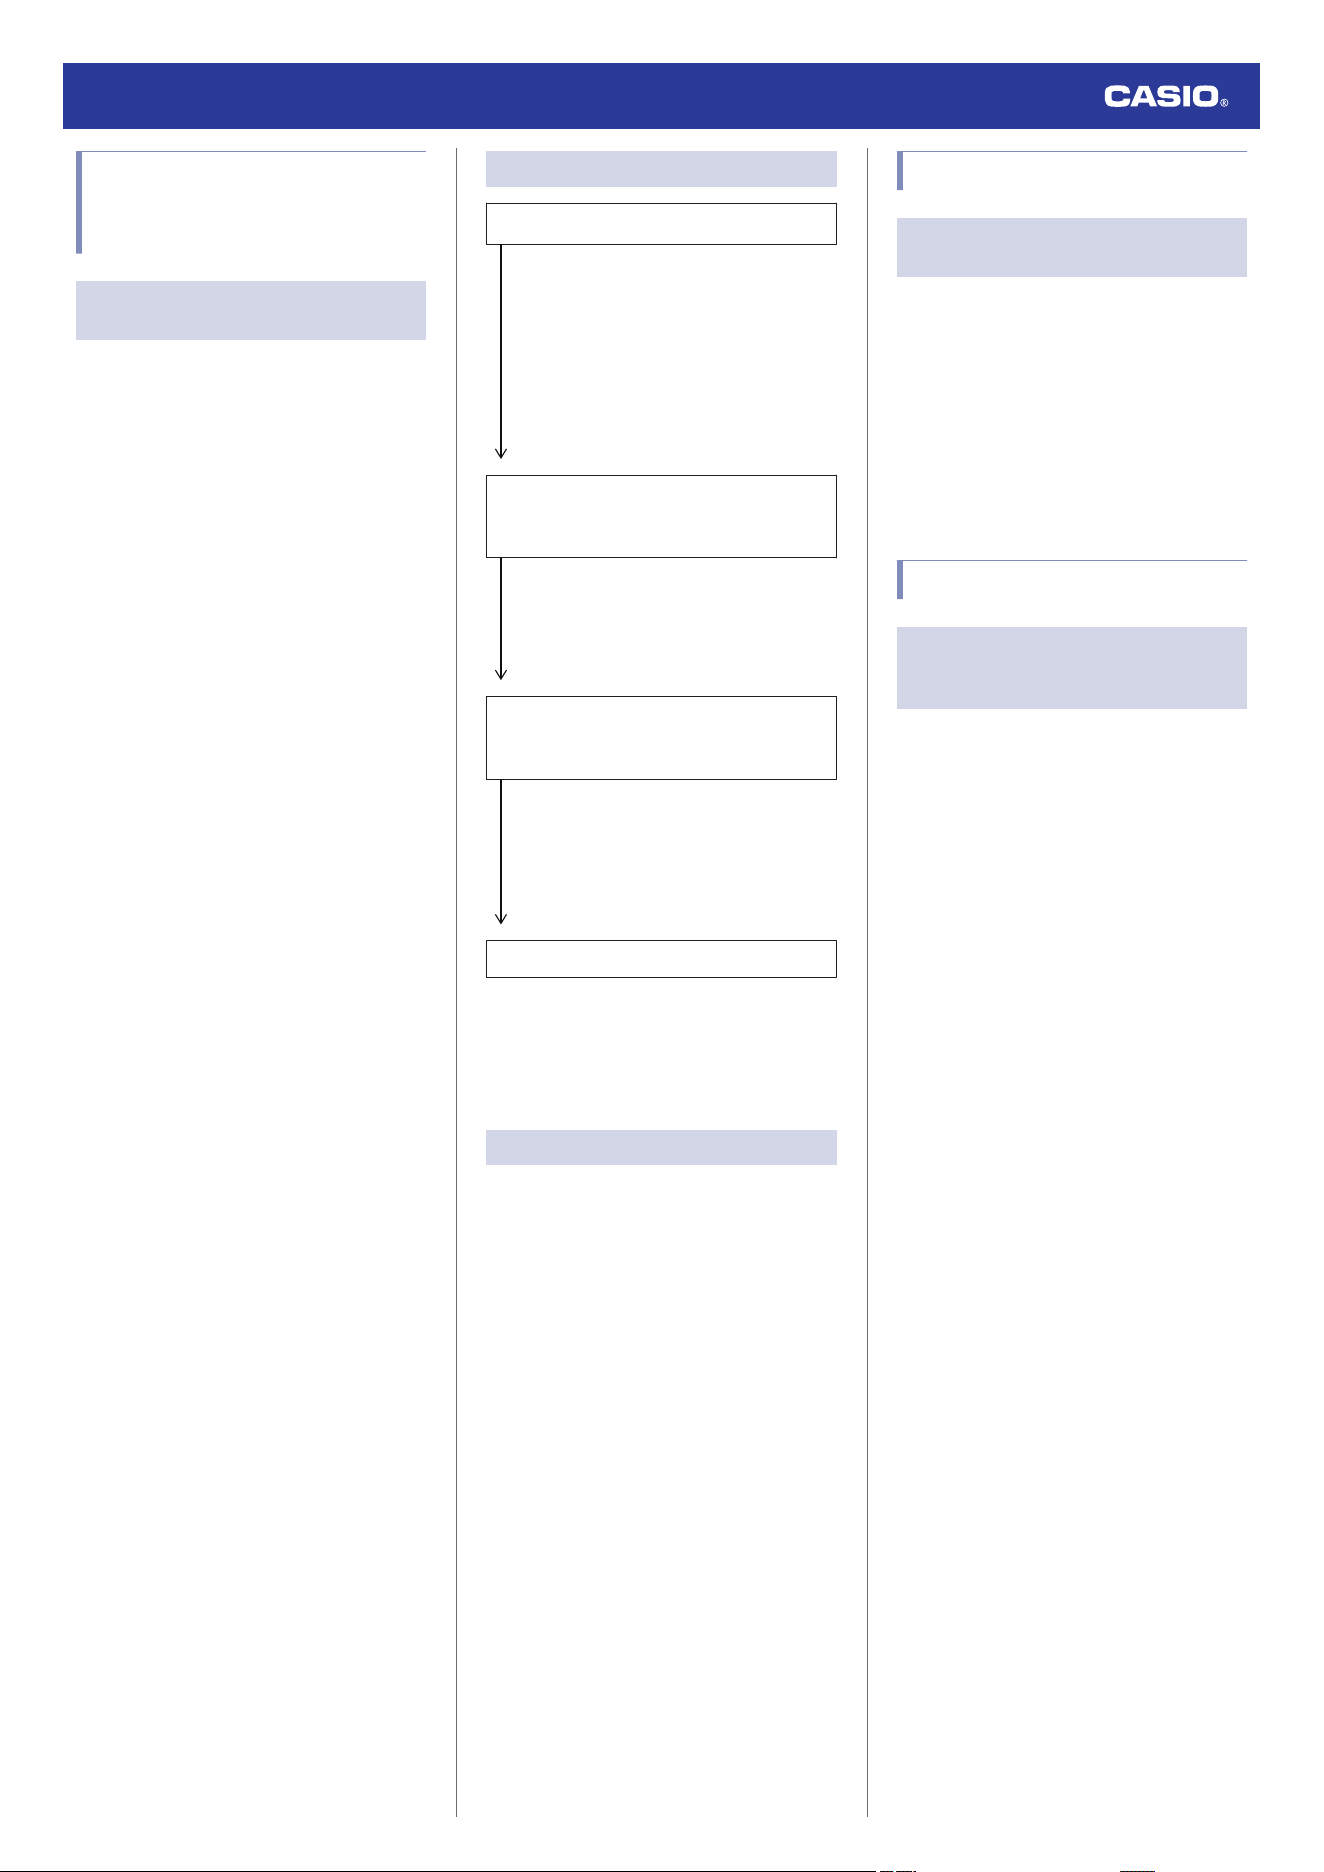
Auto Time Correction by
Bluetooth Connection (Time
Correction)
Q1
When does the watch correct its
time?
Your watch can connect with a paired phone
to adjust its time setting. Auto time adjustment
is performed at the times described below.
●
After your phone’s time zone or summer
time setting is changed
●
After 24 hours or more have passed since
the last time adjustment using Bluetooth
connection
●
After 24 hours or more have passed since
the last home city change or time
adjustment using watch operation
Q2
Auto time setting is not correct.
Is
e
displayed?
To preserve battery power, the watch will
automatically terminate Bluetooth
connection with your phone temporarily if
it detects the connection has been unused
for approximately one hour. Auto Time
Correction is disabled while there is no
connection. To reconnect, press any
watch button or angle the watch towards
your face.
Have 24 hours or more passed since the
last time adjustment using Bluetooth
connection?
Note that auto time correction is not
performed for 24 hours after you adjust
the time setting manually on the watch.
Auto time correction will resume after 24
hours.
Have 24 hours or more passed since the
last manual time adjustment or city
change?
Auto time correction is not performed for
24 hours after a manual time adjustment
or city change. Auto time correction will
resume after 24 hours or more have
elapsed after either of the above
operations is performed.
Is the watch’s Airplane Mode enabled?
Connection with your phone is not
possible while the watch’s Airplane Mode
is enabled. To connect with your phone,
disable the Airplane Mode.
l
Entering the Watch Airplane Mode
Q3
Time is not displayed correctly.
The phone’s time setting may be incorrect
because it is unable to connect with its
network due to being out of range, etc. If this
happens, connect the phone to its network
and then adjust the time setting.
Activity Log and Life Log
Q1
How much Activity Log and Life Log
data does the watch store?
The data storage capacity of watch memory is
shown below.
●
Activity Log: 100 records
●
Life Log: 3 days
If there is a lot of data, it will take time to
transfer the data to the CASIO WATCHES
phone app. Frequent connection to the
CASIO WATCHES to transfer data is
recommended.
Nightly Recharge™
Q1
Sleep measurement (Nightly
Recharge™) results are not
displayed.
Sleep data cannot be acquired when any of
the following conditions exist.
●
Your actual sleep time does not match the
current bedtime/wake-up time setting
●
Sleep (from bedtime to wake up) of less
than 4 hours
●
Wearing the watch only while asleep and
taking it off immediately after awaking
●
Something other than [ON] or [ACTIVITY &
NIGHT TIME ON] is selected for the heart
rate measurement setting
●
The watch is not fastened securely to your
wrist while sleeping
●
A minimum of three sleep measurement
operations (one of which was the night
before) not performed within the past 28
days
Watch Operation Guide 3554
99
Heart Rate Measurement
Q1
[ERROR] is displayed during
measurement.
There may be a problem with the sensor. Try
taking another measurement. If [ERROR]
keeps appearing after multiple measurement
attempts, contact a CASIO service center or
your original retailer.
Altitude Measurement
Q1
Readings produce different results at
the same location.
Watch readings are different from
altitude information available from
other sources.
Correct altitude readings are not
possible.
Relative altitude is calculated based on
changes in barometric pressure measured by
the watch’s pressure sensor. This means that
barometric pressure changes can cause
readings taken at the same location to be
different. Also note that the value displayed by
the watch may be different from the actual
elevation and/or sea level elevation indicated
for the area where you are located. When
using the watch’s altimeter while mountain
climbing, it is recommended that you regularly
calibrate its readings in accordance with local
altitude (elevation) indications.
l
Calibrating Altitude Readings
Q2
[- - - - -] appears on the display
following altitude differential
measurement.
[- - - - -] appears on the display when the
altitude differential is outside the allowable
measuring range (±3,000 m (±9,840 feet)). If
[ERROR] is displayed, there may be a
problem with the sensor.
l
Setting a Reference Altitude and Taking
Altitude Differential Readings
Q3
[ERROR] is displayed during
measurement.
There may be a problem with the sensor. Try
taking another measurement. If [ERROR]
keeps appearing after multiple measurement
attempts, contact a CASIO service center or
your original retailer.
Digital Compass
Q1
The symbol [ ] is shown on the
display.
Accessing the compass function causes
[ ] to appear on the display. This icon will
disappear when you perform a bearing
measurement operation.
l
Taking a Compass Reading
If [ ] appears on the display during
bearing or activity measurements, it means
abnormal magnetism was detected. Move
away from any potential source of strong
magnetism and try taking a reading again.
If [ ] appears again, it could mean that the
watch body has become magnetized. Move
away from any potential source of strong
magnetism, perform direction calibration, and
then try taking a reading again.
l
Calibrating the Compass
l
Digital Compass Reading Precautions
Q2
[ERROR] is displayed during
measurement.
There is a problem with the sensor or there
may be a source of strong magnetic force
nearby. Move away from any potential source
of strong magnetism and try taking a reading
again. If [ERROR] keeps appearing after
multiple measurement attempts, contact a
CASIO service center or your original retailer.
l
Digital Compass Reading Precautions
Q3
[ERROR] appears on the display
following direction calibration.
If [- - -] is followed by [ERROR] on the display,
it could mean there is something wrong with
the sensor.
●
If [ERROR] disappears after about one
second, try calibrating again.
●
If [ERROR] keeps appearing after multiple
attempts, contact a CASIO service center or
your original retailer.
Q4
Direction information indicated by the
watch is different from that indicated
by a backup compass.
Move away from any potential source of
strong magnetism, perform direction
calibration, and then try taking a reading
again.
l
Calibrating the Compass
l
Digital Compass Reading Precautions
Q5
Readings at the same location
produce different results.
Cannot take readings indoors.
Move away from any potential source of
strong magnetism and try taking a reading
again.
l
Digital Compass Reading Precautions
Barometric Pressure
Measurement
Q1
[ERROR] is displayed during
measurement.
There may be a problem with the sensor. Try
taking another measurement. If [ERROR]
keeps appearing after multiple measurement
attempts, contact a CASIO service center or
your original retailer.
Temperature Measurement
Q1
[ERROR] is displayed during
measurement.
There may be a problem with the sensor. Try
taking another measurement. If [ERROR]
keeps appearing after multiple measurement
attempts, contact a CASIO service center or
your original retailer.
Watch Operation Guide 3554
100
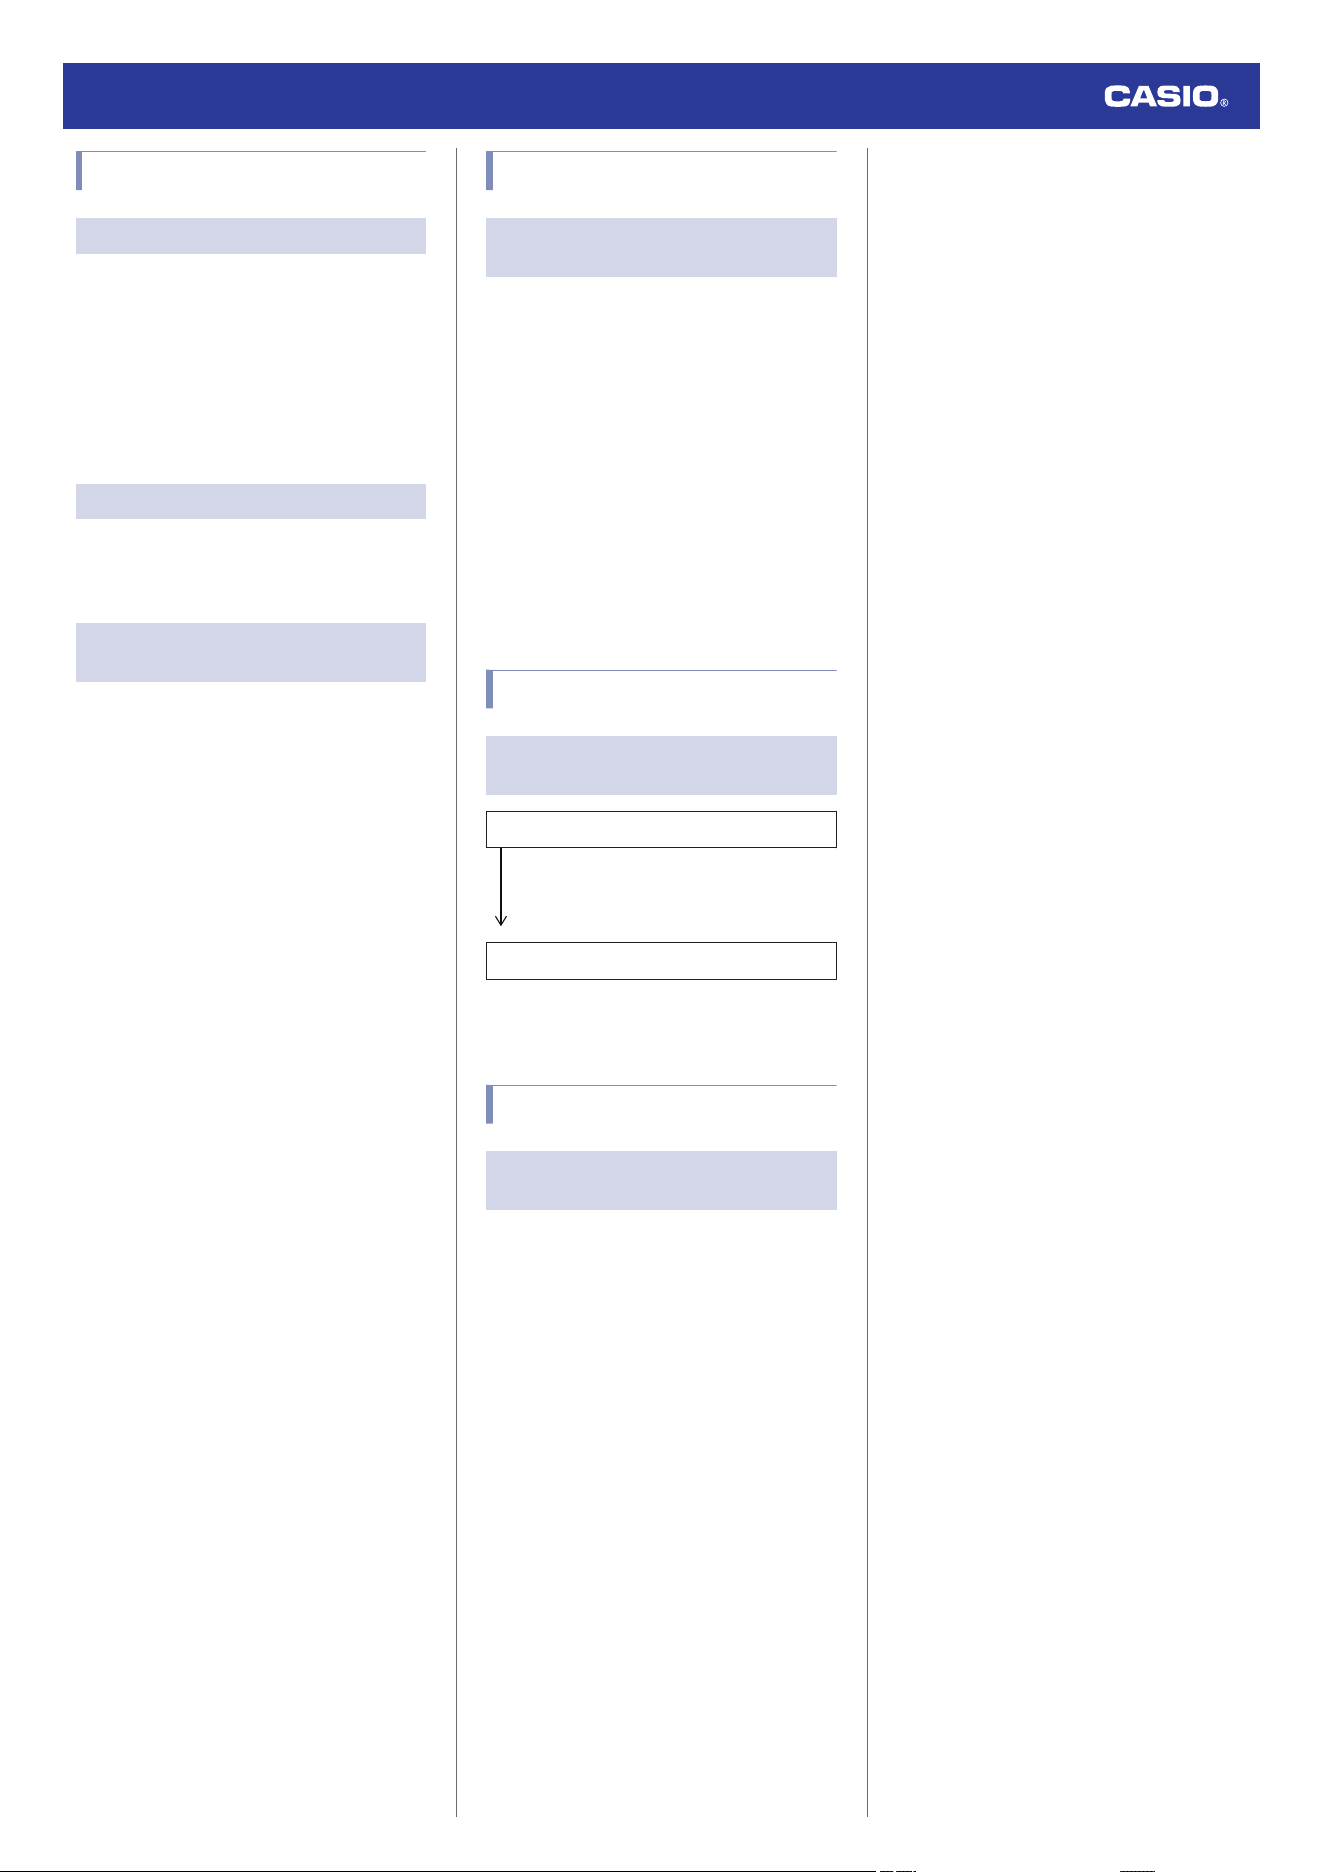
Pedometer
Q1
Displayed step count is not correct.
While the watch is on your wrist, it may detect
non-step movements and count them as
steps.
l
Counting Steps
Also, step count problems can also be caused
by how the watch is being worn and abnormal
arm movement while walking.
l
Causes of Incorrect Step Count
Q2
The step count does not increase.
To prevent erroneous counting, the count
display does not increase immediately after
you start walking.
Q3
[ERROR] appears when using the
pedometer.
[ERROR] (error) is displayed when sensor
operation is disabled because of sensor or
internal circuitry malfunction.
If the indicator remains on the display for more
than three minutes or if it frequently appears,
it could indicate a faulty sensor.
Contact a CASIO service center or your
original retailer.
Tide Function
Q1
There are errors in the tide
information.
Since the high tide and low tide times and tide
levels of the Tide Graph are calculated based
on past data, the calculated data may be
different from actual tide information.
Also note that the degree of the error can be
affected by terrain, weather, and other
conditions. Use the tide information of this
watch for reference only.
Be sure to check accurate tide forecast
information issued by various organizations,
and do not use the tide information of this
watch to determine tide levels used for
navigation or any other purpose where there
is the risk of danger.
Alarm
Q1
There is no sound and/or vibration
operation performed for alarms.
Is the watch’s battery charged?
Charge the watch until the battery is
sufficiently recharged.
l
Charging the Watch
Is alarm sound and/or vibration enabled?
Enable the alarm.
l
Turning Off an Alarm
Other
Q1
I can’t find the information I need
here.
Visit the website below.
https://world.casio.com/support/
Watch Operation Guide 3554
101

