1
P/N 241355 Rev. 02
Effective: 03-14-2025
Replaces: 12-01-2008
Manway Installaon:
• Manway covers and gaskets are shipped in place so
they will not be lost in shipment. The bolts are not
tightened completely so that the tank can be opened
and cleaned prior to service. Once the manway bolts
are fully torqued, the gasket often cannot be reused.
Replacement gaskets are available.
• The gaskets may shift due to vibration in transit.
• For final assembly of the manway, the gaskets MUST
cover the surface of the ring 100% and project slightly
on each side of the ring. The bolts should be tightened
before the tank has pressure, and then re-tightened
when the tank is at operating pressure.
• Only the gasket should be used. Do not use glues or
materials such as Permatex to assist the gasket seal.
These can cause the gasket to creep under pressure,
and make later installation of a new gasket very
difficult.
The informaon contained in this manual is intended for use by qualied professional
installers, service technicians or gas suppliers. Consult your local expert for proper
installaon or service procedures.
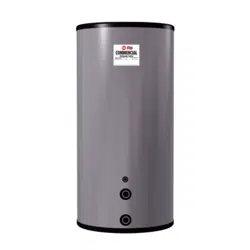
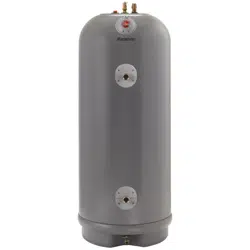
Raypak Glass-Lined Storage Tank Installation & Maintenance Procedures
NOTE
NOTE: Anodes are, in many cases, shipped loose and need to be
installed/ghtened correctly before start-up. If rigid anodes are
shipped in place, they MUST be inspected and ghtened before
pressurizing the vessel.
Installaon:
The water storage tank MUST be installed using dielectric
connecons. Failure to do so will void the manufacturer’s
warranty. Installaon of the tank without dielectric
connecons can cause the rapid failure of the storage tank
due to electrolysis. For this reason, it is imperave that
dielectric connecons be ulized.
The tank should be installed in such a manner that should
the tank or any of its connecons leak, the resulng ow
of water will not cause damage.
Follow the Dielectric Protecon instrucons in these
procedures to verify that the dielectric connecons are
installed properly. If electrical connuity exists between
the tank and its piping, the connecons MUST be xed.
Maintenance:
A new tank installaon should have a regular inspecon
program set up inially. The rst inspecon should be
within the rst three months of operaon. Once the
tendency to accumulate sediment has been established,
the inspecon program can be modied to suit the water
condions. Typical inspecon programs ush the tank at
six-month intervals and clean the tank in yearly intervals.
Deliming solvents or acid-type ush agents are not
recommended for use in lined storage tanks. These
chemical cleaners are usually designed for use in non-
potable systems such as heang boilers. These chemicals
may be aggressive and cause damage to the tank lining
and deteriorate the magnesium anodes supplied in Raypak
glass-lined storage tanks.
WARNING: HOT WATER WILL BE RELEASED UNDER PRESSURE.
AVOID CONTACT WITH THE HOT DISCHARGE WATER TO PREVENT
THE RISK OF SEVERE SCALD INJURY.
Flushing the Storage Tank:
Since the mineral accumulaon is occurring in an unred
tank it will be in a so sediment form. Much of this so
sediment can be removed by a regular ushing of the
lower poron of the tank.
To ush the tank, follow these steps:
1. Turn off the electricity and gas supply to the water
heater piped to the storage tank.
2. Turn off electrical power to the circulating pump.
3. Close the valve on the hot water outlet on the top of
the storage tank.
4. Ensure that the drain located on the bottom of the
tank is routed to a floor drain with adequate capacity
to allow the tank to be flushed.
5. Open the drain valve and allow the incoming cold
water to flush the soft sediment out the bottom of
the storage tank. Use extreme caution, as the water
exiting the tank drain may be very hot. Avoid contact
with the hot discharge water to prevent the risk of
severe scald injury.
SCAN WITH QR EQUIPPED SMART DEVICE
FOR DIGITAL ONLINE VERSION.
APPROVED
UNCONTROLLED DOCUMENT IF PRINTED

2
6. Observe the color of the water initially discharged from
the tank drain. This water will generally be milky or
slightly discolored by the sediment discharge. Allow the
drain to run until the water runs clear.
7. Close the drain valve on the tank.
8. Open the hot water outlet valve on the top of the tank.
9. Open an adjacent hot water tap to purge any air that
may have entered the storage tank during the draining
process. Close the hot water tap if no air discharge is
observed.
10. Turn on electric power to the water heater and circulating
pump.
11. Turn on the gas supply to water heater.
12. Observe heater and piping to ensure all components are
functioning properly.
Cleaning the Storage Tank:
The mineral accumulaon in an un-red tank will be in a so
sediment form that can be removed by a regular cleaning of
the lower poron of the tank. Many tanks will have a hand
hole or a larger manway to allow access to the interior of the
tank for complete removal of accumulated sediment. The
opening will be in the boom poron of a vercal tank and
on the end of a horizontal tank.
To clean the tank, follow these steps:
1. Turn off the electricity and gas supply to the water
heater piped to the storage tank.
2. Turn off electrical power to the circulating pump.
3. Close the valves on the hot water outlet on the top of the
storage tank and the cold water supply to the system.
4. Ensure that the drain located on the bottom of the tank
is routed to a floor drain with adequate capacity to allow
the tank to be drained.
5. Open the drain valve and open a vent to allow the air
to enter the tank (manually opening the relief valve
will usually accomplish this). Use extreme caution, as
the water exiting the tank drain may be very hot. Avoid
contact with the hot discharge water to prevent the risk
of severe scald injury.
6. Allow the tank to drain completely.
7. Remove the cover over the manway or hand hole (if
equipped). Remove the bolt(s) securing the tank access
opening. Use a flashlight to observe the sediment
collected in the tank.
8. Use hand tools to remove all sediment from the interior
of the tank. Use care not to damage the interior lining of
the storage tank.
9. Use a water hose to flush the remaining sediment from
the interior surfaces of the tank and ensure that all
debris is removed. Scale or sediment allowed to reach
the potable system can foul valves, pumps, strainers
and other water fixtures. Ensure that the tank interior is
clean before refilling the vessel.
10. Install a new gasket on the manway or hand hole to
prevent any possible leaks. Tighten the gasket properly
to prevent leaks.
11. Install a new gasket on the manway or hand hole to
prevent any possible leaks. Tighten the gasket properly
to prevent leaks.
CAUTION: OVER TIGHTENING CAN RESULT IN CUTTING THE
GASKET AND ALLOWING A WATER LEAK TO OCCUR.
12. Close the drain and open the cold water supply and
hot water outlet. If the relief valve was used for a vent,
ensure that it is now closed. Open the closest hot water
valve to allow the air in the tank to vent as water enters
the vessel. Close the valve opened for a vent when water
flows from the valve.
13. Check the manway or hand hole and all related piping
for any water leaks.
14. Turn on electric power to the water heater and circulating
pump.
15. Turn on the gas supply to water heater.
16. Observe heater and piping to ensure all components are
functioning properly.
Magnesium Anode Rod Inspecon:
Glass-lined storage tanks have magnesium anodes to
cathodically protect the lining and minimize corrosion.
Aggressive water condions in some areas of the country
may accelerate the deterioraon of the anodes. The anodes
should be periodically removed and inspected to determine
if replacement is necessary.
The tank MUST be valved o from the system and fully
drained to remove an anode for inspecon. Raypak storage
tanks have mulple anodes installed in threaded tappings
along the length of the tank or on top of the tank. Adequate
service clearance is required to allow removal of an anode.
The anodes should be replaced when more than six inches of
the core wire is exposed at either end of the rod.
Dielectric Protecon:
Inspect each dielectric coupling at each tank connecon
for corrosion and proper operaon. This is done when the
tank is empty using an Ohm meter, which must indicate
there is no connuity between the tank and the system
piping. Should the electrical isolaon between the tank and
its piping or structure fail, electrolysis will occur and the
resulng damage will eventually destroy the tank. This check
MUST be repeated at least every 18 months with no water in
the tank to ensure proper operaon of the dielectrics. Clean
or replace dielectric ngs as required.
Immersion Heang Coil:
If the tank has a coil, it should be removed every twelve
months for inspecon to determine lime build-up on
copper tubes. If build-up is excessive, the coil should
be cleaned by immersion in 20% inhibited muriac acid
soluon.
NOTE: For the sake of convenience, it is suggested that the
Magnesium Anode Rod Inspecon and the Dielectric Protecon
procedure be handled at the me of the yearly tank draining for
cleaning purposes.
APPROVED
UNCONTROLLED DOCUMENT IF PRINTED