User Guide
MiniOven
™

4 Features
5 Important Safeguards
6 Before First Use
Cooking with the MiniOven
8 Cleaning and Maintenance
MiniOven Do’s and Don’ts
9 Terms and Conditions
Table of Contents

This guide contains instructions for using your
MiniOven™, including helpful cooking
tips and warranty information. Just scroll down
to discover all that your MiniOven can do. You
can also find more information on our FAQ
pages on both the app and our website.
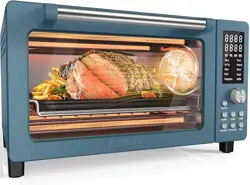
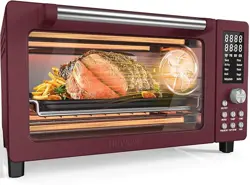
Whether you’re craving a juicy broiled ribeye, a
basket of crisp fries, a platter of tender roasted
veggies, or a perfectly toasted bagel,
has you covered. With the MiniOven on your
side, there’s no more guesswork,
only guaranteed success.
We know you’re excited to start cooking—better
than ever!—with your new oven, but please read
all safety information before you get cooking.
Happy Cooking!
Welcome to
4
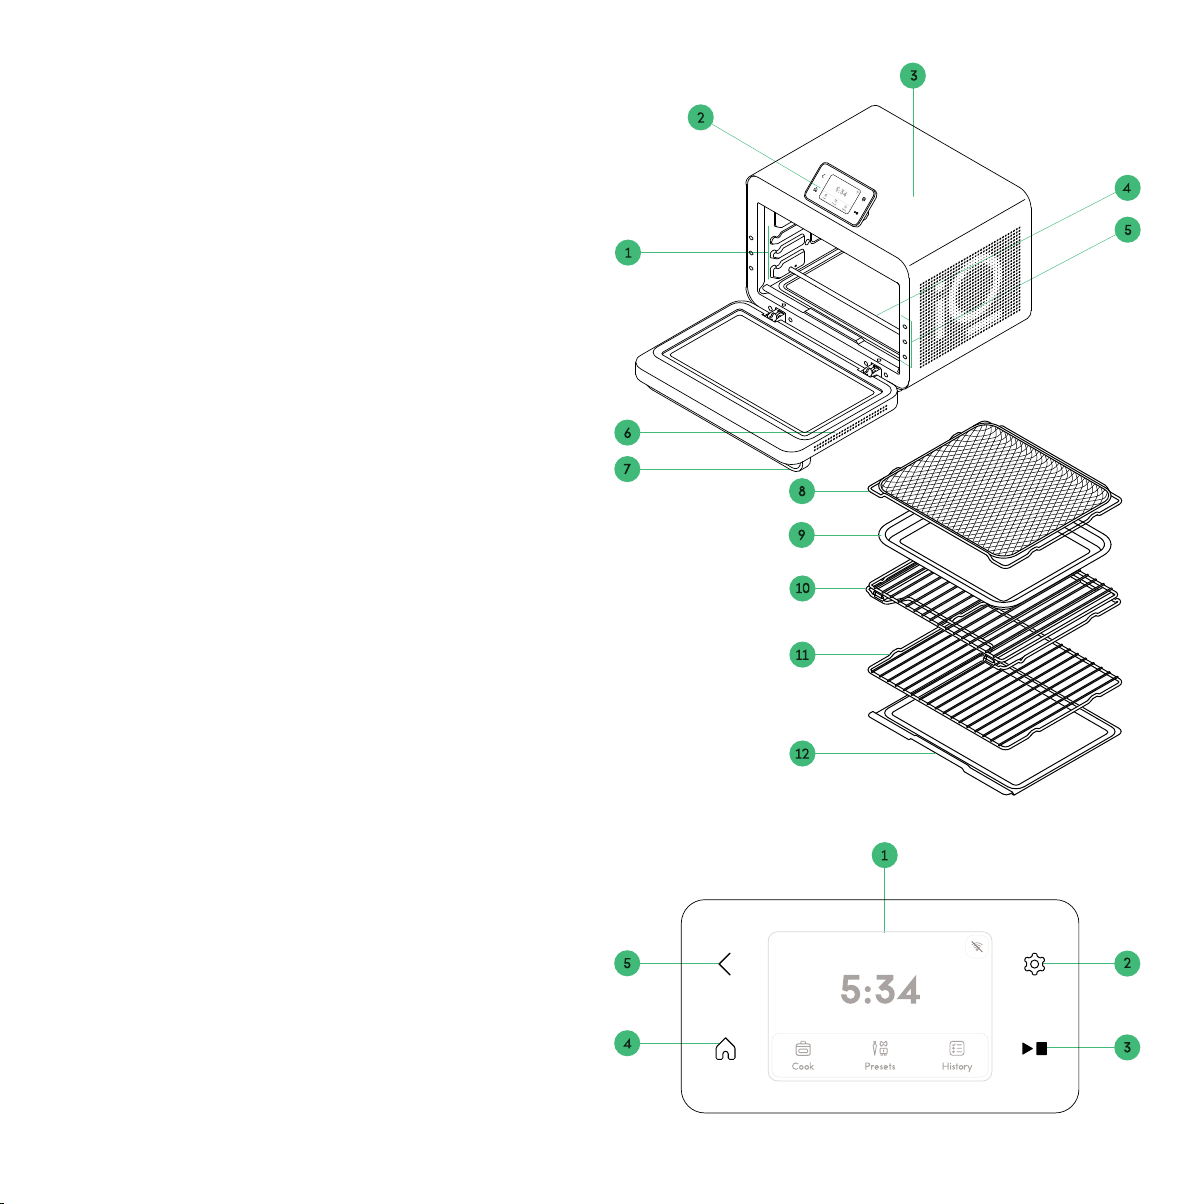
FEATURES
1. Multiple rack slots (3)
2. Control Panel
3. Convection fan (in ceiling)
4. Heating elements (4 upper, 2 lower)
5. Rack positioning lights (3 sets)
6. Soft close door with large viewing window
7. Cool-touch handle
8. Air fry | Dehydrate basket
9. Baking pan
10. Glide rack
11. Wire rack
12. Crumb tray
13. Interior lights (not pictured)
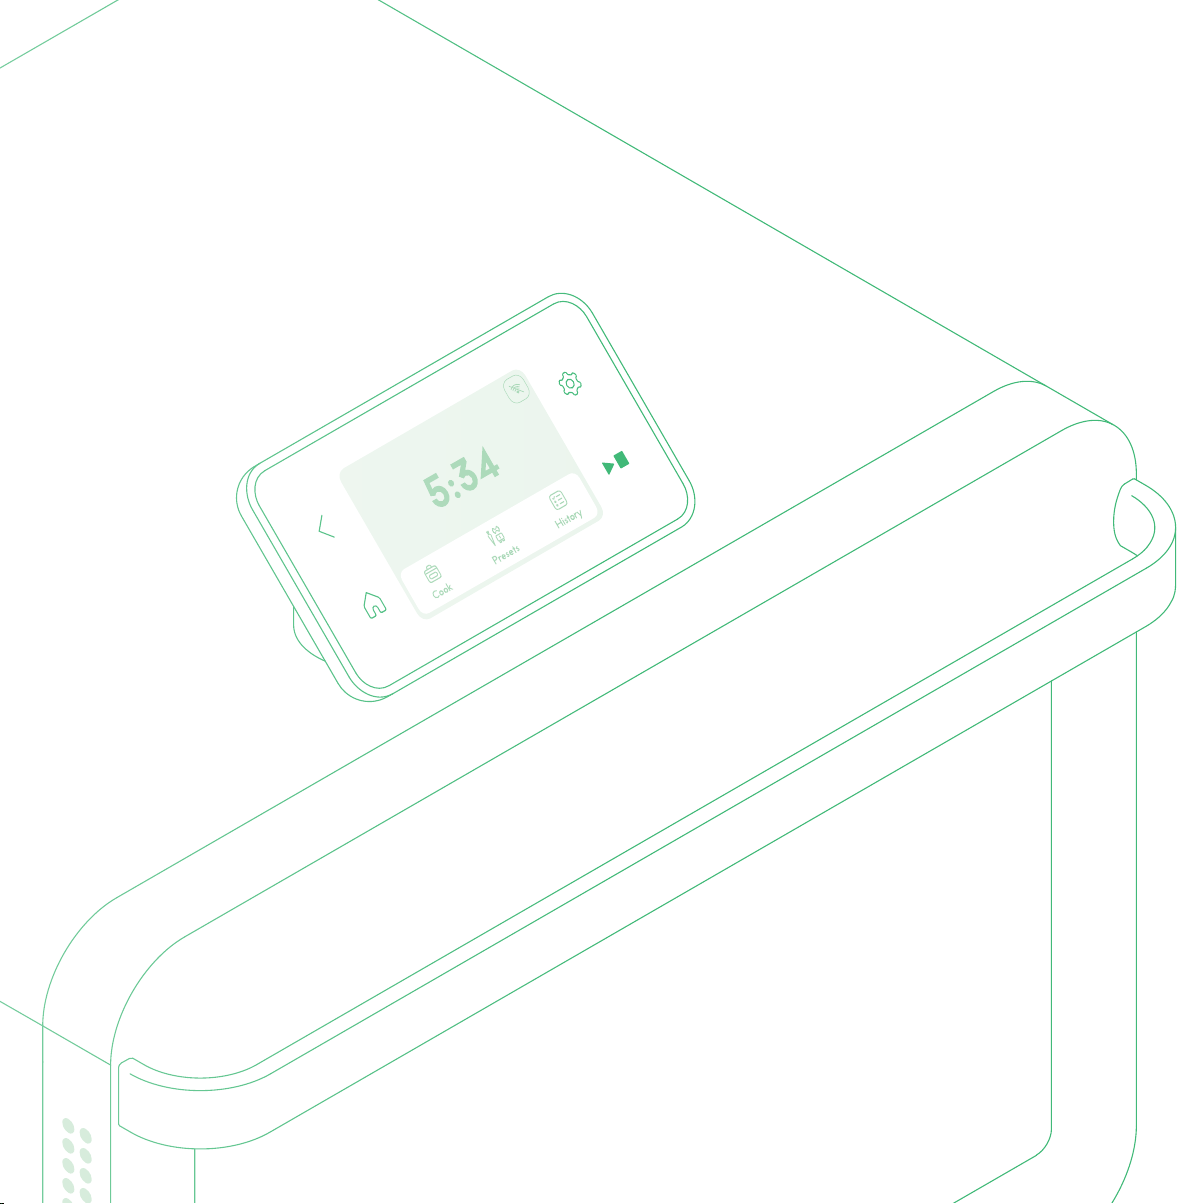
CONTROL PANEL
1. Touchscreen Display
2. Settings Button
3. Start | Stop Button
4. Home Button
5. Back Button
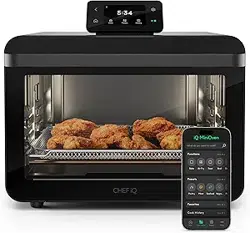
THE APP
The MiniOven works in conjunction with the free
App, which must be downloaded onto your smartphone or tab-
let. Once paired with the oven, the app’s presets will program
the ideal oven settings for whatever you want to cook, whether
you want to bake, air fry, broil, or much more. You can also look
to the app for Guided Cooking recipes that take you through
every step of the process, with accompanying videos for each
step. With either feature, the app automatically sets the oven
for you and notifies you when you need to take any action.
If you prefer to set and control the oven manually, you can
do so using either the app or the onboard control panel.
CONTROL PANEL
FEATURES DRAWING

5
IMPORTANT SAFEGUARDS
Basic safety precautions should always be followed, including:
READ ALL THE INSTRUCTIONS
1. Do not touch hot surfaces. Use handles.
2. To protect against electric shock do not immerse cord,
plugs, or unit body in water or other liquid.
3. Close supervision is necessary when any appliance is used
by or near children.
4. Unplug from outlet when not in use and before cleaning.
Allow to cool before putting on or taking o parts, and
before cleaning the appliance.
5. Do not operate any appliance with a damaged cord or
plug or after the appliance malfunctions, or has been
damaged in any manner. Contact for examina-
tion, repair, or adjustment.
6. The use of accessory attachments not recommended by
may cause injuries.
7. Do not use outdoors.
8. Do not let cord hang over edge of table or counter, or
touch hot surfaces.
9. Do not place on or near a hot gas or electric burner, or in a
heated oven.
10. Extreme caution must be used when moving an appliance
containing hot oil or other hot liquids.
11. To disconnect, turn any control to off, then remove plug from
wall outlet.
12. Do not use appliance for other than intended use.
13. Oversize foods or metal utensils must not be inserted into
the oven as they may create a fire or risk of electric shock.
14. A fire may occur if the oven is covered or touching flam-
mable material, including curtains, draperies, walls, and
the like, when in operation. Do not store any item on top of
the appliance when in operation.
15. Do not clean with metal scouring pads. Pieces can break
o the pad and touch electrical parts involving a risk of
electric shock.
16. Extreme caution should be exercised when using contain-
ers constructed of materials other than metal or glass.
17. Do not store any materials, other than manufacturer rec-
ommended accessories, in the oven when not in use.
18. Do not place any of the following materials in the oven:
paper, cardboard, plastic, etc.
19. Do not cover crumb tray or any part of the oven with
metal foil. This will cause overheating of the oven.
CALIFORNIA PROPOSITION 65:
(Applicable to California residents only.)
WARNING: Cancer and Reproductive Harm –
www.P65Warnings.ca.gov.
HOUSEHOLD USE ONLY
SAVE THESE INSTRUCTIONS
FCC STATEMENT
This device complies with Part 15 of the FCC Rules. Operation
is subject to the following two conditions:
1. This device may not cause harmful interference, and
2. This device must accept any interference received, including
interference that may cause undesired operation.
CAUTION
Changes or modifications to this unit not expressly approved
by the party responsible for compliance could void the user’s
authority to operate the equipment.
NOTE
This equipment has been tested and found to comply with
the limits for a Class B digital device, pursuant to Part 15 of
the FCC Rules. These limits are designed to provide reason-
able protection against harmful interference in a residential
installation. This equipment generates, uses, and can radiate
radio frequency energy and, if not installed and used in accor-
dance with the instructions, may cause harmful interference
to radio communications. However, there is no guarantee
that interference will not occur in a particular installation. If
this equipment does cause harmful interference to radio or
television reception, which can be determined by turning the

6
equipment o and on, the user is encouraged to try to correct
the interference by one or more of the following measures:
1. Reorient or relocate the receiving antenna.
2. Increase the separation between the equipment and receiver.
3. Connect the equipment to an outlet on a circuit dierent
from that to which the receiver is connected.
To satisfy RF exposure requirements, a separation distance of
20 cm or more should be maintained between the antenna of this
device and persons during device operation. To ensure compliance,
operation at closer than this distance is not recommended.
ISED REGULATORY COMPLIANCE
This device contains license-exempt transmitter(s)/receiver(s)
that comply with Innovation, Science and Economic Develop-
ment Canada’s license-exempt RSS(s). Operation is subject to
the following two conditions:
1. This device may not cause interference.
2. This device must accept any interference, including inter-
ference that may cause undesired operation of the device.
L’émetteur/récepteur exempt de licence contenu dans le
présent appareil est conforme aux CNR d’Innovation, Sciences
et Développement économique Canada applicables aux
appareils radio exempts de licence. L’exploitation est autorisée
aux deux conditions suivantes :
1. L’appareil ne doit pas produire de brouillage.
2. L’appareil doit accepter tout brouillage radioélectrique
subi, même si le brouillage est susceptible d’en comprom-
ettre le fonctionnement.
This equipment complies with IC RSS-102 radiation expo-
sure limits set forth for an uncontrolled environment. This
equipment should be installed and operated with a minimum
distance of 20 cm between the radiator and your body.
Cet équipement est conforme aux limites d’exposition aux
radiations IC CNR-102 établies pour un environnement non
contrôlé. Cet équipement doit être installé et utilisé avec une
distance minimale de 20 cm entre le radiateur et votre corps.
BEFORE FIRST USE
For best results, follow these steps before using your MiniOven
for the first time.
1. Remove all packaging materials and check to ensure that
all parts are accounted for.
2. Read and remove any stickers, except for the rating label,
which should remain on the unit.
3. Carefully wipe down the interior and exterior of the oven
with a damp cloth to remove any packing debris.
4. Wash the accessories in warm, soapy water. Rinse and dry
thoroughly.
5. Set the unit on a flat, heat-safe surface with at least
6 inches of clearance behind it and 3 inches on each side.
Plug in the unit.
6. Download the App from the App Store or Google
Play (if you don’t already have it).
7. Pair your oven as directed on the app to set up and acti-
vate your new oven.
COOKING WITH THE IQ MINIOVEN
The MiniOven is your go-to appliance for baking, roasting, air fry-
ing, toasting, broiling and much more. You can set the oven directly
using the control panel on the top, by manually entering your
cook function, time, and temperature . You can also use the free
App to access more than 500 preset cooking parameters
for all your favorite foods--or to follow our Guided Cooking recipes
(coming soon), which automatically set the oven and give you video
tutorials for every step. Also coming soon: you can use your
MiniOven coupled with the Sense™ wireless thermom-
eter (sold separately) to ensure proteins are cooked to your
exact liking.

7
FUNCTION TEMPERATURE
RANGE
PREHEAT HEATING
ELEMENT(S)
DEFAULT
FAN SPEED*
SUGGESTED
RACK/PAN
SUGGESTED RACK
POSITION
Air Fry 300°F – 450°F No 2 Upper
2 Lower
High (fixed) Air fry/Dehy-
drate basket
Middle
Bake 200°F – 500°F Yes 2 Upper
2 Lower
Low Baking pan Middle
Roast 200°F – 500°F Yes 2 Upper
2 Lower
Medium Baking pan Middle
Broil Low (400°F) OR
High (500°F)
No 4 Upper No fan Baking pan Top
Air Broil Low (400°F) OR
High (500°F)
No 4 Upper High Baking pan Top
Dehydrate 95°F – 165°F No 2 Upper
2 Lower
Low Air fry/Dehy-
drate basket
Middle
Proof 70°F – 130°F No 2 Upper Low (fixed) Baking pan Middle
Reheat 200°F – 350°F No 2 Upper
2 Lower
Low Wire rack Middle
Slow Cook 200°F (Low) /
300°F (High)
No 2 Upper
2 Lower
Low Glide rack Bottom
Toast 500°F No 4 Upper
2 Lower
No fan Glide rack or
Wire rack
Middle
Keep Warm 110 °F – 200 °F No 2 Upper
2 Lower
Low N/A Same as preceding
function (Middle if
used alone)
COOKING FUNCTIONS AT A GLANCE
The MiniOven boasts 12 different cooking functions, and can replace up to 7 different kitchen appliances. Here’s a look at
how they differ.
*Unless noted as “no fan” or “fixed,” fan speed is adjustable.

8
HOW TO COOK IN MANUAL MODE
1. Insert the crumb tray in its slot at the bottom of the oven.
2. From the home screen of the Control Panel, press Cook,
then scroll and tap to select your cook function. From each
cook function screen, use the touchscreen menus to set
the time and temperature. If desired, you can also turn the
Keep Warm feature on or o here, as well as set the fan
speed for some of the cook functions.
3. For preheat functions (Bake and Roast): Insert the rack
into the desired slot. Close the door.
For non-preheat functions: Put the food on/in the rack or
pan of your choice and slide it into the desired slot. Close
the door.
4. Press the Start | Stop button and cooking will begin. For most
functions, the unit will begin cooking and counting down
the selected time. For Bake or Roast, the oven will begin
preheating. It will alert you when the target temperature is
reached. Open the oven door, add your food, and close the
door, and cooking will begin. NOTE: If you need more time
to prep your food once the oven is preheated, tap WAIT on
the screen, and the oven will stay hot for up to 20 minutes.
5. When the time is up, the unit will chime and display “Cook
Complete.” The heating elements and fan will turn o
immediately, or, if Keep Warm is selected, the unit will
automatically enter Keep Warm mode. Remove your food,
or leave it in the oven in Keep Warm mode for up to 4
hours. NOTE: If you didn’t turn Keep Warm mode on when
programming the oven, you can do so when the cooking
cycle ends.
CLEANING AND MAINTENANCE
1. Let the oven cool completely before cleaning.
2. Wipe down the inside of the oven with a damp cloth. Be
sure to wipe the upper and lower heating elements and
the fan on the ceiling of the oven, as spattering grease can
often land and adhere there.
3. Remove the crumb tray and any racks or pans used, and
wash in warm, soapy water, then rinse and dry thoroughly.
Except for the glide rack and crumb tray, the accesso-
ries are also top-rack dishwasher safe but do not use an
intense-heat setting like Sanitize for them.
4. Avoid using very abrasive sponges and cleansers, which
can damage the stainless-steel finish.
5. Every 3 to 5 uses (if the oven is slightly more dirty) use
either club soda or a mixture of 4 parts water and 1 part
vinegar to clean the interior, elements, and fan in the
same way. A spray bottle can be helpful for making sure
every component is cleaned.
6. Every 6 to 10 uses, or if there is visible grease or spattering
on the oven, use a non-abrasive sponge and a gentle dish
soap to clean the interior, elements, and fan, then wipe it
down with a damp paper towel. Plastic scrubber sponges
can be used but avoid any sort of metallic scrubber or
scouring pad.
MINIOVEN DO’S AND DON’TS
DO make sure your rack or baking pan is positioned so that
food doesn’t touch the upper heating element.
DON’T use metal utensils on the baking pan, which can
damage the finish. Likewise avoid scraping the interior
with metal utensils.
DO make sure the crumb tray is in place if cooking directly
on one of the racks or baskets. Otherwise crumbs and grease
can fall to the bottom of the oven and burn.
DO keep an eye on steam coming from the oven. If food
is steaming excessively, be careful opening the door to
prevent burns.
DO use a potholder, oven mitt, or towel when handling pans and
racks coming out of the hot oven.
DON’T use scouring pads or harsh cleansers that can scratch
when cleaning either the oven or its accessories.
DO use the factory reset if you want to change to whom the
MiniOven is registered. Look for more information on the
MORE page of the app.

9
TERMS AND CONDITIONS
Limited Warranty
RJ Brands, LLC d/b/a ® oers a limited 1-year Warranty
(the “Warranty”) available on sales through authorized
distributors and retailers only. Please note that this Warranty
becomes valid from the date that you connect your product with
the App. To activate your Warranty, follow these steps:
1. Download the App from the App Store
or Google Play.
2. Connect your product to the app.
In cases where there is no connection, requires a
proof of purchase to include receipt, order confirmation, etc.
at the discretion of the Support Team. Please retain
your proof of purchase even after registering. In the event
that you do not have proof of your purchase date, we may
declare your Warranty void, or we may, at our sole discretion,
apply the date of manufacture as the purchase date for pur-
poses of this Warranty.
The Warranty is nontransferable, applies only to the original
purchaser, supersedes all other warranties, and constitutes the
entire agreement between the consumer and . Any
changes to the Terms and Conditions of this Warranty must
be in writing, signed by a representative of . No other
party has the right or ability to alter or change the Terms and
Conditions of this Warranty.
WHAT THE WARRANTY COVERS
Manufacturer Defects
products are warranted against defects in material
and workmanship, under normal household use, for a period
of 1 year from the date the Warranty is activated in accordance
with the directions listed in the User Guide. If your
product does not work as it should, please contact Customer
Support at support@chefiq.com so that we may assist you.
We may ask you to please submit, via email, photos and/or
video of the issue you are experiencing. This is to help us better
assess the matter and possibly oer a quick fix. Photos and/or
video may also be required to determine Warranty eligibility.
If the product is damaged, does not work as it should, or is no
longer available, a replacement product of equal or lesser value
will be sent at the discretion of Support Team. We
reserve sole discretion whether to require you to return the
purchased product to us prior to shipping you a replacement.
THIS WARRANTY DOES NOT COVER
Misuse
Damage that occurs from neglectful or improper use of
products, including, but not limited to, damage that occurs as
a result of usage with incompatible voltage, regardless of
whether the product was used with a converter or adapter.
See Safety Instructions in the User Guide for information
on proper use of product;
Poor Maintenance
General lack of proper care. Please see Cleaning and Mainte-
nance directions in the User Guide for information on
proper maintenance.
Commercial Use
Damage that occurs from commercial use.
Normal Wear and Tear
Damage or degradation expected to occur due to normal
use over time.
Altered Products
Damage that occurs from alterations or modifications by any
entity other than ; removal of the rating label aixed
to the product.
Catastrophic Events
Damage that occurs from fire, floods, or natural disasters.
Loss of Interest/Buyer’s Remorse
Claims of loss of interest or enjoyment.
HAVE A QUESTION?
Please reach out to us at chefiq.com/support.

10
Need more help? We’re here for you!
Contact us at support@chefiq.com or (888) 593-1701.
OTHER LIMITATIONS:
ALL WARRANTIES OF ANY KIND WHATSOEVER, EXPRESS,
IMPLIED AND STATUTORY, ARE HEREBY DISCLAIMED. ALL
IMPLIED WARRANTIES OF MERCHANTABILITY AND FIT-
NESS FOR A PARTICULAR PURPOSE ARE HEREBY
DISCLAIMED, PROVIDED THAT IF ANY IMPLIED WARRANTY
OF ANY KIND IS REQUIRED BY ANY JURISDICTION,
INCLUDING MERCHANTABILITY AND FITNESS FOR A
PARTICULAR PURPOSE, THE DURATION OF SUCH
IMPOSED IMPLIED WARRANTY IS LIMITED TO ONE (1) YEAR.
EXCEPT WHERE SUCH LIABILITY IS REQUIRED BY LAW,
THIS WARRANTY DOES NOT COVER, AND SHALL
NOT BE LIABLE FOR, INCIDENTAL, INDIRECT, SPECIAL,
OR CONSEQUENTIAL DAMAGES, INCLUDING WITHOUT
LIMITATION, DAMAGE TO, OR LOSS OF USE OF THE PROD-
UCT, OR LOST SALES OR PROFITS OR DELAY OR FAILURE
TO PERFORM THIS WARRANTY OBLIGATION. THE REME-
DIES PROVIDED HEREIN ARE THE EXCLUSIVE REMEDIES
UNDER THIS WARRANTY, WHETHER BASED ON CON-
TRACT, TORT OR OTHERWISE.
® is a registered trademark of RJ Brands, LLC.
MiniOven™ is a trademark of RJ Brands, LLC.
Sense™ is a trademark of RJ Brands, LLC.

Cook smarter with
CQ50ENUG012825