!
"#$%!
!&&'(
&
!"
"!
"!
$)*#!
+,-!
#$
% &'( )&
) *(+&,
- !"
.!(( &
/ )$0 !
&"
#)$!
", 1/2&)$)"
/! &
(!1/2"
&
./
# !) &
&!
& )$3(4
)!, )$"
#&)51"6 "
! *+
/# $0
-0 &0!0111
&"(
2
"(
&
3&4
3& 4
34
.!./!2
5!!(6
-0"47!2!!&
-0
)$0/. !
)$)!
"
&')&
)$"(0!&
' !"
'#) !0%
/2"789 !
/1.$
/0
%& !"
:&!(( )$4! !
(& )$!;*+"
< (&),, !
, 4 4&
)"
5 &)
!&! !"(
) "
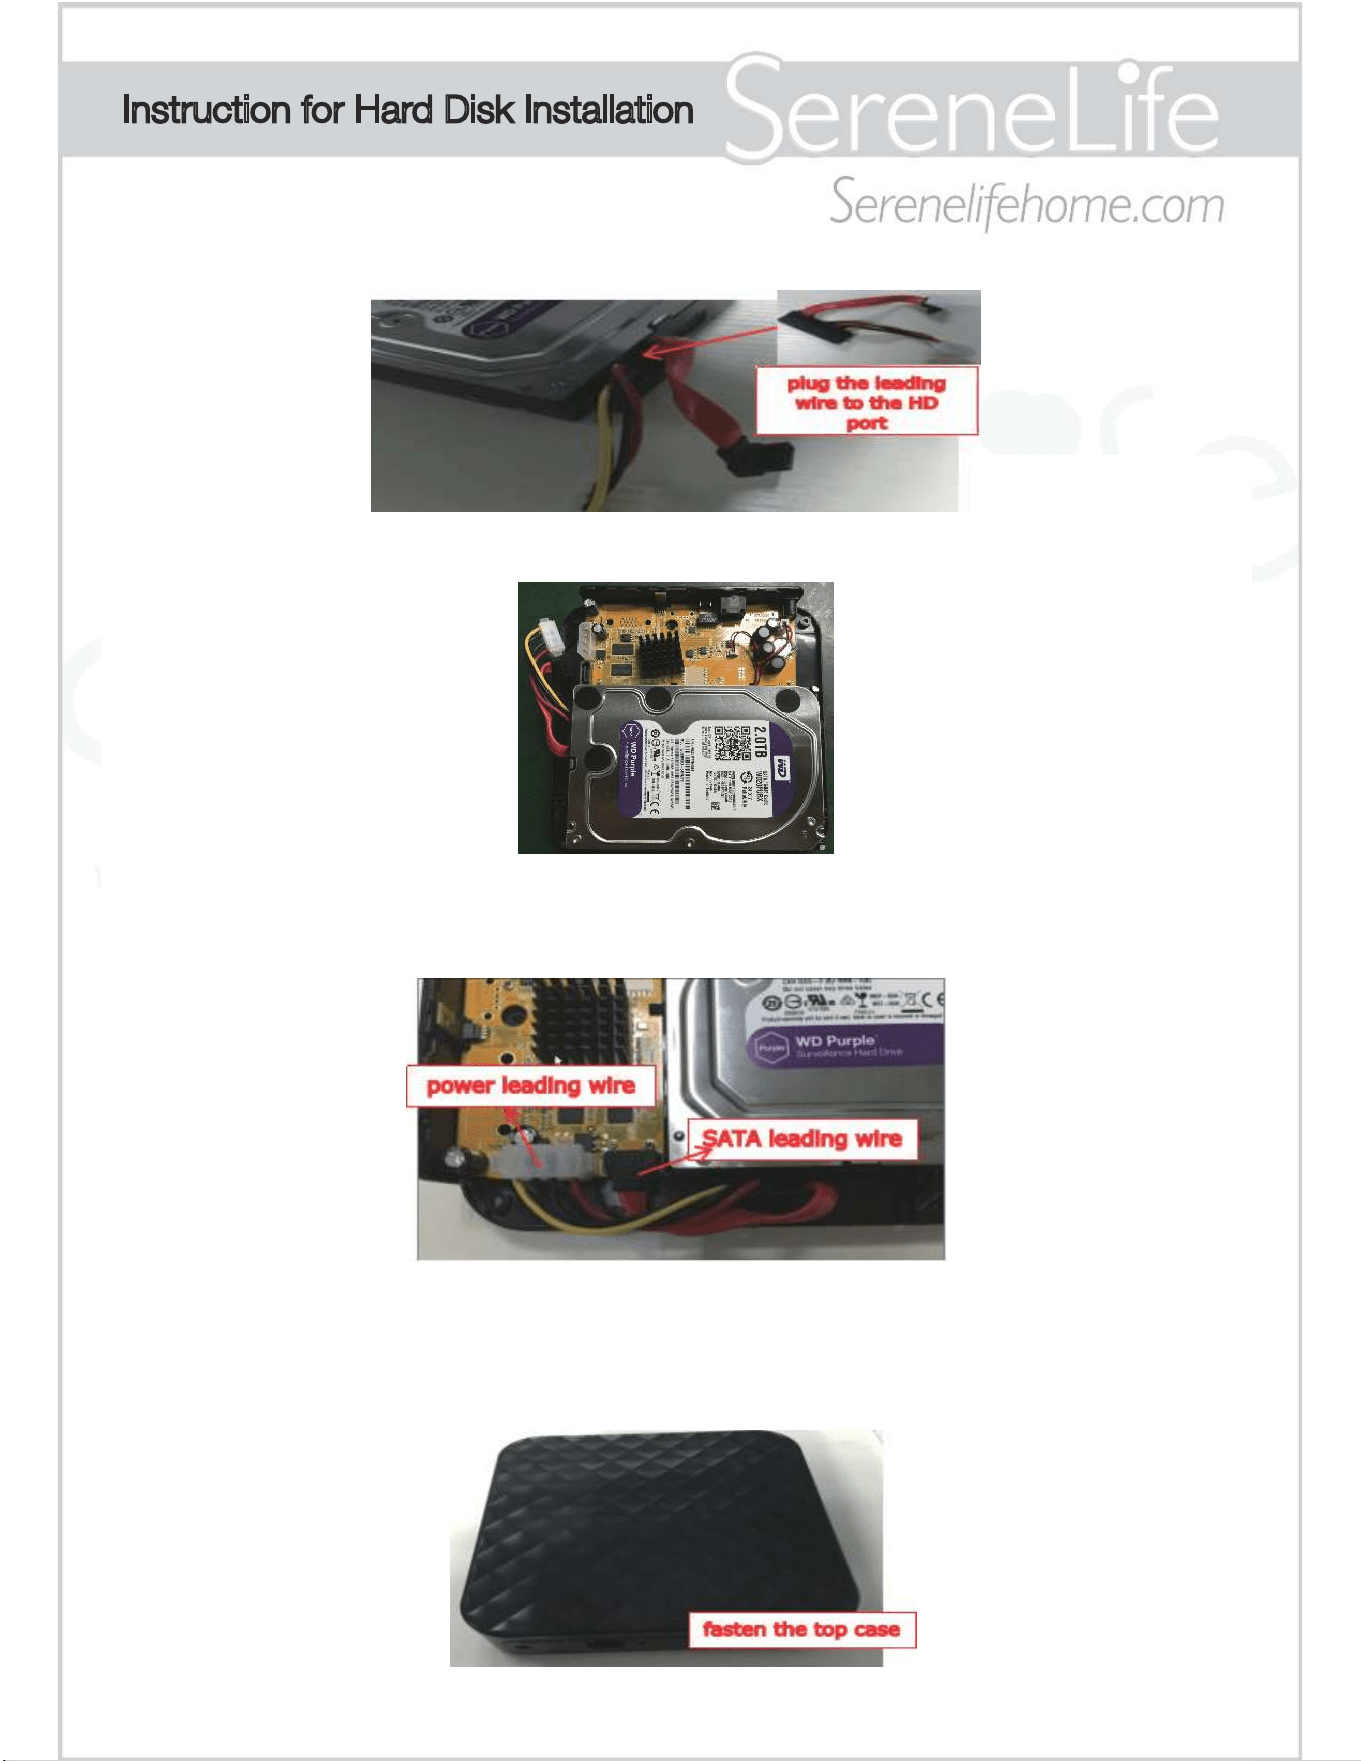
1.Plug the leading wire to the hard disk port
2.Put the hard disk into the bottom case,and check if it's wellfixed.
3.Plug the SATA leading wire to the CN2 socket of the PCB
4.Install the hard disk power cable into the CN4 socket of the PCB
5.Put on the top case from the lead wire end and check to ensure
it won't press down on the SATA wire(may cause bad contact), do
not fasten the top case vertically.
Instruction for Hard Disk Installation
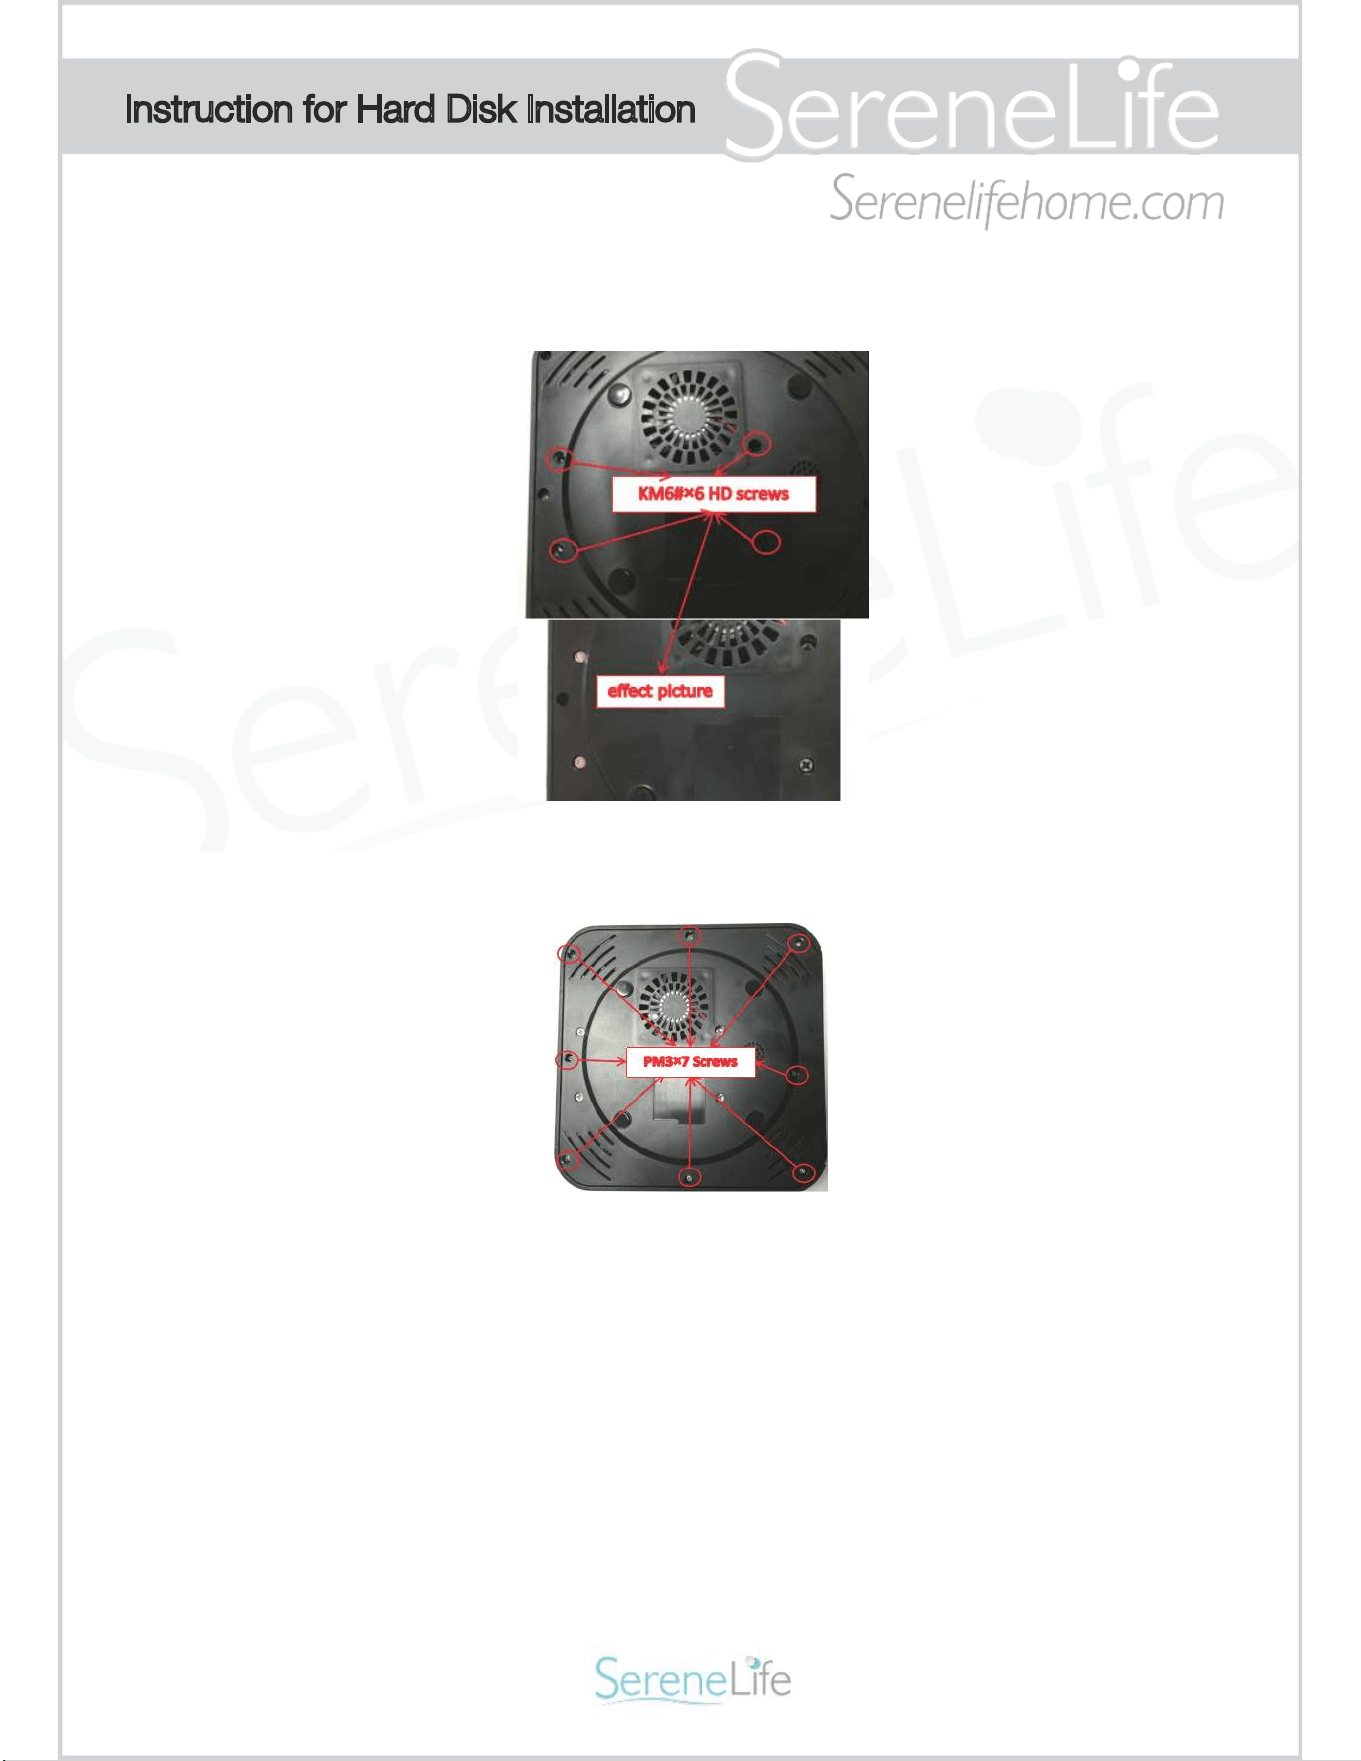
6.Put on the 4pcs KM6#×6 screws to the bottom case in order to
fix the hard disk.
7.Put on the 8pcs PM3×7 silver screws to the bottom case in order
to fix the top case.
Notes:
1. The 8pcs PM3×7 screws need to be removed so the box is open.
2. Please do not open the cloud box while plugged into power or
pick up while on.
3. The “SATA leading wire” and the “power leading wire” are already
attached at the board.
Instruction for Hard Disk Installation
Sound Around Service Center
1600 63rd Street
Brooklyn, NY 11204