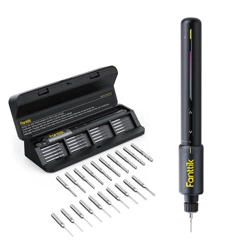
NEX K2 Nano
Electric Precision Drill Kit
Please read this instruction manual carefully before use
and keep it for future reference.

Contents
1. Safety Warnings
2. Package Contents
3. Product Overview
4. Operation and Funtions
5. Specifications
6. Warranty Card
02
03
04
06
10
12
- 01 -

- 02 -
Avoid moisture, dust, and drop.
Do not store the product in extreme temperature
environment.
Stay alert, watch what you are doing and use
common sense when operating. Do not operate
while you are tired or under the influence of
drugs, alcohol or medication.
This product is not a toy and should not be used
by kids under 10 years old.
This product has built-in battery, do not throw it
into fire and should be recycled by local laws and
regulations.
Do not dismantle the machine by yourself. Have
your power tool serviced by a qualified repair
person or contact us for advice.
1. Safety Warnings
•
•
•
•
•
•
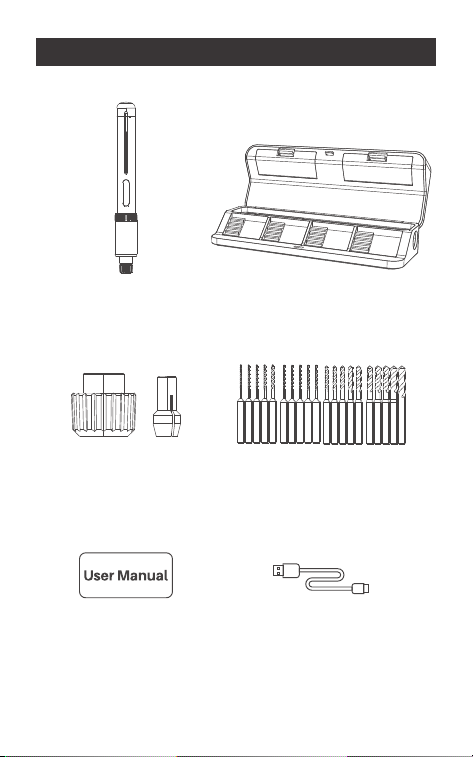
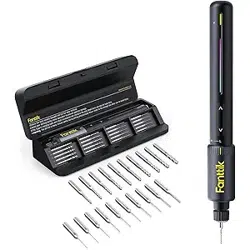
Type-C charging
cable x 1
Storage Case x 1
HSS Drill Bits x 20
User Manual x 1
Electric Precision
Drill x 1
Chuck
Accessories x1
- 03 -
2.Package Contents
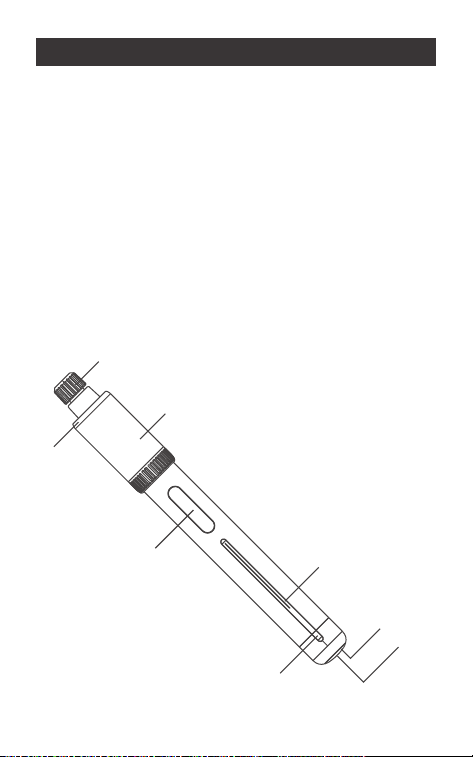
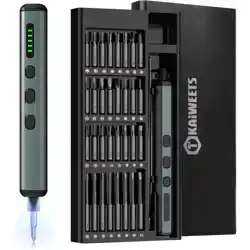
1. Type-C charging port
2. Charging Indicator
3. On/Off Knob
4. Direction Indicator
5. Forward/Reverse Button
6. High/Low Speed Switch Knob
7. LED Lighting
8. Quick-Install Drill Chuck
8
7
6
4
2
1
5
3
Electric Precision Drill
3.Product Overview
- 04 -
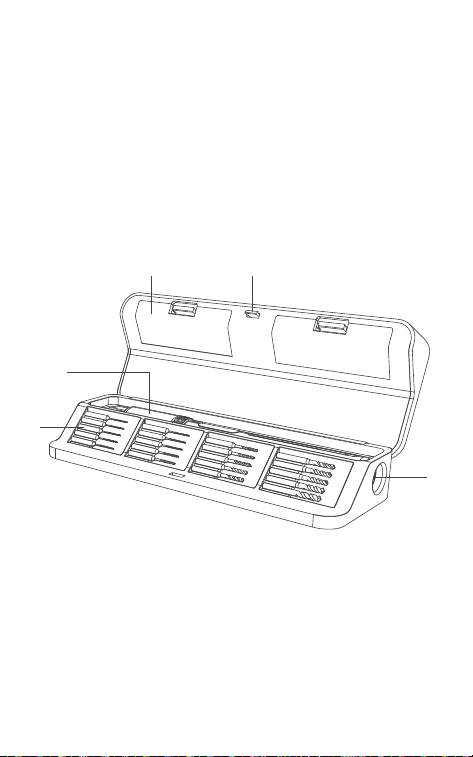
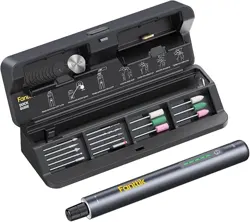
1.Open/Close Button
2.Charging Port
3.Storage Compartment
4.Drill bits
5.Electric Precision Drill
Storage Case
- 05 -
13
4
5
2

- 06 -
4.Operation and Funtions
Press the Open/Close button to open the Storage
Case.
Close the storage case and the button will
automatically lock to completely close the
storage case.
Drill bits are stored in the magnetic holders in the
storage. After use, place the drill bit back into the
magnetic holder, and it will be held in place by
magnet.
Pick up the strip firstly and then the Drill will lift
with it, then you can pick up the Drill.
Remember to keep the strip always under the
Drill, or it will be difficult to pick up the Drill.
How to open/close the Storage Case
•
•
•
Storage of Drill Bits
•
How to Pick up the Electric Precision Drill
•
•
- 07 -
Press the Forward Button to drill.
Press the Reverse Button to
remove the drill bit and prevent it
from getting stuck.
Double click the Forward/Re-
verse button to automatically
rotate. Click the button again to
stop automatic rotation.
Drill bits are stored in the
magnetic holders in the storage.
After use, place the drill bit back
into the magnetic holder, and it
will be held in place by magnet.
Pick up the strip firstly and then
the Drill will lift with it, then you
can pick up the Drill.
Remember to keep the strip
always under the Drill, or it will be
difficult to pick up the Drill.
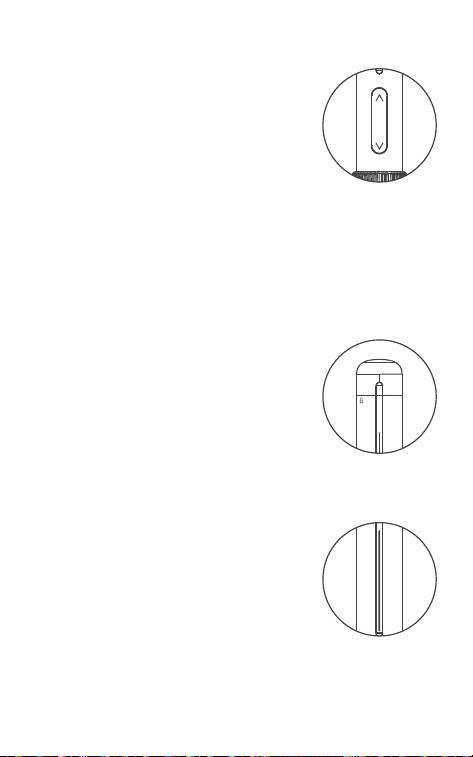
Forward/Reverse Button
•
•
•
On/Off Knob
•
Direction Indicator( Light Bar )
•
•
- 08 -
Rotate the speed switch knob to
switch between high and low
speed settings.
Low speed mode: 250±10%RPM.
The low speed mode is suitable
for high hardness materials and
high torque applications, such as
resin, composite clay model
drilling, pearl, PCB drilling, etc.
High speed mode:
1300±10%RPM.
The high speed mode is suitable
for general hardness materials
and low torque applications,
such as small woodworking
projects, plastic/soft metal model
drilling, soft stone, etc.
When the Forward/Reverse
button is pressed, the Drill starts
rotating/automatically rotating,
the LED light turns on simultane-
ously.
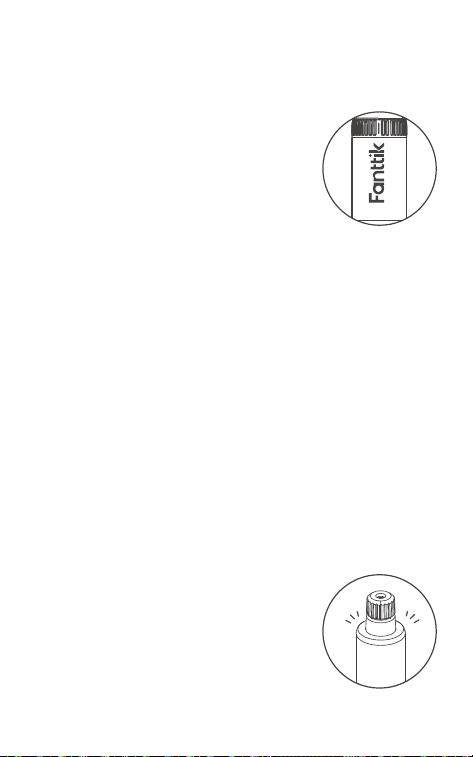
High/Low Speed Switch Knob
•
•
•
LED light
•
•

- 09 -
The LED light will stay on for 10 seconds without
any further operation.
The drill is equipped with a universal Type-C
charging port and includes a USB charging
cable. A charger is not included.
Please use a 5V charger for charging. The drill
supports a maximum charging input of
5W(5V/1A).
If the battery level is below 20% during use, the
indicator will flash red rapidly for 5 seconds
before turning off. Please recharge the battery
promptly
During charging, the indicator will flash green
slowly.
When the battery is fully charged, the indicator
will remain solid green.
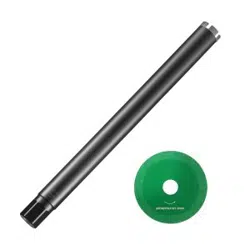
Remove a drill bit from the Storage, then Loosen
the Quick-Install Drill Chuck and insert the drill bit
into the chuck, and finally tighten the chuck.
•
Battery Charging
•
•
Charging Indicator Status
•
•
•
Drill Bit Installation
•

- 10 -
Notice: The drill bit is sharp. Be sure to remove the
drill bit and put it back into the storage after using
to avoid injury.
•
5. Specifications
Product Name
Product Model
Product Dimension
Net Weight
Electric Precision
Drill Dimension
Low Speed Mode
High Speed Mode
Max. manual torque
Battery Capacity
Rated Voltage
Charging Input
Input Port
Charging Time
Drill bit Shank Size
Electric Precision Drill Kit
NEX K2 Nano
204 x 76 x 40 mm
378g
187×Φ24 mm
0.6Nm Max. / 250±10% RPM
0.15Nm Max. / 1300±10% RPM
3 N·m
800mAh
3.7V
5V/1A
USB Type-C
<180 min
3.2mm

- 11 -
Drill bit Length
Drill bit Material
Drill bits diameter
(unit:mm)
35mm
HSS
0.6*3/0.7*3/0.8*2/1.0/1.2/1.4/1.6/
1.8/2.0/2.2/2.4/2.6/2.8/3.0/3.2
- 12 -
Your Warranty Includes
Your product is covered for 12 months against
manufacturing defects.
How to Return Your Fanttik Product
Email us at [email protected] with your order
number.
We'll email you a prepaid return shipping label.
Tear off the 'Return Details' page, fill it out, and
include it inside your return package.
Use the provided label to ship your package
back to us.
Once shipped, please email us. We'll expedite
your replacement or solution.
Return Details
Complete this section and include it in your
package for faster processing
WARRANTY CARD
•
•
•
•
•
•
Purchase Name:
Order Number:
Date of Purchase:
Place of Purchase:

929-693-6066MON-FRI 9AM-5PM (ET)
www.fanttik.com
METASEE LLC
12 GREENWAY PLZ STE 1161A HOUSTON,
TX 77046-1203