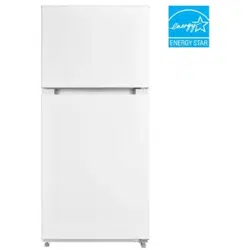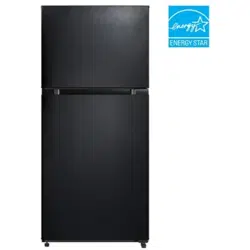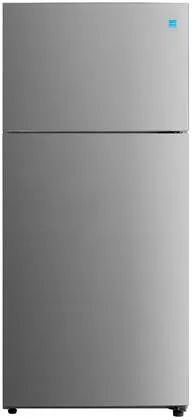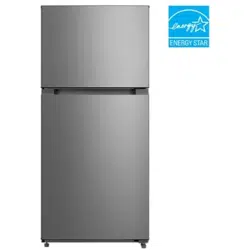
18.1 cu.ft. Top Freezer Refrigerator
ERT18CSEW
ERT18CSEB
ERT18CSES
Product may vary. Refer to the actual product

Contents
Important Safety Instructions ...................................................................... 2
Environmental Protection.............................................................................. 5
Installation Instructions.................................................................................. 6
Door reversal (optional) ........................................................................................................7
Leveling feet ...............................................................................................................................10
Changing the light ...................................................................................................................10
Moving the appliance .............................................................................................................10
Installing an optional ice maker .........................................................................................10
Tips for energy saving............................................................................................................10
Product Overview ............................................................................................ 11
Parts and functions .................................................................................................................11
Operation Instructions ................................................................................... 12
Use and functions ....................................................................................................................12
Storing food ................................................................................................................................14
Maintenance and Cleaning ............................................................................ 15
Troubleshooting ............................................................................................... 17
Warranty ............................................................................................................ 19
Before switching on the appliance for the first time read the following safety hints!
> This appliance is intended to be used in household and similar applications such
as staff kitchen areas in shops, offices and other working environments; farm
houses and by clients in hotels, motels and other residential type environments;
bed and breakfast type environments; catering and similar non-retail
applications.
> This appliance is not intended for use by persons (including children) with
reduced physical, sensory or mental capabilities, or lack of experience and
knowledge, unless they have been given supervision or instruction concerning
use of the appliance by a person responsible for their safety.
Explanation of terms/symbols
DANGER
This symbol indicates that there are dangers to the life and health of
persons due to extremely flammable gas.
WARNING
The signal word indicates a hazard with a medium level of risk which, if
not avoided, may result in death or serious injury.
CAUTION
The signal word indicates a hazard with a low degree of risk which, if not
avoided, may result in minor or moderate injury.
ATTENTION
The signal word indicates important information (e.g. damage to
property), but not danger.
IMPORTANT: Pay particular attention to messages that contain the words DANGER,
WARNING or CAUTION. These words are used to alert you to a potential hazard that
can seriously injure you and others.
The instructions will tell you how to reduce the chance of injury and let you know
what can happen if the instructions are not followed.
ATTENTION:These operating instructions are general. This means that certain
functions apply to your refrigerator/freezer, while others do not.

2
Important Safety Instructions
IMPORTANT SAFETY INSTRUCTIONS
REad and SavE ThESE InSTRuCTIOnS!
WARNING: Risk of fire / flammable material
Refrigerant and cyclopentane foaming material used for the
appliance are flammable. Therefore, when the appliance is scrapped,
it shall be kept away from any fire source and be recovered by a
special recovering company with corresponding qualification other
than be disposed by combustion, so as to prevent damage to the
environment or any other harm.
WARNING
General Safety
> Children should be supervised to
ensure that they do not play with
the appliance.
> If the supply cord is damaged,
it must be replaced by the
manufacturer, its service agent or
similarly qualified persons in order
to avoid a hazard.
> Do not store explosive substances
such as aerosol cans with a
flammable propellant in this
appliance.
> The appliance has to be unplugged
after use and before carrying out
user maintenance on the appliance.
> WARNING: Keep ventilation
openings, in the appliance
enclosure or in the built-in structure,
clear of obstruction.
> WARNING: Do not use mechanical
devices or other means to
accelerate the defrosting process,
other than those recommended by
the manufacturer.
> WARNING: Do not damage the
refrigerant circuit.
> WARNING: Do not use electrical
appliances inside the food storage
compartments of the appliance,
unless they are of the type
recommended by the manufacturer.
> WARNING: Please abandon the
refrigerator according to local
regulators for it uses flammable
blowing gas and refrigerant.
> WARNING: When positioning the
appliance, ensure the supply cord is
not trapped or damaged.
> WARNING: Do not locate multiple
portable socket-outlets or portable
power supplies at the rear of the
appliance.
> Do not use extension cords or
ungrounded (two prong) adapters.
> To avoid a hazard due to instability
of the appliance, it must be fixed in
accordance with the instructions.
> The refrigerator must be
disconnected from the source of
electrical supply before attempting
the installation of accessory. Ensure
that the power cable is not trapped
by the refrigerator. Do not step on
the power cable.
> For a freestanding appliance:
this refrigerating appliance is not
intended to be used as a built-in
appliance.

3
Important Safety Instructions
CAUTION
daily use
> Do not pull the power cord when
pulling the power plug of the
refrigerator. Please firmly grasp the
plug and pull out it from the socket
directly.
> To ensure safe use, do not damage
the power cord or use the power
cord when it is damaged or worn.
> Please use a dedicated power
socket and the power socket shall
not be shared with other electrical
appliances.
> The power plug should be firmly
contacted with the socket or else
fires might be caused.
> Please ensure that the grounding
electrode of the power socket is
equipped with a reliable grounding
line.
> Please turn off the valve of the
leaking gas and then open the
doors and windows in case of
leakage of gas and other flammable
gases.
> Do not unplug the refrigerator
and other electrical appliances
considering that spark may cause
a fire.
> Do not use electrical appliances on
the top of the appliance, unless they
are of the type recommended by
the manufacturer.
> The gaps between refrigerator
doors and between doors and
refrigerator body are small, be
noted not to put your hand in these
areas to prevent from squeezing the
finger. Please be gentle when close
the refrigerator door to avoid falling
articles.
> Do not pick foods or containers
with wet hands in the freezing
chamber when the refrigerator is
running, especially metal containers
in order to avoid frostbite.
> Do not allow any child to get into
or climb the refrigerator; otherwise
suffocation or falling injury of the
child may be caused.
> Do not place heavy objects on the
top of the refrigerator considering
that objectives may fall when
closing or opening the door, and
accidental injuries might be caused.
> Do not put flammable, explosive,
volatile and highly corrosive items in
the refrigerator to prevent damages
to the product or fire accidents.
> Do not place flammable items near
the refrigerator to avoid fires.
> The refrigerator is intended for
household use, such as storage of
foods; it shall not be used for other
purposes, such as storage of blood,
drugs or biological products, etc.
> Do not store beer, beverage or
other fluid contained in bottles or
enclosed containers in the freezing
chamber of the refrigerator;
otherwise the bottles or enclosed
containers may crack due to
freezing to cause damages.
WARNING
> Connect to potable water supply
only. (Suitable for ice cube maker)
(*)
> To prevent children from being
entrapped, the keys must be kept
out of reach of children and not in
the vicinity of refrigerator (or chest
freezer) (suitable for products with
locks).(*)
(*): This feature varies depending on the
model purchased.
4
Important Safety Instructions
CAUTION
To avoid contamination of food, please
respect the following instructions:
– Opening the door for long
periods can cause a significant
increase of the temperature in the
compartments of the appliance.
– Regularly clean surfaces that can
come in contact with food and
accessible drainage systems.
– Clean water tanks if they have not
been used for 48h; flush the water
system connected to a water supply
if water has not been drawn for 5
days. (*)
WARNING
WARNING: Fill with potable water only.
(*)
WARNING:
Connect to potable water
supply only. (Suitable for ice making
machine)
(*)
(*): This feature varies depending on the
model purchased.
CAUTION
This product is not recommended for use
with sockets or main switch with the A/
GFCI function, otherwise it may cause false
tripping.
1. It does not pose a safety risk when
tripped.
2. If tripping persists, it is recommended
to replace the sockets or main switch
without A/GFCI function.
WARNING
Risk of child entrapment. Before you throw
away your old refrigerator or freezer:
> Take off the doors.
> Leave the shelves in place so that
children may not easily climb inside.

5
Environmental Protection
ENVIRONMENTAL PROTECTION
disposing of old electrical devices in an
environmentally-friendly manner
This crossed-out wheeled bin
symbol indicates that waste
electrical and electronic
products (WEEE) should be
disposed of separately from
the municipal waste stream.
Old electrical products can contain
hazardous substances so correct disposal
of your old appliance will help prevent
potential negative consequences for the
environment and human health. Your old
appliance may contain reusable parts that
could be used to repair other products,
and other valuable materials that can be
recycled to conserve limited resources.
CAUTION
Refrigerant and cyclopentane foaming material
used for the refrigerator are flammable. Therefore,
when the refrigerator is scrapped, it shall be kept
away from any fire source and be recovered by a
special recovering company with corresponding
qualification other than be disposed by
combustion, so as to prevent damage to the
environment or any other harm.
Package information
Packaging materials of the product are
manufactured from recyclable materials in
accordance with our National Environment
Regulations. Do not dispose of the
packaging materials together with the
domestic or other wastes. Take them to
the packaging material collection points
designated by the local authorities.
6
Installation Instructions
INSTALLATION INSTRUCTIONS
Before first use
Remove the exterior and interior packing,
wipe the outside thoroughly with a soft, dry
cloth and the inside with a wet, lukewarm
cloth.
Avoid placing the cabinet in a narrow recess
or near any heat source, direct sunlight, or
moisture.
Keep the air circulation free around the
cabinet. When installing the unit, ensure 4in
of free space at both sides, 4 in at the top of
the unit, and not more than 3 in at the rear
of the unit.
Before connecting your refrigerator to
the power supply, check that the voltage
stated on the rating label of your appliance
corresponds to the voltage in your home.
A different voltage could damage the
appliance.
The appliance must be grounded. The
manufacturer is not responsible for damages
that may occur as a result of usage without
grounding.
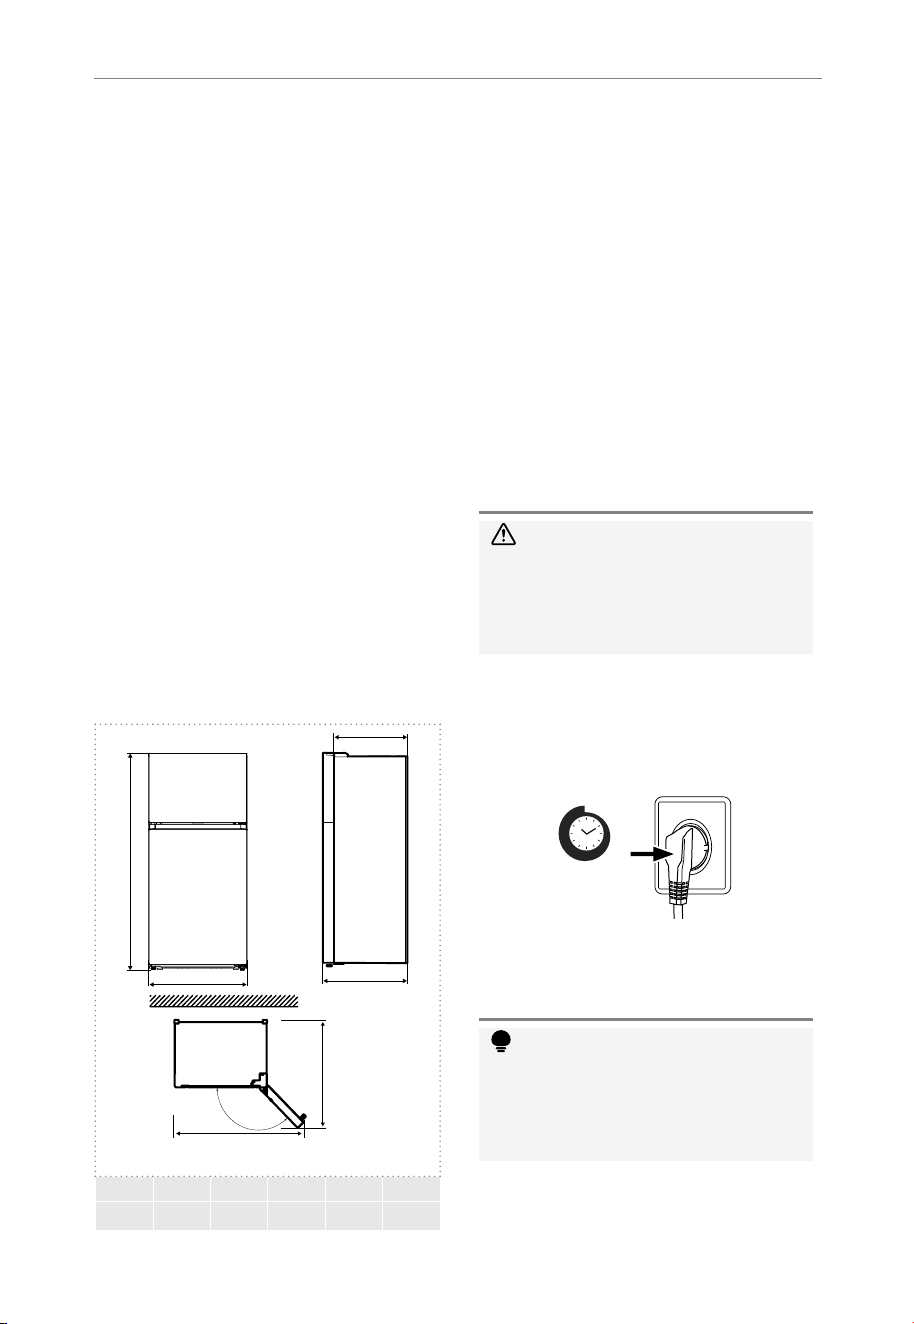
Space requirement diagram
B
A
C
C1
D
E
a B C C1 d E
29.7 66.6 30.7 26.8 50.2 52.8
Notice: All dimensions in inches
Providing a proper power supply
Check your local power source. This
refrigerator requires a AC115 V, 60 Hz power
supply.
Use a receptacle that accepts the grounding
prong. The power cord is equipped with a
3-prong (grounding) plug which mates with
a standard 3-prong (grounding) wall outlet
to minimize the possibility of electric shock
hazard from this refrigerator.
If you have any doubts regarding installation,
please turn to the vendor, to our customer
service or to the nearest Authorized Service
Center.
CAUTION
The refrigerator should always be plugged into
its own individual electrical outlet which has a
voltage rating that matches the rating plate.
When positioning the appliance, ensure the supply
cord is not trapped ordamaged.
Connecting the appliance
After installing the product, please let it stay
for more than 2 hours before turning on the
power, otherwise it will lead to a decrease
in cooling capacity or a damage to the
product.
2 h
Allow the appliance to run empty for 24
hours so the compartment can cool to the
appropriate temperature.
ATTENTION
The cooling performance and power consumption
of the refrigerator may be aected by the ambient
temperature, the door-opening frequency, and
the location of the refrigerator. We recommend
adjusting the temperature settings as appropriate.
7
Installation Instructions
door reversal (optional)
Based on the location where you plan to use your refrigerator, you may find it more convenient
to reverse the position of the door.
CAUTION
To avoid injury to yourself or your property, we recommend that someone assist you during the door reversal
process.
Preparing to reverse the door position
You will need: A standard screwdriver, a Phillips screwdriver, and the included Allen wrench.
• Make sure that your refrigerator is unplugged and empty.
• Have someone available to assist you in the process.
• Keep all of the parts you remove to reuse them later.
Step:
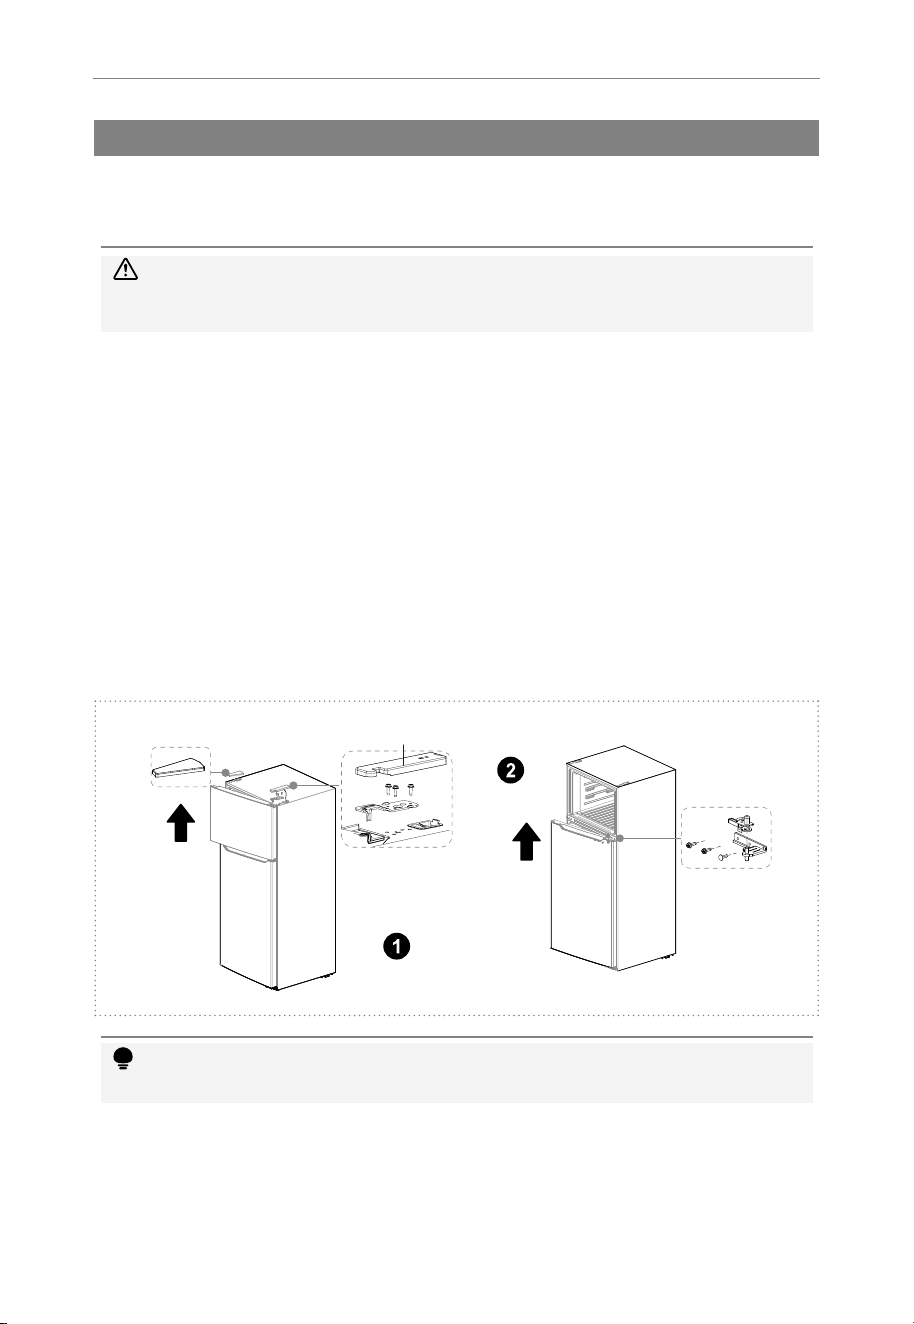
1. Unplug your refrigerator and remove all food from the door shelves.
2. Remove the left cover plate and the right top hinge cover, then unscrew screws and remove
the right top hinge. Keep the screws to reuse.
3. Lift the freezer door up and away from your refrigerator.
4. Unscrew screws of middle hinge, remove the hinge, then lift the refrigerator door up and away
from your refrigerator. Save the screws to reuse.
Center hinge
Top hinge cover
Cover plate
Top hinge cover
ATTENTION
Images show a refrigerator that opens on the left side. Your refrigerator may open on the right side.
5. Unscrew screws of the bottom hinge, then remove the bottom hinge from the bottom right
side of the refrigerator.
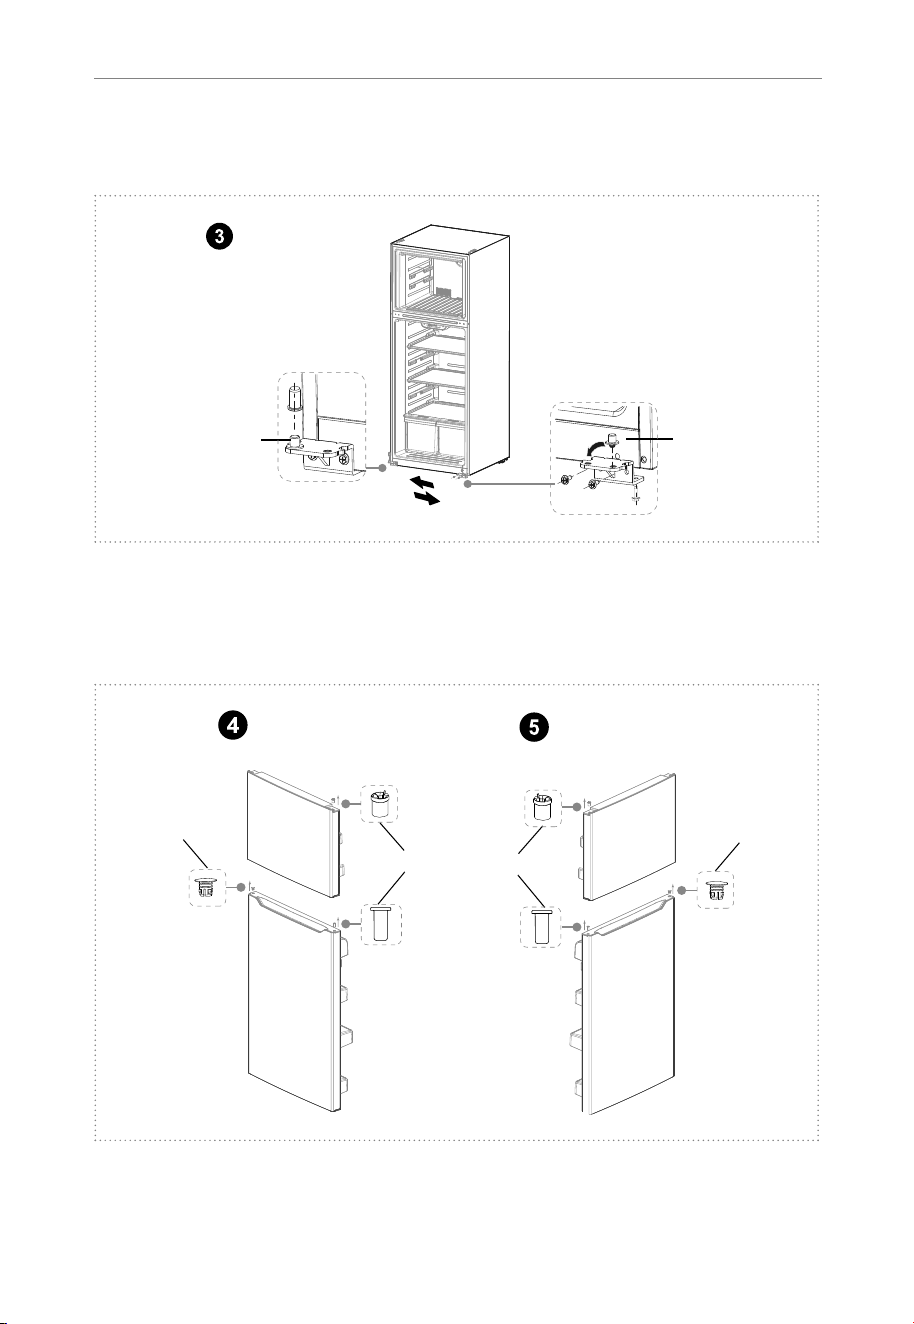
8
Installation Instructions
6. Unscrew the hinge shaft from the right side of the bottom hinge and move it to the left side,
then secure the bottom hinge to the bottom left side of the refrigerator, using the screws you
removed previously.
Remove the bottom hinge
Reattach the bottom hinge
Hinge pin
Hinge pin
7. Dismantle the sleeves from the top right of doors and hole cap from top left of doors, and
assemble them on the other side.
8. Remove the refrigerator door stopper and install it on the other side of the door. Remove the
freezer door self-locking block and stopper. Save them to reuse. Take out the left self-locking
block and stopper from the accessory bag in the refrigerator and installed on the left of door.
Hole caps
Plastic bushings
Hole caps
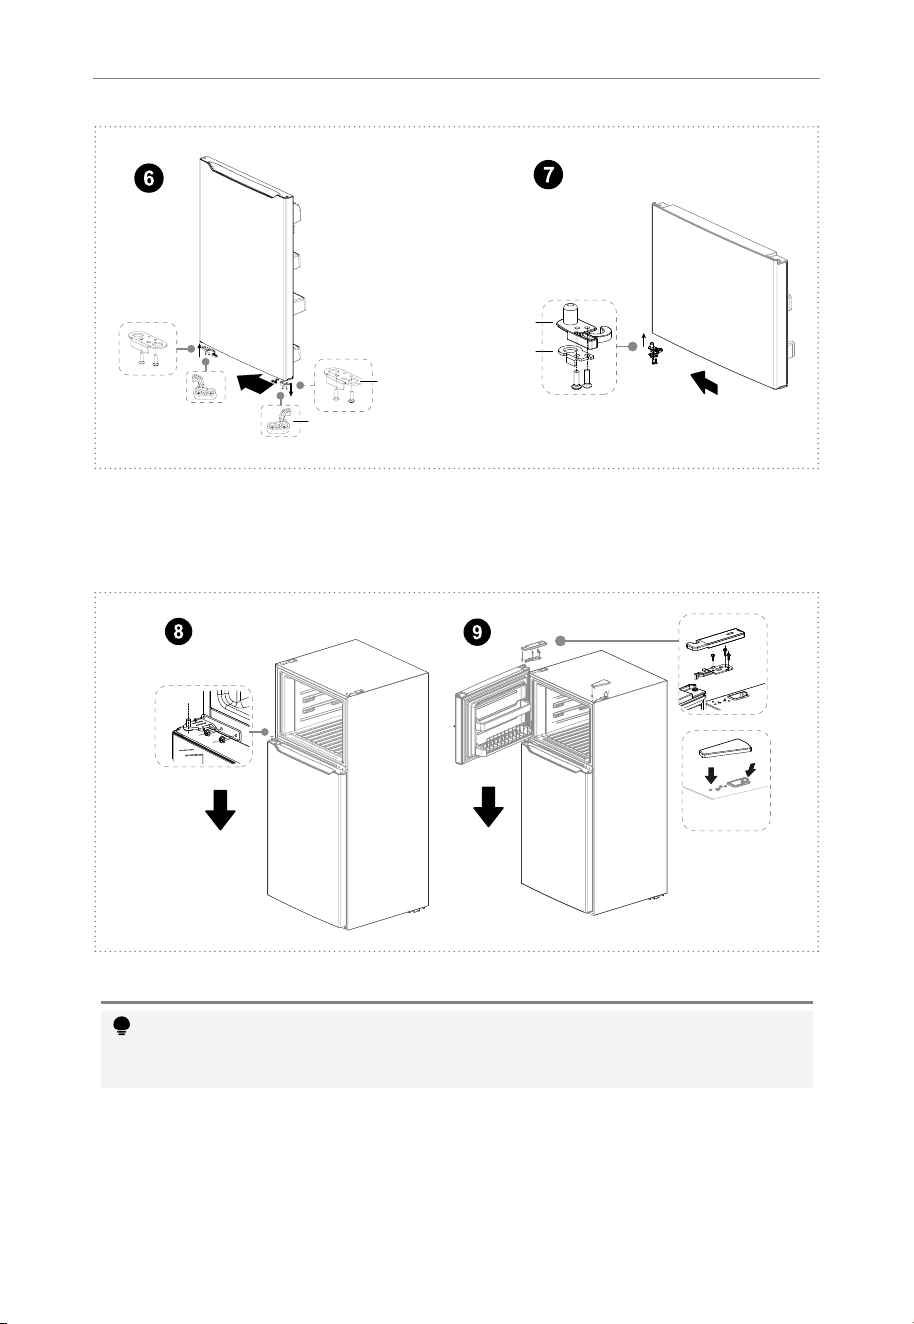
9
Installation Instructions
Lower door
self -locking block
Upper door
self-locking block
Door-open stopper
Door block
9. Put down the refrigerator door bottom hinge vertically, take out the middle hinge of the other
side from the accessory bag then assemble the middle hinge on.
10. Put down the freezer door on the middle hinge vertically, then take out the top hinge and
cover of other side from accessory bag, assemble top hinge, hinge cover and hole cover.
Attach the top hinge
Attach the center hinge
ATTENTION
Dierences: Due to technical changes and dierent models, some of the illustrations in this manual may
dier from your model.

10
Installation Instructions
Leveling feet
To avoid vibration, the appliance must be
leveled.
If required, adjust the leveling feet to
compensate for the uneven floor.
The front should be slightly higher than the
rear to aid in door closing.
Leveling feet can be turned easily by tipping
the cabinet slightly.
Turn the leveling feet counterclockwise
to raise the unit, clockwise
to lower it.
Changing the light
Any replacement or maintenance of the
LED lamps is intended to be made by the
manufacturer, its service agent or similar
qualified person.
Moving the appliance
1. Remove all items from the appliance.
2. Pull the power plug out, insert and fix it
into the power plug hook at the rear or on
top of the appliance.
3. Tape parts such as shelves and the door
to prevent from falling off while moving
the appliance.
4. Move the appliance with more than two
people carefully. When transporting the
appliance over a long distance, keep the
appliance upright.
Installing an optional ice maker
Ice maker type:
• This refrigerator is compatible with
Element brand ice maker EAIMM19.
Ice maker installation:
• If the refrigerator can be installed with
an ice maker, please refer to the ice maker
installation instructions provided separately
for the installation method of the ice maker.
The ice maker is installed by the customer.
Tips for energy saving
Do not place the appliance near cookers,
radiators or other heat sources. If the
ambient temperature is high, the compressor
will run more frequently and for longer,
resulting in increased energy consumption.
Ensure that there is sufficient ventilation at
the base of the appliance, on the sides of the
appliance and at the back of the appliance.
Please also observe the spacing dimensions
in the chapter “Installation”.
The arrangement of drawers, shelves and
trays as shown in the product overview
offers the most efficient use of energy and
should be retained as far as possible.
To obtain a larger storage space (e.g. for
large refrigerated/frozen goods), the middle
drawers and shelves can be removed. The
top and bottom drawers and shelves should
be removed last if necessary.
An evenly filled refrigerator/freezer
compartment contributes to optimal energy
use.
Allow warm food to cool before placing it in
the refrigerator/freezer compartment. Food
that has already cooled down increases
energy efficiency.
Allow frozen food to defrost in the
refrigeration compartment. The
coldness of the frozen food reduces the
energy consumption in the refrigerator
compartment and thus increases the energy
efficiency.
Open the door only as briefly as necessary
to minimize cold loss. Opening the door
briefly and closing it properly reduces
energy consumption.
Setting the temperature no colder than
necessary contributes to optimal energy use.
The door gaskets of your appliance must
be perfectly intact so that the doors close
properly and energy consumption is not
increased unnecessarily.
11
Product Overview
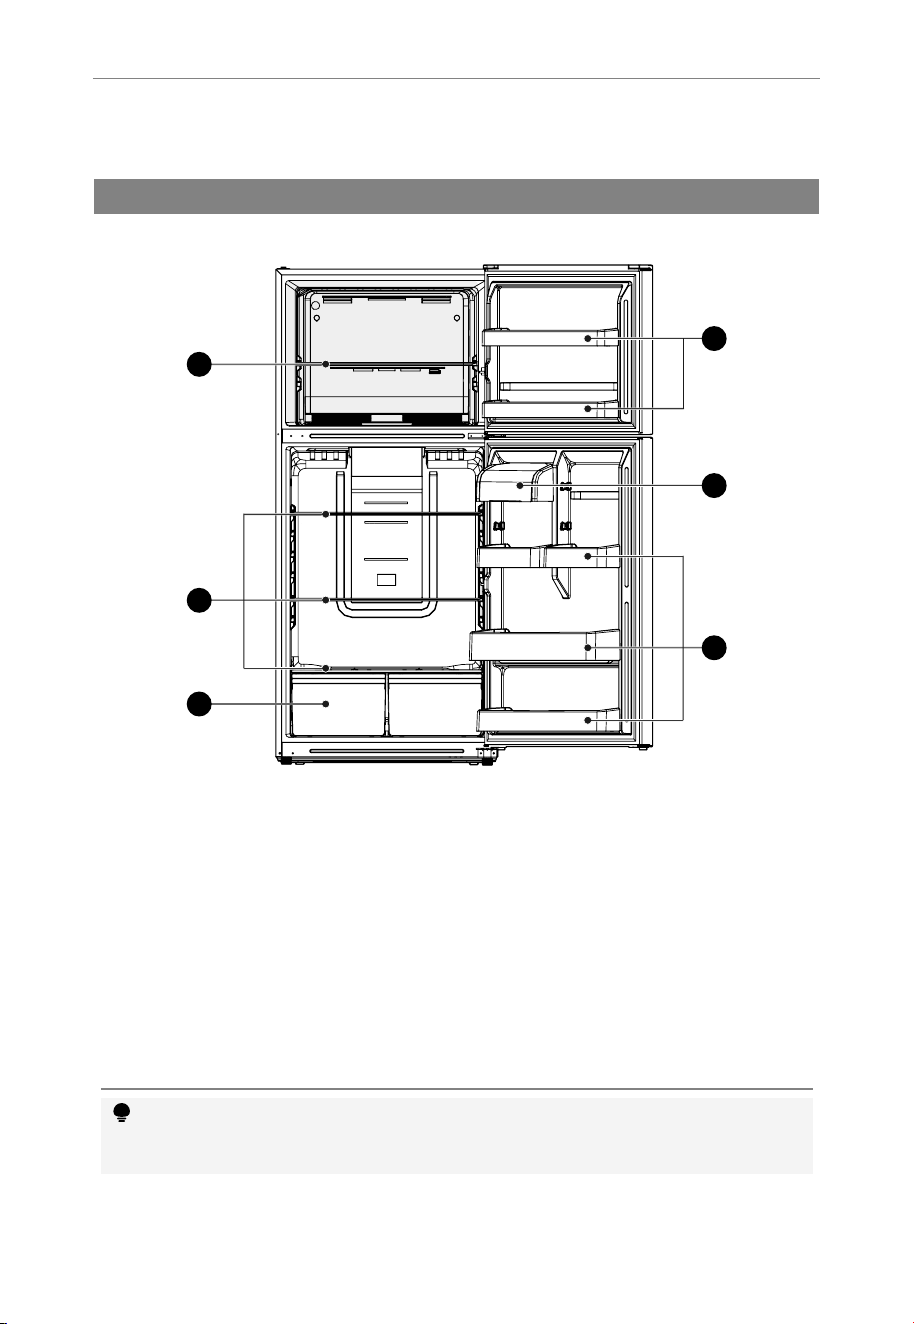
PRODUCT OVERVIEW
Parts and functions
1
2
3
4
5
6
1 Freezer glass shelf 4 Freezer door trays
2 Refrigerator glass shelves 5 Dairy box
3 Fruits and vegetables box 6 Refrigerator door trays
> For the most efficient use of energy, please keep the all internal items such as trays, drawers,
shelves and ice cube box on the position supplied by manufacturer.
> This refrigerating appliance needs to be installed independently and cannot be used as a
built-in. Otherwise, it will cause problems such the performance and life of the appliance are
reduced.
ATTENTION
Dierences: Due to technical changes and dierent models, some of the illustrations in this manual may
dier from your model.
12
Operation Instructions
OPERATION INSTRUCTIONS
use and functions
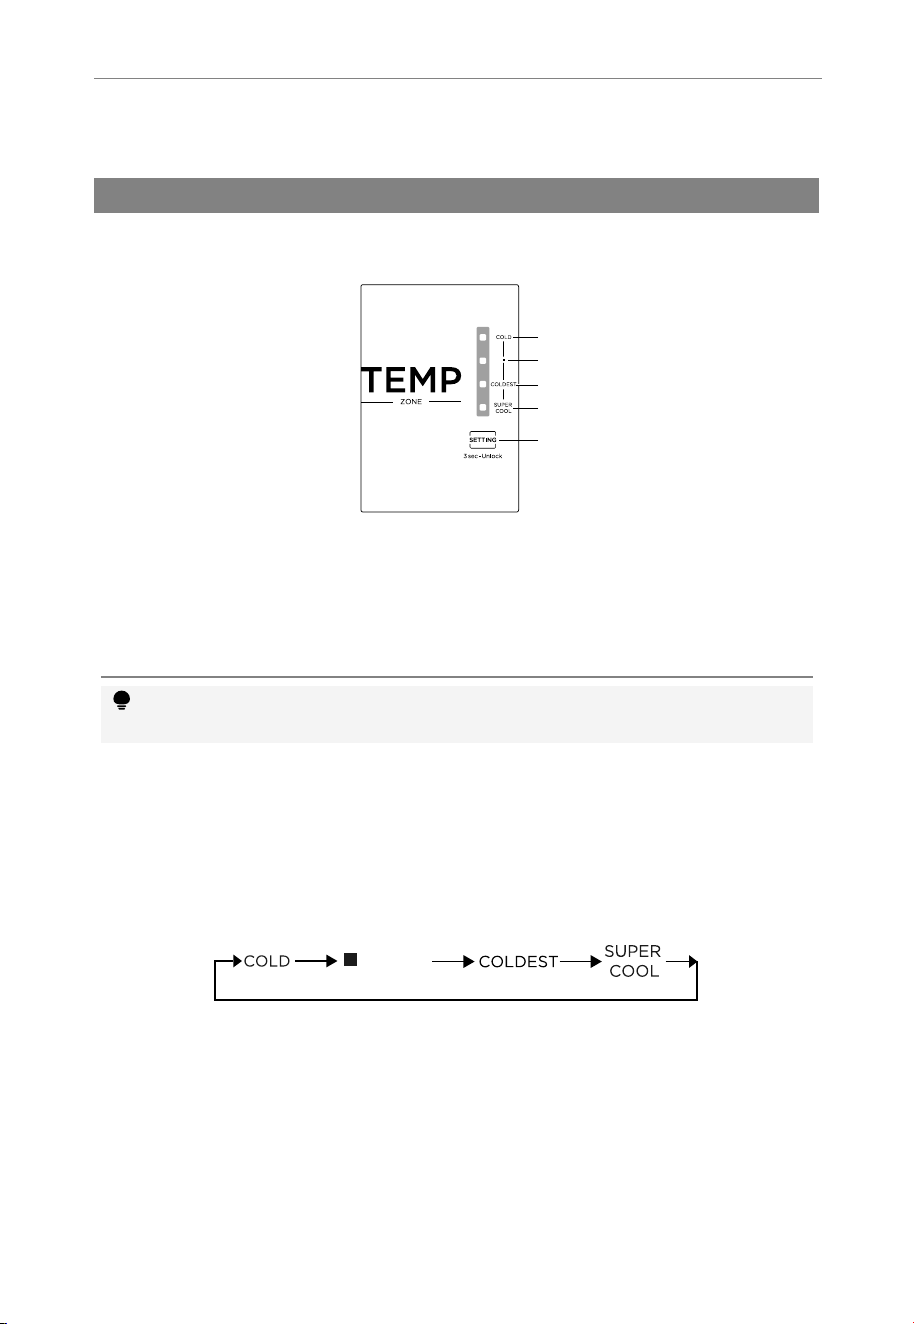
Functions
A
4
3
2
1
1 LED 1 (COLD)
2 LED 2 (Normal)
3 LED 3 (COLDEST)
4 LED 4 (SUPER COOL)
a Setting button
ATTENTION
The actual control panel may dier from model to model.
display
Each time the temperature SETTING button is pressed once, the temperature setting changes
one time. After the temperature setting has been completed, the refrigerator will run according
to the set value after 15 seconds.
When Super Cool mode is activated, the fridge will run at its maximum capacity to faster reach
the coolest setting and lasting longest for 6 hours.
(normal)
Lock/unlock
When the temperature control panel is in lock state, it needs to long press temperature setting
key for 3 seconds for unlocking the panel, all LEDs will blink for 2 seconds when panel is
unlocked. When the temperature control panel is in unlock state, if there is no operation on
control panel within 15 seconds, it will enter into lock state automatically.
damper adjusting slider
The temperature inside the freezer can be adjusted by changing the position of the damper
slider. The initial position of the damper slider is at position A. If lower temperature inside the
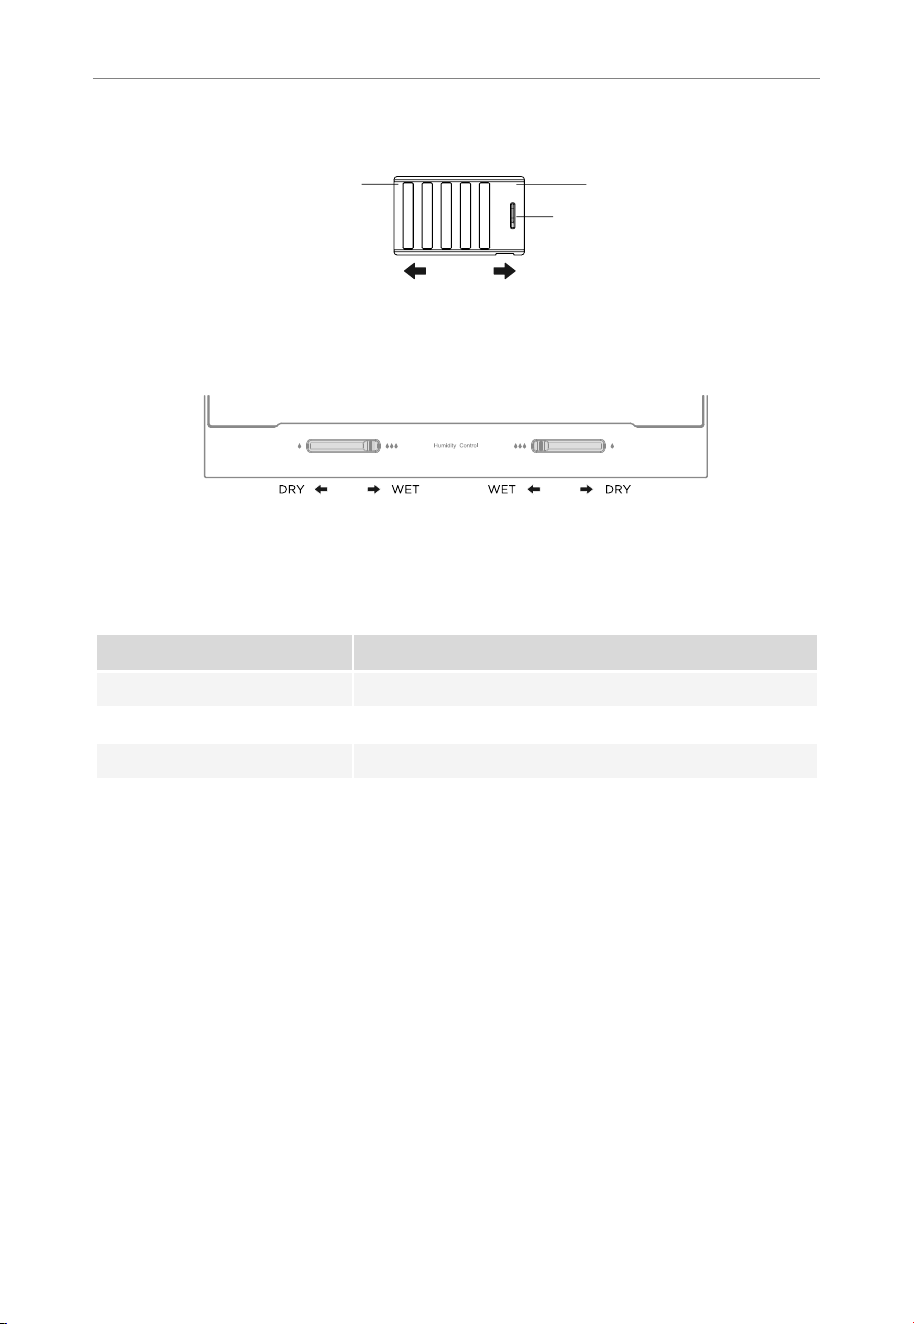
13
Operation Instructions
freezer is required, you can adjust the damper slider from the position A to left side.
COLDEST
Damper SliderMax setting position
A
COLD
Shelf humidity control
The movement of the paddle to the middle is wet, and the movement of the paddle to both sides
is dry.
Fault code
The following warnings appearing on the display indicate corresponding faults of the refrigerator.
Though the refrigerator may still have refrigerator and freezing function with the following faults,
the user shall contact a maintenance specialist for maintenance, so as to ensure normal use of
the refrigerator.
Fault code Fault description
LED 3/LED 4 flashing Refrigerator temperature sensor circuit
LED 2/LED 4 flashing Freezer defrost sensor
LED 1/LED 4 flashing Ambient temperature sensor

14
Operation Instructions
Storing food
Freezer compartment
The freezer compartment is designated
for the low-temperature freezing of food,
long-term storage of frozen food, and for the
production of ice cubes.
Pay attention to the star classifications
(4 star, 2 star and 1 star) in the freezer
compartment and the resulting storage
periods for frozen food.
Do not put fresh and frozen food next to
each other. The frozen food may thaw.
When freezing large amounts of fresh food
(such as meat, fish or chopped meat), please
divide them into several small pieces before
putting in, so that they can be quickly frozen
and picked up easily.
Abide by the storage times recommended
by food manufacturers on the packages,
there is no information on the packaging,
food should not be stored frozen for
longer than three months from the date of
purchase.
When purchasing frozen food, make sure
that it was frozen at a suitable temperature
and that the packaging is not damaged.
Frozen food should be kept in suitable
individual packages to ensure that adjacent
food cannot be contaminated. Consume
thawed and defrosted foods immediately, do
not refreeze them.
In case of prolonged power failure or
malfunction of the appliance, remove the
stored frozen food and check whether
they are still edible, then store them in
a sufficiently cool place or in another
appliance.
To defrost food, remove it from the freezer
and let it defrost at room temperature or
in the refrigerator. To defrost food quickly,
you can use the defrost function on your
microwave, for example.
If you only want to defrost part of a
pack, remove the portion you need and
immediately close the rest of the pack. In
this way, you will avoid “freezer burn” and
will reduce ice formation on the remaining
foods.
Cooling compartment
To reduce moisture and subsequent ice
build-up, never put liquid into the fridge
compartment in unsealed containers.
Frost tends to concentrate in the coolest
parts of the evaporator. Storing uncovered
liquids results in a more frequent need for
defrosting.
Never put warm food in the fridge
compartment. These should first cool down
at room temperature and then be placed so
as to ensure adequate air circulation in the
fridge compartment.
Food or food containers should not touch
the back wall of the fridge because they
could freeze to the wall. Do not regularly
keep opening the door of the refrigerator.
Meat and clean fish (packed in a package
or plastic foil) can be placed in the fridge
compartment, which can be used in 1–2 days.
Fruit and vegetables without packaging can
be placed in the part designated for fresh
fruit and vegetables
ATTENTION
Storage of too much food during operation after
the initial connection to power may adversely
aect the freezing eect of the refrigerator.
Storage times and temperature
Note: Overlong storage or storage at
inappropriate freezing temperature may
cause a quality loss or spoiled foods,
which causes food waste, is inedible and
may cause food poisoning. The minimum
temperature in most cases should be 0°F or
colder. Follow the maximum recommended
storage times below:
> Stew, ice cream, sausages, bread: 2-6
months.
> Fish, shrimp, lamb, meat: 4-8 months.
> Vegetables, fruits, poultry, beef: 6-12
months.
15
Maintenance and Cleaning
MAINTENANCE AND CLEANING
CAUTION
Disconnect the appliance from the electrical
supply before undertaking any routine
maintenance. Allow at least 5 minutes before
restarting the appliance, as frequent starting
may damage the compressor.
Do not use mechanical devices or other
means to accelerate the defrosting process,
other than those recommended by the
manufacturer.
Do not try to repair, disassemble or modify
the appliance by yourself. In case of repair
please contact our customer service.
Eliminate the dust on the back of the unit at
least once in the year to avoid hazard by fire,
as well as increased energy consumption.
Check the door gasket regularly to make
sure there is no debris. Clean the door
gasket with a soft cloth dampened with
soapy water or diluted detergent.
The interior of the product should be
cleaned regularly to avoid odor.
Use a soft cloth or sponge to clean the
inside of the product, with two tablespoons
of baking soda and a quart of warm water.
Then rinse with water and wipe clean.
After cleaning, open the door and let it dry
naturally before turning on the power.
For areas that are difficult to clean in the
product (such as narrow spaces gaps or
corners), it is recommended to wipe them
regularly with a soft rag, soft brush, etc.
and when necessary, combined with some
auxiliary tools (such as thin sticks) to ensure
no contaminants or bacteria accumulates in
these areas.
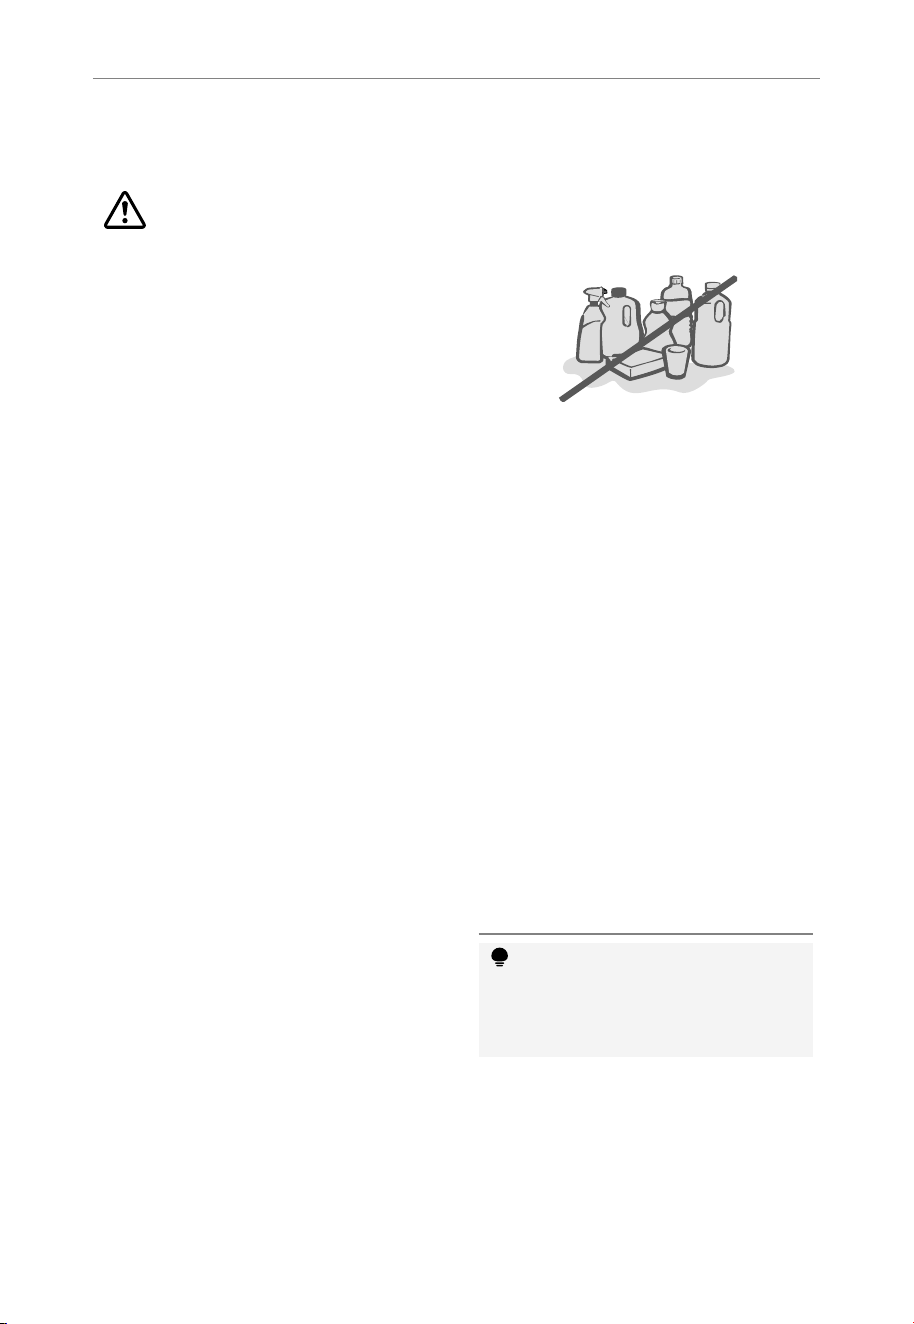
Wipe the outer surface of the product with
a soft cloth dampened with soapy water,
detergent, etc., and then wipe dry.
Do not use hard brushes, clean steel
balls, wire brushes, abrasives (such as
toothpastes), organic solvents (such as
alcohol, acetone, Isoamyl acetate, etc.),
boiling water, acid or alkaline items, which
may damage the fridge surface and interior.
Boiling water and organic solvents such as
benzene may deform or damage plastic
parts.
Do not rinse directly with water or other
liquids during cleaning to avoid short circuits
or affect electrical insulation after immersion.
defrosting
Although this appliance automatically
defrosts, a layer of frost may occur on the
freezer compartment’s interior walls if the
freezer door is opened frequently or kept
open too long. If the frost is too thick,
choose a time when the supply of food is
low and proceed as follows:
1. Remove existing food and accessories
baskets, unplug the appliance from
the mains power and leave the doors
open. Ventilate the room thoroughly to
accelerate the thawing process.
2. When defrosting is completed, clean your
freezer as described above.
CAUTION! Don’t use sharp objects to
remove frost from the freezer. Only after the
interior completely dry should the appliance
be switched back on and plugged back into
the mains socket.
ATTENTION
The appliance shall run continuously once it is
started. Generally, the operation of the appliance
shall not be interrupted; otherwise the service life
may be impaired
16
Maintenance and Cleaning
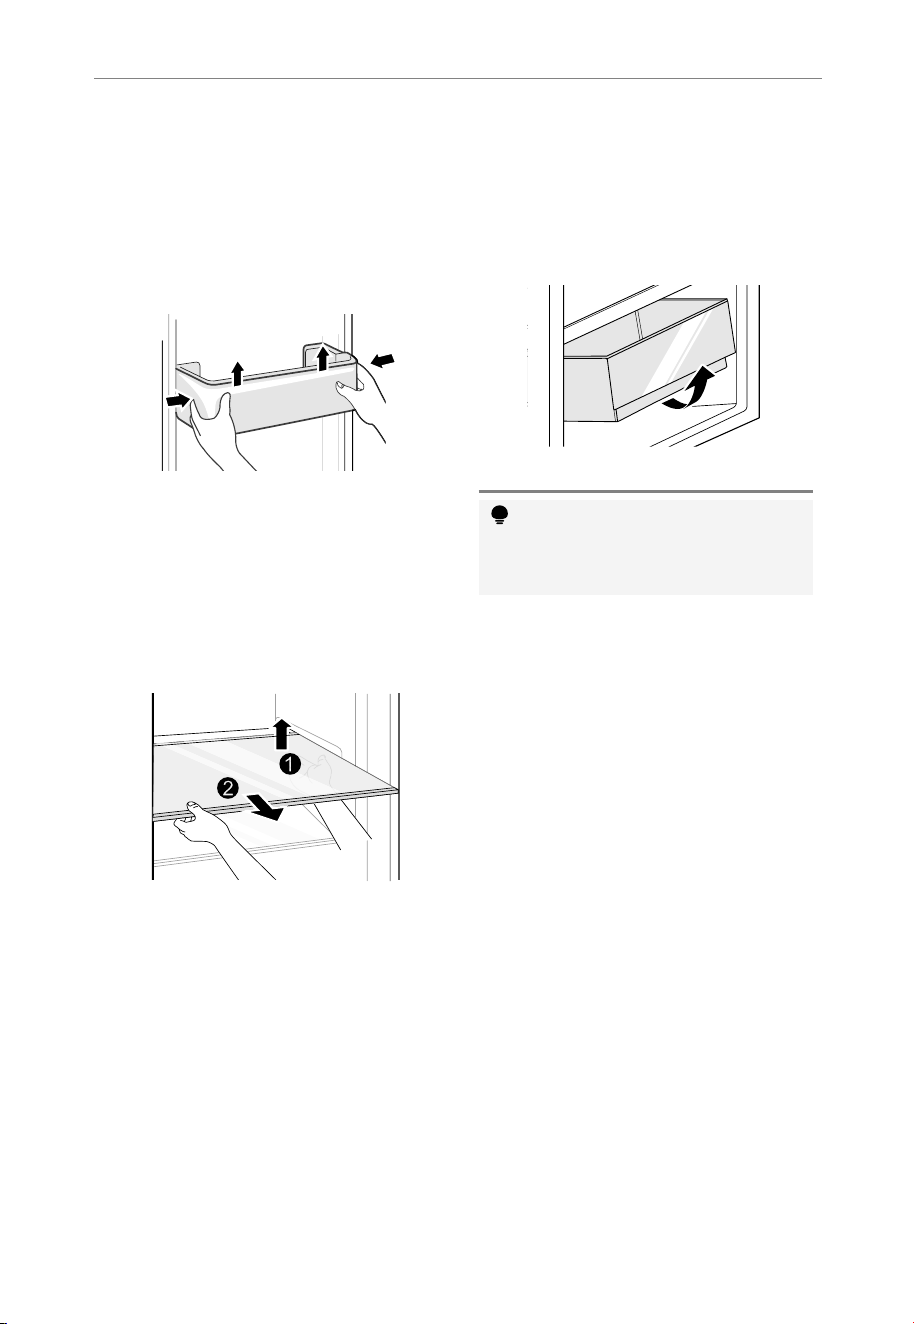
Cleaning of door bin
According to the direction arrow in the
figure below, use both hands to squeeze the
tray, and push it upward, then you can take
it out.
After washing the tray having been taken
out, you can adjust its installation height in
accordance with your requirement.
Cleaning of glass shelf
As the innermost part of the refrigerator
liner where contacting the shelves has a
backstop, you shall raise the shelves upward,
then you can be able to take it out.
Adjust or clean the shelves according to your
requirement.
Cleaning the vegetable drawer
Remove the contents of the drawer. Hold the
handle of the vegetable drawer and pull it
out completely until it stops.
Lift the vegetable drawer up and remove by
pulling it out.
ATTENTION
Dierences: Due to technical changes and
dierent models, some of the illustrations in this
manual may dier from your model.

17
Troubleshooting
TROUBLESHOOTING
The following simple issues can be handled by the user. Please call the after-sale
service department if the issues are not solved.
Problem Possible Causes Solution
Not operate
• The power supply is not turned on and
the plug is not firmly inserted.
• Low voltage, power failure or part of
the circuit tripped.
• Insert the power cord plug firmly.
• Check the power supply at home.
Light not on
• The appliance is not powered on.
• The light is broken.
• Unplug and re-plug the power cord.
• Replace the light with a new one.
Fruits or vegetables
are frozen
• Has the food been placed at the back
of the fridge? The area near the back
wall is where the temperatures are
coldest.
• Fruits or vegetables are stored in the
Fresh/Chill zone.
• Not placing food which may freeze
easily at the back of the fridge
compartment.
• The Fresh/Chill zone is only for meat/
fish.
Fridge/freezer is over-
cooling
• Temperature control is not set
correctly.
• Set the temperature higher.
Compressor working
for a long time
• High ambient temperature causing
long working time.
• Putting too much food in at one time.
• Food is put in before it has cooled
down.
• Opening the door too often.
• The frost layer inside is too thick.
• This is normal.
• Do not put too much food in at one
time.
• Wait until the food has cooled down
before putting it in.
• Do not open the door too often.
• Need to defrost.
Door does not close
properly
• Door is stuck with objects.
• Too much food in the refrigerator.
• Door gasket deformed.
• Do not put in too much food.
• Place the appliance stably.
• Heat the door gasket, then cool it for
restoration (with an electrical drier or
hot water for heating).
Outer wall is hot
• When the appliance is operating, heat
is dissipated to the outside through the
metal tubes inside the cabinet.
• Higher ambient temperatures in the
summer cause the temperature of the
outer wall to rise.
• Higher temperature on the outer wall
is normal.
• Increase the heat dissipation space, or
put the appliance in a ventilated and
cool place.
Cross or vertical
beams are hot
• There are metal tubes inside the
beams, and the heat released from the
tubes prevents condensation.
• This is normal.
Odors
• Spoiled food
• Food with strong odors
• The interior compartment is dirty.
• Clean and remove any spoiled food.
• Make sure strong smelling food is
wrapped airtight.
• Clean the interior compartment.
The actual
temperature
differs from the set
temperature
• When warm food is put in, the
temperature will rise temporarily.
• After setting a new temperature, it will
take some time for the temperature
in the compartment to reach the set
temperature when the door is not
opened.
• After the temperature stability, the
actual temperatures at different
locations within the compartment are
different, with a deviation of about
±5°F.
• This is normal.
• Wait for some time before testing the
actual temperature.

18
Troubleshooting
Problem Possible Causes Solution
Condensation forms
on the outside
• Condensation may form when the
humidity in the room is high.
• This is normal. Wipe off the
condensation using a dry cloth.
Condensation forms
inside the fridge and
drawers
• The fridge maintains a high humidity
to keep vegetables and other food
items fresh.
• Humidity is too high in the room and
doors have been opened frequently.
• The door gasket is not tight.
• Wipe off the condensation using a
dry cloth.
• Do not open doors as frequently or do
not keep them open too long.
• Check the door gasket, clean or
correct position.
Frost around the
vents
• Door is not closed properly.
• The door gasket is not tight.
• Make sure food does not block the
door.
• Check the door gasket, clean or
correct position.
Hard to open the door
• The difference in air pressure
between the inside and outside of the
compartment may sometimes make it
hard to open the freezer door.
• Wait a few moments, and then try to
open the door slowly.
Not making ice cubes
(Only models with ice
maker)
• The ice making function not turned on.
• The appliance is not being supplied
with water.
• The water pipe has kinks in it.
• The water pipe connection is installed
incorrectly.
• Water pressure is too low.
• Switch on the ice maker.
• Check whether the water supply is on.
• Straighten out the kinks.
• Check the water connection.
• Check the pressure of the water
supply, or whether the filter is clogged.
Certain sounds can be heard during normal use of the refrigerator, which do not
affect its correct operation.
Sounds, which can be easily prevented:
> Noise caused by the appliance which is not level - adjust the position with the adjustable
turn-in front feet. Alternatively, place pads made of soft material under the rear rollers,
especially when the appliance is placed on tiles.
> Touching the adjacent piece of furniture - move the refrigerator away.
> Creaking of the drawers or shelves - take out and put back the drawer or shelf.
> Sounds of clinking bottles - move bottles apart.
Sounds heard during normal use are mainly due to operation of the compressor (switching on)
and cooling, system (thermal expansion and contraction of the radiator caused by flow of the
cooling agent).

19
Warranty
WARRANTY
Element Appliance Limited Warranty
(the “Products” or “Product” when referencing a singular product herein)
This Product (including any accessories included in the original packaging) as supplied and
distributed in new condition, is warranted by Element Appliance Company, LLC (“Element”)
to the original customer who purchases the Product from an authorized Element retailer (the
“Original Customer” or “you”) against defects in material and workmanship under proper
use, maintenance, and care according to the owner’s manual, warnings, and instructions
accompanying the Product (“Warranty”) as follows:
* PLEASE NOTE – Proof of purchase evidencing the date of purchase by the Original Purchaser
from an authorized Element retailer (“Valid Proof of Purchase”) is required for all Warranty
service. The express Warranty set forth herein is subject to all terms and conditions set forth
below.
1. WARRANTY SERVICE:
A. ONE-YEAR WARRANTY: Except as provided in subpart 1.B below, for a period of one (1)
year from the date of purchase by the Original Customer (the “Warranty Period”), if the parts
or components covered by this Warranty are determined by Element or Element’s authorized
service provider to be defective in material or workmanship, Element will, at its sole and absolute
discretion and option: (i) repair the defective part or component at no charge to the Original
Customer, (ii) replace the defective Product with a new Product of similar or better quality, at
no charge to the Original Customer, or (iii) refund the documented purchase price paid by the
Original Customer (excluding tax) to the Original Customer upon return of the defective Product
as directed by Element. After the Warranty Period expires, the Original Customer must pay for
all parts, components, shipping and handling, labor, and replacement costs associated with the
Product or any part or component thereof, regardless of any defects in the Product or any part
or component thereof.
B. LIMITED EXTENDED WARRANTY THROUGH PRODUCT REGISTRATION: If and only if the
Original Customer registers the Product at www.elementelectronics.com within ninety (90) days
of the date of purchase by the Original Customer, then the Warranty Period discussed in subpart
1.A. above shall be extended an additional one (1) year to a new Warranty Period equaling two
(2) years from the date of purchase by the Original Customer. If the Product is not registered as
provided for in this subpart 1.B, then the standard one-year Warranty Period set forth in subpart
1.A shall apply.
C. TIMING AND PROCEDURE: Before Warranty service can commence, the Original Customer
must contact either (i) the retailer from whom the Original Customer purchased the Product, or
(ii) Element directly, in either case for problem determination and service procedures. Valid Proof
of Purchase evidencing that the Product is within the Warranty Period MUST be presented by
Original Customer in order to obtain the requested Warranty service. Please have your model
and serial number available, along with your date of purchase of the Product. To remain eligible
for Warranty service, Original Customer may not return the Product or any part or component
thereof to the retailer or Element without Element’s prior written consent.
2. EXCLUSIONS AND LIMITATIONS TO WARRANTY SERVICE
The Warranty covers manufacturing defects in materials and workmanship of the Product
encountered in the normal, non-commercial use of the Product, and does not cover (a)
damages or malfunctions resulting from improper or unreasonable use or maintenance, abuse,
negligence, failure to follow instructions contained in any written materials that accompany the
Product, deterioration by reason of excess moisture, corrosive atmosphere, lightning, power
surges, connections to improper voltage supply, unauthorized alteration, or other external
causes such as extremes in temperature or humidity, modifications, scratches or discoloration;
(b) any damage caused by using non-authorized parts or service facilities for repair of Products
(however, for avoidance of doubt, using non-authorized parts or service facilities will not, in and

20
Warranty
of itself, void the Warranty); (c) transportation, shipping, delivery, pickup, insurance, installation,
or set-up costs; (d) ordinary wear and tear, cosmetic damage, or damage due to acts of nature,
including but not limited to, water, floods, wind, storm, tornado, earthquake, or fire, or due to
damage caused by extraordinary impact events, such as dropping, crushing, demolition or other
extraordinary damage; (e) commercial use of the Product, or use of the Product for anything
other than single-family household or residential use; or (f) modification of the Product or any
part of the Product.
This Warranty is made to the Original Customer only and does not cover Products sold AS IS or
WITH ALL FAULTS. The Warranty is invalid if the factory-applied serial number has been altered
or removed from the Product. This Warranty is valid only in the United States, and only applies
to Product if it was purchased and serviced in the United States. The addition of equipment or
features to the Product that are not manufactured or recommended by Element could affect
the intended function of the Product, and therefore may void the Warranty. Furthermore, the
exposure of the Product to chemicals, heat, cold, humidity, or other elements can affect the
Product components, and therefore, the Warranty does not cover discoloration, fading, cosmetic
changes, rust, or any damages or failure related to any such items. The Warranty is contingent
upon the proper use, maintenance, and care of the Product. The Warranty may be void if the
Product has been used in a manner contradictory to, or in violation of, the terms of the user’s
manual, warnings, or instructions accompanying the Product.
THIS WARRANTY IS MADE IN LIEU OF AND SUPERSEDES ALL OTHER WARRANTIES OR
CONDITIONS OF MERCHANTABILITY OR FITNESS FOR A PARTICULAR PURPOSE OR
GENERAL USE, WHETHER EXPRESS, IMPLIED, COLLATERAL, STATUTORY, OR PROVIDED BY
COMMON LAW, THE UNIFORM COMMERCIAL CODE, OR OTHERWISE. ELEMENT FURTHER
DISCLAIMS ALL WARRANTIES AFTER THE END OF THE WARRANTY TERM DEFINED ABOVE.
NO OTHER EXPRESS WARRANTY OR GUARANTY GIVEN BY ANY OTHER PERSON, FIRM,
OR ENTITY WITH RESPECT TO THE PRODUCT SHALL BE BINDING ON ELEMENT. REPAIR,
REPLACEMENT, OR REFUND OF THE ORIGINAL PURCHASE PRICE, AT ELEMENT’S SOLE
DISCRETION, ARE THE EXCLUSIVE REMEDIES OF THE CUSTOMER.
ELEMENT SHALL NOT BE LIABLE FOR ANY INCIDENTAL OR CONSEQUENTIAL DAMAGES
CAUSED BY THE USE, MISUSE, OR INABILITY TO USE THE PRODUCT. THESE INCLUDE,
BUT ARE NOT LIMITED TO, ANY DAMAGES IN THE FORM OF LOST PROFITS, LOSS OF USE,
LEGAL FEES, ECONOMIC LOSS, PERSONAL INJURIES, OR ANY OTHER DAMAGES CAUSED
BY CIRCUMSTANCES BEYOND THE CONTROL OF ELEMENT. NOTWITHSTANDING THE
FOREGOING, ELEMENT’S AGGREGATE LIABILITY TO ANY CUSTOMER SHALL NOT EXCEED
THE ORIGINAL PURCHASE PRICE OF THE PRODUCT. THIS WARRANTY SHALL NOT EXTEND
TO ANYONE OTHER THAN THE ORIGINAL CUSTOMER WHO PURCHASED THE PRODUCT,
AND IS NOT TRANSFERRABLE. NO PERSON IS AUTHORIZED TO ALTER, EXTEND, OR
WAIVE THIS WARRANTY OR ANY OF ITS TERMS OR CONDITIONS.
Some states do not allow the exclusion or limitation of incidental or consequential damages,
or allow limitations on warranties, so the above limitations or exclusions may not apply to you.
This Warranty gives you specific rights, and you may have other rights, which vary from state to
state. The exclusions and limitations to the Warranty apply to the maximum extent permitted by
law and unless restricted or prohibited by law. Where any term of this Warranty is prohibited by
applicable law, it shall be null and void, but the remainder of this Warranty shall remain in effect.
PLEASE DIRECT ALL CORRESPONDENCE TO:
Element Appliance Company, LLC
customerservice@elementelectronics.com
(888) 842-3577
https://elementelectronics.com