
Wireless Calling system
P4 Series Instruction Manual
A Good Life in Old Age
Monitoring and Improving Quality in Long-term Care
As a growing number of frail old people in need of home care,
delivering quality long-term care services, which are effective and
responsive in time, has become a priority for every family.
"Call to You" is determined to provide perfect solutions that enable
your loved ones to retain their independence and dignity in daily life,
so they can live on their own and release your burden with peace of
mind.
We "CallToU" focuses on professional home caregiver pagers for
more than a decade, and have helped and cared for millions of
ELDERLY and those in need to help timely.
"Call to you" gives more care for the elderly
You Need, We Here!
Receiver Model: P4
Call Button Model: E-01A/E-01AB
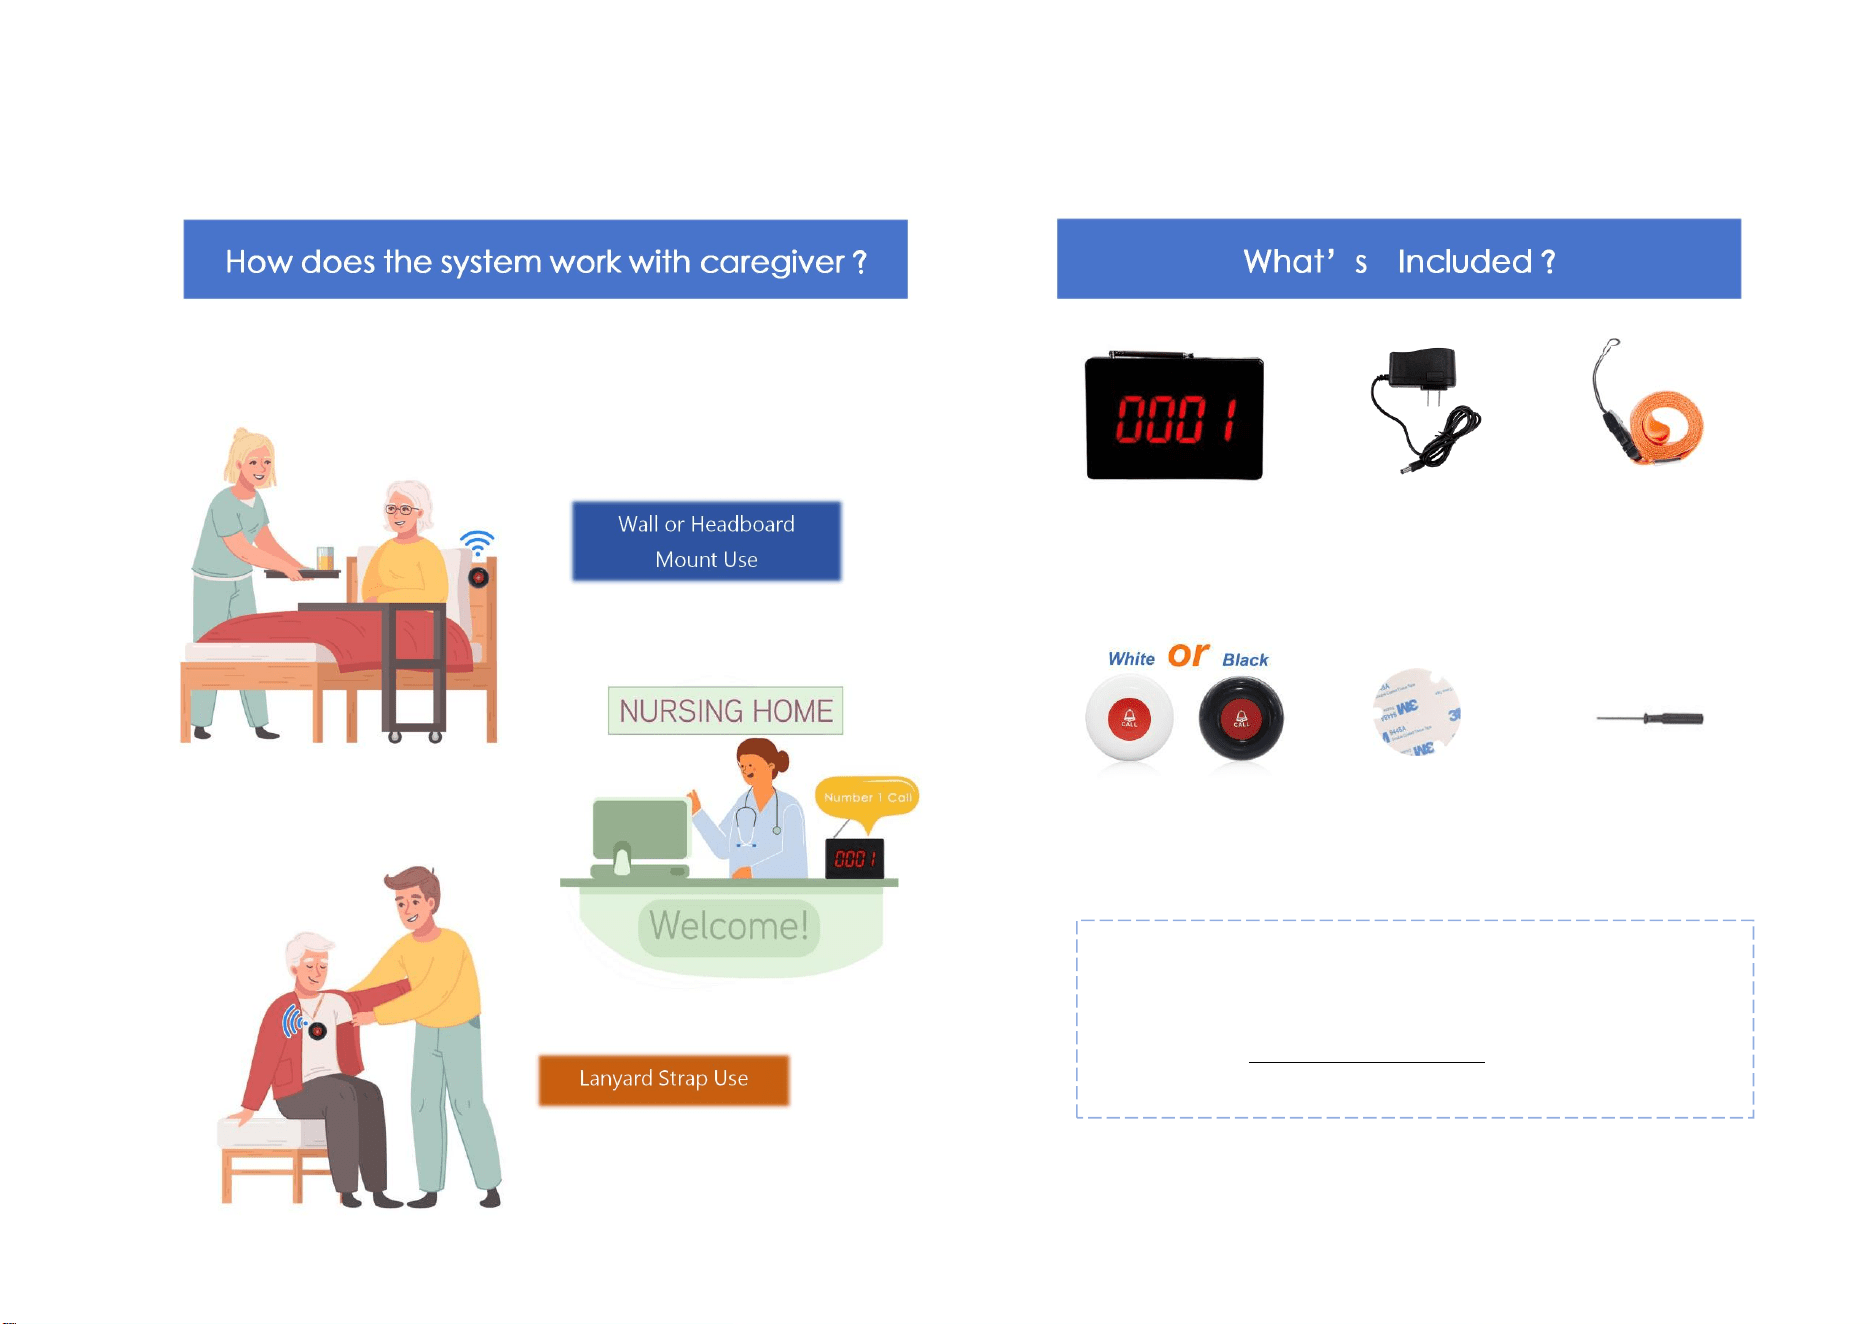
Deliver users' help signal to caregivers
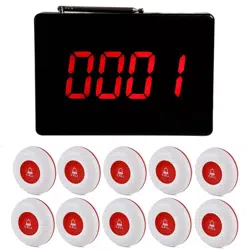
P4 Receiver
Call Button (5/10 PCS)
(white/black)
Contained Battery
Lanyard
(5/10 PCS)
AC Adapter
Double Sided
Adhesive Tape
Screwdriver
Thank you for your purchase. To ensure proper use and
trouble-free operation, please read this manual carefully and
follow the instructions to set up the system.
assistance when using the system.
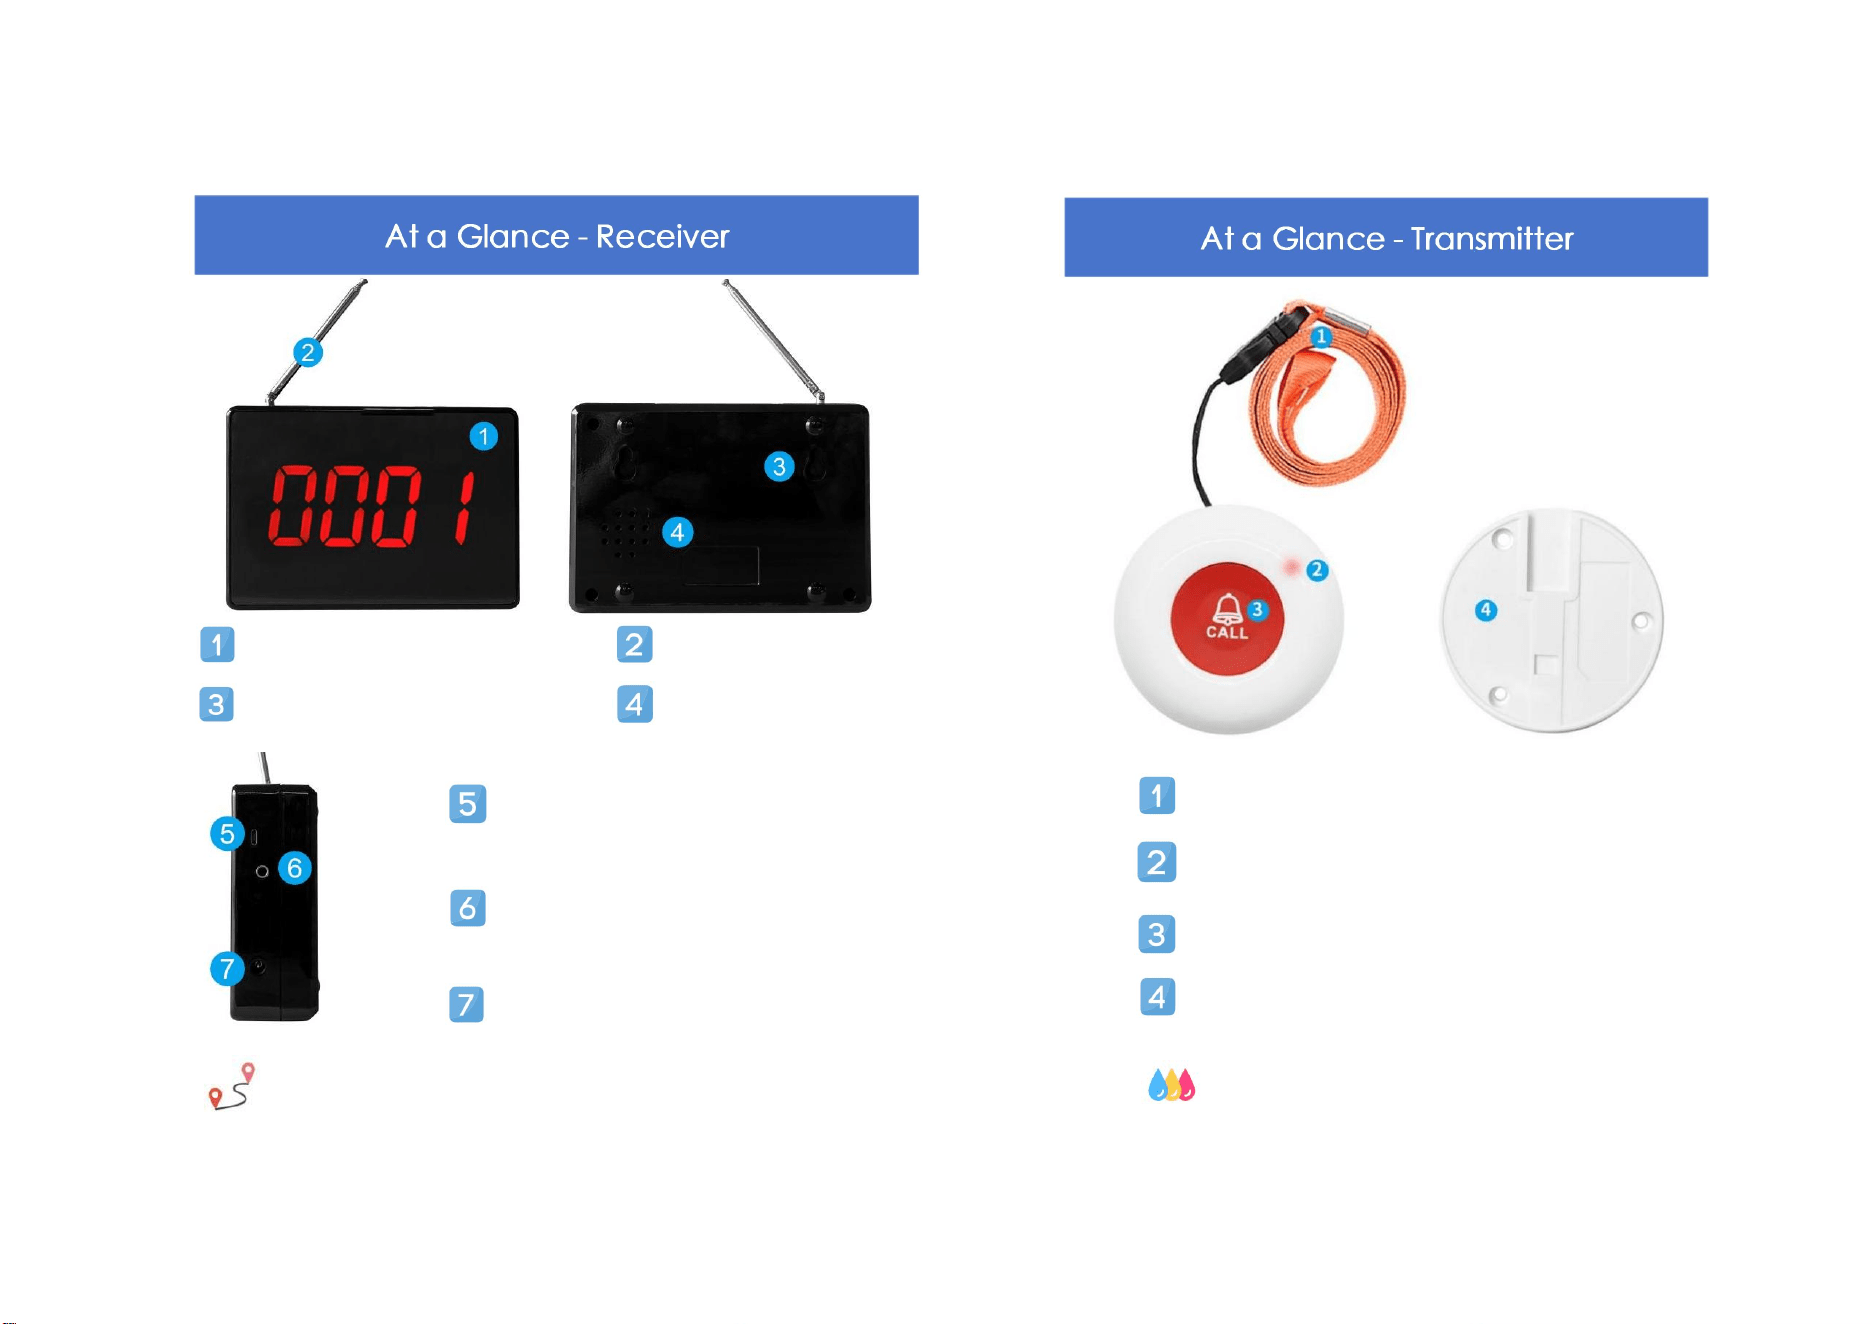
Digital Display Screen
Red Light Indicator after Pressing
Silicone Cover
Detachable Bracket (For wall-mounted)
Waterproof Grade: IP55
Detachable Lanyard
Antenna
Hook Slot
Loudspeaker
USB Interface for Modify Voice
(Can not modify by yourself)
Speaker Jack (3.5mm)
AC Socket
1000 feet operating range in open areas
1) One call button can work with multiple receivers at the same time
2) The paging system just one-way, for example, the patient presses the button,
then the nurse will go to know what's they need
3) 3) If the wireless signal range is decreased, please replace a new battery for
the call button
4) The call button is Just a simple IP55 waterproof function, please don't soak it
in the water
5) The display receiver can add up to 1000 transmitters. Extra call buttons are
available to purchase on CallToU AMAZON Store
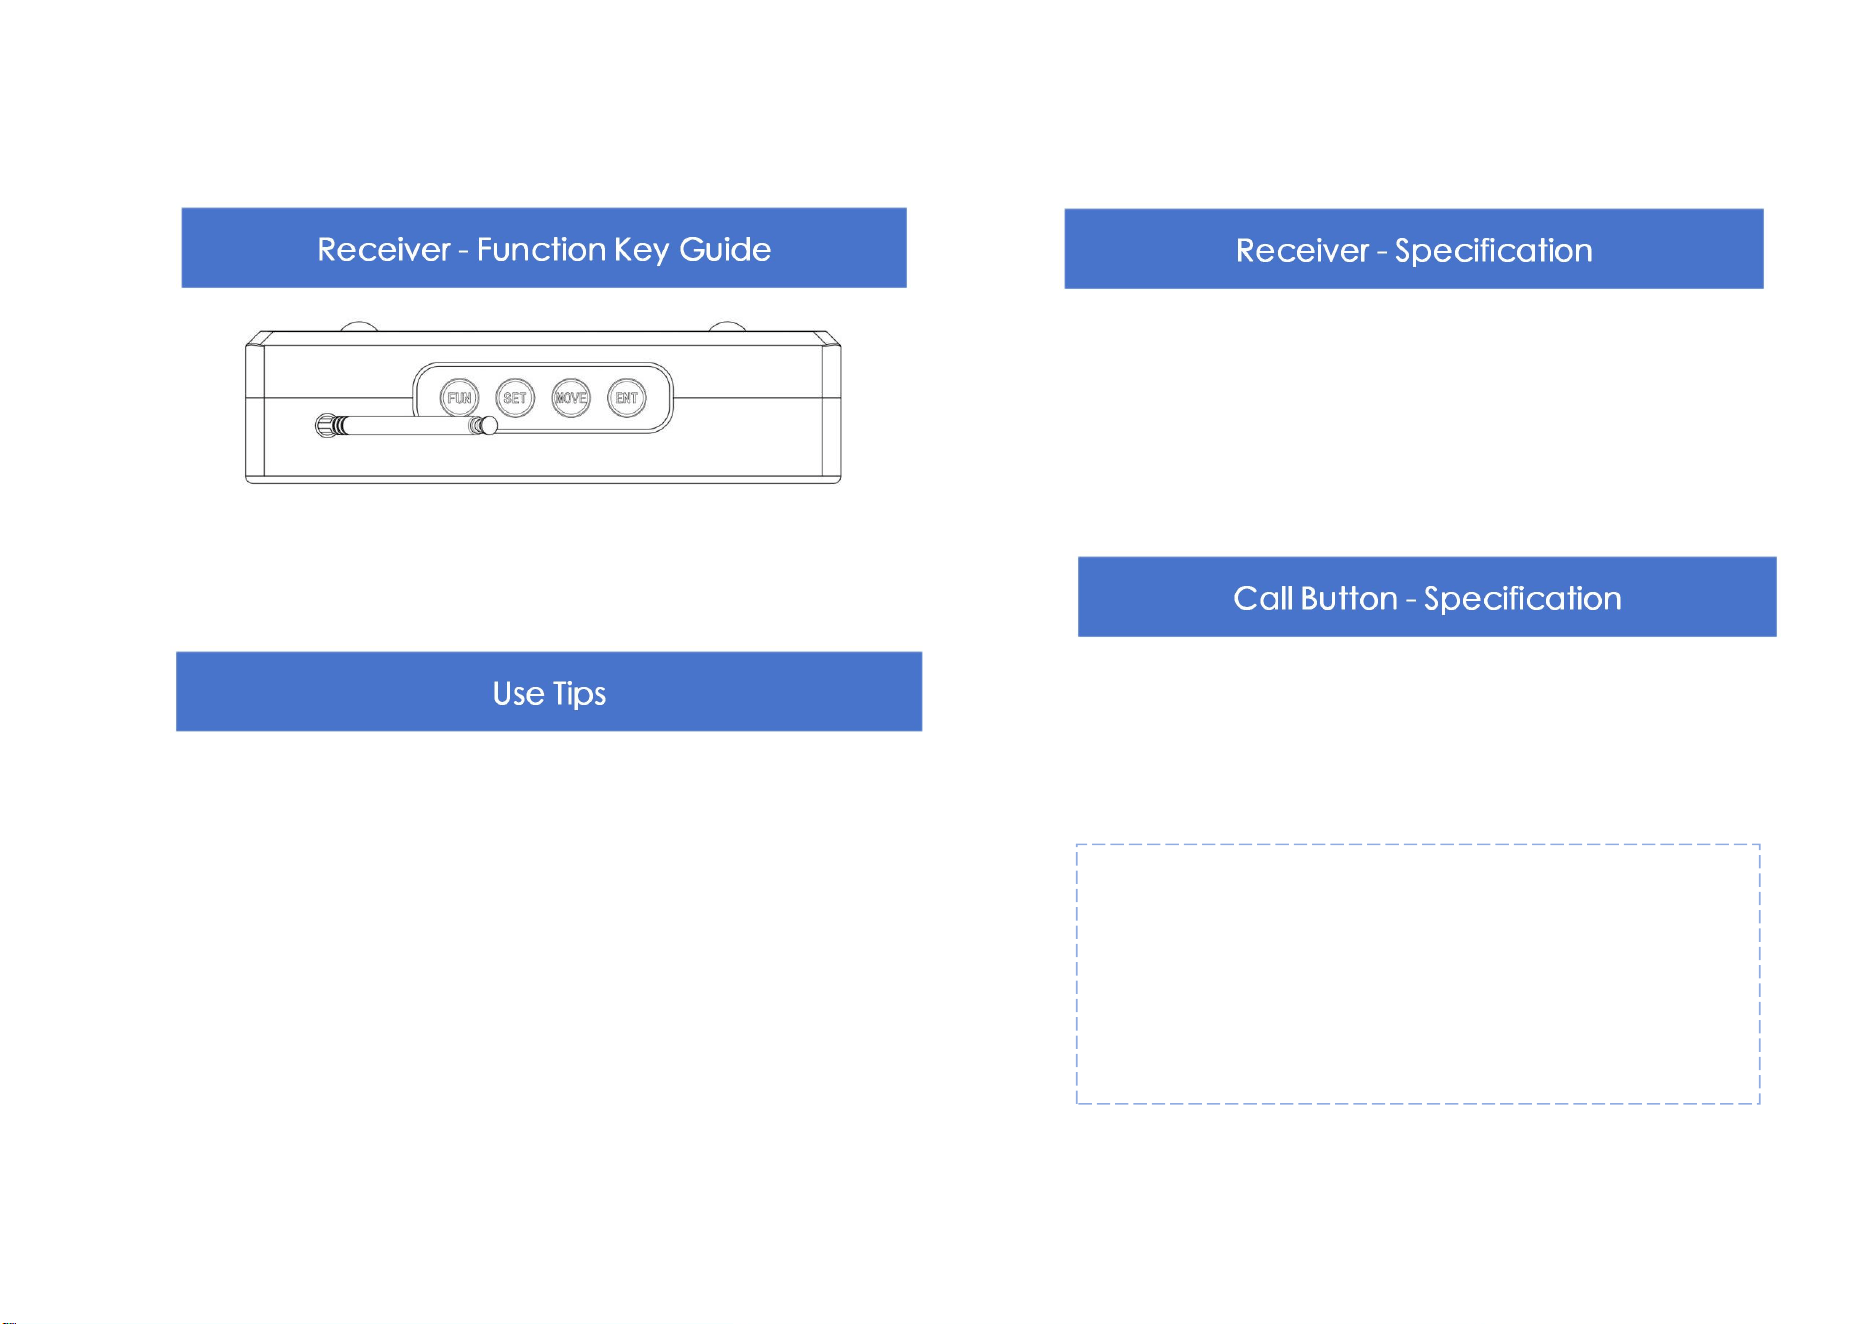
PLUG-AND-PLAY
The receiver and the button in the kits have been configured.
Press [FUN] key for 3 seconds: Enter setting status or Exit setting status
Press [SET] key: Adjust number
Press [MOVE] key: Adjust the number position
Press [ENT] key: Confirm the setting
1. Voltage: 12V
2. Current: ≤1A
3. Capacity: Multiple up to 1000pcs wireless call button
4. Number:0001~9999, A001~F999
5. Working Temperature: -20℃-80℃
6. Receiving Sensitivity: ≥-105dBm
7. Frequency: 433MHZ
1. Button battery: 23A 12V alkaline battery(included)
2. Button Waterproof Standard: IP55
3. Button Size: Diameter 2.4 inch, thickness 0.7 inch
4. Temperature: -30℃ to+70℃
5. Frequency: 433MHz
NOTE:
This system is extendable with more receivers and call buttons;
Other models of CallToU receivers and buttons can also work
with this system;
For more information please refer to our customer service.
This is for pairing buttons to the receiver:
① Press for [FUN] 3 seconds and the screen will show [F-01]
② Press [ENT], and it will show [0001]
③ Set a number for the button by pressing [SET] &[MOVE]
④ Press [ENT] to confirm, the number you set will flash
⑤ Press a button and it will send a signal to the receiver, the receiver
will ring with a "ding-dong", meaning the pairing is successful
⑥ Then press [FUN] twice to standby status to finish the setting
Attention:
If the pairing is successful, the number on the receiver will switch to
the next number paring automatically
This is for unpairing certain buttons to the receiver:
① Press [FUN] for 3 seconds and the screen will show [F-01]
② Press [SET] to reach [F-02]
Video Guide
Storage Mode (F-01)
Suitable for adding/pairing additional transmitters
Video Guide
Deletion Mode (F-02)
Delete the transmitters that have been paired
③ Press [ENT], and it will show [0001]
④ Press [SET] & [MOVE] to get the number you want to delete.
⑤ Press [ENT] to delete the number, after "dingdong" indicate
that setting is successful
⑥ After setting, press [FUN] twice back to standby status
F3-1: Whether to cycle setting 0-2 (Defaults 2)
① Press [FUN] for 3 seconds and the screen will show [F-01]
② Press [SET] to reach [F-03]
③ Press [ENT], and it will show [F3-1], press [ENT]to enter setup mode
④ Use [SET] or [MOVE] to set the times of cycles
⑤ Press [ENT] to set it successfully, after "dingdong" indicate
that setting is successful
⑥ Press [FUN] twice back to standby status
Attention:
"0" indicates that the number of the display is pressed and cut
immediately.
"1" indicates ring only once before switching to the next call
number (cannot be used with F3-2)
"2" means Ring the bell twice and can be used with the F3-2,
multiplying the number to get the number of ring times;
For example, F3-1 set "2", F3-2 set "2", then ring time is 2×2=4, a
total of 4 times ringing
F3-2: Set the number of ring cycles (0-9)
1
Press [FUN] for 3 seconds and the screen will show [F-01]
2
Press [SET] to reach [F-03]
Video Guide
Cycle Mode (F3-1)
Set the number of loop reminders
Video Guide
Cycle Mode (F3-2)
Set the number of loop reminders
③ Press [ENT], and it will show [F3-1]
④ Use the [SET] key to display [F3-2], and press the [ENT] to enter
setup mode
⑤ Use the [SET] key and [MOVE] key to select the cycle times of
the ringing required(0-9)
⑥ Press [ENT] to set it successfully, after "dingdong" indicate
that setting is successful
⑦ Press [FUN] twice back to standby status
Attention:
"0" DO NOT USE.
The maximum number of cycles with voice prompts can be 9
F3-3: Call number stay screen time setting (Default is 120 seconds)
① Press [FUN] for 3 seconds and the screen will show [F-01]
② Press [SET] to reach [F-03]
③ Press [ENT], and it will show [F3-1]
Attention:
"0" will broadcast call number only
"1" will ring with“ding-dong”
"2" will ring with“chord music”
8 sound levels for your choice:
①Hold [FUN] for 3 seconds and the screen will show [F-01]
②Press [SET] until it shows [F-05]
③Press [ENT], it will show a number between [0-8]
④Press [SET] to adjust the volume level from 0-8 (lowest-loudest)
⑤Press [ENT] to confirm the choice, will ring with a "ding-dong"
indicating the setting is successful
⑥After Setting, press [FUN] twice back to standby status
Video Guide
Storage Mode (F-04)
Set the reminder ringtone mode
④ Use the [SET] to display [F3-3], press the [ENT] to enter setup mode
⑤ Use the [SET] and [MOVE] to select the stay time of call number
display(005-500 seconds)
⑥ Press [ENT] to set it successfully, after "dingdong" indicate
that setting is successful
⑦ Press [FUN] twice back to standby status
Attention:
Setting for how long does call number stay screen back to standby status
The display stay time can be set to a min.005 seconds/max.500 seconds
Video Guide
Cycle Mode (F3-3)
Set the number of loop reminders
This is to switch from different calling modes:
① Press [FUN] for 3 seconds and the screen will show [F-01]
② Press [SET] until it shows [F-04],press the [ENT] to enter setup mode
③Press [SET] to switch different from calling modes, “0” “1” “2”,3 modes
for choose
④Press [ENT] to confirm the choice, will ring with a "ding-dong"
indicating the setting is successful
⑤Press [FUN] twice back to standby status to finish the setting
① Press [FUN] for 3 seconds and the screen will show[F-01]
② Press [SET] to adjust, until it shows[F-07]
③ Press [ENT], press the [SET] and [MOVE] to select
④ Under[F-07], [F7-1] means all the buttons are deleted; [F7-2]
means restore factory settings
⑤ Press [ENT] to confirm,after "dingdong" indicate that setting is
successful, and the system automatically switches to the volume setting
⑥ Select the volume you want (1-8) and press the [ENT] to confirm
⑦ After Setting, press [FUN] twice back to standby status
Video Guide
Storage Mode (F-05)
Set the reminder volume mode
Video Guide
Storage Mode (F-07)
Clearing all setting
Attention:
“1” means minimum volume
“8” means loudest(Default is “6”)
Frequency Bandwidth Settings (F-08)
Key Setting (F-09)
DO NOT SUGGEST TO USE, REQUIRE PROFESSIONAL COUNSELL
Only used by manufacturer for programming before shipping.
Do not adjust, otherwise will not receive signal
1) For product care, wipe with a soft slightly wetted cloth
2) It might be easier to get dusty due to static electricity,
especially in winter.
Do NOT spray water or detergent on the product, or on the
power plug, in case of risks of fire or electric shock
Do NOT use benzene, thinner, cleanser, nylon scrubbing brush,
etc. on the product. It will damage the product.
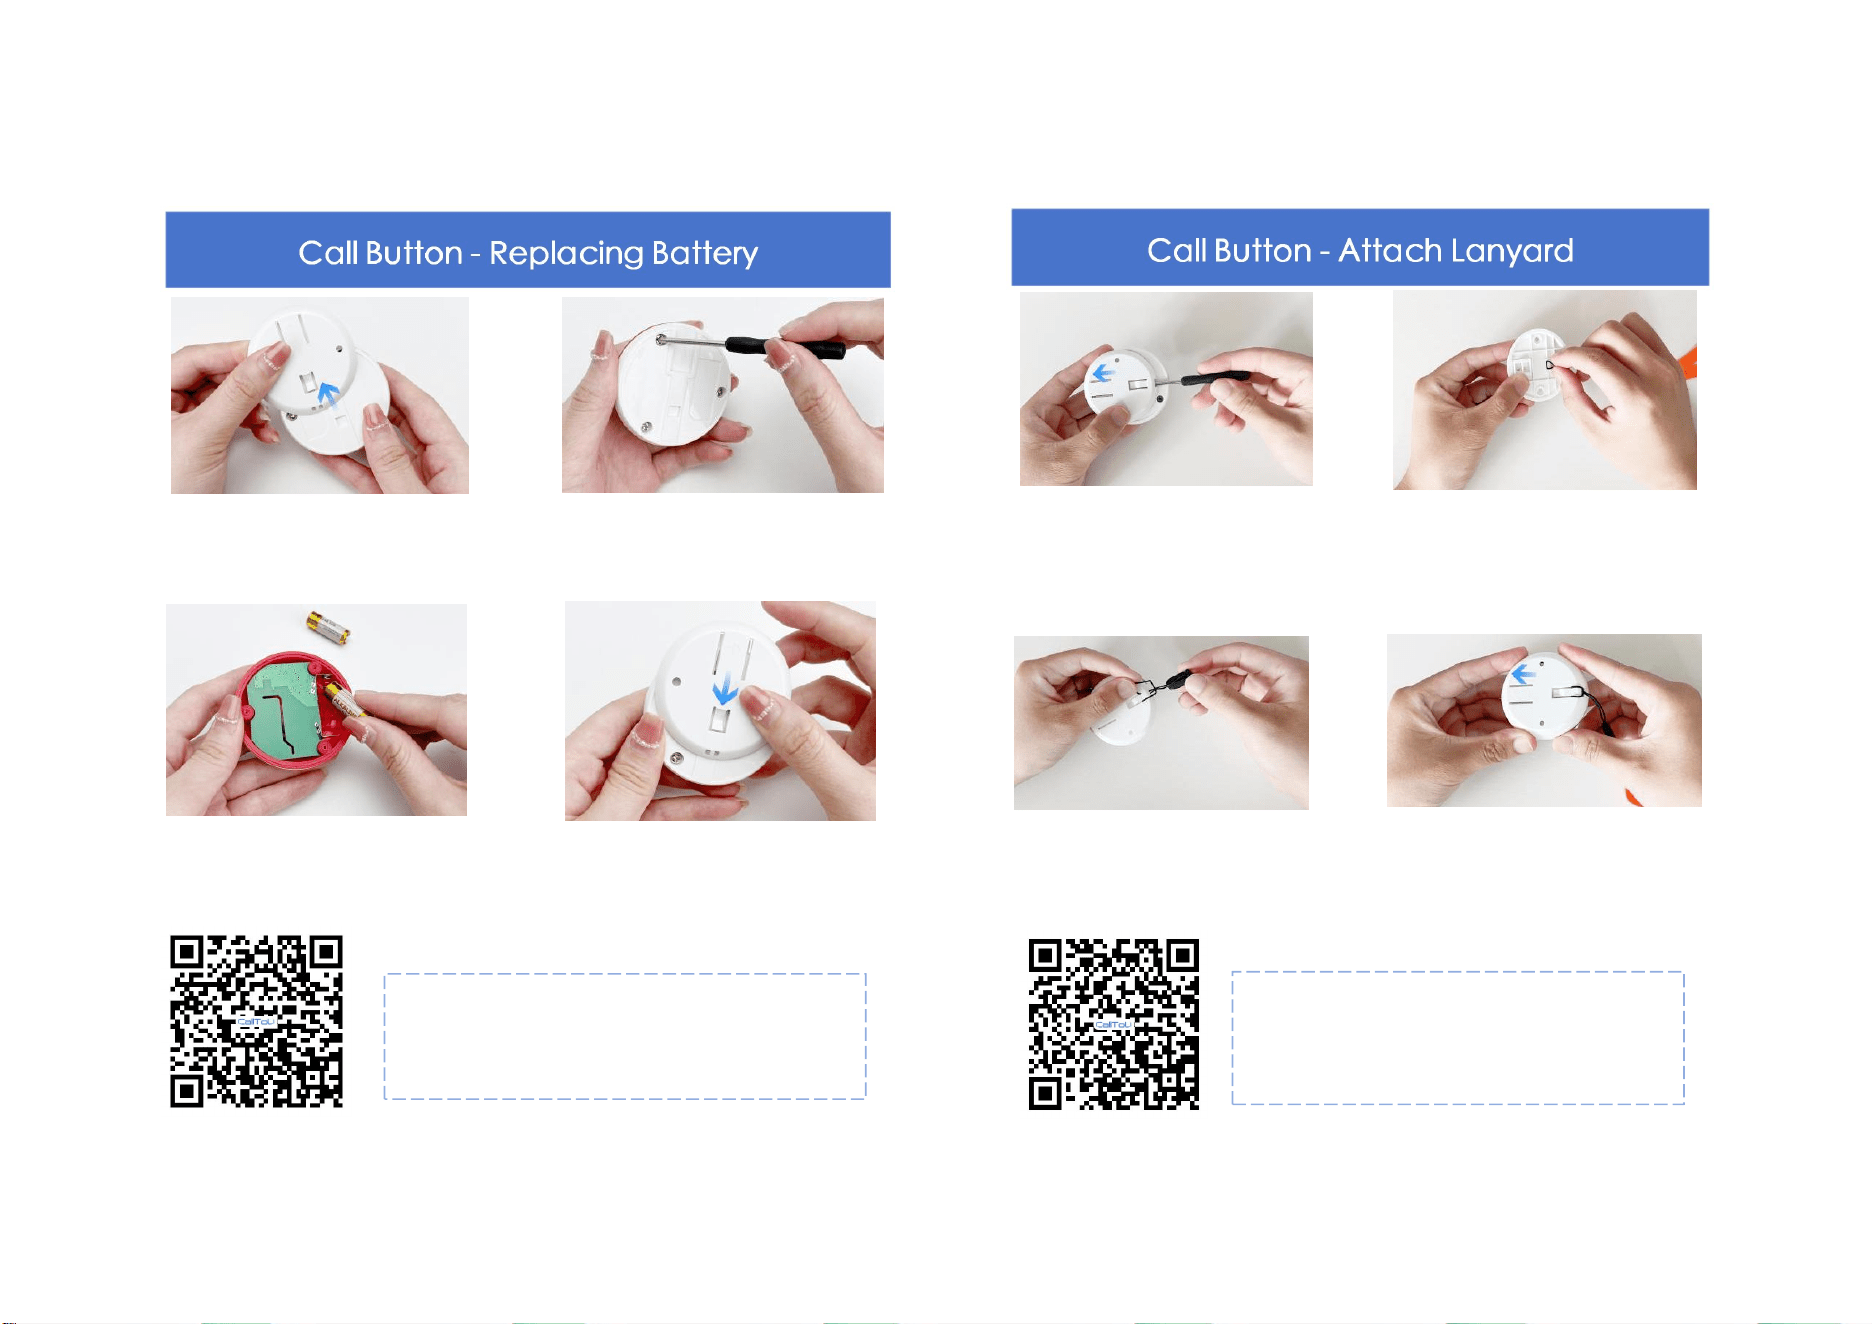
STEP 1
Slide the back cover according
to the direction of the arrow
STEP 2
Open the button base by turning
the screw with a screwdriver
STEP 3
Replace the 23A 12V Alkaline
battery
STEP 4
Close the button base, retighten
the screws, and close back cover
Video Guide
Replace Battery
Battery life depends on how often you use it
STEP 1
Slide the back cover according to
the direction of the arrow
STEP 2
Pin the lanyard
STEP 3
Slip the tip of the rope
over the entire lanyard
STEP 4
Slide the back cover back
(to where it was)
Video Guide
Attach Lanyard
Portable necklace lanyard
(Use the included screwdriver if necessary)
Installation Guide
If you are using this product with buildings around you, you may receive
frequencies from the surrounding. Malfunctions may occur. Also, radio
waves are extremely difficult to reach in reinforced buildings so the
pager system unit might not respond normally. If the pager system unit
does not respond after a call button/device signal is sent, check the
installation location and surrounding environment. Or change the
installation location.
The reception of the signal on the pager system unit is
affected by ambient noise (disturbance radio waves) as the
call button signal may not be received accurately and may not
operate normally. We suggest installing the unit at least 3ft
away from any equipment that creates interfering radio
waves. If installing the unit on a wall, ensure there is no
device that generates radio waves or noise on the back side of
the wall. Or change the installation location to achieve the
most optimal signal range.
Examples of devices that easily generate interfering radio waves/noise:
air conditioner (outdoor unit), refrigerator, mobile phone (WLAN)/other
electric appliances with high power consumption when it is turned on
IMPORTANT
When I press the call button, nothing is displayed on the monitor
screen(or there is no responding sound).
Check if the power AC adapter is connected to a power outlet.
Check if the call button/device is paired to the receiver correctly. Or
pair the call button/device again.(see "Storage Mode (F-01)").
If you use this product in a store or with building around you, you will
receive frequencies from the outside. Malfunctions may occur (see
"Installation").
The corresponding number does not display on the pager system
unit during setting.
Try to replace new battery for call button.
If you press two or more call buttons at the same time, the receiver will
only receive one signal and call.
The display screen is sticky.
If you remove the protective film on the monitoring unit screen, the
adhesive part may remain and become sticky. Wipe down with a soft
cloth or alcohol wipe.
Many thanks for thinking of us and choosing us!
For everyone in CALLTOU family, it's our honor to have us as our customers.
It's always a pleasure serving you and certainly looking
forward to more in the future.
A big thank you for helping us to grow
Our customer service, especially in the after-sales phase, guarantees the
satisfaction of our clients. In line with this strategy, we hope you share with
us your feedback at any time, be it positive or negative. There is always
room for improvement, so if we can serve you better in any way, please do
inform us.
We provide 1-year limited product warranty to the original purchaser
against manufacturing defects in materials and workmanship, not covering
any normal wear and tear, improper handling, or accidental damage.
CallToU Customer Care Support Team
www.calltou.com
Address:
room 605, building 2, hengdali factory, chidian
Jinjiang, fujian,CN
IMPORTANT INFORMATION:
Smart CordLess products utilize wireless technology which is subject to
physical and environmental considerations.
THESE PRODUCTS MUST BE TESTED BY THE END-USER
BEFORE EACH USE IN THE SETTING IN WHICH THEY ARE TO BE USED.
Please be aware that the transmitter will not be 100% accurate if it is
out of range at any time.
Wireless systems are intended as an adjunct to good caregiving
practices and are not a substitute for proper staffing and patient
management practices.
We recommend that all personnel receive periodic training in the
operation of these systems and that the systems are tested before
each use.
