www.auna-multimedia.com
iTuner CD
Internetradio mit CD-Player
Internet Radio with CD Player
Radio Internet avec lecteur CD
Radio por Internet con reproductor de CD
Internet radio con lettore CD
Internetradio met CD speler
10032753 10032754


3
DE
Technische Daten 4
Sicherheitshinweise 5
Geräteübersicht 7
Fernbedienung 8
Anschluss 11
Inbetriebnahme 12
Systemeinstellungen 16
Internetradio 20
Podcasts 23
Spotify Connect 24
DAB Radio 25
FM-Radio 28
CD-Player 30
USB-Wiedergabe 32
BT-Wiedergabe 33
Audioeingang (line In) 34
Net-Remote 34
Verwendung von Kopfhörern 35
Abschalttimer festlegen (Sleep) 35
Wecker stellen 36
Spezielle Entsorgungshinweise für Verbraucher in Deutschland 38
Hinweise zur Entsorgung 40
INHALT
Sehr geehrter Kunde,
wir gratulieren Ihnen zum Erwerb Ihres Gerätes.
Lesen Sie die folgenden Hinweise sorgfältig durch
und befolgen Sie diese, um möglichen Schäden
vorzubeugen. Für Schäden, die durch Missachtung
der Hinweise und unsachgemäßen Gebrauch
entstehen, übernehmen wir keine Haftung.
Scannen Sie den QR-Code, um Zugri auf die
aktuellste Bedienungsanleitung und weitere
Informationen rund um das Produkt zu erhalten.

4
DE
TECHNISCHE DATEN
Artikelnummer 10032753 10032754
Stromversorgung Netzgerät 100-240 V ~ 50/60 Hz , 1 A
USB-Ausgang
5 V
, 1 A
Audio
Ausgangsleistung 2 x 5 W RMS
UKW-Radio
Frequenzbereich 87,5 MHz - 108 MHz
CD
Frequenzgang 20 Hz - 20 Khz
DAB
Frequenzbereich 174-240 MHz
WLAN-Spezikationen
Standard
Frequenzband
Max. Sendeleistung
802.11 b/g/n
2412–2472MHz
19dBm
BT
Frequenzbereich
Maximale Sendeleistung
2402–2480MHz
2dBm
Stromverbrauch im Standby
Standard-Standby-Betrieb
Netzwerk-Standby-Betrieb
<1.00 W (WLAN aus)
<2.00 W (WLAN an)

5
DE
SICHERHEITSHINWEISE
Allgemeine Sicherheitshinweise
• Lesen Sie alle Hinweise genau durch, bevor Sie das Gerät verwenden
und bewahren Sie die Bedienungsanleitung für den zukünftigen
gebrauch auf.
• Verwenden Sie ausschließlich die Stromspannung, die auf dem
Typenschild des Geräts angegeben ist. Vergewissern Sie sich, dass Ihre
Steckdose geerdet ist.
• Das Gerät sollte auf einer achen, stabilen Fläche platziert werden und
darf keinen Vibrationen ausgesetzt werden
• Bitte stellen Sie das Gerät nicht auf schräge oder instabile Flächen, da
das Gerät herunterfallen könnte.
• Die Steckdose sollte sich in der Nähe des Geräts benden und sollte
leicht zugänglich sein.
• Vermeiden Sie extreme Temperaturen, sowohl Hitze als auch Kälte.
Stellen Sie das Gerät in sicherer Entfernung zu Hitzequellen wie
Wärmestrahlern oder Gas-/Elektroherden auf. Setzen Sie das Gerät
nicht direkter Sonneneinstrahlung oder anderen Wärmequellen aus.
• Stellen Sie niemals Kerzen oder ähnliche Gegenstände mit oener
Flamme auf dem Gerät ab.
• Um Brandrisiko, die Gefahr eines Stromschlags und Schäden am Gerät
zu vermeiden, setzen Sie das Gerät keinem Regen, Feuchtigkeit oder
tropfenden und spritzenden Flüssigkeiten aus. Es sollten keine mit
Wasser gefüllten Gegenstände, wie beispielweise Blumenvasen, auf
dem Gerät abgestellt werden.
• Wenn Sie irgendeine Flüssigkeit auf dem Gerät verschütten, können
dadurch schwerwiegende Schäden verursacht werden. Schalten Sie das
Gerät in diesem Fall sofort aus und ziehen Sie den Netzstecker aus der
Steckdose. Setzen Sie sich mit dem Kundendienst in Verbindung.
• Decken Sie die Belüftungsönungen des Geräts nicht ab und achten
Sie darauf, dass Vorhänge und andere Materialien nicht in die
Belüftungsönungen hinein gelangen, um eine Überhitzung des Geräts
und dadurch bedingte Brand- und Stromschlaggefahr zu vermeiden.
• Stellen Sie das Gerät nicht in ein geschlossenes Bücherregal,
einen Einbauschrank oder andere Abstellplätze mit beengten
Platzverhältnissen. Achten Sie darauf, dass das Gerät in einem
Mindestabstand von 10cm zu allen es umgebenden Flächen und
Gegenständen platziert wird, um eine ausreichende Belüftung zu
gewährleisten.
Sicherheit
• Ziehen Sie den Netzstecker des Geräts immer aus der Steckdose, bevor
Sie das Radio mit anderen Geräten verbinden bzw. die Verbindung zu
anderen Geräten trennen oder das Radio bewegen.

6
DE
• Achten Sie darauf, dass der Netzstecker des Radios während eines
Gewitters nicht in der Steckdose steckt.
• Das Gerät wird warm, wenn es über einen längeren Zeitraum verwendet
wird. Das ist normal und weist nicht auf ein Problem des Geräts hin.
Stromanschluss
• Achten Sie darauf, dass das Gerät nicht auf dem Stromanschlusskabel
steht, da das Kabel durch das Gewicht des Geräts beschädigt und zu
einem Sicherheitsrisiko werden könnte.
• Sollte das Anschlusskabel des Geräts beschädigt sein, muss es vom
Hersteller dem Kundendienst oder einer anderen hierfür qualizierten
Person ausgetauscht werden, um Schäden zu vermeiden.
Störungen
• Stellen Sie das Radio nicht auf oder in die Nähe von anderen Geräten,
die eine elektromagnetische Störung hervorrufen könnten. Sollten
Sie das Radio in die Nähe von anderen Geräten stellen, könnte die
Wiedergabequalität des Radios negativ beeinusst werden und ein
Störgeräusch könnte auftreten.
Beaufsichtigung
• Kinder, die sich in der Nähe des Geräts aufhalten sollten beaufsichtigt
werden, damit diese das Gerät nicht als Spielzeug verwenden.
• Lassen Sie niemanden, insbesondere Kinder, keine Gegenstände oder
ähnliches in die Löcher, Anschlüsse und sonstige Geräteönungen
hineinstecken, da dies zu einem tödlichen Stromschlag führen könnte.
Bedienung/ Instandhaltung/ Wartung
• Entfernen Sie nicht selbstständig Schrauben, um das Risiko eines
Stromschlags zu verringern. Das Gerät enthält keine Teile, die
vom Benutzer gewartet werden könnten. Überlassen Sie alle
Wartungsarbeiten hierfür qualiziertem Personal.
• Entfernen und önen Sie keine fest angebrachten Abdeckungen des
Geräts, da dadurch gefährliche elektrische Spannung freigesetzt werden
könnte.
• Ziehen Sie den Netzstecker vor der Reinigung des Geräts aus der
Steckdose.
• Verwenden Sie keinen Scheuerschwamm oder aggressive
Reinigungsmittel, da dadurch die Oberäche es Geräts beschädigt
werden kann.
• Verwenden Sie zur Reinigung des Geräts keine Flüssigkeiten.

7
DE
GERÄTEÜBERSICHT
1 CD-Lade
2 IR-Sensor
3 Köpfhöreranschluss
4 Wiedergabe/Pause
5 Stopp - Wiedergabe anhalten
6 Titel zurück
7 Titel vor
8 Display
9 CD-Lade önen/schließen
10 Menü
11 Einstellungen
12 Modus
13 Scrollen/auswählen
14 Lautstärke / Ein-Aus
15 IR-Empfänger
16 Stromanschluss
17 WLAN-Antenne
18 Audioausgang (analog)
19 Audioeingang (analog)
20 Optischer Ausgang (digital)
21 Koaxialausgang (digital)
22 Stabantenne
Vorderseite
Rückseite

8
DE
FERNBEDIENUNG
1
15
16
17
18
19
21
20
22
23
24
25
26
2
3
4
5
6
7
8
9
10
11
12
13
14

9
DE
1 Ein/Standby
2 CD auswerfen
3 Timer
4 Scan
5 Wiedergabemodus
Wiederholung
6 BT-Kopplung
7 Info
8 Titel vor/
Menünavigation rechts
9 Stopp/
Menünavigation runter
10 Senderspeicher
11 Menü
12 Senderspeicher hoch/runter
13 Menünavigation zurück
14 Stumm
15 Mono/Stereo
16 Zahlenfeld für Direktwahl
17 Lautstärke +/-
18 Equalizer
19 Titel zurück/
Menünavigation links
20 Auswahl bestätigen
21 Wiedergabe/Pause/
Menünavigation hoch
22 Modus
23 Titel anspielen
24 Wiedergabemodus:
Zufallswiedergabe
25 Uhrzeiteinstellung
26 Abschalt-Timer
10
DE
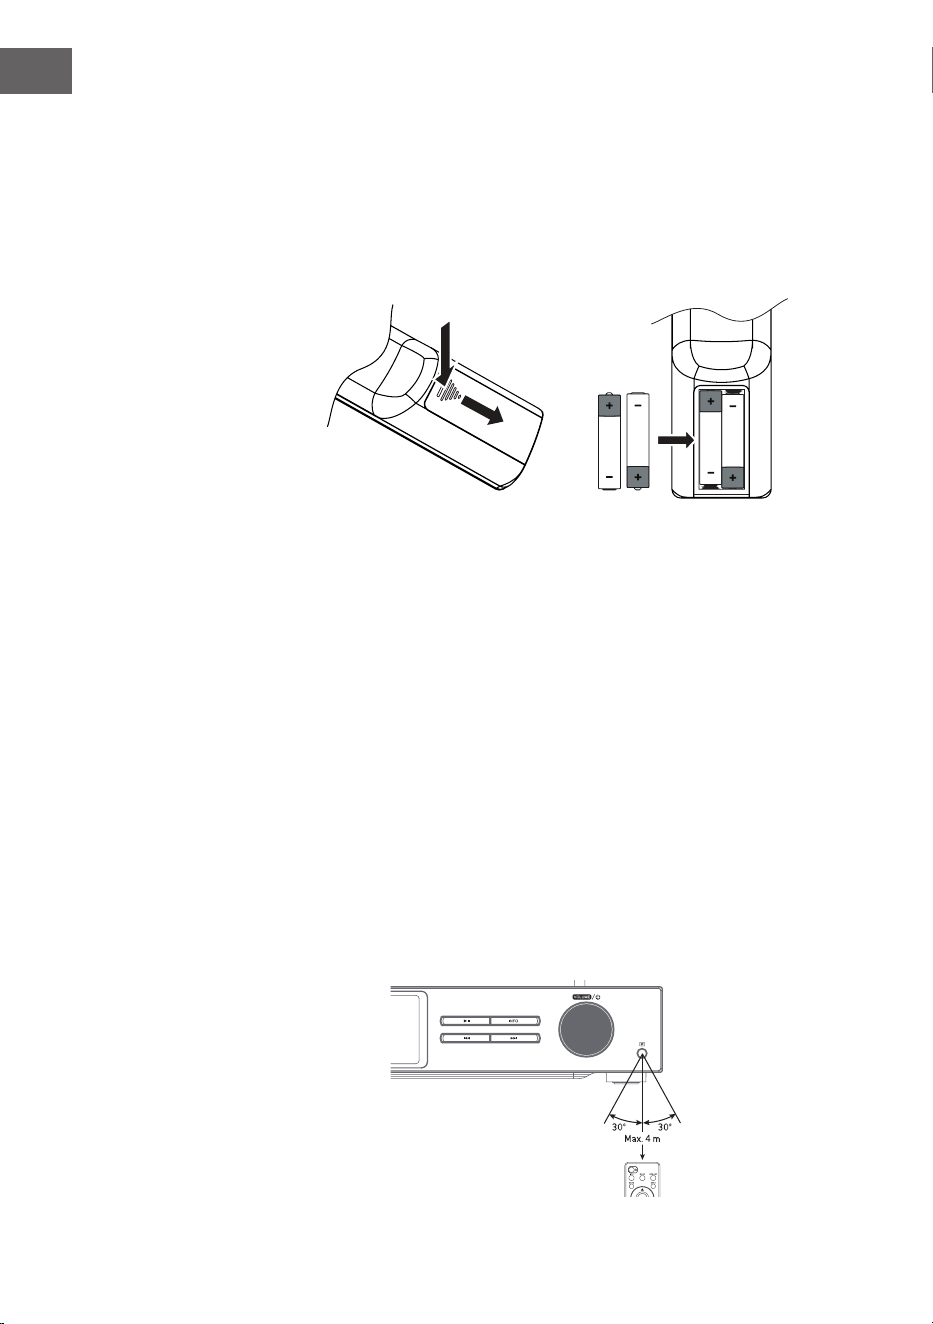
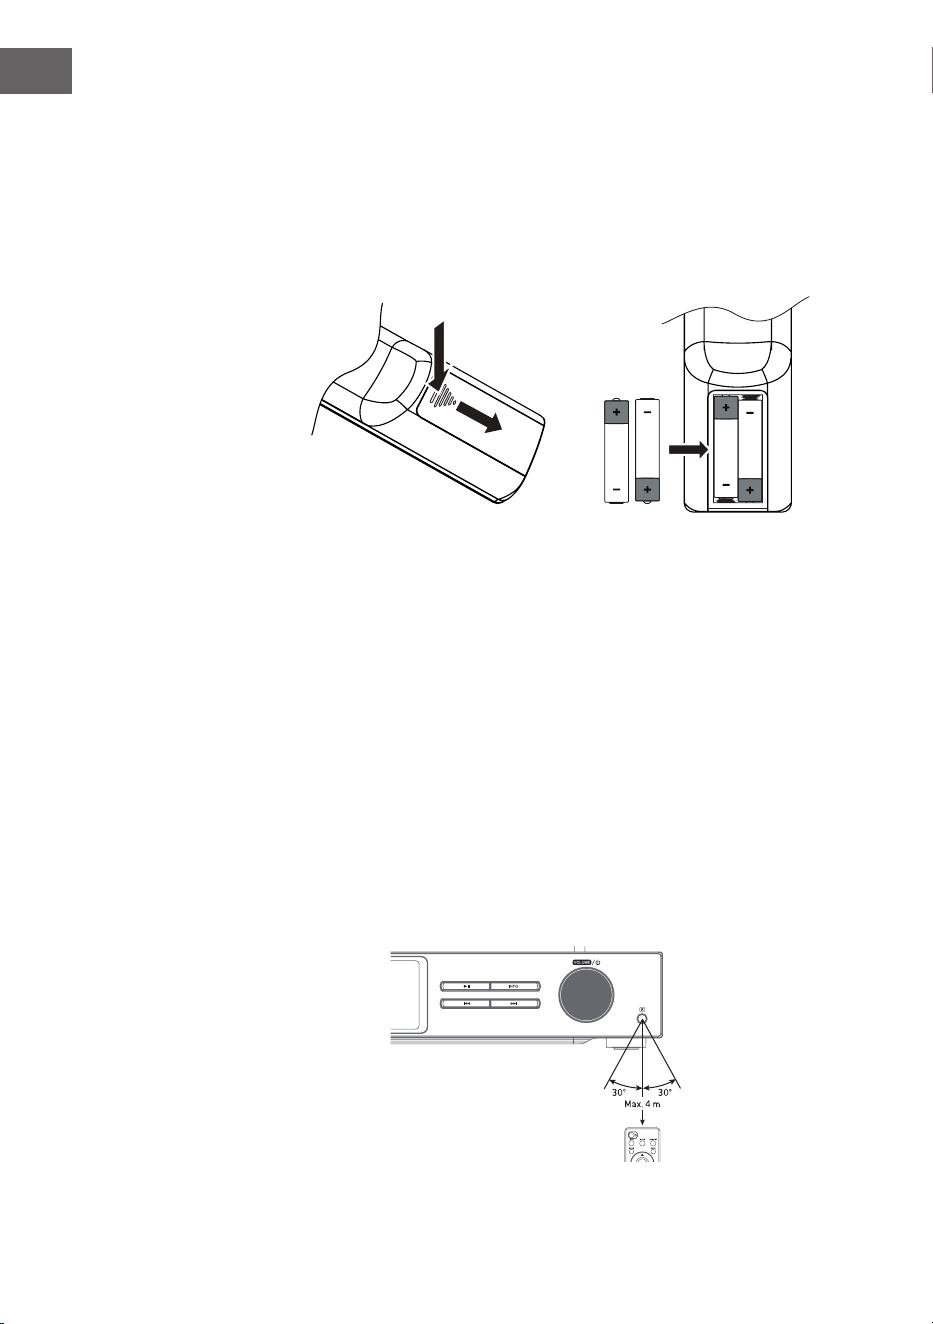
Batterien in die Fernbedienung einlegen
1. Drücken Sie die Batteriefachabdeckung an der Markierung nach unten
und schieben Sie diese in Pfeilrichtung nach außen.
2. Legen Sie 2 Batterien des Typs LR03 (AAA 1,5 V) in das Batteriefach
ein (nicht im Lieferumfang enthalten). Stellen Sie sicher, dass die +
und – Markierungen auf der Batterie den Markierungen im Batteriefach
entsprechen.
3. Setzen Sie die Batteriefachabdeckung wieder ein.
Umgang mit der Batterie
• Unsachgemäße oder falsche Verwendung der Batterie kann Korrosion
oder ein Auslaufen der Batterie verursachen, was zu Feuer und Sach-/
oder Personenschäden führen könnte.
• Verwenden Sie nur den in der Bedienungsanleitung angegebenen
Batterietyp.
• Entsorgen Sie gebrauchte Batterien nicht im Hausmüll. Entsorgen Sie
diese gemäß den landesüblichen Richtlinien.
• Entnehmen Sie die Batterie aus der Fernbedienung, wenn Sie die
Fernbedienung über einen längeren Zeitraum nicht verwenden werden,
da Korrosion oder ein Auslaufen der Batterie auftreten können, was
zu körperlichen Verletzungen und/oder Sachschäden und/oder Feuer
führen könnte.
Fernbedienung Betriebsradius
Der Fernbedienungssensor an der Vorderseite des Geräts reagiert bis
zu einer Entfernung von 4 Metern innerhalb eines Winkels von maximal
60Grad auf von der Fernbedienung ausgehende Befehle.
Der Betriebsradius ist ebenfalls von der Helligkeit im Raum abhängig.

11
DE
ANSCHLUSS
1. Der Audioeingang und Audioausgang (analog), der optische Ausgang
(digital) und der koaxiale Ausgang (digital) benden sich auf der
Rückseite des Geräts. Ein A/V Verstärker oder ein HiFi-System können
dort angeschlossen werden.
2. Verbinden Sie die im Lieferumfang enthaltene Antenne mit der
Antennenverbindung und ziehen Sie diese bis zur gewünschten Länge
aus.
3. Verbinden Sie die im Lieferumfang enthaltene WLAN-Antenne mit dem
entsprechenden Anschluss an der Rückseite des Geräts.
4. Wickeln Sie das Kabel bis zu dessen vollständiger Länge ab. Stecken
Sie den Netzstecker des Geräts in die Steckdose. Das Gerät ist nun
angeschlossen und kann verwendet werden.
Stellen Sie sicher, dass das Gerät ausschließlich an Steckdosen mit
der richtigen Stromspannung angeschlossen wird. Halten Sie den
Netzstecker beim Einstecken/Herausziehen in die/aus der Steckdose
immer am Steckerkopf und niemals am Netzkabel fest. Ziehen oder
reißen Sie niemals am Netzkabel.
5. Ziehen Sie den Netzstecker aus der Steckdose, um das Gerät vollständig
auszuschalten.
Netzwerkverbindung
Dieses Gerät unterstützt ausschließlich drahtlose Netzwerkverbindungen für
den Netzwerkzugang und unterstützt keine LAN-Verbindungen.
Drahtloses Netzwerk
1. Überprüfen Sie zunächst, ob die Kontrollleuchten (LINK/ACT) Ihres
Routers aueuchten.
2. Fahren Sie mit den im Abschnitt „Erste Schritte“ genannten Schritten
fort. Es wird empfohlen, den in den Systemeinstellungen bendlichen
Einrichtungsassistenten zu nutzen.
Hinweis: Dieses Gerät kann nicht direkt an ein Modem angeschlossen
werden. Es muss ein Router oder ein in einem Router integriertes Modem
verwendet werden. Befolgen Sie die entsprechenden Anweisungen Ihres
Anbieters und beachten Sie die Bedienungsanleitung Ihres Routers.
12
DE
INBETRIEBNAHME
In dieser Bedienungsanleitung werden die grundlegenden Schritte zur
Verwendung des Geräts erklärt. Falls nicht explizit genannt, beziehen
sich alle Bedienungshinweise auf die Bedienung des Geräts mit der
Fernbedienung.
Ein-/ Ausschalten
1. Drücken Sie den Lautstärkeregler Volume/ auf dem Gerät oder die
Taste der Fernbedienung, um das Gerät einzuschalten.
2. Drücken Sie den Lautstärkeregler Volume/ auf dem Gerät oder die
Taste der Fernbedienung, um das Gerät wieder in den Standby-Modus
zu schalten.
Modusauswahl
Drücken Sie die Taste MODE auf dem Gerät oder der Fernbedienung, um
zwischen den Modi Internetradio, Podcasts, Spotify, DAB-Radio, FM-Radio,
CD-Player, USB, BT-Audio und AUX-IN-Modus auswählen.
Alternativ
1. Drücken Sie die Taste MENU am Gerät oder auf der Fernbedienung,
um das Funktionshauptmenü aufzurufen, drehen Sie dann den
SCROLL|SELECT-Regler am Gerät oder drücken Sie die Tasten
auf der Fernbedienung, um das Hauptmenü auszuwählen,
und drücken Sie dann den SCROLL|SELECT-Regler am Gerät oder die
SELECT-Taste auf der Fernbedienung zur Bestätigung.
2. Drehen Sie den SCROLL|SELECT-Regler am Gerät oder drücken Sie
die Tasten auf der Fernbedienung, um den Zielmodus auszuwählen,
und drücken Sie dann den SCROLL|SELECT-Regler am Gerät oder die
SELECT-Taste auf der Fernbedienung, um zu bestätigen.
Wenn das Gerät circa 15 Minuten lang nicht verwendet wird, wechselt
dieses automatisch in den Standbymodus. Ziehen Sie den Netzstecker aus
der Steckdose, um das Gerät vollständig auszuschalten. Schalten Sie zum
Energie sparen das Gerät vollständig aus, wenn dieses nicht in Verwendung
ist.
Lautstärkeanpassung
• Drehen Sie zum Anpassen der Lautstärke am Lautstärkeregler
Volume| oder drücken Sie die Tasten VOL +/- der Fernbedienung.
• Drücken Sie zum Stummschalten des Tons die MUTE-Taste auf der
Fernbedienung. Drücken Sie erneut die MUTE-Taste oder drehen Sie
am Lautstärkeregler Volume| oder drücken Sie die Taste VOL +/- der
Fernbedienung, um die normale Wiedergabe fortzusetzen.

13
DE
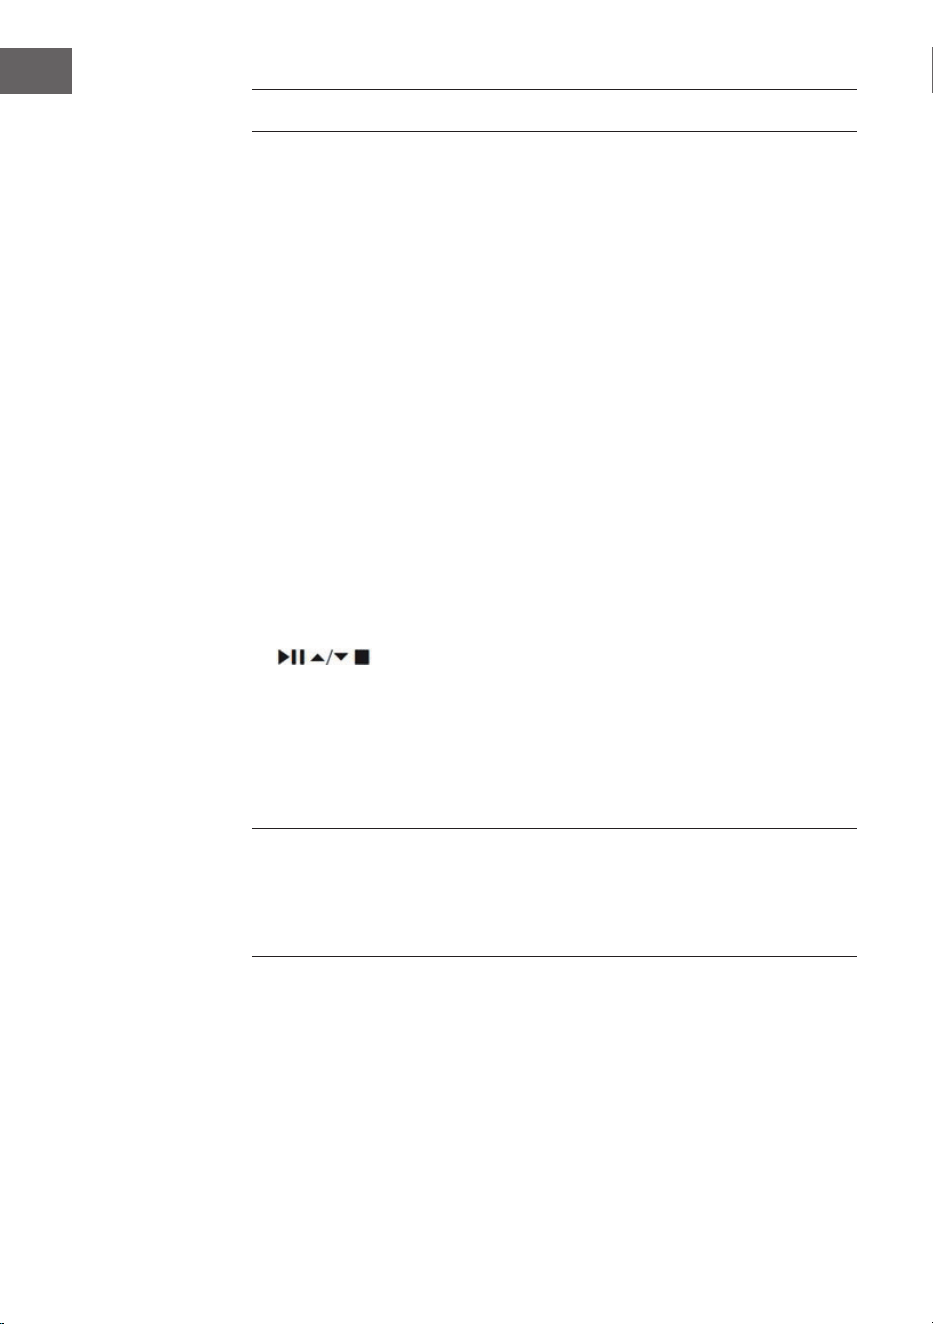
Im Menü navigieren
1. Halten Sie die Taste MENU des Geräts gedrückt oder drücken Sie die
Taste MENU auf der Fernbedienung, um in das Menü zu gelangen.
2. Drehen Sie am Auswahlregler des Geräts oder drücken Sie zu Auswahl
die Tasten
⏮ oder ⏭.
3. Drücken Sie den Auswahlregler des Geräts nach unten oder drücken Sie
die Taste SELECT der Fernbedienung, um Ihre Auswahl zu bestätigen.
Ersteinrichtung
Wenn Sie den Netzstecker des Geräts zum ersten Mal in die Steckdose
stecken, wird auf dem Bildschirm der Willkommensbildschirm angezeigt.
Anschließend erscheint das Sprachmenü auf dem Bildschirm. Wählen Sie
die gewünschte Sprache durch Drehen des Auswahlreglers am Gerät oder
drücken der Tasten
⏮ oder ⏭ der Fernbedienung aus. Drücken Sie zum
Bestätigen Ihrer Auswahl den Auswahlregler des Geräts nach unten oder
drücken Sie die Taste SELECT der Fernbedienung. Anschließend werden
die Datenschutzbestimmungen angezeigt. Besuchen Sie für genauere
Informationen zu den Datenschutzbestimmungen die unten genannte
Website. Drücken Sie zum Akzeptieren den Auswahlregler des Geräts nach
unten oder drücken Sie die Taste SELECT der Fernbedienung.
1. Drehen Sie zum Starten des Einrichtungsassistenten am Auswahlregler
oder wählen Sie mit den Tasten ⏮ oder ⏭ „YES“ aus. Bestätigen Sie Ihre
Auswahl, indem Sie den Auswahlregler nach unten drücken oder die
Taste SELECT der Fernbedienung drücken.
2. Im nächsten Schritt kann das Zeitformat ausgewählt werden. Wählen
Sie die gewünschte Einstellung „12“ oder „24“ und bestätigen Sie Ihre
Auswahl durch Drücken des Auswahlreglers oder der Taste SELECT der
Fernbedienung.
3. Sie haben nun die Möglichkeit einzustellen, welche Quelle (DAB/
FM/Netzwerk/kein Update) genutzt werden soll, um Uhrzeit und
Datum automatisch aktualisieren zu lassen. Sollten Sie „Update from
Network (Update aus Netzwerk) ausgewählt haben, wählen Sie im
nächsten Schritt die richtige Zeitzone aus, um zu gewährleisten, dass
die Uhrzeit richtig angezeigt wird. Wählen Sie anschließend aus, ob die
Sommerzeiteinstellung ein- oder ausgeschaltet sein soll.
4. Im nächsten Schritt haben Sie die Möglichkeit festzulegen, ob das Gerät
im Standbymodus mit dem Internet verbunden bleiben soll. Drehen Sie
am Auswahlregler des Geräts oder drücken Sie die Tasten ⏮ oder ⏭ um
„YES“ (ja) auszuwählen. Drücken Sie anschließend zum Bestätigen Ihrer
Auswahl den Auswahlregler des Geräts nach unten oder drücken Sie die
Taste SELECT der Fernbedienung.
5. Ihr Radio sucht nun nach drahtlosen Netzwerken. Dies kann einige
Sekunden in Anspruch nehmen. Anschließend wird eine Liste aller
verfügbaren Netzwerke auf dem Bildschirm angezeigt. Wählen Sie das
gewünschte WLAN-Netzwerk aus. Nutzen Sie zur Passworteingabe
entweder WPS oder geben Sie das Passwort direkt auf dem Bildschirm
14
DE
des Radios ein.
Verbindungsherstellung durch Verwendung der WPS-Taste Ihres
Routers
Die Verwendung der WPS-Taste (WLAN geschützte Einrichtung) Ihres
Routers ist ein schneller und einfacher Weg, Ihr Radio mit dem WLAN-
Netzwerk zu verbinden, ohne ein Passwort eingeben zu müssen. Wählen Sie
eine der nachfolgenden Verbindungsmethoden aus:
WPS-Taste
Wenn Ihr Router über eine WPS-Taste verfügt, sehen Sie vorne am
Netzwerknamen [WPS].
1. Wählen Sie mit den Tasten
„Pushbutton“ (Drucktaste) aus
und bestätigen Sie anschließend Ihre Auswahl durch Drücken der Taste
SELECT.
2. Auf dem Bildschirm wird eine Nachricht angezeigt, in welcher Sie dazu
aufgefordert werden, die WPS-Taste Ihres Routers zu drücken. Drücken
Sie die WPS-Taste Ihres Routers. Ziehen Sie die Bedienungsanleitung
Ihres Routers zu Rate, falls Sie sich unsicher sein sollten, um welche
Taste es sich handelt.
3. Drücken Sie anschließend zum Bestätigen die Taste SELECT. Das Radio
verbindet sich dann mit dem Router. Dieser Vorgang kann einige
Sekunden in Anspruch nehmen.
Passworteingabe
Das Radio generiert ein 8-stelliges Passwort. Geben Sie dieses Passwort am
Router oder dem Zugangsgerät ein.
Verbindungsherstellung durch Nutzung des WLAN-Passworts
Falls Ihr Router nicht über eine WPS-Taste verfügt, werden Sie dazu
aufgefordert, das WLAN-Passwort einzugeben. Sollte Ihr Gerät über die
WPS-Funktion verfügen, Sie möchten aber dennoch das WLAN-Passwort
zur Verbindungsherstellung nutzen, wählen Sie „SKIP WPS“ (WPS
überspringen) aus.
1. Drücken Sie zur Auswahl der Zahlen/Buchstaben jeweils die Tasten
. Drücken Sie nach jeder Auswahl die Taste SELECT zum
Bestätigen der jeweiligen Zahl/ des jeweiligen Buchstabens.
2. Drücken Sie, nachdem Sie das Passwort vollständig eingegeben haben,
die Tasten , um „OK“ auf der rechten Bildschirmseite
auszuwählen.
3. Drücken Sie nach der erfolgreichen Verbindungsherstellung die Taste
SELECT, um die Einstellung zu verlassen.

15
DE
Die Einstellungen können jederzeit im Menü System Settings
(Systemeinstellungen) > Network (Netzwerk) > Network wizard
(Netzwerkassistent) angepasst werden. In dieser Bedienungsanleitung
werden die grundlegenden Schritte zur Bedienung dieses Geräts erklärt.
Falls nicht explizit genannt, beziehen sich alle BedienungsHinweise auf die
Bedienung des Geräts mit der Fernbedienung.

16
DE
SYSTEMEINSTELLUNGEN
Halten Sie die Taste MENU des Geräts gedrückt oder drücken Sie die Taste
MENU der Fernbedienung, um sich das Menü anzeigen zu lassen. Drehen
Sie am Drehregler des Geräts oder drücken Sie die Tasten der
Fernbedienung, um die Systemeinstellungen auszuwählen. Bestätigen Sie
Ihre Auswahl durch Drücken des Auswahlreglers am Gerät oder der Taste
SELECT auf der Fernbedienung.
Equalizer
Dieses Gerät unterstützt eine Vielzahl von Equalizern und Soundeekten.
Drücken Sie die Taste EQ, um in das Equalizermenü zu gelangen. Alternativ
haben Sie die Möglichkeit, während des Systemeinstellungsmodus die
Tasten
zu drücken, um Equalizer auszuwählen und anschließen
die Taste SELECT zum Bestätigen Ihrer Auswahl zu drücken.
1. Auf dem Bildschirm wird folgendes angezeigt: FLAT > CLASSIC > ROCK >
POP > JAZZ.
2. Wählen Sie die gewünschte Equalizereinstellung mit den Tasten
aus und bestätigen Sie Ihre Auswahl mit der Taste SELECT.
Streaming-Audioqualität
Die Anlage unterstützt verschiedene Audioqualitäten für verfügbare
Streamingdienste. Die tatsächliche Bitrate für jede Einstellungsstufe hängt
von dem verwendeten Streamingdienst ab.
Netzwerk
1. Drücken Sie während des Systemeinstellungsmodus die Tasten
, um „Network“ (Netzwerk) auszuwählen und drücken Sie
zum Bestätigen Ihrer Auswahl die Taste SELECT.
2. Wählen Sie mit den Tasten eine der unten aufgelisteten
Einstellungen aus und bestätigen Sie Ihre Auswahl durch Drücken der
Taste SELECT.
Netzwerkeinrichtungs-
assistent
SSID – wählen Sie das gewünschte drahtlose
Netzwerk aus. Rescan (erneute Suche) – Suche
nach verfügbaren Netzwerken. Manuelle Ein-
stellung – wählen Sie ein drahtloses Netzwerk
aus mit DHCP aktiviert/deaktiviert.
17
DE
PBC WLAN-Einrichtung
Wählen Sie auf Ihrem Gerät WPS aus und
drücken Sie die WPS-Taste des Modems/Rou-
ters, mit welchem Sie sich verbinden möchten.
Drücken Sie zum Fortsetzen den Auswahlreg-
ler des Geräts nach unten oder drücken Sie die
Taste SELECT der Fernbedienung.
Einstellungen
anzeigen
Zeigt die Einstellungen auf dem Bildschirm an.
Manuelle Einstellung
Wählen Sie ein drahtloses Netzwerk aus mit
DHCP aktiviert/deaktiviert.
NetRemote PIN-
Einrichtung
Zur Festlegung eines Passworts, welches vor
der Verbindungsherstellung des Geräts mit
einem Netzwerk eingegeben werden muss.
Netzwerkprol Zeigt das verbundene Netzwerk an.
Netzwerkverbindung
aufrecht erhalten
Festlegen, on das Gerät im Standbymodus/ in
anderen Modi mit dem Netzwerk verbunden
bleibt.
3. Drücken Sie die Taste BACK auf dem Gerät oder der Fernbedienung, um
die Einstellung abzubrechen und zum vorherigen Menü zu gelangen.
Uhrzeit/Datum
Uhrzeit/Darum können automatisch eingestellt werden, sobald das
Gerät sich mit dem Internet oder einem DAB-/ FM-Sender mit Uhrzeit-/
Datumsinformationen verbindet. Es besteht ebenfalls die Möglichkeit,
Uhrzeit und Datum manuell anzupassen. Drücken Sie auf der Fernbedienung
die Taste CLOCK, um in das Menü zur Anpassung von Uhrzeit und Datum zu
gelangen.
Alternativ besteht die Möglichkeit, während des Systemeinstellungsmenüs
durch Drücken der Tasten
„Time/Date“ (Uhrzeit/Datum)
auszuwählen und Ihre Auswahl durch Drücken der Taste SELECT zu
bestätigen. Wählen Sie mit den Tasten „Set Time/Date“
(Uhrzeit/Datum anpassen) aus und bestätigen Sie Ihre Auswahl durch
Drücken der Taste SELECT.
1. Die Datumsziern blinken auf dem Bildschirm auf.
2. Drücken Sie die Tasten zur Anpassung des Tags die Taste
SELECT zum Bestätigen.
3. Wiederholen Sie Schritt 2 für die Einstellung von Monat/Jahr/Stunde/
Minute.
4. Die Datums- und Uhrzeiteinstellung ist nun abgeschlossen.
18
DE
Drücken Sie für weitere Einstellungen im Menü „Time/Date“ (Uhrzeit/
Datum) die Tasten und wählen Sie aus den untenstehenden
Einstellungen aus. Bestätigen Sie Ihre Auswahl durch Drücken der Taste
SELECT.
Automatisches Update DAB/FM/Netzwerk/kein Update
Format einstellen 12/ 24 Stundenformat
Zeitzone einstellen
Wählen Sie eine Zeitzone aus (nur verfügbar,
wenn das Update aus dem Netzwerk
ausgewählt wurde).
Sommerzeit
Aktivieren/Deaktivieren Sie die Sommerzeit
(nur verfügbar, wenn das Update aus dem
Netzwerk ausgewählt wurde).
Hinweis: Werkseitig eingestellt ist „Update from Network“ (Update aus dem
Netzwerk). Wenn Sie die Uhrzeit manuell einstellen möchten, empehlt es
sich, die automatische Aktualisierung auszuschalten.
Zeit bis zum automatischen Ausschalten festlegen
Mithilfe der Funktion „Inactive Standby“ können Sie den Zeitraum festlegen,
nach welchem das Gerät im Wiedergabemodus ausgeschaltet werden soll.
1. Drücken Sie während des Systemeinstellungsmodus die Tasten
, um „Inactive Standby“ auszuwählen und drücken Sie zum
Bestätigen Ihrer Auswahl die Taste SELECT.
2. Drücken Sie zur Auswahl vom Aus, 2 Stunden, 4 Stunden, 5 Stunden und
6 Stunden die Tasten . Bestätigen Sie Ihre Auswahl durch
Drücken der Taste SELECT
Sprache
1. Drücken Sie während des Systemeinstellungsmodus die Tasten
, um „Language“ auszuwählen und drücken Sie zum
Bestätigen Ihrer Auswahl die Taste SELECT.
2. Drücken Sie zur Auswahl der gewünschten Sprache die Tasten
. Bestätigen Sie Ihre Auswahl durch Drücken der Taste
SELECT.
19
DE
Auf Werkseinstellung zurücksetzent
Es kann, insbesondere nach einem Umzug, vorkommen, dass Sie das Gerät
auf Werkseinstellung zurücksetzen möchten. Sollten Sie Empfangsprobleme
haben, empehlt es sich, das Gerät auf Werkseinstellung zurückzusetzen
und es erneut zu versuchen. Wenn Sie in einen anderen Landesteil ziehen
kann es vorkommen, dass lokale und nationale DAB-Sender, welche Sie
zuvor gespeichert hatten, dort nicht mehr verfügbar sind.
1. Drücken Sie während des Systemeinstellungsmodus die Tasten
, um „Factory Reset“ auszuwählen und drücken Sie zum
Bestätigen Ihrer Auswahl die Taste SELECT.
2. Drücken Sie zur Auswahl von „Yes“ die Tasten ⏮/⏭. Bestätigen Sie
Ihre Auswahl durch Drücken der Taste SELECT, oder wählen Sie zum
Abbrechen „No“ aus.
Hinweis: Wenn das Gerät auf Werkseinstellung zurückgesetzt wird, werden
alle gespeicherten Sender gelöscht.
Softwareupdate
1. Drücken Sie während des Systemeinstellungsmodus die Tasten
, um „Software Update“ auszuwählen und drücken Sie zum
Bestätigen Ihrer Auswahl die Taste SELECT.
2. Drücken Sie zur Auswahl von „Auto-check setting“ (automatisches Prüfen
auf Updates) oder „Check now“ (jetzt prüfen) die Tasten .
Bestätigen Sie Ihre Auswahl durch Drücken der Taste SELECT.
Hinweis: Stellen Sie vor dem Aktualisieren sicher, dass der Netzstecker
des Radios richtig in der Steckdose eingesteckt ist und dass die
Stromverbindung stabil ist. Wenn die Stromverbindung während eines
Softwareupdates unterbrochen wird, kann die zu funktionalen Störungen
und/oder Schäden am Gerät führen kann.
Einrichtungsassistent
Der Einrichtungsassistent kann in den Systemeinstellungen ausgewählt
werden. Der Einrichtungsassistent kann für Uhrzeit/ Datum und Netzwerk
durchlaufen werden. Sobald der Einrichtungsassistent beendet ist, ist das
Radio betriebsbereit.
Info
1. Drücken Sie während des Systemeinstellungsmodus die Tasten
, um „Info“ auszuwählen und drücken Sie zum Bestätigen
Ihrer Auswahl die Taste SELECT.
2. Softwareversion, Radio-ID und Gerätename werden auf dem Bildschirm
angezeigt.
20
DE
Datenschutzerklärung
1. Drücken Sie zum Anzeigen der Datenschutzseite zunächst die Taste
MENU. Wählen Sie anschließend System settings (Systemeinstellungen)
– Privacy policy (Datenschutzerklärung) aus.
2. Nach dem Zurücksetzen auf Werkseinstellung muss die
Datenschutzerklärung erneut akzeptiert werden.
Hintergrundbeleuchtung
1. Drücken Sie während des Systemeinstellungsmodus die Tasten
, um „Backlight“ auszuwählen und drücken Sie zum
Bestätigen Ihrer Auswahl die Taste SELECT.
2. Drücken Sie für weitere Einstellungen in diesem Menü die Tasten
. Bestätigen Sie Ihre Auswahl durch Drücken der Taste
SELECT.
Betriebsmodus Hoch/ mittel/ niedrig
Standbymodus
Abschaltung: Aus/ 10 Sek/ 30 Sek/ 60 Sek
Standbystufe: Hoch/ mittel/ niedrig/ aus
Alternativ können Sie zur Anpassung der Hintergrundbeleuchtung mehrfach
die Taste DIMMER auf der Fernbedienung drücken.
Hinweis: Wenn Sie bei Abschaltung „Aus“ ausgewählt haben, bleibt
die Hintergrundbeleuchtung im Standbymodus genauso hell wie im
Betriebsmodus und kann nicht mit der Fernbedienung angepasst werden.
INTERNETRADIO
Damit Sie Internetradio hören können, muss Ihr Gerät mit dem Internet
verbunden sein. Versuchen Sie das Radio so nah wie möglich am Router
zu platzieren, um die besten Verbindungsgeschwindigkeiten zu erreichen.
Sobald der Internetradiomodus ausgewählt wird, verbindet sich das
Gerät mit dem Frontier Silicon Internet Radioportal, um eine Senderliste
herunterzuladen. Sobald ein Sender ausgewählt wurde, verbindet sich das
Radio direkt mit diesem Sender.
Drücken Sie die Taste MODE auf dem Gerät oder der Fernbedienung, um
Internetradio auszuwählen.
Um im Internetradiomodus in das Menü zu gelangen, die Taste MENU
des Geräts oder die Taste MENU auf der Fernbedienung. Sie können
zwischen Folgendem wählen: Last listened (Zuletzt gehört), System settings
21
DE
(Systemeinstellungen) und Main menu (Hauptmenü). Drücken Sie zur
Auswahl die Tasten und bestätigen Sie Ihre Auswahl mit der
Taste SELECT.
Wenn der Internetradiomodus neu gestartet wird, wird der zuletzt gehörte
Sender automatisch ausgewählt. Drücken Sie die Taste BACK, um zur
Senderliste zurückzugelangen.
Zuletzt gehört
1. Drücken Sie die Tasten
, um den Senderverlauf der zuletzt
gehörten Sender aufzurufen.
2. Wählen Sie mit den Tasten aus den untenstehenden
Optionen aus und bestätigen Sie Ihre Auswahl durch Drücken der Taste
SELECT.
Senderliste
Wenn Sie das Radio zum ersten Mal im Internetradiomodus verwenden,
wird dieses sich in der Senderliste benden. Wählen Sie mit den Tasten
aus einer der untenstehenden Optionen aus und bestätigen Sie
Ihre Auswahl durch Drücken der Taste SELECT.
Länder
Sie können speziell nach Sendern aus Ihrem Land
suchen. Innerhalb dieser Reichweite wird ebenfalls
das lokale Radio angezeigt.
Suche
Sie können zur Sendersuche eine Vielzahl von
Schlüsselwörtern verwenden. Der Name und die
Beschreibung des von Ihnen ausgewählten Senders
wird auf dem Bildschirm angezeigt.
Standort
Sie können Sender aus einer Liste verfügbarer
Länder auswählen.
Beliebt
Wählen Sie einen Sender aus der Liste der
beliebtesten Sender weltweit aus.
Entdecken
Wählen Sie Sender aus verschiedenen
Menükategorien aus: Land, Genre oder Sprache.
Drücken Sie die Taste BACK auf dem Gerät oder der Fernbedienung, um in
Menü eine Stufe zurückzugelangen.
22
DE
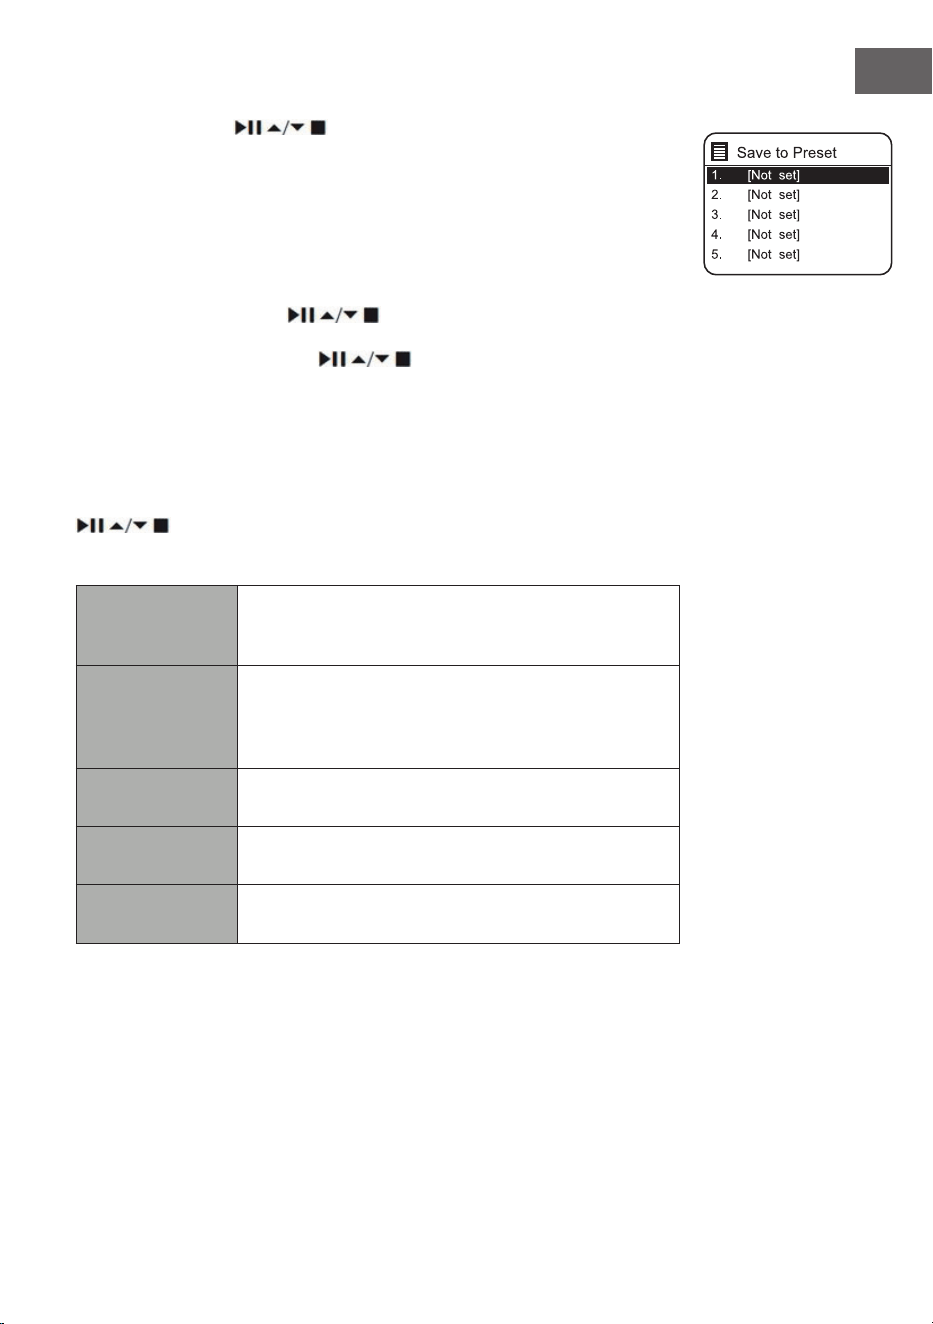
Sender speichern
Gespeicherte Internetradiosender werden innerhalb des Radios gespeichert
und es kann nicht von anderen Radios aus darauf zugegrien werden.
1. Damit ein Internetradiosender gespeichert werden kann, muss dieser
zunächst aufgerufen werden. Halten Sie die Taste MEMORY auf dem
Gerät oder die Taste PRESET auf der Fernbedienung so lange gedrückt,
bis auf dem Bildschirm „Save to Preset“ (Sender gespeichert) angezeigt
wird.
2. Wählen Sie durch Drehen am Auswahlregler oder drücken der Tasten
auf der Fernbedienung einen der 30 Speicherplätze aus, um
den aktuellen Sender dort zu speichern und bestätigen Sie Ihre Auswahl
durch Drücken des Auswahlreglers am Gerät oder der Taste SELECT der
Fernbedienung.
Einen gespeicherten Sender aufrufen
1. Drücken Sie zum Aufrufen eines gespeicherten Senders die Taste
MEMORY auf dem Gerät oder die Taste PRESET auf der Fernbedienung
und wählen Sie anschließend mit dem Auswahlregler am Gerät oder den
Tasten
der Fernbedienung den gewünschten gespeicherten
Sender aus.
2. Drücken Sie den Auswahlregler des Geräts nach unten oder drücken Sie
die Taste SELECT auf der Fernbedienung, um Ihre Auswahl zu bestätigen.
Alternativ können Sie auf der Fernbedienung gespeicherte Sender
folgendermaßen aufrufen:
• Drücken Sie mehrfach die Taste PRESET +/- um die verschiedenen
Sender aufzurufen oder drücken Sie die Zahlentasten, um direkt einen
der Sender auf Speicherplatz 1 – 10 aufzurufen.
• Sollte auf dem ausgewählten Speicherplatz kein Sender gespeichert
worden sein, wird auf dem Bildschirm „Preset empty“ angezeigt.
Das Speichern und das Aufrufen gespeicherter Sender funktioniert in den
Modi Internetradio/Podcasts, DAB und FM gleich.
Internetradio-Anzeigen
Mit jedem Drücken auf die INFO-Taste der Fernbedienung wechselt das
Display zwischen den folgenden Anzeigemodi:
Senderinfo/Beschreibung Sprache/Ort Bitrate/Soundformat/
Samplingrate Wiedergabepuer Datum
23
DE
PODCASTS
Damit Sie Internetradio hören können, muss Ihr Gerät mit dem Internet
verbunden sein. Versuchen Sie das Radio so nah wie möglich am Router zu
platzieren, um die besten Verbindungsgeschwindigkeiten zu erreichen.
Drücken Sie die Taste MODE auf dem Gerät oder der Fernbedienung, um in
das Modusmenü zu gelangen. Drehen Sie am Auswahlregler oder drücken
Sie die Tasten ⏮ oder ⏭ auf der Fernbedienung, um den Podcastmodus
auszuwählen. Drücken Sie zum Bestätigen Ihrer Auswahl den Auswahlregler
nach unten oder drücken Sie die Taste SELECT auf der Fernbedienung.
Zuletzt gehört
Drücken Sie die Tasten
, um den Senderverlauf der zuletzt
gehörten Sender aufzurufen und drücken Sie zum Bestätigen die Taste
SELECT.
Podcastliste
Wenn das Radio neu gestartet wird, werden die zuletzt gehörten Sender
automatisch ausgewählt. Drücken Sie die Taste BACK, um in die Podcastliste
zurückzugelangen.
Wenn Sie das Radio zum ersten Mal im Podcastmodus verwenden, wird
dieses sich in der Podcastliste benden. Wählen Sie mit den Tasten
aus einer der untenstehenden Optionen aus und bestätigen Sie
Ihre Auswahl durch Drücken der Taste SELECT.
Länder
Sie können speziell nach Podcasts aus Ihrem Land
suchen. Innerhalb dieser Reichweite wird ebenfalls
das lokale Radio angezeigt.
Suche
Sie können zur Podcastsuche eine Vielzahl von
Schlüsselwörtern verwenden. Der Name und die
Beschreibung des von Ihnen ausgewählten Podcasts
wird auf dem Bildschirm angezeigt.
Standort
Sie können Podcasts aus einer Liste verfügbarer
Länder auswählen.
Entdecken
Wählen Sie Podcasts aus verschiedenen
Menükategorien aus: Land, Genre oder Sprache.
Sender speichern und aufrufen
Siehe Abschnitte „Sender speichern“ und „einen gespeicherten Sender
aufrufen“ im Bereich „Internetradio“.

24
DE
SPOTIFY CONNECT
Verwende dein Smartphone, Tablet oder deinen Computer als
Fernbedienung für Spotify. Auf spotify.com/connect erfährst du
mehr.
Lizenzen
Die Spotify Software unterliegt Drittanbieter-Lizenzen, die Sie hier nden:
https://www.spotify.com/connect/third-party-licenses
25
DE
DAB RADIO
Drücken Sie die Taste MODE auf dem Gerät oder der Fernbedienung, um
in das Modusmenü zu gelangen. Drehen Sie zur Auswahl des DAB-Modus
am Auswahlregler des Geräts oder drücken Sie die Tasten ⏮ oder ⏭ der
Fernbedienung. Bestätigen Sie Ihre Auswahl, indem Sie den Auswahlregler
des Geräts nach unten drücken oder die Taste SELECT der Fernbedienung
drücken. Das Gerät wird in den DAB-Modus versetzt und startet die
automatische Suchfunktion. Während der Suche wird auf dem Bildschirm
„Scanning…“ (Suche) zusammen mit einem Balken angezeigt, welcher den
Fortschritt der Suche und die bisher gefundenen Sender anzeigt. Sobald
die automatische Sendersuche beendet ist, ruft das Gerät den ersten
alphanummerisch gefundenen Sender auf.
Die gefundenen Sender können in der Liste mit den Tasten
ausgewählt werden. Bestätigen Sie Ihre Auswahl durch Drücken der Taste
SELECT.
Senderliste
1. Drücken Sie während des DAB-Modus die Taste MENU, um in das DAB-
Menü zu gelangen.
2. Wählen Sie mit den Tasten
die Senderliste aus und drücken
Sie zum Bestätigen die Taste SELECT.
3. Eine Liste der DAB-Sender wird auf dem Bildschirm angezeigt.
Automatische Sendersuche
Drücken Sie die Taste SCAN|⏹ button auf dem Gerät oder SCAN der
Fernbedienung, um die automatische Sendersuche zu starten. Alternativ
können Sie die Taste MENU drücken und mit den Tasten „Scan“ aussuchen“
und Ihre Auswahl mit der Taste SELECT bestätigen.
1. Auf dem Bildschirm wird „Scanning…“ (Suche) und ein Fortschrittsbalken
angezeigt.
2. Alle gefundenen Sender werden automatisch gespeichert. Drücken Sie,
zur Auswahl eines Senders aus der Liste, die Tasten
und
bestätigen Sie Ihre Auswahl mit der Taste SELECT.
Manuelle Sendersuche
Es besteht ebenfalls die Möglichkeit, eine manuelle Sendersuche
durchzuführen. Dies ist vor allem beim Ausrichten der Antenne oder
beim hinzufügen von Sendern, die bei der automatischen Sendersuche
übersprungen wurden, sehr hilfreich.
1. Drücken Sie die Taste MENU, um das Menü aufzurufen.
2. Drücken Sie zur Auswahl von „manual tune“ (manuelle Sendersuche) die
Tasten
und drücken Sie zum Bestätigen die Taste SELECT.
3. Auf dem Bildschirm werden Multiplex 5A bis 13 F angezeigt.
DAB
radio
DAB Radi o
Scan
Stations: 0
Scanning
26
DE
4. Drücken Sie zur Auswahl des Senders die Tasten und
drücken Sie zum Bestätigen die Taste SELECT.
5. Kehren Sie zur Wiedergabe von gefundenen Sendern zum
Wiedergabebildschirm zurück und wählen Sie mit den Tasten
den gewünschten Sender aus der Wiedergabeliste aus.
Drücken Sie zum Bestätigen die Taste SELECT.
Ungültige Sender löschen
Nicht verfügbare Sender können aus der Senderliste gelöscht werden.
1. Drücken Sie während des DAB-Modus die Taste MENU und wählen Sie
mit den Tasten
„Prune invalid“ (ungültige Sender löschen)
aus und bestätigen Sie Ihre Auswahl durch Drücken der Taste SELECT.
2. Wählen Sie mit den Tasten ⏮ oder ⏭ „Yes“ (ja) aus und bestätigen
Sie Ihre Auswahl durch Drücken der Taste SELECT. Wählen Sie zum
Abbrechen „No“ (nein) aus.
DRC (Dynamische Bereichskompression)
Wenn Sie Musik mit einem hohen Dynamikbereich in lauter Umgebung
hören, kann es hilfreich sein, den Dynamikbereich zu komprimieren.
1. Drücken Sie während des DAB-Modus die Taste MENU und wählen Sie
mit den Tasten
„DRC“ aus. Drücken Sie zum Bestätigen Ihrer
Auswahl die Taste SELECT.
2. Wählen Sie mit den Tasten „DRC hoch/niedrig/aus“ aus und
bestätigen Sie Ihre Auswahl durch Drücken der Taste SELECT.
Senderreihenfolge
Sie können sich die Sender in der Senderliste in einer bestimmten
Reihenfolge sortieren lassen.
1. Drücken Sie im DAB-Modus due Taste MENU und wählen Sie mit
den Tasten
„Station order“ (Senderreihenfolge) aus und
bestätigen Sie Ihre Auswahl durch Drücken der Taste SELECT.
2. Wählen Sie mit den Tasten Alphanummerisch/ Ensemble
aus und bestätigen Sie Ihre Auswahl durch Drücken der Taste SELECT.
DAB-Anzeigemodi
Jedes Mal, wenn Sie auf dem Gerät die Taste MENU oder auf der
Fernbedienung die Taste INFO drücken, werden auf dem Bildschirm die
folgenden Anzeigemodi angezeigt:
DLS – Programmart – Ensemble/Frequenz – Signalfehler/Stärke – Bitrate/
Codec/Sender – Datum

27
DE
DLS (dynamisches Labelsegment)
Dabei handelt es sich um eine Rolltestnachricht mit Echtzeitinformationen
wie beispielsweise Liedtitel, Schlagzeilen etc.
Programmart
Dies beschreibt den Stil oder das Genre eines ausgestrahlten Programms.
Ensemblename/ Frequenz
Zeigt den Namen des Multiplex an, welche den Sender enthält, den sie
gerade hören und dessen Frequenz. Ein Multiplex ist eine Ansammlung
von Radiosendern, welche gebündelt und auf einer Frequenz übertragen
werden. Es gibt sowohl nationale als auch lokale Multiplexen. Lokale
Multiplexen enthalten Sender, die für Ihr Gebiet spezisch sind.
Bitrate/ Codec/ Kanäle
Zeigt die digitale Audiobitrate, welche empfangen wird, an und gibt
zusätzliche Informationen über Audiocodes und Sendereinstellung.
Datum
Zeigt das aktuelle Datum an, welches automatisch vom Sender zur
Verfügung gestellt wird.
Sender Speichern und Aufrufen
Siehe Abschnitte „Sender speichern“ und „einen gespeicherten Sender
aufrufen“ im Bereich „Internetradio“.
28
DE
FM-RADIO
Drücken Sie die Taste MODE auf dem Gerät oder der Fernbedienung, um
in das Modusmenü zu gelangen. Drehen Sie zur Auswahl des FM-Modus
am Auswahlregler des Geräts oder drücken Sie die Tasten ⏮ oder ⏭ der
Fernbedienung. Bestätigen Sie Ihre Auswahl, indem Sie den Auswahlregler
des Geräts nach unten drücken oder die Taste SELECT der Fernbedienung
drücken. Auf dem Bildschirm wird die Frequenz angezeigt.
Automatische Sendersuche
Drücken Sie die Taste SCAN|⏹ auf dem Gerät oder SCAN der
Fernbedienung, um die automatische Sendersuche zu starten. Sobald ein
Sender gefunden wurde, wird die Sendersuche automatisch gestoppt.
Halten Sie die Tasten
gedrückt, um die Suche nach einem
Sender zu starten.
Hinweis: Es kann vorkommen, dass bei der Sendersuche Sender mit
schwachem Signal übersprungen werden.
Manuelle Sendersuche
Drehen Sie für die manuelle Sendersuche am Auswahlregler des Geräts
oder drücken Sie mehrfach die Tasten
der Fernbedienung, bis
Sie die gewünschte Frequenz erreicht haben.
Hinweis: Es kann im FM-Modus notwendig sein, für jeden Sender mit dem
Auswahlregler des Geräts oder den Tasten
der Fernbedienung
eine Feineinstellung durchzuführen. Durch jedes Drücken wird die Frequenz
um 0,05 MHz angepasst. Wenn der Signalempfang schlecht ist, sollten Sie
die Position der Antenne anpassen oder das Radio an einen anderen Ort
stellen.
FM-Anzeigemodi
Jedes Mal, wenn Sie auf dem Gerät die Taste MENU oder auf der
Fernbedienung die Taste INFO drücken, werden auf dem Bildschirm die
folgenden Anzeigemodi angezeigt:
Radiotext – Programmart – Frequenz – Datum
RDS-Radio-
Text
Dabei handelt es sich um eine Rolltestnachricht mit
Informationen über das aktuelle Programm
Programmart Dies beschreibt den Stil oder das Genre eines
ausgestrahlten Programms.
FM
radio
FM Radi o

29
DE
Sendername/
Frequenz
Wenn ein RDS-Sender empfangen wird, wird der Name
des Senders angezeigt. Andernfalls wird die Frequenz
auf dem Bildschirm angezeigt.
Datum Zeigt das aktuelle Datum an, welches automatisch vom
Sender zur Verfügung gestellt wird.
Sucheinstellung
1. Drücken Sie die Taste MENU, um in das FM-Menü zu gelangen.
2. Wählen Sie mit den Tasten
„Scan Setting“ (Sucheinstellung)
aus und bestätigen Sie Ihre Auswahl durch Drücken der Taste SELECT.
3. Wählen Sie mit den Tasten ⏮ oder ⏭ „Yes“ (ja) aus, um nur nach Sendern
mit starkem Signalempfang zu suchen und bestätigen Sie Ihre Auswahl
durch Drücken der Taste SELECT.
Audioeinstellung
1. Drücken Sie, um in das Hauptmenü zu gelangen, die Taste MENU.
2. Wählen Sie mit den Tasten
„Audio setting“
(Audioeinstellung) aus und drücken Sie zum Bestätigen die Taste SELECT.
3. Wählen Sie mit den Tasten ⏮ oder ⏭ „Yes“ (ja) aus, um Sender nur in
Mono wiederzugeben oder wählen Sie „no“ (nein) aus, damit das Gerät
automatisch selbst zwischen Stereo und Mono auswählt.
4. Drücken Sie zum Bestätigen die Taste SELECT.
Alternativ besteht die Möglichkeit die Taste MONO/ST. Auf der
Fernbedienung zu drücken, um zwischen nur Mono oder Mono/Stereo hin
und her zu wechseln.
Sender Speichern und Aufrufen
Siehe Abschnitte „Sender speichern“ und „einen gespeicherten Sender
aufrufen“ im Bereich „Internetradio“.

30
DE
CD-PLAYER
Kompatible Disktypen
Disktyp Disk-Logo Medieninhalt
CD-R (Aufnahme-CD)
Audio
CD-RW (Mehrfach
beschreibbare CD)
Audio
Audio CD
(Kompaktdisk)
Audio
Am Gerät oder auf der Fernbedienung MODE drücken, um den CD-Player zu
aktivieren.
Wiedergabe
1. Drücken Sie die Auswurfe-Taste (
), um die CD-Lade zu önen.
2. Legen Sie die CD mit der bedruckten Seite nach oben in die Lade.
Drücken Sie die Taste , um die Lade mit der CD wieder zu schließen.
3. Wenn keine CD eingelegt wurde oder die CD nicht gelesen werden kann,
erscheint in der Anzeige "No disk".
4. Die Anzahl der Titel erscheint in der Anzeige, wenn die Wiedergabe
angehalten wurde. Drücken Sie nun , um den ersten Titel der CD/MP3
zu spielen.
Wiedergabe anhalten: Drücken Sie
, um die Wiedergabe anzuhalten.
Wiedergabe beenden: Zum Beenden der Wiedergabe drücken Sie
.
Zum nächsten Titel springen: Mit
und springen Sie zum vorigen
bzw. folgenden Titel. Halten Sie die Taste oder gedrückt, um in einem
Titel vor- oder zurückzuspulen.
Alternativ können Sie auch die Zierntasten auf der Fernbedienung
nacheinander drücken, um direkt zum gewünschten Titel zu springen.
Drücken und halten Sie die Tasten
/ auf der Fernbedienung, um eine
schnelle Wiedergabe vorwärts oder rückwärts durchzuführen.
Bei der Wiedergabe von MP3-Discs, deren Musik in verschiedenen Ordnern
gruppiert ist, können Sie mit den Tasten Preset/Ordner ∧/∨ auf der
Fernbedienung zum nächsten/vorherigen Ordner wechseln.
31
DE
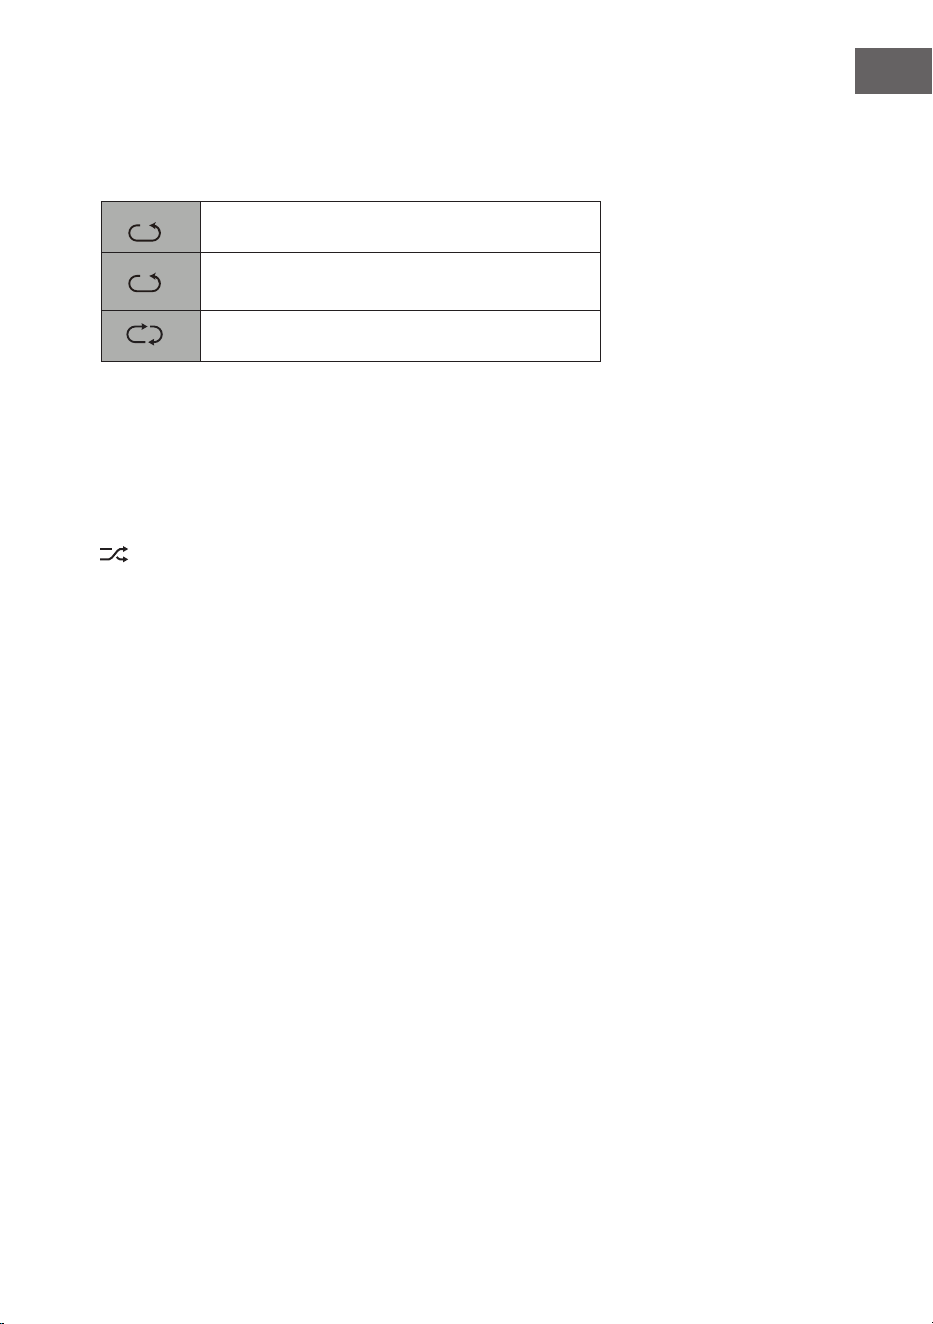
Wiederholung der Wiedergabe
1. Drücken Sie die Taste REPEAT wiederholt, um einen Wiedergabemodus
zu wählen.
1
F
Den aktuellen Titel wiederholen.
1
F
Alle Dateien im aktuellen Ordner wiederholen.
(nur für Daten-CDs)
1
F
Alle Titel wiederholen.
2. Drücken Sie die Taste REPEAT erneut, so dass die Wiederholen-Funktion
ausgeschaltet wird.
Zufallswiedergabe
Alle Titel können in einer zufälligen Reihenfolge wiedergegeben werden.
1. Drücken Sie auf der Fernbedienung RANDOM. In der Anzeige erscheint
. Alle Titel werden in zufälliger Reihenfolge wiedergegeben.
2. Mit und zum nächsten Titel in der Zufallswiedergabe springen.
3. Nachdem die Titel einmal abgespielt sind, wird die Wiedergabe
automatisch beendet.
4. Um die die Zufallswiedergabe zu beenden, drücken Sie während der
Wiedergabe RANDOM. Die normale Wiedergabe fortgesetzt.
Titel anspielen
1. Drücken Sie auf der Fernbedienung INTRO. In der Anzeige erscheint
"INTRO". Der CD-Player spielt die ersten 10 Sekunden eines jeden Titels
an.
2. Auf der Fernbedienung erneut INTRO drücken, um zur normalen
Wiedergabe zurückzukehren.
Programm erstellen
Sie können bis zu 20 Titel in einer beliebigen Reihenfolge programmieren.
Der Programmmodus wird im angehaltenden Betrieg (STOP) aktiviert.
1. Drücken Sie PRESET, um in den Programmodus zu gelangen.
2. Mit den Tasten
und wählen Sie den Titel aus, den Sie
programmieren möchten.
3. Den Titel mit SELECT bestätigen.
4. Wiederholen Sie die Schritte 2-3, um mehr Titel zu programmieren.
Wenn Sie die Auswahl der Titel abgeschlossen haben, drücken Sie ,
um mit der Wiedergabe der programmierten Titel zu beginnen.
Programm abbrechen: Drücken Sie zweimal
oder önen Sie die CD-
Lade und schließen sie wieder, um den Programmspeicher zu löschen.

32
DE
USB-WIEDERGABE
1. An der Vorderseite des Geräts bendet sich eine USB-Buchse. Wenn ein
USB-Gerät an das Gerät angeschlossen ist, drücken Sie wiederholt die
MODE-Taste am Gerät oder auf der Fernbedienung, um den USB-Modus
auszuwählen.
2. Das Gerät wird die Titel automatisch wiedergeben.
3. Alle Wiedergabefunktionen sind dieselben wie bei der Wiedergabe einer
MP3-CD.
Das Gerät kann im USB-Betrieb nur MP3-Dateiformate wiedergeben. Das
Gerät unterstützt USB-Geräte mit einer Speicherkapazität von bis zu 32 GB.
Das Gerät ist möglicherweise nicht mit allen USB-Geräten kompatibel; dies
ist kein Hinweis auf ein Problem mit dem Gerät.
Ein externes Gerät laden
Sie können Ihr Gerät mit einem USB-Kabel (nicht im Lieferumfang
enthalten) über die USB-Buchse an diesem Gerät auaden.
• Die maximale Stromstärke für das Auaden über USB beträgt 1A.
• Es wird nicht gewährleistet, dass sämtliche Geräte auadbar sind.

33
DE
BT-WIEDERGABE
Das Gerät verfügt über eine BT-Funktion, welche ein Signal innerhalb von 8
Metern empfangen kann. Verbinden Sie das Radio zum Musik hören via BT
mit einem externen BT-Gerät:
1. Drücken Sie die Taste MODE auf dem Gerät oder der Fernbedienung, um
den BT-Modus auszuwählen.
2. Wenn das Radio noch nicht mit einem BT-Gerät verbunden wurde,
beginnt das BT-Logo zu blinken, was bedeutet, dass sich das Radio im
Verbindungsmodus bendet.
3. Aktivieren Sie die BT-Funktion Ihres mobilen Endgerätes.
4. Wählen Sie aus der Liste der verfügbaren Geräte iTuner-320 BT aus.
5. Geben Sie, falls erforderlich, das Passwort „0000“ ein. Sobald die
Verbindung erfolgreich hergestellt wurde, hört das BT-Logo auf zu
blinken. Ihr mobiles Endgerät ist nun via BT mit dem Radio verbunden.
6. Durch Drücken und Halten der Taste PRESET am Gerät oder Drücken
der Taste PAIR auf der Fernbedienung, können bereits bestehende BT-
Verbindungen getrennt und die Verbindung zu einem anderen externen
BT-Gerät hergestellt werden.
7. Die BT-Funktion des Radios kann, durch Wechsel in einen anderen
Modus oder das Deaktivieren der BT-Verbindung Ihre mobilen
Endgeräts, verlassen werden.
Musikwiedergabe via BT
Es kann erforderlich sein, dass die Lautstärke sowohl am Radio als auch
am mobilen BT-Gerät angepasst werden muss. Drücken Sie die Taste
⏯ auf
dem Gerät oder der Fernbedienung, um die Musikwiedergabe zu Pausieren
oder Fortzusetzen. Mit den Tasten ⏮/⏭ kann der vorherige/ nächste Titel
übersprungen werden.
Hinweise:
• Der Betriebsbereich zwischen dem Radio und mobilen Endgeräten
beträgt circa 8 Meter.
• Wenn das BT-Signal schwach ist, kann die BT-Verbindung kurzzeitig
getrennt werden. Die Verbindung wird in diesem Fall, sobald möglich,
wiederhergestellt.
• Entfernen Sie zur Gewährleistung eines besseren Signalempfangs
Hindernisse zwischen dem Radio und dem BT-Gerät.
• Eine Kompatibilität mit allen Geräten und Medienarten wird nicht
garantiert.
• Einige Mobiltelefone trennen die BT-Verbindung, wenn Sie einen Anruf
annehmen. Die BT-Verbindung wird nach dem Beenden des Anrufs
automatisch wiederhergestellt. Dies weist nicht auf ein Problem des
Geräts hin.

34
DE
AUDIOEINGANG (LINE IN)
Sie können Musik von externen Quellen wiedergen.
1. Schließen Sie das externe Gerät an die Cinch-Anschlüsse auf der
Rückeseite an.
2. Drücken Sie wiederholt die MODE-Taste am Gerät, um den Line-In-
Modus auszuwählen.
3. Stellen Sie die gewünschte Lautstärke über den lautstärkeregler am
Gerät oder mittels +/- Tasten an der Fernbedienung ein.
4. Im Line-In-Modus können Sie Ihr Audiogerät direkt für die
Wiedergabefunktionen verwenden.
Suchen Sie Informationen zum Anschlusses des externen Autogeräts in
dessen Bedienungsanleitung.
NET-REMOTE
Das Gerät verfügt über die Funktion NetRemote, mithelfe welcher es über
eine App über ein Smartphone oder Tablet (iOS oder Android) bedient
werden kann. Laden Sie sich die App UNDOK im Google Play Store oder
Apple Store herunter und installieren Sie diese auf Ihrem Smartphone oder
Tablet.
Stellen Sie vor dem Starten der UNDOK-App sicher, dass sich das Radio und
das Smartphone oder Tablet im gleichen WLAN-Netzwerk benden. Starten
Sie nun die App. Die App sucht nach dem Starten im Netzwerk nach dem
Radio. Wählen Sie das Radio in der Liste der verfügbaren Geräte aus, um
die NetRemote-Verbindung herzustellen.
• Wenn das Smartphone oder Tablet die Verbindung zum Gerät einmal
hergestellt hat, wird die Verbindung beim nächsten Mal, sobald Sie die
App auf Ihrem mobilen Endgerät önen, automatisch hergestellt.
• Stellen Sie sicher, dass immer nur ein Gerät, welches über die App mit
dem Radio verbunden ist, gleichzeitig verbunden sein kann. Wenn Sie
sich über die App mit einem anderen Gerät mit dem Radio verbinden,
wird die Verbindung zum vorherigen Gerät getrennt.
• Wenn das mobile Endgerät zum ersten Mal mit dem Radio verbunden
wird, kann die Eingabe eines Passworts erforderlich sein. Das
werkseitig eingestellte Passwort ist „1234“. Das Passwort kann in
den Systemeinstellungen unter dem Abschnitt Network (Netzwerk)>
NetRemote PIN Setup (NetRemote Passworteinrichtung) geändert
werden.
35
DE
• Wählen Sie auf der Hauptseite der App den gewünschten Modus
aus. Der Modus kann sowohl über die App, als auch über das Gerät,
gesteuert werden.
VERWENDUNG VON KOPFHÖRERN
Hören Sie Musik bei der Verwendung von Kopfhörern nicht über
einen längeren Zeitraum mit hoher Lautstärke, da dies andernfalls zu
permanenten Hörschäden führen könnte.
• Verwenden Sie ausschließlich Kopfhörer mit einem 3,5 mm Stecker.
• Stecken Sie die Kopfhörer am Kopfhöreranschluss an der Vorderseite
des Geräts ein.
Das Hören von lauter Musik über einen längeren Zeitraum kann
Hörschäden verursachen. Vermeiden Sie hohe Lautstärken bei der
Verwendung von Kopfhörern, insbesondere dann, wenn Sie diese über
einen längeren Zeitraum verwenden.
ABSCHALTTIMER FESTLEGEN (SLEEP)
Mit dieser Funktion haben Sie die Möglichkeit einzustellen, dass sich
das Gerät nach einer von Ihnen festgelegten Zeitspanne selbst in den
Standbymodus versetzt.
1. Aktivieren Sie die Sleep-Funktion durch mehrfaches Drücken der Taste
SLEEP. Bei jedem Drücken wird in der nachfolgen Reihenfolge eine der
Optionen ausgewählt:
2. Hören Sie auf die Taste zu drücken, sobald die gewünschte Zeit auf
dem Bildschirm angezeigt wird. Die Sleep-Funktion wird dann nach 2
Sekunden aktiviert. Das Symbol wird auf dem Bildschirm angezeigt.
Neben dem Symbol wird ebenfalls die noch verbleibende Zeit bis zum
automatischen Ausschalten angezeigt.
3. Sobald der Timer abgelaufen ist, wird das Gerät in den Standbymodus
versetzt. Wenn Sie die Sleep-Funktion deaktivieren möchten, wenn der
Timer noch nicht abgelaufen ist, drücken Sie so lange die Taste SLEEP,
bis auf dem Bildschirm „SLEEP OFF“ angezeigt wird
Sleep OFF
15 minutes
30 minutes
45 minutes
60 minutes
90 minutes
120 minutes
36
DE
Alternative Vorgehensweise:
1. Drücken Sie die Taste MENU, um in das Hauptmenü zu gelangen.
Wählen Sie mit den Tasten
Main menu (Hauptmenü) aus
und drücken Sie zum Bestätigen die Taste SELECT.
2. Wählen Sie mit den Tasten Sleep aus und drücken Sie zum
Bestätigen die Taste SELECT.
3. Wählen Sie mit den Tasten den gewünschten Sleep-Timer
aus und drücken Sie zum Bestätigen die Taste SELECT.
WECKER STELLEN
1. Sobald Sie die Taste TIMER auf der Fernbedienung drücken, wird auf
dem Bildschirm „Alarm(1 oder 2): O [hh:mm]“ angezeigt.
2. Wählen Sie mit den Tasten Alarm 1 oder Alarm 2 aus und
drücken Sie zum Bestätigen Ihrer Auswahl die Taste SELECT.
Wählen Sie mit den Tasten die nachfolgenden Parameter aus
und bestätigen Sie diese jeweils durch Drücken der Taste SELECT.
Aktivieren Aus/ täglich/ einmal/ Wochenende/ Wochentage
Uhrzeit Aktivierungszeit des Alarms
Modus Summen/ Internetradio/ DAB/ FM
Voreinstellung Zuletzt gehörter Sender
Lautstärke 0 – 32
Speichern
Speichern und bestätigen Sie die
Alarmeinstellung
3. Wählen Sie „Save“ aus und drücken Sie zum Speichern der von Ihnen
vorgenommenen Einstellung die Taste SELECT. Auf dem Bildschirm wird
„Alarm Saved“ angezeigt. Sobald der Alarm eingestellt wurde, erscheint
das Alarmsymbol auf dem Bildschirm.
4. Drücken Sie zum Ausschalten des Alarms den Lautstärkeregler am Gerät
oder die Taste ALARM der Fernbedienung.
Alarm abbrechen
1. Sobald Sie die Taste TIMER auf der Fernbedienung drücken, wird auf
dem Bildschirm „Alarm(1 oder 2): Off [hh:mm]“ angezeigt.
2. Wählen Sie mit den Tasten
Alarm 1 oder Alarm 2 aus und
drücken Sie zum Bestätigen Ihrer Auswahl die Taste SELECT.
3. Wählen Sie mit den Tasten „Enable“ (aktiveren) aus und
bestätigen Sie durch Drücken der Taste SELECT.

37
DE
4. Wählen Sie mit den Tasten „Off“ (aus) aus und bestätigen
Sie durch Drücken der Taste SELECT.
5. Wählen Sie „Save“ aus und drücken Sie die Taste SELECT, um Ihre
Einstellungen zu speichern.
6. Alternativ können Sie während des Standbymodus die Taste TIMER auf
der Fernbedienung mehrfach drücken, um Alarm 1 oder Alarm 2 ein- oder
auszuschalten.
Wenn innerhalb von ca. 15 Sekunden keine Taste gedrückt wird, verlässt das
Gerät automatisch den Timer-Einstellmodus.
38
DE
SPEZIELLE ENTSORGUNGSHINWEISE FÜR
VERBRAUCHER IN DEUTSCHLAND
Entsorgen Sie Ihre Altgeräte fachgerecht. Dadurch wird gewährleistet,
dass die Altgeräte umweltgerecht verwertet und negative Auswirkungen
auf die Umwelt und menschliche Gesundheit vermieden werden. Bei der
Entsorgung sind folgende Regeln zu beachten:
• Jeder Verbraucher ist gesetzlich verpichtet, Elektro- und
Elektronikaltgeräte (Altgeräte) sowie Batterien und Akkus
getrennt vom Hausmüll zu entsorgen. Sie erkennen die
entsprechenden Altgeräte durch folgendes Symbol der
durchgestrichene Mülltonne (WEEE-Symbol).
• Sie haben Altbatterien und Altakkumulatoren, die nicht vom Altgerät
umschlossen sind, sowie Lampen, die zerstörungsfrei aus dem
Altgerät entnommen werden können, vor der Abgabe an einer
Entsorgungsstelle vom Altgerät zerstörungsfrei zu trennen.
• Bestimmte Lampen und Leuchtmittel fallen ebenso unter das Elektro-
und Elektronikgesetz und sind dementsprechend wie Altgeräte zu
behandeln. Ausgenommen sind Glühbirnen und Halogenlampen.
Entsorgen Sie Glühbirnen und Halogenlampen bitte über den Hausmüll,
sofern sie nicht das WEEE-Symbol tragen.
• Jeder Verbraucher ist für das Löschen von personenbezogenen Daten
auf dem Elektro- bzw. Elektronikgerät selbst verantwortlich.
Rücknahmepicht der Vertreiber
Vertreiber mit einer Verkaufsäche für Elektro- und Elektronikgeräte von
mindestens 400 Quadratmetern sowie Vertreiber von Lebensmitteln mit
einer Gesamtverkaufsäche von mindestens 800 Quadratmetern, die
mehrmals im Kalenderjahr oder dauerhaft Elektro- und Elektronikgeräte
anbieten und auf dem Markt bereitstellen, sind verpichtet,
1. bei der Abgabe eines neuen Elektro- oder Elektronikgerätes an einen
Endnutzer ein Altgerät des Endnutzers der gleichen Geräteart, das
im Wesentlichen die gleichen Funktionen wie das neue Gerät erfüllt,
am Ort der Abgabe oder in unmittelbarer Nähe hierzu unentgeltlich
zurückzunehmen und
2. auf Verlangen des Endnutzers Altgeräte, die in keiner äußeren
Abmessung größer als 25 Zentimeter sind, im Einzelhandelsgeschäft
oder in unmittelbarer Nähe hierzu unentgeltlich zurückzunehmen; die
Rücknahme darf nicht an den Kauf eines Elektro- oder Elektronikgerätes
geknüpft werden und ist auf drei Altgeräte pro Geräteart beschränkt.

39
DE
• Bei einem Vertrieb unter Verwendung von Fernkommunikationsmitteln
ist die unentgeltliche Abholung am Ort der Abgabe auf Elektro- und
Elektronikgeräte der Kategorien 1, 2 und 4 gemäß § 2 Abs. 1 ElektroG,
nämlich „Wärmeüberträger“, „Bildschirmgeräte“ (Oberäche von mehr
als 100 cm²) oder „Großgeräte“ (letztere mit mindestens einer äußeren
Abmessung über 50 Zentimeter) beschränkt. Für andere Elektro- und
Elektronikgeräte (Kategorien 3, 5, 6) ist eine Rückgabemöglichkeit in
zumutbarer Entfernung zum jeweiligen Endnutzer zu gewährleisten.
• Altgeräte dürfen kostenlos auf dem lokalen Wertstohof oder in
folgenden Sammelstellen in Ihrer Nähe abgegeben werden: www.take-
e-back.de
• Für Elektro- und Elektronikgeräte der Kategorien 1, 2 und 4 bieten
wir auch die Möglichkeit einer unentgeltlichen Abholung am Ort der
Abgabe. Beim Kauf eines Neugeräts haben Sie die Möglichkeit, eine
Altgerätabholung über die Webseite auszuwählen.
• Batterien können überall dort kostenfrei zurückgegeben werden, wo sie
verkauft werden (z. B. Super-, Bau-, Drogeriemarkt). Auch Wertsto- und
Recyclinghöfe nehmen Batterien zurück. Sie können Batterien auch per
Post an uns zurücksenden. Altbatterien in haushaltsüblichen Mengen
können Sie direkt bei uns von Montag bis Freitag zwischen 08:00 und
16:00 Uhr unter der folgenden Adresse unentgeltlich zurückgeben:
Chal-Tec Fulllment GmbH
Norddeutschlandstr. 3
47475 Kamp-Lintfort
• Wichtig zu beachten ist, dass Lithiumbatterien aus Sicherheitsgründen
vor der Rückgabe gegen Kurzschluss gesichert werden müssen (z. B.
durch Abkleben der Pole).
• Finden sich unter der durchgestrichenen Mülltonne auf der Batterie
zusätzlich die Zeichen Cd, Hg oder Pb ist das ein Hinweis darauf, dass
die Batterie gefährliche Schadstoe enthält. (»Cd« steht für Cadmium,
»Pb« für Blei und »Hg« für Quecksilber).
Hinweis zur Abfallvermeidung
Indem Sie die Lebensdauer Ihrer Altgeräte verlängern, tragen Sie dazu
bei, Ressourcen eizient zu nutzen und zusätzlichen Müll zu vermeiden.
Die Lebensdauer Ihrer Altgeräte können Sie verlängern, indem Sie defekte
Altgeräte reparieren lassen. Wenn sich Ihr Altgerät in gutem Zustand
bendet, könnten Sie es spenden, verschenken oder verkaufen.

40
DE
HINWEISE ZUR ENTSORGUNG
Wenn es in Ihrem Land eine gesetzliche Regelung
zur Entsorgung von elektrischen und elektronischen
Geräten gibt, weist dieses Symbol auf dem Produkt
oder auf der Verpackung darauf hin, dass dieses
Produkt nicht im Hausmüll entsorgt werden darf.
Stattdessen muss es zu einer Sammelstelle für
das Recycling von elektrischen und elektronischen
Geräten gebracht werden. Durch regelkonforme
Entsorgung schützen Sie die Umwelt und die
Gesundheit Ihrer Mitmenschen vor negativen
Konsequenzen. Informationen zum Recycling
und zur Entsorgung dieses Produkts, erhalten
Sie von Ihrer örtlichen Verwaltung oder Ihrem
Hausmüllentsorgungsdienst.
Dieses Produkt enthält Batterien. Wenn es in Ihrem
Land eine gesetzliche Regelung zur Entsorgung
von Batterien gibt, dürfen die Batterien nicht im
Hausmüll entsorgt werden. Informieren Sie sich
über die örtlichen Bestimmungen zur Entsorgung
von Batterien. Durch regelkonforme Entsorgung
schützen Sie die Umwelt und die Gesundheit Ihrer
Mitmenschen vor negativen Konsequenzen.
KONFORMITÄTSERKLÄRUNG
Hersteller:
Chal-Tec GmbH, Wallstraße 16, 10179 Berlin,
Deutschland.
Importeur für Großbritannien:
Berlin Brands Group UK Limited
PO Box 42
272 Kensington High Street
London, W8 6ND
United Kingdom
Hiermit erklärt Chal-Tec GmbH, dass der
Funkanlagentyp iTuner CD der Richtlinie 2014/53/
EU entspricht. Der vollständige Text der EU-
Konformitätserklärung ist unter der folgenden
Internetadresse verfügbar: use.berlin/10032753

41
DE
Chal-Tec GmbH
Wallstr. 16t 10179 Berlin
www.chal-tec.com
Die Spotify-Software unterliegt den Nutzungsrechten von Drittanbietern,
die auf folgender Seite eingesehen werden können:
https://www.spotify.com/connect/third-party-licenses
Alle aufgeführten Marken sind Warenzeichen der jeweiligen Unternehmen.
Fehler und Auslassungen ausgenommen und technischen Änderungen
unterliegend. Unsere allgemeinen Geschäftsbedingungen nden
Anwendung.

43
EN
Technical Data 44
Safety Instructions 45
Device Description 47
Remote Control 48
Connection 51
Getting Started 52
System Settings 55
Internet Radio 59
Podcasts 61
Spotify Connect 62
DAB Radio 63
FM Operation 66
CD Operation 68
USB Operation 70
BT Operation 71
Audio Input 72
NetRemote 72
Using Headphones 73
Sleep Setting 73
Setting the Alarm 74
Disposal Considerations 76
Declaration of Conformity 76
CONTENTS
Dear Customer,
Congratulations on purchasing this device. Please
read the following instructions carefully and follow
them to prevent possible damages. We assume
no liability for damage caused by disregard of the
instructions and improper use. Scan the QR code
to get access to the latest user manual and more
product information.

44
EN
TECHNICAL DATA
Item number 10032753 10032754
Mains Adaptor 100-240 V ~ 50/60 Hz , 1 A
USB jack
5 V
, 1 A
Audio output 2 x 5 W RMS
FM Radio
Frequency range 87,5 MHz - 108 MHz
Compact Disc
Frequency Response 20 Hz - 20 Khz
DAB
Frequency range 174-240 MHz
WLAN
Standard
Frequency band
Maximum radio-frequency power
802.11 b/g/n
2412–2472MHz
19dBm
BT
Frequency band
Maximum radio-frequency power
2402–2480MHz
2dBm
Power consumption in Standby
Standard standby mode
Network standby mode
<1.00 W (Wi o)
<2.00 W (Wi on)

45
EN
SAFETY INSTRUCTIONS
General Safety Instructions
• Read all the instructions carefully before using the unit and keep them
for future reference.
• Check that the voltage marked on the rating label matches your mains
voltage.
• The unit must be placed on a at stable surface and should not be
subjected to vibrations.
• Do not place the unit on sloped or unstable surfaces as the unit may fall
o or tip over.
• The mains socket must be located near the unit and should be easily
accessible.
• Avoid extreme degrees of temperature, either hot or cold. Place the
unit well away from heat sources such as radiators or gas/electric res.
Avoid exposure to direct sunlight and other sources of heat.
• Never place any type of candle or naked ame on the top of or near the
unit.
• To reduce the risk of re, electric shock or product damage, do not
expose this unit to rain, moisture, dripping or splashing. No objects
lled with liquids, such as vases, should be placed on the unit.
• If you spill any liquid into the unit, it can cause serious damage. Switch
it o at the mains immediately. Withdraw the mains plug and consult
your dealer.
• To prevent the risk of electric shock or re hazard due to overheating,
ensure that curtains and other materials do not obstruct the ventilation
vents.
• Do not install or place this unit in a bookcase, built-in cabinet or in
another conned space. Ensure that a minimum of 10cm should be kept
around the unit for ventilation.
Safety
• Always disconnect the unit from the mains supply before connecting/
disconnecting other devices or moving the unit.
• Unplug the unit from the mains socket during a lightning storm.
• This unit will become warm when used for a long period of time. This is
normal and does not indicate a problem with the unit.
Mains Adapter
• Make sure the unit is not resting on top of the mains cable, as the
weight of the unit may damage the cable and create a safety hazard.
• If the mains cable is damaged it must be replaced by the manufacturer,
its service agent, or similarly qualied persons in order to avoid a
hazard.

46
EN
Interference
• Do not place the unit on or near appliances which may cause
electromagnetic interference. If you do, it may adversely aect the
operating performance of the unit, and cause a distorted sound.
Supervision
• Children should be supervised to ensure that they do not play with the
unit.
• Never let anyone especially children push anything into the holes, slots
or any other openings in the case - this could result in a fatal electric
shock.
Service/Maintenance
• To reduce the risk of electric shock, do not remove screws. The unit
does not contain any user serviceable parts.
• Leave all maintenance work to qualied personnel.
• Do not open any xed covers as this may expose dangerous voltages.
• Ensure to unplug the unit from the mains socket before cleaning.
• Do not use any type of abrasive pad or abrasive cleaning solutions as
these may damage the unit's surface.
• Do not use liquids to clean the unit.

47
EN
1 Disk tray
2 USB 5V 1A charging port
3 Earphone jack
4 Play/Pause button
5 STOP button
6 Prev. button
7 Next button
8 Display
9 Open/Close disk tray button
10 MENU button
11 PRESET button
12 MODE button
13 SCROLL|SELECT dial
14 VOLUME/Standby dial
15 Remote control Sensor
16 Mains connection cable
17 WLAN antenna
18 Audio output L/R (analogue, RCA jack)
19 Audio input L/R (analogue, RCA jack)
20 Digital output (optical)
21 Digital output (coaxial)
22 DAB/FM antenna
DEVICE DESCRIPTION
Front
Rear

48
EN
REMOTE CONTROL
1
15
16
17
18
19
21
22
23
24
25
26
2
3
4
5
6
7
8
9
10
11
12
13
14
20

49
EN
1 STANDBY button
2 EJECT CD button
3 TIMER button
4 SCAN button
5 Playback mode REPEAT
6 BT PAIR button
7 INFO button
8 Skip forward button
Navigate right button
9 STOP button
Navigate down button
10 PRESET button
11 MENU button
12 PRESET UP/DOWN
13 BACK button
14 MUTE button
15 MONO/STEREO button
16 Number pad
17 VOLUME +/– button
18 Equalizer button
19 Skip back button
Navigate left button
20 SELECT button
21 PLAY/PAUSE button
22 MODE button
23 INTRO button
24 RANDOM mode button
25 CLOCK button
26 SLEEP button
50
EN
Battery replacement for the remote control
1. Press down the battery cover at the arrow and push the battery cover
outwards in the direction of the arrow.
2. Insert 2 x AAA 1.5V batteries (not included). Make sure to match the (+)
and ( - ) ends of the battery with the (+) and ( - ) ends indicated in the
battery compartment.
3. Close the cover.
Handling the Battery
• Improper or incorrect use of batteries may cause corrosion or battery
leakage, which could cause re, personal injury or damage to property.
• Only use the battery type indicated in this manual.
• Do not dispose of the used battery as domestic waste. Dispose of it in
accordance with local regulations.
• Remove the battery from the remote control when not in use for a long
period of time, as corrosion or battery leakage may occur and result in
physical injury, and/or property damage, and/or re.
Remote control operation range
The remote control sensor on the front unit is sensitive to the remote
control’s commands up to a maximum of 4 metres away and within a
maximum of 60° arc.
Note that the operating distance may vary depending on the brightness of
the room.

51
EN
CONNECTION
1. The audio input/output (analogue), optical out (digital) and coaxial out
(digital) are available on the back of the unit to connect A/V amplier or
HiFi system.
2. Connect the antenna included in the supply to the antenna connection
and extend it to the desired length.
3. Connect the WLAN antenna included in the supply to the W-LAN socket
at the back of the unit for WIFI connection.
4. Unwind the mains cable to its full length. Connect the mains plug to the
mains socket. The unit is now connected and ready to use.
Be sure to connect the power cord to an AC outlet that supplies the
correct voltage. Hold the power plug when plugging it into an outlet or
unplugging it. Never pull or yank on the power cord.
5. To switch the unit o completely, unplug the mains cable from the mains
socket.
Network Connection
This product only supports wireless network connection for network access
and does not support wired LAN connection.
Wireless network
1. Check rst of all whether the control lamps (LINK/ACT) of your router
light up.
2. Proceed with the operations described in the below “Getting Started”. It
is recommended to run through the setup wizard in the System Settings
section.
This unit cannot be connected to a standalone modem directly. A router or a
modem incorporated with a router has to be used.
Since there are various connection congurations, follow the specications
and instructions of your telecommunication carrier, internet service
provider, and router setting guidebook.
52
EN
GETTING STARTED
This instruction manual explains the basic instruction for operating this
unit. Unless otherwise stated, all operations described are based on remote
control use.
Powering ON/OFF
1. Press the Volume| dial on the unit or the button on the remote
control to switch the unit on.
2. Press the Volume| dial on the unit or the button on the remote
control to switch the unit back to standby mode.
Selecting Modes
Press MODE button on unit or remote control to switch between Internet
radio, Podcasts, Spotify, DAB Radio, FM Radio, CD, USB, BT Audio and LINE
IN modes.
Alternatively
1. Press the MENU button on unit or remote control to display the function
main menu, then turn SCROLL|SELECT dial on unit or press
buttons on the emote control to select Main menu, and then press
SCROLL|SELECT dial on unit or press SELECT button on remote control
to conrm.
2. Turn SCROLL|SELECT dial on unit or press the buttons on remote control
to select target mode, and then press SCROLL|SELECT dial on unit or
press SELECT button on remote control to conrm.
When the unit is idle for approximately 15 minutes, it will automatically
switch to standby. To switch the unit o completely, remove the mains plug
from the main socket. Turn the unit o completely to save energy when not
in use.
Adjusting the Volume
• Turn the Volume| dial on the unit or press the VOL +/– buttons on the
remote control to adjust the volume.
• If you wish to turn the sound o, press the MUTE button on the remote
control. Press the MUTE button again or turn Volume| dial on the unit
or press the VOL +/– buttons on the remote control to resume normal
listening.
Navigating the Menu
1. Press and hold the MENU button on the unit or press the MENU button
on the remote control to access the menu.

53
EN
2. Turn the SCROLL|SELECT dial on the unit or press the
buttons on the remote control to select your choice.
3. Press the SCROLL|SELECT on the unit or SELECT button on the remote
control to conrm your selection.
Initial Set-Up
When you rst connect the unit to the mains socket, the display will
show the welcome screen then with language menu shown up, turn
SCROLL|SELECT dial on unit or press
buttons on remote
control to change the display language of your choice and press the
SCROLL|SELECT dial on unit or SELECT button on remote control to
conrm.
Then the privacy policy page will come up. Please visit the website
mentioned in the page for the details of the privacy policy. Press
SCROLL|SELECT dial on the unit or SELECT button on the remote control to
accept for next step.
1. To launch the initial Setup wizard, turn the SCROLL|SELECT dial on the
unit or ⏮ / ⏭ buttons on the remote control to conrm.
2. In the next step you can select the time format. Select the desired setting
[12] or [24] and press the SCROLL|SELECT dial on the unit or SELCT
button on the remote control to move on to the next step.
3. Here it is possible to select which source (DAB/FM/Network/No update)
the unit uses to obtain and update the time and date. If "Update from
Network" selected, proceed to the next step to select time zone to
ensure that the time is displayed correctly. And then select the "Daylight
savings" is [ON] or [OFF].
4. In the next step you can specify whether the product should remain
connected to the Internet when on standby. Turn the SCROLL|SELECT
dial on the unit or press ⏮ / ⏭ buttons on the remote to select [YES],
then press the SCROLL|SELECT dial on the unit or press SELECT button
on on the remote to conrm.
5. Your radio will now scan for your wireless network, this may take a
few seconds then a list of all the wireless networks will appear on the
screen. Select the WLAN network you know and whether to use WPS
(Push Button/Pin) or Skip WPS to enter the password using the displayed
keyboard.
Connecting using the WPS button on your router
Connecting using the WPS (Wi-Fi Protected Setup) button on your router
is a quick and easy way to connect your radio without having to type in a
password. Select one of the following connection methods:
54
EN
Push button
If your router has a WPS button you will notice [WPS] at the front of your
network name.
1. Press the
buttons to select Push Button, then press SELECT
button to conrm.
2. You will now see a message on the screen telling you to press the WPS
button on your router. Press the WPS button on your router. Check your
routers instruction manual if you are unsure which button is the WPS
button.
3. Press the SELECT button to conrm. Your radio will now connect to your
router, this may take a few seconds.
Pin (code number)
The radio generates an 8-digit code number. Enter this code number into
the wireless router or access device.
Connecting using your wireless network password
If your router has not got a WPS button you will now be asked to enter your
wireless network password, or you can select SKIP WPS which also take you
to the password screen.
1. Press
buttons to select each letter/number of your
password. Then press SELECT button to enter the selected letter/
number.
2. When you have entered your password, press buttons to
select OK on the right of the screen.
3. After your radio has connected, press SELECT button to exit the setup.
Settings can be changed at any time in Menu-System Settings - Network -
Network wizard: This instruction manual explains the basic instruction for
operating this unit. Unless otherwise stated, all operations described are
based on remote control use.
55
EN
SYSTEM SETTINGS
Press and hold the MENU button on the remote control to display the menu.
Turn the SCROLL|SELECT dial on the unit or the buttons on the
remote control to select System settings. Then press the SCROLL|SELECT
dial on the unit or the SELECT button on the remote control to conrm.
Equalizer
This system supports a variety of equalizers and sound eects.
Press the EQ button to access the Equaliser menu.
Alternatively:
During System settings mode, press the
buttons to select
Equaliser and then press the SELECT button to conrm.
1. The display will show : FLAT > CLASSIC > ROCK > POP > JAZZ:
2. Press the buttons to select and then press the SELECT
button to conrm.
Streaming audio quality
This system supports dierent audio quality for available streaming
services. The actual bit rate for each level depends on the service being
used.
1. During System settings mode, press
buttons to select
Streaming audio quality and then press the SELECT button to conrm.
2. The display will show : Low quality / Normal quality/ High quality. Press
buttons to select and then press the SELECT button to
conrm.
Network
1. During System Settings mode, press the
buttons to select
Network and press the SELECT button to conrm.
2. Press the buttons to select from the following settings, and
then press the SELECT button to conrm.
Network wizard
SSID – select the desire wireless network.
Rescan – Scan for available networks.
Manual cong – select wireless network with
DHCP enable/disable.
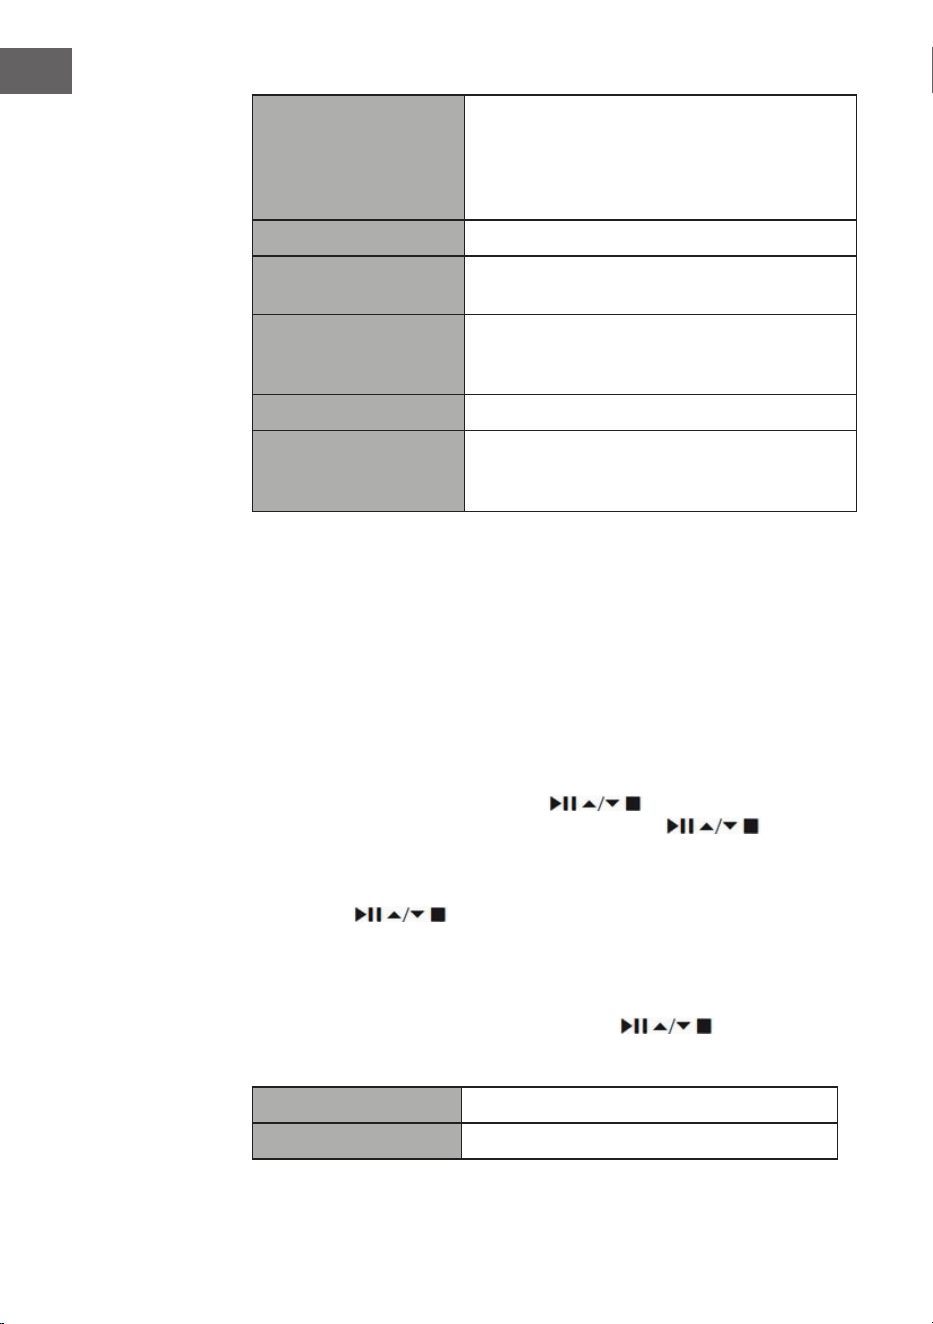
56
EN
PBC Wlan setup
Select WPS on the unit and press the WPS
button on the modem device that you wish to
connect with. Press SCROLL|SELECT dial on
unit or SELECT button on remote control to
continue.
View settings Display the setting on the unit.
Manual settings
Select wireless network with DHCP enable/
disable.
NetRemote PIN Setup
To dene a PIN number to be entered before
being able to connect to the unit remotely
over a network.
Network prole View the connected network.
Keep network
connected
Allows you to dene whether the device
remains connected to its network in Standby
mode and when not in Network radio mode.
3. Press the BACK button on the unit or remote control to cancel the setting
and return back to the previous menu.
Time/Date
The Time/Date can be automatically set once it has been connected to the
Internet, DAB or FM radio station with time/date information. You may also
adjust the Time/Date manually.
Press CLOCK button on remote control can access Set Time/Date menu to
adjust Time/Date.
During System settings mode, press
buttons to select Time/
Date and press the SELECT button to conrm. Press buttons to
select Set Time/Date and press the SELECT button to conrm.
1. The date digits will ash on the display.
2. Press the buttons to adjust the day and then press the
SELECT button to conrm.
3. Repeat above Step (2) to set the Month/Year/Hour/Minute.
4. The date and time settings are now complete.
For the other settings under Time/Date, press buttons to select
from the following options and then press the SELECT button to conrm.
Auto update DAB / FM / Network / No update.
Set format 12 / 24 hour format.

57
EN
Set timezone
Select a time zone. (Only available when
Auto update from Network is on.)
Daylight savings
Select daylight savings. (Only available
when Auto update from Network is on.)
The default auto time update setting is “Update from Network”. If you would
like to manually set the time, it is recommended to turn the Auto update
function o.
Inactive Standby
Use the Inactive Standby to turn o the unit after a certain time in play
mode.
1. During System settings mode, press the
buttons to select
Inactive Standby and then press the SELECT button to conrm.
2. The display will show : O > 2 hours > 4 hours > 5 hours > 6 hours
3. Press the buttons to select and then press the SELECT
button to conrm.
Language
1. During System settings mode, press the
buttons to select
Language and then press the SELECT button to conrm.
2. Press the buttons to change the display language of your
choice.
3. Press the SELECT button to conrm.
Factory Reset
There may be times when you need to reset your unit back to the factory
settings especially when you have moved house. If you experience
reception problems you may want to reset and try again.
If you move to another part of the country and pick up the local and national
DAB+ stations in that area, your previously tuned channels may no longer
be available.
1. During System settings mode, press the
buttons to select
“Factory reset”, and press the SELECT button to conrm.
2. Press the ⏮/⏭ buttons to select Yes, and press the SELECT button to
conrm or select No to cancel.
Note: After the system reset, all the tuned stations, Internet, DAB & FM
preset stations will be erased.
Software update
1. During System settings mode, press the
buttons to select
58
EN
Software update and then press the SELECT button to conrm.
2. Press the buttons to select Auto-check setting or Check now,
and then press the SELECT button to conrm.
Before downloading software, ensure that the radio is plugged into a
stable mains power connection. Interrupting the mains supply during
software download can lead to functional disturbances and/or damage
to the unit!
Setup wizard
The setup wizard is available in the system settings section; you can run
through this to congure settings for date/time and network. Once this has
nished, your radio is ready to use.
Info
1. During System settings mode, press the
buttons to select
Info and then press the SELECT button to conrm.
2. The software version, Radio ID and Friendly Name will show on the
display.
Privacy policy
1. To see the Privacy policy page, press MENU to go to System settings -
Privacy policy.
2. After Factory reset, you need to accept the Privacy policy again.
Backlight
1. During System settings mode, press the
buttons to select
Backlight and then press the SELECT button to conrm.
2. For the other settings under Backlight, press the buttons
to select the following options and then press the SELECT button to
conrm.
Operation Mode High / Medium/ Low
Standby Mode
Timeout O/ 10 sec / 30 sec / 60 sec
Standby Level High/Medium/Low/O
Alternatively, press DIMMER button on remote control repeatedly can
adjust the Backlight level under ON mode and Standby mode.
If Timeout set O, the display brightness at standby will keep as operation
mode not able to adjust by DIMMER button on remote control.
59
EN
INTERNET RADIO
To listen to internet radio your radio must be connected to the internet.
Try to position your radio as close as possible to your router to get the best
connection speeds. When Internet Radio mode is selected, the radio
connects with the Frontier Silicon Internet radio portal to download a list
of stations. Once a station is selected, the radio will connect directly to that
station.
Press MODE button on unit or remote control to select Internet
radio mode.
During Internet Radio mode, press the MENU button on the unit or MENU
on the remote control to access the menu. You can choose between: Last
listened, Station list, System settings and Main menu.
Press the buttons to select and press the SELECT button to
conrm.
When internet radio is restarted, the last listened stations is automatically
selected. To return to [Station List], press BACK button.
Last listened
1. Press the
buttons to select the history of stations that you
have listened to before.
2. Press the SELECT button to conrm.
Station list
If it is the rst time listen Internet radio, the radio will be in [Station List].
Press the
buttons to select from the following options, and
then press the SELECT button to conrm.
"Countries"
You can search specically for stations from your
country. Within this scope, it will display local radio.
Search
You can search stations using various keywords.
The name and a description of your selected station
will show on the display.
Location
You can select for stations from a list of countries
available.
Popular
Select station from a list of the most popular internet
stations from around the
world.
Discover
Select stations from various categories in the menu:
Country, Genre or Language
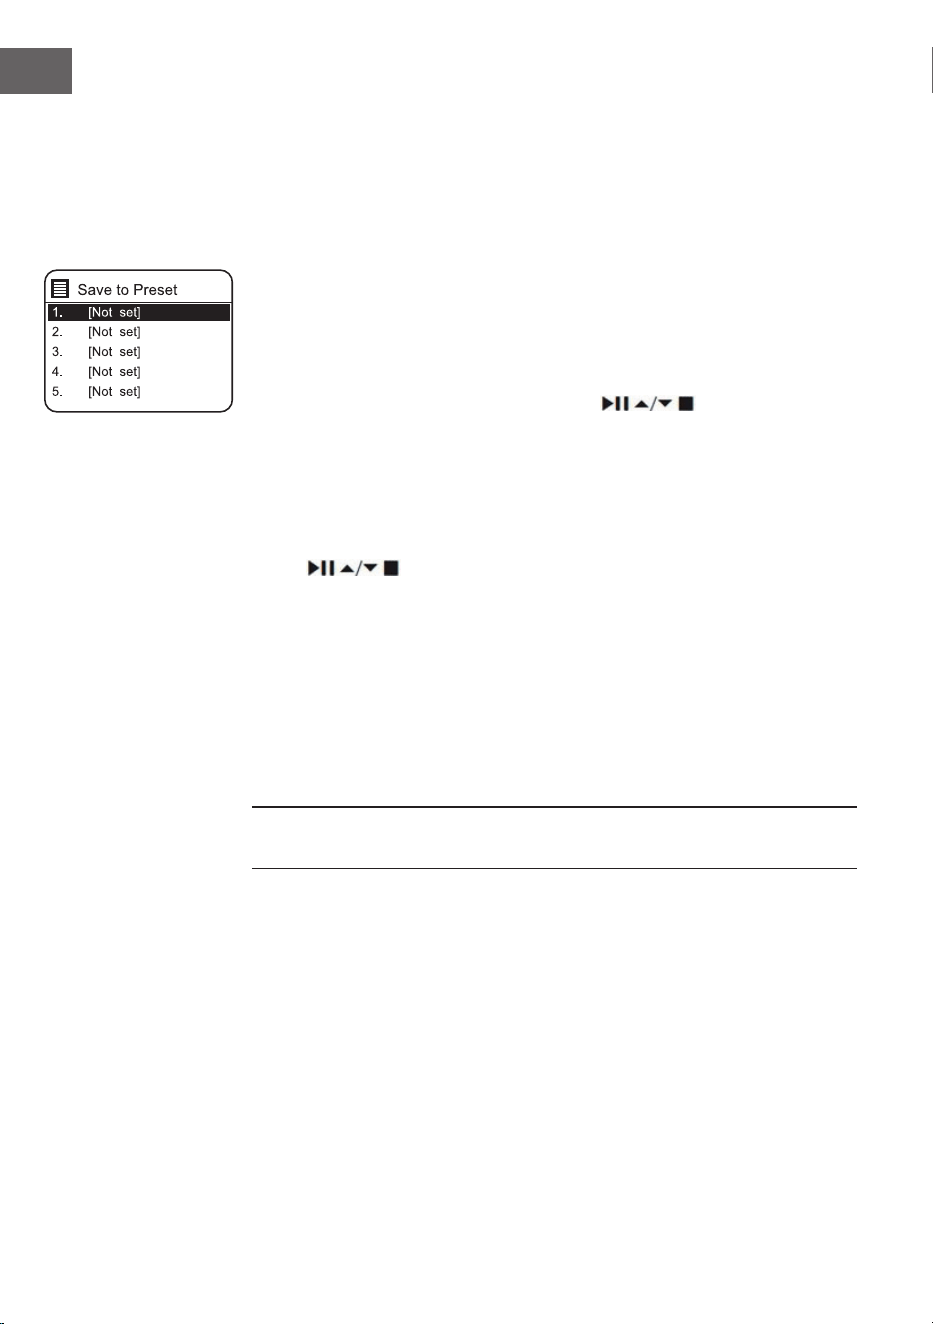
60
EN
Press the BACK button on the unit or remote control can move back a menu
level.
Preset Stations
The preset Internet radio stations are stored in the radio and cannot be
accessed from other radios.
1. To store an Internet radio preset, you must rst be listening to the
station that you would like to save. Press and hold the MEMORY button
on unit or PRESET button on remote control until the display shows the
"Save to Preset".
2. Select one of the 30 presets to store the current station by turning
SCROLL|SELECT dial on unit or pressing
buttons on remote
control to select the number, then press SCROLL|SELECT dial on unit or
SELECT button on remote control to conrm.
Recalling a Stored Station
1. To select a preset, press the MEMORY button on unit or PRESET button
on remote control, and then turn SCROLL|SELECT dial on unit or press
the
buttons on remote control to select one of the listed
preset stations.
2. Press SCROLL|SELECT dial on unit or SELECT button on remote control
to conrm the selection.
Alternatively, on remote control,
• Press Preset ∨/∧ buttons to switch through the preset stations.
• Or press the number keys (0-9) on remote control can switch to preset
station 1-10 directly.
• If there no station be saved, it will show Preset empty.
Operation of Preset and Recall stations are same for Internet Radio/
Podcasts, DAB and FM.
Internet Radio Display Modes
Every time you press the INFO button on the remote control, the display will
show the following display modes:
Channel Info/Description Language/Location Bit rate/Sound format/
Sampling rate Playback buer Date
61
EN
PODCASTS
To listen to Podcasts your radio must be connected to the internet. Try
to position your radio as close as possible to your router to get the best
connection speeds.
Press MODE button on unit or remote control to select Podcasts mode.
During Podcasts mode, press the MENU button on the unit or remote
control to access the menu. You can choose between: Last listened, Podcast
list, System settings and Main menu.
Press 1 buttons to select and press the SELECT button to
conrm.
Last listened
Press
buttons to select [Last listened], then press SELECT
button to conrm.
Podcast list
When radio is restarted, the last listened stations is automatically selected.
To return to [Podcast list], press BACK button.
If it is the rst time listen Podcasts radio, the radio will be in [Podcast list].
Press the
buttons to select from the following options, and
then press the SELECT button to conrm.
"Countries"
You can search specically for stations from your
country. Within this scope, it will display local radio.
Search
You can search stations using various keywords.
The name and a description of your selected station
will show on the display.
Location
You can select for stations from a list of countries
available.
Discover
Select stations from various categories in the menu:
Country, Genre or Language
Saving and Recalling Preset Station
Refer to "Preset Stations" and "Recalling a Stored Station" under Internet
Radio for instruction.

62
EN
SPOTIFY CONNECT
Use your phone, tablet or computer as a remote control for Spotify.
Go to spotify.com/connect to learn how.
Licenses
The Spotify Software is subject to third party licenses found here:
https://www.spotify.com/connect/third-party-licenses
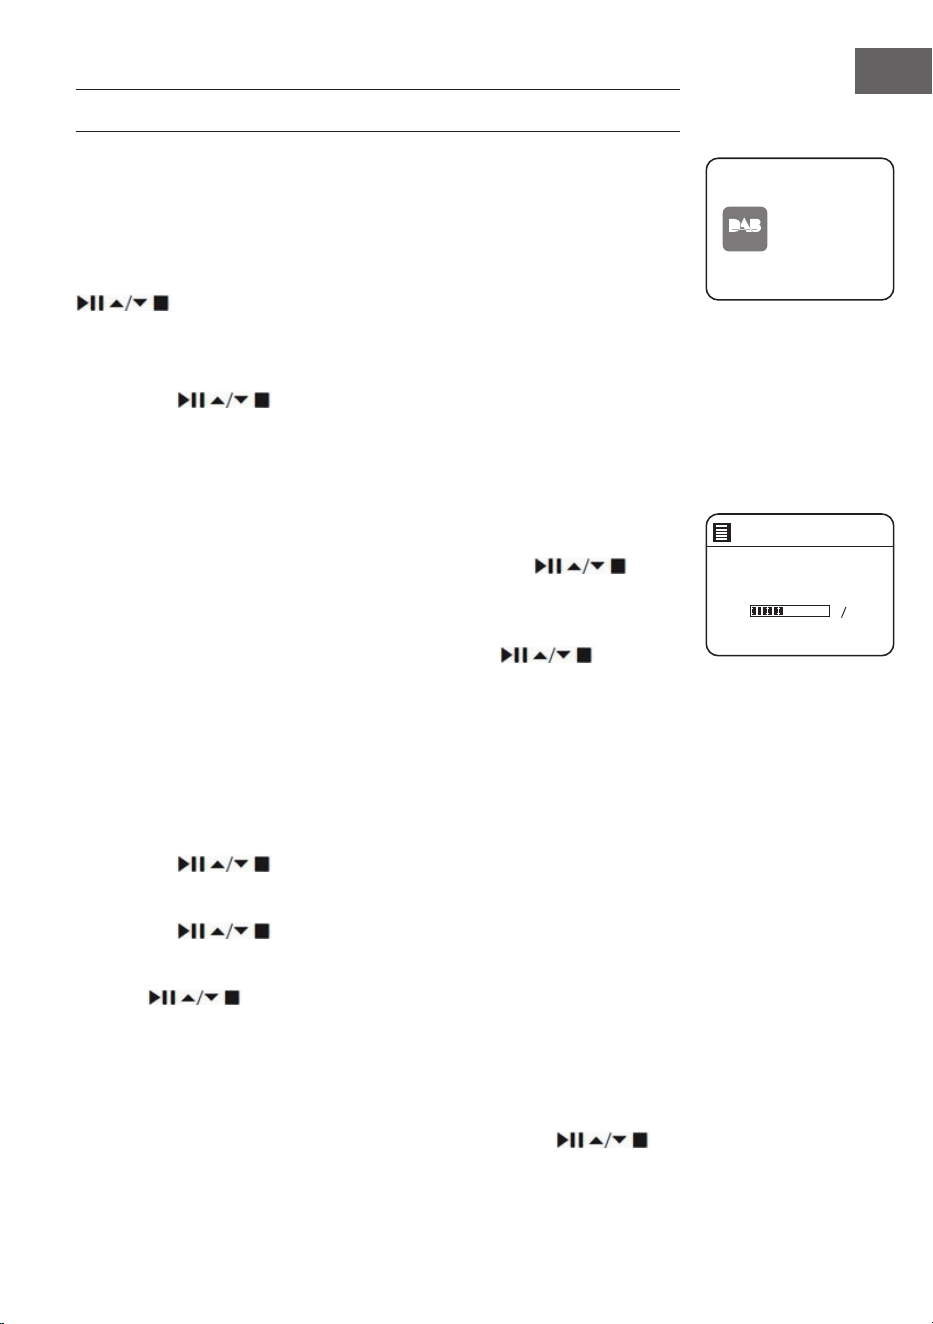
63
EN
DAB RADIO
Press MODE button on unit or remote control to select DAB Radio mode.
The unit will enter DAB mode and perform the auto scan function. During
the scan the display will show “Scanning… ” together with a slide bar that
indicates the progress of the scan and the amount of stations that have
been found so far. Once the scan has nished, the unit will select the rst
alphanumerically found station. To explore the found stations, press the
buttons to select and press the SELECT button to conrm.
Station List
1. During DAB mode, press the MENU button to access DAB menu.
2. Press the
buttons to select “Station List” and then press the
SELECT button to conrm.
3. A list of DAB+ stations will show on the display.
Auto Scan
• Press the SCAN|⏹ button on unit or SCAN on remote control to activate
auto scan.
• Alternatively, press the MENU button, and then press
buttons to select Scan. Press the SELECT button to conrm.
1. The display will show “Scanning…” and a progress slide bar.
2. All the stations that have been found will be stored automatically. To
explore and listen to the found stations, press the buttons to
select and the press the SELECT button to conrm.
Manual Tuning
As well as the auto tune function, you can manually tune the receiver. This
can help you when aligning your aerial or when adding stations that were
missed while auto tuning.
1. Press MENU to display the menu.
2. Press the
buttons to select “Manual tune”, and press the
SELECT button to conrm.
3. The display will show the multiplex 5A to 13F.
4. Press the buttons to select the channel, and press the
SELECT button to conrm.
5. To listen to any stations found, return to the now playing screen and
press buttons to select the required station from the station
list and press SELECT button to conrm.
Prune Invalid
You may remove all unavailable stations from the list.
1. During DAB mode, press the MENU button and press the
DAB
radio
DAB Radi o
Scan
Stations: 0
Scanning
64
EN
buttons to select Prune invalid and then press the SELECT button to
conrm.
2. Press the buttons to select [YES] and press the SELECT
button to conrm, or select [NO] to cancel.
DRC (Dynamic Range Compression)
If you are listening to music with high dynamic range in a noisy
environment, you may wish to compress the audio dynamic range.
1. During DAB mode, press the MENU button and press the
buttons to select DRC and press the SELECT button to conrm.
2. Press the buttons to select DRC high/low/o and press the
SELECT button to conrm the setting.
Station Order
You may wish to arrange the station listing order.
1. During DAB mode, press the MENU button and press the
buttons to select Station Order and press the SELECT button to conrm.
2. Press the buttons to select Alphanumeric/Ensemble/Valid
order and press the SELECT button to conrm the setting.
DAB Display Modes
Every time you press the MENU button on the unit or INFO on the
remote control, the display will show the following display modes: DLS –
Programme Type – Ensemble/Frequency – Signal error/Strength – Bit rate/
Codec/Channels – Date
DLS (Dynamic Label Segment)
This is a scrolling message giving real-time information, e.g. song titles,
news headlines, etc.
Programme Type
This describes the "style" or "genre" of the programme that is being
broadcast.
Ensemble Name/Frequency
This display the name of the multiplex that contains the station you are
listening to and the frequency. A multiplex is a collection of radio stations
that are bundled and transmitted on one frequency. There are national and
local multiplexes. Local ones contain stations that are specic to that area.
Signal Error/ Signal Strength
The error is shown as a number. If the number is 0, it means the signal
received is error free and the signal strength is strong. If the error rate is

65
EN
high, it is recommended to reposition the radio aerial or reposition the unit.
The display will show a slide bar to indicate the signal strength, the stronger
the signal, the longer the bar will be from left to right.
Bit Rate / Codec / Channels
The display will show the digital audio bit rate being received with
additional information about the audio codec and channel conguration.
Date
This displays the current date provided automatically by the broadcaster.
Saving and Recalling Preset Station
Refer to "Preset Stations" and "Recalling a Stored Station" under Internet
Radio section for instruction.
66
EN
FM OPERATION
Press MODE button on unit or remote control to select FM Radio mode.
Auto Scan
Press SCAN|⏹ button on unit or SCAN button on remote control to start
searching for a station.
Once a station has been found, the scanning will stop automatically.
Alternatively, press and hold
buttons to start searching for a
station.
Note: The search may not stop at a station with a very week signal.
Manual Tuning
To search for FM stations manually, turn the SCROLL|SELECT dial on unit
or press the
buttons on remote control repeatedly until your
desired frequency is reached.
Note: With FM radio, it may be necessary to ne tune each station by
turning the SCROLL|SELECT dial on unit or pressing
buttons
on remote control repeatedly. Each press will adjust the frequency by
0.05MHz. If reception is still poor, adjust the position of the aerial or try
moving the radio to another location.
FM Display Modes
Every time you press the MENU button on unit or INFO button on remote
control , the display will show the following display modes: Radio Text –
Programme Type – Frequency – Date
RDS Radio
Text
This is a scrolling message information about the
current programme.
Programme
Type
This describes the “Style” or “Genre” of music that is
being broadcast.
Station
Name /
Frequency
When an RDS station is received, the name of that
station will be displayed, or if not the frequency will
bedisplayed.
Date This displays the current date provided automatically by
the broadcaster.
FM
radio
FM Radi o

67
EN
Scan Setting
1. Press the MENU button to access FM menu.
2. Press the
buttons to select Scan setting and then press the
SELECT button to conrm.
3. Press the
⏮/⏭ buttons to select YES to receive Strong stations only and
then press the SELECT button to conrm.
Audio Setting
1. Press the MENU button to access the main menu.
2. Press
buttons to select Audio setting and press the SELECT
button to conrm.
3. Press ⏮/⏭ buttons to select [Yes] to listen in mono only or [NO] to let
the unit select Stereo or Mono automatically.
4. Press the SELECT button to conrm.
Alternatively, press the MONO/ST. button on the remote control to toggle
between the Mono only or Mono/Stereo selection.
Saving and Recalling Preset Station
Refer to "Preset Stations" and "Recalling a Stored Station" under Internet
Radio section for instruction.
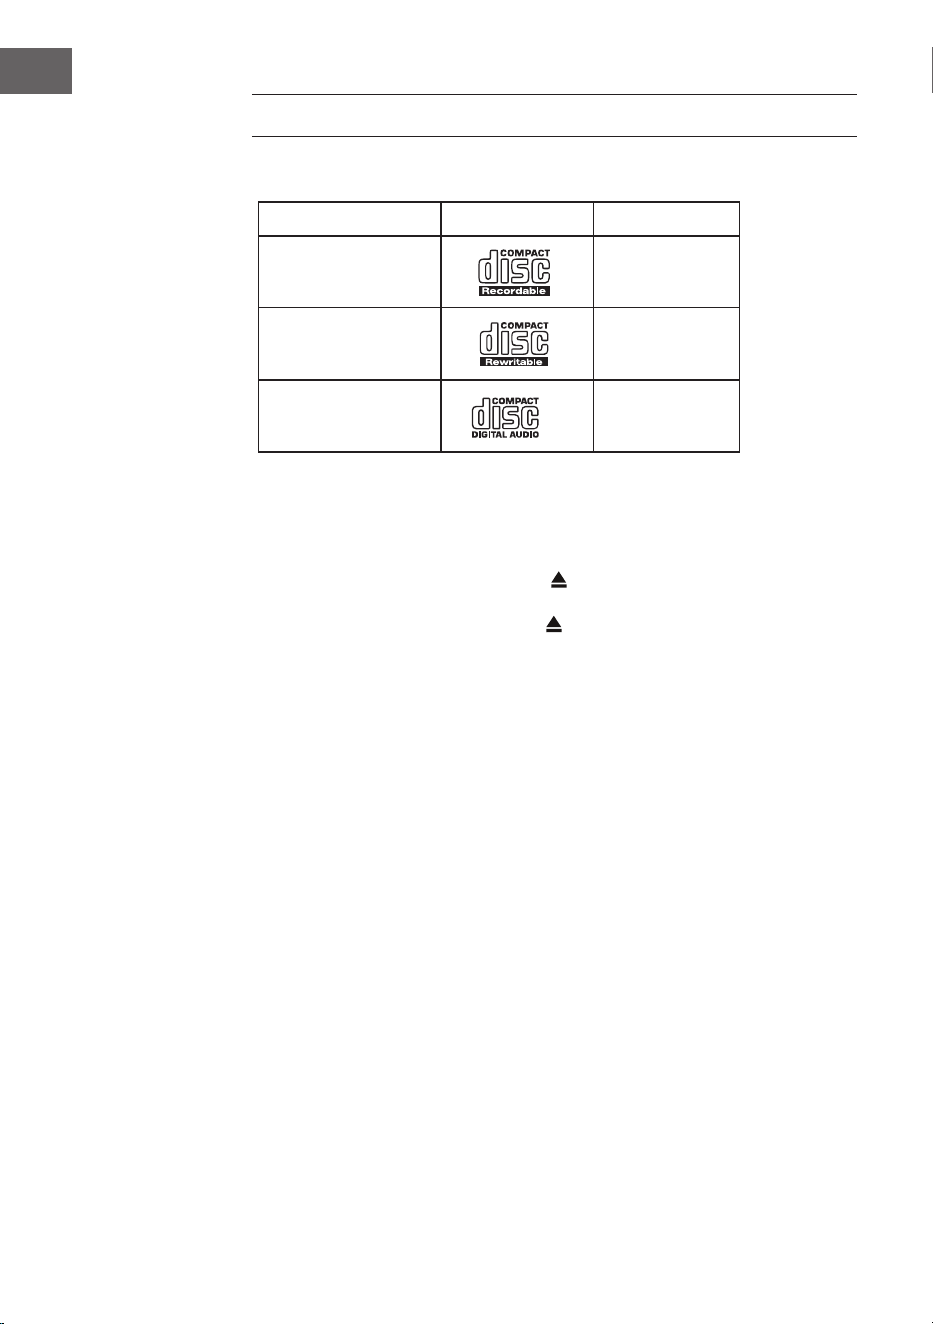
68
EN
CD OPERATION
Compatible disc types
Disc type Disk-Logo Medieninhalt
CD-Recordable
Audio
CD-RW
(CD Rewritable)
Audio
Audio CD (Compact
Disc Digital Audio)
Audio
Press MODE repeatedly on the unit or the remote control to select CD
mode.
Playback
1. Press the OPEN/CLOSE Disk Tray (
), um die CD-Lade zu önen.
2. Place the CD with the label side up into the CD compartment, and then
press the OPEN/CLOSE Disk Tray , button to close the disc tray.
3. If there is no disc or the disc can’t be read, “No disc” will show on the
display.
4. When the playback is stopped, the total number of tracks will display on
the display, then press the button to play the rst track of CD/ MP3
disc automatically.
To pause playback: Press the
button to pause the playback. And resume
playback by press this button again.
To stop playback: Press the
button to stop playback.
Skiping to another track: Press the
/ buttons to skip backwards to
the beginning of the track or previous track or skip forwards to the next
track. Press and hold the / buttons to perform fast forward/reverse
playback.
Alternatively, press number keys in sequence on remote control can skip to
the target track directly.
Press and hold
/ buttons on remote control to perform fast forward/
reverse playback.
When playing MP3 disc with music grouped in dierent folder, press Preset/
Folder ∧/∨ , buttons on remote can switch to next/previous folder.

69
EN
Repeat playback
1. Press the REPEAT button repeatedly to choose a function.
1
F
It will play the current track repeatedly.
1
F
It will play all les in the current folder
repeatedly (for data CDs only).
1
F
Alle Titel wiederholen.
2. Press the REPEAT button once more again, the REPEAT function will turn
o.
Random playback
All tracks on the disc can be played in a random order.
1. Press the RANDOM button on the remote control. The
. indicator will
show on the display. All tracks will be played randomly.
2. Press the / buttons to playback the next random track.
3. After all the tracks have played once, the playback will stop
automatically.
4. To cancel random playback, press the RANDOM button during Random
playback. Normal playback will resume.
Intro playback
1. Press the INTRO button on the remote control. The "INTRO" indicator
will show on the display. The unit will play the rst 10 seconds of each
track.
2. Press the INTRO button on the remote control again to resume normal
playback.
Programme setting
User can program up to 20 tracks in any desired order. And Programme
mode is activated while in STOP mode.
1. Press the PRESET button to enter programme mode.
2. Press the
/ buttons to select the track that you want to preset.
3. Press the SELECT button to confirm the track.
4. Repeat steps 2-3 to programme more tracks. When nished selecting
tracks, press the , button to start playback of the programmed tracks.
Programme cancel: Press the
button twice, or open the disk tray and
close it again to erase the memory.

70
EN
USB OPERATION
1. There is a USB socket located at the front of the unit. When a USB device
is connected to the unit, press the MODE button on unit or remote
control repeatedly to select USB mode.
2. The unit will automatically playback the tracks.
3. All playback features are the same as if you were playing an MP3 CD.
The unit can only play MP3 le formats in USB operation. The unit can
support USB devices with up to 32GB of memory. The unit may not
compatible with all USB devices; this is not an indication of a problem of
the unit.
Charge Your Device
You can charge your device through the USB socket on this unit with a USB
cable (not supplied).
• The maximum current for USB charging is 1A.
• All devices for USB charging are not guaranteed.

71
EN
BT OPERATION
The unit has a BT function that can receive a signal within 8 metres.
Pair the unit with a BT device to listen to music:
1. Press MODE button on unit or remote control to select BT Audio mode.
2. If the unit is not paired with any BT device, the BT logo will start to ash
to show the unit in pairing mode.
3. Activate your BT device and select the search mode.
4. “iTunerCD” will appear on your BT device list.
5. Select “iTunerCD” and enter “0000” for the password if necessary. Once
connected the BT logo on the screen will stop ashing. Your device is
now paired with the unit.
6. Pressing and hold PRESET button on unit or remote control or pressing
PAIR button on remote control can disconnect existing BT connection,
with other BT devices able to locate and make connection with the unit.
7. To disconnect the BT function, switch to another function on the unit or
disable the function from your BT device.
Playing Music via BT
You may need to adjust the volume on your radio and BT device.
Press the
⏯ button on the unit or on the remote control to play/pause music
or press ⏮ / ⏭ buttons on unit or remote control to skip to the previous/
next track.
Notes:
• The operational range between the unit and the device is approximately
8 metres.
• If the signal strength is weak, your BT receiver may disconnect, but it
will re-enter pairing mode automatically.
• For better signal reception, remove any obstacles between the unit and
the BT device.
• Compatibility with all devices and media types is not guaranteed.
• Some mobile phones with the BT function may connect and disconnect
as you make and end calls. This is not an indication of a problem with
your unit.
72
EN
AUDIO INPUT
You can play sound from an external device via the device.
1. Connect the external device to the Analog Audio Input on the device
through suitable RCA cable (not included).
2. Press MODE button on unit or remote control repeatedly to select Line
In mode.
3. Turn the VOLUME|q dial on the unit or press the VOL +/– buttons on
the remote control to adjust the volume control for your desired sound
output level. Set the desired volume on the radio and the external audio
device if necessary.
4. In Line In mode, operate your audio device directly for playback features.
When connecting the external audio device, refer to the owner's manual of
the external device.
NETREMOTE
The device gives a feature of NetRemote by smartphone or tablet in iOS or
Android system. By downloading the app named UNDOK, you can view all
the modes of Internet radio, Spotify, Music player, DAB and FM. And select
the mode on your smartphone or tablet.
Before using the UNDOK app, make sure the device and the smartphone or
tablet are in the same WiFi network. Launch the app. The app initializes and
scans for the device in the network. Tap the device to make the NetRemote
connection.
• Once the smartphone or tablet has already accessed the device, they
will automatically connect the next time when you open the app again.
• Be aware that if another smartphone or tablet with the app in the same
network has access with the device; the original connection will be cut
o.
• When it is the rst time that you connect the device to Internet Radio,
the app may ask you to enter the PIN. Default PIN is "1234". For details
of changing the PIN for security, please refer to System Settings section:
Network - NetRemote PIN Setup.
• Select your desired mode in the main page. You may then control
the selected mode on your smartphone or tablet and on the device
simultaneously.
USING HEADPHONES
Do not listen to music at high volume when using headphones. Doing so
can cause permanent hearing impairment. Turn the tuner volume level to
the lowest before using headphones.
• Only use headphones with a 3.5-mm jack plug.
• Insert the headphone connector in the headphone socket in front of the
unit.
Long-term exposure to loud music may cause hearing damage. It is best
to avoid extreme volume when using earphones, especially for extended
periods of time.
SLEEP SETTING
This function allows you to program the unit to turn to standby mode by
itself after a set period of time.
1. To activate the sleep function, press the SLEEP button repeatedly. The
time will change in the below sequence on every press:
2. When your desired sleep time appears in the display, stop pressing the
button and the sleep function will be activated in two seconds. “ ” will
show on the display. Also the time remaining until switch o is displayed
next to the symbol in the display.
3. When the sleep timer counts down to zero, the unit will turn to standby
mode. To turn the sleep function o while the sleep timer is still counting
down, press the SLEEP button repeatedly to select “SLEEP OFF”.
Alternatively:
1. Press the MENU button on the remote control to display the function
main menu. Press the
buttons to select Main menu, and then
press the SELECT button to conrm.
2. Press the buttons to select Sleep mode, and then press the
SELECT button to conrm.
3. Press the buttons to select sleep timer, and then press the
SELECT button to conrm.
Sleep OFF
15 minutes
30 minutes
45 minutes
60 minutes
90 minutes
120 minutes
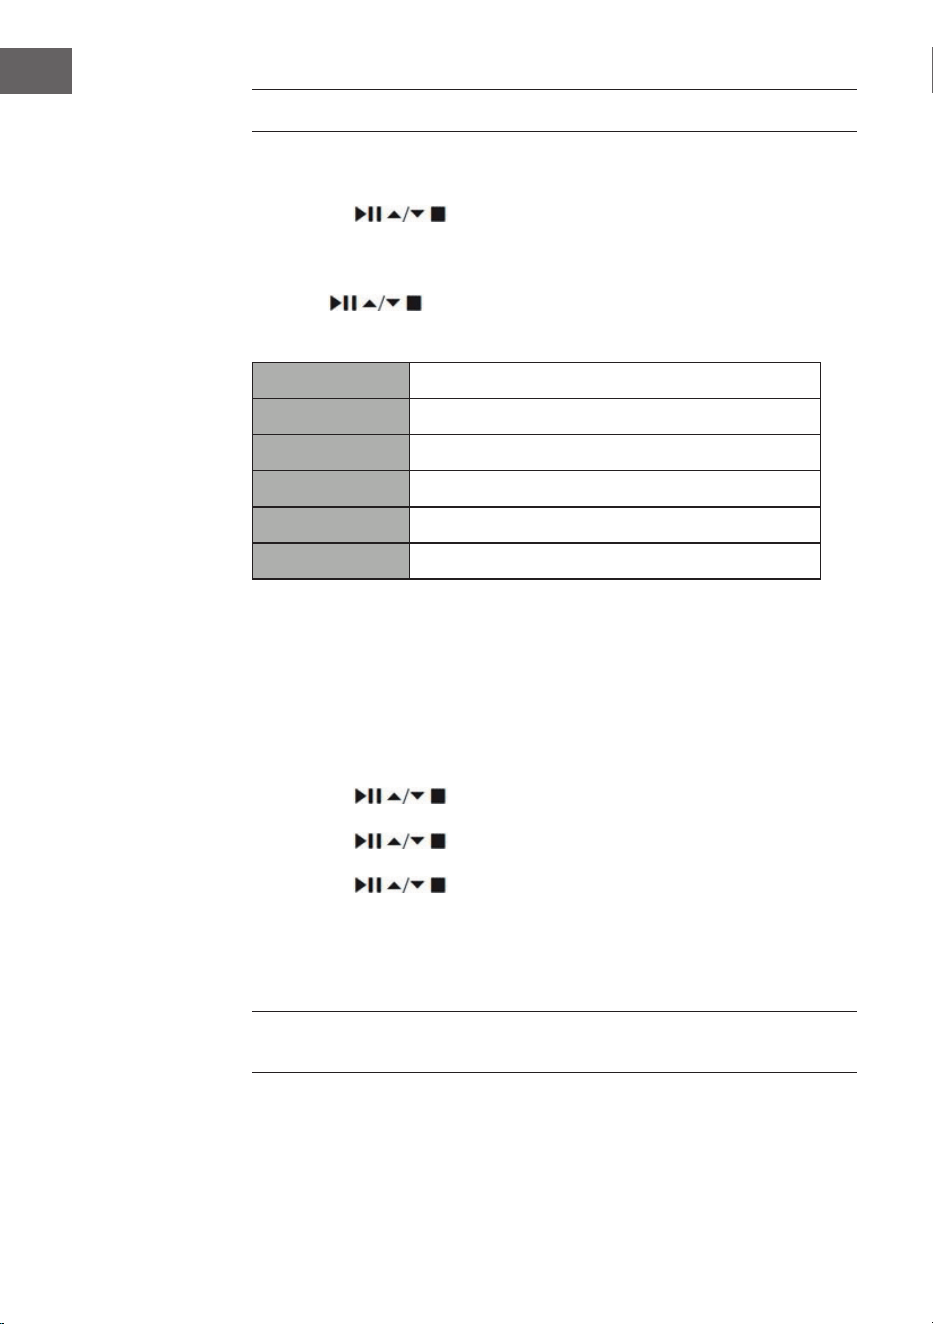
74
EN
SETTING THE ALARM
1. Press the TIMER button on the remote control, the display shows “Alarm
(1 or 2): O [hh:mm]”.
2. Press the buttons to select the Alarm number (1 or 2)
and then press the SELECT button to start thesetting of the following
parameters.
Press the buttons to select then press the SELECT button to
conrm.
Enable O/ Daily/ Once/ Weekends/ Weekdays
Time (Alarm On time)
Mode Buzzer/ Internet radio/ Spotify/ DAB/ FM
Preset Last Listened/ (Preset station)
Volume Muted, 1-32
Save Save and conrm the alarm setting
3. Finally, select “Save” and press the SELECT button to save the alarm
setting. When the alarm is set, the alarm icon will appear on the display.
4. To turn o the alarm when it sounds, press the Volume| dial on the
unit or the or ALARM button on the remote control.
Cancelling the Alarm
1. Press the TIMER button on the remote control, the display shows “Alarm
(1 or 2): On [hh:mm]”.
2. Press the
buttons to select the Alarm number (1 or 2) and
then press SELECT to start the setting of the timer.
3. Press the buttons to select “Enable” then press the SELECT
button to confirm.
4. Press the buttons to select “Off” then press the SELECT
button to confirm.
5. Finally, select “Save” and press the SELECT button to save the setting.
6. Alternatively, during Standby mode, press the TIMER button on remote
control repeatedly can turn the saved Alarm 1/2 on/o sequentially.
If no button is pressed within approx. 15 seconds, the unit exits timer setting
mode automatically.

75
EN
Chal-Tec GmbH
Wallstr. 16 10179 Berlin, Germany
www.chal-tec.com
The Spotify software is subject to third party licenses found here:
https://www.spotify.com/connect/third-party-licenses
All listed brands are trademarks of their companies. Errors and omissions
excepted, and subject to technical change. Our general terms of delivery
and payment are applied.

76
EN
DISPOSAL CONSIDERATIONS
If there is a legal regulation for the disposal of
electrical and electronic devices in your country,
this symbol on the product or on the packaging
indicates that this product must not be disposed of
with household waste. Instead, it must be taken to
a collection point for the recycling of electrical and
electronic equipment. By disposing of it in accordance
with the rules, you are protecting the environment and
the health of your fellow human beings from negative
consequences. For information about the recycling
and disposal of this product, please contact your local
authority or your household waste disposal service.
This product contains batteries. If there is a legal
regulation for the disposal of batteries in your country, the
batteries must not be disposed of with household waste.
Find out about local regulations for disposing of batteries.
By disposing of them in accordance with the rules, you are
protecting the environment and the health of your fellow
human beings from negative consequences.
DECLARATION OF CONFORMITY
Manufacturer:
Chal-Tec GmbH, Wallstrasse 16, 10179 Berlin,
Germany.
Importer for Great Britain:
Berlin Brands Group UK Limited
PO Box 42
272 Kensington High Street
London, W8 6ND
United Kingdom
Hereby, Chal-Tec GmbH declares that the radio
equipment type iTuner CD is in compliance with Directive
2014/53/EU. The full text of the EU declaration of
conformity is available at the following internet address:
use.berlin/10032753
For Great Britain: Hereby, Chal-Tec GmbH declares that
the radio equipment type iTuner CD is in compliance with
the relevant statutory requirements. The full text of the
declaration of conformity is available at the following
internet address: use.berlin/10032753
77
FR
Fiche technique 78
Consignes de sécurité 79
Aperçu de l'appareil 81
Télécommande 82
Connexion 85
Mise en marche 86
Paramètres du système 90
Radio Internet 94
Podcasts 97
Spotify Connect 98
Radio DAB 99
Radio FM 102
Lecteur CD 104
Lecture par USB 106
Lecture BT 107
Entrée audio (line In) 108
Net-Remote 108
Utilisation d'un casque 109
Réglage de la minuterie d'arrêt (Sleep) 109
Régler le réveil 110
Informations sur le recyclage 112
SOMMAIRE
Cher client, chère cliente,
Toutes nos félicitations pour l’acquisition de ce
nouvel appareil. Lisez attentivement les indications
suivantes et suivez-les pour éviter d'éventuels
dommages. Nous ne saurions être tenus pour
responsables des dommages dus au non-respect
des consignes et à la mauvaise utilisation de
l’appareil. Scannez le QR-Code pour obtenir
la dernière version du mode d'emploi ainsi que
d'autres informations concernant le produit

78
FR
FICHE TECHNIQUE
Numéro d'article 10032753 10032754
Alimentation électrique de
l'adaptateur secteur
100-240 V ~ 50/60 Hz, 1 A
Sortie USB
5 V
, 1 A
Audio
Puissance de sortie 2 x 5 W RMS
Radio FM
Plage de fréquence 87,5 MHz – 108 MHz
CD
Plage de fréquence 20 Hz - 20 kHz
DAB
Plage de fréquence 174-240 MHz
Spécications Wi
Standard
Bande de fréquence
Puissance d'émission max.
802.11 b/g/n
2412-2472 MHz
19 dBm
BT
Plage de fréquence
Puissance maximale d'émission
2402-2480 MHz
2 dBm
Consommation en mode veille
Mode veille standard
Mise en veille du réseau
<1.00 W (Wi éteint)
<2.00 W (Wi allumé)

79
FR
CONSIGNES DE SÉCURITÉ
Consignes générales de sécurité
• Avant d'utiliser l'appareil, lisez attentivement et intégralement le mode
d'emploi et conservez-le pour vous y référer ultérieurement.
• Utilisez uniquement la tension électrique indiquée sur la plaque
signalétique de l'appareil. Assurez-vous que votre prise de courant est
reliée à la terre.
• L'appareil doit être placé sur une surface plane et stable et ne doit pas
être soumis à des vibrations
• Veuillez ne pas placer l'appareil sur des surfaces inclinées ou instables,
car l'appareil pourrait tomber.
• La prise de courant doit se trouver à proximité de l'appareil et doit être
facilement accessible.
• Évitez les températures extrêmes, aussi bien la chaleur que le froid.
Placez l'appareil à une distance sûre des sources de chaleur telles
que les radiateurs ou les cuisinières à gaz/électriques. N'exposez pas
l'appareil à l'ensoleillement direct ou à d'autres sources de chaleur.
• Ne placez jamais de bougies ou d'objets similaires à amme nue sur
l'appareil.
• Pour éviter tout risque d'incendie, d'électrocution ou
d'endommagement de l'appareil, ne l'exposez pas à la pluie, à
l'humidité, à un égouttement ou éclaboussures de liquides. Ne placez
pas d'objets remplis d'eau, comme des vases de eurs, sur l'appareil.
• Si vous renversez un liquide quelconque sur l'appareil, vous risquez
de l'endommager gravement. Dans ce cas, éteignez l'appareil
immédiatement et débranchez la che de la prise. Contactez le service
clientèle.
• Ne couvrez pas les orices de ventilation de l'appareil et veillez à ce
que les rideaux et autres matériaux ne pénètrent pas dans les orices
de ventilation an d'éviter toute surchaue de l'appareil et tout risque
d'incendie ou d'électrocution qui en résulterait.
• Ne placez pas l'appareil dans une bibliothèque fermée, une armoire
encastrée ou tout autre endroit conné. Veillez à placer l'appareil à
une distance minimale de 10 cm de toutes les surfaces et objets qui
l'entourent an de garantir une ventilation suisante.
Sécurité
• Débranchez toujours l'appareil de la prise de courant avant de le
connecter ou de le déconnecter d'autres appareils ou de déplacer la
radio.
• Veillez à ce que la che d'alimentation de la radio ne soit pas branchée
sur la prise de courant pendant un orage.
• L'appareil chaue s'il est utilisé pendant une période prolongée. Cela
est normal et n'indique pas un problème de l'appareil.

80
FR
Branchement au secteur
• Veillez à ce que l'appareil ne repose pas sur le câble d'alimentation, car
son poids pourrait endommager le câble et constituer un risque pour la
sécurité.
• Si le cordon d'alimentation est endommagé, il doit être remplacé par
le fabricant, le service après-vente ou une personne de qualication
similaire an d'éviter tout dommage.
Parasites
• Ne placez pas la radio sur ou à proximité d'autres appareils susceptibles
de provoquer des interférences électromagnétiques. Si vous placez la
radio à proximité d'autres appareils, la qualité de lecture de la radio
pourrait être aectée et il risque d'y avoir des parasites.
Surveillance
• Les enfants à proximité de l'appareil doivent être surveillés an qu'ils ne
l'utilisent pas comme un jouet.
• Ne laissez personne, en particulier les enfants, insérer des objets dans
les trous, fentes ou autres ouvertures car cela pourrait entraîner un choc
électrique potentiellement mortel.
Utilisation / maintenance / entretien
• Ne retirez pas de vis vous-même an de réduire le risque de choc
électrique. L'appareil ne contient aucune pièce pouvant être réparée par
l'utilisateur. Conez toute la maintenance à un personnel qualié.
• Ne retirez pas et n'ouvrez pas les caches xés à l'appareil, car cela
pourrait libérer une tension électrique dangereuse.
• Avant le nettoyage de l'appareil, débranchez la che d'alimentation de
la prise.
• N'utilisez pas d'éponges abrasives en métal ou d'autres produits
agressifs car cela pourrait rayer la surface de l'appareil.
• N'utilisez aucun produit liquide pour nettoyer l'appareil.

81
FR
APERÇU DE L'APPAREIL
1 Tiroir CD
2 capteur IR
3 Prise casque
4 Lecture / Pause
5 Stop - Pour arrêter la lecture
6 Titre précédent
7 Titre suivant
8 Écran
9 Ouvrir / fermer le tiroir CD
10 Menu
11 Paramètres
12 Mode
13 Délement/sélection
14 Volume / marche-arrêt
15 Récepteur IR
16 Branchement au secteur
17 Antenne Wi-Fi
18 Sortie audio (analogique)
19 Entrée audio (analogique)
20 Sortie optique (numérique)
21 Sortie coaxiale (numérique)
22 Antenne fouet
Face avant
Dos de l'appareil

82
FR
TÉLÉCOMMANDE
1
15
16
17
18
19
21
20
22
23
24
25
26
2
3
4
5
6
7
8
9
10
11
12
13
14

83
FR
1 Marche / veille
2 Éjecter le CD
3 Minuterie
4 Scan
5 Mode de lecture avec répétition
6 Appairage BT
7 Info
8 Titre suivant/
Navigation dans le menu vers
la droite
9 Stop/
Navigation dans le menu vers
le bas
10 Mémorisation de station
11 Menu
12 Mémorisation de station haut
/ bas
13 Navigation dans les menus :
retour
14 Muet
15 Mono/Stéréo
16 Touches numériques pour la
numérotation directe
17 Volume +/-
18 Égaliseur
19 Titre précédent /
Navigation dans le menu vers
la gauche
20 Conrmer la sélection
21 Lecture/Pause/
Navigation dans le menu vers
le haut
22 Mode
23 Lecture d'un titre
24 Mode lecture aléatoire
25 Réglage de l'heure
26 Minuterie d'arrêt

84
FR
Insertion des piles dans la télécommande
1. Poussez le couvercle du compartiment à piles vers le bas au niveau du
repère et faites-le glisser vers l'extérieur dans le sens de la èche.
2. Insérez 2 piles de type LR03 (AAA 1,5 V) dans le compartiment à
piles (non fournies). Assurez-vous que les repères + et - sur la pile
correspondent aux repères dans le compartiment de la pile.
3. Remettez le couvercle du compartiment des piles en place.
Manipulation des piles
• Une utilisation inadéquate ou incorrecte de la pile peut entraîner une
corrosion ou une fuite de celle-ci, ce qui pourrait provoquer un incendie
et des dommages matériels et/ou corporels.
• Utilisez uniquement le type de pile spécié dans le mode d'emploi
• Ne pas jeter les piles usagées dans les ordures ménagères. Mettez-les
au rebut conformément à la réglementation locale.
• Retirez la pile de la télécommande si vous ne comptez pas l'utiliser
pendant une période prolongée, car une corrosion ou une fuite de la
pile pourrait se produire et entraîner des blessures physiques et/ou des
dommages matériels et/ou un incendie.
Portée de la télécommande
Le capteur situé à l'avant de l'appareil répond aux commandes de la
télécommande jusqu'à une distance de 4 mètres dans un angle maximal de
60 degrés.
La portée dépend également de la luminosité de la pièce.

85
FR
CONNEXION
1. L'entrée et la sortie audio (analogique), la sortie optique (numérique) et
la sortie coaxiale (numérique) se trouvent à l'arrière de l'appareil. Vous
pouvez y brancher un amplicateur A/V ou une chaîne hi-.
2. Branchez l'antenne fournie sur le connecteur d'antenne et déployez-la
jusqu'à la longueur souhaitée.
3. Connectez l'antenne Wi-Fi fournie à la prise correspondante à l'arrière
de l'appareil.
4. Déroulez le cordon d'alimentation sur toute sa longueur. Branchez la
che d'alimentation de l'appareil dans la prise. L'appareil est maintenant
connecté et vous pouvez l'utiliser.
Assurez-vous que l'appareil est exclusivement branché sur des prises de
courant de la tension requise. Retirez toujours la che secteur de la prise
en la tenant par la tête de la che et jamais par le cordon d'alimentation.
Ne jamais tirer ou déchirer le cordon d'alimentation.
5. Retirez la che de la prise pour éteindre complètement l'appareil.
Connexion au réseau
Cet appareil ne prend en charge que les connexions réseau sans l pour
l'accès au réseau et ne prend pas en charge les connexions LAN.
Réseau sans l
1. Vériez d'abord que les voyants (LINK/ACT) de votre routeur sont
allumés.
2. Poursuivez les étapes décrites dans la section « Premiers pas ». Il est
recommandé d'utiliser l'assistant d'installation dans les paramètres du
système.
Remarque : cet appareil ne peut pas se connecter directement à un modem.
Utilisez un routeur ou un modem intégré à un routeur. Suivez les instructions
correspondantes de votre fournisseur et consultez le mode d'emploi de
votre routeur.
86
FR
MISE EN MARCHE
Ce mode d'emploi explique les étapes de base de l'utilisation de l'appareil.
Sauf mention explicite, toutes les instructions d'utilisation se réfèrent à
l'utilisation de l'appareil avec la télécommande.
Allumer / éteindre
1. Appuyez sur le bouton de réglage du volume / de l'appareil ou sur la
touche de la télécommande pour allumer l'appareil.
2. Appuyez sur le bouton de réglage du volume / de l'appareil ou sur la
touche de la télécommande pour remettre l'appareil en veille.
Sélection d'un mode
Appuyez sur la touche MODE de l'appareil ou de la télécommande pour
choisir entre les modes Radio Internet, Podcasts, Spotify, Radio DAB, Radio
FM, Lecteur CD, USB, BT-Audio et le mode AUX-IN.
Alternativement
1. Appuyez sur la touche MENU de l'appareil ou de la télécommande pour
accéder au menu principal des fonctions, puis tournez la commande
SCROLL|SELECT de l'appareil ou appuyez sur les touches
de la télécommande pour sélectionner le menu principal, puis appuyez
sur la commande SCROLL|SELECT de l'appareil ou sur la touche SELECT
de la télécommande pour conrmer.
2. Tournez la commande SCROLL|SELECT de l'appareil ou appuyez sur
les touches de la télécommande pour sélectionner le mode cible puis
appuyez sur la commande SCROLL|SELECT de l'appareil ou sur la touche
SELECT de la télécommande pour conrmer.
Si l'appareil n'est pas utilisé pendant environ 15 minutes, il passe
automatiquement en mode veille. Retirez la che secteur de la prise pour
éteindre complètement l'appareil. Pour économiser l'énergie, veuillez
éteindre complètement l'appareil lorsqu'il n'est pas utilisé.
Réglage du volume
• Tournez le bouton Volume| ou appuyez sur les touches VOL+/- de la
télécommande pour régler le volume.
• Pour couper le son, appuyez sur la touche MUTE de la télécommande.
Appuyez à nouveau sur la touche MUTE ou tournez la commande
de sur la touche Volume| ou appuyez sur la touche VOL +/- de la
télécommande pour reprendre la lecture normalement.
Naviguer dans le menu
1. Maintenez la touche MENU de l'appareil ou appuyez sur la touche MENU

87
FR
de la télécommande pour accéder au menu.
2. Tournez le sélecteur de l'appareil ou appuyez sur les touches ⏮ ou ⏭
pour sélectionner.
3. Pour conrmer votre choix, appuyez sur la commande de sélection vers
le bas ou appuyez sur la touche SELECT de la télécommande.
Première installation
Lorsque vous branchez pour la première fois la che d'alimentation de
l'appareil dans la prise de courant, l'écran de bienvenue s'aiche. Le
menu de la langue s'aiche ensuite à l'écran. Tournez la commande de
sélection de l'appareil ou appuyez plusieurs fois sur les touches
⏮ ou ⏭ de
la télécommande pour sélectionner la langue souhaitée. Pour conrmer
votre choix, appuyez vers le bas sur la commande de sélection ou appuyez
sur la touche SELECT de la télécommande. La politique de condentialité
s'aiche ensuite. Pour des informations plus détaillées sur la politique de
condentialité, veuillez consulter le site web mentionné ci-dessous. Pour
conrmer votre choix, appuyez vers le bas sur la commande de sélection ou
appuyez sur la touche SELECT de la télécommande.
1. Pour lancer l'assistant de conguration, tournez la commande de
sélection ou sélectionnez YES à l'aide des touches ⏮ ou ⏭. Pour
conrmer votre choix, poussez la commande de sélection vers le bas ou
appuyez sur la touche SELECT de la télécommande.
2. L'étape suivante consiste à sélectionner le format de l'heure. Choisissez
le réglage souhaité « 12 » ou « 24 » et conrmez votre choix en
appuyant sur la commande de sélection ou sur la touche SELECT de la
télécommande.
3. Vous avez maintenant la possibilité de choisir la source (DAB/FM/
réseau/pas de mise à jour) à utiliser pour actualiser automatiquement
l'heure et la date. Si vous avez sélectionné « Update from Network »
(mise à jour depuis le réseau), sélectionnez le fuseau horaire correct à
l'étape suivante pour vous assurer que l'heure s'aiche correctement.
Choisissez ensuite si le réglage de l'heure d'été doit être activé ou
désactivé.
4. À l'étape suivante, vous avez la possibilité de dénir si l'appareil
doit rester connecté à Internet en mode veille. Tournez le bouton
de sélection de l'appareil ou appuyez sur les touches ⏮ ou ⏭ pour
sélectionner YES (oui). Pour conrmer votre choix, appuyez ensuite vers
le bas sur la commande de sélection ou appuyez sur la touche SELECT de
la télécommande.
5. Votre radio recherche maintenant les réseaux sans l. Cela peut prendre
quelques secondes. Une liste de tous les réseaux disponibles s'aiche
ensuite à l'écran. Sélectionnez le réseau Wi-Fi souhaité. Pour saisir le mot
de passe, utilisez soit le WPS, soit entrez le mot de passe directement
sur l'écran de la radio.
Connexion en utilisant le bouton WPS de votre routeur

88
FR
L'utilisation du bouton WPS (installation protégée par Wi-Fi) de votre
routeur est un moyen rapide et facile de connecter votre radio au réseau
sans l sans avoir à saisir de mot de passe. Choisissez l'une des méthodes
de connexion suivantes :
Touche WPS
Si votre routeur dispose d'une touche WPS, vous verrez [WPS] sur le devant
du nom du réseau.
1. Utilisez les touches
« Pushbutton » (bouton poussoir) pour
sélectionner et conrmez votre sélection en appuyant sur la touche
SELECT.
2. Un message s'aiche à l'écran vous demandant d'appuyer sur le bouton
WPS de votre routeur. Appuyez sur le bouton WPS de votre routeur.
Consultez le mode d'emploi de votre routeur si vous n'êtes pas sûr de
savoir de quel bouton il s'agit.
3. Appuyez sur la touche SELECT pour conrmer. La radio se connecte alors
au routeur. Ce processus peut prendre quelques secondes.
Saisie du mot de passe
La radio génère un mot de passe à 8 caractères. Saisissez ce mot de passe
sur le routeur ou le périphérique d'accès.
Établissement de la connexion par l'utilisation du mot de passe Wi-Fi
Si votre routeur ne dispose pas d'un bouton WPS, vous serez invité à saisir
le mot de passe du réseau sans l. Si votre appareil dispose de la fonction
WPS, mais que vous souhaitez tout de même utiliser le mot de passe Wi-Fi
pour établir la connexion, sélectionnez « SKIP WPS » (ignorer WPS).
1. Pour sélectionner les chires/lettres, appuyez à chaque fois sur les
touches
. Après chaque sélection, appuyez sur la touche
SELECT pour conrmer le chire/la lettre en question.
2. Après avoir entièrement saisi le mot de passe, appuyez sur les touches
pour sélectionner OK sur la droite de l'écran.
3. Une fois la connexion établie avec succès, appuyez sur la touche SELECT
pour quitter le réglage.

89
FR
Les paramètres peuvent être ajustés à tout moment dans le menu System
Settings (Paramètres système) > Network (Réseau) > Network wizard
(Assistant réseau). Ce mode d'emploi explique les étapes de base de
l'utilisation de l'appareil. Sauf mention explicite, toutes les instructions
d'utilisation se réfèrent à l'utilisation de l'appareil avec la télécommande.
90
FR
PARAMÈTRES DU SYSTÈME
Maintenez la touche MENU de l'appareil ou appuyez sur la touche MENU
de la télécommande pour aicher le menu. Tournez le sélecteur de
l'appareil ou appuyez sur les touches de la télécommande
pour sélectionner les paramètres du système. Conrmez votre sélection en
appuyant sur la molette de sélection de l'appareil ou sur la touche SELECT
de la télécommande.
Égaliseur
Cet appareil prend en charge une variété d'égaliseurs et d'eets sonores.
Appuyez sur la touche EQ pour accéder au menu de l'égaliseur. Vous pouvez
également appuyer sur les touches
en mode de conguration
du système pour sélectionner l'égaliseur, puis appuyer sur la touche SELECT
pour conrmer votre choix.
1. Les éléments suivants s'aichent à l'écran : FLAT > CLASSIC > ROCK >
POP > JAZZ >.
2. Sélectionnez le réglage de l'égaliseur souhaité à l'aide des touches
et conrmez votre choix en appuyant sur la touche SELECT.
Qualité audio en streaming
Le système prend en charge diérentes qualités audio pour les services de
streaming disponibles. Le débit réel pour chaque niveau de réglage dépend
du service de streaming utilisé.
Réseau
1. En mode de conguration du système, appuyez sur les touches
pour sélectionner « Network » (Réseau) et appuyez sur la
touche SELECT pour conrmer votre choix.
2. Utilisez les touches pour sélectionner l'un des réglages listés
en-dessous et conrmez votre sélection en appuyant sur SELECT.
Assistant de congura-
tion réseau
SSID - Sélectionnez le réseau Wi-Fi souhaité.
Rescan (nouvelle recherche) - recherche des
réseaux disponibles. Réglage manuel - sélec-
tionnez un réseau sans l avec DHCP activé/
désactivé.
91
FR
Conguration WiFi PBC
Sélectionnez WPS sur votre appareil et ap-
puyez sur le bouton WPS du modem/routeur
auquel vous souhaitez vous connecter. Pour
conrmer votre choix, appuyez vers le bas sur
la commande de sélection ou appuyez sur la
touche SELECT de la télécommande.
Aichage des
paramètres
Aiche les paramètres à l'écran.
Paramétrage manuel
Sélectionnez un réseau sans l avec DHCP
activé/désactivé.
Paramétrage du code
PIN de commande à
distance du réseau
Pour dénir le mot de passe à saisir pour
connecter l'appareil à un réseau.
Prol réseau Aiche le réseau connecté.
Maintenir la connexion
réseau
Dénir si l'appareil reste connecté au réseau
en mode veille/autres modes.
3. Appuyez sur la touche BACK de l'appareil ou de la télécommande pour
annuler le réglage et revenir au menu précédent.
Heure / date
L'heure/la date peuvent être réglées automatiquement dès que l'appareil
se connecte à Internet ou à une station DAB/ FM diusant des informations
sur l'heure/la date. Il est également possible d'ajuster manuellement l'heure
et la date. Appuyez sur la touche CLOCK de la télécommande pour accéder
au menu de la date et de l'heure.
Vous pouvez aussi sélectionner « Time/Date » (heure/date) en appuyant
sur les touches
dans le menu de conguration du système et
conrmer votre choix en appuyant sur la touche SELECT. Utilisez les touches
pour sélectionner «Régler l'heure / la date» et conrmez votre
sélection en appuyant sur la touche SELECT.
1. Les chires de la date clignotent à l'écran.
2. Appuyez sur les touches pour ajuster la date puis sur la
touche SELECT pour conrmer.
3. Répétez l'étape 2 pour le réglage du mois/de l'année/de l'heure/des
minutes.
4. Le réglage de la date et de l'heure est maintenant terminé.
Pour d'autres réglages dans le menu « Time/Date » (heure/date), appuyez
sur les touches et faites votre choix parmi les réglages ci-
dessous. Appuyez sur la touche SELECT pour conrmer votre sélection.
92
FR
Mise à jour automatique DAB/FM/réseau/pas de mise à jour
Réglage du format Format 12/24 heures
Réglage du fuseau
horaire
Sélectionnez un fuseau horaire (disponible
uniquement si la mise à jour a été
sélectionnée depuis le réseau).
Heure d'été
Activez / désactivez l'heure d'été (disponible
uniquement si la mise à jour a été
sélectionnée depuis le réseau).
Remarque : le réglage par défaut est « Update from Network » (mise à
jour depuis le réseau). Si vous souhaitez régler l'heure manuellement, il est
recommandé de désactiver la mise à jour automatique.
Réglage de la durée jusqu'à l'arrêt automatique
La fonction « Inactive Standby » vous permet de dénir la durée après
laquelle l'appareil doit s'éteindre en mode lecture.
1. En mode de conguration du système, appuyez sur les touches
pour sélectionner « Inactive Standby » et appuyez sur la
touche SELECT pour conrmer votre choix.
2. Pour sélectionner Arrêt, 2 heures, 4 heures, 5 heures et 6 heures,
appuyez sur les touches . Appuyez sur la touche SELECT pour
conrmer votre sélection.
Langue
1. En mode de conguration du système, appuyez sur les touches
pour sélectionner « Language » et appuyez sur la touche
SELECT pour conrmer votre choix.
2. Appuyez sur les touches pour sélectionner la langue choisie.
Appuyez sur la touche SELECT pour conrmer votre sélection.
Réinitialisation aux paramètres d'usine
Il peut arriver, notamment après un déménagement, que vous souhaitiez
réinitialiser l'appareil aux réglages d'usine. Si vous avez des problèmes de
réception, vous pouvez essayer de réinitialiser l'appareil aux paramètres
d'usine, puis rechercher à nouveau les stations. Si vous déménagez
dans une autre région du pays, il se peut que les stations DAB locales
et nationales que vous aviez enregistrées auparavant ne soient plus
disponibles.
1. En mode de conguration du système, appuyez sur les touches
pour sélectionner « Factory Reset » et appuyez sur la touche
SELECT pour conrmer votre choix.
93
FR
2. Appuyez sur les touches ⏮/⏭.pour sélectionner « YES ». Appuyez sur
la touche SELECT pour conrmer votre sélection ou sélectionnez « No »
pour annuler.
Remarque : Lors de la réinitialisation des paramètres d'usine, toutes les
stations enregistrées sont supprimées.
Mise à jour logicielle
1. En mode de conguration du système, appuyez sur les touches
pour sélectionner « Software Update » et appuyez sur la
touche SELECT pour conrmer votre choix.
2. Pour sélectionner « Auto-check setting » (vérier automatiquement les
mises à jour) ou « Check now » (vérier maintenant), appuyez sur les
touches . Appuyez sur la touche SELECT pour conrmer votre
sélection.
Remarque : avant de lancer la mise à jour, assurez-vous que la che
secteur de l'appareil est branchée et que la connexion électrique est
stable. Si la connexion électrique est interrompue pendant une mise
à jour du logiciel, cela peut entraîner des dysfonctionnements et/ou
endommager l'appareil.
Assistant de conguration
L'assistant de conguration peut être sélectionné dans les paramètres du
système. L'assistant de conguration peut être utilisé pour l'heure/la date et
le réseau. Dès que l'assistant d'installation est terminé, la radio est prête à
l'emploi.
Info
1. En mode de conguration du système, appuyez sur les touches
pour sélectionner « Info » et appuyez sur la touche SELECT
pour conrmer votre choix.
2. La version du logiciel, l'ID de la radio et le nom de l'appareil s'aichent à
l'écran.
94
FR
Politique de condentialité
1. Pour aicher la page de protection des données, appuyez d'abord sur
la touche MENU. Sélectionnez ensuite System settings (Paramètres
système) - Privacy policy (Politique de condentialité).
2. Après la réinitialisation aux paramètres d'usine, la déclaration de
condentialité doit être acceptée à nouveau.
Rétroéclairage
1. En mode de conguration du système, appuyez sur les touches
pour sélectionner « Backlight » et appuyez sur la touche
SELECT pour conrmer votre choix.
2. Pour d'autres réglages dans ce menu, appuyez sur les touches
. Appuyez sur la touche SELECT pour conrmer votre
sélection.
Mode de
fonctionnement
élevé/ moyen/ faible
Mode veille
Arrêt : arrêt/ 10 sec/ 30 sec/ 60 sec Niveau
de veille : élevé/ moyen/ bas/ arrêt
Vous pouvez également appuyer plusieurs fois sur la touche DIMMER de la
télécommande pour ajuster le rétroéclairage.
Remarque : si vous avez sélectionné « Arrêt » pour l'extinction, le
rétroéclairage reste aussi lumineux en mode veille qu'en mode de
fonctionnement et ne peut pas être ajusté avec la télécommande.
RADIO INTERNET
Pour pouvoir écouter la radio sur Internet, votre appareil doit être connecté
à Internet. Essayez de placer la radio le plus près possible du routeur an
d'obtenir les meilleures vitesses de connexion. Dès que le mode radio
Internet est sélectionné, l'appareil se connecte au portail radio Internet de
Frontier Silicon pour télécharger une liste de stations. Dès qu'une station
est sélectionnée, la radio se connecte directement à cette station.
Appuyez sur la touche MODE de l'appareil ou de la télécommande pour
sélectionner la radio Internet.
En mode radio Internet, appuyez sur la touche MENU de l'appareil ou sur
la touche MENU de la télécommande pour accéder au menu. Vous pouvez
choisir entre les options suivantes : Last listened (Dernièrement écouté),

95
FR
System settings (Paramètres système) et Main menu (Menu principal). Pour
faire votre choix, appuyez sur les touches et conrmez votre
choix avec la touche SELECT.
Lorsque le mode radio Internet est redémarré, la dernière station écoutée
est sélectionnée automatiquement. Appuyez sur la touche BACK pour
revenir à la liste des stations.
Dernièrement écouté
1. Appuyez sur les touches
pour aicher l'historique des
dernières stations écoutées.
2. Utilisez les touches pour sélectionner l'une des options
listées en-dessous et conrmez votre sélection en appuyant sur SELECT.
Liste des stations
Lorsque vous utilisez la radio pour la première fois en mode Radio Internet,
celle-ci se trouve sur la liste des stations. Utilisez les touches
pour sélectionner l'une des options listées en-dessous et conrmez votre
sélection en appuyant sur SELECT.
Pays
Vous pouvez rechercher spéciquement les stations
de votre pays. La radio locale est également aichée
à l'intérieur de cette portée.
Recherche
Vous pouvez utiliser un grand nombre de mots-
clés pour rechercher des stations. Le nom et la
description de la station que vous avez sélectionnée
s'aichent à l'écran.
Emplacement
Vous pouvez sélectionner des stations d'une liste de
pays disponibles.
Populaires
Choisissez une station dans la liste des stations
préférées du monde entier.
Découverte
Sélectionnez des stations dans diérentes catégories
de menu : Pays, Genre ou Langue.
Appuyez sur la touche BACK de l'appareil ou de la télécommande pour
revenir en arrière d'un pas dans le menu.
96
FR
Sauvegarder une station
Les stations de radio Internet enregistrées sont stockées à l'intérieur de la
radio et il n'est pas possible d'y accéder à partir d'autres radios.
1. Pour pouvoir enregistrer une station de radio Internet, il faut d'abord
l'écouter. Appuyez sur la touche MEMORY de l'appareil ou sur la touche
PRESET de la télécommande et maintenez-la jusqu'à ce que l'écran
aiche « Save to Preset » (Enregistrer dans la présélection).
2. Choisissez l'un des 30 emplacements de mémoire en tournant la
commande de sélection ou en appuyant sur les touches
de
la télécommande pour y mémoriser la station actuelle et conrmez votre
choix en appuyant sur la commande de sélection de l'appareil ou sur la
touche SELECT de la télécommande.
Pour écouter une station mémorisée
1. Pour écouter une station mémorisée, appuyez sur la touche MEMORY
de l'appareil ou sur la touche PRESET de la télécommande, puis utilisez
la commande de sélection de l'appareil ou les touches
de la
télécommande pour sélectionner la station mémorisée souhaitée.
2. Pour conrmer votre choix, appuyez sur la commande de sélection vers
le bas ou appuyez sur la touche SELECT de la télécommande.
Il est également possible de rappeler les stations enregistrées avec la
télécommande en procédant comme suit :
• Appuyez plusieurs fois sur la touche PRESET +/- pour appeler les
diérentes stations ou appuyez sur les touches numériques pour
appeler directement l'une des stations des emplacements de mémoire
1 à 10.
• Si aucune station n'a été mémorisée dans l'emplacement mémoire
sélectionné, l'écran aiche «Preset empty ».
La mémorisation et le rappel des stations enregistrées fonctionnent de la
même manière dans les modes Radio Internet/Podcasts, DAB et FM.
Aichages des radios Internet
Chaque fois que vous appuyez sur la touche INFO de la télécommande,
l'écran change entre les modes d'aichage suivants :
Info station/description Langue/lieu Débit binaire/format sonore/taux
d'échantillonnage Mémoire tampon de lecture Date
97
FR
PODCASTS
Pour pouvoir écouter la radio sur Internet, votre appareil doit être connecté
à Internet. Essayez de placer la radio le plus près possible du routeur an
d'obtenir les meilleures vitesses de connexion.
Appuyez sur la touche MODE de l'appareil ou de la télécommande
pour accéder au menu des modes. Tournez la commande de sélection
de l'appareil ou appuyez plusieurs fois sur les touches ⏮ ou ⏭ de la
télécommande pour sélectionner le mode Podcast. Pour conrmer votre
choix, appuyez sur la commande de sélection vers le bas ou appuyez sur la
touche SELECT de la télécommande.
Dernièrement écouté
Appuyez sur les touches
pour aicher l'historique des dernières
stations écoutées et appuyez sur la touche SELECT pour conrmer.
Liste des podcasts
Lorsque vous redémarrez la radio, les dernières stations écoutées sont
sélectionnées automatiquement. Appuyez sur la touche BACK pour revenir à
la liste des Podcasts.
Lorsque vous utilisez la radio pour la première fois en mode Podcast,
celle-ci se trouve sur la liste des Podcasts. Utilisez les touches
pour sélectionner l'une des options listées en-dessous et conrmez votre
sélection en appuyant sur SELECT.
Pays
Vous pouvez rechercher spéciquement les Podcasts
de votre pays. La radio locale est également aichée
à l'intérieur de cette portée.
Recherche
Vous pouvez utiliser un grand nombre de mots-
clés pour rechercher des Podcasts. Le nom et la
description du Podcast que vous avez sélectionné
s'aichent à l'écran.
Emplacement
Vous pouvez sélectionner des Podcasts dans une
liste de pays disponibles.
Découverte
Sélectionnez des Podcasts dans diérentes
catégories de menu : Pays, Genre ou Langue.
Sauvegarder et rappeler une station
Voir les sections « Mémoriser des stations » et « Rappeler une station
mémorisée » dans la section « Radio Internet ».

98
FR
SPOTIFY CONNECT
Utilisez votre smartphone, tablette ou ordinateur comme
télécommande pour Spotify. En savoir plus sur spotify.com/connect
.plus
Licences
Le logiciel Spotify est soumis à des licences de tiers, que vous pouvez
trouver ici :
https://www.spotify.com/connect/third-party-licenses
99
FR
RADIO DAB
Appuyez sur la touche MODE de l'appareil ou de la télécommande
pour accéder à la sélection du mode. Tournez le bouton de sélection de
l'appareil ou appuyez sur les touches ⏮ ou ⏭ de la télécommande pour
choisir le mode DAB. Pour conrmer votre choix, poussez la commande
de sélection de l'appareil vers le bas ou appuyez sur la touche SELECT de
la télécommande. L'appareil passe en mode DAB et lance la fonction de
recherche automatique. Pendant la recherche automatique de stations,
l'écran aiche « scanning... » et une barre qui aiche la progression de la
recherche et le nombre de stations trouvées jusqu'à présent. Dès que la
recherche automatique de stations est terminée, l'appareil sélectionne
automatiquement la première station trouvée par ordre alphanumérique.
Les stations trouvées peuvent être sélectionnées dans la liste à l'aide des
touches . Appuyez sur la touche SELECT pour conrmer votre
sélection.
Liste des stations
1. En menu Podcast, appuyez sur la touche MENU pour accéder au menu
DAB.
2. Sélectionnez la liste de stations souhaitée à l'aide des touches
et conrmez votre choix en appuyant sur la touche SELECT.
3. Une liste de stations DAB s'aiche à l'écran.
Recherche automatique de stations
Appuyez sur la touche SCAN|⏹ de l'appareil ou SCAN sur la télécommande
pour lancer la recherche automatique des stations. Vous pouvez également
appuyer sur la touche MENU et sélectionner « scan » à l'aide des touches et
conrmer votre choix avec la touche SELECT.
1. L'écran aiche « Scanning... » (recherche) et une barre de progression.
2. Toutes les stations trouvées sont automatiquement sauvegardées. Pour
choisir une station dans la liste, appuyez sur les touches
et
conrmez votre choix avec la touche SELECT.
Recherche manuelle de stations
Il est également possible d'eectuer une recherche manuelle des stations.
Cela est particulièrement utile pour orienter l'antenne ou pour ajouter des
stations ignorées lors de la recherche automatique des stations.
1. Appuyez sur la touche MENU pour aicher le menu.
2. Pour sélectionner « manual tune » (recherche manuelle des stations),
appuyez sur les touches
et appuyez sur SELECT pour
conrmer.
3. L'écran aiche Multiplex 5A à 13 F.
4. Appuyez sur les touches pour sélectionner la station et
DAB
radio
DAB Radi o
Scan
Stations: 0
Scanning
100
FR
appuyez sur la touche SELECT pour conrmer.
5. Pour lire les stations trouvées, revenez à l'écran de lecture et
sélectionnez la station souhaitée dans la liste de lecture à l'aide des
touches . Appuyez sur la touche SELECT pour conrmer.
Supprimer les stations indisponibles
Les stations non disponibles peuvent être supprimées de la liste.
1. En mode DAB, appuyez sur la touche MENU et sélectionnez « Prune
invalid » (supprimer les stations invalides) à l'aide des touches
et conrmez votre choix en appuyant sur la touche SELECT.
2. Utilisez les touches ⏮ ou ⏭ pour sélectionner « Yes » (oui) et conrmez
votre sélection en appuyant sur SELECT. Sélectionnez « No » (non) pour
annuler.
DRC (Compression de plage dynamique)
Lorsque vous écoutez de la musique à plage dynamique élevée dans un
environnement bruyant, il peut être utile de comprimer la plage dynamique
audio.
1. En mode DAB, appuyez sur la touche MENU et sélectionnez « DRC » avec
les touches
. Appuyez sur la touche SELECT pour conrmer
votre sélection.
2. Utilisez les touches pour sélectionner « DRC élevé/bas/arrêt
» et conrmez votre sélection en appuyant sur SELECT.
Ordre des stations
Vous pouvez trier les stations de la liste dans un ordre spécique.
1. En mode DAB, appuyez sur la touche MENU et sélectionnez « Station
order » (ordre des stations) à l'aide des touches
et conrmez
votre choix en appuyant sur la touche SELECT.
2. Utilisez les touches Alphanumérique/Ensemble et conrmez
votre sélection en appuyant sur SELECT.
Modes d'aichage DAB
Chaque fois que vous appuyez sur la touche MENU de l'appareil ou sur la
touche INFO de la télécommande, l'écran aiche les modes d'aichage
suivants :
DLS - type de programme - ensemble/fréquence - erreur de signal/
puissance - débit binaire/codec/station - date

101
FR
DLS (Dynamic Label Segment)
Il s'agit d'un texte déroulant contenant des informations en temps réel,
comme par exemple le titre de la chanson, les gros titres, etc.
Type de programme
Décrit le style ou le genre de l'émission diusée.
Nom de l'ensemble/ fréquence
Aiche le nom du multiplex qui contient la station que vous écoutez et
sa fréquence. Un multiplex est un ensemble de stations de radio qui
sont transmises de manière groupée sur une même fréquence. Il existe
des multiplex nationaux et locaux. Les multiplex locaux contiennent des
stations spéciques à votre région.
Bitrate/ Codec/ Canaux
Aiche le débit audio numérique reçu et donne des informations
supplémentaires sur les codes audio et le réglage de la station.
Date
Aiche la date actuelle fournie automatiquement par la station.
Sauvegarder et rappeler une station
Voir les sections « Mémoriser des stations » et « Rappeler une station
mémorisée » dans la section « Radio Internet ».
102
FR
RADIO FM
Appuyez sur la touche MODE de l'appareil ou de la télécommande pour
accéder à la sélection du mode. Tournez le bouton de sélection de l'appareil
ou appuyez sur les touches ⏮ ou ⏭ de la télécommande pour choisir le
mode FM. Pour conrmer votre choix, poussez la commande de sélection de
l'appareil vers le bas ou appuyez sur la touche SELECT de la télécommande.
L'écran aiche la fréquence.
Recherche automatique de stations
Appuyez sur la touche SCAN|⏹ de l'appareil ou SCAN sur la télécommande
pour lancer la recherche automatique des stations. Dès qu'une station est
trouvée, la recherche automatique des stations s'arrête automatiquement.
Maintenez les touches
pour démarrer la recherche d'une station.
Remarque : il peut arriver que des stations dont le signal est faible soient
ignorées lors de la recherche de stations.
Recherche manuelle de stations
Pour une recherche manuelle des stations, tournez le bouton de sélection
de l'appareil ou appuyez plusieurs fois sur les touches
de la
télécommande jusqu'à ce que vous atteigniez la fréquence souhaitée.
Remarque : en mode FM, il peut être nécessaire d'eectuer un réglage
n pour chaque station à l'aide du sélecteur de l'appareil ou des touches
de la télécommande. Chaque pression permet d'ajuster la
fréquence de 0,05 MHz. Si la réception du signal est mauvaise, vous devez
ajuster la position de l'antenne ou déplacer la radio.
Modes d'aichage FM
Chaque fois que vous appuyez sur la touche MENU de l'appareil ou sur la
touche INFO de la télécommande, l'écran aiche les modes d'aichage
suivants :
Texte radio - Type de programme - Fréquence - Date
Texte radio
RDS
Il s'agit d'un texte déroulant contenant des informations
sur le programme en cours
Type de
programme
Décrit le style ou le genre de l'émission diusée.
FM
radio
FM Radi o

103
FR
Nom de
la station/
Fréquence
Lorsqu'une station RDS est reçue, le nom de la station
s'aiche. Sinon, l'écran aiche la fréquence.
Date Aiche la date actuelle fournies par la station.
Paramètre de recherche
1. Appuyez sur la touche MENU pour accéder au menu FM.
2. Utilisez les touches
pour sélectionner « Scan Setting »
(paramètres de recherche) et conrmez votre sélection en appuyant sur
la touche SELECT.
3. Utilisez les touches ⏮ ou ⏭ pour sélectionner « Yes » (oui) et rechercher
uniquement les stations ayant un signal fort, et conrmez votre sélection
en appuyant sur SELECT.
Paramètres audio
1. Appuyez sur la touche MENU pour accéder au menu principal.
2. Utilisez les touches
pour sélectionner « Audio Setting »
(Paramètres audio) et appuyez sur la touche SELECT pour conrmer.
3. Utilisez les touches ⏮ ou ⏭ pour sélectionner « Yes » (oui) pour écouter
les stations en mono uniquement ou sélectionnez « no » (non) pour que
l'appareil choisisse automatiquement lui-même entre stéréo et mono.
4. Appuyez sur la touche SELECT pour conrmer.
Vous pouvez aussi utiliser la touche MONO/ST de la télécommande pour
basculer entre mono uniquement ou mono/stéréo.
Sauvegarder et rappeler une station
Voir les sections « Mémoriser des stations » et « Rappeler une station
mémorisée » dans la section « Radio Internet ».
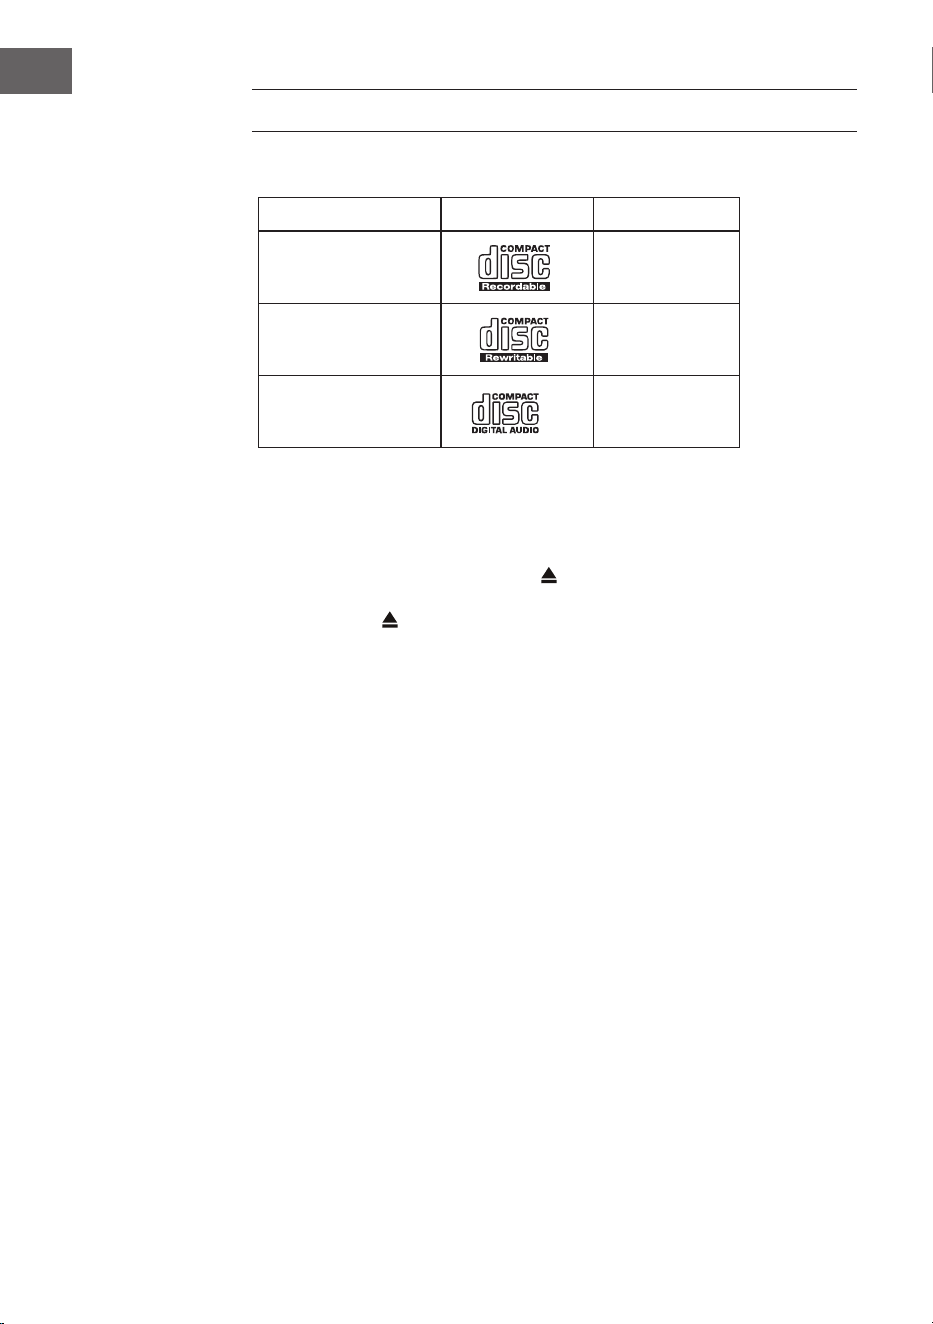
104
FR
LECTEUR CD
Disques compatibles
Type de disque Logo du disque Contenu média
CD-R (CD
enregistrable)
Audio
CD-RW (CD
réinscriptible)
Audio
CD audio (disque
compact)
Audio
Sur l'appareil ou sur la télécommande, appuyer sur MODE pour activer le
lecteur de CD.
Lecture
1. Appuyez sur la touche d'éjection (
) pour ouvrir le tiroir CD.
2. Insérez le CD dans le tiroir avec la face imprimée vers le haut. Appuyez
sur la touche pour refermer le tiroir avec le CD.
3. Si aucun CD n'a été inséré ou si le CD ne peut pas être lu, l'écran aiche
« No disk ».
4. Le nombre de titres apparaît sur l'écran lorsque la lecture est en pause.
Appuyez maintenant sur pour lire la première piste du CD/MP3.
Mettre la lecture en pause : Appuyez sur
pour mettre la lecture en
pause.
Pour arrêter la lecture : pour arrêter la lecture, appuyez sur
.
Passer au titre suivant : Utilisez
et pour passer au titre précédent
ou suivant. Pour faire avancer ou reculer rapidement une piste, maintenez la
touche ou
Vous pouvez également appuyer successivement sur les touches
numériques de la télécommande pour passer directement au titre souhaité.
Maintenez les touches
/ de la télécommande pour eectuer une
lecture rapide en avant ou en arrière.
Lors de la lecture de disques MP3 dont la musique est regroupée dans
diérents dossiers, vous pouvez passer au dossier suivant/précédent à
l'aide des touches Preset/Ordner ∧/∨ de la télécommande.

105
FR
Répétition de la lecture
1. Appuyez plusieurs fois sur la touche REPEAT pour sélectionner un mode
de lecture.
1
F
Répéter le titre en cours.
1
F
Répéter tous les chiers du dossier en cours.
(uniquement pour les CD de données)
1
F
Répéter tous les titres.
2. Appuyez à nouveau sur la touche REPEAT pour quitter la fonction de
répétition.
Lecture aléatoire
Tous les titres peuvent être lus dans un ordre aléatoire.
1. Appuyez sur la touche RANDOM de la télécommande. L'écran aiche
désormais
. Tous les titres sont lus dans un ordre aléatoire.
2. Appuyer sur et pour passer au titre suivant dans la lecture
aléatoire.
3. Une fois que les titres ont été lus, la lecture s'arrête automatiquement.
4. Pour arrêter la lecture aléatoire, appuyez sur RANDOM pendant la
lecture. La lecture se poursuit normalement.
Lecture de titres
1. Appuyez sur la touche INTRO de la télécommande. L'écran affiche
désormais « INTRO ». Le lecteur CD joue les 10 premières secondes de
chaque piste.
2. Appuyer à nouveau sur INTRO sur la télécommande pour revenir à la
lecture normale.
Créer un programme
Vous pouvez programmer jusqu'à 20 titres dans l'ordre de votre choix. Le
mode de programmation s'active en mode d'arrêt (STOP).
1. Appuyez sur PRESET pour passer en mode programme.
2. Utilisez les touches
et pour sélectionner le titre que vous
souhaitez programmer.
3. Confirmer le titre avec SELECT.
4. Répétez les étapes 2 et 3 pour programmer d'autres titres. Une fois la
sélection des titres terminée, appuyez sur pour commencer la lecture
des titres programmés.
106
FR
LECTURE PAR USB
1. Un port USB se trouve à l'avant de l'appareil. Lorsqu'un périphérique
USB est connecté à l'appareil, appuyez plusieurs fois sur la touche MODE
de l'appareil ou de la télécommande pour sélectionner le mode USB.
2. L'appareil lira automatiquement les titres.
3. Toutes les fonctions de lecture sont les mêmes que pour la lecture d'un
CD MP3.
En mode USB , l'appareil peut lire les formats de chiers MP3 uniquement.
L'appareil peut prendre en charge des périphériques USB d'une capacité
maximale de 32 Go. Il se peut que l'appareil ne soit pas compatible avec
tous les périphériques USB ; cela n'indique pas un problème avec l'appareil.
Chargement d'un appareil externe
Vous pouvez charger votre appareil à l'aide d'un câble USB (non fourni) sur
la prise USB de cet appareil.
• Le courant de charge maximal pour la charge par USB est de 1 A.
• Il n'est pas garanti que tous les appareils soient rechargeables.
Annuler le programme : Appuyez deux fois sur
ou ouvrez et refermez le
tiroir CD pour eacer la mémoire de programme.

107
FR
LECTURE BT
L'appareil dispose d'une fonction BT qui peut recevoir un signal dans
un rayon de 8 mètres. Connectez la radio à un appareil BT externe pour
écouter de la musique par BT :
1. Appuyez sur la touche MODE de l'appareil ou de la télécommande pour
sélectionner le mode BT.
2. Si la radio n'a pas encore été connectée à un appareil BT, le logo BT se
met à clignoter, ce qui signie que la radio est en mode connexion.
3. Activez la fonction BT de votre appareil mobile.
4. Sélectionnez iTuner-320 BT dans la liste des appareils disponibles.
5. Si nécessaire, saisissez le mot de passe « 0000 ». Une fois que la
connexion avec l'appareil a été établie avec succès, le logo BT cesse de
clignoter. Votre appareil mobile est maintenant connecté à la radio par
BT.
6. Maintenez la touche PRESET de l'appareil ou appuyez sur la touche PAIR
de la télécommande pour couper les connexions BT déjà existantes et
établir une connexion avec un autre appareil BT externe.
7. Vous pouvez quitter la fonction BT de la radio en passant à un autre
mode ou en désactivant la connexion BT de votre appareil mobile.
Lecture de musique par BT
Il peut être nécessaire d'ajuster le volume à la fois sur la radio et sur
l'appareil BT mobile. Appuyez sur la touche
⏯ de l'appareil ou de la
télécommande pour mettre en pause ou reprendre la lecture de la musique.
Les touches ⏮/⏭ permettent de passer au titre précédent/suivant.
Remarques :
• La distance de fonctionnement entre la radio et les appareils mobiles
est d'environ 8 mètres.
• Si le signal BT est faible, la connexion BT peut être momentanément
interrompue. Dans ce cas, la connexion sera rétablie dès que possible.
• Pour assurer une meilleure réception du signal, retirez les obstacles
entre la radio et l'appareil BT.
• La compatibilité avec tous les appareils et types de médias n'est pas
garantie.
• Certains téléphones portables coupent la connexion BT lorsque vous
répondez à un appel. La connexion BT est automatiquement rétablie
après la n de l'appel. Cela n'indique pas un problème de l'appareil.

108
FR
ENTRÉE AUDIO (LINE IN)
Vous pouvez lire de la musique à partir de sources externes.
1. Connectez le périphérique externe aux connecteurs RCA situés à
l'arrière.
2. Appuyez plusieurs fois sur la touche MODE pour sélectionner le mode
Line-In.
3. Réglez le volume à l'aide de la commande de volume de l'appareil ou
des touches +/- de la télécommande.
4. En mode entrée de ligne, vous pouvez utiliser votre appareil audio
directement pour les fonctions de lecture.
Cherchez des informations sur la connexion de l'appareil audio externe
dans son mode d'emploi.
NET-REMOTE
L'appareil dispose de la fonction NetRemote, qui permet de le commander
par une application sur un smartphone ou une tablette (iOS ou Android).
Téléchargez l'application UNDOK sur Google Play Store ou Apple Store et
installez-la sur votre smartphone ou votre tablette.
Avant de lancer l'application, assurez-vous que la radio et le smartphone
ou la tablette se trouvent sur le même réseau Wi-Fi. Démarrez maintenant
l'application. Une fois lancée, l'application recherche la radio sur le réseau.
Sélectionnez la radio dans la liste des appareils disponibles pour établir la
connexion NetRemote.
• Une fois que le smartphone ou la tablette a établi la connexion avec
l'appareil, la connexion sera établie automatiquement la prochaine fois
que vous ouvrirez l'application sur votre appareil mobile.
• Assurez-vous qu'un seul appareil connecté à la radio par l'application
puisse se connecté en même temps. Si vous vous connectez à la radio
par l'application avec un autre appareil, la connexion avec l'appareil
précédent est interrompue.
• Lorsque le terminal mobile est connecté pour la première fois à la radio,
il peut être nécessaire de saisir un mot de passe. Le mot de passe par
défaut est «1234 ». Le mot de passe peut être modié dans la section
Network (Réseau) > NetRemote PIN Setup (Conguration du mot de
passe de commande à distance du réseau) des Préférences Système.
• Sélectionnez le mode souhaité sur la page principale de l'application. Le
mode peut se contrôler aussi bien avec l'application que l'appareil.
109
FR
UTILISATION D'UN CASQUE
N'écoutez pas la musique à un volume élevé au casque pendant une période
prolongée, car cela pourrait entraîner des dommages auditifs dénitifs.
• Utilisez uniquement des écouteurs avec une prise de 3,5 mm.
• Branchez les écouteurs sur la prise casque située à l'avant de l'appareil.
L'écoute de musique à un volume élevé pendant une période prolongée
peut entraîner des lésions auditives. Évitez les volumes élevés lorsque
vous utilisez des écouteurs, surtout pendant une longue période.
RÉGLAGE DE LA MINUTERIE D'ARRÊT (SLEEP)
Cette fonction permet de régler l'appareil pour qu'il se mette lui-même en
veille après un laps de temps choisi.
1. Activez la fonction Sleep en appuyant plusieurs fois sur la touche SLEEP.
À chaque pression, une des options est sélectionnée dans l'ordre suivant
:
2. Cessez d'appuyer sur la touche dès que la durée souhaitée s'aiche
à l'écran. La fonction de mise en veille est alors activée au bout de 2
secondes. L'icône apparaît à l'écran. Le temps restant avant l'arrêt
automatique est également aiché à côté de l'icône.
3. Dès que la minuterie est écoulée, l'appareil se met en mode veille. Si
vous souhaitez désactiver la fonction de mise en veille alors que la
minuterie n'a pas encore expiré, appuyez sur la touche SLEEP jusqu'à ce
que l'écran aiche « SLEEP OFF »
Procédure alternative :
1. Appuyez sur la touche MENU pour accéder au menu principal. Utilisez
les touches
pour sélectionner Main menu (Menu principal) et
appuyez sur la touche SELECT pour conrmer.
2. Sélectionnez Sleep à l'aide des touches et conrmez votre
choix en appuyant sur la touche SELECT.
3. Sélectionnez la minuterie d'arrêt à l'aide des touches et
conrmez votre choix en appuyant sur la touche SELECT.
Sleep OFF
15 minutes
30 minutes
45 minutes
60 minutes
90 minutes
120 minutes
110
FR
RÉGLER LE RÉVEIL
1. Dès que vous appuyez sur la touche TIMER de la télécommande, l'écran
aiche « Alarm(1 ou 2) : O [hh:mm] ».
2. Sélectionnez Alarm 1 ou Alarm 2 à l'aide des touches et
conrmez votre choix en appuyant sur la touche SELECT.
Sélectionnez les paramètres suivants à l'aide des touches et
conrmez à chaque fois en appuyant sur la touche SELECT.
Activer
désactivé / tous les jours / une seule fois / le
week-end / les jours de semaine
Horloge Heure d'activation de l'alarme
Mode Buzz / radio Internet / DAB / FM
Paramètres par
défaut
Dernière station écoutée
Volume 0 – 32
Enregistrer Enregistrez et conrmez le réglage de l'alarme
3. Sélectionnez « Save » et appuyez sur la touche SELECT pour enregistrer
le réglage eectué. L'écran aiche « Alarm Saved ». Une fois l'alarme
réglée, l'icône d'alarme s'aiche à l'écran.
4. Pour désactiver l'alarme, appuyez sur le bouton de réglage du volume de
l'appareil ou sur la touche ALARM de la télécommande.
Annuler l'alarme
1. Lorsque vous appuyez sur la touche TIMER de la télécommande, l'écran
affiche « Alarm(1 ou 2) : Off [hh:mm] ».
2. Sélectionnez Alarm 1 ou Alarm 2 à l'aide des touches
et
confirmez votre choix en appuyant sur la touche SELECT.
3. Avec les touches choisissez «Enable » (activer) et confirmez
en appuyant sur la touche SELECT.
4. Utilisez les touches pour sélectionner « Off » et confirmez en
appuyant sur la touche SELECT.
5. Sélectionnez « Save » et appuyez sur SELECT pour enregistrer vos
paramètres.
6. En mode veille, vous pouvez également appuyer plusieurs fois sur la
touche TIMER de la télécommande en mode veille pour activer ou
désactiver l'alarme 1 ou l'alarme 2.

111
FR
Si vous n'appuyez sur aucune touche dans les 15 secondes environ,
l'appareil quitte automatiquement le mode de réglage de la minuterie.

112
FR
CONSEILS POUR LE RECYCLAGE
S‘il existe une réglementation pour l‘élimination ou le
recyclage des appareils électriques et électroniques
dans votre pays, ce symbole sur le produit ou sur
l‘emballage indique que cet appareil ne doit pas
être jeté avec les ordures ménagères. Vous devez le
déposer dans un point de collecte pour le recyclage
des équipements électriques et électroniques.
La mise au rebut conforme aux règles protège
l‘environnement et la santé de vos semblables des
conséquences négatives. Pour plus d‘informations
sur le recyclage et l‘élimination de ce produit, veuillez
contacter votre autorité locale ou votre service de
recyclage des déchets ménagers.
Ce produit contient des piles. S‘il existe une
réglementation pour l‘élimination ou le recyclage
des piles dans votre pays, vous ne devez pas les
jeter avec les ordures ménagères. Renseignez-vous
sur les dispositions locales relatives à la collecte
des piles usagées. La mise au rebut conforme aux
règles protège l‘environnement et la santé de vos
semblables des conséquences négatives.
DÉCLARATION DE CONFORMITÉ
Fabricant :
Chal-Tec GmbH, Wallstraße 16, 10179 Berlin,
Allemagne.
Importateur pour la Grande Bretagne :
Berlin Brands Group UK Limited
PO Box 42
272 Kensington High Street
London, W8 6ND
United Kingdom
Le soussigné, Chal-Tec GmbH, déclare que
l’équipement radioélectrique du type iTuner CD est
conforme à la directive 2014/53/UE. Le texte complet
de la déclaration UE de conformité est disponible à
l’adresse internet suivante : use.berlin/10032753

113
FR
Chal-Tec GmbH
Wallstr. 16t 10179 Berlin
www.chal-tec.com
Le logiciel Spotify est soumis à des licences de tiers,
que vous pouvez consulter sur la page suivante :
https://www.spotify.com/connect/third-party-licenses
Toutes les marques énumérées sont des marques déposées de leurs
sociétés respectives.
Sous réserve d'erreurs d'omissions et de modications techniques. Nos
conditions générales sont applicables.


115
ES
Datos técnicos 116
Indicaciones de seguridad 117
Vista general del aparato 119
Mando a distancia 120
Conexión 123
Puesta en marcha 124
Conguración del sistema 128
Internetradio 132
Podcasts 135
Conexión a Spotify 136
Radio DAB 137
Radio FM 140
Reproductor de CD 142
Reproducción USB 144
Reproducción BT 145
Entrada de audio (Line In) 146
Red remota 146
Uso de auriculares 147
Ajustar el temporizador de desconexión (Sleep) 147
Congurar el despertador 148
Indicaciones sobre la retirada del aparato 150
CONTENIDO
Estimado cliente:
Le felicitamos por la adquisición de este producto.
Lea atentamente el siguiente manual y siga
cuidadosamente las instrucciones de uso con el
n de evitar posibles daños. La empresa no se
hace responsable por los daños causados por
el incumplimiento de las instrucciones y el uso
indebido. Escanee el siguiente código QR para
acceder al último manual de usuario y a más
información sobre el producto.

116
ES
DATOS TÉCNICOS
Número de artículo 10032753 10032754
Suministro de corriente de la
fuente de alimentación
100-240 V ~ 50/60 Hz, 1 A
Puerto USB
5 V
, 1 A
Audio
Potencia de salida 2 x 5 W RMS
Radio FM
Banda de frecuencia 87,5 – 108 MHz
CD
Respuesta en frecuencia 20 Hz-20 KHz
DAB
Banda de frecuencia 174-240 MHz
Especicaciones WLAN
Estándar
Banda de frecuencia
Potencia de transmisión
802.11 b/g/n
2412-2472MHz
19dBm
BT
Banda de frecuencia
Potencia máxima de transmisión
2402-2480MHz
2 dBm
Consumo en modo espera
Funcionamiento estándar en
modo espera
Funcionamiento de la red en
modo espera
<1,00 W (WLAN desactivada)
<2,00 W (WLAN activada)

117
ES
INDICACIONES DE SEGURIDAD
Indicaciones generales de seguridad
• Lea atentamente todas las instrucciones antes de utilizar el aparato y
guarde el manual para futuras consultas.
• Utilice únicamente la tensión indicada en la placa de características del
aparato. Asegúrese de que la toma de corriente tiene conexión a tierra.
• El aparato debe colocarse en una supercie plana y estable y no debe
estar expuesto a vibraciones.
• No coloque el aparato en supercies inclinadas o inestables, ya que se
puede caer.
• La toma de corriente debe estar situada cerca del aparato y debe ser
fácilmente accesible.
• Evite las temperaturas extremas, tanto el calor como el frío. Coloque
el aparato a una distancia segura de las fuentes de calor, como los
calefactores radiantes o las cocinas de gas o eléctricas. No exponga el
aparato a la luz solar directa ni a otras fuentes de calor.
• No coloque nunca velas u objetos similares con llama abierta sobre el
aparato.
• Para reducir el riesgo de incendio, descarga eléctrica o daños en
el producto, no lo exponga a la lluvia, la humedad, el goteo o las
salpicaduras. No coloque objetos llenos de agua, como jarrones de
ores, sobre el aparato.
• Si se derrama algún líquido sobre del aparato, pueden producirse
graves daños. En ese caso, apague el aparato de inmediato y
desconecte el enchufe de la toma de corriente. Contacte con el servicio
de atención al cliente.
• No cubra las aberturas de ventilación del aparato y evite que cortinas
u otros objetos entren en las aberturas de ventilación para evitar que
el aparato se sobrecaliente y provoque un incendio o una descarga
eléctrica.
• No coloque el aparato en una estantería cerrada, un armario empotrado
o cualquier otra zona de almacenamiento donde el espacio sea
limitado. Asegúrese de colocar el aparato a una distancia mínima de 10
cm de todas las supercies y objetos circundantes para garantizar una
ventilación adecuada.
Seguridad
• Desenchufe siempre el aparato de la toma de corriente antes de
conectarlo o desconectarlo de otros equipos o de moverlo.
• Asegúrese de que el enchufe del aparato no está insertado en la toma
de corriente durante una tormenta eléctrica.
• El aparato se calentará si se utiliza durante un periodo de tiempo
prolongado. Esto es normal y no indica un problema con el aparato.

118
ES
Conexión a la red eléctrica
• Asegúrese de que el aparato no está apoyado sobre el cable de
alimentación, ya que el cable podría dañarse por el peso del aparato y
convertirse en un peligro para la seguridad.
• Si el cable de alimentación del aparato está dañado, debe ser sustituido
por el servicio técnico del fabricante o por otra persona cualicada para
ello, con el n de evitar daños.
Fallos de funcionamiento
• No coloque el aparato sobre o cerca de otros equipos que puedan
causar interferencias electromagnéticas. Si coloca el aparato cerca
de otros equipos, la calidad de reproducción podría verse afectada
negativamente y podrían producirse interferencias de ruido.
Supervisión
• Los niños que estén cerca del aparato deben ser supervisados para que
no lo utilicen como un juguete.
• No permita que nadie, especialmente los niños, introduzcan objetos en
los oricios, terminales y otras aberturas del aparato, ya que esto podría
provocar una descarga eléctrica mortal.
Funcionamiento/Mantenimiento/Servicio
• No retire los tornillos por sí mismo para reducir el riesgo de descarga
eléctrica. El aparato no contiene ninguna pieza que el usuario pueda
reparar. Encargue el mantenimiento a personal cualicado.
• No retire ni abra ninguna de las cubiertas jas del aparato, ya que esto
podría exponer una tensión peligrosa.
• Desenchufe el aparato de la toma de corriente antes de limpiarlo.
• No utilice esponjas abrasivas ni productos de limpieza agresivos, ya que
pueden dañar la supercie del aparato.
• No utilice líquidos para limpiar el producto.

119
ES
VISTA GENERAL DEL APARATO
1 Compartimento de CD
2 Sensor IR
3 Salida para auriculares
4 Reproducción/pausa
5 Stop - Parar la reproducción
6 Pista anterior
7 Siguiente pista
8 Pantalla
9 Abrir/cerrar compartimento
del CD
10 Menú
11 Conguraciones
12 Modo
13 Desplazamiento/Selección
14 Volumen/ON-OFF
15 Receptor IR
16 Conexión a la red eléctrica
17 Antena WLAN
18 Salida de audio (analógico)
19 Entrada de audio (analógico)
20 Salida óptica (digital)
21 Salida coaxial (digital)
22 Antena
Parte frontal
Parte posterior

120
ES
MANDO A DISTANCIA
1
15
16
17
18
19
21
20
22
23
24
25
26
2
3
4
5
6
7
8
9
10
11
12
13
14

121
ES
1 Encendido/modo espera
2 Expulsar CD
3 Temporizador
4 Búsqueda
5 Modo de reproducción:
repetición
6 Emparejamiento BT
7 INFO
8 Siguiente pista/
Navegación por el menú hacia
la derecha
9 Stop/
Navegación por el menú hacia
abajo
10 Memoria de emisoras
11 Menú
12 Memoria de emisoras/Arriba/
abajo
13 Menú de navegación/Atrás
14 Silencio
15 Mono/estéreo
16 Campo numérico para
marcación directa
17 Volumen +/-
18 Ecualizador
19 Pista anterior/
Navegación por el menú hacia
la izquierda
20 Conrmar selección
21 Play/Pause/
Navegación por el menú hacia
arriba
22 Modo
23 Reproducir una pista
24 Modo de reproducción:
reproducción aleatoria
25 Ajuste de la hora
26 Temporizador de apagado

122
ES
Insertar las pilas en el mando a distancia
1. Presione la tapa del compartimento de pilas hacia abajo siguiendo la
marca y deslícela hacia afuera en la dirección de la echa.
2. Introduzca 2 pilas LR03 (AAA 1,5 V) en el compartimento de las pilas (no
incluidas). Asegúrese de que las marcas + y - de la pila se corresponden
con las marcas del compartimento de la pila.
3. Vuelva a colocar la tapa del compartimento de pilas.
Manejo de las pilas
• El uso inadecuado o incorrecto de las pilas puede causar corrosión
o fugas, lo que podría provocar un incendio y daños materiales o
personales.
• Utilice únicamente el tipo de pilas especicado en las instrucciones de
uso.
• No tire las pilas usadas a la basura doméstica. Elimínelas de acuerdo
con la normativa local.
• Retire la pila del mando a distancia si no va a utilizarlo durante un largo
periodo de tiempo, ya que podría producirse corrosión o fugas en la
pila, lo que podría provocar lesiones físicas y/o daños materiales y/o un
incendio.
Radio de acción del mando a distancia
El sensor remoto de la parte frontal del aparato responde a las órdenes del
mando a distancia hasta una distancia de 4 metros dentro de un ángulo
máximo de 60 grados.
El radio de acción también depende de la luminosidad de la habitación.

123
ES
CONEXIÓN
1. La entrada y la salida de audio (analógica), la salida óptica (digital) y la
salida coaxial (digital) se encuentran en la parte posterior del aparato.
Allí se puede conectar un amplicador A/V o un sistema HiFi.
2. Conecte la antena incluida en el volumen de suministro a la conexión de
antena y extiéndala hasta la longitud deseada.
3. Conecte la antena Wi-Fi suministrada al conector correspondiente en la
parte trasera del aparato.
4. Desenrolle el cable en toda su longitud. Introduzca el enchufe de
alimentación del aparato en la toma de corriente. El aparato está ahora
conectado y lista para usarse.
Asegúrese de que el aparato sólo se conecta a tomas de corriente con
la tensión correcta. Al insertar/extraer el enchufe de la red en la toma
de corriente, sujételo siempre por la cabeza del enchufe y nunca por el
cable de alimentación. No tire ni rompa nunca el cable de alimentación.
5. Desconecte el enchufe de la toma de corriente para apagar por
completo el aparato.
Conexión a la red
Este aparato sólo admite conexiones de red inalámbricas para el acceso a
la red y no admite conexiones LAN.
Red inalámbrica
1. Compruebe primero si los indicadores luminosos (LINK/ACT) de su
router se encienden.
2. Continúe con los pasos mencionados en la sección "Cómo empezar". Se
recomienda utilizar el asistente de conguración situado en los ajustes
del sistema.
Nota: Este aparato no puede conectarse directamente a un módem.
Se debe utilizar un router o un módem integrado en un router. Siga las
instrucciones correspondientes de su proveedor y observe las instrucciones
de funcionamiento de su router.
124
ES
PUESTA EN MARCHA
Este manual de instrucciones explica los pasos básicos para utilizar el
aparato. Si no se indica explícitamente, todas las instrucciones de uso se
reeren al funcionamiento del aparato con el mando a distancia.
Encendido/apagado
1. Pulse el control de volumen /del aparato o el botón del mando a
distancia para encender el aparato.
2. Pulse el control de volumen /del aparato o el botón del mando a
distancia para volver a poner el aparato en modo de espera.
Selección del modo
Pulse el botón MODE del aparato o del mando a distancia para seleccionar
entre los modos Radio por Internet, Podcasts, Spotify, Radio DAB, Radio
FM, Reproductor de CD, USB, BT y Entrada AUX.
Alternativa
1. Pulse el botón MENU del aparato o del mando a distancia para acceder
al menú principal de funciones, luego gire la perilla SCROLL|SELECT del
aparato o pulse los botones
del mando a distancia para
seleccionar el menú principal, luego pulse la perilla SCROLL|SELECT del
aparato o el botón SELECT del mando a distancia para conrmar.
2. Gire la perilla SCROLL|SELECT del aparato o pulse los botones del
mando a distancia para seleccionar el modo deseado, luego pulse la
perilla SCROLL|SELECT del aparato o el botón SELECT del mando a
distancia para conrmar.
Si el aparato no se utiliza durante unos 15 minutos, cambia
automáticamente al modo de espera. Desconecte el enchufe de la toma
de corriente para apagar por completo el aparato. Para ahorrar energía,
apague completamente el aparato cuando no lo utilice.
Ajuste del volumen
• Para ajustar el volumen, gire la perilla de volumen| o pulse los
botones VOL +/- del mando a distancia.
• Para silenciar el sonido, pulse el botón MUTE del mando a distancia.
Pulse de nuevo el botón MUTE o gire la perilla de volumen| o pulse
el botón VOL +/- del mando a distancia para reanudar la reproducción
normal.
Navegar por el menú
1. Mantenga pulsado el botón MENU del aparato o pulse el botón MENU
del mando a distancia para entrar en el menú.

125
ES
2. Gire la perilla de selección del aparato o pulse los botones ⏮ o ⏭ para
seleccionar.
3. Pulse el mando de selección del aparato hacia abajo o pulse el botón
SELECT del mando a distancia para conrmar su selección.
Conguración inicial
Cuando se enchufa por primera vez la clavija del aparato en la toma de
corriente, aparece la pantalla de bienvenida en la pantalla. El menú de
idiomas aparece entonces en la pantalla. Seleccione el idioma deseado
girando el mando de selección del aparato o pulsando las
teclas ⏮ o ⏮ del
mando a distancia. Para conrmar la selección, pulse el selector hacia abajo
o pulse el botón SELECT del mando a distancia. A continuación, se muestra
la política de privacidad. Para obtener información más detallada sobre
la política de privacidad, visite el sitio web mencionado a continuación.
Para conrmar su selección, pulse el selector hacia abajo o pulse el botón
SELECT del mando a distancia.
1. Gire el mando de selección para iniciar el asistente de conguración o
seleccione "SI" con las teclas ⏮ o ⏭. Conrme su selección pulsando el
mando de selección hacia abajo o pulsando el botón SELECT del mando
a distancia.
2. En el siguiente paso se puede seleccionar el formato de la hora.
Seleccione el ajuste deseado "12" o "24" y conrme su selección pulsando
el mando de selección o el botón SELECT del mando a distancia.
3. Ahora tiene la opción de establecer qué fuente (DAB/FM/red/no
actualización) debe utilizarse para que la hora y la fecha se actualicen
automáticamente. Si ha seleccionado Actualizar desde la red, seleccione
la zona horaria correcta en el siguiente paso para asegurarse de que la
hora se muestra correctamente. A continuación, seleccione si el ajuste
del horario de verano debe estar activado o desactivado.
4. En el siguiente paso, tiene la opción de especicar si la unidad debe
permanecer conectada a Internet en modo de espera. Gire el mando de
selección del aparato o pulse los botones ⏮ o ⏭ para seleccionar "YES"
(Sí). Para conrmar la selección, coloque entonces el selector hacia abajo
o pulse el botón SELECT del mando a distancia.
5. Su radio buscará ahora redes inalámbricas. Esto puede tardar unos
segundos. A continuación, aparece en la pantalla una lista de todas las
redes disponibles. Seleccione la red WLAN deseada. Para introducir la
contraseña, utilice WPS o introduzca la contraseña directamente en la
pantalla de la radio.
Establecer una conexión mediante el botón WPS del router
Utilizar el botón WPS (Wi-Fi Protected Setup) de su router es una forma
rápida y sencilla de conectar su radio a la red Wi-Fi sin tener que introducir
una contraseña. Seleccione uno de los siguientes métodos de conexión:
126
ES
Botón WPS
Si su rúter tiene un botón WPS, verá [WPS] en la parte delantera del
nombre de la red.
1. Seleccione con las teclas
"Pushbutton" (Pulsador) y luego
conrme su selección pulsando la tecla SELECT.
2. Aparecerá un mensaje en la pantalla pidiéndole que pulse el botón WPS
de su router. Pulse el botón WPS de su router. Consulte el manual de
instrucciones de su router si no está seguro de cuál es el botón.
3. Finalmente, pulse la tecla ENTER para conrmar. La radio se conecta
entonces al router. Este proceso puede tardar unos segundos.
Introducción de la contraseña
La radio genera una contraseña de 8 dígitos. Introduzca esta contraseña en
el router o en el dispositivo de acceso.
Establecer una conexión utilizando la contraseña WLAN
Si su router no tiene un botón WPS, se le pedirá que introduzca la
contraseña de la WLAN. Si su máquina dispone de la función WPS pero
quiere seguir utilizando la contraseña Wi-Fi para conectarse, seleccione
"SKIP WPS" (saltar WPS).
1. Pulse los botones
para seleccionar los números/letras.
Después de cada selección, pulse el botón SELECT para conrmar el
número/letra correspondiente.
2. Una vez que haya introducido completamente la contraseña, pulse los
botones para seleccionar "OK" en la parte derecha de la
pantalla.
3. Una vez establecida la conexión con éxito, pulse el botón SELECT para
salir de la conguración.

127
ES
La conguración se puede ajustar en cualquier momento en el menú
Conguración del sistema > Red > Asistente de red. Este manual de
instrucciones explica los pasos básicos para el funcionamiento de esta
unidad. Si no se indica explícitamente, todas las instrucciones de uso se
reeren al funcionamiento del aparato con el mando a distancia.
128
ES
CONFIGURACIÓN DEL SISTEMA
Mantenga pulsado el botón MENU de la unidad o pulse el botón MENU
del mando a distancia para mostrar el menú. Gire el mando giratorio
del aparato o pulse los botones del mando a distancia para
seleccionar los ajustes del sistema. Seleccione el ajuste deseado "12" o "24"
y conrme su selección pulsando el mando de selección o el botón SELECT
del mando a distancia.
Ecualizador
Esta unidad admite diversos ecualizadores y efectos de sonido. Pulse el
botón EQ para acceder al menú de ecualización. Alternativamente, mientras
está en el modo de ajuste del sistema, pulse
para seleccionar
Ecualizador y luego pulse SELECT para conrmar su selección.
1. La pantalla muestra lo siguiente: FLAT > CLASSIC > ROCK > POP > JAZZ.
2. Seleccione el ajuste del ecualizador deseado con los botones
y conrme su selección con el botón SELECT.
Calidad de audio en streaming
El sistema admite diferentes calidades de audio para los servicios de
streaming disponibles. La tasa de bits real para cada nivel de ajuste
depende del servicio de streaming utilizado.
Red
1. Durante el modo de conguración del sistema, pulse los botones
para seleccionar "Red" y pulse SELECT para conrmar su
selección.
2. Utilice los botones para seleccionar uno de los ajustes
indicados a continuación y conrme su selección pulsando el botón
SELECT.
Asistente de conexión
Wi
SSID- seleccione la red inalámbrica que desea
utilizar. Rescan (Reexaminar) - Buscar redes
disponibles. Conguración manual: seleccione
la red inalámbrica con DHCP activado/desac-
tivado
Conguración de PBC
Wi
Selecciona WPS en tu dispositivo y pulsa el
botón WPS del módem/router al que quieras
conectarte. Para reanudar, pulse el selector de
la unidad hacia abajo o pulse el botón SELECT
del mando a distancia.
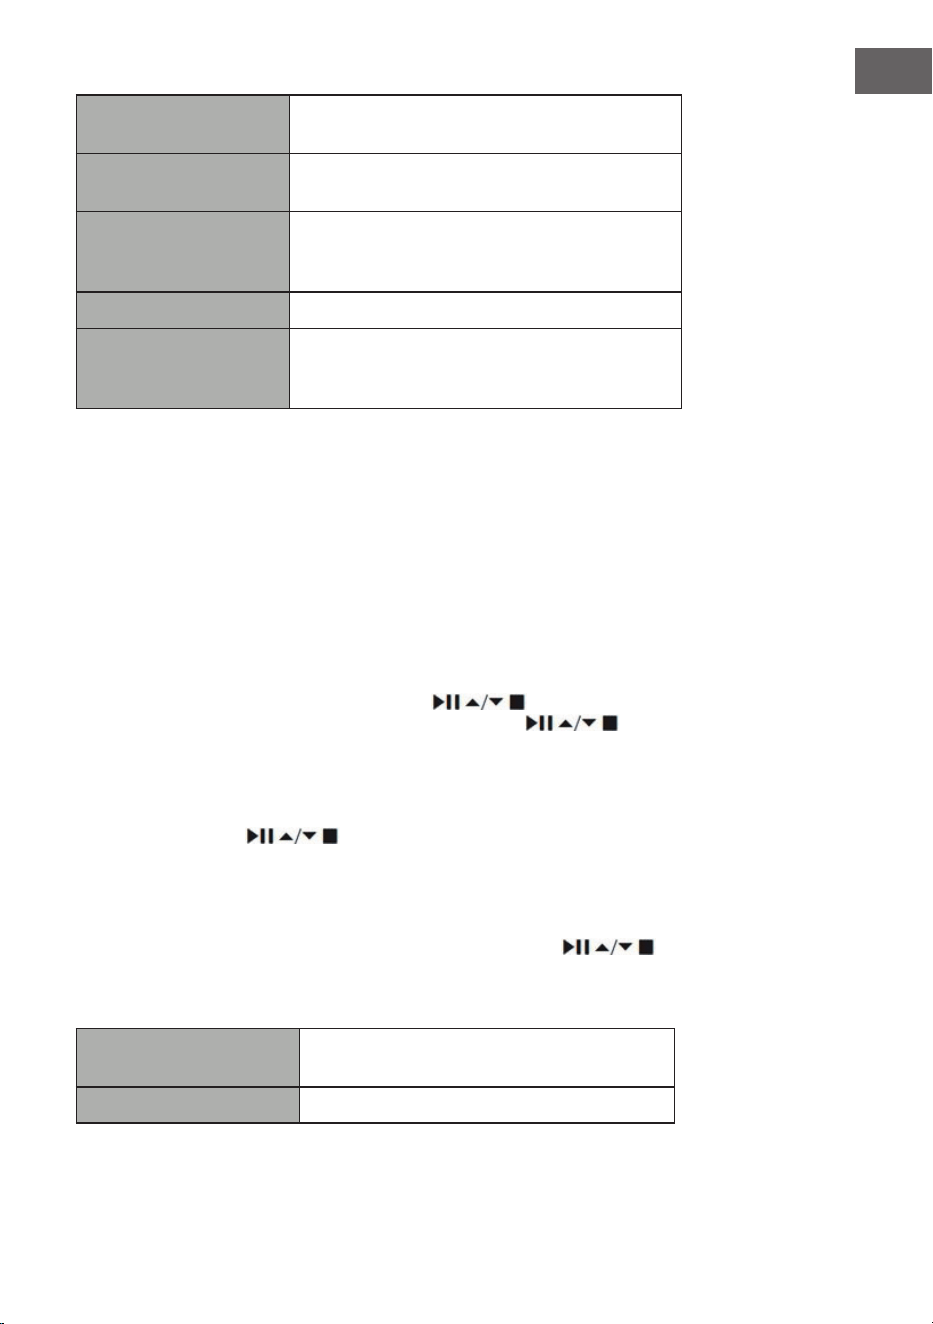
129
ES
Mostrar
conguraciones
Muestra los ajustes de la unidad en la pantalla.
Conguración manual
Seleccione la red inalámbrica con DHCP
activado/desactivado
Ajustes del PIN de Net
Remote
Para establecer una contraseña que debe
introducirse antes de conectar la máquina a
una red.
Perle de red Muestra la red de conexión
Mantener la conexión
a la red
Congure la unidad para que permanezca
conectada a la red en los modos de espera/
otros.
3. Pulse el botón BACK del aparato o del mando a distancia para cancelar
el ajuste e ir al menú anterior.
Fecha/Hora
La hora/fecha se puede ajustar automáticamente cuando la unidad se
conecta a Internet o a una emisora DAB/FM con información de hora/fecha.
También es posible ajustar la hora y la fecha manualmente. Pulse el botón
CLOCK del mando a distancia para acceder al menú de ajuste de la hora y
la fecha.
Alternativamente, es posible seleccionar "Hora/Fecha" durante el menú
de ajustes del sistema pulsando los botones
y conrmar la
selección pulsando el botón SELECT. Utilice los botones para
seleccionar "Ajustar hora/fecha" y conrme su selección pulsando el botón
SELECT.
1. Los dígitos de la fecha parpadean en la pantalla.
2. Pulse los botones para ajustar la etiqueta, el botón SELECT
para conrmar.
3. Repita el paso 2 para proceder con el ajuste del mes/año/hora/minuto.
4. El ajuste de la fecha y la hora ha nalizado.
Para otros ajustes en el menú Hora/Fecha, pulse los botones
y seleccione uno de los siguientes ajustes. Pulse la tecla ENTER para
conrmar su selección.
Actualización
automática
DAB/FM/Red/sin actualización
Congurar el formato 12/ Formato de 24 horas
130
ES
Establecer la zona
horaria
Seleccione una zona horaria (sólo disponible
si la actualización se selecciona desde la
red).
Verano
Activar/desactivar el horario de verano
(sólo disponible si se ha seleccionado la
actualización desde la red).
Nota: La conguración de fábrica es "Actualizar desde la red". Si desea
ajustar la hora manualmente, se recomienda desactivar la actualización
automática.
Ajuste del tiempo hasta la desconexión automática
Con la función "Espera Inactiva" puede ajustar el periodo de tiempo tras el
cual el aparato debe apagarse en modo de reproducción.
1. Durante el modo de ajuste del sistema, pulse los botones
para seleccionar "Inactive Standby" y pulse el botón SELECT para
conrmar su selección.
2. Para seleccionar entre apagado, 2 horas, 4 horas, 5 horas y 6 horas,
pulse los botones . Pulse la tecla ENTER para conrmar su
selección.
Idioma
1. Durante el modo de conguración del sistema
, pulse
los botones para seleccionar "Red" y pulse SELECT para conrmar su
selección.
2. Pulse los botones para seleccionar el idioma deseado . Pulse
la tecla ENTER para conrmar su selección.

131
ES
Restablecer los valores de fábrica
Puede ocurrir, sobre todo después de una mudanza, que quieras restablecer
los ajustes de fábrica de la unidad. Si tiene problemas de recepción también
puede restablecer el dispositivo desde los ajustes de fábrica y volver a
intentarlo. Si se traslada a otra parte del país, es posible que las emisoras
DAB locales y nacionales que había guardado anteriormente ya no estén
disponibles allí.
1. Durante el modo de ajuste del sistema
, pulse los botones
para seleccionar "Factory Reset" y pulse el botón SELECT para conrmar
su selección.
2. Pulse las teclas para seleccionar "YES" (sí)⏮/⏭. Conrme su selección
pulsando el botón SELECT o seleccione "No" para cancelar.
Nota: Cuando se restablece la conguración de fábrica de la unidad, se
borran todas las emisoras almacenadas.
Actualización de software
1. Durante el modo de conguración del sistema, pulse los botones
para seleccionar "Red" y pulse SELECT para conrmar su
selección.
2. Para seleccionar "Ajuste de vericación automática" o "Vericar ahora",
pulse los botones . Pulse la tecla ENTER para conrmar su
selección.
Nota: Antes de realizar la actualización, asegúrese de que el enchufe de
la radio está correctamente insertado en la toma de corriente y que la
conexión a la red eléctrica es estable. Si se interrumpe la conexión a la
red eléctrica durante una actualización de software, pueden producirse
fallos de funcionamiento y/o daños en la unidad.
Asistente de conguración
El asistente de conguración se puede seleccionar en los ajustes del
sistema. El asistente de conguración se puede ejecutar a través de la hora/
fecha y la red. En cuanto el asistente de conguración haya terminado, la
radio estará lista para funcionar.
Info
1. Durante el modo de conguración del sistema
, pulse
los botones para seleccionar "Red" y pulse SELECT para conrmar su
selección.
2. La versión del software, el ID de la radio y el nombre de la unidad
aparecen en la pantalla.
132
ES
Política de privacidad
1. Para mostrar la página de privacidad, pulse primero la tecla MENÚ.
A continuación, seleccione Conguración del sistema - Política de
privacidad.
2. Después de restablecer la conguración de fábrica, la política de
privacidad debe ser aceptada de nuevo.
Iluminación de fondo
1. Durante el modo de conguración del sistema, pulse los botones
para seleccionar "Red" y pulse SELECT para conrmar su
selección.
2. Pulse los botones para realizar más ajustes en este menú.
Pulse la tecla ENTER para conrmar su selección.
Modo de
funcionamiento
Alto/ medio/ bajo
Modo de espera
Apagado: Apagado/10 seg/30 seg/60
seg Nivel de espera: Alto/ Medio/ Bajo/
Apagado
También puede pulsar varias veces el botón DIMMER del mando a distancia
para ajustar la luz de fondo.
Nota: Si ha seleccionado "Apagado" para la desconexión, la luz de fondo
sigue siendo tan brillante en el modo de espera como en el modo de
funcionamiento y no se puede ajustar con el mando a distancia.
INTERNETRADIO
Para escuchar la radio por Internet, su unidad debe estar conectada a
Internet. Intenta colocar la radio lo más cerca posible del router para
obtener las mejores velocidades de conexión. Una vez seleccionado el
modo de radio por Internet, la unidad se conecta al portal de radio por
Internet de Frontier Silicon para descargar una lista de emisoras. Una
vez seleccionada una emisora, la radio se conecta directamente con esa
emisora.
Pulse el botón MODE del aparato o del mando a distancia para seleccionar
la radio de internet.
Para entrar en el menú en el modo de radio por Internet, pulse el botón
MENU de la unidad o el botón MENU del mando a distancia. Puede elegir
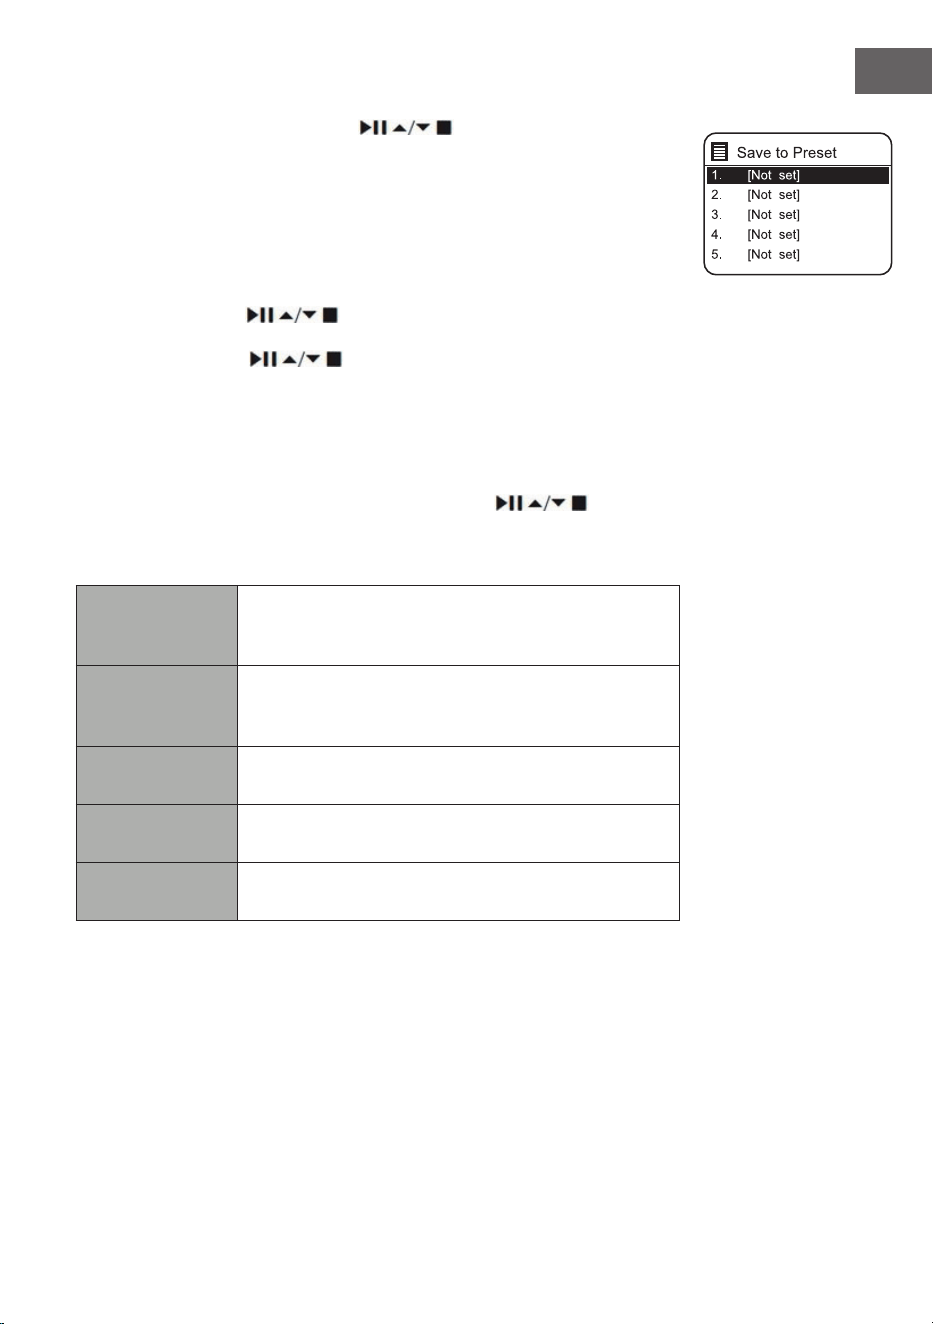
133
ES
entre lo siguiente: Última escucha, Ajustes del sistema y Menú principal.
Para seleccionar, pulse los botones y conrme su selección con
el botón SELECT.
Cuando se reinicia el modo de radio por Internet, se selecciona
automáticamente la última emisora escuchada. Pulse el botón BACK para
volver a la lista de canales.
Por último,
1. Pulse los botones
para acceder al historial de las últimas
emisoras escuchadas.
2. Utilice los botones para seleccionar uno de los ajustes
indicados a continuación y conrme su selección pulsando el botón
SELECT.
Lista de emisoras
La primera vez que utilices la radio en el modo de radio por Internet,
aparecerá en la lista de emisoras. Utilice los botones
para
seleccionar uno de los ajustes indicados a continuación y conrme su
selección pulsando el botón SELECT.
Países
Puedes buscar especícamente emisoras de tu país.
La radio local también se muestra dentro de este
rango.
Búsqueda
Puedes utilizar diversas palabras clave para buscar
canales. El nombre y la descripción del canal
seleccionado aparecen en la pantalla.
Lugar de
instalación
Puede seleccionar los canales de una lista de países
disponibles.
Favoritos
Seleccione un canal de la lista de los más populares
del mundo.
Descubrir
Seleccione los canales de las diferentes categorías
del menú: País, género o idioma.
Pulse el botón BACK del aparato o del mando a distancia para retroceder
un nivel en el menú.
134
ES
Almacenamiento de una emisora
Las emisoras de radio por Internet almacenadas se guardan dentro de la
radio y no se puede acceder a ellas desde otras radios.
1. Para guardar una emisora de radio por Internet, primero hay que
llamarla. Mantenga pulsado el botón MEMORY de la unidad o el botón
PRESET del mando a distancia hasta que aparezca la pantalla Guardar
en preselección.
2. Seleccione una de las 30 posiciones de memoria girando el mando de
selección o pulsando los botones
del mando a distancia
para almacenar allí la emisora actual y conrme su selección pulsando
el mando de selección del aparato o el botón SELECT del mando a
distancia.
Seleccionar una emisora guardada.
1. Para recuperar una emisora preseleccionada, pulse el botón MEMORY
de la unidad o el botón PRESET del mando a distancia y, a continuación,
seleccione la emisora preseleccionada deseada mediante el mando de
selección de la unidad o los botones
del mando a distancia.
2. Pulse el mando de selección del aparato hacia abajo o pulse el botón
SELECT en el mando a distancia para conrmar su selección.
Alternativamente, puede llamar a los canales almacenados en el mando a
distancia de la siguiente manera:
• Pulse el botón PRESET +/- varias veces para llamar a las diferentes
emisoras o pulse los botones numéricos para llamar directamente a una
de las emisoras en la posición de memoria 1 - 10.
• Si no se ha almacenado ninguna emisora en la posición de memoria
seleccionada, en la pantalla aparece "Preset empty".
El almacenamiento y la recuperación de las emisoras almacenadas
funcionan de la misma manera en los modos de radio por Internet/podcast,
DAB y FM.
Indicaciones de radio en Internet
Cada vez que se pulsa el botón INFO del mando a distancia, la pantalla
cambia entre los siguientes modos de visualización:
Información de la emisora/Descripción/Idioma/ubicación Tasa de bits/
Formato de sonido/Velocidad de muestreo Buer de reproducción
Fecha
135
ES
PODCASTS
Para escuchar la radio por Internet, su unidad debe estar conectada a
Internet. Intenta colocar la radio lo más cerca posible del router para
obtener las mejores velocidades de conexión.
Pulse el botón PROG del mando a distancia para entrar en el modo de
almacenamiento. Gire el dial de selección o pulse los botones⏮o ⏭del
mando a distancia para seleccionar el modo de Podcast. Para conrmar su
selección, pulse el selector hacia abajo o pulse el botón SELECT del mando
a distancia.
Por último,
Pulse los botones
para ver el historial de las últimas emisoras
escuchadas y pulse el botón SELECT para conrmar.
Lista de podcasts
Al reiniciar la radio, se seleccionan automáticamente las últimas emisoras
escuchadas. Pulse el botón BACK para volver a la lista de podcasts.
La primera vez que utilice la radio en modo podcast, estará en la lista
de podcasts. Utilice los botones
para seleccionar uno de los
ajustes indicados a continuación y conrme su selección pulsando el botón
SELECT.
Países
Puedes buscar especícamente Podcasts de tu país.
La radio local también se muestra dentro de este
rango.
Búsqueda
Puedes utilizar diversas palabras clave para buscar
podcasts. El nombre y la descripción del Podcast
seleccionado aparecen en la pantalla.
Lugar de
instalación
Puede seleccionar los podcasts de una lista de países
disponibles.
Descubrir
Seleccione los Podcasts de las diferentes categorías
del menú: País, género o idioma.
Almacenamiento y recuperación de estaciones
Consulte los apartados "Almacenamiento de emisoras" y "Recuperación de
una emisora almacenada" en la sección "Radio por Internet".

136
ES
CONEXIÓN A SPOTIFY
Utiliza tu smartphone, tablet u ordenador como
Control remoto para Spotify. Visita spotify.com/connect para saber
más.
Licencias
El software de Spotify está sujeto a licencias de terceros, que se pueden
consultar aquí:
https://www.spotify.com/connect/third-party-licenses
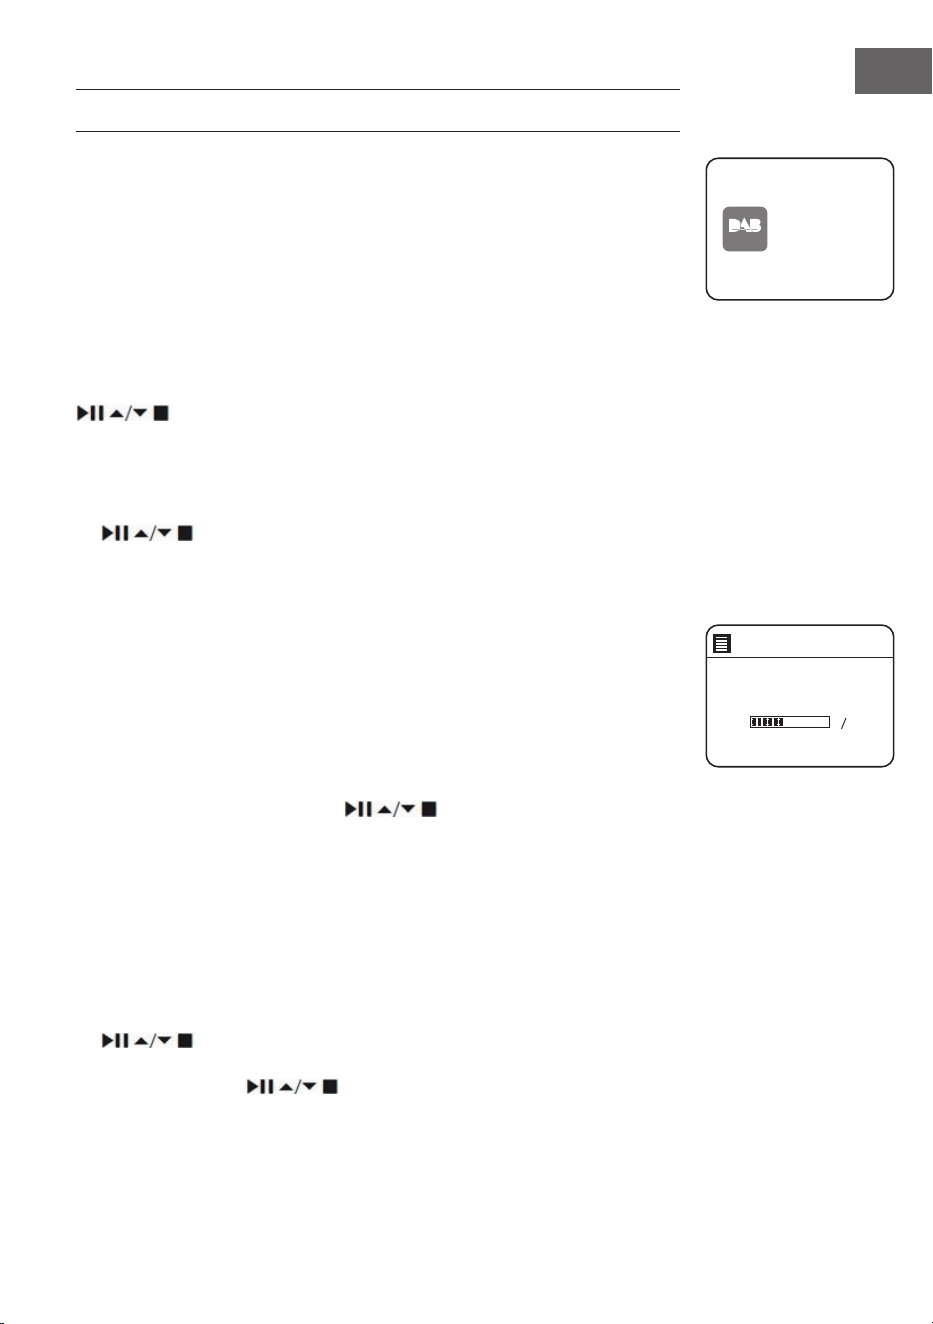
137
ES
RADIO DAB
Pulse el botón PROG del mando a distancia para entrar en el modo de
almacenamiento. Para seleccionar el modo DAB, gire el mando de selección
del aparato o pulse los botones ⏮ o ⏭ del mando a distancia. Conrme su
selección pulsando el mando de selección hacia abajo o pulsando el botón
SELECT del mando a distancia. El aparato se pone en modo DAB e inicia la
función de búsqueda automática. Durante la búsqueda, la pantalla muestra
"Escaneando...". (Buscar) se muestra junto con una barra que muestra el
progreso de la búsqueda y las estaciones encontradas hasta el momento.
Una vez nalizada la búsqueda automática de emisoras, el aparato pone a
la primera emisora encontrada alfanuméricamente.
Las emisoras encontradas se pueden seleccionar en la lista con los botones
. Pulse la tecla ENTER para conrmar su selección.
Lista de emisoras
1. Durante el modo DAB pulse el botón MENU para entrar en el menú DAB.
2. Utilice los botones para seleccionar la lista de canales y pulse el botón
SELECT para conrmar.
3. En la pantalla aparece una lista de emisoras DAB.
Búsqueda automática de emisoras
Pulse el botón SCAN|⏹ del aparato o del mando a distancia para iniciar la
búsqueda automática de canales. Como alternativa, puede pulsar la tecla
MENÚ y seleccionar "Escanear" con las teclas y conrmar su selección con
la tecla SELECCIONAR.
1. La pantalla muestra "Escaneando..." (Buscar) y se muestra una barra de
progreso.
2. Todas las emisoras encontradas se almacenarán automáticamente. Para
seleccionar, pulse los botones
y conrme su selección con el
botón SELECT.
Búsqueda manual de emisoras
También es posible realizar una búsqueda manual de emisoras. Esto es
especialmente útil cuando se alinea la antena o se añaden emisoras que se
saltaron durante la búsqueda automática de emisoras.
1. Pulse el botón MENÚ para entrar en el menú.
2. Pulse los botones para seleccionar "sintonía manual" y pulse el botón
SELECT para conrmar.
3. En la pantalla aparecen los múltiplex 5A a 13 F.
4. Pulse los botones para seleccionar el canal y pulse SELECT
para conrmar.
5. Para reproducir las emisoras encontradas, vuelva a la pantalla de
reproducción y seleccione la emisora deseada de la lista de reproducción
DAB
radio
DAB Radi o
Scan
Stations: 0
Scanning
138
ES
con los botones. Para conrmar, pulse el botón OK.
Borrar emisoras no válidas
Los canales no disponibles se pueden eliminar de la lista de canales.
1. Durante el modo DAB, pulse el botón
MENU y utilice los
botones para seleccionar "Prune invalid" (eliminar emisoras no válidas) y
conrme su selección pulsando el botón SELECT.
2. Seleccione "Sí" con las teclas ⏮ o ⏭ y conrme su selección pulsando la
tecla SELECT. Seleccione "No" para cancelar.
DRC (Compresión de rango dinámico)
Si está escuchando música de alto rango dinámico en un entorno ruidoso,
comprimir el rango dinámico del audio puede ser útil.
1. Durante el modo DAB, pulse el botón
MENU y seleccione
"DRC" con los botones . Pulse el botón SELECT para conrmar su
selección.
2. Utilice los botones para seleccionar "DRC high/low/o" y
conrme su selección pulsando el botón SELECT.
Lista de emisoras
Puede hacer que los canales de la lista de canales se clasiquen en un
orden especíco.
1. En el modo DAB, pulse el botón MENU y utilice los botones para
seleccionar "Orden de emisoras" y conrme su selección
pulsando el botón SELECT.
2. Utilice los botones alfanuméricos/de conjunto para
seleccionar y conrme su selección pulsando el botón SELECT.
Modos de visualización DAB
Cada vez que pulse el botón MENU de la unidad o el botón INFO del mando
a distancia, aparecerán en la pantalla los siguientes modos de visualización:
DLS - tipo de programa - conjunto/frecuencia - error/fuerza de la señal -
tasa de bits/códec/transmisor - fecha

139
ES
DLS (segmento de etiquetas dinámico)
Se trata de un mensaje de prueba con información en tiempo real, como
títulos de canciones, titulares, etc.
Tipo de programa
Describe el estilo o el género de un programa que se emite.
Nombre del conjunto/ Frecuencia
Muestra el nombre del múltiplex que contiene la emisora que estás
escuchando y su frecuencia. Un múltiplex es un conjunto de emisoras
de radio que se transmiten agrupadas en una frecuencia. Hay multiplex
tanto nacionales como locales. Los múltiplex locales contienen emisoras
especícas de su zona.
Bitrate/ Codec/ Canales
Muestra la tasa de bits de audio digital que se está recibiendo y ofrece
información adicional sobre los códigos de audio y los ajustes de la
emisora.
Fecha
Muestra la fecha actual, que es proporcionada automáticamente por el
transmisor.
Almacenamiento y recuperación de estaciones
Consulte los apartados "Almacenamiento de emisoras" y "Recuperación de
una emisora almacenada" en la sección "Radio por Internet".
140
ES
RADIO FM
Pulse el botón PROG del mando a distancia para entrar en el modo de
almacenamiento. Para seleccionar el modo FM, gire el mando de selección
del aparato o pulse los botones⏮ o ⏭ del mando a distancia. Conrme su
selección pulsando el mando de selección hacia abajo o pulsando el botón
SELECT del mando a distancia. La frecuencia se muestra en la pantalla.
Búsqueda automática de emisoras
Pulse el botón SCAN|⏹ del aparato o del mando a distancia para iniciar la
búsqueda automática de canales. En cuanto se encuentra una emisora, la
búsqueda se detiene automáticamente. Mantenga pulsados los botones
para iniciar la búsqueda de una emisora.
Nota: Puede ocurrir que las emisoras con una señal débil se salten durante
la búsqueda de emisoras.
Búsqueda manual de emisoras
Para la búsqueda manual de canales, gire el mando de selección del
aparato o pulse varias veces los botones
del mando a distancia
hasta alcanzar la frecuencia deseada.
Nota: En el modo FM, puede ser necesario sintonizar con precisión
cada emisora utilizando el dial de selección de la unidad o los botones
del mando a distancia. Cada pulsación ajusta la frecuencia
en 0,05 MHz. Si la recepción de la señal es pobre, ajuste la posición de la
antena o traslade la radio a otro lugar.
Modos de visualización de FM
Cada vez que pulse el botón MENU de la unidad o el botón INFO del mando
a distancia, aparecerán en la pantalla los siguientes modos de visualización:
Texto de la radio - Tipo de programa - Frecuencia - Fecha
Texto de radio
RDS
Este es un mensaje de prueba con información sobre el
programa actual
Tipo de
programa
Describe el estilo o el género de un programa que se
emite.
Nombre de
la estación/
Frecuencia
Cuando se recibe una emisora RDS, se muestra el
nombre de la emisora. Si no, se muestra la frecuencia
en la pantalla.
FM
radio
FM Radi o
141
ES
Fecha Muestra la fecha actual, que es proporcionada
automáticamente por el transmisor.
Conguración de la búsqueda
1. Pulse el botón MENU para entrar en el menú FM.
2. Utilice los botones
para seleccionar "Scan Setting" y
conrme su selección pulsando el botón SELECT.
3. Seleccione "Sí" con las teclas ⏮ o ⏭ y conrme su selección pulsando la
tecla SELECT.
Conguración de audio
1. Pulse la tecla MENU para entrar en el menú principal.
2. Utilice los botones para seleccionar "Audio setting" (conguración de
audio) y pulse el botón
SELECT para conrmar.
3. Utilice los botones ⏮ o ⏭ para seleccionar "Sí" para reproducir
emisoras sólo en mono, o seleccione "no" para que la unidad seleccione
automáticamente entre estéreo y mono por sí misma.
4. Para conrmar, pulse el botón OK.
Como alternativa, es posible pulsar la tecla MONO/ST. Pulse en el mando a
distancia para alternar entre sólo mono o mono/estéreo.
Almacenamiento y recuperación de estaciones
Consulte los apartados "Almacenamiento de emisoras" y "Recuperación de
una emisora almacenada" en la sección "Radio por Internet".
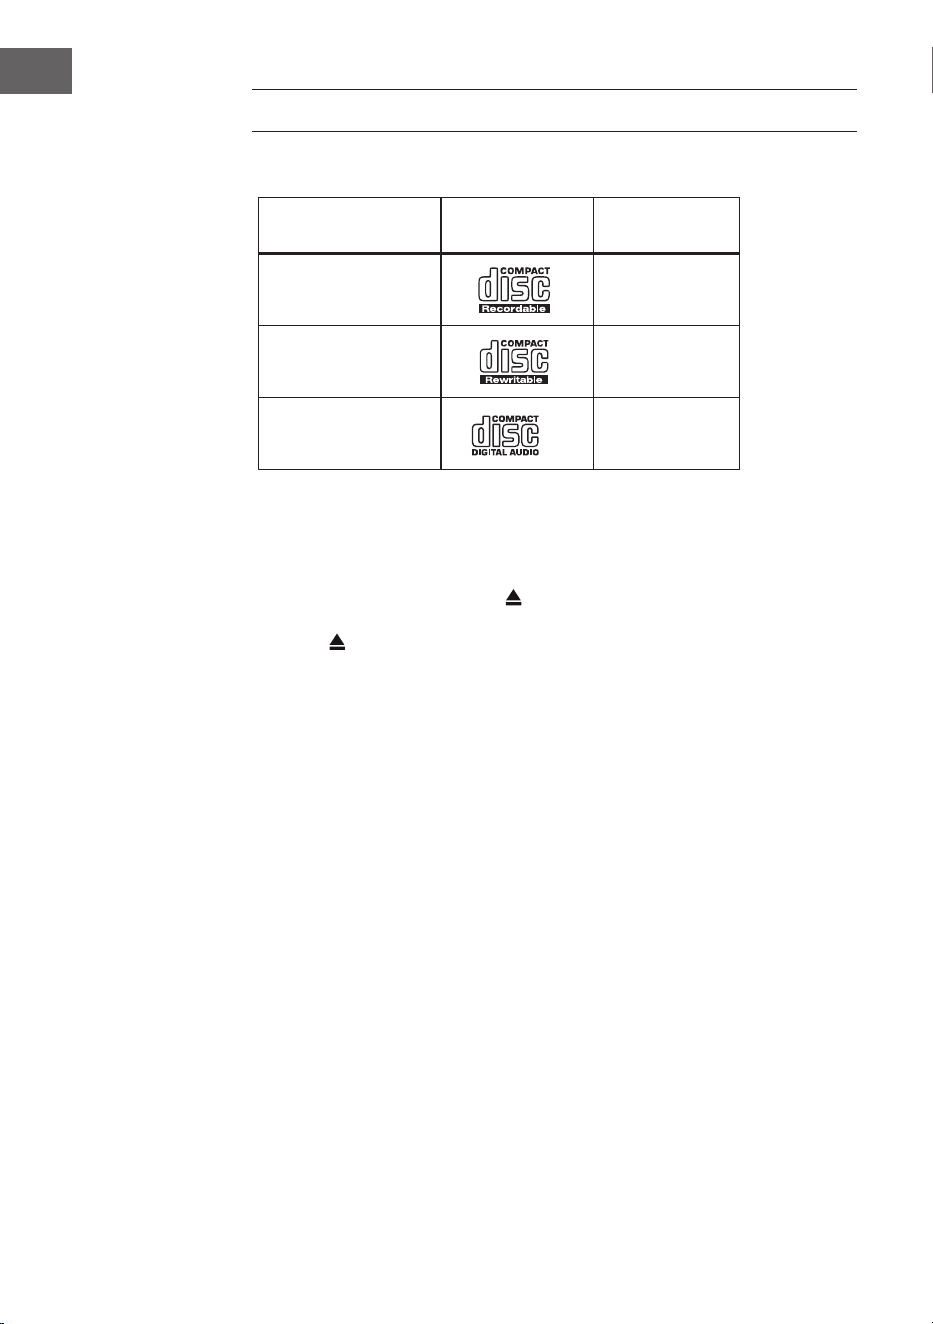
142
ES
REPRODUCTOR DE CD
Discos compatibles
Tipo de disco Logotipo del disco Contenido
multimedia
CD-R (grabar CD)
Audio
CD-RW (CD
regrabables)
Audio
CD audio (Compact
Disc)
Audio
Pulse MODE en el aparato o en el mando a distancia para activar el
reproductor de CD.
Reproducción
1. Pulse el botón de expulsión (
) para abrir el compartimento de CD.
2. Coloque el CD en la bandeja con la cara impresa hacia arriba. Coloque el
CD en la bandeja con la cara impresa hacia arriba.
3. Si no hay ningún CD insertado o no se puede leer el CD, la pantalla
muestra "No hay disco".
4. El número de pistas aparece en la pantalla cuando la reproducción está
en pausa. Ahora pulse para reproducir la primera pista del CD/MP3.
Poner en pausa: Pulse
para pausar la reproducción.
Detener la reproducción: Para detener la reproducción, pulse
Pasa a la siguiente pista: Pulse / para saltar a la pista anterior o
siguiente. Mantenga pulsado el botón / para avanzar o retroceder una
pista.
Como alternativa, puede pulsar las teclas numéricas del mando a distancia
una tras otra para ir directamente a la pista deseada.
Mantenga pulsados los botones
/ del mando a distancia para avanzar
o retroceder rápidamente dentro de una pista.
Cuando reproduzca discos MP3 cuya música esté agrupada en diferentes
carpetas, puede utilizar los botones Preset/Folder ∧/∨ del mando a
distancia para cambiar a la carpeta siguiente/anterior.

143
ES
Repetir la reproducción
1. Pulse el botón REPEAT repetidamente para seleccionar un modo de
reproducción.
1
F
Repite el título actual.
1
F
Repite todos los archivos de la carpeta actual.
(sólo para CD de datos)
1
F
Repetir título
2. Pulse de nuevo el botón REPEAT para que la función de repetición se
desactive.
Modo de reproducción aleatorio
Todos los títulos se pueden reproducir en orden aleatorio.
1. Pulse RANDOM en el mando a distancia. La pantalla muestra
. Todas
las pistas se reproducen en orden aleatorio.
2. Pulse para saltar a la siguiente pista en la reproducción aleatoria.
3. Una vez que las pistas se han reproducido una vez, la reproducción se
detiene automáticamente.
4. Para detener la reproducción aleatoria, pulse RANDOM durante la
reproducción. La reproducción normal continúa.
Reproducir una pista
1. Pulse INTRO en el mando a distancia. En la pantalla aparece "INTRO". El
reproductor de CD reproduce los primeros 10 segundos de cada pista.
2. Pulse de nuevo INTRO en el mando a distancia para volver a la
reproducción normal.
Creación de un programa
Puedes programar hasta 20 pistas en cualquier orden. El modo de
programación se activa en el modo de parada (STOP).
1. Pulse PRESET para entrar en el modo de programación.
2. Utilice los botones
y para seleccionar la pista que desea
programar.
3. Pulse SELECT para confirmar el título.
4. Repita los pasos 2 y 3 para programar más títulos. Cuando haya
terminado de seleccionar los títulos, pulse para iniciar la
reproducción de los títulos programados.
Cancela el programa: Pulse dos veces
o abra y cierre la bandeja del
CD para borrar la memoria de programas.

144
ES
REPRODUCCIÓN USB
1. Hay un puerto USB en la parte delantera del aparato. Cuando un
dispositivo USB está conectado al aparato, pulse el botón MODE en el
aparato o en el mando a distancia varias veces para seleccionar el modo
USB.
2. El aparato reproducirá las pistas automáticamente.
3. Todas las funciones de reproducción son las mismas que para reproducir
un CD de MP3.
El aparato solo puede reproducir formatos de archivo MP3 en modo USB. El
aparato admite dispositivos USB con una capacidad de almacenamiento de
hasta 32 GB. El aparato puede no ser compatible con todos los dispositivos
USB; esto no indica un problema con el aparato.
Carga de un dispositivo externo
Puede cargar su dispositivo con un cable USB (no incluido) a través de la
toma USB de este aparato.
• La corriente máxima de carga vía USB es de 1 A.
• No se garantiza que todos los dispositivos sean recargables.

145
ES
REPRODUCCIÓN BT
El aparato tiene una función BT que puede recibir una señal en un radio de
8 metros. Conecte la radio a un dispositivo BT externo para escuchar música
a través de BT:
1. Pulse el botón MODE del aparato o del mando a distancia para
seleccionar el modo BT.
2. Si la radio aún no se ha conectado a un dispositivo BT, el logotipo
BT comenzará a parpadear, indicando que la radio está en modo de
conexión.
3. Active la función BT de su terminal móvil.
4. Seleccione iTuner-320 BT en la lista de dispositivos disponibles.
5. Si es necesario, introduzca la contraseña "0000". Una vez establecida la
conexión con éxito, el logotipo de BT deja de parpadear. Su dispositivo
móvil está ahora conectado a la radio a través de BT.
6. Manteniendo pulsado el botón PRESET del aparato o del mando a
distancia, se pueden desconectar las conexiones BT ya existentes y
establecer la conexión con otro dispositivo BT externo.
7. Se puede salir de la función BT de la radio pasando a otro modo o
desactivando la conexión BT de su terminal móvil.
Reproducción de música a través de BT
Puede ser necesario ajustar el volumen tanto en la radio como en el
dispositivo móvil BT. Pulse el botón
⏯ de la unidad o del mando a distancia
para pausar o reanudar la reproducción de música. Con los botones ⏮/⏭ se
puede saltar la pista anterior/siguiente.
Notas:
• El rango de funcionamiento entre la radio y los terminales móviles es
de aproximadamente 8 metros.
• Si la señal BT es débil, la conexión BT puede desconectarse durante un
breve periodo de tiempo. En este caso, la conexión se restablecerá lo
antes posible.
• Para garantizar una mejor recepción de la señal, elimine los obstáculos
entre la radio y el dispositivo BT.
• No se garantiza la compatibilidad con todos los dispositivos y tipos de
medios.
• Algunos teléfonos móviles desconectan la conexión BT cuando
se responde a una llamada. La conexión BT se restablece
automáticamente tras nalizar la llamada. Esto es normal y no indica un
problema con la unidad.
146
ES
ENTRADA DE AUDIO (LINE IN)
Puede reproducir música de fuentes externas.
1. Conecte el dispositivo externo a los conectores RCA del panel posterior.
2. Pulse el botón MODE del aparato varias veces para seleccionar el modo
de entrada de línea.
3. Ajuste el volumen deseado utilizando el control de volumen del aparato
o los botones +/- del mando a distancia.
4. En el modo de entrada de línea, puede utilizar su dispositivo de audio
directamente para las funciones de reproducción.
Consulte el manual de usuario del dispositivo externo para obtener
información sobre cómo conectarlo.
RED REMOTA
La unidad cuenta con la función NetRemote, que permite manejarla a
través de una app en un smartphone o tablet (iOS o Android). Descargue
la aplicación UNDOK en Google Play Store o Apple Store e instálela en su
smartphone o tableta.
Antes de iniciar la aplicación UNDOK, asegúrese de que la radio y
el smartphone o la tableta están en la misma red Wi-Fi. Ahora inicie
la aplicación. Una vez iniciada, la aplicación busca la radio en la red.
Seleccione la radio de la lista de dispositivos disponibles para establecer la
conexión NetRemote.
• Una vez que el smartphone o la tableta se han conectado al dispositivo,
la conexión se establece automáticamente la próxima vez que se abre
la aplicación en el dispositivo móvil.
• Asegúrate de que solo se puede conectar un dispositivo a la radio a
través de la aplicación a la vez. Si te conectas a la radio a través de la
aplicación con otro dispositivo, la conexión con el dispositivo anterior
se desconecta.
• Cuando el terminal móvil se conecta a la radio por primera vez, puede
ser necesario introducir una contraseña. El código PIN por defecto es
"1234". La contraseña se puede cambiar en los ajustes del sistema en la
sección Red > Conguración del PIN de NetRemote.
• Seleccione el modo deseado en la página principal de la aplicación. El
modo se puede controlar a través de la aplicación y del dispositivo.
147
ES
USO DE AURICULARES
Cuando utilices los auriculares, no escuches la música a un volumen alto
durante un periodo de tiempo prolongado, ya que podría causar daños
auditivos permanentes.
• Utiliza sólo auriculares con clavija de 3,5 mm.
• Conecta los auriculares a la toma de auriculares situada en la parte
delantera del aparato.
Escuchar música a gran volumen durante un periodo de tiempo
prolongado puede provocar daños auditivos. Evita los niveles de
volumen altos cuando utilices los auriculares, especialmente si los usas
durante un largo periodo de tiempo.
AJUSTAR EL TEMPORIZADOR DE DESCONEXIÓN
(SLEEP)
Esta función le permite ajustar la unidad para que se ponga en modo de
espera después de un período de tiempo que usted especique.
1. Active la función de dormir pulsando varias veces el botón SLEEP. Cada
pulsación selecciona una de las opciones de la secuencia:
2. Deje de pulsar el botón en cuanto aparezca la hora deseada en la
pantalla. La función de reposo se activa después de 2 segundos. El
icono aparece en la pantalla. El tiempo restante hasta la desconexión
automática también se muestra junto al símbolo.
3. En cuanto el temporizador ha expirado, la unidad se pone en modo de
espera. Si desea desactivar la función de sueño cuando el temporizador
aún no ha expirado, pulse el botón SLEEP hasta que aparezca "SLEEP
OFF" en la pantalla
Enfoque alternativo:
1. Pulse el botón MENU para entrar en el menú principal. Utilice los
botones
para seleccionar el menú principal y pulse SELECT
para conrmar.
2. Utilice los botones para seleccionar la función SLEEP y pulse
el botón SELECT para conrmar.
3. Utilice los botones para seleccionar la programación del
Sleep OFF
15 minutes
30 minutes
45 minutes
60 minutes
90 minutes
120 minutes
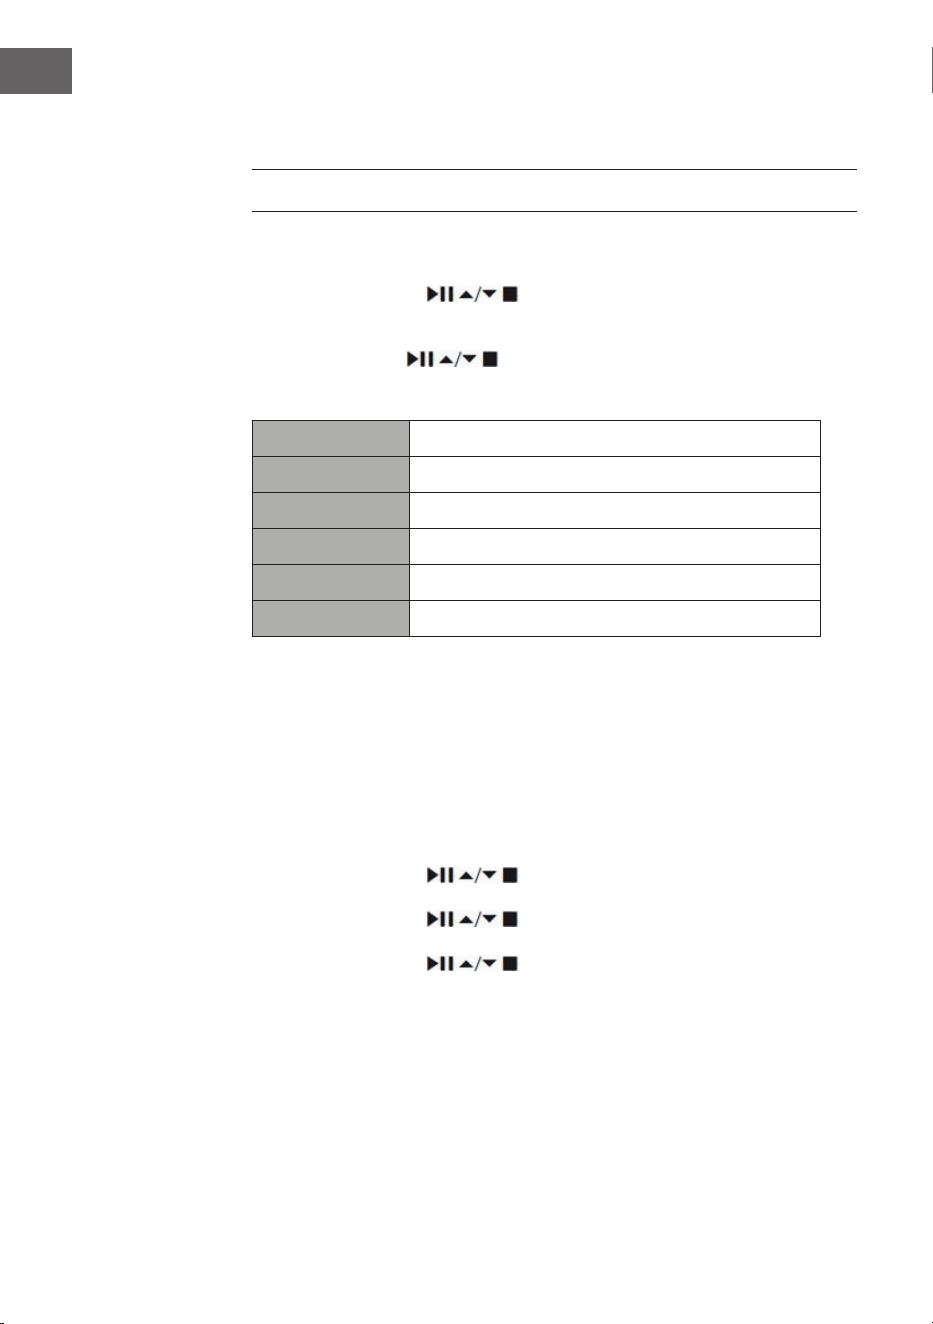
148
ES
apagado y pulse el botón SELECT para conrmar.
CONFIGURAR EL DESPERTADOR
1. En cuanto pulse el botón TIMER del mando a distancia, la pantalla
mostrará "Alarma(1 o 2): O [hh:mm]".
2. Utilice los botones para seleccionar la función Alarma 1 o
Alarma 2 y pulse el botón SELECT para conrmar.
Utilice los botones para seleccionar los siguientes parámetros
y conrme cada uno de ellos pulsando el botón SELECT.
Activar O/ Diario/ Fin de semana/ Días de la semana
Hora Tiempo de activación de la alarma
Modo Timbre/ Radio por Internet/ DAB/ FM
Preestablecido Última emisora escuchada.
Volumen 0 - 32
Guardar Guardar y conrmar el ajuste de la alarma
3. Seleccione "Guardar" y pulse el botón SELECT para guardar el ajuste
realizado. En pantalla aparece "Alarm Saved". Una vez ajustada la
alarma, el icono de la alarma aparece en la pantalla.
4. Para desactivar la alarma, pulse el control de volumen del aparato o el
botón ALARM del mando a distancia.
Cancelar una alarma
1. En cuanto pulse el botón TIMER del mando a distancia, la pantalla
mostrará "Alarma(1 o 2): Off [hh:mm]".
2. Utilice los botones
para seleccionar la función Alarma 1 o
Alarma 2 y pulse el botón SELECT para confirmar.
3. Utilice los botones para seleccionar "Enable" (activar) y
confirme su selección pulsando el botón SELECT.
4. Utilice los botones para seleccionar "Off" (apagar) y confirme
su selección pulsando el botón SELECT.
5. Seleccione "Save" y pulse el botón SELECT para guardar el ajuste
realizado.
6. Como alternativa, puede pulsar el botón TIMER del mando a distancia
varias veces durante el modo de espera para activar o desactivar la
alarma 1 o la alarma 2.

149
ES
Si no se pulsa ningún botón en unos 15 segundos, la unidad sale
automáticamente del modo de ajuste del temporizador.

150
ES
RETIRADA DEL APARATO
Si en su país existe una disposición legal relativa a
la eliminación de aparatos eléctricos y electrónicos,
este símbolo estampado en el producto o en
el embalaje advierte que no debe eliminarse
como residuo doméstico. En lugar de ello, debe
depositarse en un punto de recogida de reciclaje
de aparatos eléctricos y electrónicos. Una gestión
adecuada de estos residuos previene consecuencias
potencialmente negativas para el medio ambiente
y la salud de las personas. Puede consultar más
información sobre el reciclaje y la eliminación de este
producto contactando con su administración local o
con su servicio de recogida de residuos.
Este producto contiene baterías. Si en su país existe
una disposición legal relativa a la eliminación de
baterías, estas no deben eliminarse como residuo
doméstico. Infórmese sobre la normativa vigente
relacionada con la eliminación de baterías. Una
gestión adecuada de estos residuos previene
consecuencias potencialmente negativas para el
medio ambiente y la salud de las personas.
DECLARACIÓN DE CONFORMIDAD
Fabricante:
Chal-Tec GmbH, Wallstraße 16, 10179 Berlín, Alemania.
Importador para Gran Bretaña:
Berlin Brands Group UK Limited
PO Box 42
272 Kensington High Street
London, W8 6ND
United Kingdom
Por la presente, Chal-Tec GmbH declara que el tipo
de equipo radioeléctrico iTuner CD es conforme con
la Directiva 2014/53/UE. El texto completo de la
declaración UE de conformidad está disponible en la
dirección Internet siguiente: use.berlin/10032753

151
ES
Chal-Tec GmbH
Wallstr. 16t 10179 Berlin
www.chal-tec.com
El software de Spotify está sujeto a los derechos de uso de terceros,
que puede verse en la siguiente página:
https://www.spotify.com/connect/third-party-licenses
Todas las marcas mencionadas son marcas comerciales de sus respectivas
empresas.
Salvo errores u omisiones y sujeto a cambios técnicos. Se aplican nuestras
condiciones generales.


153
IT
Dati tecnici 154
Avvertenze di sicurezza 155
Descrizione del dispositivo 157
Telecomando 158
Connessione 161
Messa in funzione 162
Impostazioni di sistema 166
Radio web 170
Podcast 173
Spotify Connect 174
Radio DAB 175
Radio FM 178
Lettore CD 180
Riproduzione USB 182
Riproduzione BT 183
Ingresso audio (line In) 184
Net-Remote 184
Uso delle cuie 185
Impostare il timer di spegnimento (Sleep) 185
Impostare la sveglia 186
Avviso di smaltimento 188
INDICE
Gentile cliente,
la ringraziamo per l'acquisto del dispositivo. La
preghiamo di leggere attentamente le seguenti
istruzioni per l'uso e di seguirle per evitare possibili
danni. Non ci assumiamo alcuna responsabilità per
danni scaturiti da una mancata osservanza delle
avvertenze di sicurezza e da un uso improprio del
dispositivo. Scansionare il codice QR seguente
per accedere al manuale d’uso più attuale e per
ricevere informazioni sul prodotto.

154
IT
DATI TECNICI
Numero articolo 10032753 10032754
Alimentatore 100-240 V ~ 50/60 Hz, 1 A
Uscita USB
5 V
, 1 A
Audio
Potenza di uscita 2 x 5 W RMS
Radio FM
Gamma di frequenza 87,5-108 MHz
CD
Risposta in frequenza 20 Hz-20 kHz
DAB
Gamma di frequenza 174-240 MHz
Speciche WiFi
Standard
Banda di frequenza
Potenza di trasmissione max.
802.11 b/g/n
2412–2472MHz
19 dBm
BT
Gamma di frequenza
Potenza di trasmissione max.
2402–2480MHz
2dBm
Consumo di corrente in
standby
Funzionamento standard in
standby
Funzionamento in rete in standby
<1.00 W (WiFi spento)
<2.00 W (WiFi acceso)

155
IT
AVVERTENZE DI SICUREZZA
Avvertenze di sicurezza generiche
• Leggere attentamente tutte le avvertenze prima di utilizzare il
dispositivo e conservare il manuale d'uso per futuri utilizzi.
• Utilizzare solo la tensione indicata sulla targhetta del dispositivo.
Assicurarsi che la presa di corrente sia dotata di messa a terra.
• Il dispositivo deve essere posizionato su una supercie piana e stabile e
non deve essere esposto a vibrazioni di alcun tipo.
• Si prega di non posizionare il dispositivo su superci inclinate o
instabili, altrimenti potrebbe cadere.
• La presa elettrica deve essere vicina al dispositivo e deve essere sempre
facilmente accessibile.
• Evitare temperature estreme, sia calde che fredde. Posizionare il
dispositivo a distanza di sicurezza da fonti di calore, come radiatori o
fornelli a gas o elettrici. Non esporre il dispositivo alla luce del sole
diretta o ad altre fonti di calore.
• Non poggiare mai candele o altri oggetti con amme libere sopra al
dispositivo.
• Per evitare il rischio di scosse elettriche e danni al dispositivo, non
esporlo a pioggia, umidità o gocce e spruzzi di liquido. Non poggiare
sopra il dispositivo oggetti pieni d'acqua, come ad es. vasi di ori.
• Se viene rovesciato un liquido sul dispositivo, possono risultare seri
danni. In tal caso, spegnere il dispositivo e staccare la spina dalla presa.
Contattare il servizio di assistenza ai clienti.
• Non coprire le aperture di ventilazione del dispositivo e assicurarsi che
non ci niscano dentro tende e altri materiali, in modo da evitare il
surriscaldamento del dispositivo e il conseguente pericolo di incendi e
scosse elettriche.
• Non posizionare il dispositivo in librerie chiuse, armadi a incasso o
altri luoghi con spazio limitato. Assicurarsi di mantenere una distanza
minima di 10 cm da tutte le superci e gli oggetti circostanti, in modo da
garantire una ventilazione suiciente.
Sicurezza
• Staccare sempre la spina dalla presa prima di collegare/scollegare la
radio con/da altri dispositivi e di spostarla.
• Assicurarsi che la spina sia staccata dalla presa durante temporali.
• Il dispositivo diventa caldo se viene utilizzato a lungo. Questo è normale
e non indica un problema del dispositivo.
Connessione di alimentazione
• Assicurarsi che il dispositivo non si trovi sul cavo di alimentazione,
altrimenti il peso potrebbe danneggiarlo e diventerebbe un rischio per
la sicurezza.

156
IT
• Se il cavo di alimentazione è danneggiato, deve essere sostituito dal
produttore, dal servizio di assistenza ai clienti o da una persona con
qualica equivalente, in modo da evitare pericoli.
Interferenze
• Non posizionare la radio vicino ad altri dispositivi che possono causare
interferenze elettromagnetiche. Se si posiziona la radio vicino ad altri
dispositivi, la qualità di riproduzione potrebbe risentirne e potrebbero
comparire rumori di disturbo.
Supervisione
• I bambini che si trattengono nelle vicinanze del dispositivo devono
essere tenuti sotto controllo per assicurarsi che non lo usino come un
giocattolo.
• Non lasciare che nessuno, in particolare bambini, inseriscano oggetti
o similari nei fori, nelle connessioni o in altre aperture del dispositivo,
altrimenti possono risultare scosse elettriche fatali.
Utilizzo/Cura/Manutenzione
• Non rimuovere alcuna vite autonomamente, in modo da evitare il
rischio di scosse elettriche. Il dispositivo non contiene componenti che
possono essere manutenuti dall'utente. Lasciare che tutte le opere di
manutenzione siano realizzate da personale qualicato.
• Non aprire o rimuovere coperture sse del dispositivo, altrimenti si
possono liberare tensioni elettriche pericolose.
• Staccare la spina dalla presa prima della pulizia.
• Non utilizzare spugne abrasive o detergenti aggressivi, altrimenti si
potrebbe rovinare la supercie del dispositivo.
• Non utilizzare liquidi per pulire il dispositivo.
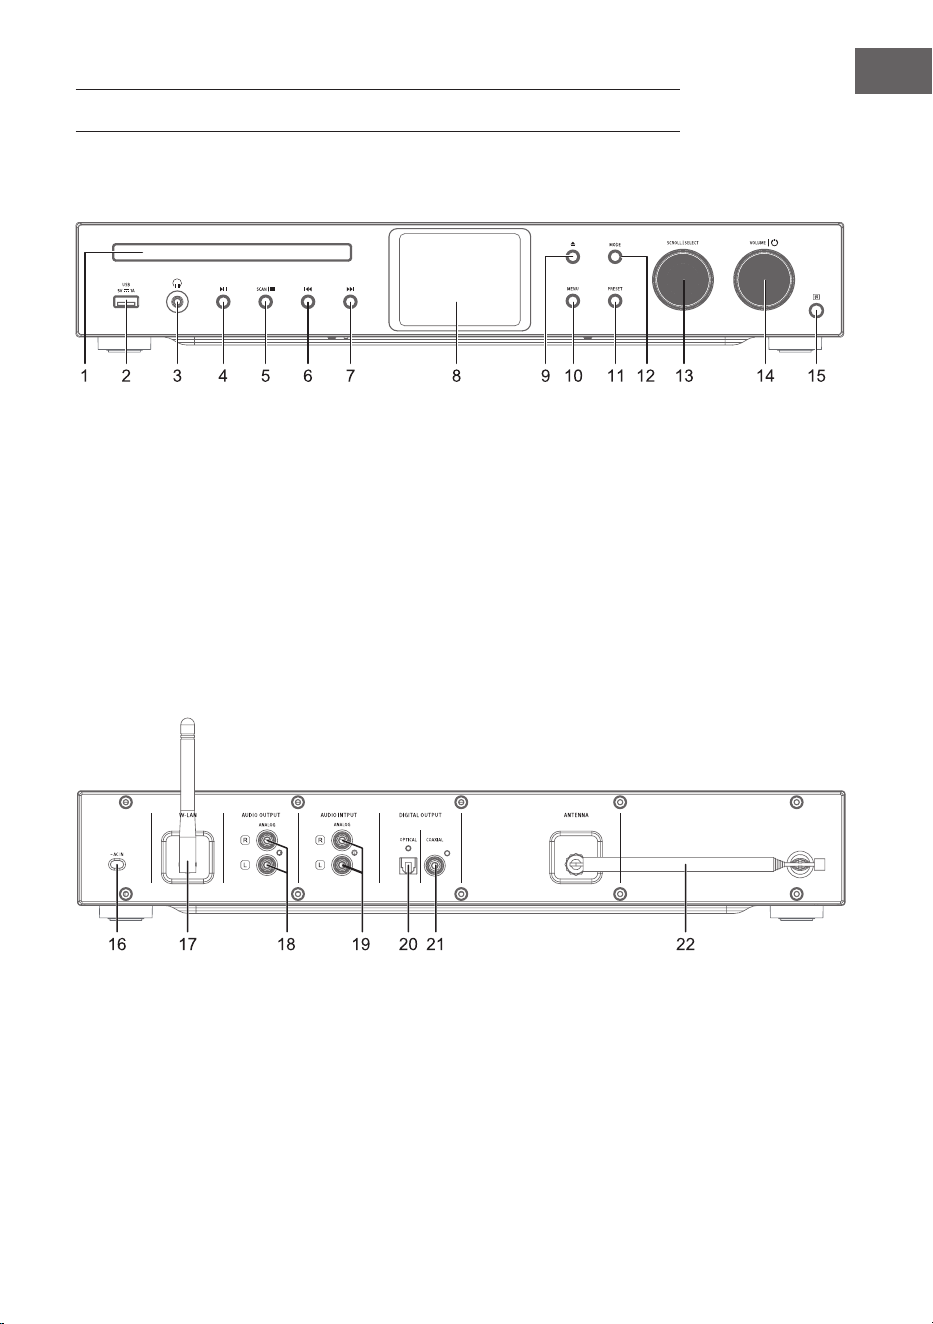
157
IT
DESCRIZIONE DEL DISPOSITIVO
1 Vano CD
2 Sensore IR
3 Connessione cuie
4 Riproduzione/pausa
5 Stop: arrestare la riproduzione
6 Titolo precedente
7 Titolo successivo
8 Display
9 Aprire/chiudere il vano CD
10 Menu
11 Impostazioni
12 Modalità
13 Scorrere/selezionare
14 Volume/On-O
15 Ricevitore IR
16 Connessione alla rete elettrica
17 Antenna WiFi
18 Uscita audio (analogica)
19 Ingresso audio (analogico)
20 Uscita ottica (digitale)
21 Uscita coassiale (digitale)
22 Antenna ad asta
Lato anteriore
Lato posteriore

158
IT
TELECOMANDO
1
15
16
17
18
19
21
20
22
23
24
25
26
2
3
4
5
6
7
8
9
10
11
12
13
14

159
IT
1 On/standby
2 Espulsione CD
3 Timer
4 Scan
5 Modalità di riproduzione:
ripetizione
6 Accoppiamento BT
7 Info
8 Titolo successivo/
Navigare verso destra nel menu
9 Stop/
Navigare verso il basso nel
menu
10 Memoria delle emittenti
11 Menu
12 Navigare verso l'alto/il basso
nella memoria delle emittenti
13 Navigazione nel menu: indietro
14 Muto
15 Mono/Stereo
16 Campo numerico per la
selezione diretta
17 Volume +/-
18 Equalizzatore
19 Titolo precedente/
Navigare verso sinistra nel
menu
20 Confermare la selezione
21 Play/Pausa/
Navigare verso l'alto nel menu
22 Modalità
23 Riprodurre un intro dei brani
24 Modalità di riproduzione:
casuale
25 Impostare l'ora
26 Timer di spegnimento

160
IT
Inserire le batterie nel telecomando
1. Premere il coperchio del vano delle batterie sul contrassegno e farlo
scorrere verso l'esterno in direzione della freccia.
2. Inserire 2 batterie LR03 (AAA 1,5 V) nel vano (non incluse in consegna).
Assicurarsi che i segni + e - sulla batteria corrispondano ai segni nel
vano.
3. Richiudere il coperchio.
Gestione delle batterie
• Un utilizzo improprio o errato delle batterie può causare corrosione o
perdite, con il conseguente rischio di incendi e danni a cose o persone.
• Usare solo batterie della tipologia indicata nel manuale d'uso.
• Non smaltire le batterie esauste nei riuti domestici. Smaltirle nel
rispetto delle normative nazionali vigenti.
• Se non si usa il telecomando per lunghi periodi, togliere le batterie,
in modo da evitare corrosione o perdite, con il conseguente rischio di
lesioni personali, danni materiali e/o incendi.
Raggio di copertura del telecomando
Il sensore del telecomando sul lato anteriore del dispositivo reagisce ai
comandi no a una distanza di 4 metri e un'inclinazione massima di 60
gradi.
Il raggio di copertura dipende anche dalla luminosità del locale.

161
IT
CONNESSIONE
1. L'ingresso e l'uscita audio (analogici), l'uscita ottica (digitale) e l'uscita
coassiale (digitale) si trovano sul retro del dispositivo. Possono essere
utilizzati per collegare un amplicatore A/V o un impianto HiFi.
2. Collegare l'antenna inclusa in consegna all'apposita connessione ed
estenderla alla lunghezza desiderata.
3. Collegare l'antenna WiFi inclusa in consegna all'apposita connessione
sul retro del dispositivo.
4. Srotolare completamente il cavo di alimentazione in tutta la sua
lunghezza. Inserire la spina nella presa elettrica. Il dispositivo è ora
collegato e può essere utilizzato.
Assicurarsi che il dispositivo venga collegato solo a prese con la corretta
tensione di alimentazione. Per staccare la spina dalla presa elettrica o
collegarla a essa, impugnarla saldamente e non tirare mai dal cavo. Non
tirare o trascinare il dispositivo dal cavo di alimentazione.
5. Per spegnere completamente il dispositivo, staccare la spina dalla presa
elettrica.
Connessione alla rete
Questo dispositivo supporta solo connessioni di rete wireless per l'accesso
alla rete e non supporta connessioni LAN.
Rete senza li
1. Controllare per prima cosa, se le spie di controllo (LINK/ACT) del router
sono accese.
2. Procedere con i passaggi menzionati nella sezione "Primi passaggi". Si
consiglia di utilizzare gli assistenti di congurazione nelle impostazioni
di sistema.
Nota: questo dispositivo non può essere collegato direttamente a un
modem. Bisogna utilizzare un router o un modem integrato in un router.
Seguire le indicazioni del provider e rispettare le istruzioni del manuale
d'uso del router.

162
IT
MESSA IN FUNZIONE
Questo manuale spiega i passaggi fondamentali per l'utilizzo del
dispositivo. Se non esplicitamente indicato, tutte le note relative all'utilizzo
si riferiscono alla gestione del dispositivo con il telecomando.
On/O
1. Premere la manopola del volume/ sul dispositivo o il tasto del
telecomando per accendere il dispositivo.
2. Premere la manopola del volume/ sul dispositivo o il tasto del
telecomando per rimettere il dispositivo in modalità standby.
Selezione della modalità
Premere il pulsante MODE su dispositivo o telecomando per selezionare tra
le modalità Radio web/Podcast/Spotify/Radio DAB/Radio FM/Lettore CD/
USB/Audio BT/AUX-IN.
In alternativa
1. Premere il tasto MENU su dispositivo o telecomando per accedere al
menu delle funzioni principali, poi girare la manopola SCROLL|SELECT
sul dispositivo o premere i tasti
sul telecomando
per selezionare il menu principale e premere poi la manopola
SCROLL|SELECT sul dispositivo o il tasto SELECT sul telecomando per
confermare.
2. Girare la manopola SCROLL|SELECT sul dispositivo o premere i tasti
sul telecomando per selezionare la modalità a cui accedere e premere
poi la manopola SCROLL|SELECT sul dispositivo o il tasto SELECT sul
telecomando per confermare.
Se il dispositivo non viene utilizzato per circa 15 minuti, passa
automaticamente in modalità standby. Per spegnere completamente il
dispositivo, staccare la spina dalla presa elettrica. Per risparmiare energia,
si prega di spegnere completamente il dispositivo quando non è in uso.
Regolazione del volume
• Ruotare la manopola Volume/ per regolare il volume o utilizzare i
tasti VOL +/- del telecomando.
• Per disattivare l'audio, premere il tasto MUTE sul telecomando.
Premere nuovamente il tasto MUTE, ruotare la manopola Volume/ o
premere il tasto VOL+/- sul telecomando per continuare con la normale
riproduzione.
Navigare nel menu
1. Tenere premuto il tasto MENU sul dispositivo o premere MENU sul

163
IT
telecomando per entrare nel menu.
2. Ruotare la manopola di selezione sul dispositivo o premere i tasti ⏮ o ⏭
per procedere alla selezione.
3. Per confermare, premere la manopola di selezione del dispositivo verso
il basso o premere SELECT sul telecomando.
Congurazione iniziale
Quando si inserisce la spina di alimentazione del dispositivo nella presa
per la prima volta, sul display compare la schermata di benvenuto.
Sullo schermo compare poi il menu per selezionare la lingua. Ruotare
la manopola di selezione sul dispositivo o premere i tasti
⏮ o ⏭ del
telecomando per selezionare la lingua desiderata. Per confermare la
selezione, premere la manopola di selezione verso il basso o premere
SELECT sul telecomando. Ora viene mostrata l'informativa sulla privacy.
Per informazioni più dettagliate sull'informativa sulla privacy, si prega di
visitare il sito web indicato di seguito. Per accettare, premere la manopola
di selezione verso il basso o premere SELECT sul telecomando.
1. Ruotare la manopola di selezione per avviare l'assistente di
congurazione o selezionare "YES" con i tasti ⏮ o ⏭. Per confermare,
premere la manopola di selezione verso il basso o premere SELECT sul
telecomando.
2. Nel passaggio successivo si può selezionare il formato orario. Scegliere
l'impostazione desiderata "12" o "24" e confermare premendo la
manopola di selezione o il tasto SELECT sul telecomando.
3. Ora è possibile impostare la fonte (DAB/FM/rete/nessun
aggiornamento) da utilizzare per aggiornare automaticamente ora e
data. Se si sceglie "Update from Network" (aggiornamento dalla rete),
impostare il fuso orario corretto nel passaggio successivo per assicurarsi
che venga mostrata l'ora corretta. Scegliere poi se attivare o disattivare
l'impostazione dell'ora legale.
4. Nel passaggio successivo, è possibile specicare se il dispositivo deve
rimanere collegato a Internet in modalità standby. Ruotare la manopola
di selezione sul dispositivo o premere i tasti ⏮ o ⏭ per scegliere "YES"
(sì). Per confermare la selezione, premere la manopola di selezione verso
il basso o premere SELECT sul telecomando.
5. La radio inizia la ricerca delle reti wireless. Possono volerci alcuni
secondi. Sullo schermo compare un elenco di tutte le reti disponibili.
Selezionare la rete WiFi desiderata. Per inserire la password, usare la
funzione WPS o inserirla direttamente sullo schermo della radio.
Stabilire una connessione utilizzando il tasto WPS sul router
Il tasto WPS (congurazione WiFi protetta) sul router permette di collegarsi
alla rete WiFi in modo facile e veloce, senza bisogno di inserire una
password. Scegliere uno dei seguenti metodi di connessione:
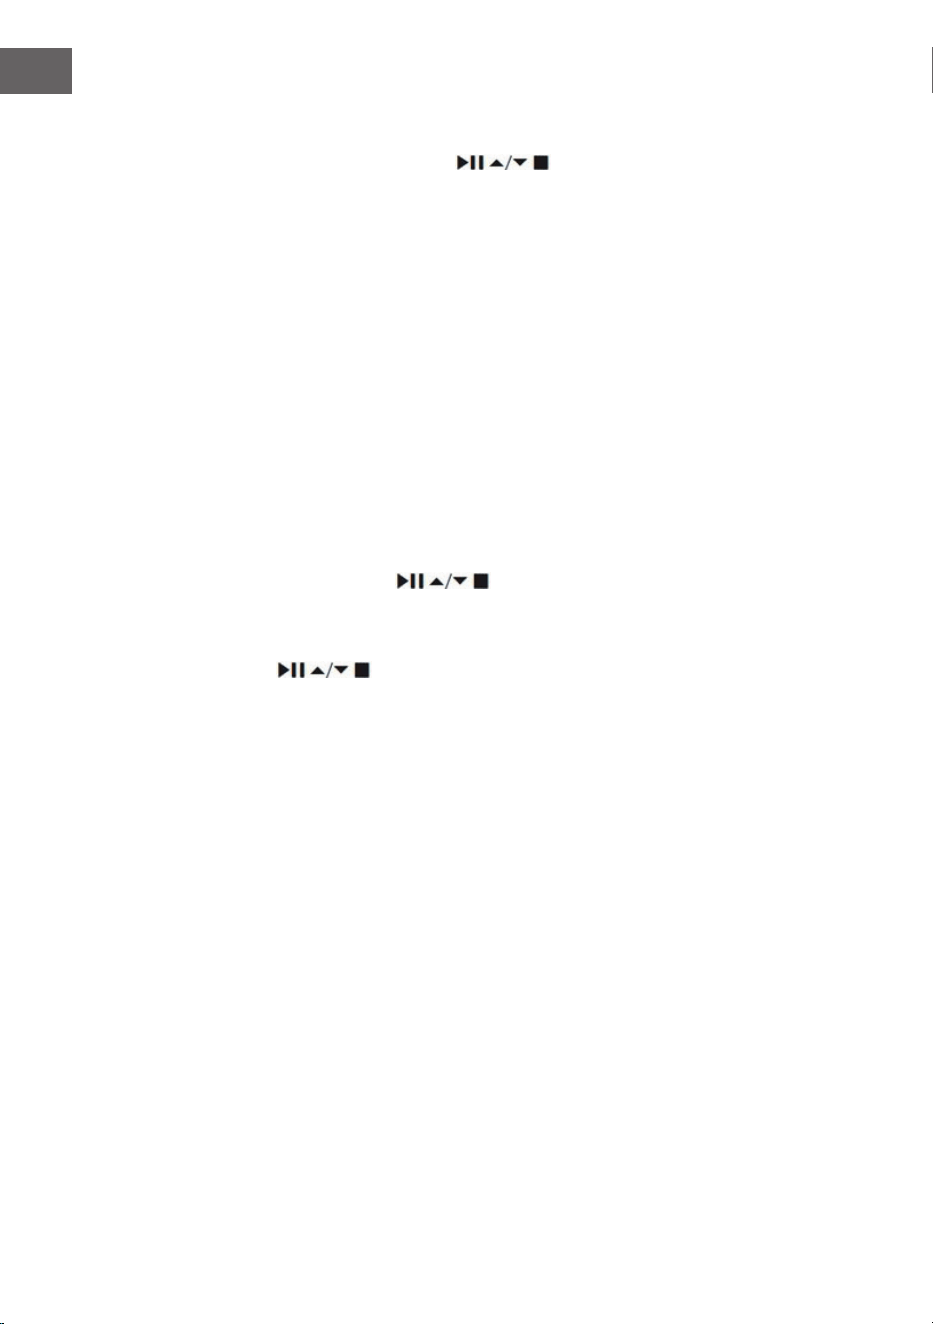
164
IT
Tasto WPS
Se il router ha un tasto WPS, comparirà [WPS] davanti al nome della rete.
1. Selezionare con i tasti
"Pushbutton" (tasto a pressione) e
confermare con SELECT.
2. Sullo schermo compare un messaggio che chiede di premere il tasto
WPS sul router. Premere il tasto WPS sul router. Consultare il manuale
d'uso del router se non si è sicuri di quale sia il tasto.
3. Premere SELECT per confermare. La radio si collega al router. Questa
procedura può richiedere alcuni secondi.
Inserimento della password
La radio genera una password di 8 caratteri. Inserire questa password sul
router o sul dispositivo di accesso.
Stabilire una connessione usando la password del WiFi
Se il router non ha un tasto WPS, verrà richiesto di inserire la password del
WiFi. Se il dispositivo è dotato di funzione WPS, ma si desidera comunque
usare la password del WiFi per la connessione, selezionare "SKIP WPS"
(saltare WPS).
1. Premere i tasti
per selezionare numeri/lettere. Dopo
ogni selezione, premere SELECT per confermare numero/lettera
corrispondente.
2. Dopo aver inserito completamente la password, premere i tasti
per selezionare "OK" sul lato destro dello schermo.
3. Dopo che la connessione è stata stabilita con successo, premere SELECT
per uscire dall'impostazione.

165
IT
Le impostazioni possono essere modicate in qualsiasi momento nel menu
System Settings (impostazioni di sistema) > Network (rete) > Network
wizard (assistente di rete). Questo manuale spiega i passaggi fondamentali
per l'utilizzo del dispositivo. Se non esplicitamente indicato, tutte le
note relative all'utilizzo si riferiscono alla gestione del dispositivo con il
telecomando.
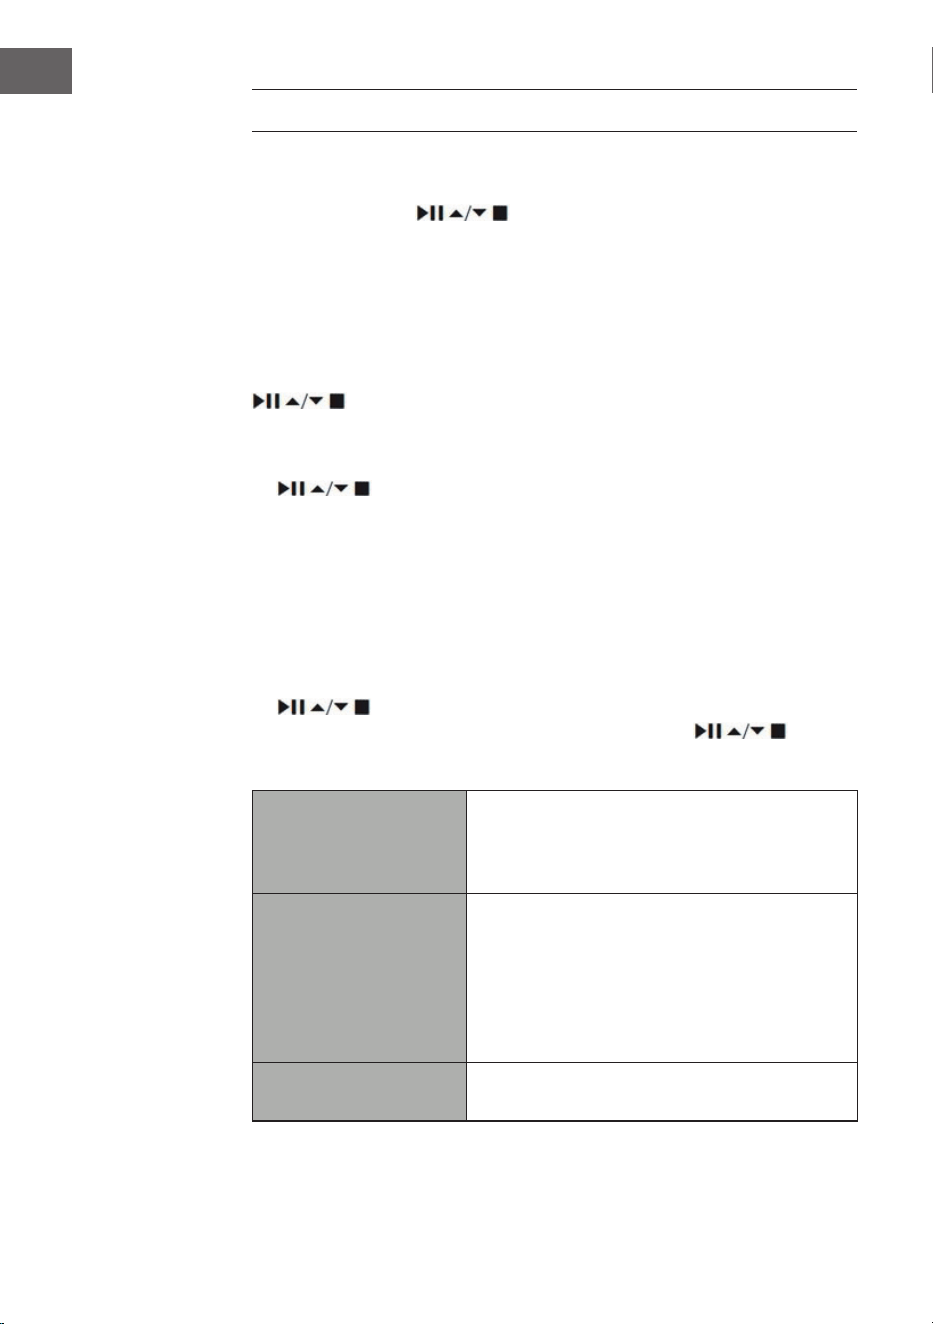
166
IT
IMPOSTAZIONI DI SISTEMA
Tenere premuto il tasto MENU sul dispositivo o premere MENU sul
telecomando per visualizzare il menu. Ruotare la manopola sul dispositivo
o premere i pulsanti sul telecomando per selezionare le
impostazioni di sistema. Confermare premendo la manopola di selezione
sul dispositivo o il tasto SELECT sul telecomando.
Equalizzatore
Questo dispositivo supporta una moltitudine di equalizzatori ed eetti
sonori. Premere il tasto EQ per accedere al menu dell'equalizzatore. In
alternativa, mentre si è in modalità di impostazione di sistema, premere
per selezionare Equalizzatore e poi SELECT per confermare.
1. Lo schermo mostra quanto segue: FLAT > CLASSIC > ROCK > POP > JAZZ.
2. Selezionare l'impostazione di equalizzazione desiderata con i tasti
e confermare con SELECT.
Qualità audio in streaming
L'impianto supporta diverse qualità audio per i servizi di streaming
disponibili. Il bit rate eettivo per ogni livello di impostazione dipende dal
servizio di streaming utilizzato.
Rete
1. Durante la modalità di impostazione di sistema, premere i tasti
per selezionare "Network" (rete) e confermare con SELECT.
2. Scegliere una delle impostazioni elencate con i tasti e
confermare con SELECT.
Assistente di congu-
razione della rete
SSID - selezionare la rete senza li desiderata.
Rescan (cercare di nuovo) - cercare reti dispo-
nibili. Impostazione manuale - selezionare una
rete senza li con DHCP attivato/disattivato
Congurazione WiFi
PBC
Selezionare WPS sul dispositivo e premere il
tasto WPS del modem/router a cui si desidera
connettersi. Per procedere, premere la mano-
pola di selezione verso il basso o SELECT sul
telecomando.
Visualizzare le
impostazioni
Mostra le impostazioni sullo schermo.
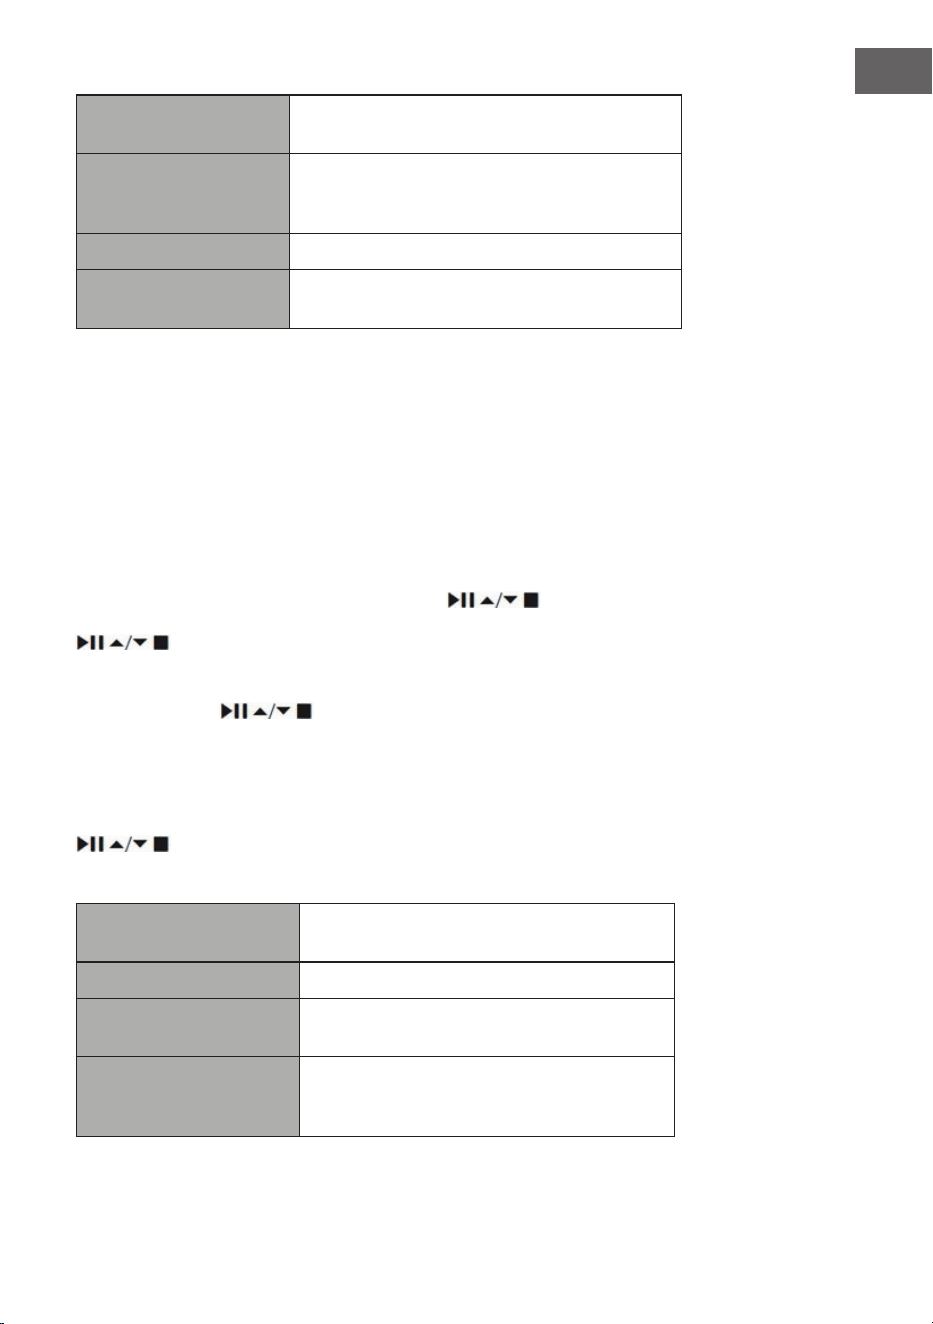
167
IT
Impostazione manuale
Selezionare una rete senza li con DHCP atti-
vato/disattivato
Congurazione PIN
NetRemote
Per impostare una password da inserire prima
di stabilire la connessione del dispositivo con
una rete.
Prolo di rete Indica la rete collegata.
Mantenere il collega-
mento alla rete
Decidere se lasciare il dispositivo collegato
alla rete in modalità standby/altre modalità.
3. Premere BACK su dispositivo o telecomando per interrompere
l'impostazione e tornare al menu precedente.
Ora/Data
L'ora e la data possono essere impostate automaticamente quando il
dispositivo si connette a Internet o a una stazione DAB/FM con informazioni
su ora e data. È anche possibile regolare ora e data manualmente. Premere
CLOCK sul telecomando per accedere al menu di regolazione di ora e data.
In alternativa, è possibile selezionare "Time/Date" (ora/data) nel menu
delle impostazioni di sistema premendo i tasti
e confermando
con SELECT. Selezionare "Set Time/Date" (impostare ora/data) con i tasti
e confermare con SELECT.
1. Le cifre della data lampeggiano sullo schermo.
2. Premere i tasti per impostare il giorno e confermare con
SELECT.
3. Ripetere il 2° passaggio per impostare mese/anno/ore/minuti.
4. L'impostazione di data e ora è conclusa.
Per ulteriori impostazioni nel menu "Time/Date" (ora/data), premere i tasti
e selezionare una delle impostazioni seguenti. Confermare la
selezione premendo il tasto SELECT.
Aggiornamento
automatico
DAB/FM/rete/nessun aggiornamento
Impostare il formato Formato 12/24 ore
Impostare il fuso orario
Selezionare un fuso orario (disponibile solo
se è stato scelto l'aggiornamento dalla rete).
Ora legale
Attivare/disattivare l'ora legale (disponibile
solo se è stato scelto l'aggiornamento dalla
rete).
168
IT
Nota: l'impostazione predenita è "Update from Network". Se si desidera
impostare l'ora manualmente, si consiglia di spegnere l'aggiornamento
automatico.
Impostare il tempo no allo spegnimento automatico
Con la funzione "Inactive Standby" è possibile impostare una durata per lo
spegnimento del dispositivo in modalità di riproduzione.
1. Durante la modalità di impostazione di sistema, premere i tasti
per selezionare "Inactive Standby" e confermare con
SELECT.
2. Premere i tasti per scegliere tra o, 2 ore, 4 ore, 5 ore e 6
ore. Confermare la selezione premendo il tasto SELECT.
Lingua
1. Durante la modalità di impostazione di sistema, premere i tasti
per selezionare "Language" e confermare con SELECT.
2. Premere i tasti per selezionare la lingua desiderata.
Confermare la selezione premendo il tasto SELECT.
169
IT
Ripristinare le impostazioni di fabbrica
Può succedere, specialmente dopo un trasloco, che si voglia resettare
il dispositivo alle impostazioni di fabbrica. Se ci sono problemi con la
ricezione, si consiglia di ripristinare le impostazioni di fabbrica e provare
di nuovo. Se ci si sposta in un'altra parte del Paese, le stazioni DAB locali e
nazionali precedentemente salvate potrebbero non essere più disponibili.
1. Durante la modalità di impostazione di sistema, premere i tasti
per selezionare "Factory Reset" e confermare con SELECT.
2. Premere i tasti ⏮/⏭ per scegliere "Yes". Confermare la selezione
premendo il tasto SELECT, o scegliere "No" per interrompere la
procedura.
Nota: quando si ripristinano le impostazioni di fabbrica, tutte le emittenti
salvate vengono cancellate.
Aggiornamento del software
1. Durante la modalità di impostazione di sistema, premere i tasti
per selezionare "Software Update" e confermare con
SELECT.
2. Premere i tasti per selezionare "Auto-check setting"
(controllo automatico per aggiornamenti) o "Check now" (controllare
ora). Confermare la selezione premendo il tasto SELECT.
Nota: prima dell'aggiornamento, assicurarsi che la spina della radio
sia collegata correttamente e che l'alimentazione sia stabile. Se
l'alimentazione viene interrotta durante un aggiornamento del software,
possono risultare guasti funzionali e/o danni al dispositivo.
Assistente di congurazione
L'assistente di congurazione può essere selezionato nelle impostazioni di
sistema. L'assistente di congurazione può essere utilizzato per ora/data
e rete. Non appena si conclude la procedura guidata di congurazione, la
radio è pronta all'uso.
Info
1. Durante la modalità di impostazione di sistema, premere i tasti
per selezionare "Info" e confermare con SELECT.
2. Sullo schermo vengono mostrati la versione del software, l'ID della radio
e il nome del dispositivo.

170
IT
Informativa sulla privacy
1. Per visualizzare l'informativa sulla privacy, premere il tasto MENU.
Selezionare System settings (impostazioni di sistema ) - Privacy policy
(informativa sulla privacy)
2. Dopo il ripristino delle impostazioni di fabbrica, è necessario accettare di
nuovo l'informativa sulla privacy.
Retroilluminazione
1. Durante la modalità di impostazione di sistema, premere i tasti
per selezionare "Backlight" e confermare con SELECT.
2. Premere i tasti per accedere a ulteriori impostazioni in
questo menu. Confermare la selezione premendo il tasto SELECT.
Modalità operativa Livello alto/medio/basso
Modalità standby
Spegnimento: o/10 secondi/30 secondi/60
secondi Livello di standby: alto/medio/
basso/o
In alternativa, premere più volte il tasto DIMMER sul telecomando per
regolare la retroilluminazione.
Nota: se è stato selezionato "O" per lo spegnimento, la retroilluminazione
mantiene la stessa intensità in modalità standby e operativa e non può
essere regolata con il telecomando.
RADIO WEB
Per ascoltare la radio via web, il dispositivo deve essere collegato a
Internet. Posizionare la radio il più vicino possibile al router per ottenere
la migliore velocità di connessione. Se si seleziona la modalità radio
web, il dispositivo si collega al portale Frontier Silicon per scaricare un
elenco di emittenti. Quando si seleziona un'emittente, la radio si connette
direttamente.
Premere MODE su dispositivo o telecomando per selezionare la radio web.
Premere il tasto MENU sul dispositivo o premere MENU sul telecomando
per entrare nel menu in modalità radio web. Si può scegliere tra le
seguenti opzioni: Last listened (ascoltata più di recente), System settings
(impostazioni di sistema) e Main menu (menu principale). Premere i tasti
per scegliere e confermare con SELECT.
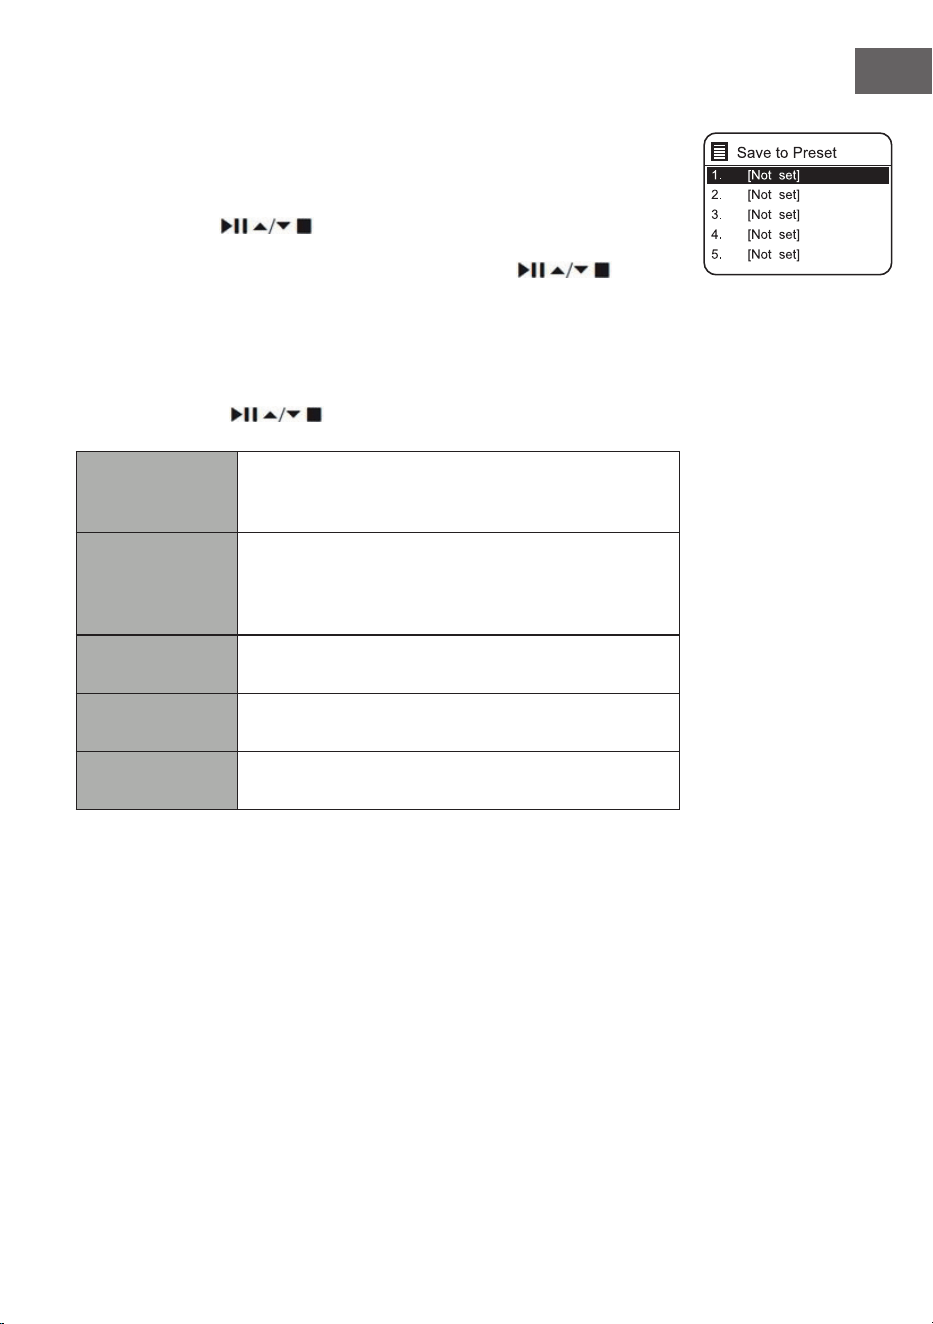
171
IT
Quando si riavvia la modalità radio web, viene selezionata
automaticamente l'ultima emittente ascoltata. Premere il tasto BACK per
tornare all'elenco delle emittenti.
Ascoltate di recente
1. Premere i tasti
per accedere alla cronologia delle ultime
emittenti ascoltate.
2. Scegliere una delle impostazioni elencate con i tasti e
confermare con SELECT.
Elenco emittenti
Quando si utilizza il dispositivo per la prima volta in modalità radio web,
viene aperto l'elenco delle emittenti. Scegliere una delle impostazioni
elencate con i tasti
e confermare con SELECT.
Paesi
Si possono cercare emittenti speciche del Paese
in cui ci si trova. All'interno di questa portata viene
mostrata anche la radio locale.
Ricerca
Per la ricerca delle emittenti è possibile utilizzare
diverse parole chiave. Nome e descrizione
dell'emittente selezionata vengono mostrati sul
display.
Località
È possibile selezionare emittenti da una lista di Paesi
disponibili.
Preferite
Scegliere un'emittente dalla lista delle stazioni più
ascoltate a livello globale.
Scopri
Scegliere emittenti dalle diverse categorie del menu:
Paese, genere o lingua.
Premere BACK su dispositivo o telecomando per tornare al livello
precedente del menu.
172
IT
Salvare le emittenti
Le emittenti web memorizzate sono salvate all'interno della radio e non
sono accessibili da altri dispositivi.
1. Per salvare un'emittente web è necessario prima accedervi. Tenere
premuto il tasto MEMORY sul dispositivo o il tasto PRESET sul
telecomando nché non compare la schermata "Save to Preset" (salvare
emittente).
2. Scegliere una delle 30 posizioni di salvataggio ruotando la manopola di
selezione o premendo i tasti
sul telecomando per salvare
l'emittente attuale e confermare premendo la manopola di selezione sul
dispositivo o SELECT sul telecomando.
Accedere a un'emittente salvata
1. Per accedere a un'emittente salvata, premere il tasto MEMORY sul
dispositivo o PRESET sul telecomando, scegliere l'emittente in memoria
desiderata con la manopola di selezione sul dispositivo o con i tasti
sul telecomando.
2. Per confermare, premere la manopola di selezione del dispositivo verso
il basso o premere SELECT sul telecomando.
In alternativa, è possibile accedere alle emittenti salvate con il telecomando
in questo modo:
• Premere più volte il tasto PRESET +/- per accedere alle diverse emittenti
o premere i tasti numerici per aprire direttamente una delle emittenti
salvate nelle posizioni 1-10.
• Se nella posizione scelta non è salvata alcuna emittente, sullo schermo
compare "Preset empty".
Il salvataggio e l'accesso alle emittenti salvate funziona allo stesso modo
per le modalità web radio/podcast/DAB/FM.
Modalità di visualizzazione per radio web
Ogni volta che si preme il tasto INFO del telecomando, il display passa tra
le seguenti modalità di visualizzazione:
Informazioni su emittente/descrizione Lingua/località Bit rate/formato
audio/tasso di campionamento Buer di riproduzione Data
173
IT
PODCAST
Per ascoltare la radio via web, il dispositivo deve essere collegato a
Internet. Posizionare la radio il più vicino possibile al router per ottenere la
migliore velocità di connessione.
Premere MODE su dispositivo o telecomando per raggiungere il menu delle
modalità. Ruotare la manopola di selezione o premere i tasti ⏮ o ⏭ del
telecomando per selezionare la modalità podcast. Per confermare, premere
la manopola di selezione verso il basso o premere SELECT sul telecomando.
Ascoltate di recente
Premere i tasti
per accedere alla cronologia delle ultime
emittenti ascoltate e confermare con SELECT.
Elenco dei podcast
Quando si riavvia la radio, viene selezionata automaticamente l'ultima
emittente ascoltata. Premere il tasto BACK per tornare all'elenco dei
podcast.
Quando si utilizza il dispositivo per la prima volta in modalità podcast, viene
aperto l'elenco dei podcast. Scegliere una delle impostazioni elencate con i
tasti
e confermare con SELECT.
Paesi
Si possono cercare podcast specici del Paese in
cui ci si trova. All'interno di questa portata viene
mostrata anche la radio locale.
Ricerca
Per la ricerca dei podcast è possibile utilizzare
diverse parole chiave. Sul display vengono mostrati
nome e descrizione del podcast selezionato.
Località
È possibile selezionare podcast da una lista di Paesi
disponibili.
Scopri
Scegliere podcast dalle diverse categorie del menu:
Paese, genere o lingua.
Salvare le emittenti e accedervi
V. i paragra "Salvare le emittenti" e "Accedere a un'emittente salvata" per la
modalità "Radio web".

174
IT
SPOTIFY CONNECT
Utilizza smartphone, tablet o computer come
telecomando per Spotify. Su spotify.com/connect sono disponibili maggiori
informazioni.
Licenze
Il software Spotify è sottoposto a licenze di parti terze, disponibili a questo
indirizzo:
https://www.spotify.com/connect/third-party-licenses
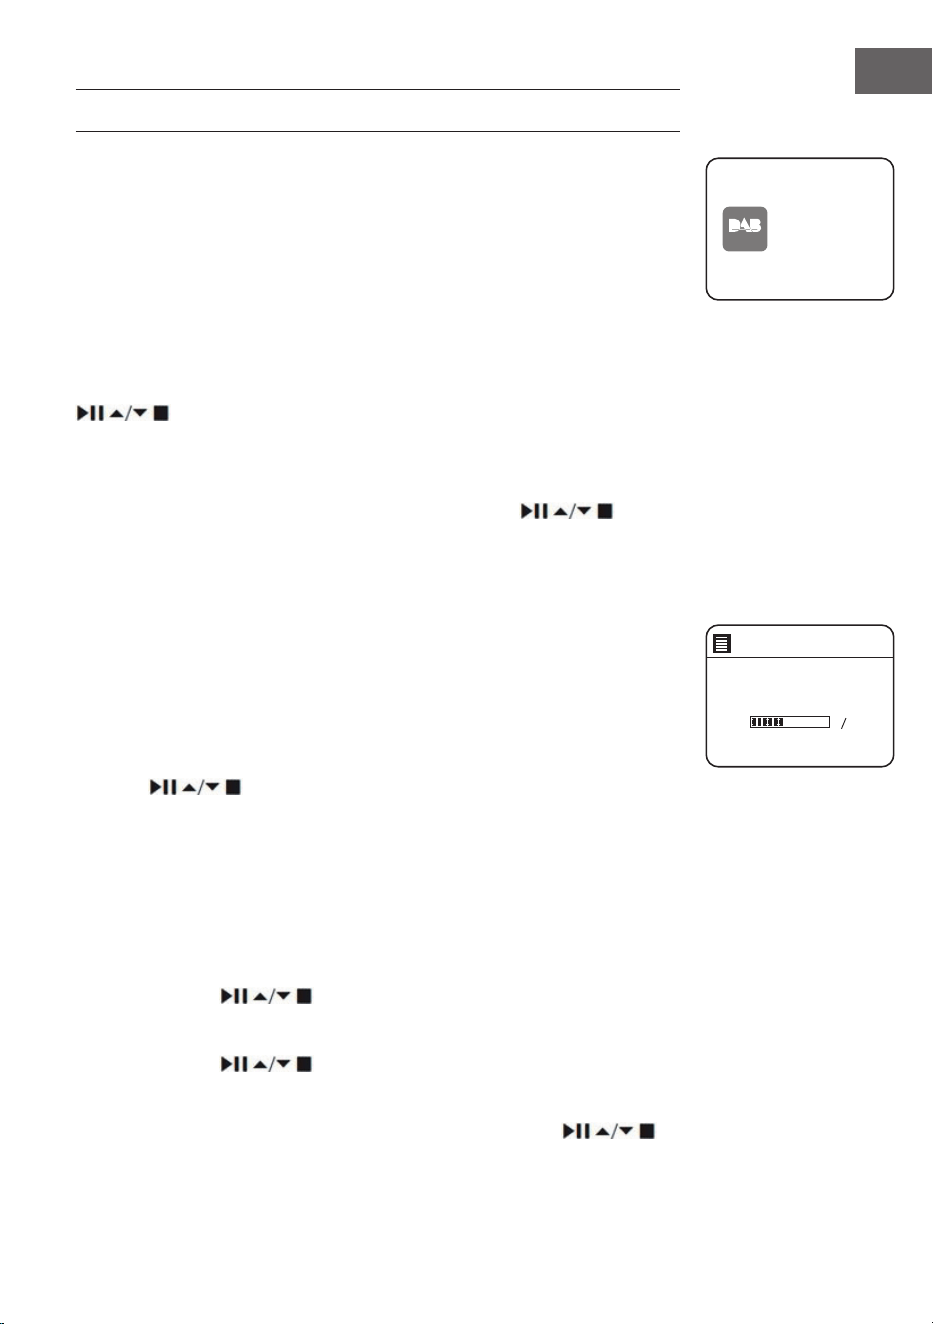
175
IT
RADIO DAB
Premere MODE su dispositivo o telecomando per raggiungere il menu delle
modalità. Ruotare la manopola di selezione sul dispositivo o premere i tasti
⏮ o ⏭ sul telecomando per scegliere la modalità DAB. Per confermare la
selezione, premere la manopola di selezione del dispositivo verso il basso
o premere SELECT sul telecomando. Il dispositivo passa in modalità DAB e
inizia la funzione di ricerca automatica. Durante la ricerca automatica, sullo
schermo compare "Scanning..." (ricerca), insieme a una barra che indica il
progresso della ricerca e le emittenti trovate no a quel momento. Non
appena la ricerca è terminata, il dispositivo seleziona automaticamente la
prima emittente alfanumerica trovata.
Le emittenti trovate possono essere selezionate nell'elenco con i tasti
. Confermare la selezione premendo il tasto SELECT.
Elenco emittenti
1. In modalità DAB, premere MENU per raggiungere il menu DAB.
2. Selezionare l'elenco delle emittenti premendo i tasti
e
confermare con SELECT.
3. Sul display viene mostrato un elenco di emittenti DAB.
Ricerca automatica delle emittenti
Premere il tasto SCAN|⏹ sul dispositivo o SCAN sul telecomando per
avviare la ricerca automatica delle emittenti. In alternativa, premere il tasto
MENU, selezionare "Scan" con i tasti e confermare con SELECT.
1. Lo schermo mostra "Scanning..." (ricerca) e compare una barra che indica
il progresso nella ricerca.
2. Tutte le emittenti trovate vengono salvate automaticamente. Premere
i tasti
per scegliere un'emittente dall'elenco e confermare
con SELECT.
Ricerca manuale delle emittenti
È possibile anche eettuare una ricerca manuale delle emittenti. Questo
è particolarmente utile quando si posiziona l'antenna o si aggiungono
emittenti che sono state saltate durante la ricerca automatica.
1. Premere MENU per accedervi.
2. Premere i tasti
per scegliere "manual tune" (ricerca manuale
delle emittenti) e confermare con SELECT.
3. I multiplex da 5A a 13 F vengono mostrati sullo schermo.
4. Premere i tasti per scegliere l'emittente e confermare con
SELECT.
5. Per riprodurre le emittenti trovate, tornare alla schermata di riproduzione
e selezionare l'emittente desiderata dall'elenco con i tasti .
Premere SELECT per confermare.
DAB
radio
DAB Radi o
Scan
Stations: 0
Scanning
176
IT
Cancellare le emittenti non disponibili
Le emittenti non disponibili possono essere cancellate dall'elenco.
1. In modalità DAB, premere MENU e utilizzare i tasti
per
selezionare "Prune invalid" (eliminare le emittenti non valide) e
confermare con SELECT.
2. Scegliere "Yes" (sì) con ⏮ o ⏭ e confermare con SELECT. Scegliere "No"
per annullare.
DRC (compressione della gamma dinamica)
Se si ascolta musica con elevata gamma dinamica in un ambiente rumoroso,
potrebbe essere consigliabile comprimere la gamma dinamica.
1. In modalità DAB, premere MENU e selezionare "DRC" con i tasti
. Premere SELECT per confermare la selezione.
2. Scegliere "DRC alta/bassa/o" con i tasti e confermare con
SELECT.
Ordine delle emittenti
Le emittenti nell'elenco possono essere organizzate in un determinato
ordine.
1. In modalità DAB, premere MENU, utilizzare i tasti
per
selezionare "Station order" (ordine delle emittenti) e confermare con
SELECT.
2. Scegliere Alfanumerico/Ensemble con e confermare con
SELECT.
Modalità di visualizzazione DAB
Ogni volta che si preme il tasto MENU sul dispositivo o il tasto INFO sul
telecomando, lo schermo mostra le seguenti modalità di visualizzazione:
DLS - Tipo di programma - Ensemble/frequenza - Errore/intensità del
segnale - Bitrate/codica/emittente - Data

177
IT
DLS (Dynamic Label Segment)
Si tratta di un testo scorrevole con informazioni in tempo reale come titoli
di canzoni, notizie più importanti, ecc.
Tipo di programma
Descrive lo stile o il genere del programma che viene trasmesso.
Nome dell'ensemble/frequenza
Mostra il nome del multiplex che contiene l'emittente in ascolto e la sua
frequenza. Un multiplex è un insieme di emittenti radio che vengono
trasmesse in blocco su una frequenza. Ci sono multiplex nazionali e locali. I
multiplex locali contengono emittenti speciche per una determinata zona
geograca.
Bit rate/codica/canali
Mostra il bit rate dell'audio digitale ricevuto e fornisce informazioni
aggiuntive sulle codiche audio e sulle impostazioni dell'emittente.
Data
Indica la data corrente, messa automaticamente a disposizione
dall'emittente.
Salvare le emittenti e accedervi
V. i paragra "Salvare le emittenti" e "Accedere a un'emittente salvata" per la
modalità "Radio web".
178
IT
RADIO FM
Premere MODE su dispositivo o telecomando per raggiungere il menu delle
modalità. Ruotare la manopola di selezione sul dispositivo o premere i tasti
⏮ o ⏭ sul telecomando per scegliere la modalità FM. Per confermare la
selezione, premere la manopola di selezione del dispositivo verso il basso o
premere SELECT sul telecomando. Sullo schermo compare la frequenza.
Ricerca automatica delle emittenti
Premere il tasto SCAN|⏹ sul dispositivo o SCAN sul telecomando per
avviare la ricerca automatica delle emittenti. Non appena viene trovata
un'emittente, la ricerca automatica si ferma. Tenere premuti i tasti
per iniziare a cercare un'emittente.
Nota: nella ricerca è possibile che vengano salvate emittenti con segnali
deboli.
Ricerca manuale delle emittenti
Per la ricerca manuale delle emittenti, girare la manopola di selezione sul
dispositivo o premere più volte i tasti
sul telecomando no a
raggiungere la frequenza desiderata.
Nota: in modalità FM potrebbe essere necessario sintonizzare
accuratamente ogni emittente usando la manopola di selezione del
dispositivo o i tasti
del telecomando. Ogni volta che si
premono i tasti, la frequenza cambia di 0,05 MHz. Se la ricezione del
segnale è debole, regolare la posizione dell'antenna o spostate la radio.
Modalità di visualizzazione FM
Ogni volta che si preme il tasto MENU sul dispositivo o il tasto INFO sul
telecomando, lo schermo mostra le seguenti modalità di visualizzazione:
Testo radio - Tipo di programma - Frequenza - Data
Testo radio
RDS
Si tratta di un testo scorrevole con informazioni sul
programma attuale.
Tipo di
programma
Descrive lo stile o il genere del programma che viene
trasmesso.
Nome
dell'emittente/
frequenza
Quando si riceve un'emittente RDS, viene mostrato il
suo nome. Altrimenti sullo schermo viene mostrata la
frequenza.
FM
radio
FM Radi o
179
IT
Data Indica la data corrente, messa automaticamente a
disposizione dall'emittente.
Impostazione di ricerca
1. Premere MENU per raggiungere il menu FM.
2. Scegliere "Scan Setting" (impostazione di ricerca) con i tasti
e confermare con SELECT.
3. Scegliere "Yes" (sì) con ⏮ o ⏭ per cercare solo emittenti con segnale
intenso e confermare con SELECT.
Impostazione audio
1. Premere MENU per entrare nel menu principale.
2. Selezionare "Audio setting" (impostazione audio) premendo i tasti
e confermare con SELECT.
3. Usare i tasti ⏮ o ⏭ per selezionare "Yes" e riprodurre le emittenti
solo in mono, o scegliere "no", in modo che il dispositivo selezioni
automaticamente tra stereo e mono.
4. Premere SELECT per confermare.
In alternativa, è possibile premere il tasto MONO/ST sul telecomando per
alternare tra solo mono o mono/stereo.
Salvare le emittenti e accedervi
V. i paragra "Salvare le emittenti" e "Accedere a un'emittente salvata" per la
modalità "Radio web".
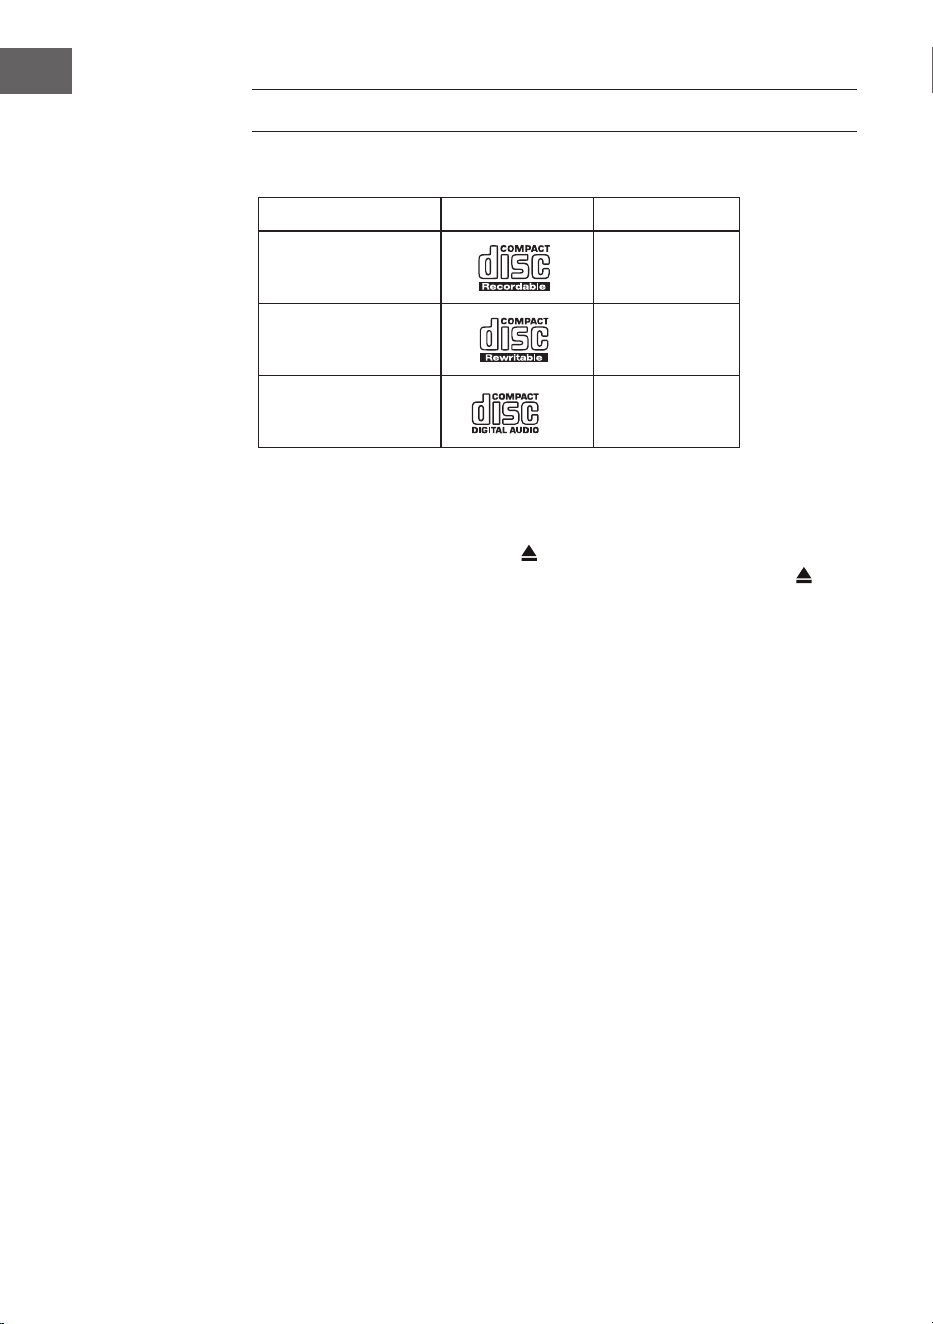
180
IT
LETTORE CD
Dischi compatibili
Tipo di disco Logo del disco Contenuto
CD-R (CD per
registrazioni)
Audio
CD-RW (CD riscrivibile) Audio
CD audio (Compact
Disc)
Audio
Premere MODE sul dispositivo o sul telecomando per attivare il lettore CD.
Riproduzione
1. Premere il tasto di espulsione (
) per aprire il vano CD.
2. Inserire un CD nel vano con il lato stampato verso l'alto. Premere per
richiudere il vano CD.
3. Se non è stato inserito alcun CD o se il CD non può essere letto, compare
l'indicazione "No disk".
4. Il numero di tracce compare sul display quando la riproduzione è in
pausa. Premere per riprodurre il primo titolo su CD/MP3.
Mettere in pausa la riproduzione: premere
per mettere in pausa la
riproduzione.
Terminare la riproduzione: premere
per terminare la riproduzione.
Passare al titolo successivo: con
e si passa al titolo precedente
o successivo. Tenere premuto o per tornare indietro o avanzare
velocemente all'interno di un titolo.
In alternativa, è possibile premere i tasti numerici sul telecomando in
successione per passare direttamente alla traccia desiderata.
Tenere premuti i tasti
/ sul telecomando per avanzare o tornare
indietro velocemente.
Quando si riproducono CD MP3 la cui musica è raggruppata in diverse
cartelle, si possono usare i tasti Preset/Folder ∧/∨ del telecomando per
passare alla cartella successiva/precedente.
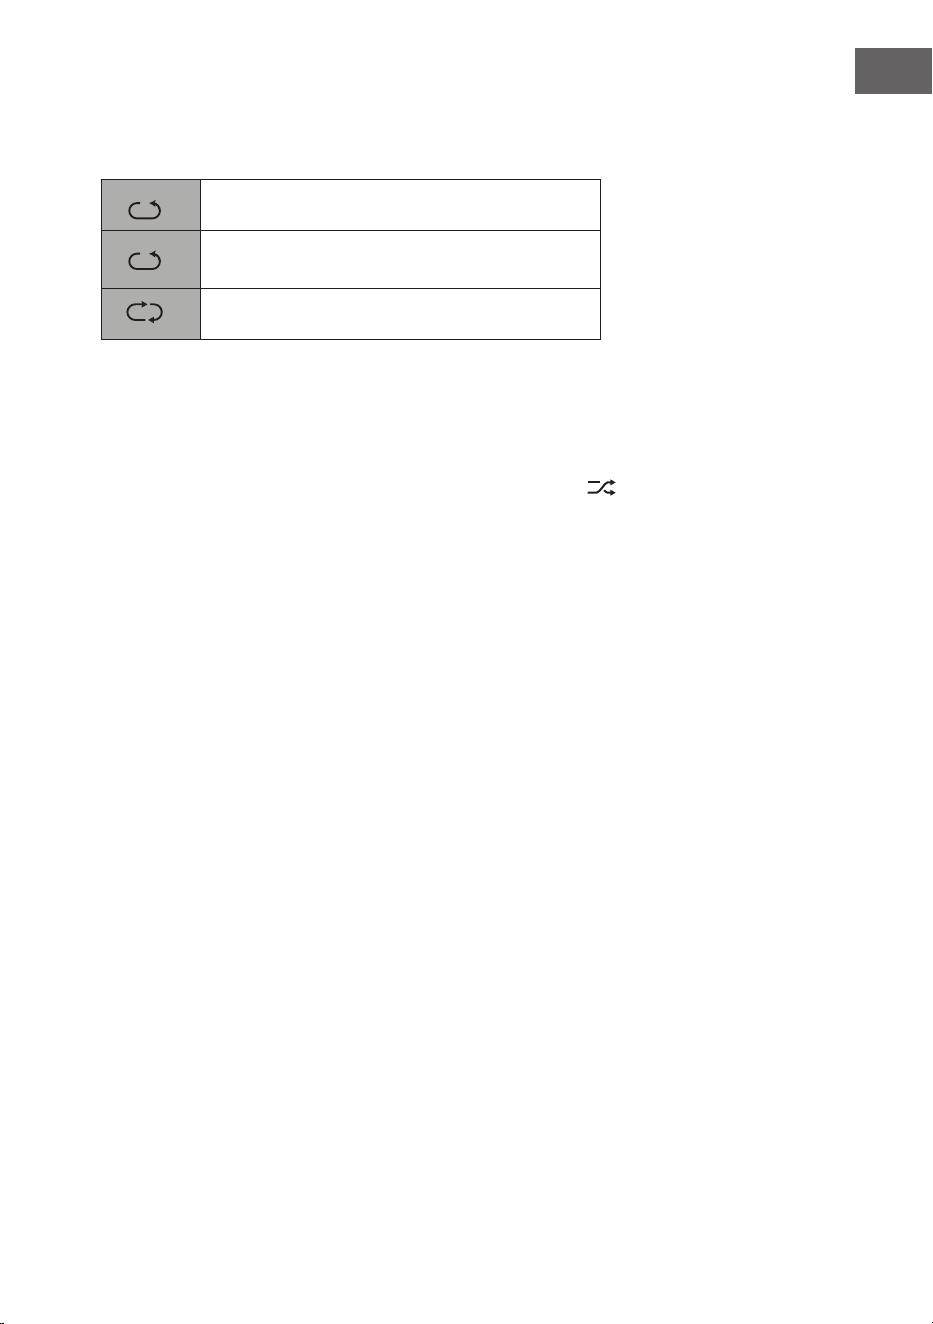
181
IT
Ripetere la riproduzione
1. Premere ripetutamente REPEAT per scegliere una modalità di ripetizione.
1
F
Ripetere il titolo attuale.
1
F
Tutti i le nella cartella attuale vengono
riprodotti (solo per CD con le).
1
F
Ripetere tutti i titoli.
2. Premere di nuovo REPEAT per spegnere la funzione di ripetizione.
Riproduzione casuale
Tutti i titolo possono essere riprodotti in ordine casuale.
1. Premere RANDOM sul telecomando. Sullo schermo compare
. Tutti i
titoli vengono riprodotti in ordine casuale.
2. Con e si passa al titolo successivo nella riproduzione casuale.
3. Dopo che i titoli sono stati ascoltati una volta, la riproduzione viene
conclusa.
4. Per terminare la riproduzione casuale, premere RANDOM durante la
riproduzione. Viene ripresa la normale riproduzione.
Riprodurre un intro dei brani
1. Premere INTRO sul telecomando. Sullo schermo compare "INTRO". Il
lettore CD riproduce i primi 10 secondi di ogni titolo.
2. Premere di nuovo INTRO sul telecomando per tornare alla riproduzione
normale.
Creare una playlist
Possono essere programmati no a 20 titoli in ordine a piacere. La modalità
di programmazione viene attivata a dispositivo in modalità STOP.
1. Premere PRESET per raggiungere la modalità di programmazione.
2. Con i tasti
e si seleziona il titolo che si desidera inserire nella
playlist.
3. Confermare il titolo con SELECT.
4. Ripetere i passaggi 2-3 per programmare altri titoli. Terminata la
selezione dei titoli, premere per iniziare la riproduzione dei titoli
programmati.
Interrompere il programma: premere due volte
o aprire il vano CD e
richiuderlo per cancellare la memoria di programmazione.

182
IT
RIPRODUZIONE USB
1. Sul lato anteriore del dispositivo si trova una porta USB. Quando un
dispositivo USB è collegato al dispositivo, premere ripetutamente il tasto
MODE su dispositivo o telecomando per selezionare la modalità USB.
2. Il dispositivo riprodurrà i brani automaticamente.
3. Tutte le funzioni di controllo sono le stesse della riproduzione di un CD
MP3.
In modalità USB il dispositivo può riprodurre solo le MP3. Il dispositivo
supporta dispositivi USB con memoria no a 32 GB. Il dispositivo potrebbe
non essere compatibile con tutti i supporti USB. Questo non indica un
problema del dispositivo.
Caricare un dispositivo esterno
Attraverso la porta USB e un cavo USB (non incluso) è possibile ricaricare
un dispositivo esterno.
• La tensione di carica massima tramite USB è di 1 A.
• Non è garantito che tutti i dispositivi possano essere caricati.

183
IT
RIPRODUZIONE BT
Il dispositivo è dotato di una funzione BT e può ricevere un segnale entro
un raggio di 8 metri. Collegare la radio a un dispositivo BT esterno per
ascoltare musica tramite Bluetooth:
1. Premere MODE su dispositivo o telecomando per selezionare la
modalità BT.
2. Se la radio non è ancora stata collegata a un dispositivo BT, il logo BT
inizierà a lampeggiare, indicando che la radio si trova in modalità di
connessione.
3. Attivare la funzione BT sul dispositivo esterno.
4. Selezionare iTuner-320 BT dalla lista dei dispositivi disponibili.
5. Se necessario, inserire la password "0000". Una volta che la connessione
è stata stabilita con successo, il logo BT smette di lampeggiare. Il
dispositivo esterno è ora collegato alla radio via BT.
6. Tenendo premuto PRESET sul dispositivo o premendo il tasto PAIR sul
telecomando, è possibile interrompere le connessioni BT già esistenti e
stabilire la connessione con un altro dispositivo BT esterno.
7. La funzione BT della radio può essere abbandonata passando ad un'altra
modalità o disattivando la connessione BT del dispositivo esterno.
Riproduzione musicale con BT
Potrebbe essere necessario regolare il volume sia sulla radio che sul
dispositivo BT esterno. Premere il tasto
⏯ sul dispositivo o sul telecomando
per mettere in pausa o riprendere la riproduzione. I tasti ⏮/⏭ possono
essere usati per saltare la traccia precedente/successiva.
Note:
• La portata operativa tra radio e dispositivi esterni è di circa 8 metri.
• Se il segnale BT è debole, la connessione può essere interrotta per un
breve periodo. La connessione verrà ripristinata il prima possibile.
• Per garantire una migliore ricezione del segnale, rimuovere gli ostacoli
tra radio e dispositivo BT.
• Non viene garantita la compatibilità con tutti i dispositivi e i tipi di le.
• Alcuni telefoni cellulari interrompono la connessione BT quando
si risponde a una chiamata. La connessione BT viene ristabilita
automaticamente al termine della chiamata. Questo non indica un
problema del dispositivo.

184
IT
INGRESSO AUDIO (LINE IN)
È possibile riprodurre musica da fonti esterne.
1. Collegare il dispositivo esterno alle connessioni RCA sul pannello
posteriore.
2. Premere più volte MODE per selezionare la modalità Line-In.
3. Ruotare la manopola per regolare il volume o utilizzare i tasti +/- del
telecomando.
4. In modalità Line-In, il dispositivo audio può essere utilizzato
direttamente per le funzioni di riproduzione.
Fare riferimento al manuale d'uso del dispositivo esterno per informazioni
sulle modalità di collegamento.
NET-REMOTE
Il dispositivo è dotato di funzione NetRemote, che permette la gestione
tramite un'app su smartphone o tablet (iOS o Android). Scaricare l'app
UNDOK da Google Play Store o Apple Store e installarla su smartphone o
tablet.
Prima di avviare l'app UNDOK, assicurarsi che radio e smartphone o tablet
siano sulla stessa rete WiFi. Avviare l'app. Dopo l'avvio, l'app cerca la radio
nella rete. Selezionare la radio dalla lista dei dispositivi disponibili per
stabilire la connessione NetRemote.
• Una volta che smartphone o tablet sono collegati al dispositivo,
al successivo avvio dell'app la connessione viene stabilita
automaticamente.
• Assicurarsi che ci sia sempre un solo dispositivo collegato alla radio
tramite l'app. Se si connette la radio a un altro dispositivo con la app, la
connessione al dispositivo precedente viene interrotta.
• Quando si collega il dispositivo esterno alla radio per la prima volta,
potrebbe essere necessario inserire una password. La password
predenita è "1234". La password può essere cambiata nelle
impostazioni di sistema nella sezione Network (rete) > NetRemote PIN
Setup (impostazione password per NetRemote).
• Selezionare la modalità desiderata nella schermata principale dell'app.
La modalità può essere controllata sia dall'app che dal dispositivo.
185
IT
USO DELLE CUFFIE
Quando si usano le cuie, non ascoltare musica ad alto volume per un
lungo periodo di tempo, altrimenti potrebbero risultare danni permanenti
all'udito.
• Utilizzare solo cuie con un connettore da 3,5 mm.
• Inserire le cuie nell'apposita presa sulla lato anteriore del dispositivo.
L'ascolto prolungato di musica ad alto volume può causare danni
all'udito. Evitare livelli di volume elevati quando si usano le cuie,
specialmente se le si usa per un lungo periodo di tempo.
IMPOSTARE IL TIMER DI SPEGNIMENTO (SLEEP)
Questa funzione permette di impostare un timer, allo scadere del quale il
dispositivo passa in modalità standby.
1. Attivare la funzione premendo più volte il tasto SLEEP. Ogni volta che lo
si preme, si seleziona una delle seguenti opzioni nella sequenza indicata:
2. Smettere di premere il tasto non appena compare sullo schermo la
durata desiderata. La funzione Sleep viene attivata dopo 2 secondi. Il
simbolo compare sullo schermo. Inoltre, accanto al simbolo viene
mostrato il tempo restante no allo spegnimento.
3. Allo scadere del timer, il dispositivo passa in modalità standby. Se si
desidera disattivare la funzione prima della ne del tempo impostato,
premere il tasto SLEEP no a quando compare "SLEEP OFF" sullo
schermo.
Procedura alternativa:
1. Premere MENU per raggiungere il menu principale. Scegliere Main Menu
(menu principale) con i tasti
e confermare con SELECT.
2. Selezionare Sleep con i tasti e confermare con SELECT.
3. Selezionare il timer della funzione Sleep con i tasti e
confermare con SELECT.
Sleep OFF
15 minutes
30 minutes
45 minutes
60 minutes
90 minutes
120 minutes

186
IT
IMPOSTARE LA SVEGLIA
1. Non appena si preme il tasto TIMER sul telecomando, sullo schermo
compare "Alarm(1 o 2): O [hh:mm]".
2. Selezionare Alarm 1 o Alarm 2 con i tasti e confermare con
SELECT.
Utilizzare i tasti per selezionare i seguenti parametri e
confermarli con SELECT.
Attivazione O/Tutti i giorni/Fine settimana/Giorni lavorativi
Orario Ora di attivazione dell'allarme
Modalità Segnale acustico/Web radio/DAB/FM
Impostazione
predenita
Ultima emittente ascoltata
Volume 0-32
Salvare Salvare e confermare l'impostazione della sveglia
3. Selezionare "Salva" e premere SELECT per salvare l'impostazione
eettuata. Sullo schermo compare "Alarm Saved". Una volta che la
sveglia è stata impostata, l'icona corrispondente compare sullo schermo.
4. Premere la manopola del volume sul dispositivo o il tasto ALARM del
telecomando per spegnere la sveglia.
Interrompere la sveglia
1. Non appena si preme il tasto TIMER sul telecomando, sullo schermo
compare "Alarm(1 o 2): Off [hh:mm]".
2. Selezionare Alarm 1 o Alarm 2 con i tasti
e confermare con
SELECT.
3. Scegliere "Enable" (attivare) con i tasti e confermare con
SELECT.
4. Scegliere "Off" (spenta) con i tasti e confermare con SELECT.
5. Selezionare "Save" e premere SELECT per salvare l'impostazione
effettuata.
6. In alternativa, premere più volte il tasto TIMER sul telecomando in
modalità standby per attivare o disattivare Alarm 1 o Alarm 2.

187
IT
Se non viene premuto alcun tasto entro circa 15 secondi, il dispositivo esce
automaticamente dalla modalità di impostazione del timer.

188
IT
SMALTIMENTO
Se nel proprio paese si applicano le
regolamentazioni inerenti lo smaltimento di
dispositivi elettrici ed elettronici, questo simbolo
sul prodotto o sulla confezione segnala che questi
prodotti non possono essere smaltiti con i riuti
normali e devono essere portati a un punto di
raccolta di dispositivi elettrici ed elettronici. Grazie
al corretto smaltimento dei vecchi dispositivi si
tutela il pianeta e la salute delle persone da possibili
conseguenze negative. Informazioni riguardanti
il riciclo e lo smaltimento di questi prodotti si
ottengono presso l’amministrazione locale oppure il
servizio di gestione dei riuti domestici.
Il prodotto contiene batterie. Se nel proprio
paese si applicano le regolamentazioni inerenti
lo smaltimento di batterie, non possono essere
smaltite con i normali riuti domestici. Preghiamo
di informarvi sulle regolamentazioni vigenti sullo
smaltimento delle batterie. Grazie al corretto
smaltimento dei vecchi dispositivi si tutela l’ambiente
e la salute delle persone da conseguenze negative.
DICHIARAZIONE DI CONFORMITÀ
Produttore:
Chal-Tec GmbH, Wallstraße 16, 10179 Berlino,
Germania.
Importatore per la Gran Bretagna:
Berlin Brands Group UK Limited
PO Box 42
272 Kensington High Street
London, W8 6ND
United Kingdom
Il fabbricante, Chal-Tec GmbH, dichiara che il tipo
di apparecchiatura radio iTuner CD è conforme
alla direttiva 2014/53/UE. Il testo completo della
dichiarazione di conformità UE è disponibile al
seguente indirizzo Internet: use.berlin/10032753

189
IT
Chal-Tec GmbH
Wallstr. 16, 10179, Berlino
www.chal-tec.com
Il software Spotify è sottoposto a diritti d'utilizzo di parti terze,
consultabili alla pagina web seguente:
https://www.spotify.com/connect/third-party-licenses
Tutte le marche presentate sono marchi registrati delle rispettive aziende.
Errori ed omissioni esclusi e soggetti a modiche tecniche. Si applicano i
nostri termini e le nostre condizioni generali.

190
IT

191
NL
Technische gegevens 192
Veiligheidsinstructies 193
Overzicht apparaat 195
Afstandsbediening 196
Aansluiting 199
Ingebruikname 200
Systeeminstellingen 204
Internetradio 208
Podcasts 211
Spotify Connect 212
DAB radio 213
FM radio 216
CD speler 218
USB weergave 220
BT weergave 221
Audio-ingang (line-in) 222
Net Remote 222
Gebruik van een koptelefoon 223
Uitschakeltimer instellen (Sleep) 223
Wekker instellen 224
Instructies voor afvoer 226
INHOUD
Geachte klant,
gefeliciteerd met de aanschaf van dit apparaat.
Lees de hierna volgende handleiding aandachtig
door en volg de instructies op om schade te
voorkomen. Voor schade veroorzaakt door het niet
in acht nemen van de instructies of door onjuist
gebruik nemen wij geen verantwoordelijkheid.
Scan de QR code voor toegang tot de meest
actuele gebruikershandleiding en voor meer
informatie rondom het artikel.

192
NL
TECHNISCHE GEGEVENS
Artikelnummer 10032753 10032754
Stroomvoorziening 100-240 V ~ 50/60 Hz, 1 A
USB uitgang
5 V
, 1 A
Audio
Uitgangsvermogen 2 x 5 W RMS
FM radio
Frequentiebereik 87,5 MHz–108 MHz
CD
Frequentie 20 Hz - 20 Khz
DAB
Frequentiebereik 174-240 MHz
Wi specicaties
Standaard
Frequentie
Max. zendvermogen
802.11 b/g/n
2412 - 2472 MHz
19 dBm
BT
Frequentiebereik
Max. zendvermogen
2402–2480MHz
2 dBm
Stroomverbruik in stand-by
Standaard stand-by werking
Netwerk stand-by werking
< 1,00 W (wi uit)
< 2,00 W (wi aan)

193
NL
VEILIGHEIDSINSTRUCTIES
Algemene veiligheidsinstructies
• Lees de instructies voor gebruik aandachtig door en bewaar de
gebruikershandleiding voor toekomstig gebruik.
• Gebruik uitsluitend de spanning die op het typeplaatje van het apparaat
staat vermeld. Zorg ervoor dat uw stopcontact geaard is.
• Het toestel moet op een vlakke, stabiele ondergrond worden geplaatst
en mag niet aan trillingen worden blootgesteld
• Plaats het toestel niet op een scheve of onstabiele ondergrond om te
voorkomen dat het omvalt.
• Het stopcontact moet zich in de nabijheid van het toestel bevinden en
moet gemakkelijk bereikbaar zijn.
• Vermijd extreme temperaturen, zowel hitte als koude. Plaats het toestel
op een veilige afstand van warmtebronnen zoals straalkachels of gas-/
elektrische fornuizen. Stel het toestel niet bloot aan direct zonlicht of
andere warmtebronnen.
• Plaats nooit kaarsen of andere objecten met open vlam op of in de
nabijheid van het apparaat.
• Stel het apparaat niet bloot aan regen, vocht of druipende en
opspattende vloeistoen, om gevaar voor brand, elektrische schokken
en beschadiging van het apparaat te voorkomen. Er mogen geen met
water gevulde objecten, zoals een bloemenvaas, op het toestel worden
geplaatst.
• Als u vloeistof op het toestel knoeit, kan dit ernstige schade
veroorzaken. Wanneer dat toch gebeurt schakelt u het apparaat direct
uit en neemt u de stekker uit het stopcontact. Neem contact op met de
klantenservice.
• Dek de ventilatieopeningen van het toestel niet af en zorg ervoor dat
gordijnen en andere materialen niet in de ventilatieopeningen komen
om oververhitting van het toestel en het daaruit voortvloeiende
brandgevaar en gevaar van elektrische schokken te voorkomen.
• Plaats het toestel niet in een gesloten boekenkast, inbouwkast of
andere bergplaats waar de ruimte beperkt is. Zorg ervoor dat het
toestel op een afstand van ten minste 10 cm van alle omringende
oppervlakken en objecten wordt geplaatst om voldoende ventilatie te
garanderen.
Veiligheid
• Neem altijd eerst de stekker uit het stopcontact voordat u de radio
aansluit op of loskoppelt van andere apparatuur of voordat u de radio
verplaatst.
• Let erop dat de stekker van de radio niet in het stopcontact zit tijdens
onweer.
• Het toestel wordt warm wanneer het gedurende langere tijd wordt

194
NL
gebruikt. Dit is normaal en wijst niet op een probleem.
Stroomaansluiting
• Zorg ervoor dat het toestel niet op de voedingskabel staat, aangezien
de kabel door het gewicht van het toestel beschadigd zou kunnen raken
en een veiligheidsrisico zou kunnen ontstaan.
• Indien de aansluitkabel van het toestel beschadigd is, moet het door de
klantenservice van de fabrikant worden vervangen of door een ander
daartoe gekwaliceerde persoon, om schade te voorkomen.
Storingen
• Plaats de radio niet op of in de buurt van andere apparaten die
elektromagnetische storingen kunnen veroorzaken. Als u de radio in de
buurt van andere apparaten plaatst, kan de weergavekwaliteit van de
radio negatief worden beïnvloed en kan er ruis ontstaan.
Toezicht
• Kinderen die zich in de nabijheid van het toestel bevinden, moeten
onder toezicht staan, zodat zij het toestel niet als speelgoed gebruiken.
• Sta niet toe dat iemand, vooral kinderen, voorwerpen (of vloeistof) in
de gaten, aansluitingen en andere openingen van het toestel plaatst,
aangezien dit kan leiden tot een elektrische schok met dodelijke aoop.
Bediening/ Onderhoud/ Service
• Verwijder de schroeven niet zelf om het risico op elektrische
schokken te verminderen. Het toestel bevat geen onderdelen
die door de gebruiker kunnen worden onderhouden. Laat alle
onderhoudswerkzaamheden over aan hiervoor gekwaliceerd
personeel.
• Verwijder of open geen permanent bevestigde afdekkingen van het
toestel, aangezien hierdoor gevaarlijke elektrische spanning kan
vrijkomen.
• Neem voor het reinigen altijd de stekker uit het stopcontact.
• Gebruik nooit agressieve reinigingsmiddelen of schuursponsjes
aangezien het oppervlak van het apparaat hierdoor kan beschadigen.
• Gebruik geen vloeistoen om het toestel te reinigen.

195
NL
OVERZICHT APPARAAT
1 CD lader
2 IR sensor
3 Koptelefoonaansluiting
4 Afspelen/ Pauze
5 Stop - pauzeren van de
weergave
6 Vorige titel
7 Volgende titel
8 Display
9 CD lade open/dicht
10 Menu
11 Instellingen
12 Modus
13 Scrollen/ Selecteren
14 Volume / Aan-uit
15 IR receiver
16 Stroomaansluiting
17 Wi antenne
18 Audio-uitgang (analoog)
19 Audio-ingang (analoog)
20 Optische uitgang (digitaal)
21 Coaxiale uitgang (digitaal)
22 Staafantenne
Voorkant
Achterkant
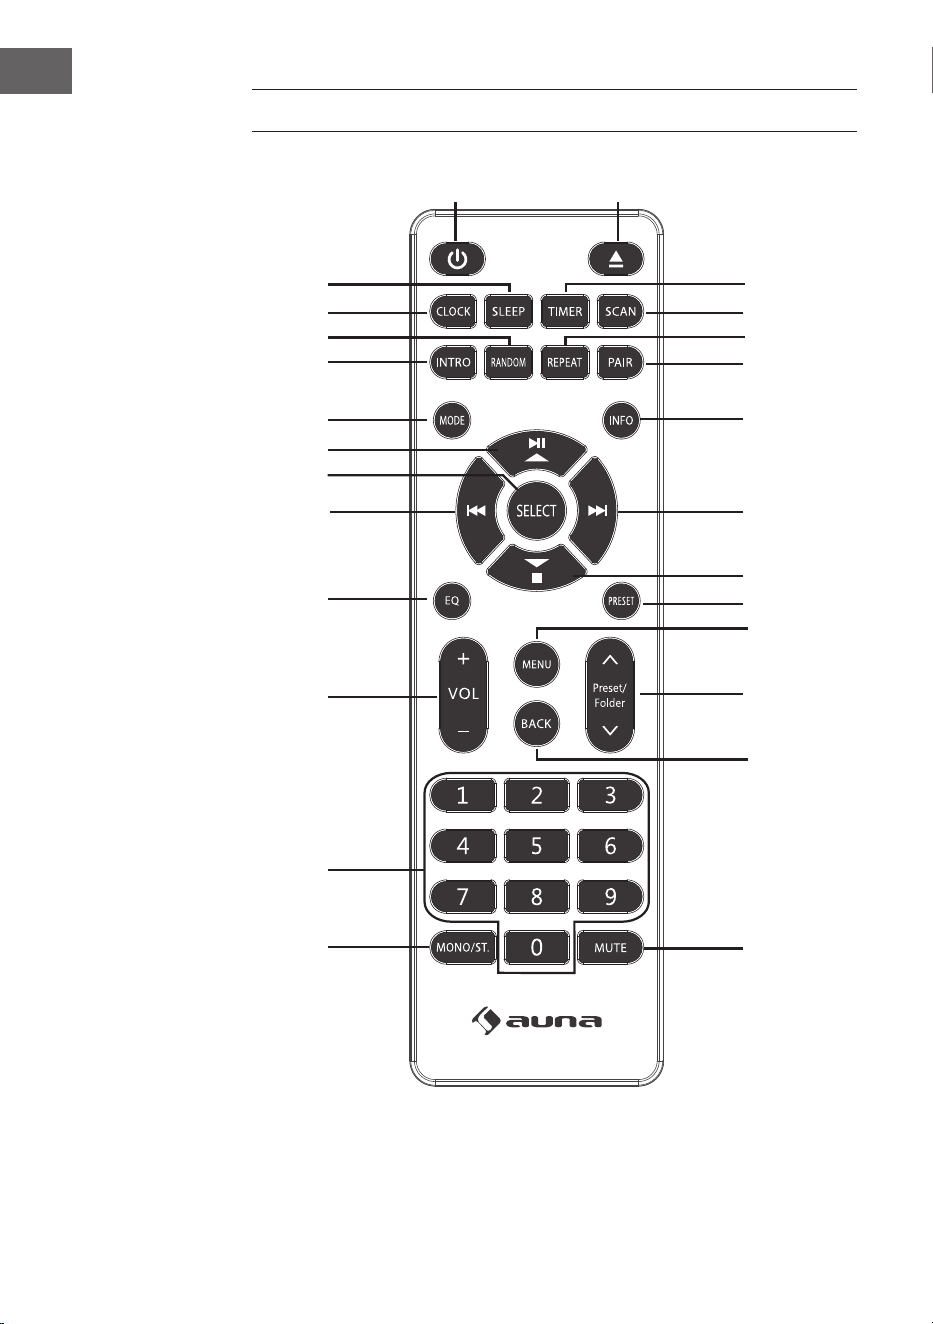
196
NL
AFSTANDSBEDIENING
1
15
16
17
18
19
21
20
22
23
24
25
26
2
3
4
5
6
7
8
9
10
11
12
13
14

197
NL
1 Aan/ Stand-by
2 CD uitwerpen
3 Timer
4 Scan
5 Afspeelmodus herhalen
6 BT koppeling
7 Info
8 Volgende titel/
Menunavigatie rechts
9 Stop/
Menunavigatie omlaag
10 Zenderopslag
11 Menu
12 Zenderopslag omhoog/omlaag
13 Menunavigatie terug
14 Mute
15 Mono/ Stereo
16 Cijferveld voor direct kiezen
17 Volume +/-
18 Equalizer
19 Vorige titel/
Menunavigatie links
20 Keuze bevestigen
21 Afspelen/ Pauze/
Menunavigatie omhoog
22 Modus
23 Titel afspelen
24 Afspeelmodus: random play
25 Tijdinstelling
26 Uitschakeltimer

198
NL
Plaatsen van batterijen in de afstandsbediening
1. Druk de afdekking van het batterijenvak omlaag bij de markering en
schuif het weg in de richting van de pijl.
2. Plaats 2 LR03 batterijen (AAA 1,5 V) in het batterijenvak (batterijen niet
inbegrepen). Controleer of de + en - markeringen op de batterijen
overeenkomen met de markeringen in het batterijenvak.
3. Plaats het deksel van het batterijenvak terug.
Omgaan met de batterij
• Onjuist of oneigenlijk gebruik van de batterij kan corrosie of
batterijlekkage veroorzaken, hetgeen kan leiden tot brand en materiële
schade en/of persoonlijk letsel.
• Gebruik alleen het type batterij dat in de gebruiksaanwijzing wordt
genoemd.
• Gooi gebruikte batterijen niet bij het huisvuil. Voer ze af in
overeenstemming met de plaatselijke voorschriften.
• Verwijder de batterij uit de afstandsbediening als u de
afstandsbediening langere tijd niet gebruikt, omdat er corrosie of
lekkage van de batterij kan optreden, wat kan leiden tot lichamelijk
letsel en/of materiële schade en/of brand.
Actieradius afstandsbediening
De sensor van de afstandsbediening aan de voorkant van het toestel
reageert tot op een afstand van 4 meter binnen een maximale hoek van 60
graden.
De actieradius hangt daarnaast af van de helderheid in het vertrek.

199
NL
AANSLUITING
1. De audio-ingang en -uitgang (analoog), de optische uitgang (digitaal)
en de coaxiale uitgang (digitaal) bevinden zich aan de achterkant van
het toestel. Hier kan een A/V-versterker of een hi-systeem op worden
aangesloten.
2. Sluit de meegeleverde antenne aan op de antenneaansluiting en trek
hem uit tot de gewenste lengte.
3. Sluit de inbegrepen wi antenne aan op de corresponderende
aansluiting aan de achterkant van het toestel.
4. Wikkel de kabel helemaal af. Steek de stekker in het stopcontact. Het
toestel is nu aangesloten en klaar voor gebruik.
Zorg ervoor dat het apparaat alleen wordt aangesloten op
stopcontacten met de juiste spanning. Houdt de stekker altijd bij de kop
vast en nooit bij het snoer, wanneer u deze in het stopcontact steekt of
eruit haalt. Trek nooit aan de stroomkabel.
5. Neem de stekker uit het stopcontact om het apparaat volledig uit te
schakelen.
Netwerkverbinding
Dit toestel ondersteunt alleen draadloze netwerkverbindingen en geen
LAN-verbindingen.
Draadloos netwerk
1. Controleer eerst of de indicatielampjes (LINK/ ACT) op uw router
branden.
2. Herhaal de handelingen zoals vermeld in het hoofdstuk "Eerste stappen".
Het wordt aanbevolen de installatiewizard te gebruiken die zich in de
systeeminstellingen bevindt.
Let op! Dit toestel kan niet rechtstreeks op een modem worden
aangesloten. Er moet een router of een in een router ingebouwde modem
worden gebruikt. Volg de betreende instructies van uw provider en neem
de gebruiksaanwijzing van uw router in acht.
200
NL
INGEBRUIKNAME
In deze gebruiksaanwijzing worden de basisstappen voor het gebruik van
het apparaat uitgelegd. Indien niet uitdrukkelijk anders vermeld, hebben
alle gebruiksaanwijzingen betrekking op de bediening van het toestel met
de afstandsbediening.
Aan-/ Uitzetten
1. Druk op de volumeknop / op het toestel of op de toets op de
afstandsbediening om het toestel aan te zetten.
2. Druk op de volumeknop / op het toestel of op de toets op de
afstandsbediening om het toestel weer in stand-by modus te zetten.
Modus selectie
Druk op de MODE-toets op het apparaat of de afstandsbediening om te
kiezen tussen internetradio, podcasts, Spotify, DAB-radio, FM-radio, CD-
speler, USB, BT audio en AUX-IN.
Alternatief
1. Druk op de MENU knop op het apparaat of op de afstandsbediening
om het functie-hoofdmenu te openen, draai vervolgens aan de
SCROLL|SELECT knop op het apparaat of druk op de
knop op de afstandsbediening om het hoofdmenu te selecteren, druk
vervolgens op de SCROLL|SELECT knop op het apparaat of op de
SELECT knop op de afstandsbediening om te bevestigen.
2. Draai aan de SCROLL|SELECT knop op het apparaat of druk op de toets
op de afstandsbediening om de gewenste modus te selecteren en
druk vervolgens op de SCROLL|SELECT knop op het apparaat of op de
SELECT knop op de afstandsbediening om te bevestigen.
Als het toestel gedurende circa 15 minuten niet wordt gebruikt, gaat het
apparaat automatisch over in stand-by modus. Neem de stekker uit het
stopcontact om het apparaat volledig uit te schakelen. Wanneer het
apparaat niet in gebruik is schakelt u hem volledig uit om energie te
besparen.
Volume aanpassen
• Draai voor het aanpassen van het volume aan de volumeknop
VOLUME| of druk op de toetsen VOL +/- op de afstandsbediening.
• Druk voor het uitschakelen van het geluid op de MUTE toets op
de afstandsbediening. Druk nogmaals op de MUTE toets of draai
aan de volumeknop VOLUME| of druk op de toets VOL +/- op de
afstandsbediening om de normale weergave te hervatten.

201
NL
Menunavigatie
1. Houd de toets MENU ingedrukt op het apparaat of druk op de toets
MENU op de afstandsbediening om het menu te openen.
2. Draai aan de selectieknop op het apparaat of druk op de
⏮ of ⏭ toetsen.
3. Druk de selectieknop op het toestel omlaag of druk op de toets SELECT
op de afstandsbediening om uw keuze te bevestigen.
Eerste installatie
Wanneer u de netstekker van het toestel voor het eerst in het
stopcontact steekt, verschijnt het welkomstbericht op het scherm.
Vervolgens verschijnt het taalmenu op het scherm. Kies de gewenste
taal door aan de selectieknop van het apparaat te draaien of druk de
toetsen
⏮ of ⏭ op de afstandsbediening. Om uw keuze te bevestigen,
drukt u de selectieknop omlaag of drukt u op de toets SELECT op de
afstandsbediening. Aansluitend wordt het privacybeleid dan weergegeven.
Bezoek de hieronder genoemde website voor meer informatie over de
gegevensbescherming. Om het privacybeleid te accepteren drukt u de
selectieknop op het toestel omlaag of druk op de toets SELECT op de
afstandsbediening.
1. Draai aan de selectieknop om de set-up wizard op te starten of selecteer
"YES" met de ⏮ of ⏭ toets. Bevestig uw keuze door de selectieknop
omlaag te drukken ofdoor op de SELECT toets van de afstandsbediening
te drukken.
2. In de volgende stap kan het tijdformat worden gekozen. Selecteer
de gewenste instelling '12' of '24' en bevestig uw keuze door op de
selectieknop of de toets SELECT op de afstandsbediening te drukken.
3. U hebt nu de mogelijkheid in te stellen welke bron (DAB/ FM/ netwerk/
geen update) moet worden gebruikt om de tijd en datum automatisch te
laten actualiseren. Wanneer u 'Update from Network' (update vanuit het
netwerk) hebt geselecteerd, kiest u in de volgende stap de juiste tijdzone
om ervoor te zorgen dat de tijd correct wordt weergegeven. Selecteer
vervolgens of de zomertijd aan of uit moet staan.
4. In de volgende stap hebt u de mogelijkheid om aan te geven of het
toestel in stand-by modus met het Internet verbonden moet blijven.
Draai aan de selectieknop op het toestel of druk de ⏮ of ⏭ toets
om 'YES' (ja) te selecteren. Druk aansluitend de selectieknop van het
apparaat omlaag ter bevestiging van uw keuze of druk de toets SELECT
op de afstandsbediening.
5. Uw radio zoekt nu naar draadloze netwerken. Dit kan een paar seconden
duren. Een lijst van alle beschikbare netwerken verschijnt vervolgens op
het scherm. Selecteer het gewenste wi netwerk. Om het wachtwoord in
te voeren, gebruikt u WPS of voert u het wachtwoord rechtstreeks in op
het beeldscherm van de radio.
Verbinding door gebruik van de WPS knop op uw router.
202
NL
Het gebruik van de WPS-knop (Wi Protected Setup) op uw router is
een snelle en eenvoudige manier om uw radio te verbinden met het wi
netwerk zonder dat u een wachtwoord hoeft in te voeren. Selecteer een van
de volgende verbindingsmethoden:
WPS knop
Als uw router een WPS knop heeft, ziet u [WPS] vooraan bij de
netwerknaam staan.
1. Selecteer met de toets
'Pushbutton' (drukknop) en bevestig
vervolgens uw keuze door op de SELECT toets te drukken.
2. Er verschijnt een bericht op het scherm waarin u wordt gevraagd op
de WPS-knop van uw router te drukken. Druk op de WPS-knop op uw
router. Raadpleeg de gebruiksaanwijzing van uw router als u niet zeker
weet welke knop het is.
3. Druk vervolgens op de SELECT toets om te bevestigen. De radio maakt
dan verbinding met de router. Dit kan een paar seconden duren.
Wachtwoord invoeren
De radio genereert een 8-cijferig wachtwoord. Voer dit wachtwoord in op
de router of het toegangsapparaat.
Verbinding tot stand brengen met behulp van het wi wachtwoord
Als uw router niet over een WPS-knop beschikt, wordt u gevraagd het wi
wachtwoord in te voeren. Als uw apparaat over de WPS-functie beschikt,
maar u toch het wi wachtwoord wilt gebruiken om verbinding te maken,
selecteert u 'SKIP WPS' (WPS overslaan).
1. Druk op de toetsen
om de cijfers/ letters te selecteren. Na
elke gemaakte keuze drukt u op de SELECT toets om de desbetreende
cijfer/letter te bevestigen.
2. Nadat u het wachtwoord volledig hebt ingevoerd, drukt u op de toetsen
om rechts in het beeldscherm 'OK' te selecteren.
3. Nadat de verbinding met succes tot stand is gebracht, drukt u op de
SELECT toets om de instellingen te verlaten.

203
NL
De instellingen kunnen op elk moment worden aangepast in het menu
System Settings (systeeminstellingen) > Network (netwerk) > Network
wizard (netwerkassistent). In deze gebruikershandleiding worden de
basisstappen voor het gebruik van dit apparaat uitgelegd. Indien niet
uitdrukkelijk anders vermeld, hebben alle gebruiksaanwijzingen betrekking
op de bediening van het toestel met de afstandsbediening.
204
NL
SYSTEEMINSTELLINGEN
Houd de toets MENU toets op het apparaat ingedrukt of druk op de
toets MENU op de afstandsbediening om het menu te openen. Draai
aan de draaiknop op het apparaat of druk op de toets op de
afstandsbediening om de systeeminstellingen te selecteren. Bevestig uw
keuze door op de selectieknop van het apparaat te drukken of op de toets
SELECT op de afstandsbediening.
Equalizer
Dit toestel ondersteunt een verscheidenheid aan equalizers en
geluidseecten. Druk op de EQ toets om het equalizermenu te openen. U
kunt ook, in de systeeminstellingsmodus, op de knop
drukken
om Equalizer te selecteren en vervolgens op SELECT om uw keuze te
bevestigen.
1. Op het display verschijnt het volgende: FLAT > CLASSIC > ROCK > POP
> JAZZ.
2. Selecteer de gewenste equalizerinstelling met de toets en
bevestig uw keuze met de toets SELECT.
Streaming audiokwaliteit
Het systeem ondersteunt verschillende audiokwaliteiten voor beschikbare
streamingdiensten. De werkelijke bitrate voor elke instelling hangt af van
de gebruikte streamingdienst.
Netwerk
1. Druk in de systeeminstellingsmodus op de toetsen
om
'Network' (netwerk) te selecteren en druk op SELECT om uw keuze te
bevestigen.
2. Kies met de toetsen één van de hieronder vermelde
instellingen uit en bevestig uw keuze door op de toets SELECT te
drukken.
Netwerkassistent
instellen
SSID - Selecteer het gewenste draadloze
netwerk. Rescan (opnieuw scannen) - Zoeken
naar beschikbare netwerken. Handmatige
instelling - selecteer een draadloos netwerk
met DHCP ingeschakeld/uitgeschakeld.
205
NL
PBC wi inrichting
Selecteer WPS op uw apparaat en druk op de
WPS-knop van de modem/router waarmee
u verbinding wilt maken. Druk, om verder te
gaan, de selectieknop van het apparaat om-
laag of druk de toets SELECT op de afstands-
bediening.
Instellingen
weergeven
Laat de instellingen op het beeldscherm zien.
Handmatige instelling
Selecteer een draadloos netwerk met DHCP
ingeschakeld/uitgeschakeld.
NetRemote PIN-
inrichting
Om een wachtwoord op te slaan dat moet
worden ingevoerd voor het tot stand komen
van een verbinding tussen het apparaat en een
netwerk.
Netwerkproel Laat het verbonden netwerk zien.
Netwerkverbinding
onderhouden
Instellen zodat het toestel in stand-by/ andere
modi verbonden blijft met het netwerk.
3. Druk op de BACK toets van het apparaat of de afstandsbediening om de
instelling te af te breken en naar het vorige menu te gaan.
Tijd/ datum
De tijd/ datum kan automatisch worden ingesteld wanneer het toestel
verbinding maakt met het internet of met een DAB/FM-zender met tijd/
datumvermelding. Het is ook mogelijk om de tijd en datum handmatig in
te stellen. Druk op de toets CLOCK van de afstandsbediening om het menu
voor het instellen van de tijd en datum te openen.
Alternatief bestaat de mogelijkheid om 'Time/ Date' (tijd/datum) te
selecteren tijdens het systeeminstellingenmenu door op de toetsen
te drukken en uw keuze te bevestigen met de toets SELECT.
Selecteer met de toetsen 'Set Time/Date' (tijd/ datum
aanpassen) en bevestig vervolgens uw keuze door op de SELECT toets te
drukken.
1. De datumposities knipperen op het beeldscherm.
2. Druk op de toetsen om de dag aan te passen en op de
SELECT toets om te bevestigen.
3. Herhaal stap 2 voor het instellen van maand/ jaar/ uur/ minuut.
4. Het instellen van datum en tijd is nu voltooid.
Voor verdere instellingen in het menu 'Time/ Date' (tijd/datum) drukt u op
de toetsen en kiest u uit de onderstaande instellingen. Bevestig
206
NL
uw keuze door op SELECT te drukken.
Automatische update DAB/ FM/ Netwerk/ geen update
Format instellen 12-/ 24-uurs format
Tijdzone instellen
Selecteer een tijdzone (alleen beschikbaar
wanneer de update via het netwerk is
geselecteerd).
Zomertijd
Inschakelen/ uitschakelen van de zomertijd
(alleen beschikbaar wanneer de update via
het netwerk is geselecteerd).
Info: De fabrieksinstelling is 'Update from Network' (Update vanaf netwerk).
Als u de tijd handmatig wilt instellen, is het raadzaam de automatische
update uit te schakelen.
Tijd tot automatisch uitschakelen vastleggen
Met behulp van de functie 'Inactive Standby' kunt u vastleggen na hoeveel
tijd het toestel moet worden uitgeschakeld in de afspeelmodus.
1. Druk in de systeeminstellingsmodus op de toetsen
om
'Inactive Standby' te selecteren en druk op SELECT om uw keuze te
bevestigen.
2. Om te kiezen tussen uit, 2 uur, 4 uur, 5 uur en 6 uur, drukt u op de toetsen
. Bevestig uw keuze door op SELECT te drukken.
Taal
1. Druk in de systeeminstellingsmodus op de toetsen
om
'Language' te selecteren en druk op SELECT om uw keuze te bevestigen.
2. Druk ter selectie van de gewenste taal op de toetsen .
Bevestig uw keuze door op SELECT te drukken.
207
NL
Terugzetten naar fabrieksinstellingen
Het kan gebeuren, vooral na een verhuizing, dat u het toestel wilt
terugzetten naar de fabrieksinstellingen. Als u ontvangstproblemen heeft,
is het raadzaam het toestel terug te zetten op de fabrieksinstellingen en
het opnieuw te proberen. Als u naar een ander deel van het land verhuist
kan het gebeuren dat lokale en nationale DAB-zenders die u eerder had
opgeslagen, niet meer beschikbaar zijn.
1. Druk in de systeeminstellingen op de toets
om 'Factory
Reset' te selecteren en druk op SELECT om uw keuze te bevestigen.
2. Om 'Yes' te selecteren, drukt u op de toetsen ⏮/⏭. Bevestig uw keuze
door op SELECT te drukken of kies om te annuleren voor 'No'.
Let op! Wanneer het toestel wordt teruggezet naar de fabrieksinstellingen,
worden alle opgeslagen zenders gewist.
Software-update
1. Druk in de systeeminstellingsmodus op de toetsen
om
'Software Update' te selecteren en druk op SELECT om uw keuze te
bevestigen.
2. Om 'Auto-check setting' (automatisch zoeken naar updates) of 'Check
now' (nu zoeken) te selecteren, drukt u op de toetsen .
Bevestig uw keuze door op SELECT te drukken.
Tip: Controleer voor het updaten of de stekker van de radio goed in
het stopcontact zit en of de stroomverbinding stabiel is. Wanneer de
stroomverbinding tijdens een software update wordt onderbroken, kan
dit functionele storingen en/ of schade aan het apparaat tot gevolg
hebben.
Inrichtingsassistent
De inrichtingsassistent kan worden geselecteerd in de systeeminstellingen.
De inrichtingsassistent kan worden ingezet voor tijd/datum en het netwerk.
Zodra de inrichtingsassistent klaar is, is de radio klaar voor gebruik.
Info
1. Druk in de systeeminstellingsmodus op de toetsen
om 'Info'
te selecteren en druk op SELECT om uw keuze te bevestigen.
2. Softwareversie, radio-ID en toestelnaam worden op het beeldscherm
weergegeven.
208
NL
Gegevensbeschermingsverklaring
1. Om de gegevensbeschermingspagina weer te geven, drukt u eerst op de
MENU toets. Selecteer vervolgens System Settings (systeeminstellingen)
- Privacy Policy (gegevensbeschermingsverklaring).
2. Na het terugzetten naar de fabrieksinstellingen moet de
gegevensbeschermingsverklaring opnieuw worden geaccepteerd.
Achtergrondverlichting
1. Druk in de systeeminstellingsmodus op de toetsen
om
'Blacklight' te selecteren en druk op SELECT om uw keuze te bevestigen.
2. Druk op de toetsen voor verdere instellingen in dit menu.
Bevestig uw keuze door op SELECT te drukken.
Bedrijfsmodus Hoog/ gemiddeld/ laag
Stand-by modus
Uitschakelen: Uit/ 10 sec/ 30 sec/ 60 sec,
stand-by positie: Hoog/ gemiddeld/ laag/
uit
U kunt ook een aantal keren op de DIMMER toets van de afstandsbediening
drukken om de achtergrondverlichting aan te passen.
Let op! Wanneer u bij het uitschakelen voor 'Uit' hebt gekozen blijft
de achtergrondverlichting in de stand-by modus even helder als in de
bedrijfsmodus en kan niet met de afstandsbediening worden aangepast.
INTERNETRADIO
Om naar internetradio te luisteren, moet uw toestel verbonden zijn met het
internet. Probeer de radio zo dicht mogelijk bij de router te plaatsen om
de beste verbindingssnelheid te bereiken. Zodra de internetradiomodus is
geselecteerd verbindt het apparaat zich met het Frontier Silicon Internet
Radioportal om een zenderlijst te downloaden. Zodra een zender is
geselecteerd verbindt de radio zich direct met deze zender.
Druk op de MODE-toets van het apparaat of de afstandsbediening om
internetradio te selecteren.
Druk op de toets MENU op het toestel of op de afstandsbediening
om de internetradiomodus in het menu te openen. U kunt tussen de
volgende opties kiezen: Last listened (laatst geluisterd), System settings
(systeeminstellingen) en Main menu (hoofdmenu). Maak uw keuze door op
de toetsen te drukken en bevestig uw keuze met de SELECT
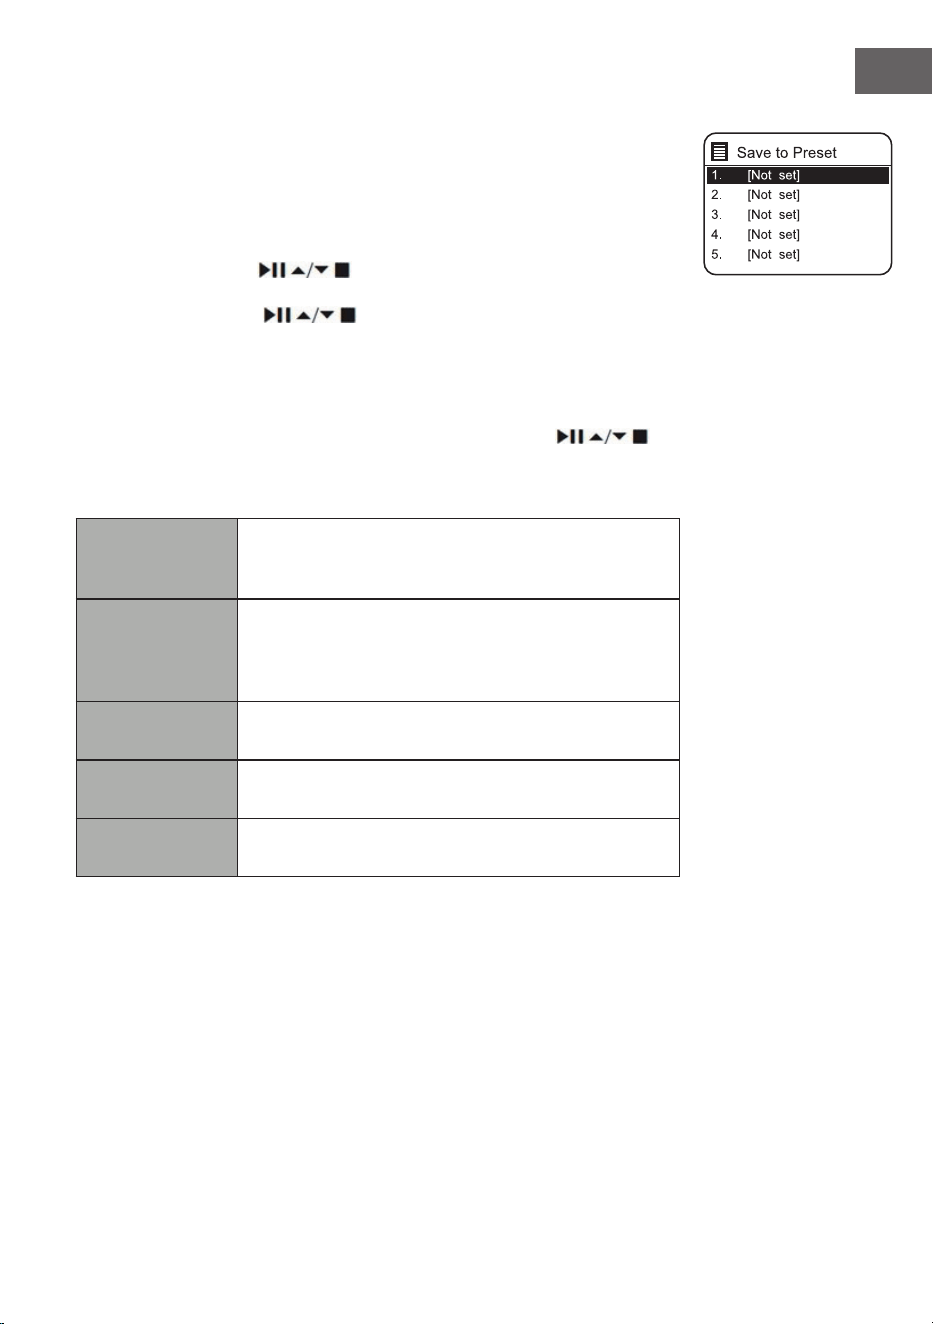
209
NL
toets.
Wanneer de internetradiomodus opnieuw gestart wordt, wordt automatisch
de laatst geluisterde zender gekozen. Druk op de toets BACK om terug naar
de zenderlijst te gaan.
Het laatst geluisterd
1. Druk op de toetsen
om de zenderhistorie van de laatst
geluisterde zenders op te roepen.
2. Kies met de toetsen uit de onderstaande opties en bevestig
uw keuze door op de SELECT toets te drukken.
Zenderlijst
Wanneer u de radio voor de eerste keer in de internetradiomodus gebruikt
zal deze zich in de zenderlijst bevinden. Kies met de toetsen
uit
de onderstaande opties en bevestig uw keuze door op de SELECT toets te
drukken.
Landen
U kunt speciek naar zenders in uw eigen land
zoeken. Binnen dit bereik wordt ook naar lokale
radiozenders gezocht.
Zoeken
U kunt in uw zoektocht talloze sleutelwoorden
gebruiken. De naam en de beschrijving van de door
uw gekozen zenders wordt op het beeldscherm
weergegeven.
Standplaats
U kunt zenders uit een lijst met beschikbare landen
kiezen.
Meest geliefd
Kies een zender uit de lijst met de meest geliefde
zenders wereldwijd.
Ontdekken
Kies een zender uit de verschillende menu-
categorieën: Land, genre of taal.
Druk op het apparaat of op de afstandsbediening op de toets BACK om in
het menu een stap terug te gaan.
210
NL
Zenders opslaan
Opgeslagen internetradiozenders staan in de radio opgeslagen en zijn niet
beschikbaar voor andere radio's.
1. Om een internetradiozender op te slaan moet deze eerst opgeroepen
worden. Houdt de toets MEMORY op het apparaat of de toets PRESET
op de afstandsbediening net zolang ingedrukt tot op het beeldscherm
'Save to Preset' (zender opslagen) wordt weergegeven.
2. Kies één van de 30 geheugenplaatsen door aan de selectieknop te
draaien of door op de toetsen
van de afstandsbediening te
drukken om de huidige zender daar op te slaan en bevestig uw keuze
door op de selectieknop van het toestel of op de SELECT toets op de
afstandsbediening te drukken.
Een opgeslagen zender oproepen
1. Om een voorkeuzezender op te roepen, drukt u op de MEMORY toets
op het toestel of op de PRESET toets op de afstandsbediening en kiest
u vervolgens de gewenste zender met de selectieknop op het toestel of
met de toetsen
op de afstandsbediening.
2. Druk de selectieknop op het toestel omlaag of druk op de SELECT toets
op de afstandsbediening om uw keuze te bevestigen.
Alternatief kunt u de op de afstandsbediening opgeslagen zenders als volgt
oproepen:
• Druk meerdere malen op de toets PRESET +/- om de verschillende
zenders op te roepen of druk op de cijfertoetsen om rechtstreeks een
van de zenders in de geheugenposities 1 - 10 op te roepen.
• Wanneer er geen zender is opgeslagen in de geselecteerde
geheugenplaats, verschijnt "Preset empty" op het scherm.
Het opslaan en oproepen van opgeslagen zenders werkt hetzelfde in de
internetradio/podcast-, DAB- en FM-modi.
Internetradioweergave
Telkens wanneer u op de INFO-toets van de afstandsbediening drukt,
schakelt het display tussen de volgende weergavemodi:
Zenderinfo/Beschrijving Taal/Locatie Bitrate/Soundformat/Samplingrate
Weergavebuer Datum
211
NL
PODCASTS
Om naar internetradio te luisteren, moet uw toestel verbonden zijn met het
internet. Probeer de radio zo dicht mogelijk bij de router te plaatsen om de
beste verbindingssnelheid te bereiken.
Druk op de MODE toets van het apparaat of de afstandsbediening om het
modusmenu te openen. Draai aan de selectieknop of druk op de toetsen ⏮
of ⏭ op de afstandsbediening om de podcast-modus te selecteren. Om uw
keuze te bevestigen, drukt u de selectieknop omlaag of drukt u op de toets
SELECT op de afstandsbediening.
Het laatst geluisterd
Druk op de toets
om de zenderhistorie van de laatst geluisterde
zenders op te roepen en druk ter bevestiging op de SELECT toets.
Podcastlijst
Wanneer de radio opnieuw gestart wordt, zal automatisch de laatst
geluisterde zender worden gekozen. Druk op de toets BACK om terug naar
de podcastlijst te gaan.
Wanneer u de radio voor de eerste keer in de podcast-modus gebruikt zal
deze zich in de podcastlijst bevinden. Kies met de toetsen
uit
de onderstaande opties en bevestig uw keuze door op de SELECT toets te
drukken.
Landen
U kunt speciek naar podcasts uit uw eigen land
zoeken. Binnen dit bereik wordt ook naar lokale
radiozenders gezocht.
Zoeken
U kunt in uw zoektocht talloze sleutelwoorden
gebruiken. De naam en de beschrijving van de door
uw gekozen podcasts wordt op het beeldscherm
weergegeven.
Standplaats
U kunt podcasts uit een lijst met beschikbare landen
kiezen.
Ontdekken
Kies een podcast uit de verschillende menu-
categorieën: Land, genre of taal.
Zenders opslaan en oproepen
Zie de onderwerpen 'Zenders opslaan' en 'Oproepen van een opgeslagen
zender' in het hoofdstuk 'Internetradio'.

212
NL
SPOTIFY CONNECT
Gebruik je smartphone, tablet of computer als
afstandsbediening voor Spotify. Op spotify.com/connect lees je
meer.
Licenties
Voor de Spotify software gelden licenties van derden, die hier kunnen
worden gevonden:
https://www.spotify.com/connect/third-party-licenses
213
NL
DAB RADIO
Druk op de MODE toets van het apparaat of de afstandsbediening om het
modusmenu te openen. Draai aan de selectieknop op het toestel of druk
de ⏮ of ⏭ toets op de afstandsbediening om de DAB modus te selecteren.
Bevestig uw keuze door de selectieknop op het apparaat omlaag te
drukken of door op de SELECT toets van de afstandsbediening te drukken.
Het toestel gaat in DAB modus en start de automatische zoekfunctie.
Tijdens de automatische zoektocht wordt op het beeldscherm 'Scanning...'
(zoeken) weergegeven samen met een balk die de voortgang en de tot
dusver gevonden zenders laat zien. Zodra de automatische zoekopdracht
voltooid is kiest de radio de eerste alfanumerieke zender die is gevonden
uit.
De gevonden stations kunnen in de lijst worden geselecteerd met de
toetsen . Bevestig uw keuze door op SELECT te drukken.
Zenderlijst
1. Druk tijdens de DAB modus op de MENU toets om het DAB menu te
openen.
2. Selecteer de zenderlijst met de toetsen
en bevestig met de
SELECT toets.
3. Een lijst met DAB zenders wordt op het beeldscherm weergegeven.
Automatische zenderzoekopdracht
Druk op de SCAN|⏹ toets van het apparaat of de afstandsbediening om
met het automatisch zoeken naar zenders te beginnen. Alternatief kunt u
ook op de MENU toets drukken en met de toets 'Scan' zoeken en uw keuze
met de SELECT toets bevestigen.
1. Op het beeldscherm verschijnt 'Scanning...' (zoeken) en een
voortgangsbalk wordt weergegeven.
2. Alle gevonden zenders worden automatisch opgeslagen. Druk om een
zender uit de lijst te kiezen op de toets
en bevestig uw keuze
met de SELECT toets.
Handmatige zenderzoekopdracht
Het is ook mogelijk om handmatig zenders te zoeken. Dit is vooral nuttig bij
het uitrichten van de antenne of bij het toevoegen van zenders die tijdens
het automatisch zoeken zijn overgeslagen.
1. Druk op de MENU toets om het menu te openen.
2. Druk om 'Manual tune' (handmatig zenders zoeken) te selecteren op de
toetsen
en drukt u op de toets SELECT om te bevestigen.
3. Multiplex 5 A tot 13 F worden op het scherm weergegeven.
4. Druk om zenders te selecteren op de toetsen en druk om te
bevestigen op de SELECT toets.
DAB
radio
DAB Radi o
Scan
Stations: 0
Scanning
214
NL
5. Om gevonden zenders af te spelen, keert u terug naar het
weergavescherm en selecteert u de gewenste zender uit de afspeellijst
met de toetsen . Druk op de SELECT toets om te bevestigen.
Ongeldige zenders verwijderen
Niet-beschikbare zenders kunnen uit de zenderlijst worden verwijderd.
1. Druk in de DAB modus op de toets MENU, gebruik de toetsen
om 'Prune invalid' (ongeldige zender verwijderen) te
selecteren en bevestig uw keuze door op de toets SELECT te drukken.
2. Selecteer 'Yes' (ja) met de toetsen ⏮ of ⏭ en bevestig uw keuze door op
de SELECT toets te drukken. Om af te breken kiest u 'No' (nee).
DRC (dynamisch compressiebereik)
Als u naar muziek met een groot dynamisch bereik luistert in een
lawaaierige omgeving, kan het nuttig zijn het dynamisch bereik te
comprimeren.
1. Druk tijdens de DAB modus op de toets MENU en selecteer 'DRC' met de
toetsen
. Druk op de SELECT toets om te bevestigen.
2. Selecteer met de toetsen 'DRC hoog/ laag/ uit' en bevestig
uw keuze door op de toets SELECT te drukken.
Zendervolgorde
U kunt de zenders in een bepaalde volgorde in de zenderlijst laten sorteren.
1. Druk in de DAB modus op de toets MENU, gebruik de toetsen
om 'Station order' (zendervolgorde) te selecteren en
bevestig uw keuze door op de toets SELECT te drukken.
2. Selecteer met de toets alfanumeriek/ ensemble en bevestig
uw keuze door op de SELECT toets te drukken.
DAB weergavemodi
Telkens wanneer u op de toets MENU op het apparaat of op de toets INFO
op de afstandsbediening drukt, verschijnen de volgende weergavemodi op
het scherm:
DLS - soort programma - ensemble/frequentie - signaalfout/sterkte -
bitrate/codec/zender - datum

215
NL
DLS (dynamisch labelsegment)
Dit is een tekstbericht met real-time informatie zoals titels van liedjes,
nieuwsberichten, enz.
Soort programma
Dit beschrijft de stijl of het genre van een programma dat wordt
uitgezonden.
Naam ensemble/ frequentie
Toont de naam van de multiplex waarin de zender waarnaar u luistert
zich bevindt en de frequentie ervan. Een multiplex is een verzameling
radiozenders die worden gebundeld en op één frequentie worden
uitgezonden. Er zijn nationale en lokale multiplexen. Lokale multiplexen
bevatten zenders die speciek op een bepaalde streek zijn afgestemd.
Bitrate/ Codec/ Kanalen
Toont de digitale audio bitrate die wordt ontvangen en geeft aanvullende
informatie over audiocodes en zenderinstellingen.
Datum
Geeft de actuele datum weer, die automatisch door de zender ter
beschikking wordt besteld.
Zenders opslaan en oproepen
Zie de hoofdstukken 'Zenders opslaan' en 'Oproepen van een opgeslagen
zender' in het hoofdstuk 'Internetradio'.
216
NL
FM RADIO
Druk op de MODE toets van het apparaat of de afstandsbediening om het
modusmenu te openen. Draai aan de selectieknop op het toestel of druk
de ⏮ of ⏭ toets op de afstandsbediening om de FM modus te selecteren.
Bevestig uw keuze door de selectieknop omlaag te drukken of door op de
SELECT toets van de afstandsbediening te drukken. Op het beeldscherm
wordt de frequentie weergegeven.
Automatisch zenders zoeken
Druk op de SCAN|⏹ toets van het apparaat of de afstandsbediening om
met het automatisch zoeken naar zenders te beginnen. Zodra een zender
is gevonden, stopt het zoeken automatisch. Houd de toets
ingedrukt om het zoeken naar een zender te starten.
Opmerking: Het kan gebeuren dat zenders met een zwak signaal worden
overgeslagen tijdens het zoeken.
Handmatig zenders zoeken
Om handmatig zenders te zoeken, draait u aan de selectieknop op het
toestel of drukt u verschillende keren op de toetsen
op de
afstandsbediening tot u de gewenste frequentie bereikt heeft.
Opmerking: In de FM modus kan het nodig zijn elke zender nauwkeurig af
te stemmen met de selectieknop van het toestel of de
toetsen
op de afstandsbediening. Elke druk op de toets past de frequentie met
0,05 MHz aan. Als de signaalontvangst slecht is, past u de positie van de
antenne aan of verplaatst u de radio.
FM weergavemodi
Telkens wanneer u op de toets MENU op het apparaat of op de toets INFO
op de afstandsbediening drukt, verschijnen de volgende weergavemodi op
het scherm:
Radiotekst - soort programma - frequentie - datum
RDS radiotekst Dit is een tekstbericht met informatie over het huidige
programma.
Soort
programma
Dit beschrijft de stijl of het genre van het programma.
FM
radio
FM Radi o
217
NL
Naam van
het station/
Frequentie
Wanneer een RDS zender wordt ontvangen, wordt de
naam van de zender weergegeven. Anders wordt de
frequentie op het beeldscherm weergegeven.
Datum Geeft de actuele datum weer, die automatisch door de
zender ter beschikking wordt besteld.
Zoekinstelling
1. Druk de toets MENU om het FM menu te openen.
2. Selecteer met de toetsen
'Scan setting' (zoekinstelling) en
bevestig uw keuze door op de toets SELECT te drukken.
3. Selecteer 'Yes' (ja) met de toetsen ⏮ of ⏭ om alleen naar zenders met
een krachtige ontvangst te zoeken en bevestig uw keuze door op de
SELECT toets te drukken.
Audio-instelling
1. Druk de toets MENU om het hoofdmenu te openen.
2. Selecteer de 'Audio setting' (audio-instelling) met de toetsen
en bevestig met de SELECT toets.
3. Gebruik de ⏮ of ⏭ toetsen om 'Yes' (ja) te selecteren om zenders alleen
in mono af te spelen, of selecteer 'No' om het toestel zelf automatisch
tussen stereo en mono te laten kiezen.
4. Druk op de SELECT toets om te bevestigen.
Als alternatief bestaat de MONO/ST toets. Druk op de afstandsbediening
om te schakelen tussen mono en mono/stereo.
Zenders opslaan en oproepen
Zie de onderwerpen 'Zenders opslaan' en 'Oproepen van een opgeslagen
zender' in het hoofdstuk 'Internetradio'.

218
NL
CD SPELER
Compatibele disktypes
Soort disc Logo disc Media-inhoud
CD-R (opneembare CD)
Audio
CD-RW (herschrijfbare
CD)
Audio
Audio-CD (compact
disc)
Audio
Druk op MODE op het apparaat of op de afstandsbediening om de CD-
speler te activeren.
Afspelen
1. Druk op de eject-toets (
) om de CD-lade te openen.
2. Leg de CD er met de bedrukte zijde naar boven in. Druk op de toets
om de lade met de CD weer te sluiten.
3. Als er geen CD is geplaatst of als de CD niet kan worden gelezen,
verschijnt op het display "No disk".
4. Het aantal tracks verschijnt op het display wanneer de weergave wordt
gepauzeerd. Druk nu op om het eerste nummer van de CD/mp3 af te
spelen.
Het afspelen pauzeren: Druk op
om de weergave te pauzeren.
Het afspelen stoppen: Om het afspelen te beëindigen, drukt u op
.
Naar de volgende titel gaan: Met
en springt u naar de vorige of
volgende titel. Houd de toets of ingedrukt om een nummer snel
vooruit of terug te spoelen.
Alternatief kunt ook de cijfertoetsen op de afstandsbediening na elkaar
indrukken om direct naar het gewenste nummer te gaan.
Houd de toetsen
/ op de afstandsbediening ingedrukt om snel vooruit
of achteruit af te spelen.
Wanneer u mp3-discs afspeelt waarvan de muziek zich in verschillende
mappen is bevindt, kunt u de Preset/Folder ∧/∨ toetsen op de
afstandsbediening gebruiken om naar de volgende/vorige map te gaan.

219
NL
Repeat
1. Druk herhaaldelijk op de REPEAT toets om een afspeelmodus te
selecteren.
1
F
De huidige titel herhalen.
1
F
Alle bestanden in de huidige folder herhalen.
(alleen voor gegevens-CD's)
1
F
Alle titels herhalen.
2. Druk nogmaals op de REPEAT toets om de herhaalfunctie uit te
schakelen.
Random play
Alle titels kunnen in een willekeurige volgorde worden afgespeeld.
1. Druk op de toets RANDOM van de afstandsbediening. In het display
verschijnt
. Alle titels worden in een willekeurige volgorde
afgespeeld.
2. Met en spring je naar het volgende nummer in random play.
3. Nadat de nummers allemaal zijn afgespeeld, stopt de weergave
automatisch.
4. Om de random play te stoppen, drukt u tijdens de weergave op
RANDOM. De normale weergave wordt voortgezet.
Titel afspelen
1. Druk op de afstandsbediening op INTRO. In het display verschijnt INTRO.
De CD-speler speelt de eerste 10 seconden van elk nummer af.
2. Druk nogmaals op INTRO op de afstandsbediening om terug te keren
naar normale weergave.
Programma samenstellen
U kunt maximaal 20 titels in willekeurige volgorde programmeren. De
programmamodus wordt geactiveerd wanneer het apparaat op stop staat
(STOP).
1. Druk op PRESET om de programmamodus te openen.
2. Gebruik de toetsen
en om de titels te selecteren die u wilt
programmeren.
3. Bevestig een titel met SELECT.
4. Herhaal stappen 2-3 om meer titels te programmeren. Wanneer u klaar
bent met het selecteren van titels, drukt u op om met het afspelen
van de geprogrammeerde nummers te beginnen.

220
NL
USB WEERGAVE
1. Aan de voorkant van het apparaat bevindt zich een USB-aansluiting.
Wanneer een USB-apparaat op het toestel is aangesloten, drukt
u herhaaldelijk op de MODE toets op het apparaat of op de
afstandsbediening om de USB-modus te selecteren.
2. Het toestel zal de nummers automatisch afspelen.
3. Alle afspeelfuncties zijn hetzelfde als voor het afspelen van een mp3 CD.
Het apparaat kan in USB modus alleen mp3's afspelen. Het apparaat
is compatibel met USB-apparaten met een geheugen tot 32 GB. Het is
mogelijk dat het apparaat niet compatibel is met alle USB-apparaten; dit
wijst niet op een probleem met het apparaat.
Opladen van een extern apparaat
U kunt een extern apparaat met een USB-kabel (niet meegeleverd) opladen
via de USB-aansluiting van dit apparaat.
• De maximale stroomsterkte voor opladen via USB is 1 A.
• Het is niet gegarandeerd dat alle apparaten kunnen worden opgeladen.
Programma afbreken: Druk tweemaal op
of open de CD-lade en sluit
deze weer om het programma te wissen.

221
NL
BT WEERGAVE
Het toestel heeft een BT functie die binnen 8 meter een signaal kan
ontvangen. Verbindt de radio via bluetooth met een extern BT apparaat om
naar muziek te luisteren:
1. Druk op de MODE-toets van het apparaat of de afstandsbediening om
BT te selecteren.
2. Als de radio nog niet met een BT apparaat verbonden is geweest
begint het BT logo te knipperen om aan te geven dat de radio in
verbindingsmodus is.
3. Activeer de BT functie van uw mobiele apparaat.
4. Selecteer de iTuner-320 BT in de lijst van beschikbare toestellen.
5. Voer zo nodig het wachtwoord 0000 in. Zodra de verbinding met succes
tot stand is gebracht, stopt het BT logo met knipperen. Uw mobiele
apparaat is nu via BT verbonden met de radio.
6. Door de PRESETS toets op het apparaat of de PAIR toets op de
afstandsbediening ingedrukt te houden kunnen al bestaande BT
verbindingen verbroken worden en de verbinding met een ander extern
BT apparaat tot stand worden gebracht.
7. De BT functie van de radio kan worden uitgeschakeld door over te
schakelen naar een andere modus of door de BT verbinding van uw
mobiele apparaat te deactiveren.
Muziekweergave via BT
Het kan nodig zijn om het volume aan te passen op zowel de radio
als het mobiele BT apparaat. Druk op de
⏯ toets op het toestel of de
afstandsbediening om de muziekweergave te pauzeren of te hervatten. De
⏮/⏭ toetsen kunnen worden gebruikt om de vorige/volgende titel over te
slaan.
Let op!
• De actieradius tussen radio en mobiele terminal is ongeveer 8 meter.
• Wanneer het BT signaal zwak is, kan de BT verbinding kortstondig
worden verbroken. In dat geval wordt de verbinding zo snel mogelijk
hersteld.
• Voor een betere signaalontvangst dient u obstakels tussen de radio en
het BT apparaat te verwijderen.
• Compatibiliteit met alle apparaten en mediatypen is niet gegarandeerd.
• Sommige mobiele telefoons verbreken de BT verbinding wanneer u
een oproep beantwoordt. De BT verbinding wordt automatisch hersteld
nadat het gesprek is beëindigd. Dit wijst niet op een probleem van het
apparaat.
222
NL
AUDIO-INGANG (LINE-IN)
U kunt muziek van externe bronnen afspelen.
1. Sluit het externe apparaat aan op de RCA-aansluitingen aan de
achterkant.
2. Druk herhaaldelijk op de MODE toets van het apparaat om de line-in
modus te kiezen.
3. Pas het volume aan via de volumeknop van het apparaat of via de
toetsen VOL +/- op de afstandsbediening.
4. In de line-in modus kunt u uw audio-apparaat direct gebruiken voor de
afspeelfuncties.
Raadpleeg de gebruiksaanwijzing van het externe audio-apparaat voor
informatie over het aansluiten ervan.
NET REMOTE
Het toestel beschikt over de Net Remote-functie, waarmee het kan worden
bediend via een app op een smartphone of tablet (iOS of Android).
Download de UNDOK app uit de Google Play Store of Apple Store en
installeer hem op uw smartphone of tablet.
Voordat u de app opstart, moet u ervoor zorgen dat de radio en de
smartphone of tablet zich op hetzelfde wi netwerk bevinden. Start nu
de app op. Na het opstarten, zoekt de app in het netwerk naar de radio.
Selecteer de radio in de lijst met beschikbare apparaten om de NetRemote
verbinding tot stand te brengen.
• Zodra de smartphone of tablet verbinding heeft gemaakt met het
apparaat, wordt de verbinding automatisch tot stand gebracht wanneer
u de app de volgende keer op uw mobiele apparaat opent.
• Denk eraan dat slechts één apparaat tegelijk via de app kan worden
aangesloten op de radio. Wanneer u een ander apparaat via de app
met de radio verbindt, wordt de verbinding met het vorige apparaat
verbroken.
• Wanneer het mobiele apparaat voor de eerste keer met de radio wordt
verbonden, kan het nodig zijn een wachtwoord in te voeren. Het in de
fabriek ingestelde wachtwoord is 1234. Het wachtwoord kan worden
gewijzigd in de systeeminstellingen onder het hoofdstuk Network
(Netwerk)> NetRemote PIN Setup (NetRemote wachtwoord set-up).
• Selecteer de gewenste modus op de hoofdpagina van de app. De
modus kan zowel via de app als via het apparaat worden geselecteerd.
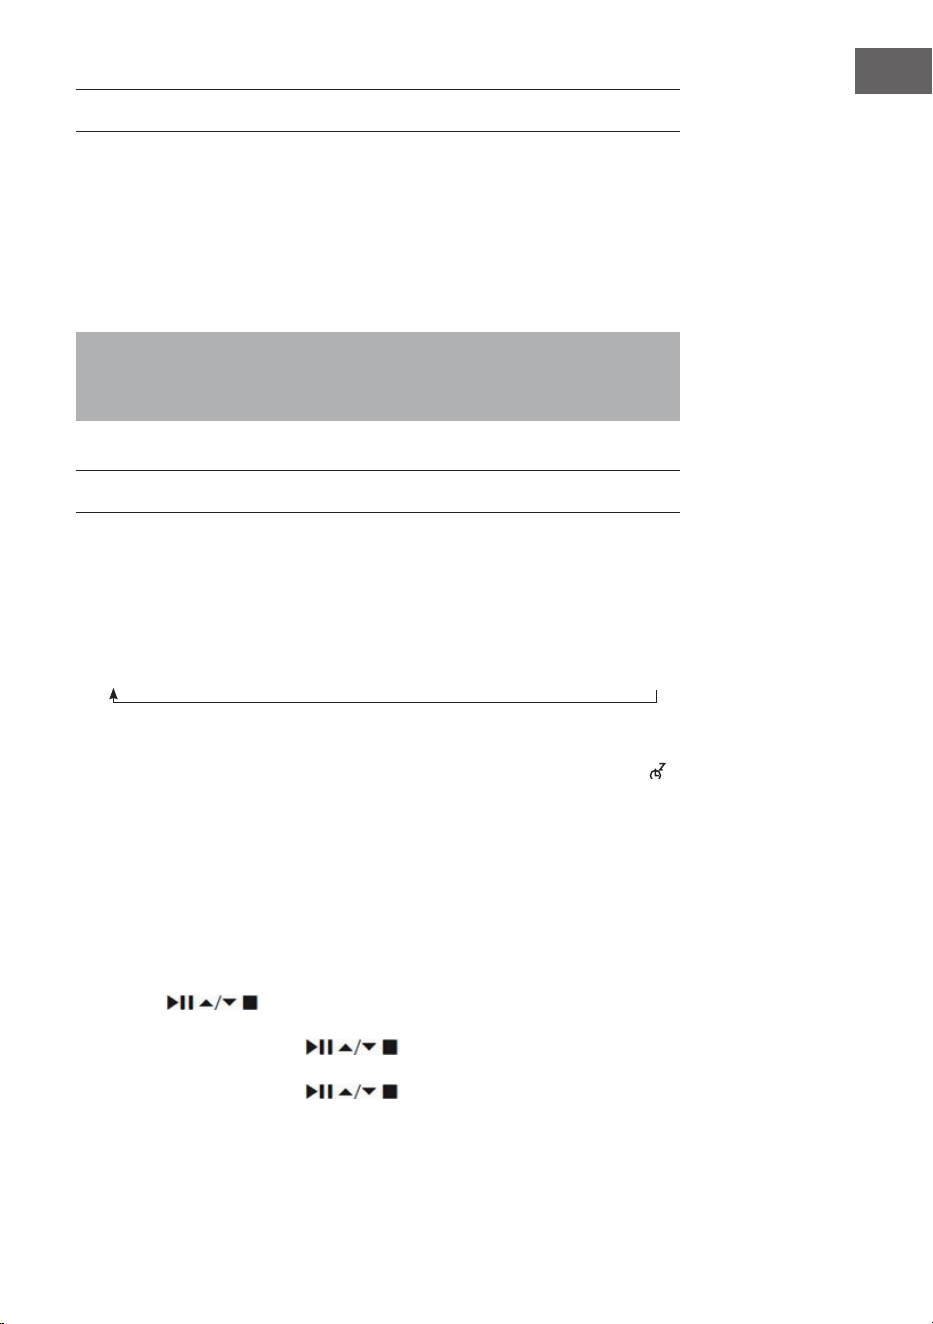
223
NL
GEBRUIK VAN EEN KOPTELEFOON
Als u een koptelefoon gebruikt, luister dan niet langdurig naar muziek
op een hoog volume aangezien dit permanente gehoorbeschadiging kan
veroorzaken.
• Gebruik alleen een koptelefoon met een stekker van 3,5 mm.
• Steek de koptelefoon in de hiervoor bestemde aansluiting aan de
voorkant van het apparaat.
Luisteren naar harde muziek gedurende langere tijd kan
gehoorbeschadiging veroorzaken. Vermijdt een hoog volume bij het
gebruik van een koptelefoon, vooral als u hem langdurig gebruikt.
UITSCHAKELTIMER INSTELLEN (SLEEP)
Met deze functie kunt u het toestel zo instellen dat het na een door u
bepaalde tijd in de stand-by modus gaat.
1. Activeer de sleep-functie door meerdere malen op de SLEEP toets te
drukken. Elke druk op deze toets selecteert een van volgende opties:
2. Zodra de gewenste tijd op het scherm verschijnt houdt u op met drukken.
De sleep-functie wordt dan na 2 seconden geactiveerd. Het symbool
wordt op het beeldscherm weergegeven. Naast dit symbool wordt ook
de resterende tijd tot automatische uitschakeling weergegeven.
3. Zodra de timer is afgelopen, wordt het toestel in stand-by gezet.
Wanneer u de sleep-functie wilt uitschakelen voordat de timer is
verstreken, drukt u net zolang op de SLEEP toets totdat 'SLEEP OFF' op
het scherm verschijnt.
Alternatieve benadering:
1. Druk de toets MENU om het hoofdmenu te openen. Selecteer met de
toetsen
Main menu (hoofdmenu) en druk ter bevestiging op
de SELECT toets.
2. Selecteer met de toetsen Sleep en druk ter bevestiging op
de SELECT toets.
3. Selecteer met de toetsen de gewenste sleep-timer en druk
ter bevestiging op de SELECT toets.
Sleep OFF
15 minutes
30 minutes
45 minutes
60 minutes
90 minutes
120 minutes
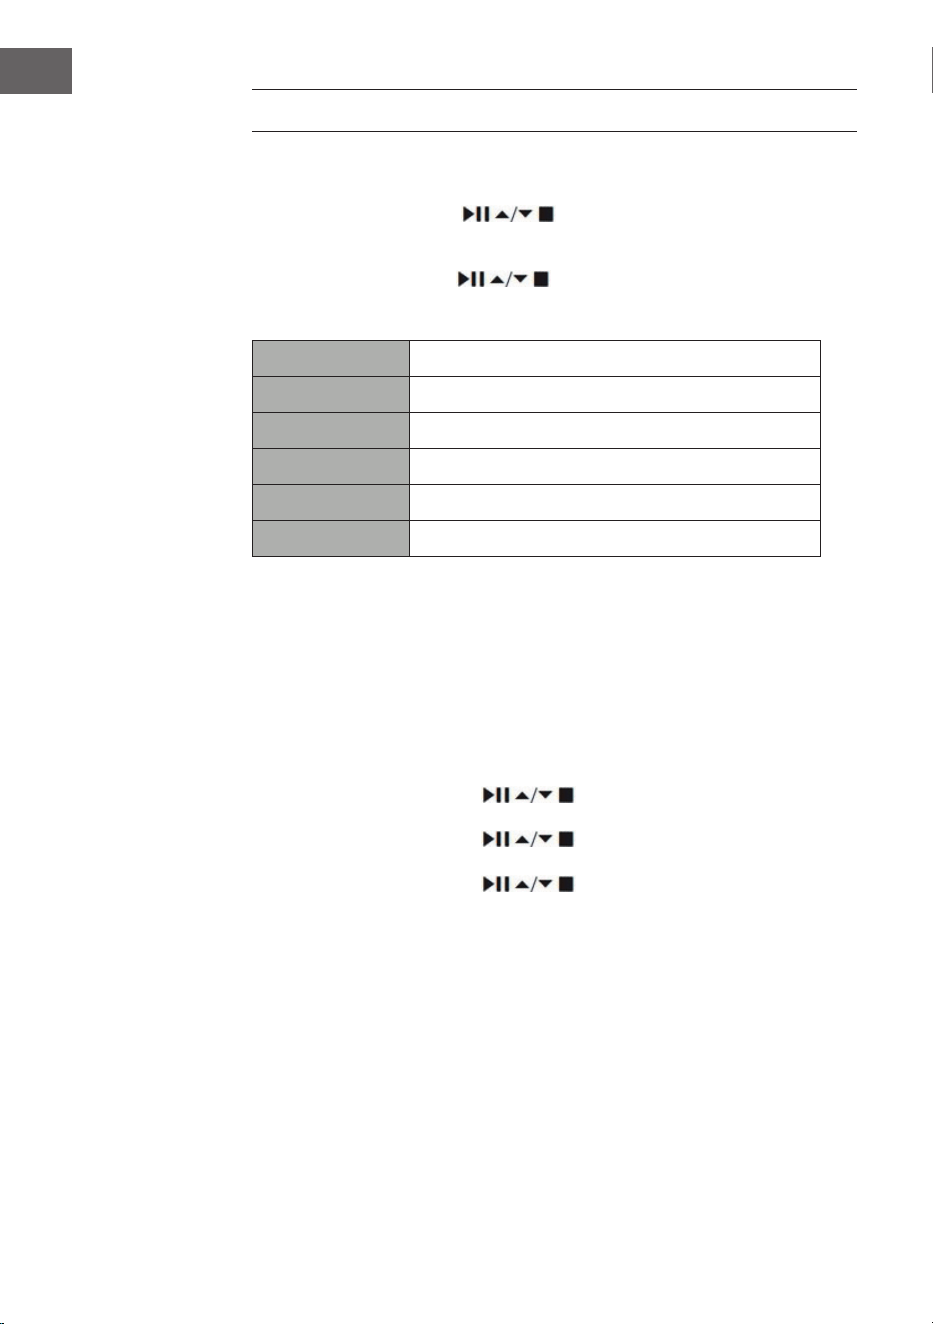
224
NL
WEKKER INSTELLEN
1. Zodra u op de TIMER toets van de afstandsbediening drukt, verschijnt op
het beeldscherm 'Alarm (1 of 2): O [hh:mm]'.
2. Selecteer met de toets Alarm 1 of Alarm 2 en druk ter
bevestiging van uw keuze op de SELECT toets.
Selecteer met de toetsen de volgende parameters en bevestig
elke parameter door op de toets SELECT te drukken.
Activeren Uit/ dagelijks/ eenmalig/ weekend/ weekdagen
Tijd Activeringstijd van het alarm
Modus Zoemtoon/ Internetradio/ DAB/ FM
Vooraf ingesteld Laatste geluisterde zender
Volume 0 – 32
Opslaan Sla de alarminstelling op en bevestig deze
3. Selecteer 'Save' en druk op de SELECT toets om de ingevoerde instelling
op te slaan. Op het beeldscherm verschijnt 'Alarm saved'. Zodra het
alarm is ingesteld, verschijnt het alarmsymbool op het display.
4. Om het alarm uit te schakelen drukt u op de volumeknop van het
apparaat of op de ALARM knop op de afstandsbediening.
Alarm afbreken
1. Zodra u op de TIMER toets van de afstandsbediening drukt, verschijnt op
het beeldscherm 'Alarm (1 of 2): Off [hh:mm]'.
2. Selecteer met de toetsen
Alarm 1 of Alarm 2 en druk ter
bevestiging op de SELECT toets.
3. Selecteer met de toetsen 'Enable' (activeren) en bevestig uw
keuze door op de toets SELECT te drukken.
4. Selecteer met de toetsen 'Off' (uit) en bevestig uw keuze
door op de toets SELECT te drukken.
5. Selecteer 'Save' en druk op de SELECT toets om uw instellingen op te
slaan.
6. Alternatief kunt u in stand-by modus meerdere malen op de TIMER
toets op de afstandsbediening drukken om Alarm 1 of Alarm 2 in of uit te
schakelen.

225
NL
Als er binnen ca. 15 seconden niet op een knop wordt gedrukt, verlaat het
apparaat automatisch de timerinstellingen.

226
NL
INSTRUCTIES VOOR AFVOER
Wanneer in uw land een wettelijke regeling geldt
voor het afvoeren van elektrische en elektronische
apparaten, wijst het hiernaast afgebeelde symbool,
op het product zelf of op de verpakking, erop dat het
betreende product niet met het huisvuil afgevoerd
mag worden. In plaats daarvan dient het naar een
centraal depot voor het recyclen van elektrische
en elektronische apparaten te worden gebracht.
Door het afval volgens de voorschriften af te voeren
beschermt u het milieu en de gezondheid van uw
medemensen tegen de negatieve consequenties.
Informatie over recycling en de afvoer van dit
product ontvangt u van uw gemeente of van uw
plaatselijke grondstoen- en afvaldienst.
Dit artikel bevat batterijen. Wanneer in uw land
een wettelijke regeling geldt voor het afvoeren
van batterijen, mogen deze niet met het normale
huisvuil worden weggegooid. Informeer naar de
plaatselijke regelgeving inzake de gescheiden
afvoer van batterijen. Door de batterijen volgens de
voorschriften af te voeren beschermt u het milieu
en de gezondheid van uw medemensen tegen de
negatieve consequenties.
VERKLARING VAN OVEREENSTEMMING
Fabrikant:
Chal-Tec GmbH, Wallstraße 16, 10179 Berlijn,
Duitsland.
Importeur voor Groot-Brittannië:
Berlin Brands Group UK Limited
PO Box 42
272 Kensington High Street
London, W8 6ND
United Kingdom
Härmed försäkrar Chal-Tec GmbH att denna typ av
radioutrustning iTuner CD överensstämmer med
direktiv 2014/53/EU.Den fullständiga texten till EU-
försäkran om överensstämmelse nns på följande
webbadress: use.berlin/10032753

227
NL
Chal-TecGmbH
Wallstr. 16, 10179 Berlijn
www.chal-tec.com
De Spotify software is onderworpen aan de gebruiksrechten van derden,
die op de volgende pagina kunnen worden bekeken:
https://www.spotify.com/connect/third-party-licenses
Alle vermelde merken zijn handelsmerken van de respectievelijke bedrijven.
Fouten, hiaten en technische wijzigingen voorbehouden. Onze Algemene
Voorwaarden zijn van toepassing.