- 1 -
Item No. 210497
CORDLESS ELECTRIC SHEARS
User Guide
Thank you for purchasing the Cordless Electric Shears. Please read this manual thoroughly
before operating this device.
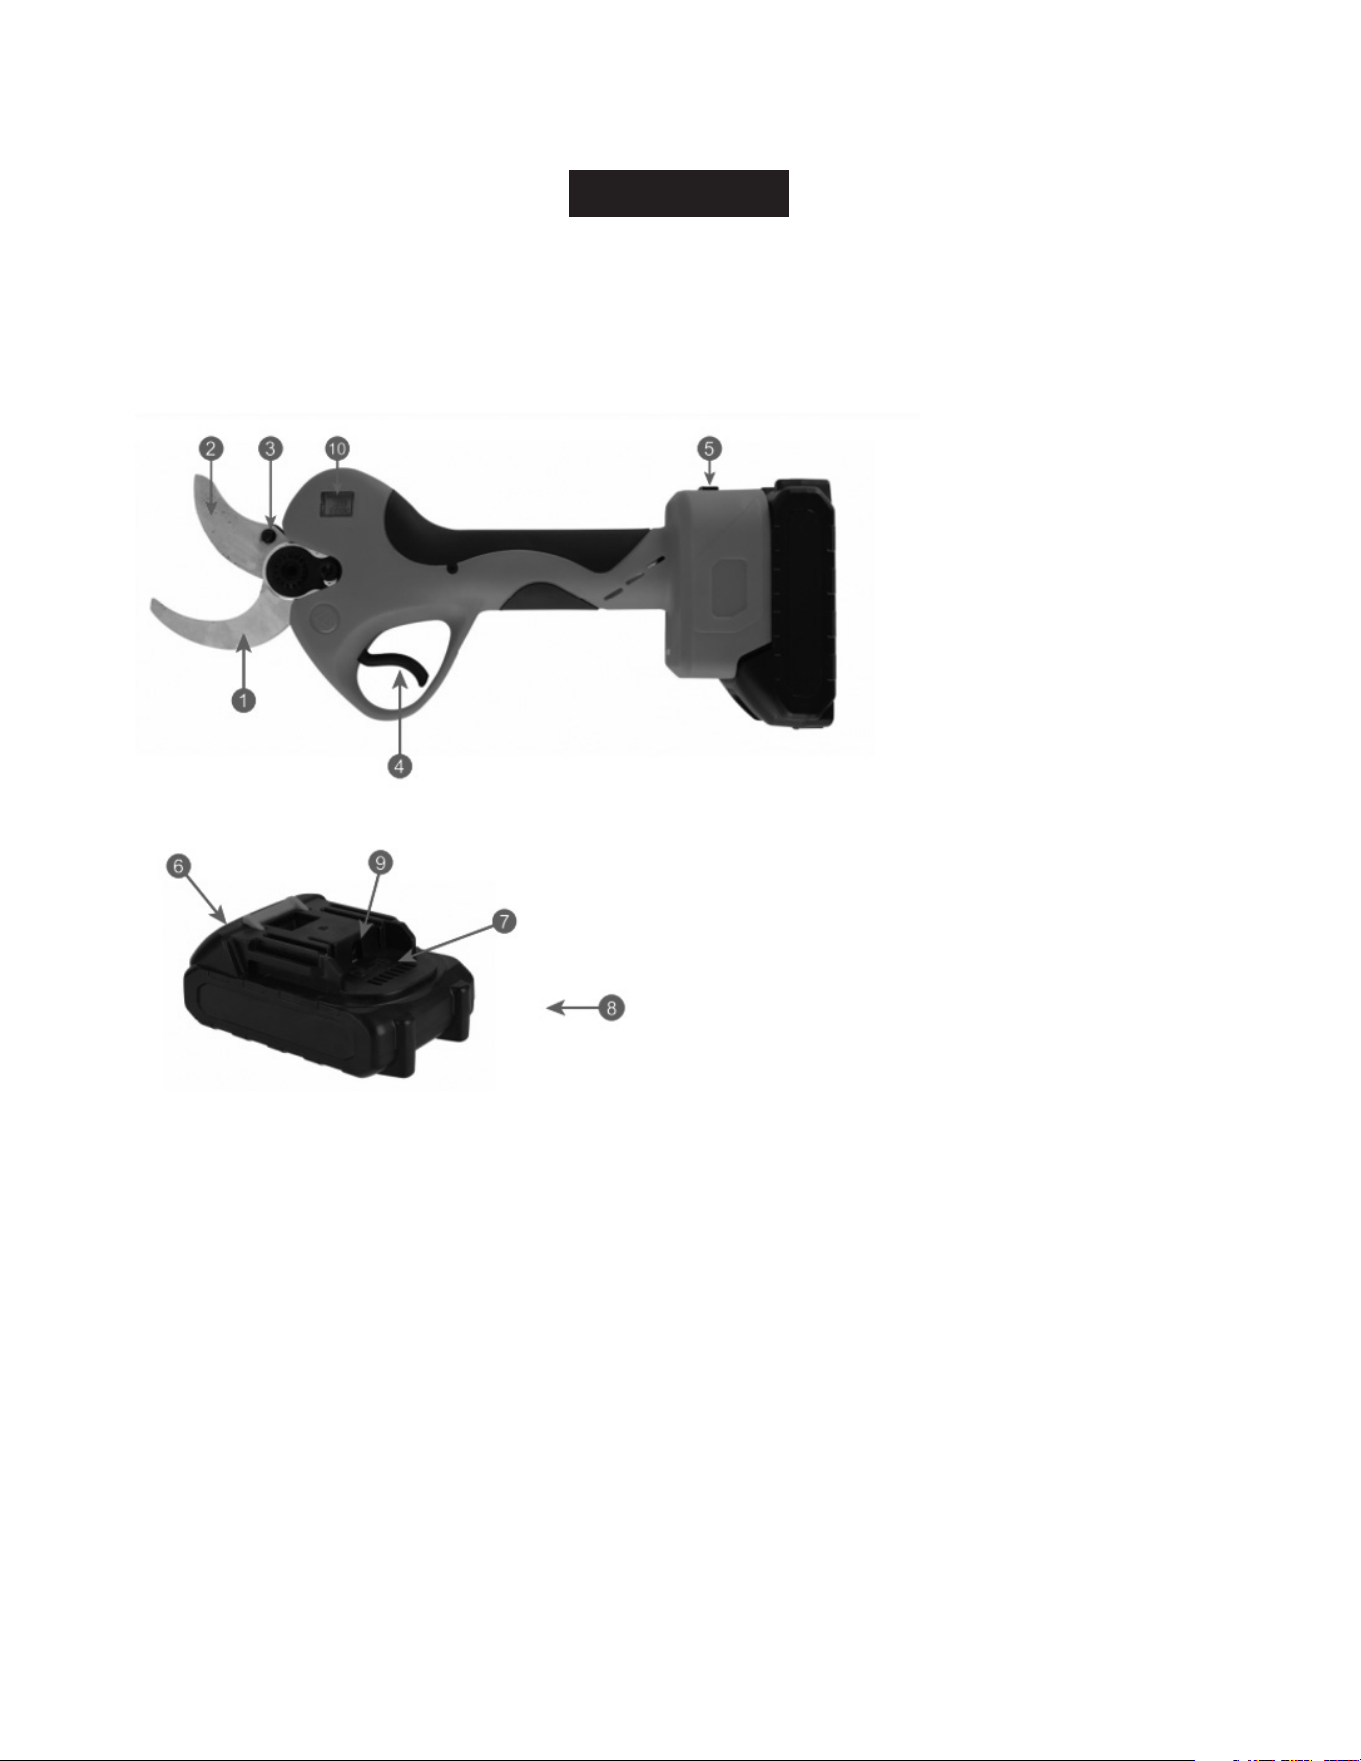
DESCRIPTION OF PARTS
1. Fixed Blade 6. Battery Disassembly Button
2. Moving Blade 7. Battery
3. Pin 8. Charger Unit
4. Trigger Switch 9. Battery Charging Socket
5. Power Control Switch 10. LCD Display
INSTRUCTIONS BEFORE USE
1. Ensure the battery pack is fully charged before use.
2. When not in use, disconnect the power cord and power supply. Always disconnect the power
supply when refueling, grinding, or replacing the blade.
3. Check the blade’s tightness before use.
- 2 -
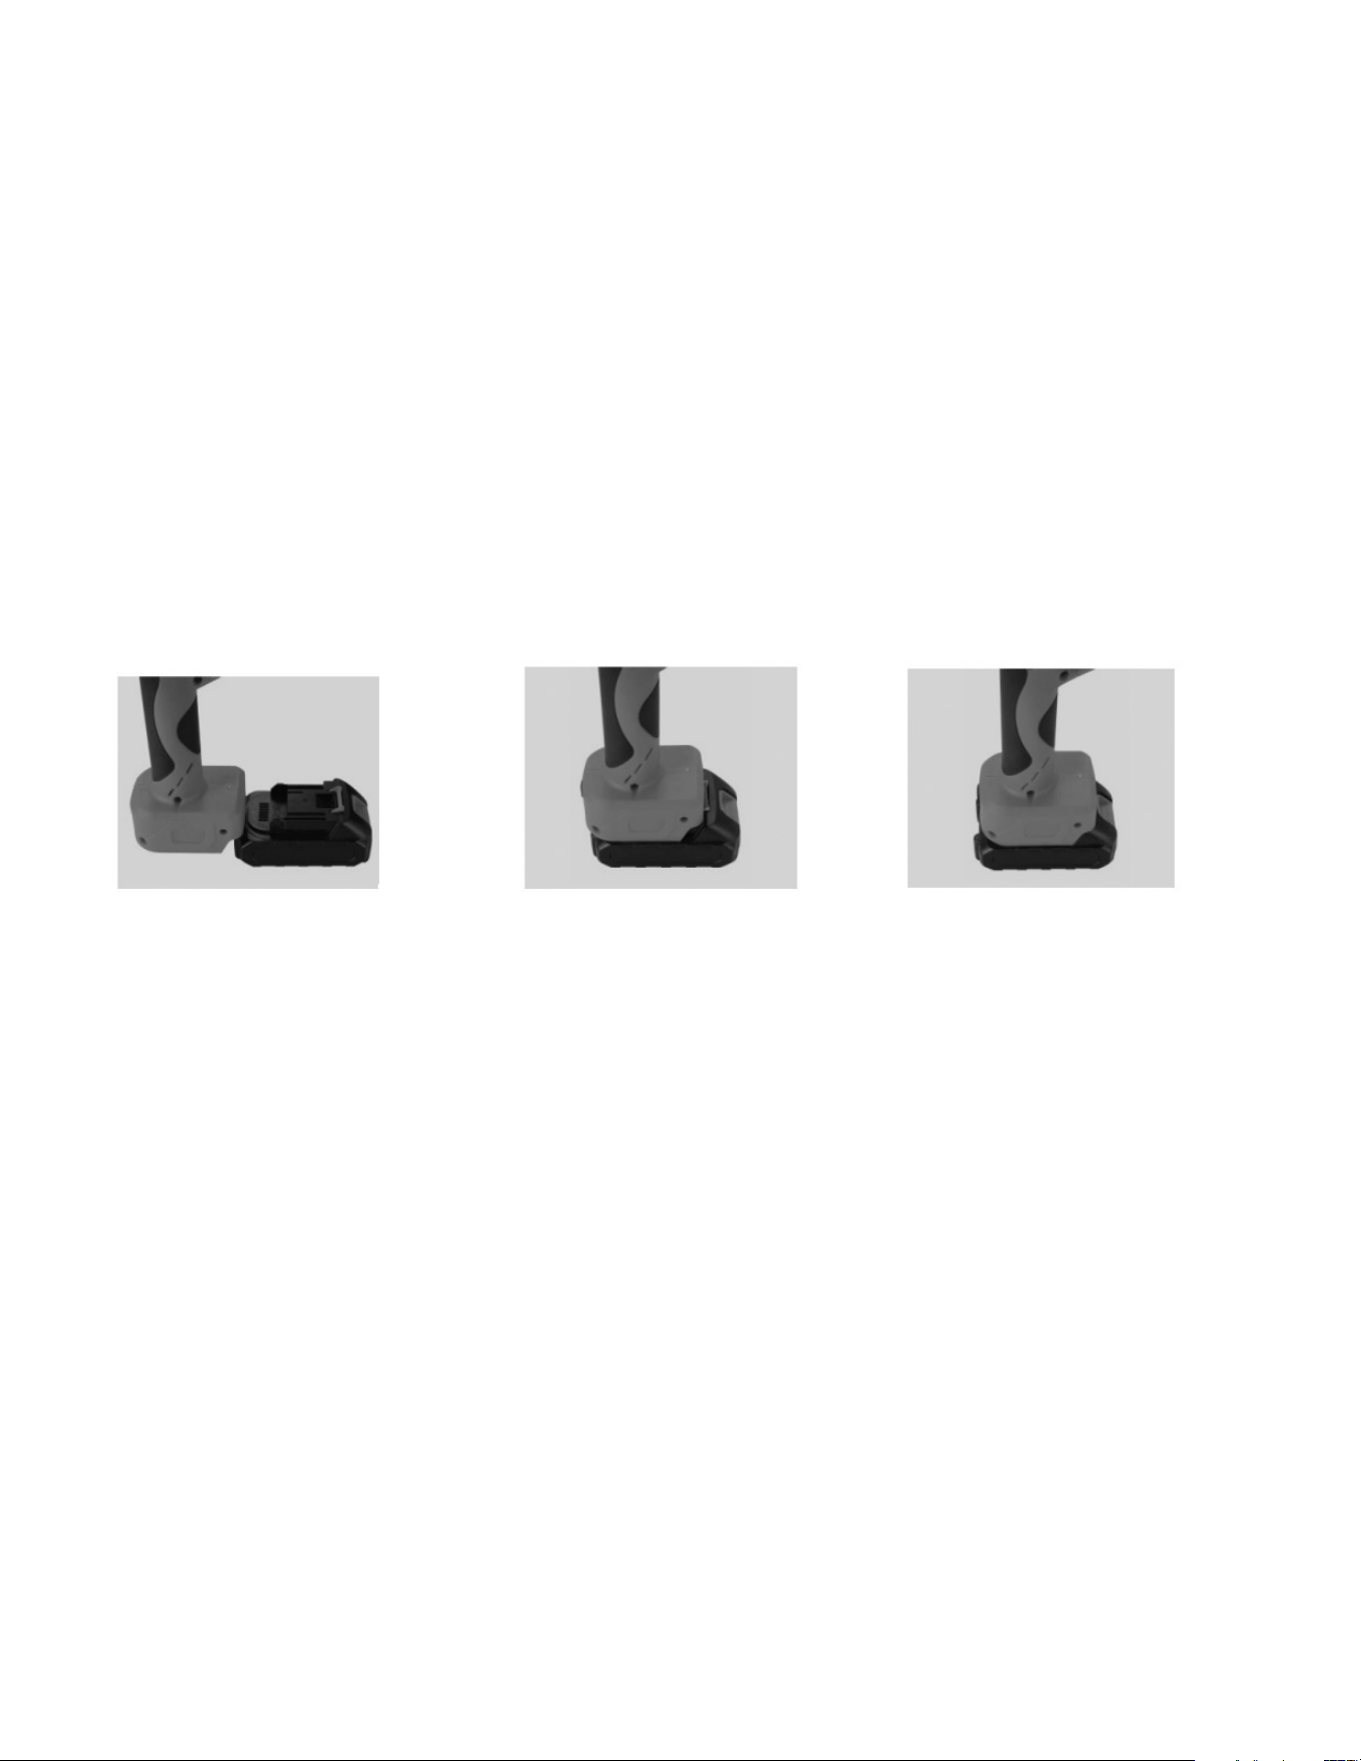
BATTERY INSTALLATION
Start Operation
1. Open the packaging and insert the battery pack into the battery pack interface of the
Cordless Electric Shears.
2. Turn on the power control switch; the battery indicator light will turn green.
3. Take out the Cordless Electric Shears, turn on the battery power switch, and the control box
buzzer will sound twice upon first powering on. Pull the trigger twice continuously to activate
the shears.
4. Normal Cutting: Press the trigger to close the blade. Release the trigger to open the blade.
5. Blade Closed: Press the trigger continuously until the buzzer sounds a long tone, indicating
the blade is closed. Before starting work, press the trigger intermittently a few times to close
the blade without a load and check if it’s functioning properly.
6. Begin work after ensuring normal operation.
OPERATION ENDED
1. Hold down the trigger continuously for more than 5 seconds, then release the trigger. The
blade will close and remain closed.
2. Turn off the power and remove the battery.
3. Sort, clean, and pack the tool.
Note:
• When installing or removing the battery pack, grip the tools and battery pack tightly. Failure to
do so may cause the tools or battery pack to slip, leading to damage or personal injury.
• To disassemble the battery pack, press the button on the front side of the battery pack while
simultaneously removing it from the tool.
• When installing the battery pack, align the tongue spring on the battery pack with the groove
on the outer cover. Push and slide the battery pack into place until it is fully inserted and
locked with a clicking sound. If the red indicator light on the top of the button is still visible
after insertion, the battery adapter is not fully locked.
Attention: Before adjusting or checking the tool’s function, always turn off the power and
remove the battery pack.
STEP 1: PREPARE THE BATTERY
AND THE SHEAR’S NOSE.
STEP 2: INSERT THE SHEAR’S
HEAD INTO THE BATTERY.
STEP 3: COMPLETE THE
INSTALLATION.

- 3 -
CAUTION
• Do not cut branches beyond the working range of the scissors, and avoid cutting hard objects like metal,
stones, or other non-plant materials. Do not clamp tools with pliers. Replace worn or damaged blades
promptly.
• Keep the equipment clean. Use a clean cloth to wipe down the Cordless Electric Shears, battery pack,
and charger. Avoid using corrosive or solvent-based cleaners. Use a soft brush or dry cloth to remove
dust from the blade.
• Do not soak Cordless Electric Shears, battery packs, or chargers in any liquid, including water.
• If the switch does not operate properly, do not use the Cordless Electric Shears. Tools that cannot be
controlled by the switch are dangerous and require repair.
• Always turn off the switch when making adjustments, replacing accessories, or storing the Cordless
Electric Shears. This precaution reduces the risk of accidental activation.
IMPORTANT SAFETY PRECAUTIONS FOR BATTERY PACK
• Before using the battery pack, read all instructions and warning labels on the battery charger, battery,
and related products carefully.
• Turn off the switch before charging. It’s normal for the charger and battery to generate slight heat
during charging.
• If the battery is not used for an extended period, recharge it every 2 months to extend its service life.
• New batteries or batteries unused for a long time will reach their maximum capacity after about 5
charge and discharge cycles.
• Avoid repeated charging after short periods of use, as this can reduce battery efficiency and lifespan.
• As the battery level decreases, the shearing ability of the Cordless Electric Shears may diminish, which
is normal.
• During charging, the Cordless Electric Shears must be turned off. Do not use them while charging.
• Do not use damaged battery packs, and do not disassemble chargers or batteries.
• If the machine’s running time becomes too short, stop using it immediately to prevent overheating, fire,
or explosion.
• If electrolyte enters your eyes, rinse with clean water and seek medical attention immediately to prevent
injury.
• Keep conductive materials away from battery terminals.
• Do not store the battery pack with metal objects like nails or coins.
• Do not expose the battery pack to water or rain. Short-circuiting can cause high current, overheating,
and potential fire or breakdown.
• Do not store tools and battery packs in areas where temperatures exceed 50°C (122°F).
• If the battery pack is severely damaged or worn, do not burn it. It may explode in a fire.
• Do not use the battery pack with unauthorized devices.
• Handle the battery pack with care; do not hit or drop it.
• Do not use damaged batteries.
• Do not use leaking batteries.
• Follow local regulations for battery disposal.

- 4 -
The SHARPER IMAGE® name and logo are registered trademarks.
©Sharper Image. All Rights Reserved.
WARRANTY AND CUSTOMER SERVICE
This item from SharperImage.com includes a 1-year limited replacement warranty. If you have any
questions not covered in this guide, please call our Customer Service department at 1 (877) 210-3449.
Customer Service agents are available Monday through Friday, 9:00 a.m. to 6:00 p.m. ET.