
www.auna-multimedia.com
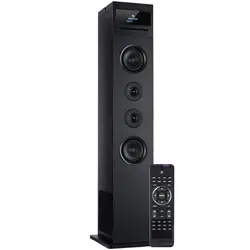
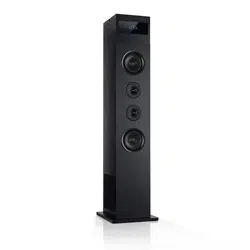
Karaboom 100
Turmlautsprecher
Tower Speaker
Enceinte tour
Torre de sonido
Altoparlante a torre
10033148 10033149


3
DE
Sehr geehrter Kunde,
wir gratulieren Ihnen zum Erwerb Ihres Geräts.
Lesen Sie die folgenden Hinweise sorgfältig durch
und befolgen Sie diese, um möglichen Schäden
vorzubeugen. Für Schäden, die durch Missachtung
der Hinweise und unsachgemäßen Gebrauch
entstehen, übernehmen wir keine Haftung. Scannen
Sie den QR-Code, um Zugri auf die aktuellste
Bedienungsanleitung und weitere Informationen
rund um das Produkt zu erhalten.
TECHNISCHE DATEN
Artikelnummer 10033148 10033149
Stromversorgung 230 V~ 50 Hz
Gesamtleistung 65 W
RMS-Leistung 60 W
Lautsprecherimpedanz 8 Ohm
Signal-Rausch-Abstand 75 dB
INHALT
Technische Daten 3
Sicherheitshinweise 4
Lieferumfang 4
Geräteübersicht 5
Inbetriebnahme 8
Musik abspielen 9
AUX-Eingang 10
USB/SD-Eingang 10
BT-Betrieb 10
Spezielle Entsorgungshinweise für Verbraucher in Deutschland 12
Hinweise zur Entsorgung 14
Konformitätserklärung 14

4
DE
SICHERHEITSHINWEISE
• Lesen diese Hinweise. Bewahren Sie die Bedienungsanleitung auf.
Beachten Sie alle Warnhinweise. Befolgen Sie die Anleitung.
• Verwenden Sie das Gerät nicht in der Nähe von Wasser. Nur mit einem
trockenen Tuch reinigen.
• Nicht die Lüftungsönungen blockieren.
• Nicht in der Nähe von Wärmequellen wie Radiatoren, Heizkörpern,
Öfen und anderen Geräten (inkl. Verstärkern), die Wärme produzieren.
• Schützen Sie das Netzkabel davor, dass darauf getreten wird oder dass
es geknickt wird, insbesondere am Netzstecker und an der Stelle, wo
das Netzkabel aus dem Gerät tritt.
• Verwenden Sie nur vom Hersteller angegebenes Zubehör.
• Nur mit dem Wagen, Ständern, Regalen oder Auagen benutzen, die
vom Hersteller angegeben sind. Beim Bewegen des Gerätes vorsichtig
sein, um ein Umfallen zu vermeiden.
• Ziehen Sie während eines Gewitters den Netzstecker, auch wenn Sie
das Gerät für längere Zeit nicht nutzen.
• Wenden Sie sich bei Reparaturen an qualizierte Fachleute. Reparaturen
werden erforderlich, wenn das Gerät irgendwie beschädigt wurde, das
Netzkabel oder der Netzstecker beschädigt wurden, Flüssigkeit auf dem
Gerät vergossen wurden, Gegenstände hineingefallen sind, das Gerät
Regen oder Feuchtigkeit ausgesetzt wurde, nicht normal funktioniert
oder fallen gelassen wurde.
• Das Gerät darf Wassertropfen und -spritzern nicht ausgesetzt werden.
• Behältnisse mit Flüssigkeiten wie Vasen dürfen nicht auf das Gerät
gestellt werden.
• Die Batterie darf nicht großer Hitze durch Sonneneinstrahlung, Feuer
usw. ausgesetzt werden.
• Das Gerät wird durch den Netzstecker vom Stromnetz getrennt.
• Während des Stromnetzanschlusses bleibt das Gerät betriebsbereit.
• Turmlautsprecher
• Fernbedienung
• Bedienungsanleitung
• Cinch-Kabel
• 4 Schrauben
LIEFERUMFANG

5
DE
GERÄTEÜBERSICHT
Von oben
1 Tablethalterung
2 Ein/Aus-Schalter
Gerät einschalten und ausschal-
ten.
3 Quelle
Quelle wählen: BT; USB, Audio
ein
4
Titel vor
Gedrückt halten, um im BT-
und USB-Modus rückwärts zu
suchen
5
Titel vor
gedrückt halten, um im BT- und
USB-Modus vorwärts zu suchen
6 c
Wiedergabe/Pause im USB/B-
Modus
7 VOL+ : Lautstärke +
8 VOL –: Lautstärke -
9 Uhrzeit
Einstellung der Uhrzeit
(im Standby-Modus)
10 Wecker
Einstellung eines Weck
alarms
(im Standby-Modus)
11 LED-Anzeige

6
DE
Rückseite
12 USB-Eingang
13 USB Ladeanschluss
14 Cinchbuchse: Anschluss an ein externs Gerät
15 Ein-/Ausschalter
16 Stromanschluss

7
DE
Übersicht über die Fernbedienung
1 EIN/AUS
Drücken, um das Gerät ein-
oder auszuschalten
2 Schlaf
Wiederholt drücken, um den
Schlaftimer (Abschaltautomatik)
einzustellen.
3 Uhrzeit
Einstellen der Uhrzeit
4 WECKER
Einstellen der Weckzeit
5 FOLDER -/+
Durch die Ordner navigieren.
6 LAUTSTÄRKE -
Die Lautstärke verringern
LAUTSTÄRKE +
Die Lautstärke erhöhen
7 STUMM
Zum Stummschalten drücken:
Erneut drücken, um Ton wieder
herzustellen.
8 Quelle (SOURCE)
Wahl einer Quelle (BT, USB, FM
or AUDIO IN)
9 PAIRING (BT Kopplung)
10
Wiedergabe/Pause
11
Titel vor
Titel zurück
Gebrauch: Die Fernbedienung wird mit einer Knopfzellenbatterie (CR 2025)
betrieben (im Lieferumfang enthalten). Um die Fernbedienung in Betrieb zu
nehmen, ziehen Sie die Isolationslasche auf der Rückseite heraus.

8
DE
INBETRIEBNAHME
Vorsicht: Gefahr eines Stromschlags.
Wenn Sie das Netzkabel von der Stromversorgung trennen,
fassen Sie immer am Netzstecker an. Ziehen Sie nie am
Netzkabel.
Stellen Sie das Gerät in die gewünschte Position.
Auto-Standby
Wenn Sie Medien von einem verbundenen Gerät abspielen, geht die
Anlage automatisch in den Standby-Betrieb, wenn 10 Minuten lang keine
Taste gedrückt wurde oder von dem verbundenem Gerät 10 Minuten keine
Wiedergabe erfolgt ist.
Einstellen der Uhr
Nachdem der Karaoketurm an die Stromversorgung angeschlossen wurde
und nach einem Stromausfall zeigt das Display "0:00" an. Zum Einstellen
der aktuellen Uhrzeit muss das Gerät im Standby sein.
1. Drücken Sie TIME/ALARM. Die Ziern im Display blinken.
2. Drücken Sie
, bis die richtige Stunde eingestellt ist. Die Taste TIME/
ALARM drücken.
3. Die Ziern der Minuten im Display blinken.
4. Drücken Sie die Tasten
wiederholt, bis die richtigen Minuten
eingestellt wurde.
Einstellen des Weckers
Das Gerät kann als Wecker verwendet werden. Die Quelle USB wird zur
voreinstellten Weckzeit aktiviert.
1. Die EIN/AUS-Taste drücken, um das Gerät in den Standby-Betrieb zu
setzen.
2. Überprüfen, ob die Uhr richtig eingestellt wurde.
3. Die Taste TIME/ALARM gedrückt halten. Im Display blinkt ON. Nun
können Sie die Weckzeit einstellen.
4. Die Taste TIME/ALARM drücken. Das Display blinkt.
5. Die Tasten FOLDER +/- drücken, um durch die Dateiordner zu navigieren.
6. Wiederholt die Tasten
drücken, um die Stunde einzustellen. Mit
TIME/ALARM bestätigen.
7. Mit
die Minute einstellen.
8. Zur Bestätigung ALARM drücken und dann über die Tasten
, USB
wählen.

9
DE
9. Die Lautstärke auf eine Stufe von 0 bis 20 einstellen.
10. Die Taste TIME/ALARM drücken in ausgeschaltetem Zustand drücken. Im
Display blinkt zum Einstellen des Weckers ON.
11. Wecker deaktivieren: Wählen Sie mit den Tasten
"OFF".
deaktivieren.
Schlafmodus
Drücken und halten Sie die SLEEP-Taste gedrückt. Das Display blinkt. Die
Taste wiederholt drücken, bis das Display die Mintute anzeigt. Sie können
10 bis 90 Minuten einstellen.
Bei der Bestätigung blinkt es dreimal und kehrt dann zur vorigen Anzeige
zurück. Wenn Sie den Schlafmodus beenden wollen, drücken Sie OFF.
Nach dreimaliger Leereingabe wird der Schlafmodus beendet.
MUSIK ABSPIELEN
Wiedergabe anhalten/fortfahren
1. Während der Wiedergabe
drücken, um anzuhalten oder fortzufahren.
2. Während der Wiedergabe
gedrückt halten, um vor- oder
zurückzuspulen.
Einen Titel überspringen
MP3-Disk, USB/SD-Datenträger
1.
drücken, um einen anderen Titel zu wählen.
2. VOL-/VOL+ drücken, um die Lautstärke zu regeln.
Innerhalb eines Titels suchen
1. Halten Sie während der Wiedergabe oder gedrückt.
2. Loslassen, um zur normaler Wiedergabe zurückzukehren.

10
DE
AUX-EINGANG
(erfordert ein Cinch-Kabel)
Schließen Sie das Cinch-Kabel nicht an den AUX-Eingang an. Verbinden
Sie das andere Ende des Cinch-Kabels mit dem Audioausgang eines DVD-
Players, Stereoanlage, Spielkonsole oder Fernseher.
1. Gerät einschalten: den Ein/Aus-Schalter drücken.
2. Nach Aux wechseln: die SOURCE-Taste drücken.
3. Verwenden Sie das Bedienfeld am angeschlossenen Gerät, um mit der
Videowiedergabe zu beginnen.
USB/SD-EINGANG
1. Schließen Sie das USB-Speichermedium oder die SD-Karte an den
entsprechenden Anschluss an.
2. Drücken Sie die SOURCE-Taste, um den USB- bzw. SD-Betrieb zu
wählen. Das Gerät gibt die Titel automatisch wieder; falls nicht, die
Taste
drücken.
3. Mit den Tasten
den Titel wählen.
4. Mit den Tasten VOL+ und VOL-
Hinweis: Der USB-Anschluss und der SD-Steckplatz sind empndliche
Anschlüsse, die zur Instabilität des Geräts führen können.
Auaden von Geräten am USB-Anschluss
Oben am Gerät bendet sich ein USB-Ladeanschluss.
BT-BETRIEB
1. Die SOURCE-Taste und den BT-Modus wählen.
2. Drücken Sie dann die Taste PAIR auf der Fernbedienung.
3. Schalten Sie die BT-Funktion auf Ihrem Mediengerät ein, die sich
normalerweise sich in den Einstellungen bendet.
4. Aktivieren Sie den BT-Empfang und machen Sie Ihr Gerät "sichtbar".
Wählen Sie in den Einstellungen Ihres BT-Geräts "Neues Gerät
hinzufügen" oder "BT-Gerät einrichten". Nun wird eine Suche
angestoßen. Mit "Karaboom 100" verbinden, sobald es angezeigt
wird. Wenn nach einem Passwort verlangt wird, geben Sie "0000"
(vier Nullen) ein. Wenn der Kopplungsversuch fehlschlägt oder die Zeit
abgelaufen ist, wiederholen Sie die Schritte.

11
DE
5. Nachdem das Gerät und der Karaoketurm miteinander gekoppelt
wurden, ist ein Signalton zu vernehmen.
6. Überprüfen, ob die BT-Verbindung tatsächlich hergestellt wurde.
7. Drücken Sie PLAY/PAUSE, um die Wiedergabe anzuhalten und
erneut, um mit der Wiedergabe fortzufahren und , um einen Titel
vorzuspringen und , um einen Titel zurückzuspringen.

12
DE
SPEZIELLE ENTSORGUNGSHINWEISE FÜR
VERBRAUCHER IN DEUTSCHLAND
Entsorgen Sie Ihre Altgeräte fachgerecht. Dadurch wird gewährleistet,
dass die Altgeräte umweltgerecht verwertet und negative Auswirkungen
auf die Umwelt und menschliche Gesundheit vermieden werden. Bei der
Entsorgung sind folgende Regeln zu beachten:
• Jeder Verbraucher ist gesetzlich verpichtet, Elektro- und
Elektronikaltgeräte (Altgeräte) sowie Batterien und Akkus
getrennt vom Hausmüll zu entsorgen. Sie erkennen die
entsprechenden Altgeräte durch folgendes Symbol der
durchgestrichene Mülltonne (WEEE-Symbol).
• Sie haben Altbatterien und Altakkumulatoren, die nicht vom Altgerät
umschlossen sind, sowie Lampen, die zerstörungsfrei aus dem
Altgerät entnommen werden können, vor der Abgabe an einer
Entsorgungsstelle vom Altgerät zerstörungsfrei zu trennen.
• Bestimmte Lampen und Leuchtmittel fallen ebenso unter das Elektro-
und Elektronikgesetz und sind dementsprechend wie Altgeräte zu
behandeln. Ausgenommen sind Glühbirnen und Halogenlampen.
Entsorgen Sie Glühbirnen und Halogenlampen bitte über den Hausmüll,
sofern sie nicht das WEEE-Symbol tragen.
• Jeder Verbraucher ist für das Löschen von personenbezogenen Daten
auf dem Elektro- bzw. Elektronikgerät selbst verantwortlich.
Rücknahmepicht der Vertreiber
Vertreiber mit einer Verkaufsäche für Elektro- und Elektronikgeräte von
mindestens 400 Quadratmetern sowie Vertreiber von Lebensmitteln mit
einer Gesamtverkaufsäche von mindestens 800 Quadratmetern, die
mehrmals im Kalenderjahr oder dauerhaft Elektro- und Elektronikgeräte
anbieten und auf dem Markt bereitstellen, sind verpichtet,
1. bei der Abgabe eines neuen Elektro- oder Elektronikgerätes an einen
Endnutzer ein Altgerät des Endnutzers der gleichen Geräteart, das
im Wesentlichen die gleichen Funktionen wie das neue Gerät erfüllt,
am Ort der Abgabe oder in unmittelbarer Nähe hierzu unentgeltlich
zurückzunehmen und
2. auf Verlangen des Endnutzers Altgeräte, die in keiner äußeren
Abmessung größer als 25 Zentimeter sind, im Einzelhandelsgeschäft
oder in unmittelbarer Nähe hierzu unentgeltlich zurückzunehmen; die
Rücknahme darf nicht an den Kauf eines Elektro- oder Elektronikgerätes
geknüpft werden und ist auf drei Altgeräte pro Geräteart beschränkt.

13
DE
• Bei einem Vertrieb unter Verwendung von Fernkommunikationsmitteln
ist die unentgeltliche Abholung am Ort der Abgabe auf Elektro- und
Elektronikgeräte der Kategorien 1, 2 und 4 gemäß § 2 Abs. 1 ElektroG,
nämlich „Wärmeüberträger“, „Bildschirmgeräte“ (Oberäche von mehr
als 100 cm²) oder „Großgeräte“ (letztere mit mindestens einer äußeren
Abmessung über 50 Zentimeter) beschränkt. Für andere Elektro- und
Elektronikgeräte (Kategorien 3, 5, 6) ist eine Rückgabemöglichkeit in
zumutbarer Entfernung zum jeweiligen Endnutzer zu gewährleisten.
• Altgeräte dürfen kostenlos auf dem lokalen Wertstohof oder in
folgenden Sammelstellen in Ihrer Nähe abgegeben werden: www.take-
e-back.de
• Für Elektro- und Elektronikgeräte der Kategorien 1, 2 und 4 bieten
wir auch die Möglichkeit einer unentgeltlichen Abholung am Ort der
Abgabe. Beim Kauf eines Neugeräts haben Sie die Möglichkeit, eine
Altgerätabholung über die Webseite auszuwählen.
• Batterien können überall dort kostenfrei zurückgegeben werden, wo sie
verkauft werden (z. B. Super-, Bau-, Drogeriemarkt). Auch Wertsto- und
Recyclinghöfe nehmen Batterien zurück. Sie können Batterien auch per
Post an uns zurücksenden. Altbatterien in haushaltsüblichen Mengen
können Sie direkt bei uns von Montag bis Freitag zwischen 08:00 und
16:00 Uhr unter der folgenden Adresse unentgeltlich zurückgeben:
Chal-Tec Fulllment GmbH
Norddeutschlandstr. 3
47475 Kamp-Lintfort
• Wichtig zu beachten ist, dass Lithiumbatterien aus Sicherheitsgründen
vor der Rückgabe gegen Kurzschluss gesichert werden müssen (z. B.
durch Abkleben der Pole).
• Finden sich unter der durchgestrichenen Mülltonne auf der Batterie
zusätzlich die Zeichen Cd, Hg oder Pb ist das ein Hinweis darauf, dass
die Batterie gefährliche Schadstoe enthält. (»Cd« steht für Cadmium,
»Pb« für Blei und »Hg« für Quecksilber).
Hinweis zur Abfallvermeidung
Indem Sie die Lebensdauer Ihrer Altgeräte verlängern, tragen Sie dazu
bei, Ressourcen eizient zu nutzen und zusätzlichen Müll zu vermeiden.
Die Lebensdauer Ihrer Altgeräte können Sie verlängern, indem Sie defekte
Altgeräte reparieren lassen. Wenn sich Ihr Altgerät in gutem Zustand
bendet, könnten Sie es spenden, verschenken oder verkaufen.

14
DE
HINWEISE ZUR ENTSORGUNG
Wenn es in Ihrem Land eine gesetzliche Regelung
zur Entsorgung von elektrischen und elektronischen
Geräten gibt, weist dieses Symbol auf dem Produkt
oder auf der Verpackung darauf hin, dass dieses
Produkt nicht im Hausmüll entsorgt werden darf.
Stattdessen muss es zu einer Sammelstelle für
das Recycling von elektrischen und elektronischen
Geräten gebracht werden. Durch regelkonforme
Entsorgung schützen Sie die Umwelt und die
Gesundheit Ihrer Mitmenschen vor negativen
Konsequenzen. Informationen zum Recycling
und zur Entsorgung dieses Produkts, erhalten
Sie von Ihrer örtlichen Verwaltung oder Ihrem
Hausmüllentsorgungsdienst.
Dieses Produkt enthält Batterien. Wenn es in Ihrem
Land eine gesetzliche Regelung zur Entsorgung
von Batterien gibt, dürfen die Batterien nicht im
Hausmüll entsorgt werden. Informieren Sie sich
über die örtlichen Bestimmungen zur Entsorgung
von Batterien. Durch regelkonforme Entsorgung
schützen Sie die Umwelt und die Gesundheit Ihrer
Mitmenschen vor negativen Konsequenzen.
KONFORMITÄTSERKLÄRUNG
Hersteller:
Chal-Tec GmbH, Wallstraße 16, 10179 Berlin,
Deutschland.
Importeur für Großbritannien:
Berlin Brands Group UK Limited
PO Box 42
272 Kensington High Street
London, W8 6ND
United Kingdom
Hiermit erklärt Chal-Tec GmbH, dass der
Funkanlagentyp Karaboom 100 der Richtlinie
2014/53/EU entspricht. Der vollständige Text der
EU-Konformitätserklärung ist unter der folgenden
Internetadresse verfügbar: use.berlin/10033148

15
EN
Dear Customer,
Congratulations on purchasing this equipment.
Please read this manual carefully and take care of
the following hints on installation and use to avoid
technical damages. Any failure caused by ignoring
the items and cautions mentioned in the operation
and installation instructions are not covered by
our warranty and any liability. Scan the QR code
to get access to the latest user manual and other
information about the product.
TECHNICAL DATA
Item number 10033148 10033159
Power supply 230 V~ 50 Hz
Total consumption 65 W
RMS power 60 W
Speakers impedance 8 Ω
S/N (A) 75 dB
CONTENTS
Technical Data 15
Safety Instructions 16
Scope of Supply 16
Product Overview 17
Getting Started 20
Play 21
Play from external Audio 21
Using the USB/SD Input 23
BT Mode 23
Disposal Considerations 24
Declaration of Conformity 24

16
EN
SAFETY INSTRUCTIONS
• Read these instructions. Keep these instructions. Heed all warnings.
Follow all instructions.
• Do not use this apparatus near water.
• Clean only with dry cloth.
• Do not block any ventilation openings. Install in accordance with the
manufacturer’s instructions.
• Do not install near any heat sources such as radiators, heat registers,
stoves, or other apparatus (including ampliers) that produce heat.
• Protect the power cord from being walked on or pinched, particularly at
plugs, convenience receptacles, and the Point where they exit from the
apparatus.
• Only use attachments/accessories specied by the manufacturer.
• Use only with the cart, stand, tripod, bracket, or table specied by
the manufacturer or sold with the apparatus. When a cart is used, use
caution when moving the cart/apparatus combination to avoid injury
from tip-over.
• Unplug this apparatus during lightning storms or when unused for long
periods of time.
• Refer all servicing to qualied service personnel. Servicing is required
when the apparatus has been damaged in anyway, such as power-
supply cord or plug is damaged, liquid has been spilled or objects have
fallen into the apparatus, the apparatus has been exposed to rain or
moisture, does not operate normally, or has been dropped.
• Apparatus shall not be exposed to dripping or splashing.
• Do not place any sources of danger on the apparatus (e.g. liquid lled
objects, lighted candles).
• Batteries (battery pack or batteries installed) shall not be exposed to
excessive heat such as sunshine, re or the like.
• Do not use this unit in wet or damp conditions.
• Always disconnect the unit from the mains power supply before
cleaning. Clean the appliance with a soft, damp, lint free cloth. Do not
use abrasives or harsh cleaners.
• 1x main unit
• 1x remote control
• 1x user manual
• 1x RCA cable
• 4x screws
SCOPE OF SUPPLY

17
EN
PRODUCT OVERVIEW
Top and front
1 Tablet groove
2 Standby
Turn on the unit, switch to
Standby mode.
3 Source
Select a source: Bluetooth, USB
or AUDIO IN
4
Skip to the previous track
Press and hold the key to search
within BT / USB
5
Skip to the next track
Press and hold the key to search
within BT / USB
6
Play/pause in USB/BT
7 VOL+ : Adjust the volume +
8 VOL –: Adjust the volume -
9 TIME
Setting the time in standby
10 ALARM
Setting the alarm in standby
11 LED display

18
EN
Rear
12 USB port
13 USB charge
14 RCA jack: Connect an external audio device
15 Power switch
16 Power mains

19
EN
Overview of remote control
1 POWER
Press to power the tower o and on
2 SLEEP
Press repeatedly to set a sleep
timer to turn the tower of after
a set amount of time has
passed.
3 TIME
Press to set time on standby
mode
4 ALARM
Press to set alarm on standby
mode
5 FOLDER +/-
6 VOLUME -/+
Press to adjust the volume
7 MUTE
Press to mute or restore volume.
8 SOURCE
Select a source: BT, USB or
AUDIO IN
9 PAIR (BT pairing)
10
Start or pause play
11
Skip to the previous track
Skip to the next track
Use: The remote control operates on 1 pc CR2025 lithium battery
(included).to power up the remote control; remove the insulation tab from
the back unit.

20
EN
GETTING STARTED
Caution: Danger of electric shock.
When you unplug the AC power cord always pull the plug from
the socket. Never pull the cord. Before connecting the AC power
cord, ensure you have completed all other connections.
Place the unit in the desired position and unravel the mains cable. Insert the
cable into the supply socket and switch on if applicable.
Auto-Standby
When playing media from a connected device, the Tower automatically
switches to standby if
• No button is pressed for 10 minutes,
• No audio from a connected device for 10 minutes.
Setting Clock
After the unit is plugged into a mains supply or mains power failure, the
display will show the “0:00” on the LED display. The unit should be in
standby mode to set the current clock.
1. Press TIME/ALARM button, the digits for the display will blink.
2. Press the , button repeatedly until correct hour is set. Press the
TIME/ALARM to conrm the hour setting.
3. The minute digits on the display will blink.
4. Press the button repeatedly until correct minute is set. Press the
TIME/ALARM to conrm the minute setting.
Setting Alarm
This unit can be used as an alarm clock, USB is activated to play at a preset
time.
1. Press the Standby switch to switch the unit to standby mode.
2. Make sure that you have set the clock correctly.
3. Press and hold TIME/ALARM button in shutdown state, the display will
ash ON to select setting alarm and the display will blink.
4. Press the TIME/ALARM conrm, the time display will blink.
5. Press buttons repeatedly to set hour. Press TIME/ALARM to
confirm.
6. Press to set minute.
7. Press ALARM to confirm, and then press , to select USB status.
Press TIME/ALARM to confirm.

21
EN
8. The volume would turn up from 0 to 20 gradually.
9. Press TIME/ALARM button in shutdown state, the display will flash ON
to select setting alarm, and the display will blink.
10. Press the to select "OFF" to cancel alarm.
Sleep Mode
Press and hold the SLEEP button, the display will blink. Press the button
repeatedly until the display shows the minute you want to set. You can set
10 to 90 minutes.
It blinks three times to conrm, and then return to the interface before. If
you want to cancel the sleep mode, press to OFF, after blanking three times,
the sleep mode will cancel.
PLAY
Pause / resume play
1. During play, press
to pause/resume play
2. During play, long press button to fast forward/fast rewind
Skip to a track
For MP3 disc and USB/SD
1. Press / to select a track or a le.
2. Press the VOL+/VOL- to adjust the volume.
Search within a track
1. During play, press and hold or .
2. Release to resume normal play
PLAY FROM EXTERNAL AUDIO
You can play from an external audio device such as MP3 player through this
unit.
Line in Jack (Requires a 3.5mm cable)
1. Connect a 3.5mm cable to the Line jack on top panel. Connect the other
end of the 3.5mm cable to an Mp3 player or other audio device.
2. Press the button to turn the unit on.

22
EN
3. Press the SOURCE button to switch to Line In mode.
4. Use the controls on the connected device to begin playing audio routed
through the unit.
Auxiliary Input RCA (Requires an RCA cable)
1. Connect an RCA cable to the Auxiliary Input. Connect the other end of
the RCA cable to the audio output on your DVD player, stereo system,
gaming system or television.
2. Press the power button to turn the unit on.
3. Press the SOURCE button to switch to Aux In mode.
4. Use the controls on the connected device to begin playing audio routed
through the unit.

23
EN
USING THE USB/SD INPUT
1. Plug your USB ash drive or SD card to the USB socket or SD slot
2. Press SOURCE button to select USB or SD mode, the unit can play
automatically. If not, press
3. Press the / to select track
4. Press the VOL+/VOL – to adjust the volume
Remarks: USB/SD port is easy to sensitive equipment, will cause the
equipment work is not stable
USB charging
There is a USB charger on the top of the unit to charge small devices such as
smartphones that can be charged via USB
Output power: 5V/2.1A max
BT MODE
1. Press the SOURCE button on the device or PAIR on the remote control
to select BT mode.
2. Then press the PAIR button on the remote control.
3. Turn on BT functionality on your BT device. Typically, BT controls are
found on the device’s tools or setting menu (see your user manual).
4. Turn on BT connectivity and make your device ‘discoverable”. Choose
‘add a new BT device’ or ‘setup BT device’ on your device. It will start
to search. Once "Karaboom 100" shows on your device, select it. If your
device prompts you for a pass code, please enter 0000. If the pairing
attempt fails or times out, please start pairing procedure again (see
steps above).
5. After your device and the tower speaker have connected each other, a
sound can be heard.
6. Make sure the BT connection between the unit and the device is active.
7. Press the Play/Pause button to pause playback, press again to resume
playback and press button to skip forward to next track and to skip
backward to previous track.

24
EN
DISPOSAL CONSIDERATIONS
If there is a legal regulation for the disposal of
electrical and electronic devices in your country,
this symbol on the product or on the packaging
indicates that this product must not be disposed of
with household waste. Instead, it must be taken to
a collection point for the recycling of electrical and
electronic equipment. By disposing of it in accordance
with the rules, you are protecting the environment and
the health of your fellow human beings from negative
consequences. For information about the recycling
and disposal of this product, please contact your local
authority or your household waste disposal service.
This product contains batteries. If there is a legal
regulation for the disposal of batteries in your country, the
batteries must not be disposed of with household waste.
Find out about local regulations for disposing of batteries.
By disposing of them in accordance with the rules, you are
protecting the environment and the health of your fellow
human beings from negative consequences.
DECLARATION OF CONFORMITY
Manufacturer:
Chal-Tec GmbH, Wallstrasse 16, 10179 Berlin,
Germany.
Importer for Great Britain:
Berlin Brands Group UK Limited
PO Box 42
272 Kensington High Street
London, W8 6ND
United Kingdom
Hereby, Chal-Tec GmbH declares that the radio
equipment type Karaboom 100 is in compliance with
Directive 2014/53/EU. The full text of the EU declaration
of conformity is available at the following internet
address: use.berlin/10033148
For Great Britain: Hereby, Chal-Tec GmbH declares that
the radio equipment type Karaboom 100 is in compliance
with the relevant statutory requirements. The full text of
the declaration of conformity is available at the following
internet address: use.berlin/10033148

25
FR
Chère cliente, cher client,
Toutes nos félicitations pour l’acquisition de ce
nouvel appareil. Veuillez lire attentivement et
respecter les instructions de ce mode d’emploi an
d’éviter d’éventuels dommages. Nous ne saurions
être tenus pour responsables des dommages dus
au non-respect des consignes et à la mauvaise
utilisation de l’appareil. Scannez le QR-Code pour
obtenir la dernière version du mode d'emploi et à
d'autres informations concernant le produit.
.
FICHE TECHNIQUE
Numéro d'article 10033148 10033149
Alimentation 230 V~ 50 Hz
Puissance totale 65 W
Puissance RMS 60 W
Impédance de l'enceinte 8 Ohm
Rapport signal bruit 75 dB
SOMMAIRE
Fiche technique 25
Consignes de sécurité 26
Contenu de l'emballage 26
Aperçu de l'appareil 27
Mise en marche 30
Lecture de musique 31
Entrée AUX 32
Entrée USB/SD 32
Utilisation en BT 32
Conseils pour le recyclage 34
Déclaration de conformité 34

26
FR
CONSIGNES DE SÉCURITÉ
• Lisez ces conseils. Conservez le mode d'emploi. Tenez compte de tous
les avertissements. Suivez les instructions.
• N'utilisez pas l'appareil près de l'eau. Nettoyez uniquement avec un
chion sec.
• Ne bloquez pas les ouvertures de ventilation.
• Tenez l'appareil à l'écart des sources de chaleur telles que les
radiateurs, les poêles, les fours et autres équipements (y compris les
amplicateurs) produisant de la chaleur.
• Protégez le cordon d'alimentation pour que personne ne marche
dessus ou qu'il ne soit pas plié, en particulier au niveau de la che
d'alimentation et de la sortie de l'appareil.
• N'utilisez que des accessoires spéciés par le fabricant.
• Utilisez uniquement avec le chariot, les supports, les étagères ou les
tampons indiqués par le fabricant. Soyez prudent lorsque vous déplacez
l'appareil pour éviter une chute.
• Débranchez le cordon d'alimentation pendant un orage, de même que
si vous n'utilisez pas l'appareil pendant une longue période.
• Pour les réparations, contactez des spécialistes qualiés. Les
réparations sont nécessaires si l'appareil a été endommagé de
quelque façon que ce soit, si le cordon d'alimentation ou la prise a été
endommagé, si du liquide a été renversé sur l'appareil ou si des objets
sont tombés à l'intérieur, s'il a été exposé à la pluie ou à l'humidité ou
s'il a fait une chute ou ne fonctionne pas normalement.
• L'appareil ne doit pas être exposé à des gouttes d'eau ni aux
éclaboussures.
• Les récipients contenant des liquides tels que des vases ne doivent pas
être placés sur l'appareil.
• La batterie ne doit pas être exposée à la chaleur excessive du soleil, du
feu, etc.
• L'appareil se déconnecte du secteur en débranchant la che.
• Tant qu'il est connecté au secteur, l'appareil reste prêt à être utilisé.
• Enceinte tour
• Télécommande
• Mode d'emploi
• Câble RCA
• 4 vis
CONTENU DE L'EMBALLAGE

27
FR
APERÇU DE L'APPAREIL
Vue de haut
1 Support de tablette
2 Interrupteur de marche/arrêt
Pour allumer et éteindre l'ap-
pareil.
3 Source
Choix de la source : BT, USB,
Entrée Audio
4
Titre précédent
Maintenez pour rechercher vers
l'arrière en mode BT et USB
5
Titre suivant
Maintenez la touche appuyée
pour faire avancer la recherche
en mode BT et USB
6 c
Lecture /Pause en mode USB/
BT
7 VOL+ : volume +
8 VOL –: volume -
9 Heure
Réglage de l'heure (en mode
veille)
10 Alarme
Réglage d'une alarme (en mode
veille)
11 Ecran LED

28
FR
Vue de dos
12 Port USB
13 Port de charge USB
14 Prise RCA : pour brancher un appareil externe
15 Bouton de marche/arrêt
16 Prise d'alimentation

29
FR
Aperçu de la télécommande
1 MARCHE/ARRÊT
Appuyez sur pour allumer ou éteindre l'appareil
2 Arrêt automatique
Appuyez plusieurs fois pour
régler la minuterie de mise en
veille (arrêt automatique).
3 Heure
Réglage de l'heure
4 ALARME
Réglage de l'alarme
5 FOLDER +/-
Changer le dossier
6 VOLUME - -
VOLUME +
7 FONCTION MUET
Pour couper le son : appuyez à
nouveau pour restaurer le son.
8 Source (SOURCE)
Choix d'une source (BT, USB ou
AUDIO IN)
9 PAIR
10
Lecture /Pause
11
Titre suivant
Titre précédent
Utilisation: La télécommande est alimentée par une pile bouton (CR 2025,
incluse). Pour utiliser la télécommande, retirez la languette d’isolation à
l’arrière.

30
FR
MISE EN MARCHE
Attention : risque de choc électrique.
Lorsque vous débranchez le cordon d'alimentation du
secteur, touchez toujours la che d'alimentation. Ne tirez
jamais sur le cordon d'alimentation.
Placez l'appareil dans la position souhaitée.
Veille auto
Lorsque vous lisez du contenu multimédia à partir d’un appareil connecté, le
système passe automatiquement en veille si aucune touche n'a été pressée
pendant 10 minutes ou si aucune lecture n'est intervenue depuis l'appareil
connecté pendant 10 minutes.
Réglage de l'heure
Après la connexion de la tour de karaoké à l’alimentation et après une
coupure de courant, l’aichage indique "0:00". Pour dénir l'heure actuelle,
l'appareil doit être en mode veille.
1. Appuyez sur TIME / ALARM. Les chires de l'écran clignotent.
2. Appuyez sur
, jusqu'à ce que l'heure juste soit aichée. Appuyez sur
la touche TIME/ ALARM.
3. Les chires des minutes clignotent à l'écran.
4. Appuyez plusieurs fois sur les touches
jusqu'à ce que les minutes
soient bien réglées.
Réglage de l'alarme
L'appareil peut être utilisé comme réveil. Les sources USB sont activées à
l'heure programmée.
1. Appuyez sur la touche ON/OFF pour mettre l'appareil en mode veille.
2. Vériez que l'horloge a été réglée correctement.
3. Appuyez sur le bouton TIME/ALARM et maintenez-le. ON clignote à
l'écran. Vous pouvez maintenant dénir l'heure de l'alarme.
4. Appuyez sur le bouton TIME/ALARM. L'aichage clignote.
5. Appuyez plusieurs fois sur les touches
pour régler les heures.
Confirmez avec TIME/ALARM.
6. Réglez les minutes avec
.
7. Confirmez avec ALARM puis utilisez les touches
, pour choisir USB.
8. Ajustez le volume à un niveau compris entre 0 et 20.
9. Appuyez sur le bouton TIME / ALARM avec l'appareil éteint. L'affichage

31
FR
clignote pour activer l'alarme.
10. Désactiver l'alarme : utilisez les touches
pour choisir "OFF".
Arrêt automatique
Appuyez sur la touche SLEEP et maintenez-la. L'aichage clignote. Appuyez
plusieurs fois sur la touche jusqu'à ce que l'écran aiche les minutes. Vous
pouvez dénir un délai de 10 à 90 minutes.
Après conrmation, l'écran clignote trois fois puis revient à l'aichage
précédent. Si vous souhaitez quitter le mode veille, appuyez sur OFF. Après
trois entrées vides, l'appareil quitte le mode veille.
LECTURE DE MUSIQUE
Mettre en pause / poursuivre la lecture
1. Pendant la lecture, appuyez sur
, pour mettre en pause ou reprendre
2. Pendant la lecture, maintenez
pour parcourir vers l'arrière ou
l'avant.
Saut d'un titre
Disque MP3, support de données USB/SD.
1. Appuyez sur
, pour choisir un autre titre.
2. Appuyez sur VOL-/VOL+ pour régler le volume.
Parcourir un titre
1. Pendant la lecture, maintenez ou .
2. Relâchez la touche pour retourner en mode de lecture normale.

32
FR
ENTRÉE AUX
(nécessite un câble RCA)
Ne branchez pas le câble RCA à l'entrée AUX. Connectez l'autre extrémité
du câble RCA à la sortie audio d'un lecteur DVD, d'une chaîne stéréo, d'une
console de jeu ou d'un téléviseur.
1. Allumez l'appareil: appuyez sur l'interrupteur marche / arrêt.
2. Passer à Aux: appuyez sur le bouton SOURCE.
3. Utilisez le panneau de commande sur le périphérique connecté pour
lancer la lecture de la vidéo.
ENTRÉE USB/SD
1. Connectez le périphérique de stockage USB ou la carte SD au port
approprié.
2. Appuyez sur le bouton SOURCE pour sélectionner le mode USB ou
SD. L'appareil lit les pistes automatiquement ; sinon, appuyez sur la
touche
.
3. Choisissez un titre avec les touches
.
4. Réglez le volume avec les touches VOL+ et VOL-
Remarque : Le port USB et le lecteur SD sont des connecteurs délicats qui
peuvent provoquer une instabilité de l'appareil.
Recharge d'appareils sur le port USB
En haut de l'appareil se trouve un port de chargement USB.
UTILISATION EN BT
1. Appuyez sur le bouton SOURCE pour sélectionnez le mode BT.
2. Appuyez ensuite sur le bouton PAIR de la télécommande. L‘indicateur
LED s‘allume en bleu.
3. Activez la fonctionnalité BT sur votre périphérique multimédia,
généralement dans les paramètres.
4. Activez la réception BT et rendez votre appareil "visible". Dans les
paramètres de votre appareil BT, sélectionnez "Ajouter un nouveau
périphérique" ou "Congurer un périphérique BT". Une recherche est

33
FR
lancée. Connectez-vous avec "Karaboom 100" dès qu'il est aiché. Si
vous êtes invité à entrer un mot de passe, entrez "0000" (quatre zéros).
Si la tentative d'association échoue ou que le délai a expiré, répétez les
étapes.
5. Une fois que l'appareil et la tour de karaoké ont été couplées, un bip
retentit.
6. Vériez que la connexion BT a bien été établie.
7. Appuyez sur PLAY/PAUSE pour interrompre la lecture et appuyez à
nouveau pour reprendre la lecture et sur , pour revenir un titre en
arrière ou sur , pour passer au titre suivant.

34
FR
CONSEILS POUR LE RECYCLAGE
S‘il existe une réglementation pour l‘élimination ou le
recyclage des appareils électriques et électroniques
dans votre pays, ce symbole sur le produit ou sur
l‘emballage indique que cet appareil ne doit pas
être jeté avec les ordures ménagères. Vous devez le
déposer dans un point de collecte pour le recyclage
des équipements électriques et électroniques.
La mise au rebut conforme aux règles protège
l‘environnement et la santé de vos semblables des
conséquences négatives. Pour plus d‘informations
sur le recyclage et l‘élimination de ce produit, veuillez
contacter votre autorité locale ou votre service de
recyclage des déchets ménagers.
Ce produit contient des piles. S‘il existe une
réglementation pour l‘élimination ou le recyclage
des piles dans votre pays, vous ne devez pas les
jeter avec les ordures ménagères. Renseignez-vous
sur les dispositions locales relatives à la collecte
des piles usagées. La mise au rebut conforme aux
règles protège l‘environnement et la santé de vos
semblables des conséquences négatives.
DÉCLARATION DE CONFORMITÉ
Fabricant :
Chal-Tec GmbH, Wallstraße 16, 10179 Berlin,
Allemagne.
Importateur pour la Grande Bretagne :
Berlin Brands Group UK Limited
PO Box 42
272 Kensington High Street
London, W8 6ND
United Kingdom
Le soussigné, Chal-Tec GmbH, déclare que
l’équipement radioélectrique du type Karaboom 100
est conforme à la directive 2014/53/UE. Le texte
complet de la déclaration UE de conformité est
disponible à l’adresse internet suivante : use.
berlin/10033148

35
ES
Estimado cliente:
Le felicitamos por la adquisición de este producto.
Lea atentamente el siguiente manual y siga
cuidadosamente las instrucciones de uso con el
n de evitar posibles daños. La empresa no se
responsabiliza de los daños ocasionados por un
uso indebido del producto o por haber desatendido
las indicaciones de seguridad. Escanee el código
QR para obtener acceso al manual de usuario más
reciente y otra información sobre el producto:
.
DATOS TÉCNICOS
Número de artículo 10033148 10033149
Fuente de alimentación 230 V~ 50 Hz
Potencia total 65 W
Potencia RMS 60 W
Impedancia del altavoz 8 Ohm
Relación señal/ruido 75 dB
ÍNDICE
Datos técnicos 35
Indicaciones de seguridad 36
Envío 36
Vista general del aparato 37
Puesta en funcionamiento 40
Reproducir música 41
Entrada AUX 42
Entrada USB/SD 42
Modo BT 42
Retirada del aparato 44
Declaración de conformidad 44

36
ES
INDICACIONES DE SEGURIDAD
• Lea las siguientes indicaciones. Guarde este manual de instrucciones.
Preste atención a todas las advertencias. Siga todas las instrucciones.
• No utilice el aparato cerca del agua. Limpie el aparato únicamente con
un paño seco.
• No bloquee las ranuras de ventilación.
• No instale el aparato cerca de fuentes de calor tales como radiadores,
unidades de registro de calor, estufas u otros aparatos (incl.
amplicadores) que produzcan calor.
• Evite que el cable sea pisado o que se doble, sobre todo, en la parte de
la toma de corriente y en el punto donde sale del aparato.
• Utilice exclusivamente los accesorios recomendados por el fabricante.
• Utilice el aparato únicamente con mesas, carritos, soportes o estantes
recomendados por el fabricante. Al mover el aparato, tenga mucho
cuidado para evitar que se caiga.
• Desenchufe el aparato durante tormentas eléctricas o si no lo va a
utilizar durante periodos largos de tiempo.
• Únicamente el personal cualicado debe llevar a cabo las reparaciones.
Es necesario llevar el aparato a reparación cuando ha sufrido cualquier
tipo de daño, se ha derramado líquido encima de él, se ha caído un
objeto encima de él, el aparato ha sido expuesto a la lluvia o humedad,
no funciona correctamente o se ha caído.
• No exponga el aparato a goteos ni salpicaduras de agua.
• No coloque encima del aparato recipientes con agua, como jarrones.
• No exponga la batería al calor extremo, como rayos de sol, fuego, etc.
• Apague el aparato desenchufando el cable de alimentación de la toma
de corriente.
• El aparato permanece operativo si está enchufado a la toma de
corriente.
• Torre de sonido
• Mando a distancia
• Manual de instrucciones
• Cable RCA
• 4 tornillos
ENVÍO

37
ES
VISTA GENERAL DEL APARATO
Desde arriba
1 Soporte de tableta
2 Botón de encendido/apagado
Enciende/Apaga el aparato.
3 Fuente
Elegir la fuente: BT, USB, FM,
Audio ON
4
Siguiente pista
Mantener pulsado en modos BT
y USB para buscar hacia atrás
5
Siguiente pista
Mantener pulsado en modos BT
y USB para buscar hacia delante
6 c
Reproducción/Pausa en modos
USB y BT
7 VOL+ : volumen +
8 VOL –: volumen -
9 Hora
Congurar la hora (en modo
Standby)
10 Despertador
Congurar el despertador (en
modo Standby)
11 Display LED

38
ES
Parte posterior
12 Entrada USB
13 Puerto USB con función de carga
14 Conexión RCA Conexión a un dispositivo externo
15 Interruptor de encendido/apagado
16 Toma de corriente

39
ES
Vista general del mando a distancia
1 ENCENDIDO/APAGADO
Pulsar para encender/apagar el aparato
2 SLEEP
Pulsar varias veces para
congurar el temporizar de
apagado (apagado automático).
3 Hora
Congurar la hora
4 DESPERTADOR
Congurar el despertador
5 FOLDER +/-
6 VOLUMEN -
Disminuir el volumen
VOLUME +
Aumentar el volumen
7 MUTE
Pulsar una vez para silenciar
el sonido. Pulsar otra vez para
reactivar el sonido.
8 SOURCE (Fuente)
Elegir una fuente (BT, USB, FM o
AUDIO IN)
9 PAIR
10
Reproducción/Pausa
11
Siguiente pista
Pista anterior
Uso: El mando a distancia funciona con una pila de botón (CR 2025, incluida
en el envío). Para poder usar el mando a distancia, retire la lengüeta de
plástico ubicada en la parte posterior.

40
ES
PUESTA EN FUNCIONAMIENTO
Atención: Riesgo de descarga eléctrica.
Para desconectar el aparato de la toma de corriente, tire del
cuerpo del enchufe. Nunca tire del cable. Coloque el aparato
en el lugar deseado.
Coloque el aparato en el lugar deseado.
Modo de espera automático
Durante la reproducción de archivos del dispositivo conectado, el equipo
se pone automáticamente en modo Standby si durante 10 minutos no se ha
pulsado ningún botón o no se ha reproducido ningún archivo del dispositivo
conectado.
Conguración de la hora
Tras conectar la torre de karaoke a una toma de corriente o tras un corte
eléctrico, la pantalla muestra «0:00». Para congurar la hora, el aparato
debe encontrarse en modo Standby.
1. Pulse el botón TIME/ALARM. Los dígitos de la hora empezarán a
parpadear en la pantalla.
2. Pulse varias veces
, jhasta congurar la hora deseada. Pulse el
botón TIME/ALARM.
3. Los dígitos de los minutos empezarán a parpadear en la pantalla.
4. Pulse varias veces el botón
jusqu'à ce que les minutes soient bien
réglées.
Conguración del despertador
Se puede usar el aparato como un despertador. Las fuentes USB y FM se
activarán a la hora jada del despertador.
1. Pulse el botón ON/OFF para cambiar el aparato al modo Standby.
2. Compruebe que la hora sea la correcta.
3. Mantenga pulsado el botón TIME/ALARM. En la pantalla aparecerá
parpadeando «ON». Ahora, puede congurar el despertador.
4. Pulse el botón TIME/ALARM. La pantalla parpadeará.
5. Pulse varias veces los botones
para elegir la hora. Confirme
pulsando el botón TIME/ALARM.
6. Pulse los botones
para elegir los minutos.
7. Para confirmar, pulse el botón ALARM y, a continuación, elija con los
botones
USB.
8. Ajuste el volumen a un nivel de 0 a 20.

41
ES
9. Pulse el botón TIME/ALARM en estado apagado. En la pantalla
aparecerá parpadeando «ON» para activar el despertador.
10. Desactivar el despertador: elija con los botones
«OFF» para
desactivar el despertador.
Temporizador de apagado
Mantenga pulsado el botón SLEEP. La pantalla parpadeará. Pulse varias
veces el botón hasta que en la pantalla aparezcan los minutos. Puede elegir
entre 10 y 90 minutos. Al conrmar, los minutos parpadean parpadea 3
veces y, a continuación, vuelve a la interfaz anterior. Si desea desactivar
el apagado automático, pulse el botón OFF. Tras parpadear 3 veces, el
temporizador de apagado se desactivará.
REPRODUCIR MÚSICA
Detener/Restablecer la reproducción
1. Durante la reproducción, pulse el botón
, para detener o restablecer
la reproducción.
2. Mantenga pulsado durante la reproducción el botón
para avanzar/
rebobinar una pista.
Ir a la siguiente pista
Para discos MP3 y lápices USB/SD.
1. Pulse
, para elegir otra pista.
2. Pulse VOL-/VOL+ para regular el volumen.
Buscar dentro de una pista
1. Durante la reproducción, mantenga pulsado el botón o .
2. Suéltelo para volver a la reproducción habitual.

42
ES
ENTRADA AUX
(Requiere cable RCA)
Conecte el cable RCA a la entrada AUX. Conecte la otra punta del cable RCA
a la salida de audio de un reproductor de DVD, equipo estéreo, consola o
televisor.
3. Encienda el equipo pulsando el botón ON/OFF.
4. Pulse varias veces el botón SOURCE para cambiar al modo AUX.
5. Utilice los controles del dispositivo conectado para iniciar una
reproducción de audio.
ENTRADA USB/SD
1. Introduzca el lápiz USB o la tarjeta de memoria SD en la ranura
correspondiente.
2. Pulse varias veces el botón SOURCE para elegir el modo USB o SD. El
equipo reproducirá automáticamente las pistas. De lo contrario, pulse el
botón
.
3. Elija una pista pulsando
.
4. Regule el volumen con los botones VOL+ y VOL-
Atención: el puerto USB y la ranura SD son sensibles. Las conexiones
pueden provocar inestabilidad del dispositivo.
Cargar dispositivos vía puerto USB
El equipo dispone en la parte superior de un puerto USB con función de
carga.
MODO BT
1. Pulse el botón SOURCE para elegir el modo BT.
2. Luego presione el botón PAIR del control remoto.
3. Active la función Bluetooth en su dispositivo. Normalmente esta función
se encuentra en el panel de control.
4. Active la conexión BT y la visibilidad de su dispositivo. En el panel
de control de su dispositivo BT, elija «Añadir nuevo dispositivo» o
«Congurar dispositivo BT». A continuación, se iniciará la búsqueda.
Seleccione «Karaboom 100» cuando aparezca en la pantalla. Si su
dispositivo requiere una contraseña, teclee «0000» (cuatro ceros). Si la
conexión no se realiza con éxito o el tiempo de espera se agota, vuelva a
repetir los pasos anteriores.

43
ES
5. Tras acoplar el dispositivo con la torre de karaoke, se emitirá un pitido.
6. Compruebe que la conexión BT esté activa.
7. Pulse PLAY/PAUSE para reproducir o pausar la reproducción. Pulse ,
para ir a la siguiente pista o , para regresar a la pista anterior.

44
ES
RETIRADA DEL APARATO
Si en su país existe una disposición legal relativa a
la eliminación de aparatos eléctricos y electrónicos,
este símbolo estampado en el producto o en
el embalaje advierte que no debe eliminarse
como residuo doméstico. En lugar de ello, debe
depositarse en un punto de recogida de reciclaje
de aparatos eléctricos y electrónicos. Una gestión
adecuada de estos residuos previene consecuencias
potencialmente negativas para el medio ambiente
y la salud de las personas. Puede consultar más
información sobre el reciclaje y la eliminación de este
producto contactando con su administración local o
con su servicio de recogida de residuos.
Este producto contiene baterías. Si en su país existe
una disposición legal relativa a la eliminación de
baterías, estas no deben eliminarse como residuo
doméstico. Infórmese sobre la normativa vigente
relacionada con la eliminación de baterías. Una
gestión adecuada de estos residuos previene
consecuencias potencialmente negativas para el
medio ambiente y la salud de las personas.
DECLARACIÓN DE CONFORMIDAD
Fabricante:
Chal-Tec GmbH, Wallstraße 16, 10179 Berlín, Alemania.
Importador para Gran Bretaña:
Berlin Brands Group UK Limited
PO Box 42
272 Kensington High Street
London, W8 6ND
United Kingdom
Por la presente, Chal-Tec GmbH declara que el tipo
de equipo radioeléctrico Karaboom 100 es conforme
con la Directiva 2014/53/UE. El texto completo de la
declaración UE de conformidad está disponible en la
dirección Internet siguiente: use.berlin/10033148

45
IT
Gentile Cliente,
La ringraziamo per aver acquistato il dispositivo.
La preghiamo di leggere attentamente le seguenti
istruzioni per l’uso e di seguirle per evitare
possibili danni tecnici. Non ci assumiamo alcuna
responsabilità per danni scaturiti da una mancata
osservazione delle avvertenze di sicurezza e da un
uso improprio del dispositivo. Scansionare il codice
QR seguente, per accedere al manuale d’uso più
attuale e per ricevere informazioni sul prodotto.
.
DATI TECNICI
Numero articolo 10033148 10033149
Alimentazione 230 V~ 50 Hz
Potenza totale 65 W
Potenza RMS 60 W
Impedenza altoparlante 8 Ohm
Rapporto segnale-rumore 75 dB
INDICE
Dati tecnici 45
Avvertenze di sicurezza 46
Volume di consegna 46
Descrizione del dispositivo 47
Messa in funzione 50
Modalità CD 51
Modalità AUX 52
Ingresso USB/SD 52
Modalità BT 52
Smaltimento 54
Dichiarazione di conformità 54

46
IT
AVVERTENZE DI SICUREZZA
• Leggere il presente manuale e conservarlo con cura. Rispettare le
avvertenze e le indicazioni di questo manuale.
• Non utilizzare il dispositivo nelle vicinanze di acqua. Pulirlo solo con un
panno asciutto.
• Non bloccare le aperture di ventilazione.
• Non utilizzare nelle vicinanze di fonti di calore come radiatori,
termosifoni, forni e altri dispositivi (inclusi amplicatori) che producono
calore.
• Proteggere il cavo di alimentazione, in modo che non venga calpestato,
piegato, in particolare in corrispondenza della spina o del punto in cui
fuoriesce dal dispositivo.
• Utilizzare solo accessori indicati dal produttore.
• Utilizzare solo carrelli, supporti, mensole o appoggi indicati dal
produttore. Quando si sposta il dispositivo, prestare attenzione, in
modo da evitare che cada.
• Staccare la spina durante temporali e se non si utilizza il dispositivo per
tempi prolungati.
• Rivolgersi a personale tecnico qualicato per eventuali riparazioni.
Le riparazioni sono necessarie se il dispositivo è stato danneggiato in
qualche modo, se spina o cavo sono danneggiati, se sono stati versati
liquidi sul dispositivo, se sono caduti oggetti all’interno del dispositivo,
se il dispositivo è stato esposto a pioggia o umidità, se non funziona
correttamente o se è stato fatto cadere.
• Non esporre il dispositivo a spruzzi o gocce d’acqua.
• Non poggiare contenitori pieni d’acqua, come vasi, sopra al dispositivo.
• La batteria non deve essere esposta a calore eccessivo dovuto alla luce
solare diretta, a fuoco, ecc.
• Il dispositivo viene scollegato dalla rete elettrica staccando la spina.
• Il dispositivo resta pronto all’uso durante il collegamento alla rete
elettrica.
• Altoparlante a torre
• Telecomando
• Manuale d’uso
• Cavo RCA
• 4 viti
VOLUME DI CONSEGNA

47
IT
DESCRIZIONE DEL DISPOSITIVO
Dall’alto
1 Supporto tablet
2 Interruttore On/O
Accendere e spegnere il disposi-
tivo.
3 Fonte
Selezionare la fonte: BT; USB;
FM; audio on
4
Titolo precedente
Tenere premuto per cercare
all’indietro in modalità BT e
USB
5
Titolo successivo
Tenere premuto per cercare in
avanti in modalità BT e USB
6 c
Play/Pausa in modalità USB/BT
7 VOL+ : volume +
8 VOL –: volume -
9 Ora
Impostare l’ora (in modalità
standby)
10 Sveglia
Impostare una sveglia (in moda-
lità standby)
11 Spia LED

48
IT
Retro
12 Ingresso USB
13 Connessione di carica USB
14 Ingresso RCA: collegamento a un dispositivo esterno
15 Interruttore On/O
16 Connessione di alimentazione

49
IT
Descrizione del telecomando
1 ON/OFF
Per accendere o spegnere il dispositivo.
2 SLEEP
Premere ripetutamente per
impostare il timer di spegnimento
automatico.
3 ORA
Impostare l’ora.
4 SVEGLIA
Impostare l’ora della sveglia.
5 FOLDER +/-
6 VOLUME - -
Abbassare il volume
VOLUME + +
Alzare il volume
7 MUTE
Premere per attivare la funzione
muta; premere di nuovo per
riattivare l’audio.
8 FONTE (Fuente)
Selezionare una fonte (BT, USB o
AUDIO IN).
9 PAIR
10
Play/Pausa
11
Titolo successivo
Titolo precedente
Utilizzo: il telecomando funziona con una pila a bottone (CR 2025) (inclusa
in consegna). Per utilizzare il dispositivo, rimuovere la fascetta isolante sul
retro.

50
IT
MESSA IN FUNZIONE
Attenzione: pericolo di scosse elettriche.
Quando si stacca il cavo dalla rete elettrica, impugnare
sempre la spina e non tirare il cavo. Posizionare il dispositivo
nel luogo desiderato.
Standby automatico
Veille auto
Se vengono riprodotti le da un dispositivo connesso, il dispositivo passa
automaticamente in standby se non vengono premuti tasti per più di 10
minuti o se non viene riprodotto alcun titolo dal dispositivo collegato per
più di 10 minuti.
Impostare l’orologio
Dopo aver collegato la spina alla presa elettrica e dopo un blackout, il
display mostra “0:00”. Per impostare l’ora il dispositivo deve essere in
standby.
1. Premere TIME/ALARM. Le cifre lampeggiano sul display.
2. Utilizzare
per impostare l’ora. Premere TIME/ALARM.
3. Lampeggiano le cifre dei minuti.
4. Utilizzare AVANTI/INDIETRO
no a impostare i minuti corretti
Impostare la sveglia
Questo dispositivo può essere utilizzato come sveglia. Come sveglia può
essere attivata a connessione USB, che si avvia all’ora impostata.
1. Premere ON/OFF per passare in modalità standby.
2. Assicurarsi che l’ora impostata sia corretta.
3. Premere TIME/ALARM. Sul display lampeggia ON. Ora è possibile
impostare l’ora della sveglia.
4. Premere TIME/ALARM. L’indicazione lampeggia.
5. Premere ripetutamente
per impostare l’ora. Premere TIME/
ALARM per confermare.
6. Utilizzare
per impostare i minuti.
7. Premere TIME/ALARM per confermare e poi AVANTI/INDIETRO
,
per selezionare USB come sveglia.
8. Impostare il volume da 0 a 20.
9. Premere TIME/ALARM a dispositivo spento. Sul display lampeggia ON
per impostare la sveglia.
10. Disattivare la sveglia: selezionare “OFF” con AVANTI/INDIETRO
.

51
IT
Impostare il timer di autospegnimento
Tenere premuto SLEEP. Il display lampeggia. Premere SLEEP no a quando
sul display compare il minuto. Possono essere impostati 10-90 minuti.
Il valore impostato lampeggia tre volte per la conferma, poi il display
torna all’indicazione normale. Se si desidera interrompere il timer di
autospegnimento, premere OFF. Dopo tre immissioni vuote, la modalità di
autospegnimento viene terminata.
MODALITÀ CD
Mettere in pausa/riprodurre un CD
1. Premere PLAY/PAUSA
, per riprodurre o mettere in pausa.
2. Premere AVANTI/INDIETRO
durante la riproduzione per andare
avanti o indietro.
Saltare un titolo
Disco MP3, supporto USB/SD:
1. Premere AVANTI/INDIETRO
, per selezionare un altro titolo.
2. Premere VOL+/VOL- per regolare il volume.
Ricerca all’interno di un titolo
1. Tenere premuto AVANTI/INDIETRO ou durante la riproduzione.
2. Lasciare andare il tasto per procedere con la riproduzione.

52
IT
MODALITÀ AUX
(necessario cavo RCA)
Non collegare il cavo RCA all’ingresso AUX. Collegare l’altra estremità del
cavo RCA con l’uscita audio di un lettore DVD, impianto stereo, consolle per
videogiochi o televisore.
1. Accendere il dispositivo: premere On/o.
2. Passare in modalità AUX: premere SOURCE.
3. Utilizzare gli elementi di controllo del dispositivo connesso per iniziare
la riproduzione video.
INGRESSO USB/SD
1. Inserire la chiavetta USB o la scheda SD nell’apposito ingresso.
2. Premere SOURCE e selezionare USB o SD. Il primo titolo si avvia
automaticamente. In caso contrario, premere PLAY/PAUSA
.
3. Premere AVANTI/INDIETRO
per scegliere un determinato titolo
4. Premere VOL+/- per regolare il volume.
Nota : le connessioni USB e SD sono sensibili e comportano instabilità nel
dispositivo.
Carica tramite USB
Sul lato superiore del dispositivo si trova una connessione di carica USB.
MODALITÀ BT
1. Premere SOURCE la modalità BT.
2. Poi premere il tasto PAIR sul telecomando.
3. Attivare il BT sul dispositivo esterno, che si trova di norma nelle
impostazioni.
4. Accendere il BT e assicurarsi che il dispositivo sia “visibile”. Selezionare
nelle impostazioni del dispositivo BT “Aggiungere nuovo dispositivo BT”
o “Preparare dispositivo BT”. Inizia la ricerca. Collegare con “Karaboom
100” non appena compare. Se viene richiesta una password, inserire
“0000” (quattro zeri). Se l’accoppiamento non riesce o il tempo è
scaduto, iniziare di nuovo il procedimento di accoppiamento.
5. Quando il dispositivo è collegato alla torre, si sente un suono.

53
IT
6. Assicurarsi che il collegamento BT tra altoparlante e dispositivo sia
stabilito.
7. Premere PLAY/PAUSA per interrompere la riproduzione e premerlo
nuovamente per riprenderla. Premere INDIETRO , per passare al titolo
precedente e AVANTI , per passare a quello successivo.

54
IT
SMALTIMENTO
Se nel proprio paese si applicano le
regolamentazioni inerenti lo smaltimento di
dispositivi elettrici ed elettronici, questo simbolo
sul prodotto o sulla confezione segnala che questi
prodotti non possono essere smaltiti con i riuti
normali e devono essere portati a un punto di
raccolta di dispositivi elettrici ed elettronici. Grazie
al corretto smaltimento dei vecchi dispositivi si
tutela il pianeta e la salute delle persone da possibili
conseguenze negative. Informazioni riguardanti
il riciclo e lo smaltimento di questi prodotti si
ottengono presso l’amministrazione locale oppure il
servizio di gestione dei riuti domestici.
Il prodotto contiene batterie. Se nel proprio
paese si applicano le regolamentazioni inerenti
lo smaltimento di batterie, non possono essere
smaltite con i normali riuti domestici. Preghiamo
di informarvi sulle regolamentazioni vigenti sullo
smaltimento delle batterie. Grazie al corretto
smaltimento dei vecchi dispositivi si tutela l’ambiente
e la salute delle persone da conseguenze negative.
DICHIARAZIONE DI CONFORMITÀ
Produttore:
Chal-Tec GmbH, Wallstraße 16, 10179 Berlino,
Germania.
Importatore per la Gran Bretagna:
Berlin Brands Group UK Limited
PO Box 42
272 Kensington High Street
London, W8 6ND
United Kingdom
Il fabbricante, Chal-Tec GmbH, dichiara che il tipo
di apparecchiatura radio Karaboom 100 è conforme
alla direttiva 2014/53/UE. Il testo completo della
dichiarazione di conformità UE è disponibile al
seguente indirizzo Internet: use.berlin/10033148