www.AvantcoIce.com
Read this manual in its entirety prior to equipment setup, operation, and maintenance.
Note:
User Manual
04/2025
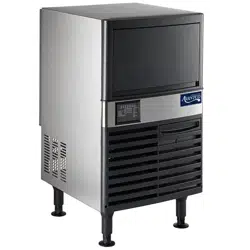
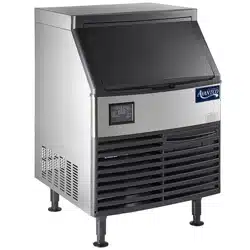
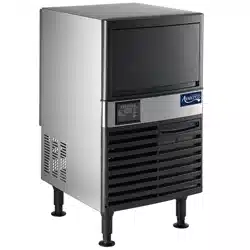
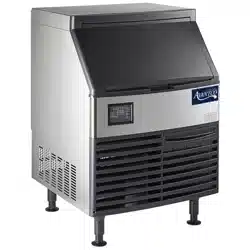
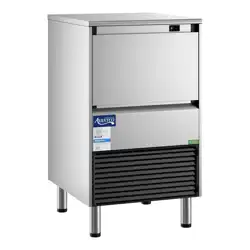
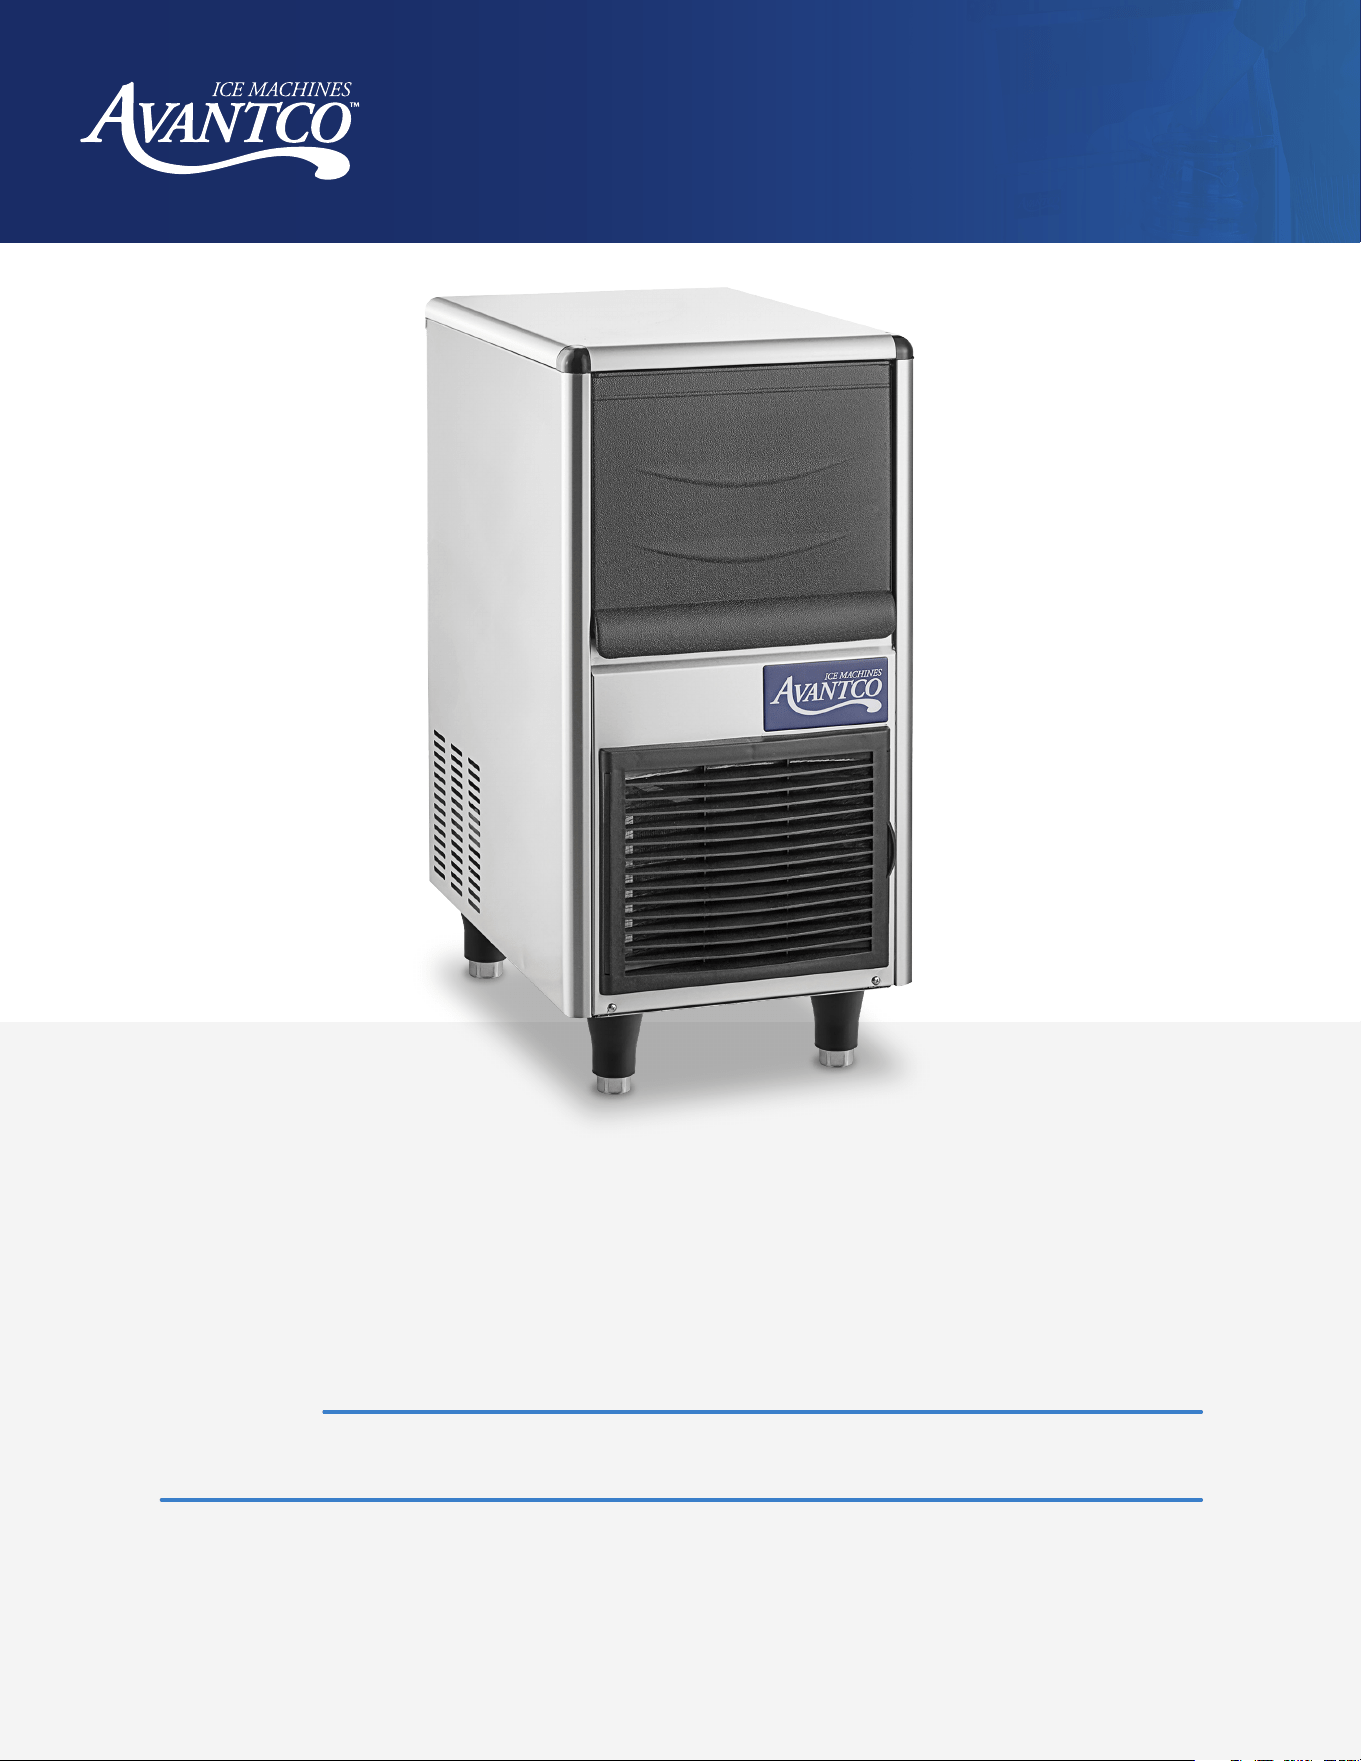
Undercounter
Ice Machine
Models:
#194UCB77A

2
www.AvantcoIce.com
User Manual
Undercounter Ice Machines
Contents
Warnings ........................................................................................................................................................ 3
Installation ..................................................................................................................................................... 4
Start Up and Operation .............................................................................................................................. 8
Operating Instructions ................................................................................................................................ 9
Control Panel ...............................................................................................................................................10
Other Special Protection - Shutdown ......................................................................................................11
Cleaner/Sanitizer .........................................................................................................................................12
Maintenance .................................................................................................................................................13
Cleaning Process ........................................................................................................................................14
Service Call ...................................................................................................................................................18
Troubleshooting ..........................................................................................................................................19

3
www.AvantcoIce.com
User Manual
Undercounter Ice Machines
Warnings
DANGER – RISK OF FIRE OR EXPLOSION. FLAMMABLE REFRIGERANT USED. TO BE REPAIRED ONLY
BY TRAINED SERVICE PERSONNEL. DO NOT PUNCTURE REFRIGERANT TUBING.
PELIGRO – RIESGO DE INCENDIO O EXPLOSION. REFRIGERANTE INFLAMABLE UTILIZADO. PARA
SER REPARADO SOLAMENTE POR PERSONAL DE SERVICIO CALIFICADO. NO PINCHAR LA TUBERÍA
REFRIGERANTE.
DANGER – RISQUE DE FEU OU D’EXPLOSION. LE FRIGORIGÈNE EST INFLAMMABLE. CONFIER LES
RÉPARATIONS À UN TECHNICIEN SPÉCIALISÉ. NE PAS PERFORER LA TUBULURE CONTENANT LE
FRIGORIGENE.
CAUTION – RISK OF FIRE OR EXPLOSION. FLAMMABLE REFRIGERANT USED. CONSULT REPAIR
MANUAL/OWNER’S GUIDE BEFORE ATTEMPTING TO SERVICE THIS PRODUCT. ALL SAFETY
PRECAUTIONS MUST BE FOLLOWED.
ATENCIÓN – RIESGO DE INCENDIO O EXPLOSIÓN. REFRIGERANTE INFLAMABLE UTILIZADO.
CONSULTE EL MANUAL DE REPARACIÓN / GUÍA DEL PROPIETARIO ANTES DE INTENTAR DAR
SERVICIO A ESTE PRODUCTO. DEBEN CUMPLIR CON TODAS LAS PRECAUCIONES DE SEGURIDAD.
ATTENTION – RISQUE DE FEU OU D’EXPLOSION. LE FRIGORIGÈNE EST INFLAMMABLE. CONSULTER
LE MANUEL DU PROPRIÉTAIRE/GUIDE DE RÉPARATION AVANT DE TENTER UNE RÉPARATION. TOUTES
LE MESURES DE SÉCURITÉ DOIVENT ÊTRE RESPECTÉES.
CAUTION – RISK OF FIRE OR EXPLOSION DUE TO PUNCTURE OF REFRIGERANT TUBING; FOLLOW
HANDLING INSTRUCTIONS CAREFULLY. FLAMMABLE REFRIGERANT USED.
ATENCIÓN – RIESGO DE INCENDIO O EXPLOSIÓN DEBIDO A LA PERFORACION DE LA TUBERÍA
REFRIGERANTE; SIGA LAS INSTRUCCIONES DE MANIPULACIÓN CON CUIDADO. REFRIGERANTE
INFLAMABLE UTILIZADO.
ATTENTION – RISQUE DE FEU OU D’EXPLOSION SI LA TUBULURE CONTENTANT LE FRIGORIGÈNE
EST PERFORÉE; SUIVRE LES INSTRUCTIONS DE MANUTENTION AVEC SOIN. LE FRIGORIGÈNE EST
INFLAMMABLE.
CAUTION – RISK OF FIRE OR EXPLOSION DUE TO FLAMMABLE REFRIGERANT USED. FOLLOW
HANDLING INSTRUCTIONS CAREFULLY IN COMPLIANCE WITH LOCAL GOVERNMENT REGULATIONS.
ATENCIÓN – RIESGO DE INCENDIO O EXPLOSIÓN DEBIDO A REFRIGERANTE INFLAMABLE UTILIZADO.
SIGA LAS INSTRUCCIONES DE MANIPULACIÓN CON CUIDADO CONFORME A LAS REGLAS DE LA
MUNICIPALIDAD.
ATTENTION – RISQUE DE FEU OU D’EXPLOSION SI LE FRIGORIGÈNE EST INFLAMMABLE. SUIVRE
LES INSTRUCTIONS DE MANUTENTION AVEC SOIN CONFORMÉMENT AUX RÈGLEMENTATION
GOUVERNEMENTALE LOCAUX.

4
www.AvantcoIce.com
User Manual
Undercounter Ice Machines
Installation
This product cannot be used in outdoor envrionments. Not intended for use by children, or persons with
reduced physical, sensory, or mental capabilities or lack of experience and knowledge.
•
The installation, repair, or maintenance of this ice machine must be carried out by professional and qualified
personnel. Electric shock, fire, or personal injury may result from incorrect operation.
•
After the ice machine is delivered, please keep the machine upright for at least 24 hours to allow the
refrigerant to be fully precipitated before startup. Otherwise, the compressor may be damaged.
•
When handling, keep the cabinet upright with the inclination not exceeding 45 degrees. Do not invert the
machine or lay it horizontally. This ice machine should not be placed in wet or easily splashed areas.
•
The grounding of this ice machine cannot be connected to a gas pipe, water pipe, telephone line, or lightning
rods, etc.
•
There are rotating components in this ice machine. Do not insert slim objects into ventilation or exhaust ports,
or serious mechanical damage and injury may occur.
•
Do not store volatile or flammable substances in this ice machine or it may result in an explosion or fire.
•
Do not store any sundries or freeze any food in the storage bin. Keep the ice scoop clean.
•
The ice machine must be placed on a floor sucient enough to support its weight. An insucient base may
cause the equipment to fall over and cause injury.
•
There should be sucient ventilation space around the ice machine. See page 6 for clearance requirements.
•
Only the power supply specified on the machine nameplate can be used with this ice machine.
•
This ice machine cannot be connected to hot water.
•
The outlet for this ice maker must be reliably grounded with leakage protection.
•
The ice machine must be disconnected from power before manual cleaning, repairing, and maintenance.
•
Before cleaning, repairing, and maintenance, the remaining ice in the ice bin should be removed from the ice
machine to avoid contamination to ice.
•
Do not splash water directly onto the surface of the ice machine during the cleaning process; otherwise it may
cause short circuit, leakage, or other faults.
•
Flammable foaming agent is used during the foaming process. The ice maker should be disposed of and
recycled by qualified personnel and institutions.
•
The ice machine should be properly managed to ensure that children will not play with the machine.
•
When the ice machine malfunctions, turn o the power and contact professional personnel to be repaired.

5
www.AvantcoIce.com
User Manual
Undercounter Ice Machines
This ice machine is fully automatic. With proper installation and connection to potable water and power
source, the ice making will start properly. When the ice cubes fill up the storage bin, the machine will
automatically stop. The ice machine is generally used in the following and similar occasions:
•
Indoor, ambient-controlled environments only.
•
The kitchen area of a store/restaurant, oce or other workplace, hotel, catering, and similar
non-retail occasions.
•
This ice machine is not intended for residential use.
C Pure creates specialty water filters to be used with common restaurant equipment, ensuring that the water
utilized by the equipment is both clean and clear. These filters are easily installed into water lines, and their
cartridges can be quickly swapped out for fast, easy, and ecient replacements. The water filters below
are approved for use with Avantco Ice Machines. Failure to use and maintain an appropriate water filter will
void warranty coverage on your Avantco Ice Machine. For installation instructions, refer to the C Pure water
filtration manual or contact a C Pure water filtration dealer.
Modular Ice Machine
Item Number
Ice Shape
Ice Production Per
24 Hrs.
Replacement
Cartridge
Replacement
Cartridge
194UCB77A Bullet Ice 96 lb. 790OCLOKITM 790OCLOCARTM
6
www.AvantcoIce.com
User Manual
Undercounter Ice Machines
Installation
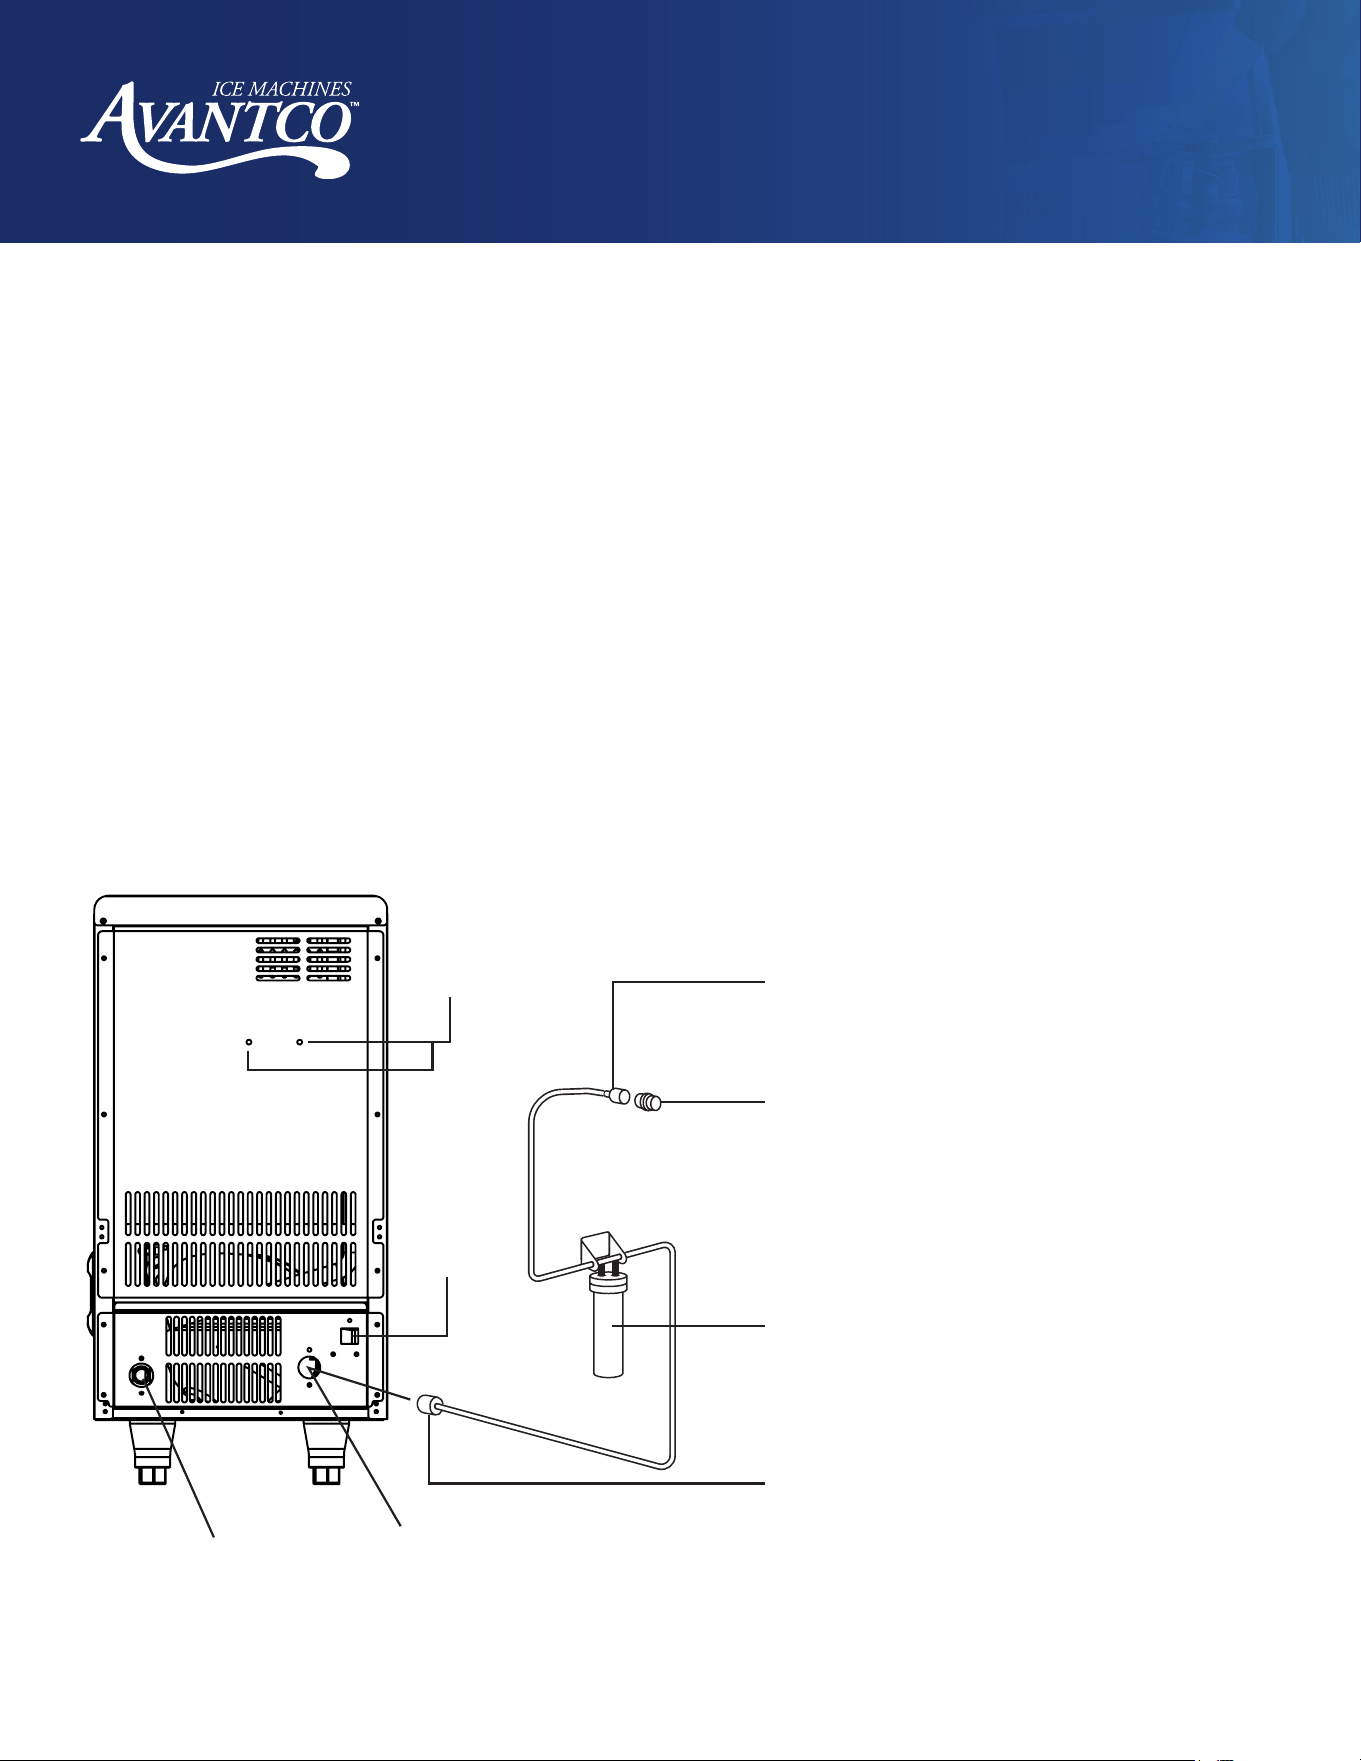
Schematic Diagram
The ice machine should be installed in a proper location meeting the following conditions:
•
Indoors, ambient temperature: 40-90°F.
•
Power supply: The rated voltage indicated on the machine nameplate ±6%.
•
Water source: Potable water, with water pressure from 18.75 PSI to 80 PSI; water temperature: 40-90°F.
•
The ice machine should be kept away from heat sources, an extremely high or low temperature environment,
and direct sunlight.
•
There should be sucient ventilation space around the ice machine; the distance from the ice
maker to the wall should be no less than 12” for the front, 6” for the sides, and 8” for the rear.
•
The ice machine must be placed on a floor sucient to support its weight.
•
The socket for the ice maker must be reliably grounded and include leakage protection.
•
Proper floor drainage must be provided near the installation location of the ice machine.
Water Inlet Pipe
Power
Cord
Mounting Hole
for Water Filter
Drain Pipe
1/2" Joint Inner Thread
1/2" Joint External Thread
Water Filter
3/4" Joint Inner Thread

7
www.AvantcoIce.com
User Manual
Undercounter Ice Machines
Installation Steps
1.
Check to see if the ice machine is in good condition and the accessories are all present; check the machine
model and the machine nameplate.
2.
Clean the ice storage bin and the food area inside with a sponge soaked in warm water and soap. Then, rinse
with potable water and dry.
3.
Place the ice machine in the operation area; ensure that the machine is placed on a leveled floor so the water
flows evenly into the evaporator.
4.
The compressor chamber is located below the front of the ice bin where the compressor and condenser are
installed. It requires ventilation space of more than 8" in the rear, 6" on the sides, and 12" in the front.
5.
The bottom of the ice machine is equipped with adjustable legs for level adjustment and clearance for floor
cleaning.
6.
Connect the machine's inlet water filter and water line referring to the installation instructions of your water
filter brand; if the installation site is already equipped with a drinking water system, the water filter may not be
needed.
7.
Connect the machine to the water supply using the 3/4" inlet fitting supplied with the machine. It is
recommended to install a water ball valve (not supplied with this machine) on the water supply line.
8.
Connect the drain line to the drain connector. To achieve a proper draining, it is recommended that the drain
pipe should have a dierence in level of more than 1" per 3'. Confirm that the drain line is not blocked. It is
recommended that the drain line be connected to an open drainage port.
9.
Any joint in the drain line must not be higher than the machine drainage port; any joint in the drain line cannot
be higher than the previous joint.
10.
Confirm the power requirements stated in the machine’s nameplate; ensure that the power supply meets the
requirements.
11.
A circuit breaker or switch with leakage protector and reliable grounding is required.
12.
Turn o the switch on the power line and connect the machine to the power source.
NOTE: The filter flow direction should be correctly installed as per the direction marker on the filter head cover
or the filter body. The filter cartridge should be replaced every 3 to 6 months.
8
www.AvantcoIce.com
User Manual
Undercounter Ice Machines
Start up and Operation
1.
Before you start the machine, please check and confirm:
• The packaging tape inside the ice machine has been removed.
• The accessories or items in the ice bin have been taken out.
• The ice machine has been adjusted to a leveled state.
• The water line has been connected and the water valve is open.
• The plug has been connected to the power supply and the power switch is o.
• The ambient temperature, water temperature, and pressure of the water supply meet the
above requirements.
2. Start up: Turn on the power switch. After power-on, the machine begins to make ice automatically.
3. For normal operation, please confirm:
• Look behind the finger curtain at the back of the ice storage area to check that water is spraying on the
evaporator nubs after 30 seconds in MAKE mode.
• The compressor is running normally and the temperature of the evaporator and the ice making water is
gradually decreasing.
• For air cooled machines, make sure the fan is running normally and there is stable airflow in the inlet and
outlet of the ice machine.
• The ice machine has no abnormal noise.
• The ice machine has no abnormal vibration.
• It takes about 10 to 20 minutes to make one batch of ice, depending on the ambient temperature and the
temperature of the water. The higher the temperature is, the longer the ice making will take.
• Ice cubes can be properly harvested from the machine.
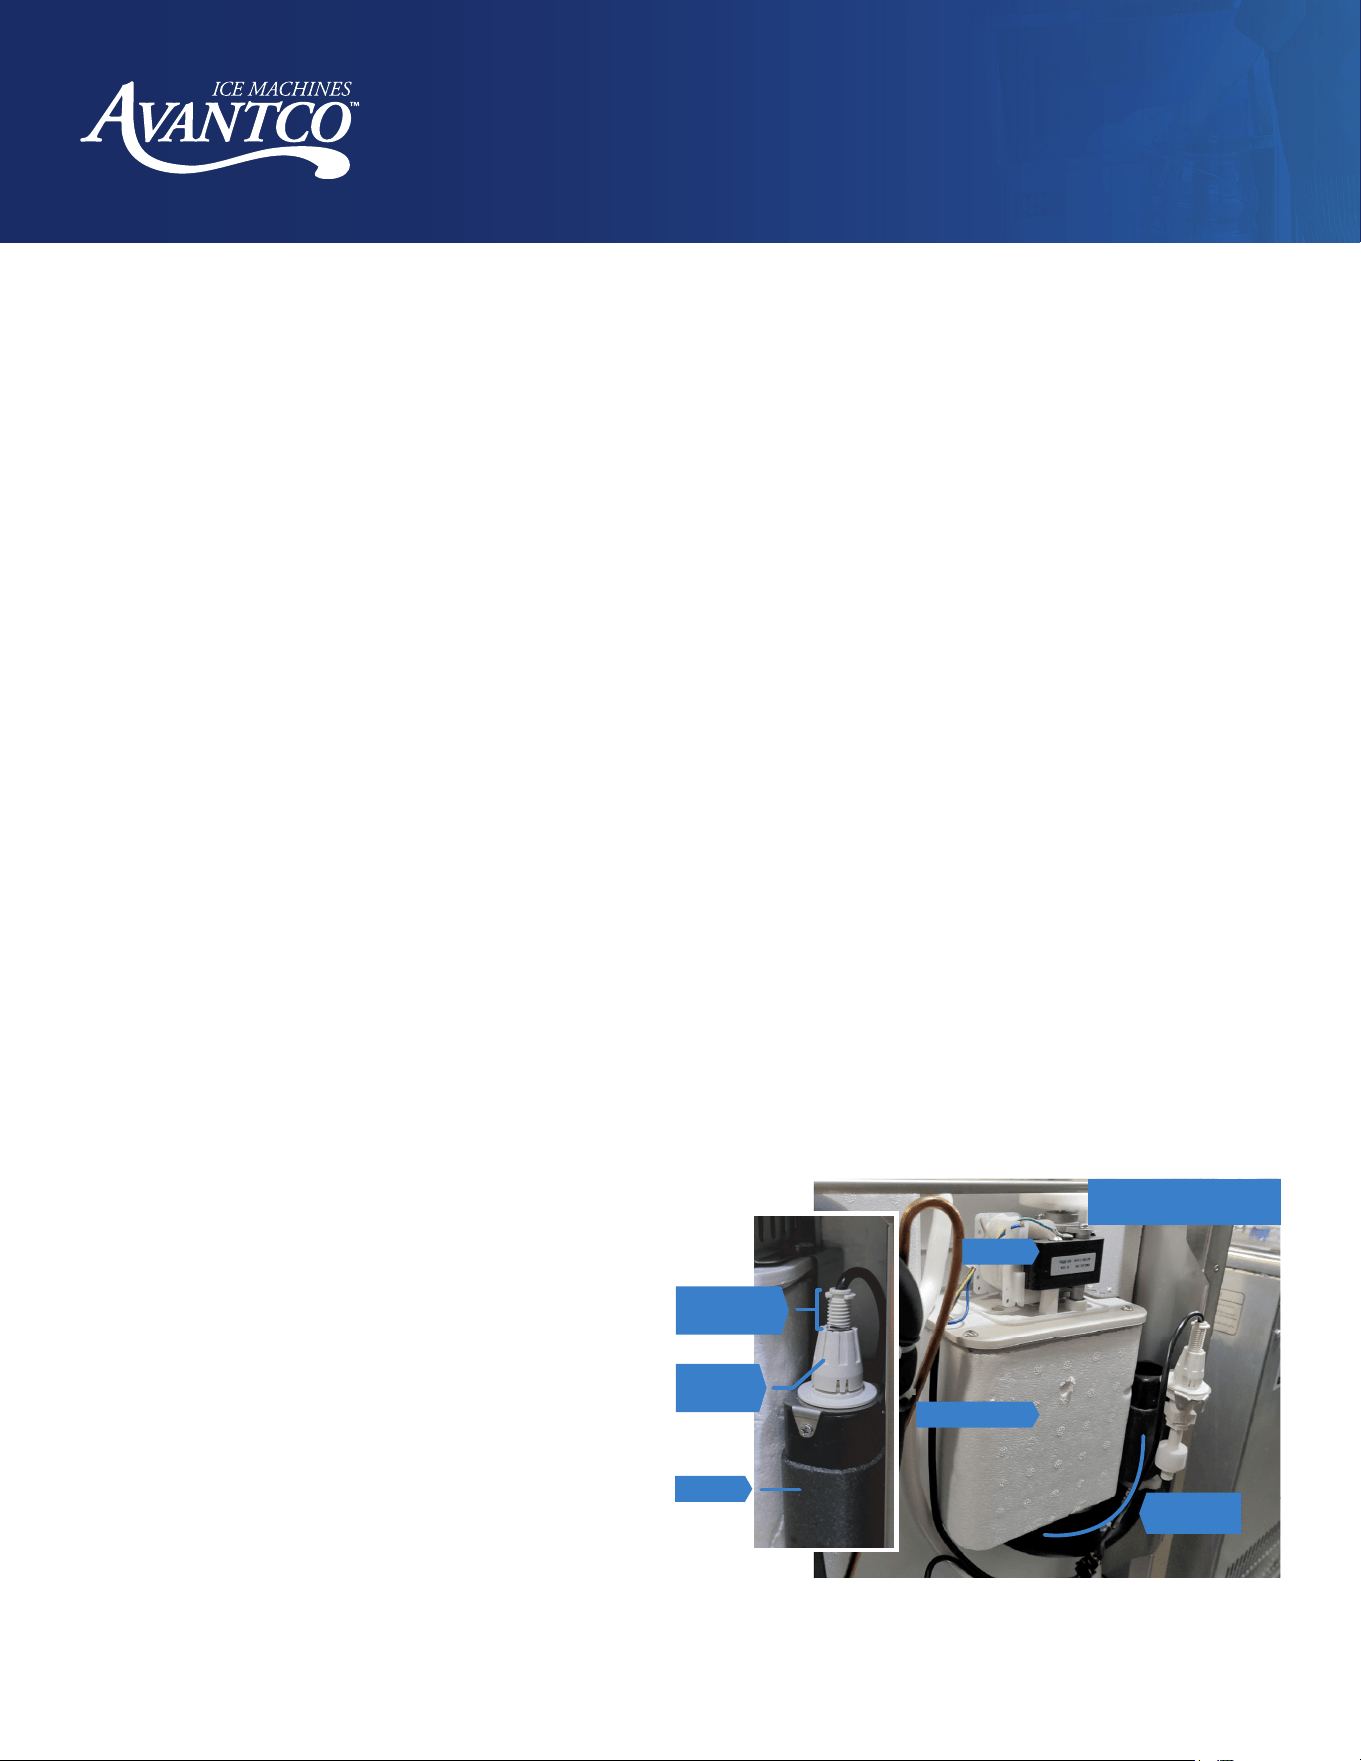
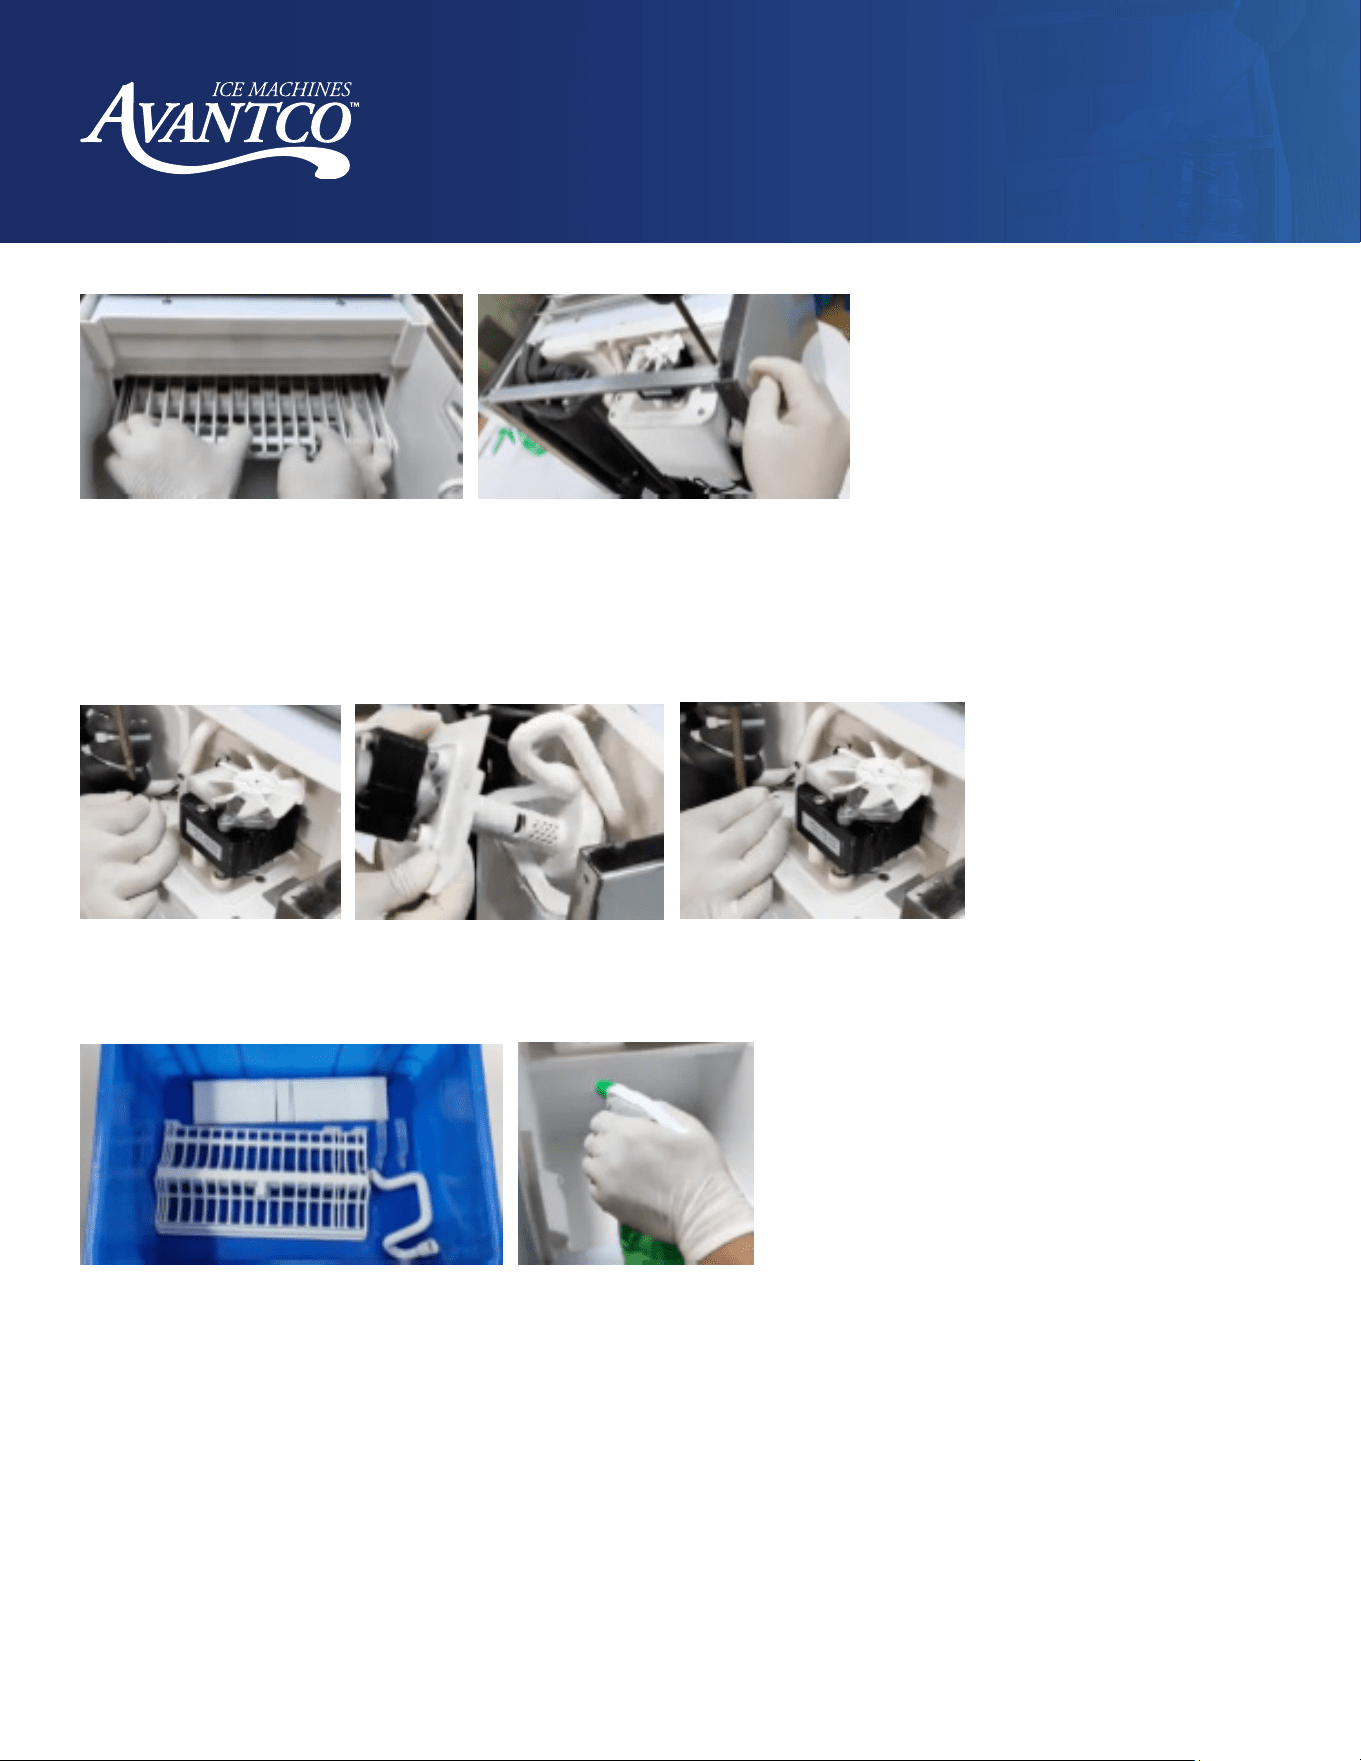
1.
Pull up on the adjuster nut to loosen it from the
stem and allow it to turn.
2.
Turn the adjuster nut so that the stem gets longer
to make thinner ice. Internally, the float moves
up in the trough. This turns HARVEST mode on
sooner.
3.
Turn the adjuster nut so that the stem gets
shorter to make thicker ice. Internally, the float
moves down in the trough. This turns HARVEST
mode on later.
4.
Once set, push the adjuster nut back down to
lock it in place.
5.
Do not set thickness based on the first run of the
unit after inital setup or after being on standby.
The first cycle is typically not the same as the
successive cycles.
Pump
Water Trough
Float Pipe
and Drain
Water Level & Probe
( Shown Outside of Pipe)
194UCB77A - Adjusting Ice Thickness
•
This unit does not have a digital adjustment for thickness. It uses the water level to
determine how much water is used to make ice, which controls thickeness.
•
To change the thickness of the ice:
Adjustment
Stem
Adjuster
Nut
Float

9
www.AvantcoIce.com
User Manual
Undercounter Ice Machines
Operating Instructions
When plugged in, the unit automatically turns on.
1. The unit starts counting down from 135 to 0 in PREP mode.
a. The INLET valve allows water to overflow trough and drains water to clear the system.
2. The unit starts a count up from 0 to 200.
a. It goes through a HARVEST cycle. The INLET indicator will light for the first part of the cycle to feed
water into the system. Some water may drain during this cycle.
3. The unit enters MAKE mode.
a. It counts up from 0.
i. From 0-30, the system starts to cool the evaporator.
ii. At 30, the circulating pump turns on and stays on for the duration of MAKE cycle.
b. The MAKE ending point is based on when the water level sensor reaches its bottom position.
i. The water does not refill during MAKE mode.
ii. The water pump runs to spray water onto the evaporator nubs where ice forms.
iii. The height of the water level sensor determines ice thickness.
4. Once water is depleted to the bottom of level sensor, the unit switches to HARVEST mode.
a. It counts up from 0 to 200 in HARVEST mode.
b. The water pump turns o.
c. The inlet valve opens to refill the water tank and shuts o after 30-50 seconds depending on the level
sensor height.
d. The condenser fan is o, and the defrost valve is on. It sends heat to the evaporator to release ice.
e. The ice will release from the evaporator and fall into the bin.
5. When the unit hits 200, it starts back at 0 with another MAKE cycle and continues to go from MAKE to
HARVEST cycles in this manner.
6. If the digital display reads "FUL", the ice bin is full. Ice is laying against the full switch on the left side of the
bin. The user will need to remove existing ice or redistribute ice away from the switch to allow the unit
to continue to make ice.
a. Once ice is removed from being against the switch, it will take roughly a minute for the unit to resume
making ice.
10
www.AvantcoIce.com
User Manual
Undercounter Ice Machines
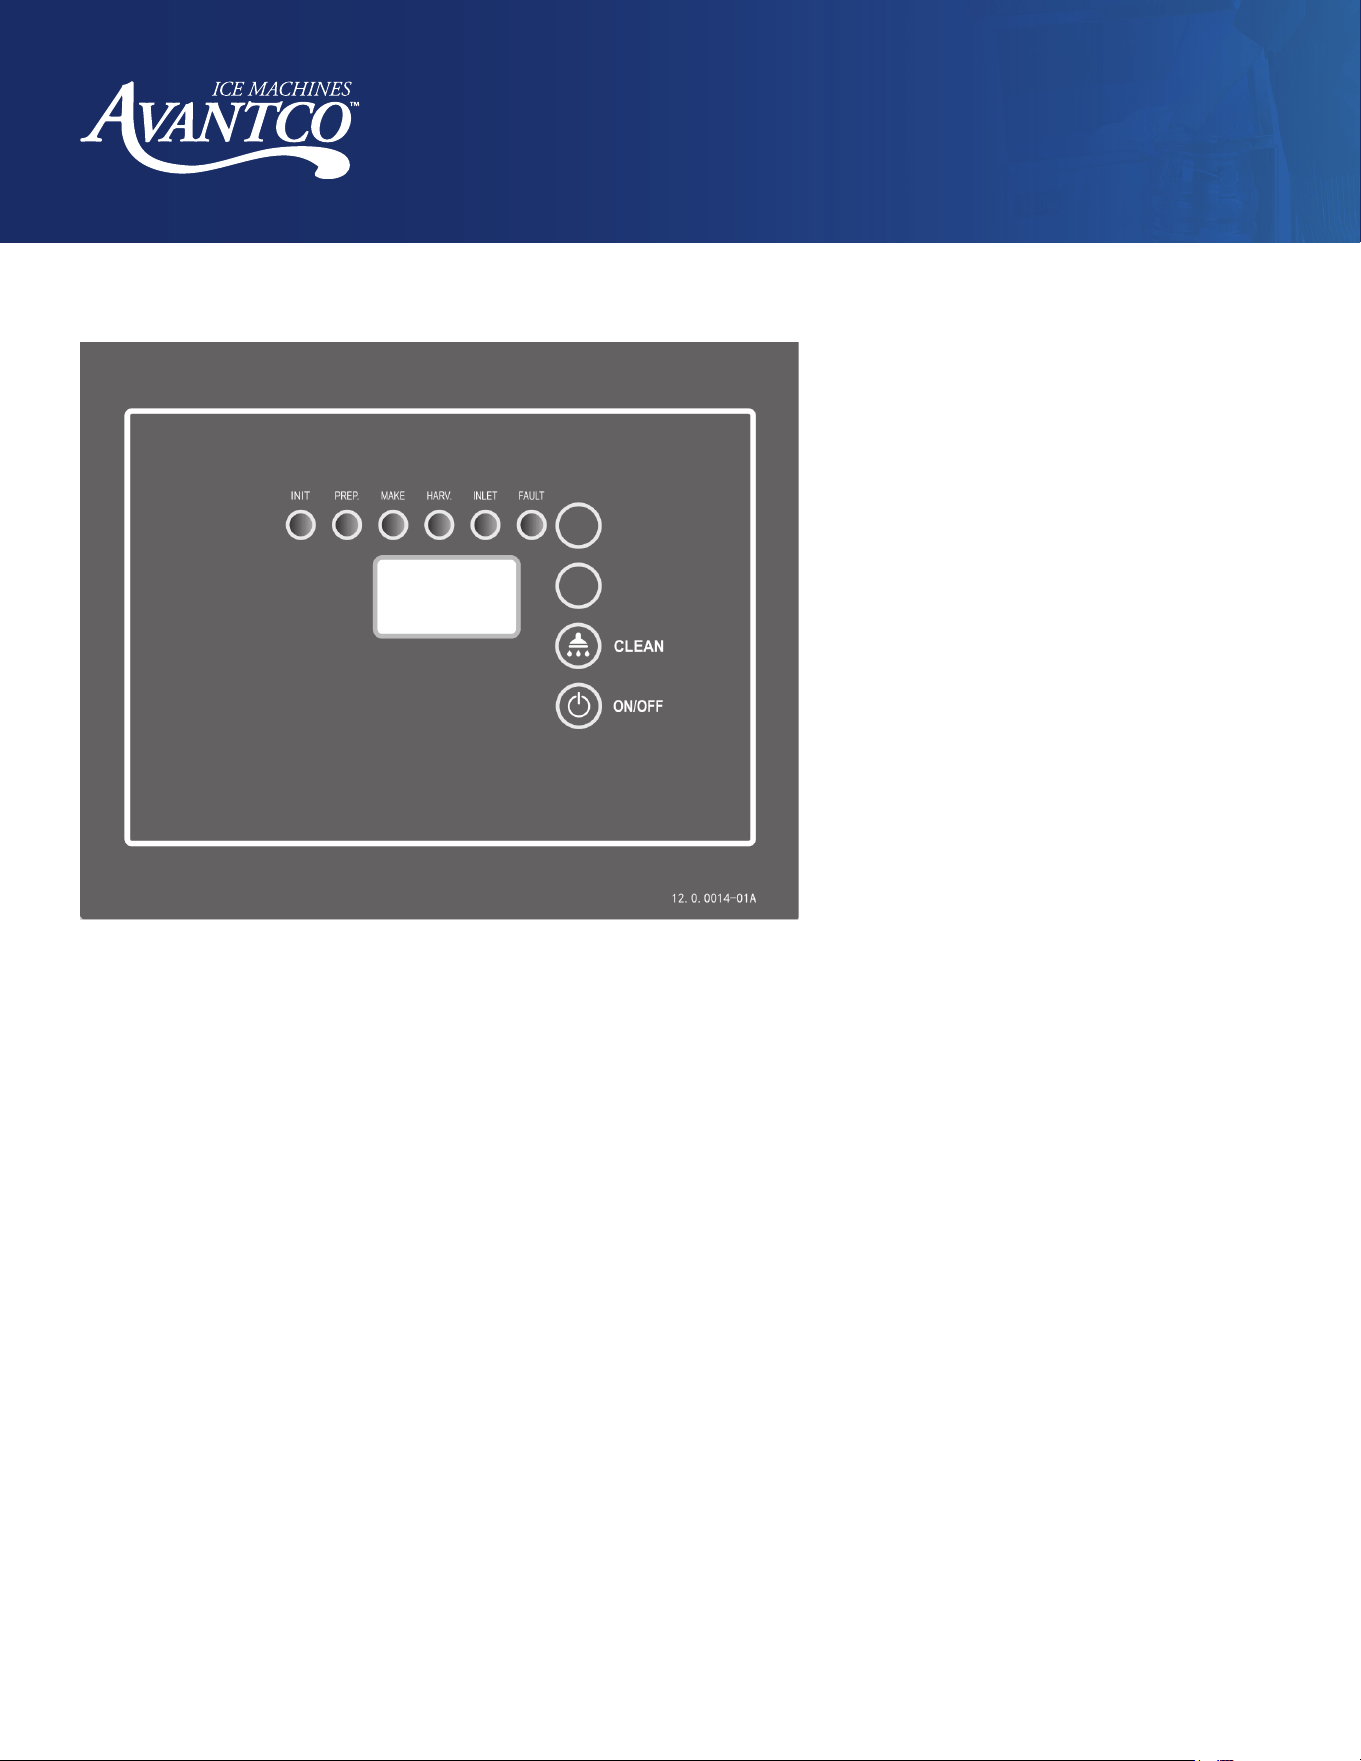
Control Panel
1. LED Display:
• Self-check: Display "ini" code.
• Preparing: Counts (in seconds) forwards.
• Ice making: Counts (in seconds) forwards prior to the water reaching 32°F. Counts seconds
backwards to 0 seconds afterwards.
• Ice harvest: Counts (in seconds) forwards.
• Clean: Display "CLE" during cleaning and descaling; display "STL" during sanitizing; display "RIN"
during rinsing.
2. Cleaning: During the normal operation, hold the cleaning button for 3 seconds to enter the cleaning process.
During the entire cleaning process, cleaning agents and disinfectants need to be put into the water trough.
When the cleaning process is finished, the ice maker will go to the ice making process.
Note: All cleaning and sanitizing chemicals used must be nickel-safe.
3. ON/OFF: Press this button to switch the machine OFF/ON.
4. Open and close the storage bin door gently. Do not slam the door. Keep door closed when not removing ice.
5. If the ice maker is not in use for a long time, it should be energized and run for 2 to 4 hours every 2 months.
E02: ICE MAKING OVERTIME
E04: HIGH TEMP. FAULT
E07: COND. TEMP. SENSOR
OPEN FAULT
E08: COND. TEMP. SENSOR
SHORT FAULT

11
www.AvantcoIce.com
User Manual
Undercounter Ice Machines
Other Special Protection - Shutdown
•
If the ice machine has not detected ice harvest in three cycles, it will shut down for safety and protection.
The ice maker needs to be checked.
•
If the ice machine detects that the ambient temperature is too high, it will stop for safety and protection.
•
The fault code and its comments are displayed as follows:
Code
Cause
How to Fix Machine Action
E02 Ice Making Overtime
1. The ice is becoming too thick on the evaporator due to a faulty water
level sensor. If so, replace the water level/temperature sensor.
2. Verify compressor operation.
3. Verify water pump function.
4. Verify water inlet valve is not leaking and constantly filling reservior
with water.
Protective shutdown
E04
High System Temp.
Fault
1. The cooling fan is not functioning. Check to see if the fan blade is
stuck. If not, replace the fan.
2. Verify defrost valve function
3. Air filter net or condenser is dirty. Clean air filter net or condenser.
Protective shutdown
E07
Cond. Temp. Sensor
Open Fault
1. Verify probe wires have a good connection in the controller by
disconnecting probe leads from controller and reconnectiong leads
to controller.
2. Use a multimeter set to Ohm setting and verify resistance valve of the
probe in 32˚F ice water. Value should be with 10% of 2.704 kohms.
Does not shutdown,
error LED light on every
5 seconds
E08
Cond. Temp. Sensor
Short Fault
1. Verify probe wires have a good connection in the controller by
disconnecting probe leads from controller and reconnectiong leads
to controller.
2. Use a multimeter set to Ohm setting and verify resistance valve of the
probe in 32˚F ice water. Value should be with 10% of 2.704 kohms.
Does not shutdown,
error LED light on every
5 seconds
12
www.AvantcoIce.com
User Manual
Undercounter Ice Machines
Item No.
Size
Type
147ARCTIC 16 oz. Concentrate
147ARCTICRPT 16 oz. Ready to use
147ARCTICR1G 1 Gallon Ready to use
Item No.
Size
Type
147QKSANICE 12 Pack/16 oz. Bottles Concentrate
999QKSANICE 16 oz. Concentrate
Noble Chemical oers a full line of products to clean and sanitize your commercial ice machine. These chemicals
are approved for use with Avantco Ice Machines. Failure to regularly clean and sanitize your Avantco Ice Machine
will void warranty coverage. For information and instructions, contact a Noble Chemical dealer. The ice machine
needs to be cleaned every other month, or once a month for high yeast environments.
Cleaners
Sanitizers

13
www.AvantcoIce.com
User Manual
Undercounter Ice Machines
Maintenance
NOTE: Maintenance must be done by a qualified technician.
WARNING: Before maintenance or manual cleaning, be sure to shut o the water source and power supply.
Exterior Cleaning
•
Frequently clean the environment around the ice machine to keep it clean. Do not block the vents.
•
The outer enclosure should be cleaned with a mild detergent and then wiped clean. If necessary, use
commercial stainless steel cleaners and polishes.
NOTE: Stainless steel may rust without proper maintenance.
Inlet Water Filter
•
The water filter should be inspected regularly. It is recommended to replace the filter cartridge every
3 to 6 months.
Interior Cleaning
•
The inside of the ice storage bin can be washed with water and cleaner solution. Rinse thoroughly with water.
Repeat this process with a water and sanitizer solution.
•
Note: Check and confirm the water pressure is lower than the maximum allowed pressure.
Do not flush the part above the water pump or the evaporator directly for water protection.
Condenser
•
For the air-cooled ice maker, the condenser should be cleaned every three weeks. Use a soft brush or a
vacuum cleaner with a brush to brush it up and down along the fin direction, to avoid damage to the fins and
further aecting the cooling eect.
•
The condenser filter should be cleaned every 2 weeks.
NOTE: Be careful when cleaning the condenser, as the edges of the fins are sharp.
Water Line
•
In order to ensure food safety, the water line of the ice machine should be cleaned regularly.
Winterizing
•
Turn o the water and power supply, and drain the residual water from the water trough inlet pipe and
drain pipe.
NOTE: The maintenance of the ice machine is not covered by the manufacturer’s warranty!
14
www.AvantcoIce.com
User Manual
Undercounter Ice Machines
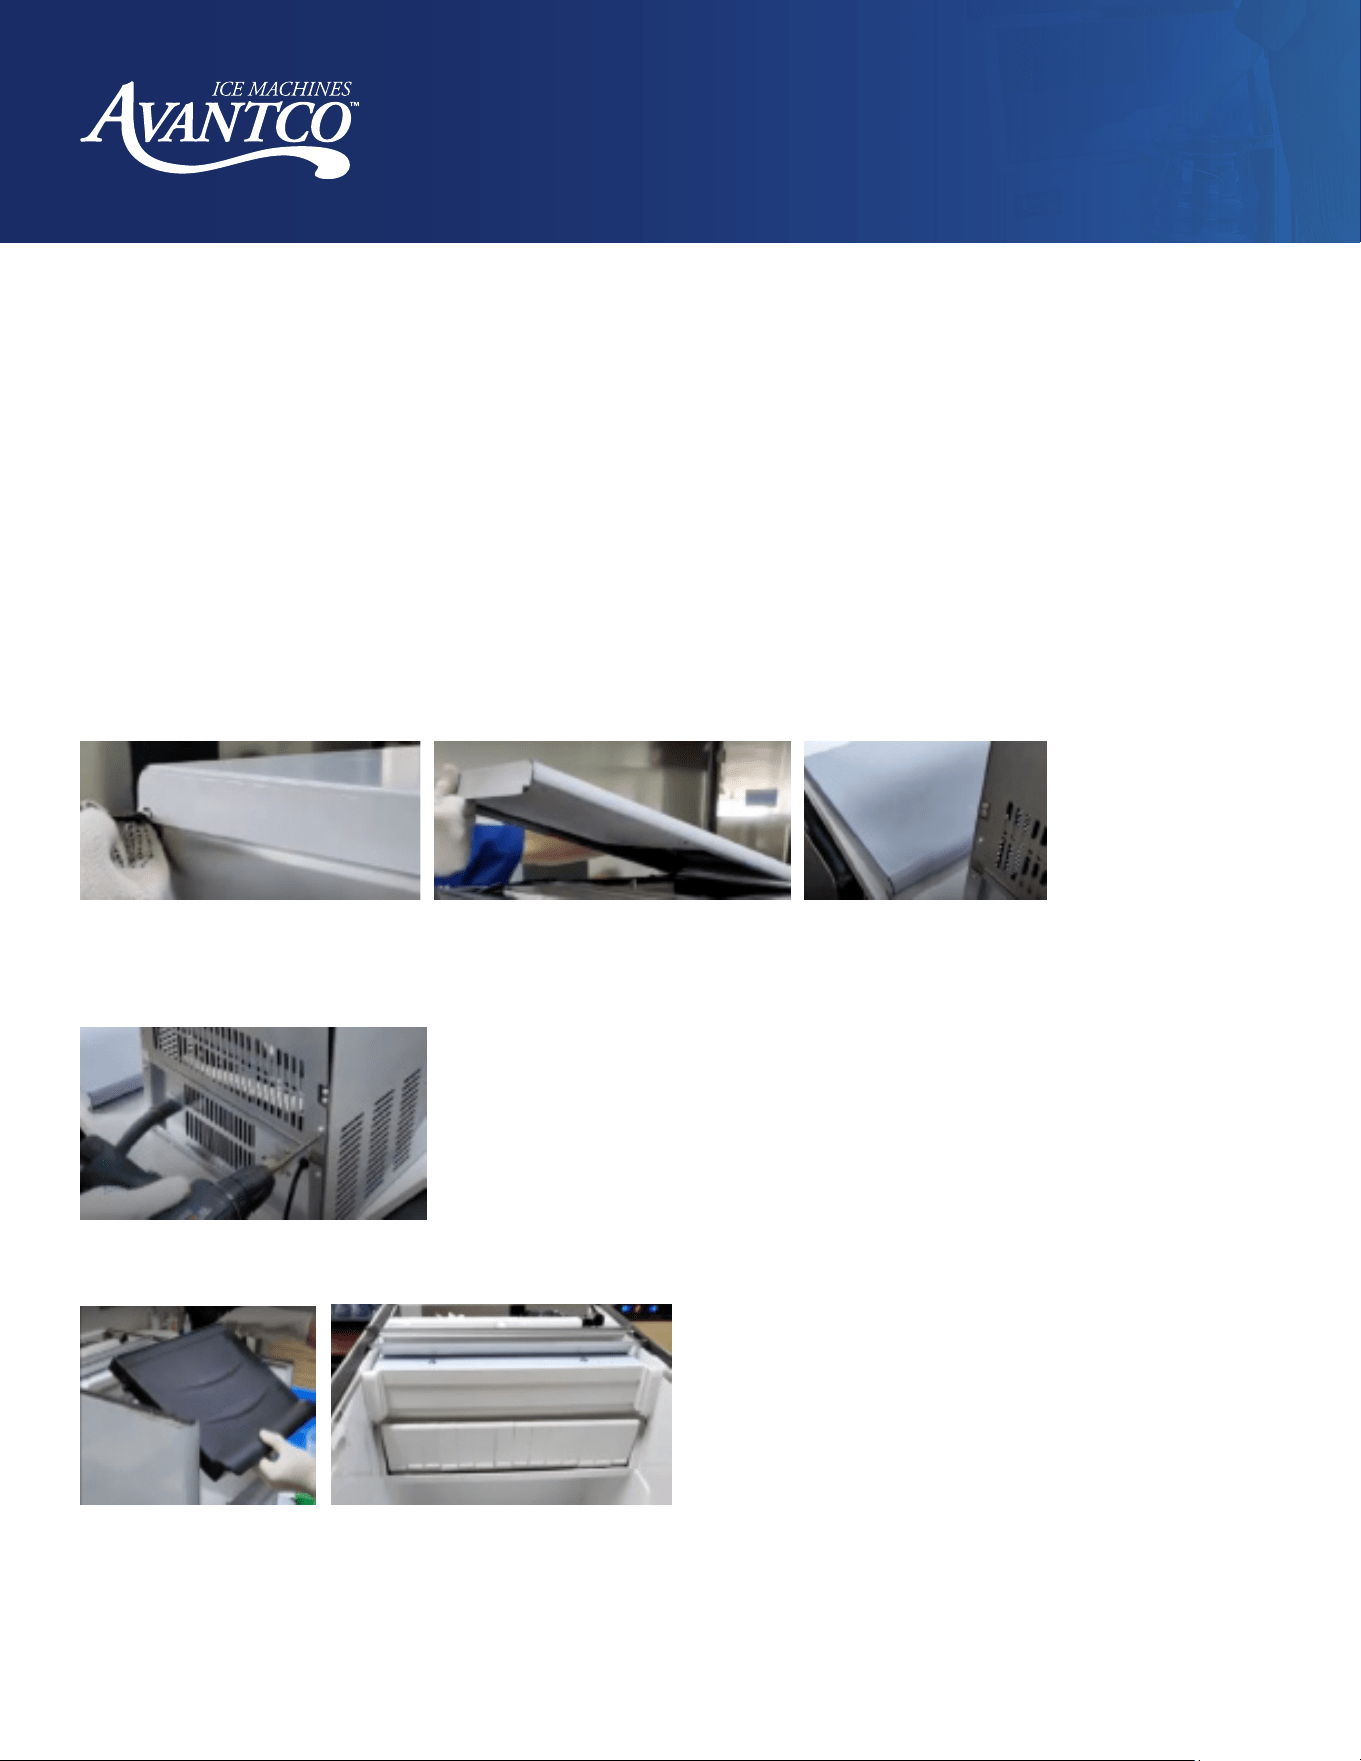
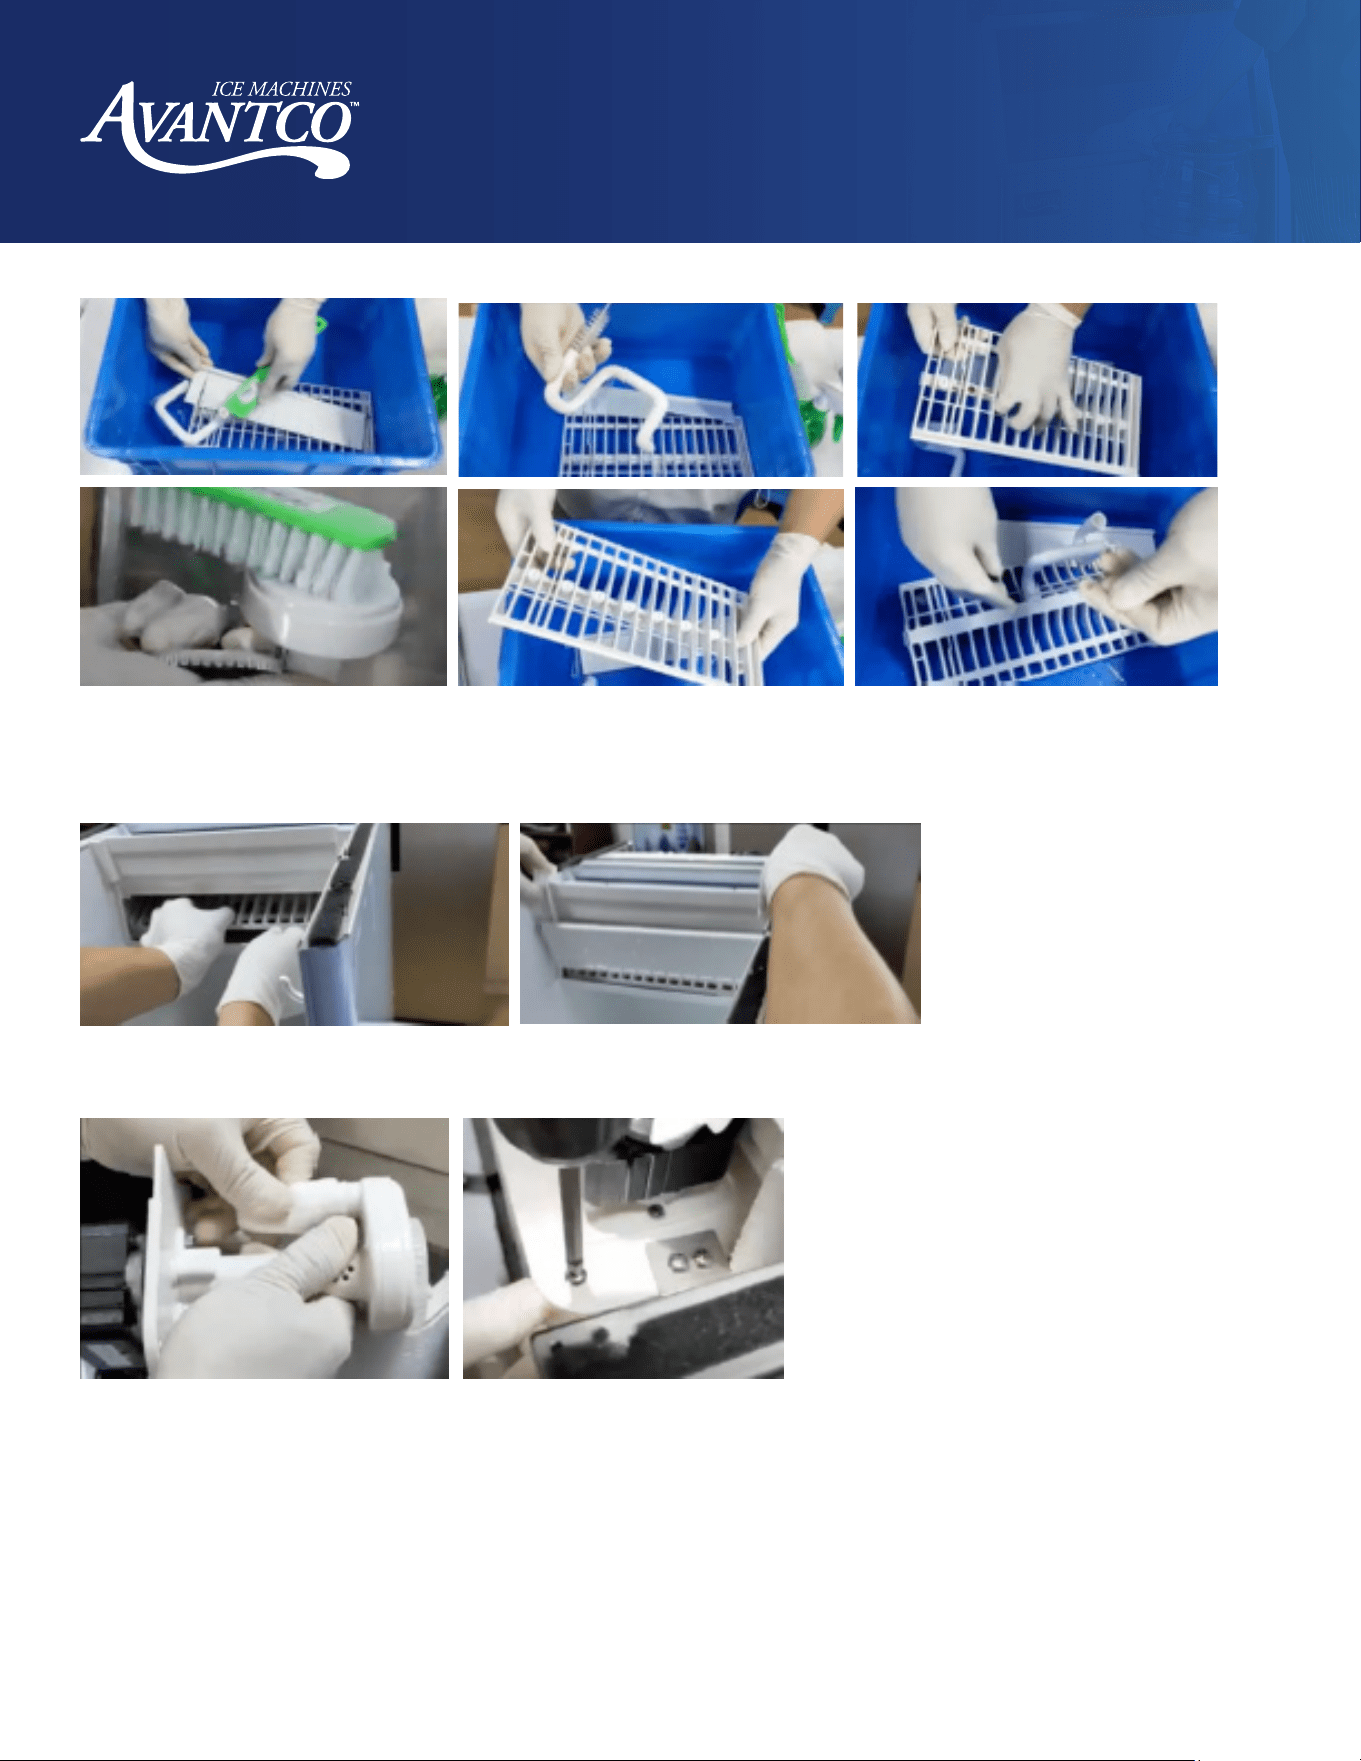
4-6 Month Cleaning Process
Items Needed:
•
Screwdriver or drill
•
Scissors and zip ties
•
Spray bottle
•
Measuring cup
•
Soaking tub
•
Scrubbing brushes
•
Draining pump
2. Remove the screws holding on the roof of the machine in the back and remove to the roof by sliding it
backwards and then up. Set aside.
4. Open the front door to the ice bin. Because the roof is now removed, you will be able to slide the door up
and out of its tracks.
5. Remove the water curtain by lifting on the two plastic hooks holding it in place. Place the water curtain in
the soaking tub.
3. Then, remove the 6 screws holding in the back plate and remove. Set aside.
1. Turn o and unplug the machine from the power source.
15
www.AvantcoIce.com
User Manual
Undercounter Ice Machines
6. Then, reach into the water trough (opening left by the water curtain removal) and pull
the spray rack up and then out. Unlatch the water tube and remove the spray rack.
Place the spray rack in the soaking tub.
7. Remove the 4 screws holding the connecting bar on the back end of the top of the
unit and remove this bar.
8. Then, remove the 5 screws holding the water pump on the back of the machine and remove the water pump.
Unlatch the water tube connected to the water pump and place the tube only in the soaking tub.
9. Mix a solution of cleaner and water according to your ice machine cleaner instructions. Pour this cleaner
solution over the items in the soaking tub until completely submerged.
10. Fill the spray bottle with the cleaning solution and spray the ice machine bin, water trough, and water pump
holder. Wipe down with a clean towel.
16
www.AvantcoIce.com
User Manual
Undercounter Ice Machines
11. Scrub the items in the soaking tub with the cleaning solution using the brush. Disassemble the spray rack and
scrub all compartments and pieces with the cleaning solution. Then, reassemble the spray rack and replace the
included clamp.
12. Reinstall the spray rack into its original position with the water tube facing down. Reattach the water curtain.
13. Reattach the water pump tube and replace the included clamp to secure. Place the water pump into its original
position and replace the 5 screws.

17
www.AvantcoIce.com
User Manual
Undercounter Ice Machines
14. Plug in the machine and turn it on. Hold the Clean button until CLE shows on the screen. Pour your cleaning
solution into the water trough. While CLE is blinking on the display, press the Clean button again to initiate the
cleaning function. When finished, drain the cleaning solution from the water trough.
15. Repeat this process using a solution of sanitizer and water according to your ice machine sanitizer instructions.
Drain the sanitizer solution and then dry o the ice bin.
16. Reinstall the door, back plate, and roof in that order. Turn on the ice machine and throw out the first batch of ice
to prevent residual cleaner or sanitizer.
17. Remove the air filter and clean excess dust and dirt. Reinstall air filter.

18
www.AvantcoIce.com
User Manual
Undercounter Ice Machines
Service Call
If the ice machine works abnormally, please confirm below before making a service call:
1. Check the water supply by ensuring:
• There is water in the water trough.
• The water pressure is 18.75 psi to 80 psi; the water temperature is 40-90°F.
• The water valve is open.
• There is no water leakage.
2. Check the power supply by ensuring:
• The indicator on the display panel is ON.
• The panel display does not display the OFF standby state.
• If the LED on the display panel is not ON, check whether the plug and socket are normal, and whether the
power supply switch is ON.
3. Check nameplate and serial number:
• Check the nameplate located on the side or back of the ice machine and record the model and series
number of the ice machine.
Note: If the machine fails due to the user’s faults, such as failure to use and maintain a water filter, no supply
of water, electricity, or environmental factors, rather than the fault of the ice maker, the door-to-door service
will be charged.
19
www.AvantcoIce.com
User Manual
Undercounter Ice Machines
Troubleshooting
Code
Comments
Machine Action
Indicator is OFF Plug is loose Check plug and socket
Ice defrost abnormal
Ambient temperature too low Normal working temperature range of 40-90°F
Defrost valve does not start normally Check and correct the defrosting valve
Ice thickness too thin or too thick Check and correct ice thickness setting
Poor transparency of ice cubes; ice cubes
too thin or incomplete
Ice thickness is too thin Check and correct ice thickness setting
Water pressure is too low
Check that the water supply pressure is 1.3 bar
to 5.5 bar
Inlet water valve is dirty and blocked Normal working temperature range of 40-90°F
Inlet water filter has not been replaced for
a long time
Check and correct the inlet water valve
Inlet water valve is dirty and blocked Check whether water leaks and correct
Water leaking
Check and correct the inlet water filter and
water connection
Inlet water filter has not been replaced for
a long time
Too slow in ice making
The condenser or air filter is dirty Clean the condenser and filter screen
High ambient temperature Normal working temperature range of 40-90°F
Poor ventilation Check the environment around the ice machine
Water temperature is too high Check the water supply temperature of 40-90°F
Too much noise
The ice machine is not placed on a
leveled foundation or the ice maker is
not leveled
Level the ice machine
Unit cycles in "MAKE" mode for 130
seconds, then Harvest for 200 seconds,
then back to "MAKE" for 120-130 seconds
and continuous repeat
Inlet valve failure or poor water supply
Machine continuously cycles from MAKE to
HARVEST without an error code
Bin overfills
Ice bin sensor fails with an open circuit or
is not contacted by ice
Ice bin can overfill; Clear ice and check ice
bin sensor