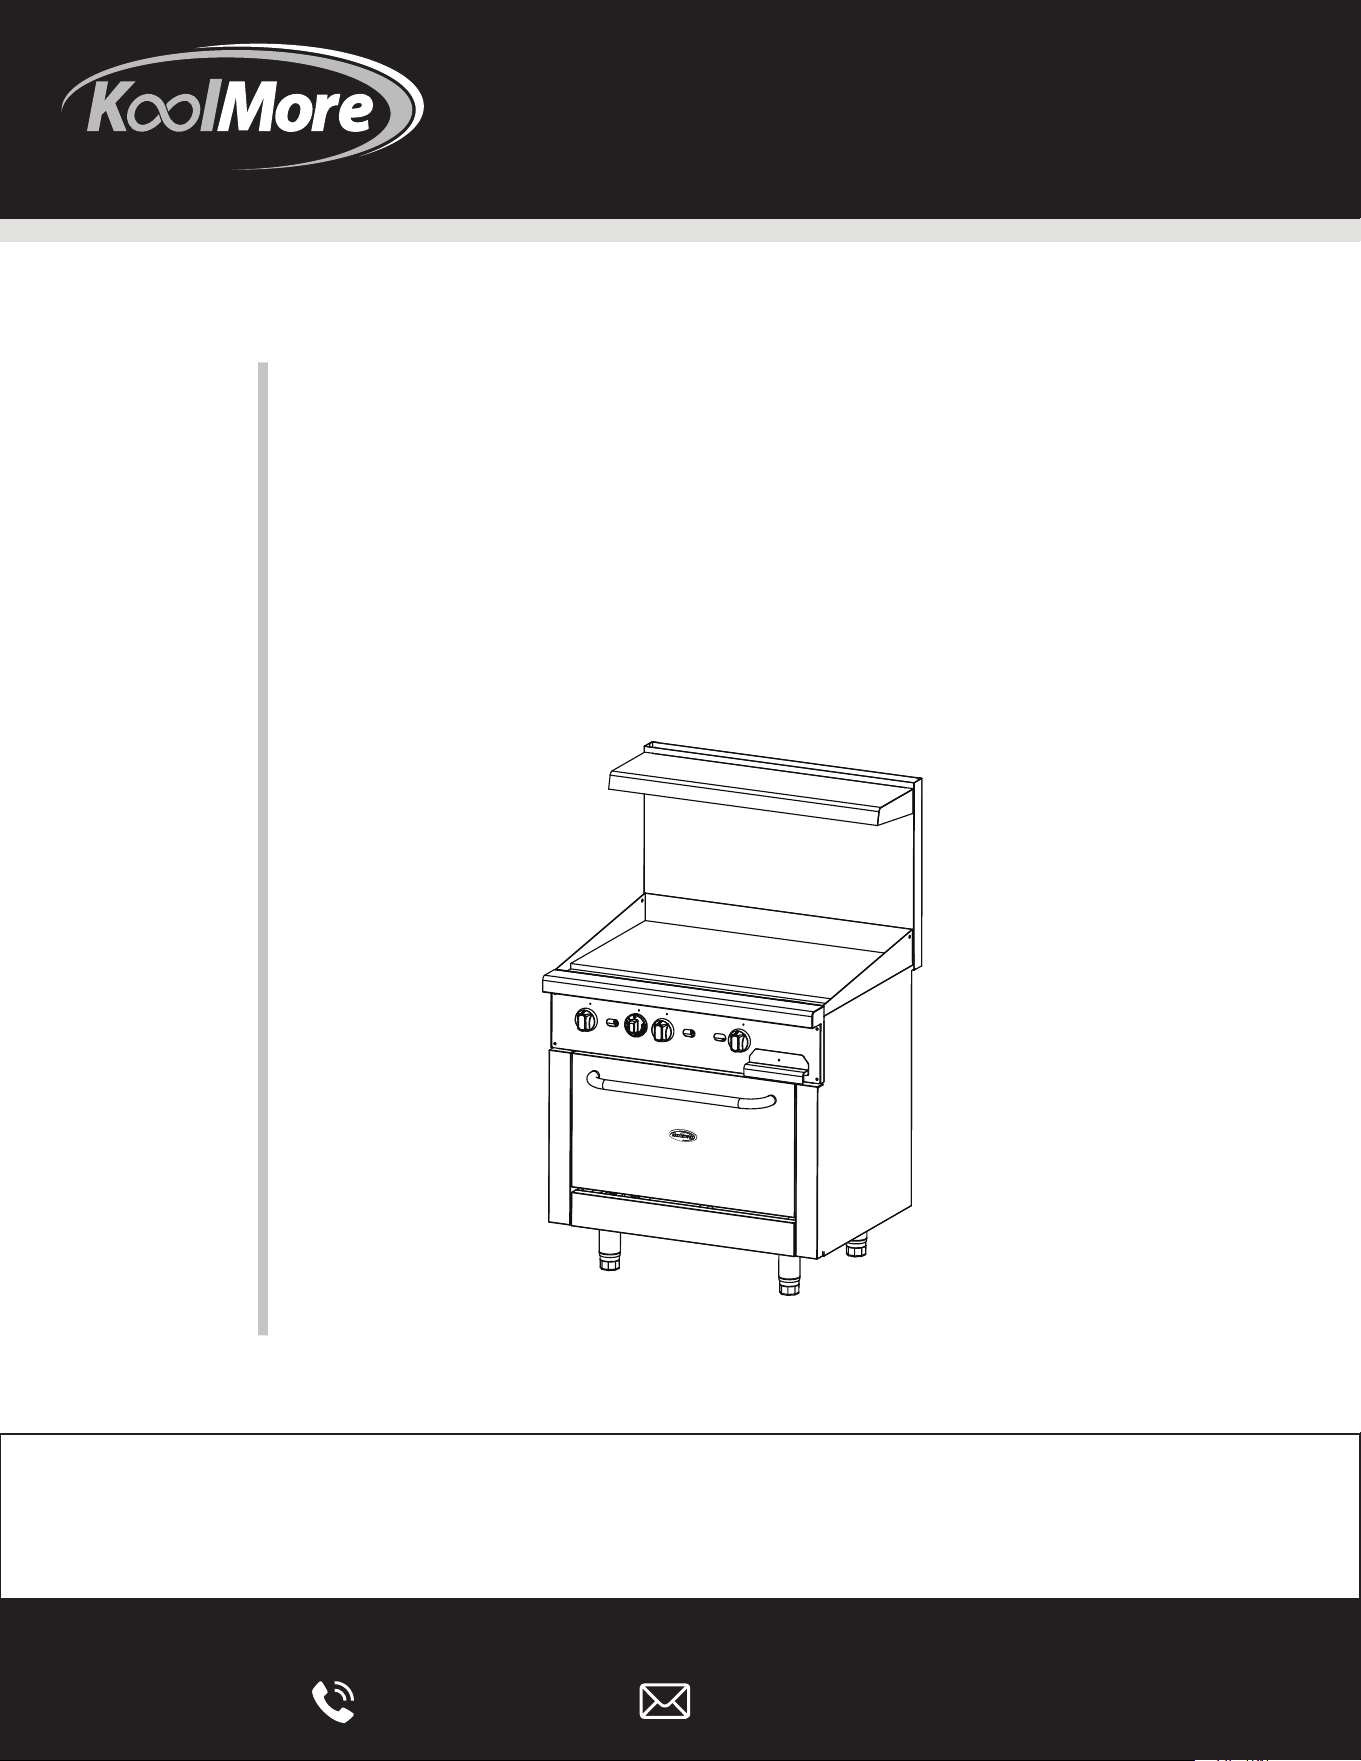
Oven Range
KM-CRG36G-NG

Stay informed with the latest information
for your KoolMore Appliance.
If you need any assistance or have questions, our customer
support team is here to help.

For Your Safety
Do not store or use gasoline or other flammable vapors or liquids near this or any other appliance.
Qualified Personnel Only:
This manual is intended for personnel qualified to install gas equipment. Only trained professionals
should perform the initial start-up and adjustments of the equipment covered by this manual.
Gas Odor Instructions:
Post instructions in a prominent location for what to do if you detect the smell of gas. This informa-
tion can be obtained from your local gas supplier.
IMPORTANT:
In Case of Gas Odor:
1. Shut down the units at the main shutoff valve.
2. Contact your local gas company or gas supplier for service.
SAFETY
Please Keep This Manual for Future Reference
General
Your range is built with quality workmanship and materials. Proper installation, usage, and mainte-
nance will ensure many years of satisfactory performance. We recommend that you thoroughly
read this entire manual and carefully follow all the provided instructions.
Warning
This appliance is equipped for natural gas. For conversion to LP (propane) gas, please refer to the
gas conversion instruction manual attached. Orifices necessary for LP gas conversion are provid-
ed. Please refer to page 3 for the orifice size list when performing a gas conversion.
Installation Codes and Standards
Ranges must be installed in accordance with:
In the United States of America:
State and local codes.
National Fuel Gas Code, ANSI/Z223.1 (latest edition). Copies can be obtained from:
The American Gas Association, Inc.
1515 Wilson Blvd., Arlington, VA 22209
Uncrating
Inspection: Before leaving the factory, this range was thoroughly inspected. The transportation company is responsible for safe delivery.
Inspect the range immediately upon unpacking for any shipping damage. If you find any damage, save the packaging and contact the
carrier within 15 days of delivery.
Uncrating the Range:
1. Carefully uncrate the range.
2. Place it in a work-accessible area as close to its final installed position as possible.
3. Remove all shipping materials and wood blocking.
Pre-Installation Check:
Verify the type of gas supply (natural or propane) and ensure it matches the specifications on the rating plate inside the lower kick panel.
If the supply and equipment requirements do not match, do not proceed with the installation. Contact your dealer or company
immediately.
Ventilation:
• Install the appliance under a ventilation hood.
• Ensure the equipment area is free from combustible and flammable substances.
Clearance Requirements:
Combustible Construction: When installed, maintain a minimum clearance of 12" on the sides and 10" at the rear.
Non-Combustible Construction: Clearance can be 0" on the sides and 6" at the rear.
Servicing and Operation:
Allow adequate clearances for servicing and proper operation.
A minimum clearance of 40" is required.
Airflow:
• Ensure the range is installed to allow proper airflow for combustion and ventilation.
• Do not obstruct the air openings in the combustion chamber.
• Ensure there is enough air in the room to allow gas combustion at the burners.
INSTALLATION
Description Pressure BTU per burner Orifice Size
Top Burner
5"(NAT)-24”36” / 6"(NAT)-60”
30,000 #41
10"(LP) 27,000 #53
Oven
5"(NAT)-24”36” / 6"(NAT)-60”
33,000 #38
10"(LP) 28,000 #53
Top Griddle
5"(NAT)-24”36” / 6"(NAT)-60”
30,000 #39
10"(LP) 27,000 #50
Top Thermostat
Griddle
5"(NAT)-24”36” / 6"(NAT)-60”
30,000 #34
10"(LP) 27,000 #52
Top Char Broiler
5"(NAT)-24”36” / 6"(NAT)-60”
35,000 #36
10"(LP) 35,000 #49
ORIFICE SIZE & BTU
RESTRAINT
If you need to disconnect the restraint, turn off the gas supply before
doing so. Reconnect the restraint before turning the gas supply back on
and returning the range to its installation position.
Separate instructions for installing casters on the range are included
with the casters.
Note: If the range is installed on casters and is moved for any reason,
make sure to level the range from front to back and side to side.
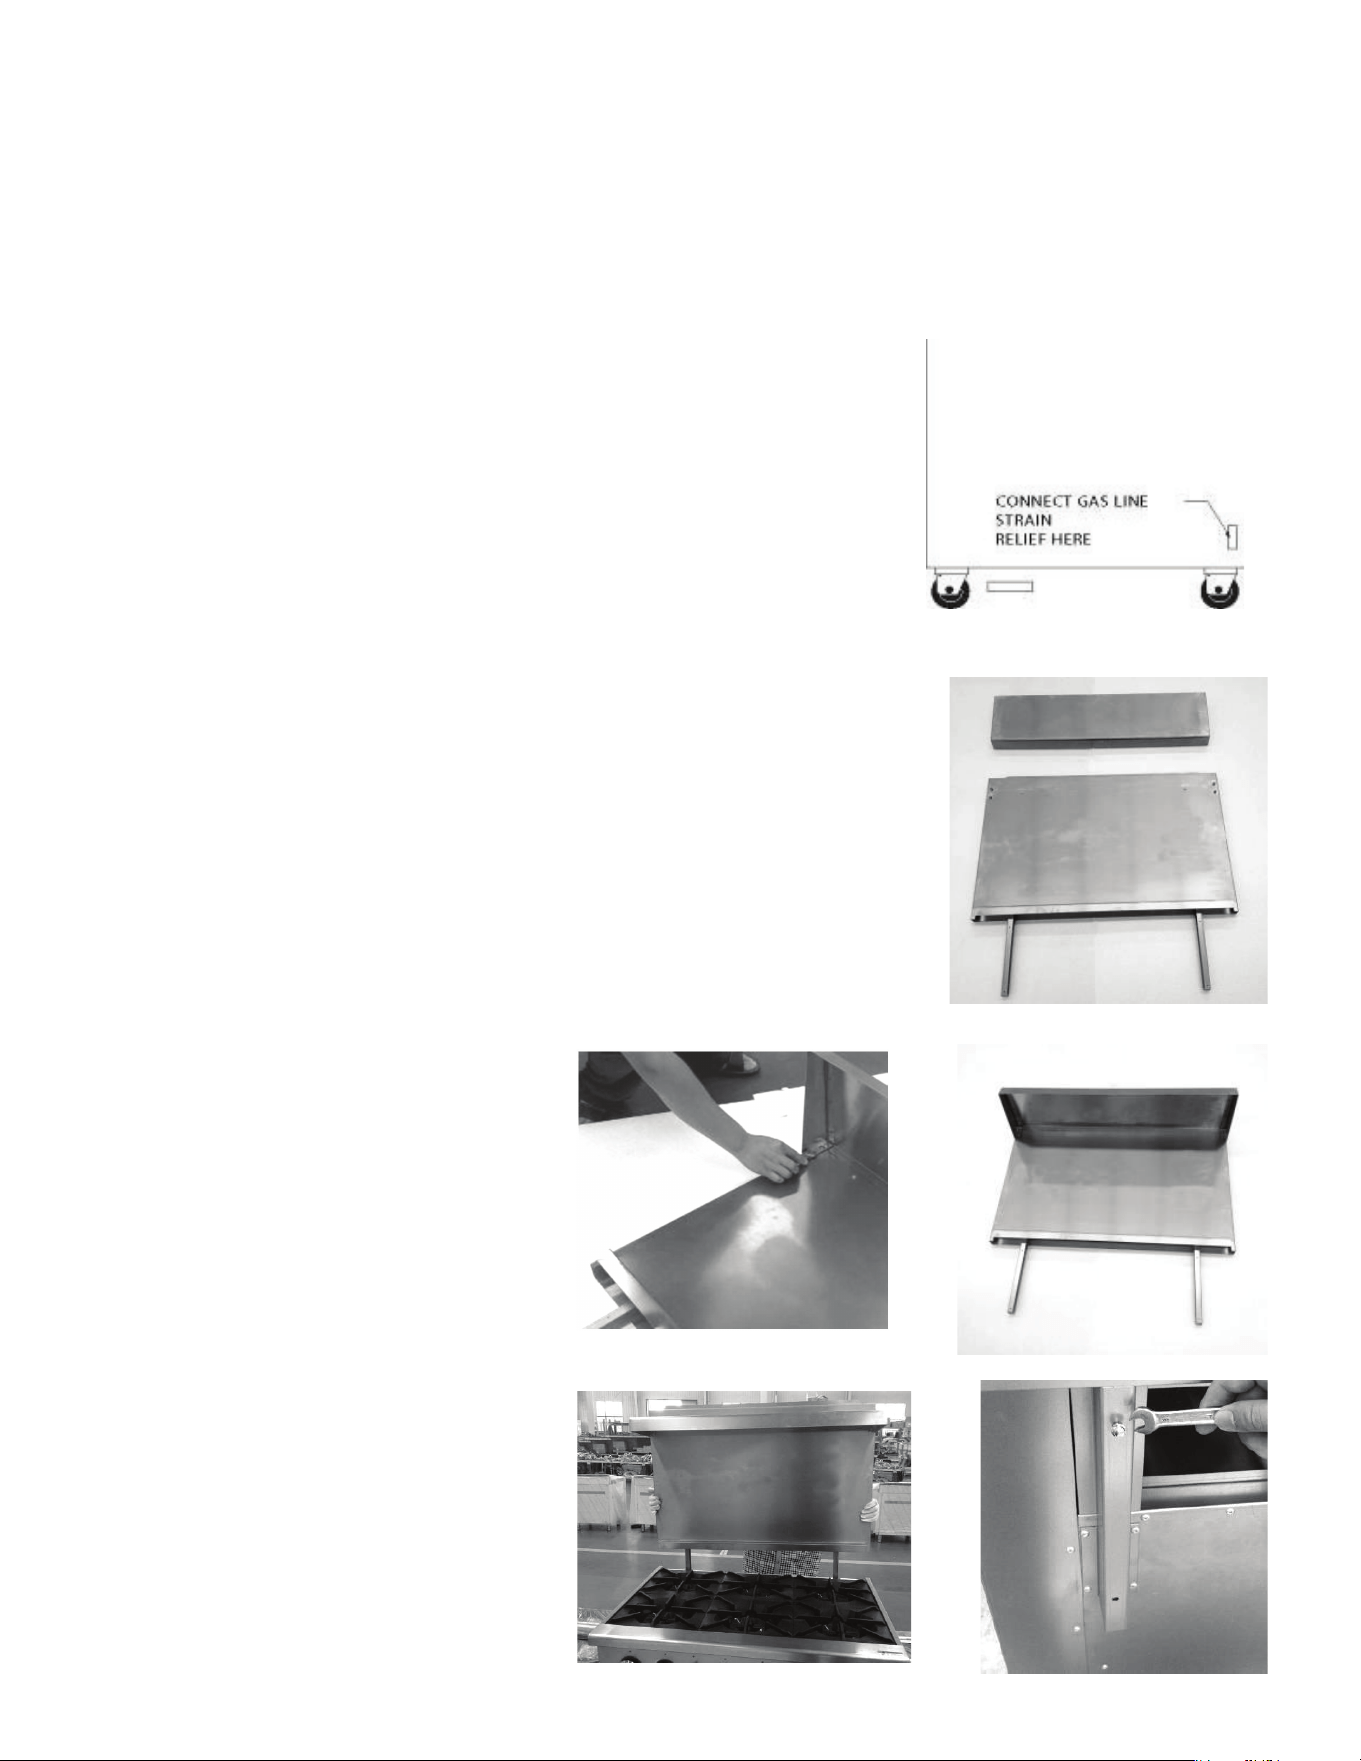
Backsplash
The standard Restaurant Range is equipped with a 23" high backsplash
and shelf.
1. Remove the backsplash components from the crating materials.
2. Assemble the required components as shown in Fig’s. 2 and 3 and 4.
3. Tighten the four screws to secure the shelf.
4. Lift the assembly up, sliding the channels into the space provided at
the rear of the range.(Fig’s. 5).
5. Install four #10 sheet metal screws (2 to each channel leg) (Fig. 6).
2
3
4
5
6
Warning
The range and its parts are hot. Be very careful when operating, cleaning, or servicing the range.
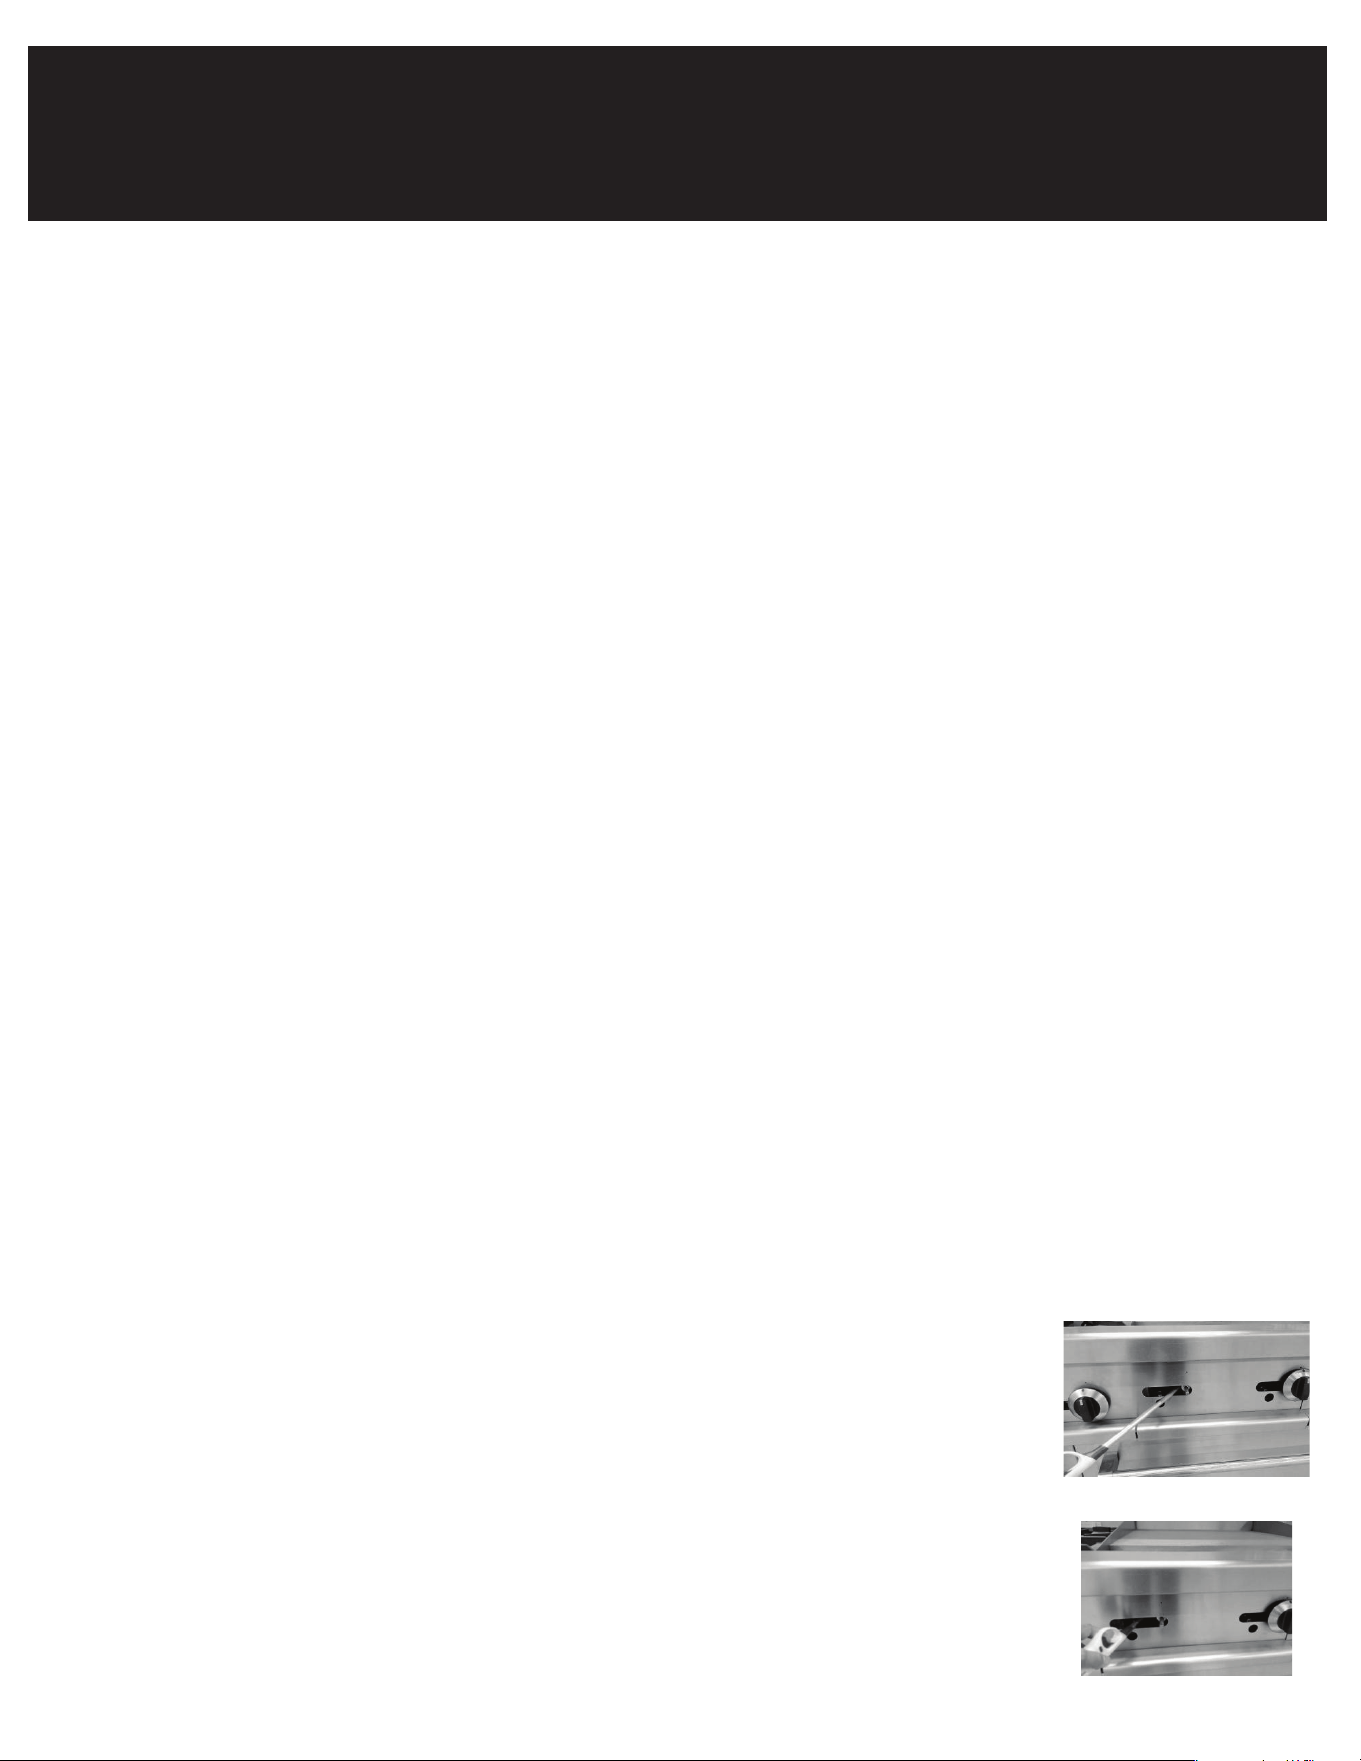
Controls
• Thermostat Dial: Allows you to regulate oven temperature from low to 500°F (260°C).
• (Optional) Griddle Burner Knob: Regulates gas flow to the griddle. To increase heat, turn the knob
counterclockwise; to decrease heat, turn the knob clockwise.
Before First Use
Griddle Seasoning (optional models)
Caution:
• The griddle plate is steel but relatively soft and can be easily dented or scratched by careless use of
spatulas or scrapers.
• Avoid denting, scratching, or gouging the plate surface.
• Do not try to knock off loose food by tapping the spatula on the griddle surface.
A new griddle must be seasoned for optimal cooking performance. The metal surface is porous, and
food can get trapped in these pores and stick. Seasoning the griddle with cooking oil fills these pores
and creates a smooth, non-stick surface.
1. Heat Griddle: Heat the top section of the griddle at a low burner setting.
2. Apply Oil: Pour one ounce of cooking oil per square foot of surface over the top section.
3. Spread Oil: Using an insulated cloth, spread the oil over the entire griddle surface to create a thin film.
4. Wipe Excess: Wipe off any excess oil with an insulated cloth.
Repeat this procedure 2 to 3 times until the griddle has a slick surface.
Lighting and Shutting Down Pilots
All adjustment procedures associated with pilot lighting must be performed by an authorized vendor,
installer, or service person.
Manual Griddle
Lighting the Pilot:
Turn the main gas supply ON.
Wait 30 seconds, then use a long lighter to light the hot top or griddle top pilot.
If Pilot Fails to Light:
Turn the main gas supply OFF.
Wait 5 minutes and repeat the above procedures.
Removing Air from Gas Line:
Turn the hot top or griddle top burner valve ON to remove air from the gas line.
Turn the burner valve OFF when gas begins to flow.
Nightly Shutdown:
Turn the burner valve OFF; the pilot will remain lit.
Complete Shutdown:
1. Turn the burner valve OFF; the pilot will remain lit.
2. Turn the main gas supply OFF.
Thermostat Griddle
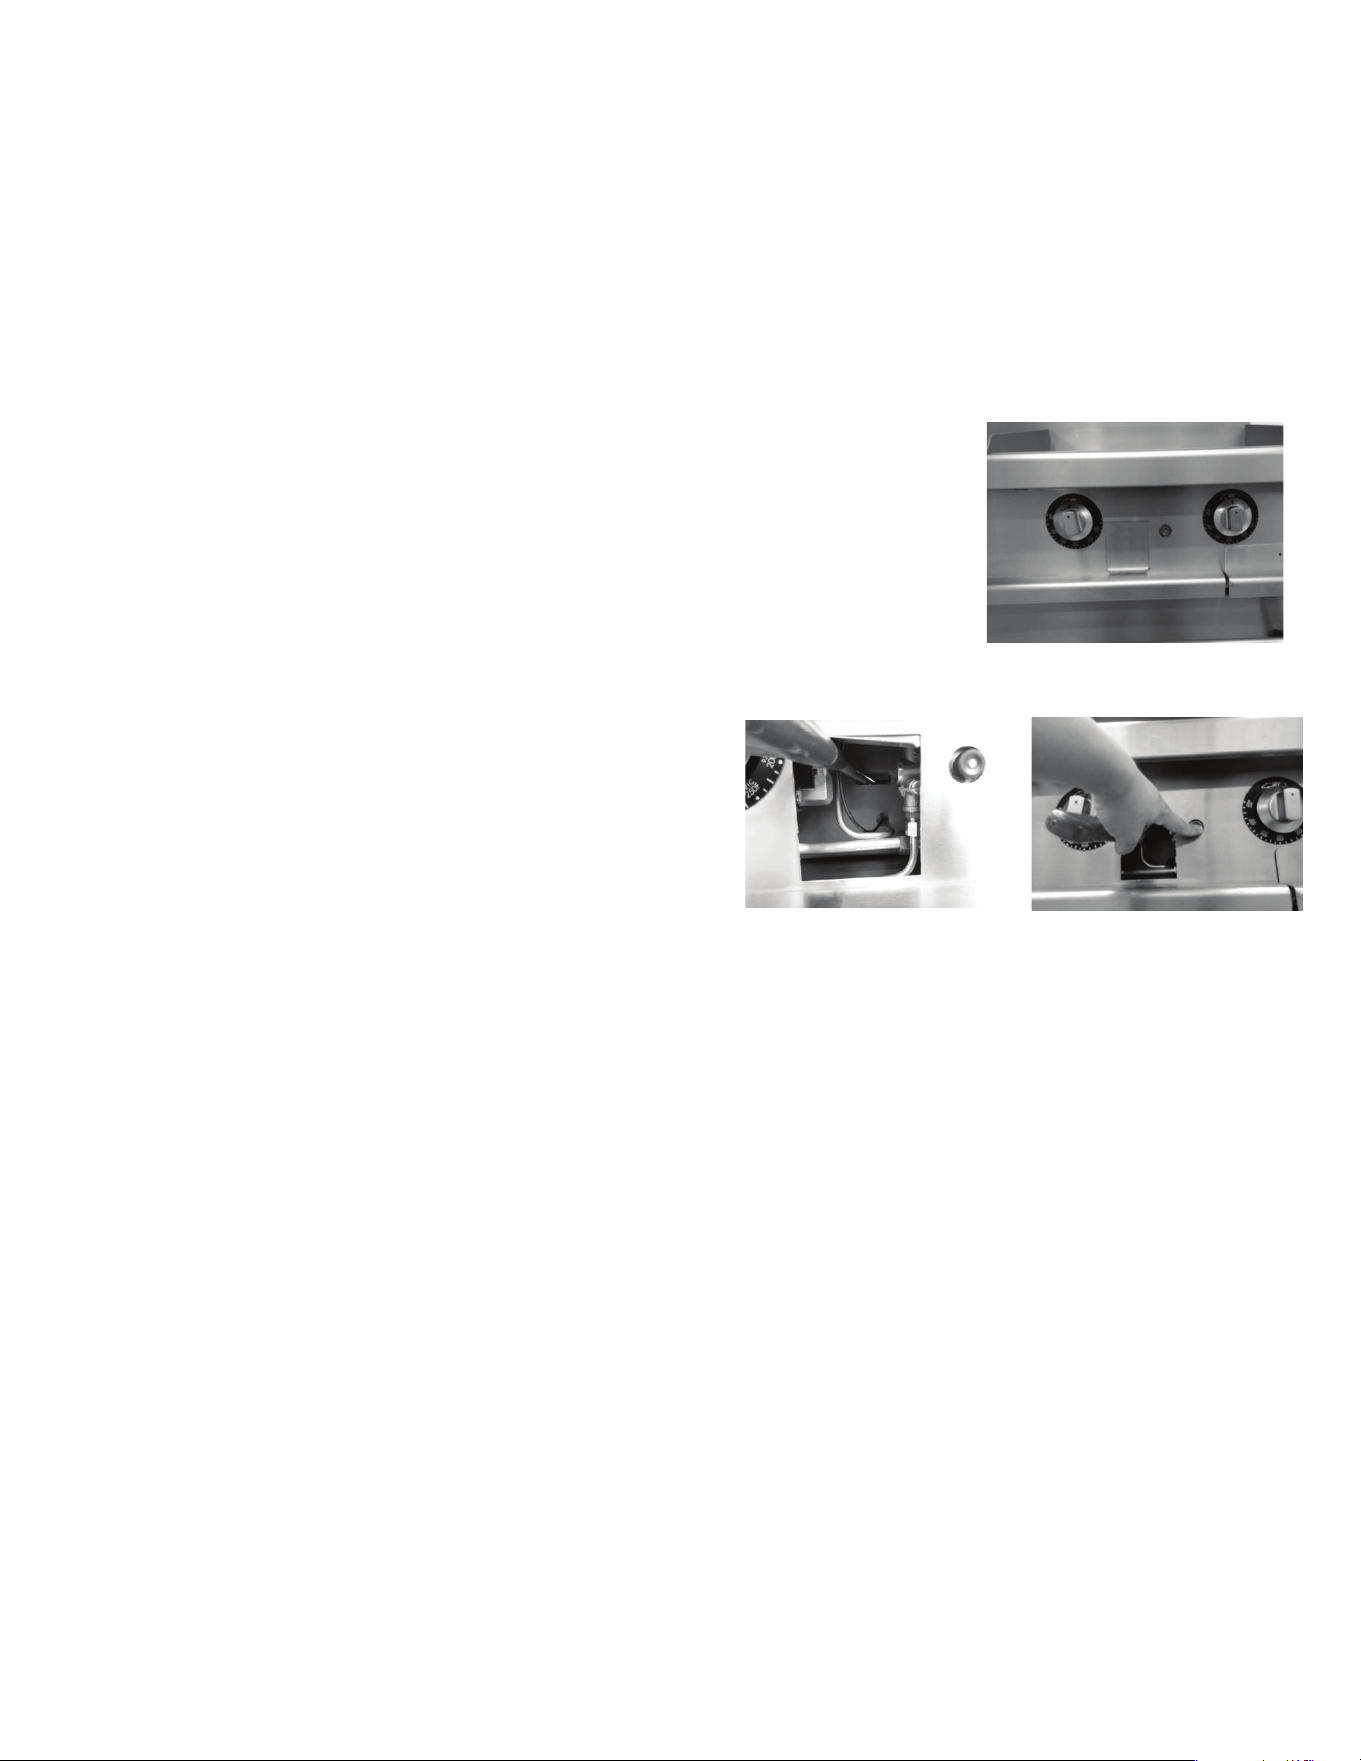
1. Turn the main gas supply ON.
2. Locate the pilot lighting door on the front of the unit to the left of the red pilot lighting button.
3. Open door and insert long lighter.
4. Press and hold red pilot button while lighting pilot. Once pilot is lit hold button for 30 seconds.
5. Release button. Pilot should remain on.
6. Close door.
7. If pilot fails to light, turn main gas supply OFF. Wait 5 minutes and repeat the above procedures.
8. Turn one hot top or griddle top burner valve ON to remove air from the gas line. Turn burner valve OFF
when gas begins to flow.
9. Nightly Shutdown:
10.Turn burner valve OFF; pilot will remain lit.
Complete Shutdown:
1. Turn burner valve OFF; pilot will remain lit.
2. Turn main gas supply OFF.
OPEN TOP BURNERS
1. Turn main gas supply ON.
2. Wait 30 seconds and, using a taper, light the open top pilot
3. If pilot fails to light, turn main gas supply OFF. Wait 5 minutes and repeat the
above procedures.
4. Turn one open top burner valve ON to remove air from the gas line. Turn burner
OFF when gas begins to flow.
Nightly Shutdown
1. Turn burner valve OFF; pilot will remain lit.
Complete Shutdown
1. Turn burner valve OFF; pilot will remain lit.
2. Turn main gas supply OFF.
GRIDDLE (optional models)
1. Turn main gas supply ON. Wait 30 seconds and, using a taper, light broiler/griddle
pilot.
2. If pilot fails to light, turn main gas supply OFF. Wait 5 minutes and repeat Steps 1
and 2.
3. Turn burner valve ON to purge air from the lines. Turn burner valve OFF when
gas begins to flow.
Nightly Shutdown
1. Turn burner valve OFF; pilot will remain lit.
Complete Shutdown
1. Turn burner valve OFF; pilot will remain lit.
2. Turn main gas supply OFF.
STANDARD OVEN LIGHTING AND SHUTDOWN INSTRUCTIONS NOTE:
Light open top/griddle pilots before lighting oven pilot.
1. Turn thermostat to the “OFF” POSITION.
2. Remove the lower panel.
3. Depress the red button on the safety valve and light the pilot through the observation
area.
4. Hold down the red button for at least 30 seconds.
5. When button is released, pilot should remain lit.
6. Replace lower panel.
7. Turn thermostat to desired temperature.
8. If the pilot becomes extinguished, Wait 5 Minutes, then repeat the above procedure.
Nightly Shutdown
1. Turn oven thermostat OFF.
Complete Shutdown
1. Turn oven thermostat OFF.
2. Turn main gas supply OFF.
RACK ARRANGEMENT -STANDARD OVEN
The standard oven has three rack positions and is supplied with one two oven racks.
Additional racks may be obtained through a vender parts depot.
INSERTING AND REMOVING RACK
The oven rack has a stop to keep the rack from being pulled all the way out when
unloading product. To install rack, place rack alongside of top of side liner runners and
slide rack completely to the rear of the oven compartment until rack drops
into place
To remove rack, reverse the procedure above by raising rear of oven rack stop above
runner and pulling rack forward.
PREHEATING
Standard Oven Turn thermostat control to the desired cooking temperature and preheat
oven for 25 minutes. To save on gas consumption, do not operate oven at maximum heat
when it is not necessary. Turn thermostat down to 250°F (121°C) or OFF when oven is
not in use or during idle cooking periods.
Griddle (optional models)
Turn the three manual gas valve knobs to full ON. After preheating for 5 minutes, turn
valves down until desired flame or heating level is achieved. Position the removable
broiler grid into one of the two slide positions, depending on which will achieve the proper
product results.
CLEANING
Do not use scouring powder or abrasives anywhere on this range
Clean only using a soft cloth and mild detergent solution.
Maintenance
Warning: The range and its parts are hot. Be very careful when operating, cleaning, or servicing the range.
Vent
When cool, the vent should be checked every six months for obstructions.
Service and Parts Information
To obtain repairs, service, and parts information concerning this model, contact our customer service
team info on the cover. When calling for service, the following information must be available: model
number, serial number, manufacture date (MD), and voltage (optional models).

7
Leveling
Check the Level:
• Place a level inside the oven cavity across the oven rack(s).
• Level the range front-to-back and side-to-side.
Adjusting the Level:
Tilt the range to one side.
Using channel locks, unscrew the adjustable leg insert as needed.
Repeat this process for each leg until the range is level.
Non-Adjustable Casters:
If your range has optional non-adjustable casters, ensure the floor is level.
An unlevel floor can cause cooking issues.
Gas Connections
Caution
All gas supply connections and any pipe joint compound used must be resistant to propane gas.
Factory-Equipped Gas:
Each range is equipped for the type of gas specified on the rating plate.
The installation gas connection is a ¾" (19 mm) 14 FPT ANSI schedule #40 standard pipe.
Connecting the Gas Supply:
Ensure the pipes are clean and free of obstructions.
Install a gas shutoff valve in the gas line ahead of the range.
Gas Pressure Regulator:
Install the gas pressure regulator provided.
Ensure the regulator matches the rating plate gas supply.
The regulator is preset for natural gas (5" W.C. or 0.99 kPa) and for propane gas (10" W.C. or 2.5 kPa).
Installation Steps
Locate Connection:
Locate the ¼" gas connection pipe extending from the rear of the range.
Seal Threads:
Cover the pipe threads with leak sealant.
Attach Regulator:
Screw the regulator hand-tight onto the pipe with the arrow pointing towards the range body.
Tighten Regulator:
Using a pipe wrench, tighten the regulator securely in an upright position (see Fig. 7).
The arrow on the regulator indicates the direction of gas flow. Ensure the pressure regulator is mounted horizontally for
Warning
The range and its parts are hot. Be very careful when operating, cleaning, or servicing the range.
Controls
• Thermostat Dial: Allows you to regulate oven temperature from low to 500°F (260°C).
• (Optional) Griddle Burner Knob: Regulates gas flow to the griddle. To increase heat, turn the knob
counterclockwise; to decrease heat, turn the knob clockwise.
Before First Use
Griddle Seasoning (optional models)
Caution:
• The griddle plate is steel but relatively soft and can be easily dented or scratched by careless use of
spatulas or scrapers.
• Avoid denting, scratching, or gouging the plate surface.
• Do not try to knock off loose food by tapping the spatula on the griddle surface.
A new griddle must be seasoned for optimal cooking performance. The metal surface is porous, and
food can get trapped in these pores and stick. Seasoning the griddle with cooking oil fills these pores
and creates a smooth, non-stick surface.
1. Heat Griddle: Heat the top section of the griddle at a low burner setting.
2. Apply Oil: Pour one ounce of cooking oil per square foot of surface over the top section.
3. Spread Oil: Using an insulated cloth, spread the oil over the entire griddle surface to create a thin film.
4. Wipe Excess: Wipe off any excess oil with an insulated cloth.
Repeat this procedure 2 to 3 times until the griddle has a slick surface.
Lighting and Shutting Down Pilots
All adjustment procedures associated with pilot lighting must be performed by an authorized vendor,
installer, or service person.
Manual Griddle
Lighting the Pilot:
Turn the main gas supply ON.
Wait 30 seconds, then use a long lighter to light the hot top or griddle top pilot.
If Pilot Fails to Light:
Turn the main gas supply OFF.
Wait 5 minutes and repeat the above procedures.
Removing Air from Gas Line:
Turn the hot top or griddle top burner valve ON to remove air from the gas line.
Turn the burner valve OFF when gas begins to flow.
Nightly Shutdown:
Turn the burner valve OFF; the pilot will remain lit.
Complete Shutdown:
1. Turn the burner valve OFF; the pilot will remain lit.
2. Turn the main gas supply OFF.
Thermostat Griddle
1. Turn the main gas supply ON.
2. Locate the pilot lighting door on the front of the unit to the left of the red pilot lighting button.
3. Open door and insert long lighter.
4. Press and hold red pilot button while lighting pilot. Once pilot is lit hold button for 30 seconds.
5. Release button. Pilot should remain on.
6. Close door.
7. If pilot fails to light, turn main gas supply OFF. Wait 5 minutes and repeat the above procedures.
8. Turn one hot top or griddle top burner valve ON to remove air from the gas line. Turn burner valve OFF
when gas begins to flow.
9. Nightly Shutdown:
10.Turn burner valve OFF; pilot will remain lit.
Complete Shutdown:
1. Turn burner valve OFF; pilot will remain lit.
2. Turn main gas supply OFF.
OPEN TOP BURNERS
1. Turn main gas supply ON.
2. Wait 30 seconds and, using a taper, light the open top pilot
3. If pilot fails to light, turn main gas supply OFF. Wait 5 minutes and repeat the
above procedures.
4. Turn one open top burner valve ON to remove air from the gas line. Turn burner
OFF when gas begins to flow.
Nightly Shutdown
1. Turn burner valve OFF; pilot will remain lit.
Complete Shutdown
1. Turn burner valve OFF; pilot will remain lit.
2. Turn main gas supply OFF.
GRIDDLE (optional models)
1. Turn main gas supply ON. Wait 30 seconds and, using a taper, light broiler/griddle
pilot.
2. If pilot fails to light, turn main gas supply OFF. Wait 5 minutes and repeat Steps 1
and 2.
3. Turn burner valve ON to purge air from the lines. Turn burner valve OFF when
gas begins to flow.
Nightly Shutdown
1. Turn burner valve OFF; pilot will remain lit.
Complete Shutdown
1. Turn burner valve OFF; pilot will remain lit.
2. Turn main gas supply OFF.
STANDARD OVEN LIGHTING AND SHUTDOWN INSTRUCTIONS NOTE:
Light open top/griddle pilots before lighting oven pilot.
1. Turn thermostat to the “OFF” POSITION.
2. Remove the lower panel.
3. Depress the red button on the safety valve and light the pilot through the observation
area.
4. Hold down the red button for at least 30 seconds.
5. When button is released, pilot should remain lit.
6. Replace lower panel.
7. Turn thermostat to desired temperature.
8. If the pilot becomes extinguished, Wait 5 Minutes, then repeat the above procedure.
Nightly Shutdown
1. Turn oven thermostat OFF.
Complete Shutdown
1. Turn oven thermostat OFF.
2. Turn main gas supply OFF.
RACK ARRANGEMENT -STANDARD OVEN
The standard oven has three rack positions and is supplied with one two oven racks.
Additional racks may be obtained through a vender parts depot.
INSERTING AND REMOVING RACK
The oven rack has a stop to keep the rack from being pulled all the way out when
unloading product. To install rack, place rack alongside of top of side liner runners and
slide rack completely to the rear of the oven compartment until rack drops
into place
To remove rack, reverse the procedure above by raising rear of oven rack stop above
runner and pulling rack forward.
PREHEATING
Standard Oven Turn thermostat control to the desired cooking temperature and preheat
oven for 25 minutes. To save on gas consumption, do not operate oven at maximum heat
when it is not necessary. Turn thermostat down to 250°F (121°C) or OFF when oven is
not in use or during idle cooking periods.
Griddle (optional models)
Turn the three manual gas valve knobs to full ON. After preheating for 5 minutes, turn
valves down until desired flame or heating level is achieved. Position the removable
broiler grid into one of the two slide positions, depending on which will achieve the proper
product results.
CLEANING
Do not use scouring powder or abrasives anywhere on this range
Clean only using a soft cloth and mild detergent solution.
Maintenance
Warning: The range and its parts are hot. Be very careful when operating, cleaning, or servicing the range.
Vent
When cool, the vent should be checked every six months for obstructions.
Service and Parts Information
To obtain repairs, service, and parts information concerning this model, contact our customer service
team info on the cover. When calling for service, the following information must be available: model
number, serial number, manufacture date (MD), and voltage (optional models).

proper preset outlet pressure. If the regulator is installed in any other position, the outlet pressure must be reset for
proper operation.
A leak limiter is supplied with every regulator to allow excess gas pressure to escape. Do not obstruct the leak limiter,
as this can cause the regulator to malfunction.
Warning
Before lighting check for leaks:
Inspect all joints in the gas supply line for leaks using a soap and water solution. Do not use an open flame.
Purge Air:
After checking for leaks, fully purge all piping receiving gas to remove air.
Verify Thermocouple:
Ensure the thermocouple is securely seated in the safety valve.
Tighten the thermocouple a ¼ turn past finger tight. Do not overtighten, as this may damage the thermocouple or safety
magnet.
Testing the Gas Supply System
High Pressure: When gas supply pressure exceeds ½ psig (3.45 kPa), disconnect the range and its individual shutoff
valve from the gas supply piping system.
Low Pressure: When gas supply pressure is ½ psig (3.45 kPa) or less, isolate the range from the gas supply system by
closing its individual manual shutoff valve until the range is ready for start-up.
Flue Connections
Do Not Obstruct: Ensure the flow of flue gases from the flue located on the rear of the range is unobstructed.
Ventilation: Flue gases should be vented to the outside of the building through a ventilation system installed by quali-
fied personnel.
Clearance: Maintain a minimum clearance of 18" (457 mm) from the termination of the flue to the filters of the hood
venting system.
Standards: For detailed information on the construction and installation of ventilating hoods, refer to the standard for
the "Removal of Vapors from Commercial Cooking Equipment," NFPA No. 96 (latest edition). This is available from:
The National Fire Protection Association Batterymarch Park, Quincy, MA 02269
Warning
The range and its parts are hot. Be very careful when operating, cleaning, or servicing the range.
Controls
• Thermostat Dial: Allows you to regulate oven temperature from low to 500°F (260°C).
• (Optional) Griddle Burner Knob: Regulates gas flow to the griddle. To increase heat, turn the knob
counterclockwise; to decrease heat, turn the knob clockwise.
Before First Use
Griddle Seasoning (optional models)
Caution:
• The griddle plate is steel but relatively soft and can be easily dented or scratched by careless use of
spatulas or scrapers.
• Avoid denting, scratching, or gouging the plate surface.
• Do not try to knock off loose food by tapping the spatula on the griddle surface.
A new griddle must be seasoned for optimal cooking performance. The metal surface is porous, and
food can get trapped in these pores and stick. Seasoning the griddle with cooking oil fills these pores
and creates a smooth, non-stick surface.
1. Heat Griddle: Heat the top section of the griddle at a low burner setting.
2. Apply Oil: Pour one ounce of cooking oil per square foot of surface over the top section.
3. Spread Oil: Using an insulated cloth, spread the oil over the entire griddle surface to create a thin film.
4. Wipe Excess: Wipe off any excess oil with an insulated cloth.
Repeat this procedure 2 to 3 times until the griddle has a slick surface.
Lighting and Shutting Down Pilots
All adjustment procedures associated with pilot lighting must be performed by an authorized vendor,
installer, or service person.
Manual Griddle
Lighting the Pilot:
Turn the main gas supply ON.
Wait 30 seconds, then use a long lighter to light the hot top or griddle top pilot.
If Pilot Fails to Light:
Turn the main gas supply OFF.
Wait 5 minutes and repeat the above procedures.
Removing Air from Gas Line:
Turn the hot top or griddle top burner valve ON to remove air from the gas line.
Turn the burner valve OFF when gas begins to flow.
Nightly Shutdown:
Turn the burner valve OFF; the pilot will remain lit.
Complete Shutdown:
1. Turn the burner valve OFF; the pilot will remain lit.
2. Turn the main gas supply OFF.
Thermostat Griddle
1. Turn the main gas supply ON.
2. Locate the pilot lighting door on the front of the unit to the left of the red pilot lighting button.
3. Open door and insert long lighter.
4. Press and hold red pilot button while lighting pilot. Once pilot is lit hold button for 30 seconds.
5. Release button. Pilot should remain on.
6. Close door.
7. If pilot fails to light, turn main gas supply OFF. Wait 5 minutes and repeat the above procedures.
8. Turn one hot top or griddle top burner valve ON to remove air from the gas line. Turn burner valve OFF
when gas begins to flow.
9. Nightly Shutdown:
10.Turn burner valve OFF; pilot will remain lit.
Complete Shutdown:
1. Turn burner valve OFF; pilot will remain lit.
2. Turn main gas supply OFF.
OPEN TOP BURNERS
1. Turn main gas supply ON.
2. Wait 30 seconds and, using a taper, light the open top pilot
3. If pilot fails to light, turn main gas supply OFF. Wait 5 minutes and repeat the
above procedures.
4. Turn one open top burner valve ON to remove air from the gas line. Turn burner
OFF when gas begins to flow.
Nightly Shutdown
1. Turn burner valve OFF; pilot will remain lit.
Complete Shutdown
1. Turn burner valve OFF; pilot will remain lit.
2. Turn main gas supply OFF.
GRIDDLE (optional models)
1. Turn main gas supply ON. Wait 30 seconds and, using a taper, light broiler/griddle
pilot.
2. If pilot fails to light, turn main gas supply OFF. Wait 5 minutes and repeat Steps 1
and 2.
3. Turn burner valve ON to purge air from the lines. Turn burner valve OFF when
gas begins to flow.
Nightly Shutdown
1. Turn burner valve OFF; pilot will remain lit.
Complete Shutdown
1. Turn burner valve OFF; pilot will remain lit.
2. Turn main gas supply OFF.
STANDARD OVEN LIGHTING AND SHUTDOWN INSTRUCTIONS NOTE:
Light open top/griddle pilots before lighting oven pilot.
1. Turn thermostat to the “OFF” POSITION.
2. Remove the lower panel.
3. Depress the red button on the safety valve and light the pilot through the observation
area.
4. Hold down the red button for at least 30 seconds.
5. When button is released, pilot should remain lit.
6. Replace lower panel.
7. Turn thermostat to desired temperature.
8. If the pilot becomes extinguished, Wait 5 Minutes, then repeat the above procedure.
Nightly Shutdown
1. Turn oven thermostat OFF.
Complete Shutdown
1. Turn oven thermostat OFF.
2. Turn main gas supply OFF.
RACK ARRANGEMENT -STANDARD OVEN
The standard oven has three rack positions and is supplied with one two oven racks.
Additional racks may be obtained through a vender parts depot.
INSERTING AND REMOVING RACK
The oven rack has a stop to keep the rack from being pulled all the way out when
unloading product. To install rack, place rack alongside of top of side liner runners and
slide rack completely to the rear of the oven compartment until rack drops
into place
To remove rack, reverse the procedure above by raising rear of oven rack stop above
runner and pulling rack forward.
PREHEATING
Standard Oven Turn thermostat control to the desired cooking temperature and preheat
oven for 25 minutes. To save on gas consumption, do not operate oven at maximum heat
when it is not necessary. Turn thermostat down to 250°F (121°C) or OFF when oven is
not in use or during idle cooking periods.
Griddle (optional models)
Turn the three manual gas valve knobs to full ON. After preheating for 5 minutes, turn
valves down until desired flame or heating level is achieved. Position the removable
broiler grid into one of the two slide positions, depending on which will achieve the proper
product results.
CLEANING
Do not use scouring powder or abrasives anywhere on this range
Clean only using a soft cloth and mild detergent solution.
Maintenance
Warning: The range and its parts are hot. Be very careful when operating, cleaning, or servicing the range.
Vent
When cool, the vent should be checked every six months for obstructions.
Service and Parts Information
To obtain repairs, service, and parts information concerning this model, contact our customer service
team info on the cover. When calling for service, the following information must be available: model
number, serial number, manufacture date (MD), and voltage (optional models).
Operation
Warning
The range and its parts are hot. Be very careful when operating, cleaning, or servicing the range.
Controls
• Thermostat Dial: Allows you to regulate oven temperature from low to 500°F (260°C).
• (Optional) Griddle Burner Knob: Regulates gas flow to the griddle. To increase heat, turn the knob
counterclockwise; to decrease heat, turn the knob clockwise.
Before First Use
Griddle Seasoning (optional models)
Caution:
• The griddle plate is steel but relatively soft and can be easily dented or scratched by careless use of
spatulas or scrapers.
• Avoid denting, scratching, or gouging the plate surface.
• Do not try to knock off loose food by tapping the spatula on the griddle surface.
A new griddle must be seasoned for optimal cooking performance. The metal surface is porous, and
food can get trapped in these pores and stick. Seasoning the griddle with cooking oil fills these pores
and creates a smooth, non-stick surface.
1. Heat Griddle: Heat the top section of the griddle at a low burner setting.
2. Apply Oil: Pour one ounce of cooking oil per square foot of surface over the top section.
3. Spread Oil: Using an insulated cloth, spread the oil over the entire griddle surface to create a thin film.
4. Wipe Excess: Wipe off any excess oil with an insulated cloth.
Repeat this procedure 2 to 3 times until the griddle has a slick surface.
Lighting and Shutting Down Pilots
All adjustment procedures associated with pilot lighting must be performed by an authorized vendor,
installer, or service person.
Manual Griddle
Lighting the Pilot:
Turn the main gas supply ON.
Wait 30 seconds, then use a long lighter to light the hot top or griddle top pilot.
If Pilot Fails to Light:
Turn the main gas supply OFF.
Wait 5 minutes and repeat the above procedures.
Removing Air from Gas Line:
Turn the hot top or griddle top burner valve ON to remove air from the gas line.
Turn the burner valve OFF when gas begins to flow.
Nightly Shutdown:
Turn the burner valve OFF; the pilot will remain lit.
Complete Shutdown:
1. Turn the burner valve OFF; the pilot will remain lit.
2. Turn the main gas supply OFF.
Thermostat Griddle
1. Turn the main gas supply ON.
2. Locate the pilot lighting door on the front of the unit to the left of the red pilot lighting button.
3. Open door and insert long lighter.
4. Press and hold red pilot button while lighting pilot. Once pilot is lit hold button for 30 seconds.
5. Release button. Pilot should remain on.
6. Close door.
7. If pilot fails to light, turn main gas supply OFF. Wait 5 minutes and repeat the above procedures.
8. Turn one hot top or griddle top burner valve ON to remove air from the gas line. Turn burner valve OFF
when gas begins to flow.
9. Nightly Shutdown:
10.Turn burner valve OFF; pilot will remain lit.
Complete Shutdown:
1. Turn burner valve OFF; pilot will remain lit.
2. Turn main gas supply OFF.
OPEN TOP BURNERS
1. Turn main gas supply ON.
2. Wait 30 seconds and, using a taper, light the open top pilot
3. If pilot fails to light, turn main gas supply OFF. Wait 5 minutes and repeat the
above procedures.
4. Turn one open top burner valve ON to remove air from the gas line. Turn burner
OFF when gas begins to flow.
Nightly Shutdown
1. Turn burner valve OFF; pilot will remain lit.
Complete Shutdown
1. Turn burner valve OFF; pilot will remain lit.
2. Turn main gas supply OFF.
GRIDDLE (optional models)
1. Turn main gas supply ON. Wait 30 seconds and, using a taper, light broiler/griddle
pilot.
2. If pilot fails to light, turn main gas supply OFF. Wait 5 minutes and repeat Steps 1
and 2.
3. Turn burner valve ON to purge air from the lines. Turn burner valve OFF when
gas begins to flow.
Nightly Shutdown
1. Turn burner valve OFF; pilot will remain lit.
Complete Shutdown
1. Turn burner valve OFF; pilot will remain lit.
2. Turn main gas supply OFF.
STANDARD OVEN LIGHTING AND SHUTDOWN INSTRUCTIONS NOTE:
Light open top/griddle pilots before lighting oven pilot.
1. Turn thermostat to the “OFF” POSITION.
2. Remove the lower panel.
3. Depress the red button on the safety valve and light the pilot through the observation
area.
4. Hold down the red button for at least 30 seconds.
5. When button is released, pilot should remain lit.
6. Replace lower panel.
7. Turn thermostat to desired temperature.
8. If the pilot becomes extinguished, Wait 5 Minutes, then repeat the above procedure.
Nightly Shutdown
1. Turn oven thermostat OFF.
Complete Shutdown
1. Turn oven thermostat OFF.
2. Turn main gas supply OFF.
RACK ARRANGEMENT -STANDARD OVEN
The standard oven has three rack positions and is supplied with one two oven racks.
Additional racks may be obtained through a vender parts depot.
INSERTING AND REMOVING RACK
The oven rack has a stop to keep the rack from being pulled all the way out when
unloading product. To install rack, place rack alongside of top of side liner runners and
slide rack completely to the rear of the oven compartment until rack drops
into place
To remove rack, reverse the procedure above by raising rear of oven rack stop above
runner and pulling rack forward.
PREHEATING
Standard Oven Turn thermostat control to the desired cooking temperature and preheat
oven for 25 minutes. To save on gas consumption, do not operate oven at maximum heat
when it is not necessary. Turn thermostat down to 250°F (121°C) or OFF when oven is
not in use or during idle cooking periods.
Griddle (optional models)
Turn the three manual gas valve knobs to full ON. After preheating for 5 minutes, turn
valves down until desired flame or heating level is achieved. Position the removable
broiler grid into one of the two slide positions, depending on which will achieve the proper
product results.
CLEANING
Do not use scouring powder or abrasives anywhere on this range
Clean only using a soft cloth and mild detergent solution.
Maintenance
Warning: The range and its parts are hot. Be very careful when operating, cleaning, or servicing the range.
Vent
When cool, the vent should be checked every six months for obstructions.
Service and Parts Information
To obtain repairs, service, and parts information concerning this model, contact our customer service
team info on the cover. When calling for service, the following information must be available: model
number, serial number, manufacture date (MD), and voltage (optional models).
Koolmore Supply, Inc. extends a limited warranty to the original purchaser, guaranteeing that this
Koolmore
product is free from manufacturing defects in material or workmanship for one year from the date of
purchase.
Should you discover any such defect within the warranty period, Koolmore Supply, Inc., reserves the
right to
repair or replace the product without charge, or to cover the cost of replacement parts and repair labor
needed
to correct defects present at the time of purchase or resulting from regular usage, when the appliance
has been
installed, operated, and maintained as per the instructions provided.
At its sole discretion, Koolmore Supply Inc. may decide to replace the product. In such an event, your
replacement
appliance will carry the warranty for the remaining term of the original unit's warranty period.
This warranty is valid exclusively to the original purchaser of the product and only applicable within the
United
States. The warranty commences from the date of original consumer purchase. Proof of the original
purchase
date will be required to obtain service under this warranty.
Under this limited warranty, your sole and exclusive remedy will be product repair, as outlined above. All
services must be provided by a Koolmore-designated service company.
To claim warranty or request repair service:
Email support@koolmore.com. Please include your name, address, phone number, warranty repair
request,
and a copy of your proof of purchase receipt. Alternatively, visit koolmore.com and use the contact us
page. A
Koolmore customer service representative will promptly arrange service for your appliance.
We thank you for choosing Koolmore.
This limited warranty will not cover:
1. Failure of the product to perform during power failures or interruptions,
or due to inadequate electrical service.
2. Damage incurred during transportation or handling.
3. Damage caused by accidents, vermin, lightning, winds, re, oods, or acts of God.
4. Damage resulting from accidents, alterations, misuse, abuse, improper installation, repair, or mainte-
nance.
This includes using any external device that alters or converts the voltage or frequency of
electricity.
5. Unauthorized product modications, repairs by unauthorized centers, or use of non-approved
replacement parts.
6. Abnormal cleaning and maintenance not aligned with the user's manual.
7. Use of incompatible accessories or components.
8. Any costs associated with repairs or replacements under these excluded circumstances shall be the
responsibility of the consumer.