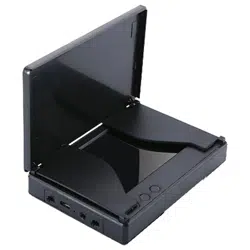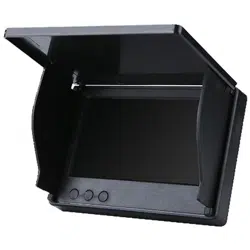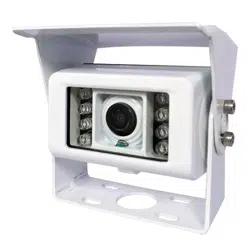

PLMRCMR50
7'' Digital Marine Camera & Monitor System
RV Camera, Water-Resistant with Built-in Microphone,
150 Degree Rear View Camera (White)

WARNING: Failure to read and follow these warnings and instructions may result in
serious injury, including damaged property, so please pay close attention and exhibit
the utmost care.
• The Digital Backup Camera is designed as an aid to the driver in detecting potentially
hazardous driving conditions, obstructions, and large stationary objects. You, the
driver, must also remember to drive safely and properly. Use of the Digital Backup
Camera is not a substitute for safe, proper and legal driving practices.
• Never back up while looking only at your connected monitor display screen.
You should always check behind and around the vehicle when backing up just as you
would if the vehicle did not have the Digital Backup Camera. Always make sure your
driving area is clear. Always back up slowly and with caution.
• Never depend on the Backup Camera entirely when backing up. The image on the
monitor display screen may be slightly dierent from actual and real‐time conditions.
Objects viewed in the rear view monitor dier from actual distances because a wide‐
angle lens is used. So use the camera as an aid and always follow intended driving
practices to properly judge distances from objects.
• The Backup Camera's assisted low lux lighting performance feature is also an aid to a
driver. Always use your own eyes to conrm the vehicle’s surroundings, as the displayed
image may be not well lit or not entirely visible. Always proceed with caution and
perform double‐checks before proceeding.
• The area displayed by the Backup Camera is limited. It does not display objects that
are close to or just below the bumper, underneath the vehicle, or objects out of the
camera’s view. The camera's view can change according to your vehicle's orientation
on the road or changing road conditions.
• Be sure to check the camera is properly functioning, is properly positioned and
securely mounted, every time you operate your vehicle.
• Make sure your trunk or hatch operates correctly, as intended, before and after
installation.
• Proceed with caution when cleaning your vehicle around the camera. Avoid excess
water exposure around the camera especially with spraying or a power washer.
• Please make sure to keep the camera clean and unobstructed from any debris.
• Follow all trac laws and motor vehicle regulations.
www.PyleUSA.com
2
Please read all of the installation instructions carefully before installing the
product. Improper installation will void manufacturer’s warranty.
The installation instructions do not apply to all types of vehicles, and are written
as guidelines to assist in installing the system. Please consult an experienced
technician if you are not comfortable installing the product. Prior to using and
installing the Backup Camera System, please read the safety information provided
in this user manual. Be sure to use the product as outlined in this user manual.
Altercation or modications carried out without appropriate authorization may
invalidate the user's right to operate the equipment.

• Consult local laws and regulations for any restrictions on installation or use.
• Using a Backup Camera System is not adequate enough to completely eliminate a
vehicle’s blind spot. Always remember to drive with caution, following all trac laws.
System Installation and Wiring
Note: Camera System installation on diesel vehicles may require a slightly dierent
wiring install.
Caution: Connecting to other types of electrical systems will cause damage to your
vehicle. Please contact the manufacturer if you are unaware of the system type in your
vehicle. Refer to the model's power requirements prior to connection and installation.
Quick Installation
This rearview backup camera system comes with camera and installation wiring.
When installing, the camera is preferably to be mounted in the rear of your vehicle
(just above the license plate).
This kit includes necessary wiring and cable connector accessories sucient for typical
connections. However, additional accessory cables and installation materials may be
necessary for completely secure and operational backup camera performance.
Camera Connection
Connect the camera to the using the included DC 12V power cable. Connect the DC
12V power cable to the positive 12V reverse tail light in the rear of your vehicle.
Then, connect the black wire, of the DC 12V power cable, and ground properly.
This connected power and ground cable then connects to the camera, and will supply
power to the camera directly.
Next, use the included yellow RCA video connector cable, and run that cable from the
yellow RCA video connector jack of the camera, to the yellow video connector of your
compatible display monitor.
The yellow RCA cable when connected, automatically retrieves the video signal when
activated (when your vehicle is switched into the reverse gear).
Installation Transcript
1. Locate the reverse taillight wiring behind your vehicle's reverse light.
You may need to remove an interior panel, or other cover, in order to locate the
wiring. Connect the included power 12V DC power cable to the reverse light.
a. Connect the power cable's Red wire to your vehicle's reverse light positive wire.
b. Connect the power cable's Black wire to your vehicle's reverse light negative wire.
2. Connect the camera to this 'reverse light' connection installation, then mount the
camera in the desired location.
3. Run the RCA video cable from the camera to your compatible video displa monitor.
www.PyleUSA.com
3

*Please remember to run cables in the least obtrusive route possible. Vehicle vibrations
and bumpy driving conditions can result, so extra care should be taken to securely
mount the camera and fasten all cables and wiring to secure locations.
*Ensure the wires are safely and securely connected, with proper isolation applied to
all connections.
Additional Notes:
• Determine the best location for the camera (The camera is preferably mounted just
above the license plate).
• Be sure when running the connection cables to leave a small amount of slack so you
can still move the camera around the license plate, if you decide to slightly adjust
the camera's positioning at a later time.
• After installation, Test the camera before use. Placing your vehicle in reverse should
provide a picture in the monitor within the rearview mirror assembly.
Front View / Rear View Camera Setup
You will have the ability to mount the camera in the front or rear of the installation
vehicle. The camera connection cable features integrated colored control wires (Black,
White, Blue), that can be activate or deactivate, front & rear view camera ability.
Rear View Setup
To Activate the Distance Scale Line Display: Connect/Disconnect the BLACK + WHITE
Control Wires
Front View Setup
To Flip the Image Horizontally (For Front/Rear View Camera Setup):
Connect/Disconnect the BLACK + BLUE Control Wires
The Camera Wire Connection
www.PyleUSA.com
4

System Features:
•
Camera & Monitor Vehicle Safety Video System
• Digital Wireless 2.4Ghz Signal Transmitter & Receiver
• Ability to Connect up to 4 Cameras (2 Wireless 2 Wired)
• Designed for Car/Truck use 12/24 Volt Systems
• Includes All Necessary Cables & Wiring
What’s in the Box:
•
Power & Wiring Harness
• Camera DC Power Cable
Camera Specs:
•
Includes (1) Rearview Camera
• Weatherproof Marine Grade Construction
• IP68 Rating Water & Fog Resistant
• LED Lights with IR Night Vision Illumination
• Low Lux Light Performance
• Image Sensor:1/4 sensor
• Eective Pixels: 720x576 Pixel
• Night Vision Visible Distance: about 3 meters
• IR Night Vision: with IR
• Power: DC 12V & Amp; 24V
• Power Consumption: Less than 5W
• Max.Current: Less 450mA
• Storage Temperature: -30°C~80°C
• Working Temperature: -20°C to 70°C
• With 15 M Long Extension Cable
• Camera Dimensions (W x H x D): 3.18" x 2.95" x 2.17" -inches
www.PyleUSA.com
5