
CONTENTS
IMPORTANT SAFEGUIDES
...................................................
P.3
PRODUCT FEATURES.....................................................................
.P.6
INSTALLATION...................................................................................
P.6
OPERATING THE APPLIANANCE
..............................................
P.7
CARE AND
MAINTENANCE
.......................................................
P.9
TROUBLESHOOTING
.................................................................
.
P.10
WARRANTY TERMS
................................................................
.
P.11
....

3
Thanks for choosing our products, hope that our products can bring you different feelings. Please
read the following safety and operating instructions carefully before using t he cooler.
IMPORTANT SAFEGUIDES
.
Plug into a grounded 3-prong outlet, do not remove grounding prong, do not use an
adapter, and do no t use an extension cord.
.
Read all instructions before u sing the cooler.
.
Child entrapment and suffocation are not problems of the past. Junked or abandoned
appliances are still da ngerous.
.
Before you throw away your old cooler , take off the door but leave the shelves in
place so that children m ay not easily climb inside.
.
Never allow children to operate, play with, or crawl inside the appliance.
.
Replace all panels before operating.
.
It is recommended that a sep arate circuit, serving only your appliance be provided.
Use receptacles that cannot be turned off by a switch or pull chain.
.
Never clean appliance parts with flammable fluids. These fumes can create a fire
hazard or explosion. And do not store or use gasoline or other flamm able vapours
and liquids in the vicinity of this or any other appliance. The fumes can create a fire
hazard or explosion.
.
Before proceeding with cleaning and m aintenance operations, make sure t he power
line of the unit is disconnected.
.
Do not connect or disconnect the electric plug when your hands are wet.
.
Unplug the appliance or disconnect power before clean ing or servicing. Fa ilure t o do
so can result in electrical shock or death.
.
Do not attempt to repair or rep lace any part of your appliance unless it is specifically
recommended in this material. All other servicing should be referred to a qualified
technician.
.
Use two or more people to move and install appliance. Failure to do so can result in
back or other injury.
To en sure proper ventilation for your appliance, the front of the unit must be
completely unobstructed. Choose a well-ventilate d area with temperatures above
16°C (60.8°F) and below 32°C (89.6°F). This unit must be installed in an area
protected from the element, such as wind, rain, water spray or drips.
.
The appliance should not be located next to ovens, grills or other sources of high
heat.
.
The appliance must be installed with all ele ctrical, wate r and drain connections in
accordance with state and loca l codes. A standard electrical supply, properly
grounded in accordance with the National Elect rical Code and local codes and
ordinances is required.
.
Do not kink or pinch the power supply cord of appliance.
.
The fuse (or circuit breaker) size should be 13 amperes.
.
Never allow children to operate, play with or crawl inside the appliance.
.
Do not use solvent-based cleaning agents of abrasives on the in terior. These
cleaners may damage or discolor the interior.
.
Do not use this ap parat us for other than its intended purpose.
.
Before the appliance is used, it must be properly positioned and installed as
described in this manual, so read the manual carefully. To reduce the risk of fire,
electrical shock or injury when using the appliance.
1.This appliance is not intended for use by persons (including children) with reduced physical,
sensory or mental capabilities, or lack of experience and knowledge, unless they have been
given supervision or instruction concerning use of the appliance by a person responsible for
their safety.
2. Children should be supervised to ensure that they do not play with the appliance.
3. This appliance can be used by children aged from 8 years and above and persons with
reduced physical, sensory or mental capabilities or lack of experience and knowledge if they
have been given supervision or instruction concerning use of the appliance in a safe way and
understand the hazards involved. Children shall not play with the appliance. Cleaning and user
maintenance shall not be made by children without supervision.
4. If the supply cord is damaged, it must be replaced by the manufacturer, its service agent or
similarly qualified persons in order to avoid a hazard.
5. To avoid a hazard due to instability of the appliance, it must be fixed in accordance with
the instructions.
6. When positioning the appliance, ensure the supply cord is not trapped or damaged.
7. Do not locate multiple portable socket-outlets or portable power supplies at the rear of the
appliance.
8. Keep ventilation openings, in the appliance enclosure or in the built-in structure, clear of
obstruction.
9. Do not use mechanical devices or other means to accelerate the defrosting process,other
than those recommended by the manufacturer.
10. Do not damage the refrigerant circuit.
11. Do not use electrical appliances inside the drink storage compartments of the appliance,
unless they are of the type recommended by the manufacturer.
12. Do not store explosive substances such as aerosol cans with a flammable propellant in
this appliance.
13. This appliance is intended to be used in household and similar applications such as
– staff kitchen areas in shops, offices and other working environments;
– farm houses and by clients in hotels, motels and other residential type environments;
– bed and breakfast type environments;
– catering and similar non-retail applications.
14. To avoid contamination of drink, please respect the following instructions:
– Opening the door for long periods can cause a significant increase of the temperature in
the compartments of the appliance.
– Clean regularly surfaces that can come in contact with drink and accessible drainage
systems.
– Clean water tanks if they have not been used for 48 h, flush the water system connected to
a water supply if water has not been drawn for 5 days.
– If the refrigerating appliance is left empty for long periods, switch off, defrost, clean, dry, and
leave the door open to prevent mould developing within the appliance.
5
B
efore the appliance is used, it must be p ro perly positio ned and installed
a
s described in this ma nual, so read the manual carefully. To reduce the
r
isk of fire, electrical shock or injury when using the appliance.
● It is recommended that a separate circuit, serving only your a ppliance be pro vided. Use
receptacles that cannot be turn ed off by a switch or pull chain.
● Never clean appliance parts with flammable fluids. These fumes can create a fire hazard
or explosion. And do not store or use gasoline or other flammable vapours and liquids in the
vicinity of this or any other appliance. The fumes can create a fire hazard or ex
plosion.
● Before proceeding with cleaning and maintenance operations, make sure the power line of
the unit is disconnected.
● Do not connect or disconnect the electric plug when your hands are wet.
● Unplug the appliance or disconnect power before cleaning or servicing. Failure to do so
can result in electrical shock or death.
● DO NOT use mechanical devices to d efrost refrigerator. DO NOT puncture refrigerant
tubing.
● To be repaired only by trained service personnel. DO N
OT puncture refrigerant tu bing.
● Consult repair m anual / owner’s guide before attempting to service this product. All safety
precautions must be followed.
● To prevent a child from being entrapped, keep out of reach of children and not in the
vicinity of the cooler.
EXTENSION CORD
Because of potential sa fety hazards, it is strongly recommended that you do not use an
extension cord with t his appliance. However, if you must use an extension cord, it is
absolutely necessary th
at it be a UL/CUL Listed, 3-wire grounding type ap pliance
extension cord having a grounding type plug and outlet and that the electrical rating of
the cord be 115 volts and at least 10 amperes.
WARNING
To reduce the risk of fire, electrical shock, or injury when using
your appliance, follow these basic precautions:
●
Read all instructions before using the cooler.
●
DANGER or WARNING: Risk of child entrapment.
Child entrapment and suffocation are not problems of the past. Ju nked or
abandoned appliances are still dangerous.
●
Before you throw away your old cooler, take off the door b ut leave the shelves in
place so t hat children may not easily climb in side.
●
Never allow children to operate, play with, o r crawl inside the appliance.
●
Never clean a ppliance parts with flammable flu ids. The fumes can cre
ate a fire
hazard or explosion.
●
Do not store or use gasoline or any o ther flammable vapours and liquids in the
vicinity of this or any other appliance. The fumes can create a fire hazard or
explosion.
-Save these instructions-
6
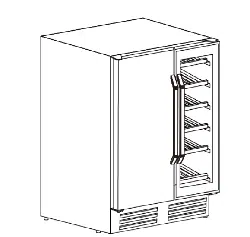
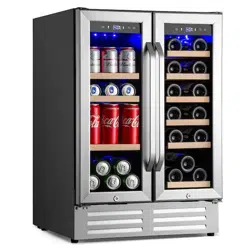
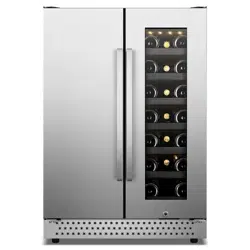
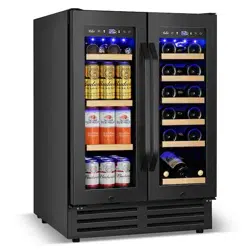
PRODUCT FEATURES
• Dual cooling zones for storing different beverages and wines together.
• Beverage Refrigerator (Left Zone) Capacity: 57 standard 12oz cans
• Wine Refrigerator (Right Zone) Capacity:18 standard 750ml wine bot tles
• Stainless steel glass doors with sleek black cabinet
• Stainless steel handle
• Tempered double-layered glass door with stainless steel frame
• Adjustable temperature for both zones
• Soft White Interior Lights
• Fahrenheit and Celsius degree optional temperature indicators
• 3 removable wire shelves - Beverage Refrigerator (Left Zone)
• 6 removable wooden shelves - W ine Refrigerator (Right Zone)
INSTALATION
Before the first use
● Remove the exterior and interior packing materials.
● It is important f or the appliance to be leveled in order to work properly. You may need to
adjust the feet to make it level.
● Let the appliance stand upright for approximately 24 hours before connecting it to
the power source, which helps to reduce the possibility of a cooling-system
malfunction from ha ndling during transportation.
● Use a soft cloth to clean the interior surface with lukewarm water.
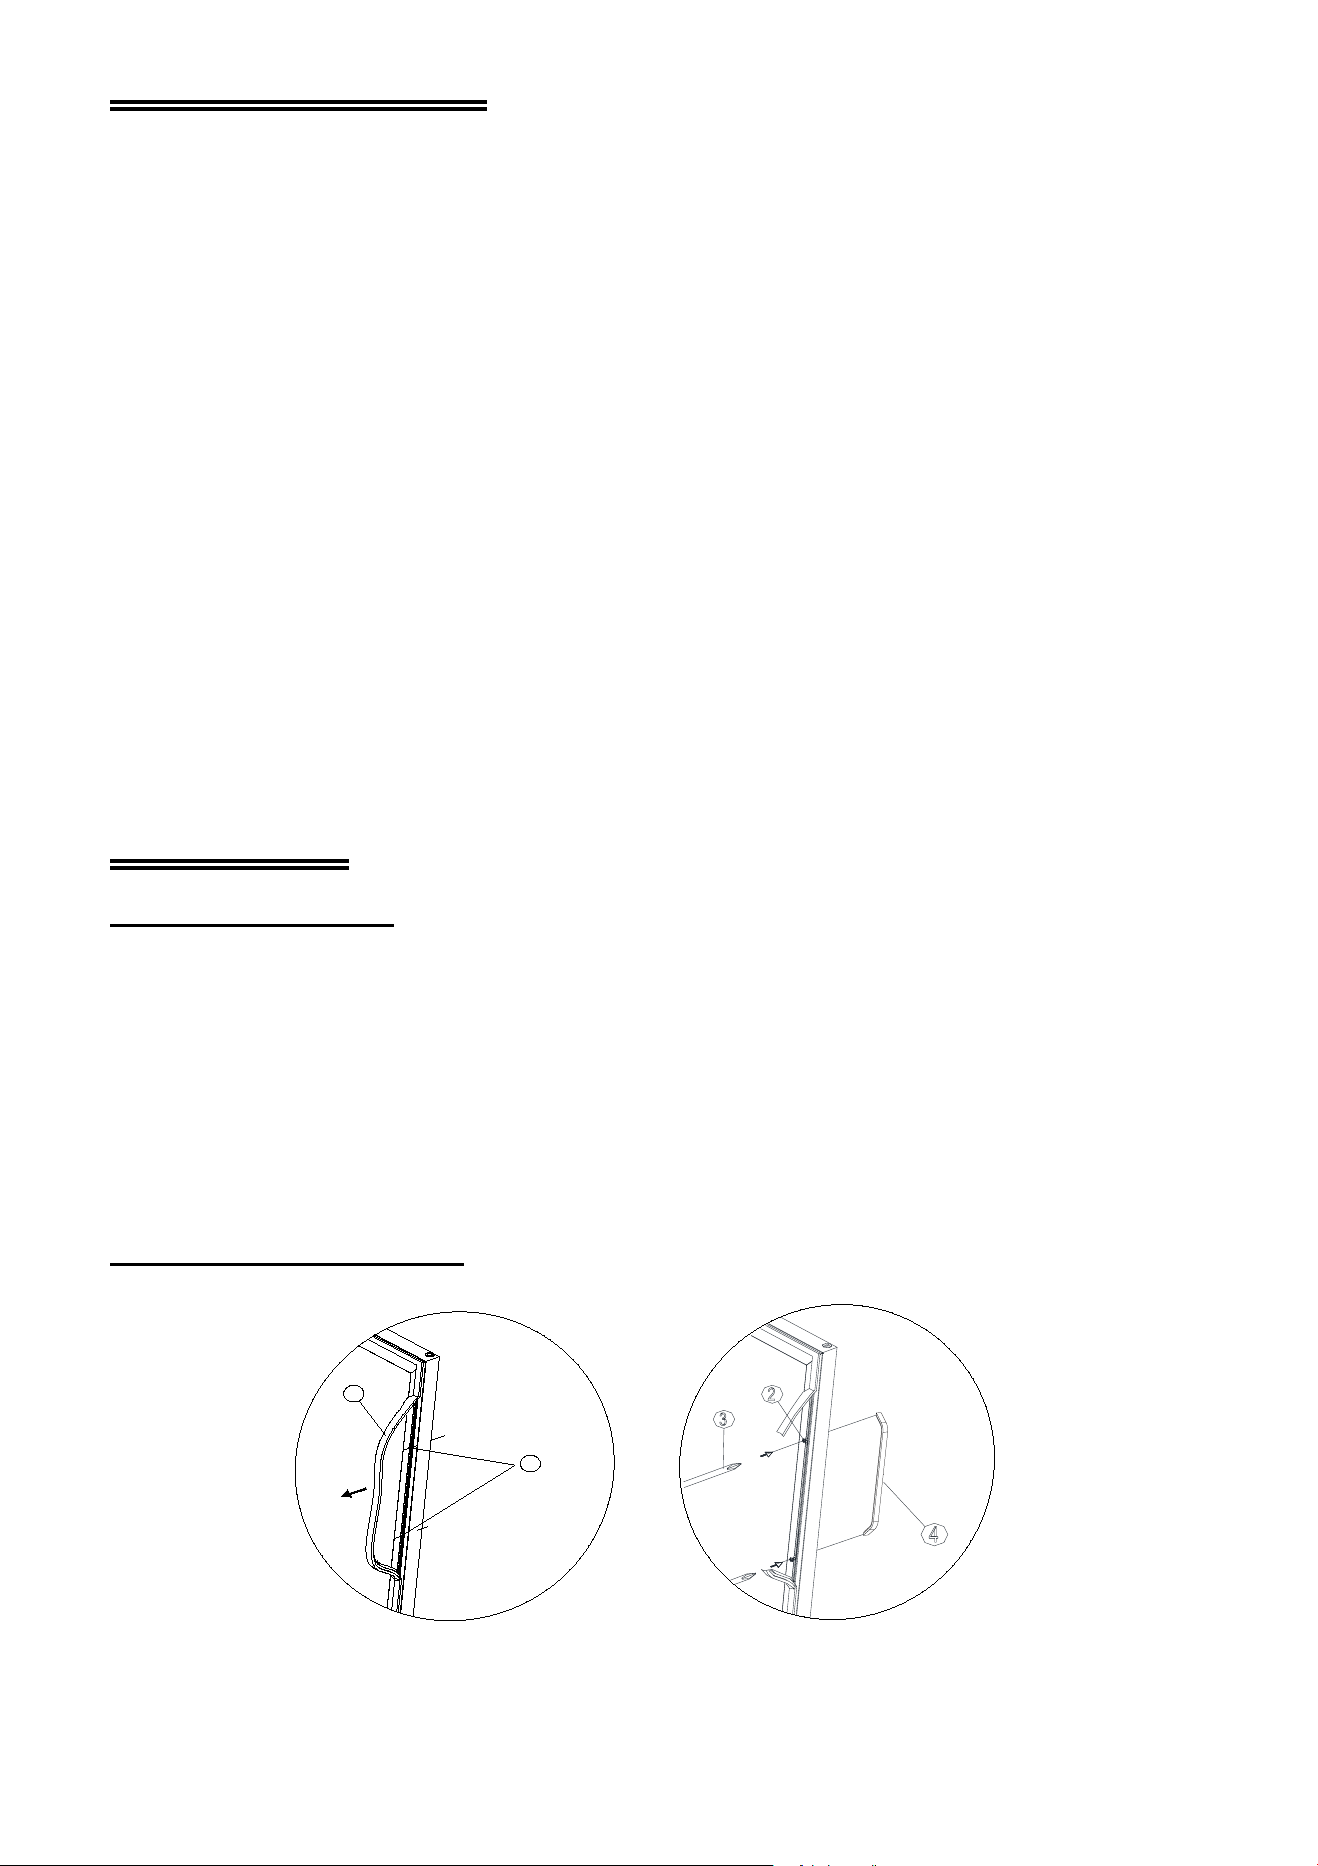
Door handle installation
①sealing ②screws ③Phillips screwdriver ④Handle
1
2
Fig :1 Fig :2
7
How to install the handl e:
1)Pull away the sealing gasket where the handle is to be installed as shown in Fig1. The
gasket is easily displaced by hand. No tools a re necessary.
2)Align the handle with the screws installed. Tighten the screws using a Phillips head
screwdriver until the handle sets both flush and secured tightly against the door frame. (DO
NOT over tighten as th is will cause damage to the handle assembly).
3) Install the sealing gasket to its original positio n.
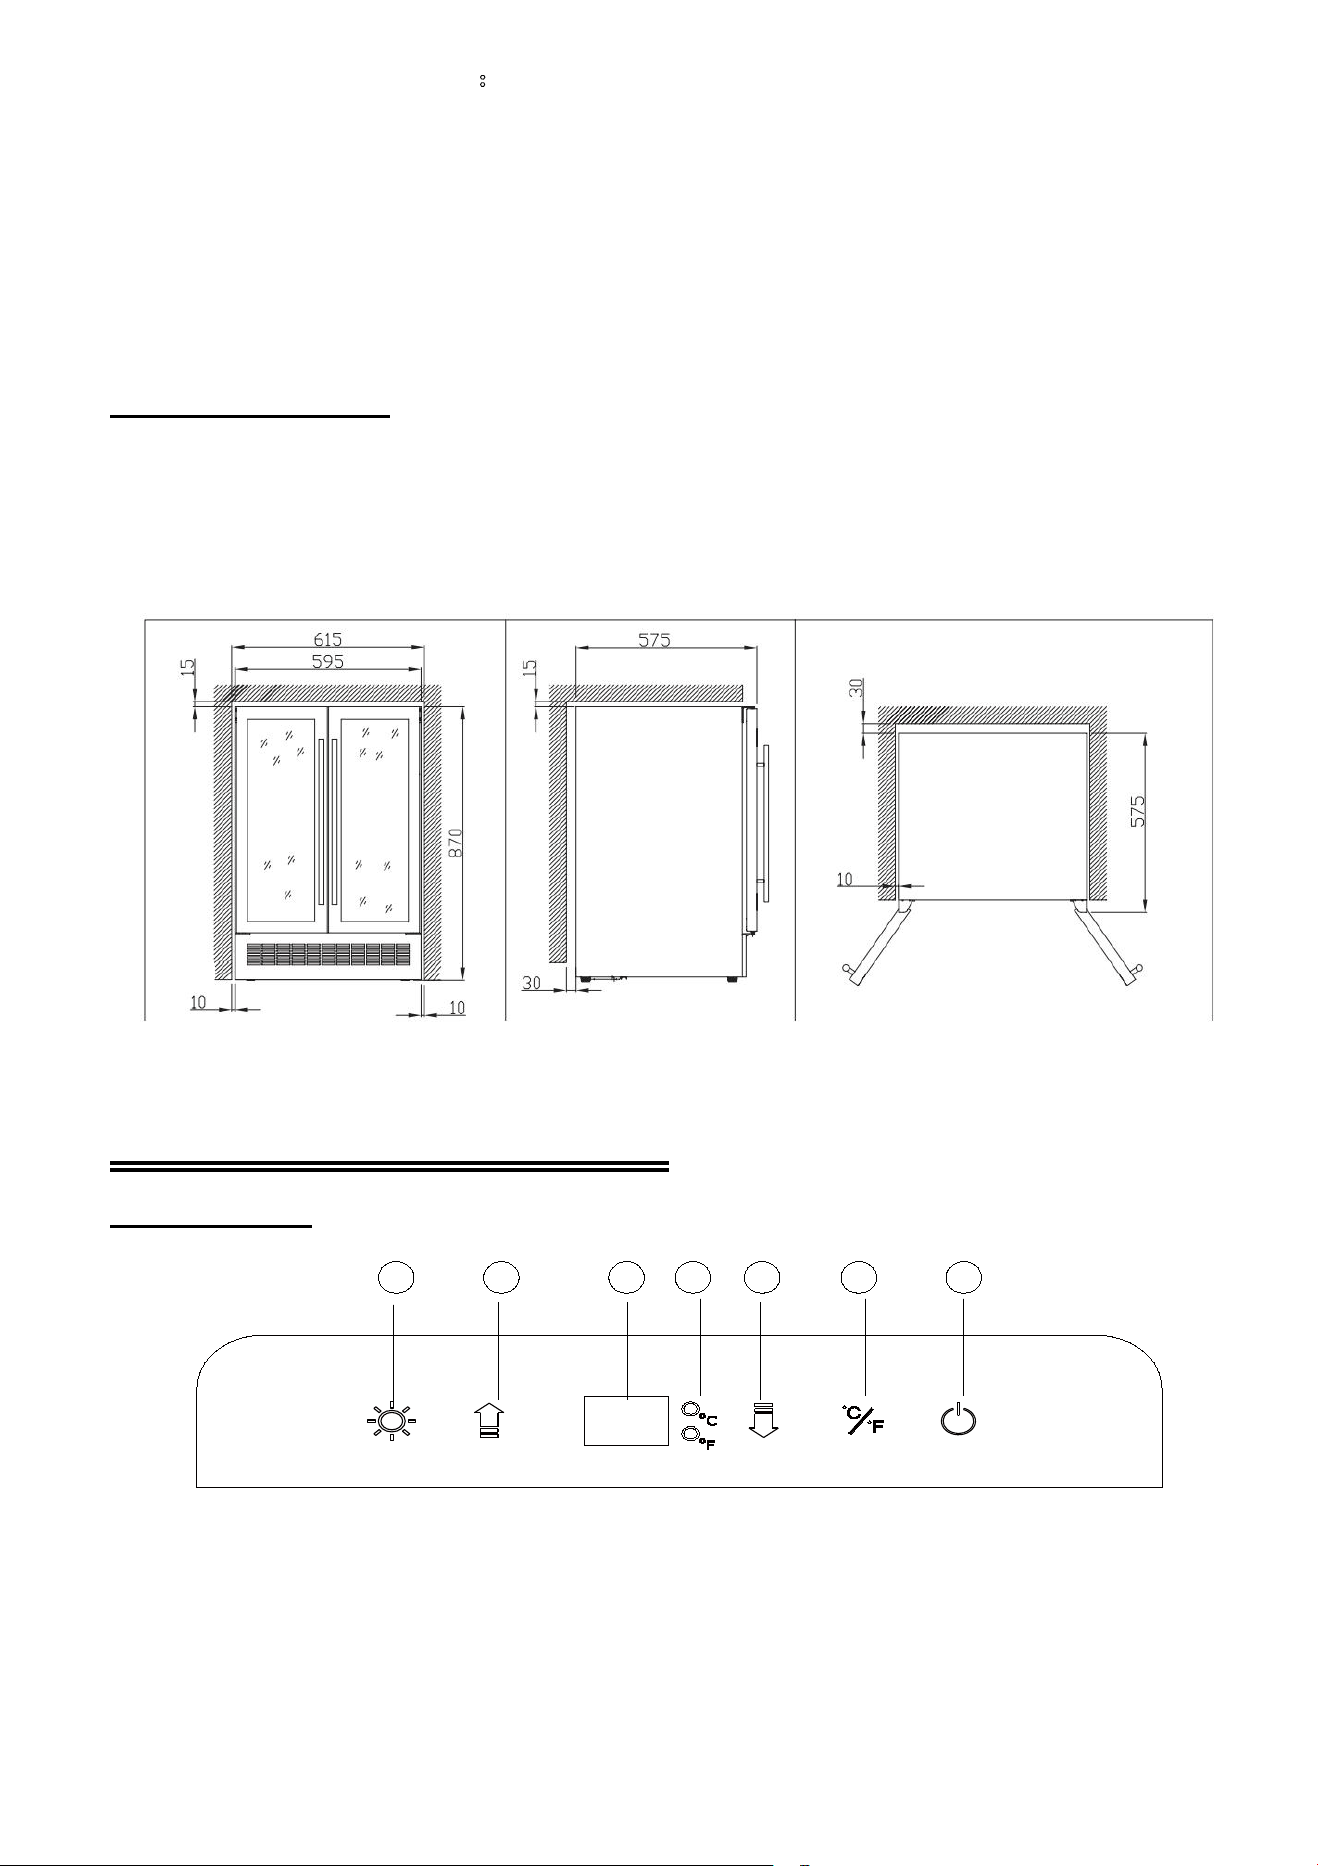
Built-in installation
These appliances a re designed fo r both bu ilt-in or free standing inst allation. For built-in
installation, ensure proper service access and ventilation, allow at least ¼” (6.35mm) space
on each side and a t the top
OPERATING THE APPLIANANCE
Control Panel
1 2 3 4 5 6 7
①Lighting button
②
Temperature up
③
Display window
④Fahrenheit and Celsius indicate light
⑤Temperature down
⑥
Fahrenheit & Celsius switch button
⑦
Power button
8
Power On / Off
● When the appliance is plugged into a power outlet, it po wers o n automatically.
● Touch the power button to turn on the appliance .
Press power button for 3 seconds to turn of f
the appliance if needed.
Light Control
● Touch the lighting button to turn on (or tu rn off) the interior cool LED lighting.
Set Temperature
Touch the or button to increase or decrease the temperature of the selected zone.
The temperature will increase 1ºF or 1ºC if you touch the button once; On the con trary the
temperature will decrease 1ºF or 1ºC if you touch the but ton o nce.
Cooling Zone
Temperature Range
Beverage Refrigerator (Left Zone)
2
℃
-10
℃
(35
℉-50℉
)
Wine Refrigerator (Right Zo ne)
5
℃
-18
℃
(41
℉
-64
℉
)
Note:
●
If the appliance is power off suddenly. Please turn on the appliance after 3-5 minutes later. The
temperature setting is with automatic memory function.
● This cooler is suitable fo r the ambient temperature 5-32℃/41-89.6ºF. If temperature
is higher or lower than it, the performance may be affected.
●
If it is the first time to use this appliance, it is normal that the preset temperature and display
temperature is different. Everything will back to normal after few hours working.
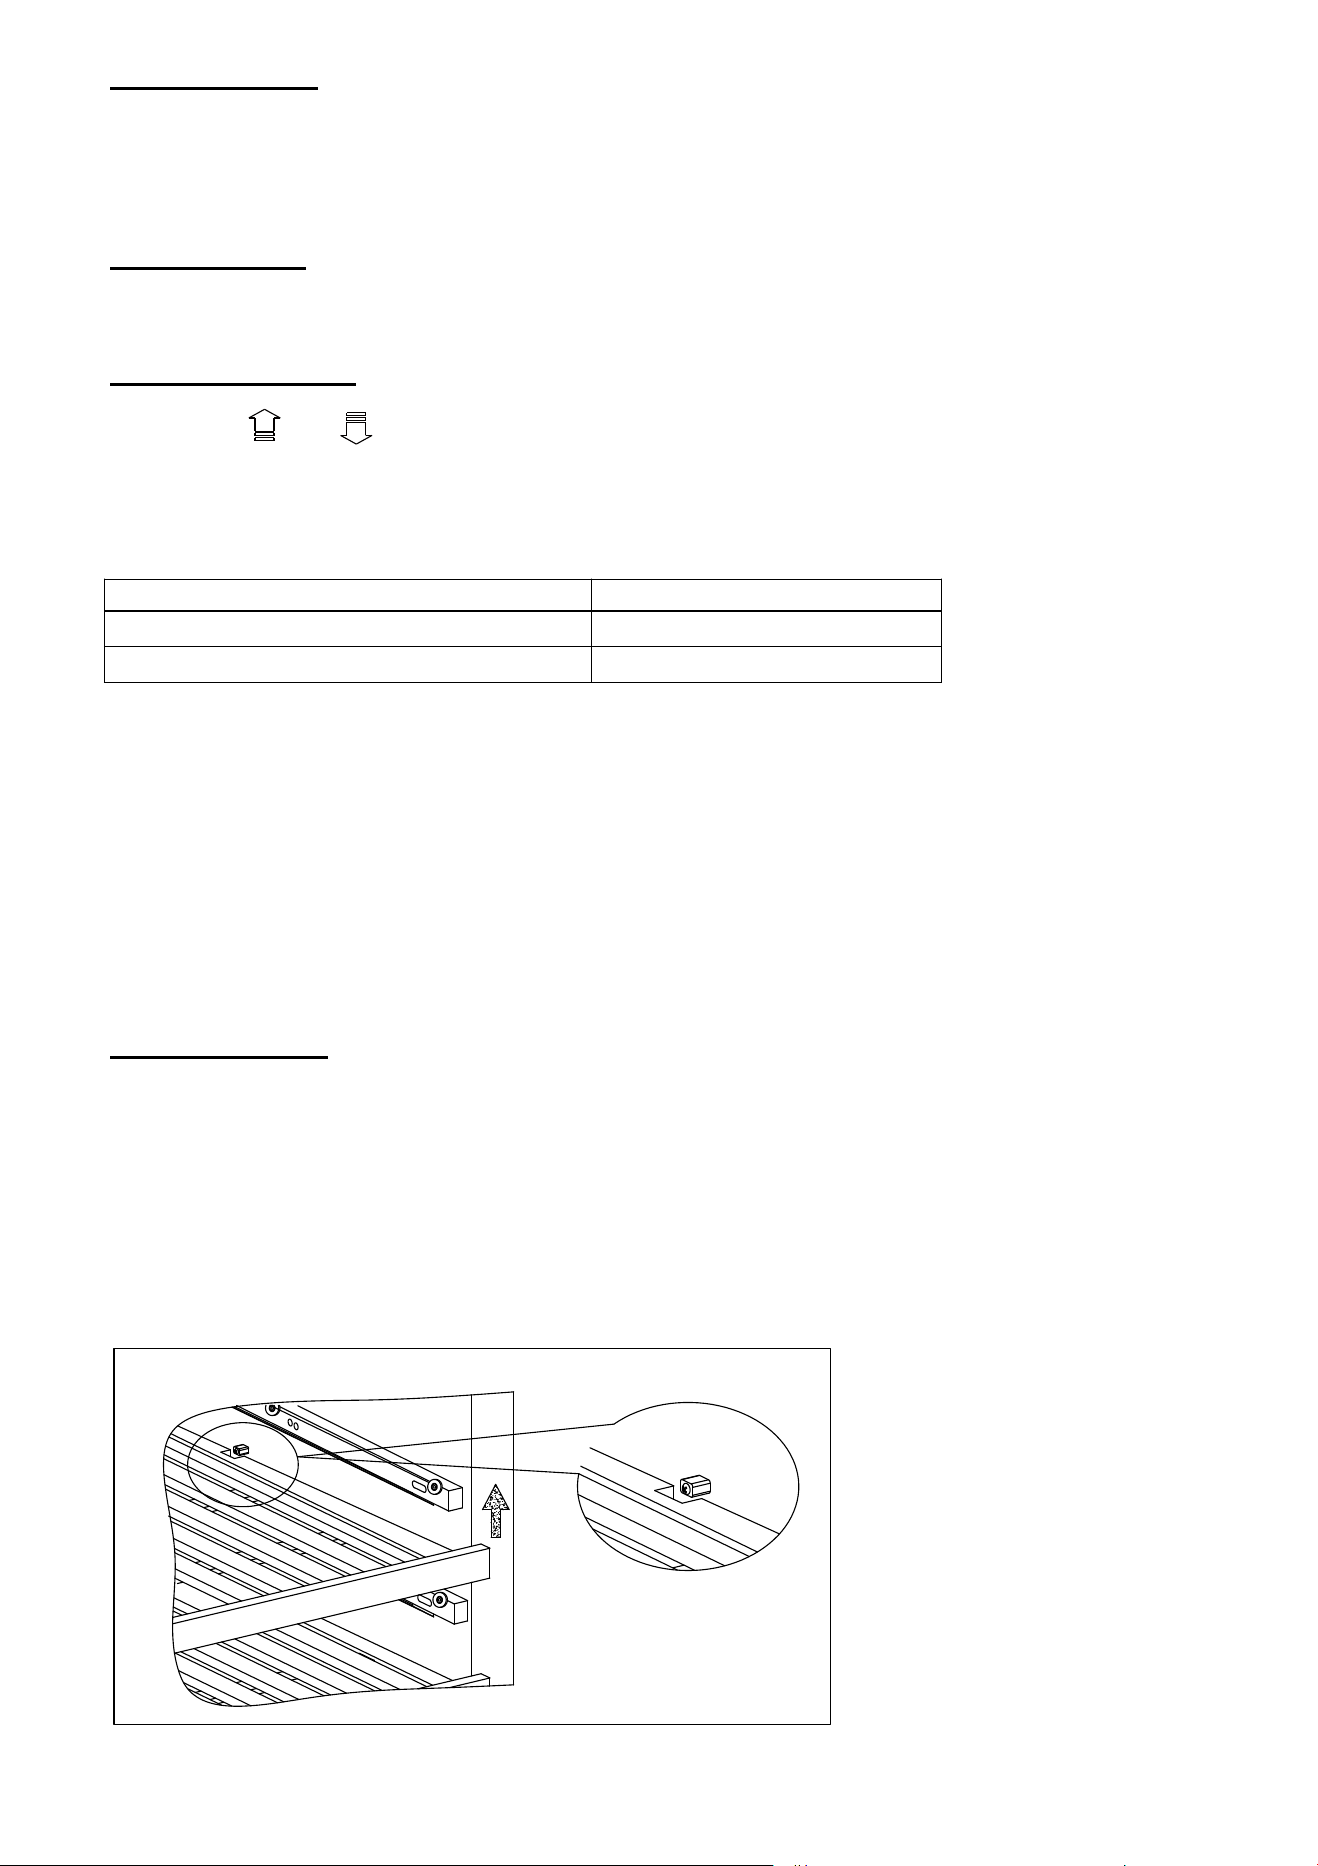
Romving Shelf
●To avoid the damage of door sealing, p lease open the door fully when you slide out the
shelves.
●For your convenience of taking wine , you can pull out the shelf by 1/3. Our product is
designed with shelf holder to prevent the shelf pull over and fall off the cabinet.
●If you need to t ake off the shelf from cabinet, you can pull out the shelf to the po sition
where the notch of shelf is exactly under the plastic post and th en lift it up and out. (See
figure below)
9
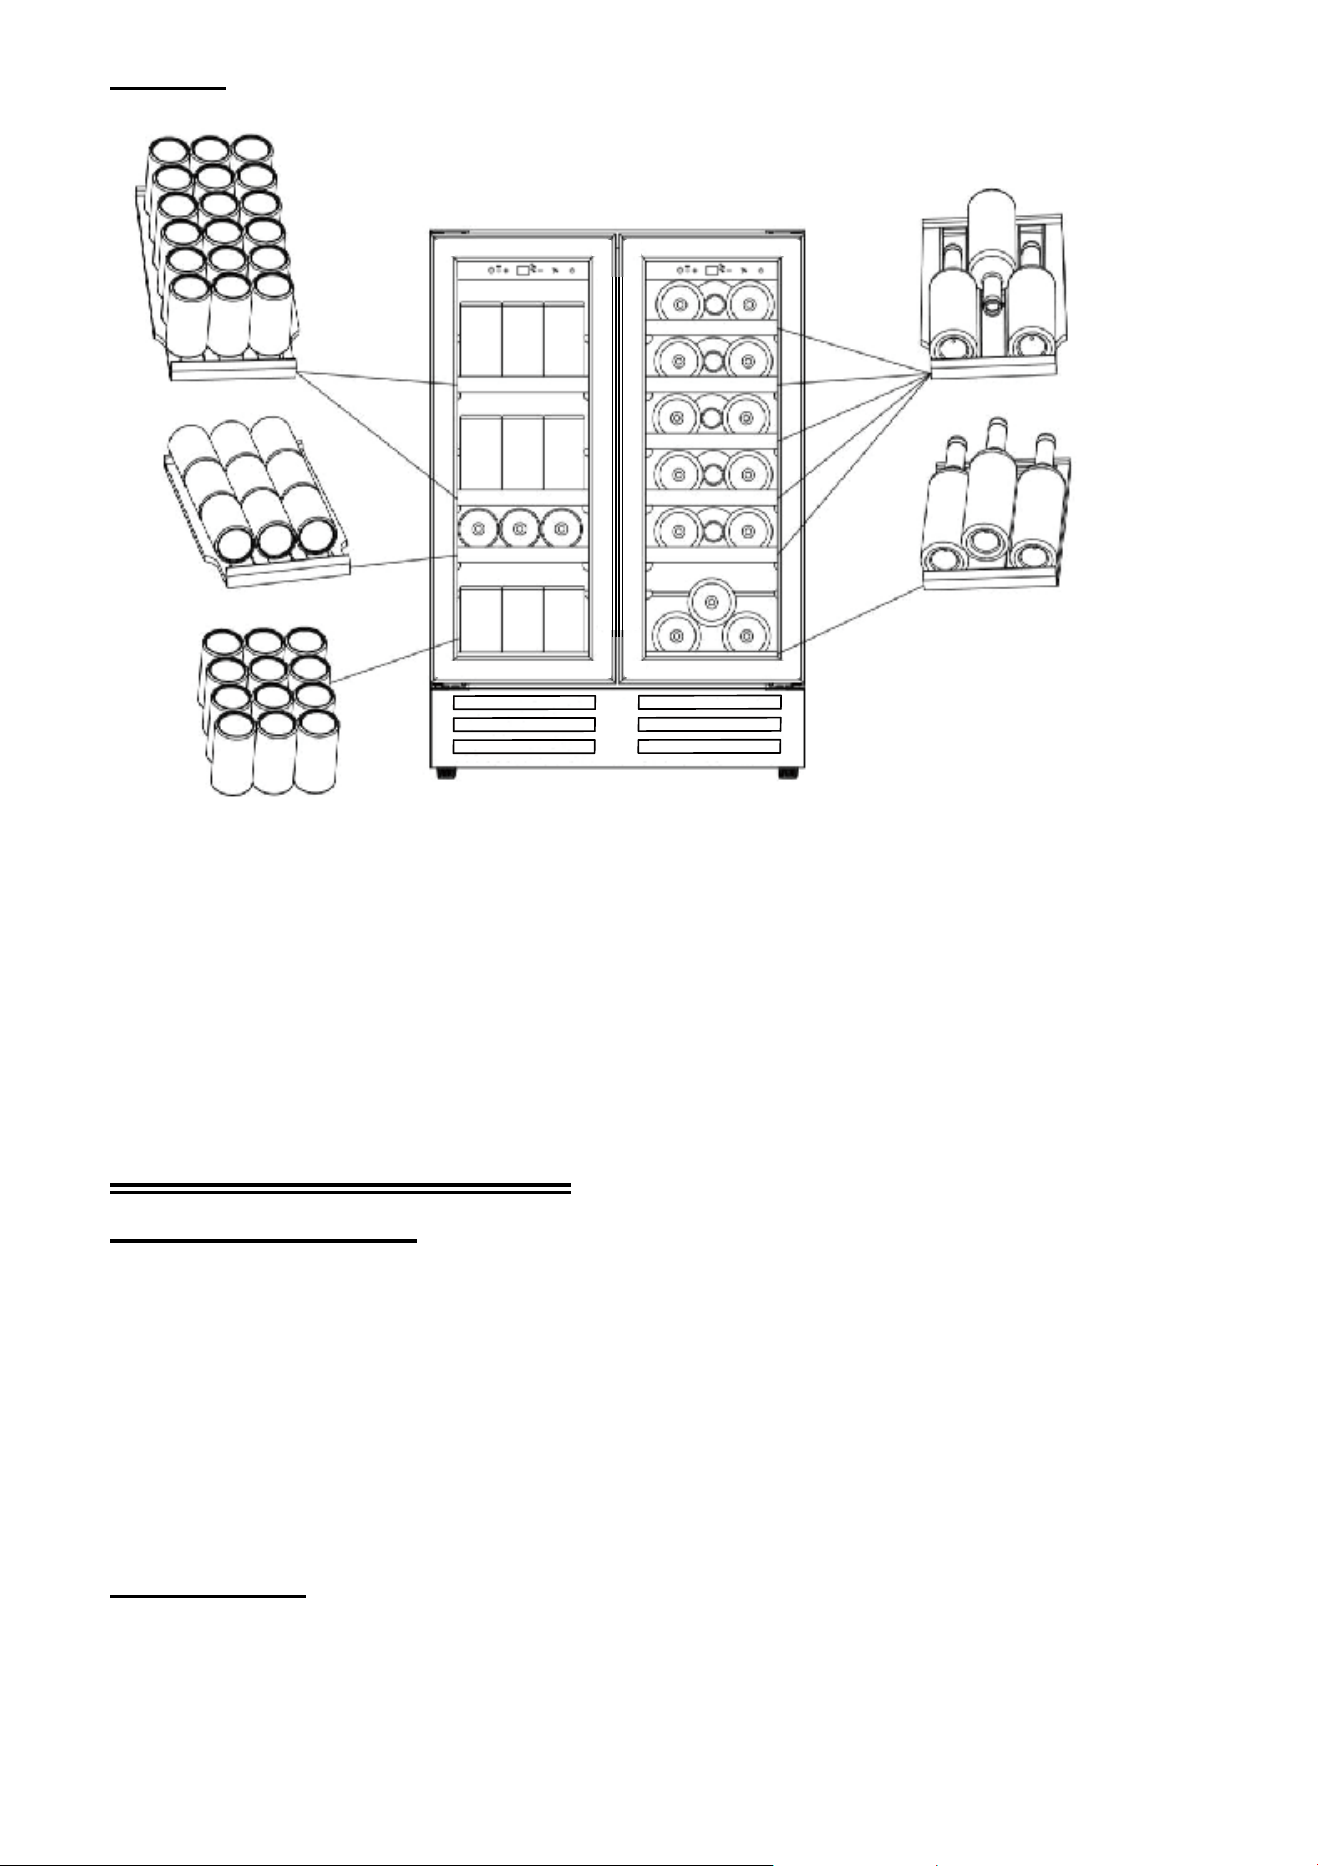
Storage
Beverage Cooler Zone
●Shelf one to two - 18 standard 12oz cans per shelf
●Shelf Three - 9 standard 12oz cans per shelf
●Bottom Section - 12 standard 12oz cans
Wine Cooler Zone
●Shelf One to Five - 3 standard 750ml bottles per shelf
●Bottom Section - 3 standard 750ml bottles
CARE AND MAINTENANCE
Cleaning your cooler
Turn off the power, unplug the appliance, and remove all items including shelves
Wash the inside surfa ces with a warm water and soft cloth
Wash the shelves with a mild detergent solution
Wring excess water out of the sponge or cloth when cleaning area of the controls, or any
electrical parts
Wash the outside cabinet with warm water and mild liquid detergent. Rinse well and
wipe d ry with a clean soft cloth. Do not use steel wool or steel brush on the stainless
steel. These will contaminate the stainless steel with steel p
articles and rustin g may
occur.
Power failure
Most power failures are corrected within a f ew hours and should not affect the temperature
of your appliance if you minimize the number of times the door is opened. If the power is
going to be off for a longer period of time, you need to take the proper steps to protect your
contents.
10
Moving your cooler
●Remove all items (bo ttles)
●Tape down securely all loose items (shelves) inside your appliance.
●Turn the adjustable leg u p to the base to avoid damage.
●Tape the door shut. Be sure the appliance stays secu re in the upright position d uring
transportation. If you absolutely n eed to transport the chiller ho rizontally, transport the chiller
on its back (door on top). Also protect outside of appliance with a blanket, or sim ilar item.
Energy saving tips
The cooler should be located in the coo lest are a of the room, away from heat producing
appliances, and out of t he direct sunlight.
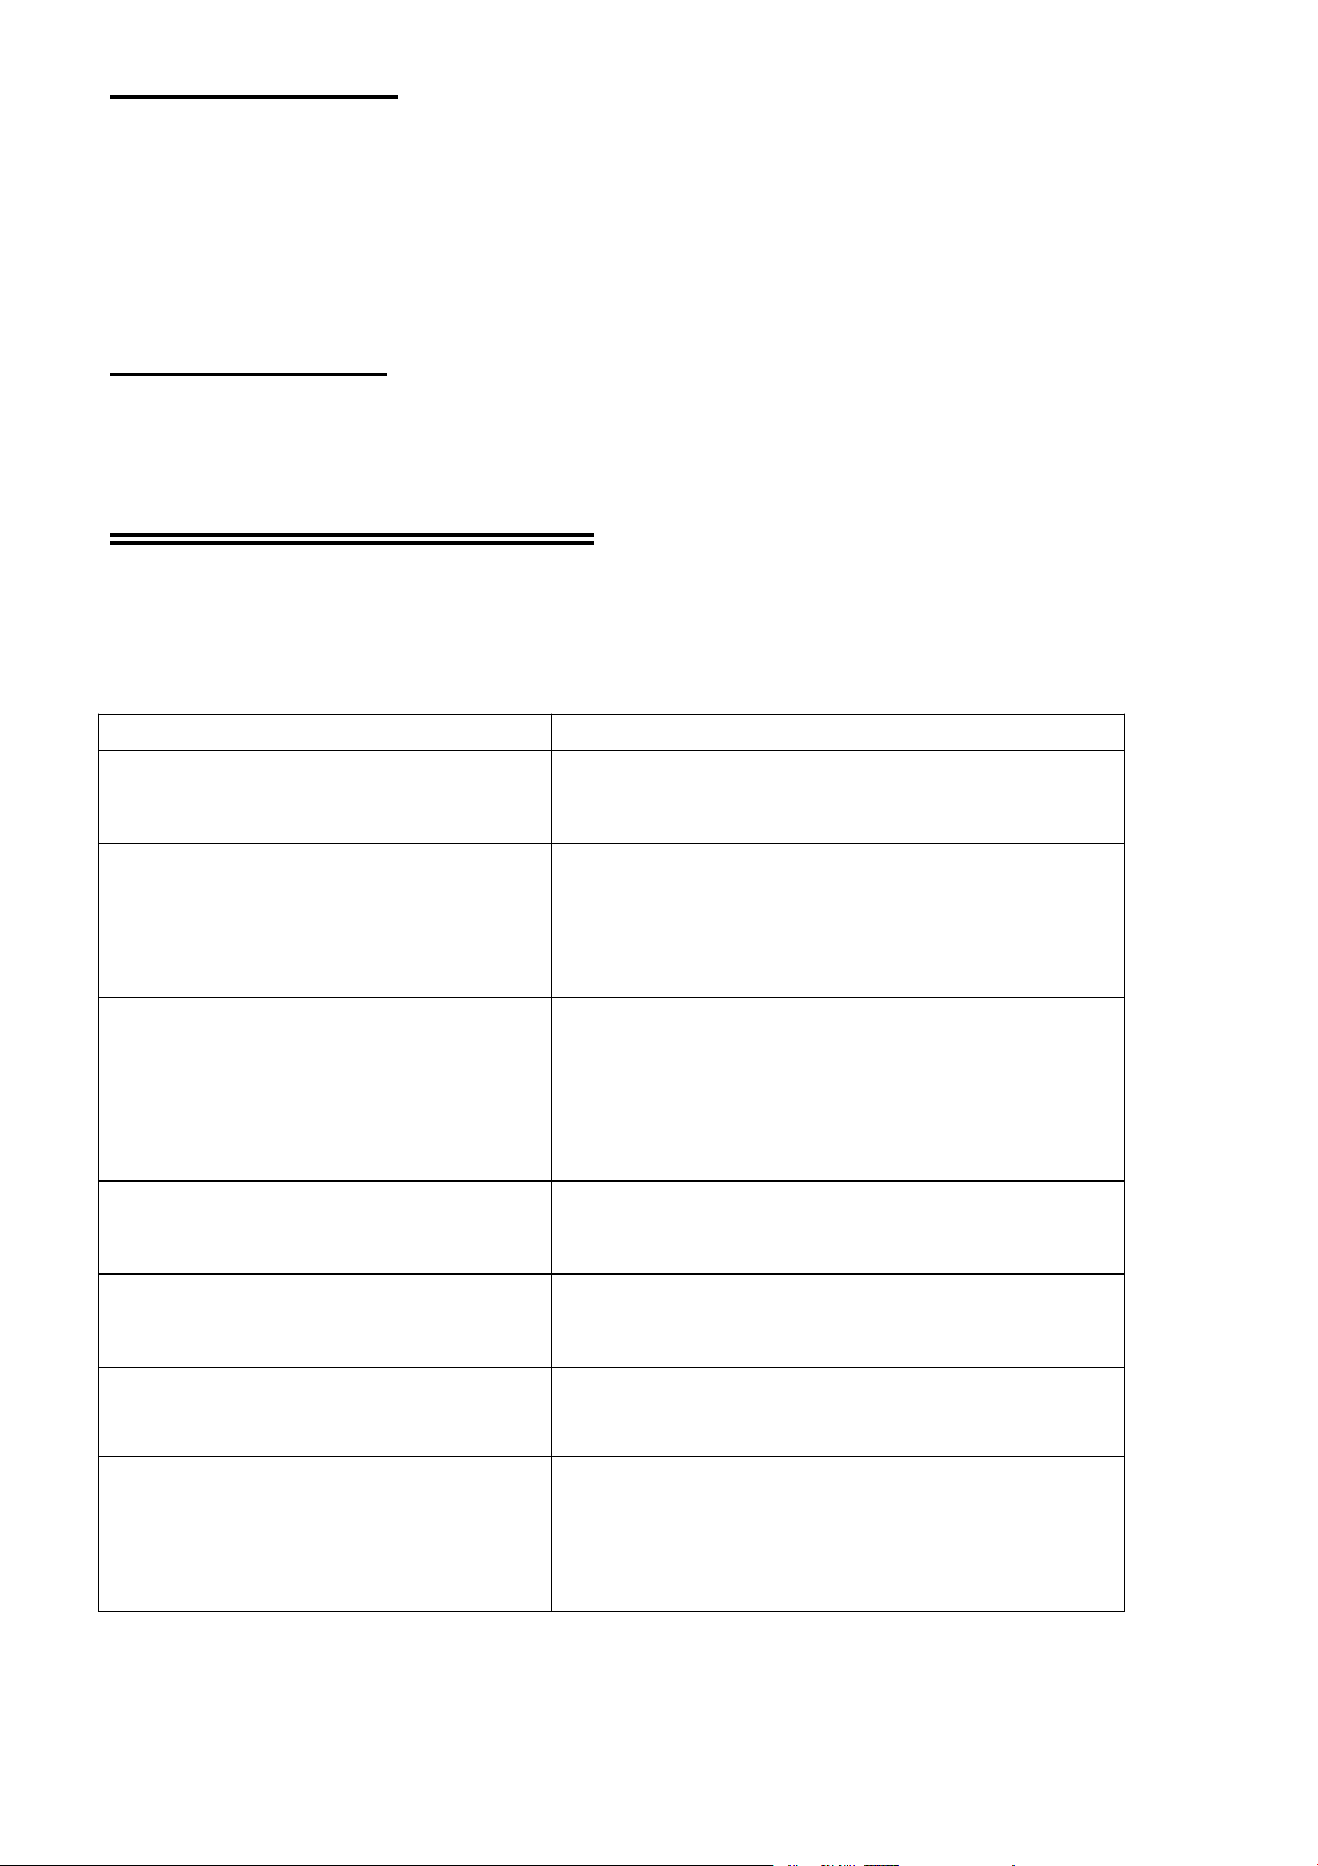
TROUBLESHOOTING GUIDE
You can solve many common cooler problems easily, saving you the cost of a possible
service call. Try the suggestions below to see if you can solve the problem before calling the
service.
PROBLEM
POSSIBLE CAUSE
Cooler does not operate.
Not plugged in.
The appliance is turned off.
The circuit breaker tripped or a blown fuse.
Cooler is not cold enough.
External environment may require a higher
setting.
The door is opened too often.
The door is not clo sed completely.
The door gasket does not seal properly.
The compressor turns on and off
frequently.
The room temperature is hotter than normal.
A lots of bottles has been added to the cooler.
The door is opened too often.
The door is not clo sed completely.
The temperature control is not set correctly.
The door gasket does not seal properly.
The light does n ot work
Not plugged in.
The circuit breaker tripped or a blown fuse.
The light button is “OFF”.
Vibrations.
The cooler is not leveled
The bottles are vibrating.
There is an object under the cooler.
The cooler seems to make too much
noise.
The flow of refrigerant is normal
The circulation of the refrigeration
The cooler is not level.
The door will not close properly.
The cooler is not level.
The door was reversed and not properly
installed.
The gasket is dirty.
The shelves are out of position.

11
Warranty Terms
Warranty Period
1. Customers are entitled to replacement or free repair service in case of quality defect(s) found
in the product within 15 days upon receipt of the product.
2. Customers are entitled to free repair service for any product proven defective in material or
workmanship that results in product failure during normal consumer usage and conditions
within the valid warranty period, which is 12 months counting from the date of selling.
However, warranty period varies by product component and country of purchase. Please contact
our after-sales service team via for detailed warranty information.
Warranty Exclusions
1. Products subjected to unauthorized repair, misuse, collision, neglect, mishandling, soaking,
accident, and unauthorized alteration.
2. Products subjected to improper use or whose labels or security tags have been torn off or
altered.
3. Products whose warranty has expired.
4. Products damaged due to force majeure, such as fire, flood, lightening, etc.
Warranty Claim Procedure
1. If failure or any problem occurs to your product after purchase, please contact us,
or you can always contact our customer service through email at
2. Our customer service will guide you through the whole service procedure regarding any
product issue or problem you have encountered.
We reserve the right to reexamine damage d or returned products.
Contact Card
Support Phone: (213)432-5433
Support Email: [email protected]