1
INSTRUCTION MANUAL
CIGAR CABINET
MODEL: JC-85A
115V 60Hz 75W
This manual contains important information including safety and installation instructions
of the
appli
ances. Please read it carefully before use and follow all safety information
&
instructions. It
is
recommended to keep this manual for easy reference so that you can
be familiar with
the
operation of the appliance.

2
CONTENTS
SECURITY CONSIDERATIONS --------------------------------------------------------------- 3
COMPONENTS ------------------------------------------------------------------------------------- 4
STORAGE -------------------------------------------------------------------------------------------- 5
INSTALLATION AND BEFORE USE ---------------------------------------------------------- 5
SET-UP AND USE OF CIGAR CABINET ---------------------------------------------------- 7
TECHNICAL DATA -------------------------------------------------------------------------------- 10
TROUBLESHOOTING ---------------------------------------------------------------------------- 11
WARRANTY ----------------------------------------------------------------------------------------- 12

3
Security considerations
Please read the following before using the cigar cabinet
Please read the instructions carefully and operate carefully.
There is a potential danger in any electrical operation. For the sake of safety, please
read the instructions carefully and operate carefully when operating this product.
Do not use power sources other than 115V or access multiple appliances on the
same wiring board.
The cigar cabinet shall use a separate power outlet and the voltage shall match
the nameplate.
Ensure separate and effective grounding of the cigar cabinet.
- This will ensure the best performance and prevent indoor circuit overload,
which may cause the wire overheating and cause fire.
Do not unplug by pulling the power cord. Please hold the plug tightly and unplug it
directly from the power plug.
- Power cord damage may cause short circuit, fire or electric shock.
Make sure the power cord plug is not squeezed or damaged by the back of the
cigar cabinet.
Do not fold the power cord in half or place heavy objects on the power cord.
- There is a fire hazard.
Do not use loose sockets or power cord with cracks or surface wear.
If the power cord is damaged, please contact the manufacturer or other agent
immediately for repair or replacement.
Please be careful not to crush or damage the power cord when moving the cigar
cabinet. Do not touch the power plug with wet hands.
Remove foreign matter and dust from power plug.
- Otherwise there is a fire hazard.
After the cigar cabinet is out of power, wait at least ten minutes before
reconnecting.
If the wall socket is loose, please do not plug into the power plug.
- Otherwise there will be fire or electric shock risk.
This machine must be placed in a suitable place so that it is easy to connect or
unplug the power plug after installation.
Be sure to use a separate, reliable grounding power supply, do not share sockets
with other electrical appliances, to ensure safe use, sockets and their connecting
wires must be able to withstand more than 10A of current.
The cigar cabinet must be grounded.
- To prevent leakage of electricity or electricity from the cigar cabinet.
Never use gas pipes, telephone lines or other hidden lightning rods for grounding.
- Improper grounding may lead to electric shock.
Do not disassemble or repair the cigar cabinet by yourself.
- This can lead to fire, machine failure or personal injury.
- If the cigar cabinet can not be used normally due to self-disassembly, cigar
cabinet will no longer bear the warranty policy and other losses caused by the
inability of the cigar cabinet to work.
The product passes through the back plate for heat dissipation, in order to achieve
the necessary heat dissipation effect please provide the necessary ventilation
conditions.
- Do not cover the product back with cloth or other material.
- Do not put this machine on the bedside to avoid the sleep effect caused by the
sound of the machine running.
4
- Do not place this machine in restricted spaces such as: bookcases or
embedded cabinets unless properly ventilated. Or contact the merchant to
consult the solution before purchase.
- Be careful to keep the distance between the back and the wall more than 5CM
when placing the product.
Do not place this machine near an electric heater or radiator, or in direct sunlight.
Do not place any heat-producing items such as candles, ashtrays, aromatherapy,
combustible gas or explosive materials near the product.
Do not place containers containing water on this machine, as this may lead to the
risk of fire or electric shock.
Do not expose this machine to rain or near water (e.g. near bathtub, sink, kitchen
sink, or laundry pool, wet basement, or near swimming pool and balcony). If this
machine is accidentally wet, unplug the power immediately and dry with a dry rag.
When cleaning, please use more than 75% medical alcohol to wipe, do not use
water-containing rag to wipe, so as not to cause wood structure mildew and
bacteria breeding.
All parts of this machine are not running with battery.
Do not allow children to climb this product.
The front of the machine is a whole tempered glass, do not use sharp products
bump, so as not to cause glass door breakage.
Do not place this product in unstable positions such as rocking shelves, tilted
ground or positions affected by external vibrations.
Do not cause the product to fall or be impacted. If the product is damaged, please
disconnect the power supply and contact the service center.
Unplug the power cord from the power outlet and wipe it with a soft dry cloth. Do
not use any chemicals such as wax, benzene, alcohol, diluent, insecticide, air
cleaner, lubricant or cleaner to wipe the power after cleaning. This may cause
short circuit of power contact and fire.
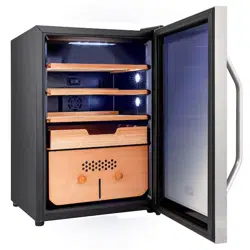
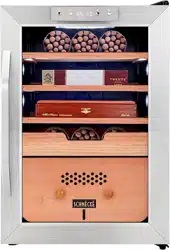
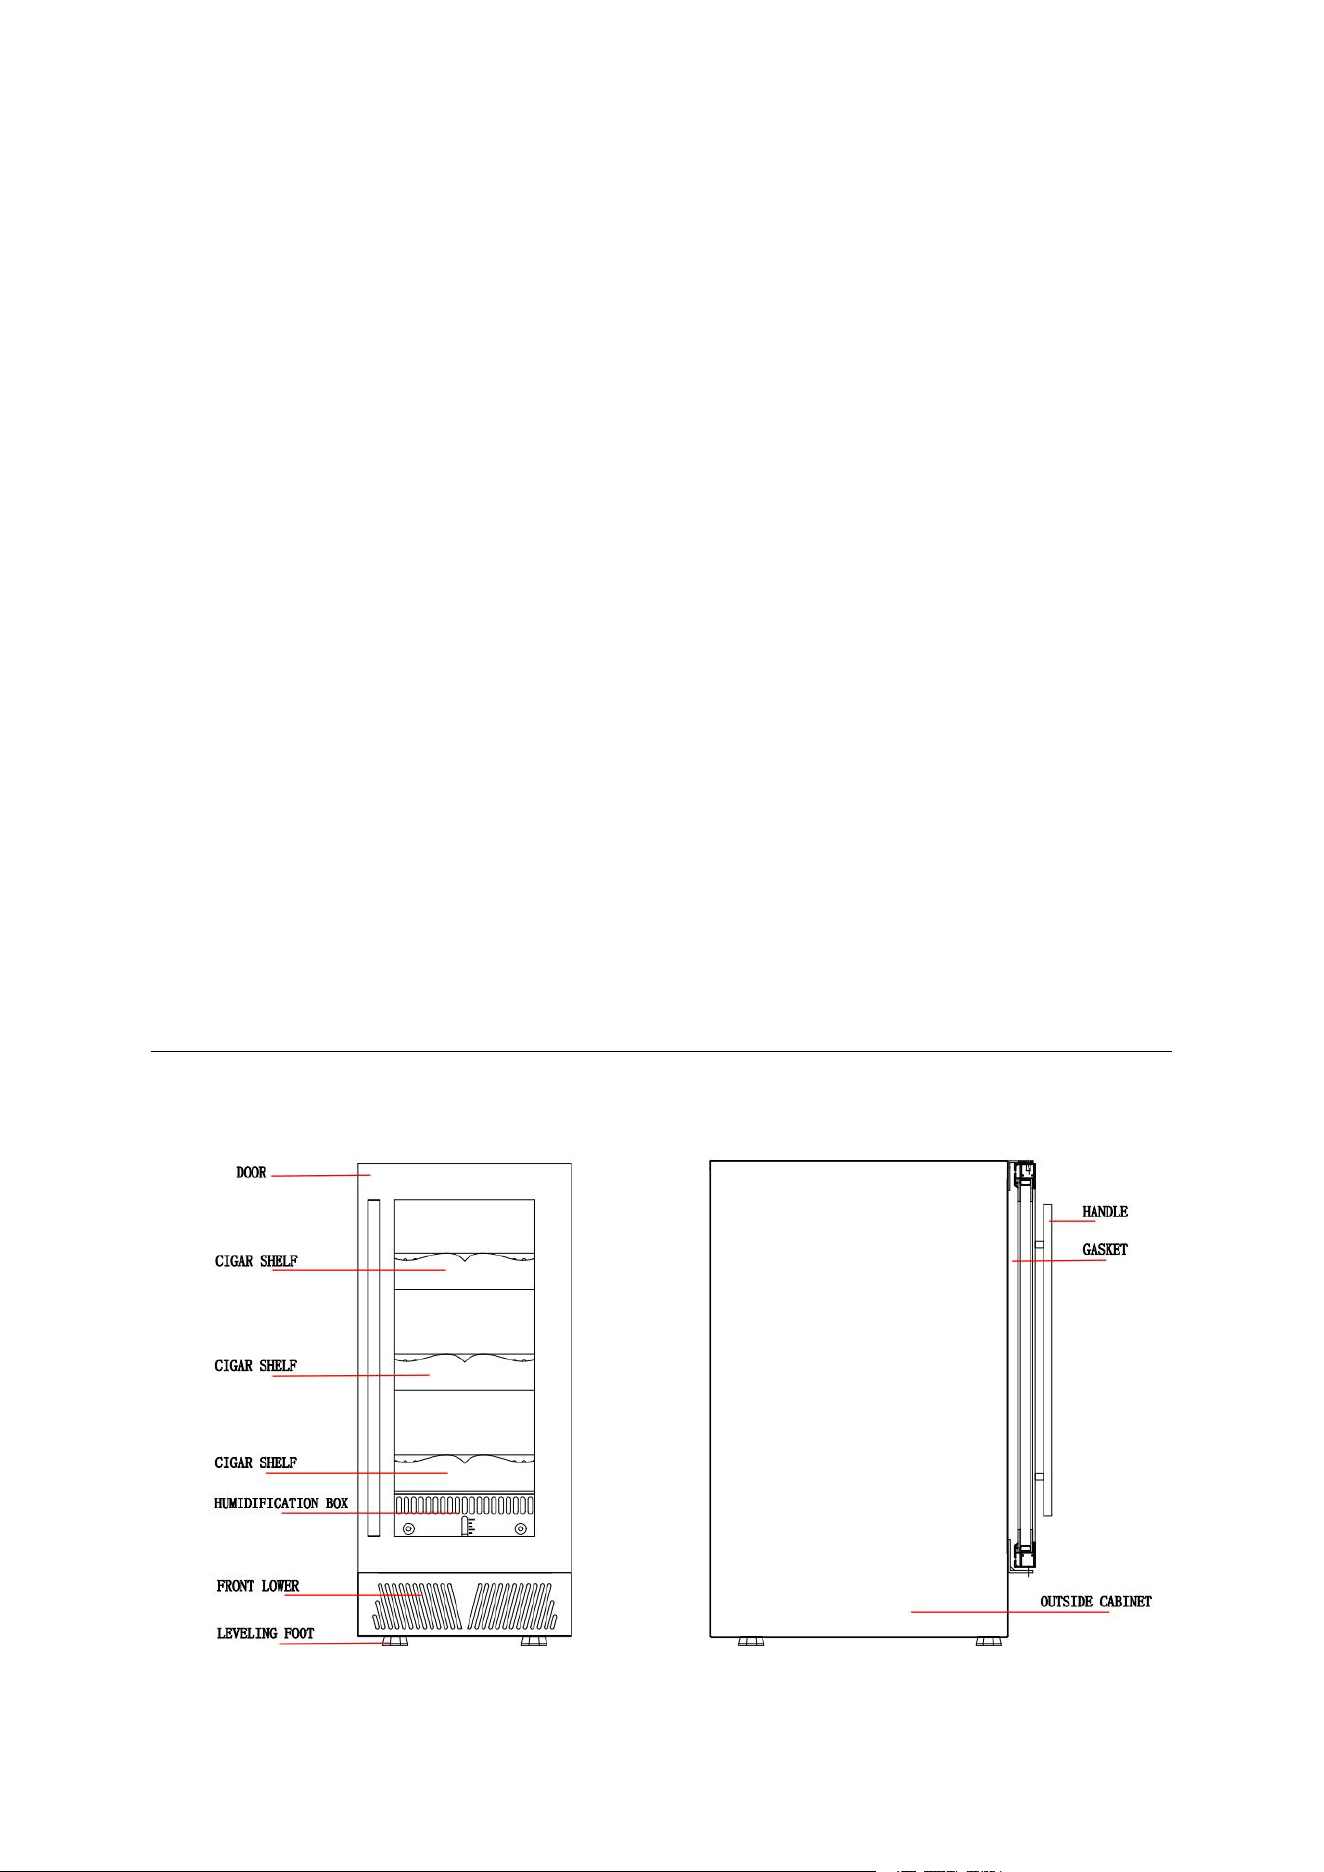
COMPONENTS

5
STORAGE
Installation and Before Use
UNPACKING AND INSTALL THE DOOR HANDLE
Remove the exterior and interior packing materials.
Install the door handle provided with the appliance by
following these steps:
Step 1 - Remove the gasket at the inner side of the
door
to expose the two screw holes.
Step 2 -Install the handle tightly with the screws
and washers provided.
Step 3 -Tidy and restore the gasket.
6
INSTALLATION INSTRUCTIONS
Before Using Your Cigar Cabinet
Remove the exterior and interior packing.
Before connecting the Cigar cabinet to the power source, let it stand upright for
approximately 24 hours. This will reduce the possibility of a malfunction in the cooling
system from handling during transportation.
Use a soft cloth to clean the interior surface with lukewarm water.
This appliance is intended to be used in household and similar applications such as
– staff kitchen areas in shops, offices and other working environments;
– farm houses and by clients in hotels, motels and other residential type environments;
– bed and breakfast type environments;
– catering and similar non-retail applications.
When disposing your appliance, please choose an authorized disposal site.
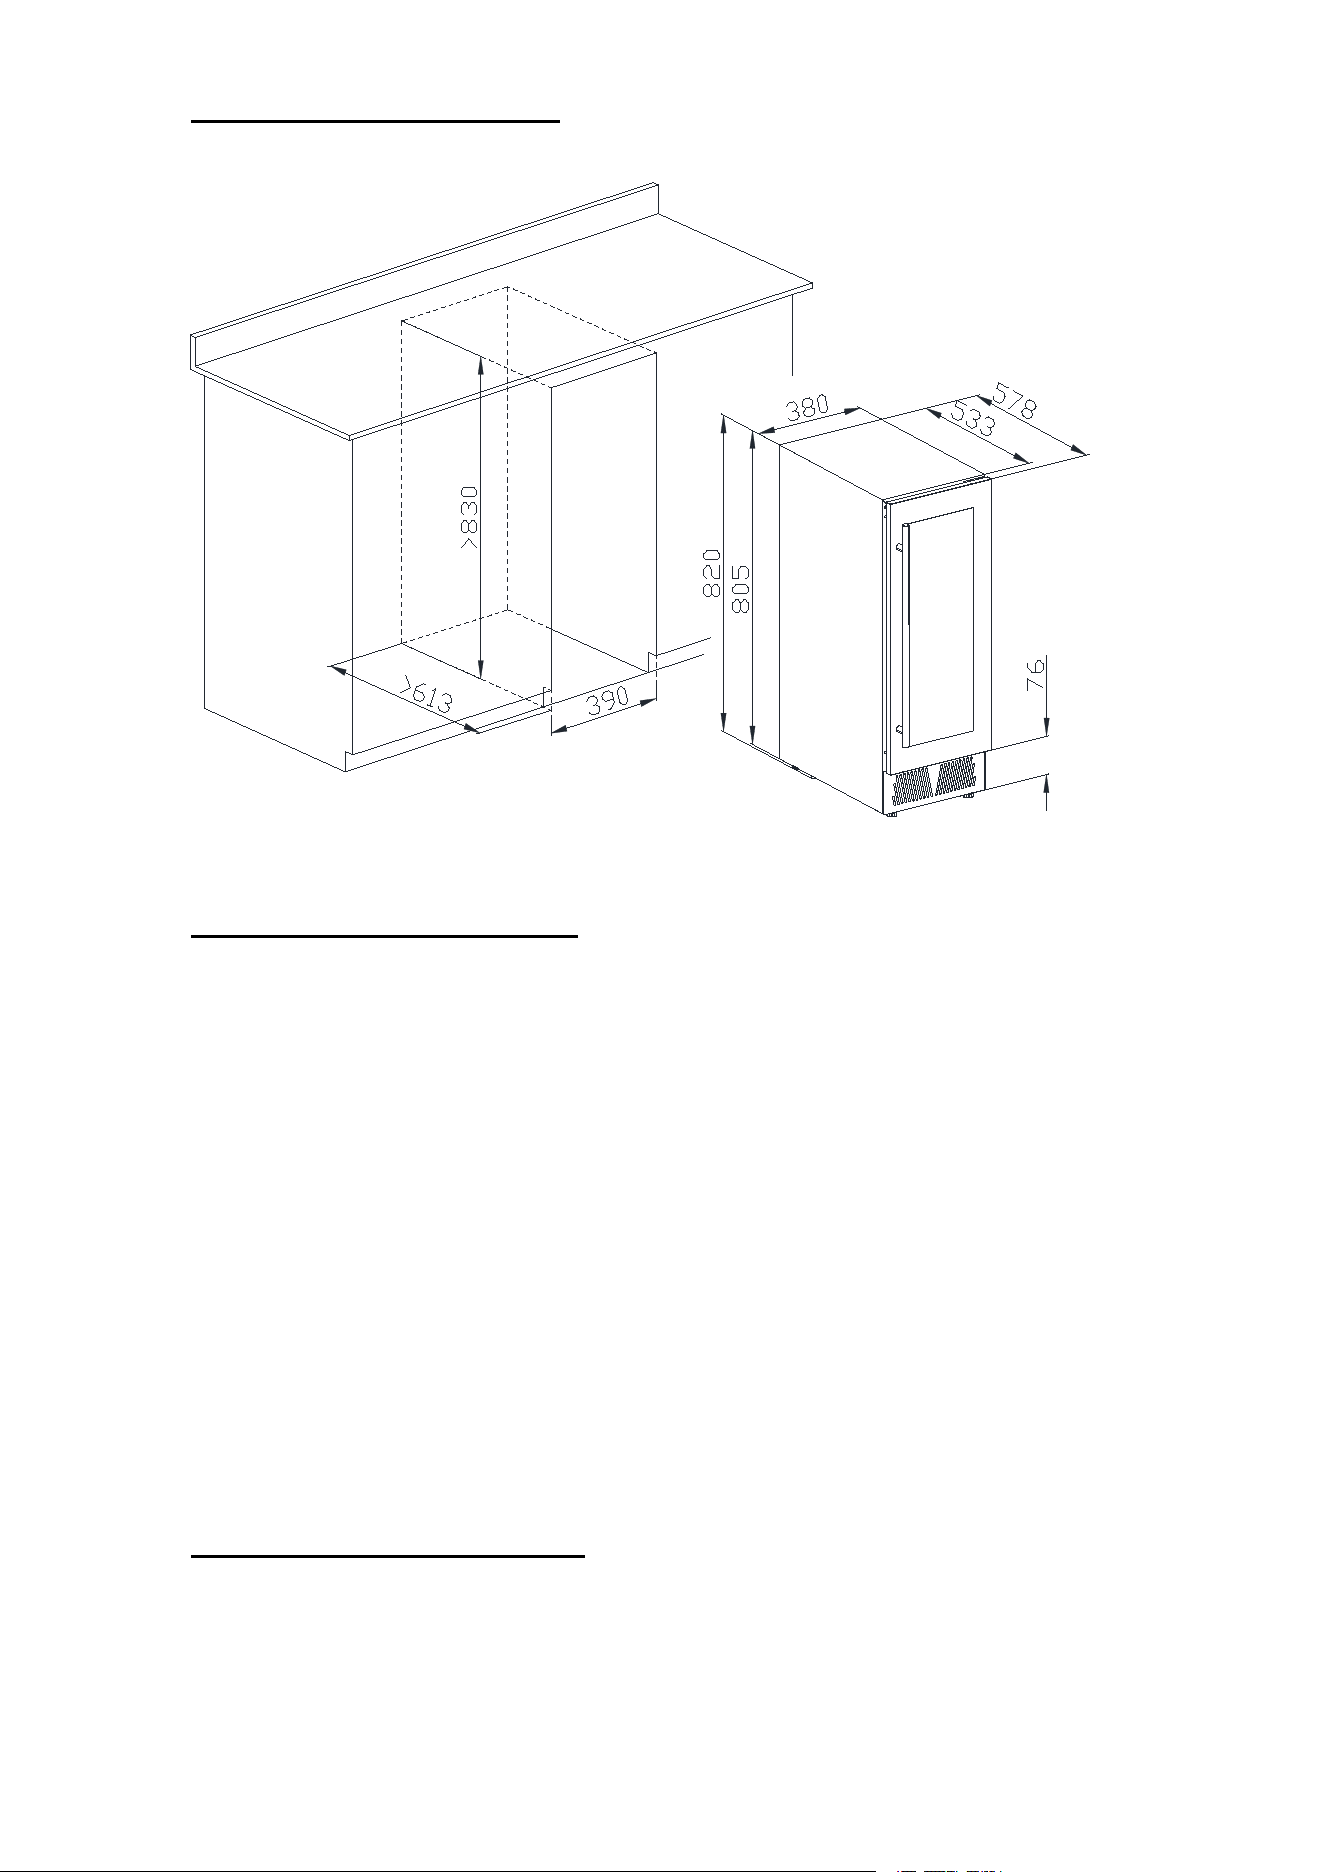
Installation of Your Cigar Cabinet
This appliance is designed to be for free standing installation or built-in (fully recessed)
(Refer to sticker location the back of this appliance).
This appliance is intended to be used exclusively for the storage of cigar.
7
Place your Cigar cabinet on a flat floor that is strong enough to support it when it is fully
loaded. To level your Cigar cabinet, adjust the front leveling leg at the bottom of the
appliance.
This appliance is using flammability refrigerant. So never damage the cooling pipework
during the transportation. Locate the Cigar cabinet away from direct sunlight and sources
of heat (stove, heater, radiator, etc.). Direct sunlight may affect the acrylic coating and heat
sources may increase electrical consumption. Extreme cold ambient temperatures may
also cause the unit not to perform properly.
Avoid locating the unit in moist areas.
Plug the Cigar cabinet into an exclusive, properly installed-grounded wall outlet. Do not cut
or remove the third (ground) prong from the power cord under any circumstances. Any
questions concerning power and/or grounding should be directed toward a certified
electrician or an authorized Products service center.
Attention
Store Cigar in sealed boxes;
Do not overload the cabinet;
Do not open the door unless necessary;
Do not cover shelves with aluminum foil or any other shelf material which may prevent air
circulation;
Should the Cigar cabinet be stored without use for long periods, it is suggested to leave the
door ajar to allow air to circulate inside the cabinet after a careful cleaning,avoiding
possible formations of condensation, mold or odors.
The product needs to run 24 hours after the power operation before putting into the cigar.
Cedar wood shelf in cigar cabinet needs to absorb enough moisture and the inner duct
board needs to be wet enough to achieve the desired operating effect.
Set-up and Use of Cigar Cabinet
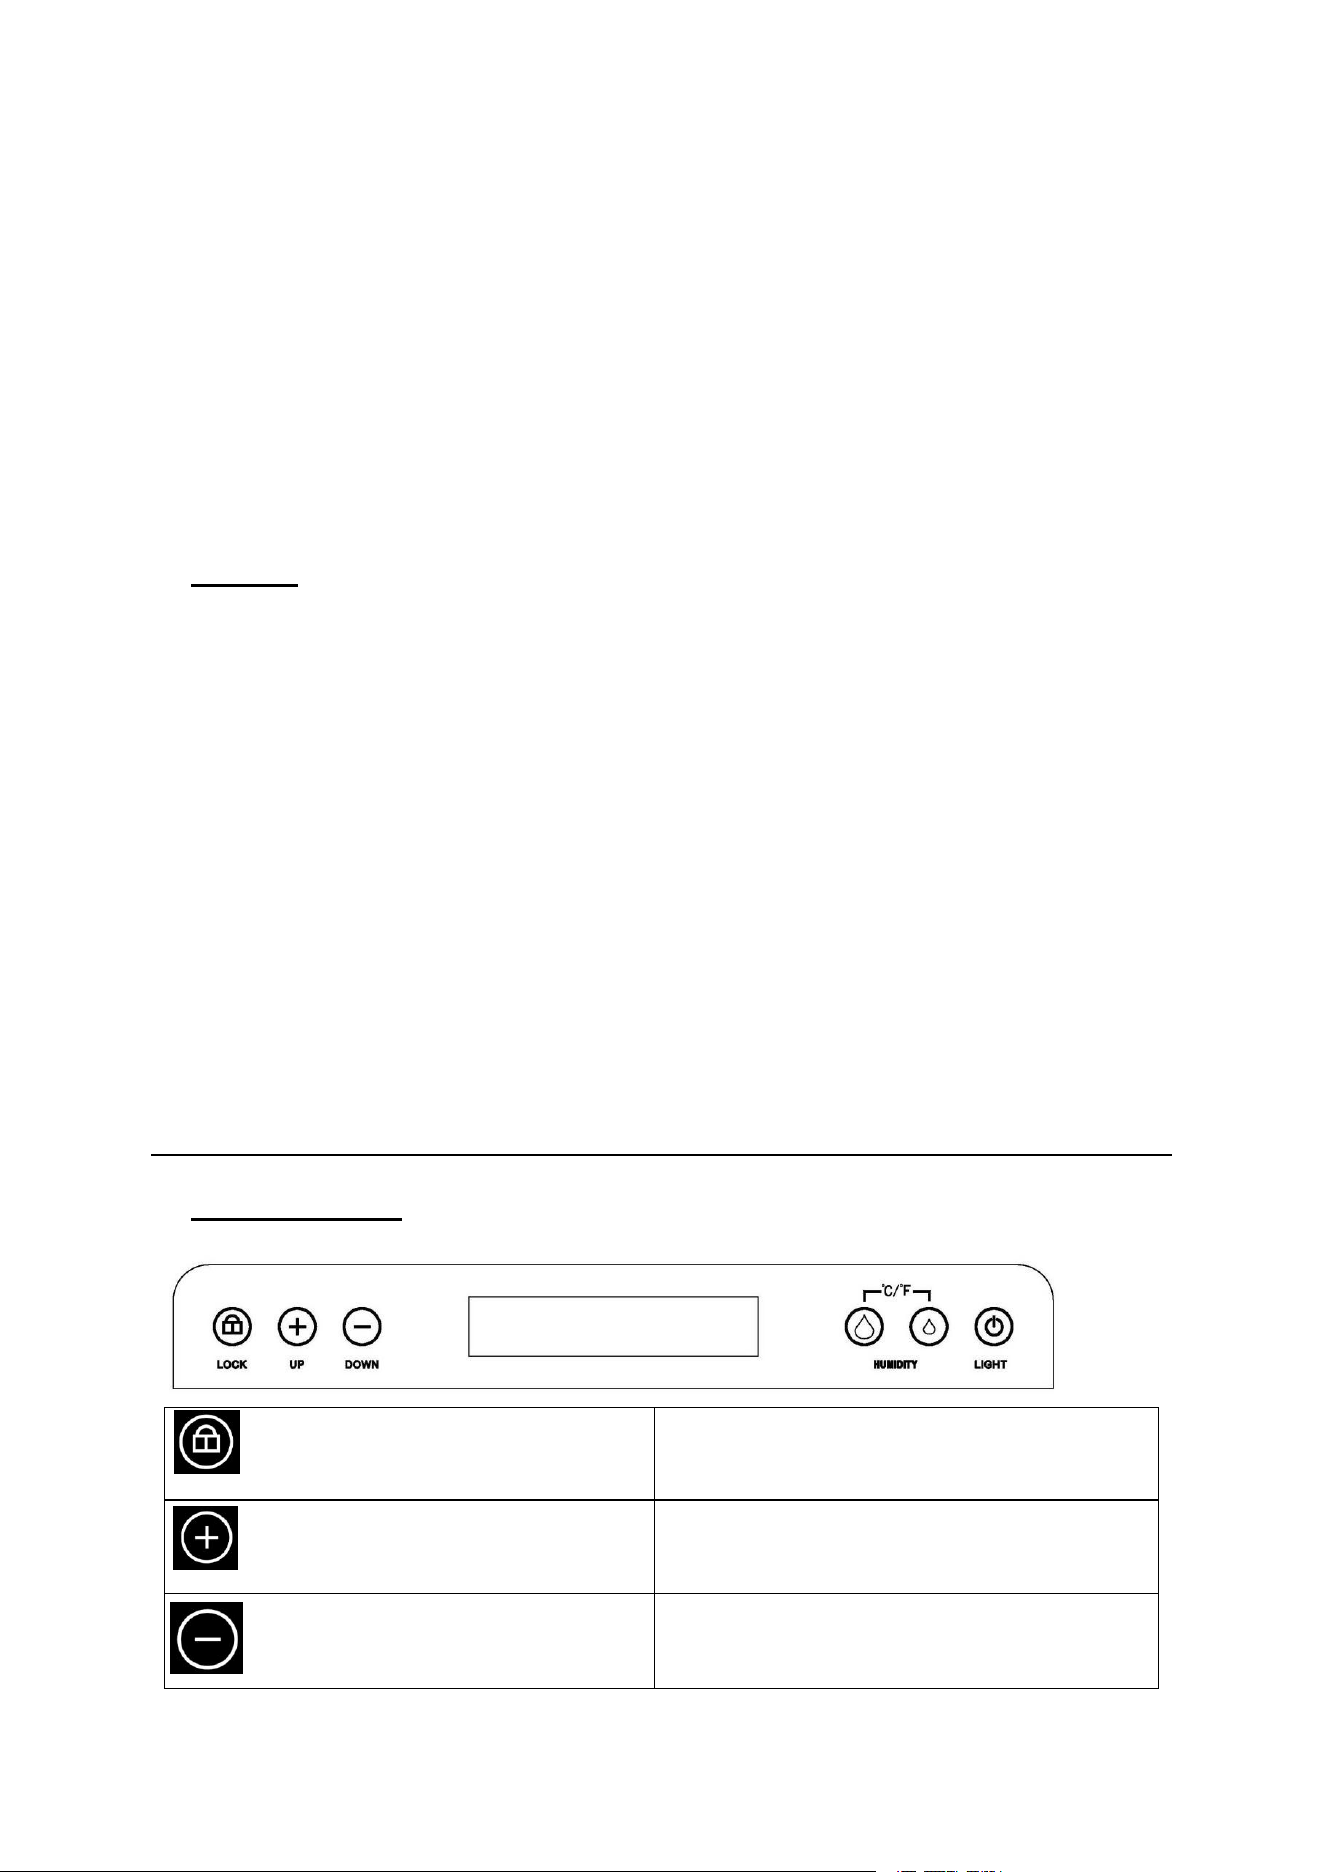
CONTROL PANEL
Lock key
Press the button for 3 seconds to
open/close the lock function.
Temp. Up button
Press to add temperature when setting.
Temp. Down button
Press to reduce temperature when
setting.
8
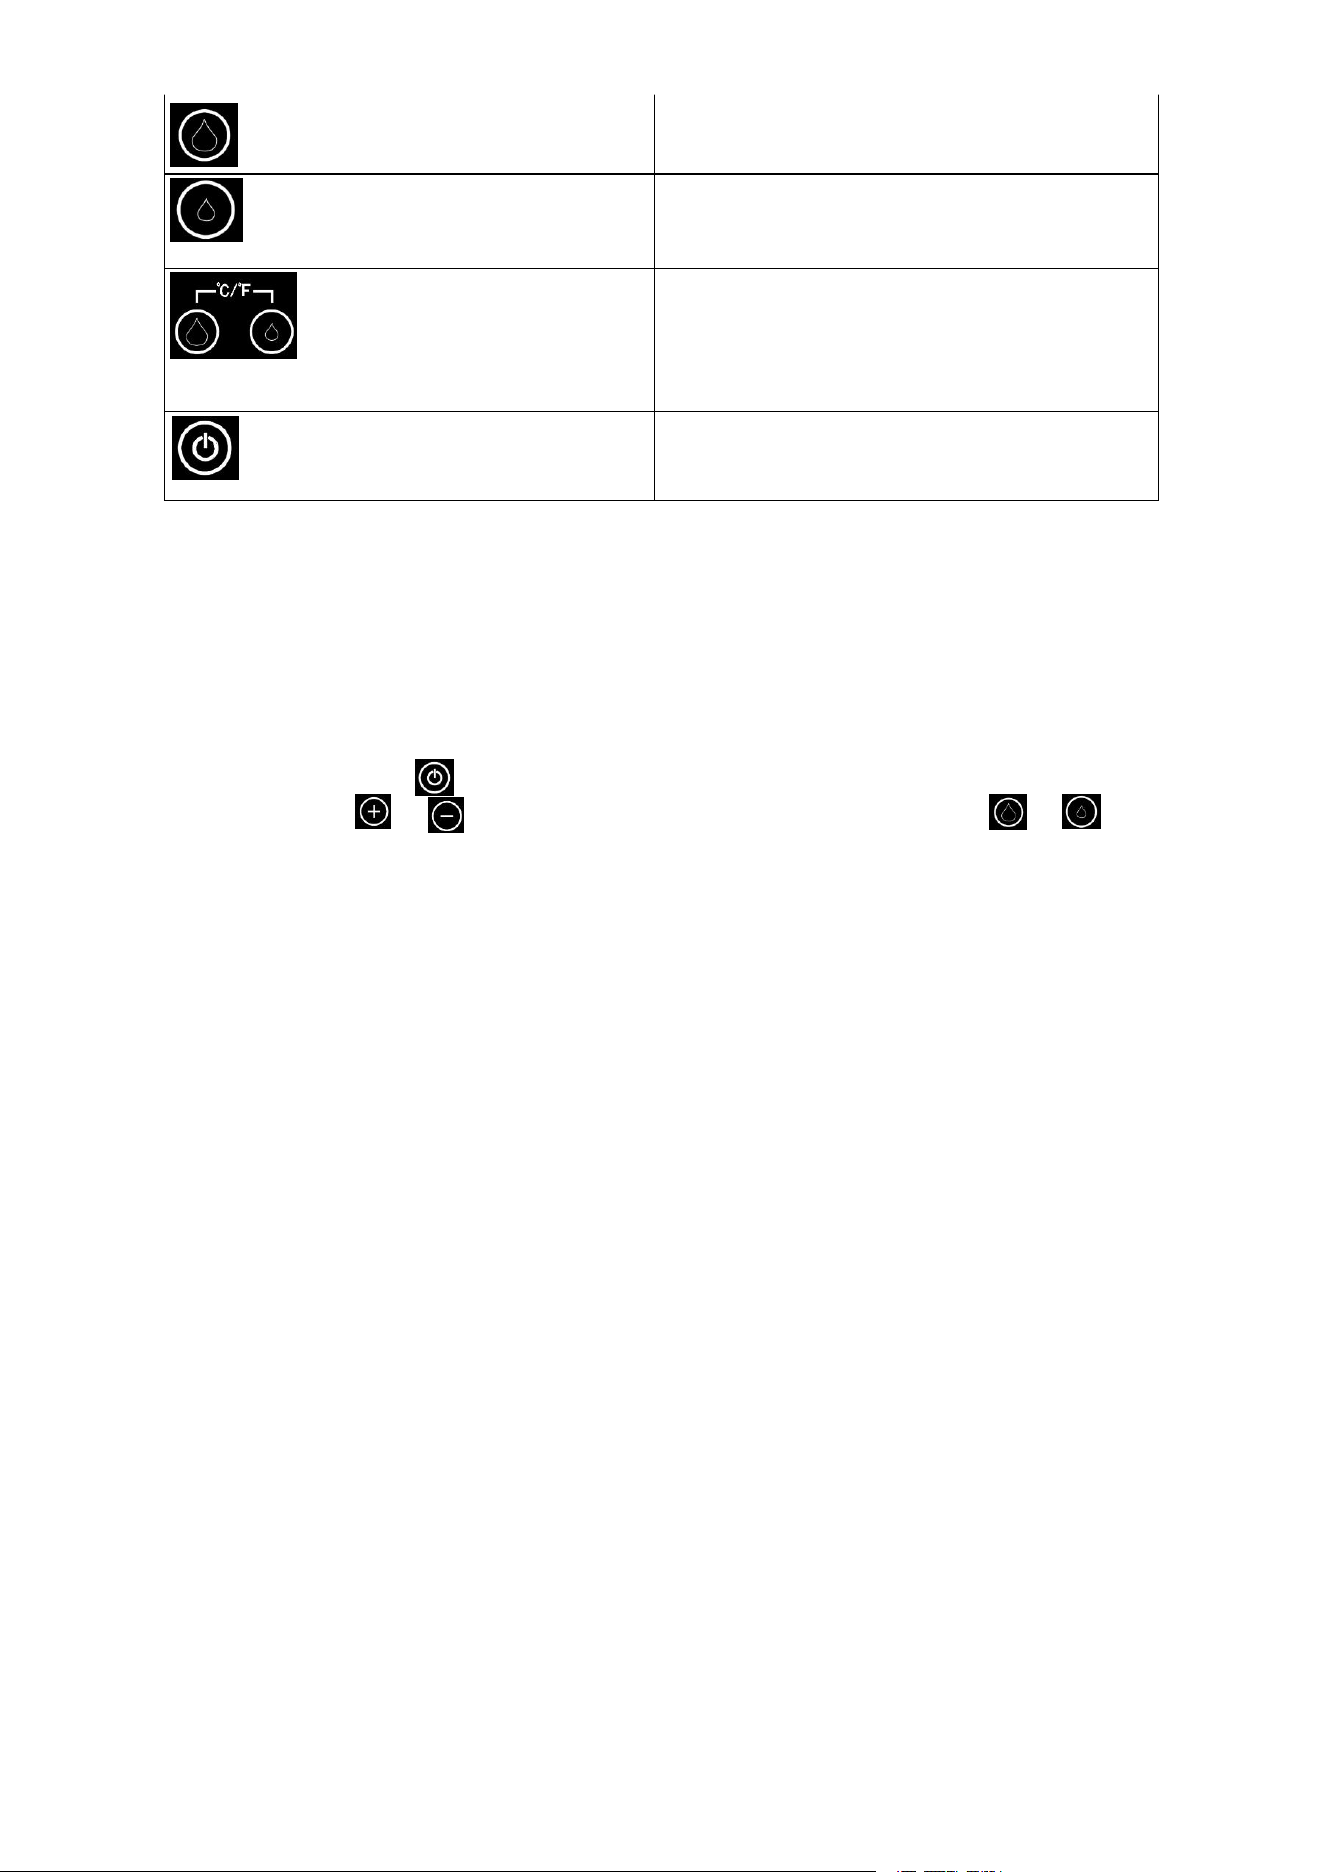
Humidity Up button
Press to add humidity when setting.
Humidity Down button
Press to reduce humidity when setting.
Combination key
Press the combination key at the same
time for 3 seconds, you can interchange
the Fahrenheit (ºF) and Celsius (ºC).
Lamp/switch power key
Press to turn on/off the light; long press
for 3 seconds to turn on/off the power
After the temperature or humidity of the cigar cabinet is set up, the system flashes for
5 seconds and automatically confirms, without the need of keystroke confirmation.
Cigar cabinet cigar maintenance temperature and humidity setting.
- Recommended temperature setting range :16-22℃(62-72℉).
- Recommended humidity setting range: 50-80%.
Set temperature and humidity.
- Long press the to turn on the unit. Then begin to set the temperature by
pressing or to add or reduce the temperature; press the or to
add or reduce humidity.
Temperature and humidity display calibration function.
- When the temperature and humidity display of the cigar cabinet comes with a
deviation from your temperature and humidity meter display, the following
operation can be carried out to calibrate the temperature and humidity display.
- It is recommended that the cigar cabinet runs at least 3 days before calibration.
Cigar cabinet calibration operation:
- Press the up and down button at the same time, after 5 seconds the
temperature displays a number "0", you can start the temperature calibration.
Press the up and down button key again for the humidity calibration while the
humidity displays “0”.
- If the temperature/humidity of the unit is < the value of temperature and
humidity meter, press temp./ humidity Up button to increase the value.
- Conversely, if the temperature/humidity of the unit is > the value of
temperature and humidity meter, press temp./ humidity Down button to reduce
the value.
Water tank.
- Note: please add water into water tank before use. Water shortage may cause
the humidity can not reach the set value.
- It is suggested to add purified or distilled water only with 1/2 of the water tank
capacity. Do not use directly the tap water to avoid impurities.
- Please keep the white mesh inside the water tank when adding water. If the
white mesh become yellow or black due the impurities, take it out and use
white vinegar, baking soda and water to soak it together.
9
- It is recommended to clean the water tank every month and replace the water
in the water tank.
Interior lighting
- Press the lamp key to turn on (or turn off) the interior cool LED lighting.
Lock
- Press the button for 3 seconds to lock. When the control panel is locked, other
key icons are not available except the light icon.Press the button for 3 seconds
to unlock.
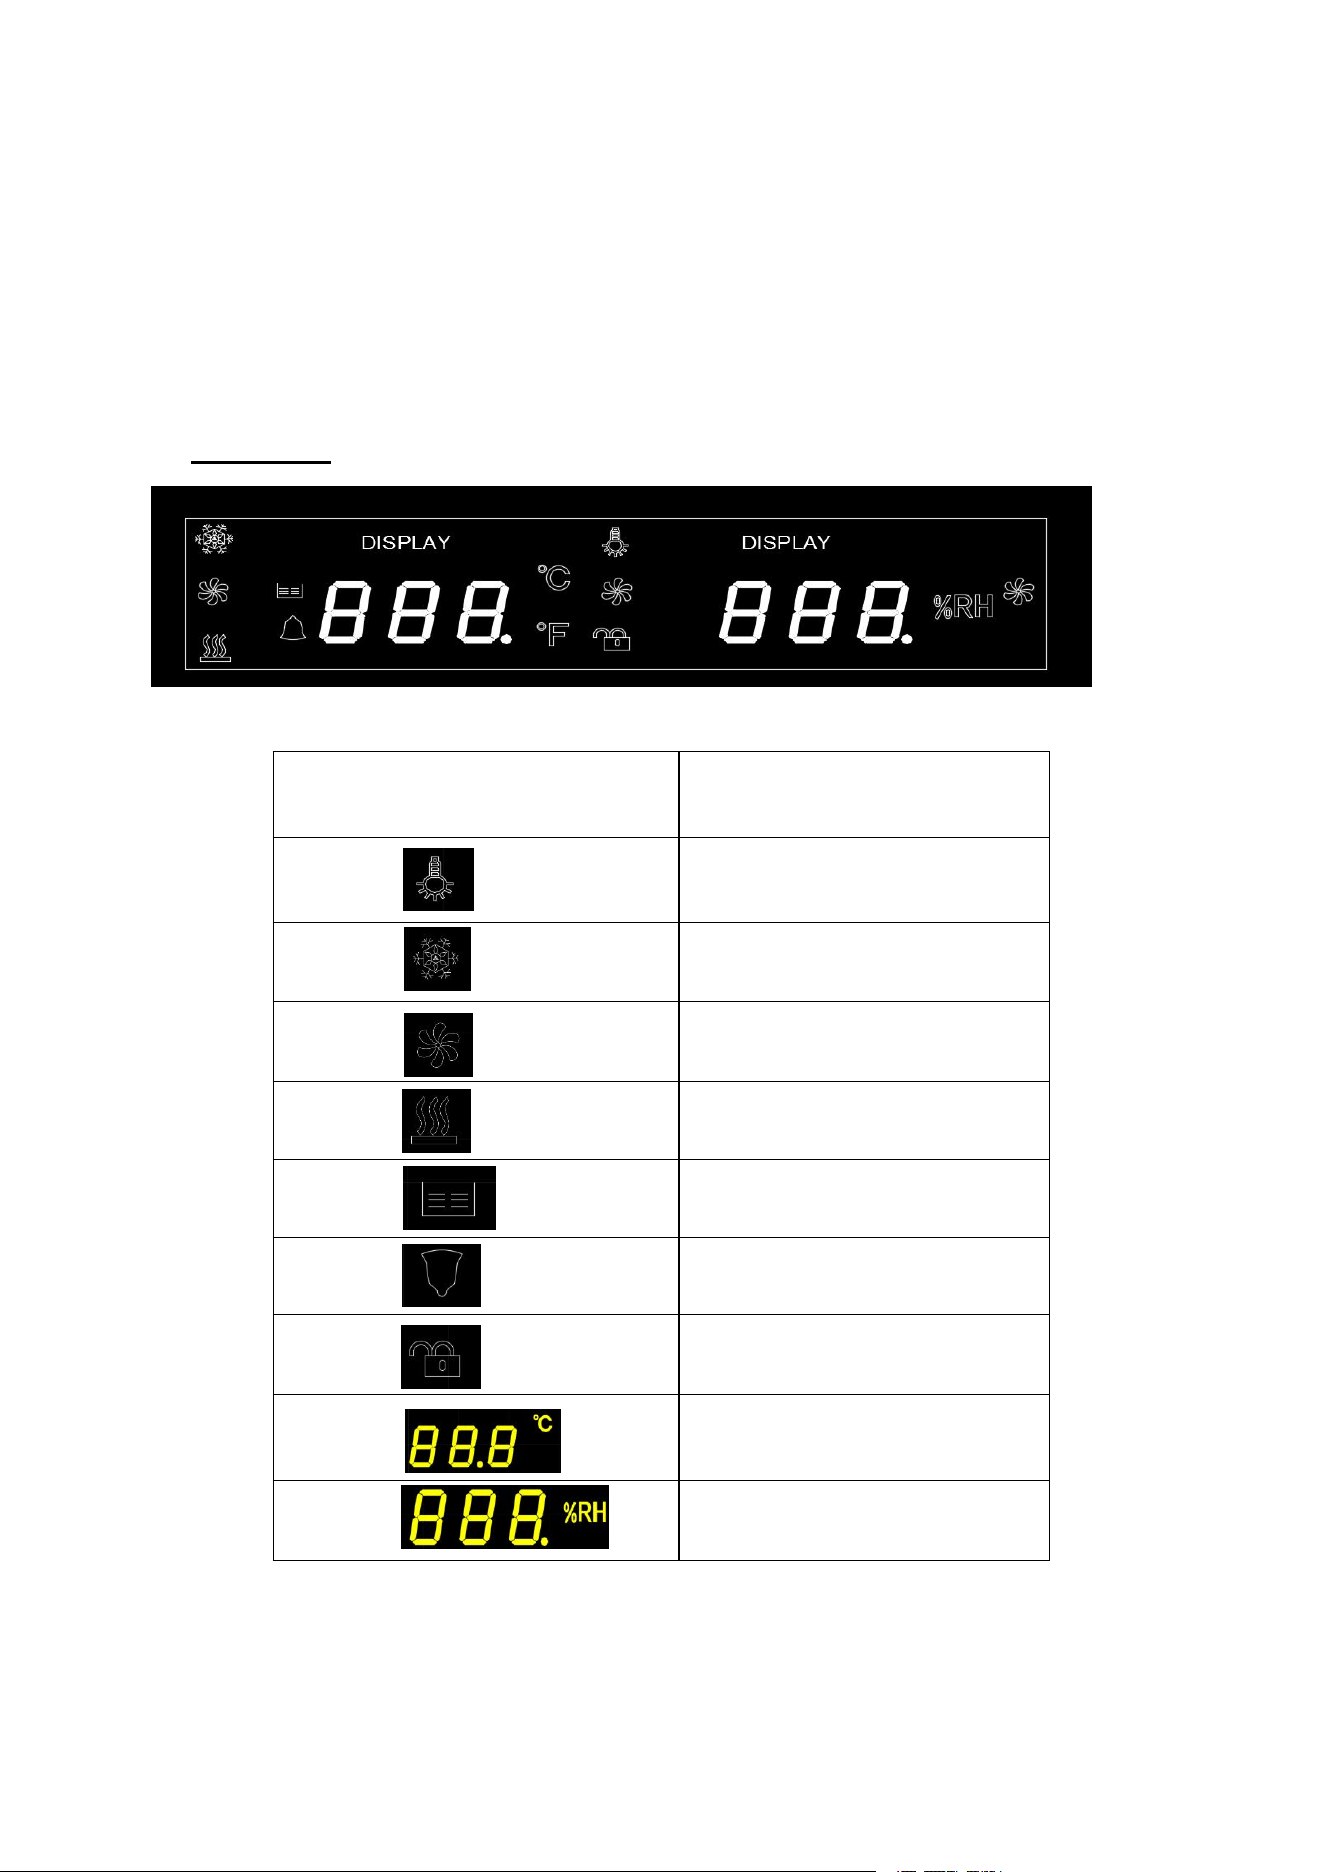
LCD PANEL
Symbol
Description
The light is on
Cooling/dehumidified
Fan is on
Heating for temperature and
humidification compensation
Defrosting
Alarm notification
Lock/unlock
Current Temperature
Current Humidity
If the unit displays other icons. Do not self-install to avoid personal injury.
The temperature and humidity are interrelated, it is normal that the cooling and
heating icons will light on at the same time when the cigar cabinet is working.
10
Refrigeration.
- While the cabinet works, the is lit.
- The cigar cabinet is designed for use with R600a as the designated ,no need to
add freon during use.
- There will be no frosting on the back at the air cooling mode.
Heating
- The cigar cabinet has heating compensation function, and the maximum
temperature compensation is 10-15 degrees. If the ambient temperature is too
low, the cigar cabinet can not reach the set temperature, please move the
product to a higher temperature environment for use.
- The cigar cabinet use PTC heater for heating, through the entire rear duct plate
for hot air heating. So there will be no damage to the cigar.
- While the cabinet begins to heat, the is lit.
Humidification
- The cigar cabinet converts the water in the bottom water tank into humidity by
humidifying fan for the inner cabinet. Therefore, it is recommended to use pure
water or distilled water to avoid impurities contaminating cigars.
- While the cabinet Humidifies, the is lit.
Dehumidification .
- The humidity will be converts to condensing water during refrigeration and flow
into the water tank.
- While the cabinet dehumidifies, the is lit.
Defrosting
-the cabinet has the auto defrosting function. While it defrost, the will be on.
Alarm notification
-If there is any failure on the appliance, the will be lit to remind you.
TECHNICAL DATA
Model
JC-85A
Total Volum
2.88Cu.Ft.
Power
115V~60Hz
Amps
1.0A
Start-up Amps
10A
Power Input
75W
Pressure High Side
105PSL
Pressure Low Side
55PSL
Refrigerant
R600a
Amount
0.78 oz.
Net Weight
70.9
11
Dimensions(HxWxD)
34.25’’ x 14.9’’ x 23’’
Climate category
N/SN
Foaming Agent
Cyclopentane
TROUBLESHOOTING
Troubleshooting Notes
Failure
Possible causes
The cigar cooler does not
operate
No plugged in.
The appliance is turned off.
The circuit breaker tripped or a blown fuse.
The cigar cooler is not
cold enough
Check temperature control settings.
The external environment may require higher settings.
The door is open frequently.
The door is not completely closed.
The door gasket does not seal properly.
Turns on and off frequently
Room temperature is higher than normal.
Overload of cabinet.
The door is open frequently.
The door is not completely closed.
The temperature control is not set correctly.
The door gasket does not seal properly.
The light does not work
The circuit breaker tripped or a blown fuse.
The bulb has burned out.
The light button is “OFF”
Vibration
Check to sure that the appliance is in level surface.
Too much noise
The rattling noise may come from the flow of the
refrigerant, which is normal.
As each cycle ends, you may hear gurgling.
Contraction and expansion of the inside walls may cause
popping and crackling noises.
The appliance is not in level.
The door will not close
properly
The appliance is not in level.
The door was reversed and not properly installed.
The gasket is dirty.
The shelves are out of position.
Before disposal of the appliance:
1. Disconnect the main plug from the main socket.
2. Cut off the main cable and discard it.
This marking indicates that this product should not be disposed with other household
wastes throughout the EU. To prevent possible harm to the environment or human
health from uncontrolled waste disposal, recycle it responsibly to promote the
sustainable reuse of material resources. To return your used device, please use the
return and collection systems or contact the retailer where the product was purchased.
They can take this product for environmental safe recycling.
12
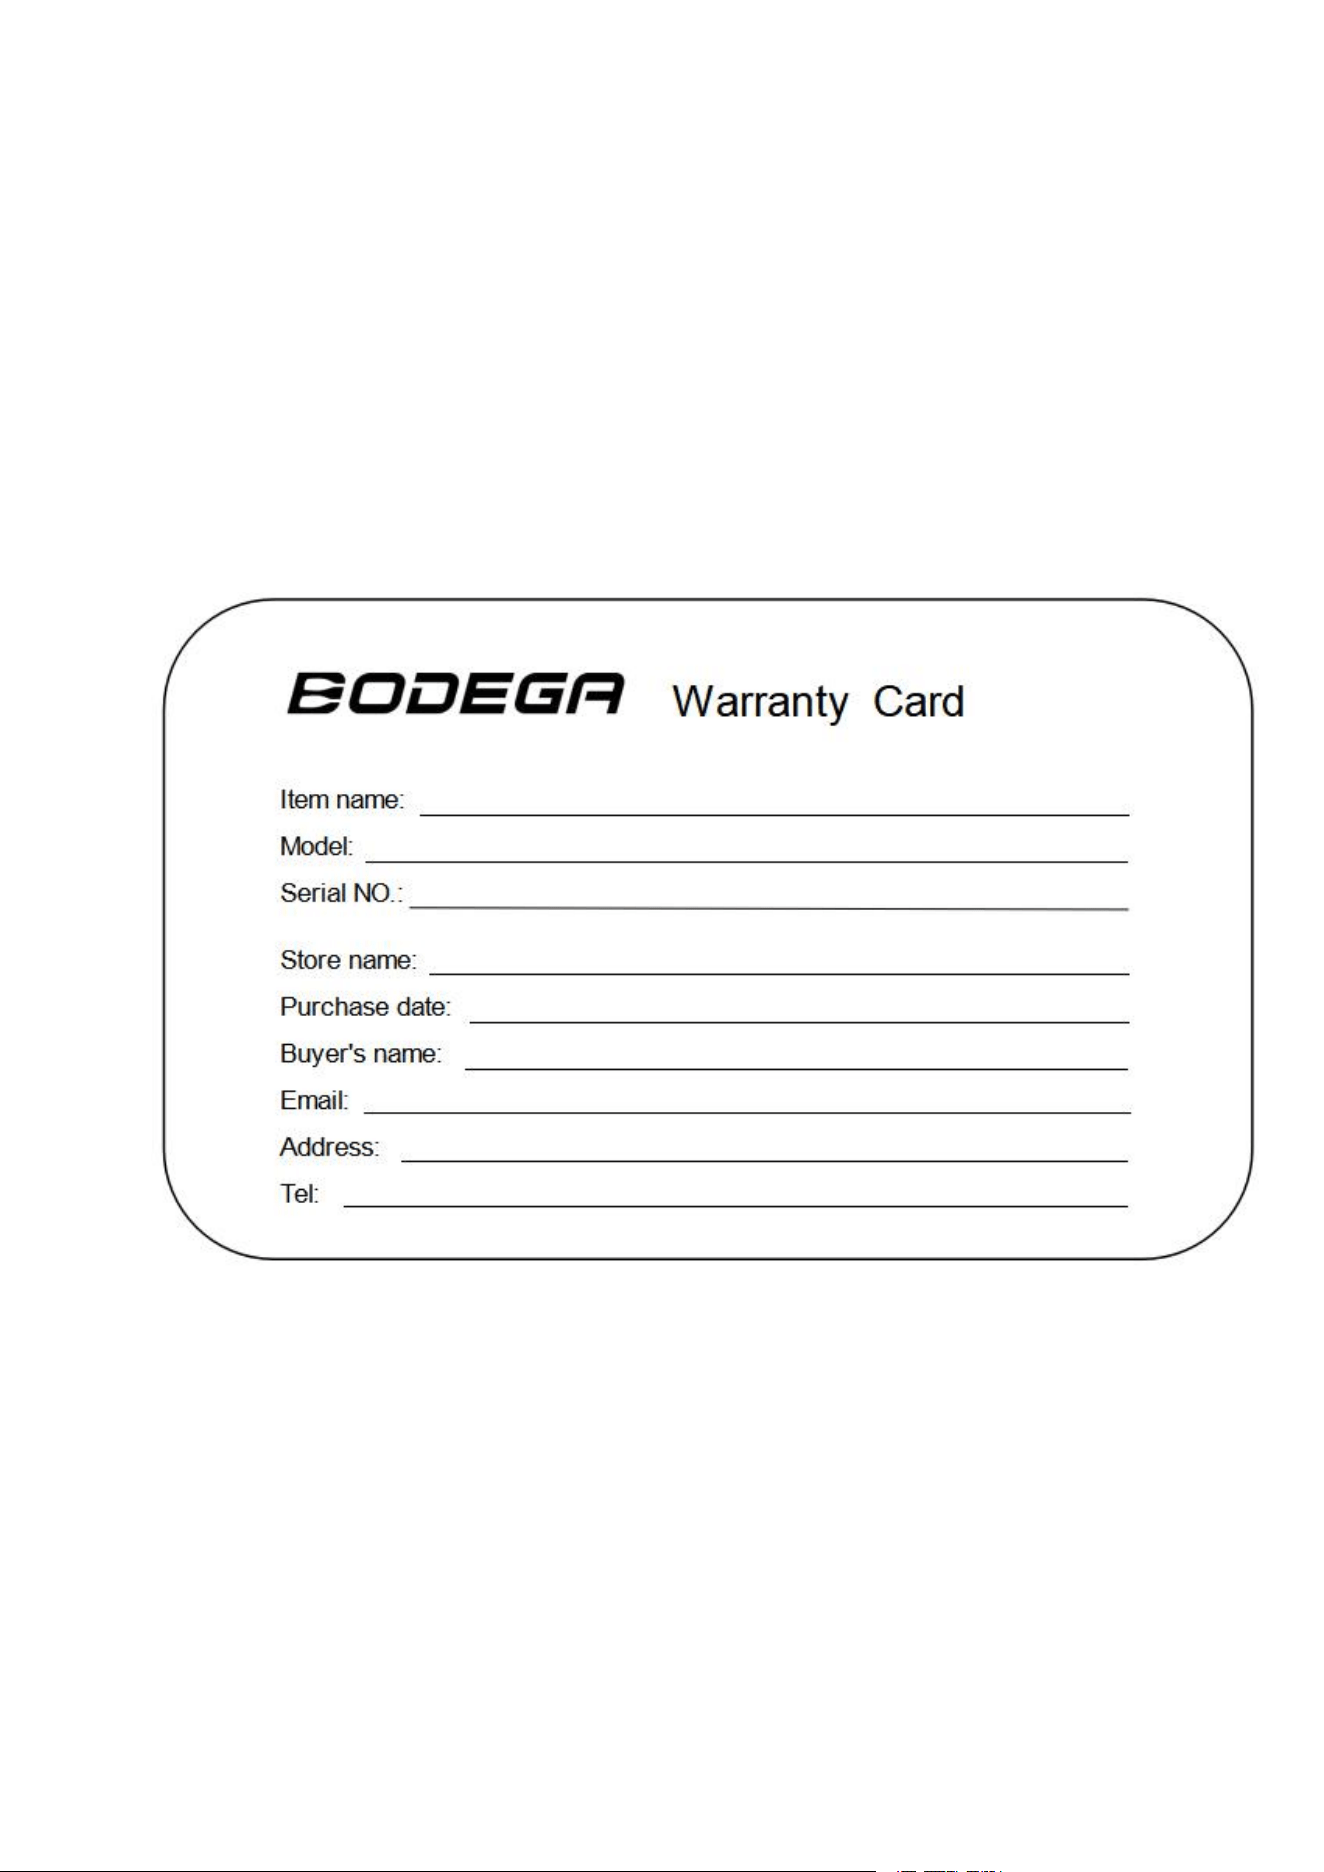
WARRANTY
Thank you for purchasing our BODEGA wine cooler, which has been made to meet high
quality standards.
The manufacturer's warranty covers the product against manufacturing defects for a period of
12 months from the date of purchase. All BODEGA warranties are automatically kept tracking
in our system, so there is no need to register your product.
For an extra 1 year's free warranty, please register at website www.bodegacooler.com or fill in
Agent/Distributor is welcome to contact us. Email:info@bodegacooler.com
Please fill in the table and email it within 10 days from the date of purchase.