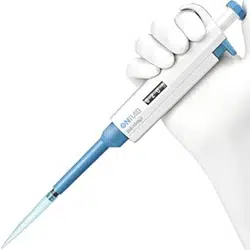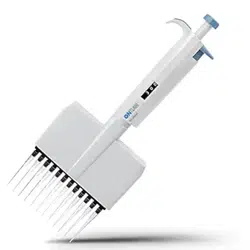
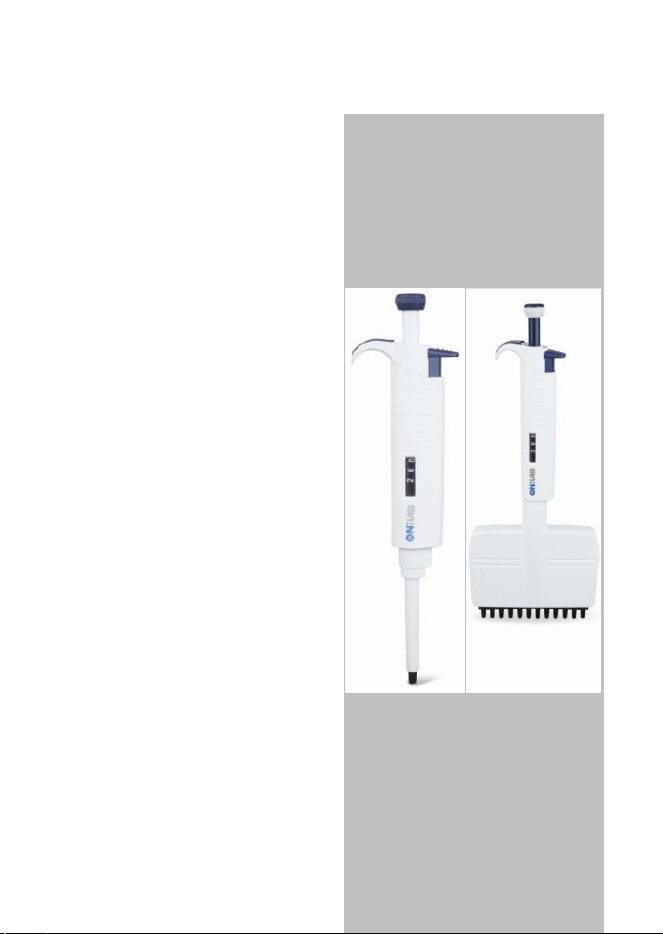
MicroPette Plus
Autoclavable
Pipette
User Manual

2
CONTENTS
1. YOUR NEW PIPETTE .............................................. 1
1.1. Adjustable volume pipettes ................................ 1
1.2. Fixed volume pipettes......................................... 2
1.3 Fully autoclavable ............................................... 3
2. UNPACKING ............................................................. 3
3. INSTALLING THE PIPETTE HOLDER .................. 4
4. PIPETTE COMPONENTS ......................................... 5
5. PIPETTE OPERATION ............................................. 6
5.1. Volume setting ................................................... 6
5.2. Sealing and ejecting tips ..................................... 6
6. PIPETTING TECHNIQUES ...................................... 7
6.1. Forward pipetting ............................................... 7
6.2. Reverse pipetting ................................................ 8
7. PIPETTING RECOMMENDATIONS ...................... 9
8. STORAGE .................................................................. 9
9. PERFORMANCE TEST AND RECALIBRATION . 9
9.1. Performance test (Checking calibration) .......... 10
9.2. Recalibration procedure .................................... 10
10. MAINTENANCE ................................................. 11
10.1. Cleaning your pipette ..................................... 11
10.2. In-house maintenance ..................................... 12
11. TROUBLE SHOOTING ...................................... 13
12. WARRANTY INFORMATION .......................... 15

1
1. YOUR NEW PIPETTE
Your new hand held pipette is a general purpose pipette for the
accurate and precise sampling and dispensing of liquid
volumes. The pipettes operate on the air displacement
principle and disposable tips.
The pipettes cover a volume range from 0.1µl to 10ml.
All pipettes have been quality tested according to
ISO8655/DIN12650. The quality control according to
ISO8655/DIN12650 involves gravimetric testing of each pipette
with distilled water (quality 3, DIN ISO 3696) at 22℃ using the
manufacturer’s original tips.
1.1. Adjustable volume pipettes
Volume Range
Increment
Tips
0.1 -2.5µl
0.05µl
10µl
0.5-10µl
0.1µl
10µl
2-20μl
0.5 μl
200, 300μl
5-50μl
0.5μl
200, 300, 350μl
10-100μl
1μl
200, 300, 350μl
20-200μl
1μl
200, 300, 350μl
50-200μl
1μl
200, 300, 350μl
100-1000μl
1μl
1000μl
200-1000μl
5μl
1000μl
1000-5000μl
50μl
5m l
2
2-10ml
0.1ml
10ml
Volume Range
Increment
Tips
8-ch 0.5-10μl
0.1μl
10μl
8-ch 5-50μl
0.5μl
200, 300, 350μl
8-ch 50-300μl
5μl
350μl
12-ch 0.5-10μl
0.1μl
10μl
12-ch 5-50μl
0.5μl
200, 300, 350μl
12-ch 30-300μl
5μl
350μl
1.2. Fixed volume pipettes
Volume
Tips
5μl
10μl
10μl
10μl
20μl
200, 300,350μl
25μl
200, 300,350μl
50μl
200, 300,350μl
100μl
200, 300,350μl
Volume
Tips
200μl
200, 300,350μl
250μl
1000μl
500μl
1000μl
1000μl
1000μl
2000μl
5000μl
5000μl
5000μl

3
1.3 Fully autoclavable
The pipette can be fully autoclaved, withstanding steam
sterilizing at 121℃,1 atm for 20 minutes. Both of single and
multi channel pipettes can be autoclaved without special
preparation. After autoclaving the pipette must be cooled down
and left to dry over 12 hours. It is recommended to check the
performance of the pipette after each autoclaving. It is also
recommended to grease the piston and seal of the pipette after
10 autoclavings.
2. UNPACKING
The pipette packing contains the following items:
Pipette
Calibration/ remove tool
User
Pipette holder
Tips
Quality control certificate
4
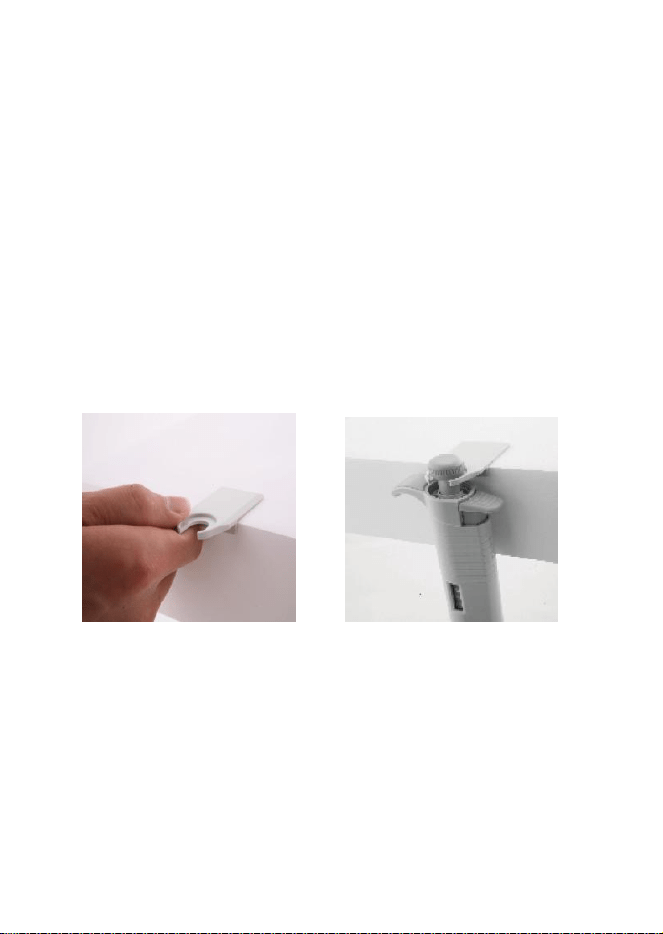
3. INSTALLING THE PIPETTE HOLDER
For convenience and safety always keep the pipette vertically
on its own holder when not in use. When installing the holder,
please follow the instruction below:
1. Clean the shelf surface with ethanol.
2. Remove the protective paper from the adhesive tape.
3. Install the holder as described in Figure 2A. (Make sure the
holder is pressed against the edge of the shelf.)
4. Place the pipette onto the holder as shown in Figure 2B.
Fig.2A
Fig.2B
5
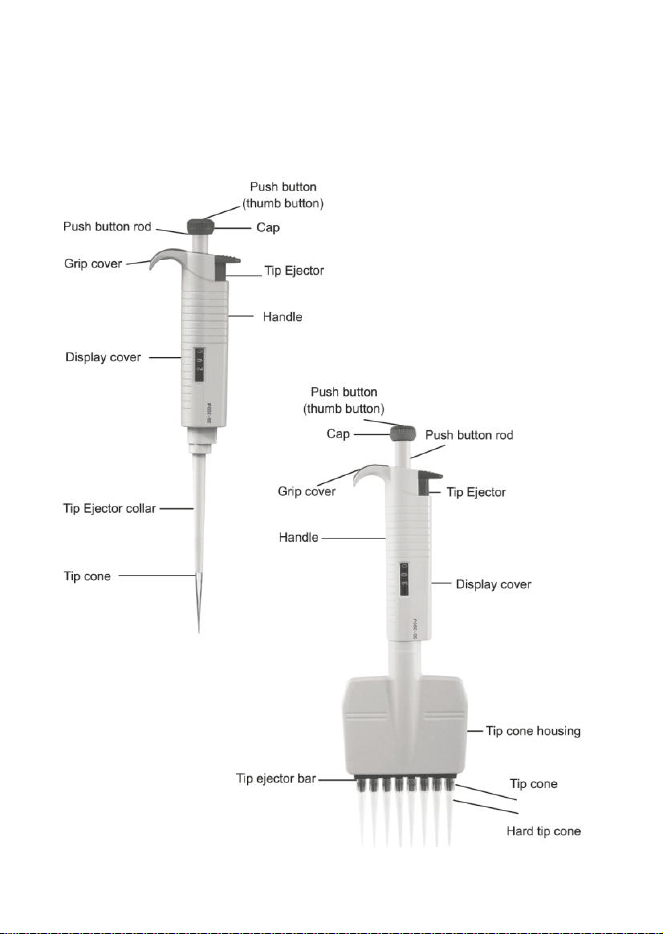
4. PIPETTE COMPONENTS
6
5. PIPETTE OPERATION
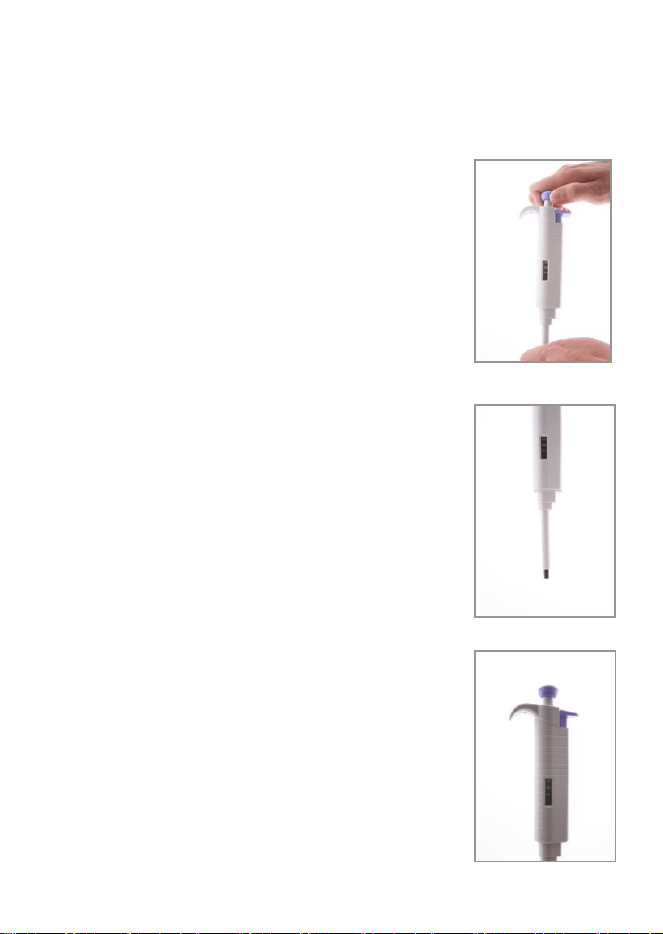
5.1. Volume setting
The volume of the pipette is clearly shown
through the handle grip window. The delivery
volume (variable volume pipette only) is set
by turning the thumb button clockwise is
anticlockwise (Fig.3). When setting the
volume, please make sure that:
The desired delivery volume clicks into
place
The digits are completely visible in the
display window
The selected volume is within the
pipette’s specified range
Using excessive force to turn the push button
outside the range may jam the mechanism
and damage the pipette.
5.2. Sealing and ejecting tips
Before fitting a tip makes sure that the pipette
tip cone is clean. Press the tip on the cone of
the pipette firmly to ensure an airtight seal.
The seal is tight when a visible sealing ring
forms between the tip and the black tip cone
(Fig.4).
Each pipette is fitted with a tip ejector to help
eliminate the safety hazards associated with
contamination. The tip ejector needs to be
Fig.3
Fig.4
Fig.3
Fig.4
Fig.5

7
pressed firmly downwards to ensure proper tip ejection (Fig.5).
Make sure the tip is disposed of into a suitable waster
container.
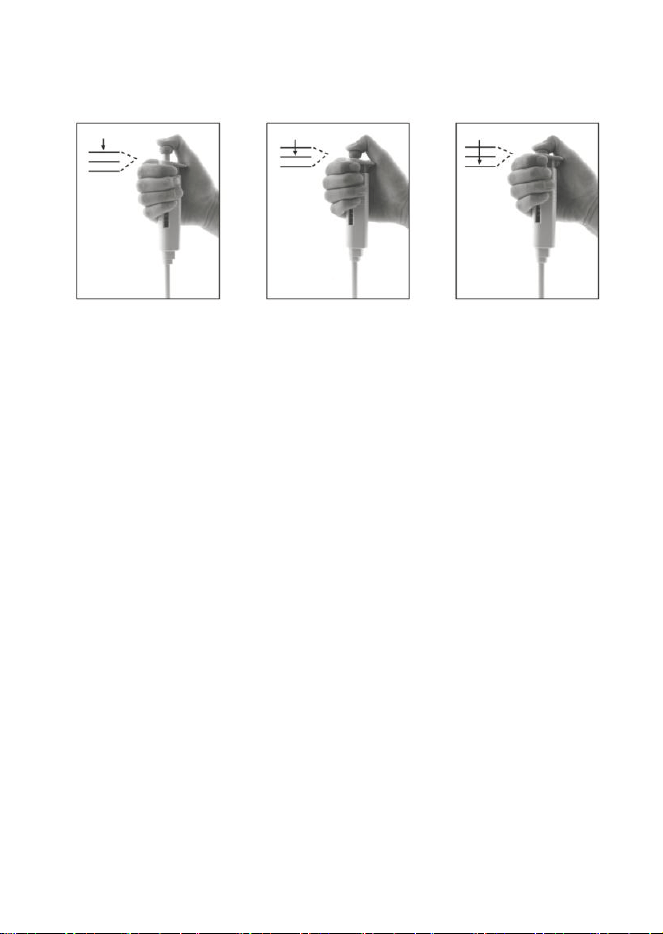
6. PIPETTING TECHNIQUES
6.1. Forward pipetting
Make sure that the tip is firmly attached to the tip cone. For
best results the thumb button should be operated slowly and
smoothly at all times, particularly with viscous liquids.
Hold the pipette vertically during aspiration. Make sure that the
liquid and container vessel are clean and that the pipette, tips
and the liquid are at the same temperature.
1. Depress the thumb button to the first stop (Fig.6B).
2. Place the tip just under the surface of the liquid (2-
3mm) and smoothly release the thumb button.
Carefully withdraw the tip from the liquid, touching
against the edge of container to remove excess.
3. Liquid is dispensed by gently depressing the thumb
button to the first stop (Fig.6B). After a short delay
continue to depress the thumb button to the second
stop (Fig.6C). This procedure will empty the tip and
ensure accurate delivery.
4. Release the thumb button to the ready position
(Fig.6A). If necessary change the tip and continue
with pipetting.
8
.
6.2. Reverse pipetting
The reverse technique is suitable for dispensing liquids that
have a tendency to foam or have a high viscosity. This
technique is also used for dispensing very small volumes when
it is recommended that the tip is first primed with the liquid
before pipetting. This is achieved by filling and emptying the tip.
1. Depress the thumb button all the way to the second
stop (Fig.6C). Place the tip just under the surface of the
liquid (2-3mm) and smoothly release the thumb button.
2. Withdraw the tip from the liquid touching against the
edge of the container to remove excess.
3. Deliver the preset volume by smoothly depressing
thumb button to the first stop (Fig.6B). Hold the thumb
button at the first stop. The liquid that remains in the tip
should not be included in the delivery.
4. The remaining liquid should now be discarded with the
tip or delivered back into the container vessel.
Starting position
Fig.6A
First stop
Fig.6B
Second stop
Fig.6C
Second stop
Fig.6C

9
7. PIPETTING RECOMMENDATIONS
Hold the pipette vertically when aspirating the liquid and
place the only a few millimeters into the liquid
Prerinse the tip before aspirating the liquid by filling and
emptying the tip 5 times. This is important especially
when dispensing liquids which have a viscosity and
density different from water
Always control the push button movements with the
thumb to ensure consistency
When pipetting liquids at a temperature different from
ambient, prerinse the tip several times before use.
8. STORAGE
When not in use it is recommended that your pipette is stored
in a vertical position.
9. PERFORMANCE TEST AND RECALIBRATION
Each pipette has been factory-tested and certified at 22℃
according to ISO8655/DIN12650. The following table shows
the maximum permitted errors (Fmax) for manufacturers gives
in ISO8655/DIN 12650, which further advises each user to
establish their own maximum permitted errors (Fmax user).
The Fmax user should not exceed the Fmax by more than
100%.
Note: Pipette specifications are guaranteed only with
manufacturer’s tips.
10
9.1. Performance test (Checking calibration)
Weighting should take place at 20-25℃, constant to +
0.5℃.
Avoid drafts.
1. Set the desired testing volume of your pipette.
2. Carefully fit tip onto the tip cone.
3. Prerinse tip with distilled water by pipetting the selected
volume 5 times.
4. Carefully aspirate the liquid, keeping the pipette vertical.
5. Pipette distilled water into a tared container read the
weight in mgs. Repeat at least five times and record each
result. Use an analytical balance with a readability of 0.01
mgs. To calculate the volume, divide the weight of the
water by its density (at 20℃: 0.9982). This method is
based on ISO8655/DIN12650.
6. Calculate the F-value by using the following equation:
F=∣inaccuracy (μl) ∣+2×imprecision (μl)
Compare the calculated F-value to the corresponding Fmax
user. If it falls within the specifications, the pipette is ready for
use. Otherwise check both your accuracy and, when necessary,
proceed to recalibration procedure.
9.2. Recalibration procedure
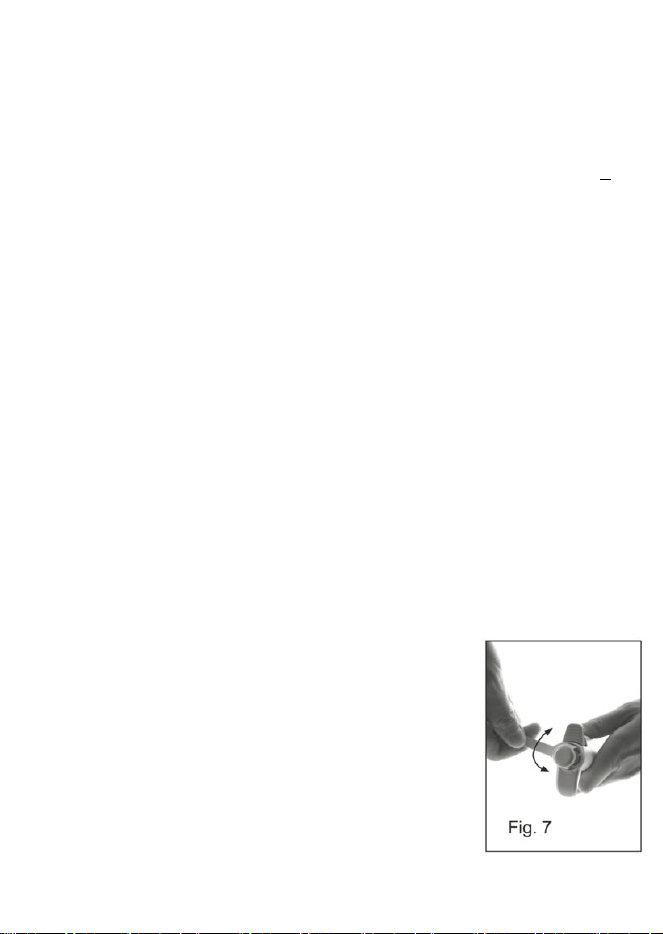
1. Place the calibration tool into the holes
of the calibration adjustment lock (under
the thumb button) (Fig.7).
2. Turn the adjustment lock anticlockwise
to decrease and clockwise to increase
the volume.

11
3. Repeat performance test (Checking calibration)
procedure from step 1 until the pipetting results are
correct.
10. MAINTENANCE
To maintain the best results from your pipette each unit should
be checked every day for cleanliness. Particular attention
should be paid to the tip cone (s).
The pipettes have been designed for easy in-house service.
However, we also provide complete repair and calibration
service including a service report and performance
certificate(s). Please return your pipette to your local
representative for repair or recalibration. Before returning
please make sure that it is free from all contamination. Please
advise our Service Representative of any hazardous materials
which may have been used with your pipette.
Note: Check the performance of your pipette regularly e.g.
every 3 months and always after in-house service or
maintenance.
10.1. Cleaning your pipette
To clean your pipette using ethanol and a soft cloth or lint-free
tissue. It is recommended to clean the tip cone regularly.

12
10.2. In-house maintenance
1. Hold down the tip ejector.
2. Place the tooth of the opening tool between the tip ejector
and the tip ejector collar to release the locking mechanism
(Fig.8).
3. Carefully release the tip ejector and remove the ejector
collar.
4. Place the wrench end of the opening tool over the tip cone,
turning it anticlockwise. Do not use any other tools (Fig.9).
The 5 ml tip cone is removed by turning it anticlockwise. Do
not use any tools (Fig.10).
5. Wipe the piston, the O-ring and the tip cone with ethanol
and a lint-free cloth.
Note: Models up to 10μl have a fixed O-ring located inside the
tip cone. Therefore, the O-ring cannot be accessed for
maintenance.
6. Before replacing tip cone it is recommended to grease the
piston slightly using the silicone grease provided.
Note: Excessive use of grease may jam the piston.
7. After reassembling use the pipette (without liquid) several
times to make sure that he grease is spread evenly.
8. Check the pipette calibration.
Fig.8
Fig.9
Fig.10
Fig.9
Fig.10
13
11. TROUBLE SHOOTING
Trouble
Possible cause
Solutions
Droplets left
inside the tip
Unsuitable tip
Use original tips
Non-uniform wetting of
the plastic
Attach new tip
Leakage or
pipetted
volume too
small
Tip incorrectly
attached
Attach firmly
Unsuitable tip
Use original tips
Foreign particles
between tip and tip
cone
Clean the tip cone,
attach new tip
Instrument
contaminated or
insufficient amount of
grease on piston and
O-ring
Clean and grease
O-ring and piston,
clean the tip cone
Grease accordingly
O-ring not correctly
positioned or
damaged
Change the O-ring
Incorrect operation
Follow instruction
carefully
Calibration altered or
Recalibrate

14
Trouble
Possible cause
Solutions
unsuitable for the
liquid
according to
instructions
Instrument damaged
Send for service
Push button
jammed or
moves
erratically
Piston contaminated
Clean and grease
O-ring and piston,
clean the tip cone
Penetration of solvent
vapours
Clean and grease
O-ring and piston,
clean the tip cone
Pipette
blocked
aspirated
volume too
small
Liquid has penetrated
tip cone and dried
Clean and grease
O-ring and piston,
clean the tip cone
Tip ejector
jammed or
moves
erratically
Tip cone and/or
ejector collar
contaminated
Clean the tip cone
and the ejector
collar

15
12. WARRANTY INFORMATION
The pipettes are warranted for one year against defects in
materials and workmanship. Should it fail to function in any
period of time, please contact your local representative
immediately. The warranty will not cover defects caused by
normal wear or by using the pipette against the instructions
gives in this manual.
Each pipette is tested before shipping by the manufacturer.
The Quality Assurance Procedure is your guarantee that the
pipette you have purchased is ready for use.

16
ONiLAB LLC.
Add: 25415 Prado De Las Peras, Calabasas,
CA 91302,USA
Tel: +1-818-318-3771