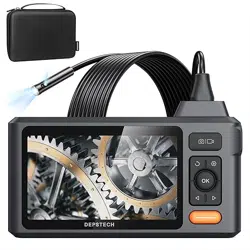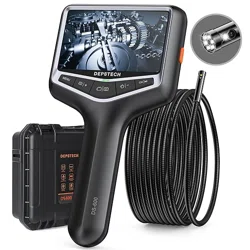
封面
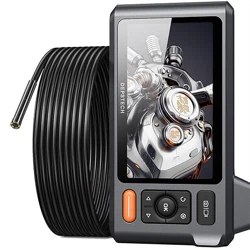
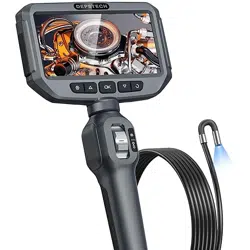
Industrial Endoscope
DS530
User Manual

- 01 -
EN
Product Features
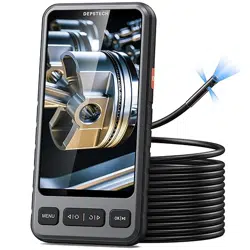
• DS530 is a high-performance industrial endoscope, equipped with 5 inch IPS
high-definition display has the camera and video functions and saves into TF memory
card (Micro-SD card).
• DS530 is also fitted with microphone and loudspeaker to bring clearer audio and
video effect.
• It is also designed with 2,200mA ultra-large capacity battery to ensure long
endurance and premium experience.
• High-performance CMOS chip, supporting record high frame rate, obtaining clear
images with Bluart 3.0 technology, widely used in industrial maintenance, home
appliance repair, machinery repair and design, etc.
Operating and Storage Environments
• The device should be operated at an ambient temperature of 32~113℉(0~45℃).
• The device should be stored in a dry, clean, oil-free and waterless place without any
chemical liquid.
DEPSTECH is an S&T company with robust development status. It is specialized in
manufacturing of various endoscopes to improve your working efficiency.
Safety and Protection
• Probe of camera is an electronic device of high precision, so please do not hit the
probe of camera or pull the cables, which may lead to failure of the device.
• With IP67 waterproof layer, the probe shall be used with extra care and protected from
scratches!
• Camera probe is made from materials that are not high temperature resistant, so make
sure the internal temperature of any internal combustion engine or other equipment
whose internal temperature is higher has been cooled when they are examined,
otherwise the device will be directly damaged!
• In case of device damaged, please do not dismantle it by yourself, but contact the
seller or the supplier for more professional maintenance services.
• Children may not use this device independently without the guidance of adults.
- 02 -
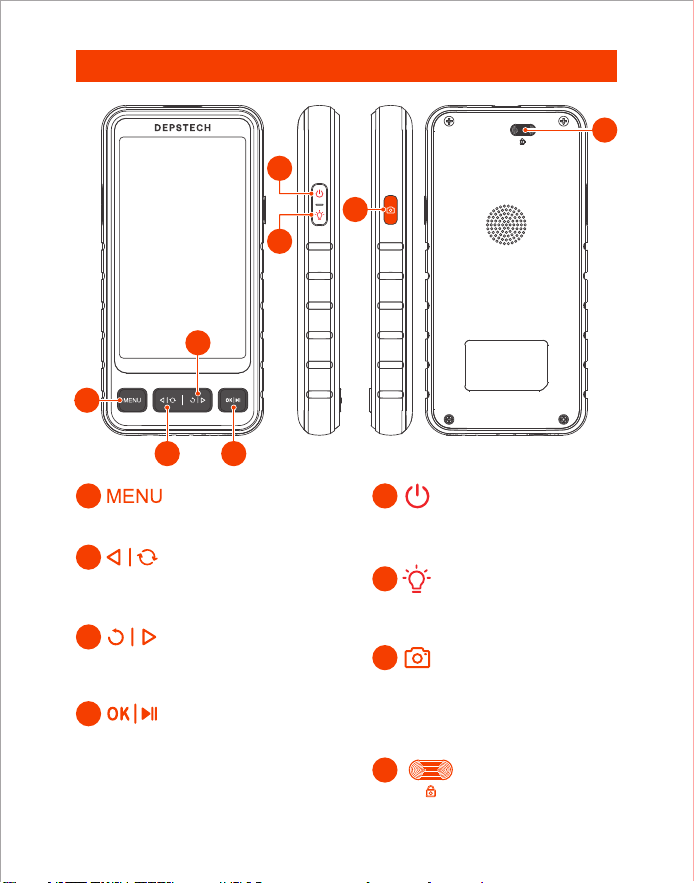
Product Appearance
• Click to enter the menu.
• Click to switch main / side camera
• Move the cursor up. (In the menu)
• Click to rotate the real-time image 180°
• Move the cursor down. (When in the menu)
• Hold this button for 2s to enter / exit the
album.
• Click to confirm the selections. (When
in the menu)
• Hold this button for 2s to power on /
off the endoscope.
• Click to adjust the brightness of
LED light in the lens.
• Single press to take a photo or end
the video record.
• Hold this button for 2s to start a
video record.
• Press and hold to pull out the
camera cable.
8
1
7
4
5
6
2
3
1
2
4
3
6
5
7
8
- 03 -
UI Introduction
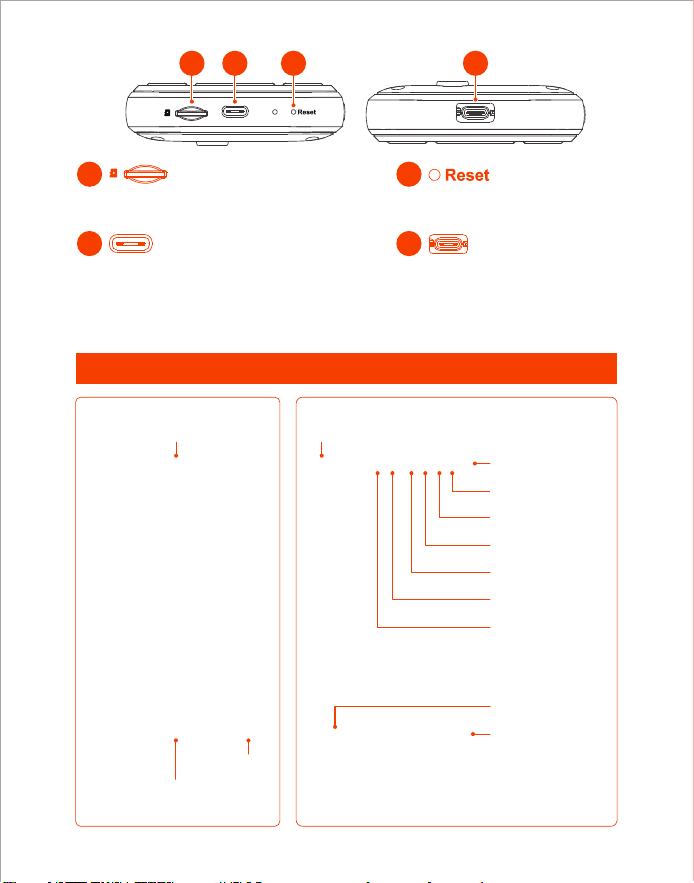
• Connect the camera cable
Main Camera
Speaker off
Microphone off
Auto-off
TF Card Status
Battery Power
Date
Time
Photo Shoot / Video Record
Album Preview
• Support up to 32G TF card
• Please format it on first use
• For charging (Type-C cable connected
to the adapter)
• For data transmission (Type-C cable
connected to PC client)
• Short click the reset button
to shut down the device
9
10
11
12
9
10 11 12
Screen
Rotation 180°
File name
Current playback duration /
Total video duration
Number
Tips!
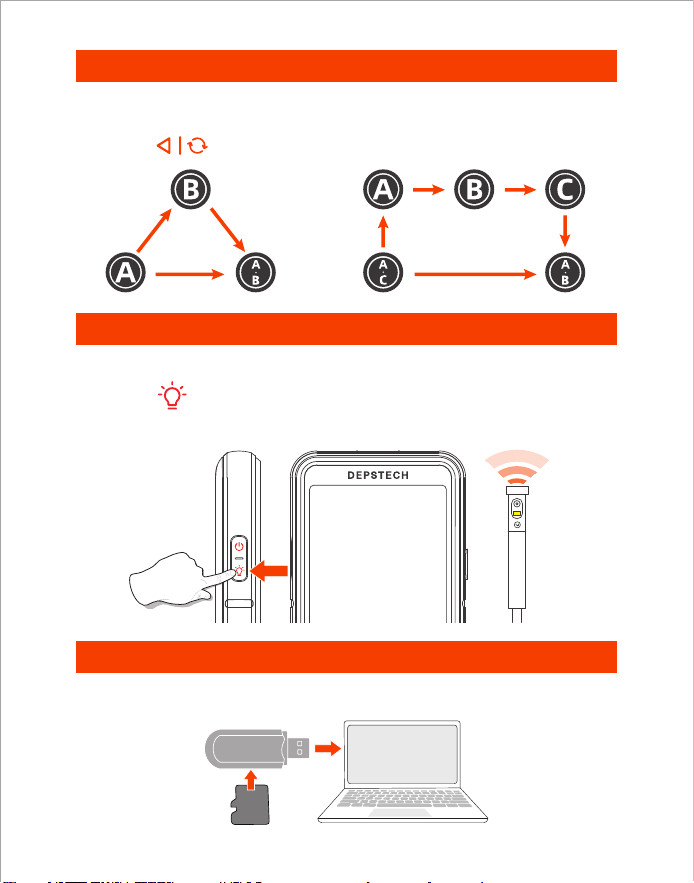
Dual Lens: A:Main Lens B:Side Lens
Three Lens: A:Main Lens B:Side Lens(B) C:Side Lens(C)
- 04 -
Language Setting
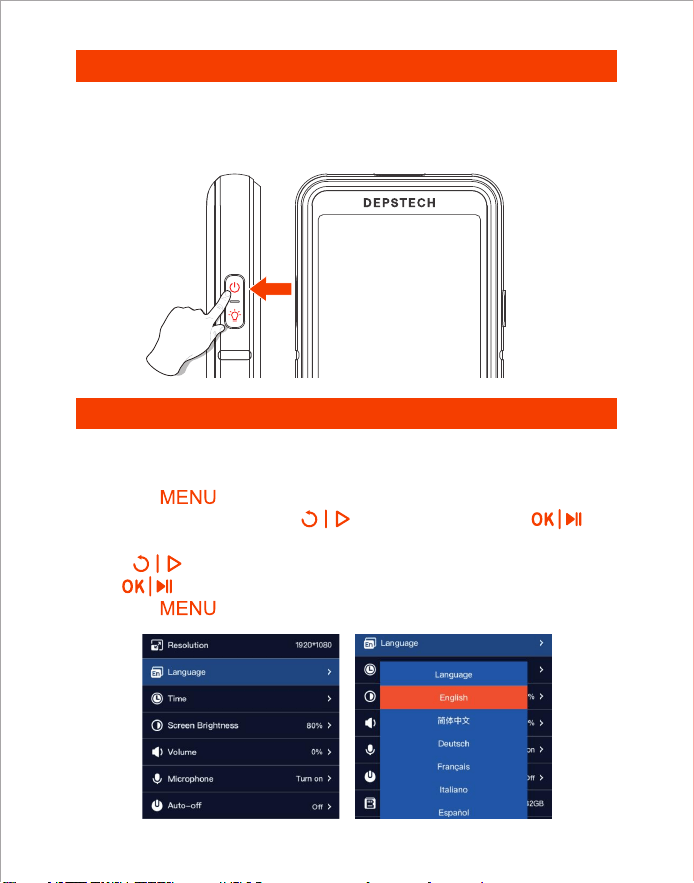
Power on
1. Click the button to enter menu interface.
2. Select Language by click the button and then click the
button, enter the language setting interface.
3. Click button to select the language you need, and then click
the button to switch the language.
4. Click the button to return the main Interface.
Hold this button for 2s to power on / off the endoscope.
Default language of the device is English; If other language is required, please
follow the steps below:
Tips:
It is recommended to fully charge the equipment before first use.
- 05 -
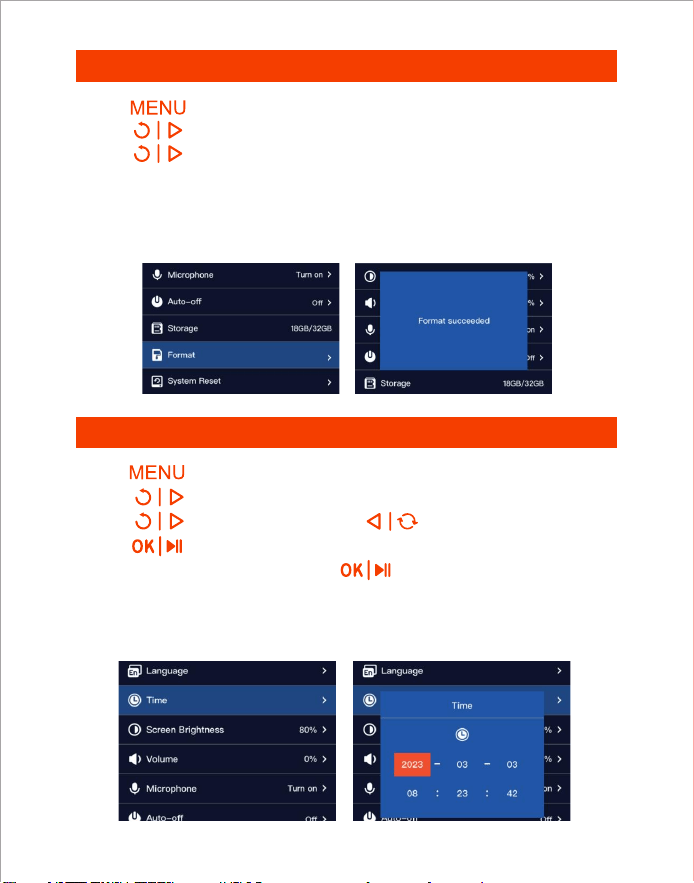
Time Setting
TF Card Formatting
1. Click button to enter the menu.
2. Click to select “Time” options.
3. Click to increase the value and to decrease the value.
4. Click to enter the next numeric setting.
5. After the setting is completed, click button to confirm, and the time
setting is completed.
1. Click button to enter the menu.
2. Click to select “Format” options.
3. Click to enter the option interface, Select “OK”.
4. Wait for the formatting to complete.
Tips: TF card’s maximum support is 128G expansion.
Memory cards with more than 32G capacity need to be formatted before
use, otherwise they cannot be used.
Tips: Time setting is necessary. Correct time information is helpful to consult
documents accurately.
- 06 -
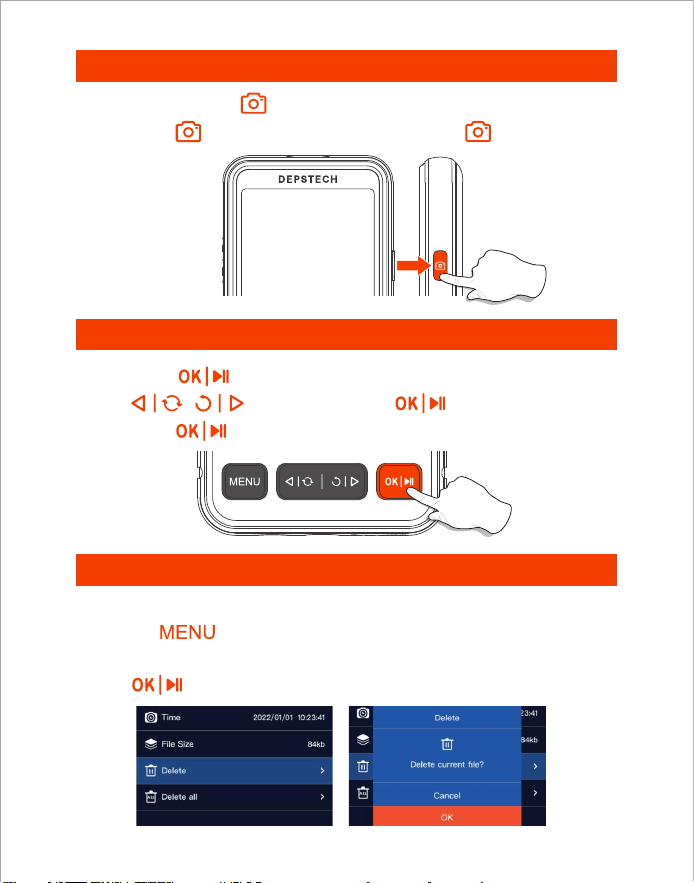
View Photo / Video
View File Properties / Delete Files
1. Long press in preview mode to enter the photo album.
2. Click / to view photos, Click to play videos.
3. Long press to exit the photo album.
1. Click the to view the material details.
2. Select Delete or Delete all options.
3. Click to delete the material.
1. Take photos by click button.
2. Long press to start a video recording, single click to the end video
recording.
In the single material viewing interface.
Photo / Video
- 07 -
Lens LED Light Brightness Adjustment
Copy Photo And Video Files To Computer
Lens Switching
1. The LED light of the lens defaults to the brightest state.
2. Click the to adjust the brightness of the LED light.
3. The adjustment gears are: Shut down — Low — Medium — High.
When the product is turned on, it opens the main lens by default.
Click to the button can switch the lens.
Only available for dual and triple lens products.
1. Use a TF card reader to copy data directly.
Card Reader
TF
Card
- 08 -
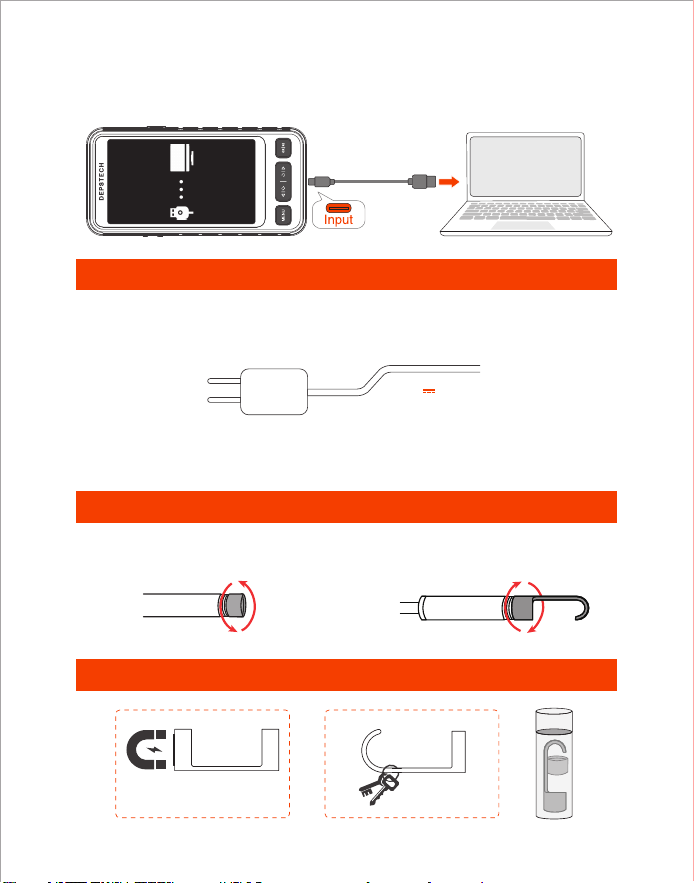
Charging Instructions
Accessories installation guide
Guide to the use of accessories
1. Red LED indicator flashes: Charging.
2. Red LED indicator stays on: Charging finished.
Tips:
Connect the device to the DC 5V 2A adapter for charging.
For your safety, please do not try an adapter that does not support DC 5V 2A.
1. Please connect the product to your computer.
2. Select “Data Transmission”.
2. Use a Type-C cable to connect to computer.
5V 2A
Turn counterclockwise-remove
protect cap
Turn clockwise-tighten
accessories
- 09 -
Turn Off The Microphone
1. Click button to enter the menu.
2. Click to select “Microphone” options.
3. Select “Turn off” and click to confirm the setting.
4. When the microphone is turned off, appears in the preview interface.
Tips: Please note that when the microphone is turned off, the recorded video
will be asonant.
Volume Adjustment
1. Click button to enter the menu.
2. Click to select “Volume” options.
3. Click and to adjust the volume.
4. Click to complete the setting.
5. When the volume is turned off, appears in the preview interface.
Auto-off
System Reset
1. Click button to enter the menu.
2. Click to select “Auto-off” options.
3. Select “15min” or “30min” and click to confirm the setting.
1. Click button to enter the menu.
2. Click to select “System Reset” options.
3. Select “OK” and click to confirm the setting.
Tips: The volume setting only affects the sound volume of the media files,
and is invalid for the system sound setting.
Tips: After setting auto-off, the automatic shutdown function is only effective
when the equipment is not in operation for a long time, and the auto
shutdown is not effective when the device is running.
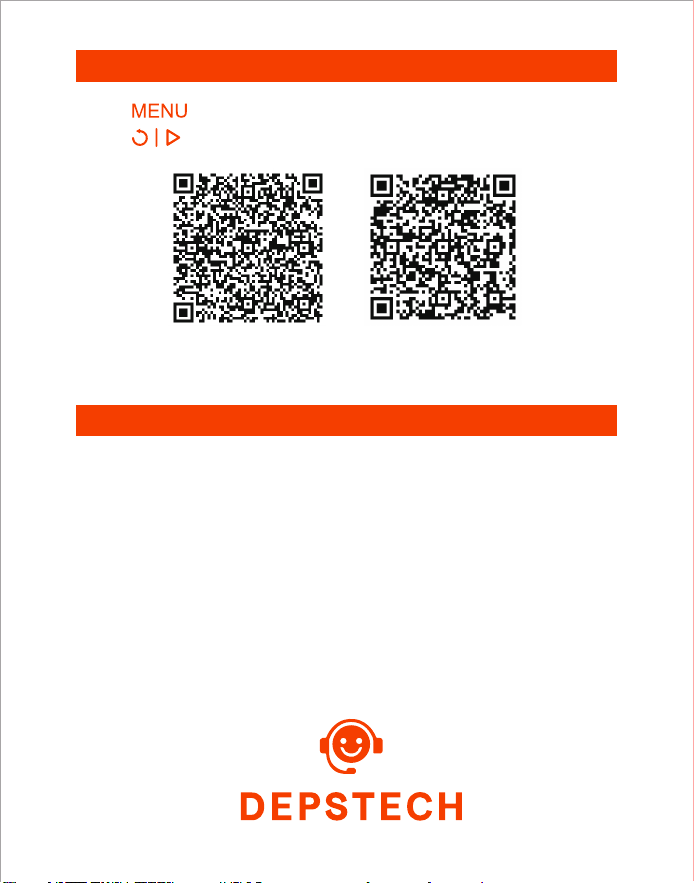
If you have a problem with your device, please scan the QR code below
and fill in the relevant problem description. We will reply to you as soon
as possible, thank you!
Electronic version
of instructions
Function Tutorial
Video
- 10 -
After Sales Service
Tutorial
1. Click button to enter the menu.
2. Click to select “Tutorial Video” or “Product Tutorials” options.
- 11 -
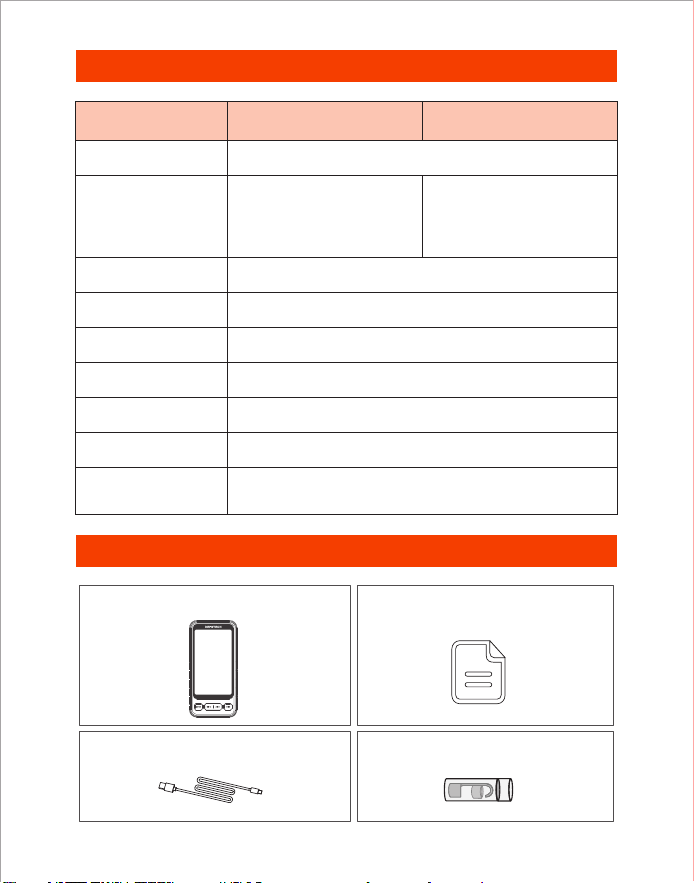
Specifications
Screen Spec
Model
Camera Diameter
Camera View
Video Spec
Charging Time 2.5-3 H
Dual Camera
Best Focal Range
Photo Resolution
Battery Life 3-4 H
Charging Voltage
and current
DC 5V/2A
A: 3-10 cm (1.18-3.93 in)
B: 2-6 cm (0.79-2.36 in)
5” IPS Screen
80°
1080 p / 15-30 fps
Triple Camera
7.9 mm (0.31 in)
1920*1080
A: 3-10 cm (1.18-3.93 in)
B: 2-6 cm (0.79-2.36 in)
C: 1.5-2.5 cm (0.59-0.98 in)
Packing List
Endoscope
User Manual
Type-C Charging Cable Accessories
※ FCC Requirement: Changes or modifications not expressly approved by the party
responsible for compliance could void the user’s authority to operate the equipment.
This device complies with Part 15 of the FCC Rules. Operation is subject to the
following two conditions:
(1) This device may not cause harmful interference, and
(2) This device must accept any interference received, including interference that
may cause undesired operation.
Note: This equipment has been tested and found to comply with the limits for a
Class B digital device, pursuant to Part 15 of the FCC Rules. These limits are
designed to provide reasonable protection against harmful interference in a
residential installation. This equipment generates, uses, and can radiate radio
frequency energy, and if not installed and used in accordance with the instructions,
may cause harmful interference to radio communications. However, there is no
guarantee that interference will not occur in a particular installation. If this
equipment does cause harmful interference to radio or television reception, which
can be determined by turning the equipment off and on, the user is encouraged to
try to correct the interference by one or more of the following measures:
※ CE compliance: This device complies with EN 60065 standard, which means this
device will not do harm to the user or products as following situations: 1)Electric
shock 2)High temperature 3)Radiation 4)Explosion from inner 5)Mechanical
Harm 6)Fire Hazard 7)Chemical burns.
※ EU Conformity Statement: This product and - if applicable - the supplied
accessories too are marked with "CE" and comply therefore with the applicable
harmonized European standards listed under the EMC Directive 2004/108/EC, the
RoHS Directive 2011/65/EU and Amendment (EU) 2015/863.
※ WEEE Notice: 2012/19/EU (WEEE directive): Products marked with this symbol
cannot be disposed of as unsorted municipal waste in the European Union. For
proper recycling, return this product to your local supplier upon the purchase of
equivalent new equipment, or dispose of it at designated collection points. For more
information see: www.recyclethis.info
※ 2013/56/EU (battery directive): This product contains a battery that cannot be
disposed of as unsorted municipal waste in the European Union. See the product
documentation for specific battery information. The battery is marked with this
symbol, which may include lettering to indicate cadmium (Cd), lead (Pb), or mercury
(Hg). For proper recycling, return the battery to your supplier or to a designated
collection point. For more information see: www.recyclethis.info
– Reorient or relocate the receiving antenna.
– Increase the separation between the equipment and receiver.
– Connect the equipment into an outlet on a circuit different from that to which the
receiver is connected.
– Consult the dealer or an experienced radio/TV technician for help.
EC REP: E-CrossStu GmbH. Mainzer Landstr.69,60329 Frankfurt am Main
UK REP: DST Co., Ltd. Fifth Floor 3 Gower Street, London, WC1E 6HA, UK

Room 1901-1902, Jinqizhigu Building, No.1 Tangling Road, Nanshan District, 518055, Shenzhen, CN
Shenzhen Deepsea Innovation Technology Co., Ltd.
Made in China
Please contact us if you have any questions,
we love to hear from you
Customer Services
Facebook Official Page: @DEPSTECH. FANS
V01.23.05
www.depstech.com