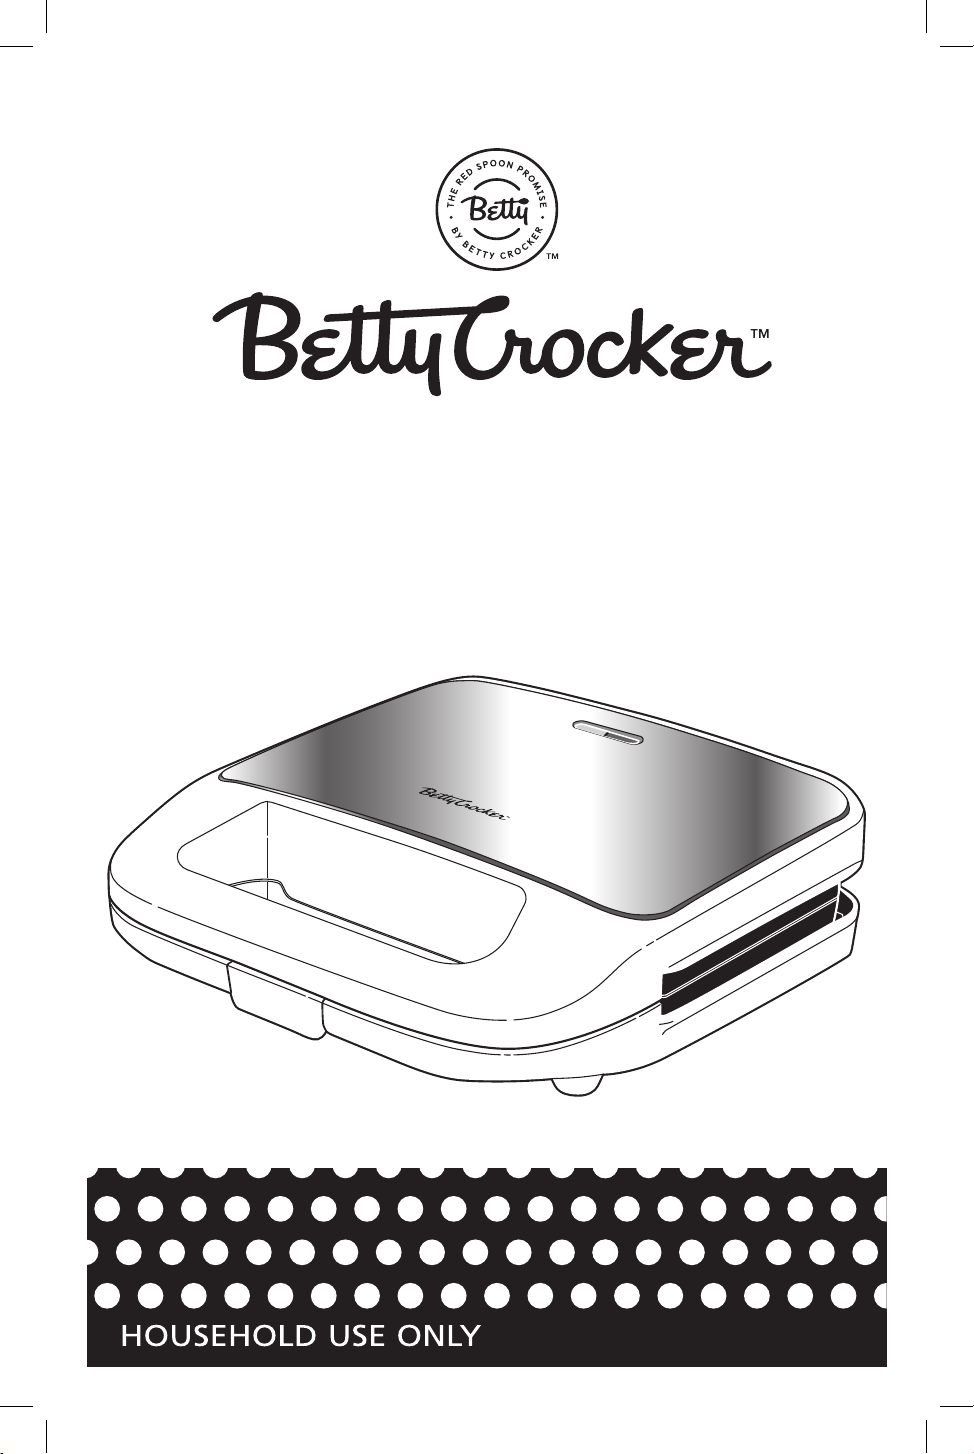
CAUTION:
Hot sur fa ce. U se o ve n mitts when opening.
Lift using handle only.
BC-4965R/S/W
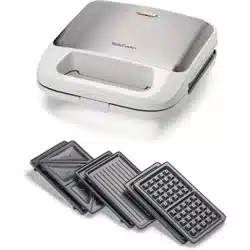
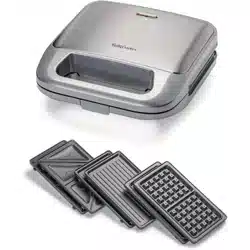
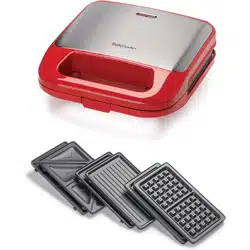
3-in-1
Grill, Sandwich &
Wae Maker
BC-4965R_S-W (Rev 02)(EN).indd 1BC-4965R_S-W (Rev 02)(EN).indd 1 2024-04-25 2:22 PM2024-04-25 2:22 PM

2
Table of Contents
Important Safeguards ....................................... 3
Before Your First Use ......................................... 5
Getting To Know Your 3-in-1
Grill, Sandwich & Waffle Maker ......................... 6
Using Your Grill ................................................. 7
Grilling Meat and Vegetables ........................... 8
Using Your Sandwich Maker ............................. 9
Using Your Waffle Maker ................................ 11
Care and Cleaning Your 3-in-1
Grill, Sandwich & Waffle Maker .......................14
Limited Warranty One (1) Year ........................ 15
Replacement Parts ..........................................16
BC-4965R_S-W (Rev 02)(EN).indd 2BC-4965R_S-W (Rev 02)(EN).indd 2 2024-04-25 2:22 PM2024-04-25 2:22 PM

3
IMPORTANT SAFEGUARDS
When using electrical appliances, the following basic safety precautions should
always be taken:
1.
Read all instructions before using the appliance.
Read all instructions before using the appliance.
2. Do not touch hot surfaces. Use handles or knobs.
3. To protect against fire, electric shock, and injury to persons, do not immerse
cord, plug, or unit in water or any other liquid.
4. Close supervision is necessary when any appliance is used by or near
children.
5. This appliance is not intended for use by persons (including children)
with reduced physical, sensory or mental capabilities or lack of experience
and knowledge, unless they have been given supervision or instruction
concerning the use of the appliance by a person responsible for their safety.
6. Unplug the unit from the outlet when not in use and before cleaning. Allow
to cool before putting on or taking off parts and before cleaning.
7. Do not operate any appliance with a damaged cord or plug, or after the
appliance malfunctions or has been damaged in any manner. Return
appliance to the nearest authorized service centre for examination, repair or
electrical or mechanical adjustment.
8. The use of accessory attachments not recommended or sold by the appliance
manufacturer may cause fire, electrical shock, or injury, and is therefore
prohibited.
9. Do not use outdoors.
10. Do not allow the cord to hang over the edge of table or counter, or touch hot
surfaces.
11. Do not place on or near a hot gas or electric burner, or in a heated oven.
12. To disconnect, remove the plug from wall outlet.
13. Extreme caution must be used when moving an appliance containing hot
foods, such as batter or hot cheese.
14. Do not use appliance for other than intended use.
15. Do not twist, kink or wrap the power cord around the appliance as this may
cause the insulation to weaken and split, particularly in the location where it
enters the unit.
16. Do not attempt to dislodge food when appliance is plugged in.
17. To prevent fire, ensure the unit is not covered or touching flammable
material, including curtains, draperies or walls during operation.
18. Do not move unit when it is still hot.
BC-4965R_S-W (Rev 02)(EN).indd 3BC-4965R_S-W (Rev 02)(EN).indd 3 2024-04-25 2:22 PM2024-04-25 2:22 PM

4
19.
NEVER leave appliance unattended while in use.
NEVER leave appliance unattended while in use.
20. Always place appliance on a heat resistant surface.
21. DO NOT touch the metallic part of the unit while the appliance is operating.
These can become very hot.
22. ALWAYS use protective, heat-resistant gloves or mitts when handling this
product to avoid steam or other burns.
SAVE THESE INSTRUCTIONS
HOUSEHOLD USE ONLY
CONSUMER SAFETY INFORMATION
POWER CORD INSTRUCTIONS
1. A short power-supply cord is provided to reduce the hazard resulting from
entanglement or tripping over a long cord.
2. Extension cords may be used if care is exercised. If it is necessary to use an
extension cord, it should be positioned so that it does not drape over the
counter or tabletop where it can be pulled on by children or tripped over
unintentionally.
3. The electrical rating of the extension cord must be the same or more than the
wattage of the appliance (the wattage is shown on the rating label located on
the underside or back of the appliance).
4. Avoid pulling or straining the power cord at outlet or applianceconnections.
POLARIZED PLUG
1. Your appliance is equipped with a polarized plug (one blade is wider than
theother).
2. To reduce the risk of injury this plug must be inserted into a properly installed
outlet.
3. If the plug does not fit fully into the outlet, reverse the plug. If it does not
fit, please consult a qualified electrician. Do not attempt to defeat this safety
feature by modifying the plug in any way.
BC-4965R_S-W (Rev 02)(EN).indd 4BC-4965R_S-W (Rev 02)(EN).indd 4 2024-04-25 2:22 PM2024-04-25 2:22 PM

5
WARNING: Improper use of the power cord may result in
electric shock. Consult a qualified electrician if necessary.
BEFORE YOUR FIRST USE
Carefully unpack the 3-in-1 Grill, Sandwich and Waffle Maker and remove any
packaging materials. Set the appliance on a clean, dry and heat-resistant counter
or table. Wipe the surface of the cooking plates with a clean, damp cloth or
sponge, then dry with another cloth. This will remove any dust that may have
settled during packaging. Wipe the cooking plates with a small amount of
cooking oil.
Wipe the outside of the appliance with a clean, damp cloth or sponge. Do not
immerse the unit in water or other liquid. Do not use harsh or abrasive cleaners.
Warning: Always ensure your plates are installed correctly
on the unit before plugging into an electrical outlet.
BC-4965R_S-W (Rev 02)(EN).indd 5BC-4965R_S-W (Rev 02)(EN).indd 5 2024-04-25 2:22 PM2024-04-25 2:22 PM
6
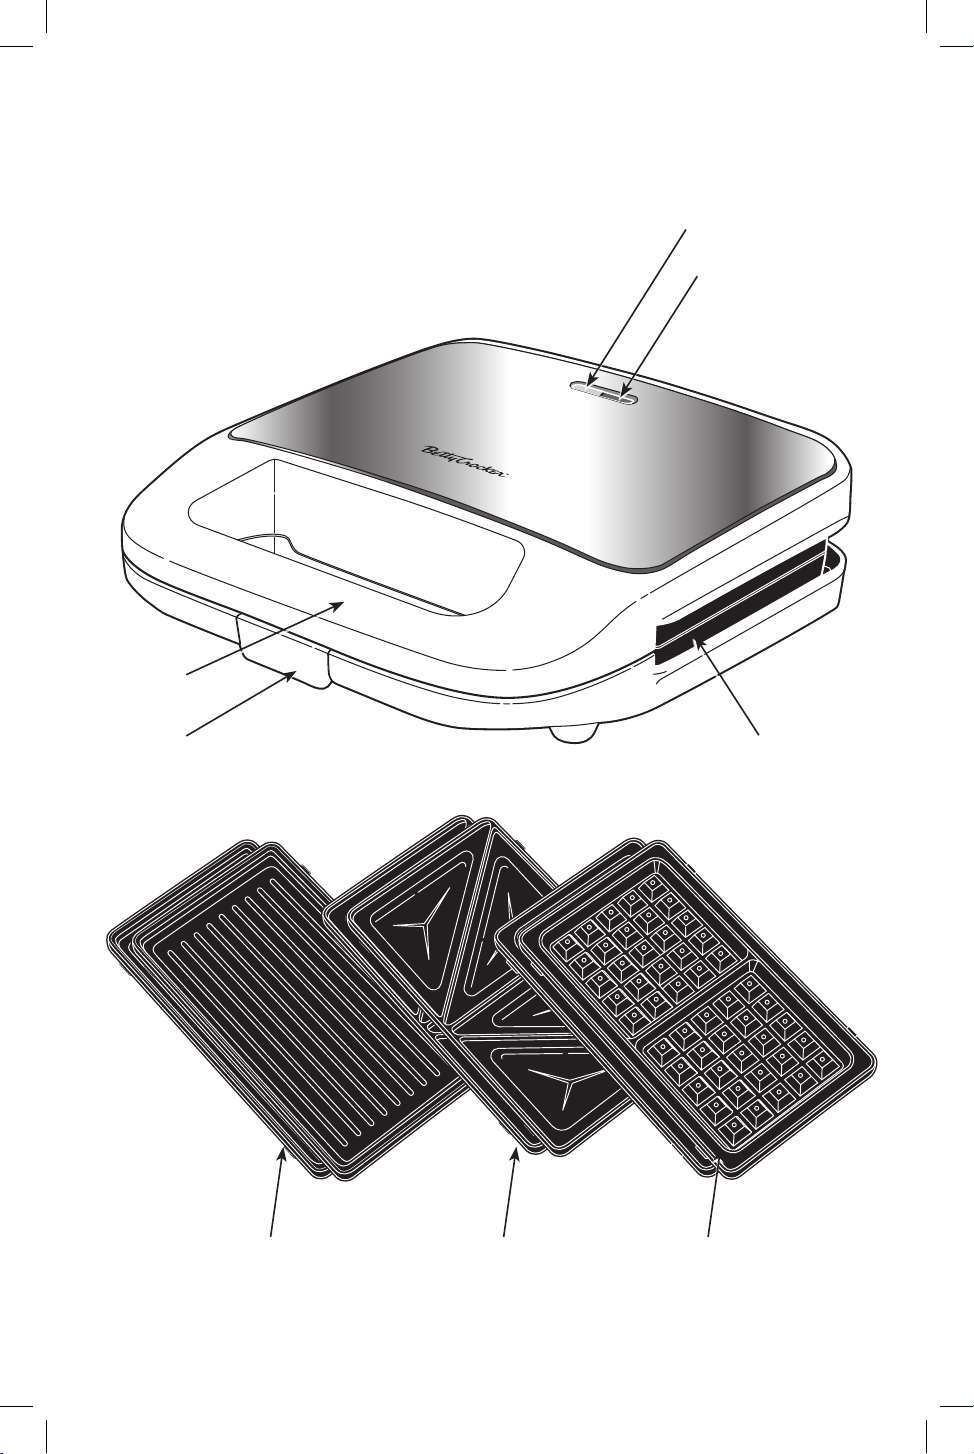
Nonstick Grill Plates (2) Nonstick Sandwich Plates (2)
RATING: 120 V, 60 Hz 750 Watts, AC ONLY
GETTING TO KNOW YOUR 3-IN-1
GRILL, SANDWICH & WAFFLE MAKER
CAUTION:
Ho t su rf ac e. U se ov en m it ts w he n ope ni ng .
Li ft u si ng h an dl e only .
Red Power-On Indicator
Green Ready Light
(Inside)
Upper and Lower
Heating Plates
Handle
Latch
Nonstick Wafe Plates (2)
BC-4965R_S-W (Rev 02)(EN).indd 6BC-4965R_S-W (Rev 02)(EN).indd 6 2024-04-25 2:22 PM2024-04-25 2:22 PM
7
USING YOUR GRILL
WARNING: Never leave the appliance unattended when
plugged into an electrical outlet.
See the Care and Cleaning Section for directions on how to install the plates (see
page14). With the grill plates installed, ensure the unit is on a dry, flat, heat-
resistant surface.
1. Place the grill on a dry, level, heat-resistant surface, such as a countertop. Plug
the unit into a working 120 V 60 Hz AC only outlet. Close the lid and allow the
unit to preheat.
CAUTION: The unit is on when it is plugged in. When the unit is plugged in, the
red “Power-On” light will illuminate.
NOTE:
NOTE: Before your first use, and approximately every 4 to 5 cooking cycles, it is
important to wipe on a small amount of cooking oil or nonstick spray, to season
the nonstick plates.
2. We find it best to plug the unit in first and then prepare your ingredients
while waiting. Follow the directions of your chosen recipe. The temperature of
the cooking plates can reach between 180° – 220° C (356° – 428° F).
WARNING: The grill cooking plates get veryhot.
Avoid touching them and the outer housingto
avoid possible injury.
* Always use oven mitts when using your appliance.
3. After a few minutes, the green “Ready” light will turn on, indicating that the
unit is now ready to cook. Using the handle, lift the lid to its fully upright
position. Keep face away to avoid any escaping steam.
4. Carefully place the food onto the cooking plates and lower the lid. Do not
apply excessive force to close the lid when grilling thicker sandwiches or food.
Steam may come from the sides of the unit while closing the lid, so care must
be taken not to burn yourself. You may lock the lid into place using the latch
at the front of the grill when grilling thin or smaller sandwiches.
NOTE:
NOTE: Cook only with the lid in the closed position.
During the grilling process, the green indicator light may cycle on and off.
This is simply the grill adjusting the temperature as the food is being cooked.
BC-4965R_S-W (Rev 02)(EN).indd 7BC-4965R_S-W (Rev 02)(EN).indd 7 2024-04-25 2:22 PM2024-04-25 2:22 PM

8
5. Unlock the lid and carefully lift it to its fully upright position. Remove the
grilled food from the cooking plates with a heat-resistant plastic or wooden
spatula. Do not use metal utensils, as this may damage the nonstick surface
of the cooking plates.
6. If additional grilling is required, lower the lid to preserve the heat while you
prepare the additional food. Simply repeat the above steps to make as many
tasty grilled meat, fish or vegetables as desired.
7. When finished with the grill, be sure to unplug and allow to cool before
cleaning and storing.
8. The grill can be latched closed and stored upright.
CAUTION:
CAUTION: Do not overfill your grill. Excessive ingredients may not allow you to
close and lock your grill. Forcing the lock will possibly damage the product and/or
the lock, which would not be covered under warranty.
GRILLING MEAT AND VEGETABLES
You may use your grill to cook boneless meat or poultry, burgers, fish and seafood
and vegetables. Cooking on the grill is a quick and healthy cooking option, since
you’re grilling the top and bottom of food at the same time, while the ribs in the
plates allow grease and unwanted fat to drip away from the meat.
See the Care and Cleaning Section for directions on how to install the grill plates.
With the grill plates installed, ensure the unit is on a dry, flat, heat-resistant
surface.
Plug the grill into a 120 volt 60 Hz AC only outlet. Close the lid, and allow the unit
to preheat.
Keep the grill in the closed position while it is preheating. When the correct
temperature has been reached, the READY light will turn on. This light may
turn on and off during cooking cycle, indicating that the temperature is being
maintained.
Place the food to be cooked on the bottom grill plate and carefully close the lid.
Grilling should take a few minutes, depending on the type of food used. Check
often to ensure your food is being grilled to your liking. For example,
Grilling asparagus takes about 2-3 minutes.
Grilling chicken breast takes about 5-7 minutes.
CAUTION: Keep your face a safe distance from the appliance
when opening the lid, as hot steam will escape and could
causeburns.
BC-4965R_S-W (Rev 02)(EN).indd 8BC-4965R_S-W (Rev 02)(EN).indd 8 2024-04-25 2:22 PM2024-04-25 2:22 PM

9
When your food is ready, unplug the grill from the electric outlet, then use a heat-
resistant plastic or wooden spatula to remove your food from the grill. Do not use
metal utensils, as they will damage the non-stick surface of the plates.
Helpful Hints
Lightly season the chicken breast or meat will help to lock the flavor and achieve
even browning results.
PRACTICE SAFE FOOD HANDLING
• Be sure to wash hands before, during, and after cooking.
• Always wash hands, knife and board after handling raw fish, meat or poultry.
• Do not reuse a board on which raw meat was prepared without cleaning it –
always use a clean board for cooked meat.
NOTE:
NOTE: This unit is for use with boneless meats only. Raw meat and poultry
should always be cooked to a safe minimum internal temperature.
USING YOUR SANDWICH MAKER
WARNING: Never leave the appliance unattended when
plugged into an electrical outlet.
See the Care and Cleaning Section for directions on how to install the plates
(see page 14). With the plates installed, ensure the unit is on a dry, flat, heat-
resistantsurface.
1. Place the sandwich maker on a clean, dry, heat-resistant level surface. Plug
the unit into a 120 V 60 Hz AC only outlet. Close the lid and allow the unit to
preheat.
CAUTION: The unit is on when it is plugged in. When the unit is plugged in, the
red “Power-On” light will illuminate.
NOTE:
NOTE: Before your first use, and approximately every 4 to 5 cooking cycles, it is
important to wipe on a small amount of cooking oil or nonstick spray, to season
the nonstick plates.
2. We find it best to plug the unit in first and then prepare the sandwiches while
waiting. Follow the directions of your chosen recipe.
BC-4965R_S-W (Rev 02)(EN).indd 9BC-4965R_S-W (Rev 02)(EN).indd 9 2024-04-25 2:22 PM2024-04-25 2:22 PM

10
WARNING: The Sandwich Maker cooking plates
get very hot. Avoid touching them and the outer
housing to avoid possible injury.
* Always use oven mitts when using your
appliance.
3. After a few minutes, the green “Ready” light will turn on, indicating that the
unit is now ready to cook. Lift the lid to its fully upright position.
4. Carefully place the sandwiches onto the cooking plates and lower the lid.
Do not apply excessive force to close the lid. If the lid will not fully close,
rearrange the sandwiches until the lid will close. Steam may come from the
sides of the unit while closing the lid, so care must be taken not to burn
yourself. Lock the lid into place using the latch at the front of the Sandwich
Maker.
NOTE: Sandwich maker has been designed for use with standard size breads.
NOTE: Cook only with the lid in the closed position.
During the cooking process, the green indicator light may flash on and
off. This is simply the Sandwich Maker adjusting the temperature as the
sandwiches are being cooked.
Most sandwiches should be ready after 3–5 minutes. Depending on personal
preference and taste, this time may vary slightly.
5. Unlock the lid and lift it to its fully upright position. Remove the sandwiches
from the cooking plates with a plastic or wooden spatula.
Do not use metal utensils, as this may damage the nonstick surface of the
cooking plates.
6. If additional sandwiches are desired, lower the lid to preserve the heat while
you prepare the additional sandwiches. Simply repeat the above steps to
make as many tasty sandwiches as desired.
7. When finished with the Sandwich Maker, be sure to unplug and allow
to cool before cleaning and storing.
8. Always follow cleaning instructions (page14) before storing.
9. The Sandwich Maker can be latched closed and stored upright.
CAUTION: Do not overfill your sandwiches. Excessive ingredients may not allow
you to close and lock your Sandwich Maker. Forcing the lock will possibly damage
the product and/or the lock, which would not be covered under warranty.
BC-4965R_S-W (Rev 02)(EN).indd 10BC-4965R_S-W (Rev 02)(EN).indd 10 2024-04-25 2:22 PM2024-04-25 2:22 PM

11
Helpful Hints
• Wipe the cooking plates with a small amount of cooking oil.
• Always preheat the unit before cooking.
• Try using flavoured butters to make interesting and exciting sandwiches.
• Try different types of breads and fillings to create your own specialties.
• Use pizza sauce, spaghetti sauce or tomato sauce interchangeably. About 1
tablespoon (15 mL) per bread slice works well.
• Standard size breads are ideal and cook more evenly than thicker sliced
bread.
• Use 1/4 to 1/3 cup (50 to 75 mL) chopped meat or vegetable mixture per
sandwich.
• Bread slices should fit within the square designs of the bottom cooking
surface. If bread is large, trim to fit or cut in half, making a smaller sandwich.
However, for best results, do not remove crusts from bread.
• Use very thinly sliced or shaved meats.
• Let sandwiches cool slightly before eating. Cheese, especially, becomes very
hot. Soft or melted fillings will firm slightly.
USING YOUR WAFFLE MAKER
WARNING: Never leave the appliance unattended when
plugged into an electrical outlet.
See the Care and Cleaning Section for directions on how to install the plates
(page14). With the plates installed, ensure the unit is on a dry, flat, heat-
resistant surface.
1. Place the waffle maker on a clean, dry, heat-resistant level surface. Plug the
waffle maker into a 120 volt 60 Hz AC only outlet. Close the lid and always
allow the unit to preheat.
CAUTION: The red “Power-On” light will come on when the unit is plugged in.
NOTE:
NOTE: Before your first use, and approximately every 4 to 5 cooking cycles, it is
important to wipe on a small amount of cooking oil or nonstick spray, to season
the nonstick plates.
BC-4965R_S-W (Rev 02)(EN).indd 11BC-4965R_S-W (Rev 02)(EN).indd 11 2024-04-25 2:22 PM2024-04-25 2:22 PM

12
CAUTION: Steam may come from the sides and front of the waffle
maker while closing the lid and during baking. Use care not to
burn yourself.
NOTE: Bake only with the lid in the closed position.
WARNING: The waffle maker cooking plates get
very hot. Avoid touching them and the outer
housing to avoid possible injury.
*Always use oven mitts when using your appliance.
2. After a few minutes, the green “Ready Indicator Light” will turn on, indicating
that the unit is now ready to cook. Lift the lid to its full upright position.
Carefully pour approximately 3-4 tbsp of batter into the centre of each plate.
Carefully lower the lid. NEVER lock the handle during the cooking process.
The “Ready Indicator Light” will now be off. The lid will lift a little while
the waffles bake.
3. Waffles should be fully baked in about 5-8 minutes. Depending on personal
preference and taste, this time may vary slightly. Please note that the
green “Ready Indicator Light” will turn on and off during the cooking cycle.
This is simply the waffle maker adjusting temperature as the waffles are
beingcooked.
NOTE:
NOTE: Do not open the waffle maker during the first 3 minutes of cooking. If
the lid resists lifting, allow the waffles to bake a little longer, then try lifting the
lidagain.
4. When ready, lift the lid to its full upright position. Remove the waffles from
the waffle maker with a plastic or wooden spatula. Do not use metal utensils
as they may damage the surface of the cooking plates. Lower the lid between
baking waffles or while making additional batter to preserve the heat.
CAUTION:
CAUTION: Avoid leaving the waffle maker plugged in with no batter on the
cooking plates for an extended length of time.
5. When finished making waffles, be sure to unplug the waffle maker and allow
it to cool before cleaning and storing.
6. Always follow cleaning instructions (page14) before storing.
7. The waffle maker can be latched closed and stored upright.
BC-4965R_S-W (Rev 02)(EN).indd 12BC-4965R_S-W (Rev 02)(EN).indd 12 2024-04-25 2:22 PM2024-04-25 2:22 PM

13
WARNING:
WARNING: The waffle maker cooking plates get very hot. Avoid touching them
and the outer housing to avoid possible injury.
RECIPE
2 cups (500mL) all-purpose flour
1 tablespoon (15 mL) sugar
4 teaspoons (20 mL) baking powder
¼ tsp (1mL) salt
2 eggs
1 ¾ cups (400mL) of milk
½ cup (125mL) melted butter or vegetable oil
In a medium bowl, combine the flour, sugar, baking powder and salt. In a
separate bowl whisk the eggs, milk and melted butter or vegetable oil until
well blended. Pour the wet ingredients into the dry ingredients and mix until
wellblended.
Lightly coat the nonstick cooking plates with butter, vegetable oil or cooking
spray. Heat the waffle maker by following the instructions located on page11.
Makes about ten (10) waffles or 3-1/2 cups (800ml) of batter.
Helpful Hints
• To ensure your waffles are evenly filled, pour batter into the centre of the
lower cooking plate. NOTE: Do not overfill the cooking plates.
• Never lock the handle latch during the cooking process.
• If waffles stick to the top cooking plates, remove them with a plastic or
wooden spatula.
• If you do not want to serve your waffles right away, you may place them in
an ovenproof dish and keep them warm in the oven at a low temperature
of about 200°F (100°C). You may wrap the waffles in foil, but they may lose
theircrispiness.
• You may also freeze your waffles for a later date. Allow the waffles to cool
completely before putting them in a plastic bag suitable for the freezer. You
may use waxed paper in between the waffles to keep them separated. When
you are ready, reheat the waffles in a toaster or toaster oven.
BC-4965R_S-W (Rev 02)(EN).indd 13BC-4965R_S-W (Rev 02)(EN).indd 13 2024-04-25 2:22 PM2024-04-25 2:22 PM

14
CARE AND CLEANING YOUR 3-IN-1
GRILL, SANDWICH & WAFFLE MAKER
CHANGING THE PLATES
The Cooking Plates can only be changed when the unit is cold.
To change the Cooking Plates, open the lid so that the Cooking Plates are facing
you. To remove the bottom Cooking Plate, place your two thumbs on the small
tabs in front of the plate and slide them toward you. The Cooking Plate will pop up
and can be lifted out. To remove the top Cooking Plate, place your hands around
the sides of the unit and use your thumbs to slide the tabs upward. Be sure that
your hands are in front of the Cooking Plate so it does not fall forward.
To replace the Plates, place the tabs at the back of the Cooking Plates against the
slots provided. Press the Cooking Plate down at both corners that are closest to
the locking tabs. Ensure Cooking Plate stays in place.
CLEANING
Be sure to unplug the appliance and allow it to cool completely before cleaning.
CAUTION: Do not immerse in water or any other liquid.
Always wipe the inside and the edges of the cooking plates with a clean, damp
cloth after every use. To remove stubborn stains or food, use a nylon brush or
other utensil safe for nonstick surfaces. Do not use steel wool or scouring pads. Do
not use abrasive cleansers. Wipe the exterior with a clean, damp cloth.
BC-4965R_S-W (Rev 02)(EN).indd 14BC-4965R_S-W (Rev 02)(EN).indd 14 2024-04-25 2:22 PM2024-04-25 2:22 PM

15
LIMITED WARRANTY ONE (1) YEAR
This warranty is the only warranty for this product. This product is warranted to be free from
defects in material and workmanship for a period of one (1) year from the date of original
purchase, as evidenced by the receipt of purchase, and provided it is used for the purpose
for which the product is intended. During this period, your exclusive remedy is repair or
replacement of this product or any component found to be defective, at our option. If the
product should become defective within the warranty period, we will repair it or replace it free
of charge. If the product or component is no longer available, we will replace with a similar one
of equal or greater value. We will return your product, transportation charges prepaid provided
it is delivered prepaid to Formula Brands Inc. Any and all remedies relating to this warranty are
limited to the amount of the purchase price of the product. This warranty extends only to the
original purchaser, consumer or gift recipient.
This warranty does not cover failure caused by food build-up, water deposits, normal cosmetic
discoloration, and inadequate maintenance of the product. This warranty will not cover
damage or failure to function if the product has been dismantled or tampered with, if it has
been damaged due to exposure to water or any other liquid, if it is not used in conformity with
the printed directions of this product or if it has been accidentally or intentionally damaged.
This warranty does not cover the following parts which may be supplied with the appliance:
plastic parts, glass parts, glass containers, ceramic containers, cutter/strainer, filters or nonstick
surfaces.
This product is intended for use in a single-family household. This warranty will become null
and void if the product is used for commercial purposes or any other purpose other than for
single-family household use.
We exclude all claims for special, incidental and consequential damages caused by breach of
any express or implied warranty. All liability is limited to the amount of the purchase price.
Every implied warranty, including any statutory warranty or condition of merchantability or
fitness for a particular purpose, is disclaimed except to the extent prohibited by law, in which
case such warranty or condition is limited to the duration of this written warranty. This warranty
gives you specific legal rights. You may have other legal rights that vary depending on where
you live. Some states or provinces do not allow limitations on implied warranties or special,
incidental or consequential damages, so the foregoing limitations may not apply to you.
BC-4965R_S-W (Rev 02)(EN).indd 15BC-4965R_S-W (Rev 02)(EN).indd 15 2024-04-25 2:22 PM2024-04-25 2:22 PM
16
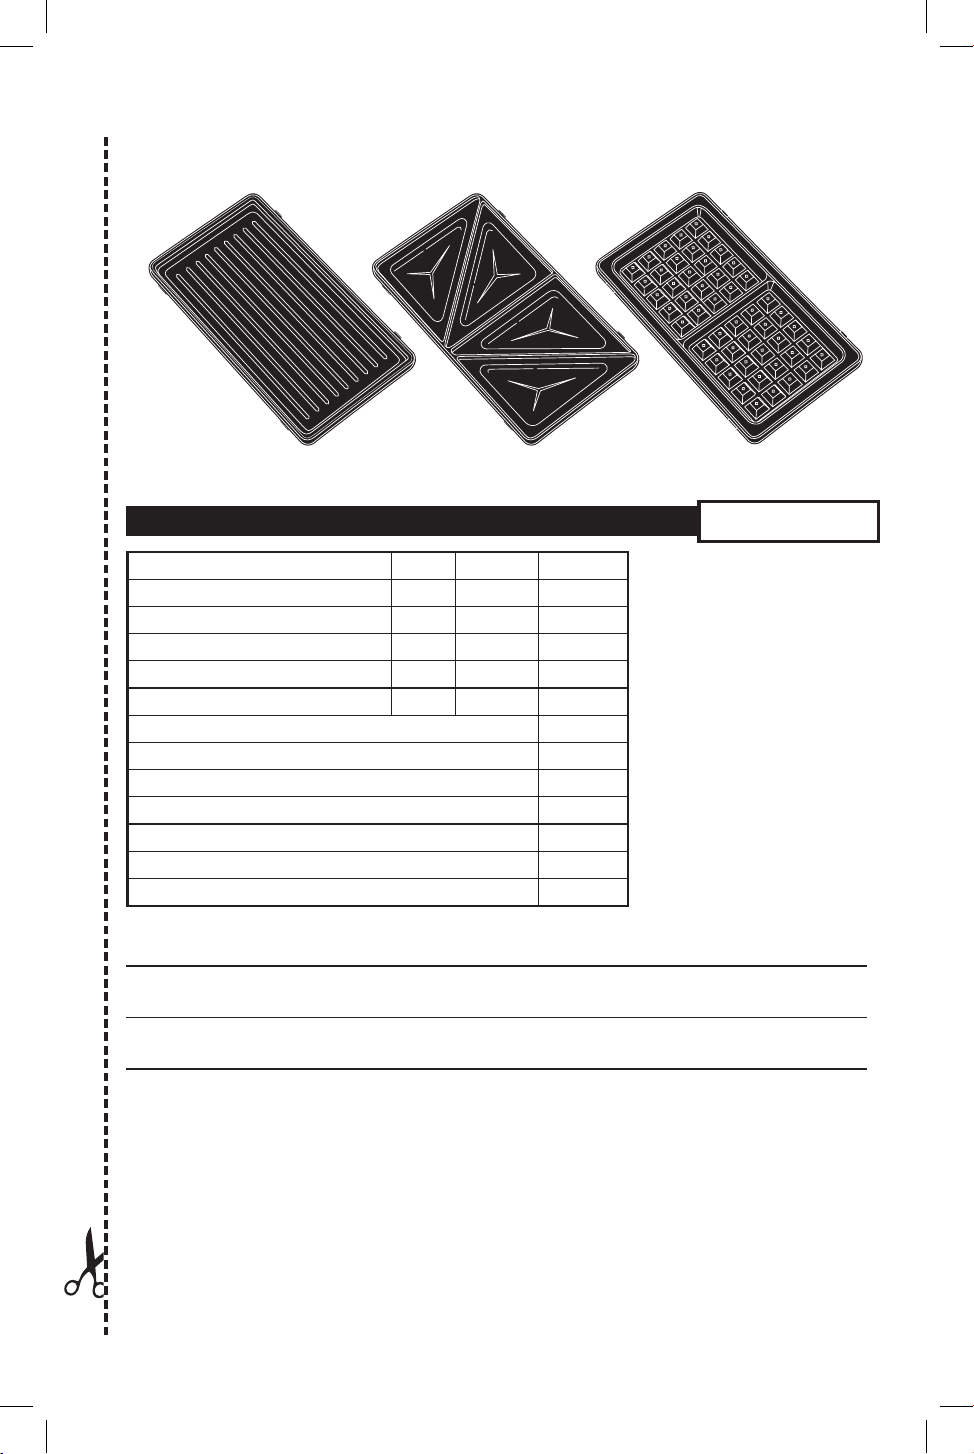
Nonstick Wafe Plate (1)Nonstick Grill Plate (1) Nonstick Sandwich Plate (1)
PLEASE WRITE MODEL NUMBER HERE:
If you would like to order
replacement or spare parts for
this appliance, please complete
and mail this form, along with
a cheque or money order made
payable to:
FORMULA BRANDS INC.
Parts Department
45 Mural Street, Unit #7,
Richmond Hill, Ontario, Canada
L4B 1J4
REPLACEMENT PARTS
NAME
ADDRESS
CITY PROVINCE/STATE POSTAL/ZIP CODE
Prices are subject to change without notice.
PLEASE NOTE: WHEN ORDERING FROM USA, AN ‘INTERNATIONAL’ MONEY ORDER MUST BE USED.
Allow 3 to 6 weeks
for delivery.
BC-4965R/S/W
04/24
* Shipping costs may vary based on fuel surcharges and
postage rates. Please call toll-free 1-877-244-1110
or email [email protected] to
confirm shipping and handling charges.
Part QTY PRICE TOTAL
Nonstick Grill Plate (1) $7.99
Nonstick Sandwich Plate (1) $7.99
Nonstick Waffle Plate (1) $7.99
TOTAL
SHIPPING AND HANDLING TO CANADA: $9.00*
SHIPPING AND HANDLING TO USA: $15.00*
SUBTOTAL
ADD 13% H.S.T. – CANADA ONLY
TOTAL
BC-4965R_S-W (Rev 02)(EN).indd 16BC-4965R_S-W (Rev 02)(EN).indd 16 2024-04-25 2:22 PM2024-04-25 2:22 PM