OWNERS MANUAL
© Copyright 2006, Superscope Technologies, Inc.
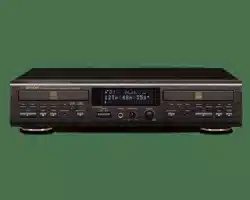
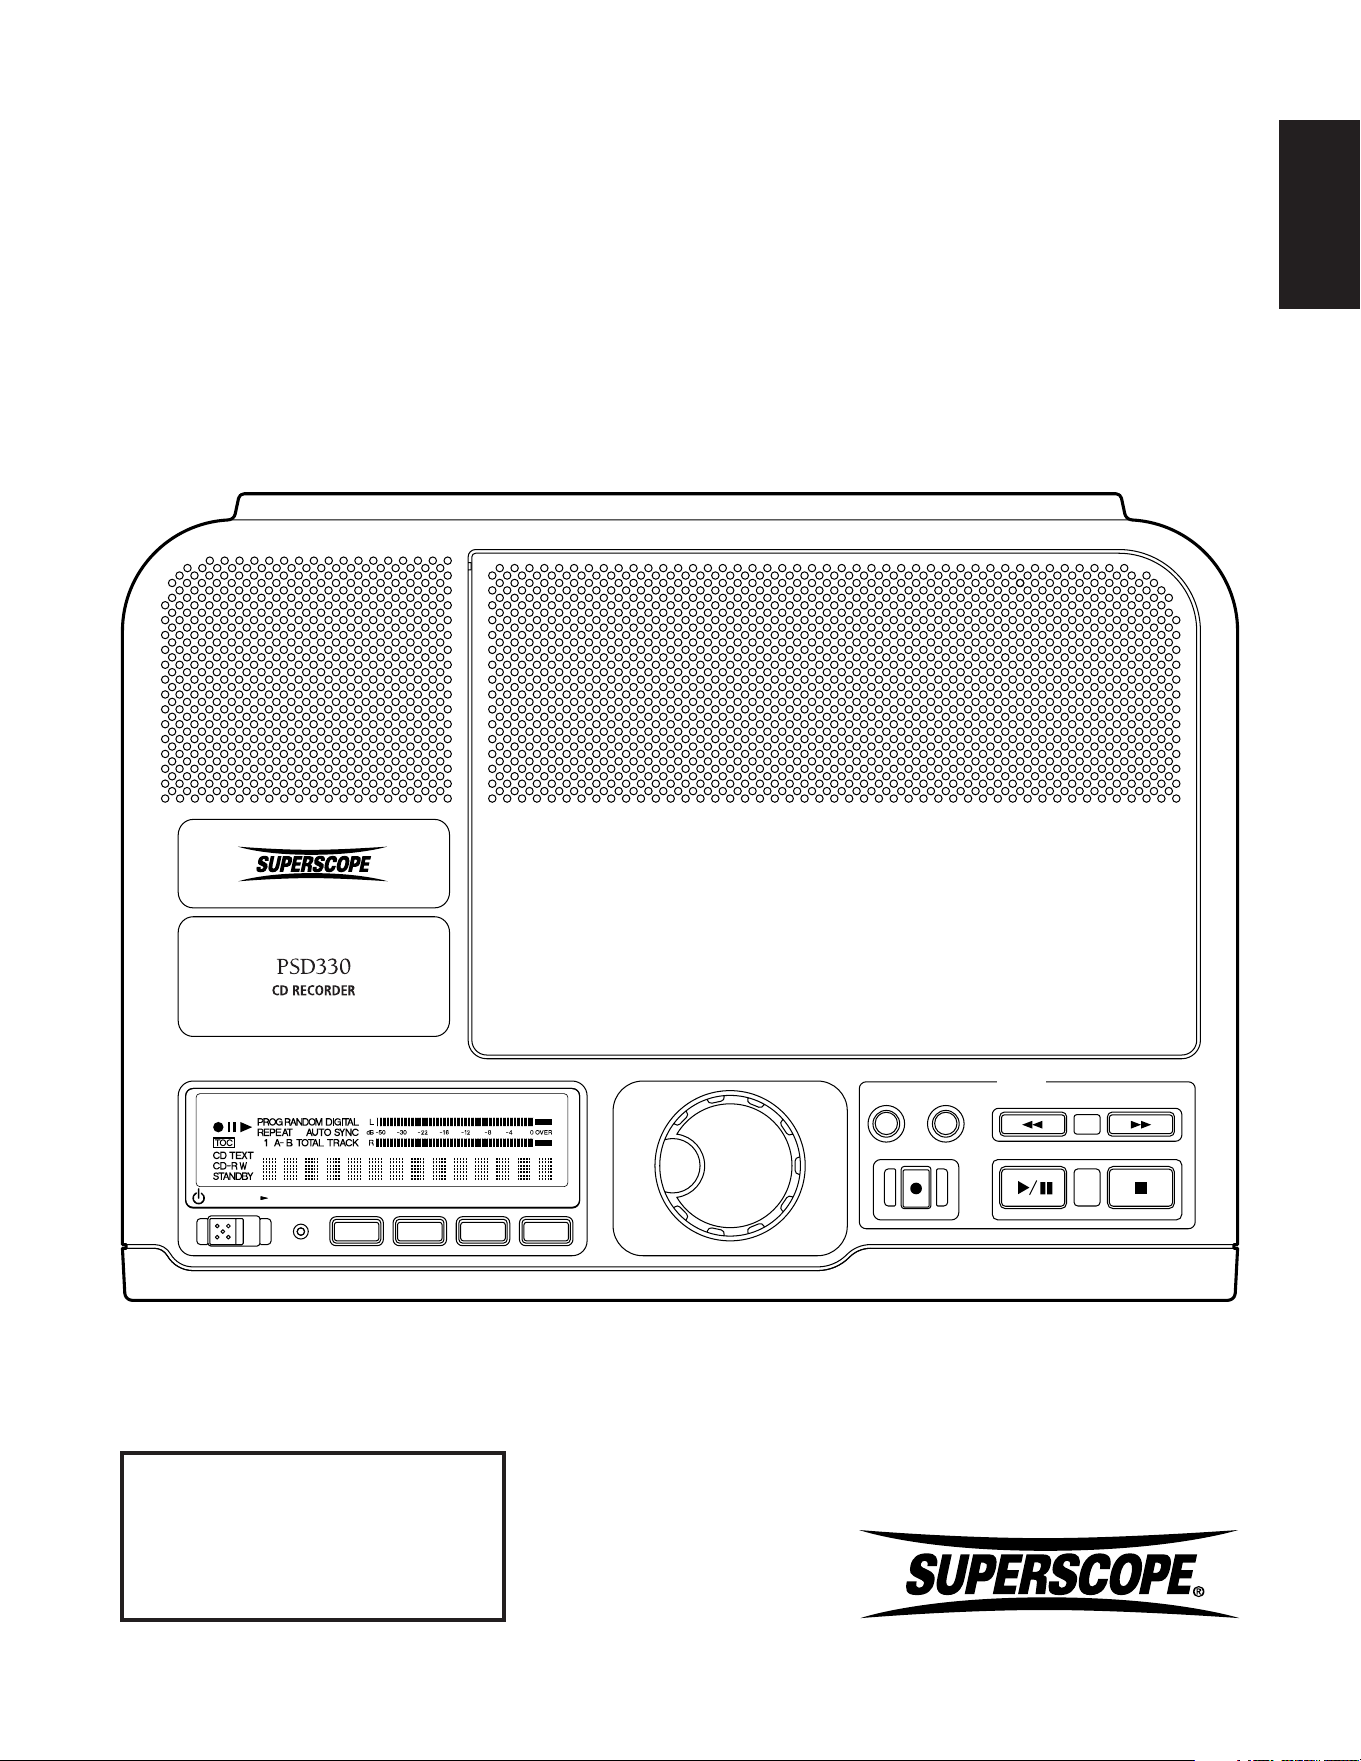
PSD330
CD Recorder
POWER
PUSH ENTER
SELECT
ERASE
FINALIZE REC REVIEW
REC
REC/PLAY
STANDBY TR INC DISPLAY
MENU/STORE
SYNC REC
www.superscopetechnologies.com
English
CLASS 1 LASER PRODUCT
LASER DE CLASSE 1
LUOKAN 1 LASERLAITE
KALSS 1 LASERAPPARAT

- 2 -
The lightning flash with
arrowhead symbol within an
equilateral triangle is intended
to alert the user to the
presence of uninsulated
"dangerous voltage" within the product's
enclosure that may be of sufficient magnitude
to constitute a risk of electric shock to persons.
The exclamation point within an equilateral
triangle is intended to alert the
user to the presence of
important operating and
maintenance (servicing)
instructions in the literature
accompanying the appliance.
LASER SAFETY
This unit employs lasers. Only a qualified service
person should remove the cover or attempt to
service this device, due to possible eye injury.
READ BEFORE OPERATING EQUIPMENT
This product was designed and manufactured to meet strict quality and
safety standards. There are, however, some installation and operation
precautions which you should be particularly aware of.
1. Read instructions.
2. Keep these instructions.
3. Heed all warnings.
4. Follow all instructions.
5. Clean only with dry cloth.
6. Do not use this apparatus near water.
7. To ventilate the unit, do not install it in a rack or bookshelf, and
note the following: Do not insert objects beneath the unit. Do not
block ventilation slots at the top of the unit. Do not place
anything about 1 meter above the top panel. Make a space of
about 8” (20 cm) around the unit.
8. Do not install near any heat sources such as radiators, heat registers,
stoves, or other apparatus (including amplifiers) that produce heat.
9. Do not defeat the safety purpose of the polarized or grounding-
type plug. A polarized plug has two blades with one wider than
the other. A grounding type plug has two blades and a third
grounding prong. The wide blade or the third prong are provided
for your safety. If the provided plug does not fit into your outlet,
consult an electrician for replacement of the obsolete outlet.
10. Protect the power cord from being walked on or pinched
particularly at plugs, convenience receptacles, and the point
where they exit from the apparatus.
11. Only use attachments/accessories specified by the manufacturer.
12. Use only with the cart, stand, tripod, bracket,
or table specified by the manufacturer, or sold
with the apparatus. When a cart is used, use
caution when moving the cart/apparatus
combination to avoid injury from tip-over.
13. Unplug this apparatus during lightning storms
or when unused for long periods of time.
14. Refer all servicing to qualified service personnel.
Servicing is required when the apparatus has been damaged in any
way, such as power-supply cord or plug is damaged, liquid has been
spilled or objects have fallen into the apparatus, the apparatus has
been exposed to rain or moisture, does not operate normally, or has
been dropped.
Additional Safety Information!
• This product should not be placed in a built-in installation such as
a bookcase or rack unless proper ventilation is provided or the
manufacturer’s instructions have been adhered to.
• Apparatus shall not be exposed to dripping or splashing and that no
objects filled with liquids, such as vases, shall be placed on the apparatus.
• When the switch is in the OFF position, the apparatus isn’t
completely switched-off from the MAINS.
WARNING
TO REDUCE THE RISK OF FIRE OR ELECTRIC SHOCK, DO NOT
EXPOSE THIS PRODUCT TO RAIN OR MOISTURE.
CAUTION: TO PREVENT ELECTRIC SHOCK, MATCH WIDE
BLADE OF PLUG TO WIDE SLOT, FULLY INSERT.
ATTENTION: POUR EVITER LES CHOC ELECTRIQUES, INTRODUIRE LA LAME
LA PLUS LARGE DE LA FICHE DANS LA BORNE CORRESPONDANTE DE LA
PRISE ET POUSSER JUSQU’AU FOND.
NOTE TO CATV SYSTEM INSTALLER:
This reminder is provided to call the CATV (Cable-TV) system
installer’s attention to Section 820-40 of the NEC which provides
guidelines for proper grounding and, in particular, specifies that the
cable ground shall be connected to the grounding system of the
building, as close to the point of cable entry as practical.
NOTE: This equipment has been tested and found to comply with the
limits for a Class B digital device, pursuant to Part 15 of the FCC Rules.
These limits are designed to provide reasonable protection against
harmful interference in a residential installation. This equipment
generates, uses and can radiate radio frequency energy and, if not
installed and used in accordance with the instructions, may cause
harmful interference to radio communications. However, there is no
guarantee that interference will not occur in a particular installation. If
this equipment does cause harmful interference to radio or television
reception, which can be determeined by tuning the equipment off and
on, the user is encouraged to try to correct the interference by one or
more of the following measures:
• Reorient or relocate the receiving attenna.
• Increase the separation between the equipment and receiver.
• Connect the equipment into an outlet on a circuit different from
that to which the receiver is connected.
• Consult the dealer or an experienced radio/TV technician for help.
NOTE: Changes or modifications not expressly approved by the party
responsible for compliance could void the user’s authority to operate
the equipment.
This Class B digital apparatus complies with Canadian
ICES-003. Cet appareil numérique de la Classe B
conforme à la norme NMB-003.
CAUTION: TO REDUCE THE RISK OF ELECTRIC SHOCK,
DO NOT REMOVE COVER (OR BACK)
NO USER-SERVICEABLE PARTS INSIDE
REFER SERVICING TO QUALIFIED SERVICE PERSONNEL
RISK OF ELECTRIC SHOCK
DO NOT OPEN
CAUTION
Important Safety
Instructions

- 3 -
Table of Contents
Warnings and Precautions .............................................. 2
Safety Instructions ......................................................... 2
Table of Contents .......................................................... 3
Specifications ................................................................ 3
Package Contents .......................................................... 4
Features ..................................................................... 5
Top of Unit ................................................................... 5
Front of Unit ................................................................ 7
Back of Unit ................................................................. 9
Remote Control ...........................................................10
Set Up ....................................................................... 12
Powering Up ...............................................................12
Setting Up Speakers ..................................................... 12
Headphones or Built-In Speaker ..........................12
External Speakers ...............................................12
Setting Up Instruments, Mics, & Other Sound Sources .......12
Microphones .....................................................12
Internal Microphone ..........................................13
Instruments .......................................................13
Line Level Sources .............................................13
Setting Levels ....................................................13
Recording ................................................................. 14
Making a Live Recording .............................................. 14
Playing a CD ................................................................ 14
Track Increments ..........................................................15
Creating New Tracks Manually ............................15
Auto Track Mode ...............................................15
Minute Track Mode ........................................... 15
Recording from a Digital Input ...................................... 15
Copying from an External Source ..................................16
Sync Record ......................................................16
Sync Record+Final ............................................ 16
How to Finalize a Disc .................................................16
How to Unfinalize a CD-RW disc .......................16
How to Erase a CD-RW ......................................16
Troubleshooting .......................................................17
About CD Text ..........................................................18
Menus ....................................................................... 19
Play Menu ........................................................19
Record Menu ....................................................20
Stop Menu ........................................................ 21
Warranty ...................................................................22
Laser Safety .............................................................. 22
Topic Page
Specifications
General
System ................ Compact Disc Digital Audio (CD-DA)
Number of channels ...................................... 2 (stereo)
Applicable discs ............................... CD, CD-R, CD-RW
Power requirements ..................... AC 120V60 Hz, 18W
Dimensions (maximum)
Width ................................... 12 inches (296 mm)
Height ...................................... 4 inches (92 mm)
Depth ..................................... 9 inches (222 mm)
Weight ................................. 6.2 pounds (2.8 Kg)
Audio
ADC 24 Bit Resolution 64x Oversampling
DAC 24 Bit Resolution
Overall frequency response ..................... 20Hz - 20kHz
CD-R drive output
Playback S/N ....................................................... 100dB
Playback Dynamic Range ...................................... 99dB
Playback Total Harmonic Distortion ............... ...0.004%
Output Voltage/Impedance (Line Output) ... 2.2V/500Ω
MIC/LINE analog input
LINE level
S/N ............................................................... 85dB
THD ............................................................0.02%
Input Sensitivity/Impedance ............... 450mV/4.5K
MIC level
S/N ............................................................... 70dB
THD ............................................................0.08%
Input Sensitivity/Impedance ................ 2.6mV/4.1K
AUX analog input
S/N ............................................................... 85dB
THD ............................................................0.01%
Input Sensitivity/Impedance ................ 500mV/33K
Digital Input
Sample rate ........................ 32kHz/44.1kHz/48kHz
Digital Output
Output Level/Impedance .................. 0.5Vp-p/75Ω
Headphone Output (10% THD)
Level/Impedance ................................ 50mW/32Ω
Speaker Output (10% THD)
Level/Impedance .................................... 2.0W/8Ω
- 4 -
Package Contents
PSD330
Infrared (IR)
Remote
AC Power Cord
RCA Patch Cables
Installing Remote Batteries
Press and lift at arrow to open the remote control
battery compartment.
Install two AAA batteries then replace compartment
cover.
When disposing of used batteries, please comply with
governmental and environmental regulations.
OPEN
OPEN
AAA batteries (2)
Recording Features
• Direct recording to CD-R (write once) or CD-RW
(rewritable) discs
• Built-in microphone preamplifiers
• Built-in condenser microphone
• Automatic Rec Level Control
for “worry free”
recording
• Record-Review which allows immediate playback of
the last track recorded
• Minute-Track Recording
• One-Touch Recording
Recommended Media
The PSD330 will record on computer CD-R or CD-RW
data discs as well as “Music CD-R” discs. We do not
recommend using generic discs with the PSD330. If
possible, choose brand name discs and test any brand
before buying in bulk.The only way to know if a disc is
a good match for your recorder is to record and finalize
a disc, then play the disc in a separate CD player.
The most important factor in choosing CD-R or CD-RW
media is the speed rating. Different formulations of
media may require a different “write strategy” at
certain speeds. It’s possible that writing slowly to “high-
speed” media will produce poor results. Since the
PSD330 records in real time (1X), it is best to avoid CDs
that are rated for “high-speed”, for example, 52X or
56X.
POWER
PUSH ENTER
SELECT
ERASE
FINALIZE REC REVIEW
REC
REC/PLAY
STANDBY TR INC DISPLAY
MENU/STORE
SYNC REC
Blank CD-R and CD-RW discs rated 1X are available for
purchase directly from Superscope at
http://www.superscopetechnologies.com.
Please visit our Web store or contact us toll free at 866-
371-4773.
- 5 -
Features
1 Speaker
2 Internal Microphone
3 CD Recorder Controls
4 Record Button
5 Finalize Button
Top of Unit
6 Erase Button
7 Select Jog Wheel
8 SYNC REC Button
9 MENU/STORE Button
10 Display Button
11 TR INC Button
12 Standby Light
13 Standby Power Button
14 Display
POWER
PUSH ENTER
SELECT
ERASE
FINALIZE REC REVIEW
REC
REC/PLAY
STANDBY TR INC DISPLAY
MENU/STORE
SYNC REC
3
2
45678
9
10
11
12
13
1
14
[1] Internal Speaker
By using the internal speaker, the PSD330 CD
Recorder can be monitored without connecting
to external amplification.
[2] Built-In Microphone (MIC)
Internal condenser microphone.
[3] Play controls
A. FAST BACKWARD SEARCH and RECORD
REVIEW button. Hold down to go backwards
within an audio track.
Note: Use the SELECT jog wheel to change
tracks.
The FAST BACKWARD
SEARCH button (A) also
controls the RECORD
REVIEW feature. Press this
button while recording, or
after the recording has
been stopped, and the unit will stop and play
back the last track recorded.
B. FAST FORWARD search button. Hold down to
advance within an audio track.
C . PLAY/PAUSE button
D . STOP button
REC REVIEW
A
C
B
D

- 6 -
[4] RECORD (REC) button/ light
Press this button to enter Record Pause mode. In
Record Pause mode, press this button to begin
recording. When the One Touch Recording feature
is ON (see Menus pg. 19), press this button to
bypass Record Pause mode and begin recording
after 3 seconds. Also used when finalizing a CD.
(see pg. 16)
[5] FINALIZE button / light
Press this button to enter CD-R Finalize mode (pg.
16).
[6] ERASE button / light
Use to enter Erase mode (CD-RW only) (pg. 16).
[7] SELECT jog wheel
This is the master control for the PSD330. For
most functions, scroll through choices with the
SELECT jog wheel, then press the wheel to
accept your choice.
• In Play mode, turn to select a track.
• When recording, turn to adjust recording level.
• After the MENU/STORE button is pressed, turn
the SELECT jog wheel to scroll through menu
selections and make adjustments.
[8] SYNC RECORD ON/OFF button
Press this button to enter Sync Record mode (see
pg.16). Turn the SELECT jog wheel to view Sync
Record options and press ENTER to confirm
selection. A blank CD-R or CD-RW disc must be
placed in the disc drive to make this feature
active.
[9] MENU/STORE button
Press this button to enter Menu mode. Menu
selections and changes are made using the
SELECT jog wheel. Turn the SELECT jog wheel to
scroll through options. Press the SELECT jog wheel
to select an option. Press the MENU/STORE button
to store changes and exit Menu mode. (For a
complete list of menu selections see pg. 19).
[10] DISPLAY (DISP) button
Press the DISPLAY button once to display the
remaining play time for the current track. The
display reads “TRACK.”
Press the button a second time to display the
remaining play time for the entire CD. The display
reads “TOTAL TRACK.” Press the DISPLAY button
again to return to the default display showing
elapsed track time.
[11] TRACK INCREMENT (TR INC)
button
During recording press this button to manually
create a new track. RECOMMENDED: When using
this feature, set AUTO TRACK to OFF (See pg. 20).
[12] STANDBY light
STANDBY light is lit when power is switched OFF by
the Standby POWER switch on the unit or remote.
[13] Standby POWER switch
Slide the Standby POWER switch to the right to turn
power ON or OFF. The MASTER POWER button on
rear of unit must be ON (the red STANDBY light
must be lit).
[14] Display
1. Record indicator - Lit when recording.
2. Pause indicator - Lit when recording or
when playback has been paused.
3. Play indicator - Lit during recording or
playback.
- 7 -
Front of Unit
(controls and connections)
[1] PHONE/SPEAKER LEVEL control
Turn this knob to adjust the volume level of the
built-in speaker or headphones.
[2] PHONE SELECTOR knob
Select the audio source for the PHONE jack and
INTERNAL SPEAKER by turning this knob to one
of the following four settings:
MIX - Audio from the entire system including
CD playback, MIC/LINE/INST inputs, Internal
Mic, and AUX input jacks.
CD - CD playback audio only.
MIC/LINE/INT MIC - Audio being input via the
MIC/LINE/INST jacks and the Internal Mic.
AUX - Audio being input via the AUX IN jack.
[3] LEFT LINE/MIC/ INSTRUMENT
(INST) switch
Switch to LINE for a line level input, MIC for a
microphone level input or INST for an instrument
level input.
Note: Audio from the front inputs can be mixed
with audio from the stereo AUX input on the rear
panel.
[4] Left level control
Turn this knob to adjust the Left Input signal level.
[5] RIGHT LINE/ MIC/ INSTRUMENT (INST)
switch
Switch to LINE for a line level input, MIC for a
microphone level input or INST for an instrument
level input.
Note: Audio from the front inputs can be mixed
with audio from the stereo AUX input on the rear
panel.
[6] Right level control
Turn this knob to adjust the Right Input signal
level.
[7] INPUT ANALOG/DIGITAL switch
Select between analog or digital external input.
[8] ALC/ATT switch
Record level limiter or MIC/LINE/INST attenuator.
ON - Limits any analog input signal greater than
-6 dB. Record Level is inactive when ALC is on.
OFF - Set level using left and right MIC/LINE/INST
(or INT MIC) level controls. Levels in excess of 0
dB may be recorded and may result in distorted
recordings.
-15dB - Reduces right and left MIC levels by
-15dB. Does not effect the internal mic.
[9] MIC/LINE (INT MIC/MONO/STEREO)
switch
Determines how the signal from the MIC/LINE/
INST (or INT MIC) inputs are recorded.
INT MIC - Internal Mic is selected as the input
source. Use the RIGHT and LEFT level control
knobs to adjust the Internal Mic level applied to
each channel of the recording.
PUSH
CD PLAY/RECORD
LINE OUT
PHONES
LEVEL
INSTMIC
PHONE/SPEAKER
LINE
INSTMIC
LINE
MIC/LINE
NEUTRIKNEUTRIK
MIC/LINE RIGHTLEFT
PHONE SELECTOR
ANALOG
DIGITAL
OFF
ON
-15dB
INPUT
ALC/ATT
SPEAKER
OPEN/CLOSE
AUX
/ INT MIC
MIC / LINE
CD
MIX
PUSH
LR
MIC
/
LINE
INT MIC
MONO
STEREO
OFF ON
1
17 16 15 14 13 12
2
3
45 6
7
8 9 10 11

- 8 -
-15dB
MONO - Left and right signals from the AUX
inputs are sent to the left and right channels of the
recording. MIC/LINE/INST inputs are mixed
together and then sent to both channels of the
recording.
STEREO - Left and right signals from the MIC/
LINE/INST inputs and/or AUX inputs are sent to the
left and right channels of the recording.
[10] SPEAKER OFF/ON switch
Turns the built-in speaker ON or OFF.
[11] OPEN/CLOSE switch
Press to OPEN the disc drive. Press again to CLOSE
the disc drive.
[12] Remote control sensor
Sensor for the supplied wireless remote control.
[13] Disc drive
Used for recording CD-R
and CD-RW discs.
The disc drive can
also play back CD,
CD-R and CD-RW discs.
[14] Right XLR or 1/4" input jack
Plug in a microphone, musical instrument or line
level audio source here to provide audio to the
right stereo channel.
[15] Left XLR or 1/4" input jack
Plug in a microphone, musical instrument or line
level audio source here to provide audio to the
left stereo channel.
[16] LINE OUT level control
Turn this knob to adjust the output level of the
LINE OUT (VARI) jacks.
[17] PHONES jack
Plug in stereo headphones here. Adjust
headphone volume with the PHONE/SPEAKER
level control.
- 9 -
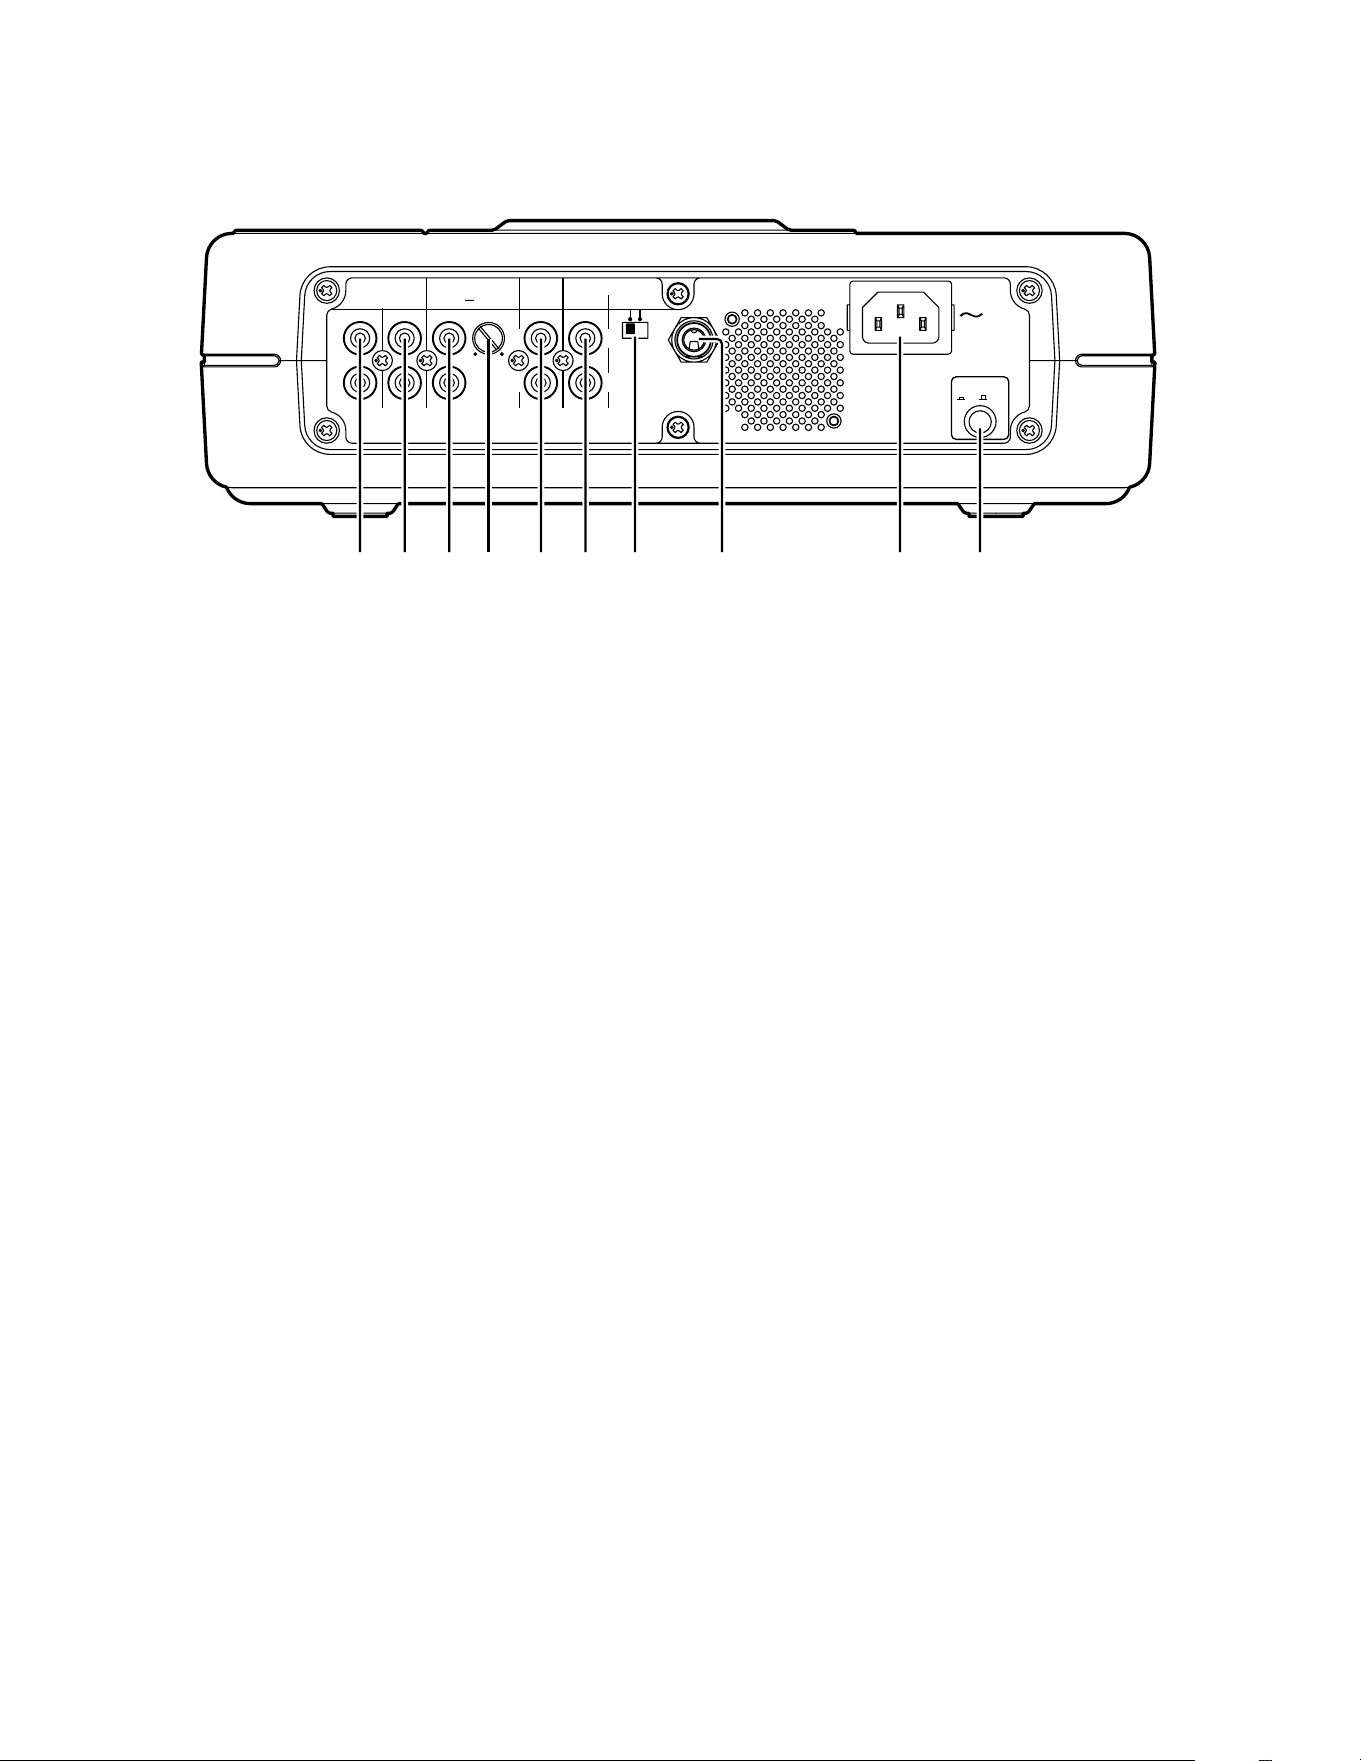
Back of Unit
(rear panel connections)
[1] LINE OUT VARIABLE (VARI) jacks
Sound from the disc drive is output as L-R line
levels to an external recorder, amplifier, or
powered speakers.
The LINE OUT (VARI) signal can be adjusted by the
LINE OUT level control (pg. 8 [16]).
[2] LINE OUT (FIXED) jacks
Sound from the disc drive is output as L-R line
levels to an external recorder, amplifier, or
powered speakers. When the PSD 330 is not
recording, the LINE OUT jacks will output the
signal from the selected input(s).
[3] AUX IN jacks
Use this stereo RCA connection for recording onto
the disc drive from an external audio source
such as a cassette deck. Audio from the AUX IN can
be mixed with audio from the front panel
inputs and the internal microphone.
[4] AUX IN level control
Turn to adjust the input signal level of the AUX
IN.
[5] DIGITAL IN and OUT jacks
Plug in RCA coaxial cables here to connect to the
input and/or output of an external digital unit.
Use DIGITAL IN for recording onto the CD-R drive
from an external digital audio source. Use
DIGITAL OUT for going to an external digital
device.
[6] REMOTE RC-5 IN and OUT jacks
Plug in RCA coaxial cables here to connect to
the input or output of an RC-5 remote control
system.
For more information on the RC-5 system, please
contact Superscope Technologies.
[7] Phantom Power ON/OFF switch
Switch ON to apply 48V phantom power to XLR
mic inputs. Switch OFF if the microphones being
used do not require 48V phantom power.
[8] FOOT PEDAL jack
An optional foot pedal provides Play/Pause or
Record/Pause control for the disc drive. The foot
pedal also may be used to toggle between Play
and Rewind. To toggle between Play and Rewind,
first turn on the Recall function (see Menus, pg.
19). The FT200 Foot Pedal is available from
Superscope Technologies Inc.
[9] Power plug
Plug one end of the supplied power cord in here
and the other end into an AC outlet.
[10] MASTER Power switch
Press to turn power ON (in position). Press again to
turn power OFF (out position).
To retain certain settings in memory, leave this
switch ON and turn power ON and OFF with the
Standby POWER slide switch on the top of the
unit.
OFFON
Phantom Power
ON/ OFF
FOOT
PEDAL
R
L
IN
OUT OUT
IN
POWER
VARI
FIXED IN
RC-5
Level
DIGITAL
AUXOUTLINE
Input
1234 567 8 9 10
- 10 -
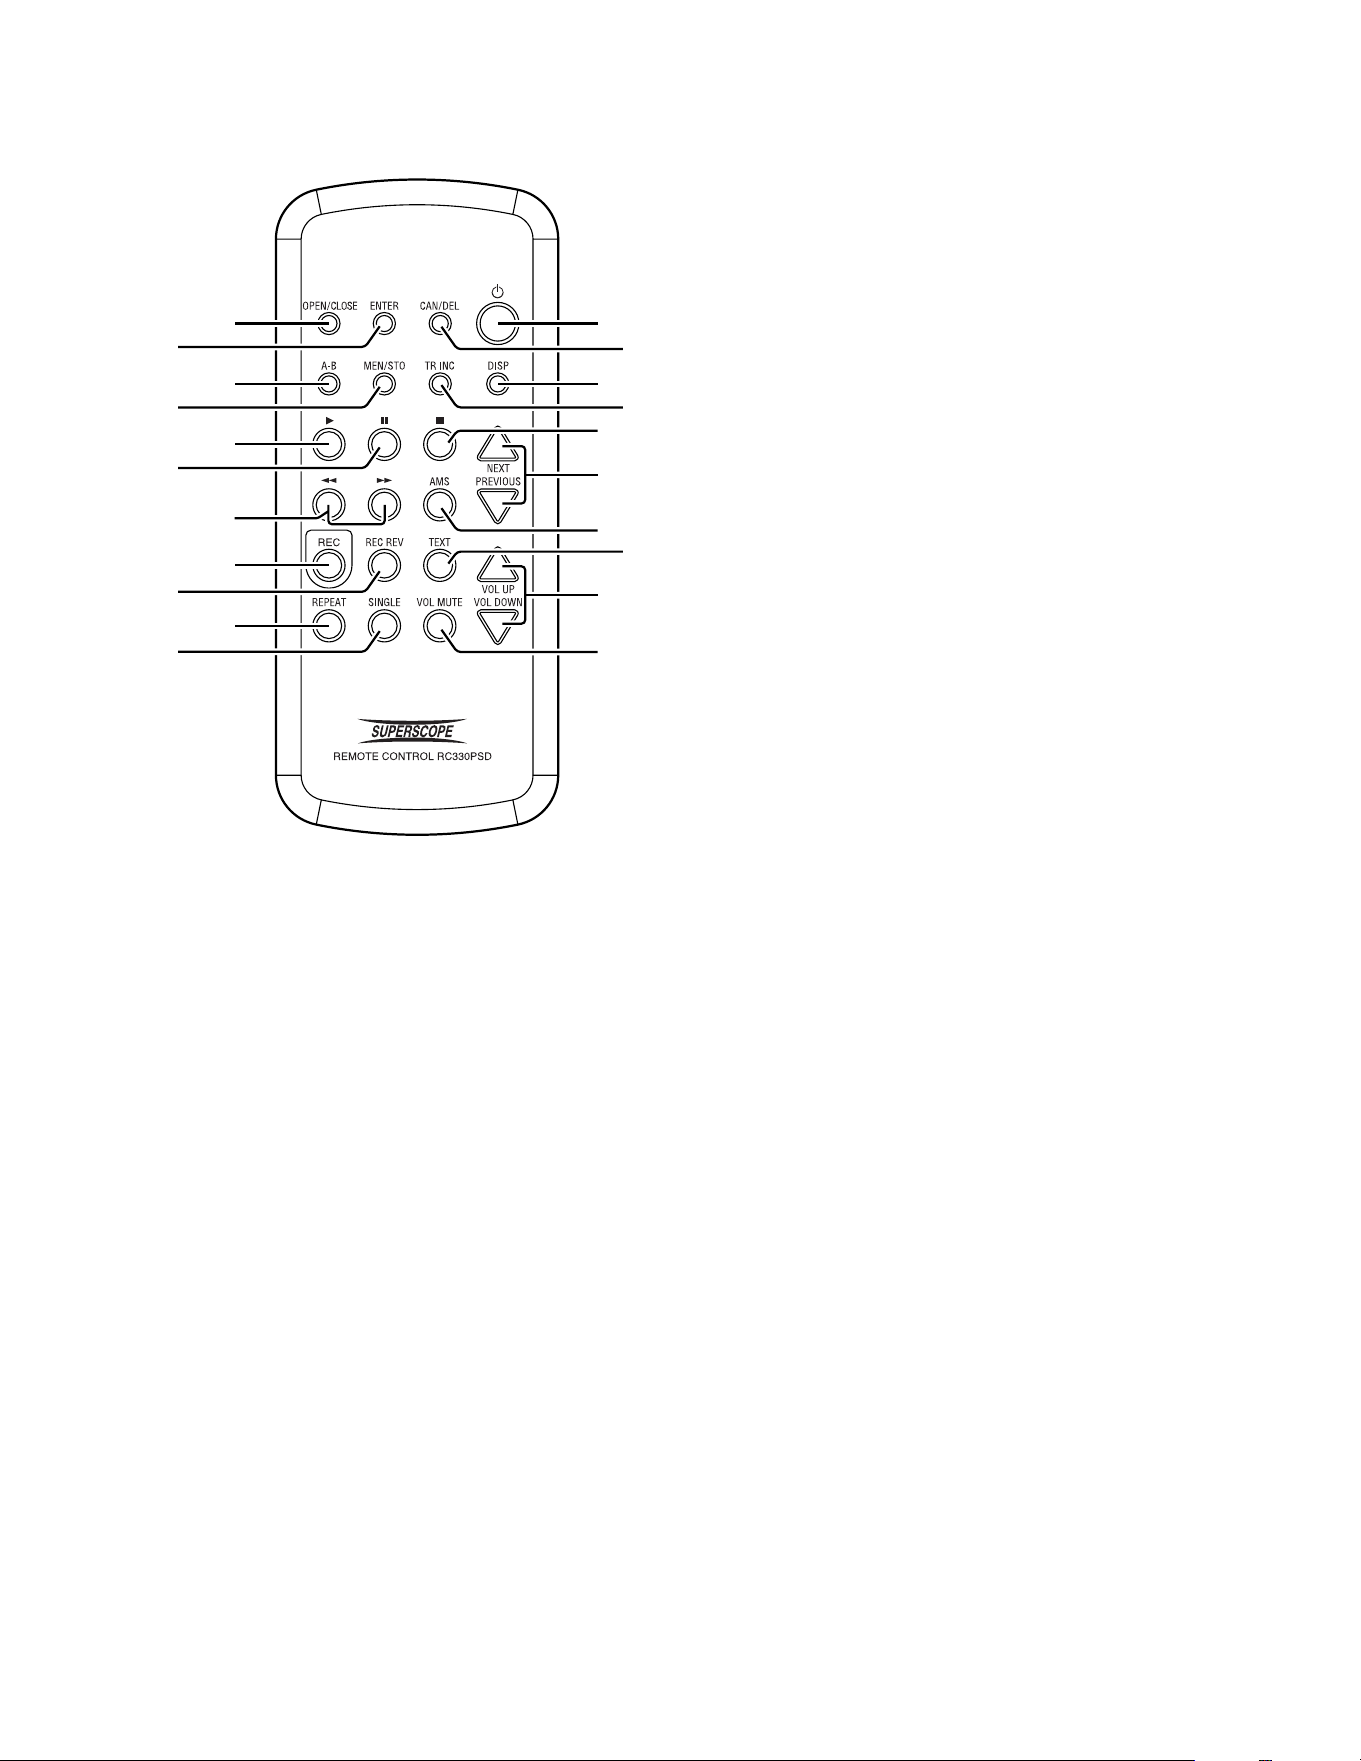
Remote ControlRemote Control
Remote ControlRemote Control
Remote Control
111
12
13
1
4
15
16
17
18
19
20
21
2
3
4
5
6
7
8
9
10
[1] Standby POWER button
Press this button to turn power ON or OFF. The
MASTER POWER button on the rear of the unit
must be ON (the red STANDBY light must be lit).
[2] CANCEL/ DELETE (CAN/DEL) button
Press this button to cancel menu changes or to
return to a higher level in the menu. When
entering CD text, use this button to delete text.
[3] DISPLAY (DISP) button
Press the DISPLAY button once to display the
remaining play time for the current track. The
display reads “TRACK”.
Press the button a second time to display the
remaining play time for the entire CD. The
display reads “TOTAL TRACK.” Press the DISPLAY
button again to return to the display
showing elapsed track time.
[4] TRACK INCREMENT (TR INC) button
During recording, press this button to manually
increment a new track. RECOMMENDED: When
using this feature, set AUTO TRACK to OFF (See
pgs. 15 and 20).
[5] STOP button
Press this button to stop playback or recording.
[6] NEXT/ PREVIOUS buttons
Press these buttons to select the next or previous
track. In Menu mode, press these buttons to
change menu items.
[7] AUTOMATIC MUSIC SEARCH (AMS)
Button
Press this button to play the first 10 seconds of
each track. Press PLAY to exit AMS mode and
continue playback of the selected track.
[8] TEXT button
Press this button to activate scrolling of CD Text in
the display. When a CD with text is first read the
text is automatically displayed and scrolled.
[9] VOLUME UP/DOWN
Press these buttons to control the volume of the
audio sent to the LINE OUT (VARI) jacks.
[10] VOLUME MUTE (VOL MUTE)
Press to mute the audio to the LINE OUT (VARI)
jacks. This does not affect the built-in speaker or
headphones.
[11] OPEN/ CLOSE button
Press this button to OPEN the disc tray. Press
again to CLOSE the disc tray.
[12] ENTER button
Press this button to accept the selected item in
the Menu mode.
[13] A-B LOOP (A-B) button
While a CD is playing, press this button once to
set the beginning of the segment you want to
repeat (A point). Press this button a second time
when playback reaches the end of the segment
you want to repeat (B point). Playback will
automatically start again from the A point when the
B point is reached. Pressing the A-B button again
will set the A point for the next loop that you create.

- 11 -
[14] MENU/STORE (MEN/STO) button
Press this button to enter Menu mode. Menu
selections and changes are made using the NEXT/
PREVIOUS button. Press the ENTER button to
select an option. Press the MEN/STO button to
store changes and exit Menu mode. (For a
complete list of menu selections , see pgs. 19-21).
[15] PLAY button
Press this button to start playback.
[16] PAUSE button
Press this button to pause playback or recording.
[17] / button
Press these buttons to search forward or
backward within an audio track.
[18] RECORD (REC) button
Press this button to enter Record Pause mode.
Press it to start recording when the unit is in
Record Pause mode. Also used when finalizing.
[19] RECORD REVIEW button
Press this button while recording, or after the
recording has been stopped, and the unit will stop
and play back the last track recorded.
[20] REPEAT button
There are two Repeat modes: Track or Entire CD.
Track Repeat - Press the REPEAT button once to
repeat only the track being played. The display
reads “REPEAT 1.”
Entire CD Repeat - Press the REPEAT button twice
to repeat the entire CD. The display reads
“REPEAT.”
Exit Repeat mode - Press REPEAT a third time.
[21] SINGLE TRACK PLAY (SINGLE)
button
Press the SINGLE button to toggle Single Track
Play ON or OFF.
While in Single Track Play and when a track is
selected with the SELECT jog wheel, the track
does not automatically start playing. Instead, it is
paused and cued up at the beginning of the
audio and the PLAY/PAUSE button of the top
flashes.
Press the PLAY button to begin playback.
When the track is finished, the PSD330 will
automatically pause, cued to music, at the
beginning of the next track.
- 12 -
PUSH
CD PLAY/RECORD
LINE OUT
PHONES
LEVEL
INSTMIC
PHONE/SPEAKER
LINE
INSTMIC
LINE
MIC/LINE
NEUTRIKNEUTRIK
MIC/LINE RIGHTLEFT
PHONE SELECTOR
ANALOG
DIGITAL
OFF
ON
-15dB
INPUT
ALC/ATT
SPEAKER
OPEN/CLOSE
AUX
/ INT MIC
MIC / LINE
CD
MIX
PUSH
LR
MIC
/
LINE
INT MIC
MONO
STEREO
OFF ON
Powering Up
1. Check that the AC power cord fits securely in the
power cord jack on the back panel.
2. Make sure the back panel MASTER POWER switch is
ON. The STANDBY light should now be ON. Slide the
STANDBY POWER switch to the right. Upon power up,
this light will dim and the display will come on.
TIP:TIP:
TIP:TIP:
TIP: If you are switching power ON/OFF via the
Remote or if you wish to retain certain settings in
memory when powering off, leave the back panel
MASTER POWER switch ON.
Setting Up Speakers
Headphones or Built-In Speaker
When using the built-in speaker, place the
SPEAKER switch in the ON position. Place
the SPEAKER switch in the OFF position
when using headphones or when connect-
ing to powered speakers or other sound
equipment. Adjust volume of the head-
phones or speaker by using the PHONE/SPEAKER level
knob.
The PHONE SELECTOR knob
determines which audio path will
be amplified/monitored through
the headphones and built-in
speaker. It does not affect audio
being recorded. Use it to monitor
one of the following:
• MIX (total system monitoring),
• CD playback
• MIC/LINE/INST inputs or Int Mic
• AUX inputs.
TIP:TIP:
TIP:TIP:
TIP: Typically, you will want to leave the PHONE
SELECTOR knob set on MIX as this setting allows
you to hear the entire system.
External Speakers
Connect external powered speakers to the rear panel
RCA line outputs, making sure the Left channel line
output is securely attached to the speaker’s Left input
and the Right channel line output is securely attached
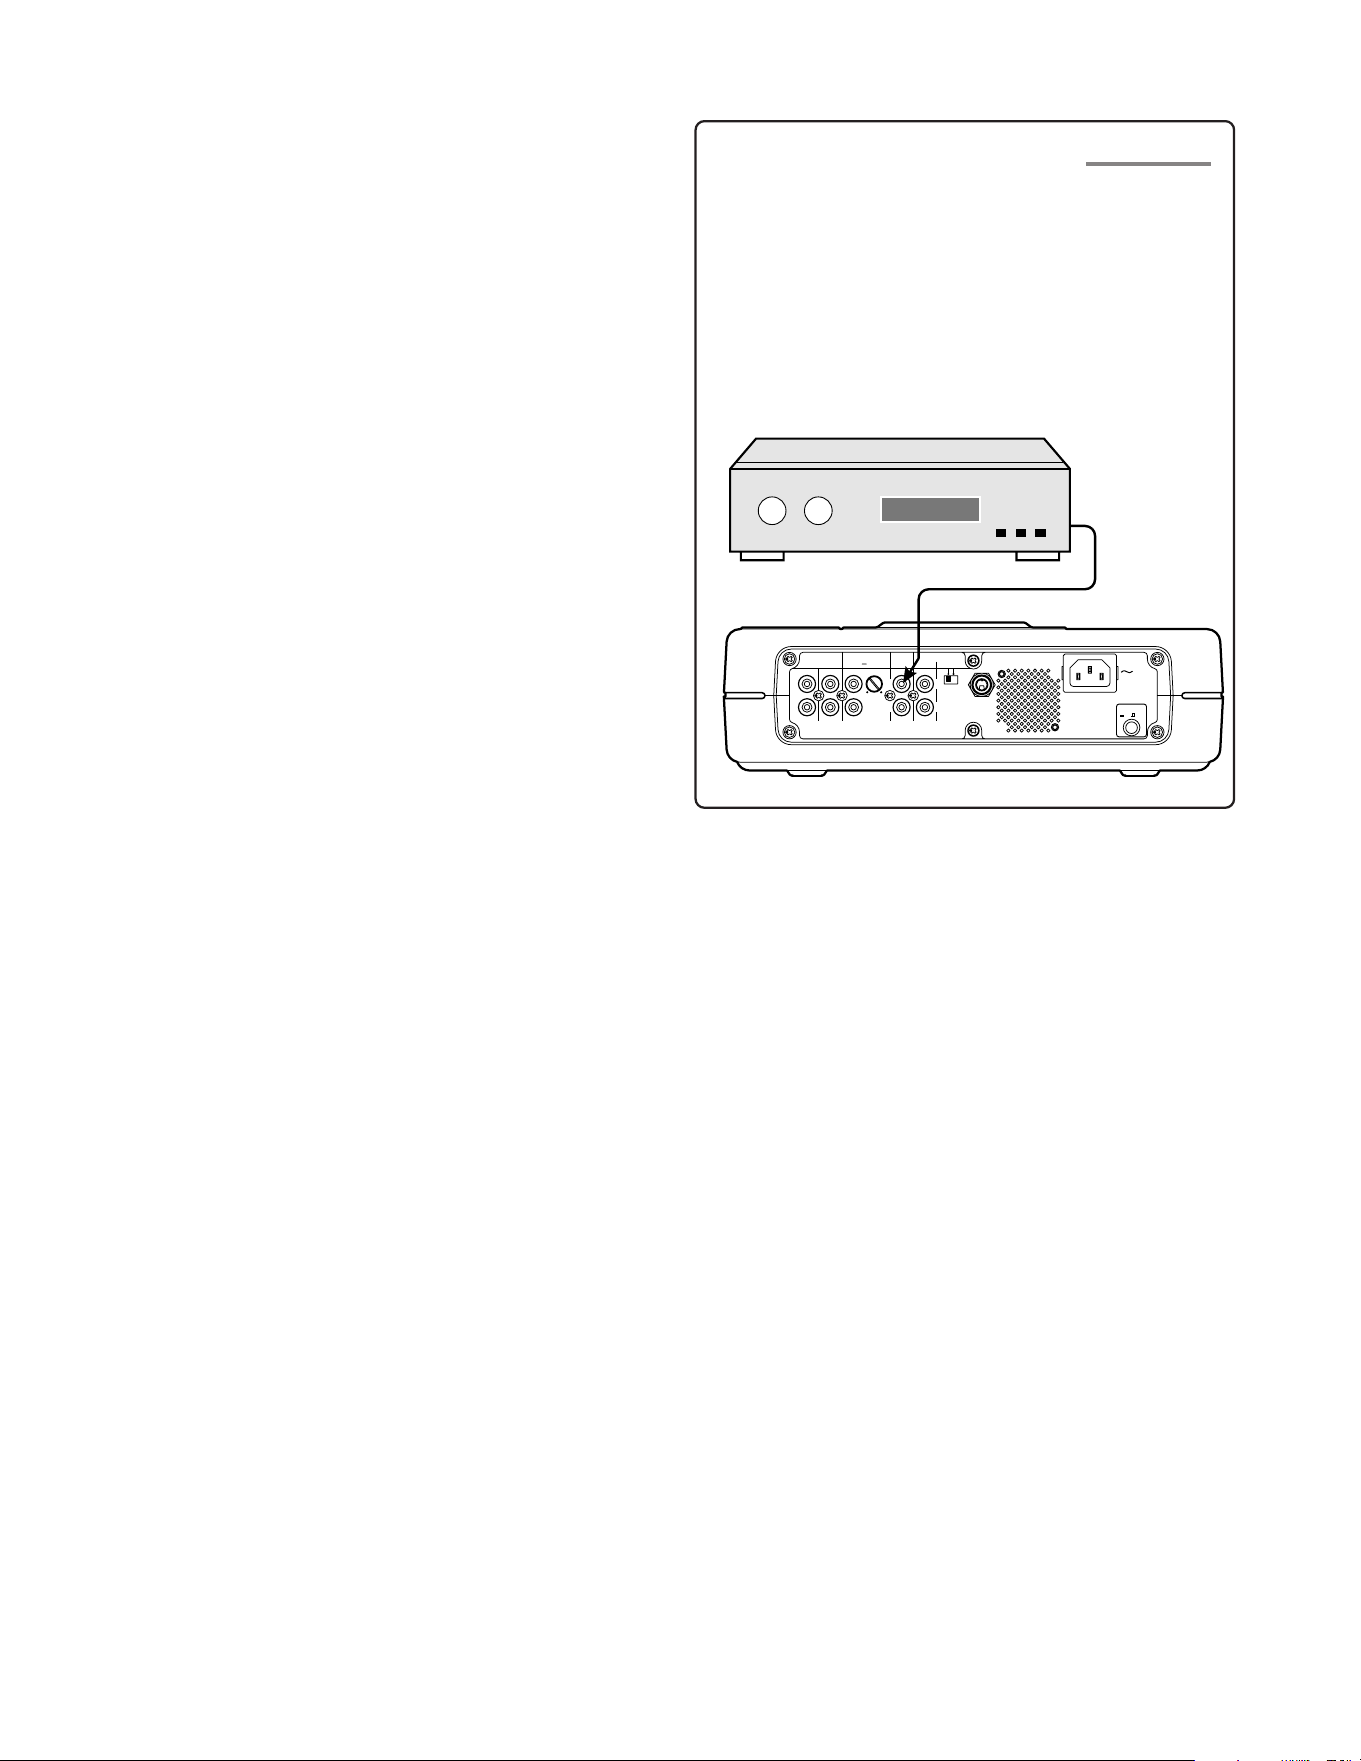
to the speaker’s Right input. (see Figure A.)
Or, similarly connect the L-R channel line outputs to the
L-R auxiliary or line inputs of a stereo amplifier that is
attached to speakers.
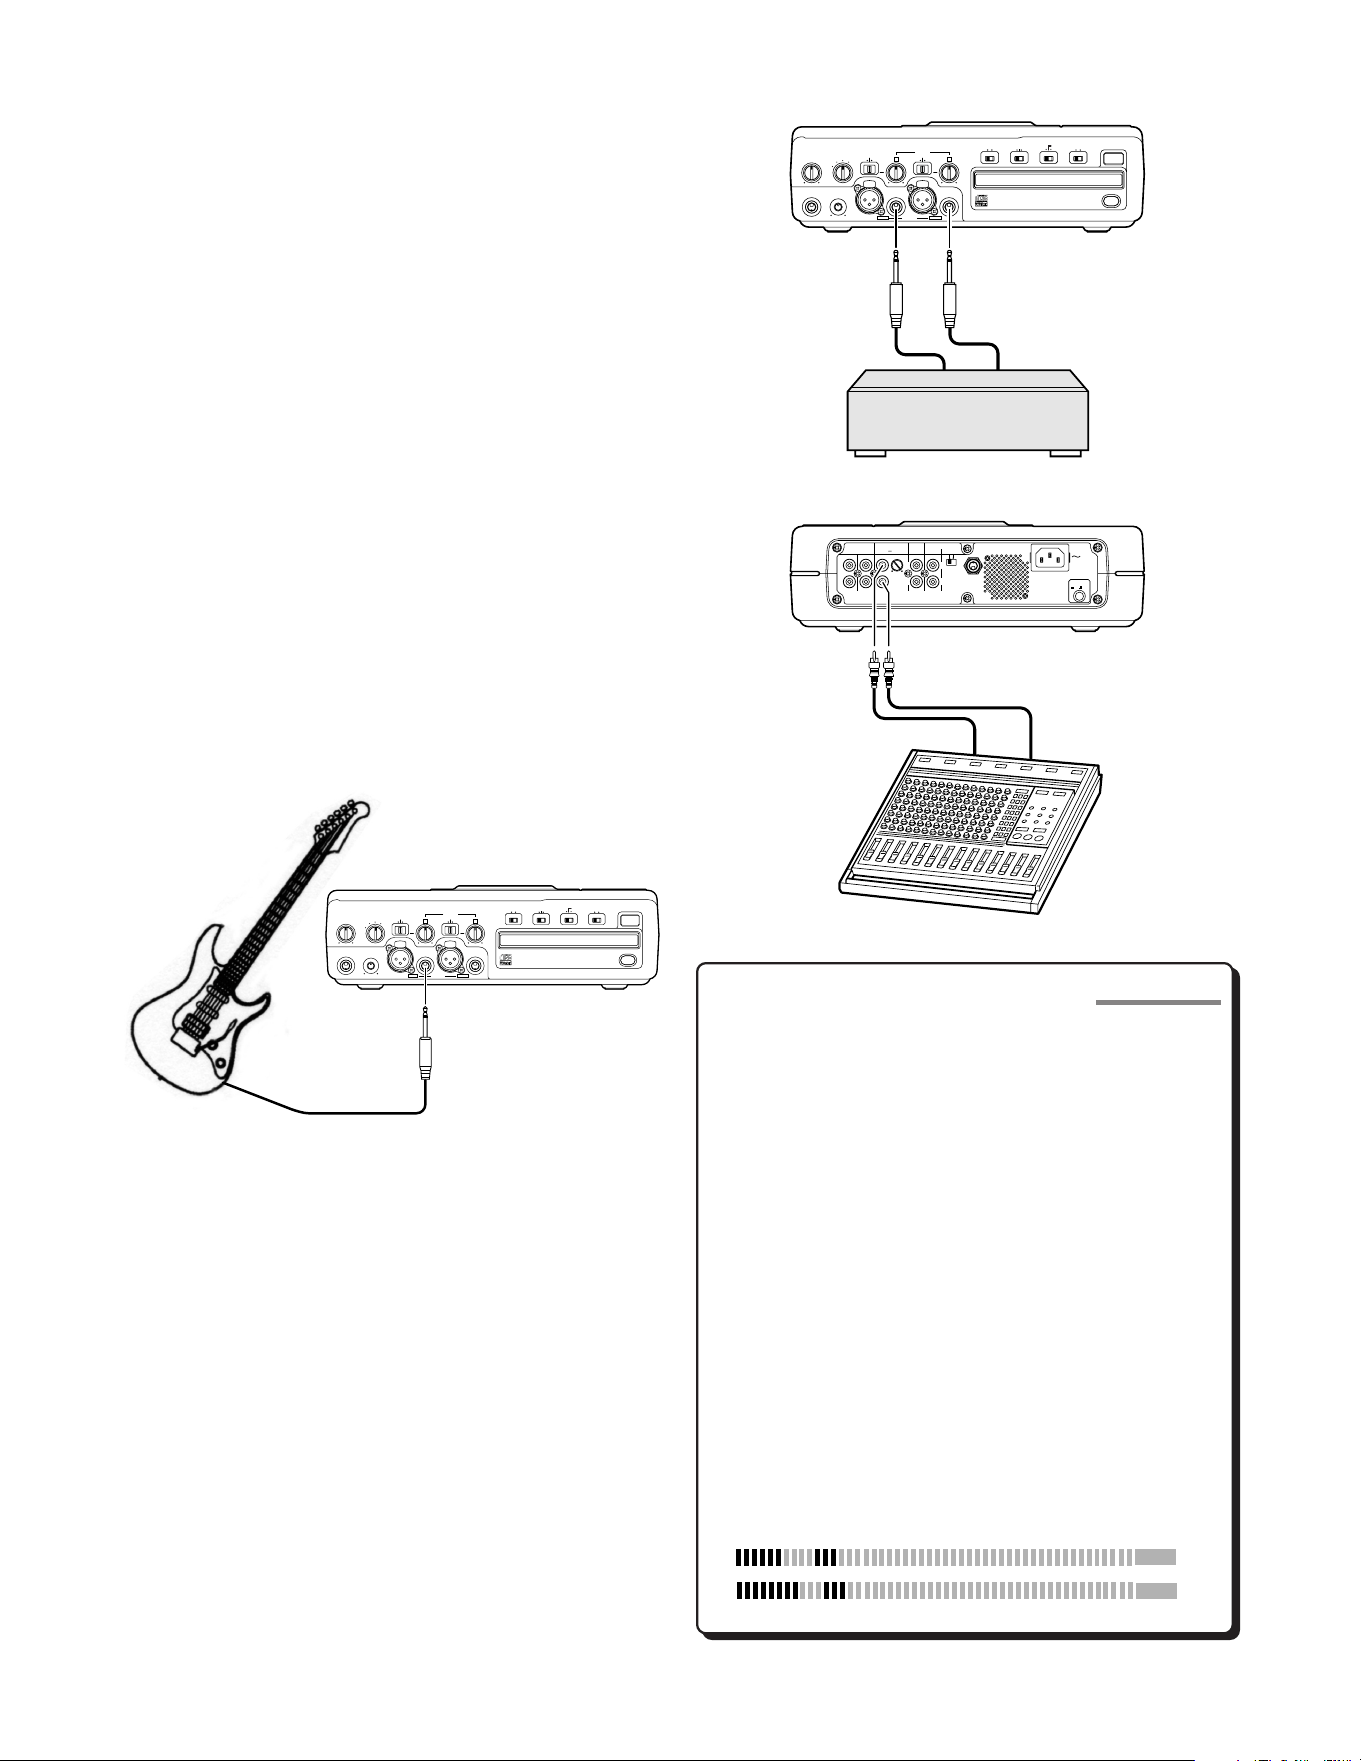
Setting Up Instruments, Mics
and other Sound Sources
The PSD330 is designed to work with microphones,
instruments, and line level sources (e.g., mixers, external
preamps). See the following diagrams for the setup that
suits your application:
OFFON
Phantom Power
ON/ OFF
FOOT
PEDAL
R
L
IN
OUT OUT
IN
POWER
VAR I
FIXED IN
RC-5
Level
DIGITAL
AUXOUTLINE
Input
Fig A. - Powered Speaker Set Up
Set Up
LINE OUT
PHONES
LEVEL
PHONE/SPEAKER PHONE SELECTO
R
AUX
/ INT MIC
MIC / LINE
CD
MIX
Microphones
1. Set both front panel LINE/MIC/INST input switches to
MIC.
2. Plug microphones into either the XLR or 1/4” front
panel inputs, depending on your mic type.
3. For condenser microphones that use batteries, make
sure the mic’s batteries are fresh. When using
microphones that require +48V phantom power,
connect mics to the XLR inputs and make sure that
the phantom power switch on the rear panel is ON.
4. See Setting Levels sidebar (pg. 13).
OFF
ON
SPEAKER
TIP:TIP:
TIP:TIP:
TIP: Remember that the LINE OUT level control on
the front panel will control the volume for exter-
nal speakers connected to the variable LINE OUT
(VARI) jacks.
- 13 -
PUSH
CD PLAY/RECORD
LINE OUT
PHONES
LEVEL
INSTMIC
PHONE/SPEAKER
LINE
INSTMIC
LINE
MIC/LINE
NEUTRIKNEUTRIK
MIC/LINE RIGHTLEFT
PHONE SELECTOR
ANALOG
DIGITAL
OFF
ON
-15dB
INPUT
ALC/ATT
SPEAKER
OPEN/CLOSE
AUX
/ INT MIC
MIC / LINE
CD
MIX
PUSH
LR
MIC
/
LINE
INT MIC
MONO
STEREO
OFF ON
OFFON
Phantom Power
ON/ OFF
FOOT
PEDAL
R
L
IN
OUT OUT
IN
POWER
VARI
FIXED IN
RC-5
Level
DIGITAL
AUXOUTLINE
Input
Stereo Preamp
Mixer
OR
PUSH
CD PLAY/RECORD
LINE OUT
PHONES
LEVEL
INSTMIC
PHONE/SPEAKER
LINE
INSTMIC
LINE
MIC/LINE
NEUTRIKNEUTRIK
MIC/LINE RIGHTLEFT
PHONE SELECTOR
ANALOG
DIGITAL
OFF
ON
-15dB
INPUT
ALC/ATT
SPEAKER
OPEN/CLOSE
AUX
/ INT MIC
MIC / LINE
CD
MIX
PUSH
LR
MIC
/
LINE
INT MIC
MONO
STEREO
OFF ON
Setting Levels
Levels should be set in Record Pause mode.
To enter Record Pause mode, the One Touch
Recording feature needs to be set for OFF in the
menu (see pg. 19).
With One Touch Recording OFF, press the
RECORD button once to enter Record Pause
mode. As you sing or play your instrument,
turn the L and R input-level control knobs
clockwise while watching the VU meters.
When your performance is at its loudest, the
VU meter should read close to 0 dB without
going into the red zone. If the meter
consistantly bounces into the red, adjust the
level control knob counterclockwise to reduce
the level. If your mics have higher than normal
output, try switching the ALC/ATT switch to -
15dB. Peaking at 0 dB will provide the greatest
dynamic range while avoiding distortion.
SIDEBAR
Internal Microphone
1. Set the MIC/LINE (INT MIC/MONO/STEREO) switch to
“INT MIC.”
2. When “INT MIC” is selected, both the left level
control and the right level controls are active. Adjust
both left and right level controls to determine how
much signal is sent to either channel.
3. When using the INTERNAL MIC, it is recommended
that the SPEAKER switch be turned OFF. If you need
to monitor the incoming sound, use headphones.
Using headphones avoids feedback--the nasty squeal
that is heard when the mic picks up sound from the
speaker and amplifies it, creating a feedback loop.
To make sure the INTERNAL MIC does not pick up
the sound of any buttons being pressed, turn on One
Touch Recording (see pg. 19) or use the remote
control to start and stop recording.
4. See Setting Levels sidebar on this page.
Instruments
1. Select an input channel, Left or Right and set that
channels LINE/MIC/INST switch to “INST.”
2. Plug an instrument into the1/4” front panel input of
the selected channel.
3. See Setting Levels sidebar on this page.
Line Level Sources
1. When using stereo line level equipment, set both
LINE/MIC/INST switches to “LINE.”
2. Connect the Left and Right outputs of your line level
source to Left and Right 1/4” or XLR inputs on the
front panel.
Note : Line level equipment can be connected to the
front panel Right and Left inputs ... OR ... to the rear
panel RCA AUX inputs. When connecting an auxiliary
source into the rear panel AUX inputs, you can adjust
the signal input level using the AUX IN control on the
rear panel. Use the front panel inputs for individual
control of Right and Left input levels.
3. See Setting Levels sidebar on this page.
R
L
dB-50 -30 -22 -16 -12 -8 -4 0OVER

- 14 -
Recording
REC
CD-RW
dB-50 -30 -22 -16 -12 -8 -4 0OVER
R
L
TRACK
CD
R
L
dB-50 -30 -22 -16 -12 -8 -4 0
CD-RW
REC REVIEW
Making a Live Recording
We realize that the primary reasons you purchased a
PSD330 is to record live to CD. That’s why we’ve made
the recording process as direct as possible. It shouldn’t
take long from the time you open the box to the time
you record your first CD. Just follow these simple steps:
1. Insert a disc. The PSD330
can record onto blank or
unfinalized CD-R (write
once), or CD-RW
(rewritable) discs.
2. Connect your equipment.
See pages 12-13 for setting
up microphones, instruments
and line level sources.
3. Set the INPUT switch to
“ANALOG.” This switch is
located above the disc drive. The INPUT switch tells
the PSD330 what type of signal it will be recording.
Microphones, instruments, and most mixers are
analog sources. Don’t let this switch confuse you.
Even though you are making a digital CD recording,
input sources are typically analog. The only time you
would set this switch to DIGITAL, is if you were
recording from the rear panel digital input. (see
sidebar pg.15)
4. Press the RECORD button. The first time you press
RECORD, the PSD330 enters ‘Record Pause Mode.’ In
this mode, you will be able to adjust the overall
record level by turning the SELECT jog wheel control.
This level is adjustable from -78 dB to
+6dB. After a moment, the display
will now prompt you to ‘Push Rec
Key.’ But, you may want to first adjust
your record levels. See step 5.
One Touch Rec: Select One Touch Recording in
order to bypass Record Pause mode. In One Touch
Recording mode, the PSD330 will automatically
begin recording 3 seconds after the RECORD button
is pressed once.
5. Set your record levels. While monitoring record
levels, we recommend using headphones. This helps
to eliminate feedback. (See Setting Levels sidebar,
pg.13) for advice on how to set up the PSD330 to
record optimal levels.)
6. Press RECORD again. You are now recording.
The level meters should respond to your Input
signals (mics, instruments, etc.) and the counter
should display the total elapsed time for the track
you are recording. The red dot and triangular
“PLAY” icon in the display indicate that a record-
ing is in progress.
Press STOP to end the recording or
press the REC REVIEW button on
the unit or remote to listen back to
the most recent track recorded.
(See PLAY Controls pg. 5, [3].)
This CD will play back in the disc drive. To play back this
CD in other standard CD players, proceed to HOW TO
FINALIZE (pg. 16).
NOTE: For standard stereo recording, make sure
the MIC/LINE (INT MIC/MONO/STEREO) switch is
set for STEREO. This ensures that the left input is
recorded to the left channel and the right input is
recorded to the right channel.
When recording one microphone or one instru-
ment, make sure the MIC/LINE (INT MIC/MONO/
STEREO) switch is set for MONO. This ensures that
a single input is recorded to both the Left and
Right channels.
For MIC/LINE (INT MIC/MONO/STEREO) switch
operation. (See pg. 7, [9]).
Playing a CD
When you close the disc tray, after a moment the display
will show the total number of tracks and total playing
time on the CD.
TOTAL TRACK
CD
R
L
dB-50 -30 -22 -16 -12 -8 -4 0
CD
In Play mode, change tracks by turning the SELECT jog
wheel.
- 15 -
Effects Processor
OFFON
Phantom Power
ON/ OFF
FOOT
PEDAL
R
L
IN
OUT OUT
IN
POWER
VARI FIXED IN
RC-5
Level
DIGITAL
AUXOUTLINE
Input
Creating New Tracks Manually
Every time you press STOP or PAUSE during the recording
process, you will create a new track. To create new tracks
during recording, press the TR INC button on the top panel
or the IR remote. You can create up to 99 tracks on a CD-
R or CD-RW disc.
Auto Track Mode
When copying prerecorded material from external
sources, tracks can be set automatically by using
AUTO TRACK Mode. From Record Pause mode, press
the MENU/STORE button and select “AUTO TRACK.”
Change the AUTO TRACK status to ON by turning the
SELECT jog wheel. Press it to accept the change. Press
the MENU/STORE button to exit and proceed with
recording. The unit will then increment tracks when
audio falls below a threshold of silence (-40dB) for a
minimum of three seconds.
Minute Track Mode
MINUTE TRACK will automatically create a seamless,
inaudible track increment every minute during recording.
That means each track is one minute long, offering a quick
and convenient way to locate a particular time in a
recording. For example, Track 10 is ten minutes into the
recording, and Track 17 is 17 minutes into the recording.
To access this mode from Record Pause mode, press the
MENU/STORE button, then select “AutoTrack.” Select
“MIN” and press ENTER.
Recording from the DIGITAL INPUT
Certain mixers and outboard effects processors are
equipped with digital outputs. If you are recording
with equipment that has a coaxial digital output,
connect to the PSD330’s DIGITAL IN. Follow the same
recording steps from pg. 14, with the exception of
step #3. When recording digital equipment, set the
Input switch to “DIGITAL.”
SIDEBAR
Track Increments
- 16 -
Copying from an ExternalCopying from an External
Copying from an ExternalCopying from an External
Copying from an External
SourceSource
SourceSource
Source
To access the SYNC RECORD modes, press the SYNC REC
button on the top panel of the PSD330. Use the SELECT
jog wheel to select either SYNC RECORD or SYNC
RECORD + FINAL. Press ENTER to confirm selection.
SYNC RECORD
This REC mode is used to automatically start the
recording process from an outside digital or analog
source including DAT, minidisc, cassette tape or LP for
example. When this mode is selected, the PSD330 will
display “PUSH REC KEY” as normal. When the RECORD
button is pressed, the PSD330 will search for an input
signal, either analog or digital depending on how the
Input switch is set (see pg. 6, [8]). When an input is
detected, the recording will begin and the display
counter will start to increment.
SYNC RECORD+FINAL
SYNC RECORD+FINAL mode operates in the same
manner as SYNC RECORD mode except that the disc
will automatically be finalized at the end of the record-
ing session. The finalization takes approximately 2
minutes. Before using this mode, change the AUTO
STOP feature to ON (see Menus, pg. 20).
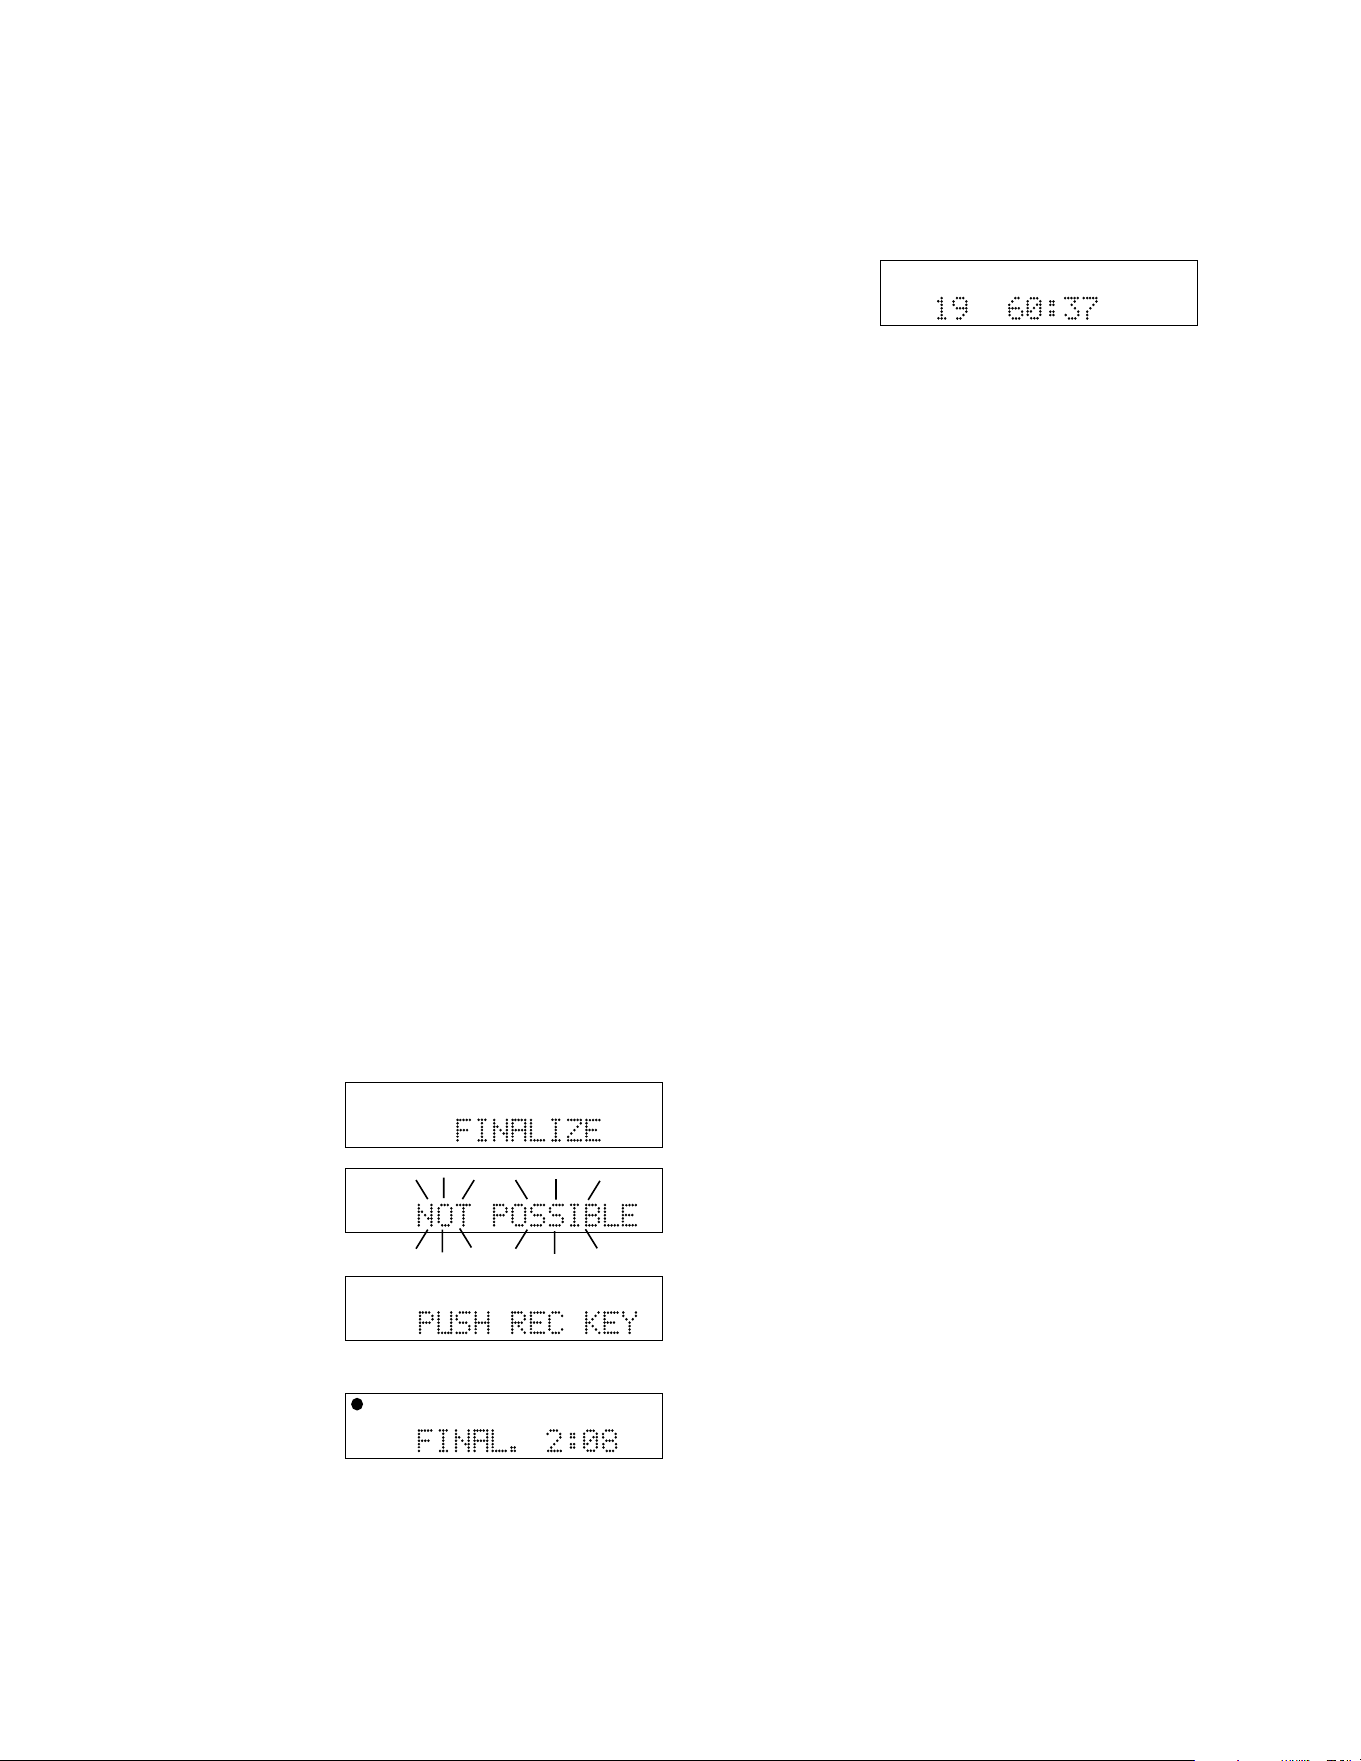
How to Finalize a Disc
The PSD330 will play finalized or unfinalized CD-R and
CD-RW discs.
However, for
recorded discs to
play on other CD
players, a disc must
first be finalized.
To finalize a disc
once you have
stopped recording
onto it, press the
FINALIZE button.
“FINALIZE” is
displayed for a
couple of seconds.
Then “PUSH REC KEY” is displayed.
TOTAL TRACK
CD-R
R
L
dB-50 -30 -22 -16 -12 -8 -4 0
CD-RW
TOTAL TRACK
CD-R
R
L
dB-50 -30 -22 -16 -12 -8 -4 0
CD-RW
TOTAL TRACK
CD-R
R
L
dB-50 -30 -22 -16 -12 -8 -4 0
CD-RW
TOTAL TRACK
CD-R
R
L
dB-50 -30 -22 -16 -12 -8 -4 0
CD-RW
TOTAL TRACK
CD
R
L
dB-50 -30 -22 -16 -12 -8 -4 0
CD
Note: If the disc
is blank or has
already been
finalized, “NOT
POSSIBLE” will
flash three times.
Now press the RECORD button.
Finalizing counts down for about 2 minutes and
automatically stops.
When done, the display shows the number of tracks
and their total playing time (example shown). Note:
Once a CD-R or CD-RW disc is finalized, the CD-R or
CD-RW icon in the display will be replaced with the CD
icon.
Once a CD-R disc is finalized it cannot be unfinalized or
recorded on further.
How to Unfinalize a CD-RW disc
The CD-RW (rewritable) format provides a way to
unfinalize a disc, erase the last track, or erase an entire
disc.
1. Push STOP on the disc drive.
2. Push ERASE three times. “UNFINALIZE” is displayed
for three seconds, then “PUSH ENTER” is displayed.
3. Push the SELECT jog wheel. The timer counts down
as the disc is unfinalized. When the display shows
the number of tracks and their total playing time,
the disc has been unfinalized but not erased.
How to Erase a CD-RW
You can only erase CD-RW discs. You can erase one or
more tracks from the end of the CD-RW disc, or you
can erase the entire disc. If finalized, erasing a track or
the disc automatically unfinalizes the disc.
• To erase the last track of a disc, press the ERASE
button once. “ERASE TRACK” is displayed. After
two or three seconds, the display will read “PUSH
ENTER”. When you push the SELECT jog wheel, the
last track will be erased.
• To erase the entire disc, press the ERASE button
twice in succession. “ERASE DISC” is displayed.
After two to three seconds, the display will read
“PUSH ENTER.” When you push the SELECT jog
wheel, the entire disc will be erased.

- 17 -
Troubleshooting
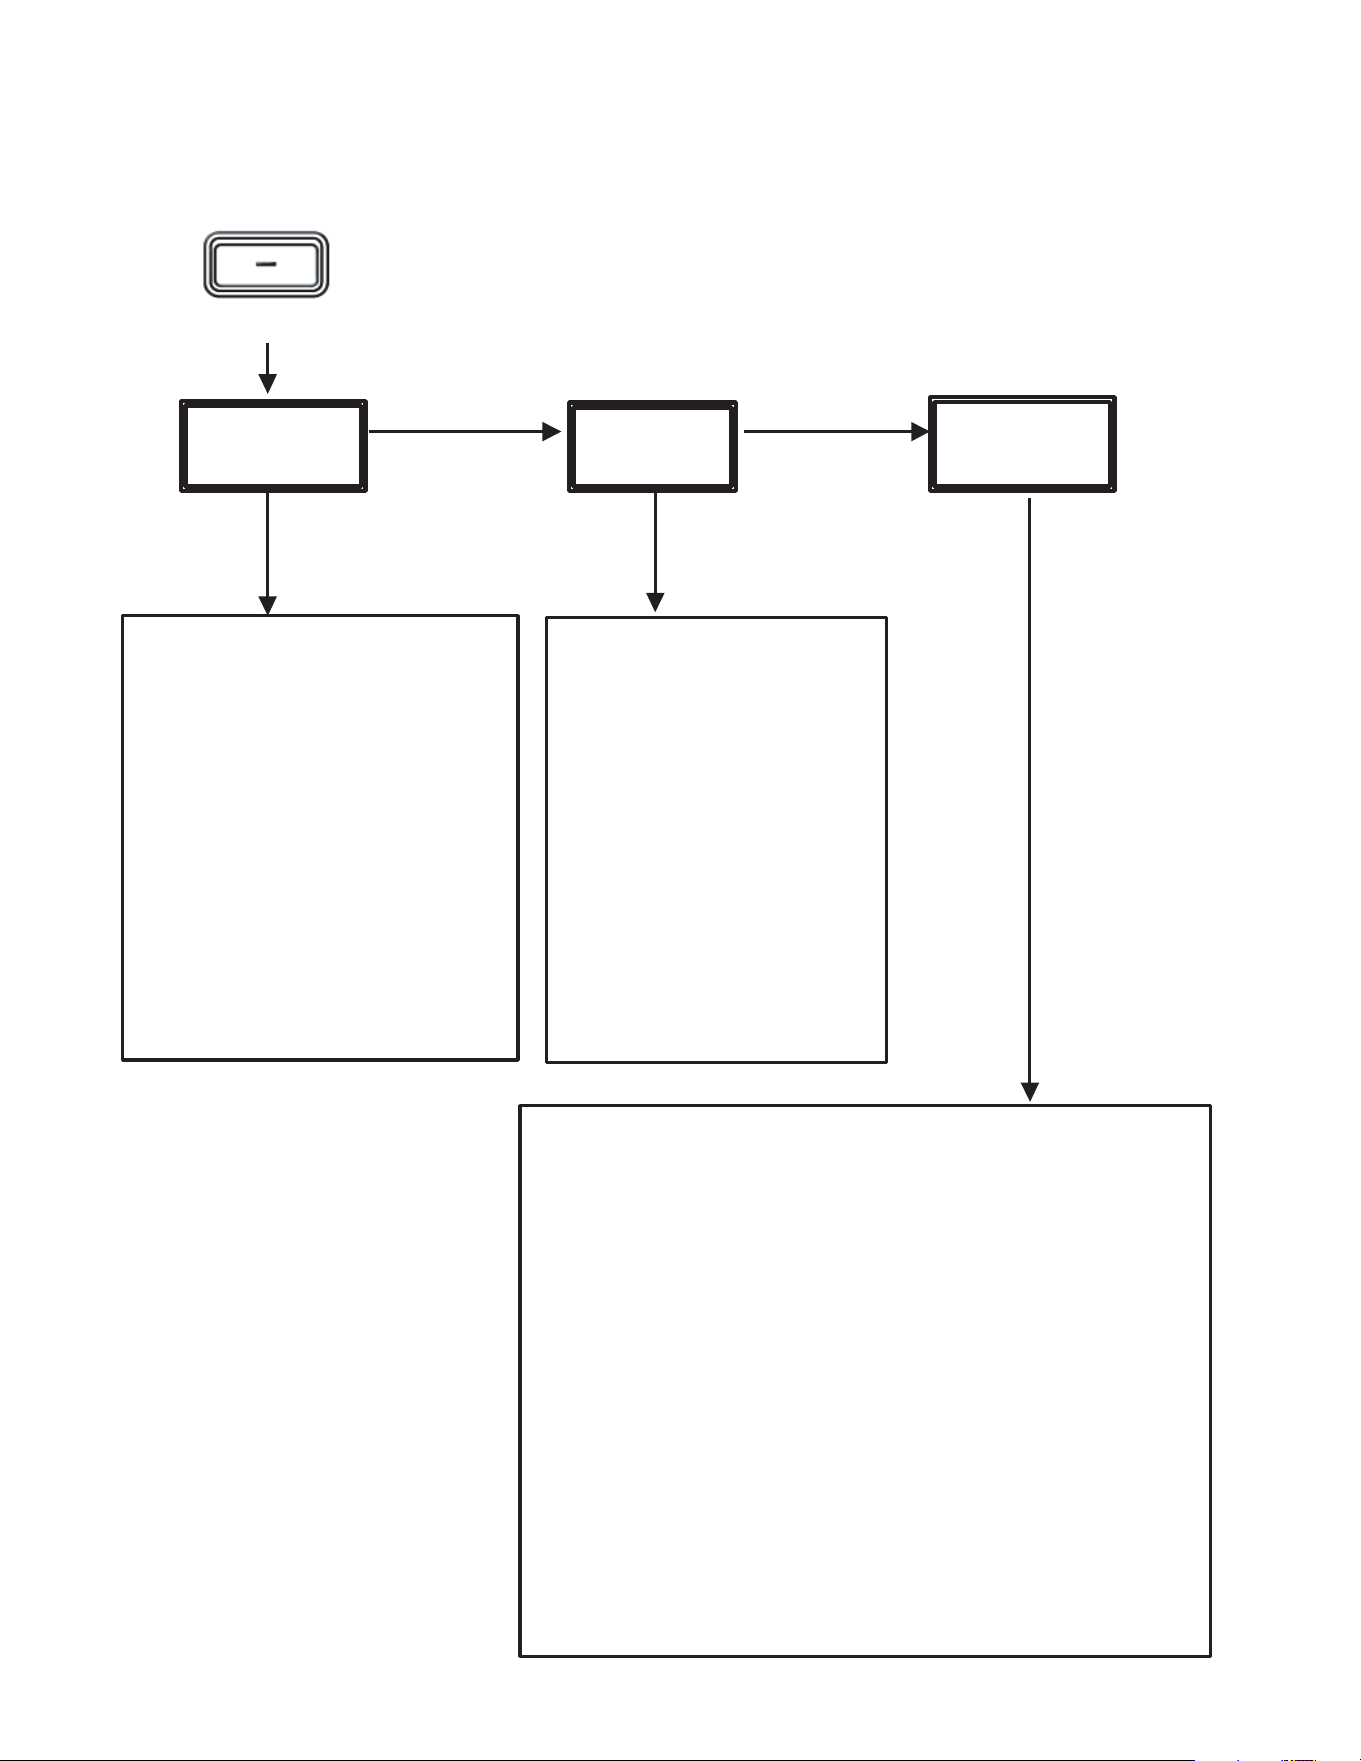
GeneralGeneral
GeneralGeneral
General
No power
Check that the POWER switch on the back of the
PSD330 is in the ON position. Check that the power
cord is securely plugged in. If the STANDBY light is lit,
slide the POWER switch to the right.
Recording
Mics plugged in, no levels on the VU
meters
1) Check the LINE/MIC/INST switches. These switches
should be set for “MIC.”
2) Check that the LEVEL control knobs are turned up.
3) If you are using a condenser mic, make sure the
required power is provided, either by Phantom Power
supply or batteries. Check your mic manufacturer’s
recommendations. If Phantom Power is required,
switch the Phantom Power switch on the back panel
to ON.
4) Make sure the MIC/LINE (INT MIC/MONO/STEREO)
switch is set for MONO or STEREO. Setting this
switch for INT MIC will override the XLR and 1/4”
inputs.
“Squealing” sound when recording
with internal or external mics
You’ve created a feedback loop. Switch the SPEAKER
switch on the front panel to OFF.
Only recording to one channel
Find the front panel switch labeled MIC/LINE (INT MIC/
MONO/STEREO). Chances are this switch is set for
STEREO. If you want your mic or instrument to record to
both channels equally, move this switch to the MONO
position.
The display reads “NOT POSSIBLE”
Check if the display also reads CD rather than CD-R or
CD-RW. If the disc in the disc drive has been finalized or
is not a CD-R/RW, the PSD330 will flash “NOT POSSIBLE”
instead of entering record mode.
The display reads “NO SIGNAL”
Find the ANALOG/DIGITAL INPUT switch on the front
panel. Chances are this switch is set for DIGITAL. This
means the PSD330 is searching for a signal from the
digital input and not finding one. Move this switch to
the ANALOG position if you are recording a microphone,
instrument, or line level source. If you are recording a
digital signal, check the connection to the digital input
on the back panel and confirm that the digital source
equipment is functioning properly.
Distortion when playing back
recordings
If distortion has been recorded to a CD, the PSD330 has
no means of removing that distortion. When you place
the unit in Record Pause mode, turn the SELECT jog
wheel to adjust the Record level. If the record level was
set too high, reduce the level to remove distortion on
future recordings. See Setting Levels sidebar, pg.13 for
how to record proper levels without distortion.
The unit flashes “REC ERROR”
It is possible that the recording was interrupted as a
result of transport failure caused by shock or a bad
sector on a disc. Replace the disc and try placing the
unit on a piece of foam. This is a simple and effective
way to prevent large sound pressure levels or room
vibrations from disrupting the recording process.
Buy accessories and compact discs direct from Superscope
at http://www.superscopetechnologies.com.
- 18 -
About CD Text
CD Text Display
CD text, when present, provides text information such
as the CD title, artist, track titles, and track artists.
When a disc is inserted in the disc drive, the PSD330
automatically detects if a disc has text information and
displays the CD title. The PSD330 can display 14
characters, if the text information is longer than that the
text automatically scrolls from right to left.
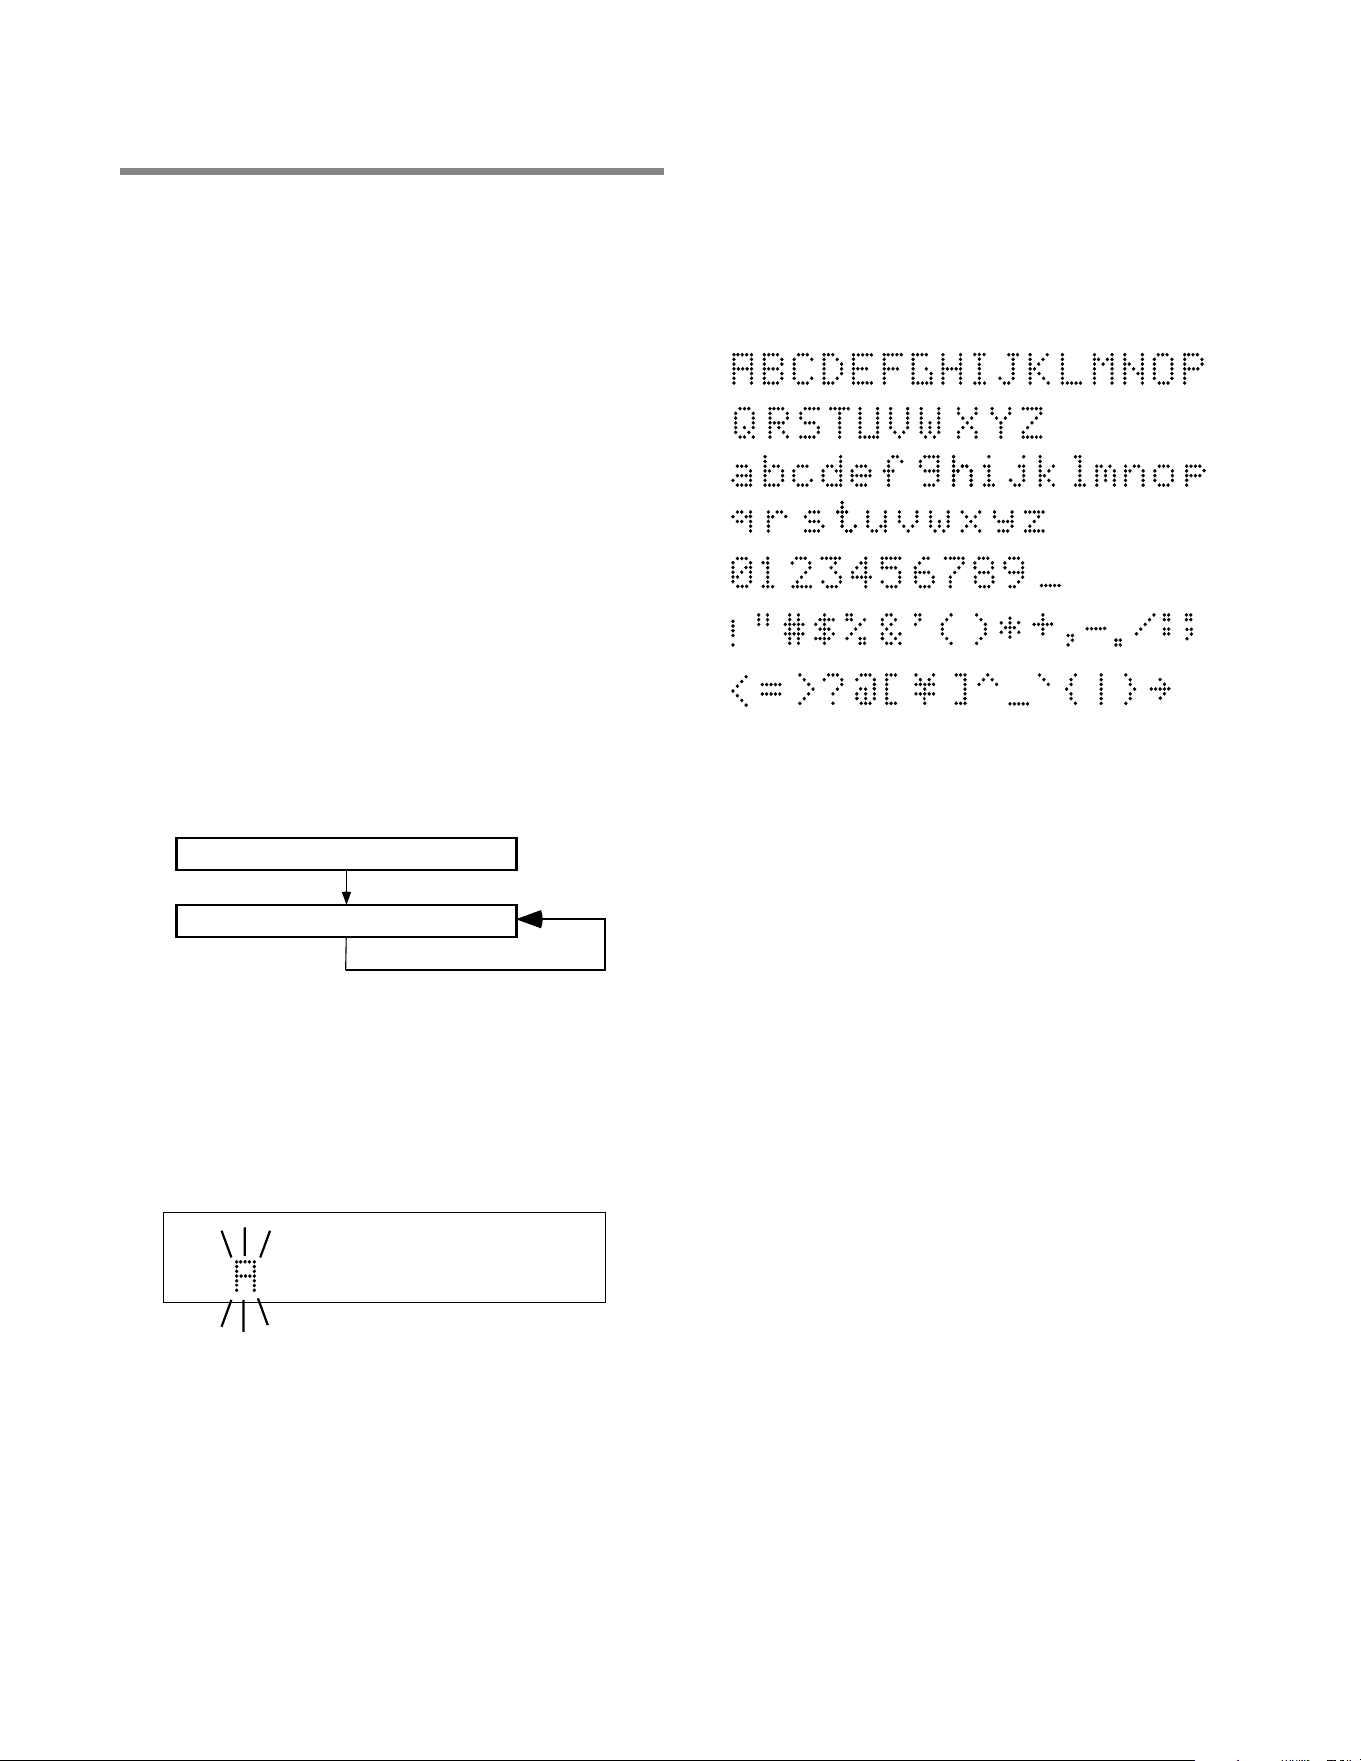
Creating CD Text
Before finalization of a CD you can enter text information.
Only the CD title and track titles can be entered.
With your disc in the disc drive and stopped:
1) Press the MENU/STORE button.
2) Turn the SELECT jog wheel until the display reads
“TEXT EDIT.”
3) Press the SELECT jog wheel to select. The display
reads “CD TITLE.”
4) Turn the SELECT jog wheel to choose between
editing CD TITLE or CD TRACK TITLE. Press to make
your selection.
5) The first character of the title is flashing. Turn the
SELECT jog wheel to select the character. Or from
the remote with CDR selected, press alphanumeric
keys to select each character.
CD Title
Title of each track
The SELECT jog wheel control presents the following
characters in order:
After the final character is entered, press the MENU/
STORE button.
NOTE: All CD TEXT entries are in short term memory
until the CD is finalized. You can play, pause and stop,
but if you turn off power, or open the disc drive your
editing will be lost.
How to Erase CD Text
The TEXT ERASE menu item lets you delete CD TEXT that
has been entered, prior to finalizing.
With your disc in the disc drive and stopped:
1) Press the MENU/STORE button.
2) Turn the SELECT jog wheel so “TEXT ERASE” is dis-
played.
3) Press the SELECT jog wheel to confirm the selection.
The display reads “ALL TEXT.” Now turn the SELECT
jog wheel to choose between erasing CD TITLE or
CD TRACK TITLE.
4) Press the SELECT jog wheel to confirm the selection.
“ERASE?” is displayed briefly, then “PUSH ENTER” Is
displayed.
5) Press the SELECT jog wheel to erase the selected text.
CD-R
R
L
dB-50 -30 -22 -16 -12 -8 -4 0
CD-RW
- 19 -
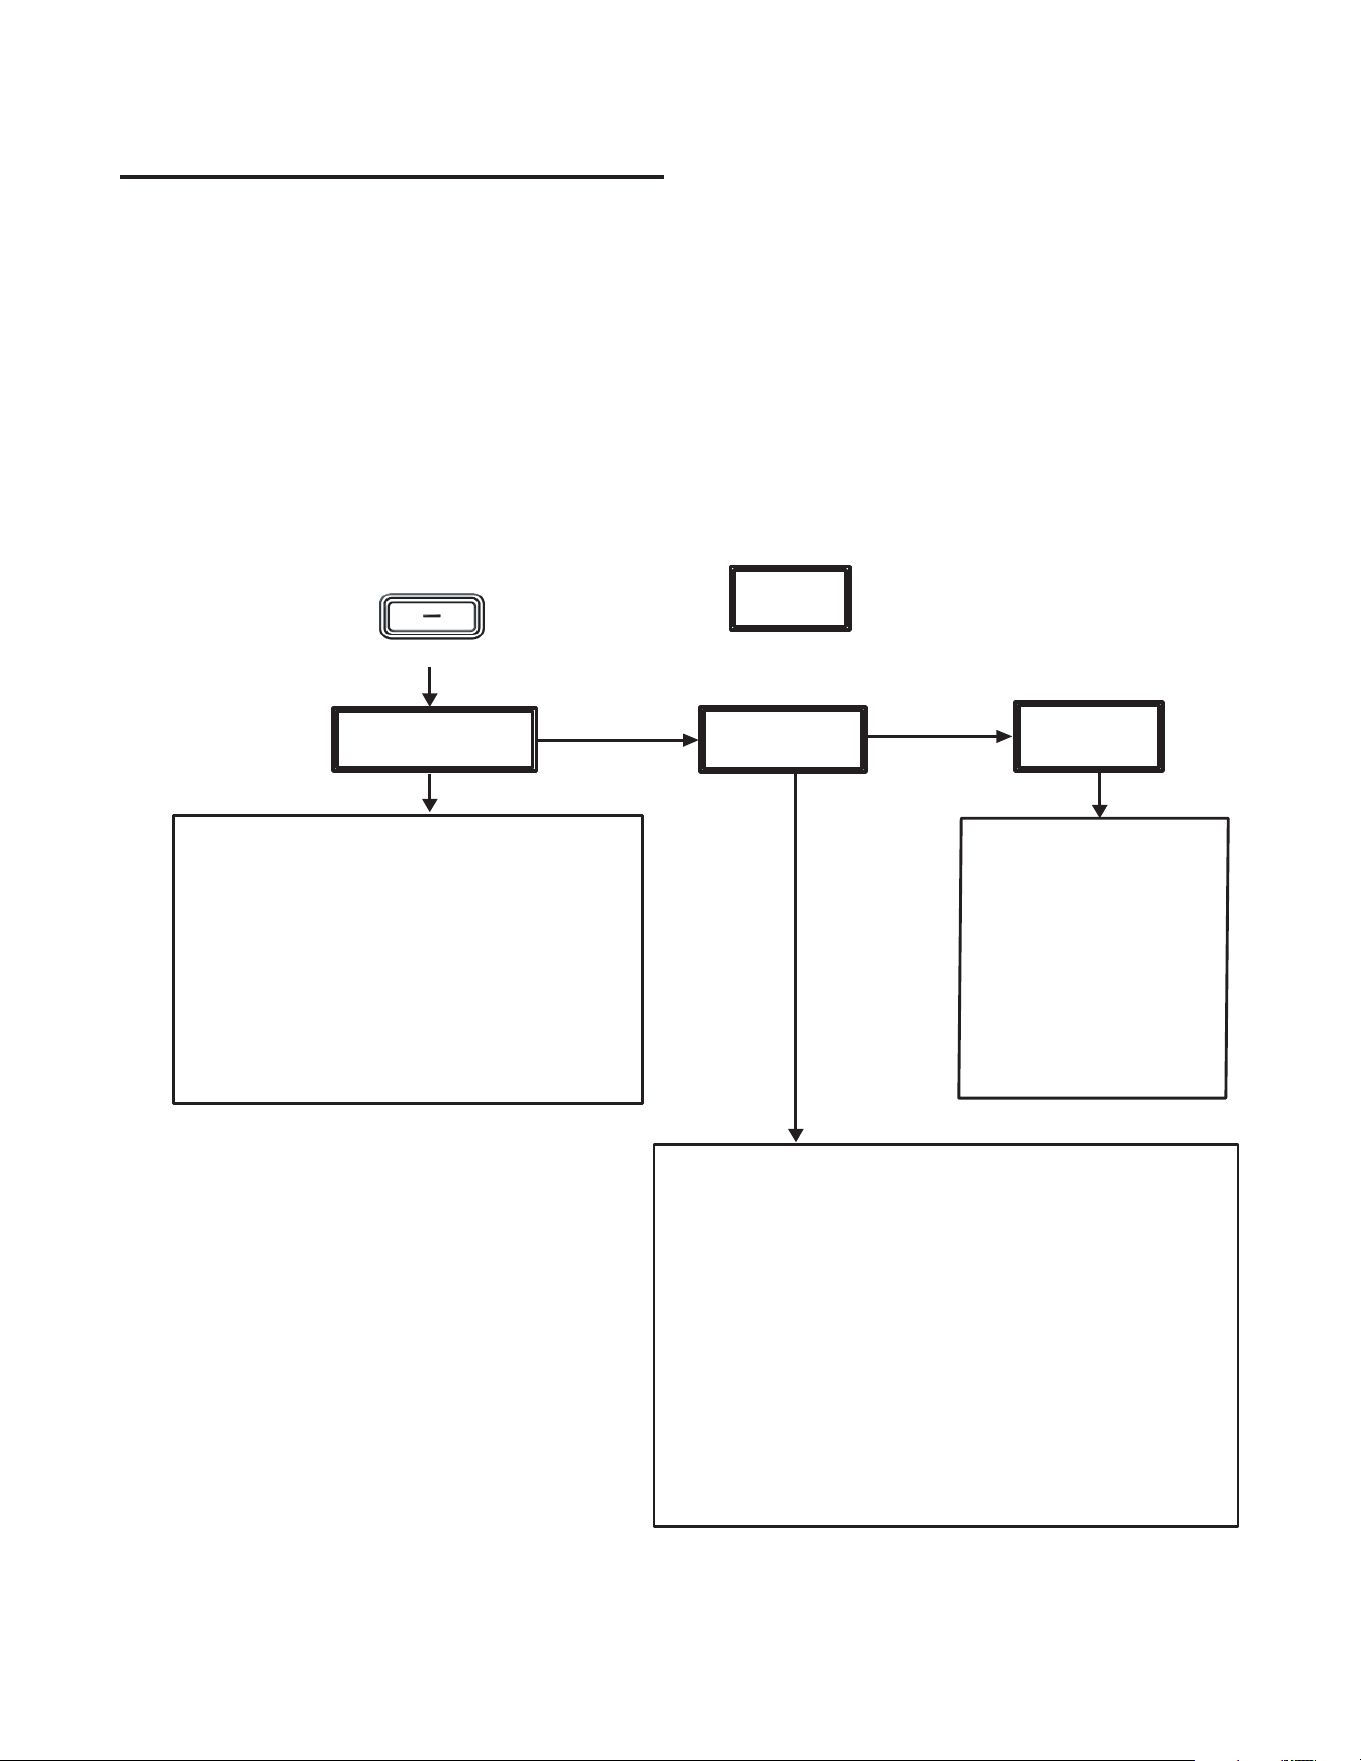
Menus
When you press the MENU/STORE button, the display will show options that change
depending on whether the PSD330 is playing, recording, or stopped.
♦ Turn the SELECT JOG WHEEL to scroll through menu options.
♦ Press the SELECT JOG WHEEL to select a menu option and press the MENU/ STORE button
to save settings.
The following charts will guide you through the menu options.
PLAY MENU
MENU/STORE button
=
Display
SCROLL SCROLL
PRESS
MIC
EQUALIZER
ONE
TOUCH REC
Turning on the ONE TOUCH feature
bypasses the Record/Pause mode.
1)
Select
ONE TOUCH REC
2)
Display reads
: ONE TOUCH OFF
3)
Turn jog wheel
to select ONE TOUCH ON
4)
Press
ENTER or MENU/STORE to confirm
5)
Press
MENU/STORE to exit Menu.
Press the RECORD button.
Recording will
begin automatically after 3 seconds.
RECALL
When Recall is on,
an
optional footpedal may
be used to toggle
between Play and
Rewind mode.
When Recall is off,
the
footpedal will toggle
between Play and Pause
mode.
Use the
Mic Equalizer
to adjust the level of high, mid
and low frequencies for the Mic/Line inputs.
1) Select MIC EQUALIZER.
2) Display reads: MIC/LINE Lch (left channel).
3) To adjust the left channel MIC EQ, press ENTER
OR
To adjust the right channel MIC EQ, turn the jog
wheel clockwise. Display reads: MIC/LINE Rch (right
channel). Press ENTER.
4) Turn the jog wheel to select HIGH, MID or LOW. Press
ENTER.
5) Turn the jog wheel to adjust +/-10 dB.
6) Press MENU/STORE to exit Menu.
- 20 -
RECORD MENU
MENU/STORE button
PRESS
SCROLL SCROLL
AUTO
TRACK
AUTO
STOP
Turn
Auto Track
on when you
want the PSD330 to
automatically increment tracks
during recording .
Turn Auto Track off when you
want to manually increment
tracks.
Turn Auto Track to MIN to
automatically increment one
track per minute.
Turn
Auto Stop
on when
you want the PSD330 to
automatically stop
recording after detecting a
period of silence (20
seconds for analog
sources, 4 seconds for
digital sources).
MIC
EQUALIZER
Use the
Mic Equalizer
to adjust the level of high, mid
and low frequencies for the Mic/Line inputs.
1) Select MIC EQUALIZER.
2) Display reads: MIC/LINE Lch (left channel).
3) To adjust the left channel MIC EQ, press ENTER
OR
To adjust the right channel MIC EQ, turn the jog
wheel clockwise. Display reads: MIC/LINE Rch (right
channel). Press ENTER.
4) Turn the jog wheel to select HIGH, MID or LOW. Press
ENTER.
5) Turn the jog wheel to adjust +/-10 dB.
6) Press MENU/STORE to exit Menu.
- 21 -
STOP MENU
MENU/STORE button
SCROLL SCROLL
SCROLL SCROLL
PRESS
Note:
Text options will only appear in the display
if a recordable CD-R or CD-RW disc is in the drive.
SCROLL
TEXT
EDIT
TEXT
ERASE
TEXT
VIEW
Edit Text
allows you to
add CD title and track titles
to your recordings. (see
pg. 18).
Text Erase
allows you to erase CD text
from an unfinalized disc.
(see pg. 18).
Before you finalize a disc,
use
Text View
to review the
CD text that has been
entered.
ONE
TOUCH REC
Turning on the ONE TOUCH feature
bypasses the Record/Pause mode.
1) Select ONE TOUCH REC.
2) Display reads: ONE TOUCH OFF.
3) Turn jog wheel to select ONE
TOUCH ON.
4) Press ENTER or MENU/STORE to
confirm.
5) Press MENU/STORE to exit Menu.
Press the RECORD button. Recording
will begin automatically after 3
seconds.
MIC
EQUALIZER
RECALL
When
Recall
is on, an optional
footpedal may be used to
toggle between Play and
Rewind mode.
When Recall is off, the
footpedal will toggle between
Play and Pause mode.
Use the
Mic Equalizer
to adjust the level of high, mid
and low frequencies for the Mic/Line inputs.
1) Select MIC EQUALIZER.
2) Display reads: MIC/LINE Lch (left channel).
3) To adjust the left channel MIC EQ, press ENTER
OR
To adjust the right channel MIC EQ, turn the jog
wheel clockwise. Display reads: MIC/LINE Rch (right
channel). Press ENTER.
4) Turn the jog wheel to select HIGH, MID or LOW. Press
ENTER.
5) Turn the jog wheel to adjust +/-10 dB.
6) Press MENU/STORE to exit Menu.

- 22 -
Limitation of implied warranties
All implied warranties, including warranties of
merchantability and fitness for a particular purpose,
are limited in duration to the length of this warranty.
Exclusion of damages
Liability for any defective product is limited to repair or
replacement of the product at Superscope's option.
Superscope shall not be liable for damage to other prod-
ucts caused by any defects in Superscope products,
damages based on inconvenience or loss of use of the
product, or any other damages, whether incidental,
consequential, or otherwise.
Some States do not allow limitations on how long an
implied warranty lasts and/or do not allow the exclu-
sion or limitation of incidental or consequential dam-
ages, so the above limitations and exclusions may not
apply to you.
How State law relates to the warranty
This warranty gives you specific legal rights, and you
may have other rights which may vary from State to
State.
This warranty is enforceable only in the United States
and its possessions or territories.
Warranty
One Year Limited Warranty:
Your Superscope PSD330 is warranted against
manufacturer defects in material and workmanship
for one year parts and labor.
Non-transferable warranty:
This warranty may be enforced only by the original
purchaser.
The following are not covered under warranty:
1. Damage, deterioration, malfunction or failure to
meet performance specifications resulting from:
• accident, acts of nature, misuse, abuse, neglect or
unauthorized product modification.
• improper installation, removal or maintenance, or
failure to follow supplied instructions.
• repair or attempted repair by a non-Superscope
authorized agent.
• any shipment (claims must be presented to the
carrier).
• any cause other than a defect of manufacturing.
2. Cleaning, check-ups with no fault found.
3. Any product on which the serial number has be
defaced, modified or removed.
4. Accessories, including but not limited to, cables and
adaptors.
5. Product purchased outside of the United States, its
possessions or territories.
The following are covered under warranty:
All labor and material expenses for items covered by the
warranty.
To obtain service:
1. If your unit needs service contact Superscope at
(630) 232-8900 Ext. 396. A service representative
will advise you of how to obtain service. Please do
not return the unit directly to Superscope Technolo-
gies, unless specified by our service representative.
2. You must pay any shipping charges if it is necessary
to ship the product for service. If the necessary
repairs are covered by the warranty, we will pay
return shipping charges to your location anywhere in
the United States.
3. Whenever warranty service is required, you must
present the original dated sales receipt, or other
proof of purchase.
LASER SAFETY
This unit employs lasers. Only a qualified service
person should remove the cover or attempt to
service this device, due to possible eye injury.
CAUTION
USE OF CONTROLS OR ADJUSTMENTS OR
PERFORMANCE OF PROCEDURE OTHER THAN
THOSE SPECIFIED HEREIN MAY RESULT IN
HAZARDOUS RADIATION.EXPOSURE.