GARMIN BLUENET
™
NETWORK DEVICE STACKING BRACKET
INSTALLATION INSTRUCTIONS
Important Safety Information
WARNING
See the Important Safety and Product Information guide in the product box for product warnings and other
important information.
Failure to install this device according to these instructions could result in personal injury, damage to the vessel
or device, or poor product performance.
CAUTION
To avoid possible personal injury, always wear safety goggles, ear protection, and a dust mask when drilling,
cutting, or sanding.
NOTICE
When drilling or cutting, always check what is on the opposite side of the surface to avoid damaging the vessel.
Tools Needed
• Drill
• Drill bit (size varies based on surface material and screws used)
• Mounting hardware applicable to surface.
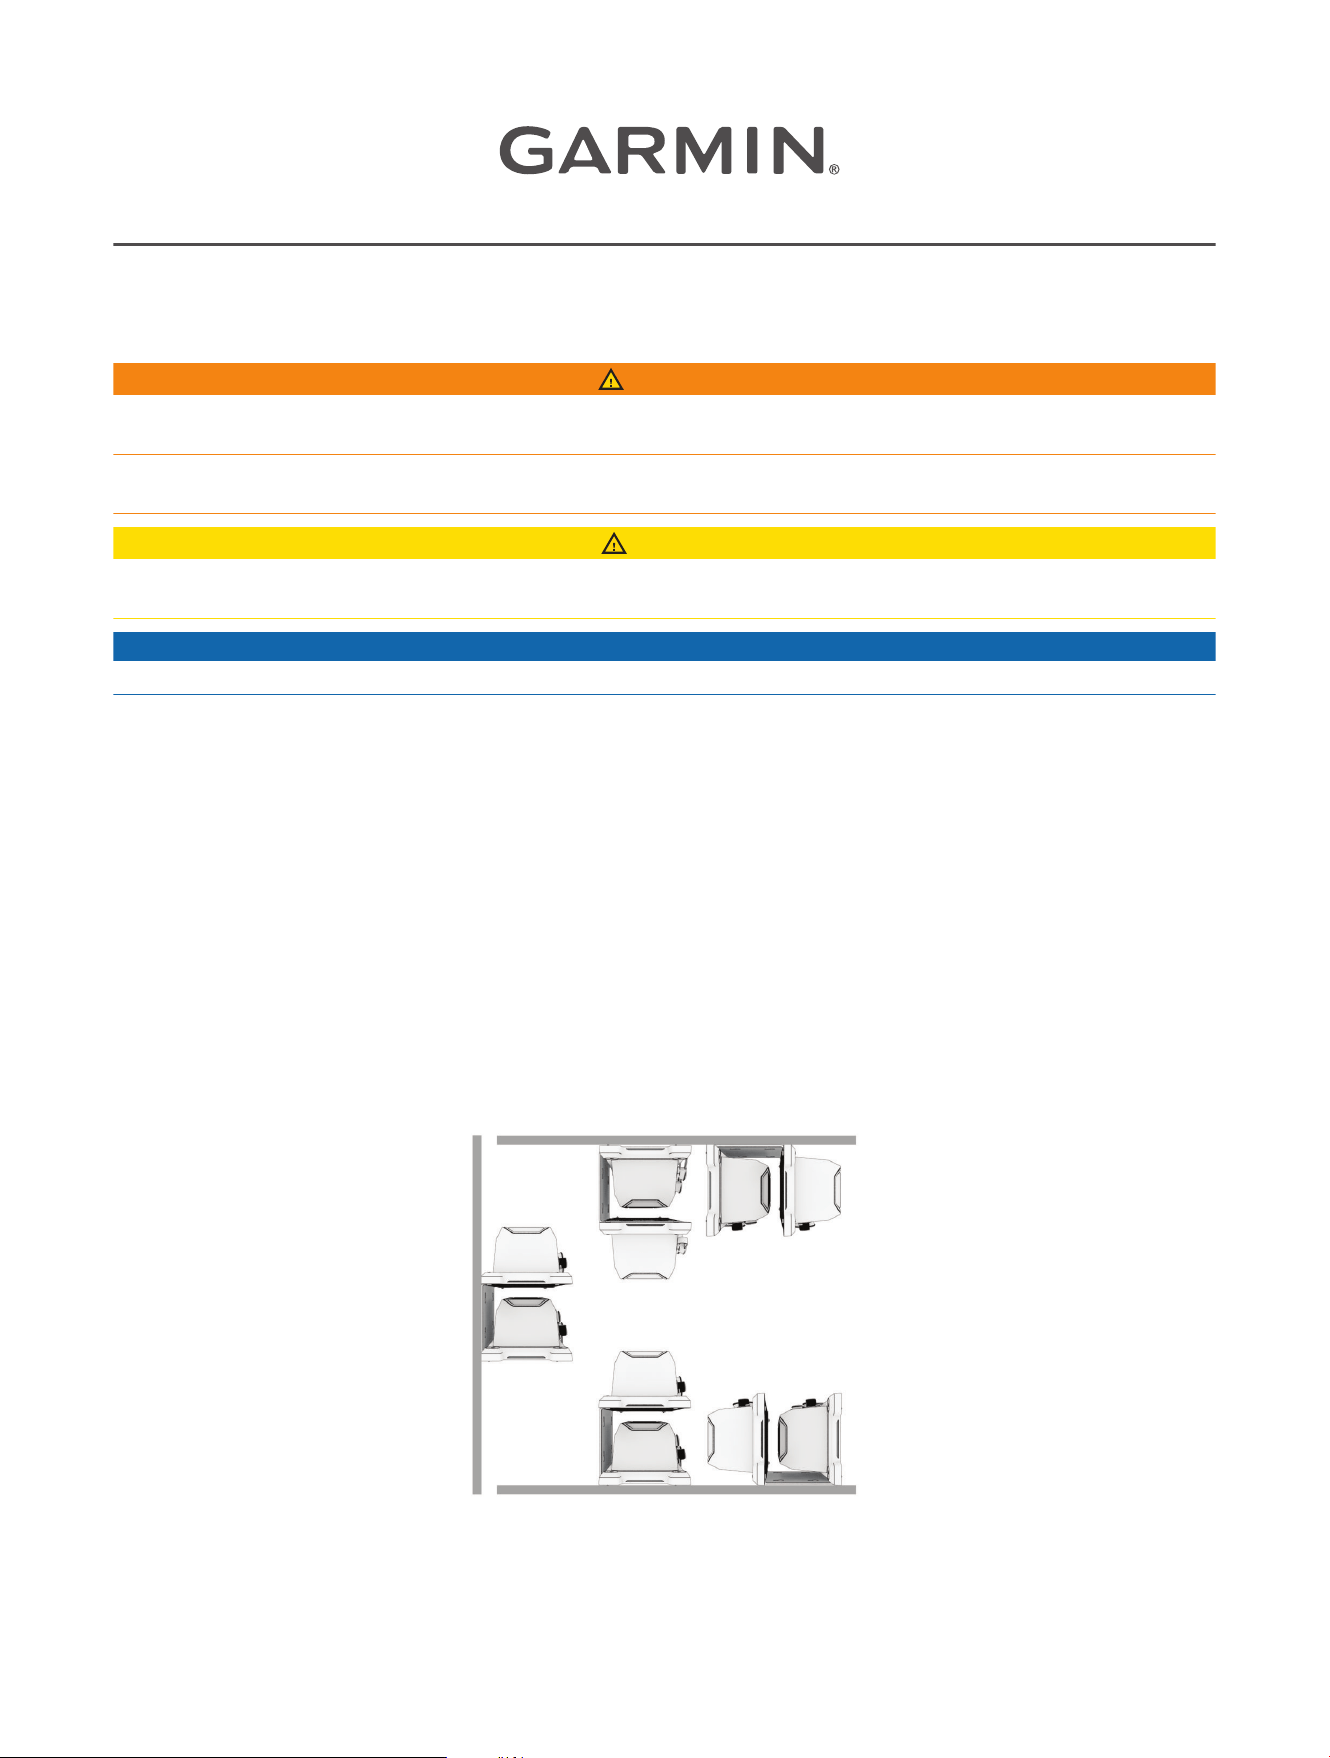
Mounting Considerations
You can use this bracket to install a Garmin BlueNet 30 gateway and a Garmin BlueNet 20 switch stacked one
above the other to more-efficiently use space on your boat. When selecting a location to install the bracket and
Garmin BlueNet devices, observe these considerations.
• You must mount the bracket and Garmin BlueNet devices in a location that meets the submersion and
ventilation requirements in the installation instructions provided with the Garmin BlueNet devices.
• You can install this bracket in various orientations on many surface angles.
GUID-792F86B9-4D14-42E2-AF63-8B6CAFCF9B98 v1September 2023
Securing the Bracket to the Mounting Surface
You should secure the bracket to the mounting surface before you attach the devices to the mounting bracket.
NOTE: M4 self-tapping pan head stainless steel screws are included to secure the bracket to the surface. If
they are not long enough for your needs or if you would prefer a different type of stainless steel pan head
mounting hardware for your mounting surface, you should supply the hardware. Be sure to test your hardware in
the bracket mounting keyholes to make sure it fits and will tightly secure the bracket to the surface.
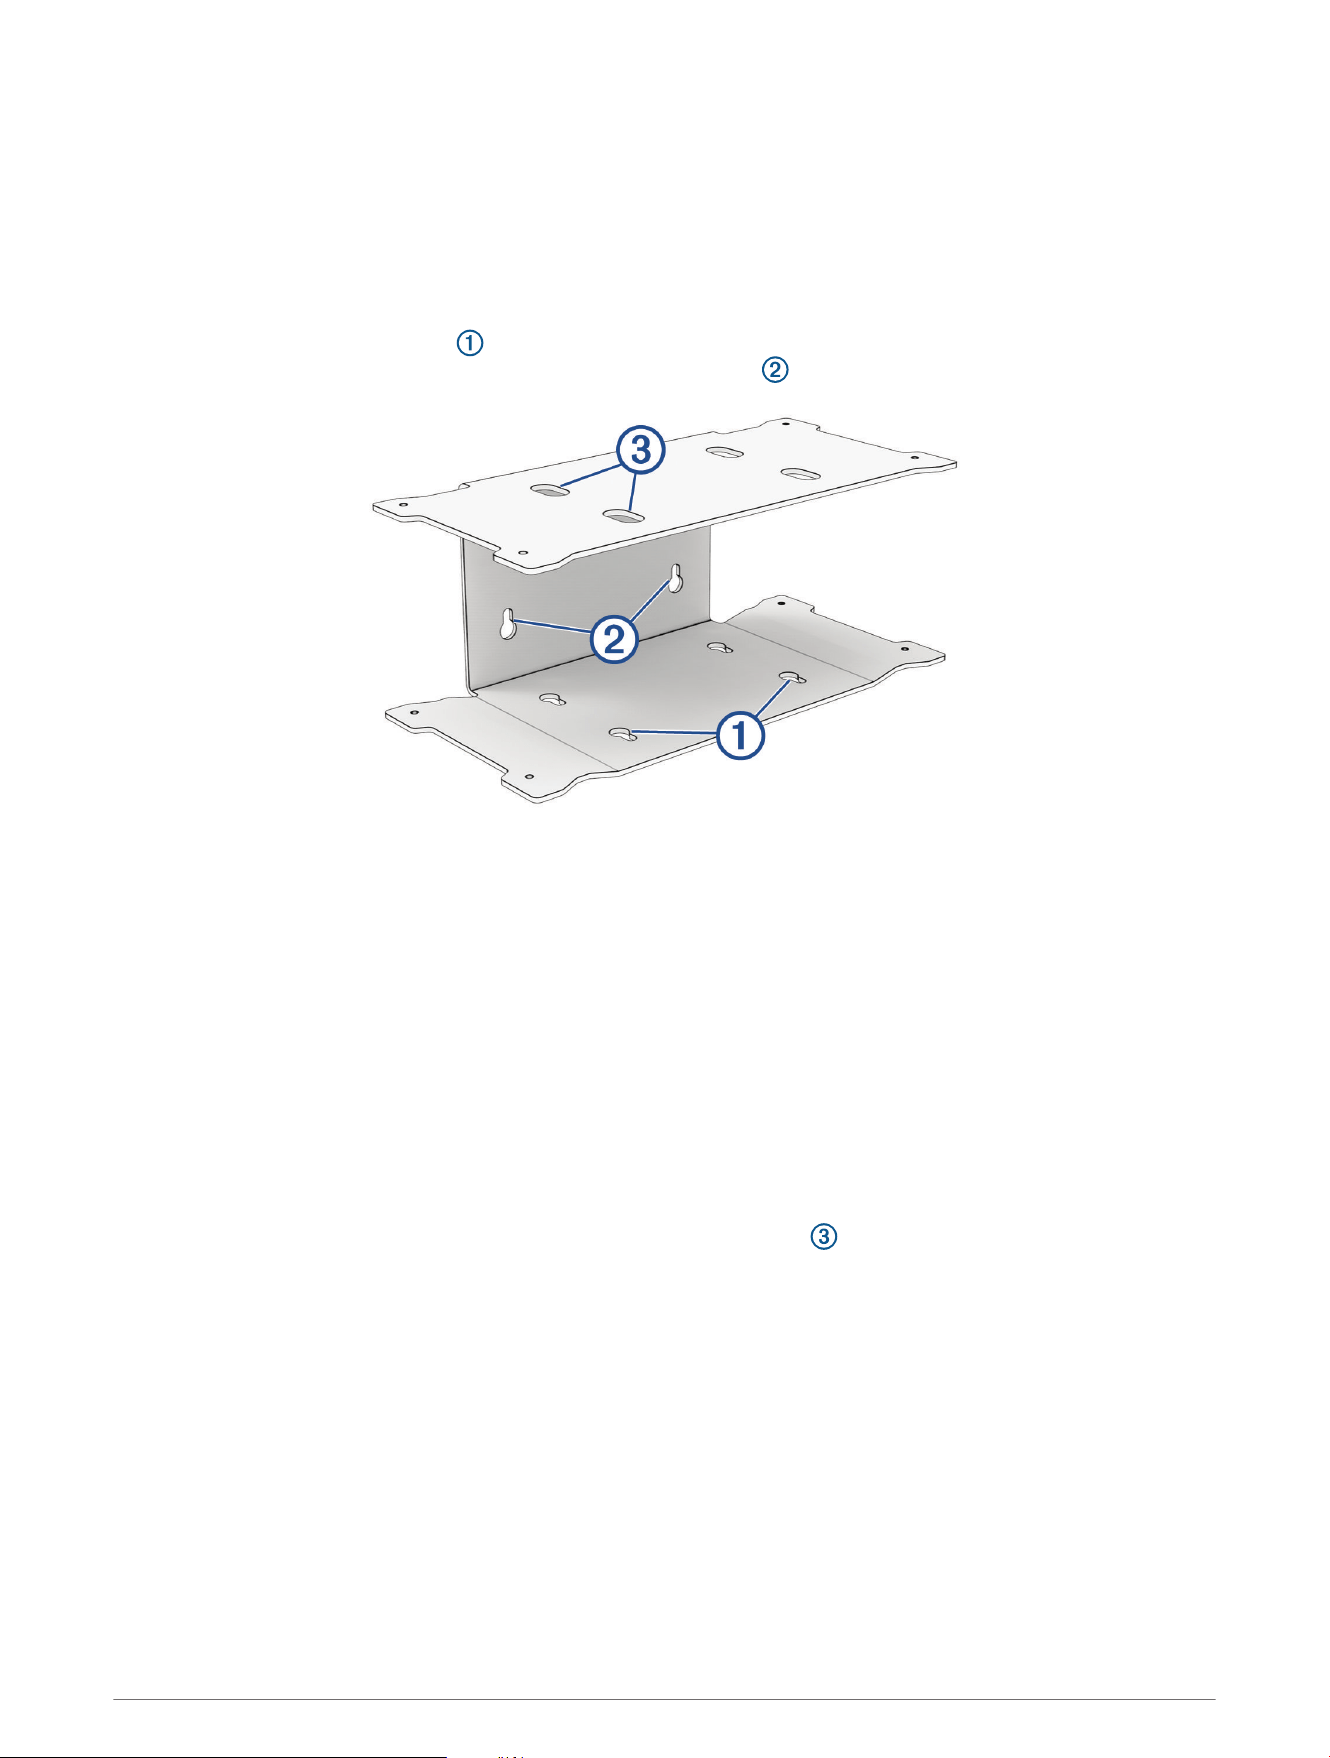
1 Hold the bracket against the mounting surface according to the intended orientation of the devices.
The bottom mounting keyholes are used when mounting the bracket on the floor or overhead with the
connectors pointing outward, and the back mounting keyholes are used for all other mounting options.
2 Using the bracket as a template, mark the location of the mounting holes.
NOTE: When properly installed, the mounting hardware secures the narrow section of the mounting keyhole
to the surface. You should mark the center of the narrow section of the keyhole for the pilot holes.
3 Remove the bracket from the surface, and using a 3.5mm (
1
/
8
in.) bit or a bit suitable for your supplied
mounting hardware, drill the pilot holes.
4 Using a Phillips screwdriver or the proper fastening tool for your supplied mounting hardware, install the
included self-tapping screws or your mounting hardware, but do not secure the hardware completely against
the surface.
5 Aligning the large end of the keyholes in the bracket with the screws or your mounting hardware, place
the bracket on the mounting surface and slide the bracket so the mounting hardware rests in the narrow
sections of the keyholes.
6 Tighten the hardware to secure the bracket.
TIP: If you are using the mounting holes on the bottom of the bracket, you can tighten the screws by
inserting the screwdriver through the holes in the top of the bracket to reach the heads of the screws
more easily.
2
Installing the Devices in the Bracket
You must mount the bracket to the surface before installing the devices in the bracket. When installed in the
bracket, the devices block the holes used to secure the bracket to the surface.
NOTICE
The appropriately threaded machine screws needed to secure the devices to the bracket are included. To avoid
damaging the bracket use only the screws supplied with the bracket to secure the devices.
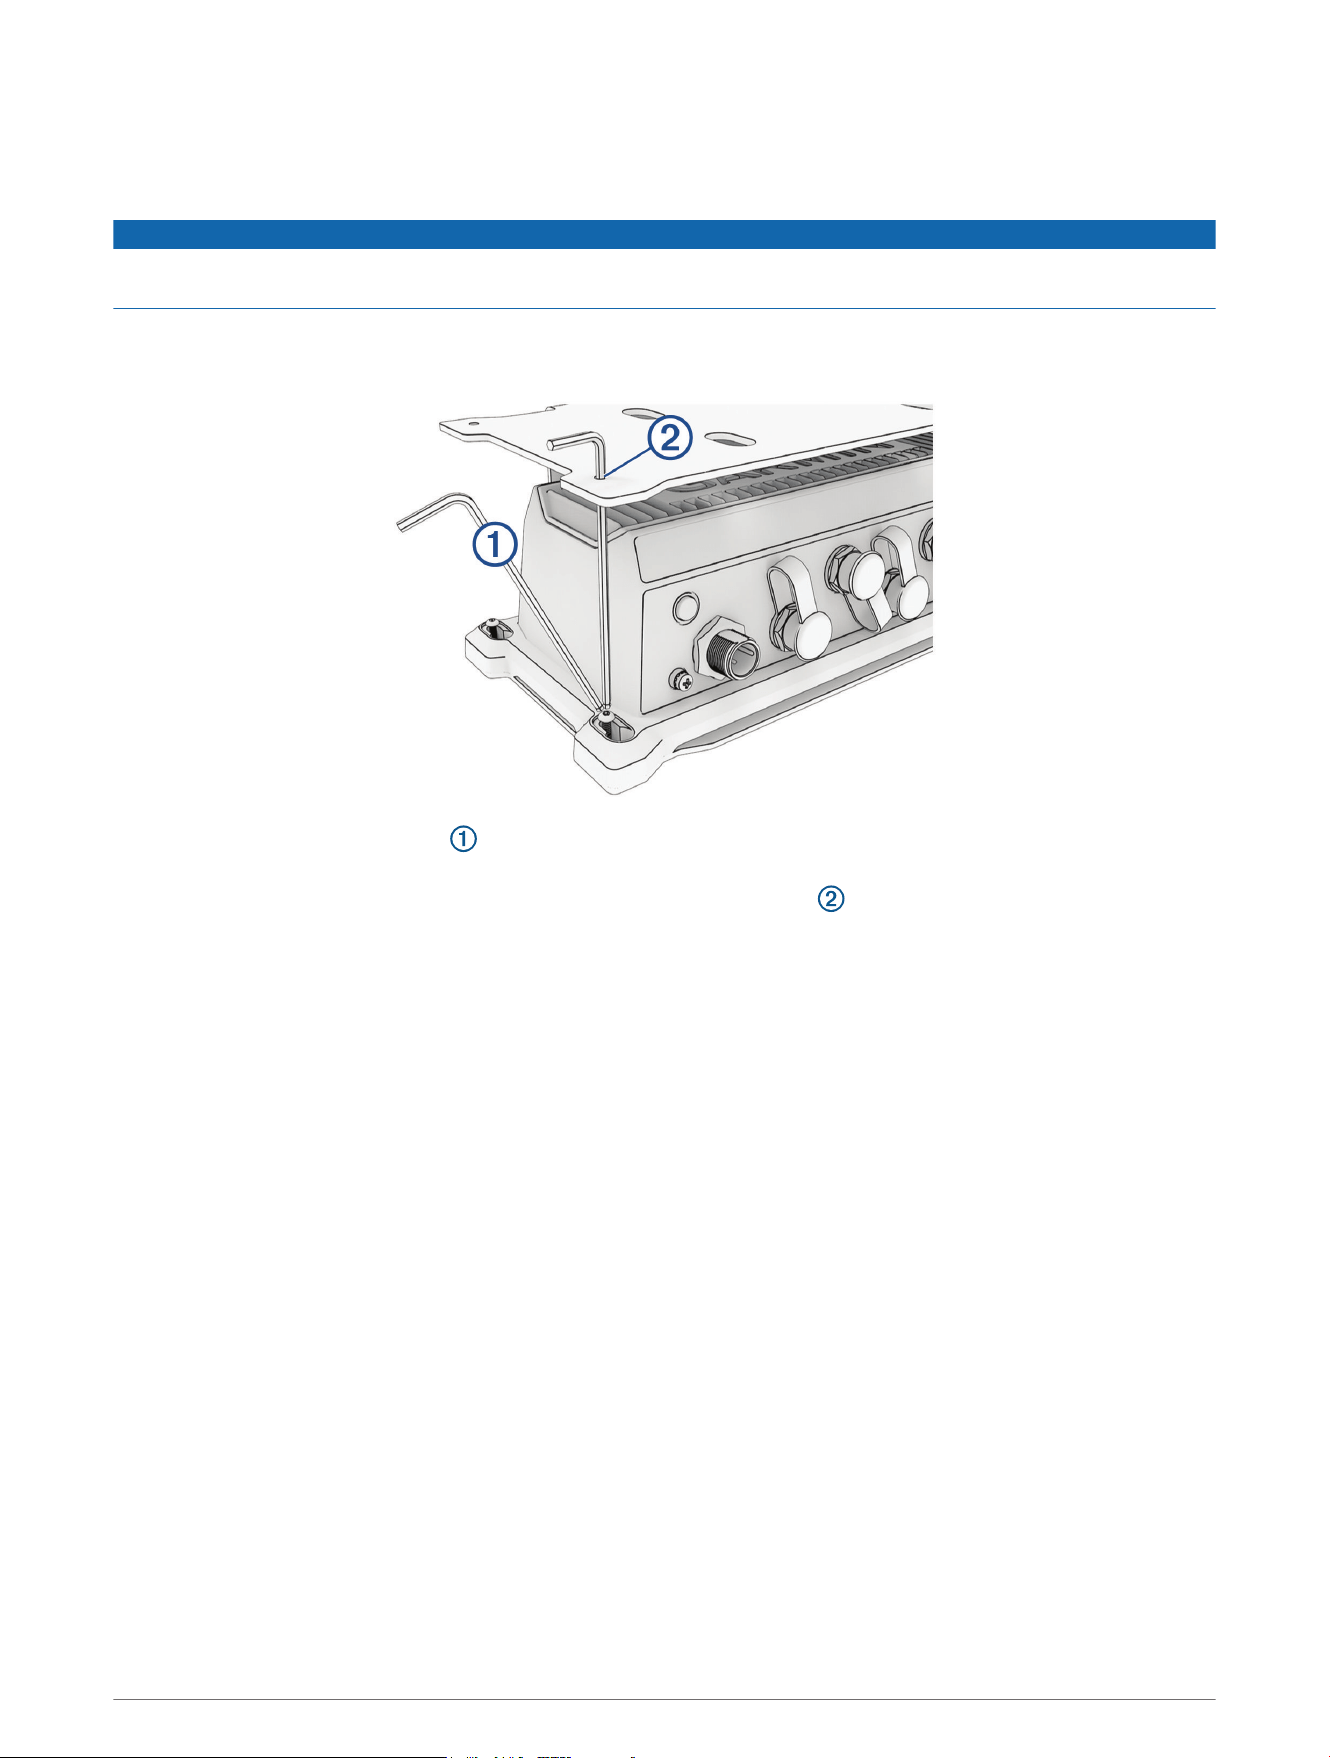
1 Place one device on the lower shelf of the bracket, aligning the mounting holes on the device with the holes
on the bracket.
2 Using the included hex wrench and four of the included pan head machine screws, secure the device to
the bracket.
TIP: The included hex wrench fits through the upper mounting holes , which makes it easier to reach the
heads when tightening the lower screws.
3 Place the other device on the upper shelf of the bracket, align the mounting holes on the device and the
bracket, and repeat the previous step to attach it to the bracket.
© 2023 Garmin Ltd. or its subsidiaries
Garmin
®
and the Garmin logo are trademarks of Garmin Ltd. or its subsidiaries, registered in the USA and other countries. Garmin BlueNet
™
is a trademark of Garmin Ltd.
or its subsidiaries. These trademarks may not be used without the express permission of Garmin.
3

© 2023 Garmin Ltd. or its subsidiaries
support.garmin.com
