
Technical Support and E-Warranty Certificate www.vevor.com/support
SILK SCREEN FRAME
ACCESSORIES LIST AND APPLICATION INSTRUCTIONS
PRODUCT MODEL: WB-1410110-2
We continue to be committed to provide you tools with competitive price.
"Save Half", "Half Price" or any other similar expressions used by us only represents an
estimate of savings you might benefit from buying certain tools with us compared to the major
top brands and does not necessarily mean to cover all categories of tools offered by us. You
are kindly reminded to verify carefully when you are placing an order with us if you are
actually saving half in comparison with the top major brands.
1
Safety Instructions
WARNING:
1. Before using this product, please read instructions carefully and understand the
specifications.
2. This product is not a toy, This product contains small parts. If swallowed, it will
pose a choking hazard. Keep these small parts away from children when
assembling! Keep this product out of the reach of children.
3. When using this product, be sure to wear personal protective equipment such
as protective gloves and goggles to prevent accidental injury.
4. When using this product, Please clean the inside of the product with a small
brush from time to time to keep it clean and lubricated to prolong the service life.
5. Be careful when opening, closing and using to avoid accidental injury.
Accessories list and application instructions
Product model:WB-1410110-2
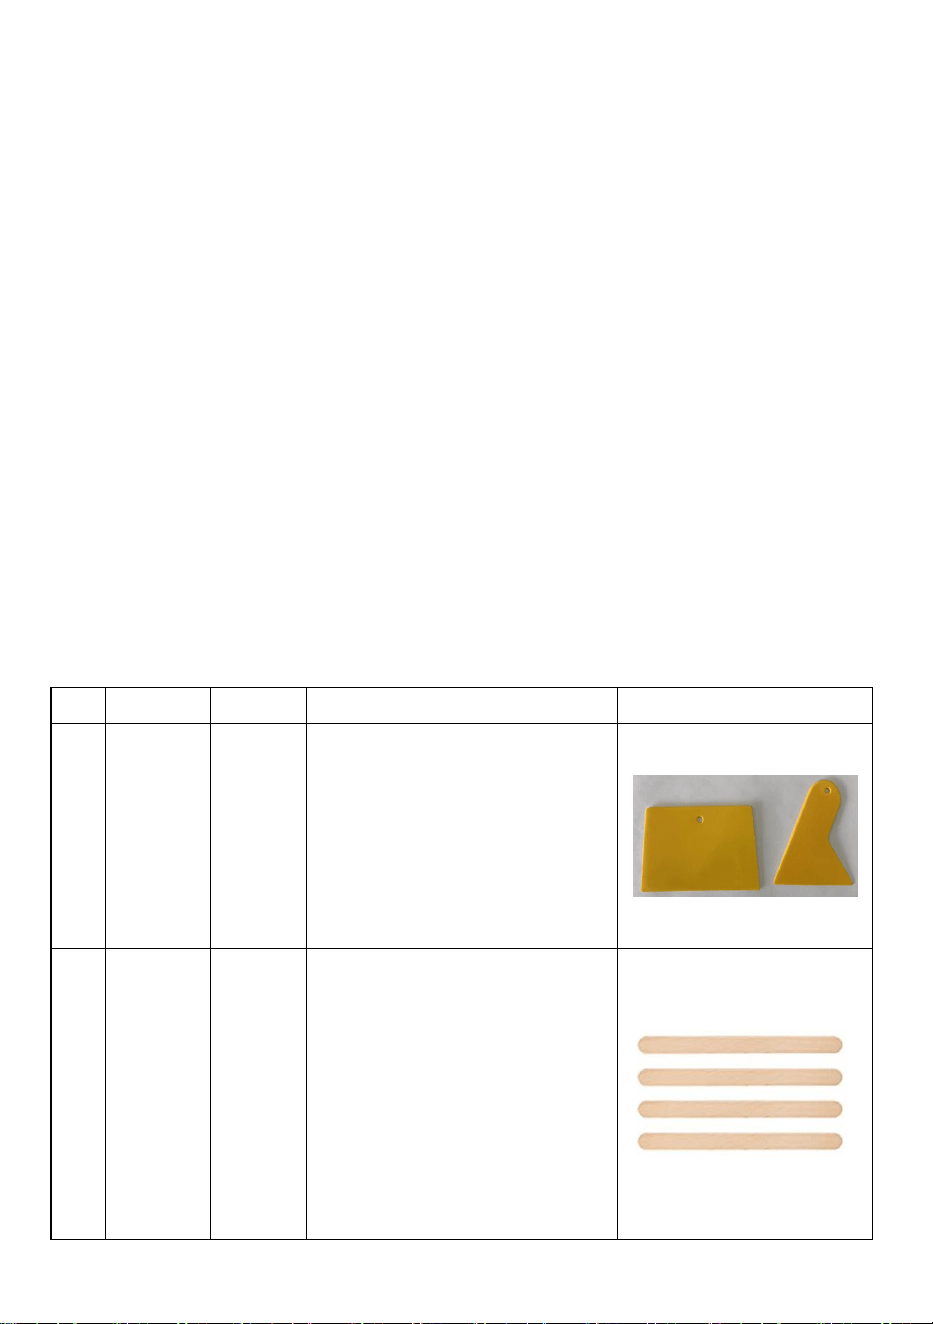
No.
Name
Quantity
Main application
Picture
1
Plastic
Scraper
2pcs
The function of plastic scraper is the
same as wood screen printing
squeegee, helping print to print
smaller image.
2
Wood
Sticks
10 pcs
Wood sticks can help to mix and
transfer the ink, as well as the
emulsion.
2
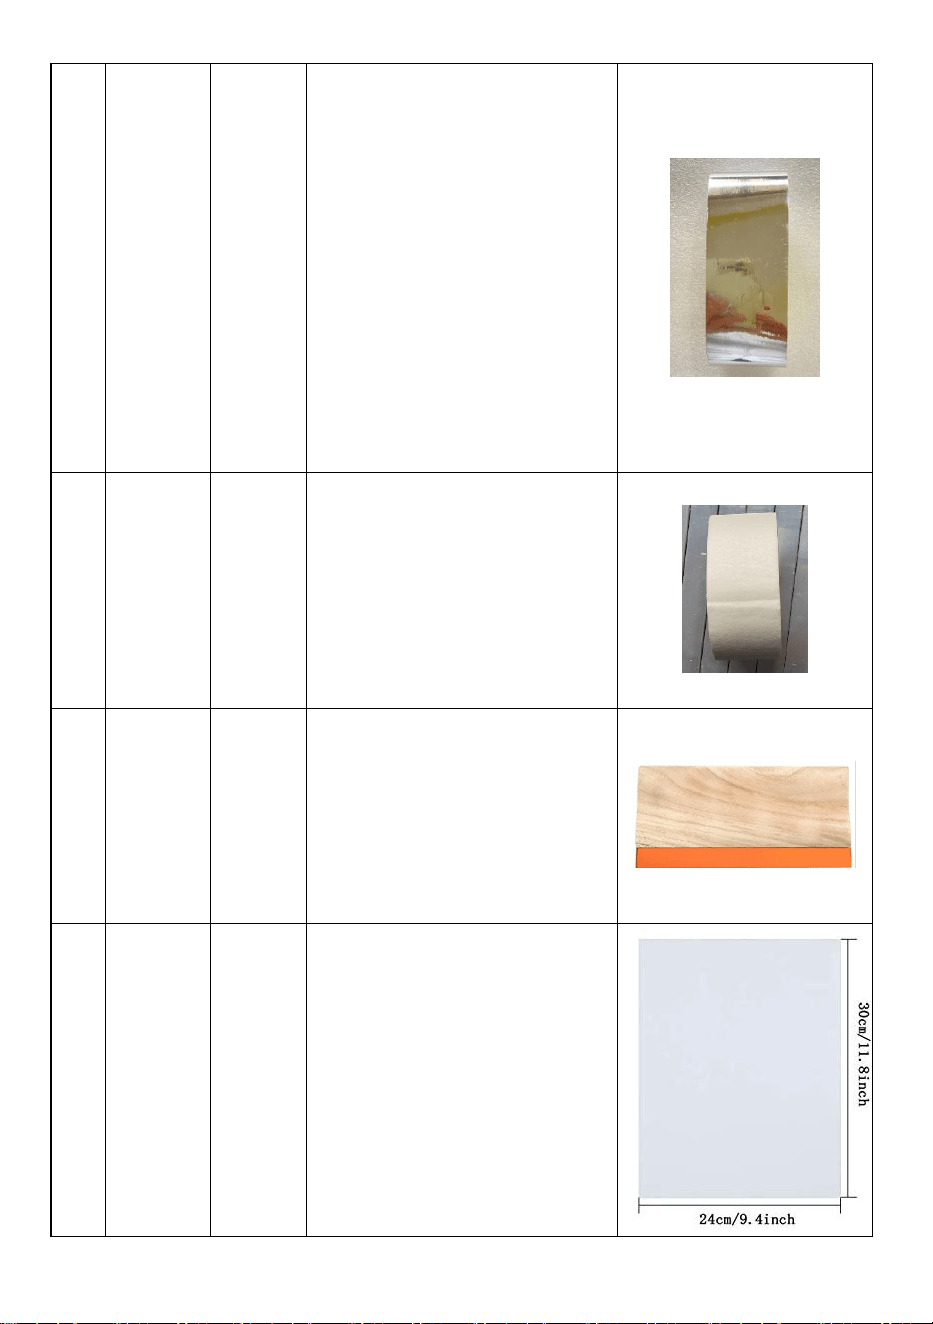
3
silver tape
1 roll
The function of this tape ensure
unwanted ink will not leak out from
all the edges of screen, which have
stronger stickiness and higher
temperature resistance than
ordinary tapes.
Masking tape can be quickly peeled
off and torn after use, and is almost
traceless, protecting your design
from interference, so it is perfect for
paint printing projects.
4
Masking
tape
1 roll
The function of this tape ensure
unwanted ink will not leak out from
all the edges of screen, which have
stronger stickiness and higher
temperature resistance than
ordinary tapes.
5
Wood
squeegee
1pc
This is the basic tool for your printing
job. The size is 18cm.
6
A4 Size
Inkjet
Transpare
ncy Film
5pc
Widely used in screen printing, they
can help you transfer the design you
want.
3
7
Stainless
steel
spatulas
1pc
This easy-to-clean ink spatula also
helps you mix ink as needed without
any problems even after prolonged
use.
8
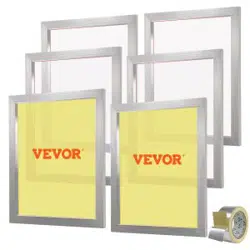
2 sizes
screen
printing
frames
2pcs
Two kinds of aluminium screen
printing frames with 2 kind of screen
printing squeegees, must be the
great work partner with this screen
printing frames to meet your
different printing needs, (10x14" &
8x10") with 110 white mesh.
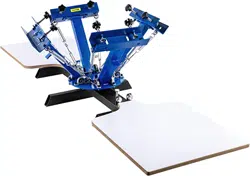
Multiple Use: You can print patterns on T-shirts, canvas tote bags, and tank tops
with this screen printing starter kit. This is a great family activity for beginners or
people that’s doing it at home.
INSTRUCTIONS Screen Printing Kit
STEP 1: Prepare the image
(This step would use transparency film from this kit)
1. Use transparency film and inkjet printer to print out the image you want, make sure the
image is in black to achieve a better opaque effect, it is better to use tape to overlap the 2-3
same films together.
2. Print on the non-smooth side of the film, if you print on the glossy uncoated side, the ink
will not dry because it is not absorbed by the coating.
4
STEP 2: Applying Photo Emulsion to the Screen
(This step would use screen printing frame and screen printing squeegee from this kit)
1. Do this step in a dark room since the photo emulsion reacts to light, spread a small
amount of the photo emulsion on one side of the screen bottom.
2. Use the scoop coater or squeegee to spread a thin layer of the emulsion across the
screen(both side), until the whole screen are covered with emulsion.
Place your finished screen in a cool dark place for a few hours or overnight to let it dry.
STEP 3: Preparing the Screen for Exposure
(This step would use screen printing frame and transparency film from this kit)
1. When your screen is dry, take your screen out of its cool dark place(but still in a dim
area).
2. Place the screen on black fabric or other black things, it can help reduce reflection. Turn
the screen with the emulsion "back" up.
3. Place your image onto the screen IN REVERSE.
4. Place a clean piece of glass over the image to hold it tight against the screen.
STEP 4: Exposing the Screen
(This step would use screen printing frame and transparency film from this kit)
Turn your UV exposure unit on. The time of expose your image will depend mostly on your
light source. There is an example for reference: 10 x 14 inch screen with 150W bulb and 12
inches height needs 10 minutes exposure.
5
STEP 5: Washing the Screen
(This step would use screen printing frame from this kit)
1. Use a sprayer or hose to spray water at the screen. After a few minutes the screen will
start to open up and the image areas will start washing away leaving your "stencil."
2. Dry the screen with newspaper or a towel (Do not rib in case the emulsion is still wet)
and leave it to dry off. If the areas do not wash away you may have overexposed the
screen, and you will need to use the "emulsion remover"(not include in this kit) to clean the
screen and start the process over, exposing it for much less time.
STEP 6: Tape the screen perimeter
(This step would use screen printing frame and masking tape from this kit)
During the printing process, unwanted ink sometimes leaks through the edges of the frame
and seeps onto the substrate. To prevent this, use masking tape to cover all the inside
edges of youro screen to prevent any ink from leaking through.
6
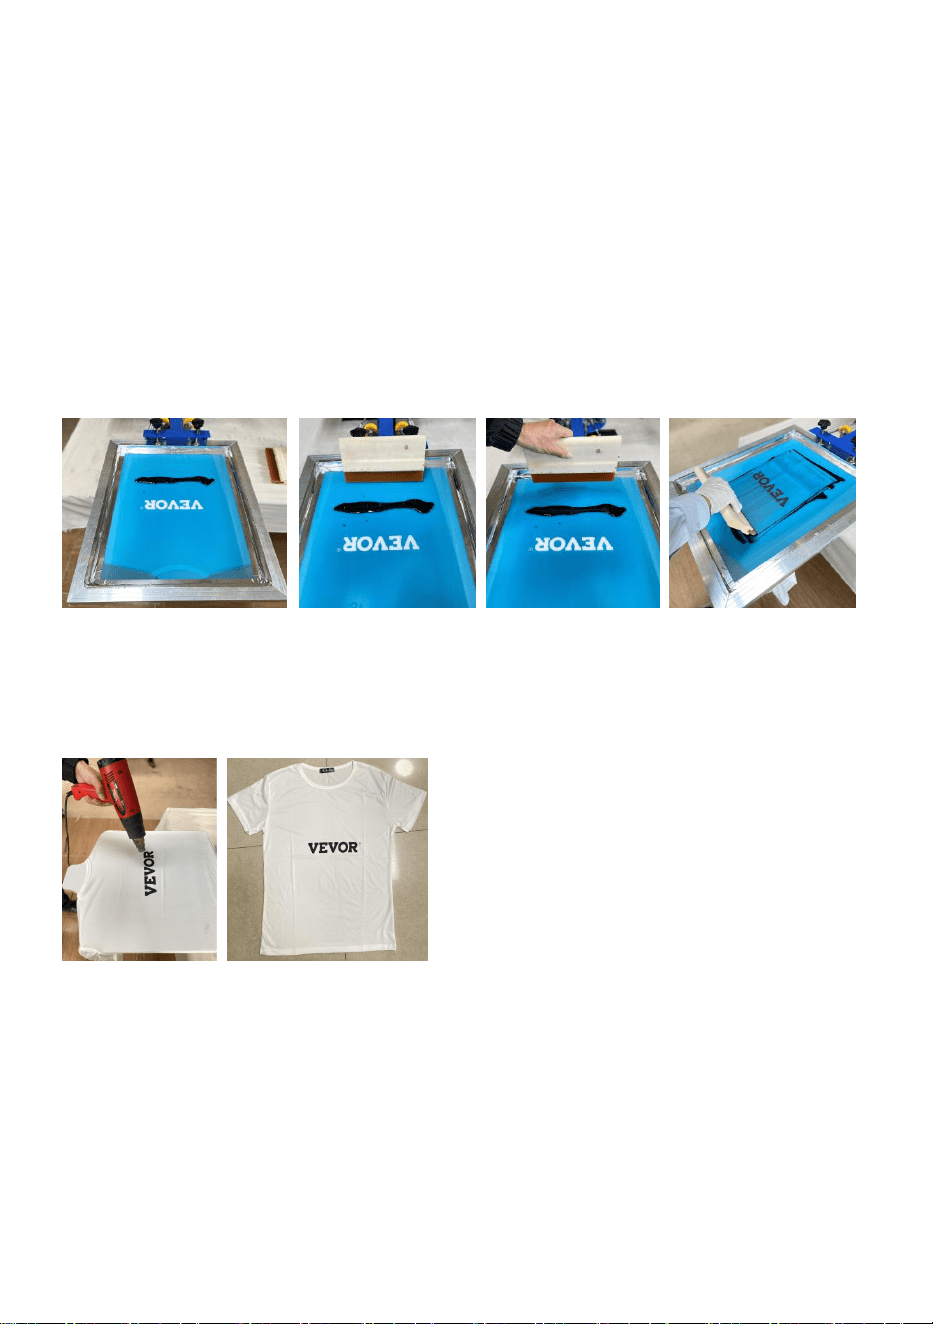
STEP 7: Printing
(This step would use screen printing frame, screen printing squeegee and wood sticks from
this kit)
1. Place your screen flat onto the fabric that you are preparing to print (if it is a T-shirt make
sure to place a piece of cardboard inside to prevent ink from soaking to the other side).
Apply a small glob of ink at the top of side of the image.
2. Use wood sticks transfer the ink onto the screen and pull the ink down the screen with
the squeegee. Y During the printing process, unwanted ink sometimes leaks through the
edges of the frame and seeps onto the substrate. To prevent this, use masking tape to
cover all the inside edges of youro screen to prevent any ink from leaking through.
STEP 8: Finished work display
After you finished the screen painting work, please clean the wooden frame and mesh, and
put it to dry location, which is convenient for your next use.
Address: Baoshanqu Shuangchenglu 803long 11hao 1602A-1609shi Shanghai
EC REP: SHUNSHUN GmbH. Römeräcker 9 Z2021,76351 Linkenheim-Hochstetten, Germany
UK REP:Pooledas Group Ltd. Unit 5 Albert Edward House, The Pavilions Preston, United
Kingdom
Imported to AUS: SIHAO PTY LTD. 1 ROKEVA STREETEASTWOOD NSW 2122 Australia
Imported to USA: Sanven Technology Ltd. Suite 250, 9166 Anaheim Place, Rancho
Cucamonga, CA 91730