12V Battery Tester 100-2000 CCA USER MANUAL


Manual Support in Other Languages
Safety is Always the First Priority!
About the BT100W
Section 1 What's in the Box?
Section 2 Product Overview
Section 3 Getting Started
Section 4 Standalone Test Mode
Section 5 Test through BT100W APP
Section 6 Technical Specication
Section 7 FAQ
Section 8 Warranty
Section 9 FCC Warnings
............................................
............................................
............................................
............................................
............................................
............................................
............................................
............................................
............................................
............................................
............................................
............................................
4
4
6
6
7
8
11
20
32
32
33
33
CONTENTS

MANUAL SUPPORT IN OTHER LANGUAGES
SAFETY IS ALWAYS THE FIRST PRIORITY!
For multilingual manual in PDF form, scan the QR code below or visit https://www.
topdon.com/products/bt100w
For your safety, the safety of others, and to avoid any damage to
the product and your vehicle, carefully read and make sure you fully
understand this manual's safety instructions in its entirety. You must
read the vehicle's service manual, the battery manufacturer's specic
safeguards, and observe the stated precautions or instructions
before and during any test or service procedure.
ALWAYS WEAR APPROVED EYE PROTECTION to prevent damage
from sharp objects and/or caustic liquids.
ONLY OPERATE TESTS IN A WELL-VENTILATED AREA since the
vehicle produces carbon monoxide when the engine is running.
DO NOT TOUCH HOT ENGINE PARTS to prevent severe burns. The
motor's parts can get extremely hot when the engine is running.
ALWAYS BE AWARE OF MOVING PARTS (such as coolant fans, pulleys,
belts, etc.) since they spin or turn at high speeds when the engine is
running.
READ ALL INSTRUCTIONS BEFORE USING
EN I 4

DO NOT CUT THE PRODUCT'S CORDS OR SUBMERGE THEM IN
WATER. The product is an electrical device that can cause shock and
severe burns.
TURN THE IGNITION OFF BEFORE CONNECTING OR DISCONNECTING
THE TOOL FROM THE BATTERY to prevent damage to the tester or
the vehicle's electronic components.
DO NOT WEAR LOOSE CLOTHING OR JEWELRY WHEN WORKING ON
AN ENGINE. Loose clothing can easily be caught in the engine's fan,
pulleys, belts, etc., and jewelry is highly conductive, which may cause
severe burns or electric shock if it contacts electricity.
WARNING: Battery acid is extremely corrosive. If acid gets into your
eyes, RINSE THEM THOROUGHLY WITH COLD RUNNING WATER FOR
AT LEAST 20 MINUTES AND SEEK MEDICAL ATTENTION IMMEDIATELY.
If battery acid contacts your skin or clothing, WASH IT IMMEDIATELY
WITH A SOLUTION OF WATER AND BAKING SODA.
DON'T SMOKE OR HAVE ANY FLAMES NEAR THE VEHICLE when
testing. Fuel and battery vapors are highly ammable.
EN I 5

EN I 6
ABOUT THE BT100W
SECTION 1 WHAT'S IN THE BOX?
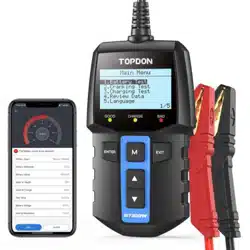
The BT100W is a battery tester that applies the most advanced conductance testing
technology and incorporates reverse polarity protection. It is designed to help
technicians locate faults quickly by taking accurate measurements of the vehicle
battery's actual Cold Cranking Amps (CCA) and State of Health (SOH), as well as
testing the cranking system and charging system. With it, users can perform any of
the tests on the tester itself or on an APP through their phone.
BT100W
User Manual
Quick User Guide
EN I 7
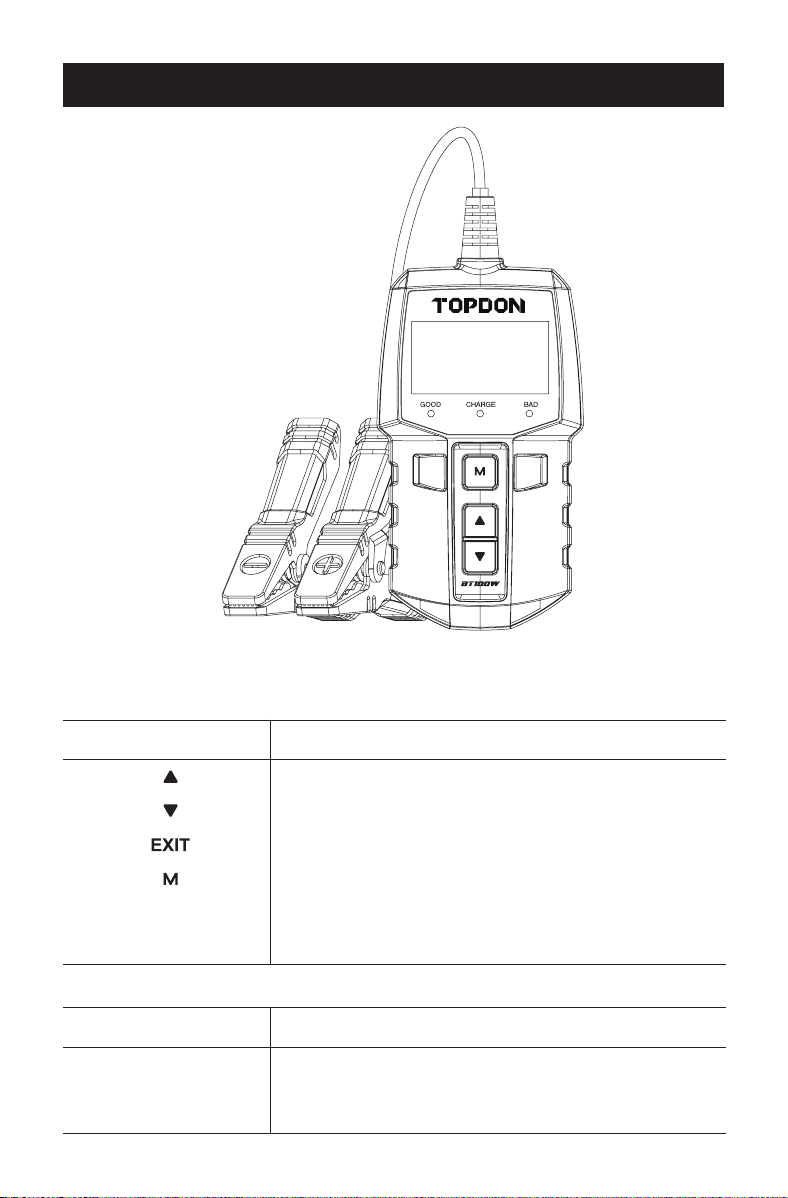
SECTION 2 PRODUCT OVERVIEW
Buttons
LED indicators
Indicators
Operations
Communicates the Battery's Status
Page up; Increase the battery rated value
Figure 2.1
Good (> 80% Capacity)
Recharge (50~80% Capacity)
Replace (< 50% Capacity)
Green
Yellow
Red
Page down; Decrease the battery rated value
Cancel; Return to the previous page
Main Menu
Connects to the battery's positive terminalRed smart clamp
Connects to the battery's negative terminalBlack smart clamp
TENTER EXI

SECTION 3 GETTING STARTED
Cars are powered by lead-acid batteries. The most commonly used ones are listed
below:
Let's take the following picture as an example (See Figure 3.2.1):
Figure 3.2.1
●
Flooded Lead Acid Batteries (Wet):
This is the oldest/most common car battery type, also known as a "SLI battery."
The Flooded Battery is usually made of 6 cells with a liquid electrolyte solution
of sulfuric acid and water that needs to be topped off periodically. This battery
typically supplies a voltage of 12.6V at full charge.
●
Enhanced Flooded Battery (EFB):
This battery type also uses a liquid electrolyte solution. However, different from the
Wet Flooded Lead Acid, it is sealed and maintenance-free. The Enhanced Flooded
battery is usually seen in cars with simple start-stop technology, and can provide
up to 85,000 engine cranks.
●
Gel Cell Battery (Gel) & VRLA Battery:
Gel batteries are similar to ooded batteries. Although for this type, calcium
replaces the antimony in the lead plates, and silica is added to the electrolyte
solution, turning the liquid into a gel.
●
Absorbent Glass Mat Battery (AGM):
AGM batteries are designed to deliver powerful bursts of starting amps and run
for a long time. "Absorbed Glass Mats" are used to cushion the ultra-thin lead
plates, allowing manufacturers to include more leads into one battery and provide
more power. AGM batteries are divided into two categories according to the cell
structure. They can be AGM FLAT PLATE or AGM SPIRAL. This type of battery
is ideal for vehicles with automatic start-stop applications and braking energy
recovery.
3.1 What Are the Most Commonly Used Car Batteries?
3.2 How to Identify What Type of Battery You Have?
EN I 8
Manufacturers
Part No.
80Ah 12v
Reserve Capacity CCA in USAVoltage
650
A
(SAE)
AGM
E51
Battery
Type
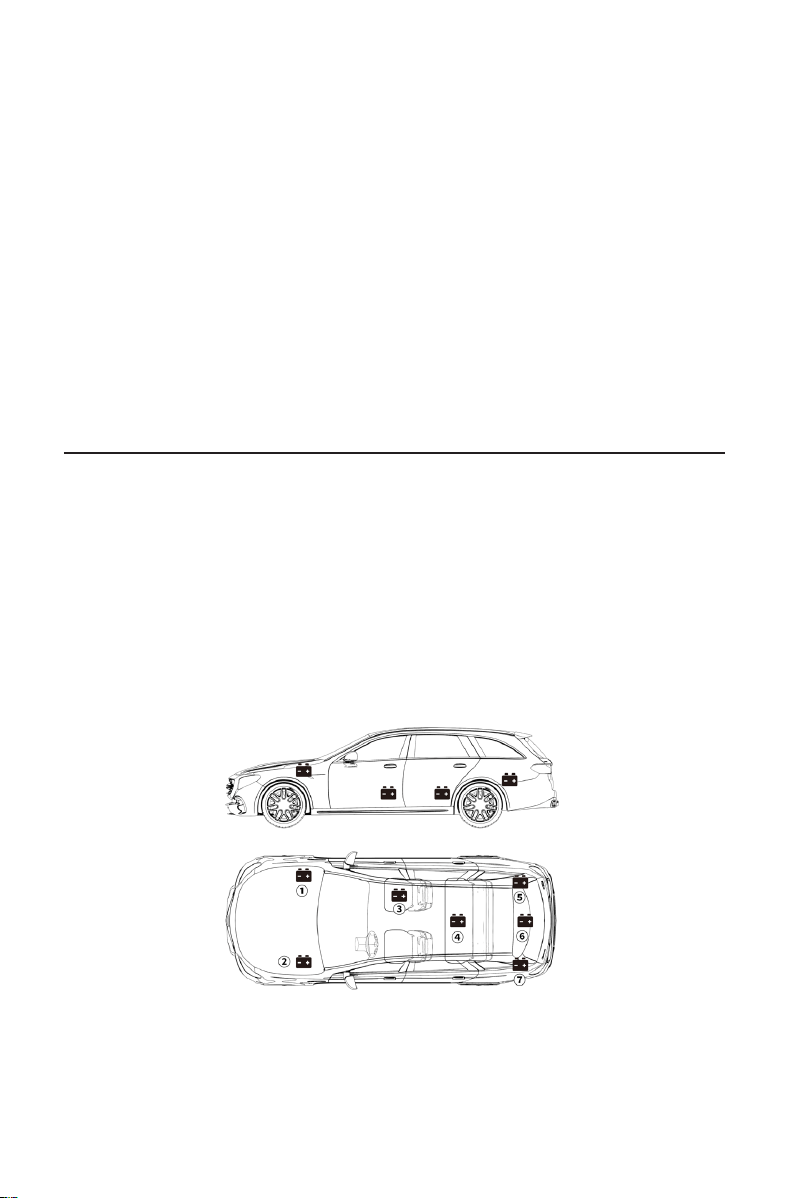
1) Most models hold the battery in the engine bay, under the hood, in one of the front
corners. See battery location
①
and
②
in Figure 3.3.1.
2) To balance uneven weight distribution, some manufacturers hold the engine in
the trunk. See battery location
⑤
,
⑥
, and
⑦
in Figure 3.3.1. In this case, the battery
may have a plastic cover that should be removed prior to any testing.
3) For some models, the battery might be stored underneath the rear seat. See
battery location
④
in Figure 3.3.1.
4) For other vehicles, the battery can be located underneath the passenger seat. See
battery location
③
in Figure 3.3.1
Figure 3.3.1
1) Reserve Capacity: 80Ah
The Reserve Capacity is a time measurement that explains how long a fully-
charged battery can deliver a 25 amps current in an 80°F environment before the
battery is discharged and drops to 10.5V.
2) Battery Type: AGM
3) Voltage: 12V
When fully charged, automotive batteries should measure at 12.6V. However, this
measurement should be from 13.7 to 14.7V when the engine is running. If the
battery tester reads less than this standard, it means that the battery's resting
voltage is weak. In this case, typically, the battery needs to be charged or replaced.
4) CCA: 650A (SAE)
The CCA rating refers to how many amps a 12V battery can deliver at 0°F in 30
seconds while maintaining at 7.2V at least. This means that the higher the CCA
rating is, the easier the engine can be cranked in cold temperatures.
3.3 Where Is the Battery of a Car Located?
EN I 9
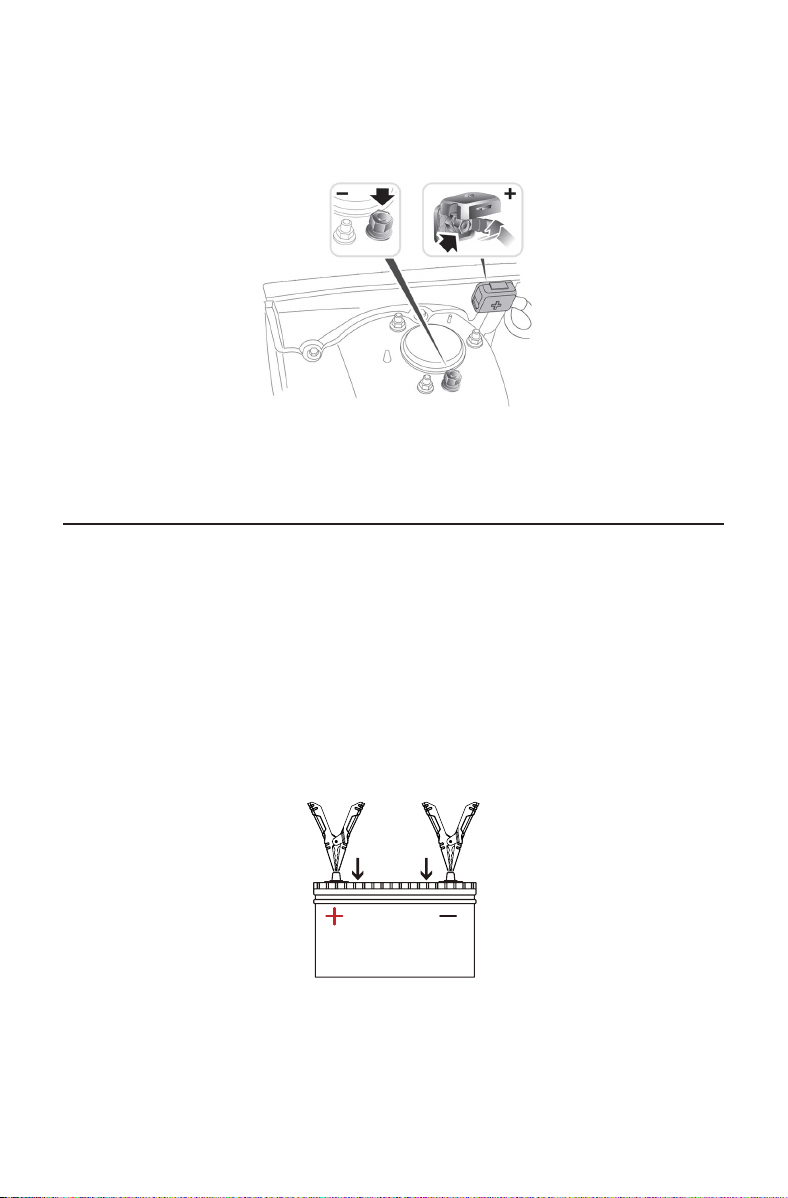
WARNING:
DO NOT TEST THROUGH THE JUMPSTART POSTS. For models that hold
the battery under the seat or in the trunk, the manufacturer usually includes
jumpstart connector conductor posts under the hood (See Figure 3.3.2) to make
jumpstarting easier. However, to ensure data accuracy and operation safety, DO NOT
CONNECT THE BATTERY TESTER TO THE JUMPSTART POSTS.
Figure 3.3.2
Figure 3.4.1
1) Before connecting the clamps to the terminals, please use sandpaper to polish
off any corrosion on the battery terminals. With this, you can avoid inaccurate test
values.
2) Attach the red clamp to the positive (+) terminal and the black clamp to the
negative (-) (See Figure 3.4.1).
• ALWAYS KEEP THE RED & BLACK CLAMPS FROM TOUCHING.
• ALWAYS DISCONNECT THE NEGATIVE CABLE FROM THE BATTERY FIRST AND
RECONNECT IT LAST.
3) Once the clamps are properly connected, the battery tester will power on
automatically and be ready to conduct tests.
3.4 Connect the Clamps to the Battery Terminals.
EN I 10
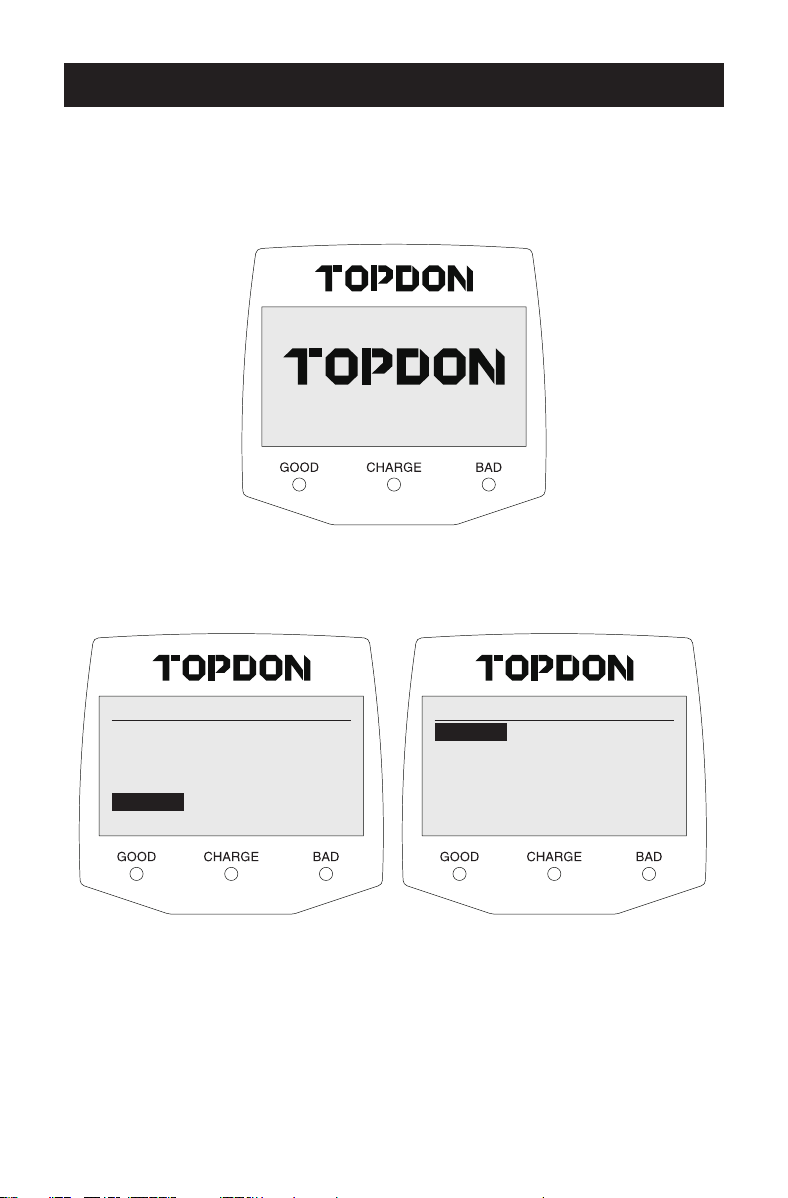
Figure 4.1
Figure 4.2 Figure 4.3
Battery Test
Main Menu Main Menu
12.5V
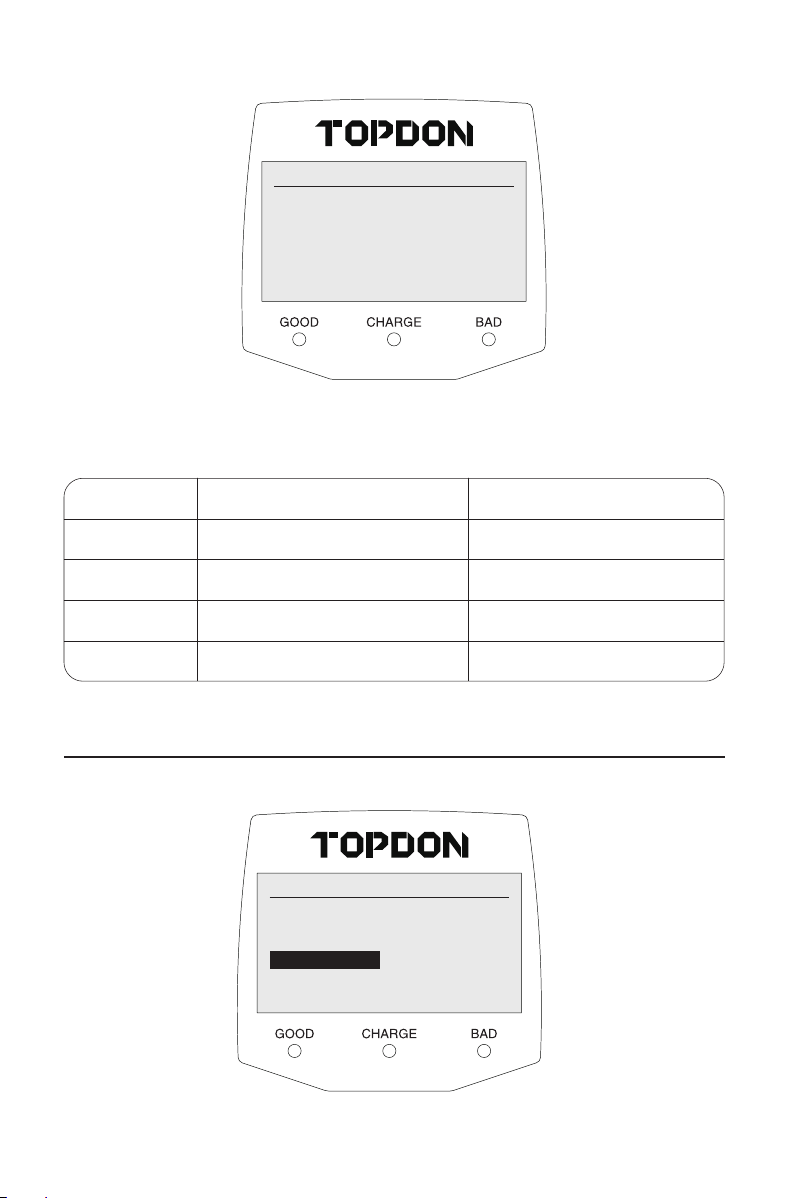
For any of the tests (either via the device or APP), clamps must be connected
securely to the corresponding terminal, that is, black to the negative terminal (-) and
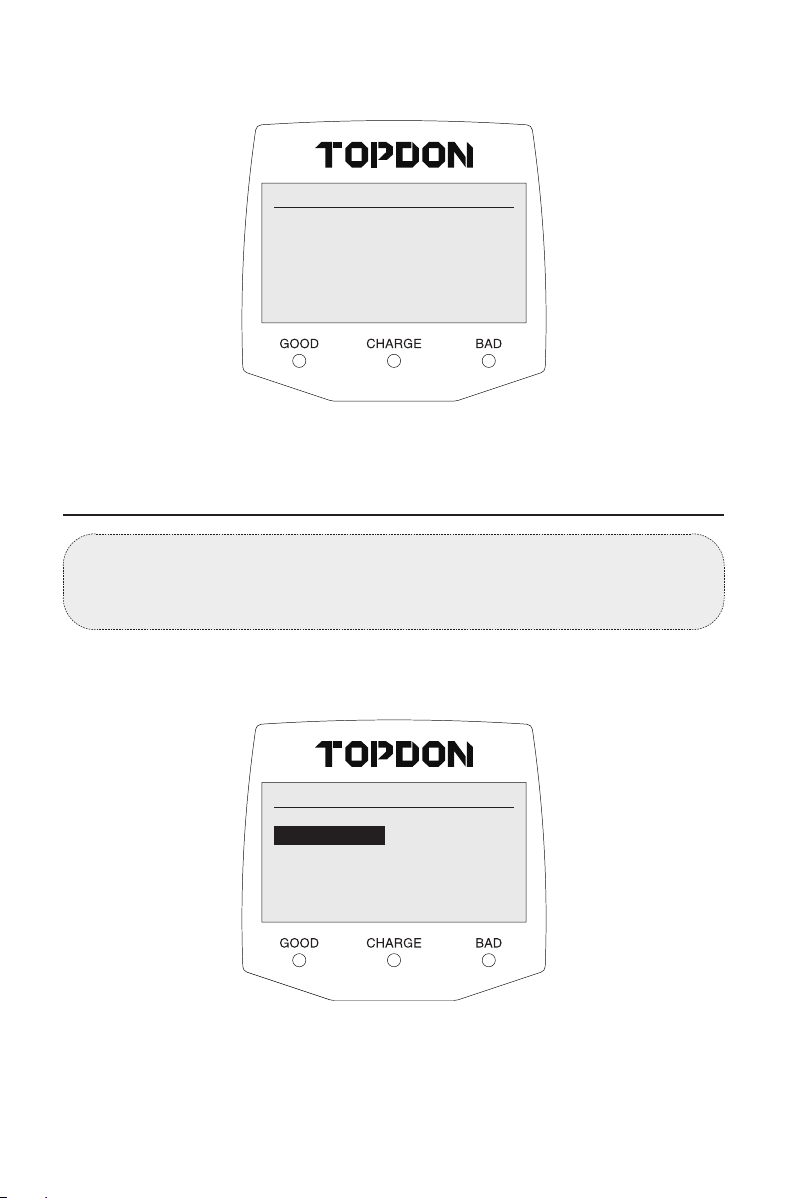
red to the positive terminal (+) (See Figure 3.4.1). After the connection is made, the
BT100W will automatically start and display the interface as shown below (See Figure
4.1):
Select your preferred language from the available 8 languages.
EN I 11
SECTION 4 STANDALONE TEST MODE
1.ENGLISH
2.French
3.German
4.Spanish
5.Italian
6.Russian
1.Battery Test
2.Cranking Test
3.Charging Test
4.Review Data
5.Language
6.About
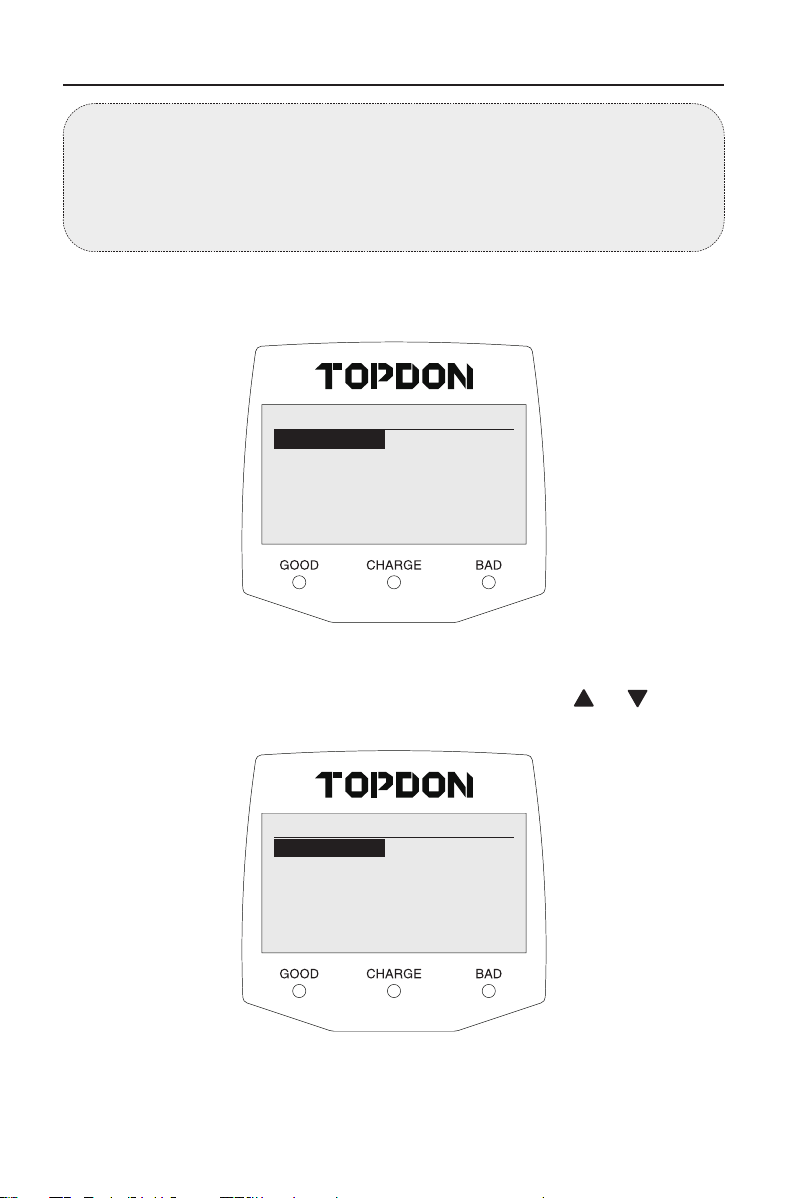
1. Battery Test
Note:
1) Turn off the engine and all accessories.
2) Turn on the vehicle headlamps for 10 seconds until the battery voltage drops
back to normal value if the battery is just fully charged.
3) The test only applies to 12V lead-acid batteries.
Test Steps:
1) Select "1. Battery Test".
2) Select battery type (specied on the battery label) by pressing or , and
then press "Enter".
Figure 4.1.1
Figure 4.1.2
Main Menu
Battery Type
1.Battery Test
2.Cranking Test
3.Charging Test
4.Review Data
5.Language
6.About
1.Regular Flooded
2.AGM Flat Plate
3.AGM Spiral
4.GEL
5.EFB
EN I 12
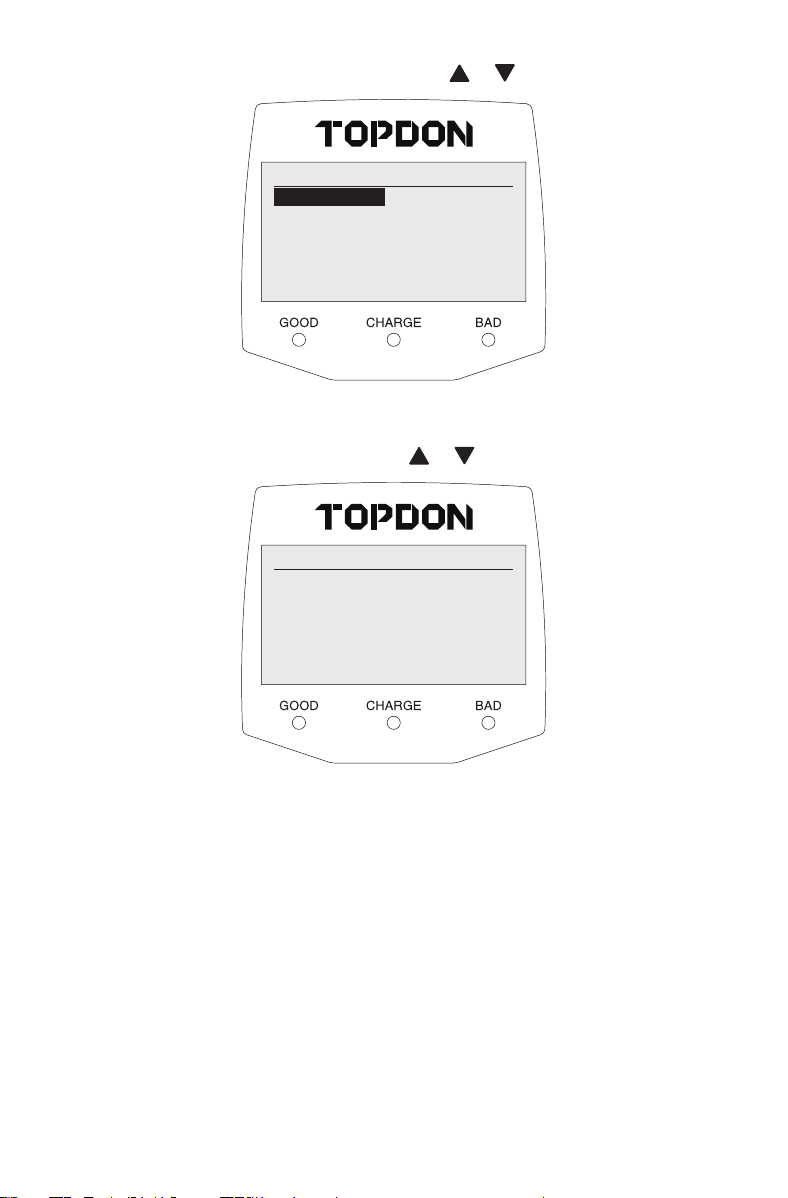
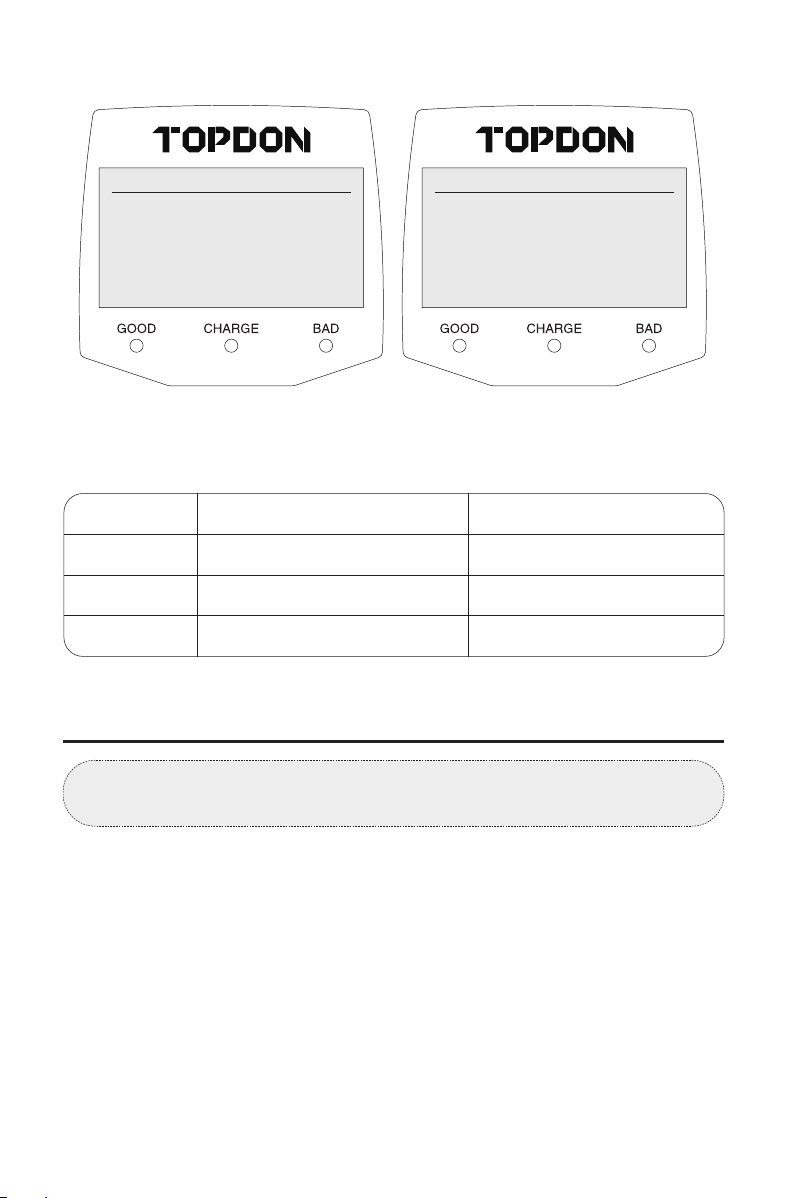
3) Select the correct testing standard by pressing or , and then press "Enter".
4) Select the correct rated value by pressing or , and then press "Enter".
Figure 4.1.3
Figure 4.1.4
Select Input
Setting Rate
1. CCA
2. DIN
3. JIS
4. EN
5. IEC
300CCA
EN I 13
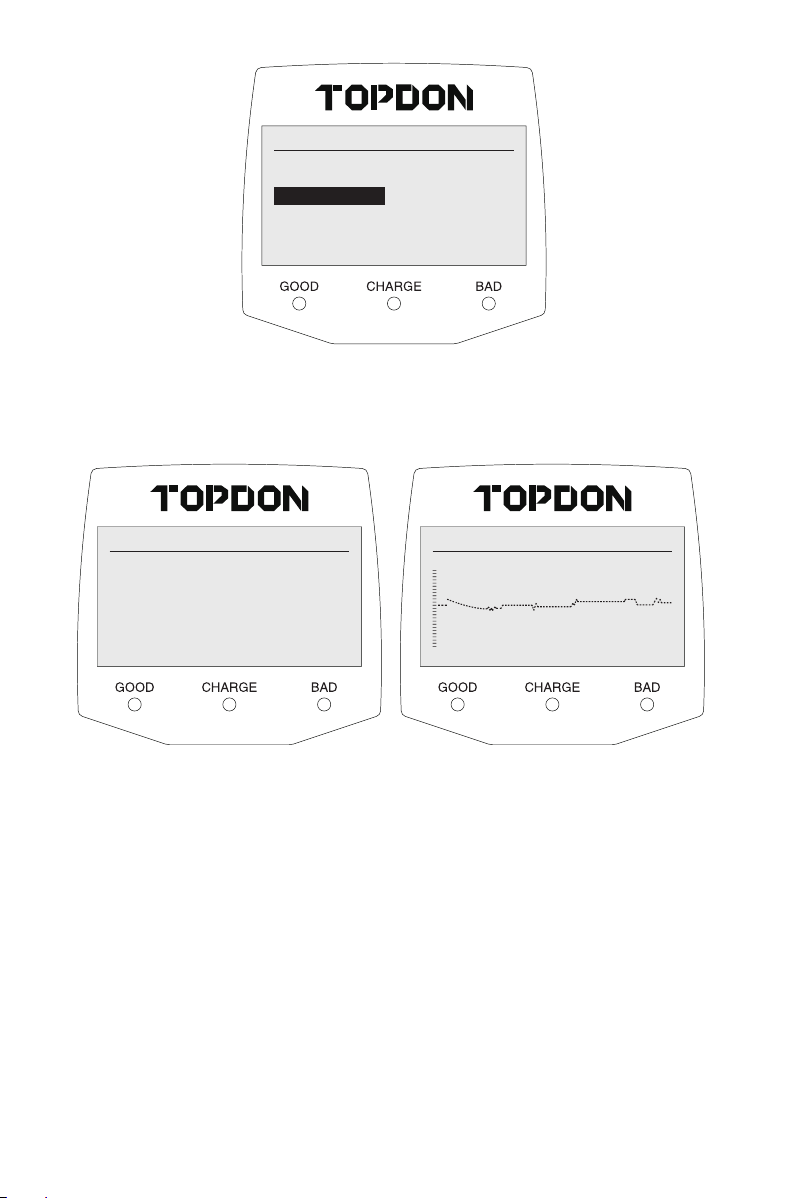
5) Test result will show as below (See Figure 4.1.5) (if there is any suggestion, please
follow accordingly):
Figure 4.1.5
2. Cranking Test
Note:
1) Turn off the engine and all accessories.
2) The test only applies to 12V lead-acid batteries.
Test Steps:
1) Select "2. Cranking Test" and press "Enter".
Figure 4.2.1
Main Menu
1.Battery Test
2.Cranking Test
3.Charging Test
4.Review Data
5.Language
6.About
EN I 14
Setting Rate
GOOD BATTERY
250CCA
12.95V
11.96mΩ
300A
Healthy
:
60%
Charge
:
98%
Internal R =
Rated
:
3. Charging Test
Note:
1) The test only applies to 12V lead-acid batteries.
Test Steps:
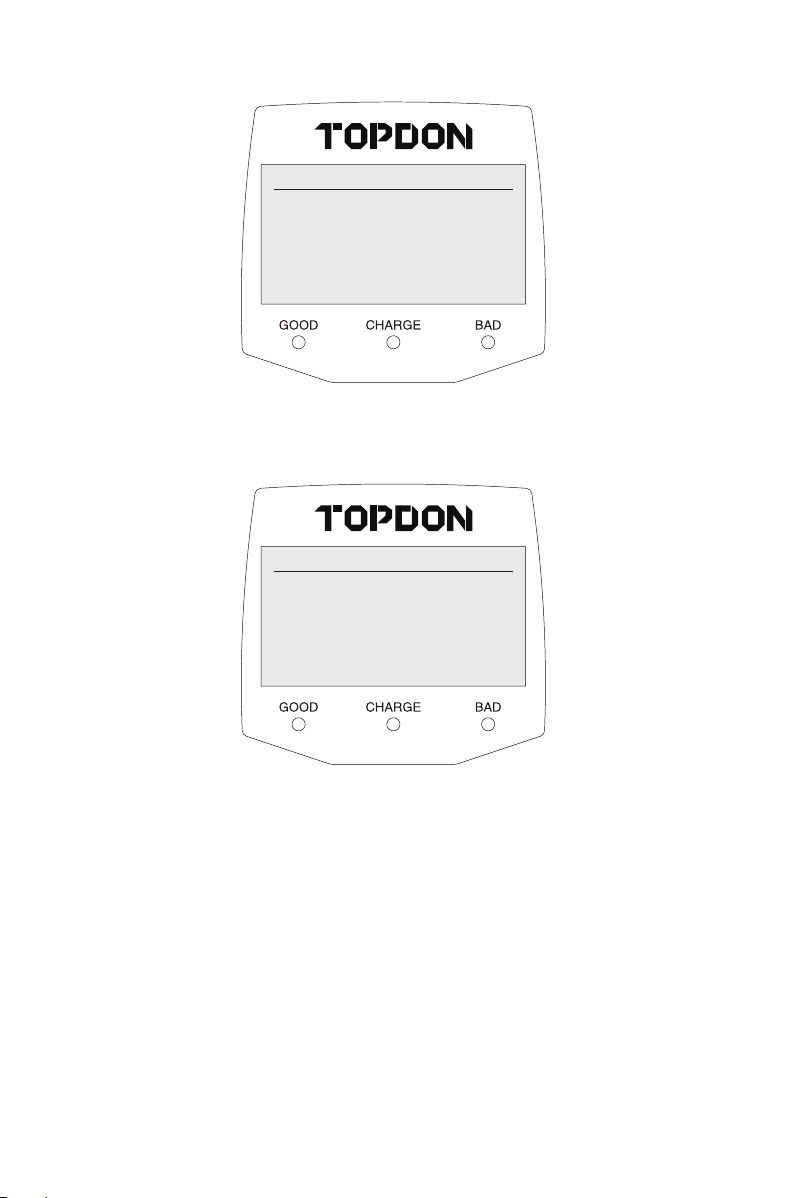
1) Select "3. Charging Test" and press "Enter".
Figure 4.2.2 Figure 4.2.3
Cranking Test Cranking Test
2) Start the engine as prompted and the test result will show as below.
Refer to the table below to better understand the test result.
Item
1
2
3
Cranking Voltage (V)
V < 9.6
9.6 ≤ V < 10.7
V ≥ 10.7
Conclusion
Cranking Low
Normal
Good
START ENGINE
TIME
VOLTAGE
NORMAL
1024ms
10.12V
30
EN I 15
EN I 16
Figure 4.3.1
Main Menu
1.Battery Test
2.Cranking Test
3.Charging Test
4.Review Data
5.Language
6.About
2) Start the engine as prompted and press "Enter" to start the ripple test.
Figure 4.3.2 Figure 4.3.3
Charging Test RIPPLE TEST
Please start engine,
Press ENTER to continue.
12.98V
EN I 17
3) Wait for a few seconds for the load test to nish.
4) Increase engine speed and maintain at 2500 rpm for 5 seconds as prompted.
Figure 4.3.5
Charging Test
Increase RPM to 2500r/min
and keep it 5 seconds.
Press ENTER to continue.
Figure 4.3.4
Charging Test
LOADED TESTING
****
EN I 18
5) Press "Enter" and then the result will show as below (See Figure 4.3.6).
Refer to the table below to better understand the test result.
Figure 4.3.6
Charging Test
CHARGING LOW
12.95V
12.95V
20mV
Loaded
Unloaded
Ripple
Item
1
2
3
4
Cranking Voltage (V)
V < 12.8
12.8 ≤ V < 13.2
13.2 ≤ V < 15
V ≥ 15.0
Conclusion
No Output
Charging Low
Charging Normal
Charging High
4. Review Data
4.1 Select "4. Review Data".
Figure 4.4.1
Main Menu
1.Battery Test
2.Cranking Test
3.Charging Test
4.Review Data
5.Language
6.About

EN I 19
4.2 Press "Enter" to display the test results saved.
Figure 4.4.2
Setting Rate
GOOD BATTERY
250CCA
12.95V
11.96mΩ
300A
Healthy
:
60%
Charge
:
98%
Internal R =
Rated
:
Note:
The device will only save and display the latest record of each tests. Latest
results of each tests will be synchronized to and saved in the APP after the APP
is installed and connected via Bluetooth. Records of all tests done via the APP
side can be checked in the APP. Results of tests done via the APP will not be
sent to the device.
EN I 20
Search BT100W in the App Store™ or Google Play™, download and install it to your
mobile device.
Figure 5.2.1
SECTION 5 TEST THROUGH BT100W APP
Note:
This APP is compatible with iOS 10.0 or later/Android 5.0 or later.
1. Download the APP and Install
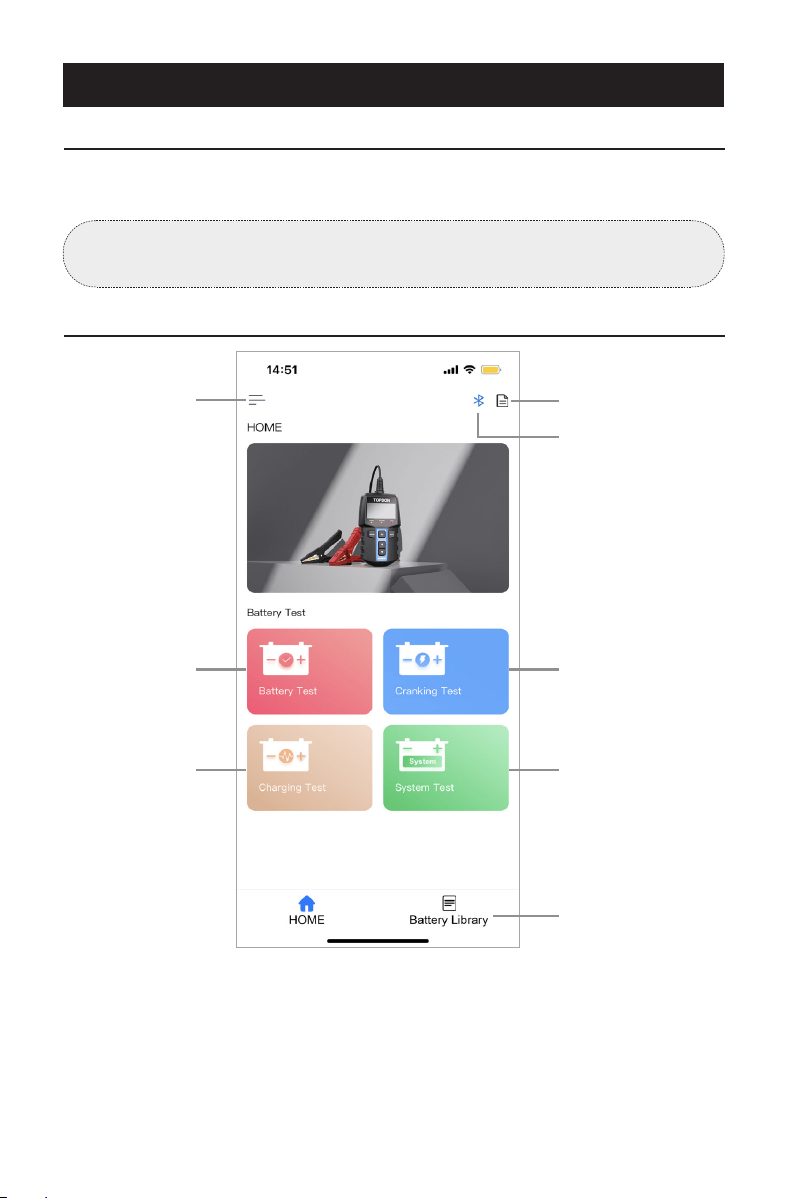
2. Homepage
Test Report
Bluetooth
Connection
Cranking TestBattery Test
Settings
Battery Library
System TestCharging Test

EN I 21
Settings
• Feedback: If you have any doubts or suggestions, write a feedback to TOPDON
technical team for support.
• Firmware upgrade: Tap it to check if any available upgrade has been released.
Bluetooth Connection
Only after connecting the APP with the Bluetooth of the battery tester can tests via
the APP be done. Tap the Bluetooth icon on the upper right to search BT100W and
connect.
Note:
Once the Bluetooth is connected, all buttons except Exit on the tester will stop
working. Pressing Exit will terminate the test on the APP and resume the
functions of buttons on the tester. After that, automatic Bluetooth connection
will be not possible. You can only manually connect it again.
Note:
1) Turn off the engine and all accessories.
2) Turn on the vehicle headlamps for 10 seconds until the battery voltage drops
back to normal value if the battery is just fully charged.
3) The test only applies to 12V lead-acid batteries.
3. Battery Test
Test Steps:
1) Tap "Battery Test" to initiate the test.
EN I 22
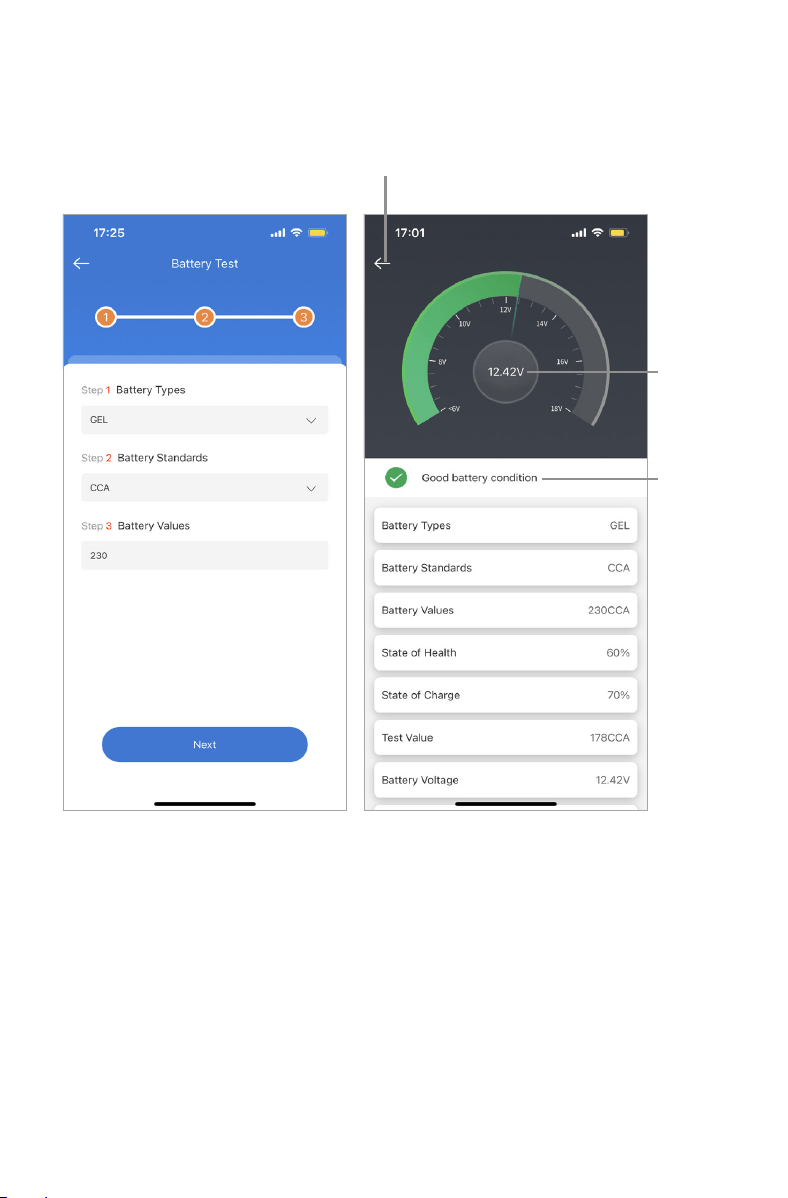
2) Select battery type and battery standard, enter battery value.
3) Press "Next" and the test result will show as below (See Figure 5.3.2). You can save
and share the test result with any individual or available applications.
Figure 5.3.1 Figure 5.3.2
Test
result
Battery
voltage
Back
EN I 23
Figure 5.4.1 Figure 5.4.2
Note:
1) Turn off the engine and all accessories.
2) The test only applies to 12V lead-acid batteries.
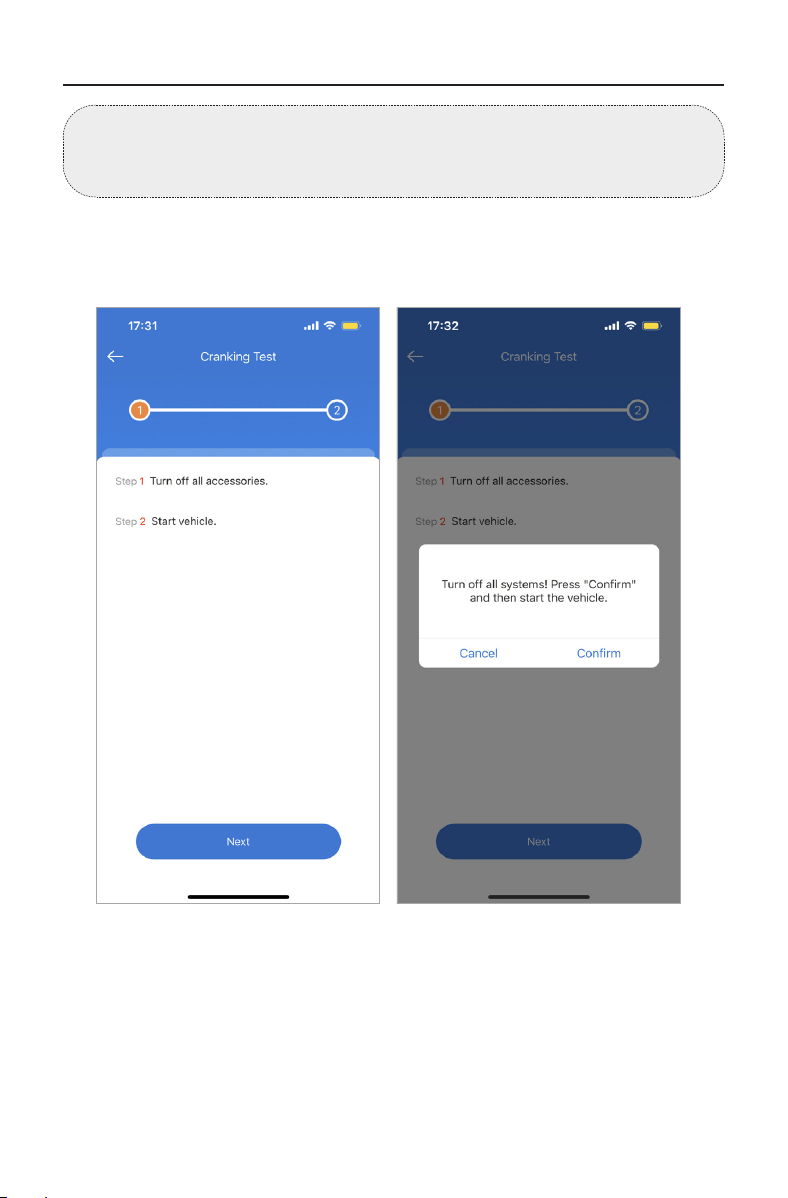
4. Cranking Test
Test Steps:
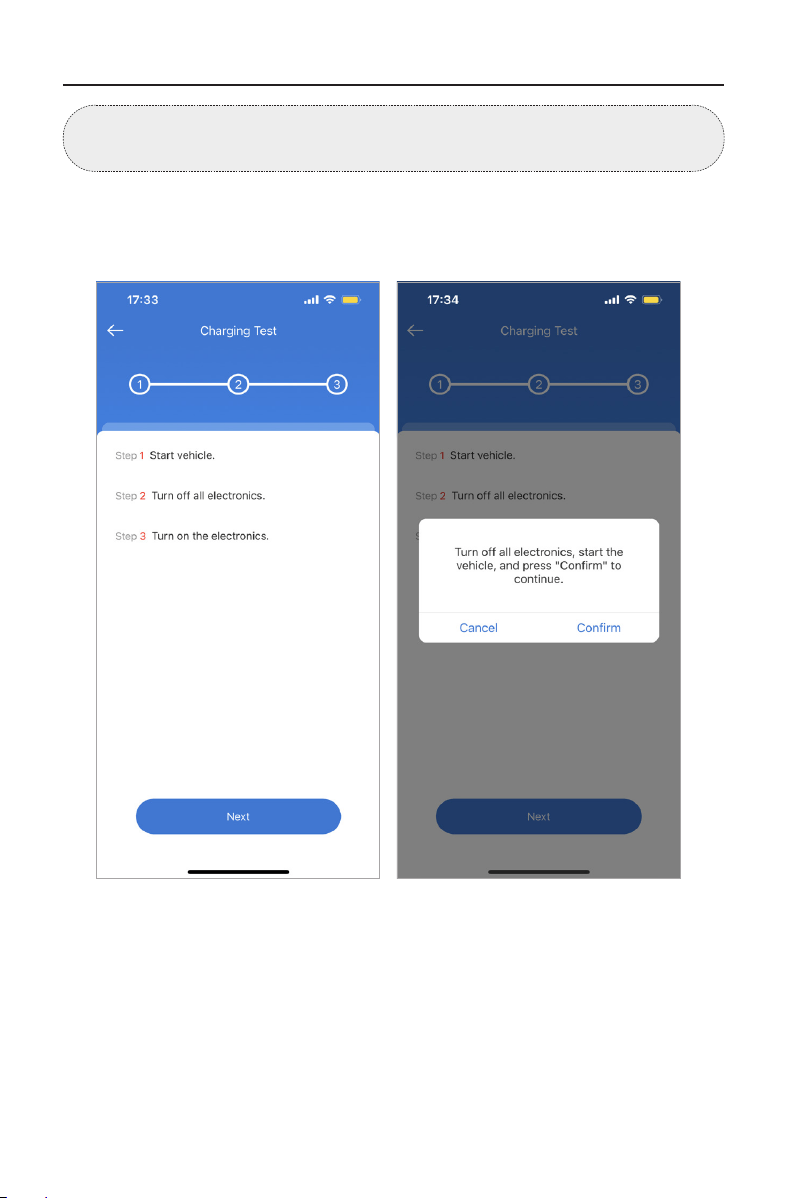
1) Tap "Cranking Test" and press "Next" to start.
2) Turn off all accessories, press conrm and start the vehicle as prompted.
EN I 24
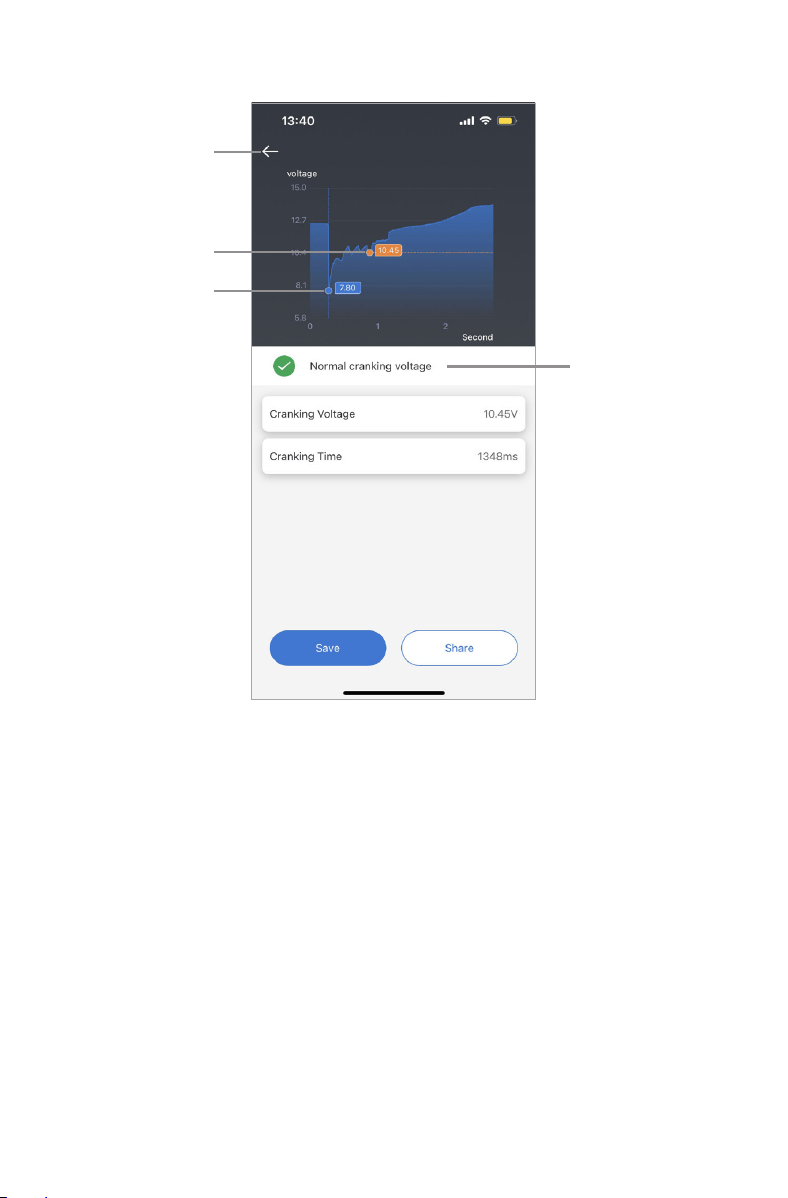
3) The test result will show as below (See Figure 5.4.3).
Figure 5.4.3
Back
Cranking voltage
The lowest
cranking voltage
Test result
EN I 25
Figure 5.5.1 Figure 5.5.2
Note:
The test only applies to 12V lead-acid batteries.
5. Charging Test
Test Steps:
1) Tap "Charging Test" to initiate the test.
2) Press "Next", turn off all accessories and start the vehicle as prompted.
EN I 26
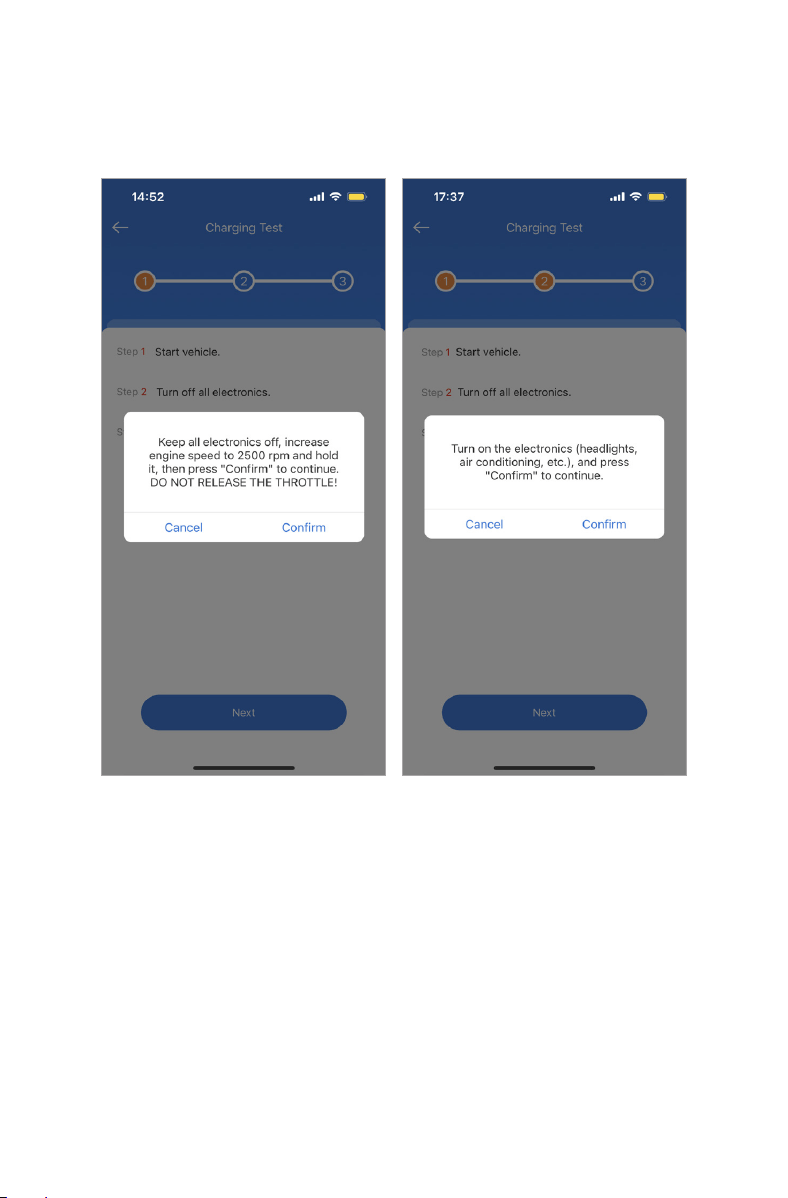
Figure 5.5.3 Figure 5.5.4
3) Press "Conrm" and then press "Next" to proceed.
4) With all accessories off, increase the engine speed and maintain at 2500 rpm.
DO NOT RELEASE THE THROTTLE!
5) Press "Conrm" and then press "Next" to proceed.
6) Turn on the accessories as prompted and press "Conrm".
EN I 27
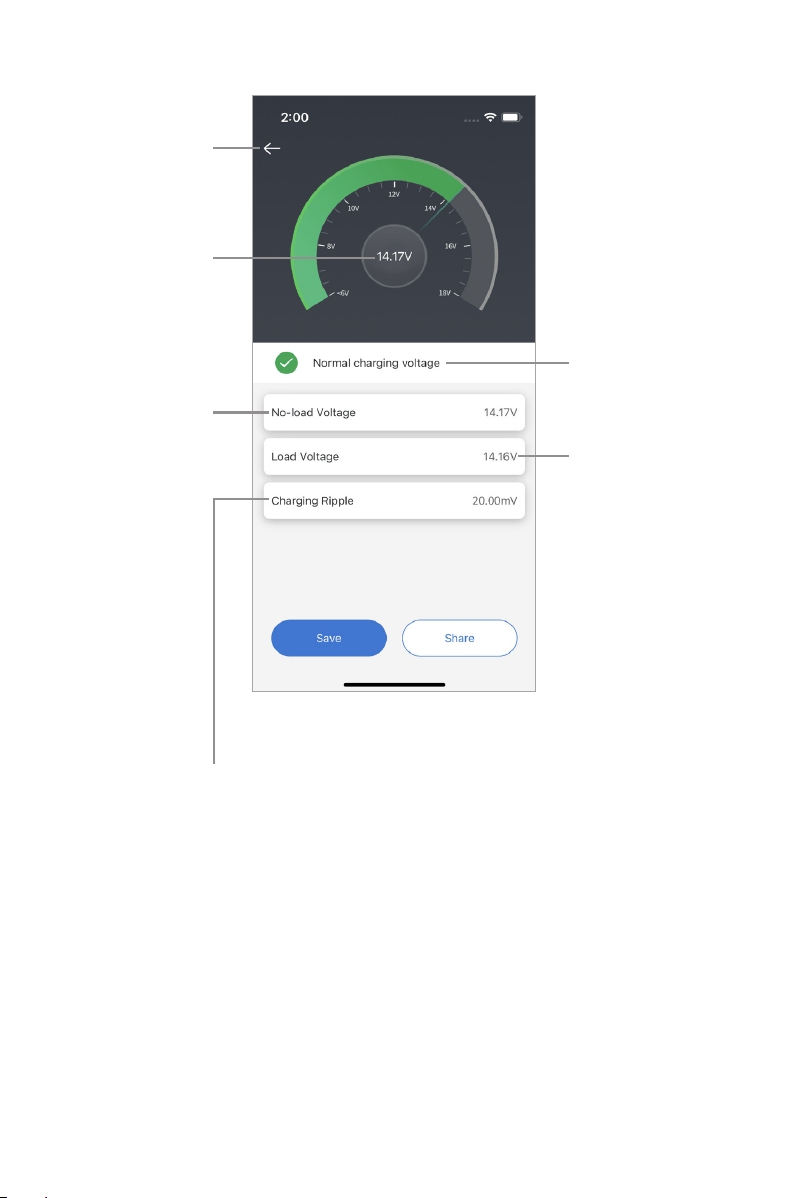
Figure 5.5.5
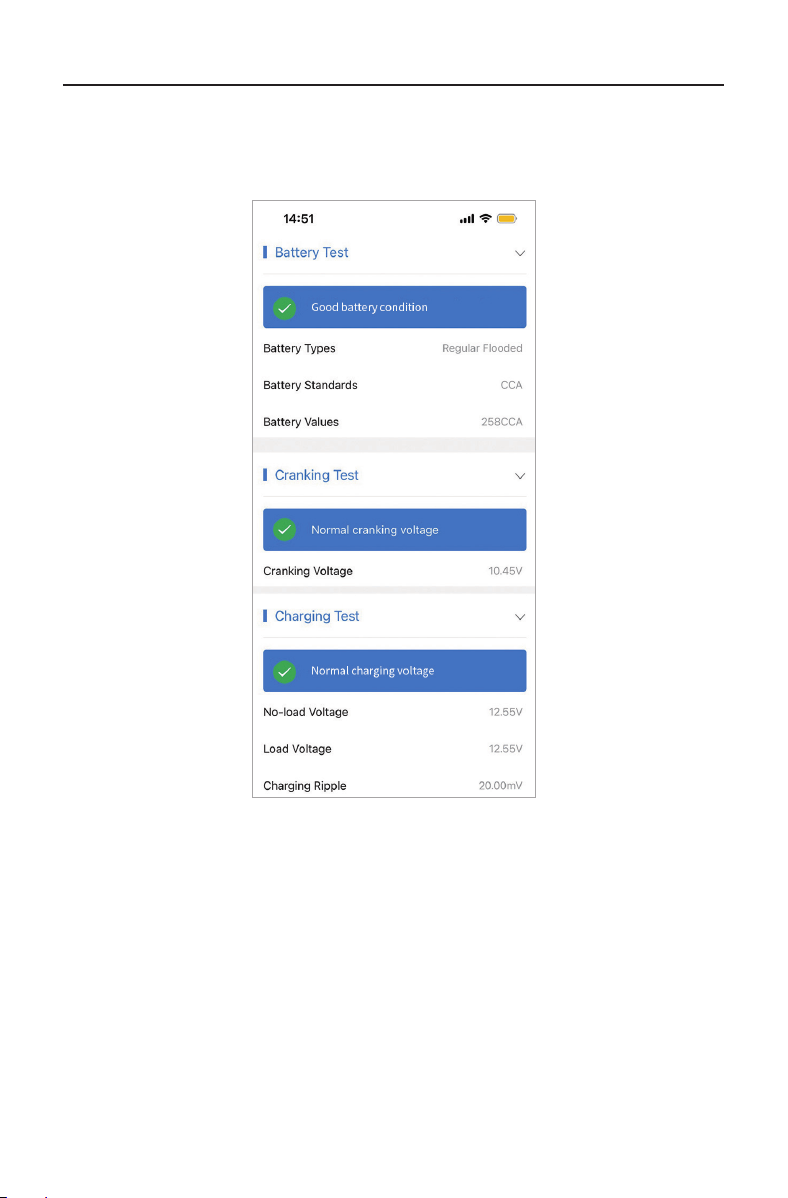
7) The test result will show as below (See Figure 5.5.5).
Charging Ripple: A vehicle's battery operates
on one-way direct current (DC) electricity, while
alternators output alternating current (AC)
electricity. In this process, the power needs to
go through the diode rectier to turn into a
direct current - that's when the ripple occurs.
Back
No-load voltage
No-load Voltage:
voltage measured
with accessories
off.
Test result
Load Voltage:
voltage measured
with accessories
on.
EN I 28
6. System Test
The system test performs all the above 3 tests in one procedure. The tests will
proceed one by one and the result for each test will be displayed only when all the
tests are nished (See Figure 5.6.1). Steps for the system test are the same as those
for the previous 3 tests. Please follow accordingly.
Figure 5.6.1
EN I 29
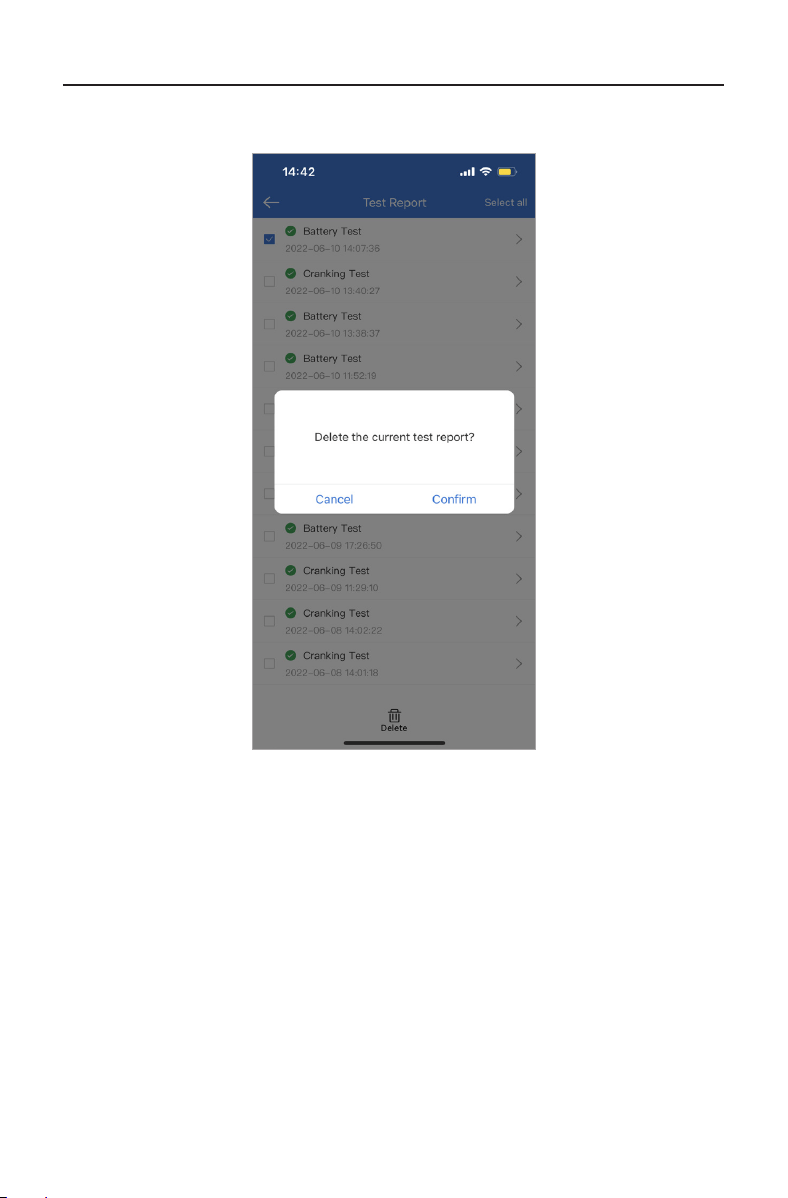
7. Test Report
Test Reports in the APP save all test records including those from the tester device
.
Tap the report icon on the upper right to view them and delete if needed.
Figure 5.7.1
EN I 30
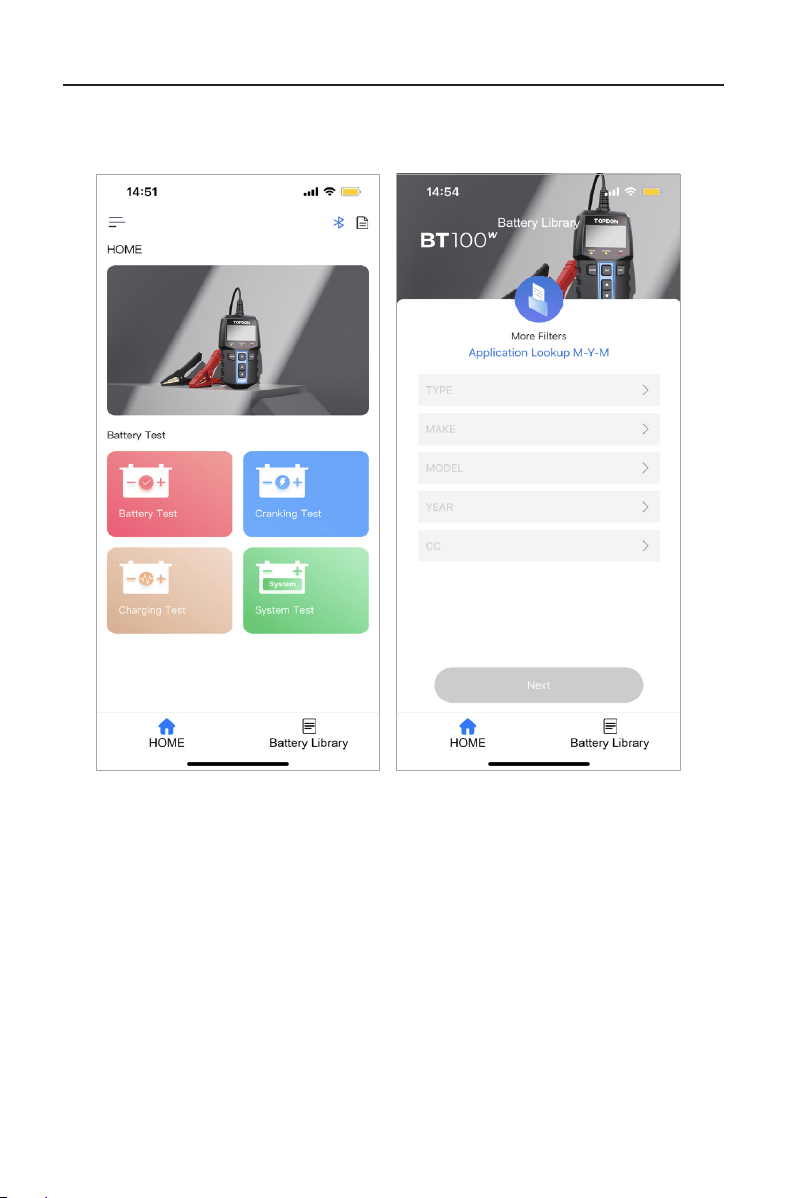
8. Battery Library
1) Battery Library is designed to check detailed information of the batteries. Press
Battery Library on the homepage (See Figure 5.8.1) and follow the prompts to enter
like TYPE, MAKE, MODEL, YEAR and CC (See Figure 5.8.2).
Figure 5.8.1 Figure 5.8.2
EN I 31
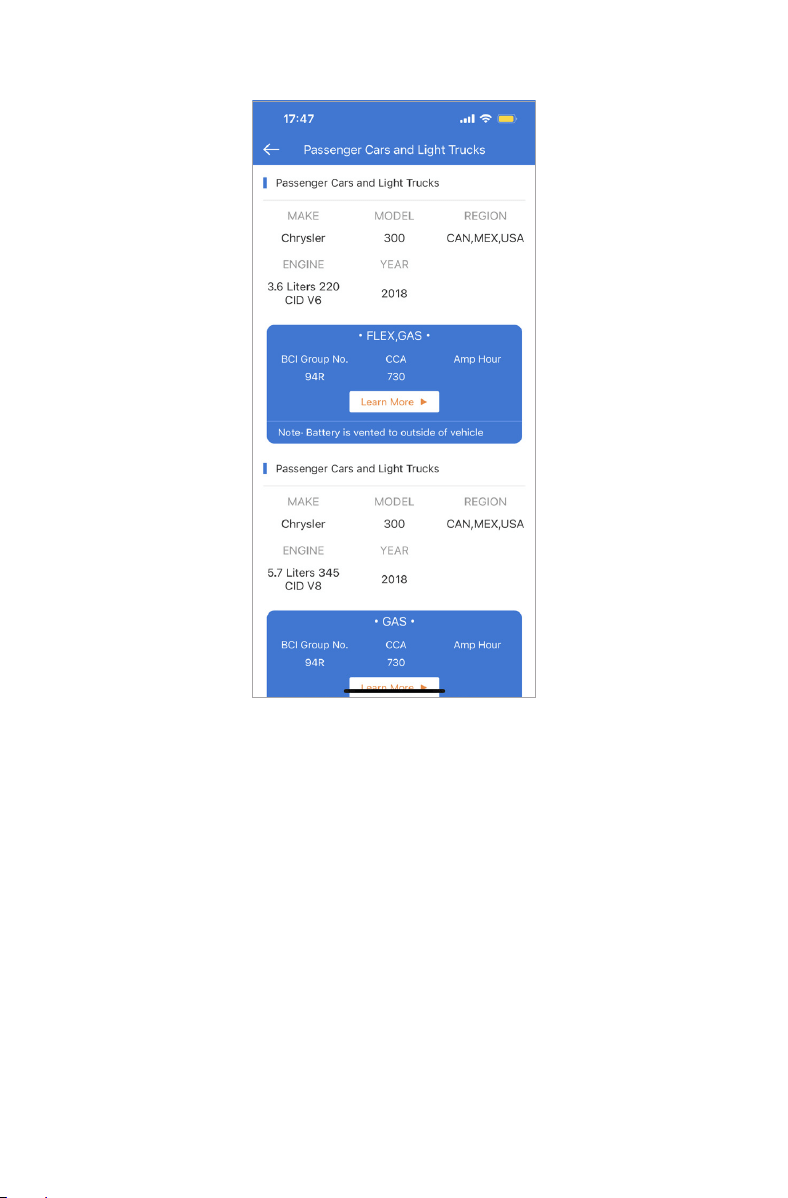
2) Details of your battery will be shown as below (See Figure 5.8.3).
Figure 5.8.3

SECTION 6 TECHNICAL SPECIFICATION
SECTION 7 FAQ
Display
Working Temperature
Storage Temperature
Dimensions
Weight
128 x 64 LCD display
-10°C~55°C (14°F~131°F)
-20°C~75°C (-4°F~167°F)
136.5 x 75.5 x 22.5mm (5.37 x 2.97 x 0.89")
246g (8.68 oz)
Q: Is the BT100W able to test vehicle alternator?
A: Yes. It can.
Q: Will the BT100W save the most recent test results in memory?
A: Yes. It will keep the most recent test results in data review.
Q: Is the BT100W able to test motorcycle batteries?
A: It can test 12V batteries between 100 and 2000 CCA. If relevant specications of the
motorcycle battery lie in the testing range, tests will be applicable.
Q: Can the rmware be updated?
A: Yes. You can check for any update under the "Settings" section in the APP.
Q: How to set the CCA range?
A: You can set the data near to the CCA standard number of your battery.
Q: Does the BT100W test 12V deep cycle batteries?
A: Yes. It does.
Q: Will the BT100W work with marine batteries?
A: Yes. It can work with marine batteries.
Q: Will the BT100W accurately load test ATV batteries?
A: Yes. It can accurately load test ATV batteries.
Q: What does SOH, SOC, and RES mean?
A: The SOH refers to the “State of Health”. The SOC is the “State of Charge” and the
RES is the “Resistance Value” of the battery.
EN I 32

SECTION 8 WARRANTY
SECTION 9 FCC WARNINGS:
TOPDON One Year Limited Warranty
The TOPDON Company warrants to its original purchaser that TOPDON products will
be free from defects in material and workmanship for 12 months from the date of
purchase (Warranty Period). For the defects reported during the Warranty Period,
TOPDON will, according to the technical support analysis and conrmation, either
repair or replace the defective part or product.
This limited warranty is void under the following conditions:
· Misused, disassembled, altered or repaired by a non-TOPDON technical repair
specialist.
· Careless handling and/or improper operation.
This device complies with Part 15 of the FCC Rules. Operation is subject to the
following two conditions: (1) this device may not cause harmful interference, and (2)
this device must accept any interference received, including interference that may
cause undesired operation. This equipment has been tested and found to comply
with the limits for a Class B digital device, pursuant to part 15 of the FCC Rules. These
limits are designed to provide reasonable protection against harmful interference in
a residential installation. This equipment generates, uses, and can radiate radio
frequency energy and, if not installed and used in accordance with the instructions,
may cause harmful interference to radio communications. However, there is no
guarantee that interference will not occur in a particular installation. If this
equipment does cause harmful interference to radio or television reception, which
can be determined by turning the equipment off and on, the user is encouraged to
try to correct the interference by one or more of the following measures:
• Reorient or relocate the receiving antenna.
• Increase the separation between the equipment and receiver.
• Connect the equipment into an outlet on a circuit different from that to which the
receiver is connected.
• Consult the dealer or an experienced radio/TV technician for help.
221111
EN I 33
Notice: All information in this manual is based on the latest information
available at the time of publication, and no warranty can be made for its
accuracy or completeness. TOPDON reserves the right to make changes at
any time without notice.