
Technical Support and E-Warranty Certificate
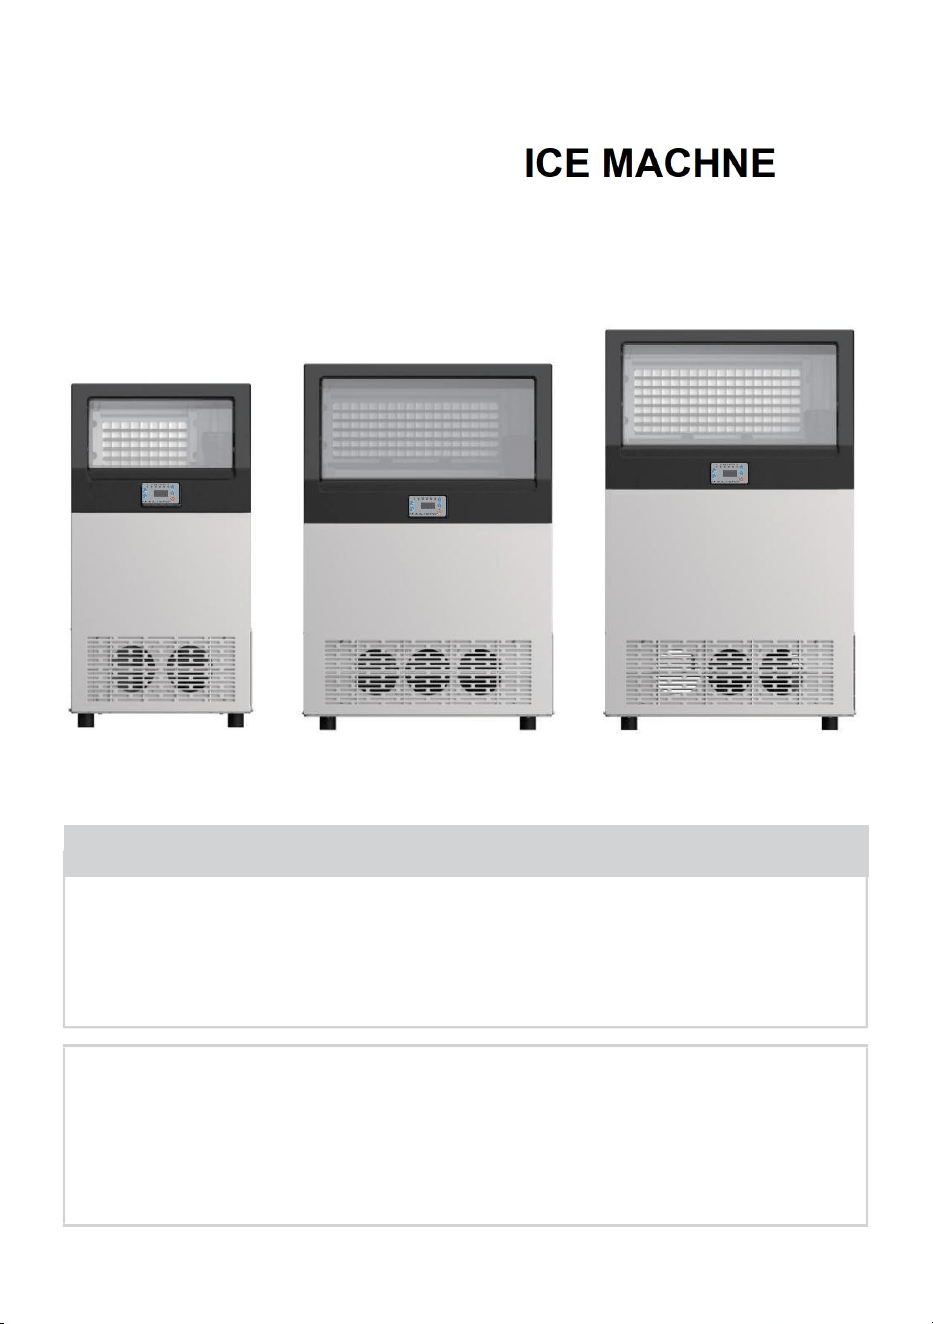
ICE MACHNE
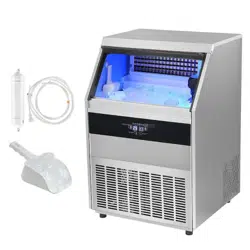
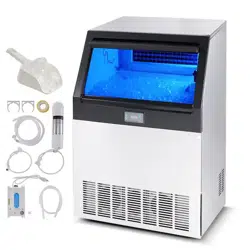
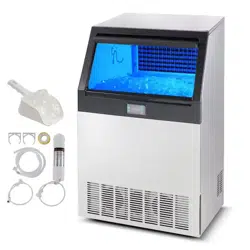
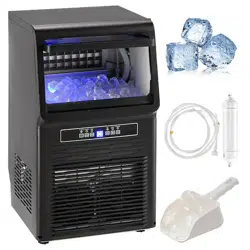
MODEL:LB100T/LB160T/LB200T/LB265T
We continue to be committed to provide you tools with competitive price.
"Save Half", "Half Price" or any other similar expressions used by us only represents an
estimate of savings you might benefit from buying certain tools with us compared to the major
top brands and does not necessarily mean to cover all categories of tools offered by us. You
are kindly reminded to verify carefully when you are placing an order with us if you are
actually saving half in comparison with the top major brands.
- 1 -
Have product questions? Need technical support? Please feel free to
contact us:
Technical Support and E-Warranty Certificate
NEED HELP? CONTACT US!
This is the original instruction, please read all manual instructions
carefully before operating. reserves a clear interpretation of our user
manual. The appearance of the product shall be subject to the product
you received. Please forgive us that we won't inform you again if there
are any technology or software updates on our product.
MODEL:LB100T/LB160T/LB200T/LB265T
LB100T LB160T/LB200T LB265T
- 2 -
IMPORTANT SAFEGUARDS
WARNING:Read all safety warnings, instructions, illustrations and
specifications provided with this electric appliance. Failure to follow all
instructions listed below may result in electric shock, fire and/or serious
injury.
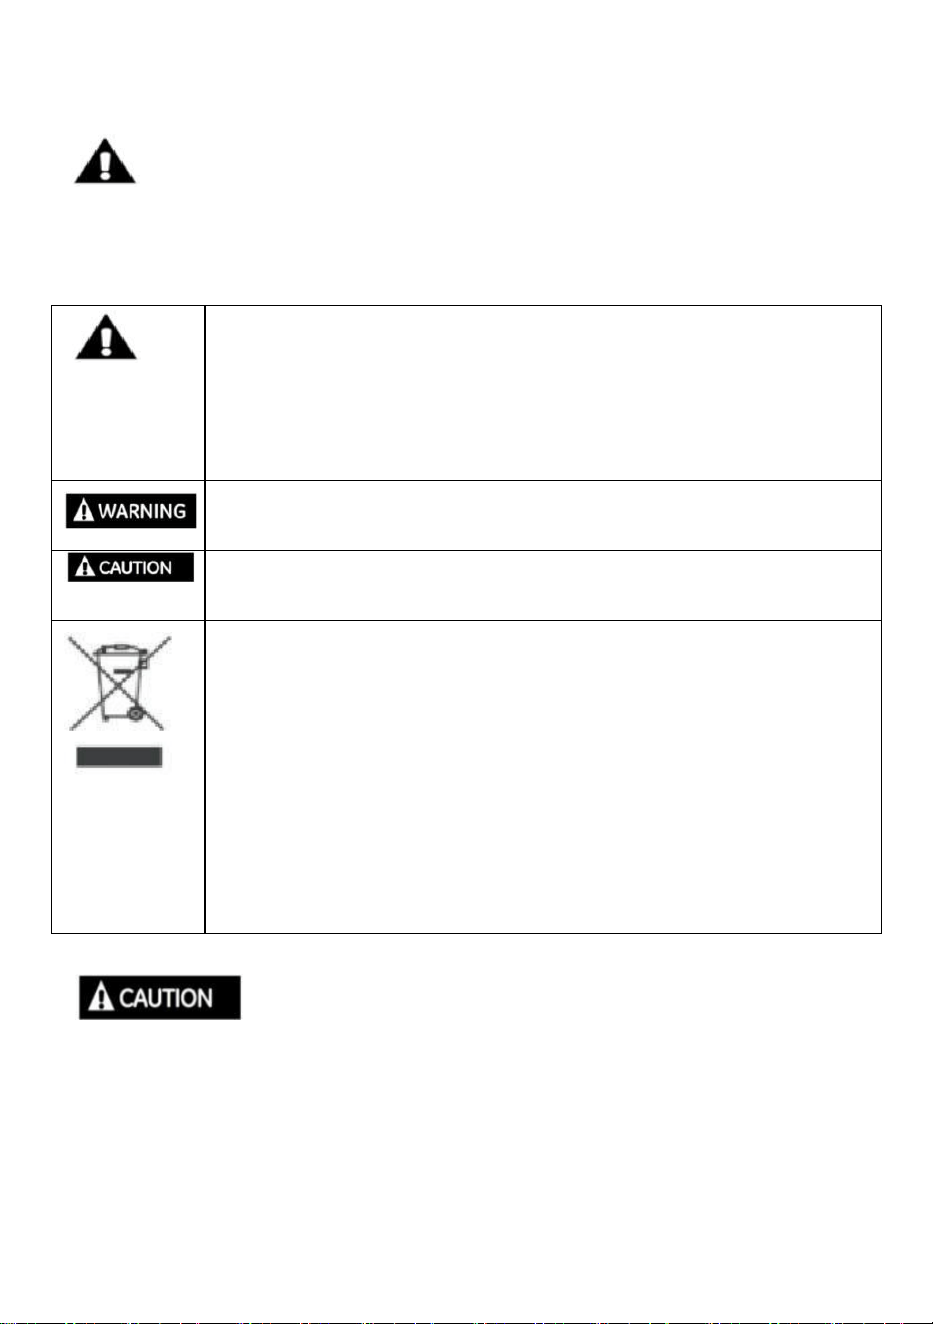
This is the safety alert symbol. This symbol alerts you to
potential hazards that can kill or hurt you and others. All
safety messages will follow the safety alert symbol and the
word “WARNING” or “CAUTION”. These words are defined
as:
Indicates a hazardous situation which, if not avoided, could
result in death or serious injury
Indicates a hazardous situation which, if not avoided, could
result in minor or moderate injury.
CORRECT DISPOSAL
This product is subject to the provision of european Directive
2012/19/EU. The symbol showing a wheelie bin crossed
through indicates that the product requires separate refuse
collection in the European Union. This applies to the product
and all accessories marked with this symbol. Products
marked as such may not be discarded with normal domestic
waste, but must be taken to acollection point for recycling
electrical and electronic devices.
ICE CAN’T BE STORED IN THE ICE BIN DURING
NIGHT TIME, IT’S NOT FRIDGE, ICE WILL BE MELTED INTO WATER
AND FLOW OUT OF THE MACHINE.

- 3 -
During using, service and disposal the appliance,
please pay attention to symbol similar as left side,
which is located on rear of appliance (rear panel or
compressor) and with yellow or orange color. It’s risk of
fire warning symbol. There are flammable materials in refrigerant
pipes and compressor. Please be far away fire source during using,
service and disposal.
To reduce the risk of fire, explosion, electric shock,
exposure to UV radiation, or injury when using your ice maker, follow
these basic safety precautions:
●
This product must be properly installed and located in accordance with
the Installation instructions before it is used.
●
When using electrical appliances,basic safety precautions should be
followed to reduce the risk of fire,electric shock and injury to persons or
property. Read all instructions before using any appliance.
●
High humidity environment will increase the risk of short circuit or electric
shock. If in doubt, please cut off the power supply of the ice maker.
●
Do not exceed power outlet ratings. It is recommended that the ice maker
is connected to its own circuit. Use only standard electrical supply that is
properly grounded in accordance with the National Electric Code and local
codes and ordinances.
●
If the ice maker is brought indoors from outdoors during the
wintertime,give it a few hours to warm up to room temperature before
plugging to power source.
●
Do not store explosives, such as combustion-supporting sprays in the
appliance.
●
The machine is intended to be used in household and similar applications
such as:

- 4 -
-kitchen areas in shops,offices and other working environments;
-farm houses
-by clients in hotels,motels and other residential type environments;
-Catering industry and similar non-retail industry.
●
This appliance can be used by children aged from 8 years and above and
persons with reduced physical, sensory or mental capabilities or lack of
experience and knowledge if they have been given supervision or
instruction concerning use of the appliance in a safe way and understand
the hazards involved. Children shall not play with the appliance. Cleaning
and user maintenance shall not be made by children without supervision.
●
Avoid direct sunlight and make sure that The machine should be used in
the household and without obstacles surrounded, good ventilation
place.There is must be 30cm at least between the four sides of the
machine with the wall.
●
Do not tip the machine over.
●
We do not recommend the use of an extension cord,as it may overheat
and become a risk of fire.
●
Don’t use any liquid other than water in the unit to make the ice.
●
Do not store or use flammable vapors or liquids near this product.
●
Do not allow children to climb, stand or hang on the ice maker. They
could seriously injure themselves.
●
Do not use with water that is microbiologically unsafe or of unknown
quality.
●
To avoid risk of injury, place power cord in such a way it cannot be pulled
on by children or cause a tripping hazard.
●
Place power cord in such a way that it is not in contact with hot surfaces.
●
Do not operate if any component, including the cord or plug, is damaged.
●
Unplug the product before cleaning or repairing, and when not in use.
(Note: If the machine needs repair, it is strongly recommended that it be
operated by professionals. Type Y attachment: If the supply cord is
damaged, it must be replaced by the manufacturer, its service agent or

- 5 -
similarly qualified persons in order to avoid a hazard.)
●
Do not immerse any part of the product in water.
●
Do not plug or unplug product with wet hands.
●
Do not place the power cord on carpet or other heat sources
●
Do not attempt to disassemble, repair, modify, or replace any part of your
product.
●
Use this product only for its intended purpose as described in this user
manual.
●
If the power cord is damaged, it must be replaced by the manufacturer or
similar professionals in order to avoid danger.
●
Do not use any accessories not recommended by the manufacturer.
●
The foaming materials inside is combustible which must be kept away
from fire.
●
It’s forbidden to pull the cable to unplug the plug,pull the plug is a must.
●
Except for the method recommended by the manufacturer, no
mechanical tools or other methods shall be used to accelerate the
defrosting process. Do not damage the refrigeration circuit.
●
There are high-pressure, flammable and explosive refrigerants in the
compressor. Do not damage the refrigeration system. Care or repair should
be carried out by professionals. Be especially careful when installing and
transporting.
●
There are heat insulation materials in the ice maker, which are
combustible materials, and must be kept away from fire sources. Repairs
must be carried out by the manufacturer or professionals. Scrap must be
disposed of by the designated recycling department.
SAVE THESE INSTRUCTIONS
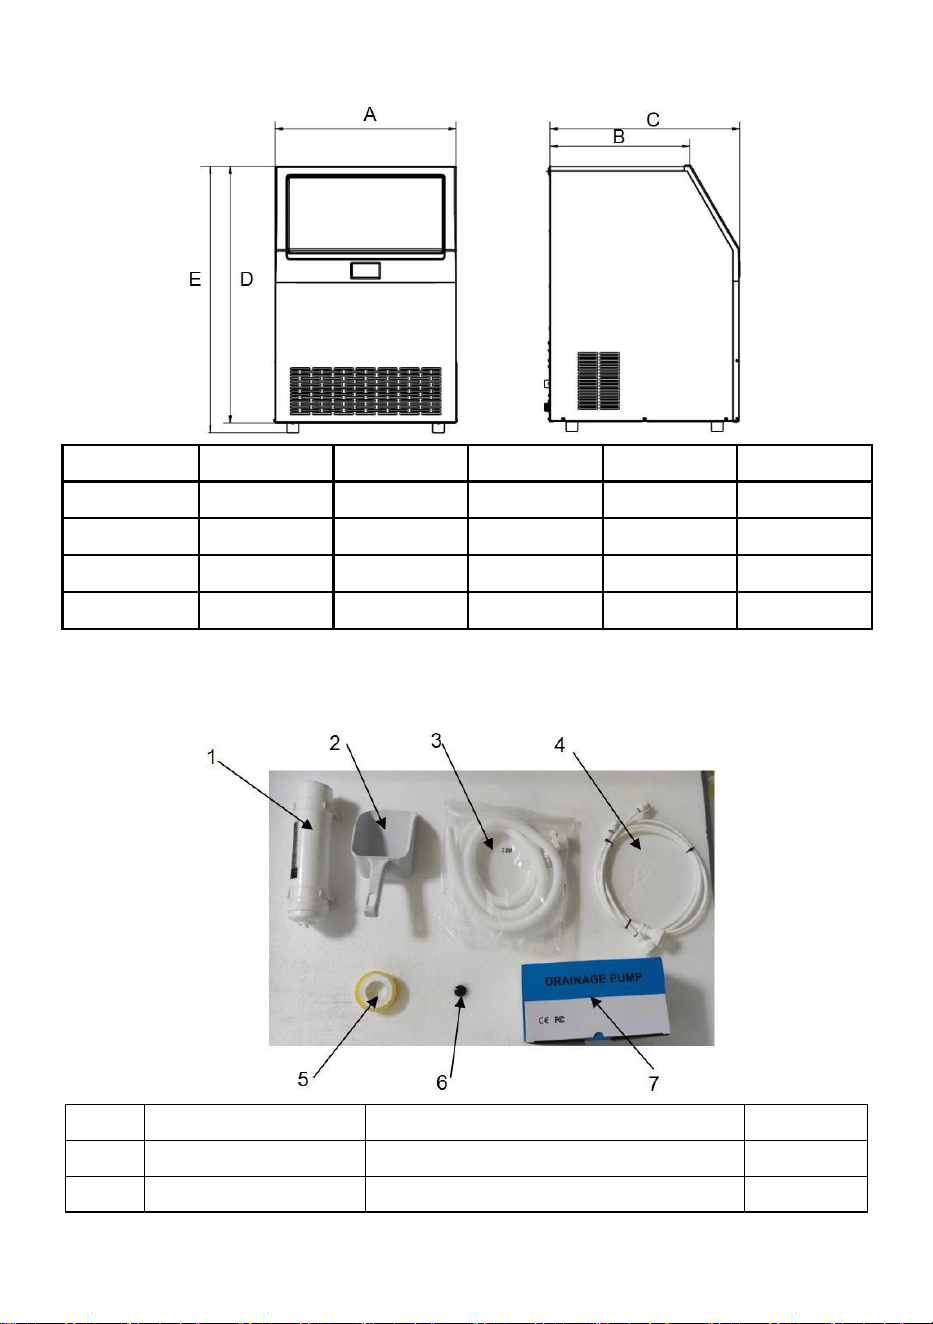
SIZE
Thank you very much for choosing this ICE machine. ICE machine are
precision instruments that should always be handled with care. Please
read all of the instructions before using it.The information will help you
- 6 -
achieve the best possible results.
A
B
C
D
E
LB100T
445
275
400
815
850
LB160T
620
480
650
880
915
LB200T
620
480
650
880
915
LB265T
620
480
650
965
1000
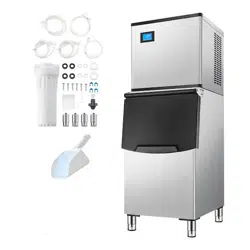
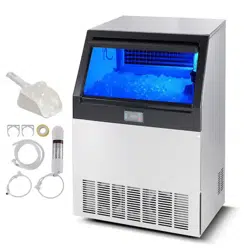
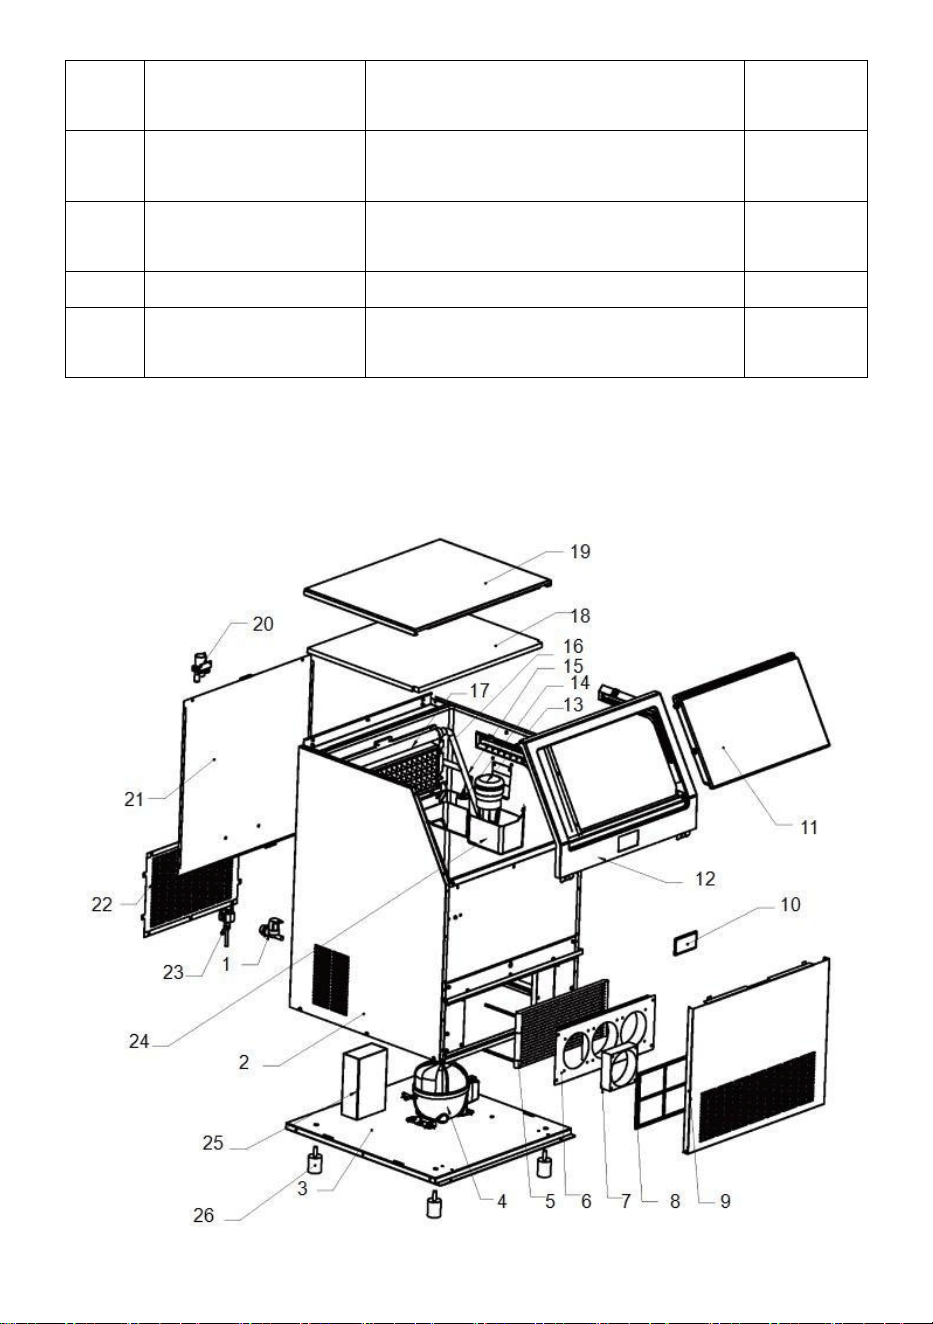
After sealing off,please contrast the packing list,check whether all radom
files and enclosures are complete,whether the machine in intact.
NO
NAME
Function
Quantity
1
Water Filter
Filter Out Water Impurities
1
2
Ice Scoop
Shovel Ice (Plastic PP)
1
- 7 -
3
Ice Maker
Drainage Pipe
Ice Maker Drainage Hose (2m)
1
4
ice Maker Water
Inlet Pipe
Connect to Ice Maker for Water
Inlet
2
5
Sealing Tape
Against Leakage when
Connecting Water Pipe
1
6
Sink plug
Block the sink
1
7
Drainage Pump
Help Ice Storage Bin Drains
Water When in Elevated Terrain
1
Some models do not include drainage pumps
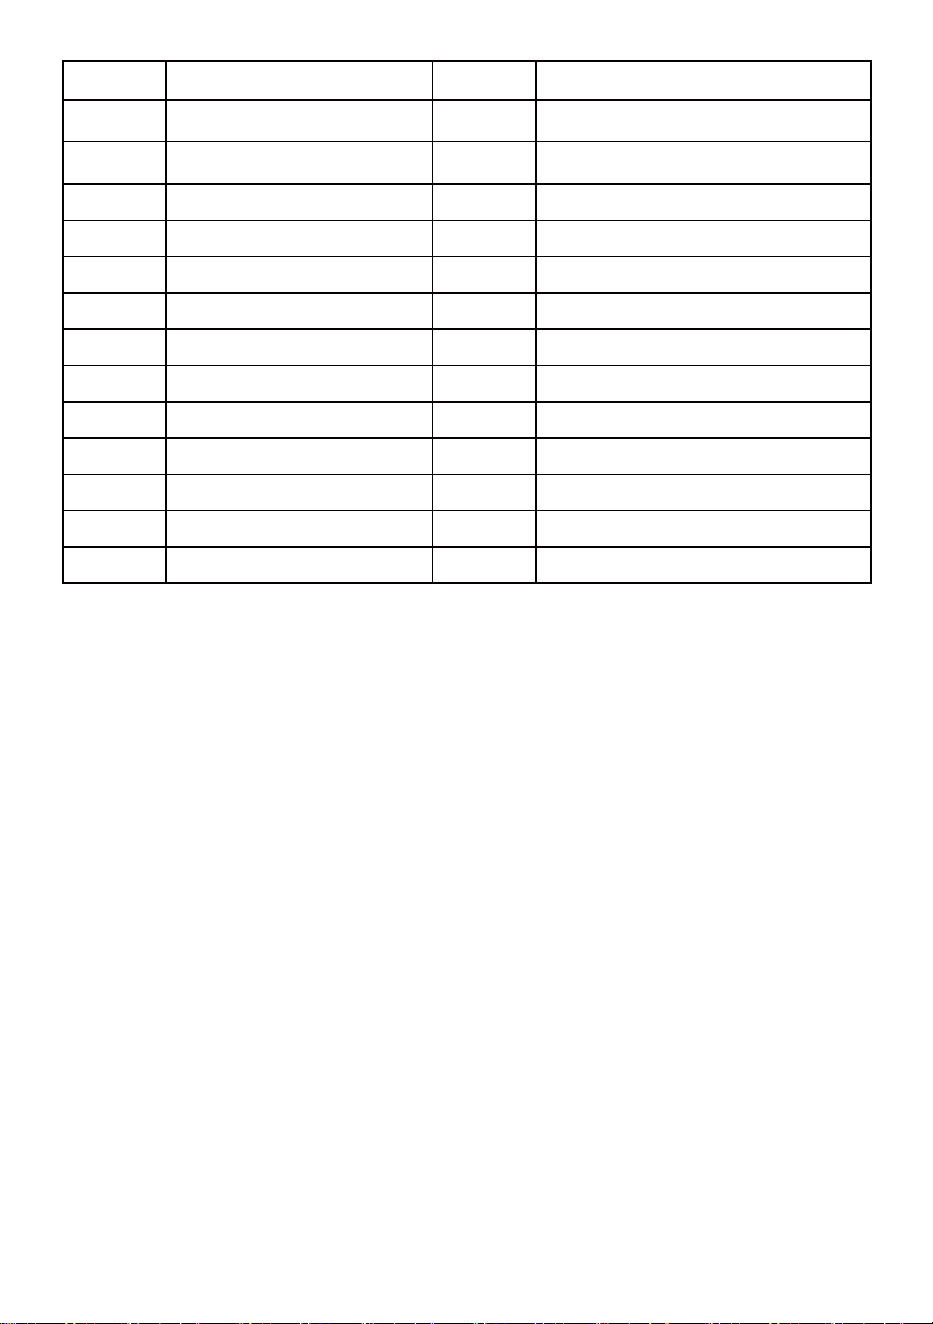
BASIC STRUCTURE
- 8 -
NO.
NAME
NO.
NAME
1
Water supply valve
14
Water level sensor
2
Cabinet components
15
Water pipe
3
Chassis
16
Evaporator
4
Compressor
17
Spray water pipe
5
Condenser
18
Lnsulation board
6
Fan bracket
19
Top panel
7
Fan
20
water supply valve
8
Filter screen
21
Real panel(above)
9
front panel
22
Real panel(below)
10
Control panel
23
Deicing solenoid valve
11
Door panel
24
Water tank
12
Door frame
25
Electrical box
13
Pump
26
Machine feet
NOTICE TO ALL USERS
1.
Please use the standard pre-purified water filter and replace the filter
element regularly to ensure it’s food hygienic and reduce the risk of failures
caused by water scale;
2.
For the first time of making ice, due to the high inlet water temperature,
normally it takes a little bit longer time to reduce the water temperature in
the water tank. After one or two ice-making cycles, the temperature in the
water tank will drop to 1--3°C. Machine will enter normal ice making cycle;
3.
At least every quarter (every month in areas with poor water quality), it is
necessary to descale the water circulation pipes and ice-making
components of the machine to reduce risk of failures or less efficient
ice-making caused by solenoid valves, water pumps, pipelines and
evaporator. Generally the cleaning time can be 5-30 minutes, visually when
all the yellow scale has been removed on the surface of the ice
evaporator, then it can stop.If conditions permit,you can use food-grade
descaling agent or diluted citric acid with a concentration of 20% ,pour it

- 9 -
into the water tank and activate the cleaning mode for internal circulation
cleaning, supplemented with a brush to wipe the scale on surface; if those
are not available, you can also use undiluted white vinegar, pour into the
water tank and use the same cleaning mode, supplemented with a brush to
wipe the scale on surface. Immediately after descaling, be sure to use
clean water internal and external circulation to clean the entire tank,
pipeline, water pump and evaporator at least 3 times (each time you need
to unscrew the drain cap to discharge the descaling agent) to ensure food
safety and prevent corrosion damage by residues
4.
The ambient temperature has a great influence on the ice making speed
and life cycle. Please use the equipment under ambient temperature of
15-35 ℃, and ensure that the space surrounding and even space on the
top are more than 30cm, then the equipment can be well ventilated and
working;
5.
Unplug the power supply at least quarterly, open the front panel and use
compressed air with a soft brush to remove the dust on the surface of the
condenser, then the equipment can run normally and ice-making efficiency
is good;
6.
Please ensure that the power supply voltage is stable and the socket is
reliably grounded for personal and equipment safety;
7.
If main power is accessible inside the equipment. Non-professionals are
not allowed to do disassemble and repair works, Any maintenance
involving the inside components of equipment must be performed when it
is completely powered off!
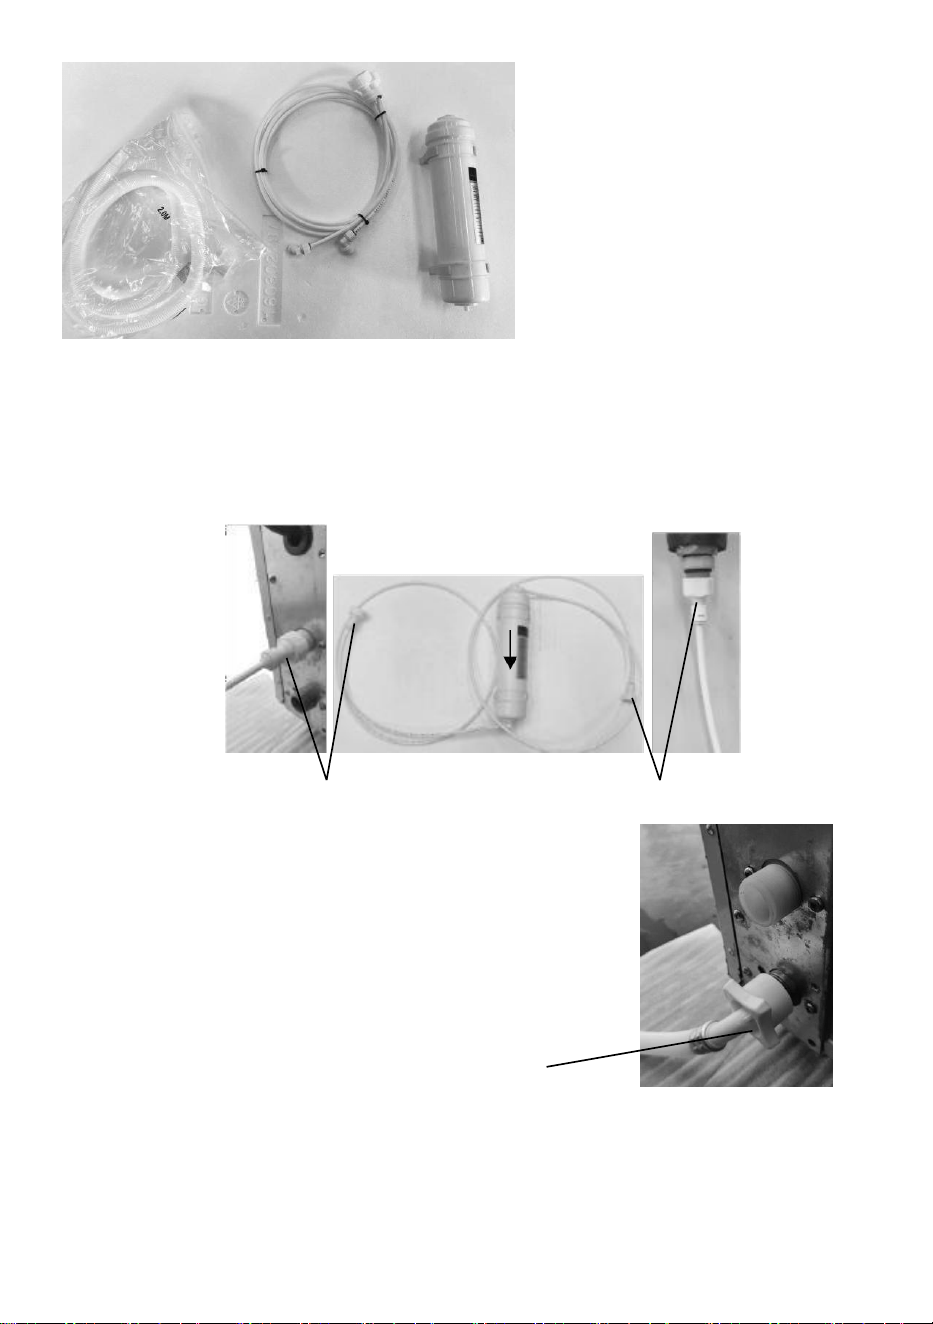
INSTALLPACKING LIST
A.
Take out the inlet pipe, filter, filter connecting pipe, and drainage pipe
accessories from the accessory box (corresponding to item numbers
1/3/4#).
- 10 -
B.
Install the filter element and water faucet: Use two 2-way PE pipes into
each end of the filter(pay attention to the direction of the arrow on the filter),
connector to connect the inlet pipe of the ice maker to the filter element,
use a ¾”connector to connect the ice maker, and use a ½”connector to
connect the Drinking water connectiongend .
a ¾”connector
a ½”connector
C.Take out the water inlet pipe, filter, and drain pipe
in the accessory box (the water inlet route shown in
the diagram -- from the faucet to the main unit
water inlet pipe ; the drain route -- from the drain
outlet to the floor drain), and connect them to the
positions shown in the figure respectively.
Ice Maker Drainage Pipe
The Whole Machine Drainage Installation Notes:
1. Gravity Drainage: Combine the drainage pipes of the main unit and ice
storage bin, and connect them to the floor drain together.
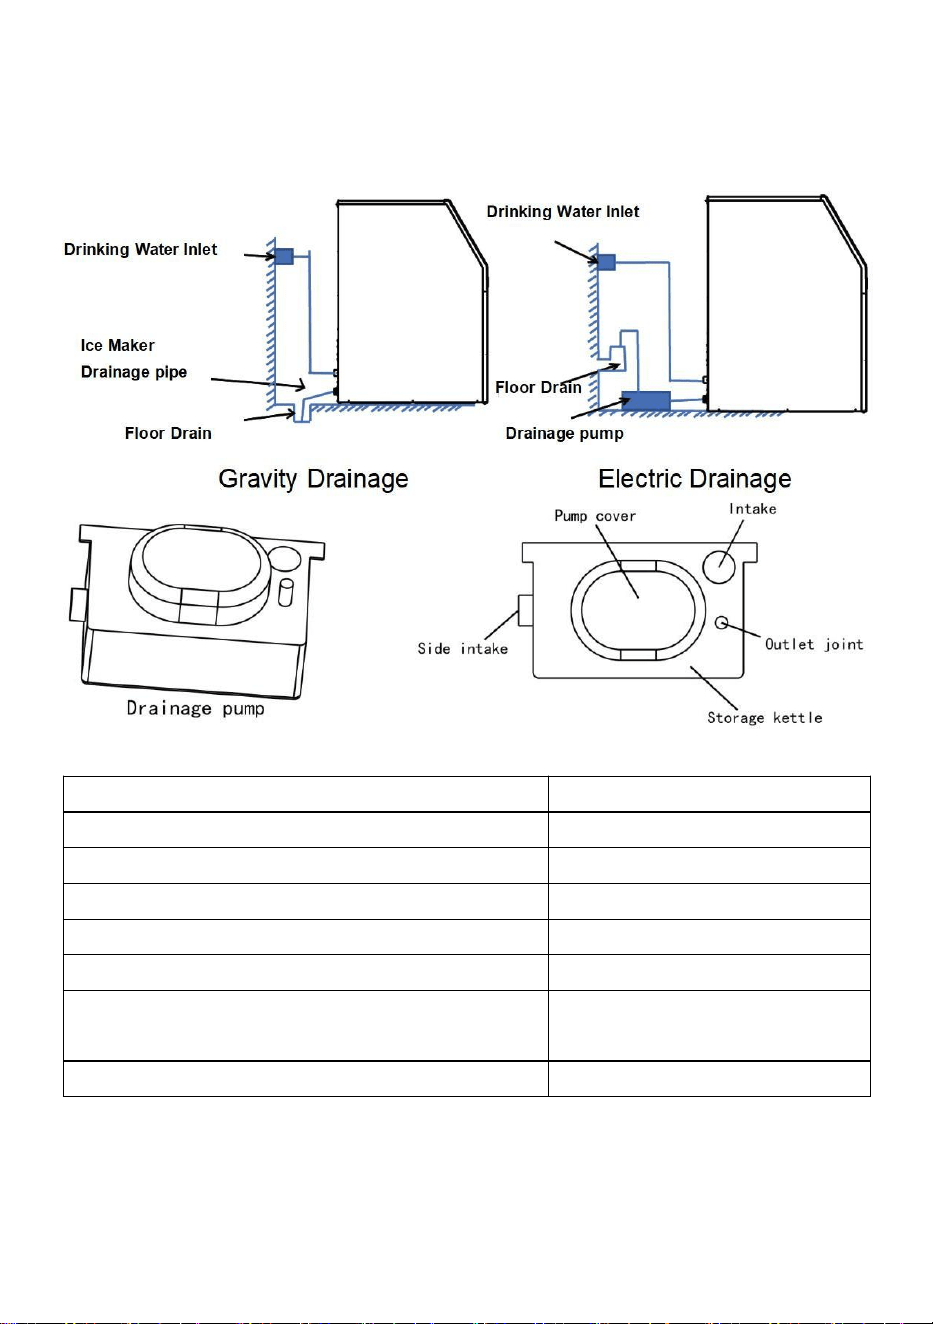
- 11 -
2. Electric Drainage: Connect the drainage pipes of the main unit and ice
storage bin to the electric water pump. Please note that this pump requires
a separate power supply.
Voltage
100-230V 50-60Hz
Maximum lift
2.0M-2.5M
Operation grade
Discontinuous
Storage tank capacity
1.2L
Applicable Power
15KW
Noise
20dnB(A)
Applicable ambient temperature
1℃-50℃
Power consumption
5W
Refer to the product manual for detailed information
Some models do not include drainage pumps
- 12 -
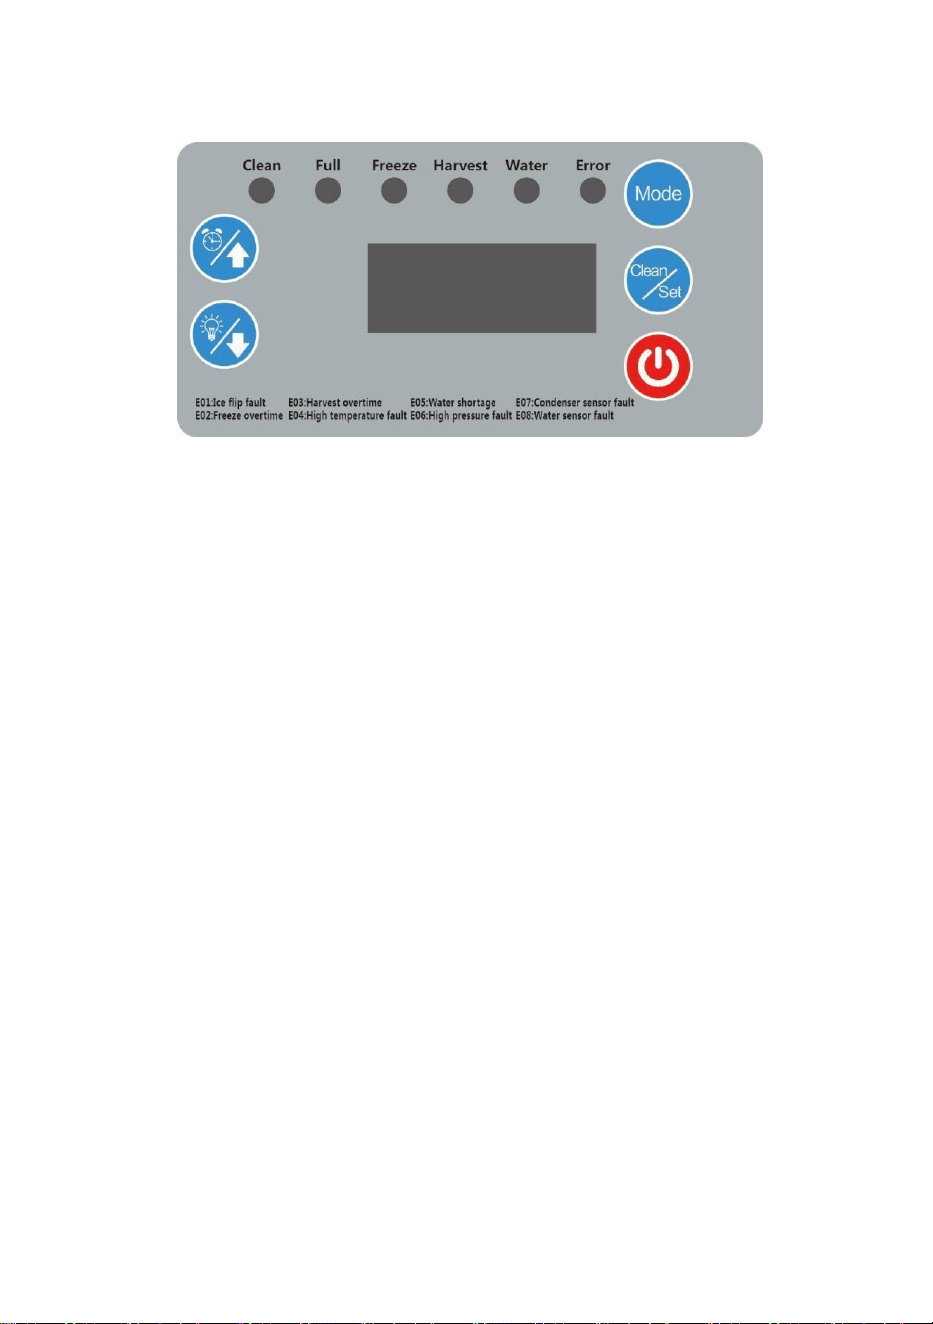
LCD FULL PAGE DISPLAY
buttons on display board
on/off buttons
press 3 seconds to turn off the machine under turn on status
press on/off button to turn on the machine under turn off status
press the on/off button to exit setting under ice thickness setting and filling
water adjust status
mode button
switch the ice making program
clean/set button
press to clean status under machine turn off status
+/reservation button
press to ice thickness adjust under pressure equilibrium、making ice、
unload ice、ice full status
click to increase 1, long press the button to increase continuously under ice
thickness adjust status
click to reservation time setting status under turn off status
-/light button
click to decrease 1,long press the button to decrease continuously under
ice thickness adjust status
- 13 -
8.
fault codes
E-01.ice full button falut, skate board not back in position properly or ice full
button damage
E-02.making ice over time,can’t detect ice thickness 5 times continuously
E-03.unload ice over time,can’t detect ice full button action within 6mintues
unload ice 3times continuously
E-04.high temperature fault,condensation temperature higher than setting
temperature
E-05.lack of water
E-06.high pressure
E-07.condensation sensor fault
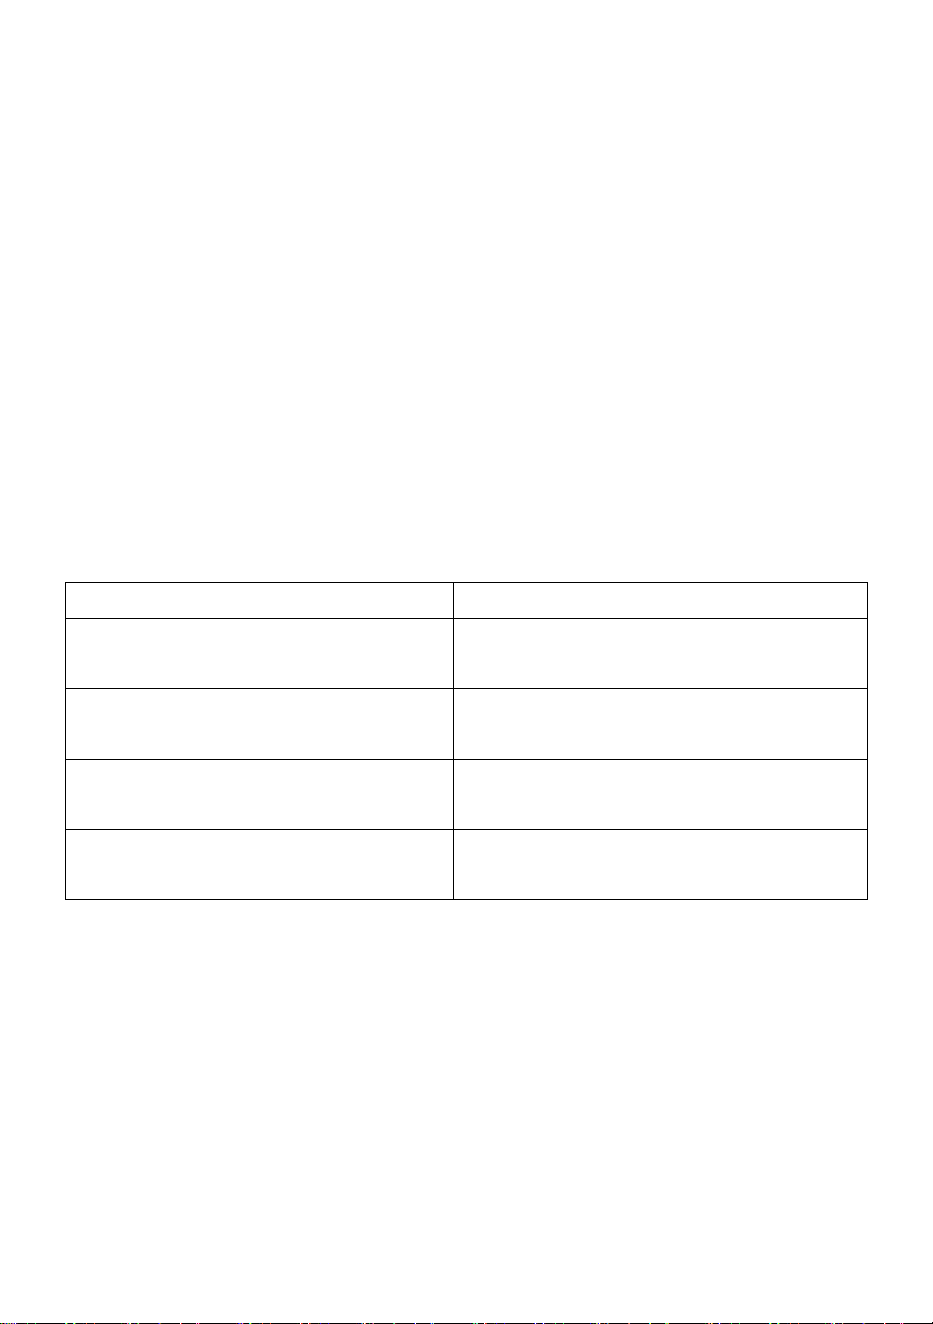
ICE THICKNESS SETTING TIME REFERENCE LIST
Ambient Temperature
Ice-Shedding Time
10℃~20℃
12min~15min
20
℃
~32
℃
15min~18min
32℃~35℃
18min~22min
35℃~43℃
22min~26min
Note: The above data is for reference only. Different regions and different
environments may have differences.
DAILY CLEANING AND MAINTENANCE
1. Clearance of side panels and inner container
A、Before cleaning and sanitizing the ice maker, cleaning up the ice blocks

- 14 -
in the ice cabinet, also ensure the power source and water source have
been cut off.
B、Cleaning the side panels and inner container with clean water (you can
join some neutral detergent in water), and then wipe up the machine with
soft towel.
2. Dust removal of the filter screen
In order to use the machine well, please clean the dust that covered on the
filter screen once every three months. Open the Ventilation fence in front of
the machine, (grasp the frame of ventilation fence by hand, pull it out
carefully), use dust collector or brush to clean the dust. The aculeate iron
tools can’t be used to clean condenser, so as not to damage the radiating
fins.
3. Cleaning the spray water pipe
A
、
Cleaning the ice maker:
The spray water pipe must be cleaned once per half a year. When you
Attention:Do not spray water to machine
directly. Alkaline detergent, perfumed soap, lapping
powder, boiling water, bananas oil, tolperison and
most of the other organic solvents can’t be used to
clean the machine.
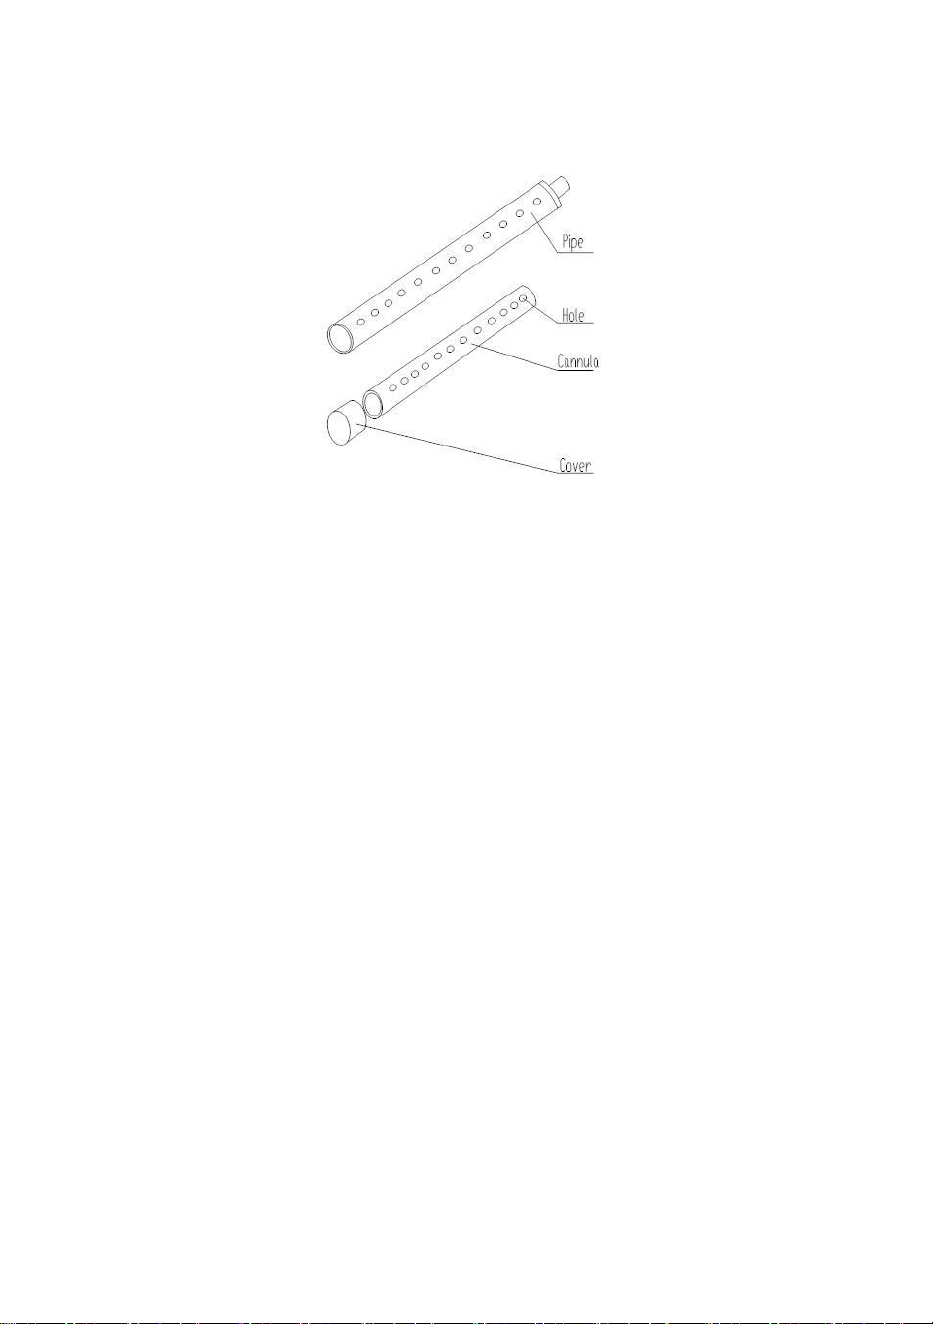
- 15 -
clean it, firstly open the front cover, take out the spray pipe, and then scour
off the scum till the every hole is unblocked. Reinstalled it after finish
cleaning.
C、After finishing washing,screw out the cap of the drain-valve and drain
out all the dirty water, then tighten the cap。
4. Automatically cleaning of the ice maker
Automatically cleaning of the ice maker: when the machine is making ice,
softly push the “clean” key on the electrical box which is on the rear panel,
the refrigeration system will stop work, and the machine turn into
auto-wash process. The total wash processes is divided into three steps:
wash, potch and drain. It will cost bout 30 minutes. In order to improve
cleaning effect, the user can add a little neutral detergent, after finishing
washing, the machine turns into ice-make condition automatically.
A、Usually, the machine is connected to the power source continually.
When you connect the machine to the power source firstly, there is a clean
process after the water in sink is full: water supply——water pump works
——water pump works and drain-valve opens——water supply——water
pump works——water pump works and drain-valve opens——pressure
balances. This process will cost about 5 minutes(once every 30 ice-make
cycle). In addition, after every four ice-make cycles, there is a drain
process, drain out the water in the sink.

- 16 -
B、After finishing washing, confirm the place of the float ball: If the float ball
is on the bottom and the machine is on, this condition is normal, the
program will turn into pressure balance process, the water level will be
controlled automatically; If the float ball is on the upper position and the
machine stops, it means that there are some problems with the water level
sensor, water pump or drain valve.
Point:the water-filter core is consumable, it is not in the guarantee scope. If
you need it, please contact with our marketing department and buy it.
5. Please according to the following steps if you havn’t used the machine
for a long time.
A、Turn off the power switch, take out the plug of the machine, then cut off
the power supply and water supply.
B、Take out the ice block from the cabinet, wipe out the water on the inner
of the cabinet.
C、Wipe out the water on the cabinet, and then open the door, make the
cabinet fully dried.
TROUBLE SHOOTING
Fault
Analysis
Solution
Do not
make ice
The electric wire didn’t connect
well.
Check the wire.
The retained board was pinned
by ice block.
Take out the ice block so
as to let the retained
board return to the original
situation.
- 17 -
The connecting wire of
compressor’s starter is loose
Check and fasten it
The starting capacitor of
compressor is broken
replace it
PC board is broken
replace it
Water level sensor is broken
replace it
water pump is broken
replace it
The sink
is
overflow.
water supply solenoid valve is
broken
replace it
water level sensor is broken
replace it
No water
flowing
on to the
ice
model
water pump is broken
replace it
PC board is broken
replace it
The ice
block is
thin
The surface of condenser is
covered with dust.
clean it
The ambient temperature is too
high
You should use the
machine in allowable
ambient temperature
The refrigerant leak
check and recharge the
refrigerant
fan motor is broken
replace it
spray tube is blocked
clean it
The ice thickness sensor is too
close to the ice model.
Adjust the screw of
sensor(turn right)

- 18 -
The ice
can not
drop off.
The ice thickness sensor is
broken
replace it
The solenoid valve is not open
check the electric wire if it
is connected well or not.
Or replace the solenoid
valve
The ambient temperature is too
low
you should use machine
in allowable ambient
temperature
TECHNICAL PARAMETER AND WIRING
DIAGRAM
A
、
Technology parameters are on the nameplate.
B
、
The electrical schematic diagram is on the inner side of the board .

Technical Support and E-Warranty Certificate
Made In China