FORTÉ™ AP/BG MANUAL
August, 2022 (v4)
1
INTRODUCTION
Thank you for choosing a Forté series coffee grinder!
This durable, user-friendly machine is ready to nd its
spot in the slow bar in a café or on your kitchen counter.
The Forté is a compact, weight-based or time-based commercial-grade grinder dedicated
to grinding for a wide range of brew methods. The Forté incorporates many features that
accommodate both commercial and professional-level home use including an all-metal
construction, small footprint, intuitive touch control panel, an accurate built-in scale,
and consistent macro and micro adjustments. The Forté is built to last thanks to its
aluminum grind chamber; a sturdy, reinforced drive belt; and a powerful DC motor with a
long duty cycle.
Note: This manual is for both the Forté AP and the Forté BG. Most instructions apply to
both models, but it will be called out when information is model-specic.
Forté™ AP/BG

FORTÉ™ AP/BG MANUAL
August, 2022 (v4)
2
TABLE OF CONTENTS
SAFETY INFORMATION 3
PARTS IDENTIFICATION 4
GRINDER SETUP 5
GRINDER OPERATION 6
CALIBRATION 9
CARE & CLEANING 11
WARRANTY & SERVICE 13
FORTÉ™ AP/BG MANUAL
August, 2022 (v4)
3
SAFETY INFORMATION
Keep these instructions for future reference. Read the information
below very carefully as it contains important safety information for
use of this appliance.
!
Use only with AC current and the correct voltage. See the
label on the base of the grinder to determine the correct
voltage.
!
Only clean the grinder housing with a dry or slightly
damp cloth. Do not immerse the grinder, plug or cord in
water or any other liquid.
!
Baratza will not accept any liability for damage, injury, or
warranty if the grinder is used other than for its intended
purpose (i.e. grinding roasted whole coffee beans) or is
improperly operated or repaired.
!
Do not operate the grinder with a damaged cord or plug.
If the supply cord is damaged, it must be replaced by
the manufacturer, its service agent or similarly qualied
persons in order to avoid a hazard.
!
Keep the appliance and its cord out of reach of children
aged less than 8 years.
!
Do not leave your grinder unattended while turned ON.
!
This appliance can be used by children aged from 8
years and above and persons with reduced physical,
sensory or mental capabilities or lack of experience
and knowledge if they have been given supervision or
instruction concerning use of the appliance in a safe way
and understand the hazards involved.
!
Cleaning and user maintenance shall not be made by
children without supervision.
!
Always unplug the grinder from the electrical supply
before assembling, disassembling or cleaning. To
unplug, grasp plug and remove from the outlet. Never
pull on the cord.
CAUTION: ALWAYS unplug the electrical supply cord prior to cleaning the grinder.
FORTÉ™ AP/BG MANUAL
August, 2022 (v4)
4
Gr
1
2
3
4
5
6 7
8
11
15
12
1314
1810
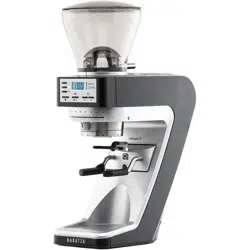
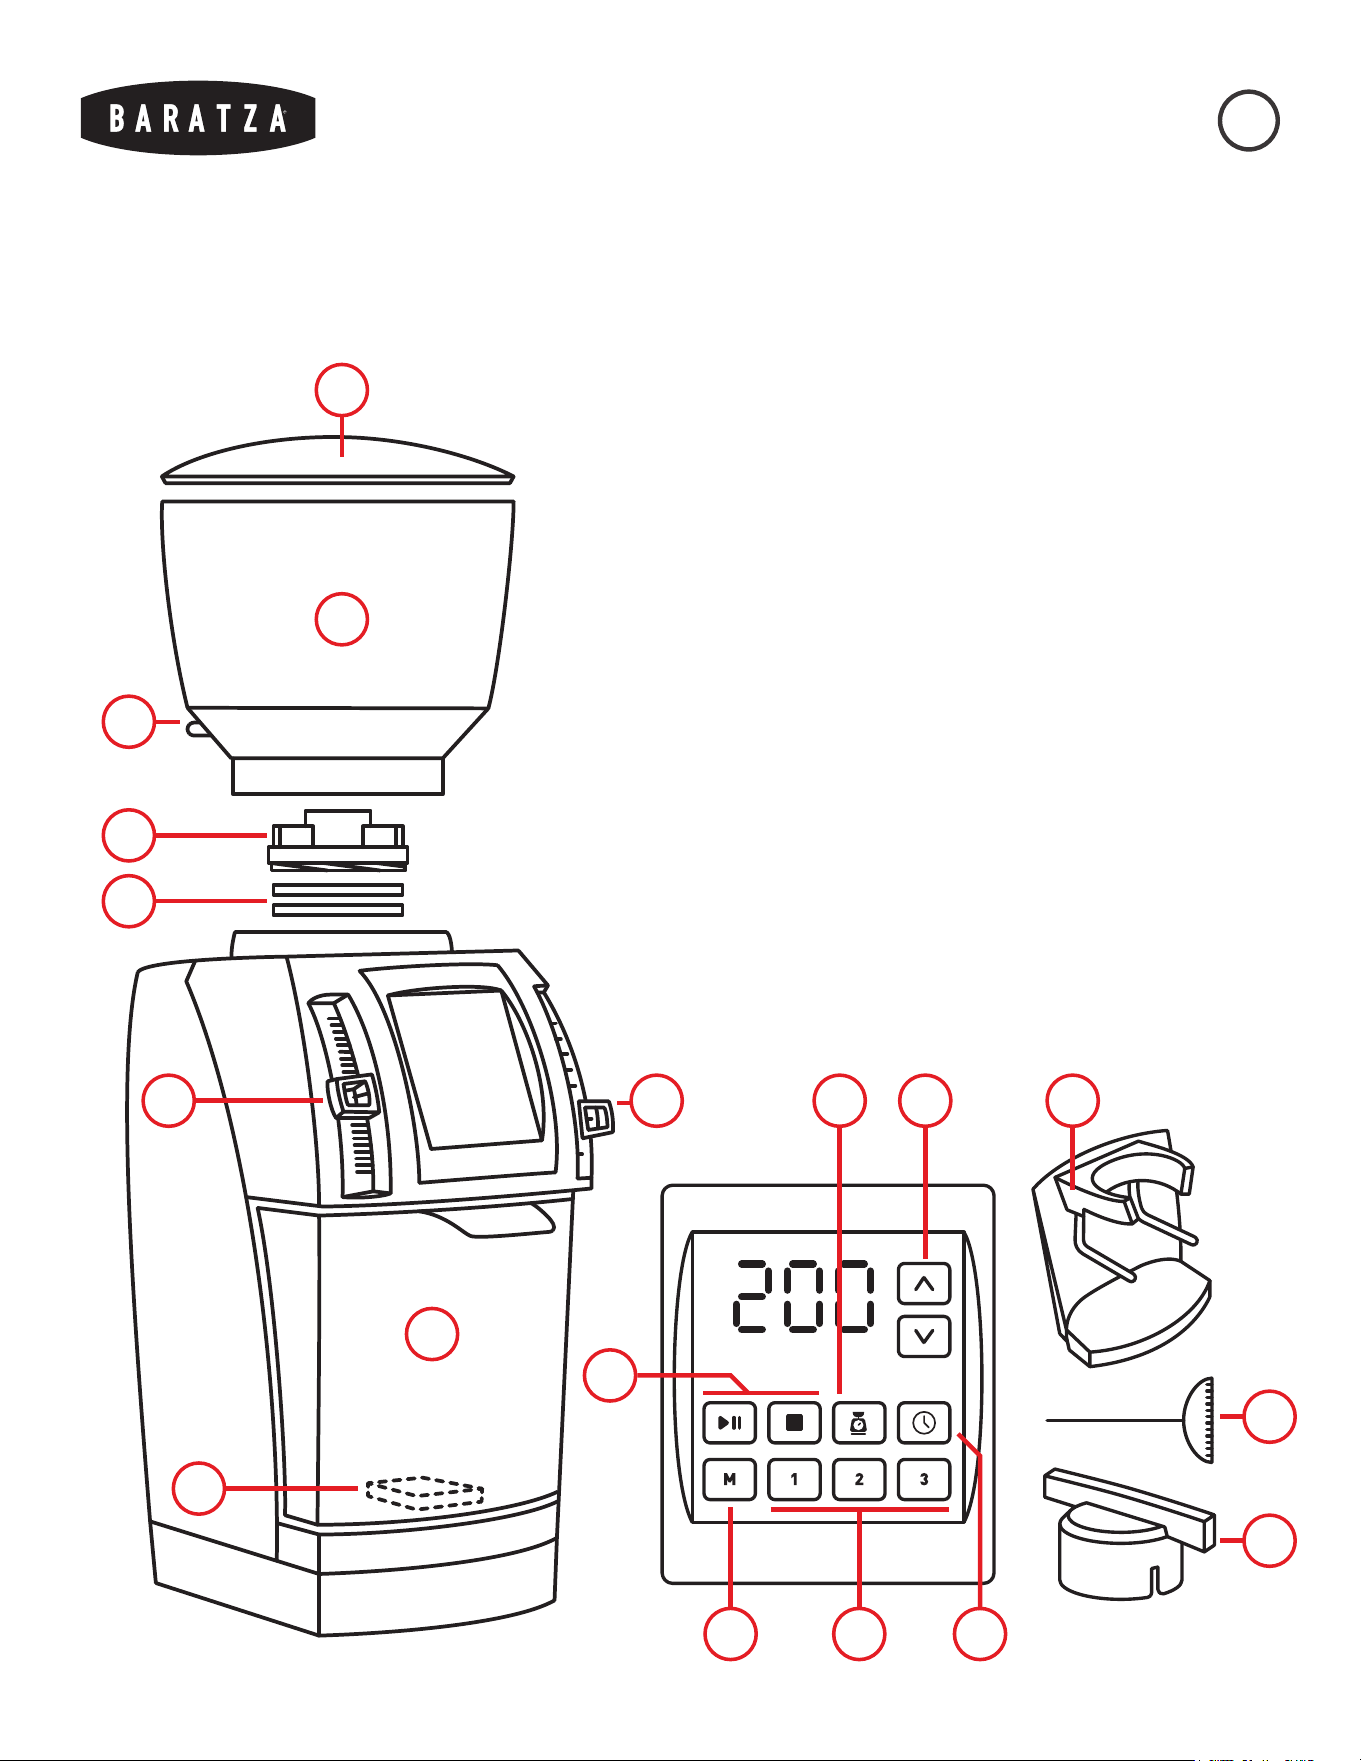
PARTS IDENTIFICATION
1. Hopper Lid
2. Bean Hopper
3. Bean Shut-Off Knob
4. Upper Burr Carrier
5. Burrs*
6. Micro Adjustment
Lever Knob
7. Macro Adjustment
Lever Knob
8. Grounds Bin
9. Scale Platform
10. Grind Adjustment
Buttons
11. Start & Stop Buttons
12. Weight Mode
13. Time Mode
14. Manual Mode
15. Grind Presets
16. Burr Calibration Tool
17. Burr Removal Tool
18. PortaHolder
(Forté AP Only)
*Ceramic Burrs (Forté AP)
or Steel Burrs (Forté BG)
9
16
17

FORTÉ™ AP/BG MANUAL
August, 2022 (v4)
5
GRINDER SETUP
1. Place the grinder on a stable, level surface.
2. Hand wash the hopper lid (1), hopper (2), and grounds bin (8) with warm, soapy water. Let air dry or dry with
a soft cloth. Do not wash any other parts in water as it may result in cosmetic damage.
3. Install the hopper:
a. With the hopper upright and the bean shut-off knob (3) pointing toward the rear left of the grinder,
place the hopper on top of the grinder and nd the point where it settles into place.
b. Push down and rotate the hopper clockwise to lock the hopper into place. The shut-off knob should be
centered behind the hopper.
c. The grinder will not start without the hopper fully locked into place.
4. Install the grounds bin, hold the bin by the tab on the front and carefully slide it onto the scale platform (9).
The bin should settle into place and sit evenly on the scale platform. If the bin is touching any other part of
the grinder, there may be interference with the scale.
5. If using the PortaHolder (18) with the Forté AP:
a. The PortaHolder will come installed in the Forté AP grinder. To remove it, pull rmly straight out of the
grinder.
b. The weight function is not usable with the PortaHolder installed as it covers the scale platform.
c. If the PortaHolder needs adjustment to properly hold the portalter, remove the PortaHolder, loosen
the two screws on the back, adjust the arms’ position, then tighten the screws gently.
6. Plug in the grinder. The display should illuminate and go through its startup process.
7. Use the micro adjustment (6) and macro adjustment (7) lever knobs to set the grind setting. The grinder
must either be empty of coffee or must be grinding while adjusting the grind size to avoid damage to the unit.
8. Add coffee beans to the hopper. Rotate the bean shut-off knob so that ‘OPEN’ is facing up, allowing coffee
to enter the grinder.
9. Use the touch screen to select weight mode (12), time mode (13), or manual mode (14), then use the start
and stop buttons (11) to start and stop grinding. The start button can also be pressed during operation to
pause grinding. More information regarding the various operation modes can be found in the next section in
this manual.
10. After three minutes of inactivity, the display will enter sleep mode. Tap the screen to wake the grinder.
FORTÉ™ AP/BG MANUAL
August, 2022 (v4)
6
GRINDER OPERATION
ADJUSTING THE GRIND SETTING:
The Forté has two grind adjustment levers that are used to select a grind setting: the micro adjustment lever knob (6) to
the left of the display, and the macro adjustment lever knob (7) to the right. The macro adjustment is used to make large
changes to the grind setting, while the micro adjustment is used for making small adjustments to ne-tune the grind
setting. Moving either knob up will result in a ner grind, while moving either knob down will result in a coarser grind.
When making a grind adjustment with coffee in the grinder, the motor must be running to ensure longevity of the unit.
From the factory, the burrs (5) will audibly contact each other around setting 2K. The grinder is calibrated for the burrs
to touch at this point, and it will not damage them to grind at their contact point or ner if coffee is being ground.
However, running the grinder without coffee while the burrs are touching for extended periods of time will reduce the
lifespan of the burrs.
CHOOSING A GRIND SETTING:
The settings shown in the table below should be used as a general starting point. The actual grind size needed for
a particular brew method will vary depending on many factors, such as: degree of roast (light vs. dark), freshness of
coffee, environmental humidity, coffee variety, oil content, etc. Brewing practice, personal preference, and brew recipe
requirements will ultimately determine which setting is needed.
Espresso AeroPress Hario V60 Automatic
Brewer
Chemex French
Press
2K 4M 6M 7M 8M 10M
Some recipes use visual descriptions to describe the grind size required, such as “ground to the consistency of kosher
salt.” To visually determine the necessary grind setting:
1. Set the grind setting to the recommendation in the chart above closest to the brew method being used.
2. Press the manual mode (14) button.
3. Use the start and stop buttons (11) to grind a small amount of coffee and check visually.
4. If the grind size is close to what is desired, use the micro adjustment knob to ne-tune the grind size. If
the grind size needs a large adjustment, keep the micro adjustment knob near the middle of the range and
adjust the macro adjustment knob to a new position.

FORTÉ™ AP/BG MANUAL
August, 2022 (v4)
7
WEIGHT-BASED OPERATION:
With its built-in scale, the Forté can dose coffee accurately, down to a tenth of a gram, from a minimum of 5.0g and
a maximum of 120.0g. When in weight mode, the Forté can either grind to a preset grind weight before automatically
stopping, or the display can be used to double-check a pre-weighed dose by grinding in manual mode. To grind in
weight mode:
1. Place the grounds bin (8) onto the scale platform (9). Ensure that the bin is resting level on the scale
platform and is not contacting the body of the grinder.
2. Press the weight mode (12) icon on the screen. It will be outlined when activated.
3. Press one of the grind preset buttons (15) to select the preprogrammed weight that the grinder will grind to
or use the grind adjustment buttons (10) to grind to a specied weight without changing a preset.
4. Press the start button (11) to begin grinding. The grinder will automatically stop once the target weight is
reached. The start button can be pressed again during operation to pause and resume grinding. If the stop
button is pressed, grinding will cease, and the display will show the original target weight.
Taring the Scale: In order to reset the scale to zero, the scale must be tared. This can be done by pressing and holding
the weight button until the display ashes. If the scale needs to be tared due to a change in weight on it, the weight
icon will begin to ash. Press it to tare the scale.
To grind continuously with a real-time weight readout on the display, press the manual mode button (14) while in
weight mode. Then, use the start button (11) to begin and pause grinding, and the stop button to cease grinding.
TIME-BASED GRINDING OPERATION:
To grind a pre-portioned dose of coffee, grinding volumetrically, or grinding using the PortaHolder (18, AP), the Forté
is equipped with a timer function. The timer can be adjusted by a tenth of a second from a minimum of 0.1 seconds
to a maximum of 60.0 seconds. When in time mode, the Forté can either grind for a preset amount of time or grind
continuously as the timer counts up. To grind in time mode:
1. Place either the grounds bin (8) or PortaHolder (18, Forté AP) onto the scale platform (9).
2. Press the time mode (13) icon on the screen. It will be outlined when activated.
3. Press one of the grind preset buttons (15) to select the preprogrammed time that the grinder will grind for or
use the grind adjustment buttons (10) to grind for a specied time without changing a preset.
4. Press the start button (11) to begin grinding. The grinder will automatically stop once the target time is
reached. The start button can be pressed again during operation to pause and resume grinding. If the stop
button is pressed, grinding will cease, and the display will show the original target time.
To grind continuously with a timer on the display, press the manual mode button (14) while in time mode. Then, use
the start button (11) to begin and pause grinding, and the stop button to cease grinding.

FORTÉ™ AP/BG MANUAL
August, 2022 (v4)
8
ADJUSTING A PRESET:
The Forté is equipped with three programmable presets for both weight (1=15g, 2=30g, 3=60g) and time (1=10s,
2=15s, 3=30s). To overwrite and save a new preset, follow the instructions below:
1. Press either the weight mode (12) or time mode (13) buttons for changing either a weight or time preset,
respectively.
2. Use the grind adjustment buttons (10) to adjust the weight (in grams) or time (in seconds) to the desired
amount.
3. Press and hold a grind preset button (15) until the display ashes once to save the amount to that preset.
These presets will be saved even if the grinder is unplugged.
TROUBLESHOOTING ERROR CODES:
The following codes may appear on the display to indicate that there is an operation error.
Err 001: Indicates that the weight on the scale is above the desired target weight. The display will alternate between
ashing ERR/001 and the weight mode button (12).
• If there is already ground coffee in the grounds bin above the target weight, or if the scale is tared before placing
the grounds bin on the grinder, this error will occur.
• This error can be cleared by pressing the weight mode button to tare the scale, or by emptying the grounds bin.
Err 002: Indicates that the load cell has not seen a substantial increase in weight in a few seconds during grinding.
• This may indicate that either coffee is not being ground, or that coffee is being ground more slowly than expected.
• Ensure that the bean hopper (2) is rotated into place clockwise to engage the top interlock switch and that the bean
shut-off knob (3) is in the open position.
• If the hopper is in place and open, the motor is engaging, but no coffee is being ground, a clog may have formed.
Please check the Troubleshooting page on Baratza.com for information on clearing clogs.
• Some different varieties and roasts of coffees may grind more slowly than others. If this seems to be the case, this
error can be cleared by pressing the start button, and then grinding can be resumed by pressing the start button
again.
Err 003: Indicates that the scale is registering a weight value that exceeds the maximum load.
• This most likely means the grounds bin is jammed on top of the scale platform (9), or there is excessive weight
placed on the scale platform.
• Remove the bin from the scale and replace it, ensuring that it rests evenly on the scale platform and does not
contact other parts of the grinder. The error will clear automatically.
Err 004: Indicates that the display is not receiving signal from the scale.
• This likely means that there is damage to the loadcell or that the loadcell wire is unplugged internally.
• Please contact Baratza Support for further troubleshooting steps and solutions.
FORTÉ™ AP/BG MANUAL
August, 2022 (v4)
9
CALIBR ATION
Though the Forté’s burrs and scale come calibrated to a high
specication, they may need adjustments over time to meet user
grinding expectations.
BURR CALIBRATION:
The Forté factory calibration will accommodate a wide range of brew
methods. However, if the Forté is unable to grind nely enough or coarsely
enough for a particular brew method at the nest and coarsest settings,
respectively, follow the instructions below to recalibrate to factory settings,
then adjust to t the grind parameters.
1. Empty all beans from the grinder by setting the bean shut-off knob
(3) to the ‘CLOSED’ position and grinding the remaining beans.
2. Remove the grounds bin (8) or PortaHolder (18, AP) from the scale
platform (9).
3. Press the time mode (13) button, then the manual button (14) to
put the grinder in timed manual mode.
4. Lower the micro adjustment (6) and macro adjustment (7) lever
knobs all the way to the bottom of the range.
5. Insert the burr calibration tool (16) into the round calibration port,
behind the discharge chute, until the tool settles into the head of
the calibration screw inside.
6. Press the start button (11) to run the motor.
7. With the motor running, move the macro lever up to setting 2, step
by step, or until burr contact is heard, whichever comes rst. If no
burr contact is heard, move the micro lever up to setting Q, or until burr contact is heard, whichever comes
rst.
8. If the grind setting is set to 2Q and the burrs are not in contact, use the calibration tool to turn the
calibration screw toward the ner direction (as indicated on the tool) until a change in motor pitch is heard.
This will move the burrs back to factory calibration.
9. If the burrs make contact prior to reaching setting 2Q:
a. Use the calibration tool to loosen the calibration screw slightly (in the opposite direction indicated on
the tool), thus coarsening the calibration.
b. Move the macro lever up to setting 2, then the micro lever to Q. If burr contact is heard before reaching
this setting, the calibration screw may need to be loosened further.
BARATZA

FORTÉ™ AP/BG MANUAL
August, 2022 (v4)
10
10. If grinding at the coarsest setting does not yield coarse enough grinds, the calibration can be set to a ner
point, up to 1A. If grinding at the nest setting does not yield ne enough grinds, the calibration can be set
to a coarser point, down to 3Z. It is not recommended to calibrate outside these parameters.
SCALE CALIBRATION:
If the amount of ground coffee yielded in weight mode does not match expectations, the scale may need to be
recalibrated. A 200g weight is needed or, if another scale is available, a makeshift weight can be made by lling
the grounds bin with something small like coffee beans to equal a total weight of 200g, including the weight of the
grounds bin. Once a weight is acquired, follow the instructions below.
1. Remove the grounds bin (8) or PortaHolder (18, AP) from the scale platform (9). Ensure that the scale
platform is clear of any debris, and that the screws on top are tightened so that the platform does not shift.
2. Unplug the grinder. Plug it back in and hold grind presets (15) 1 and 2 while the grinder is booting up. A
three-digit number should be displayed.
3. Press the manual mode button (14), and ‘CAL’ should ash on the screen before displaying ‘200g.’
4. Place the 200g weight on the scale. ‘PASS’ will ash on the screen, then ‘000.’
5. Unplug and plug in the grinder again to save the calibration.
WEIGHT OFFSET PROGRAMMING:
If the grinder consistently overshoots or undershoots the target weight, the offset may need to be adjusted. This is
most likely to occur if the original burrs have been swapped out for burrs of another material. Follow the instructions
below to adjust the weight offset:
1. Unplug the grinder. Plug it back in and hold the stop (11) and weight mode (12) icons while the grinder is
booting up.
2. Use the grind adjustment buttons (10) to adjust the offset in tenths of a second.
FORTÉ™ AP/BG MANUAL
August, 2022 (v4)
11
CARE & CLEANING
Routinely cleaning the grinder is important to ensure that it performs
as intended. With standard home use, the grinder should be cleaned at
least once per month. If darker roasted coffee, oily coffee, or avored
coffee (which has had essential oils added) is being used, more
frequent cleaning may be necessary.
Caution: Do not put the bean hopper, hopper lid, or grounds bin in the dishwasher.
Hand wash only. Do not immerse the grinder housing in water. Do NOT wash the
burrs with water.
REMOVING THE HOPPER:
1. Ensure the bean shut-off knob (3) on the hopper (2) is in the closed position. The side of the shut-off knob
that says ‘CLOSED’ should be facing up.
2. Grind the remaining beans in the grinder.
3. Grip the hopper and rotate it counterclockwise to unlock it.
4. Lift the hopper up and off the grinder.
CLEANING THE HOPPER AND GROUNDS BIN:
1. Empty the hopper and the grounds bin (8) of coffee.
2. Wash the hopper and grounds bin in warm, soapy water with a soft sponge or cloth. If necessary, rinse. The
parts can be dried with a clean, dry cloth or set aside to air dry.
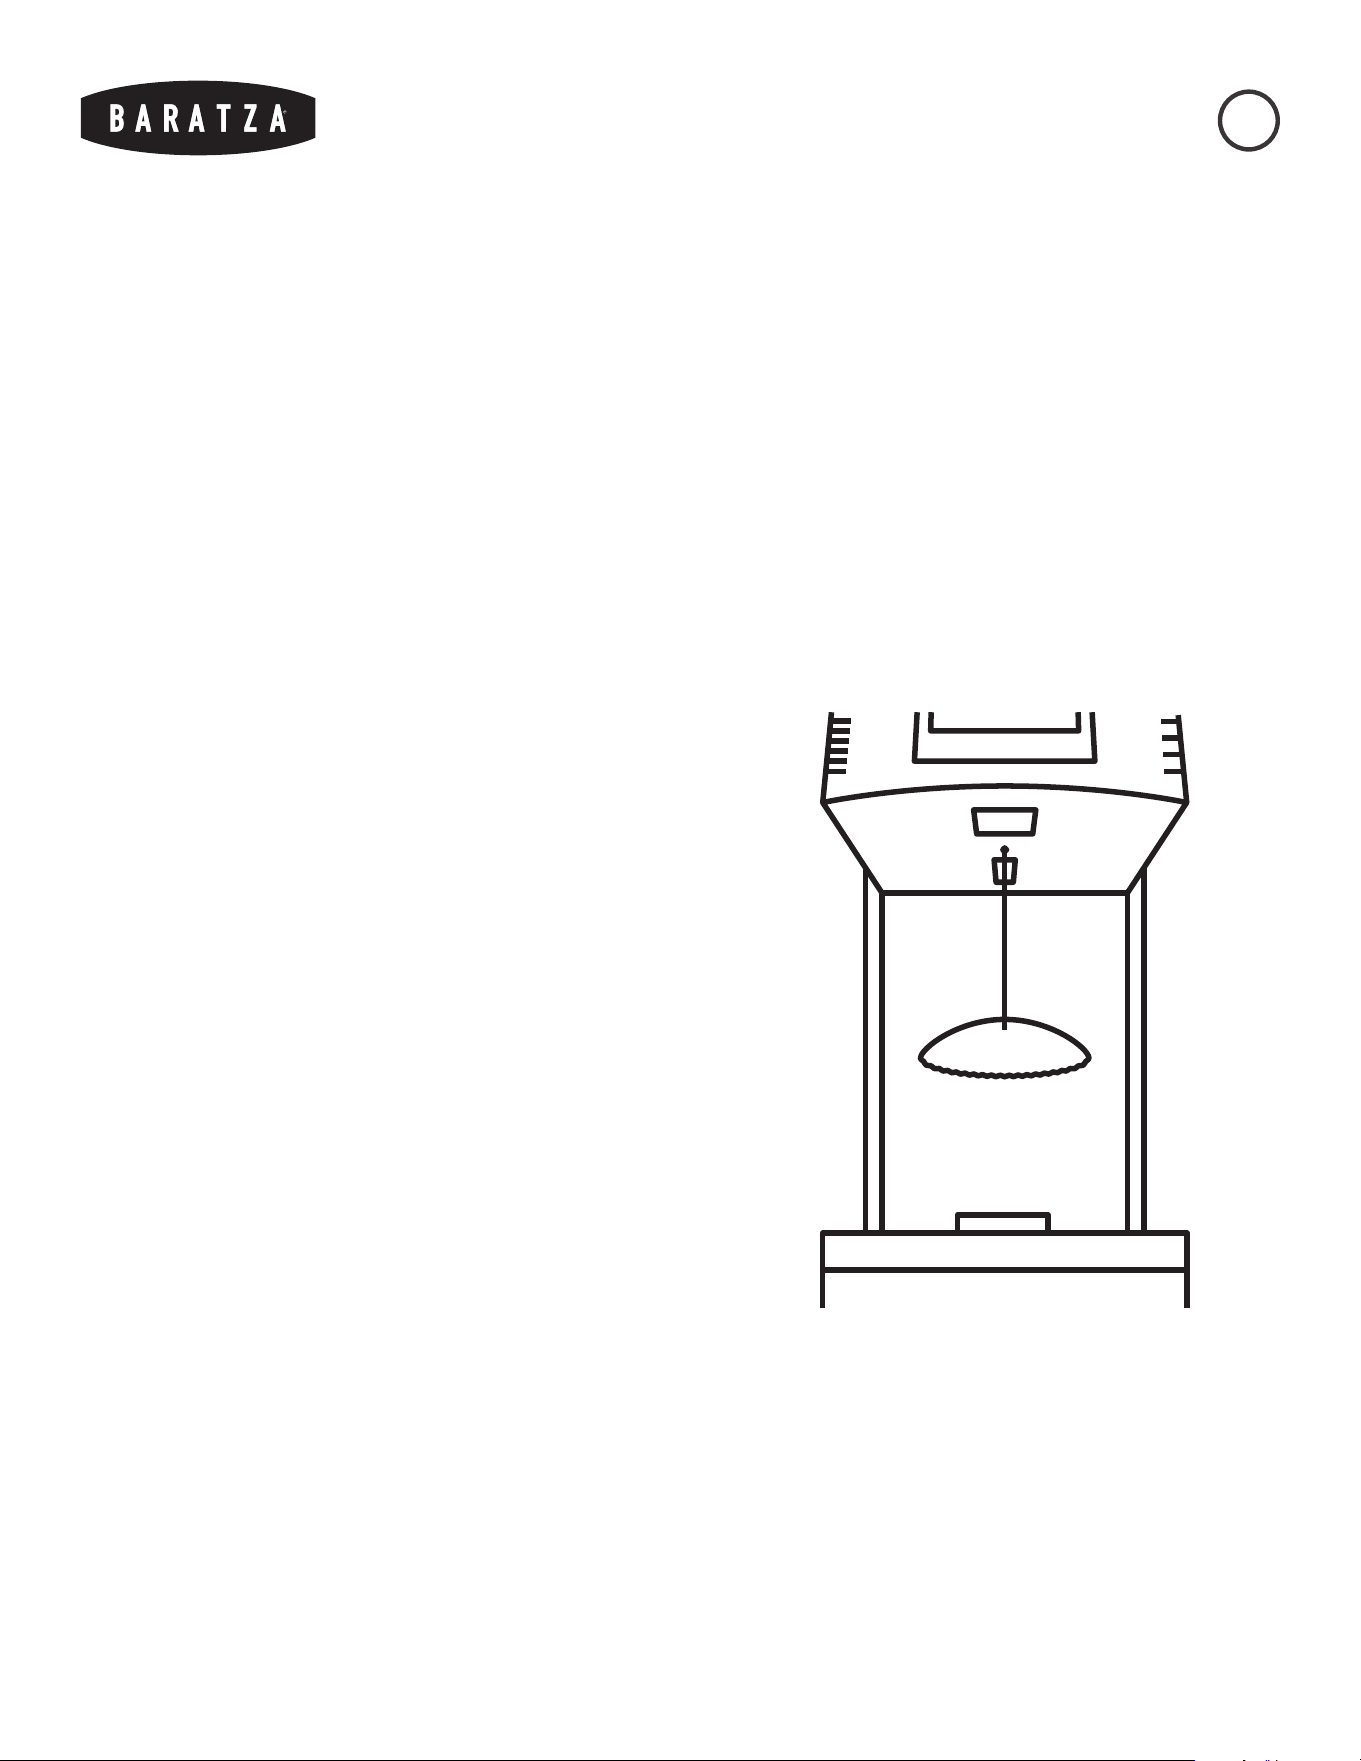
CLEANING THE BURRS AND GRIND CHAMBER:
To manually clean the burrs (5) and the grind chamber, the upper burr carrier (4) will need to be removed from the
grinder.
1. Place the included burr removal tool (17) on the upper burr carrier so that the notches on the tool interlock
with the wings on the upper burr carrier.
2. Rotate the burr removal tool clockwise to unscrew the upper burr carrier from the grind chamber. If needed,
grip the tool with pliers for additional leverage.
3. Once the upper burr carrier is unscrewed completely, lift it up and remove it from the grinder.

FORTÉ™ AP/BG MANUAL
August, 2022 (v4)
12
Upper burr carrier and upper burr cleaning:
1. With the upper burr carrier in one hand, use a non-metal, bristle brush such as a toothbrush to clean around
the burr carrier and on the surface of the upper burr.
2. For a deeper clean of the upper burr carrier, use a small at-head screwdriver to remove the screws holding
the burr in the burr carrier. Set the screws and burr aside and use a non-metal, bristle brush to clean the rest
of the upper burr carrier as well as the back of the burr. Once all coffee residue is removed from the burr and
carrier, use the screwdriver to reinstall the screws and burr. Take care not to overtighten the screws during
reinstallation.
Grind chamber, lower burr carrier, and lower burr cleaning:
1. Use a non-metal, bristle brush such as a toothbrush to clean the grind chamber around the lower burr and
the surface of the lower burr.
2. For a deeper clean of the lower burr carrier, use a small at-head screwdriver to remove the screws holding
the burr in the burr carrier. Set the screws aside and lift the burr out of the burr carrier. Then, use a brush to
clean the top of the lower burr carrier, the back of the burr, and the opening of the grounds exit chute. Once
the cleaning is complete, use the screwdriver to reinstall the screws and burr. Take care not to overtighten
the screws during reinstallation.
UPPER BURR CARRIER REINSTALLATION:
1. Place the upper burr carrier on top of the grind chamber. It should sit level with the grind chamber and will
not thread on properly if it is not level.
2. Use the burr removal tool to rotate the upper burr carrier counterclockwise to carefully thread it into the
grind chamber. Threading the upper burr carrier in to the grind chamber should be uid with minimal
resistance. If the upper burr carrier is dicult to rotate, rotate the upper burr carrier clockwise to free it from
the threading, make sure it is level, that the threads on both the grind chamber and upper burr holder are
free of ground coffee, and try again.
USE OF CLEANING TABLETS
Grinder cleaning tablets are designed to absorb coffee oil and reduce odors and should be considered supplementary
to normal cleaning. Grinder cleaning tablets should be the only substance used to clean the internals of the grinder.
Note that cleaning tablets do not take the place of the normal cleaning steps listed above and cannot be used to clear
a clog. For grinder tablet cleaning:
1. Remove all beans from the hopper and use the start button (11) to run the grinder to expel any remaining
coffee.
2. Adjust the grind setting to the coarsest setting and place the recommended amount of the chosen cleaning
tablets into the empty bean hopper. Press the manual button (14) to place the grinder in manual mode.
3. Insert the grounds bin, then press the start button. Grind all the tablets into the bin.
4. Once complete, we recommend grinding approximately 30g of coffee (or the recommended amount in the
cleaning tablet instructions) to remove any tablet residue.
5. Discard the ground tablets/coffee.

FORTÉ™ AP/BG MANUAL
August, 2022 (v4)
13
WARRANTY & SERVICE
U.S. & CANADIAN WARRANTY
INFORMATION
Limited Warranty for Baratza Grinders is 1 year from the original
date of purchase. This warranty covers all defects in materials
and workmanship (parts and labor) including free ground
transportation to and from our repair facility within the US and
Canada. This warranty does not apply to: improper use, lack of
cleaning, abuse, normal wear and tear, lack of proper adjustment,
foreign objects (stones, screws, etc.) in the beans, or uses outside
the intended use of grinding whole roasted coffee beans (roasted
beyond 1st crack). If the purchased grinder fails within one year,
email [email protected] or call +1 425-641-1245 or toll free
877-701-2021. For additional warranty, support, or troubleshooting
information, go to www.baratza.com.
Please note: Grinders that are purchased in the US or Canada and
shipped or taken out of the country have a one-year warranty for
parts only. If the grinder fails within one year of date of purchase,
simply email us at [email protected] or call +1 425-641-1245.
Please have the following information prior to contacting Baratza:
1) Proof of date of purchase and 2) Model and serial number
(located on bottom of the grinder). A Baratza representative will
respond to determine the problem and suggest a solution path.
The customer is responsible for paying the freight charges and any
duties and taxes for replacement parts that Baratza may send. The
customer is also responsible to provide any labor required to repair
the grinder.
INTERNATIONAL WARRANTY
INFORMATION
For all countries outside the US and Canada, the warranty,
support and service is provided by the International Retailer
the grinder was purchased from. If the grinder was purchased
from a retailer outside of the country the customer resides in,
the customer may be responsible for any shipping costs to
service the grinder, and may need to pay for service.
PROOF OF PURCHASE &
PRODUCT REGISTRATION
The grinder can be registered at www.baratza.com/register-
your-grinder. Registration will enable us to contact the
registrant in the unlikely event of a product safety notification
and assist us in complying with the provisions of the Consumer
Product Safety Act. The serial number is located on the bottom
of the grinder. Please keep the sales receipt that shows the
date of purchase.
FOR REPAIRS OR QUESTIONS
Email: [email protected]
For Parts and Information go to: www.baratza.com
For Troubleshooting Help:
www.baratza.com/troubleshooting